Utiliser un clavier, c’est bien. Utiliser un clavier dont la disposition des touches correspond parfaitement à vos attentes, c’est encore mieux ! Bien que tous les claviers français suivent la norme AZERTY pour la disposition des lettres, ceux de Mac et de Windows positionnent certaines touches différemment. Branchez directement un clavier Mac sur Windows, et vous verrez que son utilisation peut s’avérer déconcertante sans ajustements spécifiques.
Face à ces différences, certains se tournent vers le clavier virtuel de Windows. Mais, jongler entre le visuel à l’écran et la réalité sous vos doigts, est une véritable gymnastique de cerveau qui peut vite devenir épuisante.
Illustration de 2 claviers AZERTY. Windows à gauche et Mac à droite
Vous utilisez un clavier Mac sur un PC Windows, en Dual Boot, en machine virtuelle ? Ou vous utilisez un seul clavier pour ces deux ordinateurs ? Certes, les touches cmd ⌘ de Mac et Win ❖ de Windows se placent au même endroit, mais les autres ? Se demander constamment où sont l’arobase @, le point d’exclamation, etc. est vite usant.
i Note : en utilisant l’Assistant Boot Camp, le clavier de votre Mac devrait correctement fonctionner. Il en est de même pour certaines machines virtuelles où il est seulement nécessaire de choisir la bonne disposition du clavier. Si ce n’est pas le cas, il existe divers outils pour remédier au problème.
Dans cet article, découvrez comment utiliser un clavier Mac sur Windows en faisant correspondre au maximum les touches du clavier physique avec ce que le système affiche.
Utiliser un clavier Mac sur Windows
Deux programmes ont particulièrement attiré mon attention « ClavierAppleWin 2.0 » et « SharpKeys » pour utiliser facilement un clavier Mac sur Windows.
avec ClavierAppleWin 2.0
ClavierAppleWin 2.0 est un petit programme efficace qui vous permet de créer une nouvelle disposition de clavier. De plus, il permet les combinaisons de touches spécifiques au Mac ! C’est l’idéal pour ceux qui veulent une solution rapide et simple pour utiliser leur clavier filaire ou BlueTooth Mac sur Windows.
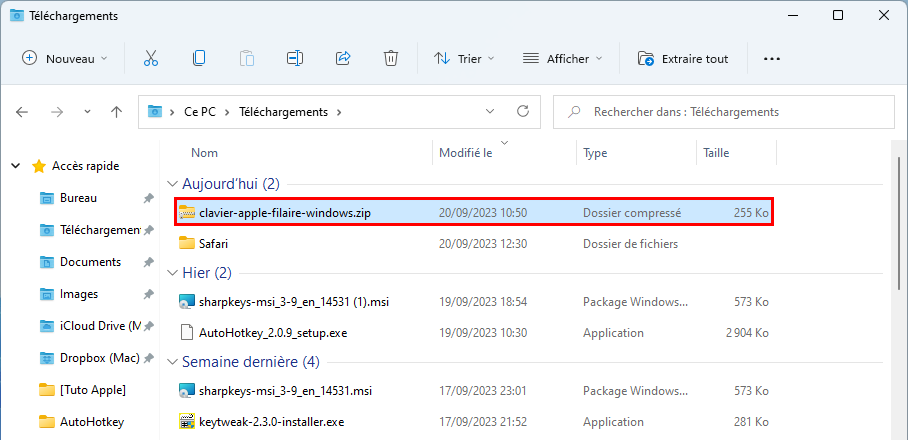
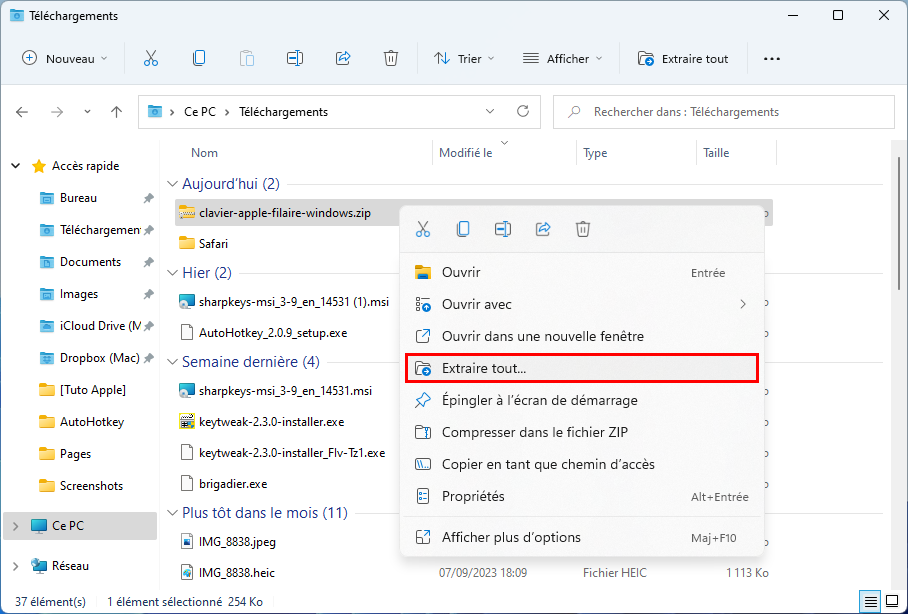
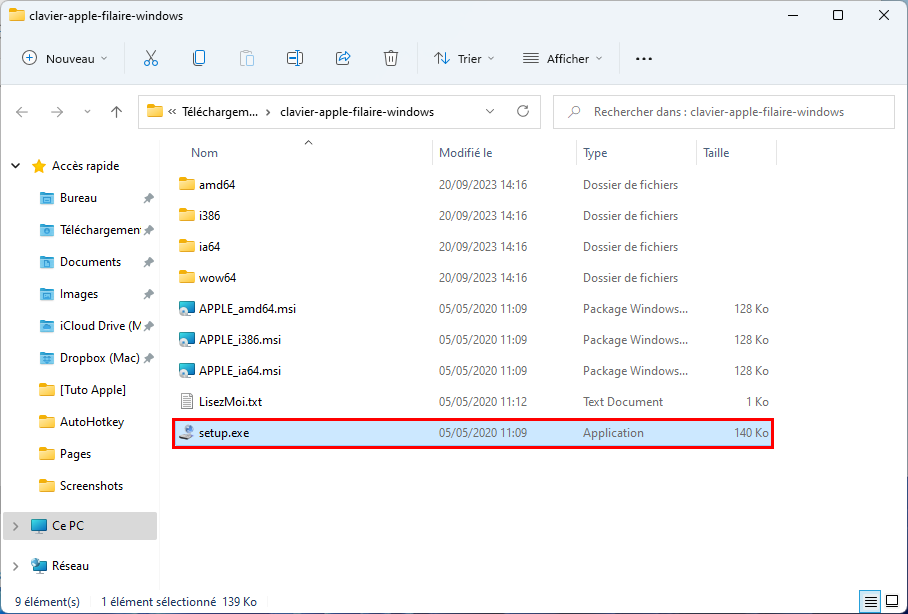
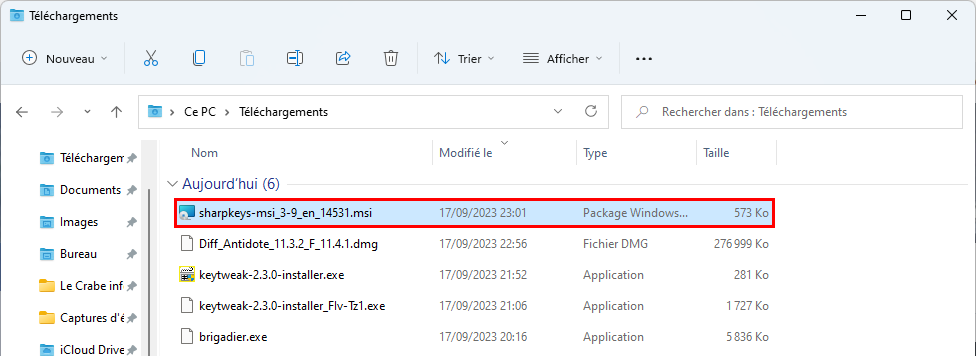
Téléchargez le programme en fonction du type de clavier utilisé et retrouvez-le dans le dossier Téléchargements :
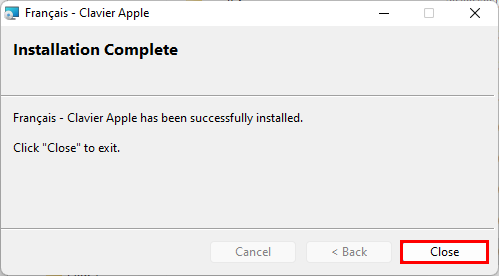
Une fois l’installation terminée, cliquez sur Close.
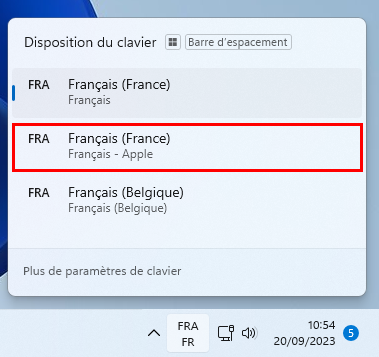
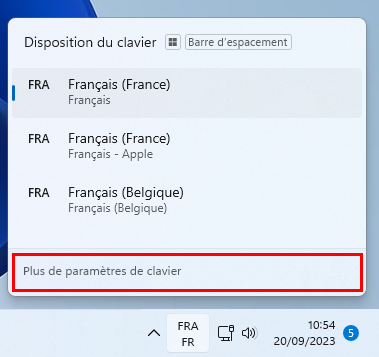
Dans la zone de notification, à droite de la barre des tâches, proche de l’heure, cliquez sur Fr (le nom de votre clavier actuel) pour afficher tous les claviers installés.
Normalement, un nouveau clavier fait son apparition : Français – Apple. Vous pouvez d’ores et déjà le sélectionner ici, à la souris, ou avec les touches Win ❖ + Espace␣.
i Note : si le clavier n’apparaît pas ou si vous voulez supprimer le clavier non Apple, suivez les prochaines étapes. Dans le cas contraire, la configuration est terminée pour vous ! 👍
Cliquez sur Plus de paramètres de clavier, en bas de cette fenêtre.
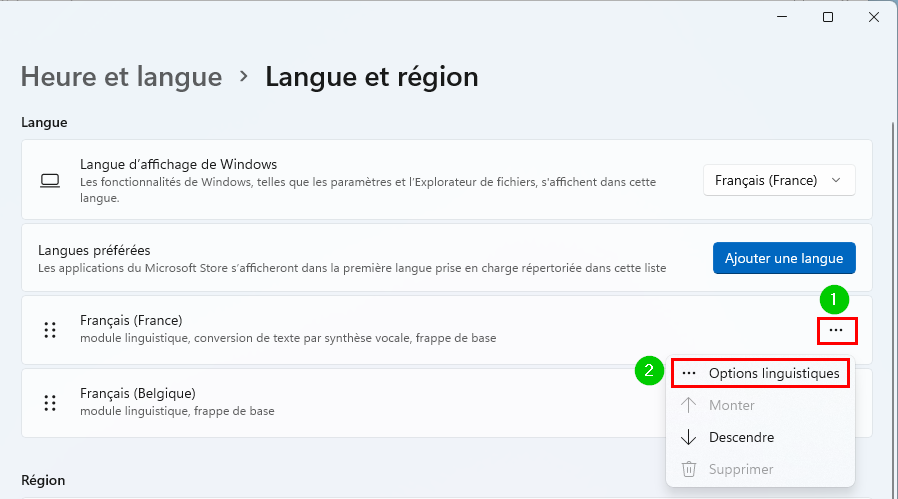
Repérez votre clavier Français (France) et cliquez sur les 3 points puis sur Options linguistiques.
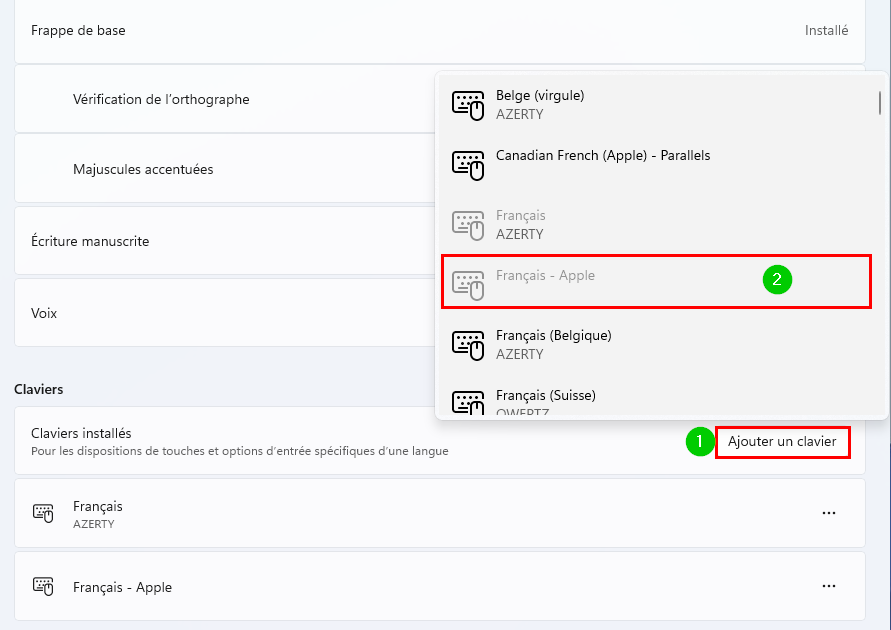
Si le clavier n’apparaît pas, cliquez sur Ajouter un clavier puis sur Français – Apple.
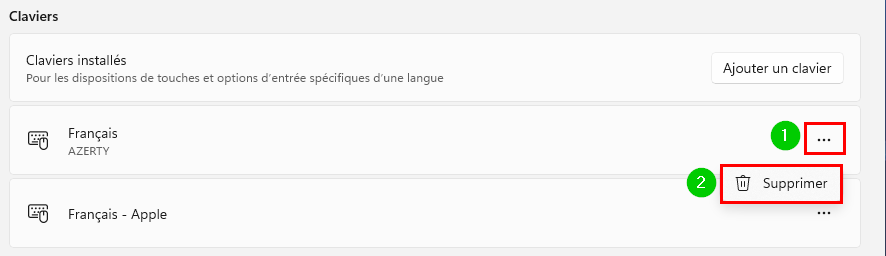
Pour supprimer le clavier non Apple, sur la ligne du clavier Français, AZERTY, cliquez sur les 3 points puis sur Supprimer.
i Informations : voici quelques spécificités de ClavierAppleWin 2.0 :
les combinaisons de touches spécifiques au Mac fonctionnent également ;
par exemple, pour obtenir le caractère « ø », utilisez alt⌥ + à pour le caractère « ø ». Cette combinaison, comme de nombreuses autres, fonctionne uniquement avec le alt⌥ de droite ;
la touche Impression d’écran est attribuée à F13 ;
le caractère spécial qu’est le logo d’Apple, accessible via alt⌥ + & sur Mac, est indisponible sur Windows ;
vous devrez adapter vos habitudes concernant certains raccourcis : ceux basés sur la touche cmd⌘ sur Mac nécessiteront généralement la touche ctrl^ comme cmd⌘ + c qui est ctrl^ + c sur Windows.
✓ Félicitations : vous avez une nouvelle disposition de clavier afin d’utiliser plus efficacement votre clavier filaire Mac sur Windows ! 👍
avec SharpKeys
SharpKeys est un outil permettant de changer la disposition de vos touches à votre convenance et d’enregistrer directement dans le Registre Windows. Il est donc personnalisable, mais vous n’aurez pas accès aux combinaisons de touches propres aux Mac, ce qui est dommage.
Son atout principal ? Changer la configuration des touches de façon propre, sans avoir besoin d’entrer vous-même dans l’Éditeur du Registre.
Téléchargez SharpKeys, ouvrez le dossier Téléchargements dans l’Explorateur de fichiers et double-cliquez sur le fichier que vous venez de télécharger au format .msi.
Cliquez sur Next.
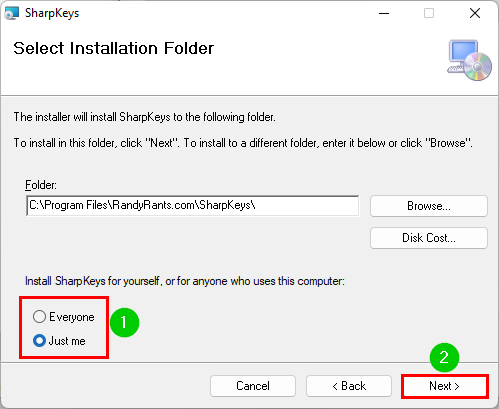
Choisissez Everyone pour installer le programme pour tous les utilisateurs ou Just me pour l’installer uniquement pour cette session. J’ai choici Just me. Validez avec Next.
Cliquez sur Next.
Autoriser l’installation de l’application avec Oui.
Patientez pendant l’installation.
Cliquez sur Close.
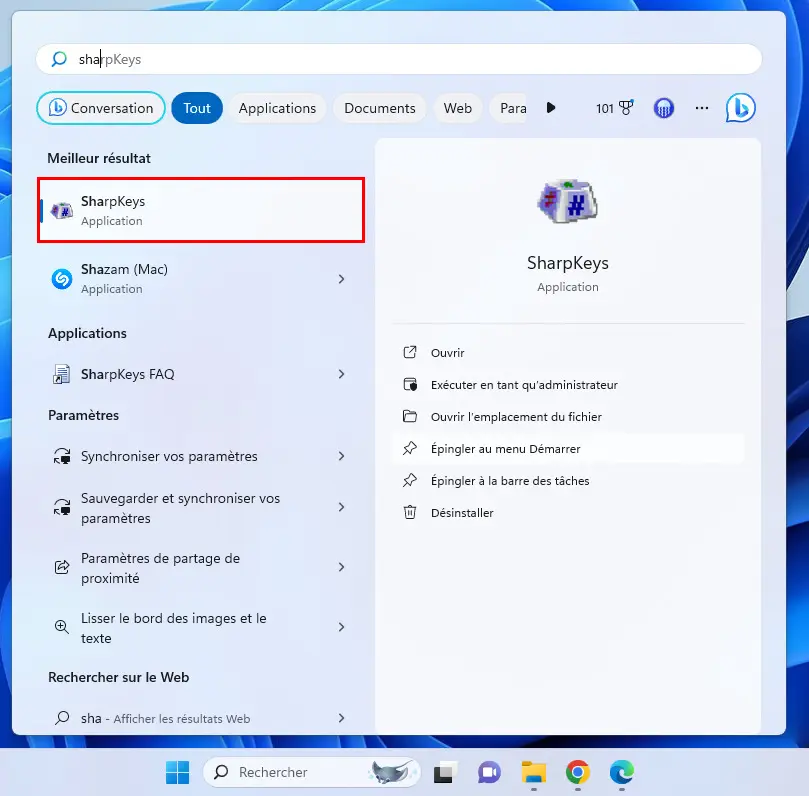
Utilisez la Recherche pour trouver et ouvrir SharpKeys.
Autoriser l’ouverture de l’application avec Oui.
Sur l’écran de bienvenue, cliquez sur OK.
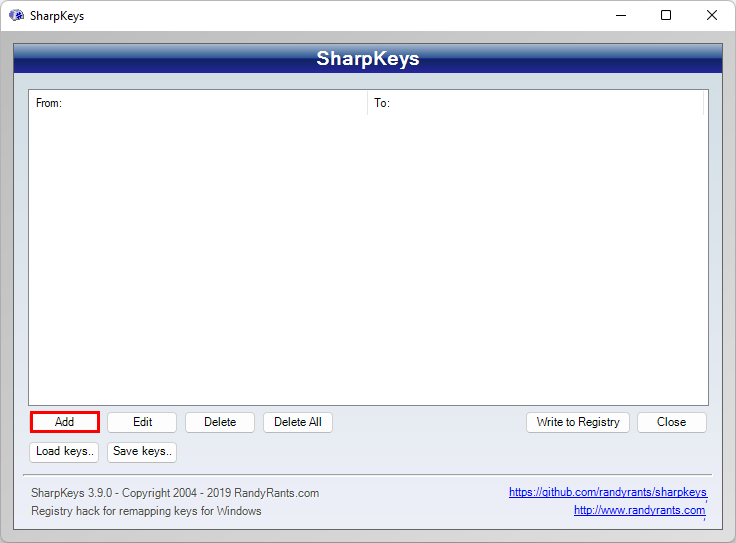
Cliquez sur Add.
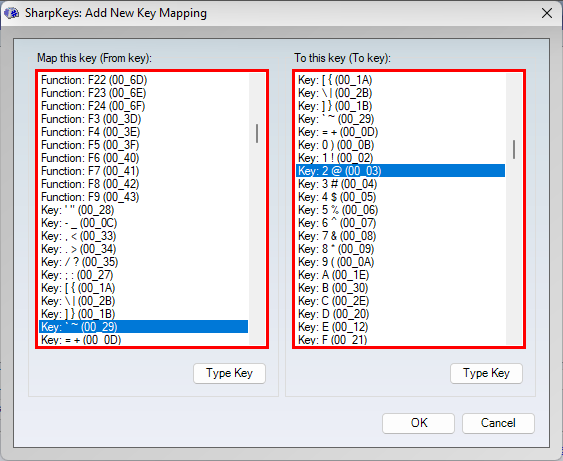
Sélectionnez la touche d’origine (à gauche) et sa nouvelle affectation (à droite). Ainsi, lorsque vous appuierez sur la touche d’origine, c’est la fonction de la touche affectée qui sera activée.
i Note : vous pouvez cliquer sur Type Key et appuyer sur votre clavier pour ne pas chercher dans la liste.
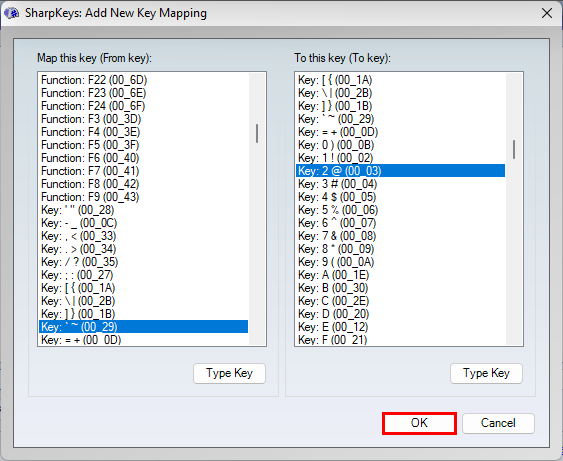
Validez avec OK.
Recommencez pour chaque touche dont vous voulez changer la disposition.
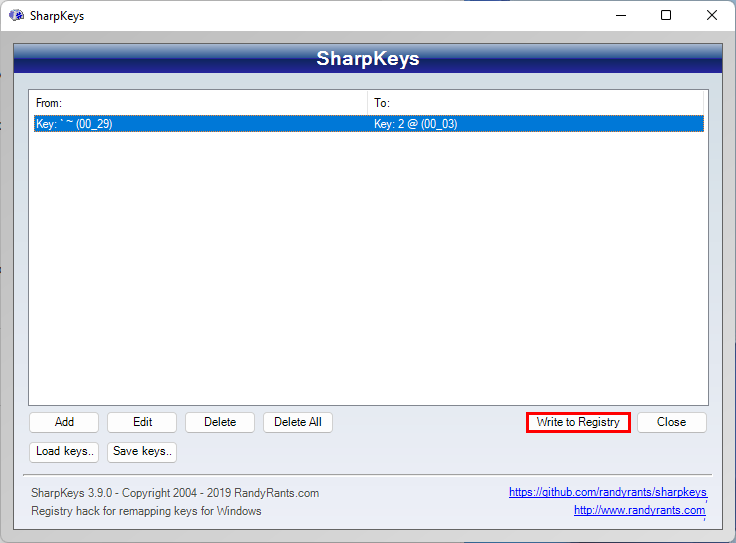
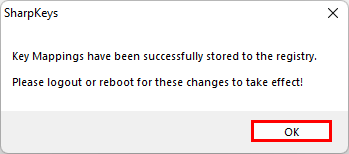
Quand vous avez fini (ou que vous voulez vérifier si ça fonctionne comme vous le voulez), cliquez sur Write to Registry.
Cliquez sur OK.
Redémarrez votre ordinateur ou votre session pour que les changements soient effectifs.
✓ Génial : vous savez comment remapper votre clavier Mac pour mieux l’utiliser sur Windows grâce à SharpKeys ! 👍
Autres programmes pour utiliser un clavier Mac sur Windows
Voici encore trois autres outils, brièvement présentés, permettant d’utiliser votre clavier Mac sur un PC Windows 10 et 11.
KeyTweak
KeyTweak permet de remapper les touches de votre clavier touche par touche, sans possibilité de combinaisons toutefois. Il s’agit peut-être de l’utilitaire le plus ancien et le plus intuitif, bien qu’il ne soit pas le plus puissant. Avec KeyTweak, tout comme avec certains autres outils, accéder à l’arobase sur un clavier Mac utilisé sous Windows n’est pas aussi direct.
Fenêtre de KeyTweak
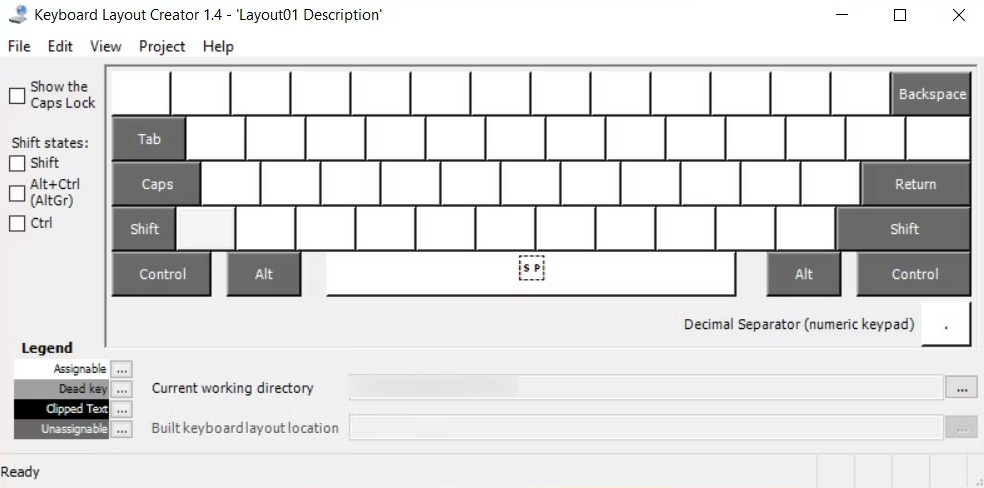
Microsoft Keyboard Layout Creator (MKLC)
Microsoft Keyboard Layout Creator (MKLC) est un outil de Microsoft destiné aux linguistes, aux développeurs et aux utilisateurs avancés. Grâce à son interface graphique, le remappage de certaines touches est simplifié. Pour aller plus loin, il vous faudra être un peu plus à l’aise avec l’informatique. Notez qu’il ne prend pas en charge les combinaisons de touches et qu’il n’est pas compatible avec Windows 11 actuellement.
Fenêtre Microsoft Keyboard Layout Creator (MKLC)
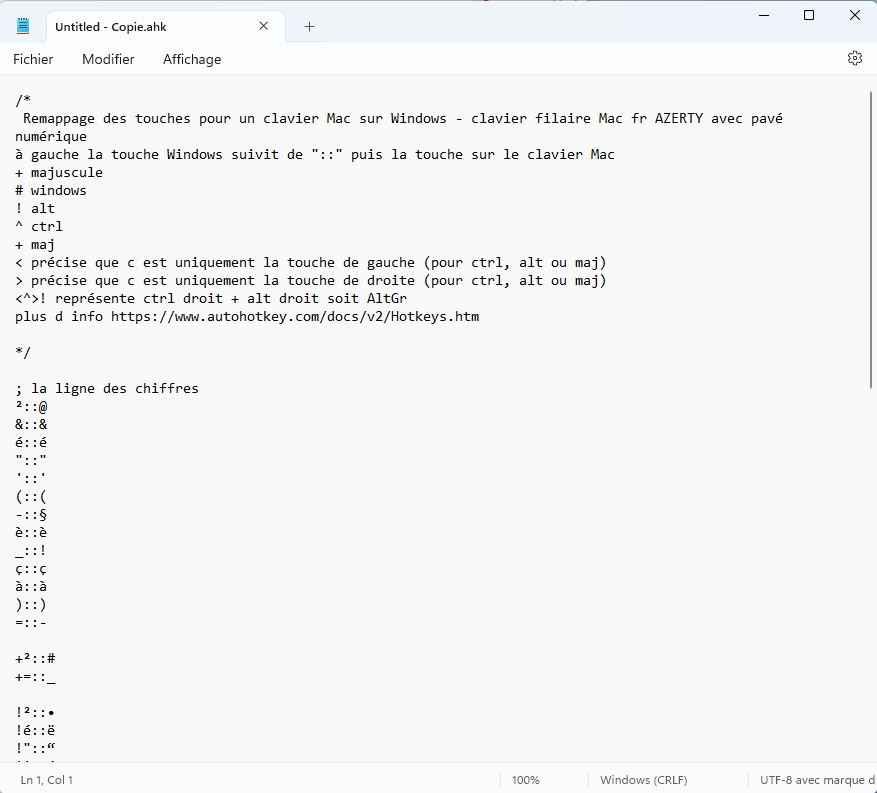
AutoHotkey
AutoHotkey est l’utilitaire le plus puissant que nous ayons évoqué. C’est peut-être également le moins convivial puisqu’il ne dispose pas d’interface graphique. Son point fort ? Sa capacité à gérer les combinaisons de touches. Le principe de base est relativement simple : indiquez le caractère à afficher, le résultat souhaité, suivi de « :: » et de la ou les touches à utiliser pour l’obtenir.
Extrait d’un script pour AutoHotkey
✓ Félicitations : vous avez plusieurs solutions à disposition pour utiliser correctement votre clavier Mac sur Windows. À vous de choisir la méthode qui vous convient le mieux ! 👍
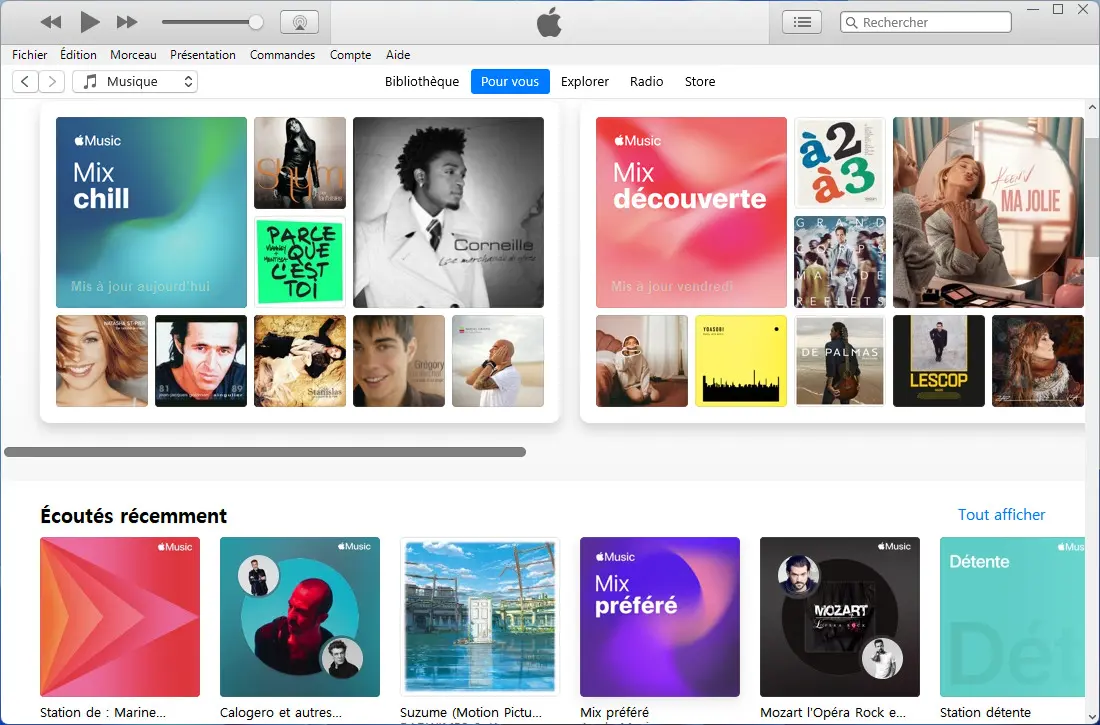
Apple Music, lancé le 30 juin 2015, est le service de streaming musical emblématique d’Apple. Dans l’univers des plateformes d’écoute en ligne, Apple Music s’est rapidement imposé comme un incontournable. Grâce à sa bibliothèque musicale conséquente et son nombre d’abonnés significatif, Apple Music rivalise avec des géants comme Spotify et Deezer.
Apple Music avec iTunes sur Windows
Bonne nouvelle pour les amateurs de musique ! Apple Music n’est pas réservé aux seuls utilisateurs d’appareils Apple. En effet, le service est accessible sur iPhone, iPad, Mac, mais également sur Windows et Android. Pour ceux qui souhaite écouter Apple Music sur Windows 10 ou 11, sachez que trois méthodes s’offrent à vous pour profiter de vos morceaux préférés.
! Attention : une fois l’abonnement à Apple Music terminé, les musiques ne seront plus accessibles, contrairement aux achats dans l’iTunes Store qui sont des acquisitions à vie.
Dans cet article, nous vous guiderons sur les différentes manières d’écouter Apple Music sur un PC Windows : iTunes, Apple Music ou votre navigateur web préféré. Et puisqu’Apple Music est inutilisable sans abonnement, nous vous expliquerons également comment y souscrire tout en vous présentant les différences entre les abonnements.
Écouter Apple Music sur un PC Windows
via iTunes
Lorsque l’on évoque l’utilisation des services d’Apple sur Windows, iTunes est souvent le premier nom qui nous vient à l’esprit. Écouter Apple Music sur un PC Windows ne fait pas exception. Avant tout, assurez-vous d’avoir déjà téléchargé, installé iTunes, connecté votre compte Apple et autorisé votre ordinateur. Installer iTunes sur Windows : comment faire ?
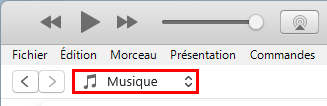
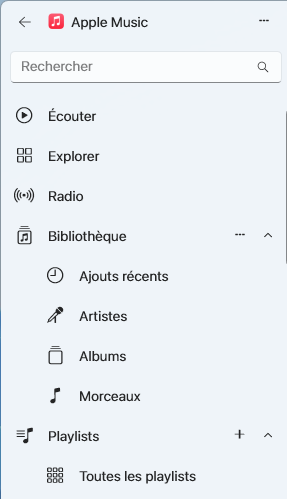
Ouvrez iTunes et sélectionnez Musique dans le menu déroulant en haut à gauche.
Parcourez librement les menus du milieu et utilisez la barre de recherche en haut à droite pour trouver les musiques, palylists et mix à écouter.
i Note : le menu Store correspond à iTunes Store, un service différent d’Apple Music.
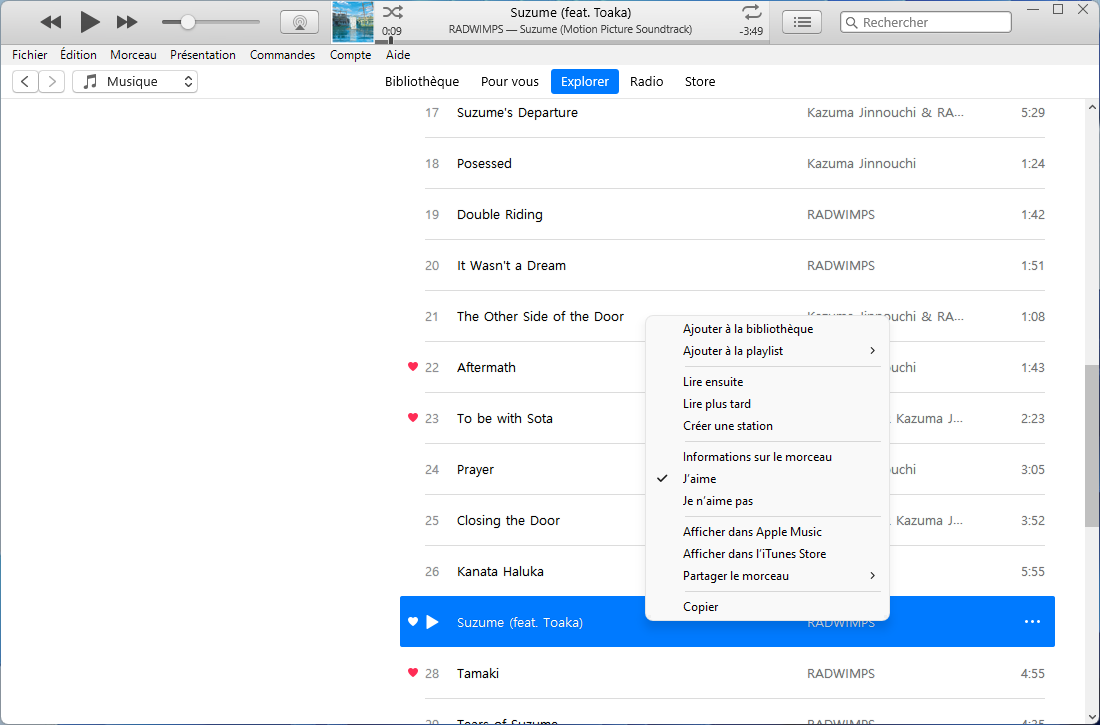
Sur chaque morceau de musique ou album, vous pouvez effectuer plusieurs actions possibles :
cliquez sur le bouton lecture▶️ pour lire l’album, le mix, la playlist ou le morceau de musique ;
cliquez sur ➕ pour ajouter l’élément à votre bibliothèque ;
cliquez sur le nuage avec une flèche vers le bas pour télécharger l’élément de votre bibliothèque sélectionné ;
faites un clic droit ou cliquez sur les trois points pour avoir plus d’options comme l’ajout à la playlist de votre choix.
via Apple Music
Apple est en train de développer trois nouvelles applications pour Windows, similairement à ce qu’ils ont fait sur macOS. Actuellement, les applications sont en cours de développement pour tous utilisateurs de Windows 10 et 11 (non ARM) sur le Microsoft Store et commencent par « Aperçu », comme « Aperçu d’Apple Music » dédiée à… vous l’avez deviné, écouter Apple Music !
! Attention : dès l’installation de l’application Apple Music, iTunes devient inutilisable. Si vous avez besoin des autres fonctionnalités d’iTunes, les applications Appareils Apple et Apple TV sont également disponibles. Pour utiliser iTunes à nouveau, vous devrez désinstaller les applications « Aperçu ».
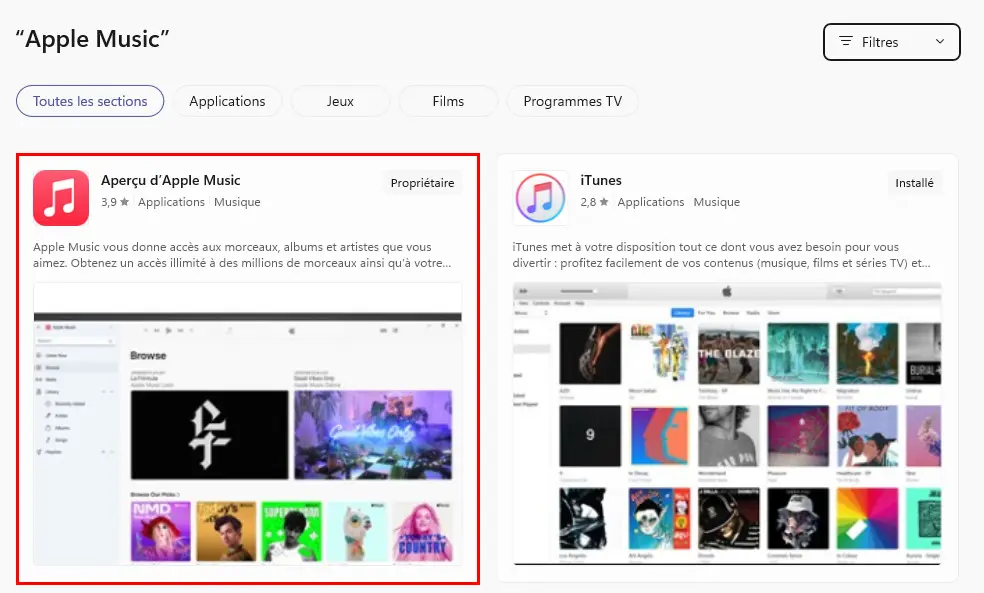
Ouvrez Microsoft Store, saisissez Apple Music dans la barre de recherche et appuyez sur la touche Entrée⏎.
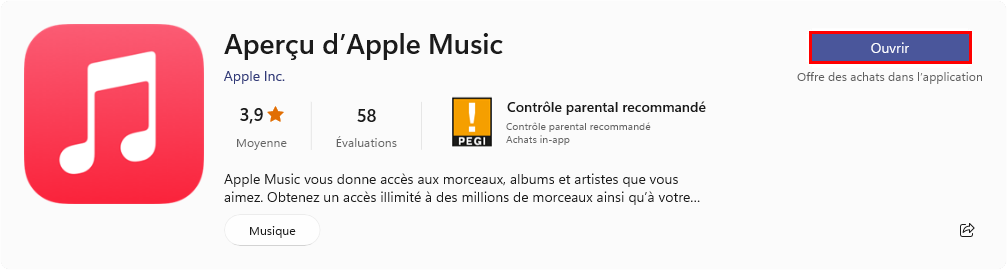
Cliquez sur la fiche Aperçu d’Apple Music.
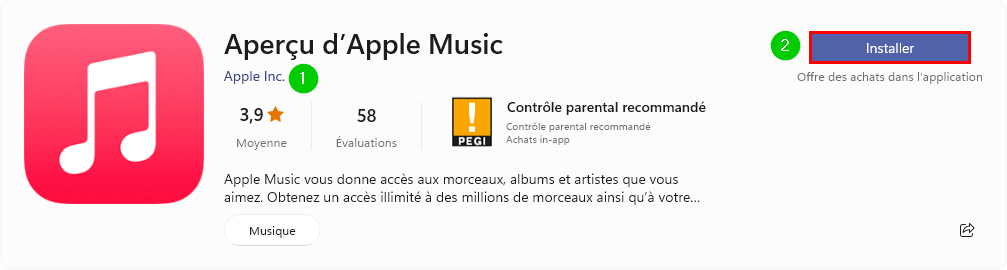
Assurez-vous que c’est bien l’application d’Apple et cliquez sur Obtenir ou Installer.
Une fois le téléchargement terminé, cliquez sur Ouvrir.
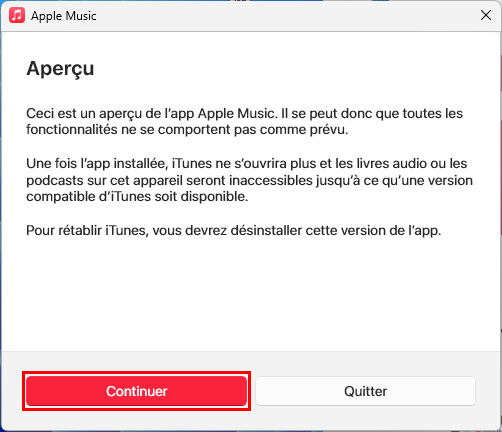
Lors du premier allumage, vous êtes invité à lire les implications d’utiliser une application Aperçu. Cliquez sur Continuer.
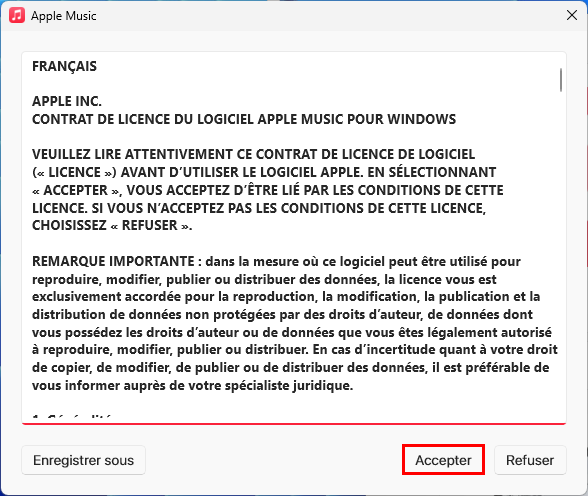
Lisez les conditions d’utilisation et cliquez sur Accepter.
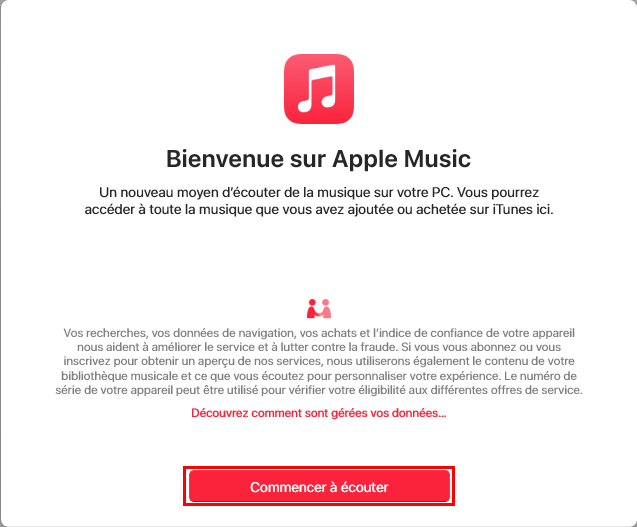
Cliquez sur Commencer à écouter sur l’écran de Bienvenue sur Apple Music.
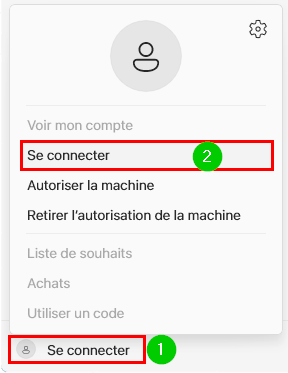
Cliquez sur Se connecter, en bas à gauche, puis cliquez de nouveau sur Se connecter.
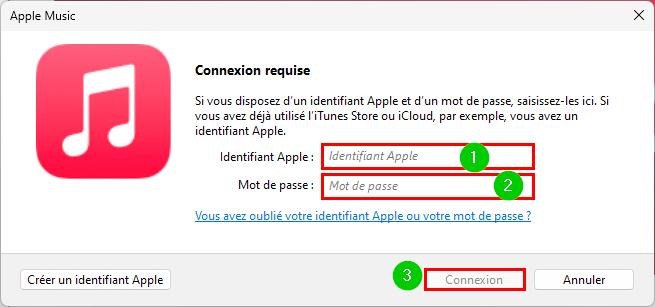
Saisissez l’e-mail de votre compte Apple et le mot de passe associé puis cliquez sur Connexion.
i Note : selon vos réglages, suivez les éventuelles étapes de vérifications.
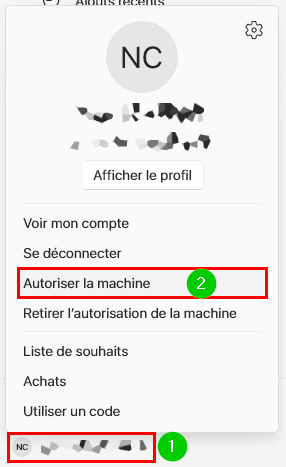
Cliquez sur votre nom, en bas à gauche, puis sur Autoriser la machine.
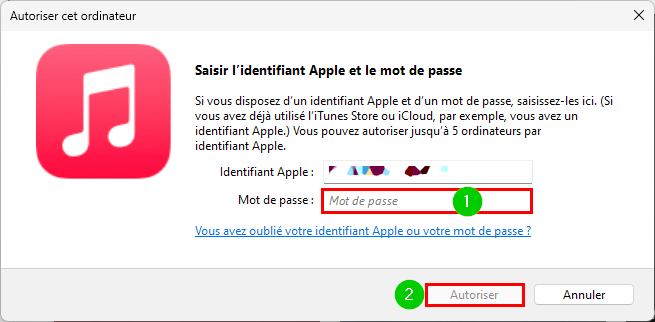
Entrez de nouveau le mot de passe de votre identifiant Apple et cliquez sur Autoriser.
i Note : vous pouvez autoriser jusque cinq ordinateurs, Mac et PC confondus. Les appareils mobiles et la version Web ne sont pas comptabilisés.
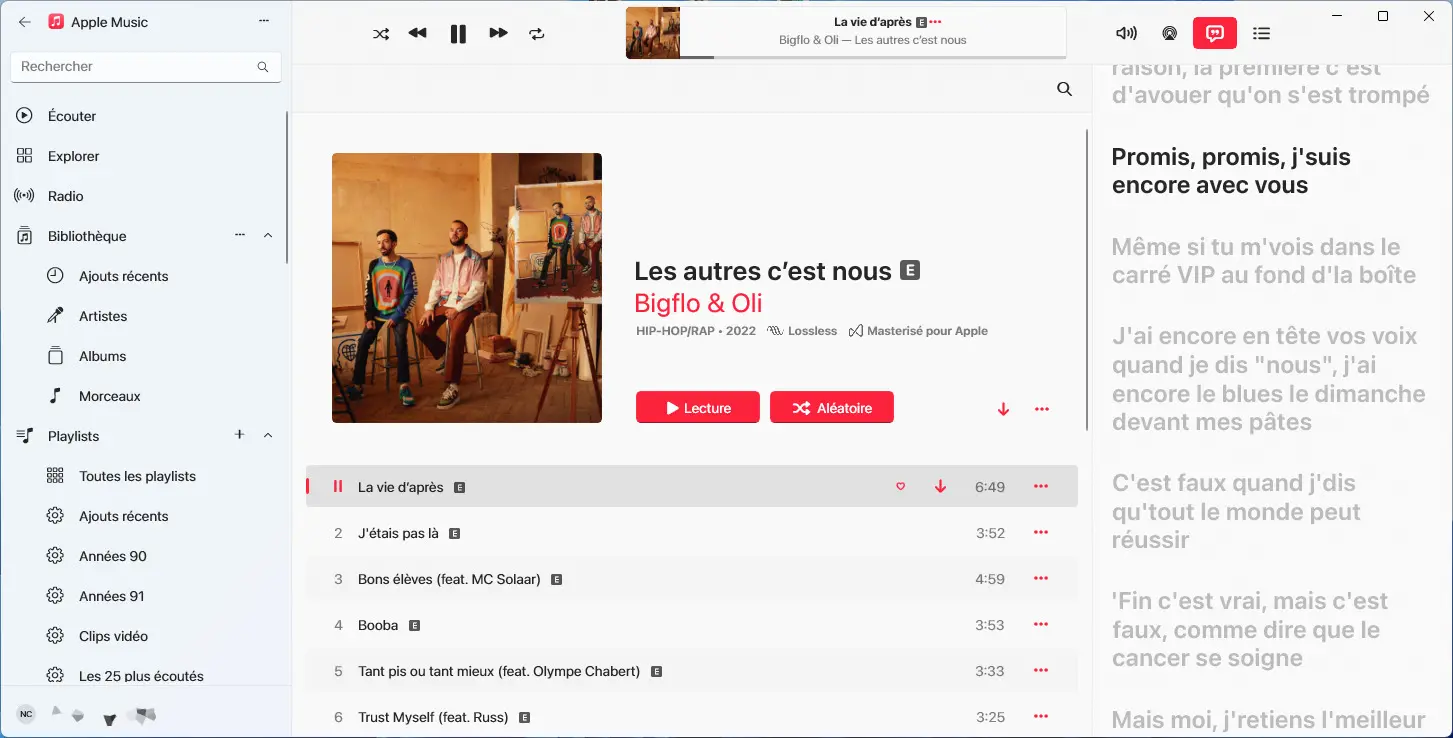
Visitez à votre guise le menu de gauche et la Recherche pour naviguer dans le catalogue, votre Bibliothèque et vos playlists.
Pour chaque titre ou album, diverses options s’offrent à vous :
lire avec le bouton lecture▶️ ;
ajouter l’élément à votre bibliothèque avec le bouton ➕ ;
télécharger un élément de votre bibliothèque grâce à la flèche vers le bas ;
accéder à tous ces choix, et plus encore, avec un clic droit ou les trois points.
via un navigateur web
Si vous n’êtes pas sur votre ordinateur ou si vous avez déjà cinq ordinateurs autorisés, la version Web d’Apple Music est votre meilleur allié :
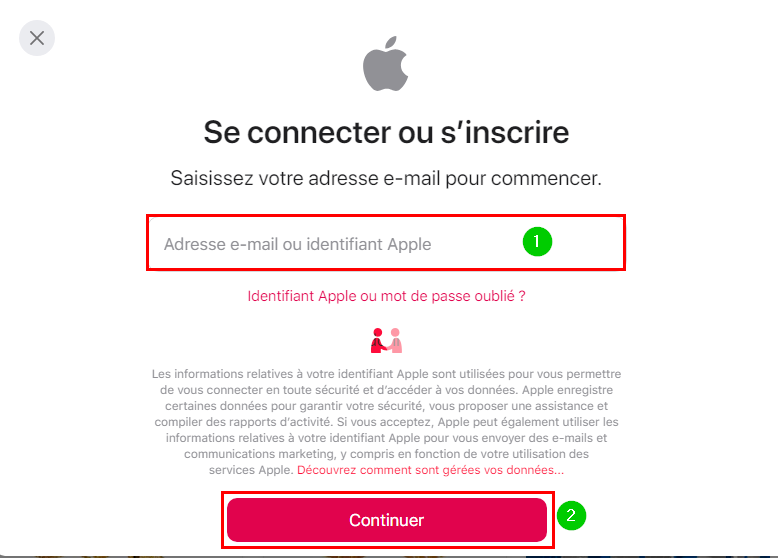
Entrez votre identifiant Apple et cliquez sur Continuer.
Continuez votre authentification en suivant les étapes indiquées selon vos choix et configurations.
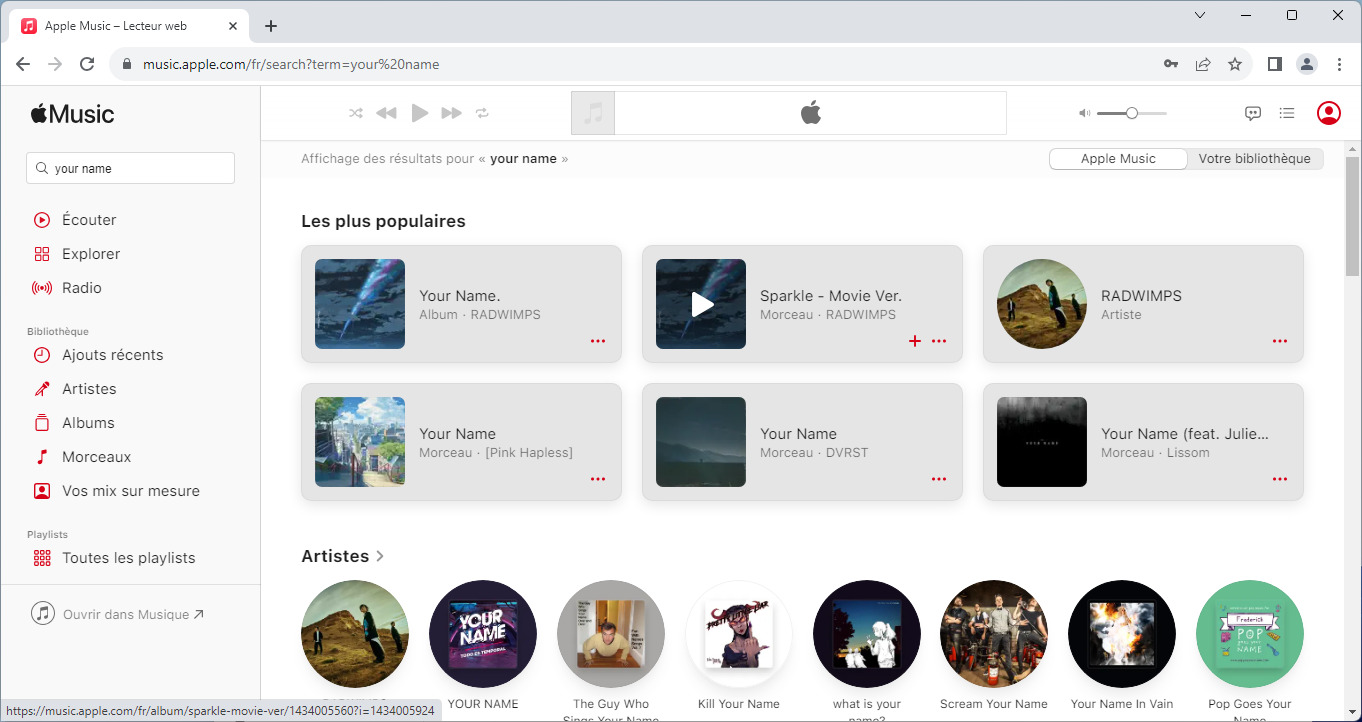
Sur la gauche, découvrez la Recherche et les menus afin de consulter les différentes musiques à disposition.
Pour chaque élément, là aussi vous avez plusieurs actions possibles :
le bouton lecture▶️, pour lancer un mix, une playlist, un album ou encore un morceau de musique ;
le bouton ➕ pour ajouter l’élément à votre bibliothèque ;
les trois points pour ouvrir un menu contextuel avec ces mêmes options et même davantage.
Vous l’aurez remarqué, avec cette méthode vous ne pouvez pas télécharger vos musiques pour les écouter hors ligne puisque, contrairement aux applications, vous ne pourrez pas accéder à la version Web sans Internet.
✓ Félicitations : vous savez maintenant comment écouter Apple Music sur un PC Windows ! 👍
Abonnement Apple Music
Souscription
Que vous soyez sur un iPhone, un iPad, un Mac, un PC Windows ou même un navigateur web, la procédure de souscription à Apple Music reste sensiblement la même. Pour l’exemple, les captures d’écran seront faites sur iTunes :
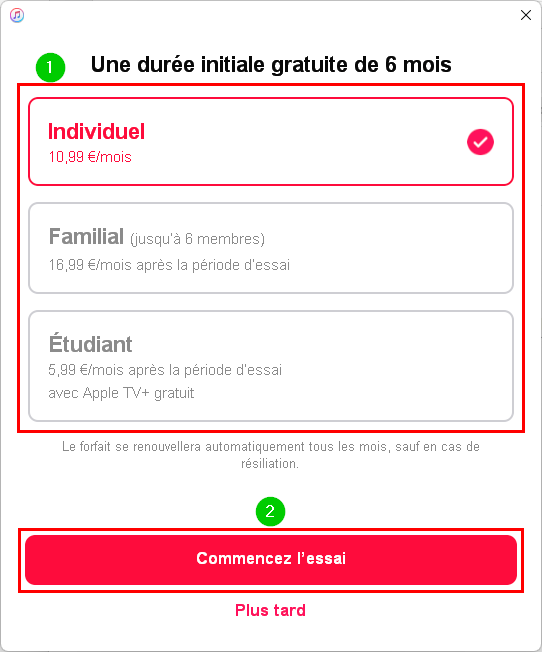
Allez dans un des menus Pour vous vous, Explorer ou encore Radio et cliquez sur Sélectionnez votre abonnement ou Essayer gratuitement Apple Music.
Choisissez l’abonnement de votre choix puis cliquez sur Commencez l’essai.
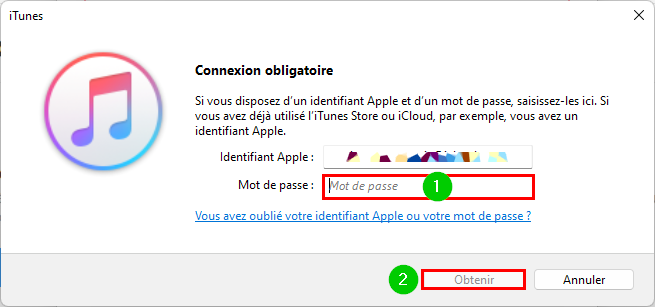
Connectez-vous avec votre identifiant Apple. Si nécessaire, suivez les étapes complémentaires comme la double authentification ou encore l’ajout d’un mode de paiement.
i Note : si vous avez choisi l’abonnement Étudiant, vous devrez suivre une procédure supplémentaire pour justifier votre statut.
✓ Bravo : l’abonnement ou la période d’essai d’Apple Music commence immédiatement ! 👍
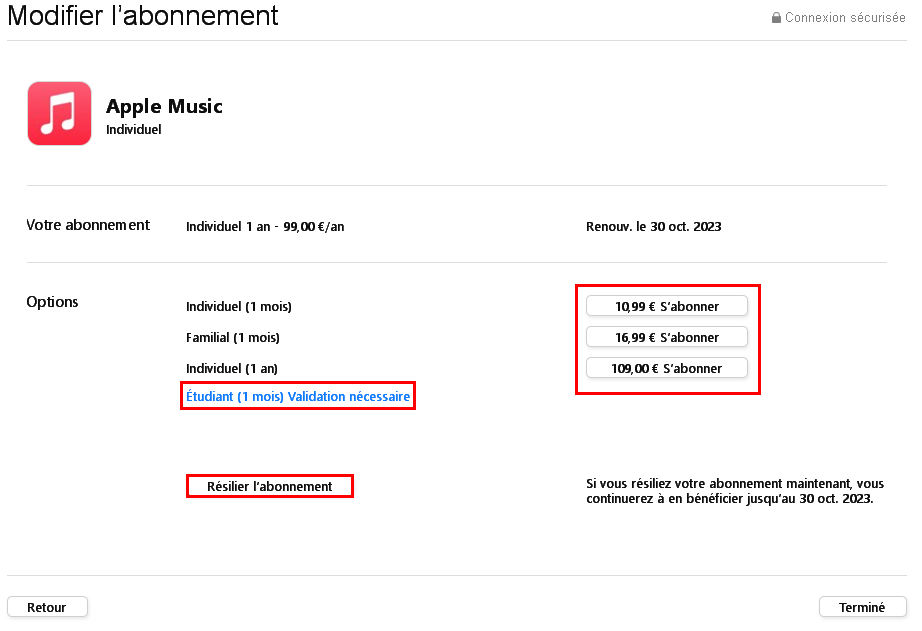
Changer d’abonnement ou l’annuler
Pour changer de formule d’abonnement, l’annuler ou ne pas poursuivre après la période d’essai, tout se fait au même endroit. Pour illustrer les étapes, nous utiliserons iTunes, mais sachez que le processus est similaire sur les autres plateformes.
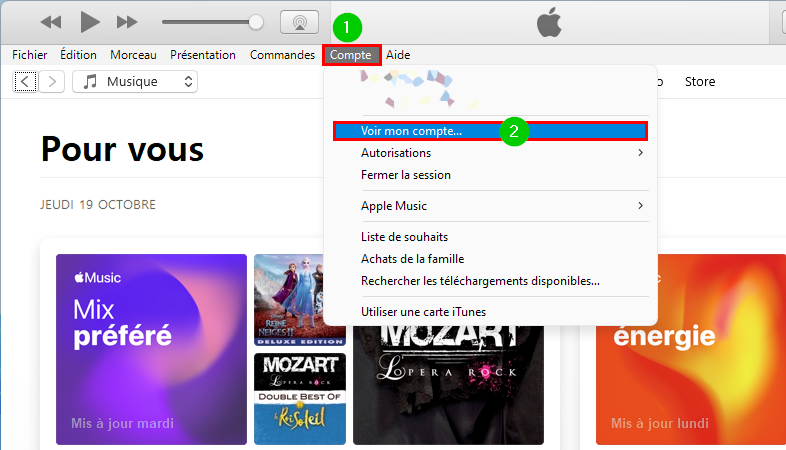
Ouvrez iTunes et allez dans le menu Compte puis Voir mon compte.
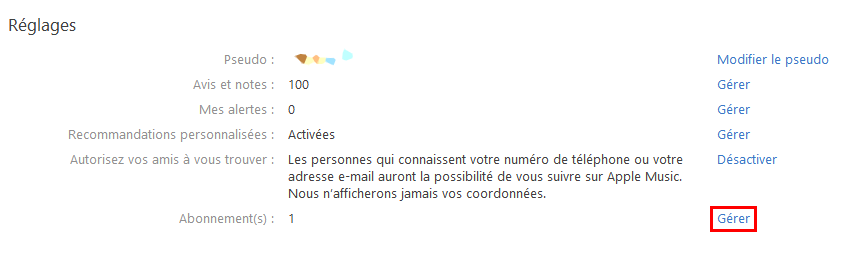
Faites défiler la page jusqu’à la section Réglages. Repérez la ligne Abonnement et cliquez sur Gérer.
Sur la ligne Apple Music, cliquez sur Modifier.
Cliquez sur S’abonner en face d’une nouvelle formule d’abonnement ou préférez Résilier l’abonnement, selon vos besoins.
Suivez les instructions à l’écran qui peuvent différer selon votre choix.
✓ Super : vous avez le contrôle de votre abonnement Apple Music ! 👍
Avantages et résumé des abonnements
Avec un abonnement actif à Apple Music, vous bénéficiez d’un accès illimité à l’ensemble du catalogue musical, et ce, sur tous vos appareils. Voici quelques-uns des avantages principaux :
☞Personnalisation : indiquez les morceaux que vous aimez ou n’appréciez pas pour affiner vos recommandations.
☞Organisation : ajoutez des musiques et albums à votre bibliothèque ou à des playlists pour les retrouver aisément.
☞Mix intelligents : Apple Music vous propose régulièrement des sélections personnalisées, comme vos titres préférés ou des découvertes.
☞Écoute hors-ligne : Une fois qu’un morceau est dans votre bibliothèque, téléchargez-le pour l’écouter sans connexion internet via l’application dédiée.
Apple propose quatre abonnements différents pour Apple Music : Voice, Étudiant, Individuel et Familial. Cependant, l’un d’entre eux, Voice, ne fonctionne qu’avec Siri. Vous ne pourrez donc pas écouter Apple Music sur un PC Windows 10 ou 11 avec un abonnement Voice. Voici un bref résumé des quatre abonnements.
Fonctionnalités
Voice
Étudiant
Individuel
Familial
Prix1,2
4,99 € / mois
5,99 € / mois
10,99 € / mois ou 109 € / an
16,99 € / mois
100 millions de morceaux et plus de 30 000 playlists
✓
✓
✓
✓
Accès à l’ensemble des morceaux, albums, playlists
Uniquement avec Siri
✓
✓
✓
Musique en streaming et sans publicité
✓
✓
✓
✓
Programmes originaux, concerts et exclusivités
✓
✓
✓
✓
Les paroles synchronisées3
✓ (sauf iTunes)
✓ (sauf iTunes)
✓ (sauf iTunes)
✓ (sauf iTunes)
Catalogue complet au format Lossless3
✓ (sauf iTunes)
✓ (sauf iTunes)
✓ (sauf iTunes)
Audio spatial avec Dolby Atmos
✓
✓
✓
Apple Music Sing3
✓ (sauf iTunes)
✓ (sauf iTunes)
✓ (sauf iTunes)
Affichage des paroles en temps réel (façon karaoké)3
✓ (sauf iTunes)
✓ (sauf iTunes)
✓ (sauf iTunes)
Téléchargement de 100 000 morceaux pour écouter hors ligne
✓
✓
✓
Possibilité de voir ce qu’écoutent vos proches
✓
✓
✓
Valable pour 6 membres de la famille avec une bibliothèque et des recommandations personnalisées pour chaque membre
✓
¹ Une seule période d’essai d’un mois par identifiant Apple.
² Ce sont les tarifs d’octobre 2023.
³ Fonctionnalité mise à disposition, tous les morceaux ne l’ont pas forcément intégrée.
Microsoft 365 est la suite bureautique de Microsoft, anciennement connue sous le nom de suite Office, comprenant sept applications. Si vous travaillez à la fois sur les environnements Windows et macOS, c’est l’ensemble idéal à utiliser pour optimiser votre travail. Cela facilite les échanges entre collaborateurs ou amis, et évite les problèmes de compatibilité. En effet, les applications équivalentes d’Apple, Page, Numbers ou encore Keynote, n’ont pas de versions Windows. Toutefois, que ce soit la suite de Microsoft ou celle d’Apple (autrefois iWork), elles sont accessibles en ligne via votre navigateur.
Microsoft Word sur Mac
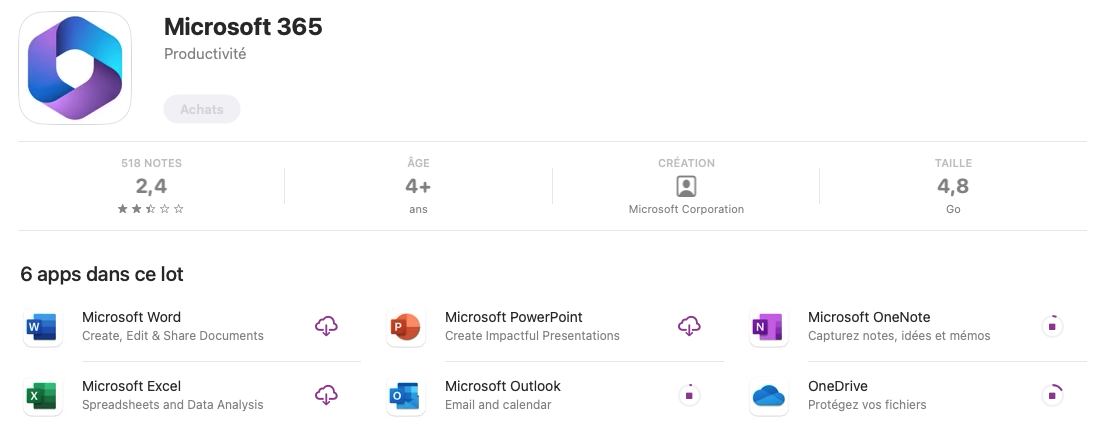
Microsoft 365 contient Word, Excel, PowerPoint, mais également OneNote, Outlook et OneDrive. Teams fait également partie de la suite Microsoft 365 sur Windows, mais se télécharge séparément sur macOS.
i Note : tandis que les applications d’Apple sont gratuites, ce n’est le cas que pour une partie de Microsoft 365. Vous devrez souscrire un abonnement pour utiliser Word, Excel et PowerPoint. Concernant les autres applications, elles bénéficient de versions gratuites et premium.
Afin de vous permettre de travailler efficacement tout en maximisant la compatibilité avec les environnements Windows, nous allons vous guider pour installer les applications de Microsoft 365 sur votre Mac d’Apple depuis l’App Store, puis Microsoft Teams à partir du site de Microsoft. Ensuite, nous passerons par votre compte Microsoft pour télécharger toutes ses applications en une seule installation. Pour finir, nous vous montrerons comment prendre un abonnement Microsoft 365 depuis les applications de l’App Store.
! Attention : contrairement à Windows, sur macOS il n’existe pas une application nommée Microsoft 365 qui sert de point central pour accéder aux différentes applications comme Word, Excel ou encore PowerPoint.
Installer Microsoft 365 sur votre Mac d’Apple
via l’App Store
Les applications de Microsoft 365 sont presque toutes disponibles sur l’App Store :
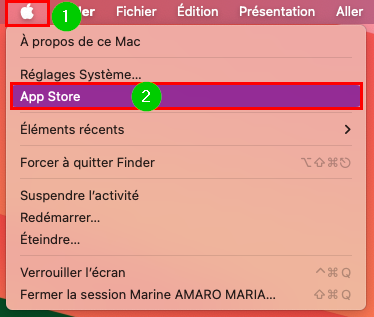
Dans la barre des menus, cliquez sur la pomme🍎 puis App Store.
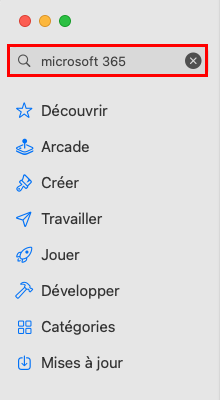
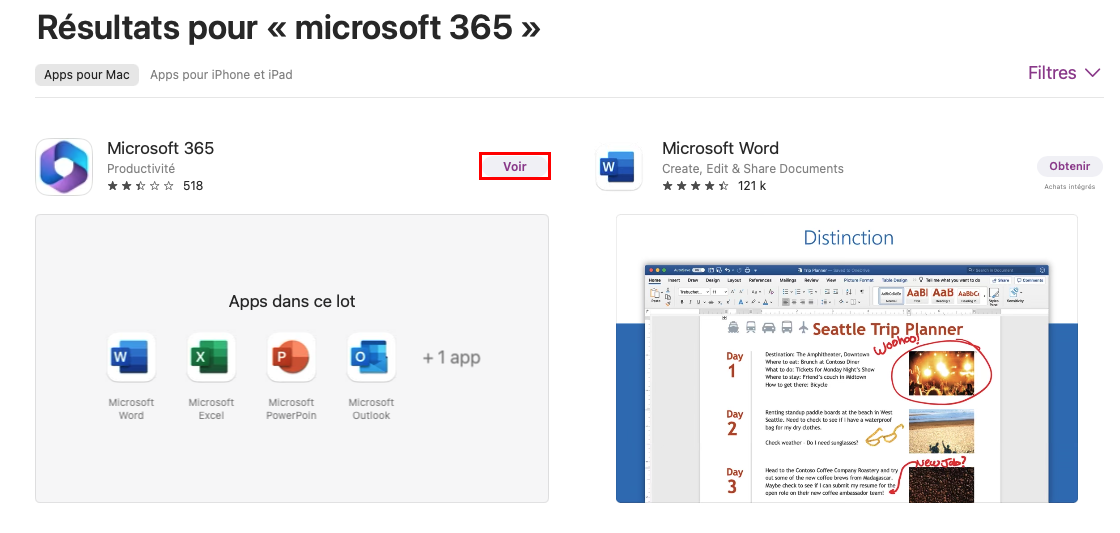
Saisissez “Microsoft 365” dans la barre de recherche en haut à gauche et validez avec la touche Entrée ⏎.
i Note : cliquez sur ce lien pour arriver directement sur la bonne fiche.
Cliquez sur Voir dans la fiche de Microsoft 365.
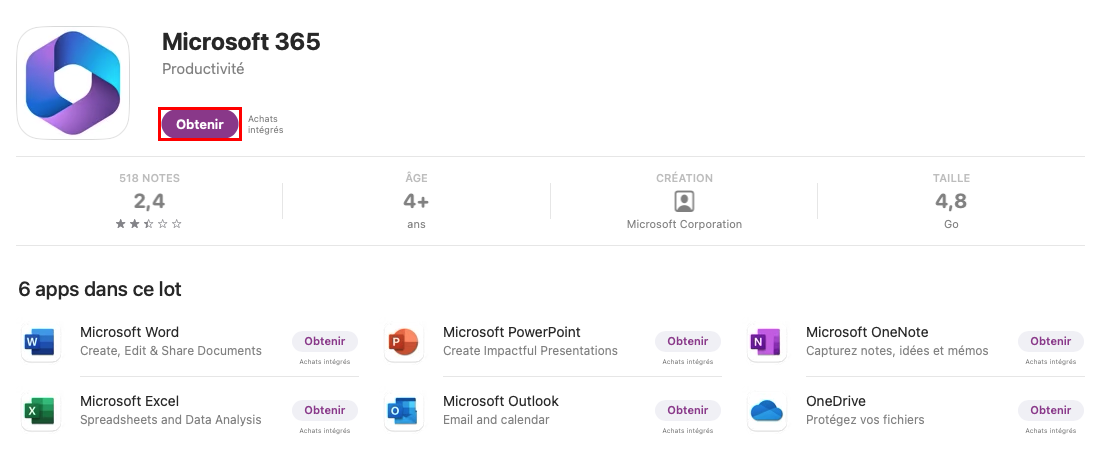
Cliquez sur Obtenir sous Microsoft 365 pour acquérir l’ensemble des 6 applications. Vous pouvez choisir de les télécharger de manière individuelle en cliquant sur Obtenir en face de chaque application désirée.
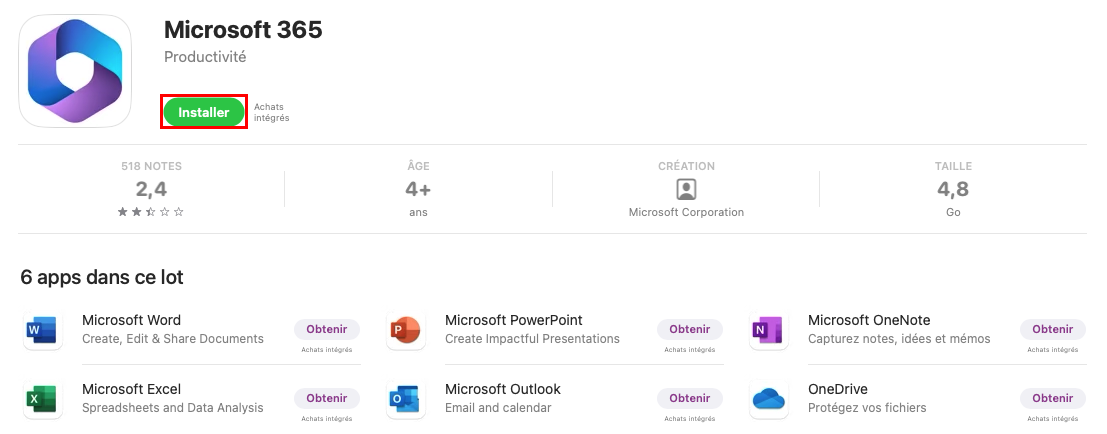
Confirmez en cliquant sur Installer.
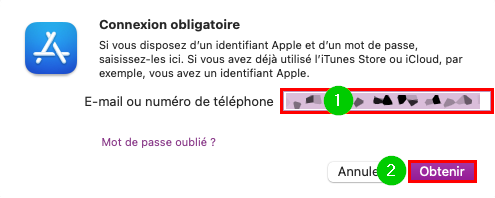
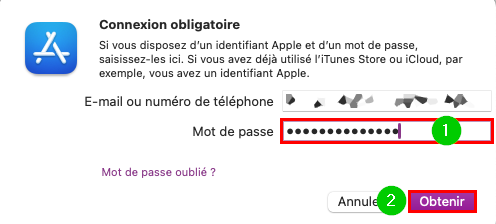
Vérifiez que l’adresse e-mail est bien celle de votre compte Apple et cliquez sur Obtenir.
Entrez le mot de passe qui lui est associé et validez avec Obtenir.
Vous pouvez voir quatre boutons différents à côté de chacune de ces applications :
☞ Le bouton Obtenir : pour commencer à télécharger et installer l’application.
☞ L’icône du carré, avec son contour rond qui se remplit : représente l’avancée du téléchargement. En cliquant dessus, vous arrêterez le téléchargement et l’installation en cours.
☞ L’icône du nuage avec une flèche vers le bas : indique que cette application a déjà été installée avec ce compte Apple, mais qu’elle n’est actuellement pas installée sur ce Mac. Cliquez dessus pour l’installer de nouveau.
☞ Le bouton Ouvrir : pour ouvrir l’application qui a fini son installation sur ce Mac.
Deux des quatre types d’icônes
En ouvrant une application, vous serez amené à vous connecter à votre compte Microsoft et, le cas échéant, à vous abonner.
✓ Félicitations : c’est avec succès que vous avez installé Word, Excel, PowerPoint, OneNote, Oultook et OneDrive de la suite Microsoft 365 sur votre Mac d’Apple depuis l’App Store ! 👍
via le site de Microsoft pour Teams
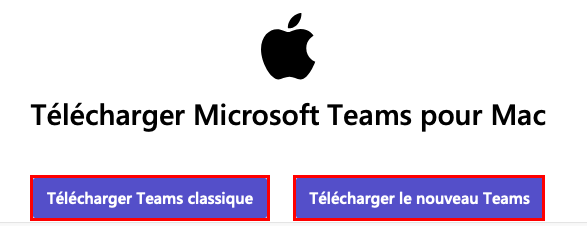
Microsoft Teams, quant à lui, n’est pas disponible dans l’App Store. Cela ne vous empêche pas d’avoir la possibilité de l’installer sur votre Mac :
i Note : à terme, le nouveau Teams remplacera totalement le Teams classique. À l’heure actuelle, le nouveau Teams ne fonctionne pas avec un compte Personnel.
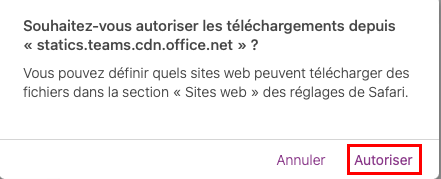
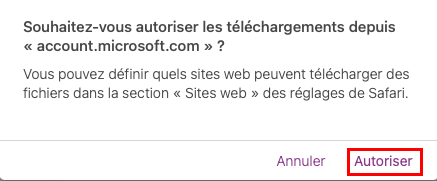
Si vous utilisez Safari, cliquez sur Autoriser pour autoriser les téléchargements.
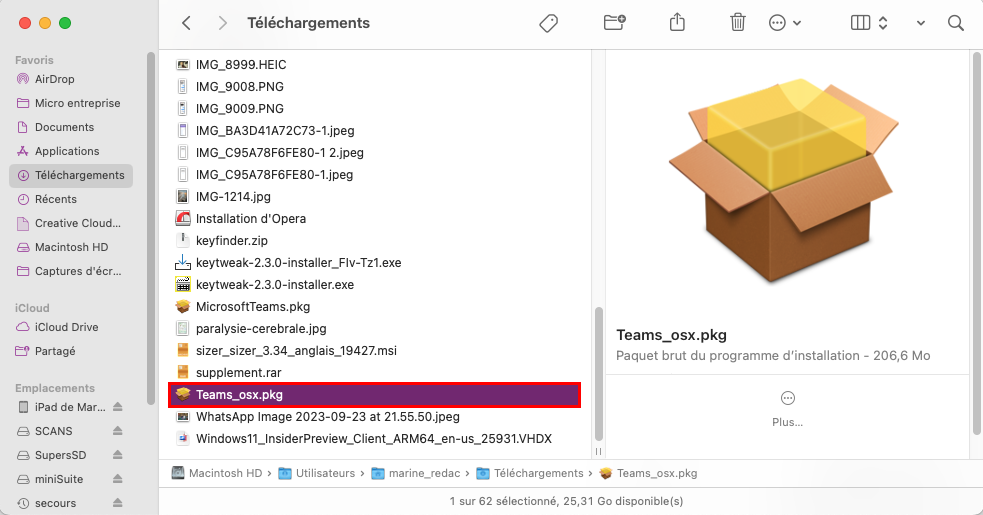
Allez dans le dossier Téléchargements dans le Finder et double-cliquez sur MicrosoftTeams.pkg (nouveau Teams) ou Teams_osx.pkg (Teams classique).
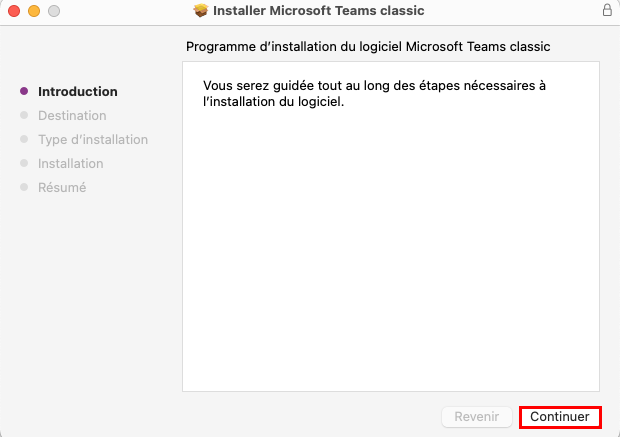
Le programme d’installation s’ouvre, cliquez sur Continuer.
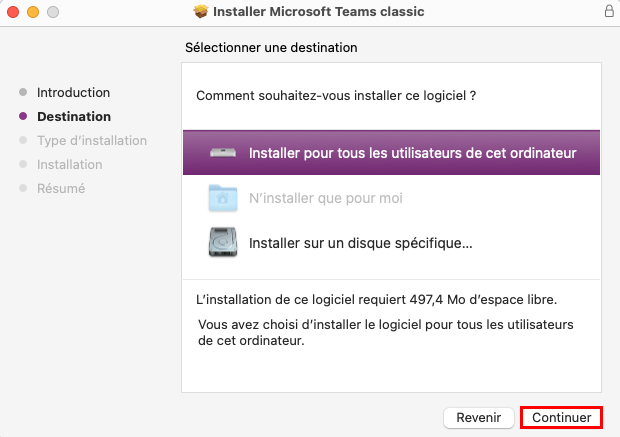
Cliquez de nouveau sur Continuer.
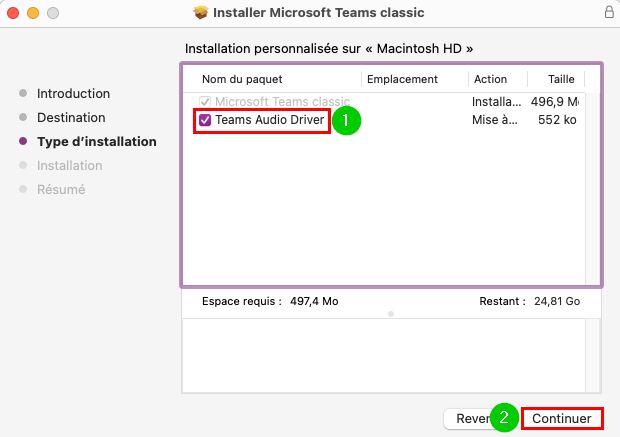
Veillez à cocher Teams Audio Driver puis cliquez sur Continuer.
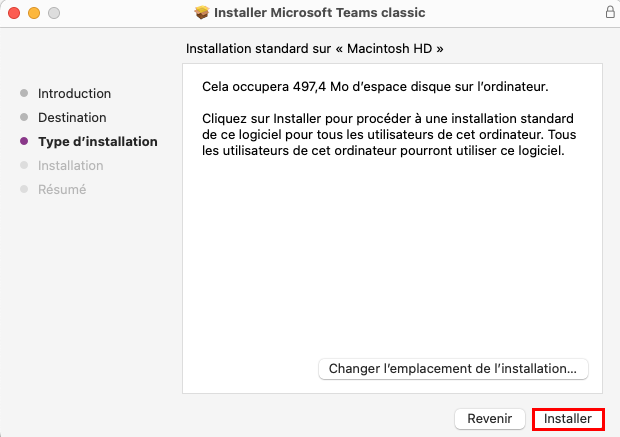
Cliquez sur Installer.
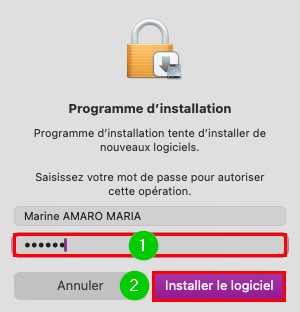
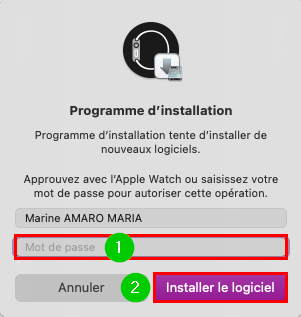
Saisissez le mot de passe de votre session et cliquez sur Installer le logiciel.
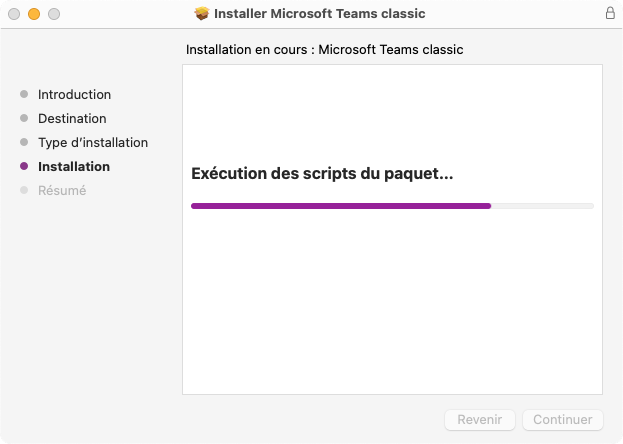
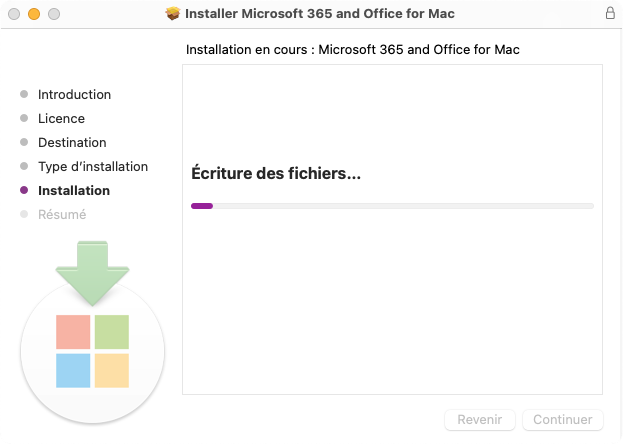
Patientez pendant l’installation.
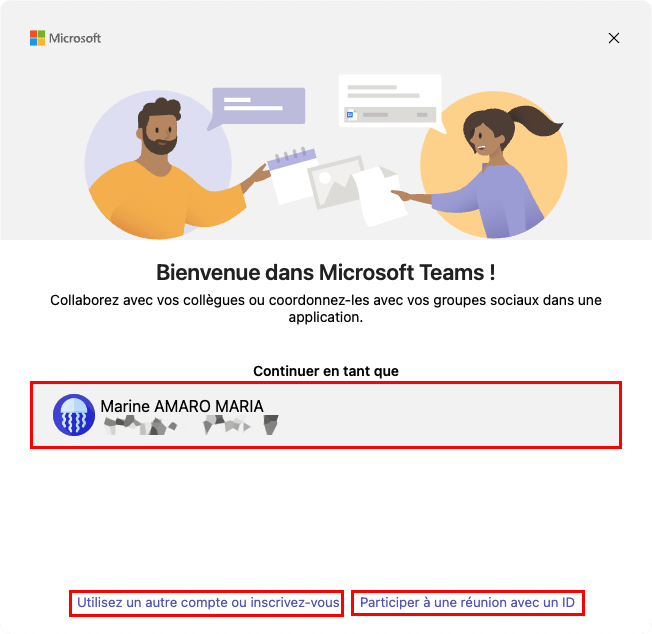
L’application Teams s’ouvre. Vous pouvez soit vous connecter avec votre compte Microsoft, soit rejoindre une réunion avec un ID.
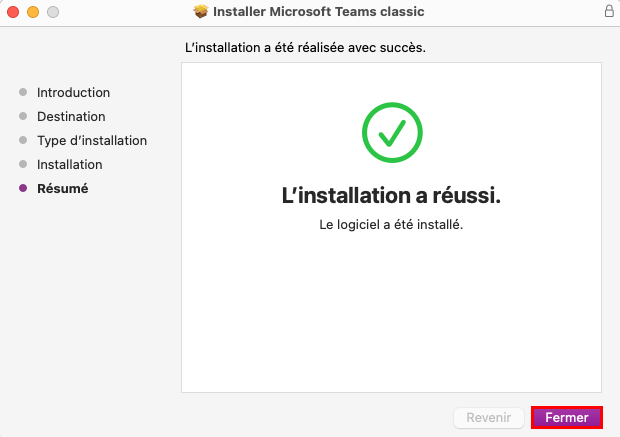
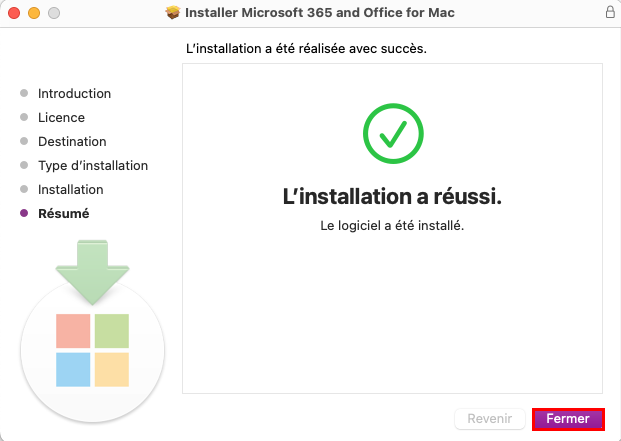
Revenez sur la fenêtre du programme d’installation et cliquez sur Fermer.
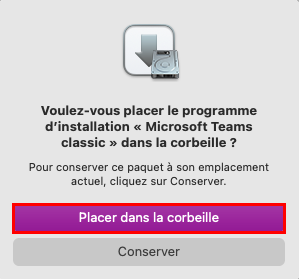
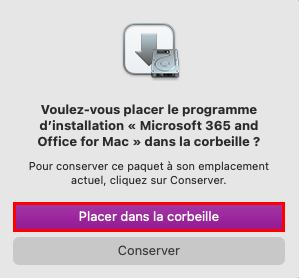
Cliquez sur Placer dans la corbeille pour supprimer le programme d’installation qui se lance avec le fichier au format .pkg.
✓ Super : vous avez réussi à installer Microsoft Teams sur votre Mac d’Apple ! 👍
via votre compte Microsoft
Si vous possédez déjà un abonnement, vous pouvez télécharger et installer toutes les applications en une fois :
Connectez-vous à votre compte Microsoft et allez dans le menu Services et abonnements.
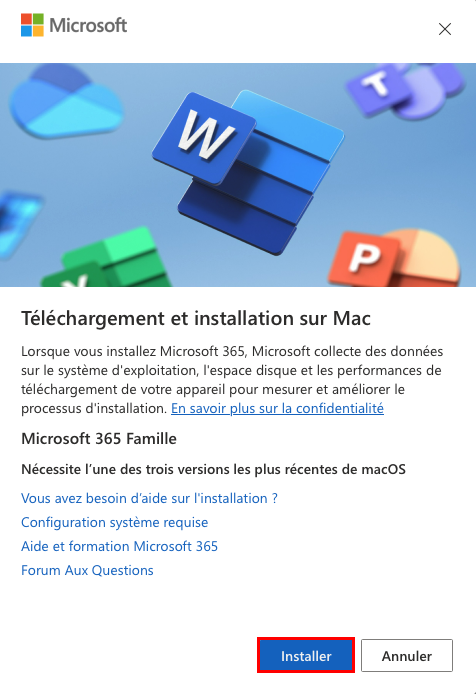
Cliquez sur Installer sur la ligne Applications Microsoft 365 sur vos appareils.
Validez avec Installer.
Avec Safari, et selon vos réglages, confirmez avec Autoriser pour autoriser les téléchargements depuis ce site.
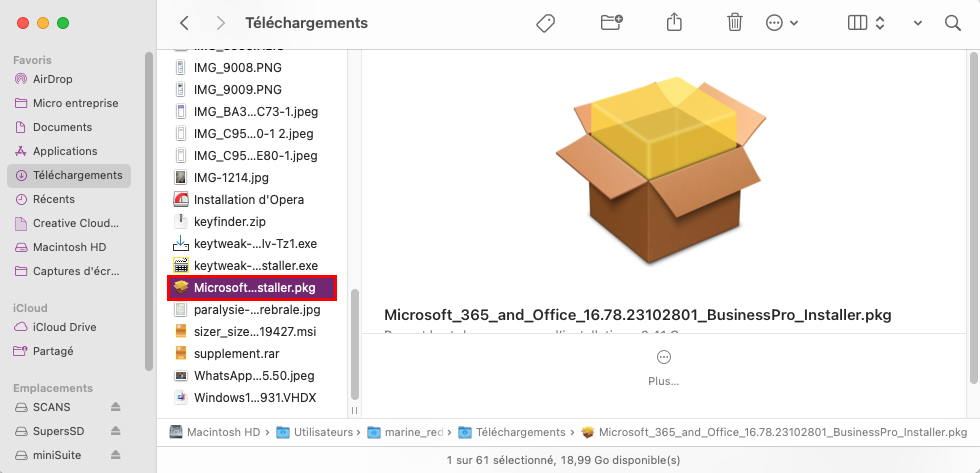
Rendez-vous dans le dossier Téléchargements du Finder et double-cliquez sur le fichier nouvellement téléchargé en .pkg, ici Microsoft_365_and_Office_16.79.23111019_BusinessPro_Installer.pkg.
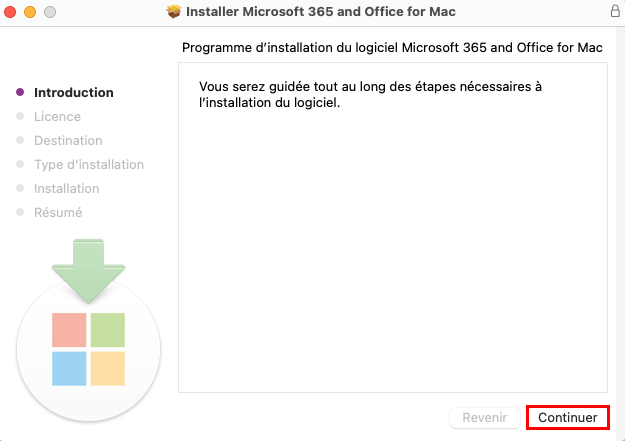
Commencez l’installation en cliquant sur Continuer.
Cliquez de nouveau sur Continuer.
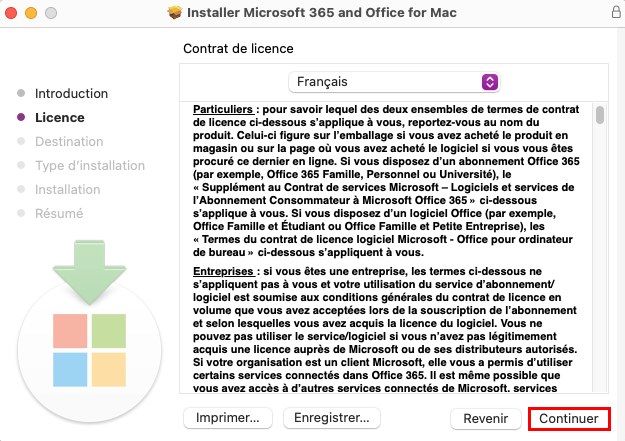
Cliquez sur Accepter les termes du contrat de licence du logiciel.
Cliquez sur Continuer, une nouvelle fois.
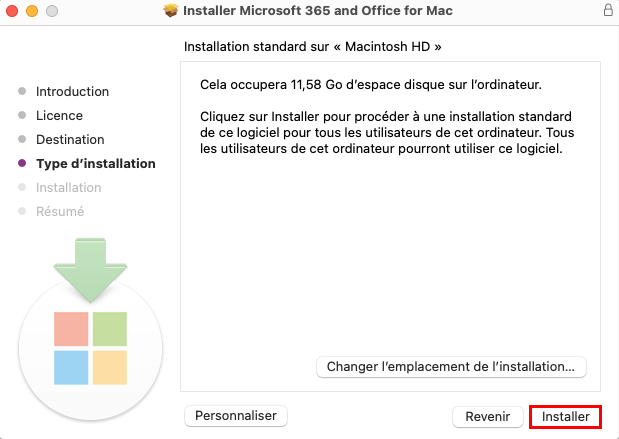
Commencez l’installation avec Installer.
Saisissez le mot de passe de votre session et cliquez sur Installer le logiciel.
Patientez pendant l’installation.
Cliquez sur Fermer lorsque l’installation a réussi.
Choisissez Placer dans la corbeille pour ne pas conserver le programme d’installation.
i Note : si vous souhaitez conserver le fichier .pkg situé dans le dossier Téléchargements, préférez l’option Conserver.
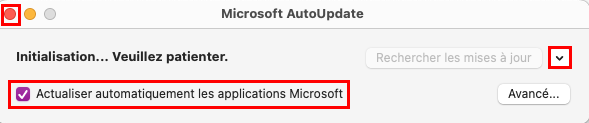
La fenêtre de Microsoft AutoUpdate s’ouvre. Cliquez sur la petite flèche à droite pour consulter les applications installées et, si vous le souhaitez, cochez Actualiser automatiquement les applications Microsoft. Fermez cette fenêtre avec la croix habituelle, dans le rond rouge en haut à gauche.
i Note : cette méthode est très pratique si vous utilisez toutes les applications. Vous ne pouvez pas choisir lesquelles installer : elles le seront toutes. Cependant, vous pouvez, par la suite, les désinstaller une à une afin de libérer l’espace de stockage.
✓ Félicitations : toutes les applications de Microsoft 365 ainsi que Microsoft AutoUpdate et Microsoft Defender sont installées sur votre Mac d’Apple sans passer par l’App Store ! 👍
S’abonner à Microsoft 365 sur votre Mac d’Apple
Avec les applications téléchargées depuis l’App Store, vous pouvez souscrire un abonnement Microsoft 365. Cet achat intégré sera facturé sur votre compte Apple :
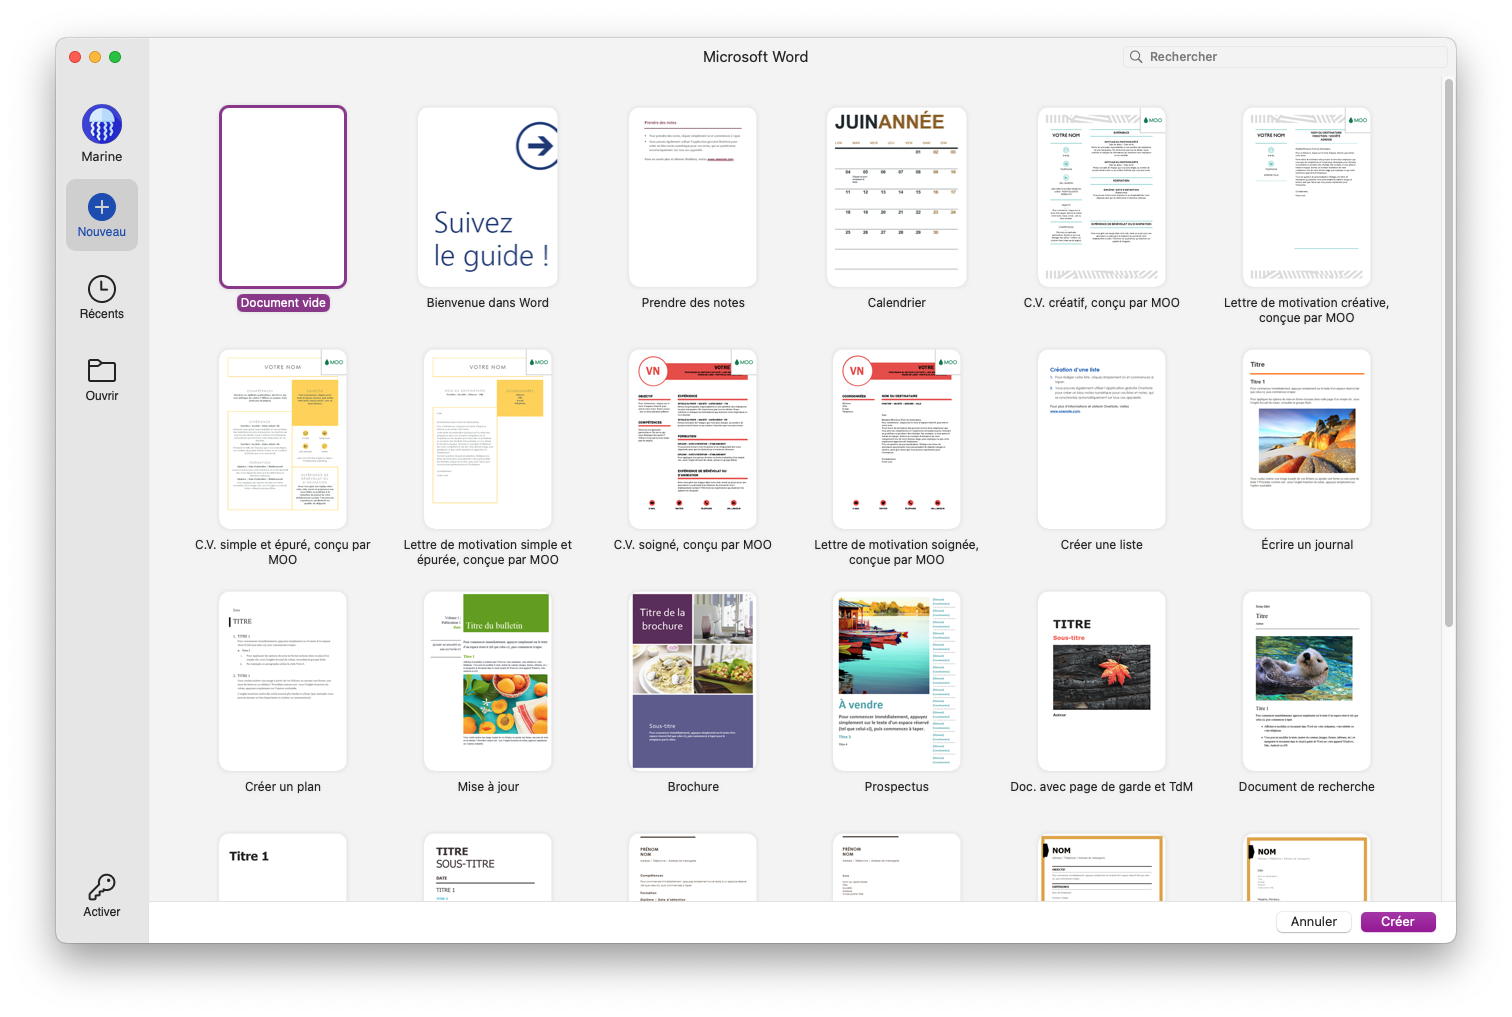
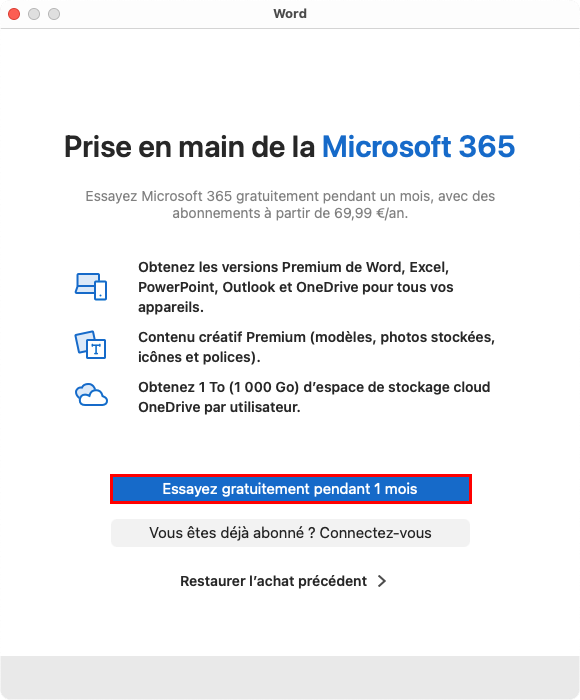
Ouvrez une application nécessitant un abonnement, comme Microsoft Word, et cliquez sur Activer, en bas à gauche.
Cliquez sur Essayez gratuitement pendant 1 mois.
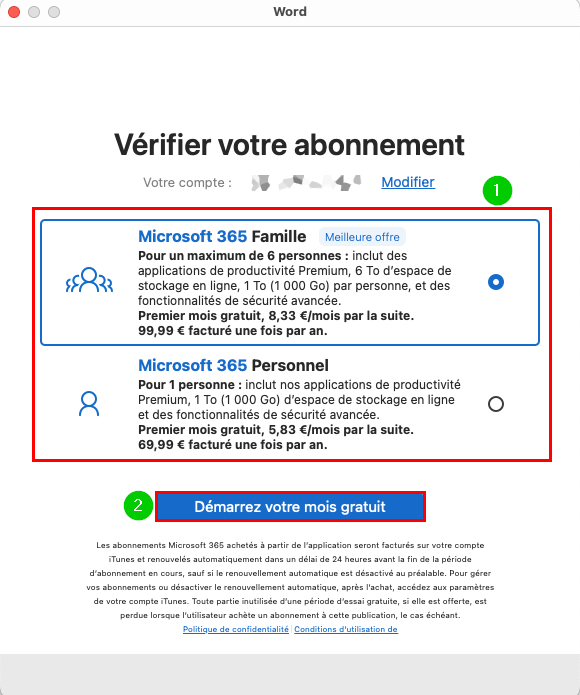
Choisissez l’abonnement de votre choix, Microsoft 365 Famille ou Microsoft 365 Personnel, et validez avec Démarrer votre mois gratuit.
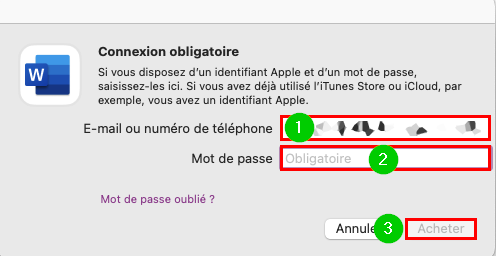
Entrez l’e-mail et le mot de passe de votre identifiant Apple et validez avec Acheter.
Cliquez sur OK pour confirmer l’abonnement.
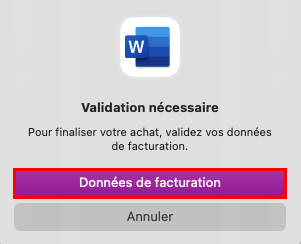
Cliquez sur Données de facturation pour pouvoir finaliser votre achat.
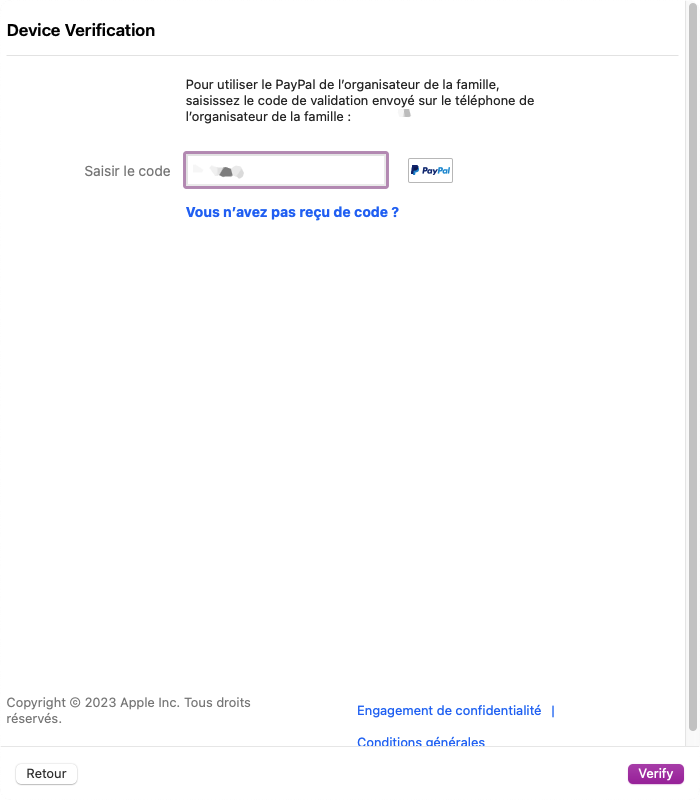
Cette étape varie selon le mode de paiement associé à votre compte Apple. Dans cet exemple, il s’agit du code de validation pour se connecter à PayPal.
Cliquez sur OK lorsque tout est prêt.
Patientez pendant la création de la licence.
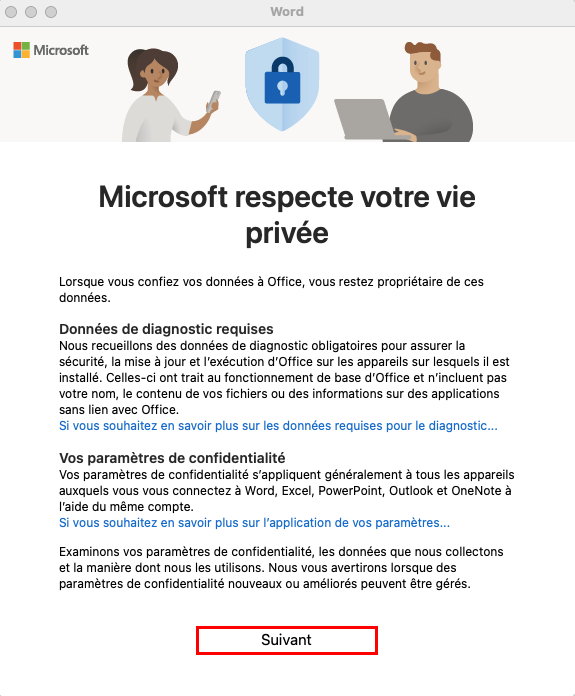
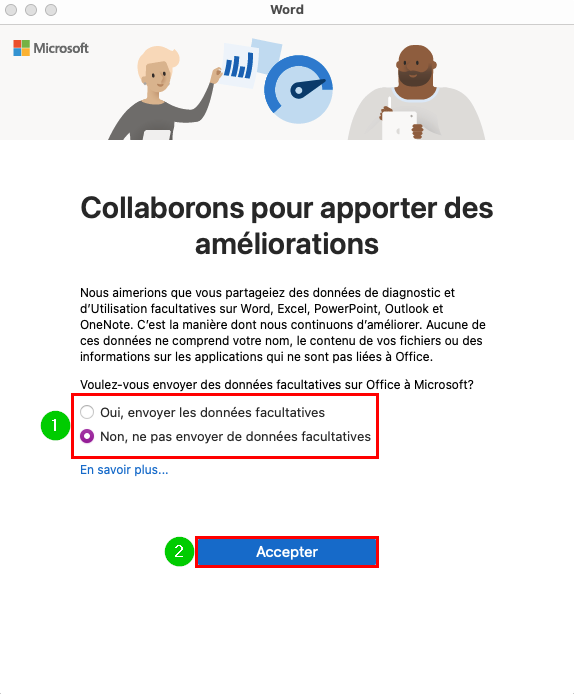
Cliquez sur Suivant après avoir lu le texte informatif sur Microsoft et votre vie privée.
Décidez si vous souhaitez ou non envoyer à vos données facultatives et validez avec Accepter.
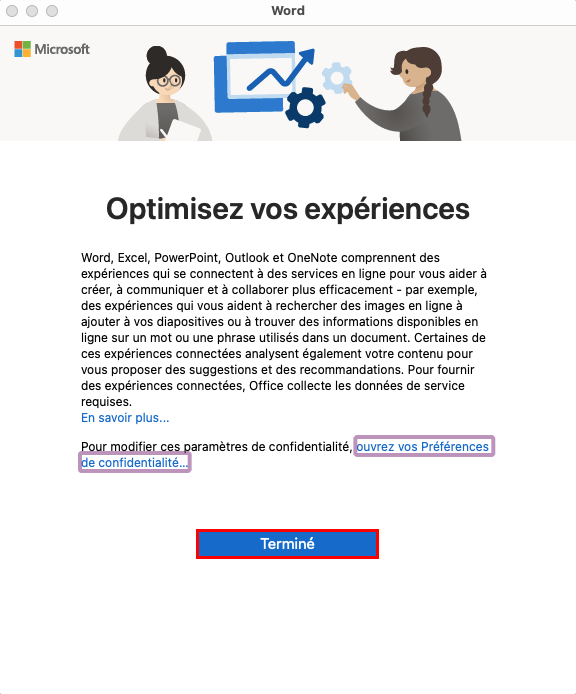
Cliquez sur Terminer.
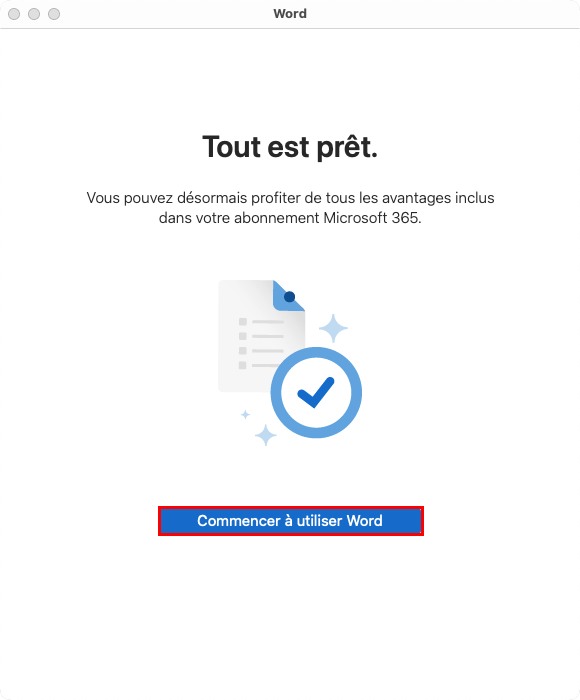
Quand tout est prêt, vous pouvez Commencer à utiliser Word.
✓ Félicitations : vous avez un abonnement à Microsoft 365 qui se gère avec votre compte Apple ! 👍
i Note : si vous préférez gérer votre abonnement depuis votre compte Microsoft, souscrivez depuis le site officiel.
Apple Podcasts, initialement lancé en 2005 sous le nom d’iTunes Podcasts, est un des services multimédias les plus anciens d’Apple. Il est également l’un des pionniers dans le monde du podcasting, qui est un format ayant gagné en popularité aux alentours de 2004. Son intégration dans iTunes a rapidement contribué à son succès et sa légitimée, offrant ainsi aux créateurs de podcasts une audience plus conséquente.
Vous avez des podcasts favoris sur Apple Podcasts, mais vous ne possédez pas de Mac ou d’iPhone ? Pas de problème, ce service n’est pas réservé aux appareils de la pomme ! Vous pouvez tout à fait écouter Apple Podcasts sur votre PC Windows. La majorité des émissions sont gratuites et couvrent un large choix de sujets. Pour accéder aux podcasts premium, vous devrez vous abonner à ce podcast en particulier ou bénéficier d’un abonnement à Apple Music.
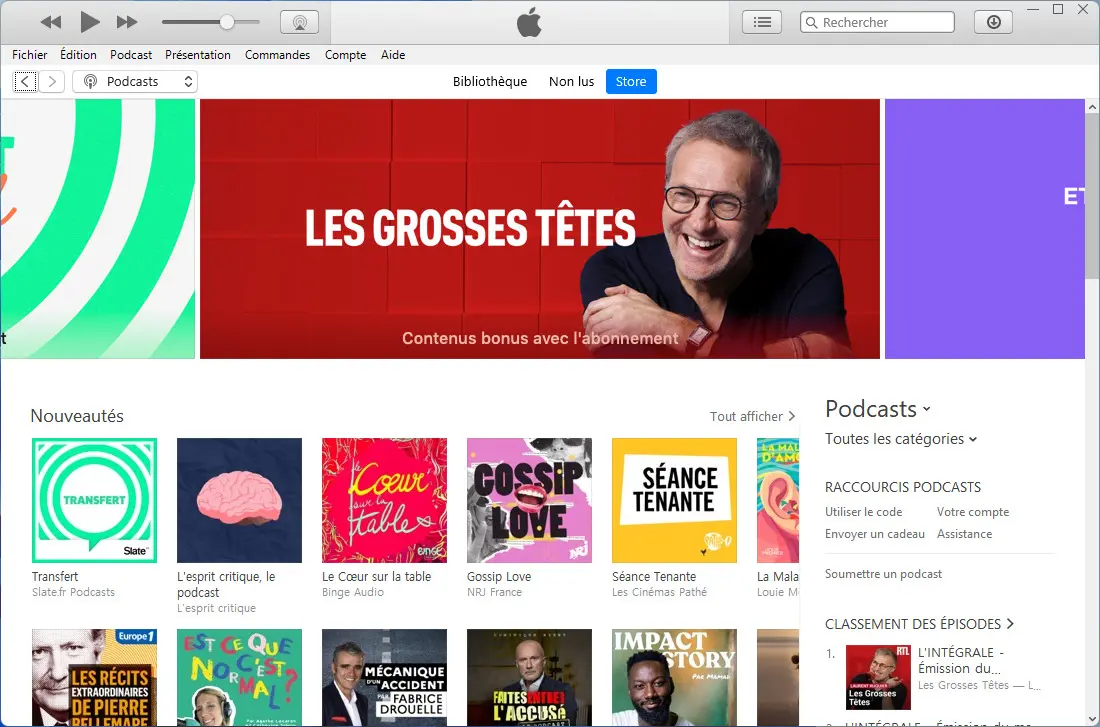
Le store d’Apple Podcasts dans iTunes, sur Windows
Dans cet article, nous vous guidons pas à pas pour que vous puissiez écouter Apple Podcasts sur votre PC Windows avec iTunes. Nous aborderons aussi la possibilité d’écoute avec un navigateur, bien que cette option soit plus limitée.
Écouter Apple Podcasts sur votre PC Windows
via iTunes
iTunes regroupe les services multimédias d’Apple, y compris les podcasts. Avant de commencer, veillez à avoir téléchargé, installé iTunes, connecté votre compte Apple et autorisé votre ordinateur.
i Note : contrairement à Apple Music ou Apple TV, il n’existe pas d’application “Aperçu” pour Podcasts sur Windows. Si vous avez précédemment installé des versions bêta, vous devrez désinstaller les applications de type “Aperçu” pour utiliser iTunes.
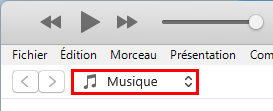
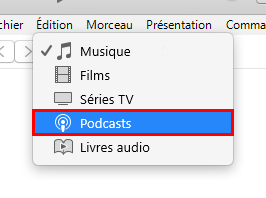
Ouvrez iTunes et cliquez sur le menu déroulant situé en haut à gauche. Par défaut, c’est Musique qui est sélectionné.
Choisissez Podcasts.
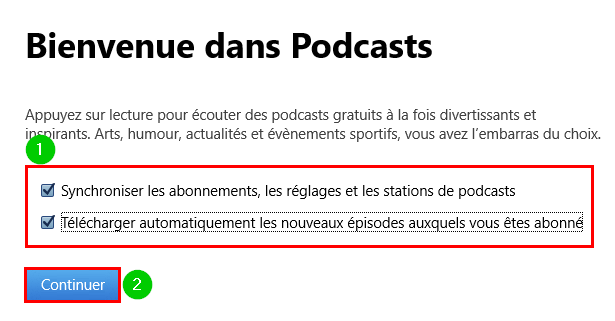
Sur la page Bienvenue dans Podcasts qui apparaît la première fois, cochez ou décochez selon vos préférences avant de cliquer sur Continuer.
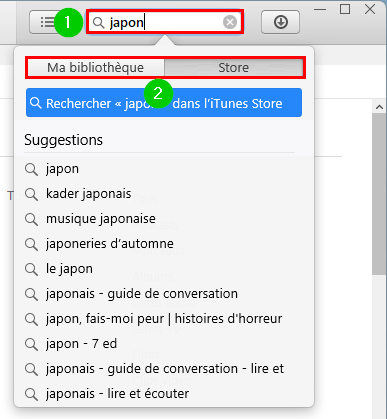
En utilisant la barre de recherche, en haut à droite de la fenêtre iTunes, vous pouvez faire une recherche, au choix, dans Ma bibliothèque ou dans le Store.
Cliquez sur Bibliothèque, dans le menu du milieu, pour consulter tous les podcasts auxquels vous êtes abonnés ainsi que vos playlists.
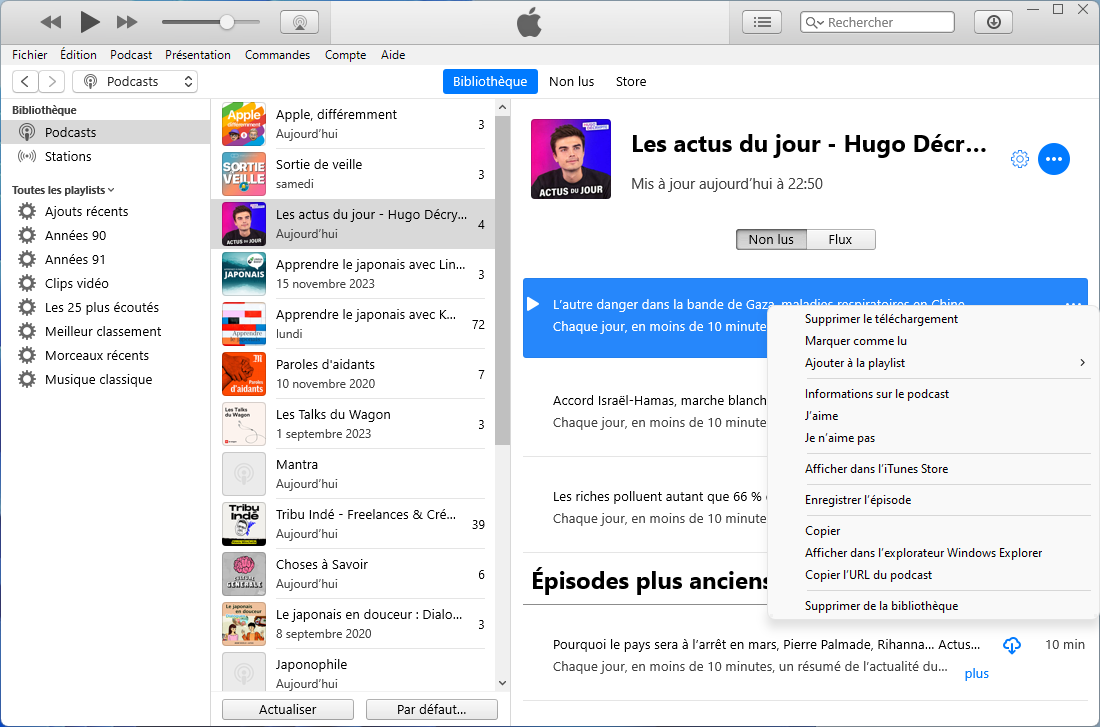
Après avoir sélectionné une émission, cliquez sur la roue, à droite, pour gérer les réglages du podcast comme l’ordre d’affiche ou les options de téléchargement.
Cliquez sur le menu Non lus pour trouver rapidement tous les épisodes que vous n’avez pas encore écouté.
Dans les menu Bibliothèque et Non lus, plusieurs actions sont possibles sur ces podcasts dont :
☞ écouter immédiatement le podcast sélectionné avec le bouton lecture ▶️ ;
☞ télécharger le podcast grâce au nuage avec la flèche vers le bas pour pouvoir l’écouter sans connexion internet ;
☞ accéder à plus d’options avec un clic droit ou les trois points, à droite de l’épisode ou de la chaîne.
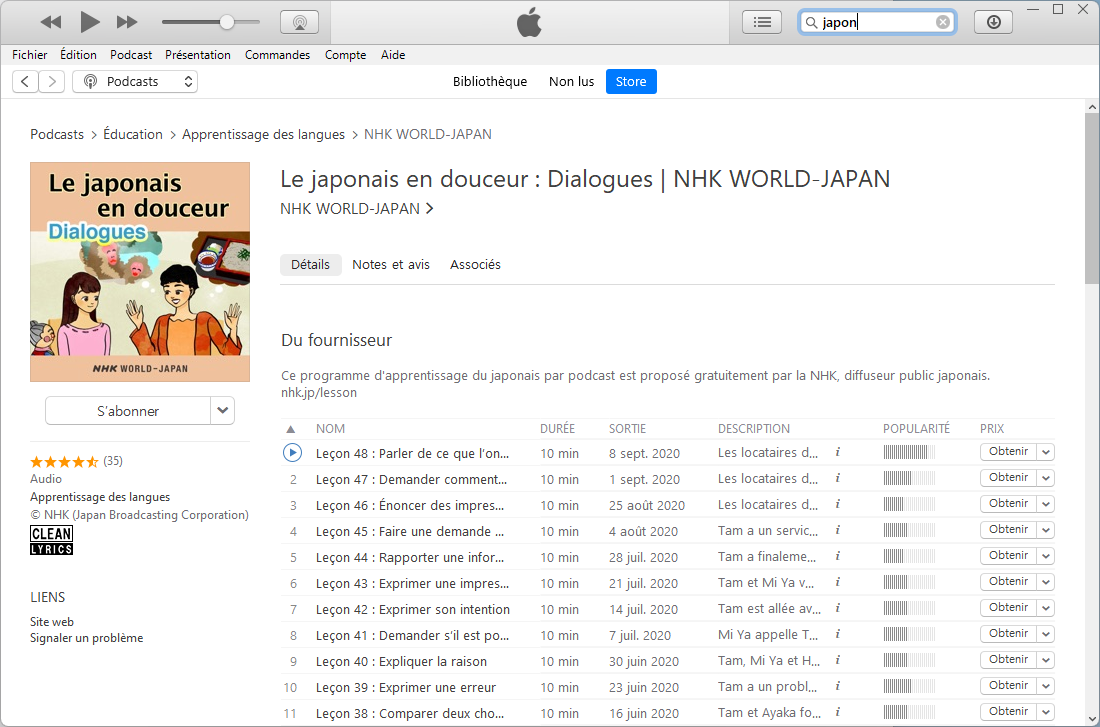
Cliquez sur Store pour chercher de nouvelles émissions.
Après avoir trouvé l’émission qui vous intéresse, vous avez le choix et vous pouvez cliquer sur :
☞S’abonner pour vous abonner à au podcast ;
☞Obtenir pour enregistrer dans votre bibliothèque uniquement cet épisode ;
☞ le bouton lecture ▶️ pour écouter l’épisode ;
☞ la petite flèche vers le bas à côté d’Obtenir et S’abonner pour plus d’options.
✓ Félicitations : les podcasts n’ont plus de secrets pour vous ! 👍 Vous savez désormais écouter Apple Podcasts sur votre PC Windows avec iTunes, mais aussi les chercher pour les ajouter à votre bibliothèque ou encore les télécharger.
via navigateur
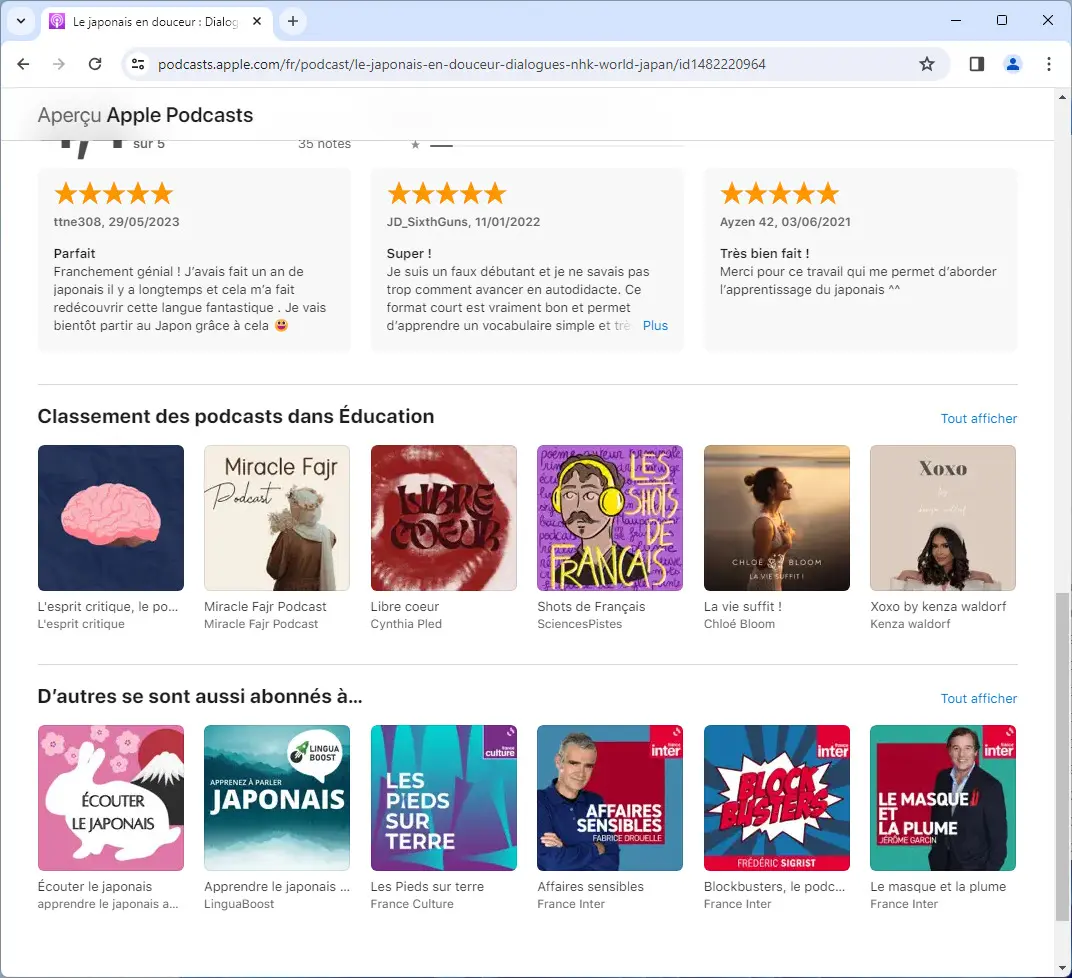
Bien qu’il n’existe pas de lecteur web dédié, vous pouvez toujours écouter des podcasts Apple depuis un navigateur :
Dans iTunes, sur un podcast, cliquez sur les trois points ou la petite flèche pour ouvrir des options supplémentaires et sélectionnez Copier l’URL du podcast ou Copier le lien.
Une fois le lien copié, ouvrez votre navigateur web et collez-le dans la barre d’adresse, tout en haut. Appuyez sur la touche Entrée ⏎.
À ce niveau, plusieurs options sont possibles :
☞Lire pour commencer à écouter votre épisode ;
☞ le bouton de Partage pour copier le lien ou encore le partager des réseaux sociaux ;
☞ cliquez sur le nom de la chaîne, en haut, pour consulter les autres épisodes de ce même podcast ;
☞ sur une émission, descendez tout en bas pour consulter d’autres podcasts.
i Note : il n’y a pas de barre de recherche, c’est donc la seule manière de naviguer entre le catalogue.
✓ Super : vous savez maintenant écouter Apple Podcasts sur votre navigateur à partir de votre PC Windows, mais également depuis votre Mac, iPhone ou encore votre appareil Android 👍
QNAP TBS-h574TX NASBook – The Best Thunderbolt NAS Yet?
QNAP has quite an enviable stronghold on the entire Thunderbolt NAS market, and although a few brands have attempted to challenge their dominance in this area over the years, ever since QNAP first revealed their first Thunderbolt device back in 2017, they have gone from strength to strength and innovated wildly in this area with each iteration. The latest entry into this, the SSD-focused TBS-h574TX NAS system, is potentially the fastest and most powerful entry yet, focusing on the use of E1.S hot-swappable M.2 SSD storage and built using an Intel 13th generation core architecture. Is this TB4 and 10GbE equipped NAS the potential to wipe everyone else off the board? There are a lot of users still unsure whether this $2,000 NAS justifies its investment. So, until the full review is available, please enjoy this shorter-form review focusing on just the highlights (and the lowlights) of the QNAP TBS-h574TX NAS.
QNAP TBS-h574TX System Specifications:
CPU: Intel® Core i5-1340PE 12C(4P+8E)/16T, up to 4.50GHz
Drive Bay: 5 x E1.S up to 15mm (5x PCIe Gen3 x2), Pre-install adapter to support M.2 2280 for each slot
2.5 Gigabit Ethernet Port: 1 (2.5G/1G/100M)
10 Gigabit Ethernet Port: 1 x 10GBASE-T (10G/5G/2.5G/1G/100M)
Thunderbolt Port: 2 (Thunderbolt 4)
USB 2.0 port: 1
USB 3.2 Gen 2 (10Gbps) Port: 2
HDMI Output: 1, HDMI 1.4b
Dimensions (HxWxD): 60 × 215 × 199 mm (Dimensions do not include foot pad; foot pad may be up to 30mm/1.18 inches high depending on model)
Weight (Net): 2.24 kg
Power Supply Unit: 120W Adapter (19VDC output, 100-240VAC input)
Power Consumption: Operating Mode, Typical 46 W
Fans: System fan: 2 x 40mm, CPU fan: 1 x 75mm
QNAP TBS-h574TX NAS Review Quick Conclusion
The QNAP TBS-h574TX NAS emerges as an exceptional and uniquely compact yet robustly powerful system, offering outstanding performance and bandwidth capabilities. Its sleek and innovative design sets a new standard in the NAS market, particularly notable for its integration of advanced features like Thunderbolt 4 and a high-capacity 10G connection. These features are further enhanced by the utilization of cutting-edge E1.S/NVMe SSD storage, all seamlessly managed by a highly capable CPU architecture. This makes the TBS-h574TX not just a NAS, but a powerhouse of data management and connectivity. Especially appealing to photo and video editors, the NAS excels in aesthetics, portability, and functionality, making it a viable alternative to traditional portable direct-attached storage systems like LaCie or G-Tech. Its ability to support multi-user access and provide immediate local network connectivity straight out of the box adds to its versatility. Additionally, the system boasts a modest power supply and impressively efficient power consumption relative to the bandwidth it offers, highlighting QNAP’s commitment to balancing performance with energy efficiency.
However, users must note some trade-offs, such as the limitation in PCIe bandwidth for each of the SSD bays, and the fixed memory capacity. While these are necessary adjustments for its compact form, they are points for consideration. Despite these minor limitations, the 13th Gen Intel Core processor used in its configurations demonstrates QNAP’s dedication to incorporating top-tier technology, although there are more advanced CPUs in other models. This system is a testament to QNAP’s ability to innovate, offering a package that promises the high performance of larger NAS units but in a remarkably portable format. It raises the question: Is this the ideal NAS for everyone? Perhaps not. But for those seeking a high-performance, Thunderbolt-enabled NAS that combines portability with powerful capabilities, the QNAP TBS-h574TX is a formidable choice.
SOFTWARE - 9/10
HARDWARE - 9/10
PERFORMANCE - 10/10
PRICE - 8/10
VALUE - 8/10
8.8
PROS
Exceptionally future-proof 13th Gen i3/i5 Processor (Mid-2023 series) with high end Int.Gfx 2x Thunderbolt 4 connectivity, one is front mounted for convenience Also features a 10GbE and 2.5GbE Connection for direct editing and/or high-speed local networking High internal and external performance and bandwidth for such a compact system Compact and portable, ideal for on-site creators to share and collaborate on-the-fly Enhanced security protocols post-Deadbolt ransomware attack. Wide range of multimedia and business tools. Equipped with QVR Pro for extensive surveillance and numerous Backup/Sync tools as standard. QuTS Has numerous ZFS based advantages + QSAL Antiwear leveling Supports AI photo recognition, AI Surveillance Tools, 4K/8K Plex Support and VM Tools. Arrives with 1TB of Cloud Space with MyQNAPCloudOne for 12 months.
CONS
High price range of $1800-$2000. Check out the TVS-h674T for similar pricing and alternative Tiering/Bandwidth allocation Limited PCIe bandwidth on SSD bays. Not a silent operation due to cooling fans.
Qnap TBS-h574TX-i3-12G Thunderbolt Compact All-Flash | 5 x E1.S or M.2 SSD's, In Amazon UK 55.91 OFF (WAS 1851) [LINK]
These Offers are Checked Daily
Reasons You SHOULD Choose the QNAP TBS-h574TX NASBook
If you are looking for a super-fast NAS, built on a powerful architecture, that’s supremely portable and supports the latest ports and connectivity, the TBS-h574TX NAS will likely serve you very well. But why specifically should you choose the TBS-h574TX NAS instead of many other devices on the market right now?
E1.S and NVMe Drive Support
The TBS-h574TX is one of the very first desktop NAS devices to feature E1.S media bays. In the last few years, we have seen a growing trend towards the use of SSDs as the primary storage media for private servers and NAS devices, with some particular standout examples from both QNAP and Asustor focusing on M.2 NVMe SSDs. However, one major downside of M.2 NVMe use is that they do not support hot swapping. This means that in the event of a drive failure leading to a degraded RAID state or the need to introduce a newer and larger capacity drive to an existing storage pool, you are required to power down the system completely. Removing an M.2 NVMe from a system that is powered on will lead it to crash and can be detrimental to the health of both the system and the storage drive. E1.S SSD bays, however, fully support hot swapping in an identical fashion to that of traditional SATA storage drives.
Additionally, the QNAP TBS-h574TX arrives with E1.S storage bays, as well as NVMe adapters that allow you to use regular off-the-shelf M.2 NVMe in these storage spaces and still have access to hot swapping. E1.S drives allow for additional storage space and taller PCB SSD space to be afforded to the storage drives, and although the gains are generally only minimal in traditional 2280 length SSDs, overall the fact that this flash NAS system supports these more flexible SSD options is always going to be desirable.
Thunderbolt 4, 10GbE, and an Intel 13th Gen CPU – YES PLEASE!
I cannot stress enough how good the connectivity is on the TBS-h574TX. Although it is not the first QNAP NAS to arrive with Thunderbolt 4 connectivity, it is definitely one of the smallest devices on the market to feature it. The TBS-h574TX features one Thunderbolt 4 USB-C port on the front for convenience, and an additional port on the rear. Not only can these be used to connect Thunderbolt storage to your NAS system, but more importantly, they allow a user to connect directly, point to point, from a Mac or Windows computer to the QNAP TBS-h574TX system. This opens the door to tremendous performance and, once you factor in the use of M.2 NVMe SSD storage, you are looking at some serious performance. QNAP reports the performance utilizing 5 Samsung 980 Pro SSDs in a RAID environment to hit 1700 megabytes per second for one connected device over Thunderbolt, and in excess of 3,000 megabytes per second for two connected Thunderbolt devices. That’s right, the support of Thunderbolt also allows multiple users to connect to the same storage space simultaneously, as well as the system supporting cross-platform file sharing, which allows the same storage area to be used simultaneously by both Mac and Windows users, regardless of the different operating systems in play.
Then, there is the inclusion of a 10GbE network port. This means that you can attach a third connected high-speed user over either a 10GbE network connection, or utilizing a Thunderbolt to 10G adapter available for around $150 to $200. Of course, you could use this port to connect the TBS-h574TX to a larger 10G equipped network and allow multiple users to enjoy full gigabit network saturation each, but I think a lot of portable users are going to enjoy the fact that a single area of high-speed intelligent storage can be connected to via three high-speed connections, all of which can edit on the fly. There is even an additional 2.5GbE port to connect the device to an existing network while all of this is going on, promoting network and internet shares.
All of this is made possible thanks to a very powerful Intel 13th Gen i5 or i3 CPU option, which is both highly efficient and powerful, thanks to its shrunk-down SOC mobile architecture. All of this adds up to an incredibly powerful system that is ready to reinvent the workflow of small to medium video editing workflows!
Very Compact and Portable
If you are looking for a storage device that needs to be portable, the TBS-h574TX is one of the best examples out there by this brand. Picture the scene: you and a small team of video or photo content creators are on the move, and after a long day of capturing content, you need to back up, edit, and/or distribute what you have created. Thanks to the small-scale stature of the QNAP TBS-h574TX, and its modest and small-scale 120-watt PSU, this system can be carried around very conveniently in a laptop bag and can be set up in minutes to allow multiple users to connect to either edit on the fly or back up from numerous different connected USB and Thunderbolt devices simultaneously.
That isn’t to say you can’t do that with most other NAS systems, but most other NAS systems arrive with clunky and fragile hard drives, have much larger power consumption requirements, or, more importantly, are considerably heavier. This system combats all three of these factors by being light, small, and exceedingly fast.
1TB of Free Cloud Space Included
This is something that I really wish QNAP would do with a lot more of their releases. QNAP has offered for the last year or so access to their own cloud service that allows you to back up the data on your NAS to their first-party encrypted cloud and makes remote access a great deal more convenient to back up data, as well as providing a first-party secondary backup option. Any user can gain access to 16GB of free space, but after that, you have to pay subscription costs in order to gain more cloud storage space on the MyQ9 cloud service. However, the QNAP TBS-h574TX, almost certainly because of its larger focus on video/photo editors, arrives with one terabyte of cloud storage space available on a 12-month license.
This is going to be hugely appealing to those that not only want to access, edit, and back up their data as quickly as possible, but also want a streamlined second-level backup to be integrated into their system, and one terabyte is a hugely generous sum of storage to be offered with this device. Of course, after the one-year license has concluded, you will need to either remove your data from the cloud or pay a subscription fee to maintain it there, but nevertheless, it is great that they have offered this alongside the device, and I really wish they did this more with some of their production-ready systems.
Includes QNAP QuTS ZFS / QTS EXT4 NAS Software, Services and Tools (A Whole Operating System)
The QNAP TVS-h874 NAS comes with a comprehensive software and services package, offering either QNAP QTS or QuTS (version 5.0.1) at initialization. This operating system, resembling Windows 11 and Android OS in design, supports hundreds of applications, services, and functions. It includes numerous mobile and desktop client applications for tailored data interaction. The software also features SSD-specific tools like anti-wearing for SSDs, better ZFS-HDD/SSD profiling, and options for storage, caching, or tiered storage. While QTS/QuTS is highly customizable, offering flexibility and user-friendliness, it does have a learning curve that may challenge novice users. Despite past security concerns, including ransomware attacks due to vulnerabilities in Linux and QNAP’s applications, improvements have been made in QTS/QuTS 5, making the system more secure and user-friendly.
QNAP’s TVS-h874 NAS excels in file management, security, storage management, multimedia handling, business tools, and surveillance. It offers sophisticated file management tools, improved security features with multi-layered protection, and diverse storage, backup, and synchronization options. The NAS supports a wide range of multimedia applications, including AI photo recognition and popular media servers like Plex. For business needs, it provides virtual machines, containers, and surveillance solutions like QVR Pro with extensive camera support. The TVS-h874’s software diversity, despite previous security issues, showcases a rich array of hardware configurations, services, and tools, solidifying its place as a versatile NAS solution. Further testing of its performance, particularly as a Plex Media Server and VM host, is upcoming on the NASCompares YouTube channel.
Reasons You SHOULD NOT Choose the QNAP TBS-h574TX NASBook
As good as all of the advantages mentioned above sound, realistically, the QNAP TBS-h574TX is a rather specialized piece of equipment, and it’s fair to say that not everyone is going to see all of its hardware and architecture as positives. So let’s go through five reasons why you might want to give the QNAP TBS-h574TX a miss and look elsewhere.
Gen 3×2 M.2 Bandwidth is Disappointing
Despite the remarkably future-proof Intel 13th generation i3 and i5 processor featured inside the TBS-h574TX, the scaling down of this processor by Intel into a mobile processor form, and the requirements by QNAP to keep this system miniature yet still facilitate high bandwidth external connections, have all resulted in particular bottlenecks and compromises being made. Probably one of the most prominent compromises is in the bandwidth afforded to each of the individual E1.S NVMe media bays. Although this processor supports both PCIe Gen 4 and PCIe Gen 3, in order to get the lanes divided neatly across the system, each drive slot is limited to PCIe Gen 3 x2.
Utilizing SSD drives that make bold promises in excess of 3,000 megabytes per second, realistically each of these bays will not really be able to exceed 1500 or 1800 MB per second. In the correct RAID configuration, this should not prove to be much of a problem as you are still going to enjoy the multiplication factor of combining multiple read and write actions across each of the disks in the single RAID storage pool. Nevertheless, there are going to be users who would have hoped to see this system enjoy the PCIe Gen 4 architecture of bigger Thunderbolt devices like the H874T released in late 2023, which features a far more aggressive processor and a larger range of bays in its larger design.
Example of Soldered Memory – Not from the TBS-h574TX NAS
16GB Max Memory (and only 12GB on the i3 Version)
I found it really peculiar that this system rolls out the gate with either 12 gigabytes or 16 gigabytes of fixed memory. The QNAP TBS-h574TX is not the first system to come out with prefixed soldered memory modules internally, and it won’t be the last! There are benefits to having memory fixed in this fashion, such as power efficiency, cost efficiency, and allowing the architecture of the processor and the number of channels it can handle to be better utilized. Nevertheless, this system is running a processor that can handle up to 64 gigabytes of memory, and because of the lack of an upgradable DIMM or SODIMM slot, you are limited to this base level amount throughout the system’s lifespan. 16 gigabytes is still a pretty reasonable amount of memory and more than enough to handle the majority of system processes, but the 12 GB of fixed memory on the i3 version just feels a bit weird and is an unusual memory quantity that feels like it was applied by design and not necessity.
$1800-2000+ Price Tag, is the QNAP TVS-h674T a Better Choice?
The price tag of the QNAP TBS-h574TX is certainly going to put some users off. Arriving at around $1800-$2000, although in the realm of Thunderbolt NAS, this is a reasonable figure, outside of that, and for a 5x10G NAS, it does seem rather high. You do need to factor in that we are talking about a specialized flash system with Thunderbolt 4 connectivity and one of the most modern NAS processors in the market, but that price is certainly going to be tough for some. However, what is probably a little bit more interesting about this price point is what else you can get for this money from QNAP themselves if you look a little broader across their range of solutions. For example, for around $100 more you can pick up the QNAP TVS-h674T – This is the six hard drive and two Gen 4 NVMe tower system.
It arrives with a very similar processor, memory that can be expanded up to 64GB if needed, the SSD slots are Gen 4 x4, it has two Gen 4 PCIe upgrade slots with one of them at x16 speed, and the system even still arrives with Thunderbolt 4 connectivity. You would lose out on the more compact nature of the TBS-h574TX system, have to spend a little more to get a 10GbE connection, and only have two SSD slots instead of five, but overall the 674T system is a better-tiered system for many and might serve as a better choice overall for some users.
Not a Silent NASBook (Unlike the TBS-464 or HS-464)
This is a very minor point, but it has to be said – The QNAP TBS-h574TX is not a silent NAS system. QNAP has rolled out several silent or near-silent systems in the last few years, some of which carried the NASBook branding as seen here on the TBS-h574TX system, unfortunately, because of the largely metal construction of the TBS-h574TX and the fact that it features two rear cooling fans and a small internal CPU fan, the system does make noise when in operation. I should stress, this is still much, much quieter than the average system but there are still going to be users that are going to look at this system and hope that it is silent when in operation. Systems such as the HS-264 and TBS-464 are both genuinely silent or as near silent as possible systems from this brand, although it’s worth remembering that these are significantly less powerful and bandwidth-rich. Ultimately, QNAP has done a great job here balancing power, scale, and portability to fit all of this into such a small single casing. Just don’t be under the illusion that they managed to make the thing completely inaudible!
Deadbolt! We Need to Talk
In 2021/2022, QNAP was one of several brands that were successfully targeted by the ransomware group Deadbolt. This resulted in thousands of systems from QNAP, Asustor, and TerraMaster being remotely encrypted, requiring payment of a ransom fee, costly data recovery services, or free but highly time-consuming data retrieval methods. You can read/watch more about it in the article HERE, but after this event, there was no avoiding that several brands were slightly tarnished with a reputation for being insecure remotely. The affected brands have all implemented numerous changes to their update and security protocols. Although the inherent vulnerabilities have never been truly identified for each individual brand, most believe it was a Linux-based vulnerability that remained unpatched, or at least a vulnerability that, if users did not update their system regularly, had been left open for exploitation. It still required a very specific range of circumstances for this exploit to be utilized by hackers, ranging from leaving network ports and router configurations open unsafely, to leaving certain SSH and administrative protocols enabled by default.
Nevertheless, after this event, QNAP, along with the other affected brands, updated how updates are delivered to the system, tightened default settings, and security protocols to ensure users would need to work harder to put their systems in unsafe states, ultimately resulting in a wake-up call for the NAS industry. This was several years ago, and although the QNAP NAS brand has improved considerably since then, it is still worth pointing out that they were impacted by this. I believe there is an important lesson to be learned here, and until at least 5 years have passed, I will mention this in every QNAP NAS review I do (as well as every Asustor and TerraMaster review too). Once again, you would need to manually place your system into a particularly unsafe state for any vulnerability to be exploited in this fashion. Additionally, a look at any of the security advisories from internet or network-connected platforms (Synology, Microsoft, Google, Apple, literally anyone!) shows that vulnerabilities on these platforms are regularly found by brands and white-hat hackers. The bottom line is, it’s important that buyers know about Deadbolt, but also keep in mind that in most instances, you would need to manually put your system into an unsafe state for particularly virulent ransomware and malware attacks to be effective.
Conclusion – Should You Buy the QNAP TBS-h574TX NASBook?
The QNAP TBS-h574TX is a genuinely unique and impressive piece of equipment, potentially one of the best NAS systems I have ever seen! For such a compact and portable system, it manages to include a phenomenal amount of both internal and external performance and bandwidth – something that the majority of systems at this price point generally need to compromise on one aspect or the other. Additionally, QNAP continues to dominate the market of Thunderbolt NAS storage, and you can clearly see their innovation and improvement with each iteration of this technology – with the TBS-h574TX being one of the sleekest and most impressive entries into this product family. The Thunderbolt 4 on this system does exactly what QNAP says it will, providing huge performance numbers to connected users via this protocol, as well as an additional thousand megabytes per second through the 10G connection. Thanks to the utilization of E1.S/NVMe SSD storage, fully saturating all these connections simultaneously is indeed possible, all enabled by an incredibly impressive choice of CPU architecture that has the muscle to keep things moving in the backend.
Equally, as this system is largely focused on photo and video editors, it is beautifully presented and highly portable. It could easily replace portable LaCie or G-Tech direct-attached storage systems used by many on-site content creators, thanks to its support of multi-user access and local network connectivity right out of the box. Add to that a modest power supply and impressively low power consumption for the bandwidth offered, and this is one of the most beautifully put-together systems by this brand. Of course, when you start miniaturizing and reducing scale, compromises inevitably need to be made for reasons of power efficiency, temperature, and space. The downgrading of the PCIe bandwidth on each of the SSD bays is a necessary but still regrettable inevitability. Likewise, although I’m impressed by the 13th Gen Intel Core processor featured in both configurations available, there are better Intel CPUs already used in other QNAP Thunderbolt systems, and whether this was the reason or logic behind the fixed 12/16 GB memory still remains to be seen. There are definitely video editors who will be completely in love with this system, and you can see why: it promises everything that the larger boxes from QNAP have been offering for years, but in a scale that you can pop in your laptop bag on the go. Is this the perfect NAS? No. Is it the Perfect Thunderbolt NAS? Maybe!
PROs of the QNAP TBS-h574TX NAS
CONs of the QNAP TBS-h574TX NAS
Exceptionally future-proof 13th Gen i3/i5 Processor (Mid-2023 series) with high end Int.Gfx
2x Thunderbolt 4 connectivity, one is front mounted for convenience
Also features a 10GbE and 2.5GbE Connection for direct editing and/or high-speed local networking
High internal and external performance and bandwidth for such a compact system
Compact and portable, ideal for on-site creators to share and collaborate on-the-fly
Equipped with QVR Pro for extensive surveillance and numerous Backup/Sync tools as standard.
QuTS Has numerous ZFS based advantages + QSAL Antiwear leveling
Supports AI photo recognition, AI Surveillance Tools, 4K/8K Plex Support and VM Tools.
Arrives with 1TB of Cloud Space with MyQNAPCloudOne for 12 months.
High price range of $1800-$2000. Check out the TVS-h674T for similar pricing and alternative Tiering/Bandwidth allocation
Limited PCIe bandwidth on SSD bays.
Not a silent operation due to cooling fans.
Need More Help Choosing the right NAS?
Choosing the right data storage solution for your needs can be very intimidating and it’s never too late to ask for help. With options ranging from NAS to DAS, Thunderbolt to SAS and connecting everything up so you can access all your lovely data at the touch of a button can be a lot simpler than you think. If you want some tips, guidance or help with everything from compatibility to suitability of a solution for you, why not drop me a message below and I will get back to you as soon as possible with what you should go for, its suitability and the best place to get it. This service is designed without profit in mind and in order to help you with your data storage needs, so I will try to answer your questions as soon as possible.
This description contains links to Amazon. These links will take you to some of the products mentioned in today's content. As an Amazon Associate, I earn from qualifying purchases. Visit the NASCompares Deal Finder to find the best place to buy this device in your region, based on Service, Support and Reputation - Just Search for your NAS Drive in the Box Below
Need Advice on Data Storage from an Expert?
Finally, for free advice about your setup, just leave a message in the comments below here at NASCompares.com and we will get back to you.Need Help?
Where possible (and where appropriate) please provide as much information about your requirements, as then I can arrange the best answer and solution to your needs. Do not worry about your e-mail address being required, it will NOT be used in a mailing list and will NOT be used in any way other than to respond to your enquiry.
[contact-form-7]
TRY CHAT Terms and Conditions
If you like this service, please consider supporting us.
We use affiliate links on the blog allowing NAScompares information and advice service to be free of charge to you.Anything you purchase on the day you click on our links will generate a small commission which isused to run the website. Here is a link for Amazon and B&H.You can also get me a Ko-fi or old school Paypal. Thanks!To find out more about how to support this advice service checkHEREIf you need to fix or configure a NAS, check FiverHave you thought about helping others with your knowledge? Find Instructions Here
Or support us by using our affiliate links on Amazon UK and Amazon US
Alternatively, why not ask me on the ASK NASCompares forum, by clicking the button below. This is a community hub that serves as a place that I can answer your question, chew the fat, share new release information and even get corrections posted. I will always get around to answering ALL queries, but as a one-man operation, I cannot promise speed! So by sharing your query in the ASK NASCompares section below, you can get a better range of solutions and suggestions, alongside my own.
Thunderbolt 4 DAS vs Thunderbolt 4 NAS? What Is The Difference?
The ascent of NAS has grown in popularity, largely due to video editing suites requiring a large amount of storage accessible by multiple users simultaneously. Even in the early days of Thunderbolt NAS, around 2017 and 2018, one of the key advantages over traditional Thunderbolt DAS storage was the facilitation of a much less complicated workflow. A NAS could be accessed by hundreds, if not thousands, of users at any given time via the internet or a local area network. The system could be used to package projects, distribute and archive them in a single system, as well as managing and facilitating multi-site backups, thanks to intelligent software that has evolved over the years from most NAS brands. Adding to this, editors could directly interface with a QNAP NAS over Thunderbolt and/or 10GbE with the appropriate interfaces, meaning this single storage system could house, manage, distribute, and orchestrate multi-tier backups for an entire photo/video production company. Whereas traditional Thunderbolt DAS can only be accessed by a single user at any given time and lacks the software management and automation that a NAS offers. However, there are definitely times when a Thunderbolt DAS is better than a Thunderbolt NAS too!
What is DAS? – In the context of Thunderbolt technology, DAS (Direct Attached Storage) refers to a storage device that is connected directly to a computer or server via a Thunderbolt interface. This setup offers high-speed data transfer and access for a single user, making it ideal for tasks that require rapid, individual access to large amounts of data. Occasionally referred to as ‘LAS’, or Local Access Storage.
And What is NAS? – In the context of Thunderbolt technology, NAS (Network Attached Storage) is a storage system connected to a network, allowing multiple users and devices to access and share data simultaneously. Unlike DAS, NAS provides broader scalability, remote access capabilities, and supports various data management features, making it suitable for collaborative and multi-user environments.
Clearly, there are significant differences between them:
Thunderbolt NAS vs Thunderbolt DAS – PERFORMANCE?
Thunderbolt DAS utilizes simple direct storage access for a single user and does not need to facilitate the use of a system operating system or be built on an architecture that needs to service multiple users at once. Thunderbolt NAS, however, operates on IP architecture and because it needs to run its own internal operating system, as well as have its data in its own file system that is not locked into any external file system of an operating system like Windows or Mac, performance is noticeably lower than that of DAS when utilizing exactly the same storage media. So, if you are a single access user and performance is what matters, Thunderbolt NAS might not be for you.
Thunderbolt NAS vs Thunderbolt DAS – Plug n Play?
There is also no avoiding that because a Thunderbolt NAS system like the QNAP TVS-h874 has its own operating system, software, appliances, and protocols, it is nowhere near as straightforward and simplistic to connect with as a traditional Thunderbolt direct attached storage device. Most of the initial work in connecting with the QNAP will be done at the beginning, and after that, the system will be automatically connected with your client machine, but if you are hoping that the TVS-h874 is as straightforward and plug-and-play as a Thunderbolt LaCie or G-Technology box, you are going to be disappointed!
Thunderbolt NAS vs Thunderbolt DAS – Fast Network/Remote Access?
Another advantage of utilizing Thunderbolt NAS systems over traditional Thunderbolt storage devices is the ability to use 10GbE passthrough. If your home or office uses larger bandwidth network connections such as 2.5GbE or 10GbE, you can use a direct connection with the NAS over Thunderbolt from your Mac or Windows system to also connect to that larger and higher bandwidth network. Additional Thunderbolt DAS storage will only provide you storage while using up that Thunderbolt port for little else.
Thunderbolt NAS vs Thunderbolt DAS – Expandability?
Expanding a traditional RAID storage device can often be quite tricky. Some Thunderbolt solutions, like the Areca series, allow users to use software RAID to attach their own series of expansion devices and add further drives to your ever-growing storage area. However, they are very much in the minority, as most Thunderbolt plug-and-play DAS solutions do not allow any kind of external expandability. Once the storage media inside the system has filled up, you either have to buy new, larger hard drives and gradually replace all of the drives, which can take weeks, or you need to buy a new Thunderbolt box and start over, adding to growing storage piles.
Thunderbolt NAS, on the other hand, allows several means to expand and upgrade your storage very efficiently over the system’s lifespan. The system arrives with two internal M.2 NVMe slots that allow you to install further, faster SSDs which can be used for additional storage or pooled together with the existing larger hard drive storage. Moreover, the system features multiple USB ports that allow you to attach one of the many official QNAP expansion devices that increase the size of your storage pool – this is especially fast if you utilize the ZFS QuTS software that now supports ZFS expansions. The QNAP TVS-h874 system also allows you to attach fast USB drives with USB 3.2 Gen 2 architecture, which will then become available via the Thunderbolt and remotely via network and internet connections. The QNAP NAS allows you to create multiple smaller storage areas both inside and outside of the system, and all of these are accessible via a single Thunderbolt port or via the network. This pales in comparison to the majority of other Thunderbolt DAS systems that only provide a single large block of storage to work with.
Thunderbolt NAS vs Thunderbolt DAS – File System Considerations?
File System Locks – Connecting a storage device via Thunderbolt to your Mac or Windows system does not always immediately make the storage available. One significant difference that many users overlook is that multiple operating systems use very different file systems, from an old USB drive all the way up to a LaCie 6big, for example. This can often result in a drive that works fine on a Mac being completely unusable on a Windows system. This has always been a challenge for editing suites with mixed Windows, Mac, and Linux OS systems in-house, preventing a single Thunderbolt device from being usable between one system and another without appropriate formatting or future provisioning during initial file system creation.
A Thunderbolt NAS, on the other hand, utilizes the system’s own EXT4 or ZFS file system during the initialization of the NAS and, after that, can be communicated with remotely via the network, internet, or over Thunderbolt by practically any operating system, as well as multiple client applications available from the brand, with third-party tools also supported. In terms of cross-platform file sharing, a Thunderbolt NAS is significantly more convenient.
Thunderbolt NAS vs Thunderbolt DAS – Costs, Price and Value?
The Price – Something a lot of you may have already noticed is that a Thunderbolt NAS like the TVS-h874 is much more expensive than a similarly scaled direct attached storage RAID box from OWC, G-Technology, or LaCie. This is because, in order for the NAS system to provide support for all of its features and services, it needs to utilize significantly more powerful hardware in terms of the CPU, memory, and general system internal cooling systems. A traditional Thunderbolt RAID DAS system does not have any of these extra features and therefore often runs on very modest SoC (Software on Chip) or RoC (RAID on Chip) processors with minimal RAM. All of this extra hardware results in a Thunderbolt NAS system being significantly more expensive than traditional plug-and-play Thunderbolt storage.
Thunderbolt 4 DAS vs. Thunderbolt 4 NAS? Which Should You Use?
Understanding the distinctions between Thunderbolt 4 DAS and Thunderbolt 4 NAS is crucial, especially when considering devices like the QNAP TVS-h874. This NAS device stands out for its versatility and future-proofing capabilities. Supporting both Thunderbolt 4 and 3, it offers an excellent long-term storage solution, adaptable to evolving client devices. While both Thunderbolt 3 and 4 deliver 40 gigabits per second bandwidth, Thunderbolt 4 excels with enhanced security, power delivery, and improved internal management. The file system flexibility of the Thunderbolt NAS, like the QNAP TVS-h874, is a significant advantage, particularly in multi-OS environments commonly found in editing suites. It overcomes the limitations of traditional DAS systems, which often face compatibility issues across different operating systems. The NAS’s ability to be communicated with remotely, regardless of the OS, streamlines cross-platform file sharing.
However, it’s important to consider the price and performance aspects. While Thunderbolt NAS offers more features, it comes at a higher cost due to its more powerful hardware. In terms of performance, Thunderbolt DAS provides straightforward, high-speed access for individual users, whereas Thunderbolt NAS excels in multi-user environments and offers greater expandability. Each system has its strengths, and the choice ultimately depends on your specific needs. If you prioritize ease of use, single-user access, and maximum performance with the right storage media, Thunderbolt DAS could be more suitable. On the other hand, if your focus is on versatility, expandability, and multi-user access in a cross-platform setting, a Thunderbolt NAS like the QNAP TVS-h874 would be an excellent investment. Remember, Thunderbolt is just the conduit; the type of system you choose should align with your specific workflow requirements and future scalability needs.
This description contains links to Amazon. These links will take you to some of the products mentioned in today's content. As an Amazon Associate, I earn from qualifying purchases. Visit the NASCompares Deal Finder to find the best place to buy this device in your region, based on Service, Support and Reputation - Just Search for your NAS Drive in the Box Below
Need Advice on Data Storage from an Expert?
Finally, for free advice about your setup, just leave a message in the comments below here at NASCompares.com and we will get back to you.Need Help?
Where possible (and where appropriate) please provide as much information about your requirements, as then I can arrange the best answer and solution to your needs. Do not worry about your e-mail address being required, it will NOT be used in a mailing list and will NOT be used in any way other than to respond to your enquiry.
[contact-form-7]
TRY CHAT Terms and Conditions
If you like this service, please consider supporting us.
We use affiliate links on the blog allowing NAScompares information and advice service to be free of charge to you.Anything you purchase on the day you click on our links will generate a small commission which isused to run the website. Here is a link for Amazon and B&H.You can also get me a Ko-fi or old school Paypal. Thanks!To find out more about how to support this advice service checkHEREIf you need to fix or configure a NAS, check FiverHave you thought about helping others with your knowledge? Find Instructions Here
Or support us by using our affiliate links on Amazon UK and Amazon US
Alternatively, why not ask me on the ASK NASCompares forum, by clicking the button below. This is a community hub that serves as a place that I can answer your question, chew the fat, share new release information and even get corrections posted. I will always get around to answering ALL queries, but as a one-man operation, I cannot promise speed! So by sharing your query in the ASK NASCompares section below, you can get a better range of solutions and suggestions, alongside my own.
Envie de tester, d’utiliser ou de développer sous macOS Sonoma 14 sur Windows ? Avec un peu de bricolage et, surtout, l’utilisation de VMware, c’est possible. VMware Workstation Player est un logiciel de virtualisation, comme VirtualBox et Parallels Desktop, qui permet d’émuler une machine virtuelle (VM pour Virtual Machine). Concrètement, vous pouvez contrôler une machine … Lire la suite
Vous avez une photo d’un iPhone et vous n’arrivez pas à l’ouvrir sur votre PC ? Celle-ci doit certainement être au format HEIC et Windows a besoin d’une extension pour pouvoir ouvrir ces fichiers. Bien que le format HEIC présente de nombreux avantages, il n’est pas nativement pris en charge par Windows, certaines applications ou … Lire la suite
Un nouvelle version d'un logiciel malveillant dédié au vol de mot passe a fait son apparition. Les pirates ont amélioré leur outil pour cibler les ordinateurs Mac.
Vous en avez assez du gros bordel dans la barre de menu sur votre Mac ? Hé bien, j’ai découvert un outil plutôt sympa qui pourrait bien résoudre ce problème. Ça s’appelle Ice et vous pouvez le trouver ici.
Trêve de blabla, pour résumer, c’est un outil de gestion de la barre de menus et sa fonction principale est de masquer et d’afficher les éléments de la barre de menus ou de créer une section « Toujours cachée » pour les éléments que vous ne voulez jamais voir.
Il y a aussi des raccourcis clavier pour basculer entre les différentes sections de la barre de menus, et même pour faire apparaître temporairement des éléments individuels. De plus, il y a une fonctionnalité qui permet d’afficher les icônes de la barre de menus dans un panneau déroulant, comme alternative à la barre de menus elle-même.
Grâce à Ice, vous pouvez adapter la barre de menus à vos besoins et à votre style. Vous pouvez également ajuster l’espacement entre les icônes de la barre de menus pour un look vraiment sur mesure.
Vous pouvez choisir entre une teinte unie et un dégradé pour la barre de menus, ajouter une ombre ou une bordure, et même opter pour des formes de barre de menus personnalisées, comme arrondies ou divisées.
Il y a aussi quelques autres fonctionnalités pratiques incluses dans Ice, comme la possibilité de le lancer au démarrage et les mises à jour automatiques.
Et c’est distribué sous licence MIT donc c’est libre ! Bref, à tester d’urgence si vous êtes sous macOS et que vous détestez la barre d’icônes, surtout avec ce foutu notch qui masque tout.
Synology DS423+ vs DS923+ NAS – Which Should You Buy
Buying your first network-attached storage device can be really intimidating! If you have spent the better part of a decade storing your personal or business data on public cloud services or in a drawer full of USB drives, but have now taken the grown-up decision to go ahead and migrate over to your own private network-attached storage (NAS). You might have done this for reasons of cost, centralization or perhaps for security, whatever the reason for your data migration, there is simply no denying that the world of NAS can be a fraction complex and confusing early doors. Like any kind of modern computer appliance, you want to make sure you buy right the first time and when it comes to choosing between two of the latest generations of Synology NAS devices, these two incredibly similar four-bay devices might be two of the most different solutions I have ever compared. The Synology DS423+ is a home and small business-focused compact NAS designed to leverage an affordable price point between reasonable hardware and reasonable software and abilities. The slightly older Synology DS923+ (by 6+ months), on the other hand, has much of a high and even in some places entry enterprise-level focus about its architecture and is needless to say the more expensive of the two. Nevertheless, both of these Synology NAS devices can be picked up for around $450 to $600 (without drives), the contrast between their pricing, are actually very different beasts. Therefore, for users that don’t quite know their AMD embedded from their Celeron integrated processors, or who aren’t sure of the benefits that ECC can bring, today I want to compare the Synology DS423+ and Synology DS923+ and help you decide which one best deserves your data!
Just before we get into the meat and potatoes of this comparison, it is worth highlighting that regardless of whether you buy the Synology DS923+ or DS423+, you are guaranteed to get a system that can perform all of the following:
Both units feature x86 processors, which allow a wide degree of app/services to run well and are a good price vs hardware balance
Both the DS923+ and DS423+ are constructed of plastic desktop compact chassis, thereby reducing power consumption, noise and heat generated
Both can Stream 1080p HD or 4K media, with superior performance natively and mid-range performance in Plex
Both the Synology DS923+ and DS423+ NAS support AI-supported photo and ‘thing’ recognition supported to a very high degree from the free branded software included
For Business users who currently enjoy the use of Google Workspace or Office 365, both of these NAS provide excellent means to backup your mass cloud accounts (as well as natively sync, dupe and configure rules on the fly)
Both the DS423+ NAS and DS923+ NAS support snapshots, for more incremental and version protecting failsafe in efforts to protect you from Malware and Ransomware attacks, by allowing multi-versioning storage history to browse through and restore
Both units are DLNA certified so can be accessed, browsed and played from by popular DLNA devices, such as Amazon Firestick, Alexa, Google Home Chromecast, Apple TV, Bose, Sonos, iPads, etc, as well as connectivity between these platforms with IFTTT
Both are multi-bay, RAID enabled devices NAS devices that support JBOD, RAID 0, RAID 1, RAID 5, RAID 6 and RAID 10 (as well as Synology Hybrid RAID too for their Plus series range), though it is worth highlighting the DS923+ is the only one that supports an expansion and therefore also can support RAID 5, RAID 6, RAID 10 and SHR-2 over an expansion (more on that later)
Both devices run on their own proprietary operating system that can be accessed remotely or locally. These include regular updates to the firmware, security patches, applications and more. Ranging from multimedia, home and multi-tiered backup applications, to more business end tools such as Surveillance software, Virtual Machine deployment and business-class backup and synchronization tools.
Both the DS423+ and DS923+ use and can be accessed equally by a multitude of mobile applications such as DS File, DS Video, DS Photo, DSCam and DS Music that are created by and constantly improved by Synology.
Both NAS are completely compatible with Windows, Android and Mac systems, as well as acting as a bring between software platforms to share and distribute files for migration and file sync]
Both units can be used as a mail and/or business servers, providing excellent 3rd party CRM and first-party CMS systems, as well as the fantastic Synology collaboration Suite of applications Chat, Drive, Mail, Calendar, Office and Active Backup Suite
Both systems will support DSM 7.1 or DSM 7.2 out the box, as well as support software updates (security and feature) for many years moving forward
Both systems support the Synology Surveillance Station applications, support numerous cameras and arrive with 2 camera licenses with your purchase
But you didn’t come to this comparison page to find out what they had in common, you wanted to know what makes them different and which one best suits your needs, so let’s crack on with this comparison.
Synology DS423+ vs DS923+ NAS – Price and Value
Now, for those of you that are keeping a very close eye on the budget, it will already be clear to you that the Synology DS423+ is the lower-priced NAS of the two, by quite a considerable margin! Arriving, depending on where you are in the world, for around $449 to $499, it will immediately look more appealing to those on a tight budget when compared against the $549 to $599 of the DS923+. And that is before you’ve gone ahead and purchased any storage media too, so that’s saving of $100 to $150 could go a long way to further bolstering your network-attached storage setup. So, if the most important thing to you right now is remaining within a tight budget, then it might be worth seeing to read the rest of this article as when comparing DS423+ and DS923+, we have to look considerably more at the subject of value, not price. Price. Both of these devices arrive with the same software, Synology DSM 7.2, as well as both systems being two drive NAS solutions that support nearly identical ranges of storage media too, but more on that later. In terms of physical size, the range of components, they are pretty darn similar at a casual glance. However, it is in terms of the individual hardware components and scalability where the Synology DS923+ shows its worth, which we will cover shortly in the hardware section. But at least in terms of numerical value, the Synology DS423+ carries the lead. However, the reality isn’t quite that simple:
This is because the Synology DS923+ was released approx than half a year earlier than the DS423+ (Nov 2022 vs April 2023) and because of its wider availability and longer presence in the market, it has been featured in numerous special offers throughout that time. We saw this near $500 NAS on a few considerably impressive special offers throughout Amazon Prime day and other smaller eShop-specific events. So, yes, the DS423+ is the lower-priced NAS of the two, but do make a point of checking your local online retailer to see if the DS923+ is on special offer right now!
Synology DS423+ vs DS923+ NAS – Hardware and Connections
The hardware architecture of the DS423+ and DS923+ clearly have two very different target audiences in mind. The DS423+ has more of a home and multimedia feel about it, while the DS923+ feels substantially more like a business solution. This is reflected in numerous areas such as the distinct differences in CPU, memory specifications, and potential for growth. Even if you were to take into account the affordability of the DS423+, it has to be said that in the majority of hardware available, the DS923+ is significantly more powerful and scalable in practically every way. Here is a brief summary of the key hardware highlights of either system, side-by-side:
The maximum number of disk slots for an expansion unit
N/A
7 (DX517 x 1)
M.2 drive bay
N/A
2 (NVMe, PCIe 3×1)
Compatible Disk Type
3.5″ SATA HDD
2.5″ SATA SSD
3.5″ SATA HDD
2.5″ SATA SSD
M.2 2280 NVMe SSD
Disk hot-plug support*
Yes
Yes
So first and foremost, we need to discuss the main differences between the CPUs available here. The Intel Celeron found inside the DS423+ is a four-core, four-thread processor with a clock speed of 2.0 GHz that can be burst to 2.7 GHz when needed. However, despite the age of this CPU, which was released towards the end of 2019, it is the integrated graphics of this processor that gives it a slight edge for some users in terms of NAS deployment- especially those looking at multimedia use for their system. For users that are looking at the manipulation of graphical data, or more commonly are using the NAS as a multimedia server and wish to convert dense multimedia into something more manageable locally (for example, converting a dense 4K file into a much smaller and portable version to watch on the phone whilst commuting to work, on the fly), integrated graphics allow the NAS to perform this task with much lower overall resource consumption.
Thanks to it having a more specialized tool to get this job done. The embedded Ryzen R1600 processor on the other hand, lacks the integrated graphics and is a dual-core processor instead of a quad-core. However, it substantially makes up for this by being a much more powerful dual-core processor, with four threads that allow the system to assign system resources in a similar way to that of having multiple cores. Equally, the clock speed is noticeably higher here with the DS923+ CPU having a 2.6 GHz base power that can be burst when needed to 3.1 GHz. It is true that in cases of graphical manipulation or multimedia conversion, the AMD CPU here will be far less efficient and capable. However, in practically every other way, it is superior to that of the J4125 inside the DS423+. And if you are more concerned with traditional file transfer speeds internally and externally, the DS923+ will comfortably be the better-performing NAS.
The CPU choices in the DS423+ and DS923+ also result in very different memory architectures in each device, which will undoubtedly result in different scalability in the long term. The DS423+ arrives with 2GB of 2666Mhz memory, soldered to the main controller board, which can be further expanded via an available SODIMM memory slot to 6 GB total. This may be a little disheartening when you find out that the CPU here is actually capable of supporting 8 GB maximum memory. However, due to that initial 2GB memory being fixed internally, you cannot officially exceed 6 GB physically. This shortfall is considerably magnified when you bring into comparison the DS723’s memory structure. It arrives with 4GB of DDR4 3200Mhz memory which can be expanded to a whopping 32 GB total across two available SODIMM slots. Additionally, the system arrives with error-correcting code (ECC) memory, which ensures that data that passes through the memory during write operations will have its integrity checked by a separate module on the memory of the system. If any irregularities or inconsistencies are spotted, that data will be repaired. This goes a long way to reassure any doubts around the integrity of long-term archival data and susceptibility to things like bit rot. This is one of the main reasons why the DS923+ is considered much more of a business solution overall.
Much like the memory choices by Synology in these two NAS devices, the ports and connections of them both are similar, but one is definitely more scalable than the other. Both systems arrive with standard gigabit ethernet connectivity, with two available ports that each will provide up to a maximum 109 megabytes per second. Both systems also arrive with USB 3 connectivity, but it is only 5GB gen 1 USB. However, it is from here onward that the DS723 massively upscales things:
Model ID
Synology DS423+
Synology DS923+
Synology NAS
RJ-45 1GbE LAN port*
2 (Supports Link Aggregation / Failover)
2 (Supports Link Aggregation / Failover)
USB 3.2 Gen 1 port*
2
2
eSATA port
0
1
USB Copy
Yes (inc. Physical Button)
Yes
PCIe expansion
N/A
1 x Gen3 x2 LAN card slot
system fan
92 mm x 92 mm x 2 pcs
92 mm x 92 mm x 2 pcs
fan mode
full speed mode
low temperature mode
silent mode
full speed mode
low temperature mode
silent mode
Front panel LED indicators with adjustable brightness
Yes
Yes
Noise value*
19.8dB(A)
22.9 dB(A)
wake on lan
Yes
Yes
Power Supply / Transformer
90W
100W
AC input voltage
100V to 240V AC
100V to 240V AC
current frequency
50/60 Hz, single frequency
50/60 Hz, single frequency
Power consumption
28.3 W (access) 8.45 W (disk hibernation)
35.51 W (access) 11.52 W (disk hibernation)
For a start, the DS923+ features an eSATA external port that is used to connect the official Synology 5-bay expansion device, the DX517. This means that while the DS423+ has a maximum long-term capacity of four SATA drives, the DS923+ allows you to expand your storage down the line by an additional five SATA bays (so 9 Bays total). This can be done gradually and this storage can either mirror the original NAS or extend the storage pool across both devices.
Scalability and expandability do not stop there though, with the DS923+ also having the option to add a network adapter upgrade module (the E10G22-T1-MINI) to increase your network bandwidth to 10GbE. This is going to be incredibly useful for users who plan on taking advantage of SSDs or plan on having a much busier network environment between the NAS and multiple users and tasks at any given time. And it doesn’t stop there! Though BOTH systems also features two SSD bays on its base for installing M.2 2280 SSD modules (which can be used for caching or as raw storage pools, depending on which drive you use), the DS423+ is a Gen 2 PCIe lane system, whilst the DS923+ is a Gen 3 system – resulting in double the bandwidth per lane (ultimately, the difference between 500MB/s max per SSD on the DS423+ and 1,000MB/s on the DS923+). This is a feature that, although growing more common across Synology’s NAS portfolio, it is still unavailable on many of their lower tier/affordable systems (such as the DS224+) and, alongside the lack of storage expansion support, the gen2 speeds on these bays will place limits the storage potential long term on the more affordable NAS.
Finally, we need to discuss storage media compatibility, as this has grown to be another thing that has changed the way in which a user can populate their NAS quite a lot in recent years. On the list of storage media that they are prepared to verify as compatible with their systems. Although technically, one could say that any SATA media drive would be compatible with a SATA NAS, there are still a few incredibly isolated examples of compatibility, durability and stability. Synology requires that all drives need to be officially checked and verified before they’re prepared to add them to their list in order to truly guarantee that a user will get the promised Synology experience from their hardware with that media. As questionable as this might sound, the result is that the list of compatible storage media for both of these devices, despite their incredible similarities, is actually pretty darn different. Take a closer look at the slideshow below of compatible HDDs from WD and Seagate on these two NAS systems (from 21st July 2023) and see if you can spot an odd inconsistency:
In the case of the DS423+, we see a smaller pool of supported storage media, as well as a lower list of larger capacity drives being featured also. The DS923+, on the other hand, seemingly has a larger pool of more high capacity drives added and available to it, as well as a larger range of Synology’s own drives available for use with that system that includes the higher end options in the HAT5300 range. Synology has clearly prioritized higher-end drives for more advanced Synology systems, but for those that like to use their system clearly and rigidly within the defined parameters of a brand to maintain their warranty/guarantee, this is going to be a little disheartening to see the smaller pool of verified compatible storage media on the more affordable NAS solution. This is something that may well change over time as more drives are added to verified compatibility lists, but Synology has not exactly been putting their foot on the gas here. Given how close these two systems have been released side by side and the large disparity between their compatibility lists, I can’t see a huge amount of change happening anytime soon. It is absolutely no surprise that the more expensive Synology NAS has a better degree of hardware options in the long term. Though, it should be highlighted that a lot of the real benefits available in the DS723 are optional extras, long-term scalability and upgrades that are not necessarily available in the default model. It could be very easily argued that you are paying for entry to then pay extra for delivering upgrades, SSD upgrades, storage scalability, and increasing your memory years from now. Nevertheless, the fact that the baseline memory is ECC and the AMD CPU is indeed more powerful in most ways, does make up some of that additional cost and ultimately mean that in terms of hardware and connectivity, the DS923+ is the better of the two.
Synology DS423+ vs DS923+ NAS – Software and Services
At the risk of being incredibly repetitious, both of these devices are remarkably similar in what they can do in Synology’s premium DSM software platform, but the scalability and scope provided by the DS923+ inevitably leads to that more expensive system, ultimately giving you just more resources with which DSM can utilize. In terms of the actual range of applications, services supported on either system and scope for use right out of the box, both the DS423+ and DS923+ have got more than enough to run every single available app and tool available in DSM 7.2. Despite their rather modest scale, both systems can run multiple virtual machines, host a fantastically capable surveillance solution with numerous cameras, both can provide an excellent Plex media server experience (with a slight edge to the DS423+ in terms of conversions and transcoding when needed), and in terms of backups, both systems support the full range of services from Hyper Backup and Active Backup Suite. If you are a small business or just a small group of users who are going to be interacting with either of these NAS units fairly regularly, you’re going to have a largely identical experience in either one of these two systems using the baseline default hardware. However, things will change as soon as you start moving into larger simultaneous access, more high-volume application exchanges between the system and client hardware, and the scope of each one of those individual processes growing over time. In terms of the escalation of accessing the services of DSM and long-term future-proofing of a system running at top speed, despite growing requirements and demands of the system, the DS923+ comfortably wins.
Synology NAS
Synology DS423+
Synology DS923+
Maximum single volume capacity*
108TB
108TB
Maximum number of storage spaces
64
64
M.2 SSD volume support*
Yes
Yes
SSD Read/Write Cache (White Paper)
Yes
Yes
SSD TRIM
Yes
Yes
Support RAID disk array type
Synology Hybrid RAID
Basic
JBOD
RAID 0
RAID 1
RAID 5
RAID 6
RAID 10
Synology Hybrid RAID
Basic
JBOD
RAID 0
RAID 1
RAID 5
RAID 6
RAID 10
file agreement
SMB/AFP/NFS/FTP/WebDAV
SMB/AFP/NFS/FTP/WebDAV
Maximum simultaneous SMB/AFP/FTP connections
500
1000
Maximum number of simultaneous SMB/AFP/FTP connections (with extended memory)
1500
2000
Windows Access Control List (ACL) Integration
Yes
Yes
NFS Kerberos authentication
Yes
Yes
Maximum number of local user accounts
2048
2048
Maximum number of local groups
256
256
Maximum number of shared folders
256
512
Maximum Shared Folder Sync Tasks
8
16
VMware vSphere with VAAI
N/A
Yes
Windows Server 2022
N/A
Yes
Citrix Ready
N/A
Yes
OpenStack
N/A
Yes
Media Server
Yes
Yes
DLNA compatible
Yes
Yes
Synology Photos
Yes
Yes
face recognition
Yes
Yes
Snapshot Replication
Yes
Yes
The maximum number of snapshots supported by a single shared folder
1024
1024
Maximum number of system snapshots
65536
65536
Surveillance Station
Yes
Yes
The maximum number of cameras supported (camera authorization is required)
Recommended number of clients that can sync simultaneously
350 (the number of devices that can be connected at the same time when the recommended number of stored files is reached)
350 (the number of devices that can be connected at the same time when the recommended number of stored files is reached)
Recommended number of files to store
5,000,000 (Applicable to files indexed or belonging to Synology Drive , files accessed through other protocols, please refer to the file service in the above field)
5,000,000 (Applicable to files indexed or belonging to Synology Drive , files accessed through other protocols, please refer to the file service in the above field)
Synology Office
Yes
Yes
Maximum number of users
1200
1200
Video Station
Yes
Yes
Virtual Machine Manager
Yes
Yes
Recommended number of virtual machines
2 (see more)
4 (see more)
Recommended number of Virtual DSMs (licensing required)
2 (including 1 set of free licenses)
4 (including 1 set of free licenses)
VPN Server
Yes
Yes
Maximum number of connections
40
40
Synology High Availability
Yes
Yes
log center
Yes
Yes
Number of logs received per second
800
800
Backup folders and packages
Yes
Yes
backup the whole system
Yes
Yes
Remark
Full system backup requires DSM 7.2 or later.
Full system backup requires DSM 7.2 or later.
Maximum number of Hybrid Share folders
10
10
Notwithstanding that the system has a much higher clock speed CPU that, despite only being a dual-core processor, features a four thread architecture with DSM, allowing a lot of the spreading of resources normally associated with cores to be made available with vCPU allocation (containers, virtual machines and just natively). Then there is the scope for the larger overall capacity available to be upgraded towards in terms of memory, with the rather modest 6GB of memory on the DS423+ looking quite underwhelming when compared against the whopping 32 GB maximum memory that is scalable on the DS923+. That ultimately adds up to the more expensive NAS system having a better opportunity to grow alongside a more demanding data storage network of connected devices and users over time. And we haven’t even touched on the performance benefit in DSM and all of the first and third party applications when we factor in support of Gen3 SSDs for caching or storage pools in the DS923+, both of which are going to allow much better, long-term utilization and overall, a much smoother experience for a considerably longer amount of time than that of the DS423+. Ultimately, if you think your utilization of the NAS is going to grow steadily and increasingly over time, the DS923+ is the better choice here in terms of software, in and out of DSM.
Synology DS423+ vs DS923+ NAS – Conclusion and Verdict
Unsurprisingly, what we have here is an old-fashioned case of getting what you pay for. The DS423+ is a very solid, and reliable NAS solution and is definitely more than capable of running the bulk of modern NAS hardware needs, also, remaining pretty flexible in the resources available to it on day one to get the job done. Equally, for home users and particularly those seeking a more flexible approach to multimedia, the DS423+ does bring a decent amount of bang for buck when you compare it against the bulk of other Synology solutions in the brand’s portfolio. But it just pales in comparison to the sheer scope of scalability, upgrade options and flexibility long-term that the DS923+ provides. And regardless of whether you’re a business user or a home user that may perhaps be looking to do something more aggressive with their storage down the line, the DS923+ justifies a lot of the extra expense, simply by the weight of it having that ECC memory, twice the default memory on day 1, Gen3 SSD NVMe storage options, expandability, 10G as an optional extra and the scale of how far you can upgrade the memory. As mentioned earlier, we have to at least acknowledge that a lot of these advantages that the DS923+ presents compared with the DS423+ are ones that you will only really take advantage of if you spend a little bit more money, but having the option for that scalability down the line for many users is going to be worth the investment on day one. Side by side, in most cases, the DS923+ will comfortably outperform the DS423+ even in the default model, so you still aren’t losing out just because you’re paying extra for upgrade options you may not use later down the line.
This description contains links to Amazon. These links will take you to some of the products mentioned in today's content. As an Amazon Associate, I earn from qualifying purchases. Visit the NASCompares Deal Finder to find the best place to buy this device in your region, based on Service, Support and Reputation - Just Search for your NAS Drive in the Box Below
Need Advice on Data Storage from an Expert?
Finally, for free advice about your setup, just leave a message in the comments below here at NASCompares.com and we will get back to you.Need Help?
Where possible (and where appropriate) please provide as much information about your requirements, as then I can arrange the best answer and solution to your needs. Do not worry about your e-mail address being required, it will NOT be used in a mailing list and will NOT be used in any way other than to respond to your enquiry.
[contact-form-7]
TRY CHAT Terms and Conditions
If you like this service, please consider supporting us.
We use affiliate links on the blog allowing NAScompares information and advice service to be free of charge to you.Anything you purchase on the day you click on our links will generate a small commission which isused to run the website. Here is a link for Amazon and B&H.You can also get me a Ko-fi or old school Paypal. Thanks!To find out more about how to support this advice service checkHEREIf you need to fix or configure a NAS, check FiverHave you thought about helping others with your knowledge? Find Instructions Here
Or support us by using our affiliate links on Amazon UK and Amazon US
Alternatively, why not ask me on the ASK NASCompares forum, by clicking the button below. This is a community hub that serves as a place that I can answer your question, chew the fat, share new release information and even get corrections posted. I will always get around to answering ALL queries, but as a one-man operation, I cannot promise speed! So by sharing your query in the ASK NASCompares section below, you can get a better range of solutions and suggestions, alongside my own.
Aujourd’hui, je vais vous parler d’un truc qui va vous faire voyager dans le temps façon Retour vers le Futur : Infinite Mac. Il s’agit d’un projet imaginé par le génial Mihai Parparita, qui permet de faire tourner d’anciens systèmes Mac et NeXT directement dans votre navigateur web.
Mihai a utilisé WebAssembly pour porter tout un tas d’émulateurs comme Mini vMac, Basilisk II, SheepShaver, DingusPPC et même Previous. Un sacré défi qui lui a demandé pas mal de bidouilles pour que tout soit compatible. Avec ça, vous allez pouvoir revivre les grandes heures de Mac OS, de System 6 jusqu’à Mac OS 9 en passant par System 7 et Mac OS 8. Et pour les fans de Steve Jobs, y a même du NeXTStep de la 0.8 de 1988 jusqu’à OPENSTEP 4.2 sorti en 1997 !
Le truc chouette, c’est que c’est hyper simple à utiliser. Vous allez sur le site infinitemac.org, vous choisissez votre version préférée (ou custom) et hop, vous voilà propulsé 20 ou 30 ans en arrière, à l’époque où les ordis avaient encore des disquettes et où on surfait avec Netscape Navigator.
D’ailleurs, c’est marrant de voir à quel point NeXTStep était en avance sur son temps par rapport au Mac de la même époque. Genre en 1988, y’avait d’un côté System 6 qui faisait un peu pitié et de l’autre ce monstre de puissance et d’innovation qu’était le Cube de Next. Pas étonnant que notre Steve national ait fini par racheter la boîte pour créer Mac OS X par la suite.
Et vous saviez qu’à partir de NeXTStep 3.0, on pouvait lire et écrire sur les disques HFS des Mac ? Ça veut dire qu’en 2024, on peut s’échanger des fichiers entre les machines NeXT et Mac d’Infinite Mac sans aucun souci. C’est beau.
Bref, un chouette projet à explorer, surtout si vous n’avez pas connu cette époque ou si vous cherchez à retrouver les sensations de votre jeunesse d’informaticien. Infinite Mac c’est par ici !
Synology DS224+ vs DS723+ NAS – Which Should You Buy
Buying your first network-attached storage device can be really intimidating! If you have spent the better part of a decade storing your personal or business data on public cloud services or in a drawer full of USB drives, but have now taken the grown-up decision to go ahead and migrate over to your own private network-attached storage (NAS). You might have done this for reasons of cost, centralization or perhaps for security, whatever the reason for your data migration, there is simply no denying that the world of NAS can be a fraction complex and confusing early doors. Like any kind of modern computer appliance, you want to make sure you buy right the first time and when it comes to choosing between two of the latest generations of Synology NAS devices, these two incredibly similar two-bay devices might be two of the most different solutions I have ever compared. The Synology DS224+ is a home and small business-focused compact NAS designed to leverage an affordable price point between reasonable hardware and reasonable software and abilities. The slightly older Synology DS723+, on the other hand, has much of a high and even in some places entry enterprise-level focus about its architecture and is needless to say the more expensive of the two. Nevertheless, both of these Synology NAS devices can be picked up for around $350 to $450 (without drives), the contrast between their pricing, are actually very different beasts. Therefore, for users that don’t quite know their AMD embedded from their Celeron integrated processors, or who aren’t sure of the benefits that ECC can bring, today I want to compare the Synology DS224+ and Synology DS723+ and help you decide which one best deserves your data!
Just before we get into the meat and potatoes of this comparison, it is worth highlighting that regardless of whether you buy the Synology DS723+ or DS224+, you are guaranteed to get a system that can perform all of the following:
Both units feature x86 processors, which allow a wide degree of app/services to run well and are a good price vs hardware balance
Both the DS723+ and DS224+ are constructed of plastic desktop compact chassis, thereby reducing power consumption, noise and heat generated
Both can Stream 1080p HD or 4K media, with superior performance natively and mid-range performance in Plex
Both the Synology DS723+ and DS224+ NAS support AI-supported photo and ‘thing’ recognition supported to a very high degree from the free branded software included
For Business users who currently enjoy the use of Google Workspace or Office 365, both of these NAS provide excellent means to backup your mass cloud accounts (as well as natively sync, dupe and configure rules on the fly)
Both the DS224+ NAS and DS723+ NAS support snapshots, for more incremental and version protecting failsafe in efforts to protect you from Malware and Ransomware attacks, by allowing multi-versioning storage history to browse through and restore
Both units are DLNA certified so can be accessed, browsed and played from by popular DLNA devices, such as Amazon Firestick, Alexa, Google Home Chromecast, Apple TV, Bose, Sonos, iPads, etc, as well as connectivity between these platforms with IFTTT
Both are multi-bay, RAID enabled devices NAS devices that support JBOD, RAID 0 and RAID 1 (as well as Synology Hybrid RAID too for their Plus series range), though it is worth highlighting the DS723+ is the only one that supports an expansion and therefore also can support RAID 5, RAID 6, RAID 10 and SHR-2 (more on that later)
Both devices run on their own proprietary operating system that can be accessed remotely or locally. These include regular updates to the firmware, security patches, applications and more. Ranging from multimedia, home and multi-tiered backup applications, to more business end tools such as Surveillance software, Virtual Machine deployment and business-class backup and synchronization tools.
Both the DS224+ and DS723+ use and can be accessed equally by a multitude of mobile applications such as DS File, DS Video, DS Photo, DSCam and DS Music that are created by and constantly improved by Synology.
Both NAS are completely compatible with Windows, Android and Mac systems, as well as acting as a bring between software platforms to share and distribute files for migration and file sync]
Both units can be used as a mail and/or business servers, providing excellent 3rd party CRM and first-party CMS systems, as well as the fantastic Synology collaboration Suite of applications Chat, Drive, Mail, Calendar, Office and Active Backup Suite
Both systems will support DSM 7.1 or DSM 7.2 out the box, as well as support software updates (security and feature) for many years moving forward
Both systems support the Synology Surveillance Station applications, support numerous cameras and arrive with 2 camera licenses with your purchase
But you didn’t come to this comparison page to find out what they had in common, you wanted to know what makes them different and which one best suits your needs, so let’s crack on with this comparison.
Synology DS224+ vs DS723+ NAS – Price and Value
Now, for those of you that are keeping a very close eye on the budget, it will already be clear to you that the Synology DS224+ is the lower-priced NAS of the two, by quite a considerable margin! Arriving, depending on where you are in the world, for around $330 to $360, it will immediately look more appealing to those on a tight budget when compared against the $450 to $499 of the DS723+. And that is before you’ve gone ahead and purchased any storage media too, so that’s saving of $100 to $150 could go a long way to further bolstering your network-attached storage setup. So, if the most important thing to you right now is remaining within a tight budget, then it might be worth seeing to read the rest of this article as when comparing DS224+ and DS723+, we have to look considerably more at the subject of value, not price. Price. Both of these devices arrive with the same software, Synology DSM 7.2, as well as both systems being two drive NAS solutions that support nearly identical ranges of storage media too, but more on that later. In terms of physical size, the range of components, they are pretty darn similar at a casual glance. However, it is in terms of the individual hardware components and scalability where the Synology DS723+ shows its worth, which we will cover shortly in the hardware section. But at least in terms of numerical value, the Synology DS224+ carries the lead. However, the reality isn’t quite that simple.
This is because the Synology DS723+ was released more than half a year earlier than the DS224+ and because of its wider availability and longer presence in the market, it has been featured in numerous special offers throughout that time. We saw this near $500 NAS on a few considerably impressive special offers throughout Amazon Prime day and other smaller eShop-specific events. So, yes, the DS224+ is the lower-priced NAS of the two, but do make a point of checking your local online retailer to see if the DS723+ is on special offer right now!
Synology DS224+ vs DS723+ NAS – Hardware and Connections
The hardware architecture of the DS224+ and DS723+ clearly have two very different target audiences in mind. The DS224+ has more of a home and multimedia feel about it, while the DS723+ feels substantially more like a business solution. This is reflected in numerous areas such as the distinct differences in CPU, memory specifications, and potential for growth. Even if you were to take into account the affordability of the DS224+, it has to be said that in the majority of hardware available, the DS723+ is significantly more powerful and scalable in practically every way. Here is a brief summary of the key hardware highlights of either system, side-by-side:
The maximum number of disk slots for an expansion unit
N/A
7 (DX517 x 1)
M.2 drive bay
N/A
2 (NVMe, PCIe 3×1)
Compatible Disk Type
3.5″ SATA HDD
2.5″ SATA SSD
3.5″ SATA HDD
2.5″ SATA SSD
M.2 2280 NVMe SSD
Disk hot-plug support*
Yes
Yes
So first and foremost, we need to discuss the main differences between the CPUs available here. The Intel Celeron found inside the DS224+ is a four-core, four-thread processor with a clock speed of 2.0 GHz that can be burst to 2.7 GHz when needed. However, despite the age of this CPU, which was released towards the end of 2019, it is the integrated graphics of this processor that gives it a slight edge for some users in terms of NAS deployment- especially those looking at multimedia use for their system. For users that are looking at the manipulation of graphical data, or more commonly are using the NAS as a multimedia server and wish to convert dense multimedia into something more manageable locally (for example, converting a dense 4K file into a much smaller and portable version to watch on the phone whilst commuting to work, on the fly), integrated graphics allow the NAS to perform this task with much lower overall resource consumption.
Thanks to it having a more specialized tool to get this job done. The embedded Ryzen R1600 processor on the other hand, lacks the integrated graphics and is a dual-core processor instead of a quad-core. However, it substantially makes up for this by being a much more powerful dual-core processor, with four threads that allow the system to assign system resources in a similar way to that of having multiple cores. Equally, the clock speed is noticeably higher here with the DS723+ CPU having a 2.6 GHz base power that can be burst when needed to 3.1 GHz. It is true that in cases of graphical manipulation or multimedia conversion, the AMD CPU here will be far less efficient and capable. However, in practically every other way, it is superior to that of the J4125 inside the DS224+. And if you are more concerned with traditional file transfer speeds internally and externally, the DS723+ will comfortably be the better-performing NAS.
The CPU choices in the DS224+ and DS723+ also result in very different memory architectures in each device, which will undoubtedly result in different scalability in the long term. The DS224+ arrives with 2GB of memory, soldered to the main controller board, which can be further expanded via an available SODIMM memory slot to 6 GB total. This may be a little disheartening when you find out that the CPU here is actually capable of supporting 8 GB maximum memory. However, due to that initial 2GB memory being fixed internally, you cannot officially exceed 6 GB physically. This shortfall is considerably magnified when you bring into comparison the DS723’s memory structure. It arrives with 2GB of DDR4 memory which can be expanded to a whopping 32 GB total across two available SODIMM slots. Additionally, the system arrives with error-correcting code (ECC) memory, which ensures that data that passes through the memory during write operations will have its integrity checked by a separate module on the memory of the system. If any irregularities or inconsistencies are spotted, that data will be repaired. This goes a long way to reassure any doubts around the integrity of long-term archival data and susceptibility to things like bit rot. This is one of the main reasons why the DS723+ is considered much more of a business solution overall.
Much like the memory choices by Synology in these two NAS devices, the ports and connections of them both are similar, but one is definitely more scalable than the other. Both systems arrive with standard gigabit ethernet connectivity, with two available ports that each will provide up to a maximum 109 megabytes per second. Both systems also arrive with USB 3 connectivity, but it is only 5GB gen 1 USB, and the more expensive DS723+ only has a single port when the DS220 Plus has two, which really surprised me. However, it is from here onward that the DS723 massively upscales things.
Model ID
Synology DS224+
Synology DS723+
Synology NAS
RJ-45 1GbE LAN port*
2 (Supports Link Aggregation / Failover)
2 (Supports Link Aggregation / Failover)
USB 3.2 Gen 1 port*
2
1
eSATA port
0
1
USB Copy
Yes (inc. Physical Button)
Yes
PCIe expansion
N/A
1 x Gen3 x2 LAN card slot
Size (HXWXD)
165 mm x 108 mm x 232.2 mm
166mm x 106mm x 223mm
weight
1.30 kg
1.51 kg
system fan
92 mm x 92 mm x 1 pcs
92 mm x 92 mm x 1 pcs
fan mode
full speed mode
low temperature mode
silent mode
full speed mode
low temperature mode
silent mode
Front panel LED indicators with adjustable brightness
Yes
Yes
Noise value*
22dB(A)
20.7 dB(A)
wake on lan
Yes
Yes
Power Supply / Transformer
60W
65W
AC input voltage
100V to 240V AC
100V to 240V AC
current frequency
50/60 Hz, single frequency
50/60 Hz, single frequency
Power consumption
14.69 W (access) 4.41 W (disk hibernation)
21.07 W (access) 8.62 W (disk hibernation)
For a start, the DS723+ features an eSATA external port that is used to connect the official Synology 5-bay expansion device, the DX517. This means that while the DS220 Plus has a maximum long-term capacity of two SATA drives, the DS723+ allows you to expand your storage down the line by an additional five SATA bays. This can be done gradually and this storage can either mirror the original NAS or extend the storage pool across both devices.
Scalability and expandability do not stop there though, with the DS723+ also having the option to add a network adapter upgrade module (the E10G22-T1-MINI) to increase your network bandwidth to 10GbE. This is going to be incredibly useful for users who plan on taking advantage of SSDs or plan on having a much busier network environment between the NAS and multiple users and tasks at any given time.
And it doesn’t stop there! The Synology DS723+ also features two SSD bays on its base for installing M.2 2280 SSD modules, which can be used for caching or as raw storage pools, depending on which drive you use (more on that later). This is a feature that, although growing more common across Synology’s NAS portfolio, it is still unavailable on the new DS224+ and, alongside the lack of storage expansion support, severely limits the storage potential long term on the more affordable NAS.
inally, we need to discuss storage media compatibility, as this has grown to be another thing that has changed the way in which a user can populate their NAS quite a lot in recent years. On the list of storage media that they are prepared to verify as compatible with their systems. Although technically, one could say that any SATA media drive would be compatible with a SATA NAS, there are still a few incredibly isolated examples of compatibility, durability and stability. Synology requires that all drives need to be officially checked and verified before they’re prepared to add them to their list in order to truly guarantee that a user will get the promised Synology experience from their hardware with that media. As questionable as this might sound, the result is that the list of compatible storage media for both of these devices, despite their incredible similarities, is actually pretty darn different. Take a closer look at the slideshow below of compatible HDDs from WD and Seagate on these two NAS systems (from 21st July 2023) and see if you can spot an odd inconsistency:
In the case of the DS224+, we see a smaller pool of supported storage media, as well as a lower list of larger capacity drives being featured also. The DS723+, on the other hand, seemingly has a larger pool of more high capacity drives added and available to it, as well as a larger range of Synology’s own drives available for use with that system that includes the higher end options in the HAT5300 range. Synology has clearly prioritized higher-end drives for more advanced Synology systems, but for those that like to use their system clearly and rigidly within the defined parameters of a brand to maintain their warranty/guarantee, this is going to be a little disheartening to see the smaller pool of verified compatible storage media on the more affordable NAS solution. This is something that may well change over time as more drives are added to verified compatibility lists, but Synology has not exactly been putting their foot on the gas here. Given how close these two systems have been released side by side and the large disparity between their compatibility lists, I can’t see a huge amount of change happening anytime soon. It is absolutely no surprise that the more expensive Synology NAS has a better degree of hardware options in the long term. Though, it should be highlighted that a lot of the real benefits available in the DS723 are optional extras, long-term scalability and upgrades that are not necessarily available in the default model. It could be very easily argued that you are paying for entry to then pay extra for delivering upgrades, SSD upgrades, storage scalability, and increasing your memory years from now. Nevertheless, the fact that the baseline memory is ECC and the AMD CPU is indeed more powerful in most ways, does make up some of that additional cost and ultimately mean that in terms of hardware and connectivity, the DS723+ is the better of the two.
Synology DS224+ vs DS723+ NAS – Software and Services
At the risk of being incredibly repetitious, both of these devices are remarkably similar in what they can do in Synology’s premium DSM software platform, but the scalability and scope provided by the DS723+ inevitably leads to that more expensive system, ultimately giving you just more resources with which DSM can utilize. In terms of the actual range of applications, services supported on either system and scope for use right out of the box, both the DS224+ and DS723+ have got more than enough to run every single available app and tool available in DSM 7.2. Despite their rather modest scale, both systems can run multiple virtual machines, host a fantastically capable surveillance solution with numerous cameras, both can provide an excellent Plex media server experience (with a slight edge to the DS224+ in terms of conversions and transcoding when needed), and in terms of backups, both systems support the full range of services from Hyper Backup and Active Backup Suite. If you are a small business or just a small group of users who are going to be interacting with either of these NAS units fairly regularly, you’re going to have a largely identical experience in either one of these two systems using the baseline default hardware. However, things will change as soon as you start moving into larger simultaneous access, more high-volume application exchanges between the system and client hardware, and the scope of each one of those individual processes growing over time. In terms of the escalation of accessing the services of DSM and long-term future-proofing of a system running at top speed, despite growing requirements and demands of the system, the DS723+ comfortably wins.
Recommended number of clients that can sync simultaneously
350 (the number of devices that can be connected at the same time when the recommended number of stored files is reached)
350 (the number of devices that can be connected at the same time when the recommended number of stored files is reached)
Recommended number of files to store
5,000,000 (Applicable to files indexed or belonging to Synology Drive , files accessed through other protocols, please refer to the file service in the above field)
5,000,000 (Applicable to files indexed or belonging to Synology Drive , files accessed through other protocols, please refer to the file service in the above field)
Synology Office
Yes
Yes
Maximum number of users
1200
1200
Video Station
Yes
Yes
Virtual Machine Manager
Yes
Yes
Recommended number of virtual machines
2 (see more)
4 (see more)
Recommended number of Virtual DSMs (licensing required)
2 (including 1 set of free licenses)
4 (including 1 set of free licenses)
VPN Server
Yes
Yes
Maximum number of connections
40
40
Synology High Availability
Yes
Yes
log center
Yes
Yes
Number of logs received per second
800
800
Backup folders and packages
Yes
Yes
backup the whole system
Yes
Yes
Remark
Full system backup requires DSM 7.2 or later.
Full system backup requires DSM 7.2 or later.
Maximum number of Hybrid Share folders
10
10
Notwithstanding that the system has a much higher clock speed CPU that, despite only being a dual-core processor, features a four thread architecture with DSM, allowing a lot of the spreading of resources normally associated with cores to be made available with vCPU allocation (containers, virtual machines and just natively). Then there is the scope for the larger overall capacity available to be upgraded towards in terms of memory, with the rather modest 6GB of memory on the DS224+ looking quite underwhelming when compared against the whopping 32 GB maximum memory that is scalable on the DS723+. That ultimately adds up to the more expensive NAS system having a better opportunity to grow alongside a more demanding data storage network of connected devices and users over time. And we haven’t even touched on the performance benefit in DSM and all of the first and third party applications when we factor in support of SSDs for caching or storage pools in the DS723+, both of which are going to allow much better, long-term utilization and overall, a much smoother experience for a considerably longer amount of time than that of the DS224+. Ultimately, if you think your utilization of the NAS is going to grow steadily and increasingly over time, the DS723+ is the better choice here in terms of software, in and out of DSM.
Synology DS224+ vs DS723+ NAS – Conclusion and Verdict
Unsurprisingly, what we have here is an old-fashioned case of getting what you pay for. The DS224+ is a very solid, and reliable NAS solution and is definitely more than capable of running the bulk of modern NAS hardware needs, also, remaining pretty flexible in the resources available to it on day one to get the job done. Equally, for home users and particularly those seeking a more flexible approach to multimedia, the DS224+ does bring a decent amount of bang for buck when you compare it against the bulk of other Synology solutions in the brand’s portfolio. But it just pales in comparison to the sheer scope of scalability, upgrade options and flexibility long-term that the DS723+ provides. And regardless of whether you’re a business user or a home user that may perhaps be looking to do something more aggressive with their storage down the line, the DS723+ justifies a lot of the extra expense, simply by weight of it having that ECC memory, SSD NVMe storage options, expandability, 10G as an optional extra and the scale of how far you can upgrade the memory. As mentioned earlier, we have to at least acknowledge that a lot of these advantages that the DS723+ presents compared with the DS224+ are ones that you will only really take advantage of if you spend a little bit more money, but having the option for that scalability down the line for many users is going to be worth the investment on day one. Side by side, in most cases, the DS723+ will comfortably outperform the DS224+ even in the default model, so you still aren’t losing out just because you’re paying extra for upgrade options you may not use later down the line.
This description contains links to Amazon. These links will take you to some of the products mentioned in today's content. As an Amazon Associate, I earn from qualifying purchases. Visit the NASCompares Deal Finder to find the best place to buy this device in your region, based on Service, Support and Reputation - Just Search for your NAS Drive in the Box Below
Need Advice on Data Storage from an Expert?
Finally, for free advice about your setup, just leave a message in the comments below here at NASCompares.com and we will get back to you.Need Help?
Where possible (and where appropriate) please provide as much information about your requirements, as then I can arrange the best answer and solution to your needs. Do not worry about your e-mail address being required, it will NOT be used in a mailing list and will NOT be used in any way other than to respond to your enquiry.
[contact-form-7]
TRY CHAT Terms and Conditions
If you like this service, please consider supporting us.
We use affiliate links on the blog allowing NAScompares information and advice service to be free of charge to you.Anything you purchase on the day you click on our links will generate a small commission which isused to run the website. Here is a link for Amazon and B&H.You can also get me a Ko-fi or old school Paypal. Thanks!To find out more about how to support this advice service checkHEREIf you need to fix or configure a NAS, check FiverHave you thought about helping others with your knowledge? Find Instructions Here
Or support us by using our affiliate links on Amazon UK and Amazon US
Alternatively, why not ask me on the ASK NASCompares forum, by clicking the button below. This is a community hub that serves as a place that I can answer your question, chew the fat, share new release information and even get corrections posted. I will always get around to answering ALL queries, but as a one-man operation, I cannot promise speed! So by sharing your query in the ASK NASCompares section below, you can get a better range of solutions and suggestions, alongside my own.
Selon Bloomberg, le prochain iPad Pro, attendu le 7 mai, serait le premier appareil Apple avec une puce M4. Une rumeur qui a de quoi surprendre, alors que la puce M3 vient tout juste de faire son apparition.
Les nouveaux iPad Pro et iPad Air ajoutent encore des noms délirants au lexique des termes marketing utilisés par Apple. On adorerait assister aux réunions où ces termes sont choisis.