Vue normale

Il y a de nouveaux articles disponibles, cliquez pour rafraîchir la page.
Hier — 16 mai 2025Flux principal

Synology Beestation Plus NAS

Par : Rob Andrews
15 mai 2025 à 18:00

Synology Beestation Plus 8TB Revealed and Detailed

Synology has unveiled the BeeStation Plus (BST170-8T) in their pre-Computex build up (alongside an early reveal back in Jan 2025 at CES/Pepcom), the latest addition to its growing portfolio of personal cloud storage solutions aimed at everyday users. Building on the success of the original BeeStation (BST150-4T), the Plus model directly addresses feedback from users who wanted greater capacity, faster performance, and more versatile applications—without the steep learning curve of traditional NAS systems. This one-bay device ships pre-populated with an 8TB Synology HAT3310 hard drive (7200 RPM), powered by a quad-core Intel Celeron J4125 processor and 4GB of non-upgradable DDR4 memory. The combination is notable because it brings x86-class processing and hardware transcoding support to an ultra-simplified setup—something virtually unheard of in this form factor. With its out-of-the-box readiness, cloud-linked setup process, and focus on seamless user experience, BeeStation Plus is designed for those seeking to move away from Google Drive, iCloud, and Dropbox subscriptions, offering complete local control of data without compromising on usability. Features such as AI-driven photo management, native mobile apps, and Plex Media Server support are now included, making this device far more than just cold storage. For individuals and families looking to centralize their backups, photos, videos, and personal files in a user-friendly ecosystem—without paying monthly cloud fees—Synology positions the BeeStation Plus as an appealing middle ground between cloud services and more complex NAS platforms like the DiskStation DS224+.

Synology Beestation Plus 8TB – Who Is This For?

The BeeStation Plus is designed with a clear goal: to serve individuals, families, and small teams who want private, centralized storage without the barriers that typically come with managing a traditional NAS. It’s aimed at users who are familiar with cloud platforms like Google Drive, Dropbox, or iCloud, but want to move away from recurring subscription fees and the privacy concerns associated with third-party cloud storage. For many, the idea of hosting data locally remains appealing—yet the complexity of DSM-based Synology systems can be overwhelming. The BeeStation Plus sidesteps that entirely by offering a plug-and-play experience: no drive installation, no volume configuration, no knowledge of RAID, and no need to navigate DSM’s enterprise-leaning control panels.

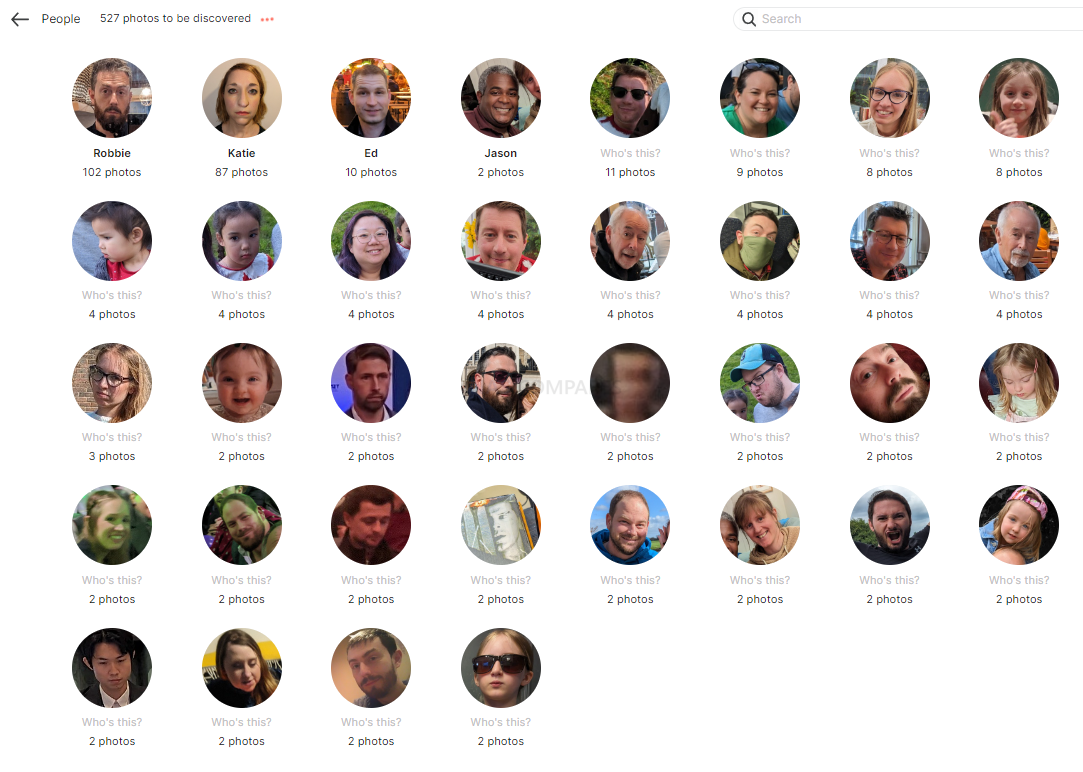
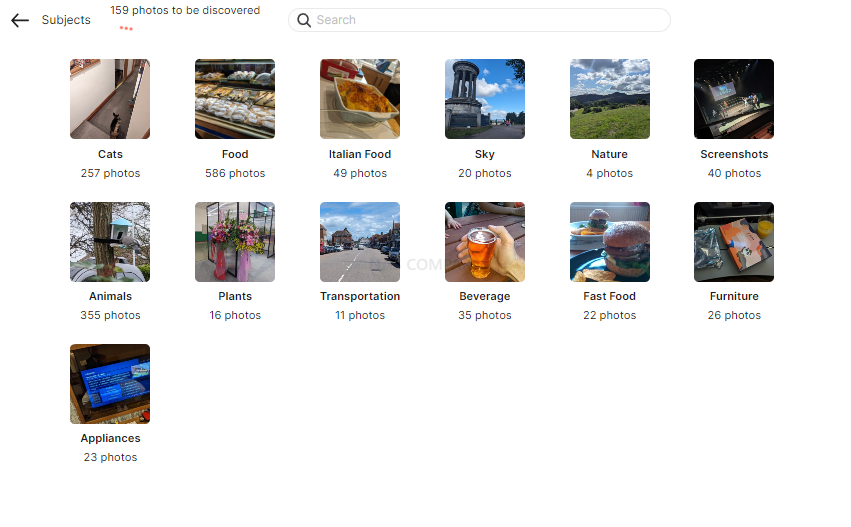
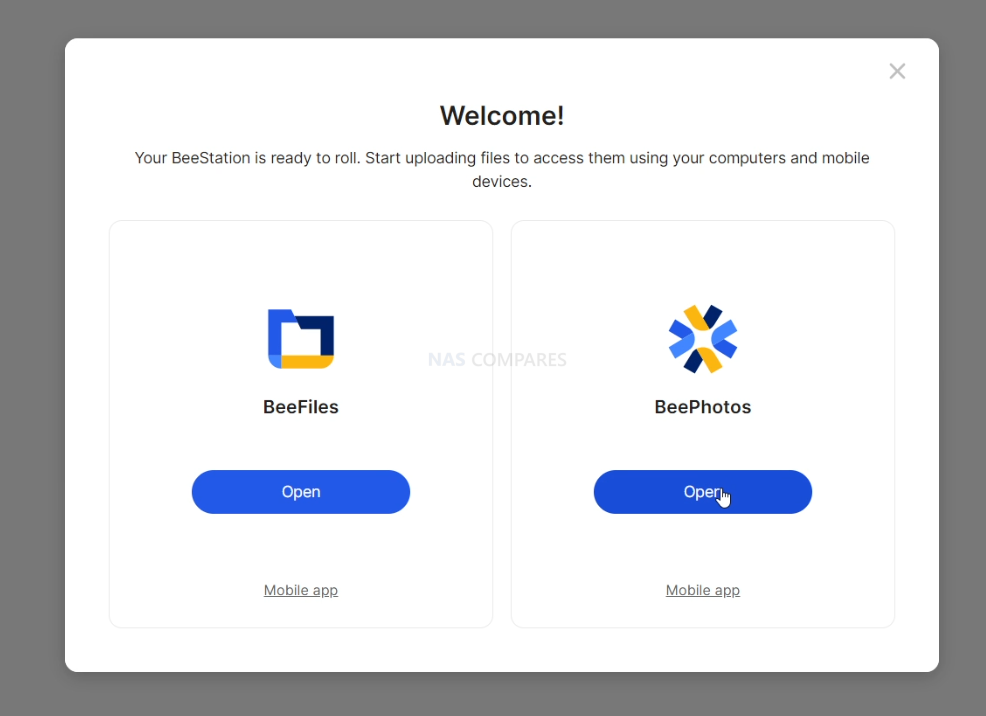
Instead of DSM, BeeStation Plus runs a simplified, task-oriented operating system that emphasizes automation and immediacy. Setup is handled via a QR code and cloud-linked sign-in process using your existing Apple or Google account. Within minutes, users can begin backing up photos, syncing cloud drives, or transferring personal data using intuitive applications like BeePhotos and BeeFiles. Notably, BeePhotos offers local AI processing for face recognition and subject categorization—no data is sent to the cloud, and everything runs on-device using the integrated GPU in the Intel Celeron chip. These features mimic what users expect from modern photo cloud services, but with full local ownership.

Where the DiskStation platform caters to power users—with capabilities like multi-tiered storage pools, user-group policies, virtualization, Docker containers, and dual-LAN failover—BeeStation Plus avoids this complexity altogether. While some may view it as limiting, Synology has correctly identified a growing segment of mainstream users who simply want a secure, reliable, and easy-to-manage storage hub for their files, memories, and work. For them, BeeStation Plus delivers a near turn-key solution that doesn’t demand IT knowledge or ongoing configuration, while still offering meaningful tools like Plex integration, two-way cloud sync, and internal snapshot recovery.

Synology Beestation Plus 8TB – Hardware Specifications

At the heart of the Synology BeeStation Plus is the Intel Celeron J4125, a quad-core x86 processor that, while not cutting-edge, is a substantial leap from the Realtek RTD1619B used in the original BeeStation. The J4125 brings integrated Intel UHD Graphics 600, enabling hardware video transcoding—critical for smooth 4K Plex streaming and responsive AI-powered photo recognition within BeePhotos. This CPU choice also allows Synology to run a broader range of services, including native Plex Media Server installation and enhanced indexing performance for large photo or document libraries. Paired with 4GB of DDR4 memory, the system is built to handle simultaneous user access and background tasks like backups and media processing without performance degradation—something the original model struggled with due to its lower RAM and ARM-based chip.

Category Specification
Model BeeStation Plus (BST170-8T)
Drive Bays 1 x 3.5″ SATA HDD (pre-installed, non-removable)
Included Storage 8TB Synology HAT3310 (7200 RPM)
Processor Intel Celeron J4125 (4-core, 2.0 GHz base, 2.7 GHz burst)
Architecture x86-64 (Intel Gemini Lake Refresh)
Memory 4GB DDR4 (non-upgradable)
Cooling 1 x System Fan (active cooling)
Ethernet 1 x 1GbE RJ-45
USB Ports 1 x USB-A 3.2 Gen 1
1 x USB-C 3.2 Gen 1
LED Indicators Power/Status (multi-color)
Buttons Power Button, Reset Button
Power Consumption 14.75W (Access), 2.83W (HDD Hibernation)
Noise Level ~21.0 dB(A) (typical operation)
Dimensions (H x W x D) 148.0 × 62.6 × 196.3 mm
Weight 1.2 kg (with drive installed)
Chassis Type Compact Desktop (Tool-free design)
Operating Temperature 0°C to 40°C
Warranty 3 Years

The BeeStation Plus ships with a pre-installed 8TB Synology HAT3310 hard drive, a 7200 RPM SATA HDD from Synology’s own verified drive lineup. While the device only supports a single internal bay, the included drive offers ample performance for most home and SOHO workloads, and the use of a higher-RPM disk ensures better responsiveness for large file transfers and indexing tasks. The storage is non-removable by design, as BeeStation products prioritize simplicity and stability over modularity. This also means there is no RAID support—underscoring that this device is not built for redundancy, but rather for centralized storage with optional external or cloud-based backup using BeeProtect or a secondary Synology NAS.

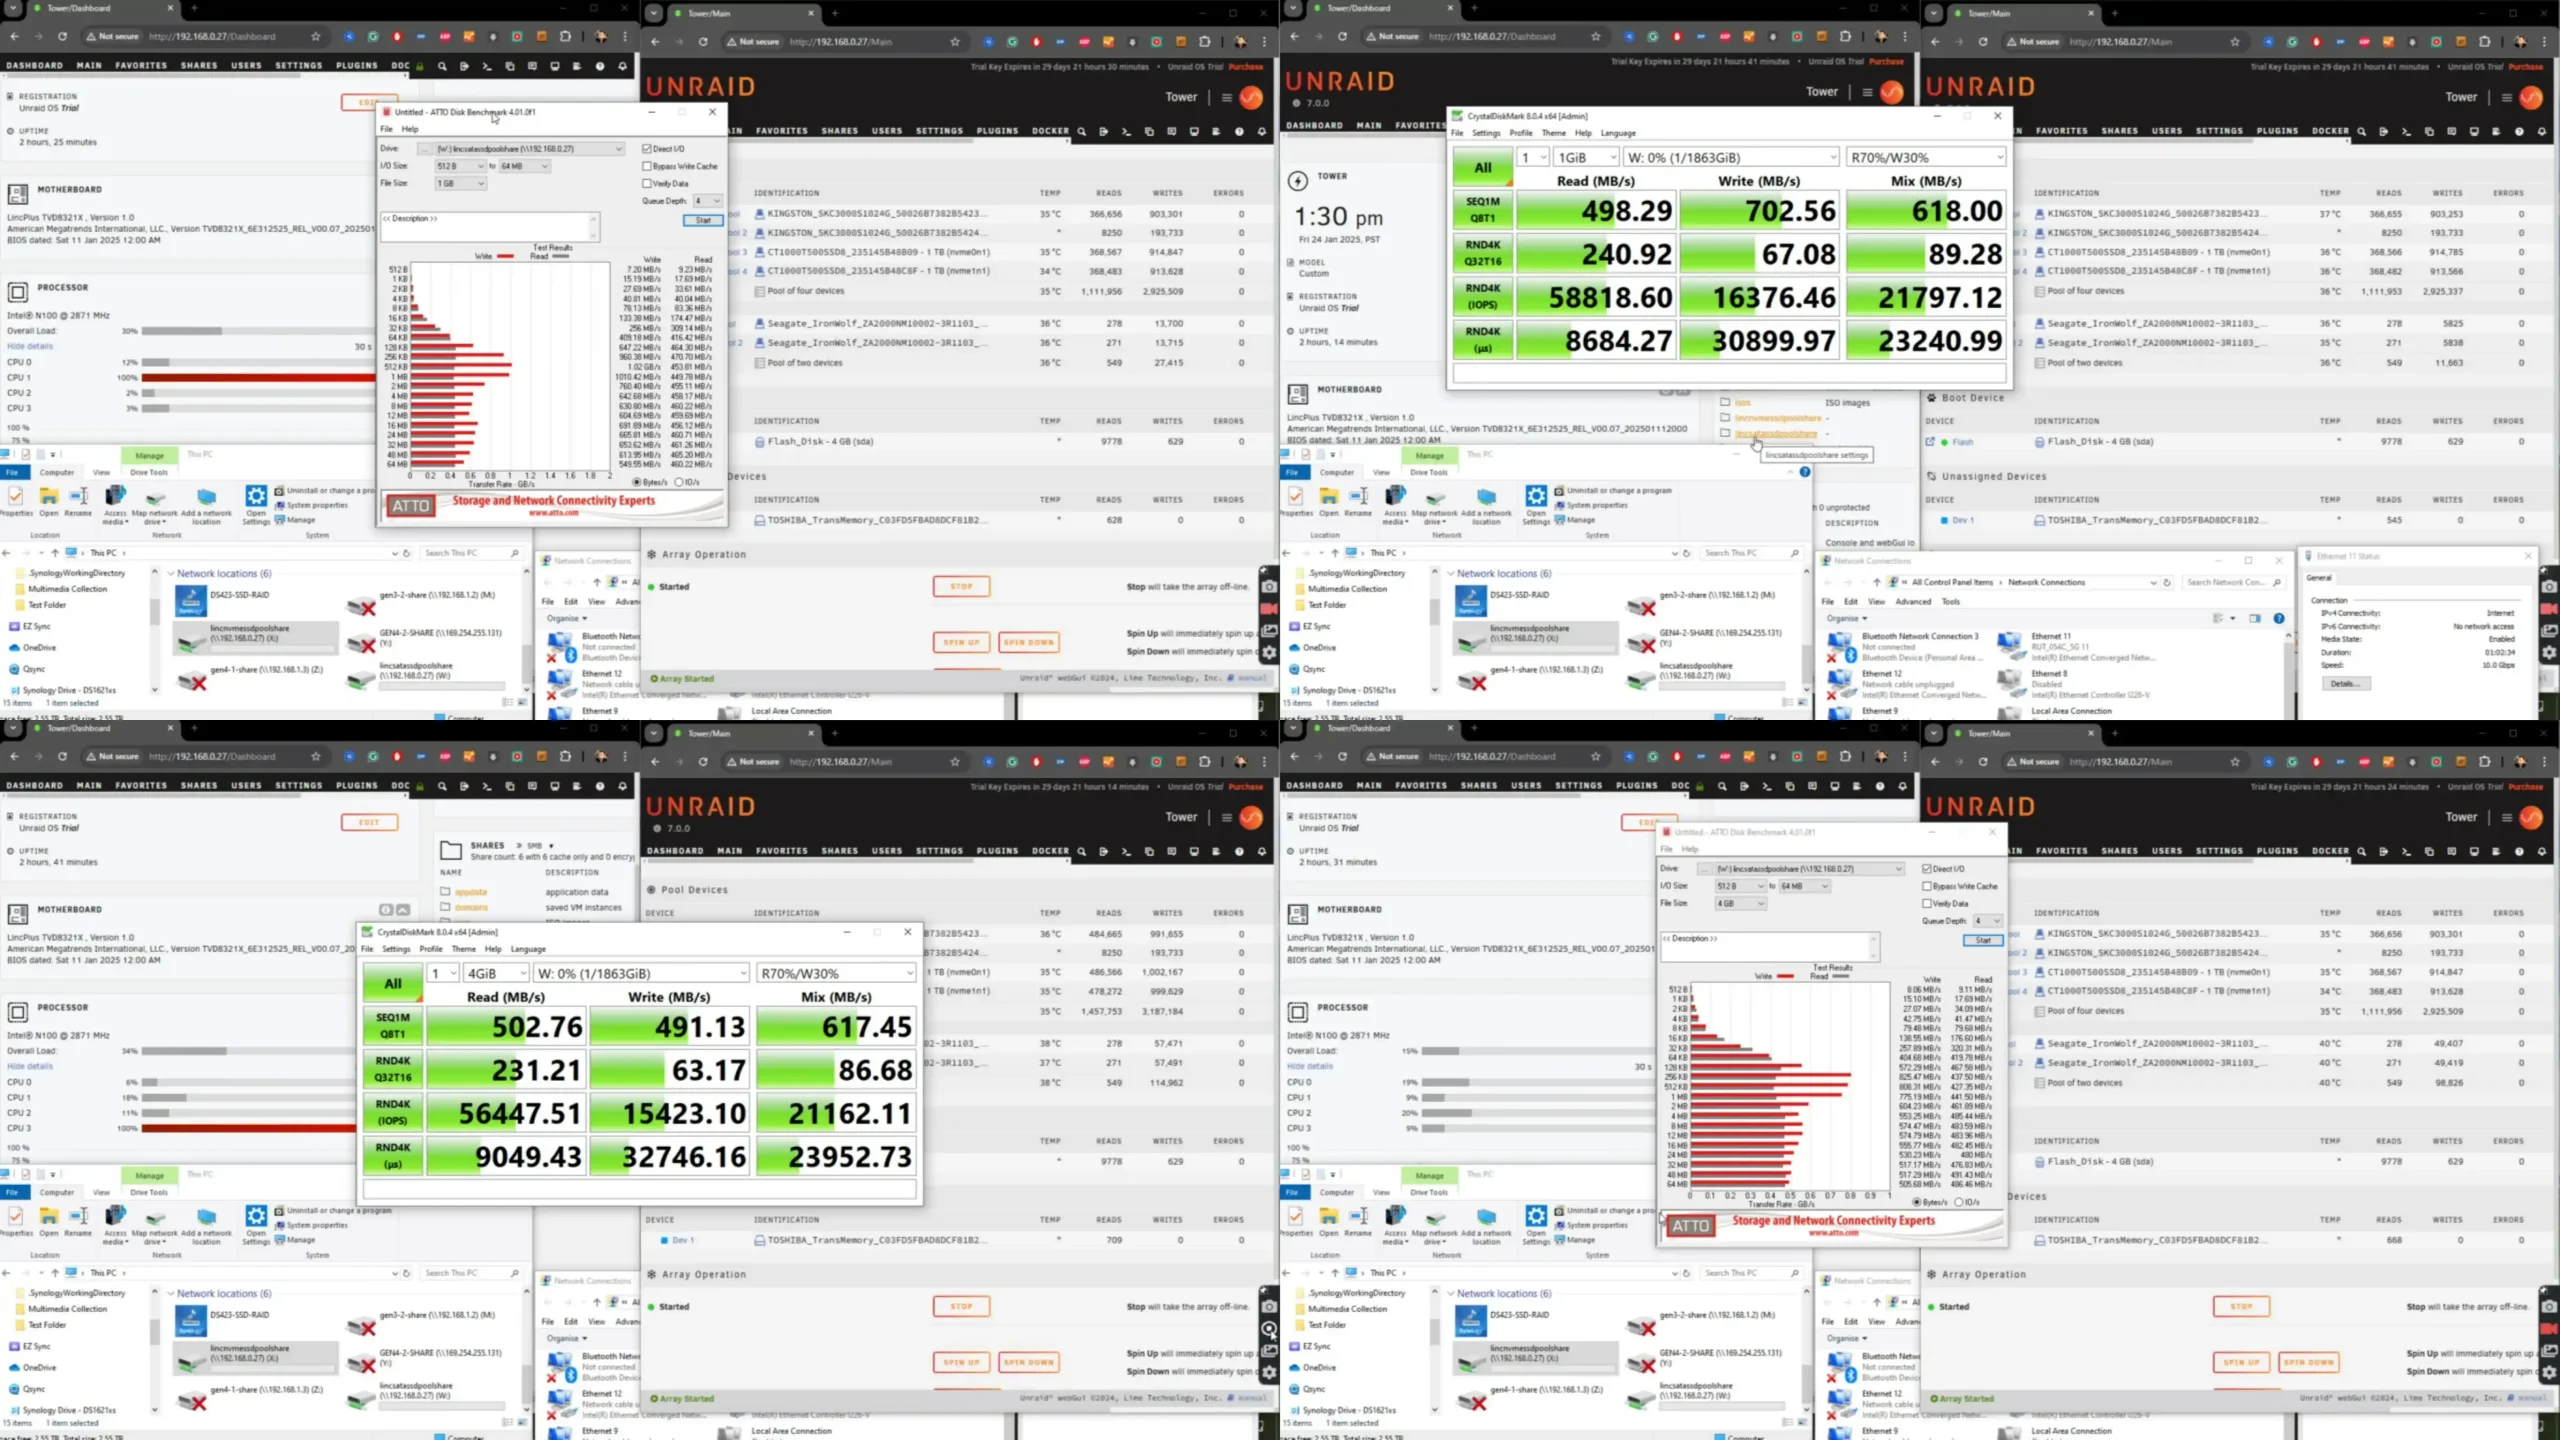
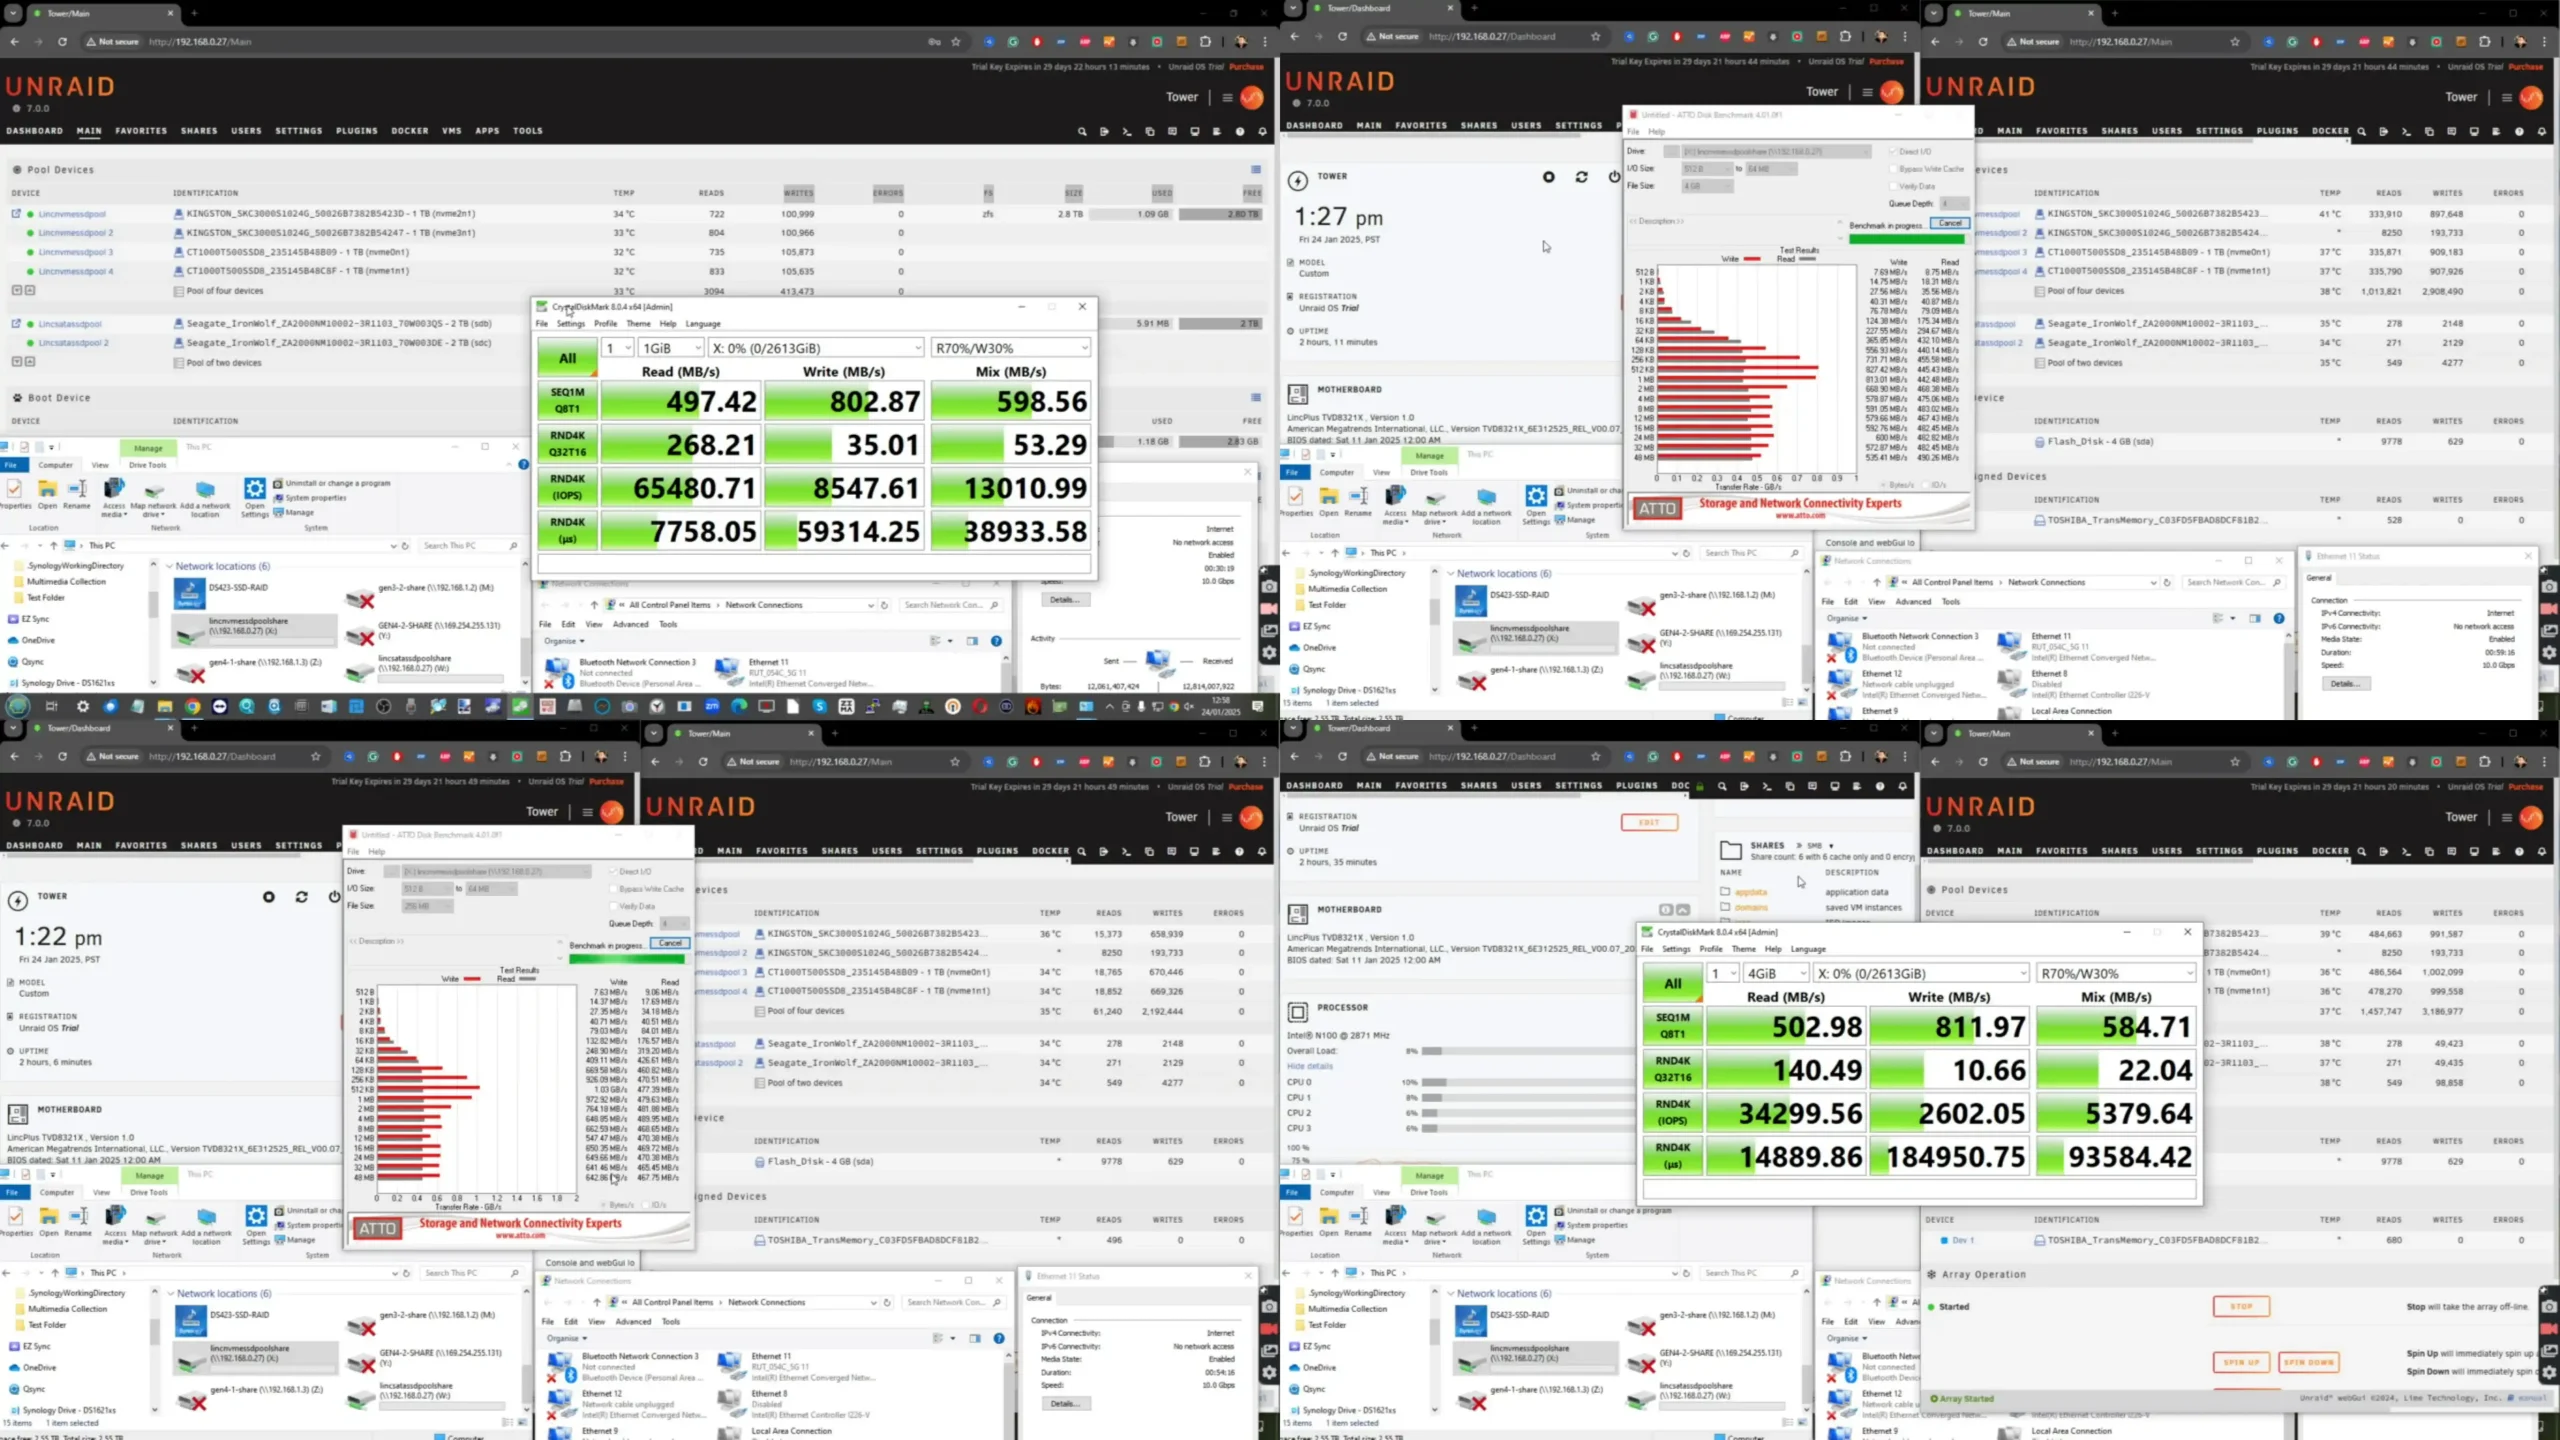
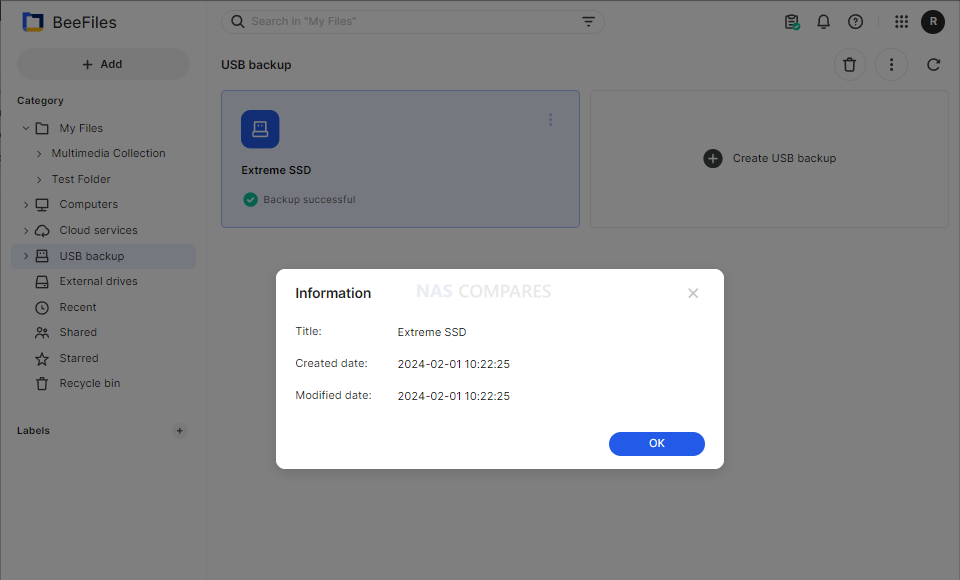
Connectivity is modest but practical. The system includes one 1GbE RJ-45 Ethernet port for network access and two USB 3.2 Gen 1 ports (one Type-A and one Type-C) for expanding storage or performing external backups. External drives can be browsed directly via BeeFiles or automatically backed up using the system’s USB Backup function. While some users may lament the lack of 2.5GbE or additional LAN ports, it’s worth noting that the target audience likely won’t saturate even gigabit speeds in everyday use. In real-world tests, BeeStation Plus can hit 150–180MB/s read speeds from its internal drive—enough to support simultaneous multimedia streaming and active file transfers across the network. The compact chassis also includes a cooling fan, a new addition over the passive original BeeStation, helping ensure thermal stability during extended workloads like Plex streaming or bulk photo indexing.

Synology Beestation Plus 8TB – BSM Software and Services

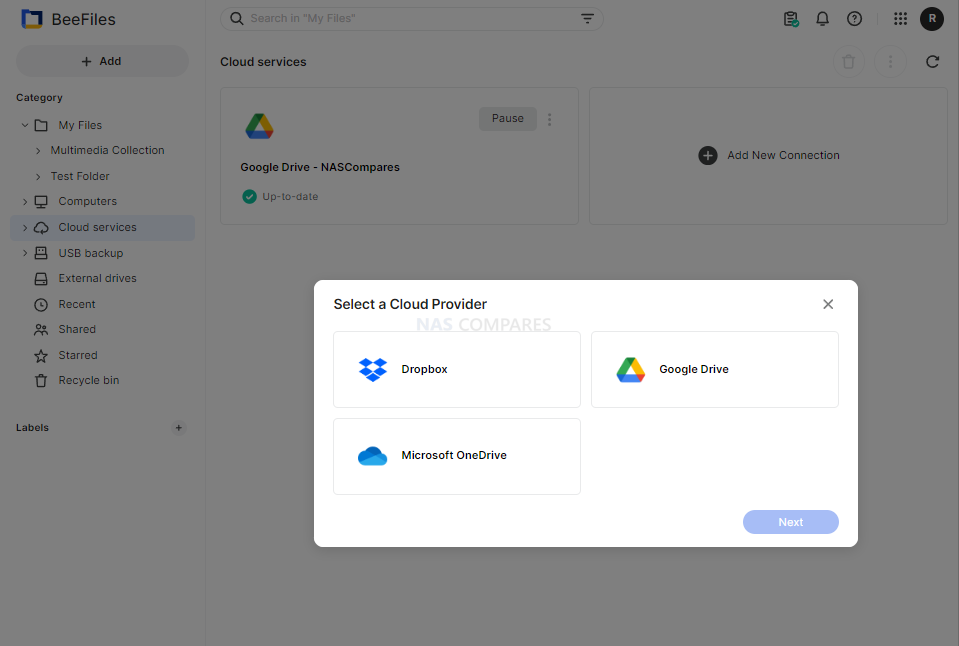
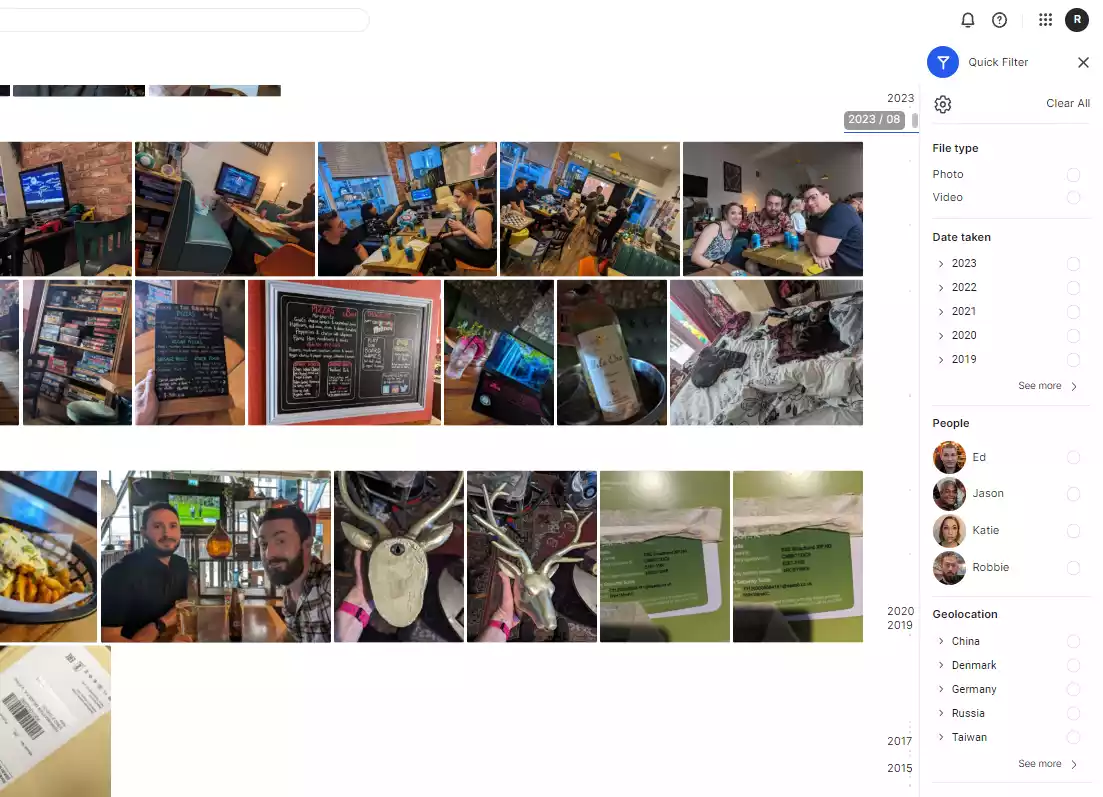
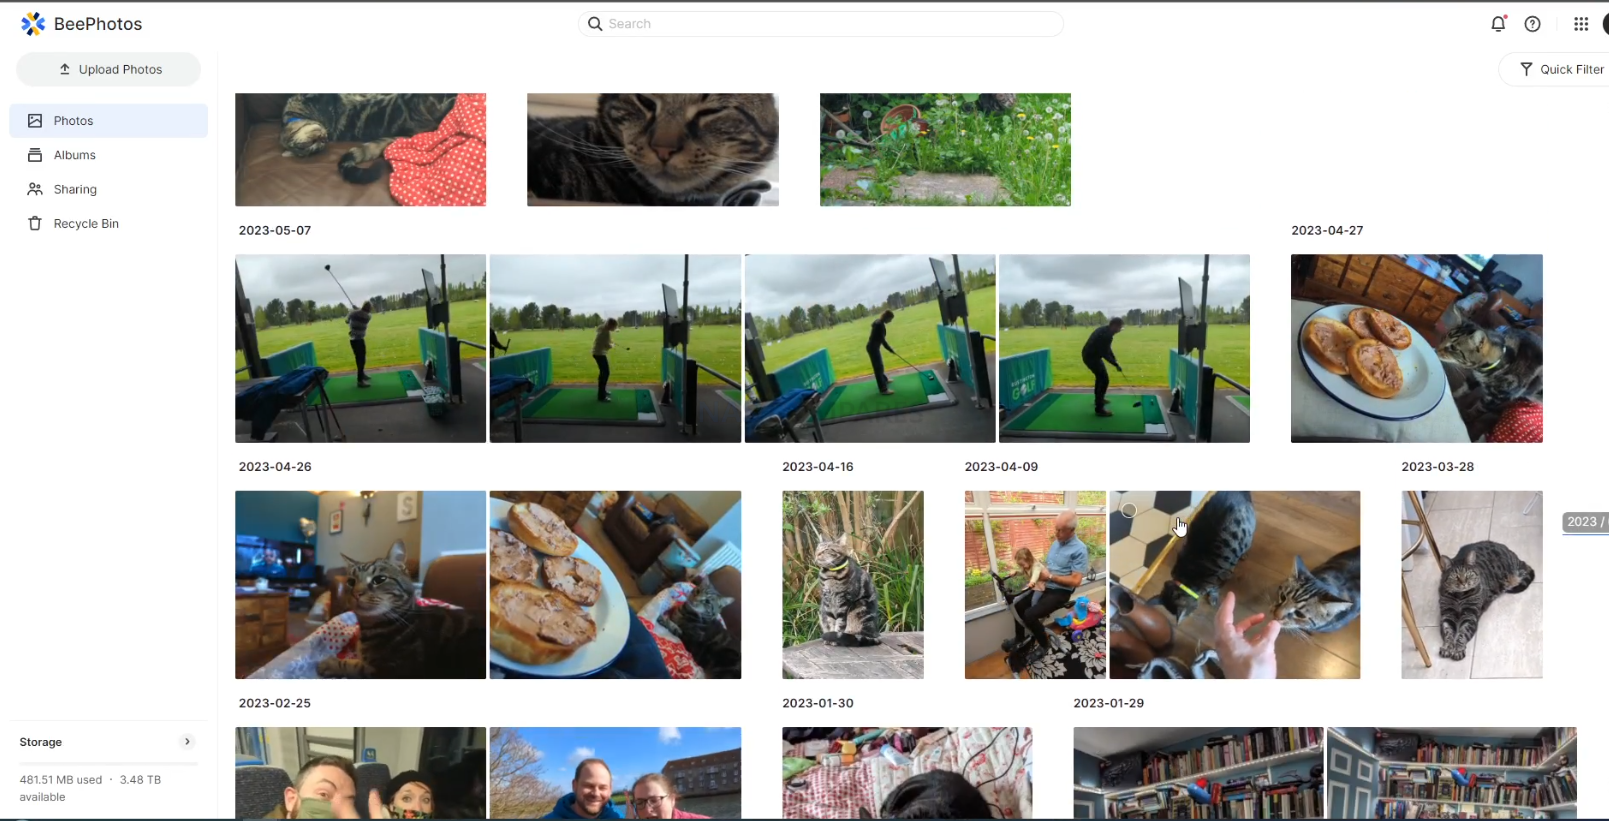
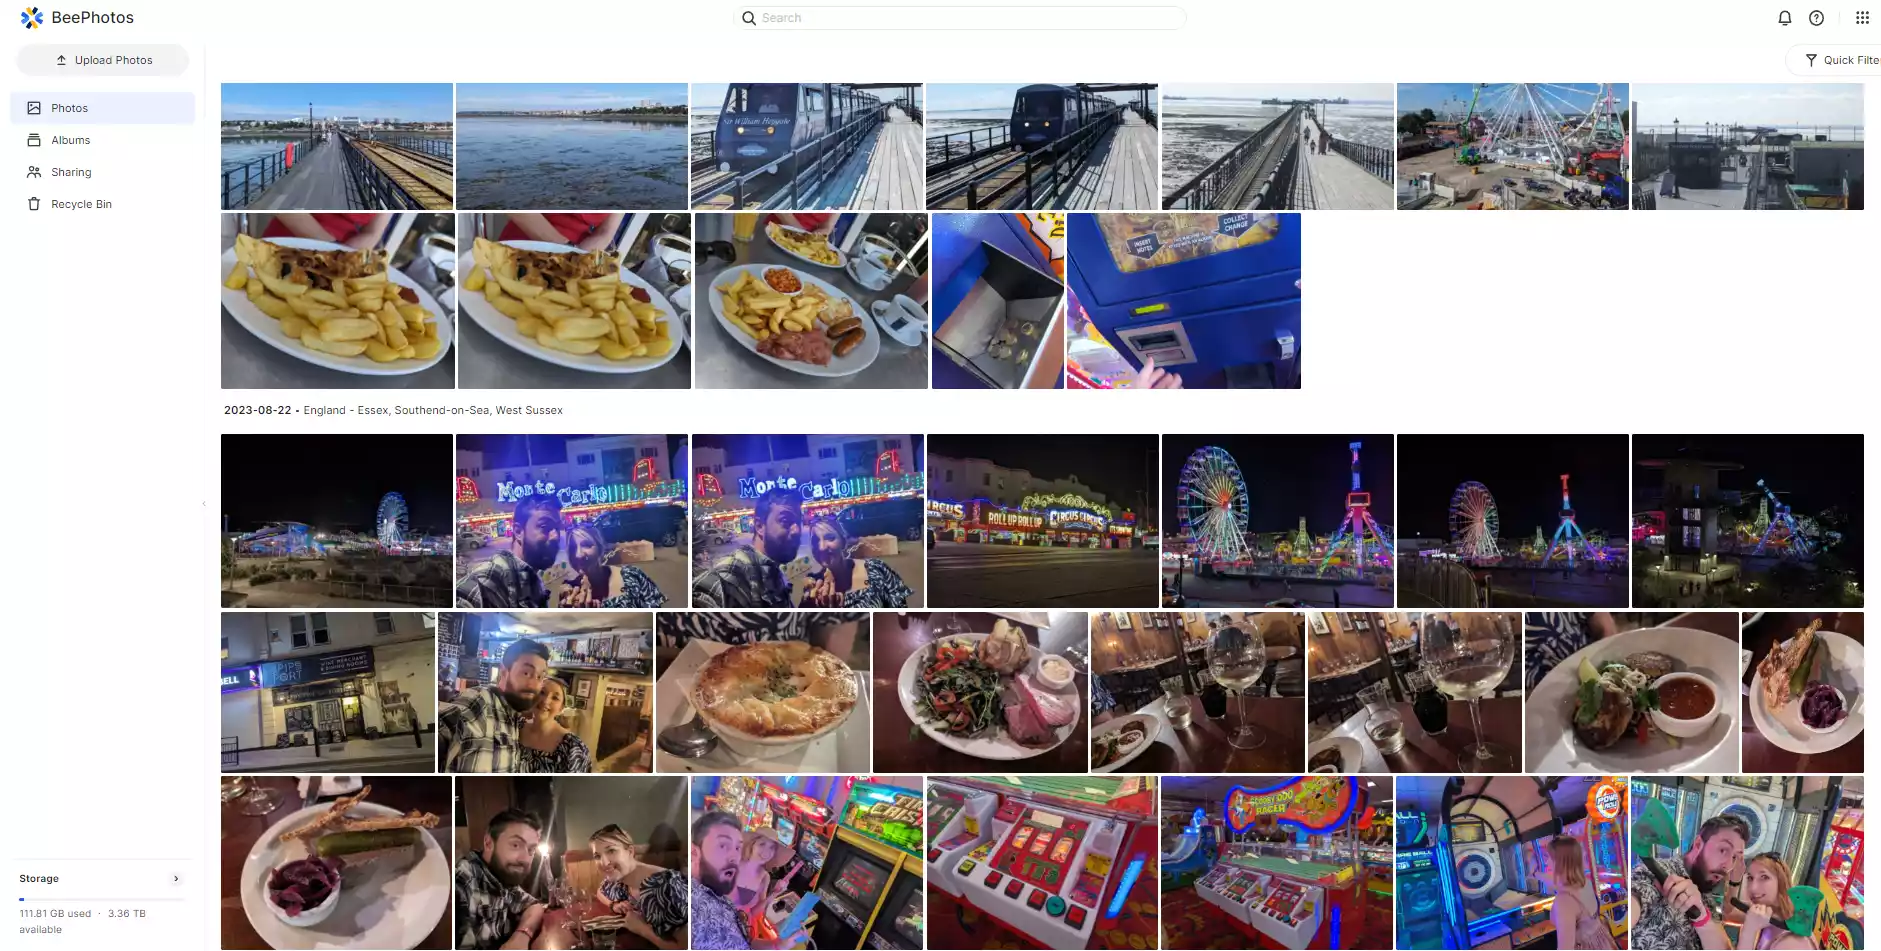
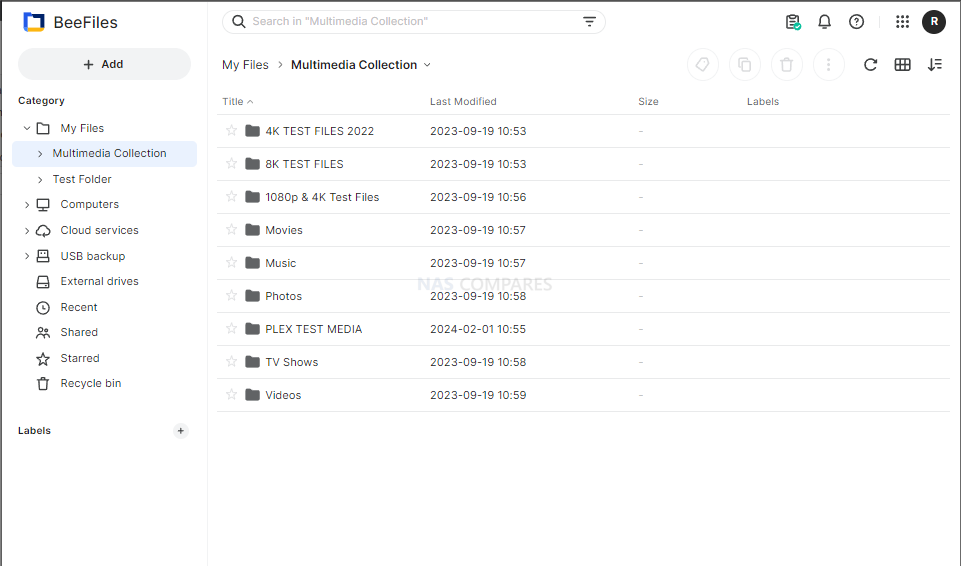
The BeeStation Plus is tightly integrated with Synology’s Bee-branded suite of applications, which form the foundation of its user experience. Chief among them is BeePhotos, a powerful photo management tool that automatically backs up images from mobile devices and organizes them using on-device AI for face, subject, and location recognition. Unlike cloud photo services, all indexing occurs locally, ensuring that sensitive images never leave the device. BeePhotos now supports iCloud Photo Backup, enabling direct migration of Apple photo libraries without requiring intermediate steps via your phone or computer. The web interface replicates the timeline-based design familiar to users of Google Photos or iCloud, complete with album views, smart filters, and Chromecast streaming. Meanwhile, BeeFiles acts as the central file manager, supporting version history, password-protected sharing, USB device browsing, and desktop sync via the BeeStation desktop client for Windows and macOS.

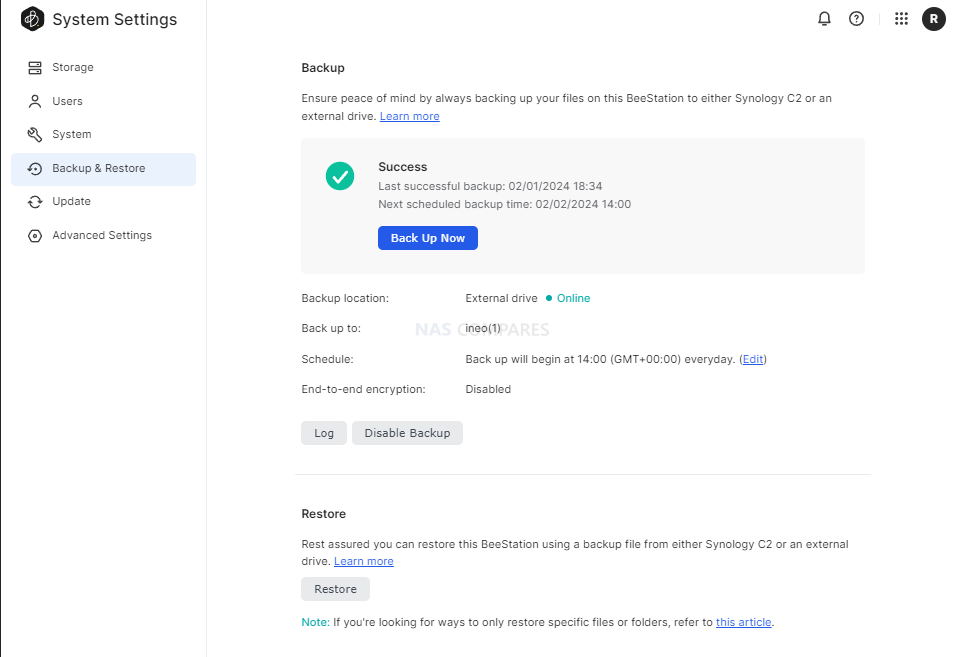
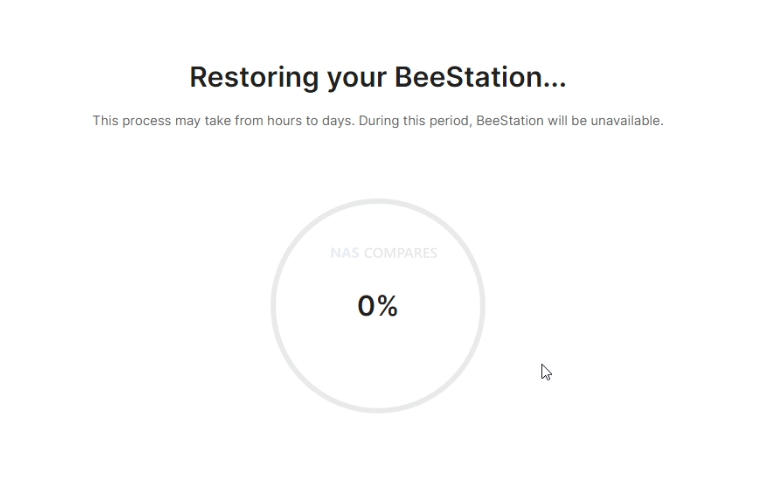
Beyond personal use, Synology has also included multi-user support for up to eight invited users, each with isolated private storage spaces and individual access rights. Users can connect to BeeStation from anywhere via the Synology cloud portal or mobile apps, allowing seamless collaboration and remote file access. BeeStation Plus also introduces native support for Plex Media Server, offering hardware-accelerated streaming of 4K content to TVs, tablets, or mobile devices. Integration is simplified through the BeeStation web portal, and libraries can be organized via BeeFiles’ dedicated “Plex Media Library” folder structure. Users can also take advantage of BeeProtect, a low-cost, unlimited-capacity cloud backup service that stores a full copy of the BeeStation’s data offsite—ideal for disaster recovery. Internal snapshot-based restore points add another layer of protection, allowing users to roll back the system in the event of accidental deletions or ransomware events, without relying on third-party services.

Synology Beestation Plus vs Synology DS224+/DS225+ and Beestation

The BeeStation Plus represents a clear technical upgrade over the original BeeStation, featuring a move from an ARM-based Realtek RTD1619B processor to a quad-core Intel Celeron J4125, along with a jump from 1GB to 4GB of DDR4 RAM. It also swaps the 5400 RPM 4TB HAT3300 drive for a faster 7200 RPM 8TB HAT3310, doubling the storage and improving responsiveness for tasks like AI photo indexing and multimedia playback. The inclusion of an active cooling fan further reinforces its suitability for continuous workloads, while added support for Plex Media Server and iCloud Photo Backup expands its capabilities far beyond the entry-level functionality of its predecessor. Both units share the same compact 1-bay form factor and cloud-integrated setup process, but the Plus model is built for heavier use, particularly in multi-user homes or for users archiving large libraries of photos and videos.

Feature / Model BeeStation Plus (BST170-8T)

BeeStation (BST150-4T)

Synology DS224+ / DS225+

Drive Bays 1 (pre-installed 8TB HAT3310) 1 (pre-installed 4TB HAT3300) 2 (user-installed, flexible capacity)
Processor Intel Celeron J4125 (x86, 4-core) Realtek RTD1619B (ARM, 6-core) Intel Celeron J4125 (x86, 4-core)
Memory 4GB DDR4 (non-upgradable) 1GB DDR4 (non-upgradable) 2GB DDR4 (upgradable to 6GB)
Ethernet Port(s) 1 x 1GbE 1 x 1GbE 2 x 1GbE / 1x 2.5GbE + 1GbE
USB Ports 1 x USB-A 3.2 Gen 1
1 x USB-C
1 x USB-A 3.2 Gen 1
1 x USB-C
2 x USB-A 3.2 Gen 1
Cooling Active (fan) Passive (no fan) Active (fan)
Software Platform BeeOS (BeePhotos, BeeFiles, etc.) BeeOS (limited app set) DSM 7.2 (full Synology ecosystem)
Plex Media Server Supported (with HW transcoding) Not supported Supported (with HW transcoding)
Cloud Backup (BeeProtect) 3-month trial included
$119.99/yr
3-month trial
$59.99/yr
C2 Backup / Hyper Backup (tiered pricing)
Multi-user Support Yes (1 owner + 8 users) Yes (1 owner + 8 users) Yes (via DSM User Manager)
Snapshots / Restore Points Yes (internal) Yes (basic) Yes (full Btrfs snapshot support)
Target User Mainstream users, families Beginners, casual users Power users, tech-savvy, SMBs
Price (SRP) $369.95 (incl. 8TB HDD) $199.95 (incl. 4TB HDD) $249-299 (No Storage)
Compared to the more advanced DS224+, the BeeStation Plus trades flexibility for simplicity. While both use the same Intel J4125 processor, the DS224+ features dual drive bays, 2GB expandable RAM, dual LAN ports, and full access to DSM 7.2, allowing users to configure RAID arrays, run Docker containers, and install Synology’s broader suite of productivity and surveillance apps. However, this comes with added complexity and a higher price tag—typically over $498 USD with equivalent storage. BeeStation Plus instead offers a fixed hardware environment, a tailored software suite, and a frictionless onboarding process that requires no knowledge of storage pools or networking. It’s aimed at users who want a cloud-like experience with full data ownership, whereas the DS224+ is intended for tech-savvy individuals or small businesses that require customizability, scalability, and integration into broader workflows.

Synology Beestation Plus 8TB – Pricing and Release

The Synology BeeStation Plus (BST170-8T) launched globally in May 2025 with a suggested retail price of $369.95 USD (excluding VAT), positioning it as a compelling middle-ground between basic cloud drives and full NAS systems. This price includes the pre-installed 8TB Synology HAT3310 hard drive, three months of complimentary BeeProtect cloud backup, and full access to the BeeFiles and BeePhotos applications out of the box. While significantly more expensive than the original BeeStation’s $199.95 launch price, the BeeStation Plus delivers a considerable leap in performance, storage, and application support. Synology is clearly aiming to attract users looking to escape rising cloud subscription fees, with the device’s total cost of ownership undercutting comparable iCloud or Google One plans over just a few years. With increasing emphasis on private cloud solutions that are easy to deploy, the BeeStation Plus marks Synology’s most consumer-friendly push yet into the mainstream storage market.

Check Amazon in Your Region for the Synology Beestation Plus 8TB

Check B&H for the Synology Beestation Plus 8TB


📧 SUBSCRIBE TO OUR NEWSLETTER 🔔
[contact-form-7]
🔒 Join Inner Circle

Get an alert every time something gets added to this specific article!


Want to follow specific category? 📧 Subscribe

This description contains links to Amazon. These links will take you to some of the products mentioned in today's content. As an Amazon Associate, I earn from qualifying purchases. Visit the NASCompares Deal Finder to find the best place to buy this device in your region, based on Service, Support and Reputation - Just Search for your NAS Drive in the Box Below

Need Advice on Data Storage from an Expert?

Finally, for free advice about your setup, just leave a message in the comments below here at NASCompares.com and we will get back to you. Need Help? Where possible (and where appropriate) please provide as much information about your requirements, as then I can arrange the best answer and solution to your needs. Do not worry about your e-mail address being required, it will NOT be used in a mailing list and will NOT be used in any way other than to respond to your enquiry. [contact-form-7] TRY CHAT Terms and Conditions
If you like this service, please consider supporting us. We use affiliate links on the blog allowing NAScompares information and advice service to be free of charge to you.Anything you purchase on the day you click on our links will generate a small commission which isused to run the website. Here is a link for Amazon and B&H.You can also get me a ☕ Ko-fi or old school Paypal. Thanks!To find out more about how to support this advice service check HEREIf you need to fix or configure a NAS, check Fiver Have you thought about helping others with your knowledge? Find Instructions Here  
 
Or support us by using our affiliate links on Amazon UK and Amazon US
    
 
Alternatively, why not ask me on the ASK NASCompares forum, by clicking the button below. This is a community hub that serves as a place that I can answer your question, chew the fat, share new release information and even get corrections posted. I will always get around to answering ALL queries, but as a one-man operation, I cannot promise speed! So by sharing your query in the ASK NASCompares section below, you can get a better range of solutions and suggestions, alongside my own.

☕ WE LOVE COFFEE ☕

 
Where to Buy a Product
amzamexmaestrovisamaster 24Hfree delreturn VISIT RETAILER ➤ 
amzamexmaestrovisamaster 24Hfree delreturn VISIT RETAILER ➤

If you like this service, please consider supporting us.
We use affiliate links on the blog allowing NAScompares information and advice service to be free of charge to you. Anything you purchase on the day you click on our links will generate a small commission which is used to run the website. Here is a link for Amazon and B&H. You can also get me a ☕ Ko-fi or old school Paypal. Thanks! To find out more about how to support this advice service check HERE   If you need to fix or configure a NAS, check Fiver   Have you thought about helping others with your knowledge? Find Instructions Here  

☕ WE LOVE COFFEE ☕

Or support us by using our affiliate links on Amazon UK and Amazon US
     

À partir d’avant-hierFlux principal

Synology vs UGREEN NAS (in 2025)

Par : Rob Andrews
25 avril 2025 à 17:00

Synology vs UGREEN NAS – Which One Deserves Your Money and Your Data?

In the evolving world of network-attached storage (NAS), users in 2025 are faced with a broader range of choices than ever before. Among the most discussed options in both professional and enthusiast communities are Synology and UGREEN. Synology has been a mainstay in the industry for over two decades, known for its reliable software, long-term support, and deeply integrated ecosystem. UGREEN, by contrast, is a relative newcomer to the NAS market in the West, but has quickly established itself as a serious contender by offering competitive hardware and pricing. Originally known for consumer tech peripherals, UGREEN has leveraged its manufacturing experience and market agility to carve out space in an area traditionally dominated by established NAS brands.

This comparison aims to provide a clear, unbiased overview of both brands, structured across several key categories: hardware capabilities, storage flexibility, software ecosystem, security infrastructure, pricing strategy, and overall value proposition. While some buyers may lean toward a brand due to legacy, others are driven by performance-per-dollar, or openness to customization. It’s important to understand that neither brand is objectively “better” in all respects. Instead, each appeals to different user priorities. What follows is a breakdown of how Synology and UGREEN compare across the board, giving potential buyers the tools they need to make a decision that aligns with their use case, technical comfort level, and long-term plans.


Synology vs UGREEN NAS Hardware Compared 

Synology’s hardware lineup spans everything from small 1-bay entry-level NAS units to rackmount enterprise-class systems with dual controllers. With approximately 15–25 models available at any given time, the variety on offer is extensive. This allows users to choose systems that align closely with their needs—whether that’s for simple backups, media streaming, virtualization, or business-critical data management. However, despite the breadth of its portfolio, Synology’s consumer and SMB offerings are frequently criticized for underpowered processors and limited upgrade paths. Many of their mid-tier models still rely on AMD Embedded or lower-end Intel chips, and memory configurations are often modest compared to similarly priced alternatives. PCIe expansion, 10GbE networking, and true Flash storage support are typically reserved for only the highest-tier devices.

UGREEN, on the other hand, has entered the NAS space with a clear emphasis on hardware strength. Their NASync series—although more limited in model variety—delivers high-performance components out of the box. Even in models priced around $1,100 to $1,200 USD, UGREEN includes features like Intel i5 processors, 16GB of DDR5 RAM, dual 10GbE ports, USB4, SD card slots, and Thunderbolt connectivity. Most of specifications are generally only found in Synology’s XS or SA series, which can cost double or triple the price. In terms of build quality, UGREEN’s enclosures also lean toward a more robust, enterprise-like design with better thermal management and port selection. While they may not yet offer the same portfolio depth or high-end rackmount solutions, the raw hardware value they deliver—especially for power users and media professionals—is difficult to overlook.


Synology DSM vs UGREEN UGOS NAS Software & Services

Storage features and flexibility represent one of the most contested areas between the two brands. Synology has developed a very feature-rich storage management system over the years, offering support for RAID configurations, Btrfs and EXT4 file systems, fast RAID rebuilds, advanced iSCSI LUN management, and deep integration with backup and synchronization tools.

File Services SMB/NFS/AFP/WebDAV ✅ Supported ✅ Supported (AFP not confirmed) Core protocols available
iSCSI Support ✅ Native iSCSI manager ❌ Not currently supported Important for VM/block-level storage
RAID & Storage RAID 0/1/5/6/10, SHR ✅ SHR and traditional RAID ✅ Traditional RAID 0/1/5/6/10 No SHR support in UGREEN
Snapshots ✅ Btrfs-based with GUI versioning ✅ Btrfs-based snapshots Comparable snapshot system
Deduplication ✅ Btrfs-based ❌ Planned, not available yet UGREEN roadmap feature
Encryption ✅ Volume/folder/drive-level + WORM ❌ No integrated encryption Major security difference
SSD Caching ✅ GUI-managed ✅ CLI-managed only (UI planned) Limited interface currently

Their platform also supports drive pooling, storage tiering (in some models), and robust snapshot capabilities. Expansion options are a strong point too, with a range of proprietary expansion units that allow users to scale storage well beyond the original NAS chassis. These are bolstered by robust utilities in DSM that help manage redundancy, performance, and data recovery, all while maintaining consistency across the ecosystem.

However, Synology’s 2025 policy shift around hard drive compatibility introduces a significant caveat. Newer devices now strictly require Synology-branded drives for both HDD and SSD roles, including caching and storage pools. This effectively locks users into the Synology ecosystem and limits the ability to use commonly available alternatives from WD, Seagate, Samsung, and others. Availability issues in some regions further complicate this approach.

UGREEN, conversely, supports a far more open system—allowing users to populate their NAS devices with nearly any 2.5″, 3.5″, or NVMe drive on the market. With support for drives up to 24TB and Gen 4 NVMe speeds reaching 6,000–7,000 MB/s, UGREEN offers unmatched flexibility in storage media. However, their systems currently lack support for iSCSI and official expansion units, which could be a limitation for more advanced storage scenarios.


Software Comparison

Synology’s DiskStation Manager (DSM) is widely regarded as one of the most refined and mature NAS operating systems in the market. Backed by over two decades of development, DSM offers a wide range of first-party apps covering backup, multimedia, productivity, collaboration, and virtualization.

Tools like Synology Drive, Active Backup for Business, and Synology Photos provide enterprise-grade capabilities in a consumer-friendly package. The platform also integrates with cloud services like Office 365 and Google Workspace, and includes support for SANs, VMs, containers, and cloud sync. Importantly, most of these apps are license-free, representing significant value over time. The application center in DSM is extensive, and Synology’s desktop and mobile client tools are similarly well-developed.

Category Feature Synology UGREEN NASync (DXP Series) Notes
Core OS OS DSM (DiskStation Manager) UGOS Synology has a mature, polished UI
Mobile Apps ✅ Multiple DS apps across iOS/Android ✅ One core management app + FireTV/Google Home apps Broader app suite on Synology
Virtualization & Containers Virtual Machines ✅ Virtual Machine Manager ✅ Dedicated VM app Both platforms now offer VMs
Docker Support ✅ GUI + Docker CLI ✅ Portainer + Docker CLI Equal container support
GPU Passthrough ❌ Not available ❌ Not supported Neither platform offers this
AI & Surveillance AI Services ✅ Facial/people detection on DVA NAS ✅ Advanced AI model recognition (Photo AI) UGREEN offers more AI model types
Surveillance Suite ✅ Surveillance Station (native) ❌ No native system (use Frigate, MotionEye via Docker) Docker-based alternative
Media & Streaming Plex Media Server ✅ Native app support ✅ Docker-only installation Equal in function
Jellyfin ❌ Docker/homebrew only ✅ Native app available More flexible on UGREEN
Video App ❌ Video Station is EOL ✅ Native video player app UGREEN actively supports this
Backup & Sync Backup Solutions ✅ Hyper Backup, Active Backup Suite ✅ Rsync, SMB, Cloud Backup, USB GUI edge to Synology
Cloud Sync ✅ Native Cloud Sync app ❌ Planned, rclone CLI workaround only Still in development
Remote Access DDNS + Tunnel ✅ QuickConnect ✅ UGREEN-hosted tunnel system Functional equivalents
App Ecosystem App Center ✅ Extensive with many native packages ✅ Real app center, but much smaller Synology has a broader catalog
Package Manager ✅ synopkg ✅ APT + Docker

UGREEN’s UGOS, by contrast, is still in its early stages—at least in the Western market—but has made notable progress. Built on a Linux-based open-source foundation, UGOS offers a modern UI and essential features like RAID management, Docker support, virtualization, remote access, and media streaming. The system is responsive and user-friendly, with most core NAS functions well-covered.

UGREEN’s App Center is less populated but growing, and the brand has made particular strides in AI-driven features—particularly in its photo application, which allows customizable object and face recognition with trainable AI modules. While still lacking some advanced enterprise features like Synology’s iSCSI or SAN support, UGOS is impressive for a brand with only a few years of development. Notably, UGREEN also supports the installation of third-party operating systems like TrueNAS or OpenMediaVault, appealing to users who want full control over their NAS.


Synology vs UGREEN NAS – Security 

When it comes to security, Synology’s long-standing reputation and infrastructure give it a distinct advantage. Over the years, the company has invested heavily in platform hardening, threat detection, and vulnerability response. The built-in Security Advisor not only scans for malware and viruses but also detects weak passwords, outdated software, open ports, and potentially exploitable system configurations. Synology participates in vulnerability disclosure programs, works with penetration testers, and maintains a public-facing security advisory database. They’ve even implemented a bounty system to reward ethical hackers for reporting vulnerabilities. These layers of proactive defense have earned Synology its reputation as one of the most secure NAS platforms in the world.

UGREEN has not experienced any public security incidents as of 2025, but its shorter time in the market means less historical data on its resilience. Their systems now include two-factor authentication and basic malware scanning, but currently lack the more comprehensive vulnerability detection tools that Synology provides. The security advisor in UGOS focuses primarily on active threats like viruses rather than system-level hardening.

That said, UGREEN has been responsive to user feedback and appears committed to improving its security infrastructure. For experienced users who follow best practices and secure their networks effectively, this may not be a deal-breaker. However, for enterprise users or those deploying systems in high-risk environments, Synology’s mature security ecosystem provides more peace of mind.

Remote Access DDNS + Tunnel ✅ QuickConnect ✅ UGREEN-hosted tunnel system Functional equivalents
Security & Access Security Advisor ✅ Ransomware, audit, malware, system hardening ❌ Basic malware scanning only Synology offers deeper protections
VPN Server ✅ Native UI for OpenVPN, L2TP, PPTP ✅ Docker-based VPNs (WireGuard, OpenVPN) Manual setup on UGREEN
SSL Certificates ✅ Let’s Encrypt + GUI ✅ Let’s Encrypt via Web UI Parity here
2FA Support ✅ App-based 2FA ✅ TOTP/Web 2FA Both support 2FA login

Synology vs UGREEN NAS – Pricing and Value 

Pricing is one of the most decisive factors favoring UGREEN in 2025. The brand offers high-performance hardware at price points that undercut Synology by a substantial margin. An 8-bay UGREEN NAS with an Intel i5 CPU, 16GB DDR5 RAM, dual 10GbE, and Thunderbolt can be purchased for roughly $1,200-1300 (store depending). A Synology unit with similar specs would require jumping to the DS1823xs+ or even the SA series—devices that retail between $1,800 and $3,000 depending on configuration and region. This gap in price-performance makes UGREEN especially appealing to users who want modern hardware for tasks like 4K video editing, large-scale backups, or AI analytics but can’t justify enterprise-level spending.

Synology’s pricing strategy is rooted more in its software and long-term value. While the upfront cost may be higher, the investment is offset by an integrated ecosystem, professional-grade applications, and superior long-term support. For some buyers, particularly businesses and advanced home users who need software stability and vendor accountability, the price premium is justified. However, for price-sensitive consumers, hobbyists, or those comfortable managing their own systems, UGREEN’s value proposition is hard to beat. It’s also worth noting that UGREEN’s openness to third-party operating systems can further extend the device’s utility without adding cost, whereas Synology systems are heavily locked into their proprietary software environment. Here is a comparison of the Synology DS1823xs+ and the UGREEN DXP8800 PLUS NAS. Around $449 difference, but also the general level of the hardware inside and externally is technically higher on the UGREEN system. That said, the Synology system software does a huge amount with it’s software, keeping things super efficient. So, now let’s discuss storage and the respective software that both of these platforms offer to house and protect your data.


Synology vs UGREEN NAS – Verdict & Conclusion

Choosing between Synology and UGREEN in 2025 ultimately comes down to what matters most to the user. Synology is the more mature and refined platform, with a rock-solid software ecosystem, strong security credentials, and long-standing industry credibility. It is ideal for users who want a fully integrated solution with minimal tinkering, extensive app support, and professional-grade backup, synchronization, and collaboration tools. However, the brand’s increasing restrictions on drive compatibility, slower hardware updates, and higher prices may discourage users seeking flexibility or better raw performance.

UGREEN, while newer and still building out its software platform, delivers excellent hardware value and impressive flexibility for the price. It supports a wide range of third-party drives, offers strong virtualization and AI capabilities, and even allows OS replacement—making it highly appealing to power users and technologists. While it may not yet match Synology in software maturity or enterprise security, it is evolving rapidly and clearly resonates with a growing segment of the NAS market. For buyers focused on hardware, performance, and freedom of customization, UGREEN may be the better choice today. For those seeking long-term support, stable software, and enterprise-grade functionality, Synology still sets the benchmark across the rest of the NAS industry in terms of providing an all covering solution, though there is no denying that buyers are getting a little more cost aware. Synology clearly has it’s eyes on bigger prizes right now, and perhaps this is a growing gap in the market that UGREEN is eying up – knife and fork in hand!

NAS Solutions

NAS Solutions

+ Better Software (In almost every respect!)

+ Much Better Global Support Presence

+ More More business desirable

+ Larger Range of solutions

– Compatibility restrictions on HDD and Upgrades More and more

– Underwhelming hardware (comparatively)

+ Better Hardware for Price

+ Flexibility to Install 3rd Party OS’

+ Excellent Mobile Application

+ Wide accessory compatibility

– Software still has beta elements

– The company has a much shorter NAS Market Experience

Check Amazon By Clicking Below:

Check Amazon By Clicking Below:

📧 SUBSCRIBE TO OUR NEWSLETTER 🔔
[contact-form-7]
🔒 Join Inner Circle

Get an alert every time something gets added to this specific article!


Want to follow specific category? 📧 Subscribe

This description contains links to Amazon. These links will take you to some of the products mentioned in today's content. As an Amazon Associate, I earn from qualifying purchases. Visit the NASCompares Deal Finder to find the best place to buy this device in your region, based on Service, Support and Reputation - Just Search for your NAS Drive in the Box Below

Need Advice on Data Storage from an Expert?

Finally, for free advice about your setup, just leave a message in the comments below here at NASCompares.com and we will get back to you. Need Help? Where possible (and where appropriate) please provide as much information about your requirements, as then I can arrange the best answer and solution to your needs. Do not worry about your e-mail address being required, it will NOT be used in a mailing list and will NOT be used in any way other than to respond to your enquiry. [contact-form-7] TRY CHAT Terms and Conditions
If you like this service, please consider supporting us. We use affiliate links on the blog allowing NAScompares information and advice service to be free of charge to you.Anything you purchase on the day you click on our links will generate a small commission which isused to run the website. Here is a link for Amazon and B&H.You can also get me a ☕ Ko-fi or old school Paypal. Thanks!To find out more about how to support this advice service check HEREIf you need to fix or configure a NAS, check Fiver Have you thought about helping others with your knowledge? Find Instructions Here  
 
Or support us by using our affiliate links on Amazon UK and Amazon US
    
 
Alternatively, why not ask me on the ASK NASCompares forum, by clicking the button below. This is a community hub that serves as a place that I can answer your question, chew the fat, share new release information and even get corrections posted. I will always get around to answering ALL queries, but as a one-man operation, I cannot promise speed! So by sharing your query in the ASK NASCompares section below, you can get a better range of solutions and suggestions, alongside my own.

☕ WE LOVE COFFEE ☕


PLEX Price Increases, The Rise of Jellyfin and Now What?

Par : Rob Andrews
18 avril 2025 à 18:00

Is This The Beginning of the End of PLEX – Is It Jellyfin Time?

After more than a decade of keeping its Lifetime Plex Pass at $119.99, Plex has officially announced a significant price increase—raising the cost to $249.99 starting April 29, 2025. This announcement, delivered through a press release on March 19, also outlined several additional changes to Plex’s pricing structure and feature availability. While price increases are common in the subscription space, this is Plex’s first major change of its kind in over ten years. It affects not just future subscribers, but the entire conversation around personal media platforms and the value Plex provides in 2025. As someone who has tested and covered Plex across various NAS platforms over the years, I think it’s important to break this all down clearly—and fairly.

Note – at the time of writing, April 5th, the old prices from Plex Pass are still available and a Lifetime Plex Pass purchased now will be no different than one purchased after April 29th 2025)

The TL;DR – Plex Just Raised Prices and Paywalled Remote Streaming

Plex is doubling the price of its Lifetime Pass from $119.99 to $249.99 starting April 29, 2025—its first increase in over a decade. At the same time, remote streaming will no longer be free, now requiring either a Plex Pass or a new $1.99/month Remote Watch Pass. While Plex has removed mobile app unlock fees and teased new features like a Common Sense Media integration, users are frustrated that core features are being moved behind paywalls. Open-source alternatives like Jellyfin are gaining traction, though they lack Plex’s polish and easy remote access. Emby sits awkwardly between the two, offering both paid and free tiers but without a clear value advantage. If you’re a regular Plex user, now is likely the last chance to grab the Lifetime Pass at its original price—after that, the equation changes.

Why is PLEX Increasing Prices and Changing their Software Services?

Plex has positioned this move as a necessary step toward long-term sustainability and innovation, citing rising infrastructure and development costs. Alongside the new Lifetime price, the monthly subscription will increase to $6.99 (up from $4.99), and the annual plan will rise to $69.99 (from $39.99). That’s a considerable leap across the board. If you’re currently on the fence about investing in a Lifetime Pass, the window is closing quickly. I’ve said it before and I’ll say it again—if Plex is part of your day-to-day setup, especially with multiple users or remote access needs, now is the most sensible time to act. Once the new pricing kicks in, the Lifetime tier may lose its appeal for newer users, especially when compared to other one-time license models in the tech space.

More controversial than the price hike, though, is the newly introduced limitation on remote streaming. As of late April, remote access will no longer be included in the free version of Plex. This means that if you want to stream media from your home server while away—say on a mobile device or at work—you’ll now need a Plex Pass or a new tier called Remote Watch Pass, which is priced at $1.99/month or $19.99/year. This shift marks a pretty significant change in Plex’s philosophy. Previously, you could set up a NAS, install Plex Media Server, and stream remotely with minimal friction. Now, that experience is essentially paywalled. While the company has clarified that users with an existing Plex Pass won’t be affected, new users and guests who rely on remote access will need to consider this new fee model.

In his own coverage of the news, Alex from the KTZ Systems YouTube channel offered a measured but critical response. He highlighted the underlying tension many feel: “You’re paying Plex to access your own files, on your own hardware, over your own network and internet connection.” It’s a fair point—and while I can understand Plex’s need for sustainable revenue, the optics of charging for what many considered a core, previously-free feature are less than ideal. In our recent joint podcast, Alex and I both agreed that if Lifetime Passes are no longer financially viable, Plex should have either phased them out or significantly increased the cost to signal their rarity. Instead, the $249.99 price tag sits in an odd middle ground—too high to feel like a deal, too low to feel truly premium.

(From official Plex Pages) IMPORTANT NOTE FOR CURRENT PLEX PASS HOLDERS:
For users who have an active Plex Pass subscription, remote playback will continue to be available to you without interruption from any Plex Media Server, after these changes go into effect. When running your own Plex Media Server as a subscriber, other users to whom you have granted access can also stream from the server (whether local or remote), without ANY additional charge—not even a mobile activation fee.

Could PLEX Have Approached Funding and Sustainability Better?

Rather than placing long-standing features behind a paywall, Plex had several other options for becoming more financially sustainable—many of which were discussed across the community in recent weeks:

  • Introduce a “Plex 2.0” Premium Tier: Instead of retroactively limiting features, Plex could have rolled out a major version update with enhanced capabilities—such as native audiobook support, advanced download controls, or multi-user analytics—reserved for paying users, while leaving existing features intact for legacy users.

  • Cap Lifetime Passes and Shift Focus to Recurring Tiers: Rather than awkwardly doubling the Lifetime price, Plex might have opted to discontinue Lifetime entirely and focus on expanding the value of annual/monthly subscriptions through regular feature rollouts or exclusive integrations, as seen in platforms like Roon or UnRAID.

  • Use a “Freemium Scaling” Model: By allowing remote access for a limited number of external users or devices on the free tier (e.g., “first one’s free”), Plex could have maintained goodwill while encouraging heavier users to upgrade organically—similar to how many SaaS platforms incentivize scaling through added value, not restriction.

What Else is Changing in Plex?

To their credit, Plex has removed one of the more annoying barriers from its platform—the mobile app unlock fee. Previously, streaming via the Android or iOS app was limited to one minute unless you paid a small one-time fee or had a Plex Pass. With the rollout of their new mobile client experience, this limitation is going away. Local streaming—meaning within the same network—will now be completely free on mobile. This is undoubtedly a welcome change, especially for users who run everything locally and don’t rely on remote features. However, for those who previously enjoyed full functionality across networks without a subscription, this small improvement may not offset the new restrictions.

Plex also used the announcement to preview some upcoming features for Plex Pass subscribers, including an integration with Common Sense Media aimed at improving parental control tools, a new server management app (separate from Plex Dash), and a long-requested open API for metadata agents and custom integrations. While these additions have genuine value, their timing—bundled with a price increase and feature restrictions—makes it harder for users to assess whether Plex is giving more or simply charging more. Alex pointed out in our podcast that innovation, not restriction, should drive paid feature rollouts. It’s a sentiment I tend to agree with: adding new tools rather than paywalling old ones is the path that generates goodwill and long-term user engagement.

Is Now the time to Ditch PLEX, and Opt for Jellyfin or Emby Media Server?

Naturally, this news has reignited interest in Jellyfin, the most well-known open-source alternative to Plex. Jellyfin remains free, with no subscriptions or data collection, and offers solid core media server functionality. However, as Alex and I discussed in our joint video, Jellyfin comes with its own set of trade-offs. While it nails the fundamentals—smooth playback, broad codec support, and responsive local streaming—it lacks polish in its client apps, and remote access typically requires self-configuration through a VPN or mesh network like Tailscale. For tech-savvy users, that’s a worthwhile trade. But for those who rely on Plex’s seamless, cross-platform access, Jellyfin may still feel like a step backward in convenience.

Emby, once considered a middle ground between Plex and Jellyfin, is rarely mentioned in this conversation anymore—and there are reasons for that. Emby straddles an awkward line between open-source philosophy and commercial aspirations. It still charges for features like hardware transcoding and has moved away from its open development roots. In our podcast, Alex shared his own frustrations with Emby’s shift to closed source shortly after he purchased a Lifetime license. Combined with a smaller user base, inconsistent app support, and limited visibility in NAS ecosystems, Emby struggles to be either the budget-friendly choice or the polished premium one. In short, it’s not that Emby is bad—it’s that it’s not compelling enough to compete meaningfully right now.

Feature Plex Emby Jellyfin
Cost Free with premium options (Plex Pass) Free with premium options (Emby Premiere) Completely free and open-source
User Interface Highly polished and intuitive Modern and user-friendly User-friendly and customizable
Media Management Excellent metadata handling and organization Powerful and versatile Robust and feature-rich
Remote Streaming Highly efficient; seamless and reliable Seamless and reliable Smooth and reliable
Parental Controls Available with Plex Pass Available and customizable Built-in and customizable
Cloud Syncing Limited support Available Not supported
Hardware Transcoding Available with Plex Pass Available with Emby Premiere Free and supported
Live TV / DVR Available with Plex Pass Available with Emby Premiere Free and supported
Multiple Users Supported Supported Supported
Offline Downloads Available with Plex Pass Available with Emby Premiere Free and supported
Plugins/Add-ons Wide range of plugins and add-ons Extensive selection Limited selection
Platform Support Broad range of platforms Wide range of platforms Wide range of platforms
Community Support Large and active community Active community support Growing community support

Are We Seeing the End of PLEX on the Horizon?

One key issue here isn’t just the new pricing or paywalled features, but how Plex has communicated these changes. As we discussed in the podcast, the rollout feels rushed and reactive, missing an opportunity to reframe this as a strategic step forward—say, through a “Plex Plus” or “Plex Lite” tier with exclusive new tools, or by versioning changes the way other platforms (like UnRAID or even macOS) handle major updates. Instead, moving features behind a paywall post-launch risks alienating loyal users. Plex’s assertion that these changes won’t affect existing Plex Pass holders is reassuring, but it doesn’t help new users discovering Plex for the first time—and realizing that what used to be free is now a subscription service.

Ultimately, I don’t believe Plex is on the brink of collapse—as some dramatic headlines might suggest—but I do think this moment marks a turning point. If you’re a regular Plex user who streams remotely or shares content with others, the Lifetime Pass at $119.99 (until April 29) remains a solid investment. After that, the value calculus shifts dramatically. For new users, the free tier will still work well for local-only setups, and the Remote Watch Pass provides a budget-friendly option. But the days of a completely free, fully featured Plex experience are clearly behind us.


📧 SUBSCRIBE TO OUR NEWSLETTER 🔔
[contact-form-7]
🔒 Join Inner Circle

Get an alert every time something gets added to this specific article!


Want to follow specific category? 📧 Subscribe

This description contains links to Amazon. These links will take you to some of the products mentioned in today's content. As an Amazon Associate, I earn from qualifying purchases. Visit the NASCompares Deal Finder to find the best place to buy this device in your region, based on Service, Support and Reputation - Just Search for your NAS Drive in the Box Below

Need Advice on Data Storage from an Expert?

Finally, for free advice about your setup, just leave a message in the comments below here at NASCompares.com and we will get back to you. Need Help? Where possible (and where appropriate) please provide as much information about your requirements, as then I can arrange the best answer and solution to your needs. Do not worry about your e-mail address being required, it will NOT be used in a mailing list and will NOT be used in any way other than to respond to your enquiry. [contact-form-7] TRY CHAT Terms and Conditions
If you like this service, please consider supporting us. We use affiliate links on the blog allowing NAScompares information and advice service to be free of charge to you.Anything you purchase on the day you click on our links will generate a small commission which isused to run the website. Here is a link for Amazon and B&H.You can also get me a ☕ Ko-fi or old school Paypal. Thanks!To find out more about how to support this advice service check HEREIf you need to fix or configure a NAS, check Fiver Have you thought about helping others with your knowledge? Find Instructions Here  
 
Or support us by using our affiliate links on Amazon UK and Amazon US
    
 
Alternatively, why not ask me on the ASK NASCompares forum, by clicking the button below. This is a community hub that serves as a place that I can answer your question, chew the fat, share new release information and even get corrections posted. I will always get around to answering ALL queries, but as a one-man operation, I cannot promise speed! So by sharing your query in the ASK NASCompares section below, you can get a better range of solutions and suggestions, alongside my own.

☕ WE LOVE COFFEE ☕


The Best Travel Routers, SIM-LTE Routers and Pocket Internet Devices (I Personally Recommend)

Par : Rob Andrews
4 avril 2025 à 18:00

The Best Travel Routers, SIM/LTE Routers and Gateway Devices I Have Ever Used

I think it would be fair to say that in 2025, unless you are travelling within your own country, chances are that you are definitely going to need some kind of internet connection in order to get around when travelling around the world. Unfortunately, the age when you could get by with an A to Z book and a handful of local phrases has long gone, and alongside the complexity of most cities growing exponentially, a lot of shops, restaurants and services are moving towards 3D barcode menus and digital-only point of sale resources. Add to that the enormous benefits of translation tools and Babel Fish-level communication services that are internet-assisted, and it’s almost impossible to imagine travelling around the world now without any kind of internet connection at all times. However, whether it is barriers from requiring a local phone number for authentication, or simply that you are going places without a reliable public Wi-Fi access point at your fingertips, many users have started hopefully relying on the use of portable routers, mobile access point devices and SIM card routers. In the last few years, I’ve travelled to numerous trade shows and public events around the world, and in that time required different kinds of mobile router device in order to get things done professionally. Sometimes I’ve needed a simple router that allows me to safely and securely use public Wi-Fi services in coffee shops and train stations. Other times I’ve needed a dedicated internet connection from a cell phone provider via SIM card to be available 24/7. Over the years, I’ve used numerous devices, good and bad, and to save you a lot of trouble, I’m going to go through the ones that I (and professional colleagues that I’ve met) have come to rely upon in their day-to-day professional travel. I will also include a router that has consistently let me and a number of my professional colleagues down on a regular basis, in order to help you avoid making the same mistake we did. Let’s go.

IMPORTANT – You Might Not Need a SIM Router!

Before I go any further, it’s worth highlighting that none of the physical travel routers that I recommend below have paid for this article, and all of the opinions provided are my own, those of my professional colleagues, and are based on years of genuine use together. I have included links to purchase these items, and doing so will result in a small commission that helps me keep doing what I do, but the brands themselves have no influence over the content of this article.

Using Airport Routers – Are They Safe?

It’s also worth mentioning that it has become increasingly common, especially in the East, for users to be able to rent travel routers with a dedicated cellular internet connection from a local airport. These can be incredibly affordable and very convenient, as they often eliminate the need for purchasing a whole router device for your travel. I have used these a couple of times when travelling to Hong Kong and Taipei, Taiwan, when I’ve needed to travel especially light and with only hand luggage. However, be aware that these do arrive with some caveats. Firstly, you will need to supply the vendor with a passport, documentation, as well as provide a deposit for security purposes. Secondly, be aware that the level of control that you have over your network will be extremely limited, and you will have zero admin control of the router. That means that not only can you not adapt the router in terms of quality and priority of service for different devices, but you cannot utilise an in-router VPN or be 100% certain that the data and passwords that pass through the router are not being collected in some way. I am not suggesting that all mobile router providers are inherently untrustworthy, I am simply saying that these options are limited, and I would only recommend them as short-term, ad hoc options at best.

You Might Not Need a Travel Router in Europe!

Last point, and this is mainly for Europeans but does also apply to some other regions of the world, in some cases, if you already have an existing cellular contract for your phone data, it may still be supported in the region you intend to visit. For example, even though the UK chose to leave the EU, there is still shared coverage of cellular providers across the majority of Europe, and your O2/EE/Vodafone data plan may well work in the majority of other European countries, still within your own data allowances. It is by no means a solid rule, but it is worth checking before you travel, as it may save you the need for a travel router at all.


GL.iNet Slate 7

Pros – Wi-Fi 7, dual-band, physical VPN switch, fully functional software, mobile app, physical RJ45 2.5GbE connections, touchscreen LCD, USB NAS storage sharing support, app centre, multiple VPN support, USB tethering, USB phone tethering.

Cons  Requires USB power, no SIM card slot, no eSIM support.

Currently, this is the newest addition to my travel kit when going anywhere in the world. Although it has only been physically present in my travel bag for a little over 6 weeks, I have known about this device for almost half a year, and GL.iNet made a lot of noise in their early development of the device and received a lot of early praise. Touted as one of, if not the first, Wi-Fi 7 travel routers, this device allows you to take advantage of bandwidth enhancements like Multi-Link Operation and faster data supported in Wi-Fi 7. Although it lacks support for the 6GHz band, it has still been an ever-reliable source of connectivity to me when I need to use public Wi-Fi services and I need to ensure that they are as secure as possible. GL.iNet has been in the business of making travel routers for a while, and indeed there is a second router mentioned later in this article, but even in the short time I’ve utilised this travel router, it has been something of a game changer when I need to travel light.

It features a touchscreen LCD that allows me to configure and connect on the go without the app, the open-source software allows me to use third-party applications, create storage shares with a USB, and it also supports multiple simultaneous internet connections for both failover and load balancing. That means that you can utilise a local USB-connected phone or dongle, connect to a third-party Wi-Fi connection, and even repeat an existing connection, giving you a 2-tier failover for when you need it. Additionally, it features two physical RJ45 ports that support both WAN and LAN utilisation, and both are 2.5Gb bandwidth.

All that said, keep in mind that this is a gateway device and not a SIM/LTE router. The device does not support eSIM usage and does not have any physical SIM card slot. This is a device for securely and conveniently connecting multiple devices at once to a single existing internet connection via a connected cable or via a third-party available Wi-Fi point. You are still going to need an existing internet connection going in, in order to really take advantage of the features and facilities of this router on your travels.


Solis 5G SIM Router

Pros – Free worldwide 1GB of data every month without a paid subscription requirement, Wi-Fi 6 support, eSIM and physical SIM card slot, USB power bank support, LCD touchscreen, dual-band, guest Wi-Fi SSID option, multiple data plan subscriptions on pay-as-you-go, coverage of the majority of the world, regular deals during seasonal events, USB tethering.

Cons – No physical RJ45 connections, some users will be put off by the optional subscription services.

The Solis 5G is a very different kind of travel router than the GL.iNet Slate 7 I just mentioned. Not only does this travel router feature a physical SIM/LTE slot for adding a cellular data plan in your local country of choice, but it also supports the use of the pay-as-you-go daily data plans available from Solis. Now, I will get onto the advantages and disadvantages of that shortly, but what I really think is cool about this product is that when you buy it and create an account (no bank details or subscription sign-up at all—just an email address, etc.), it entitles you to 1GB of free global data every single month.

That means that if you only plan on travelling internationally once a month on average, you will have a gigabyte of data available to you for absolutely no additional cost. And unless you plan on doing large data uploads or streaming high-definition movies on your travels, 1GB of data can go an exceptionally long way with regards to transportation and maps from the airport to the hotel, utilising translation applications every single day, making international internet phone calls on WhatsApp or WeChat, etc.

Otherwise, you can purchase individual unlimited days of data in packs of single days or multiple days in bundles that you can use ad hoc when you need to. Add to that that there are regular sales and offers on the Solis website during Black Friday, New Year, summer sales, and more, and it’s really easy to just purchase and keep a handful of individual data day passes on your account that you can choose to activate when needed for fast 5G and 4G internet services.

Moving slightly away from the internet connection, however, the device itself is no slouch either. Featuring a touchscreen LCD panel for controls and a mobile application for managing the device and its clients on the go, you can have multiple different SSIDs that vary in security and priority. The system features a large battery to maintain its operation for a great deal of time, as well as supporting USB tethering and USB power bank support.

That’ll allow you to also use it to charge up your USB devices when needed. Support for Wi-Fi 6 ensures up to 1.2Gbps connections to your client devices that feature support for 802.11ax over the two bands of 5GHz and 2.4GHz, and overall, this is easily the most convenient travel router you’re ever going to find. The only main downsides are the lack of physical RJ45 network connection ports and that the software is nowhere near as configurable as that of the GL.iNet routers.


Asus RT-AX57 Go Travel Router

Pros – Wi-Fi 6, small and light at just 12 cm square and 2 cm thick,full open-source software and controls, Wi-Fi repeating, physical VPN switch, multiple VPN services supported, supports mesh with local home/office Asus router for long-term use even when not traveling.

Cons – Lacks physical SIM card slot, pricing is a little all over the place between $99 and $139, I have not personally used it for an extended period of time and it arrives via recommendation from my professional colleagues (not a “con” exactly, but I thought it was worth mentioning).

Now, full disclaimer as mentioned earlier, this is a router that I’ve only utilised personally a very light amount when I’ve been working alongside professional colleagues who have brought this with them and we’ve all connected to it. However, I have heard nothing but good things about this device from my professional colleagues both on YouTube and generally in content creation. Whether it was because of its incredible portability at just 12 cm square and 2 cm thick, the incredibly low power consumption it has, or the fact that it can be used as a mesh point with an existing Asus router at home or in the office and therefore has deployment even outside of its use as a travel-only router, there is a reason I keep seeing this travel router being used at trade shows. Much like the GL.iNet Slate 7, this router does not feature its own SIM/LTE card slot. This is a gateway device that allows you to safely and securely connect all of your devices via a single Wi-Fi connection to an existing USB-connected internet service, wired WAN service, or existing Wi-Fi service in the area.

The hardware is pretty decent for its scale, and although you can find its price to be a little bit erratic depending on the store you shop at, it is possible to find this device at just $99 at some e-retailers. The software is pretty comparable to that of GL.iNet’s software and is built on open-source with support for third-party optional plugins, USB storage sharing, VPN services via physical button, and load balancing/failover. Probably the main appeal for this travel router—something that several of my colleagues informed me was part of their decision to purchase it—is that the device can be utilised for mesh with existing Asus routers. That means that if you have an Asus router already in your home or office environment that supports mesh, you can use this travel router as a mesh node to extend your existing home Wi-Fi coverage greatly when you are not travelling. And then, when you’re ready to travel, disconnect the device and take it with you. Once again, keep in mind that it does not feature a SIM card slot and also requires USB power for operation. But it is one of the smallest travel routers on this list, and although it’s the second oldest router on this list, it is still very capable in 2025.


GL.iNet Puli AX

Pros – Does everything that you want from both a travel router and a local home/office router, has two SIM card slots, features an SD card slot, supports USB storage and NAS-like sharing, and has six antennas shared between local Wi-Fi and cellular connectivity. Features physical RJ45 ports and 2.5G WAN/LAN, includes a battery that can be easily removed if needed, clear LED display and controls, comprehensive router management software and mobile app, VPN physical button and multiple VPN protocols supported. Can be used as a prosumer router locally and easily disconnected and made portable as a travel router at any time (i.e., a 24×7 router, anywhere).

Cons – Expensive at $399-499, large size even without the battery attached.

Without a shadow of a doubt—and if you have the budget for it—the GL.iNet Puli AX SIM/LTE router is not only the best travel router I have ever used, but it might even be one of the best day-to-day routers I have ever used. That’s a pretty big statement, right? Let me explain. First and foremost, with the exception of Wi-Fi 7 support, the GL.iNet Puli AX provides everything that the Slate 7 at the start of this article does, as it utilises the same software platform and services but arrives with more memory, more CPU power/cores, and more storage by default to get started with and make the most of that software. However, it doubles down on everything that other routers from this brand provide. Need a SIM card slot? This device has two LTE/SIM card slots that support 5G and 4G SIM cards. Need physical network ports? This has two and supports 2.5G. Need portability? The system arrives with a large battery that is completely removable. Need good wireless coverage? This device has six individual antennas that cover a huge amount of local network coverage with Wi-Fi 6, and two antennas for cellular coverage. Don’t want to use a physical SIM and would rather use an eSIM? Yep, you can use an eSIM on this device too.

Much like other GL.iNet travel routers, the device supports failover across all of these SIM/eSIM/wired WAN options, and it supports load balancing, while also including Wi-Fi repeating and the ability to utilise the device as an encrypted gateway when connecting to third-party public/free Wi-Fi services. Add to all of that the fact that this router—and its comprehensive and detailed software—means that you can deploy this device in your office as your everyday router for managing countless devices and client hardware, and when you’re ready to go on your travels, the battery enables it to become a comprehensive travel router. That means that unlike other travel routers, which are only used when you travel (meaning the return on investment happens gradually over time), the Puli AX can be used 24×7 as your office router and then as your travel router—without needing to reconfigure security credentials or change anything about your setup unnecessarily between in-house and off-site use.

The Puli AX is by no means a perfect router. Of course, it is way more expensive than any other travel router on this list, and it’s also bigger—even without the battery attached. However, there is also no avoiding the fact that this is by far the most capable and powerful travel router that does absolutely everything you’re going to need, all in one device. With the exception of when I need to travel light or travel locally, I always use this router on my travels, and it has already replaced the router in my studio for day-to-day use too.

(What I said in conclusion on my dedicated Puli.AX Router review HERE) The GL.iNet Puli AX Mobile Router is arguably one of the most capable and powerful mobile routers available today. With an extensive feature set, including 5G support, Wi-Fi 6, robust failover options, and comprehensive storage capabilities, it stands out in the market. Despite its hefty price tag of $499, the value it offers in terms of functionality and reliability justifies the cost. Whether used in a static environment or on the go, this router provides a robust and versatile solution for internet connectivity. Overall, the GL.iNet Puli AX Mobile Router is an exceptional device that combines advanced features with practical usability. It is well-suited for a wide range of users, from business professionals requiring reliable internet on the go to home users seeking robust and versatile connectivity solutions. Its high price tag is justified by the extensive functionality and reliability it offers, making it a worthy investment for those who need a top-tier mobile router. Whether you’re looking for a reliable internet solution for your home, office, or travels, the Puli AX is a formidable contender that delivers on all fronts.


Avoid Netgear M6 (and most other Netgear Travel Routers for now)

I really hate to be negative, but the following is more of a warning for those of you who have seen the Netgear M6 mobile travel router—either on offer, offered by your local phone shop via contract, or even second-hand on eBay. Please do not buy this travel router, as both myself and many of my colleagues have experienced problems using the Netgear M6 travel router. On the face of it, it’s a great little thing. It’s small, offers great Wi-Fi, has a physical network port, supports SIM/LTE, includes an internal battery, and even features an LCD touchscreen that provides real-time information about the device when in operation. So, what’s the problem? Easy. For a start, it’s one of the most expensive routers for what you’re actually getting—and this applies, by the way, to the newer generation Wi-Fi 6E and Wi-Fi 7 versions too.

The router being expensive wouldn’t be a problem if the device were good enough to do the job. The Puli AX is an expensive travel router, but it has an incredible feature set and performs its role really well—so up to a point, it justifies its price tag. However, in the case of the Netgear M6, this is especially painful when you remember that this isn’t a brand coming out of left field or one you’ve never heard of. Netgear is an international brand associated with both home and professional-class hardware. Even a cursory look at the reviews online about the Netgear M6 indicates that my colleagues and I were not the only ones experiencing these issues with this router—yet these issues have persisted for many years. This isn’t written out of hate or with any intent of negativity, but simply to help stop users who might trust that this product’s name-brand label is enough to assume it’s a good router. I think it’s definitely worth spending the extra time looking around for better options first.

Examples of user other issues with the Netgear Travel Router series (couple of other examples here on the official Netgear Support Forum and on Reddit), but on the whole user feedback across Netgear’s official forums and platforms reveals a consistent pattern of serious reliability issues with the Nighthawk M6 and M6 Pro routers. Multiple users report that while the device appears promising—offering features like 5G connectivity, Wi-Fi 6, a touchscreen, and long battery life—the reality often falls short. A common issue involves internet connectivity degrading after 6 to 24 hours of uptime, with the router still technically online (able to ping or resolve DNS) but unable to load any web pages. This effectively renders the device unusable until it is rebooted. Even replacing units, SIM cards, or applying firmware updates often failed to resolve the issue. Many users, including those who rely on the M6 for home or business use, were forced to bypass its router functions entirely—using it as a basic modem while relying on a separate standalone router (like the Linksys EA8500) for Wi-Fi and LAN tasks. This workaround significantly improved performance but defeated the all-in-one purpose of the M6.

Another frequent complaint centers on overheating and throttling, especially when the device is plugged in for extended periods or placed in warmer environments. Users have reported the M6 reaching temperatures well above the recommended 35°C limit, leading to dropped connections, performance slowdowns, and in some cases, device shutdowns. Attempts to address these thermal issues—like using fans, disabling Wi-Fi, removing the battery while powered—provided only partial relief. Firmware updates are inconsistently delivered (especially via AT&T), with some users stuck on outdated builds that don’t resolve known bugs. Ultimately, for many users, the combination of high cost, unstable firmware, poor thermal management, and lackluster support has made the M6 series an unreliable choice—especially when more stable and affordable travel routers are readily available.

📧 SUBSCRIBE TO OUR NEWSLETTER 🔔
[contact-form-7]
🔒 Join Inner Circle


Get an alert every time something gets added to this specific article!


Want to follow specific category? 📧 Subscribe

This description contains links to Amazon. These links will take you to some of the products mentioned in today's content. As an Amazon Associate, I earn from qualifying purchases. Visit the NASCompares Deal Finder to find the best place to buy this device in your region, based on Service, Support and Reputation - Just Search for your NAS Drive in the Box Below

Need Advice on Data Storage from an Expert?

Finally, for free advice about your setup, just leave a message in the comments below here at NASCompares.com and we will get back to you. Need Help? Where possible (and where appropriate) please provide as much information about your requirements, as then I can arrange the best answer and solution to your needs. Do not worry about your e-mail address being required, it will NOT be used in a mailing list and will NOT be used in any way other than to respond to your enquiry. [contact-form-7] TRY CHAT Terms and Conditions
If you like this service, please consider supporting us. We use affiliate links on the blog allowing NAScompares information and advice service to be free of charge to you.Anything you purchase on the day you click on our links will generate a small commission which isused to run the website. Here is a link for Amazon and B&H.You can also get me a ☕ Ko-fi or old school Paypal. Thanks!To find out more about how to support this advice service check HEREIf you need to fix or configure a NAS, check Fiver Have you thought about helping others with your knowledge? Find Instructions Here  
 
Or support us by using our affiliate links on Amazon UK and Amazon US
    
 
Alternatively, why not ask me on the ASK NASCompares forum, by clicking the button below. This is a community hub that serves as a place that I can answer your question, chew the fat, share new release information and even get corrections posted. I will always get around to answering ALL queries, but as a one-man operation, I cannot promise speed! So by sharing your query in the ASK NASCompares section below, you can get a better range of solutions and suggestions, alongside my own.

☕ WE LOVE COFFEE ☕


UGREEN NASync NAS – One Year Later, Should You Buy?

Par : Rob Andrews
26 mars 2025 à 18:00

UGREEN NASync NAS: One Year Later – The Good, The Bad, and What’s Still Missing?

One year ago, UGREEN made waves in the NAS industry by launching its NASync series through a hugely successful Kickstarter campaign, raising $6.6 million from over 13,000 backers. This new line of NAS devices aimed to offer a cost-effective alternative to established brands like Synology and QNAP, promising powerful hardware, a user-friendly experience, and AI-powered features at a more competitive price. Since its general retail release in mid-2024, UGREEN NASync has been available via Amazon, B&H, and UGREEN’s website, gaining a strong following among enthusiasts and small businesses. But after a year of real-world usage, firmware updates, and customer feedback, does the NASync series truly compete with industry leaders? Has UGREEN delivered on its promises, or are there still major issues preventing it from being a go-to NAS solution? This article will explore where UGREEN has excelled, where it still needs improvement, and whether the NASync series is a worthwhile investment in 2025.

Note – UGREEN are running a promotion during World Backup Day that drops the price significantly on several of their NASync devices on their own website and on Amazon. Find out more here or via the banner link below:

The UGREEN NASync NAS Kickstarter – A Recap

Unlike many hardware startups that struggle with fulfilling Kickstarter orders, UGREEN managed to deliver its NASync units on schedule to most backers, a significant achievement for a crowdfunded product. While there were some reports of faulty units, these appeared to be within normal failure rates for electronics and were generally covered by UGREEN’s replacement and support policies. What truly set UGREEN apart, however, was its unorthodox marketing strategy. Instead of focusing on traditional advertising or securing major sponsorship deals, UGREEN distributed thousands of review units to mid-tier and micro-influencers.

This grassroots approach ensured that discussions about the NASync series remained active and widespread across online tech communities. Unlike companies that pay for high-profile reviews on massive platforms like Linus Tech Tips, UGREEN instead prioritized authenticity and volume, creating long-term engagement from reviewers who actually tested the product in-depth. This strategy has proven successful, keeping UGREEN’s NAS devices relevant in online discussions long after their launch, though it has also meant that larger, mainstream tech publications have not widely covered the NASync series. While this marketing approach has helped build a loyal user base, it also raises concerns about how well UGREEN’s products will compete with more established brands in the long run if they do not gain broader mainstream recognition.

The UGREEN NAS Software Development So Far…

When the NASync series launched, its UGOS operating system was one of its most significant unknowns. Unlike Synology DSM or QNAP QTS, which have been refined for years, UGOS was a first-generation NAS OS that lacked many critical features and refinements expected by experienced users.

Over the past year, UGREEN has made steady improvements, rolling out regular firmware updates that have expanded its functionality. One of the most notable additions is the inclusion of Jellyfin as a native app, providing an alternative media server option for users who want to stream videos without needing complex third-party installations.

However, Plex support remains absent, a surprising omission considering Plex is the most widely used NAS-based media server. Another major shortcoming is the lack of iSCSI support, which is essential for business users, virtualization environments, and enterprise-level storage solutions.

While UGREEN has stated that iSCSI support is on their roadmap, it has yet to be implemented, making the NASync series a less viable option for professional users who rely on networked block storage solutions. Despite these improvements, UGOS is still not as polished or feature-rich as competing NAS operating systems, and for users who need advanced storage capabilities, its limitations remain a concern.

UGREEN NAS and Security – After 1 Year

Security was one of the biggest concerns when UGREEN first launched its NASync series, as it initially lacked two-factor authentication (2FA) and had limited built-in protections for remote access. Over the past year, UGREEN has addressed some of these concerns, adding 2FA and expanding firewall settings to include IP blocking, MAC filtering, and customizable access controls.

These updates have significantly improved overall security, but the absence of dedicated anti-ransomware protection remains a critical weakness. Competing NAS brands such as Synology and QNAP have introduced automated ransomware protection tools, snapshot-based rollback systems, and real-time anomaly detection, features that UGOS has yet to incorporate.

The NASync series does provide basic malware and antivirus scanning, but it is still lacking the more advanced automated security solutions that have become standard in the NAS industry. Users who are particularly concerned about security may prefer to disable UGREEN’s remote access services and instead use third-party VPN solutions like Tailscale or even install an alternative NAS operating system such as TrueNAS or UnRAID, both of which UGREEN supports without voiding hardware warranties.

UGREEN NAS and Local AI Use

UGREEN has been heavily investing in AI-driven functionality, integrating photo recognition, AI-assisted indexing, and content categorization into UGOS. Unlike cloud-based AI solutions, these run entirely on the NAS itself, keeping user data private and locally processed. This makes UGREEN one of the few NAS brands to offer AI-powered automation without cloud dependencies, a feature that privacy-conscious users appreciate.

However, with the recent announcement of UGREEN’s new IDX series, which focuses even more on AI-powered storage and advanced computing, there is growing uncertainty about the long-term future of the NASync series. It remains unclear whether UGREEN will continue to develop UGOS at the same pace for NASync devices or shift focus toward its newer, AI-driven IDX models.

While UGREEN insists that the NASync and IDX series will coexist as separate product lines, there is a possibility that software development for NASync may slow down in favor of newer hardware platforms. This uncertainty may deter potential buyers who want long-term software support guarantees.

UGREEN NASync Devices and Mixed Global Availability

Despite the NASync series’ popularity, UGREEN has struggled to expand its global distribution network. While the devices are widely available in the US, Germany, and select European markets, many regions still lack direct purchasing options. The UK recently saw improved availability, but other regions remain underserved, forcing potential buyers to import devices at higher costs.

Given the strong demand and continued interest, it is surprising that UGREEN has not prioritized expanding its retail presence globally. If the company wants to compete seriously with major NAS brands, broader availability through additional international retailers should be a key focus moving forward.

UGREEN NAS 1 Year Later – Verdict

One year in, UGREEN’s NASync series has made a strong impression in the NAS market, proving that it is more than just a one-off experiment. The company has demonstrated consistent software development, ongoing support, and a commitment to hiring industry experts to strengthen its NAS business. However, the NASync series still falls short in key areas, particularly iSCSI support, security automation, and mainstream availability. For enthusiasts and tech-savvy users willing to customize their setup, UGREEN’s NASync devices offer solid hardware at an attractive price. But for those who expect a polished, fully mature NAS experience, Synology and QNAP still lead the market. UGREEN has the potential to become a serious competitor in the NAS space, but its future success depends on how aggressively it continues to develop UGOS, improve security, and expand its global footprint.

20% OFF UGREEN NAS this World Backup Day

UGREEN is currently running a Work Backup Day promotion, offering a 20% discount on NASync devices purchased through their official website and Amazon. This limited-time deal runs from March 25th to March 31st, making it an excellent opportunity for those considering a UGREEN NAS for data protection and backup storage. With the growing importance of secure, local backups, especially for businesses and home users managing large datasets, this promotion provides a cost-effective way to invest in a NAS solution. Whether you’re looking to set up automated backups, secure your media collection, or expand your existing storage infrastructure, the discount makes UGREEN’s already competitive pricing even more attractive. However, with global availability still being somewhat inconsistent, buyers should check regional stock levels and shipping options before purchasing.

📧 SUBSCRIBE TO OUR NEWSLETTER 🔔
[contact-form-7]
🔒 Join Inner Circle

Get an alert every time something gets added to this specific article!


Want to follow specific category? 📧 Subscribe

This description contains links to Amazon. These links will take you to some of the products mentioned in today's content. As an Amazon Associate, I earn from qualifying purchases. Visit the NASCompares Deal Finder to find the best place to buy this device in your region, based on Service, Support and Reputation - Just Search for your NAS Drive in the Box Below

Need Advice on Data Storage from an Expert?

Finally, for free advice about your setup, just leave a message in the comments below here at NASCompares.com and we will get back to you. Need Help? Where possible (and where appropriate) please provide as much information about your requirements, as then I can arrange the best answer and solution to your needs. Do not worry about your e-mail address being required, it will NOT be used in a mailing list and will NOT be used in any way other than to respond to your enquiry. [contact-form-7] TRY CHAT Terms and Conditions
If you like this service, please consider supporting us. We use affiliate links on the blog allowing NAScompares information and advice service to be free of charge to you.Anything you purchase on the day you click on our links will generate a small commission which isused to run the website. Here is a link for Amazon and B&H.You can also get me a ☕ Ko-fi or old school Paypal. Thanks!To find out more about how to support this advice service check HEREIf you need to fix or configure a NAS, check Fiver Have you thought about helping others with your knowledge? Find Instructions Here  
 
Or support us by using our affiliate links on Amazon UK and Amazon US
    
 
Alternatively, why not ask me on the ASK NASCompares forum, by clicking the button below. This is a community hub that serves as a place that I can answer your question, chew the fat, share new release information and even get corrections posted. I will always get around to answering ALL queries, but as a one-man operation, I cannot promise speed! So by sharing your query in the ASK NASCompares section below, you can get a better range of solutions and suggestions, alongside my own.

☕ WE LOVE COFFEE ☕


Terramaster TrueNAS Scale/Core Installation Guide (2025)

Par : Rob Andrews
17 mars 2025 à 18:00

How to Install TrueNAS Scale/Core on a Terramaster NAS

If you’re new to private server storage, you’ve probably heard the phrase “everything runs on Linux.” While that’s not entirely true (many other platforms exist with their own foundations), Linux remains the dominant base for much of the software we use daily—including Network Attached Storage (NAS). When it comes to NAS, most new or less experienced users fall into two main categories:

  1. DIY Enthusiasts – Those who prefer to build their own systems, optimizing costs and flexibility with open-source platforms like TrueNAS Scale (the Linux-based counterpart to the popular TrueNAS Core on FreeBSD).
  2. Turnkey Buyers – Those willing to pay extra for a prebuilt system, even if it means dealing with some software limitations.

But what if you want the best of both worlds? Good news—you can have it! In this guide, I’ll show you how to transform TerraMaster’s highly affordable NAS solutions (arguably the best value on the market right now) into a TrueNAS -powered, ZFS-backed NAS system. Even the 2024/2025 models come well-equipped with multiple NVMe support (the F8 SSD PLUS as a particular stand out device), 2.5GbE networking, embedded graphics CPUs, and more, making them a fantastic base for a Linux NAS.

Best of all, setting this up is much easier than you might think, completely reversible, and provides you with the customization and flexibility of TrueNAS while still benefiting from a prebuilt 24/7 server at an unbeatable price. Sounds great, right? Let’s get started with the step-by-step guide!

Note – You can watch my FULL 30 Min+ beginners Guide to installing TrueNAS on a Terramaster NAS Here

TrueNAS on Terramaster – What You Need?

Before you begin, it’s important to note that simply owning a TerraMaster NAS isn’t enough. To get TrueNAS up and running, you’ll need to complete a few preliminary checks and have a few extra items—many of which you may already have at home or in the office. If not, a quick $10 purchase online should cover it.

To upgrade your TerraMaster NAS to TrueNAS , make sure you have the following:


  • I recommend not using a USB larger than 32GB, due to the constraints of 1st party software to format larger than this in FAT32. Don’t be tempted to spend like $2 more for a 64GB, as the TrueNAS installation will occupy the full USB space (as you will create a system-image-USB) and space is utterly irrelevant when the TrueNAS installation is so small
  • A Disk Image to USB conversion too. I recommend ‘Rufus’, currently in ver 3.19 and can be run in a portable .exe form that doesn’t require installation – DOWNLOAD
  • A basic USB Keyboard (example HERE but really, any will do) and an HDMI Monitor (or simply any device that has an HDMI input – NOT output) such as a TV or Capture card
  • Hard Drive and/or SSD media (you should already have these, but just in case) for your storage
  • OptionalDownload Advanced IP Scanner HERE, as it is a really useful tool for analyzing your network and finding your new TrueNAS NAS for remote access

That is about it. Most of these (maybe not the USB drive at that physical size) you will almost certainly already have to hand.

Can I Reverse the TrueNAS Installation back to Terramaster TOS?

Almost certainly, yes! However, there is one key consideration. When switching from TerraMaster’s TOS to TrueNAS , the internal drives (HDDs and/or SSDs) will be formatted to ZFS, meaning they won’t be recognized by TOS if you choose to switch back later.

The good news? Reverting back is incredibly easy—all you need to do is replace the internal USB drive and reboot the system. However, switching between NAS operating systems will wipe the data on the drives, so be sure to back up your important files elsewhere before proceeding.

Now that you’re ready, let’s move on to installing TrueNAS on your TerraMaster NAS!

TrueNAS on a Terramaster NAS – Step 1, Download TrueNAS

Head to the TrueNAS website HERE and download the latest stable release of the software to your local PC, Linux or Mac system. Make sure to remember where you downloaded it.

TrueNAS on a Terramaster NAS – Step 2, Download Rufus USB Image Tool

Head to the Rufus website and download the latest version of that tool – I recommend downloading the standalone executable file here, as then it will immediately run when you double click the file, without installation etc. It may redirect you to Github, but it will be the same executable file. Once again, remember where you downloaded it.

TrueNAS on a Terramaster NAS – Step 3, Preparing the USB

Connect the small form factor USB Drive to your system (again, this is the one I used from Sandisk) and after a few seconds, it should appear as an available USB Drive. The drive MAY need formatting (you will be prompted to do so), if that is the case, then you can format it via the system prompts and by default, it will format it to FAT32 (as long as your USB is less than 32GB). If you are not presented with a system prompt to format your USB, then you can head into My PC, or My Computer via a windows computer and right-click the drive, select ‘format’ and format it that way.

If you have used the USB for other things previously, there is a chance that the drive has existing partitions in place. For that, the quickest way to completely remove any partitions is to open up the bottom-left windows system menu as normal, and then just type diskpart and open the command-line GUI tool. From there, use the command list disk to show the available drives that are connected, you will see your USB (normally disk 1 or 2, but can differ depending on your system layout and can be spotted by the storage amount). From there, type select disk # (where # is the drive number that your USB is shown as) and then type clean, which which will then remove any index structure for the drive (i.e the partitions and existing format) and then you can go back to the My Computer/My PC page and format the drive to FAT 32 as normal.

TrueNAS on a Terramaster NAS – Step 4, Creating a USB Installer Image of TrueNAS

Open the Rufus application and from there you will see the USB Drive (listed as NO NAME, or ‘UNTITLED’, ETC) at the top. From there, look to the select image/find image option (depending on the ver. of Rufus or your USB Image Creator tool of choice) and find the TrueNAS disk image you downloaded earlier). If the drive is not listed, it may have downloaded as a compressed/archive file. If that is the case, head to the location of where you downloaded TrueNAS (in your file explorer, not in Rufus) and right-click the file you downloaded. If the option to ‘extract‘ is visible, then you can extract it (i.e unpack it to the original form) in that same download directory. From there, head back into RUFUS and then the TrueNAS system image should be visible. Select it, then run the Rufus System image creator tool and create your USB bootable TrueNAS disk image.

REMEMBER! This will completely format your USB drive and any files that are on that USB will be destroyed. The system image creator tool will turn the USB into a pure boot image tool – the USB will not be usable for traditional storage again unless you completely format it again.

TrueNAS on a Terramaster NAS – Step 5, REMOVE THE USB FROM YOUR PC!!!!!!!!!

Really, really important and sometimes overlooked. Once the USB creation is completed, you need to remove the USB (using the eject hardware safely option at the bottom right of your windows machine taskbar as normal). DO NOT accidentally leave the USB in your USB Ports for any longer than necessary. If you leave it in and your system reboots at any point (eg in a normal ‘end of day shut down, go home, reboot tomorrow’ scenario), then the system might boot directly into the TrueNAS installation and although it is easy to exit from, it can change your system default boot preferences, maybe even remove your primary boot drive as the OS drive – requiring a little messing with a windows installation disk to change it back. The odds of this are very small, but not zero, so make sure to safely remove your USB drive when the TrueNAS system image creator tool is completed.

TrueNAS on a Terramaster NAS – Step 6, Opening up your Terramaster NAS

This next step is going to differ depending on the Terramaster NAS Drive you are choosing to use. For this guide, I am using a 2022/2023 generation F4-423 4-Bay NAS, but the general steps are the same for any Terramaster NAS (though the location of the USB will differ) (the F8 SSD PLUS for example has a particularly secluded USB key internally). With the Terramaster NAS disconnected from the network and from any power source. From there you will need to remove the external casing. In the case of most Terramaster NAS, the chassis is held by 4-6 screws on the rear of the casing that, when removed, allow you to remove the rear pannel+fans and slide the internal framework out the front of the casing (be sure to check the fans are not disconnected accidentally in this process). IMPORTANT – Remove any HDD/SSD Media during the dismantling of the Terramaster NAS chassis, as it would be so, SO easy to harm these with accidentally dropping/motion damage. No need to remember the order of the drives when you re-install them, as they are going to be formatted during the TrueNAS installation.

Now, if you take a closer look at the main controller board of the Terramaster NAS (the one with network/USB ports attached, not the one that the HDD/SSD bays are on), you will spot a VERY small USB module in a tiny USB port. It should look something like this:

Now, THIS is where the default Terramaster TOS NAS software installation is kept. This is NOT where the OS actually runs from, but this is where the system checks in it’s BIOS when booting to find installation media (IF the system does not already have an active OS on the drives). Very delicately (as it IS a small USB and likely tucked in next to some other delicate components) remove the USB there is there, put it somewhere safe (as you will need this if you ever want to return the Terramster back to a TOS software system) and then replace it with the USB from earlier that has the TrueNAS system image you created in Rufus. THIS is why you needed a very small USB, as otherwise there is simply no way you would fit a traditional USB flash stick in the space provided.

That is pretty much it. This only other thing to factor in here is IF your Terramaster NAS does NOT have an external HDMI port. Most Terramsater NAS released in 2020-2025 have an HDMI port on the rear that although largely useless in TOS, is still accessible (something you will need for TrueNAS initialization. However, some Terramaster NAS with Intel Processors have the HDMI Port located INSIDE the main chassis (especially the older great box 2019-2020 gen devices). So, IF your NAS has an inside HDMI port, you are going to need to connect an  HDMI monitor to it and run the initial installation (covering in a bit) with the chassis in this open state. After installation is complete, you can close the Terramaster NAS chassis up. Otherwise, if your NAS already has an external HDMI port, you can go ahead and reconstruct the NAS chassis. Essentially, if you NAS has integrated graphics (Intel Celeron, Pentium, N100, N305, Core, etc), you will have an HDMI output.

NOTE – If you plan on upgrading the memory of your NAS to 8GB-16GB (in order to use ALL of the features of TrueNAS to their fullest extent), I would recommend doing so at this point before rebuilding the physical chassis again, as many Terramaser NAS have the 2nd SODIMM memory slot in really tight locations.

TrueNAS on a Terramaster NAS – Step 7, Accessing the HDMI Port and Keyboard Control

Next, you need to start getting the system ready for Initialization and Setup. I would strongly recommend running the first-time installation via a direct interface with the Terramaster NAS. You will need to connect an HDMI Monitor/TV/Capture Card to the HDMI port of the NAS, a Keyboard (and/or mouse) to an available USB port) and then connect the power/network connections to the NAS and boot the device up.

After a few minutes, the TrueNAS GUI/Command will appear on your monitor and all you need to do is navigate the config choices to set up your TrueNAS NAS the first time.

Important – TrueNAS Scale/Core runs at its best when it is run on a separate drive from your storage. Much like an Operating System, you can install TrueNAS on an available SSD in a SATA or NVMe SSD slot in the Terramaster NAS, then (after initialization) you can go into the TrueNAS > Storage area and create a pool of storage using the available storage media bays,

It is NOT recommended that you install it on a USB drive, for reasons of speed and power-connections.

After you have completed the setup and are back at the initial TrueNAS boot menu, select the ‘SHUTDOWN‘ option (not reboot/restart, for reasons I will explain in a moment).

TrueNAS on a Terramaster NAS – Step 8, Remove the Boot USB Drive

Once your Terramaster NAS has fully powered down, you need to disconnect the storage, power and any other cables, then open up the Terramaster NAS again (if it was re-constructed from earlier) and then remove the USB drive you installed earlier with TrueNAS boot loader on it. You need to do this as otherwise, when you reboot the Terramaster NAS, it will reboot into the bootloader again. You can skip past this and/or it will not action a reinitialization without your input, but better to remove the USB and therefore allow the system to always immediately boot into the TrueNAS system. After you have reconstructed the terramaster NAS, you can go ahead and connect all the cables and power on the device.

Note – Do NOT replace the USB with the original Terramaster USB Drive that it arrived with, or the system will auto boot into the Terramaster TOS Installation setup.

TrueNAS on a Terramaster NAS – Step 9, Reboot the NAS

Upon rebooting the Terramaster into TrueNAS (can take up to 5 mins, but usually much quicker). You have two options with how to access the configuration and controls. You can use the HDMI+Keyboard if you choose for console/command level access, but it will be ALOT higher a learning curve than the network GUI.

Alternatively (much more recommended), use a program such as Advanced IP Scanner, which is free and VERY useful anyway, or even network command prompt) to scan your local area network and find where the Terramaster with TrueNAS is located (i.e it’s IP). This IP (eg 192.168.1.111) is what you put into the URL bar ofay web browser and it will load into the login GUI for TrueNAS . From here you will need to use the username ‘root’ in combination with the password that you created during initialization.

And that is about it. You now have TrueNAS installed as the default OS of your Terramaster NAS. From here you can do anything and everything that his highly regarded ZFS powered server software offers. Head into the Storage area and start creating pools, as well as areas for caching and lots more features.

TrueNAS Core was recently updated to ver.13 in a stable release of the FreeBSD format, as well as new improvements in the Linux-based version ‘TrueNAS ‘. The first thing you are going to need to do when setting up your TrueNAS > Terramaster NAS server is set up your storage. Do this by heading into the storage tab and following the handy steps on screen. After that, you can pretty much do anything on your new ZFS NAS!

You can find out more about TrueNAS in my full review below that covers everything I like and dislike about the platform:

Thanks for reading! I hope this guide has helped you make the most of your storage setup. If you’d like to support my work and help me create more guides, reviews, and tutorials on NAS and related topics, there are several ways to do so—I’d truly appreciate any support!

  • Visit the “Support NAS Passion” page [HERE] to explore different ways to contribute.
  • Use the links below when shopping for NAS hardware—purchasing through these links earns us a small commission (at no extra cost to you), which helps keep the site running.
  • Spread the word! If you found this guide useful, share it with friends, colleagues, or on your favorite social media platform.

Thank you again for your support, and have an amazing week!


Where to Buy a Product
amzamexmaestrovisamaster 24Hfree delreturn VISIT RETAILER ➤ 
amzamexmaestrovisamaster 24Hfree delreturn VISIT RETAILER ➤


📧 SUBSCRIBE TO OUR NEWSLETTER 🔔
[contact-form-7]
🔒 Join Inner Circle

Get an alert every time something gets added to this specific article!


Want to follow specific category? 📧 Subscribe

This description contains links to Amazon. These links will take you to some of the products mentioned in today's content. As an Amazon Associate, I earn from qualifying purchases. Visit the NASCompares Deal Finder to find the best place to buy this device in your region, based on Service, Support and Reputation - Just Search for your NAS Drive in the Box Below

Need Advice on Data Storage from an Expert?

Finally, for free advice about your setup, just leave a message in the comments below here at NASCompares.com and we will get back to you. Need Help? Where possible (and where appropriate) please provide as much information about your requirements, as then I can arrange the best answer and solution to your needs. Do not worry about your e-mail address being required, it will NOT be used in a mailing list and will NOT be used in any way other than to respond to your enquiry. [contact-form-7] TRY CHAT Terms and Conditions
If you like this service, please consider supporting us. We use affiliate links on the blog allowing NAScompares information and advice service to be free of charge to you.Anything you purchase on the day you click on our links will generate a small commission which isused to run the website. Here is a link for Amazon and B&H.You can also get me a ☕ Ko-fi or old school Paypal. Thanks!To find out more about how to support this advice service check HEREIf you need to fix or configure a NAS, check Fiver Have you thought about helping others with your knowledge? Find Instructions Here  
 
Or support us by using our affiliate links on Amazon UK and Amazon US
    
 
Alternatively, why not ask me on the ASK NASCompares forum, by clicking the button below. This is a community hub that serves as a place that I can answer your question, chew the fat, share new release information and even get corrections posted. I will always get around to answering ALL queries, but as a one-man operation, I cannot promise speed! So by sharing your query in the ASK NASCompares section below, you can get a better range of solutions and suggestions, alongside my own.

☕ WE LOVE COFFEE ☕


Lincstation N2 NAS Review

Par : Rob Andrews
17 février 2025 à 18:00

The Lincstation N2 NAS Review

The Lincstation N2 NAS is the successor to the Lincstation N1, a flash-focused NAS system that made waves in 2024. While the N1 was praised for its compact size and SSD-centric design, it had certain limitations, such as the lack of 10GbE connectivity and limited active cooling. Now, Lincplus has refined and upgraded its previous design, bringing the N2 to crowdfunding with a stronger CPU, better airflow management, and a built-in 10GbE port. But do these enhancements justify the upgrade, and is it a true alternative to other compact NAS systems from QNAP, Synology, or Asustor? Let’s take a deep dive into the new Lincstation N2 NAS and see how it stacks up.

SOFTWARE - 9/10
HARDWARE - 8/10
PERFORMANCE - 7/10
PRICE - 8/10
VALUE - 9/10


8.2
PROS
👍🏻10GbE networking for high-speed transfers
👍🏻Compact, silent, and power-efficient
👍🏻Includes 1 Year UnRAID license for easy setup
👍🏻Supports four M.2 NVMe SSDs and two SATA SSDs
👍🏻Low power consumption and passive+active cooling
👍🏻Improved design over the N1 with better airflow
CONS
👎🏻Limited PCIe lanes affecting 10GbE throughput
👎🏻Non-upgradeable RAM (fixed 16GB LPDDR5)
👎🏻N100 CPU has very recently seen a refresh towards the N150
👎🏻Uses a barrel-type power adapter instead of USB-C

Where to Buy a Product
amzamexmaestrovisamaster 24Hfree delreturn VISIT RETAILER ➤ 
amzamexmaestrovisamaster 24Hfree delreturn VISIT RETAILER ➤


Lincstation N2 NAS – Specifications

The Lincstation N2 is powered by an Intel Alder Lake-N N100 processor, a quad-core CPU designed for low power consumption and efficient performance. It comes pre-installed with 16GB of onboard LPDDR5 memory, which is non-upgradeable but maximized for the CPU’s capabilities. Storage options include four M.2 NVMe slots and two SATA SSD bays, allowing for a fast, all-flash storage configuration.

Connectivity sees a major boost with the inclusion of a single 10GbE port, a significant upgrade over the dual 2.5GbE ports found on the N1. Additional USB connectivity includes one USB Type-C 10Gbps, one USB 3.2 Gen 2 Type-A, and two USB 2.0 ports for peripherals. The external chassis has been redesigned with better ventilation, including a larger passive cooling panel and improved heat dissipation for long-term reliability.

Specification Lincstation N2
Processor Intel Alder Lake-N N100 (Quad-Core, up to 3.4GHz)
Memory 16GB LPDDR5 (Non-upgradeable)
Storage (OS) 128GB eMMC
Storage (SATA) 2 x 2.5″ SATA SSD bays
Storage (NVMe) 4 x M.2 NVMe 2280 SSD slots (PCIe Gen 3 x1)
Networking 1 x 10GbE RJ45
USB Ports 1 x USB Type-C 10Gbps, 1 x USB 3.2 Gen 2 Type-A, 2 x USB 2.0
Video Output 1 x HDMI 2.0 (4K 60Hz)
Cooling Passive and Active Hybrid Cooling System
Power Supply 60W External PSU (Barrel-type Connector)
Operating System UnRAID (Pre-installed, 1-year license included)
Chassis Material Metal & Plastic Hybrid
Dimensions Compact Desktop Form Factor
Weight TBD

Lincstation N2 NAS – Packaging

Since the N2 is currently in prototype stage, its final retail packaging is yet to be confirmed. However, the unit received for review included the NAS unit, a 60W external power supply, a first-time setup guide, and an UnRAID activation scratch card. Unlike many NAS brands, the Lincstation N2 does not include an Ethernet cable, which is something users should prepare for.

The packaging is minimalist and protective, designed to keep the NAS unit secure during transit, ensuring it remains well-protected from impact or shifting during shipping. The outer packaging features clear branding and basic specifications, though additional documentation on first-time setup would be beneficial, particularly for new UnRAID users. The box itself is relatively compact, reducing unnecessary waste while maintaining effective protection for the unit.

One of the notable elements in the package is the UnRAID activation card, which includes a scratch-off code for license registration. This ensures that users can activate their UnRAID installation immediately, allowing them to set up their storage array and applications with minimal delay. Given that UnRAID is a key selling point of the N2, including physical licensing details within the packaging is a welcome touch. The activation process is straightforward, and the included instructions provide a step-by-step guide on how to register and enable the software.

The external PSU remains barrel-type rather than USB-C, a decision that may disappoint users accustomed to more modern power connectors. However, the power brick itself is high quality, ensuring stable and efficient energy delivery. Given the N2’s low overall power draw, the external PSU design makes sense to keep heat generation outside the NAS chassis. While USB-C would have been a more modern and convenient choice, this power adapter provides reliable and consistent power delivery.

Additionally, it would have been useful to see additional accessories included, such as a basic network cable or drive installation tools, which are often included in NAS packages from other brands. Having all essential setup components in the box would make the initial setup experience even smoother, particularly for users who may not have immediate access to spare cables or peripherals.


Lincstation N2 NAS – Design & Build

The Lincstation N2 follows a compact, minimalistic design, much like its predecessor, making it an ideal desktop or office NAS. The metallic cooling panel at the bottom has been improved, allowing better passive airflow to support the fanless cooling design.

The four M.2 NVMe bays are located on the underside, while two SATA SSD slots are positioned at the front for easy installation.

A set of front-facing LED indicators provides system status updates, while an integrated neon status light enhances visibility. The magnetic panel for SSD installation remains a standout feature, allowing quick access to drive bays without the need for tools. Although the N2 is nearly silent in operation, high-intensity workloads may cause the system to warm up, making the new airflow improvements crucial for long-term performance.

The new chassis design enhances durability, featuring a sturdier metal and plastic blend that reinforces the unit without adding excess weight. The minimalist aesthetic is well-suited for both home and professional environments, ensuring that the NAS fits seamlessly alongside existing equipment. Cooling remains a primary focus, with improved airflow pathways reducing heat buildup and ensuring stable performance even under extended workloads.

The ventilation improvements include an expanded airflow channel that spans the entire underside of the device. This design allows heat from the NVMe drives and CPU to dissipate more effectively, reducing the need for aggressive active cooling solutions. Combined with efficient heat sinking, the N2 is able to maintain performance without excessive noise.

The compact footprint ensures that desk space usage is minimal, making it an ideal option for users with limited workspace. Additionally, the stackable design means multiple units can be arranged efficiently for users with multiple NAS or networking devices. The thoughtful combination of passive and active cooling elements ensures the N2 delivers sustained performance without requiring frequent maintenance.


Lincstation N2 NAS – Ports & Connectivity

The Lincstation N2 improves on the N1 by introducing a single 10GbE network port, replacing the dual 2.5GbE ports seen in its predecessor. This upgrade allows users to achieve significantly higher transfer speeds, making the NAS ideal for large file transfers, media editing, and network virtualization. However, the 10GbE performance is somewhat limited due to PCIe lane constraints, meaning users may not fully saturate the bandwidth under all conditions.

In addition to the 10GbE port, the N2 includes a USB Type-C 10Gbps port, providing high-speed connectivity for external storage devices. There is also a USB 3.2 Gen 2 Type-A port, ensuring compatibility with a range of USB peripherals. The inclusion of two USB 2.0 ports allows users to connect basic accessories, such as keyboards and mice for local management.

The rear layout of the N2 is designed for easy cable management, ensuring tidy workspace integration. Users looking to expand network connectivity beyond 10GbE may need to rely on USB-to-Ethernet adapters, as the system does not support PCIe expansion. The limited expandability of networking options might disappoint users who were hoping for an additional slot for NIC upgrades, but the onboard 10GbE should suffice for most users in this category.

Given that USB ports are an essential component of any NAS setup, the N2 provides a good balance between speed and compatibility. The USB-C 10Gbps port is particularly useful for connecting external SSD enclosures, expanding fast-access storage options for users with additional high-speed media requirements. However, it is worth noting that additional expansion beyond USB is not available, making pre-planning your connectivity needs essential before setup.


Lincstation N2 NAS – Internal Hardware & Performance

The Lincstation N2 utilizes an Intel N100 CPU, a power-efficient quad-core processor capable of handling basic NAS tasks, virtualization, and container workloads. While not a high-end processor, it provides a good balance of power and efficiency. The 16GB LPDDR5 memory ensures smooth multitasking but cannot be expanded.

Storage performance is solid, with M.2 NVMe drives operating at PCIe Gen 3×1, delivering around 800MB/s read/write speeds. SATA SSDs achieve speeds of 500–600MB/s, making them suitable for RAID 1 or RAID-Z configurations. However, users looking to push extreme performance benchmarks will find the PCIe lane allocation slightly restrictive, especially for multi-drive simultaneous access scenarios.

(Click below to open in new tab in full size)

2x SATA SSD, BTRFS MIRROR, SMB  SHARE, 1GB and 4GB TESTS

4x M.2 NVMe SSD, ZFS POOL, SMB  SHARE, 1GB and 4GB TESTS

Power consumption is exceptionally low, with idle usage around 10–13W and peak operation at 18–22W. The external power adapter remains adequate, though a USB-C power option would be preferable. Energy efficiency remains one of the standout features of the N2, making it an excellent choice for users looking to build a long-term, low-cost NAS setup.

Heat dissipation has been improved significantly over the N1, with an upgraded passive cooling system featuring a larger vented bottom panel. Under full load, temperatures remain within acceptable limits, preventing thermal throttling or reduced drive longevity.

Given that flash-based NAS systems tend to generate more heat than HDD counterparts, these improvements help maintain reliability for continuous operation.

During real-world testing, the N2 performed admirably under multiple storage scenarios, including RAID-Z, traditional RAID configurations, and direct disk access. The optimized drive placement and airflow system allow the NAS to maintain consistent speeds without overheating, even under heavy sequential read/write workloads. While the N2 may not break records in enterprise performance metrics, it delivers stable and reliable performance for home and small-business users.


Lincstation N2 NAS – Software & UnRAID Integration

The N2 ships with UnRAID, providing a flexible NAS platform for storage pooling, Docker containers, and virtual machines. The included one-year UnRAID license ensures access to the latest features and security updates. Users can opt to renew their license or switch to other NAS OS options.

UnRAID’s intuitive UI allows for quick configuration, making it suitable for beginners and advanced users alike. Additional plugins may be required for full system monitoring, as Lincstation does not develop its own NAS OS. While UnRAID offers extensive community support, some users may prefer TrueNAS or OpenMediaVault, both of which are also compatible with the N2.

Given that UnRAID runs off a USB boot drive, users can easily swap out the OS if required, allowing greater flexibility in long-term system customization.

The inclusion of a 30-day trial before activating the license means users can test the system before committing to a paid software platform, a welcome addition for those considering different configurations.


Lincstation N2 NAS – Final Verdict

The Lincstation N2 NAS is a solid upgrade over its predecessor, the N1, offering better connectivity, improved cooling, and more efficient hardware. The inclusion of 10GbE networking makes it a more appealing option for users who require higher data transfer speeds, and the passive and active cooling improvements ensure better thermal regulation under sustained workloads. With support for four M.2 NVMe SSDs and two SATA SSDs, the N2 provides flexible storage options, allowing users to build a high-speed, all-flash NAS setup. The Intel N100 processor and 16GB LPDDR5 memory deliver decent performance for most home and small business NAS applications, but the non-upgradeable memory may be a limiting factor for more demanding users. The compact, efficient design makes it an ideal NAS for those looking for a balance between power efficiency and performance.

That being said, the N2 does have a few drawbacks that may impact users looking for greater expandability. The lack of PCIe expansion slots means users cannot add additional NICs or storage controllers, making it less versatile compared to some competing NAS solutions. Additionally, while the 10GbE port is a significant upgrade, it is limited by PCIe bandwidth constraints, meaning users may not be able to fully utilize its maximum throughput in all scenarios. The USB connectivity options are decent, but having only one high-speed USB-C 10Gbps port may feel restrictive for those wanting multiple fast external connections. Furthermore, the reliance on a barrel-type power connector instead of USB-C is another missed opportunity for modernization.

Overall, the Lincstation N2 NAS remains a good choice for UnRAID users looking for an affordable, high-speed, all-flash NAS solution. It provides great energy efficiency, a streamlined setup process, and a solid mix of connectivity options. While it lacks some scalability features, for most home and small business users, it offers a compelling blend of performance, efficiency, and ease of use. If Lincplus continues refining their NAS lineup, future iterations with more robust networking, storage expandability, and minor refinements to cooling and connectivity could make it a standout competitor in the small NAS market.

Pros and Cons of the Lincstation N2 NAS

Pros:

  • 10GbE networking for high-speed transfers
  • Compact, silent, and power-efficient
  • Includes 1 Year UnRAID license for easy setup
  • Supports four M.2 NVMe SSDs and two SATA SSDs
  • Low power consumption and passive+active cooling
  • Improved design over the N1 with better airflow

Cons:

  • Limited PCIe lanes affecting 10GbE throughput
  • Non-upgradeable RAM (fixed 16GB LPDDR5)
  • N100 CPU has very recently seen a refresh towards the N150
  • Uses a barrel-type power adapter instead of USB-C


📧 SUBSCRIBE TO OUR NEWSLETTER 🔔
[contact-form-7]
🔒 Join Inner Circle


Get an alert every time something gets added to this specific article!


Want to follow specific category? 📧 Subscribe

This description contains links to Amazon. These links will take you to some of the products mentioned in today's content. As an Amazon Associate, I earn from qualifying purchases. Visit the NASCompares Deal Finder to find the best place to buy this device in your region, based on Service, Support and Reputation - Just Search for your NAS Drive in the Box Below

Need Advice on Data Storage from an Expert?

Finally, for free advice about your setup, just leave a message in the comments below here at NASCompares.com and we will get back to you. Need Help? Where possible (and where appropriate) please provide as much information about your requirements, as then I can arrange the best answer and solution to your needs. Do not worry about your e-mail address being required, it will NOT be used in a mailing list and will NOT be used in any way other than to respond to your enquiry. [contact-form-7] TRY CHAT Terms and Conditions
If you like this service, please consider supporting us. We use affiliate links on the blog allowing NAScompares information and advice service to be free of charge to you.Anything you purchase on the day you click on our links will generate a small commission which isused to run the website. Here is a link for Amazon and B&H.You can also get me a ☕ Ko-fi or old school Paypal. Thanks!To find out more about how to support this advice service check HEREIf you need to fix or configure a NAS, check Fiver Have you thought about helping others with your knowledge? Find Instructions Here  
 
Or support us by using our affiliate links on Amazon UK and Amazon US
    
 
Alternatively, why not ask me on the ASK NASCompares forum, by clicking the button below. This is a community hub that serves as a place that I can answer your question, chew the fat, share new release information and even get corrections posted. I will always get around to answering ALL queries, but as a one-man operation, I cannot promise speed! So by sharing your query in the ASK NASCompares section below, you can get a better range of solutions and suggestions, alongside my own.

☕ WE LOVE COFFEE ☕


❌
❌