Test LE360 V2 de DeepCool
 GinjFo s’est intéressé au LE360 V2, un Watercooling AIO équipé de 3 ventilateurs de 120 mm annoncé à seulement 79,99 € et garanti de 3 ans
Cet article Test LE360 V2 de DeepCool a été publié en premier par GinjFo.
GinjFo s’est intéressé au LE360 V2, un Watercooling AIO équipé de 3 ventilateurs de 120 mm annoncé à seulement 79,99 € et garanti de 3 ans
Cet article Test LE360 V2 de DeepCool a été publié en premier par GinjFo.
Every so often in the NAS market, a new model arrives that challenges not just its predecessors but also its closest competitors. With the 2025 release of the Synology DS925+, buyers now face an interesting dilemma: go with Synology’s latest compact powerhouse, or choose QNAP’s TS-464—a device that has already proven itself since its release in 2022/2023 and offers a wide array of features at a competitive price. The DS925+ brings notable upgrades to CPU architecture, system memory scalability, and integration within Synology’s tightly controlled ecosystem. Meanwhile, the TS-464 has spent years benefiting from firmware maturity, PCIe expandability, and a more open hardware approach that appeals to power users and tinkerers alike. But which device is ultimately the better buy in 2025? Should you embrace Synology’s ecosystem with its newer, high-performance release, or does QNAP’s more versatile and budget-friendly offering still hold strong in the face of newer competition? Let’s dive into the details to help you decide which NAS deserves your next investment.
When placing the 2025 Synology DS925+ alongside the 2022/2023 QNAP TS-464, one might expect the newer model to clearly dominate in every area. But hardware comparisons in the NAS market are rarely so simple. While both units are aimed at tech-savvy home users and small businesses looking for reliable, always-on storage solutions, their approaches to hardware—and the user needs they prioritize—are noticeably different. The DS925+ emphasizes streamlined performance, reduced noise, and integration within Synology’s tightly managed ecosystem. The QNAP TS-464, meanwhile, leans into raw hardware flexibility, DIY expandability, and a more open feature set for power users. Below is a detailed hardware breakdown of both NAS devices, showing where each shines and where compromises were made.
| Category | Synology DS925+
|
QNAP TS-464
|
Advantage / Notes |
|---|---|---|---|
| CPU Model | AMD Ryzen V1500B | Intel Celeron N5105 | Different architectures; depends on workload |
| CPU Cores / Threads | 4 Cores / 8 Threads | 4 Cores / 4 Threads | DS925+ has more threads |
| CPU Frequency | 2.2 GHz | 2.0 GHz (base) / 2.9 GHz (turbo) | TS-464 has higher clock speeds |
| Architecture | 64-bit | 64-bit | – |
| Hardware Encryption Engine | Yes | Yes | – |
| Memory (Pre-installed) | 4 GB DDR4 ECC SODIMM | 4 GB DDR4 non-ECC SODIMM | DS925+ uses ECC memory |
| Total Memory Slots | 2 | 2 | – |
| Max Memory Capacity | 32 GB (2x 16 GB ECC) | 16 GB officially, 32 GB unofficially | DS925+ officially supports more RAM |
| Drive Bays | 4 | 4 | – |
| Max Drive Bays (with Expansion) | 9 (DX525) | Up to 8/12/16 (TL-D800S or TL-D1600S) | TS-464 supports more total drives |
| M.2 Drive Slots | 2 x NVMe (cache only, unless you use Synology SSDs) | 2 x NVMe (cache or storage) | TS-464 offers more flexibility |
| Supported Drive Types | Synology-only verified HDD/SSD | Full third-party drive compatibility | TS-464 supports Seagate, WD, Toshiba, Kingston, Samsung, etc. |
| Hot Swappable Drives | Yes (SATA only) | Yes (SATA only) | – |
| LAN Ports | 2 x 2.5GbE | 2 x 2.5GbE | – |
| USB Ports | 2 x USB 3.2 Gen 1 | 2 x USB 3.2 Gen 2 Type-A | TS-464 has faster and more versatile ports |
| Expansion Port Type | USB Type-C (for DX525 only) | USB Type-C / USB-A (for TL & TR series) | TS-464 supports more expansion chassis |
| PCIe Slot | None | 1 x PCIe Gen3 x2 | TS-464 allows 10GbE or AI/GPU card upgrades |
| Dimensions (HxWxD) | 166 x 199 x 223 mm | 168 x 170 x 226 mm | Virtually the same size |
| Weight | 2.26 kg | 2.18 kg | TS-464 is slightly lighter |
| System Fans | 2 x 92mm | 1 x 120mm | DS925+ may offer better airflow; TS-464 is quieter |
| Fan Modes | Full-Speed, Cool, Quiet | Smart Fan Control | Comparable flexibility |
| LED Brightness Control | Yes | Yes | – |
| Power Recovery | Yes | Yes | – |
| Noise Level (Idle) | 20.5 dB(A) | 18.6 dB(A) | TS-464 is quieter |
| Power Supply | 100W External Adapter | 90W External Adapter | TS-464 is more power efficient |
| Power Consumption (Access / Hibernate) | 37.91W / 12.33W | 26.08W / 9.48W | TS-464 uses less power |
| BTU (Access / Hibernate) | 129.27 / 42.05 | 89.03 / 32.38 | TS-464 generates less heat |
| Operating Temp | 0°C to 40°C | 0°C to 40°C | – |
| Storage Temp | -20°C to 60°C | -20°C to 70°C | TS-464 is rated for slightly higher extremes |
| Humidity | 5% to 95% RH | 5% to 95% RH | – |
| Warranty | 3 years (extendable to 5) | 3 years (extendable with license or bundle) | – |
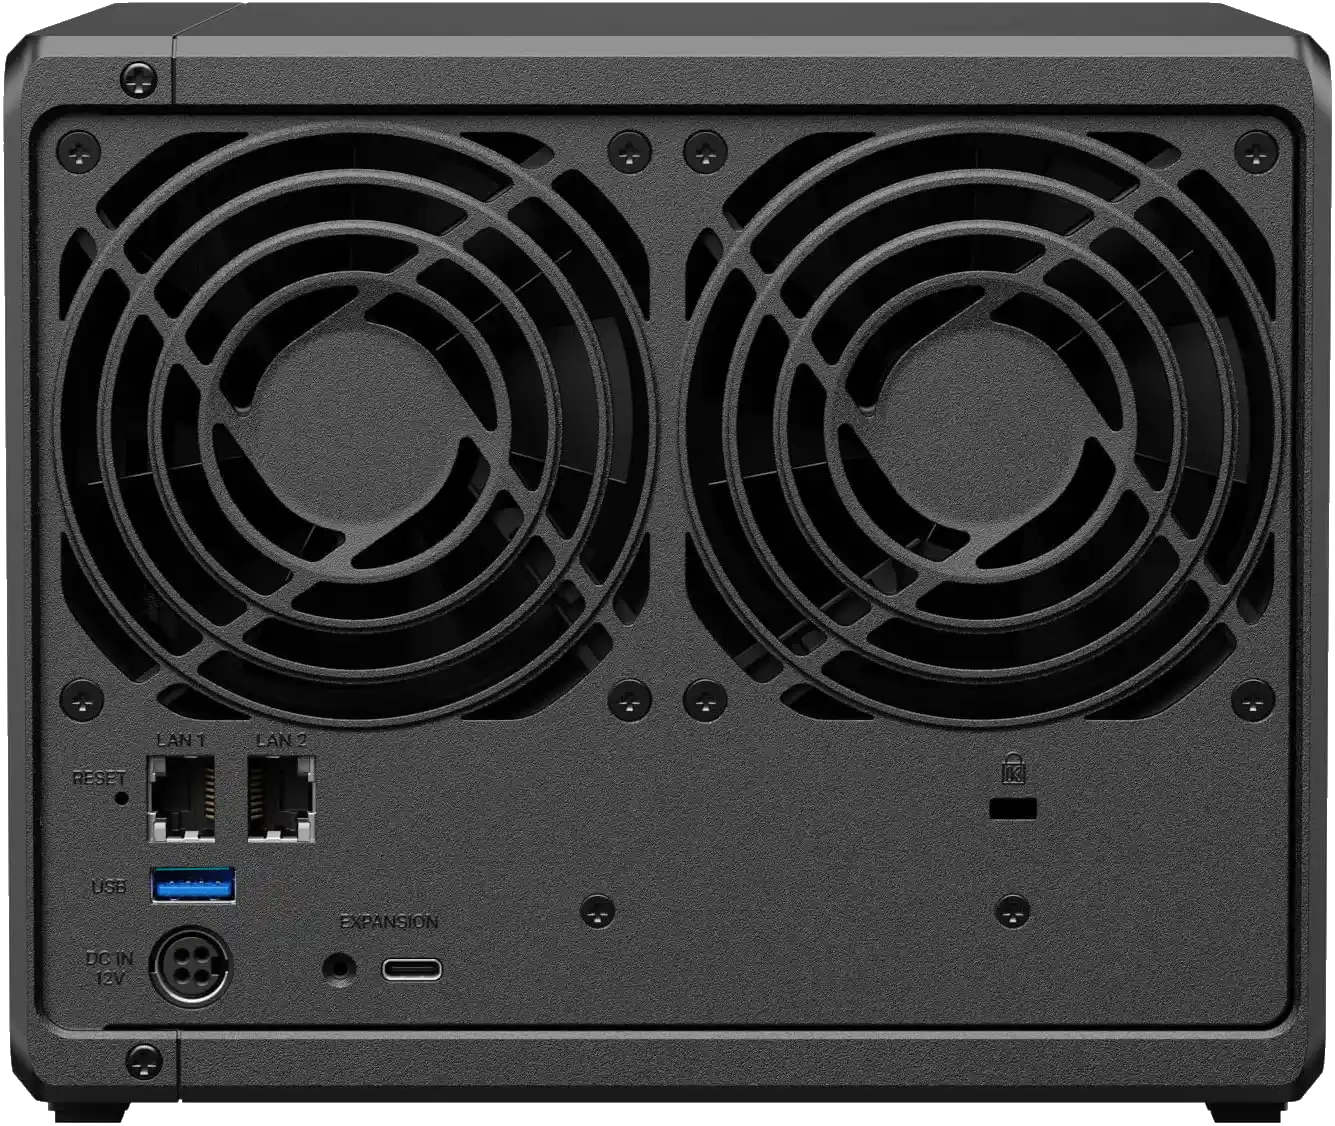
The DS925+ delivers a refined hardware experience out of the box, with its newer AMD Embedded Ryzen V1500B 4 Core/ 8 thread processor, dual 2.5GbE ports for faster LAN connectivity, and modern I/O including USB-C. It features two M.2 NVMe slots (for cache only, unless you use the Synology SNV3400 drives from Synology), dual memory slots supporting up to 32GB of ECC DDR4 RAM, and a compact metal chassis designed for quiet, efficient operation. It also runs cooler and quieter than many of its rivals, making it an ideal fit for environments where noise levels matter—such as living rooms, home studios, or small offices. This makes the DS925+ a “plug-and-play” NAS with premium internal components and minimal need for user intervention.
 |
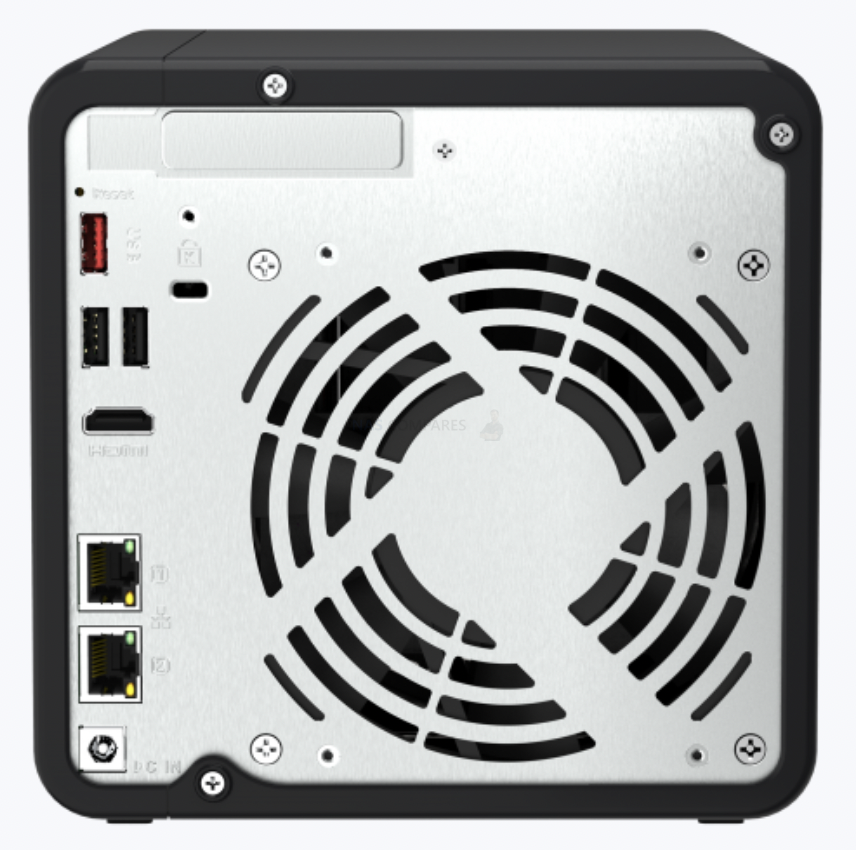 |
By contrast, the QNAP TS-464 takes a more modular, expandable approach. Powered by the Intel Celeron N5105/N5095 CPU (a quad-core processor with integrated graphics, but only 4 threads), it offers HDMI 2.0 output, two M.2 PCIe Gen3 x1 slots (which can be used for either caching or storage pools), and a PCIe Gen3 x2 slot for optional 10GbE or more M.2s, USB expansion, or even GPU cards. QNAP also includes dual 2.5GbE ports, putting it on par with the DS925+ in terms of network speed, but it edges ahead in overall hardware adaptability. Want multimedia output via HDMI? QNAP has it. Want to add NVMe storage pools or real-time transcoding? QNAP supports that too. That said, the TS-464 is based on a slightly older CPU architecture, lacks ECC memory support, and typically generates more fan noise under load. Additionally, its OS and ecosystem are broader in scope but often require more manual setup. Ultimately, the DS925+ is purpose-built for those who prioritize a quiet, polished, and simplified experience with modern performance. The TS-464, on the other hand, remains an excellent choice for users who prefer control, multimedia support, and greater hardware flexibility. Choosing between them largely depends on whether you value Synology’s stability and turnkey design, or QNAP’s freedom and potential.
In any NAS system, the processor plays a pivotal role in determining the scope of functionality—whether it’s managing multiple concurrent users, running virtual machines, powering AI-driven applications, or simply handling encrypted transfers and background tasks efficiently. The Synology DS925+ and the QNAP TS-464 take noticeably different approaches in this regard. The DS925+ features the AMD Ryzen Embedded V1500B, a server-grade SoC designed for sustained multi-threaded workloads. The TS-464, on the other hand, runs on the Intel Celeron N5105, a more consumer-oriented chip that prioritizes integrated multimedia support and power efficiency. While both CPUs are quad-core, their architecture, instruction set, and target use cases diverge sharply—affecting not only raw processing, but also the capabilities unlocked within DSM and QTS/QuTS, respectively.
| Category | AMD Ryzen V1500B
|
Intel Celeron N5105
|
Advantage / Notes |
|---|---|---|---|
| Architecture | Zen (1st Gen) | Tremont (10nm) | N5105 uses newer fabrication process |
| Core / Thread Count | 4 Cores / 8 Threads | 4 Cores / 4 Threads | V1500B has SMT (hyperthreading) support |
| Base Clock Speed | 2.2 GHz | 2.0 GHz | V1500B slightly faster base |
| Boost Clock Speed | N/A (fixed clock) | Up to 2.9 GHz | N5105 has dynamic boost for single-thread performance |
| TDP (Thermal Design Power) | 16W | 10W | N5105 is more power efficient |
| L2 Cache | 2 MB | 1.5 MB | V1500B has more L2 cache |
| L3 Cache | 4 MB | 4 MB | Same |
| Integrated Graphics | None | Intel UHD Graphics (24 EUs @ 800 MHz) | N5105 supports HDMI, video decoding, and light GPU tasks |
| PCIe Version | PCIe 3.0 | PCIe 3.0 | – |
| Max Memory Supported | 32 GB ECC DDR4 | 16 GB officially (32 GB unofficially) | V1500B supports higher, ECC-capable memory |
| Memory Type | DDR4 ECC | DDR4 / LPDDR4x (non-ECC) | V1500B supports ECC, better for critical NAS use |
| Virtualization Support | Yes (AMD-V) | Yes (VT-x, VT-d) | Both CPUs support virtualization features |
| AES-NI (Encryption) | Yes | Yes | Both support hardware encryption |
| Target Use Case | Embedded systems / Business NAS | Low-power desktops / SMB NAS / IoT | V1500B is more server/NAS-specific |
| Release Year | 2020 | 2021 | N5105 is newer |
In terms of raw specs, the V1500B offers 4 cores and 8 threads with a base clock of 2.2GHz and support for ECC memory—a key advantage for mission-critical environments. This CPU is built for multitasking and thrives in scenarios involving virtual machines, container services, and intensive file indexing or backup operations. As a result, the DS925+ supports up to 8 concurrent virtual machines, 8 virtual DSM instances, and higher thresholds for connected users across Synology apps. It is better suited to offices or power users who rely on services like Synology Office, Drive, or Surveillance Station running in tandem. The system handles up to 150 Synology Chat users, 80 Office users, and 80 Drive users, offering excellent multitasking performance with low overhead.
The QNAP TS-464’s Intel N5105 is a 10nm Jasper Lake processor, also quad-core but without hyper-threading and with a slightly lower base clock (2.0GHz). However, it includes integrated Intel UHD Graphics, giving it one key advantage the DS925+ lacks: hardware-accelerated video transcoding via QNAP’s own QuMagie, Video Station, and especially Plex Media Server with support for on-the-fly 1080p and 4K decoding when paired with proper client-side licensing. This makes the TS-464 ideal for multimedia-heavy environments. Beyond media, the N5105 powers QTS and QuTS hero with access to QNAP’s broader and often more modular ecosystem. This includes Hybrid Backup Sync (HBS 3) for unified backup and disaster recovery, QuDedup for deduplicated snapshot replication, QVR Elite and QVR Pro for professional-grade surveillance (supporting multiple IP camera licenses natively), and AI Core features like face recognition and event detection when paired with the QuMagie or QVR Human apps. The TS-464 also supports Virtualization Station, enabling users to run lightweight Linux or Windows VMs with direct passthrough access to USB or PCIe devices, and Container Station, which offers both Docker and LXC container compatibility with GPU passthrough for NPU-based AI inference workloads. Thanks to the included PCIe Gen 3 x2 slot, the system supports optional upgrades like 10GbE NICs, QM2 expansion cards (for M.2 SSD or additional 2.5GbE/10GbE ports), or even Wi-Fi 6 cards, something entirely absent in the DS925+. Additionally, QNAP allows direct output to an external display via HDMI 2.0, enabling standalone use of HD Station apps like Chrome, LibreOffice, Kodi, and even Linux desktop environments — a feature highly prized in HTPC and security NVR deployments. Users can leverage Linux Station to run full Ubuntu VMs locally, or install Ubuntu Core through the App Center for custom development or edge AI inference scenarios.
Taken together, the TS-464 may not support the same high virtual machine/user count as the DS925+, but it compensates with a broader set of integrated appliances catering to power users, home labs, edge AI, and media-heavy deployments. It’s a more “tinker-friendly” platform, favoring flexibility and breadth over centralized system control and vertical integration. If you need an appliance that works across entertainment, security, and hybrid cloud workflows, with room for add-on functionality via hardware or apps, the TS-464 is hard to beat for the price. That said, the Synology DS925+ ultimately offers greater headroom for enterprise workflows, heavier VM usage, and large-scale hybrid deployments. It sacrifices media transcoding and graphical acceleration, but gains a server-class CPU that ensures consistent performance under heavier load conditions. Meanwhile, the TS-464 excels in edge-case versatility, offering more multimedia flexibility and richer expansion potential via PCIe. If your priorities lie in business-class performance, ECC memory support, and robust multi-user capacity, the DS925+ is the clear winner. But for media streaming, home lab tinkering, and a wider hardware feature set, the TS-464 remains a very compelling alternative.
When it comes to NAS platforms, hardware is only half the story—what truly determines a system’s long-term value is the strength, maturity, and flexibility of its software. Synology’s DSM (DiskStation Manager) and QNAP’s QTS/QuTS Hero are two of the most advanced NAS operating systems available today, offering extensive suites of services for backup, virtualization, hybrid cloud, media streaming, and AI-assisted surveillance. But while both OS platforms cover similar ground, their design philosophies, application depth, and supported workloads differ substantially. The Synology DS925+ and QNAP TS-464, though comparable in price and both aimed at prosumers and SMBs, unlock very different software experiences depending on the deployment goals—be it centralized IT infrastructure, media-rich home labs, or container-based edge computing.
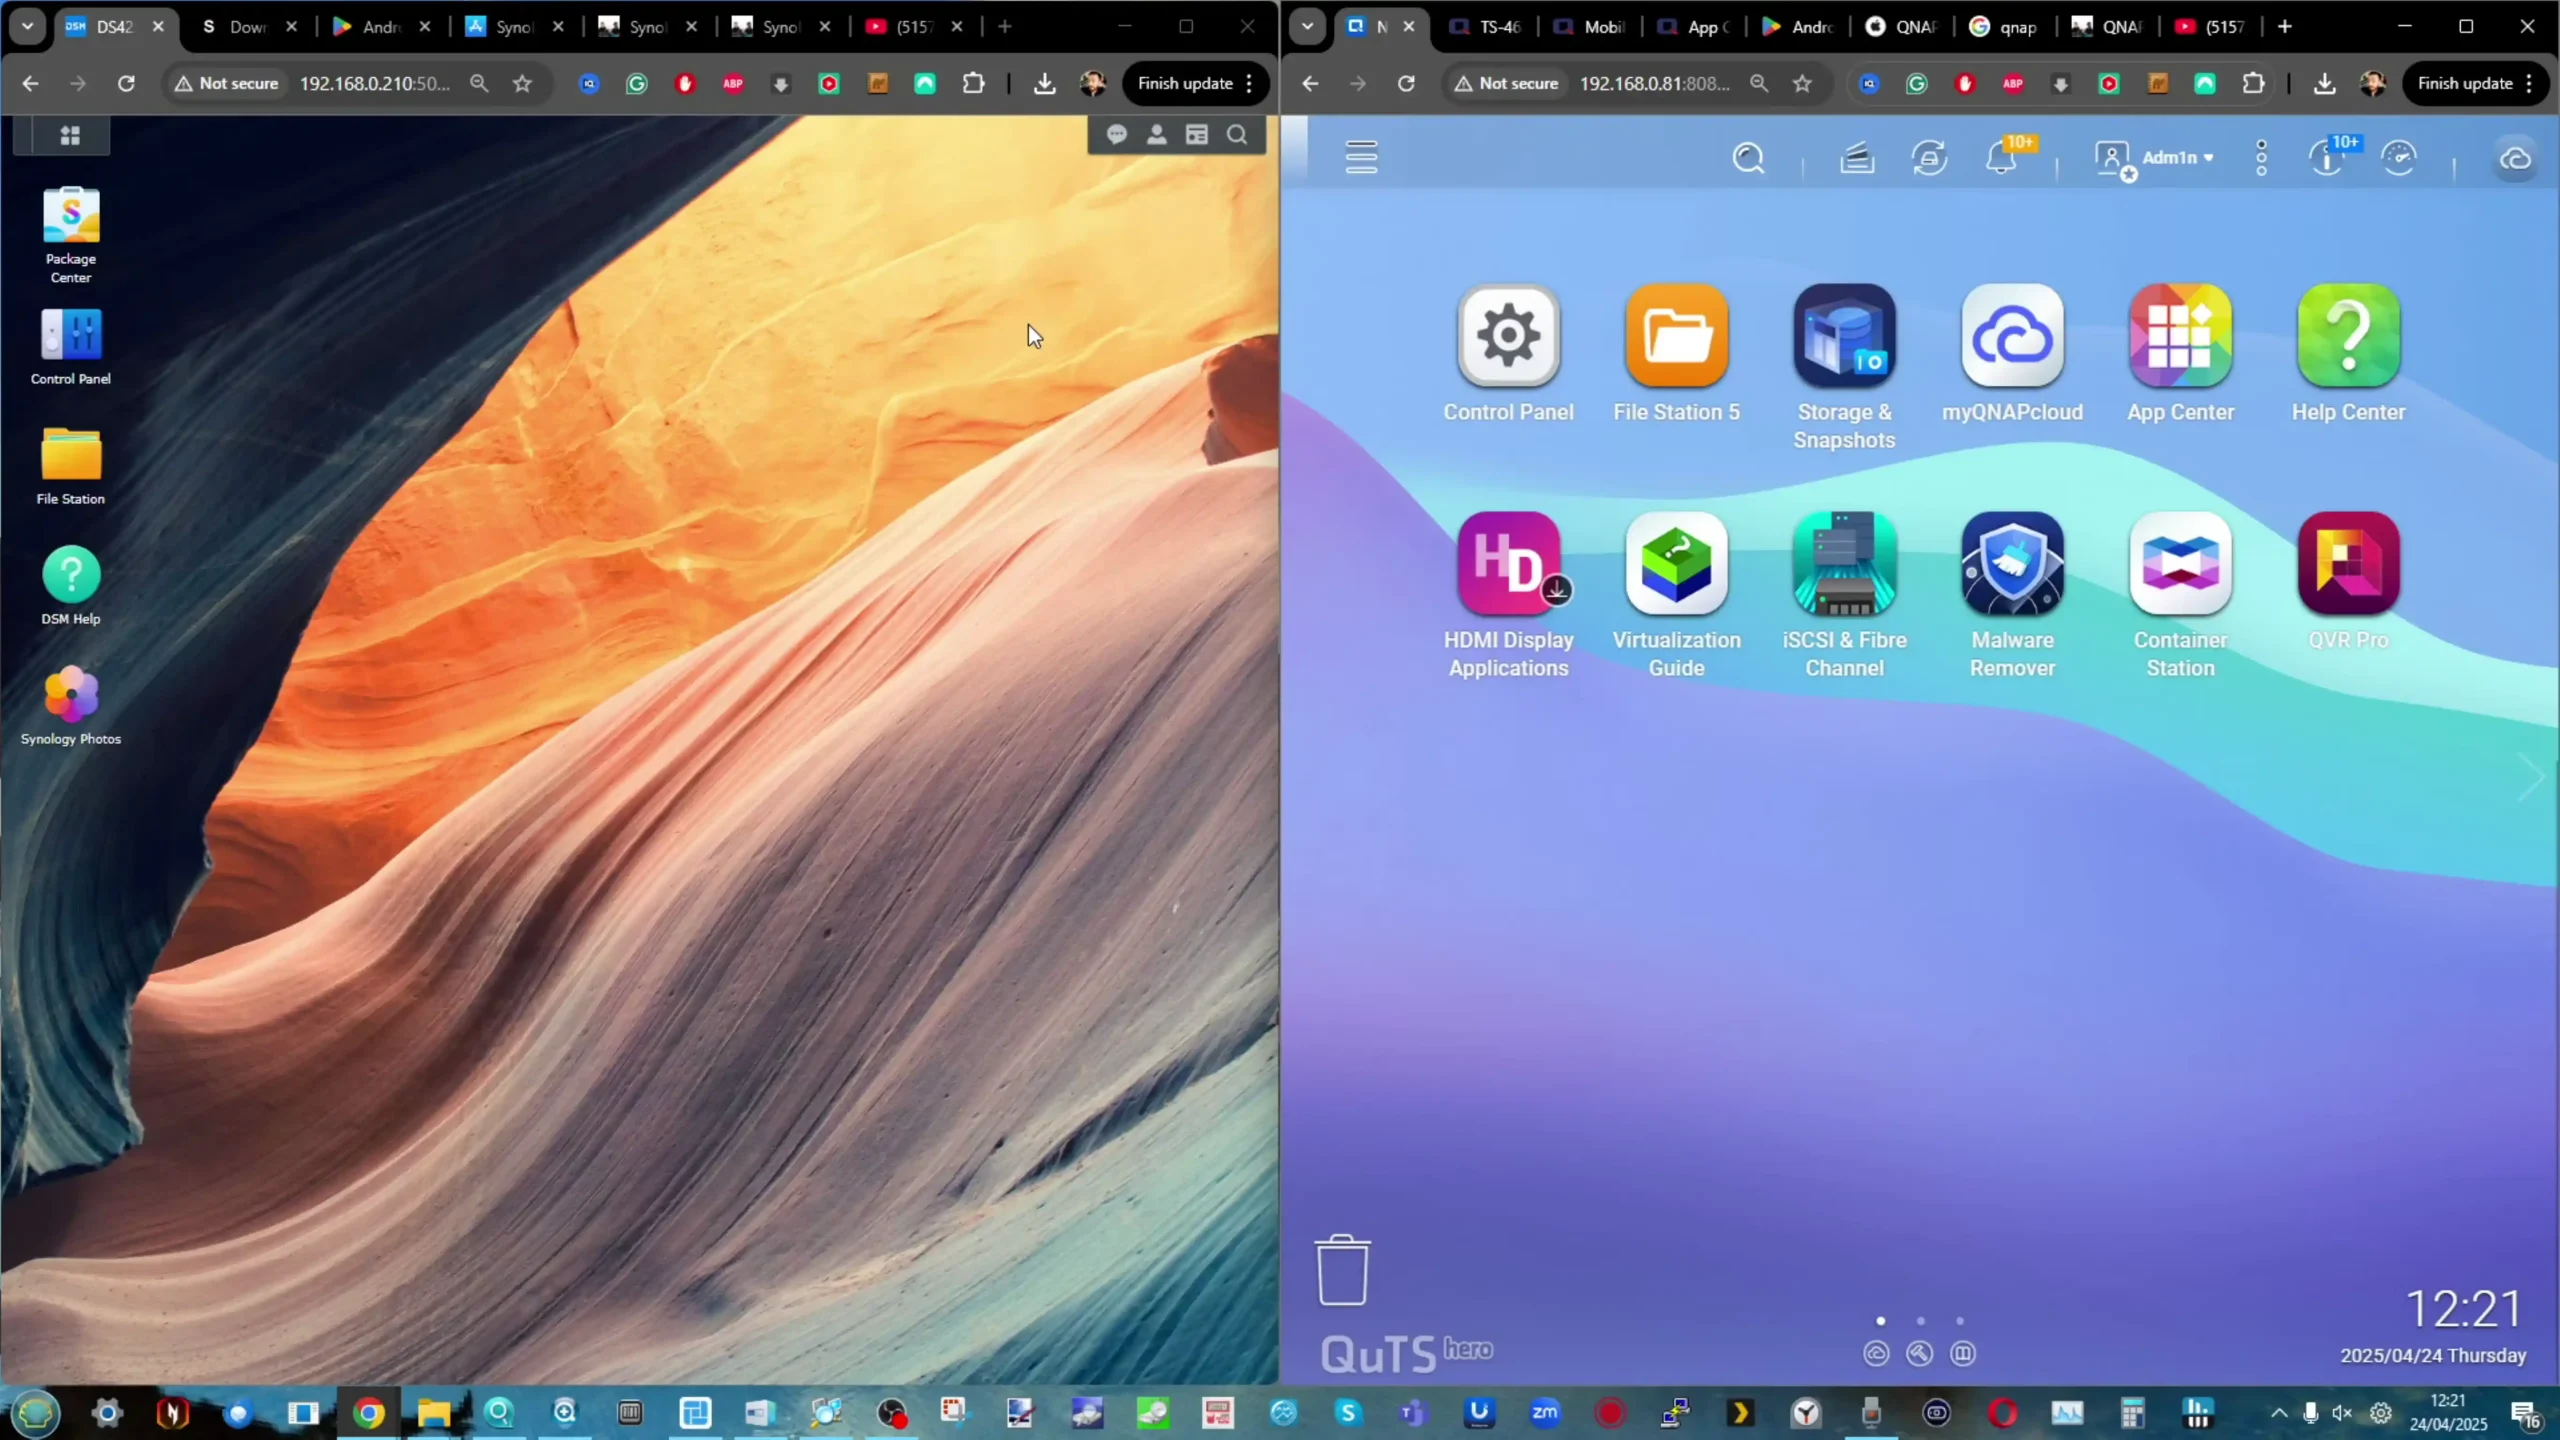
With the DS925+, Synology leans into its strength in unified management and vertical integration. DSM 7.2 is optimized for reliability, simplicity, and scalability within Synology’s ecosystem. The DS925+ supports up to 8 virtual machines and 8 Virtual DSM instances through Virtual Machine Manager, offers extensive group and user quotas, and enables full integration with Synology’s cloud services (such as Synology C2 Backup, C2 Identity, and Hybrid Share). Its higher hardware ceiling allows for more active users: 150 on Synology Chat, 80 on Synology Drive and Office, and up to 8 simultaneous VPN connections. Backup capabilities are similarly robust, with a higher threshold of shared folder sync tasks and superior support for incremental snapshot replication. Surveillance Station on the DS925+ supports up to 40 IP cameras and benefits from reduced CPU overhead during continuous recording, even while handling concurrent backup or media indexing operations. DSM’s elegant UI, consistent updates, and tightly integrated packages make it ideal for organizations that value centralized IT administration and long-term platform stability.
On the other hand, the QNAP TS-464 running QTS 5 or QuTS Hero offers a more open and modular software ecosystem. While the Intel N5105 CPU imposes lower multitasking ceilings than the V1500B, QNAP compensates with a broader set of feature-specific applications and customization paths. The TS-464 supports virtualization through Virtualization Station (for VMs) and Container Station (for Docker + LXC), and unlike the DS925+, can output video directly via HDMI 2.0—allowing the NAS to act as a standalone Linux desktop, NVR, or HTPC via HybridDesk Station. QNAP also differentiates itself with Hybrid Backup Sync (HBS3), which enables multi-destination sync, deduplicated backup via QuDedup, and real-time disaster recovery tools not found in DSM. QVR Pro and QVR Elite offer an expansive surveillance suite with optional AI-powered analytics (e.g., face recognition, people counting) when paired with compatible QNAP AI apps. The inclusion of ZFS with QuTS Hero (an optional OS for the TS-464) enables inline compression, self-healing file systems, and block-level snapshots, which can be critical for data integrity in business scenarios.
QNAP also encourages expansion through its App Center, which includes over 150+ native and third-party apps, from Node.js and GitLab to Home Assistant, Ubuntu Station, and even Mattermost for self-hosted chat. While the system supports fewer concurrent users and VMs than the DS925+, its strength lies in feature breadth and system-level flexibility. Add-ons like 10GbE NICs, QM2 SSD accelerators, or Wi-Fi 6 cards via PCIe further extend its versatility, especially for hybrid edge workloads or multi-role deployments that evolve over time. In short, the Synology DS925+ is designed for administrative simplicity and long-term scaling, excelling in consistent performance across multi-user deployments with deep DSM integration. The QNAP TS-464, meanwhile, is a powerful sandbox for customization, offering greater freedom, multimedia functionality, and third-party integration—at the cost of some operational polish and software limits. Choosing between them depends on whether your priorities lie in predictable enterprise-grade execution or a more adaptable, feature-dense platform.
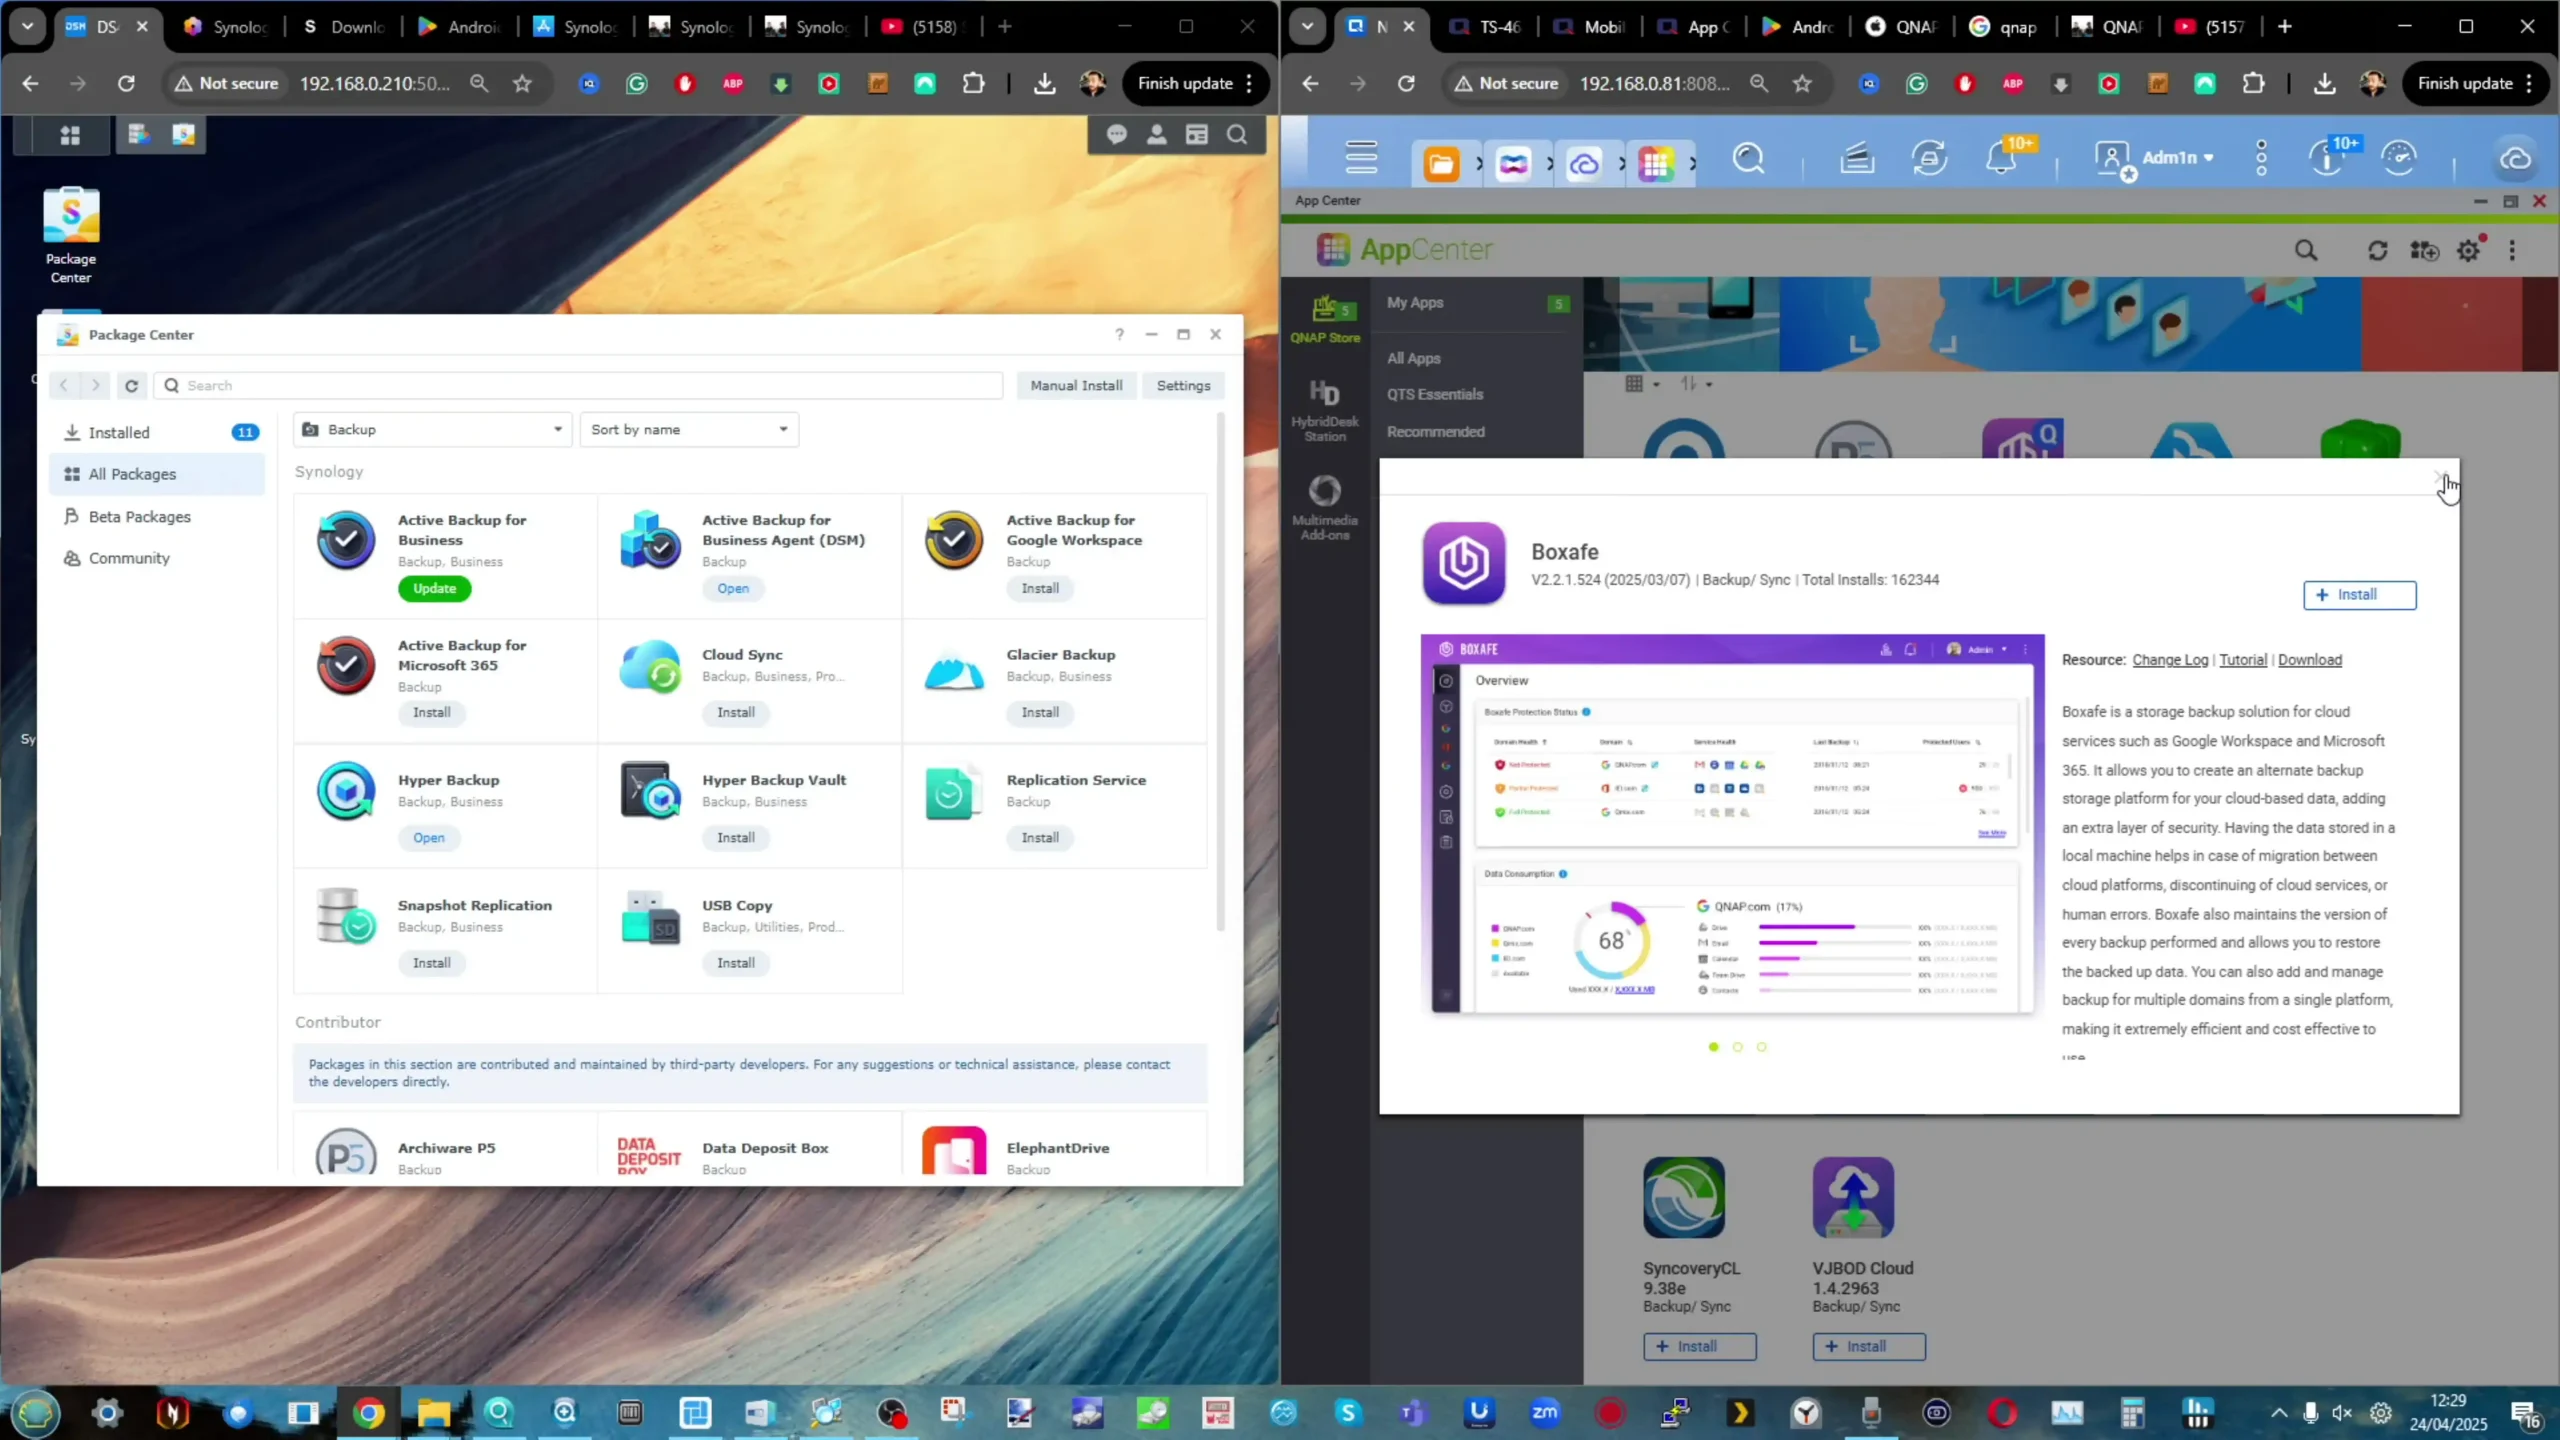
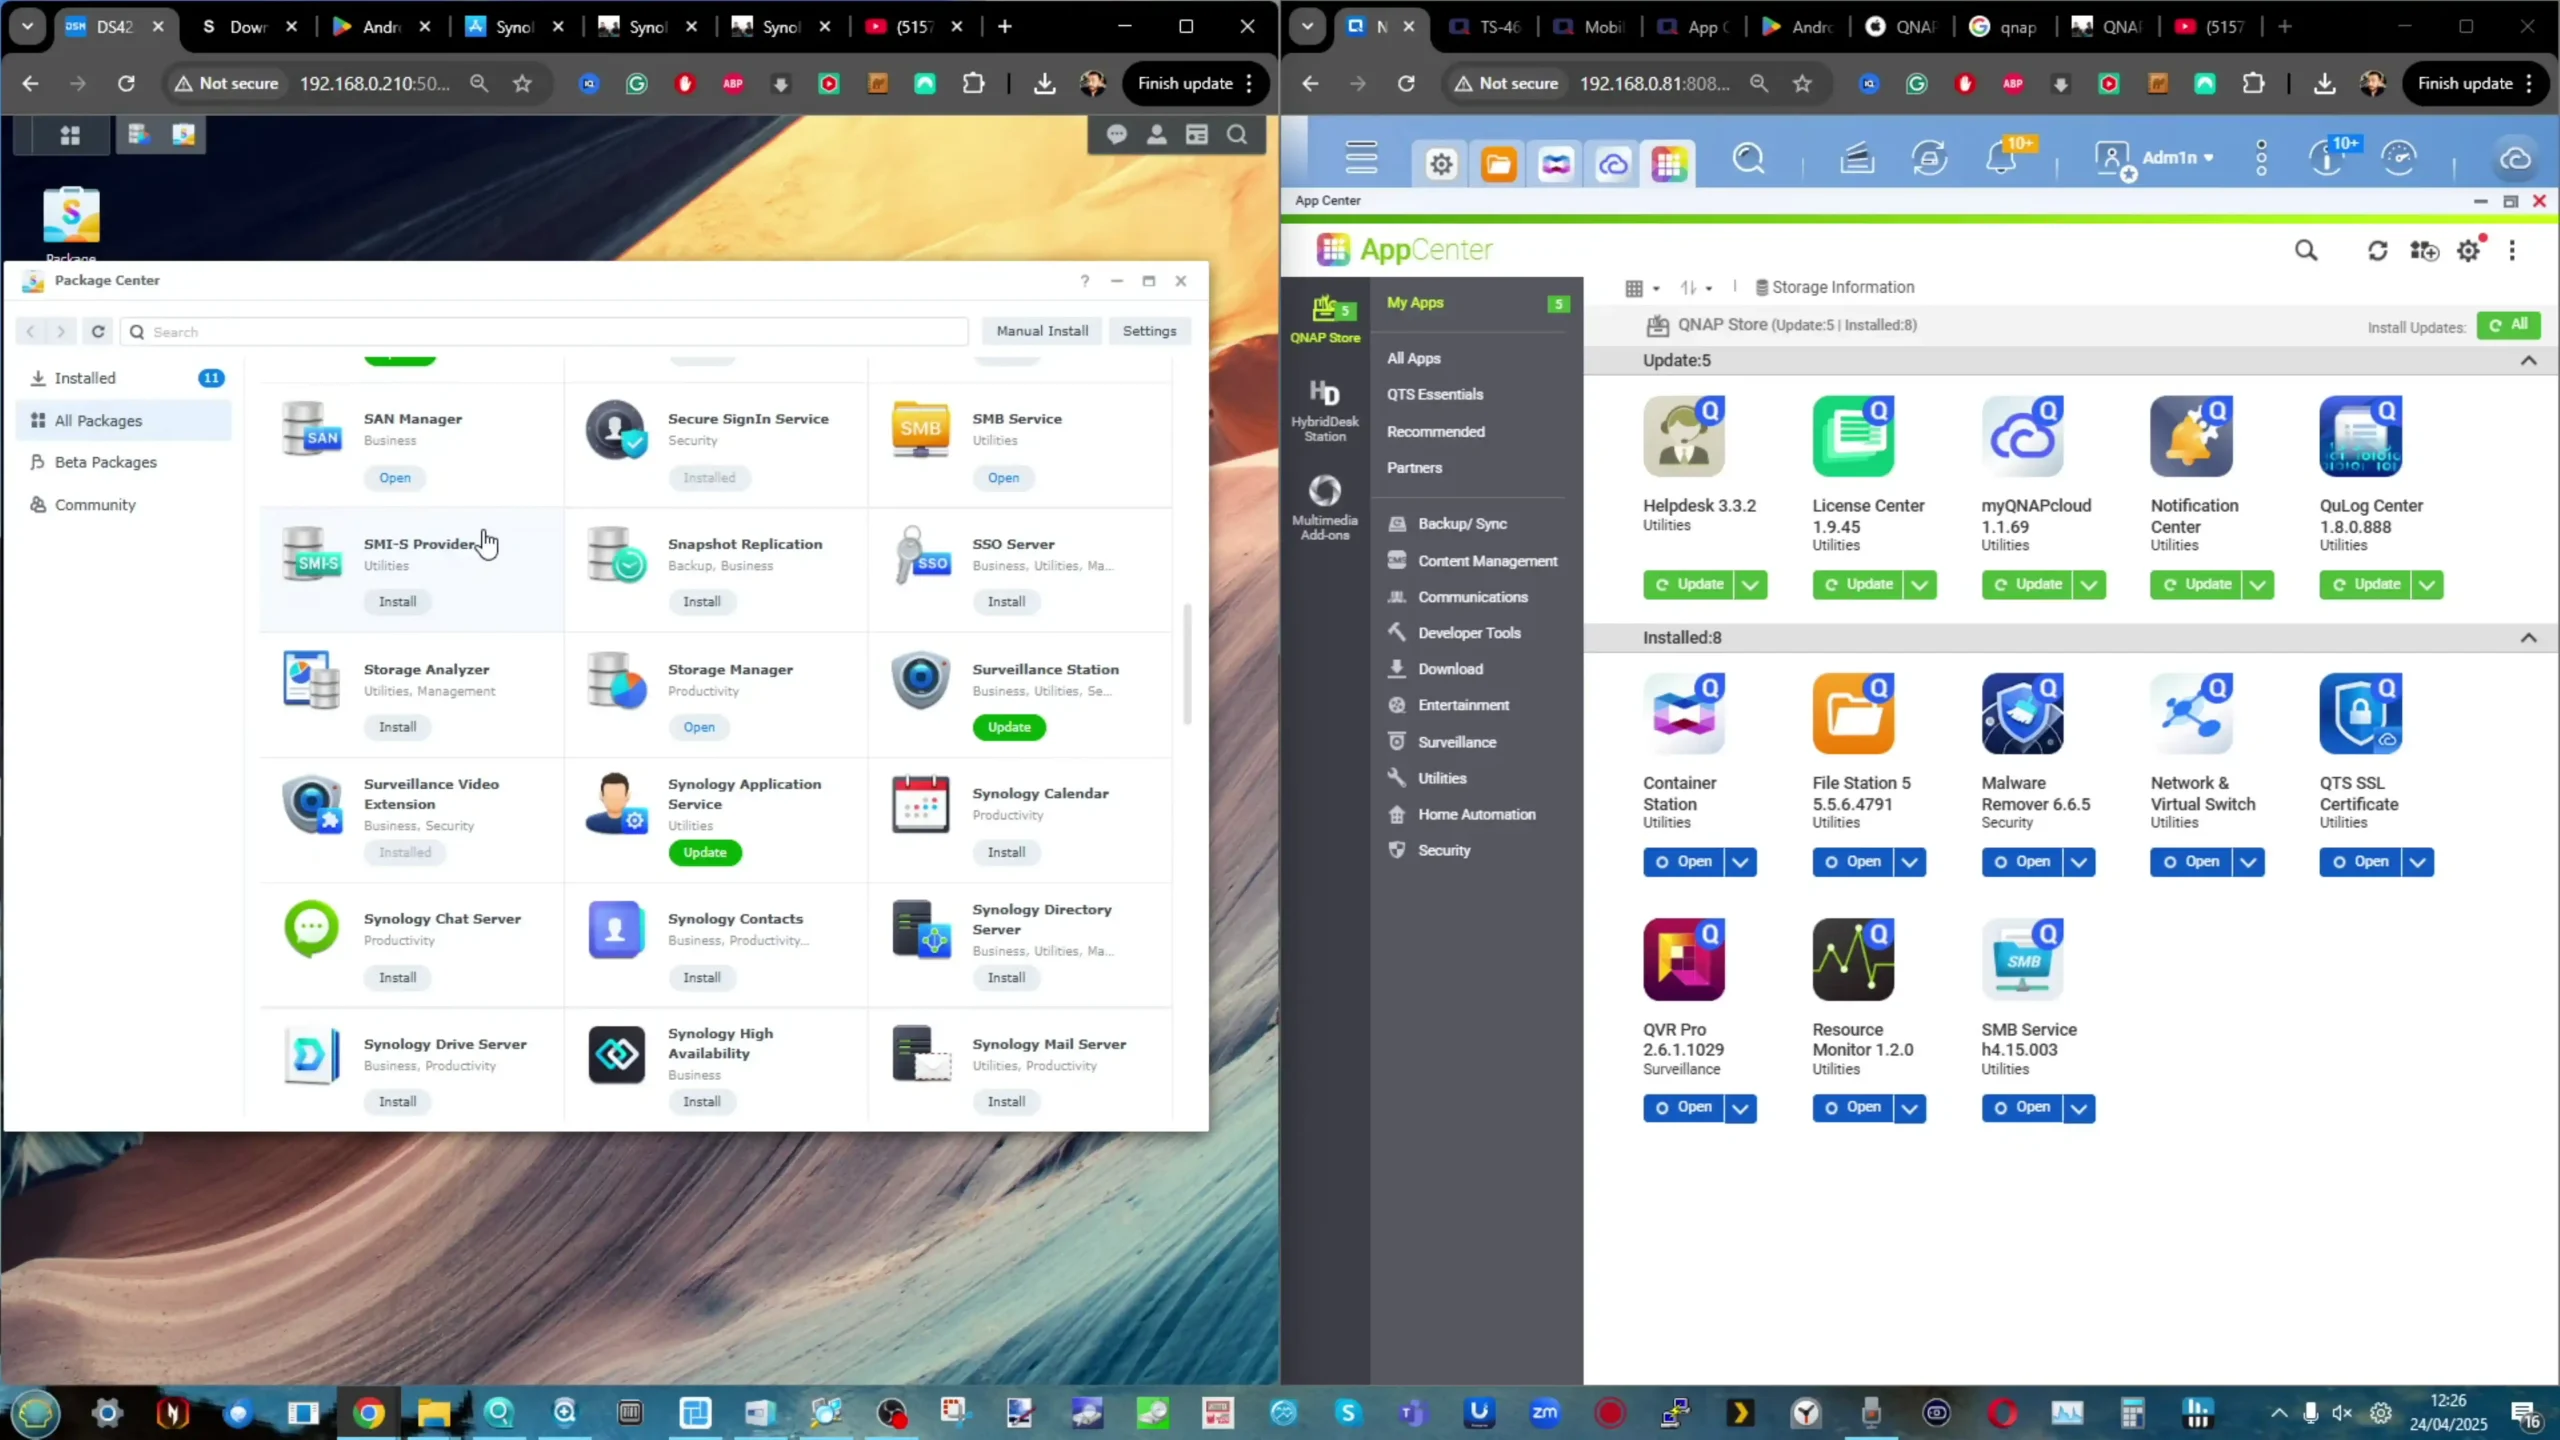
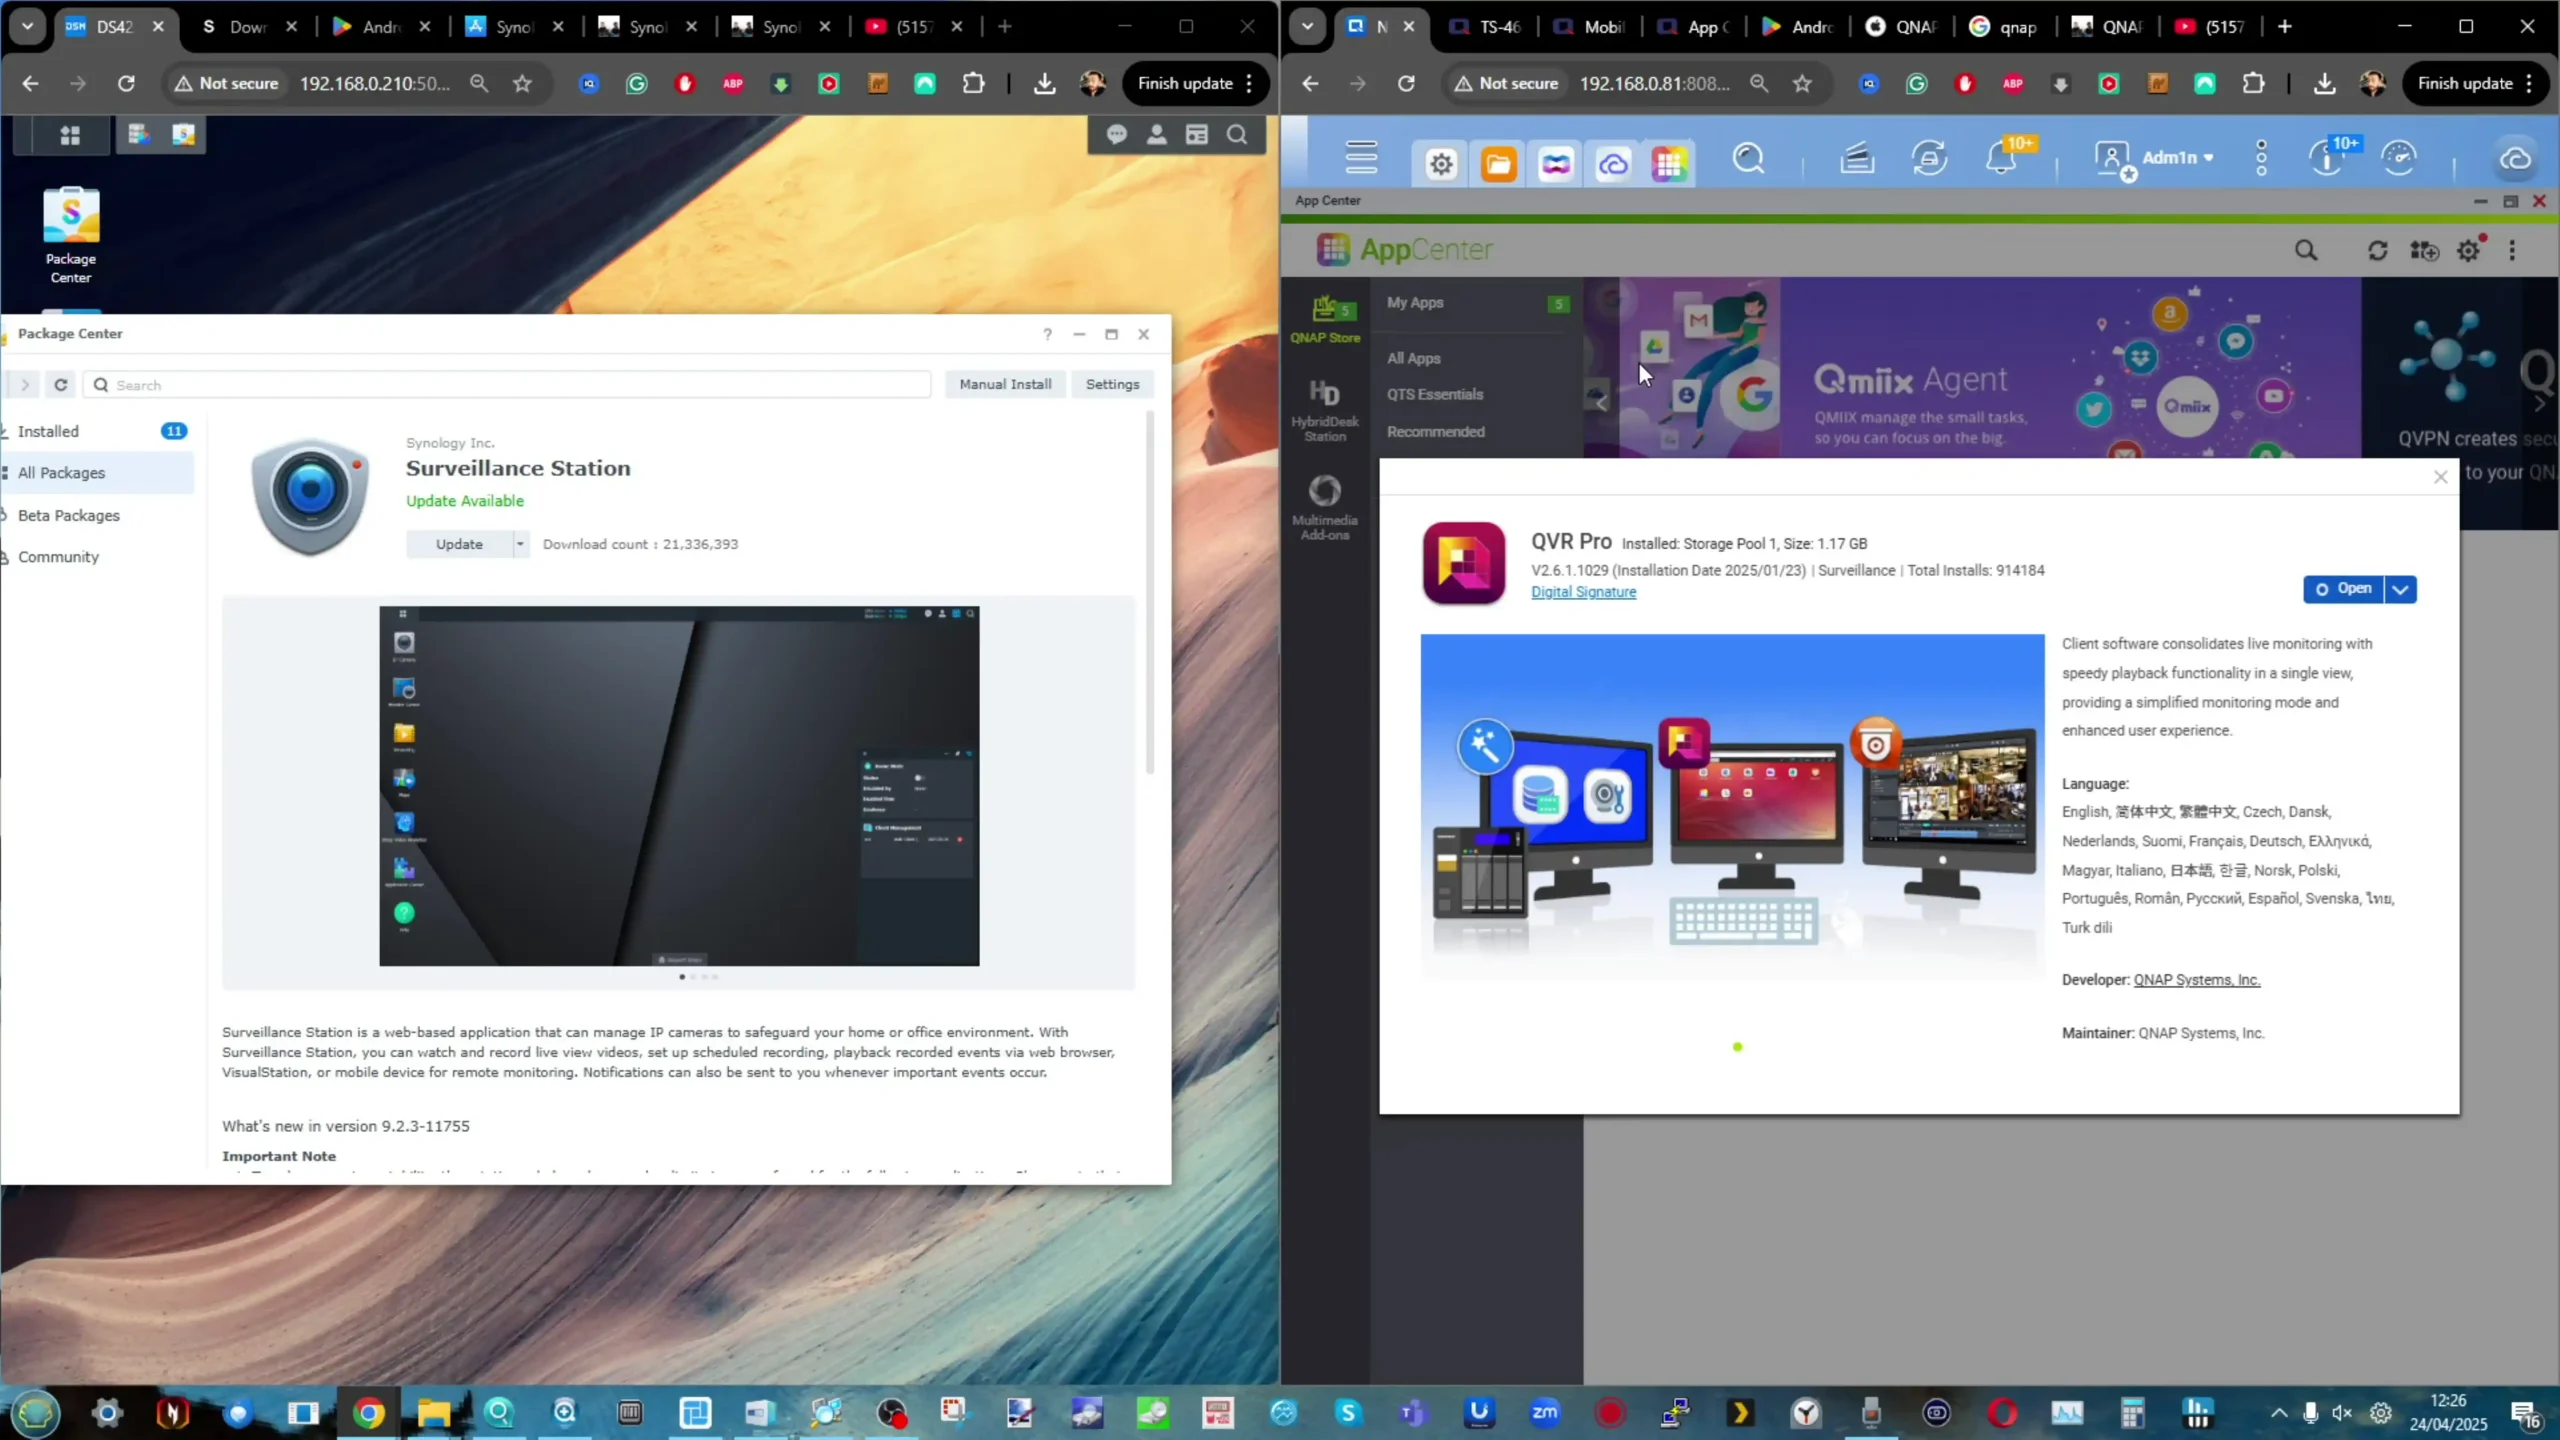
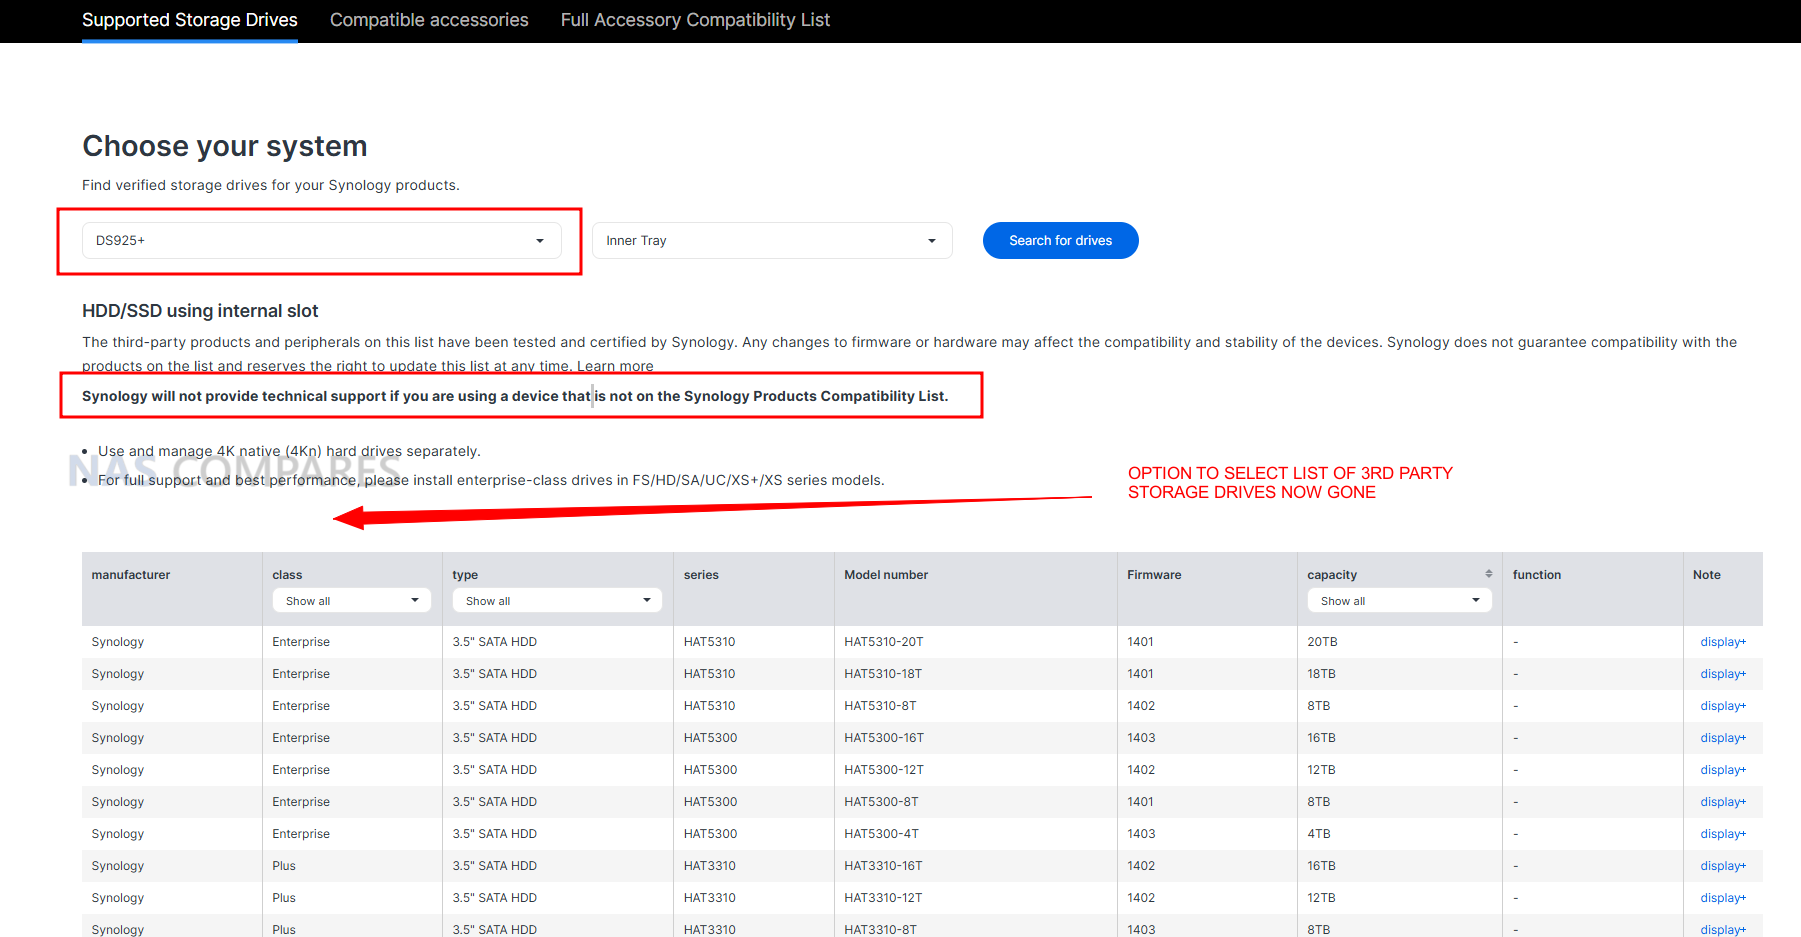
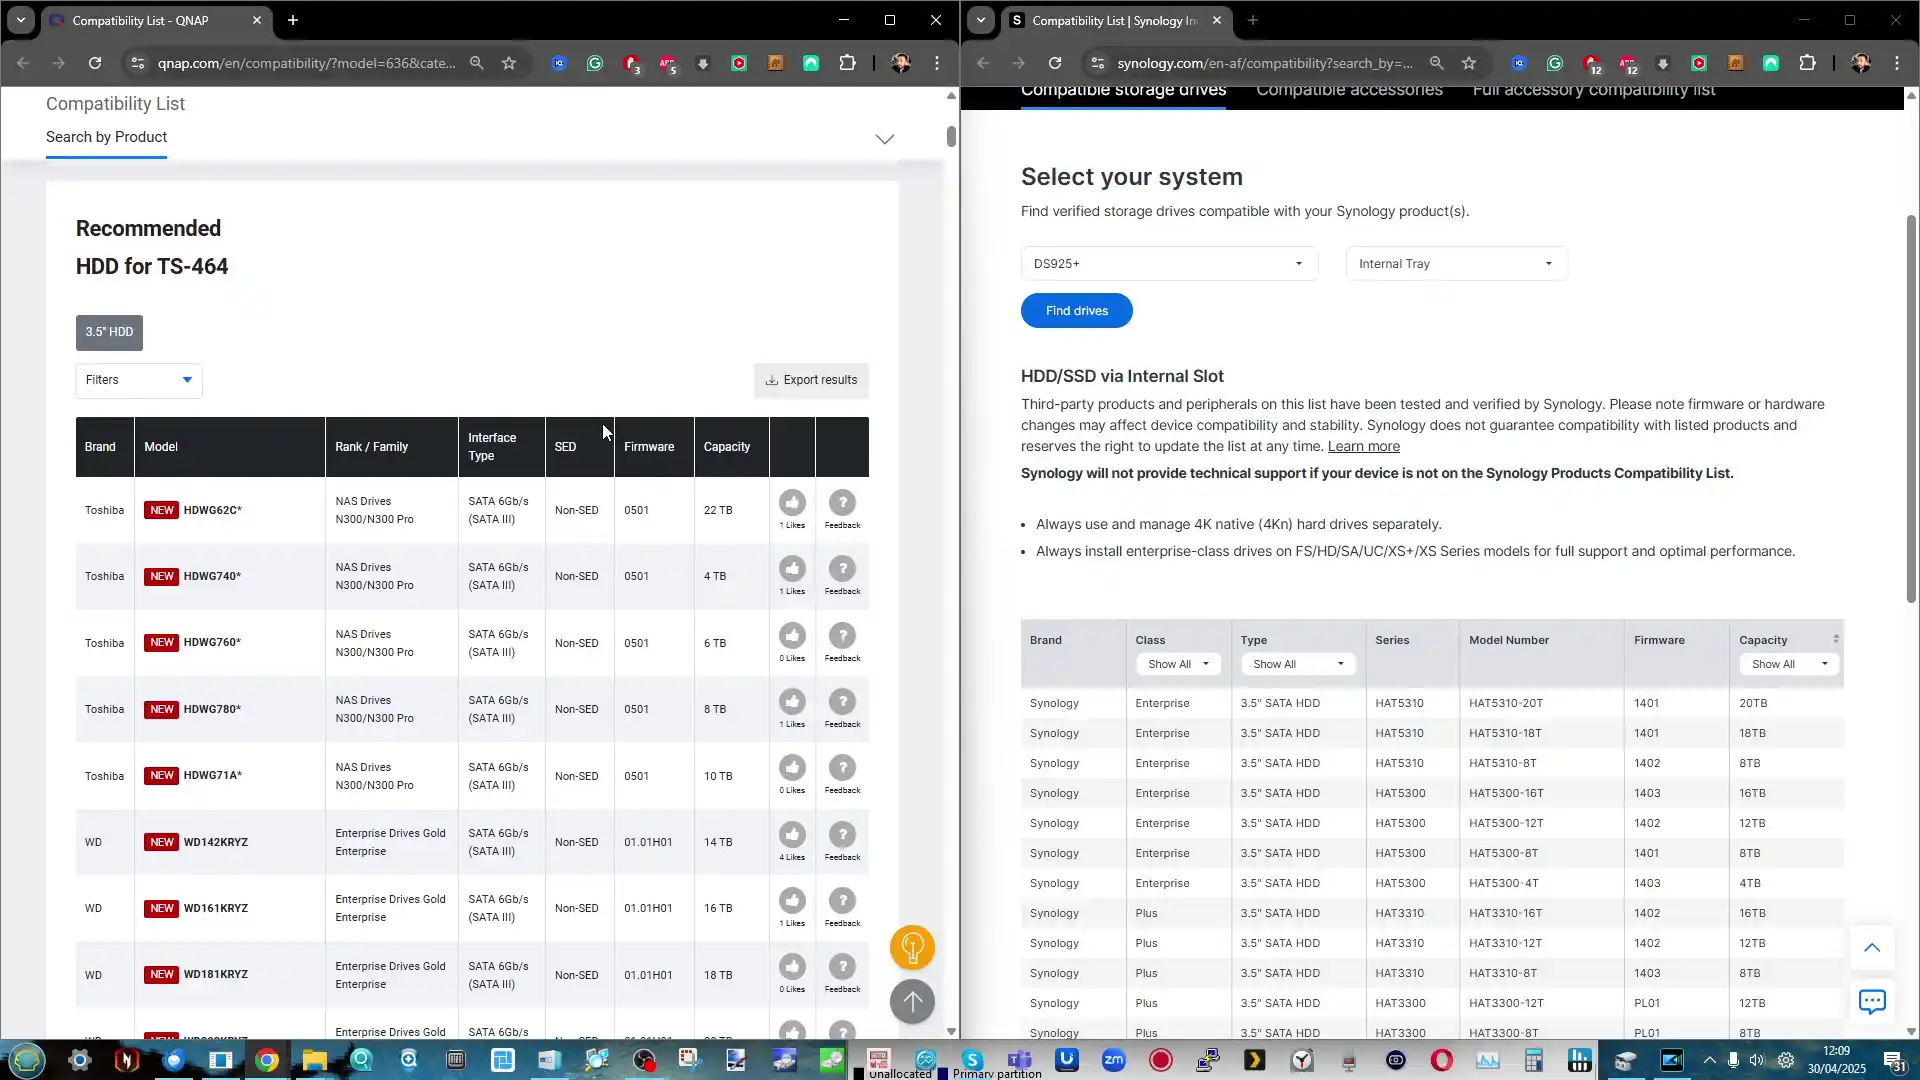
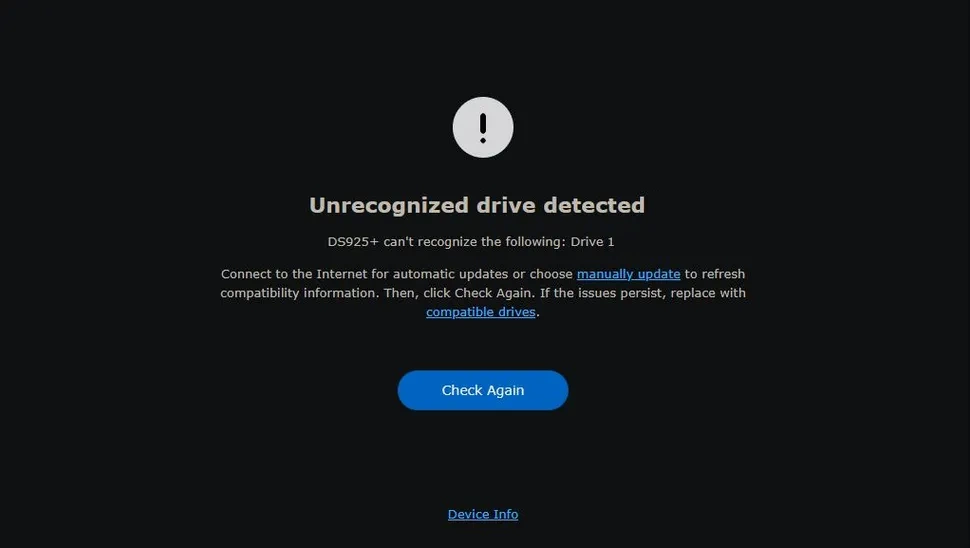
In 2025, Synology has taken its most aggressive step yet toward locking down hardware compatibility, and nowhere is this more evident than in the DS925+. Following years of gradual restrictions—starting with warnings for unverified drives and progressing to default white-listing only Synology-branded media—the DS925+ now represents a firm line in the sand. At the time of writing, this system will not allow DSM initialization if it detects hard drives or SSDs that are not officially listed on Synology’s compatibility list. This list includes exclusively Synology HAT5300/HAT3310 HDDs and SAT5200 SSDs, with no third-party Seagate, WD, Toshiba, Samsung, or Kingston media currently supported. Regardless of drive quality or performance, unsupported models will be outright blocked during system setup. While Synology claims this guarantees optimal reliability and performance within DSM 7.2, the move drastically reduces flexibility for users and integrators alike.
In stark contrast, the QNAP TS-464 embraces an open compatibility philosophy. It supports virtually all major consumer and enterprise drives—from Seagate IronWolf and Exos, to WD Red, Red Plus, and Ultrastar, as well as Toshiba N300/X300 and Samsung/Kingston SSDs—up to 24TB per drive (or higher as of late 2025). QNAP also maintains a regularly updated compatibility list, but crucially, this list is advisory rather than mandatory. Users can install any 3.5″ or 2.5″ SATA HDD/SSD, and as long as it meets the physical and electrical standards, the TS-464 will initialize without issue. This means integrators, home users, or small businesses can reuse existing drives or select from the most cost-effective options in their region—something that’s increasingly difficult to do on newer Synology units. Moreover, QNAP allows mixing and matching of drive brands and capacities within the same storage pool (especially under QuTS hero’s ZFS environment), giving users granular control over redundancy, performance tuning, and cache layering with non-proprietary M.2 NVMe SSDs. This openness also applies to QNAP expansion units, many of which continue to work even with completely mixed-brand storage configurations—something Synology’s newer expansion policies have started to restrict.
For users in regions where Synology-branded media is expensive, hard to find, or simply not justified for non-critical applications, this policy shift on the DS925+ can be a deal-breaker. It positions the system closer to an appliance model, where Synology controls not only the hardware and software, but the storage medium itself. While that vertical integration may improve long-term reliability for some enterprise users, it’s difficult to reconcile with the broader DIY NAS community that values choice and modularity. Ultimately, this creates a philosophical divide: QNAP remains open, modular, and adaptable, trusting users to make informed decisions about their storage media. Synology, in contrast, is consolidating control, with the DS925+ exemplifying a move toward a closed ecosystem—potentially alienating users who previously praised DSM for its balance of simplicity and flexibility. Prospective buyers need to weigh not just performance and features, but how tightly they want to be tied to a single vendor’s hardware roadmap.
The Synology DS925+ is a 2025 refresh designed with clear intent: push performance, tighten control, and streamline the out-of-box experience. In contrast, the QNAP TS-464—released in late 2022—is a Swiss Army knife of NAS flexibility, packed with customization options, open compatibility, and enough horsepower to meet the needs of both power users and small business deployments. Choosing between them ultimately comes down to what kind of NAS experience you’re after: a controlled, polished, and tightly integrated environment, or an open, adaptable, and hardware-friendly platform. On raw performance, the DS925+ has the edge. Its quad-core, 8-thread AMD V1500B CPU delivers higher throughput for multitasking, virtual machines, and heavier concurrent services, and DSM’s user/service thresholds are notably higher as a result. Add in dual 2.5GbE ports by default, and it’s clearly a step ahead of the DS923+ predecessor 1GbE-only base configuration, and you are looking at a healthy upgrade in several ways in this refresh. However, QNAP claws back ground with its PCIe Gen3 x2 slot, allowing 10GbE upgrades, Wi-Fi cards, and even GPU acceleration in select use cases—something Synology removed entirely from the DS925+. In QNAP’s favor is also its support for real-time hardware transcoding, HDMI 2.0 video output, and direct-attached monitor access—making it a better fit for media-centric environments where local playback, Plex, or Kodi usage matters.
|
|

QNAP TS-464 NAS |
||
|
Check Amazon in Your Region for the Synology DS925+ NAS
|
Check B&H for the Synology DS925+ NAS
|
Check Amazon in Your Region for the QNAP TS-464 NAS
|
Check B&H for the QNAP TS-464 NAS
|
But perhaps the most significant dividing line is drive compatibility. The DS925+ will only initialize DSM with Synology-validated drives—locking out nearly all third-party HDDs and SSDs unless explicitly approved. This hardline stance means limited flexibility for users wanting to build using existing drives or regional market alternatives. Meanwhile, the TS-464 supports virtually all consumer and enterprise drives, from Seagate to Toshiba to Kingston, giving users total control over their storage budget and deployment roadmap. This open-ecosystem approach extends to M.2 NVMe usage too, where QNAP allows storage pool creation, caching, and tiering with off-the-shelf modules, while Synology restricts pool creation to only their branded NVMes. If you’re an IT administrator, content creator, or SMB looking for a polished, performance-forward NAS and you’re fully on board with Synology’s ecosystem—including its branded drives—then the DS925+ offers a streamlined, high-ceiling experience with excellent multitasking potential and cleaner UI/UX polish under DSM 7.2. But if you’re someone who values flexibility, upgrade paths, media support, or simply wants to control your storage choices without vendor lock-in, the QNAP TS-464 is an incredibly compelling alternative—offering strong performance for its price, an open architecture, and a deeper toolbox under QTS/QuTS Hero.
NAS Solutions |
NAS Solutions |
| + Better Software (In almost every respect!)
+ Much Better Global Support Presence + More business desirable + Larger Range of solutions – Compatibility restrictions on HDD and Upgrades More and more – Underwhelming hardware (comparatively) |
+ Better Hardware for Price
+ Wider Variety of Solutions and Hardware Profiles + Supports ZFS and/or EXT4 (with ZFS platform now available on latest Intel Celeron Systems) + Wide accessory range and compatibility – Software can often feel inconsistent – Hit by Security Issues if the past |
|
Check Amazon By Clicking Below:
|
Check Amazon By Clicking Below:
|
The Synology DS925+ is the better plug-and-play NAS for prosumers and SMBs who want a high-performance, low-maintenance experience—provided they’re comfortable buying into Synology’s tightly controlled ecosystem of software and storage hardware. On the other hand, the QNAP TS-464 remains the better choice for users who value flexibility, hardware freedom, and scalability—especially if media features, drive compatibility, or future upgrades are part of the plan. Ultimately, the DS925+ is the sharper tool, but the TS-464 is the more versatile one.
 SUBSCRIBE TO OUR NEWSLETTER
 Join Inner Circle Subscribe
This description contains links to Amazon. These links will take you to some of the products mentioned in today's content. As an Amazon Associate, I earn from qualifying purchases. Visit the NASCompares Deal Finder to find the best place to buy this device in your region, based on Service, Support and Reputation - Just Search for your NAS Drive in the Box Below
 Need Help?
Where possible (and where appropriate) please provide as much information about your requirements, as then I can arrange the best answer and solution to your needs. Do not worry about your e-mail address being required, it will NOT be used in a mailing list and will NOT be used in any way other than to respond to your enquiry.
[contact-form-7]
Need Help?
Where possible (and where appropriate) please provide as much information about your requirements, as then I can arrange the best answer and solution to your needs. Do not worry about your e-mail address being required, it will NOT be used in a mailing list and will NOT be used in any way other than to respond to your enquiry.
[contact-form-7]
 Ko-fi or old school Paypal. Thanks!To find out more about how to support this advice service check HEREIf you need to fix or configure a NAS, check Fiver
Have you thought about helping others with your knowledge? Find Instructions Here
Ko-fi or old school Paypal. Thanks!To find out more about how to support this advice service check HEREIf you need to fix or configure a NAS, check Fiver
Have you thought about helping others with your knowledge? Find Instructions Here


|
 |
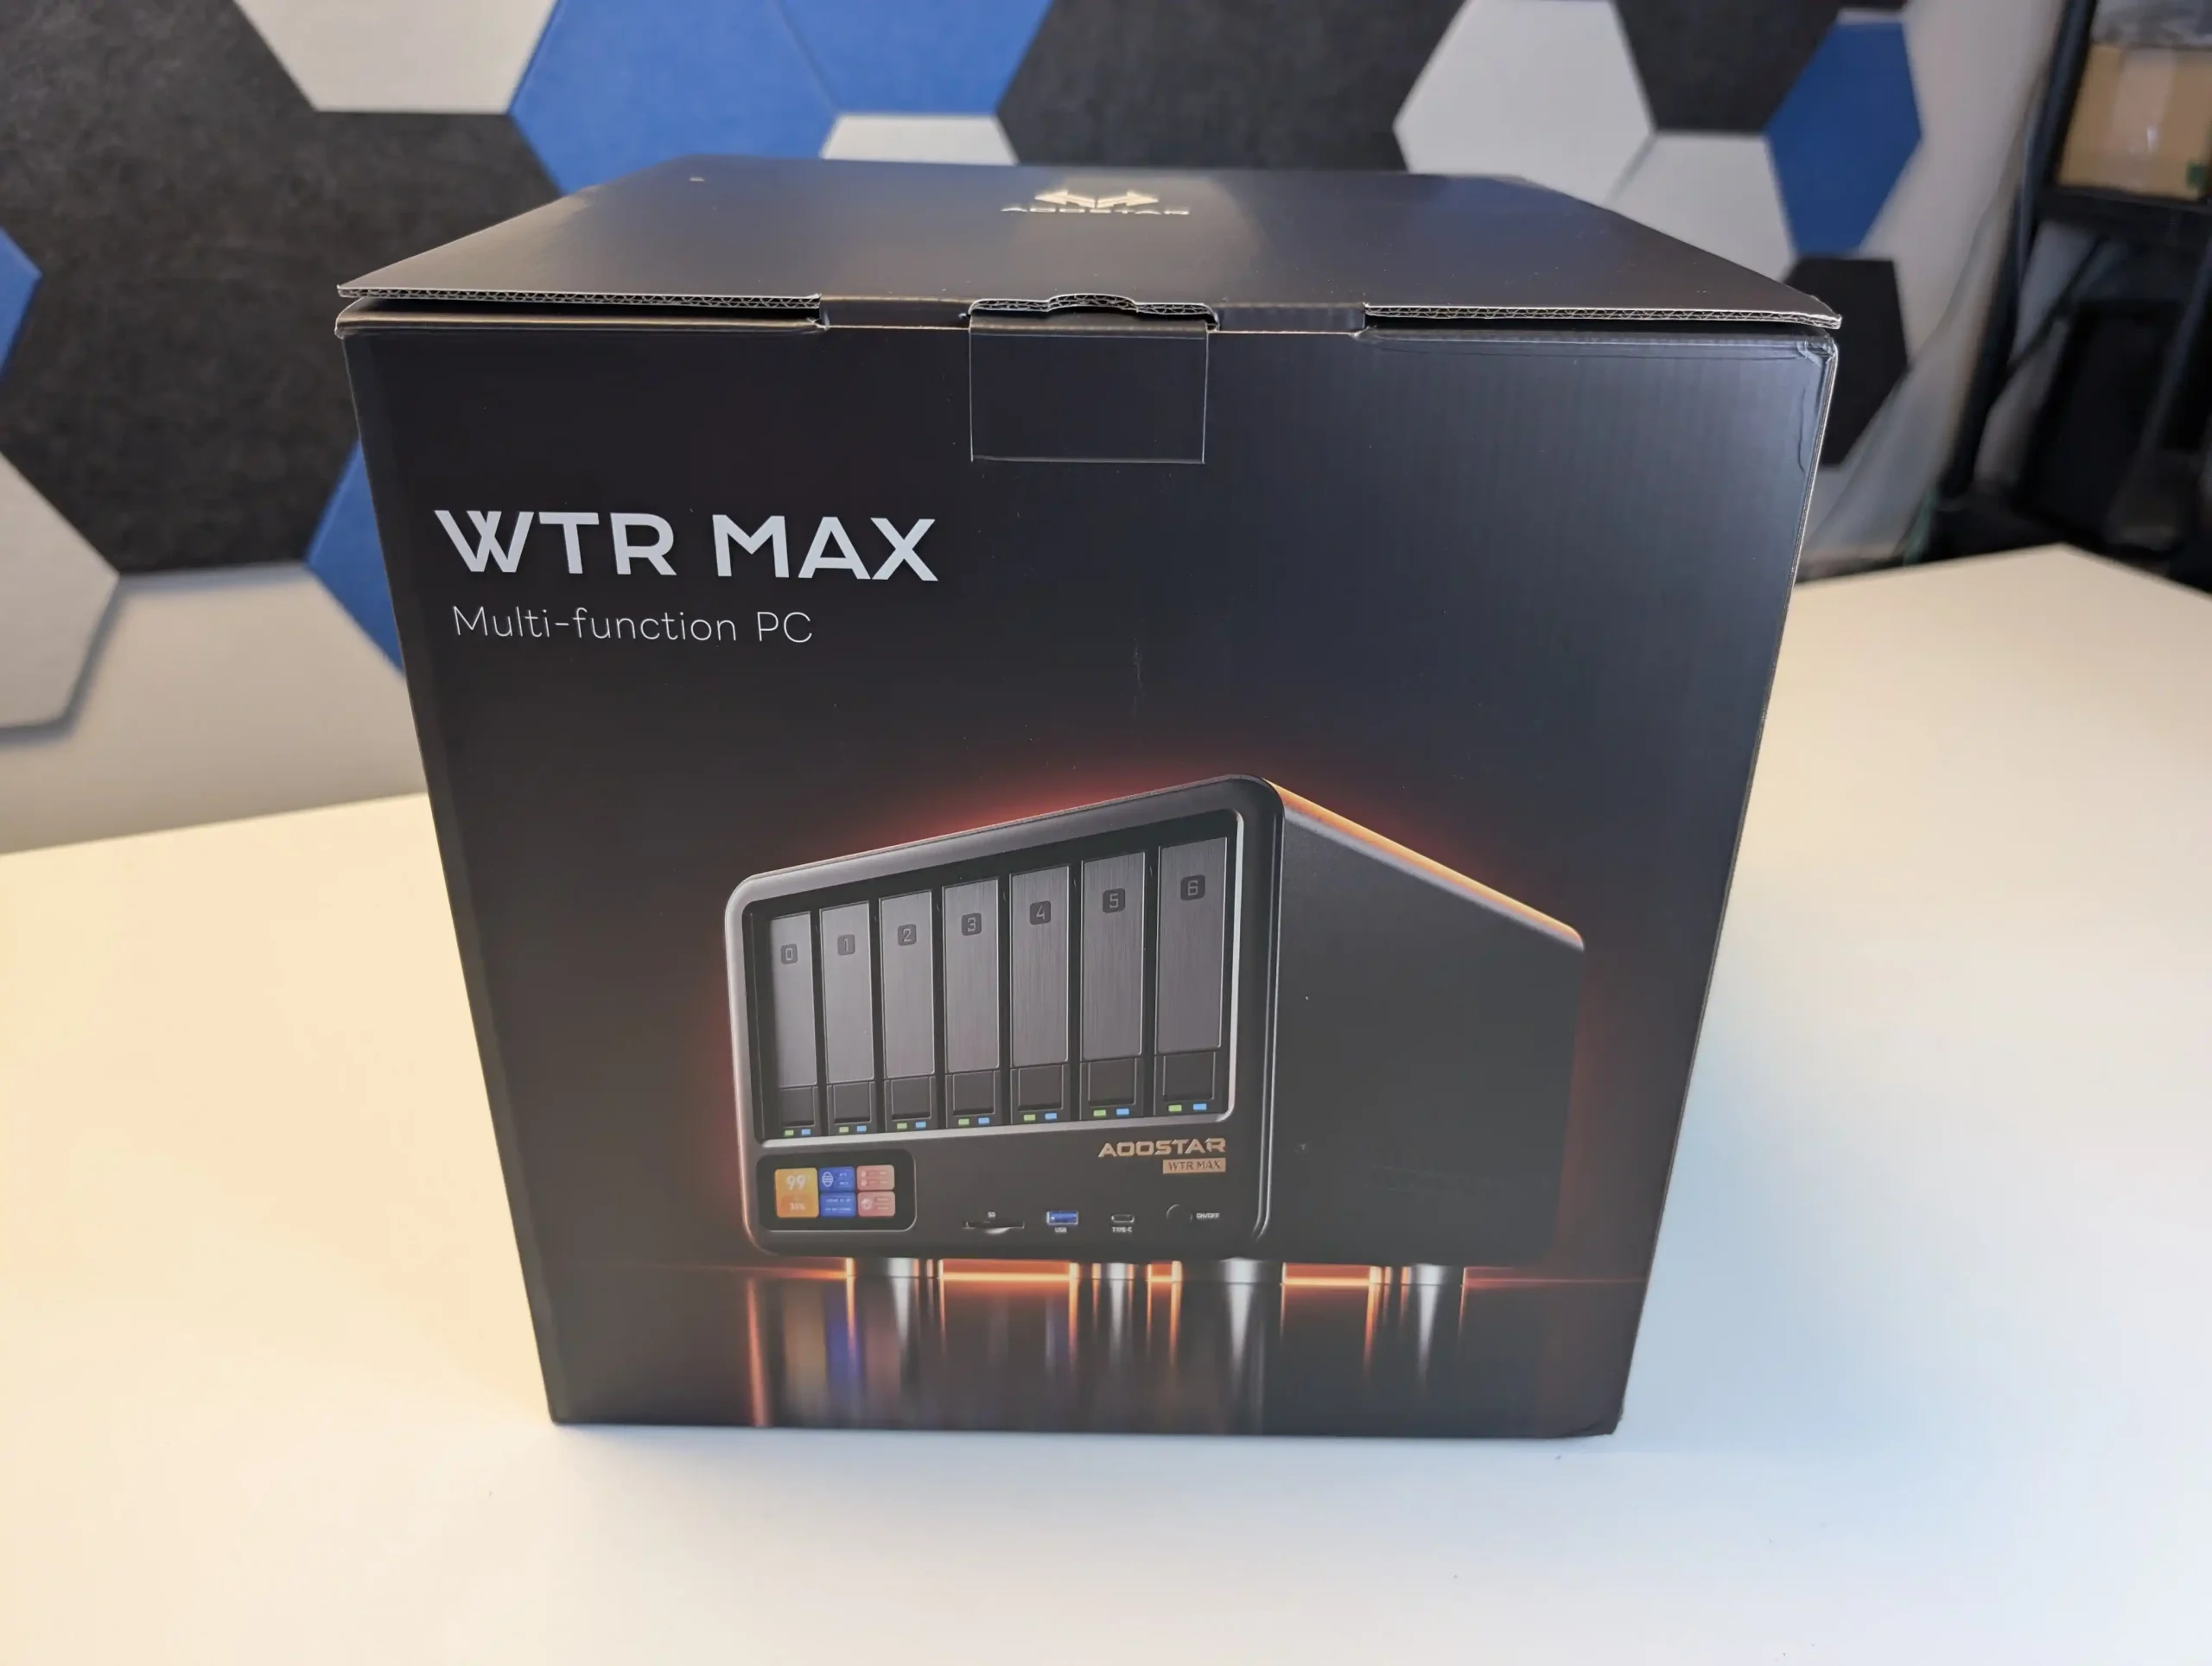
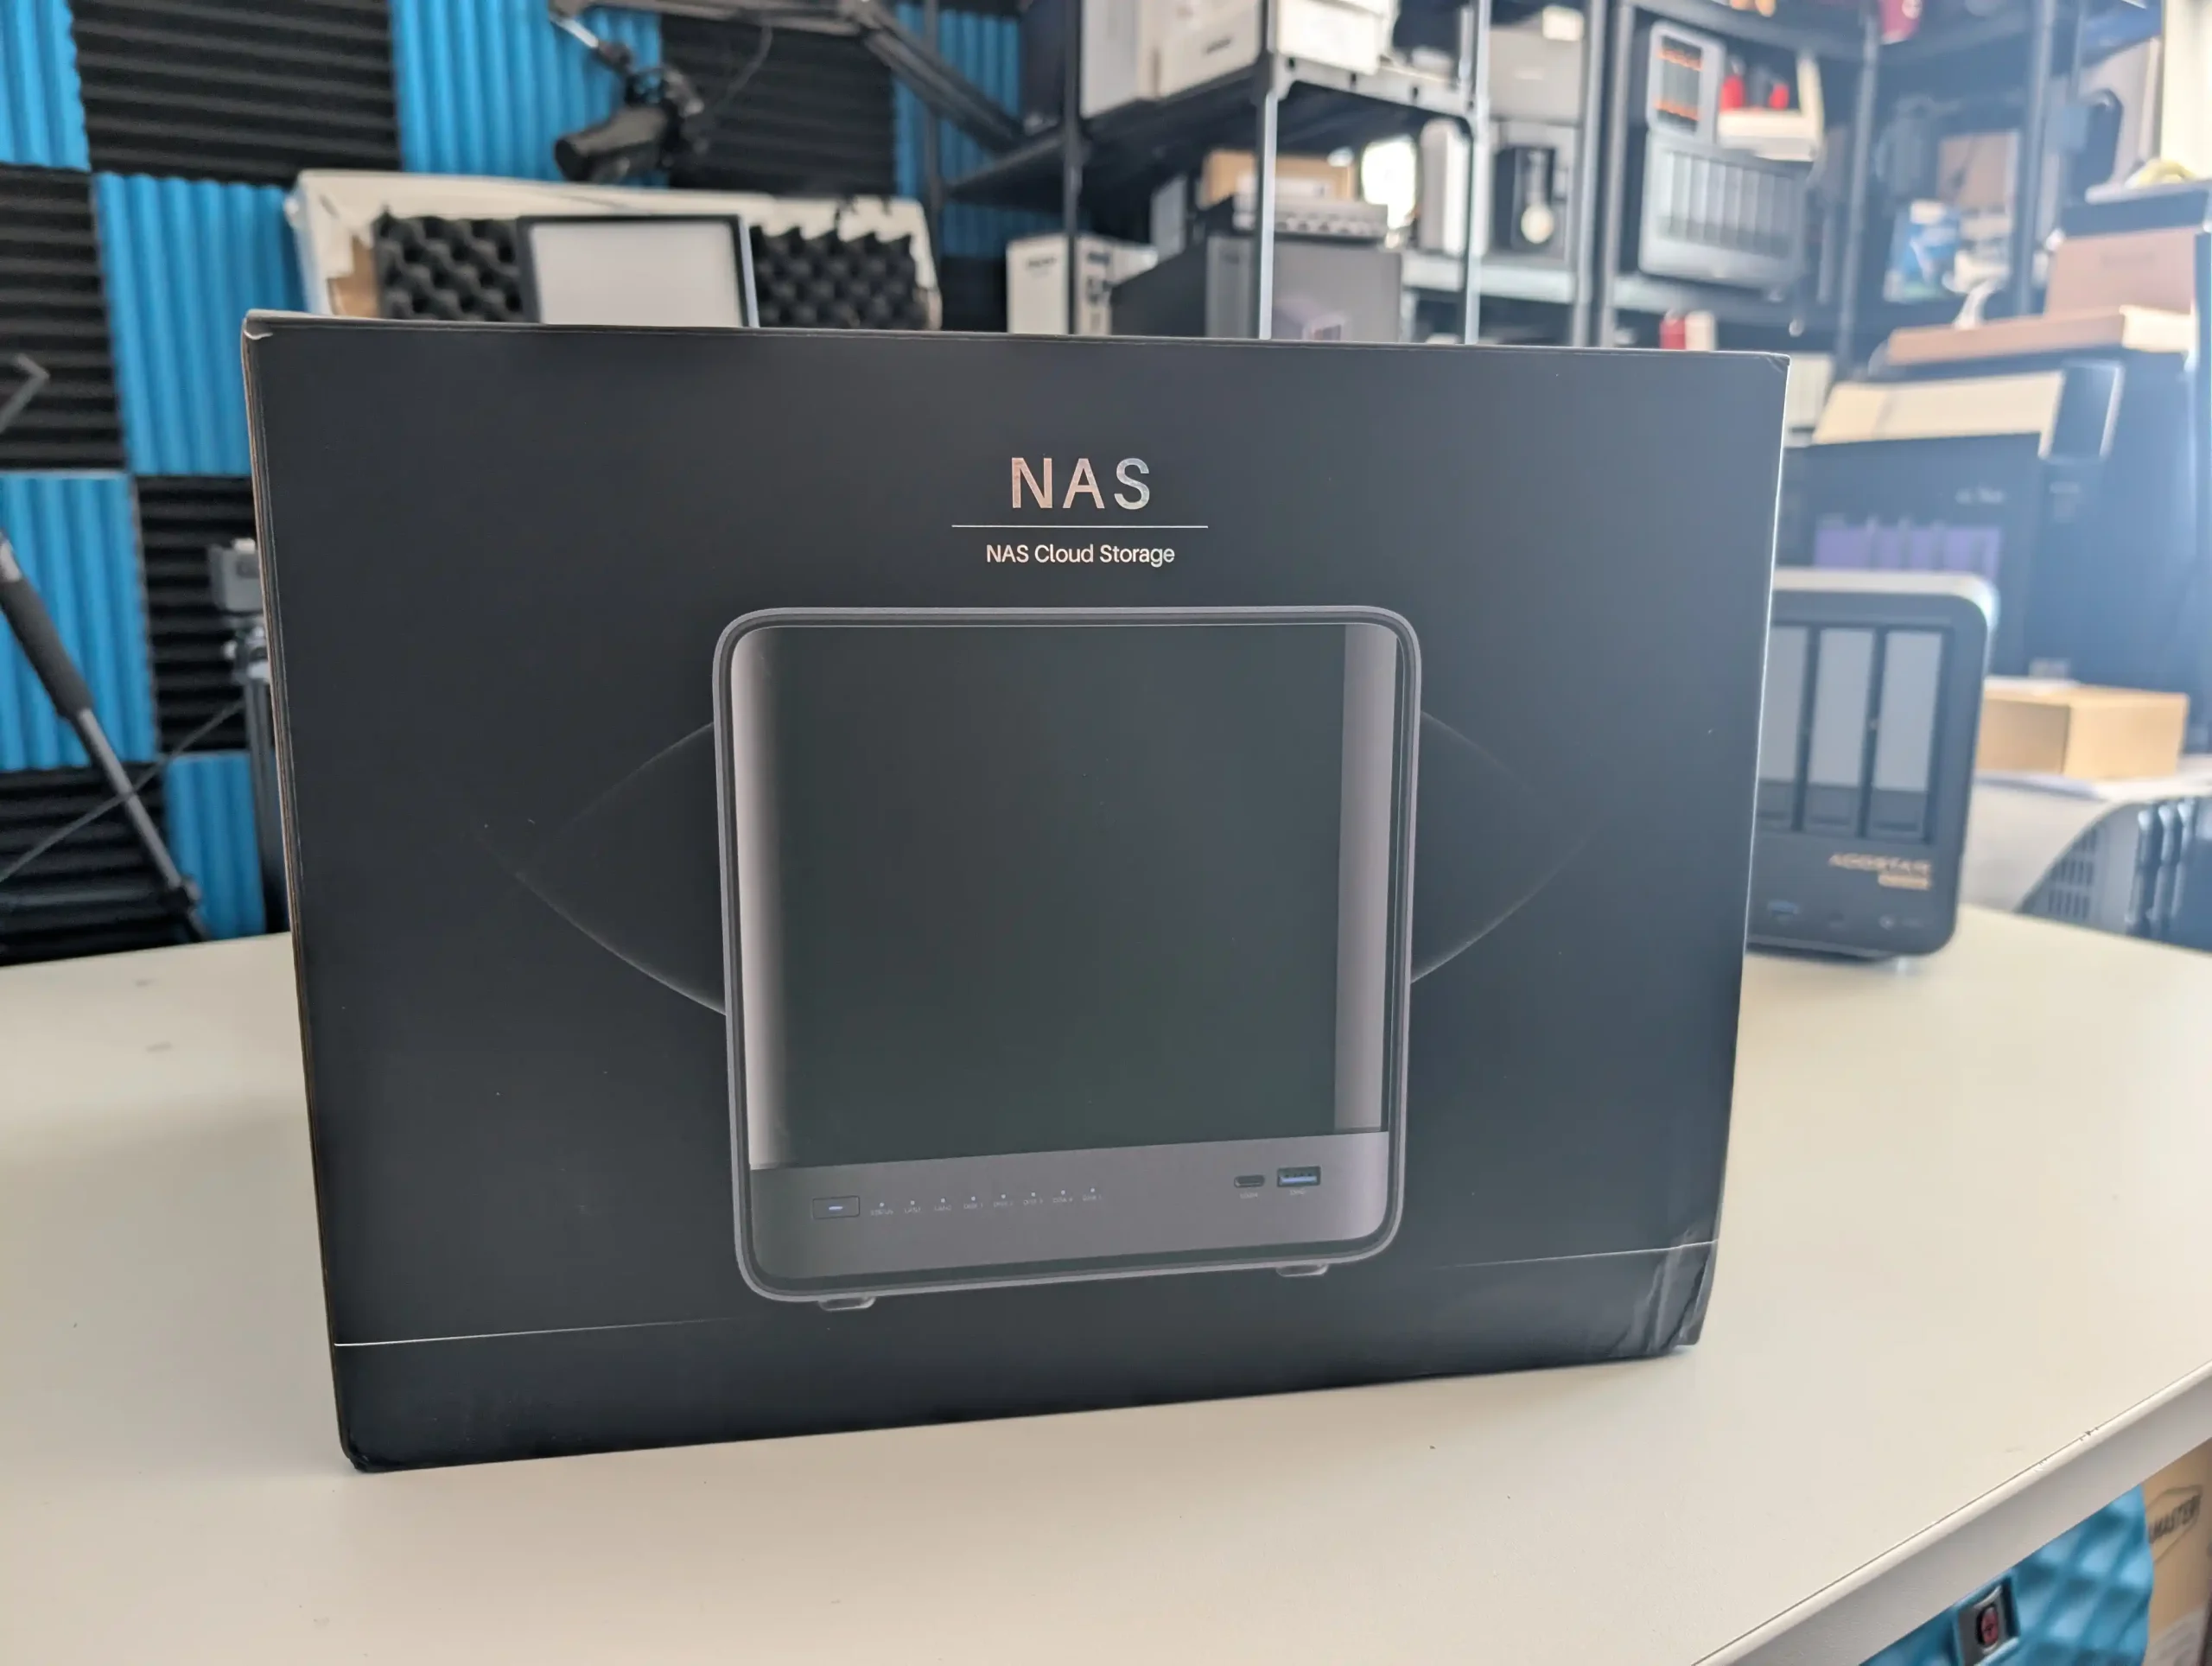
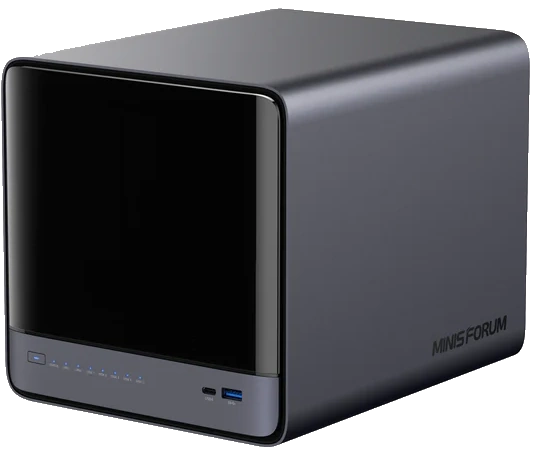
The demand for high-performance, multi-functional NAS systems has never been higher, as users increasingly expect far more than basic file storage from their hardware. Today’s workloads often include virtualization, AI-assisted operations, multi-tiered storage strategies, and high-speed, low-latency networking—demands that blur the line between a traditional NAS and a fully-fledged home server. In response to these needs, two closely matched contenders have emerged in the prosumer and power-user space: the Aoostar WTR Max and the Minisforum N5 series, which consists of both the more affordable standard N5 and the higher-spec N5 Pro. These devices, released in mid-2025, share some common DNA—both are bare-metal NAS platforms that let you install your own operating system and tailor your setup to your specific use case—but they diverge significantly in how they balance compute power, storage density, connectivity options, noise and power efficiency, and overall value.
 |
 |
||
| Check Amazon for the WTR Pro MAX
|
Check AliExpress for the WTR Pro MAX
|
Check Amazon for the Minisforum N5
|
Check AliExpress for the Minisforum N5
|
In this article we provide a detailed, category-by-category comparison of these systems based on hands-on testing and real-world workloads. Key factors like physical design, internal architecture, storage configuration, CPU and memory performance, external connectivity, and power and noise profiles are all assessed in depth. We also consider important use case distinctions, such as suitability for 24/7 enterprise-grade uptime, AI model hosting, or quiet home use. Whether you’re looking to build a dense storage appliance, a virtualized host for multiple VMs, a locally deployed AI engine, or simply a robust and scalable home NAS, this analysis aims to clarify which of these two (or three, when factoring in the standard N5) offers the best fit. As the boundaries between NAS and full server hardware continue to blur, understanding these subtle trade-offs will help you make a more informed investment for your own specific workload and budget.
Written Review of the Minisforum N5 Pro NAS – HERE
YouTube Review of the Minisforum N5 Pro NAS – HERE
Written Review of the Aoostar WTR Max NAS – HERE
YouTube Review of the Aoostar WTR Max NAS – HERE
 |
 |
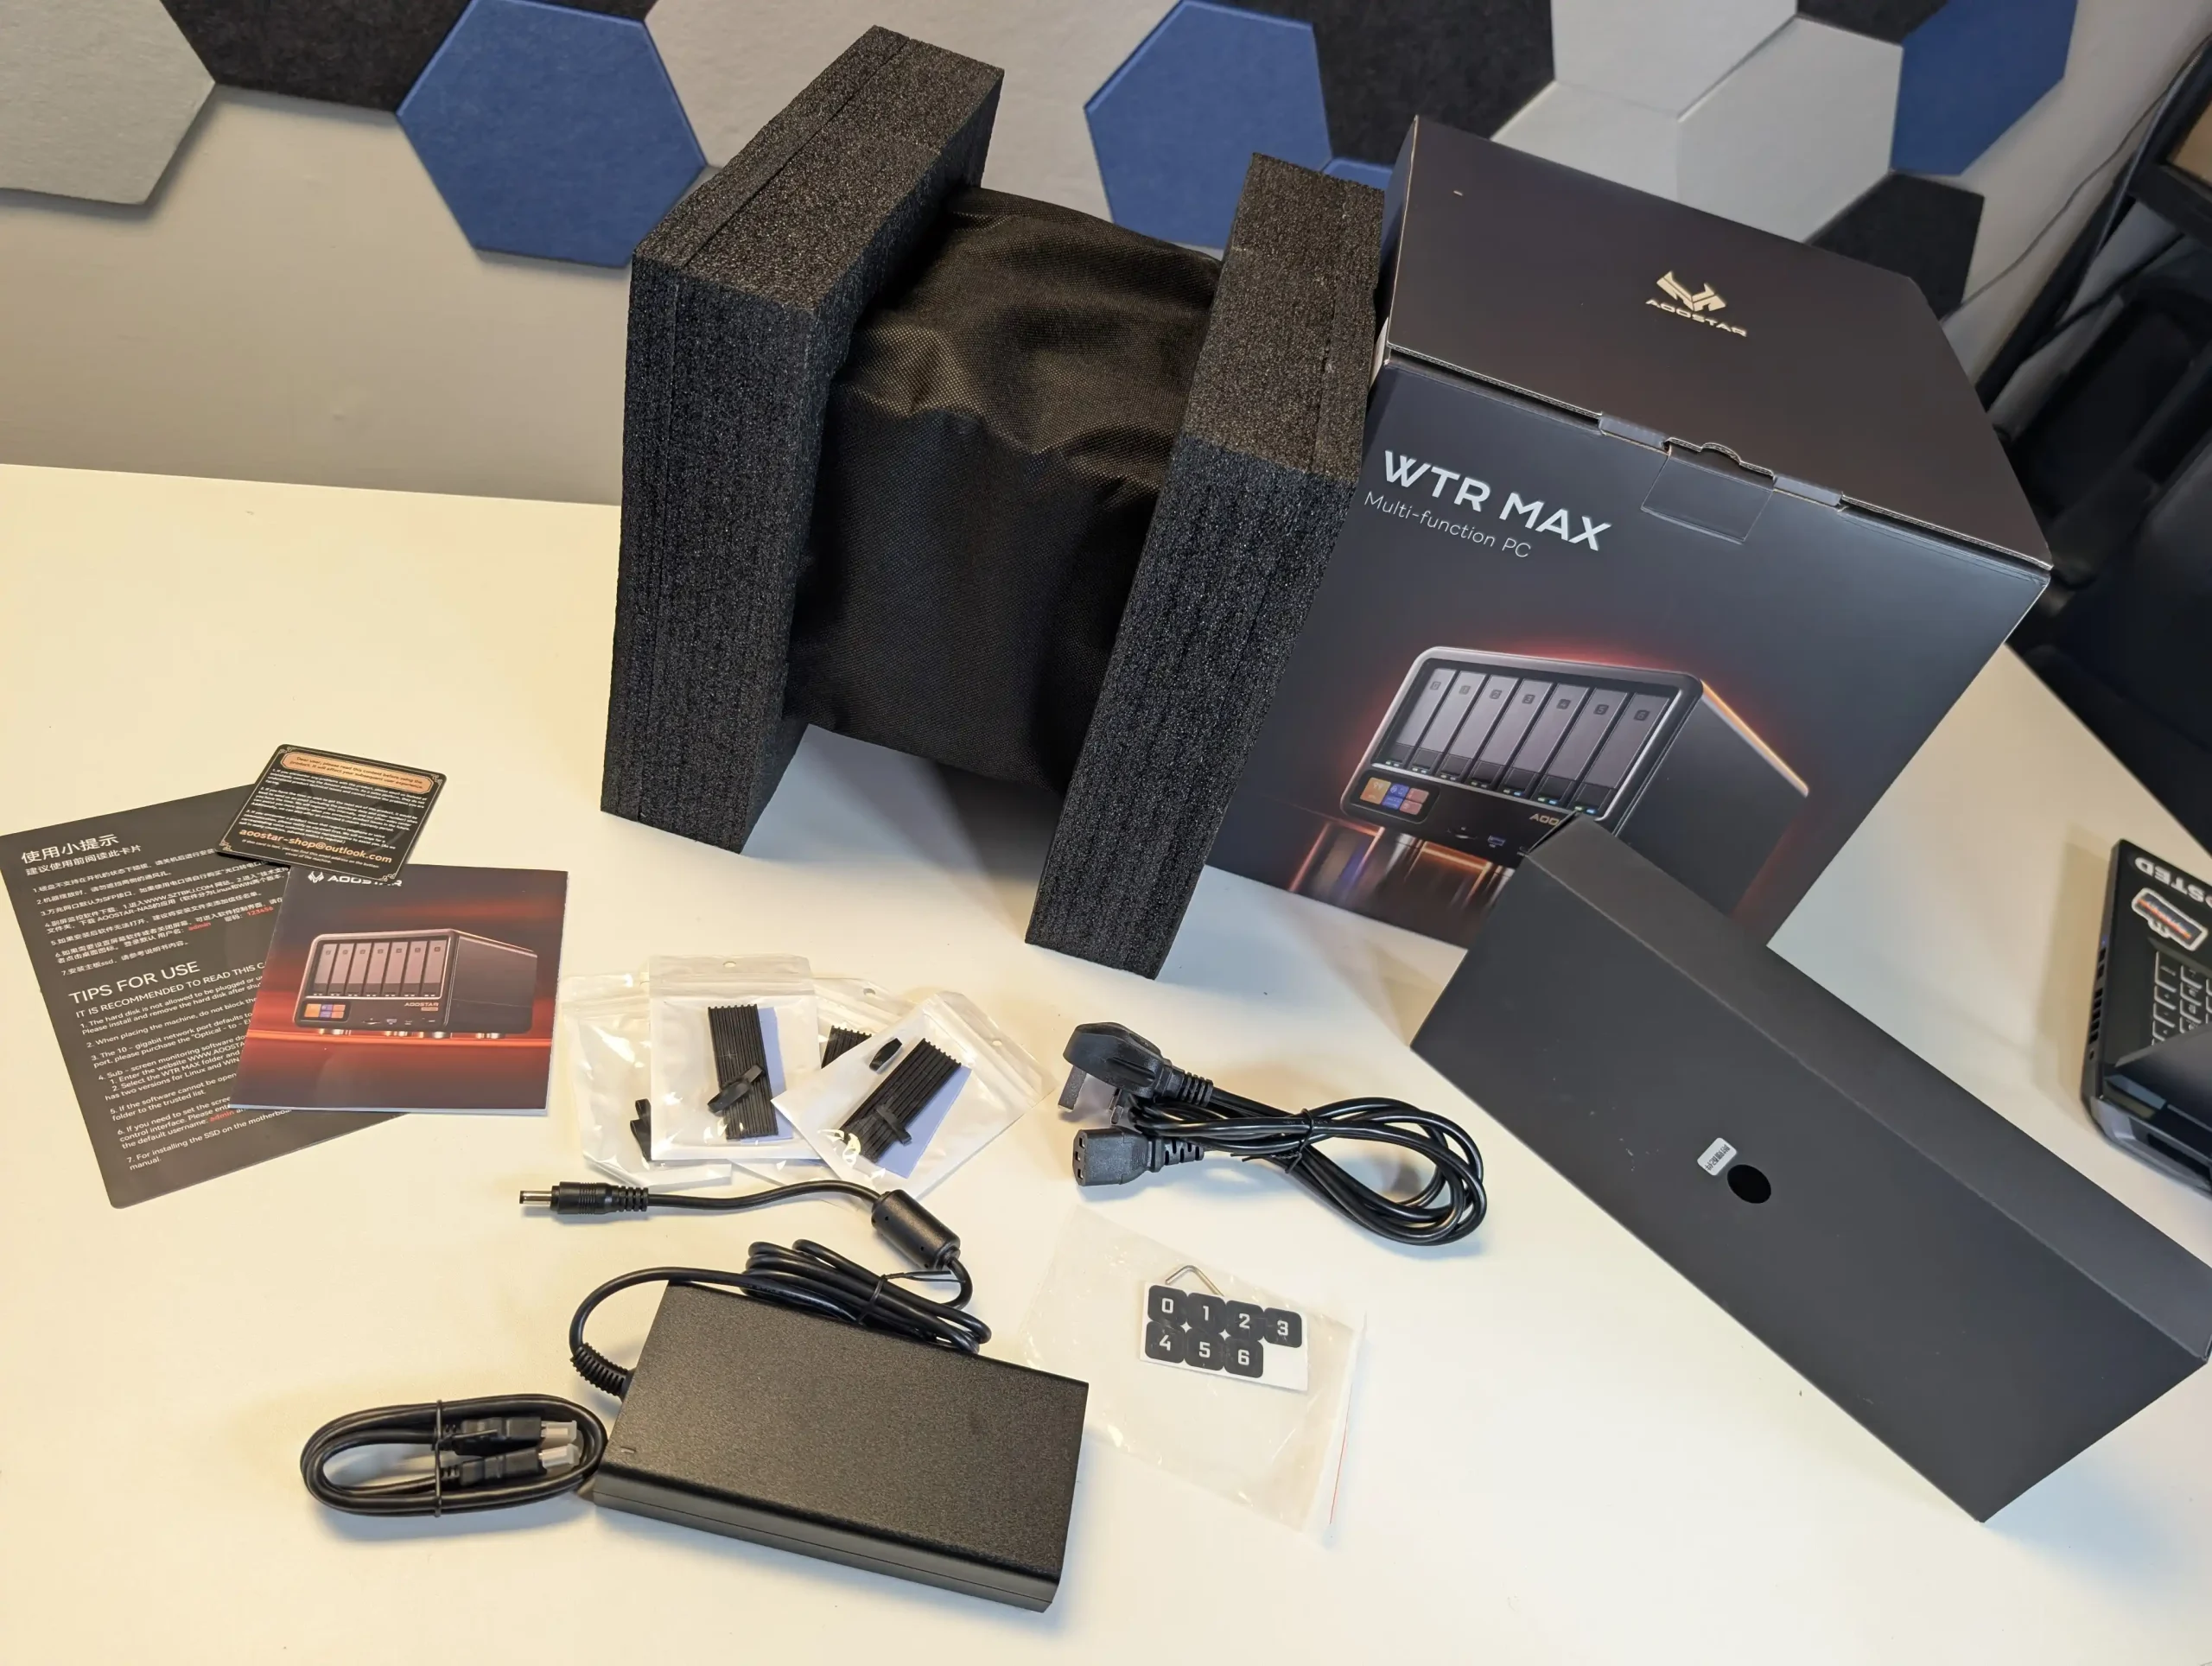
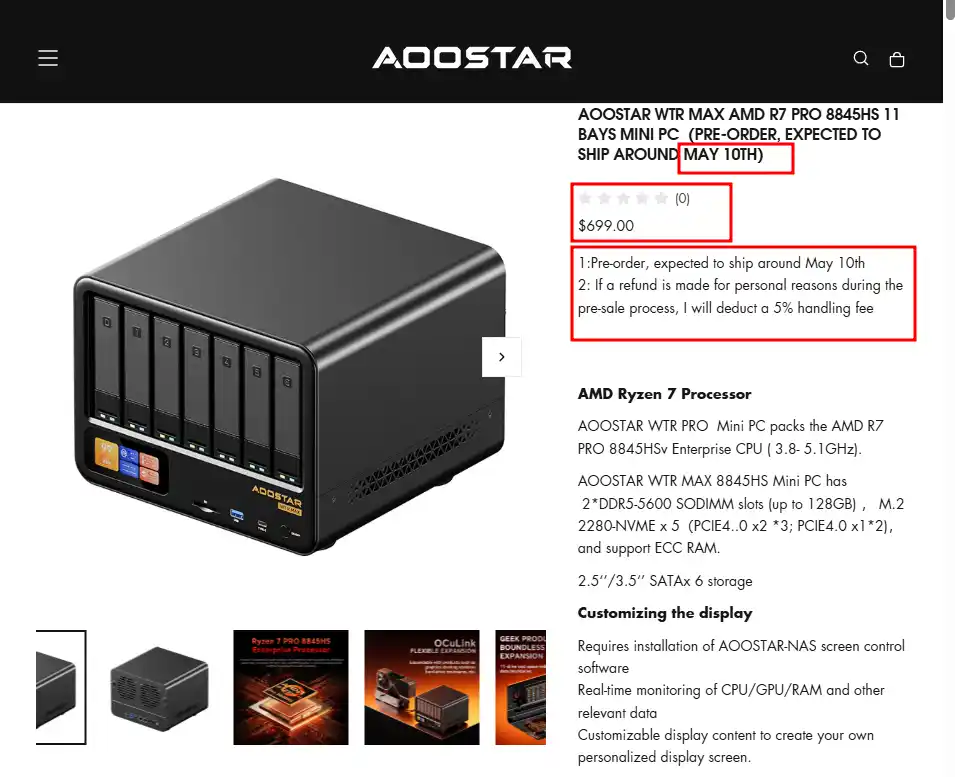
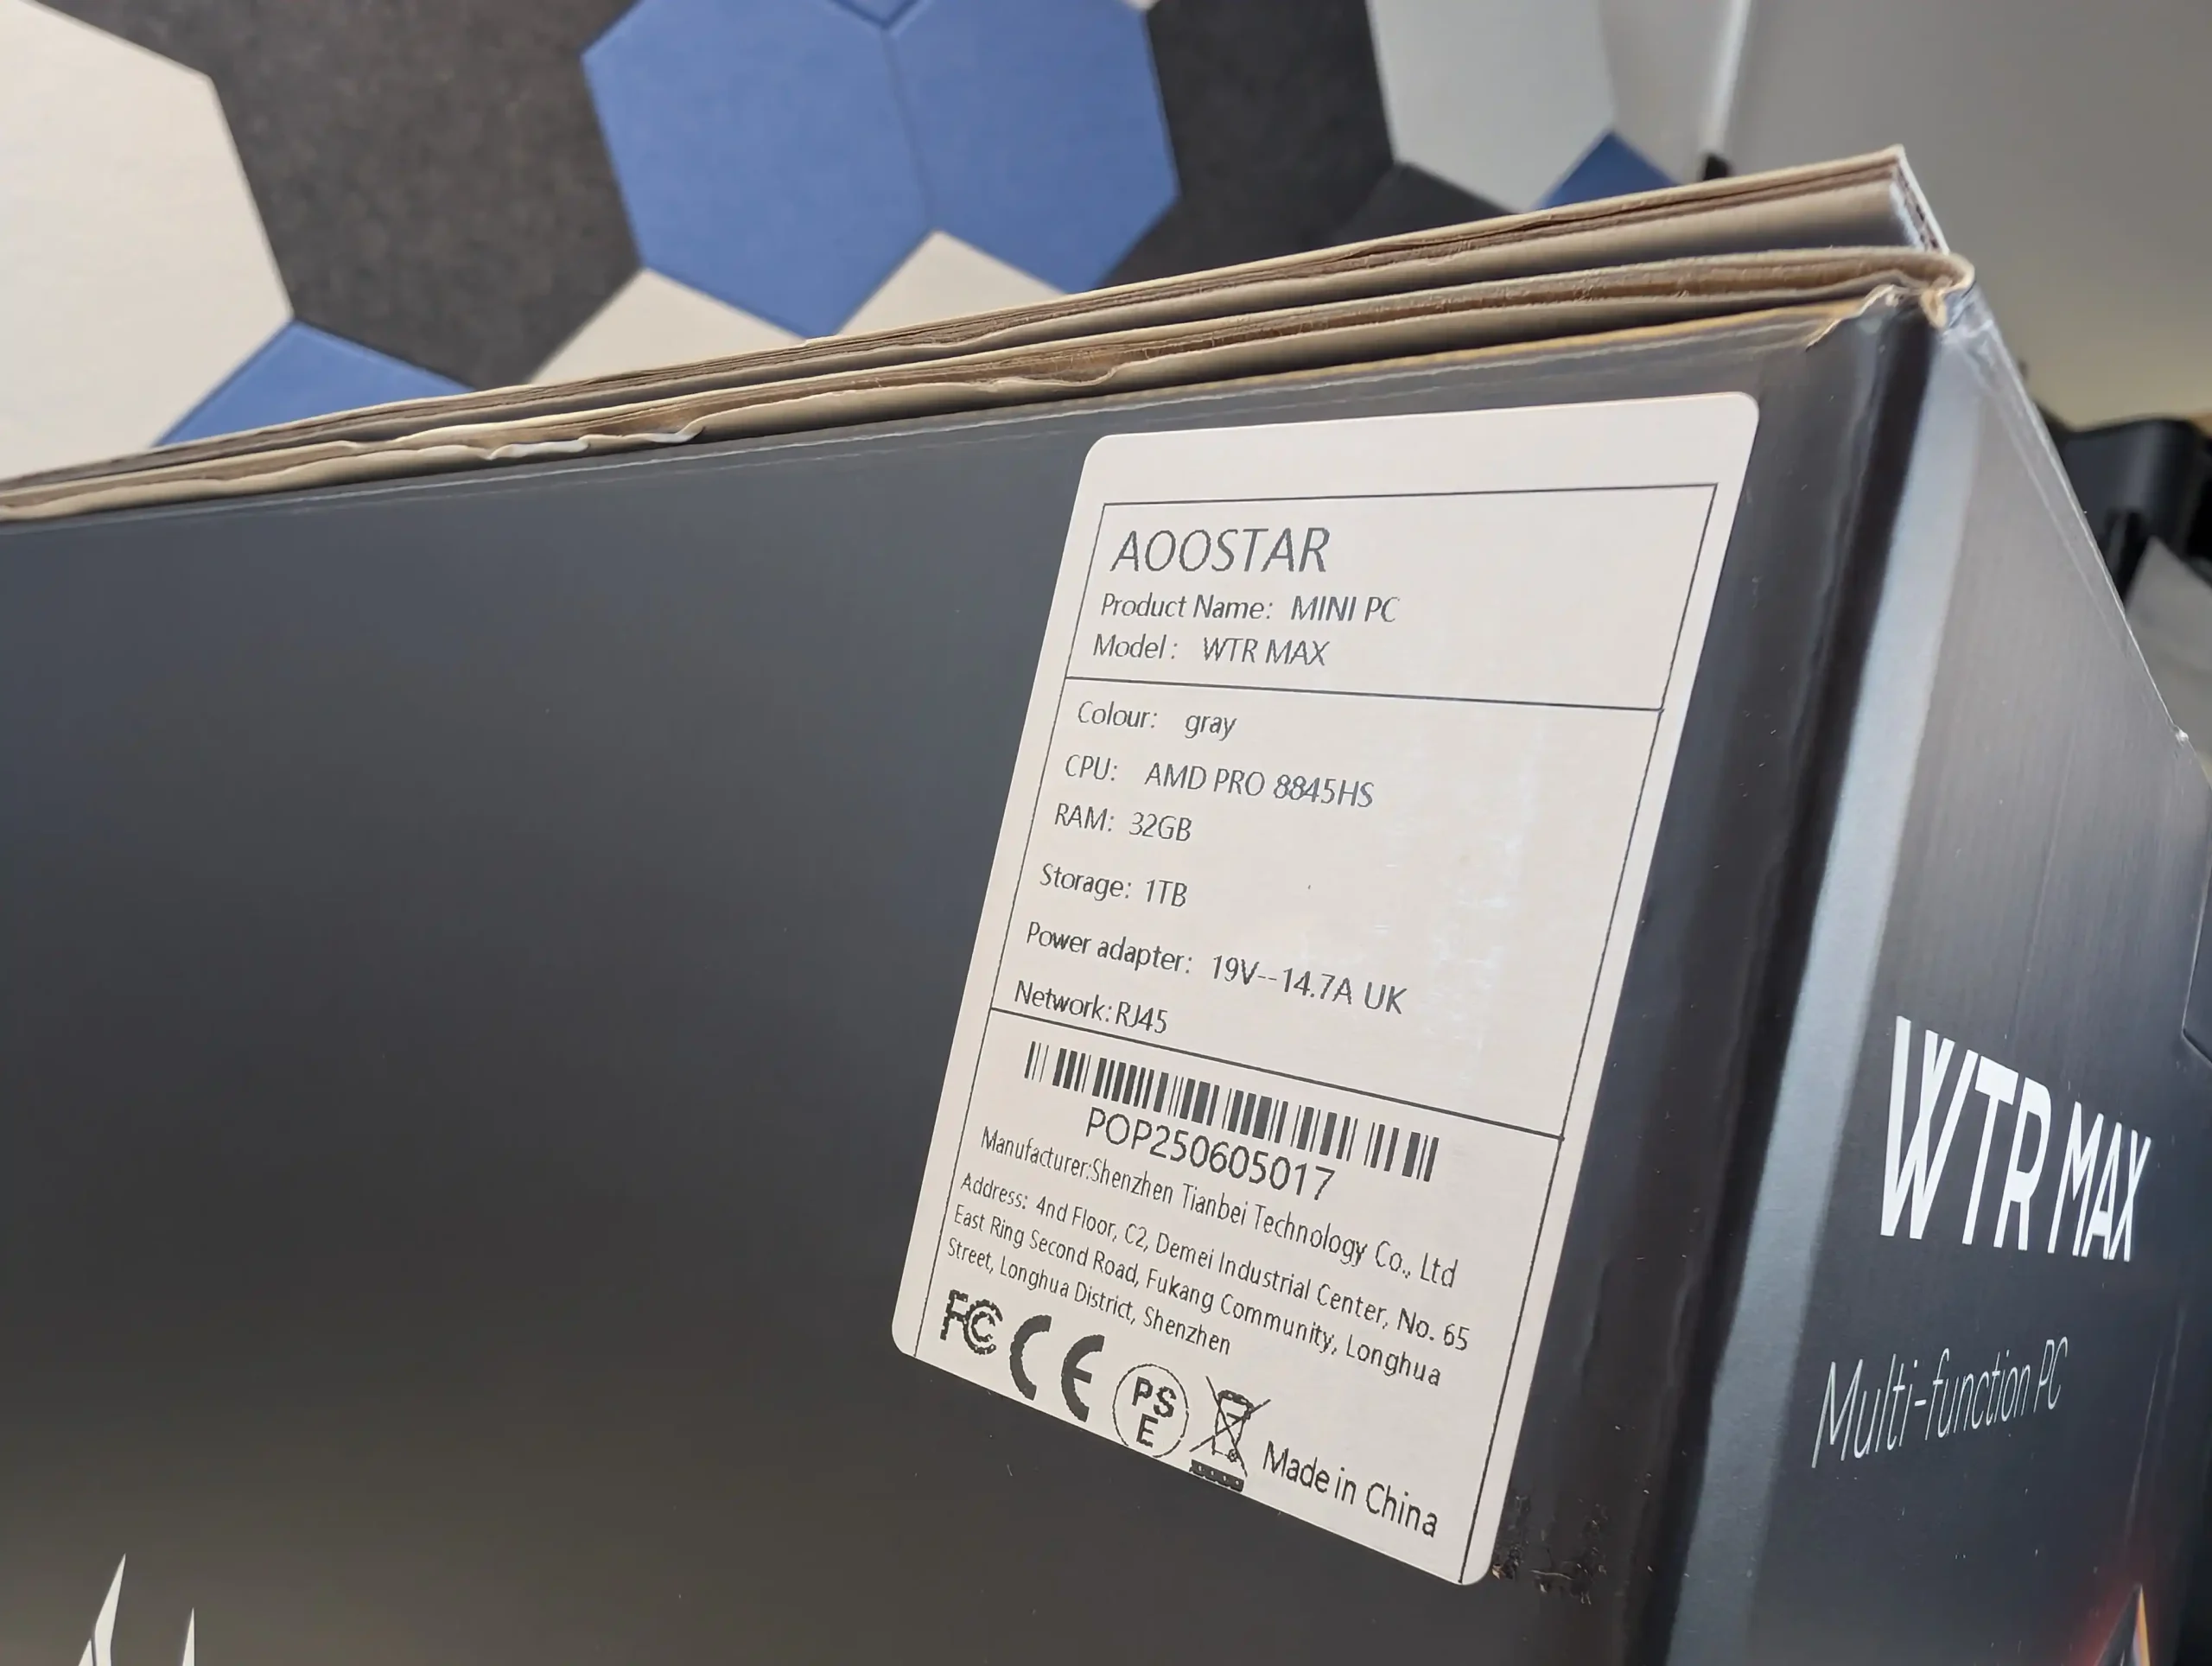
When examining the price points of the Aoostar WTR Max and the Minisforum N5 series, it becomes clear that each brand has intentionally targeted slightly different segments of the advanced NAS and home-server market. The Aoostar WTR Max launches at $699 in a barebone configuration, which includes the chassis, preinstalled AMD Ryzen 7 PRO 8845HS CPU, external PSU, dual 10GbE SFP+ networking, and a front LCD panel. Like its competitor, it does not include RAM or additional storage at this price.
 |
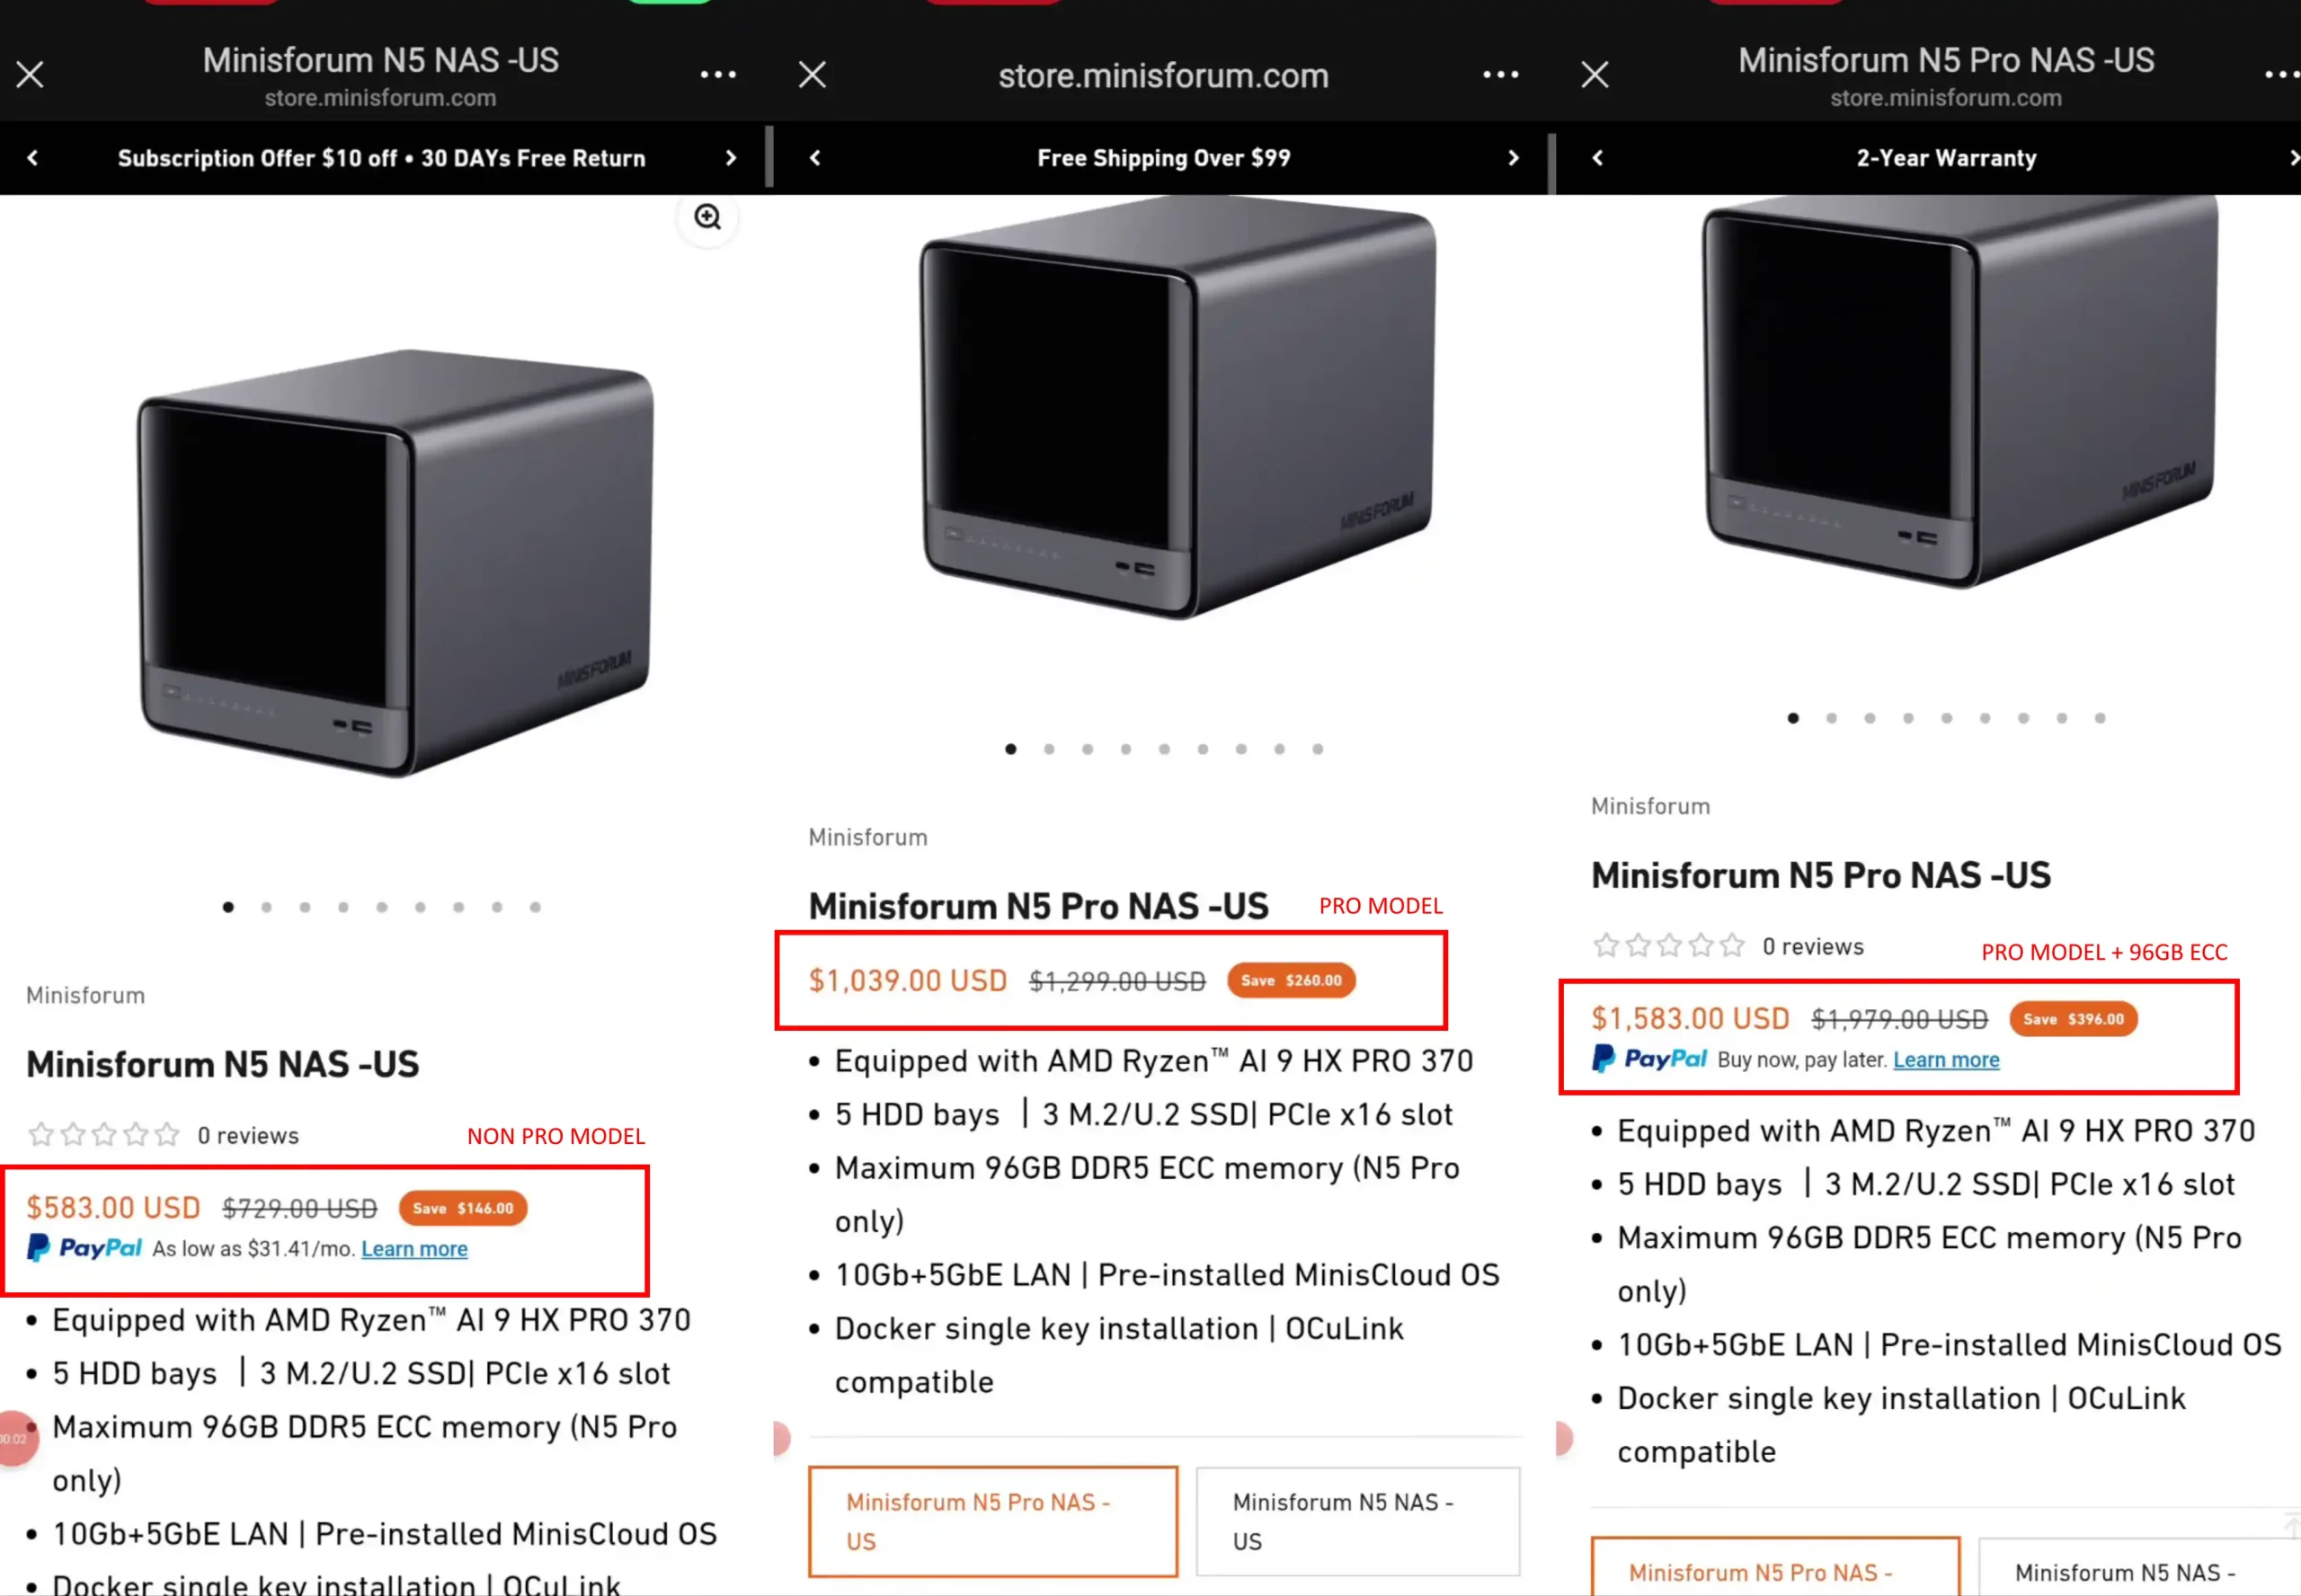 |
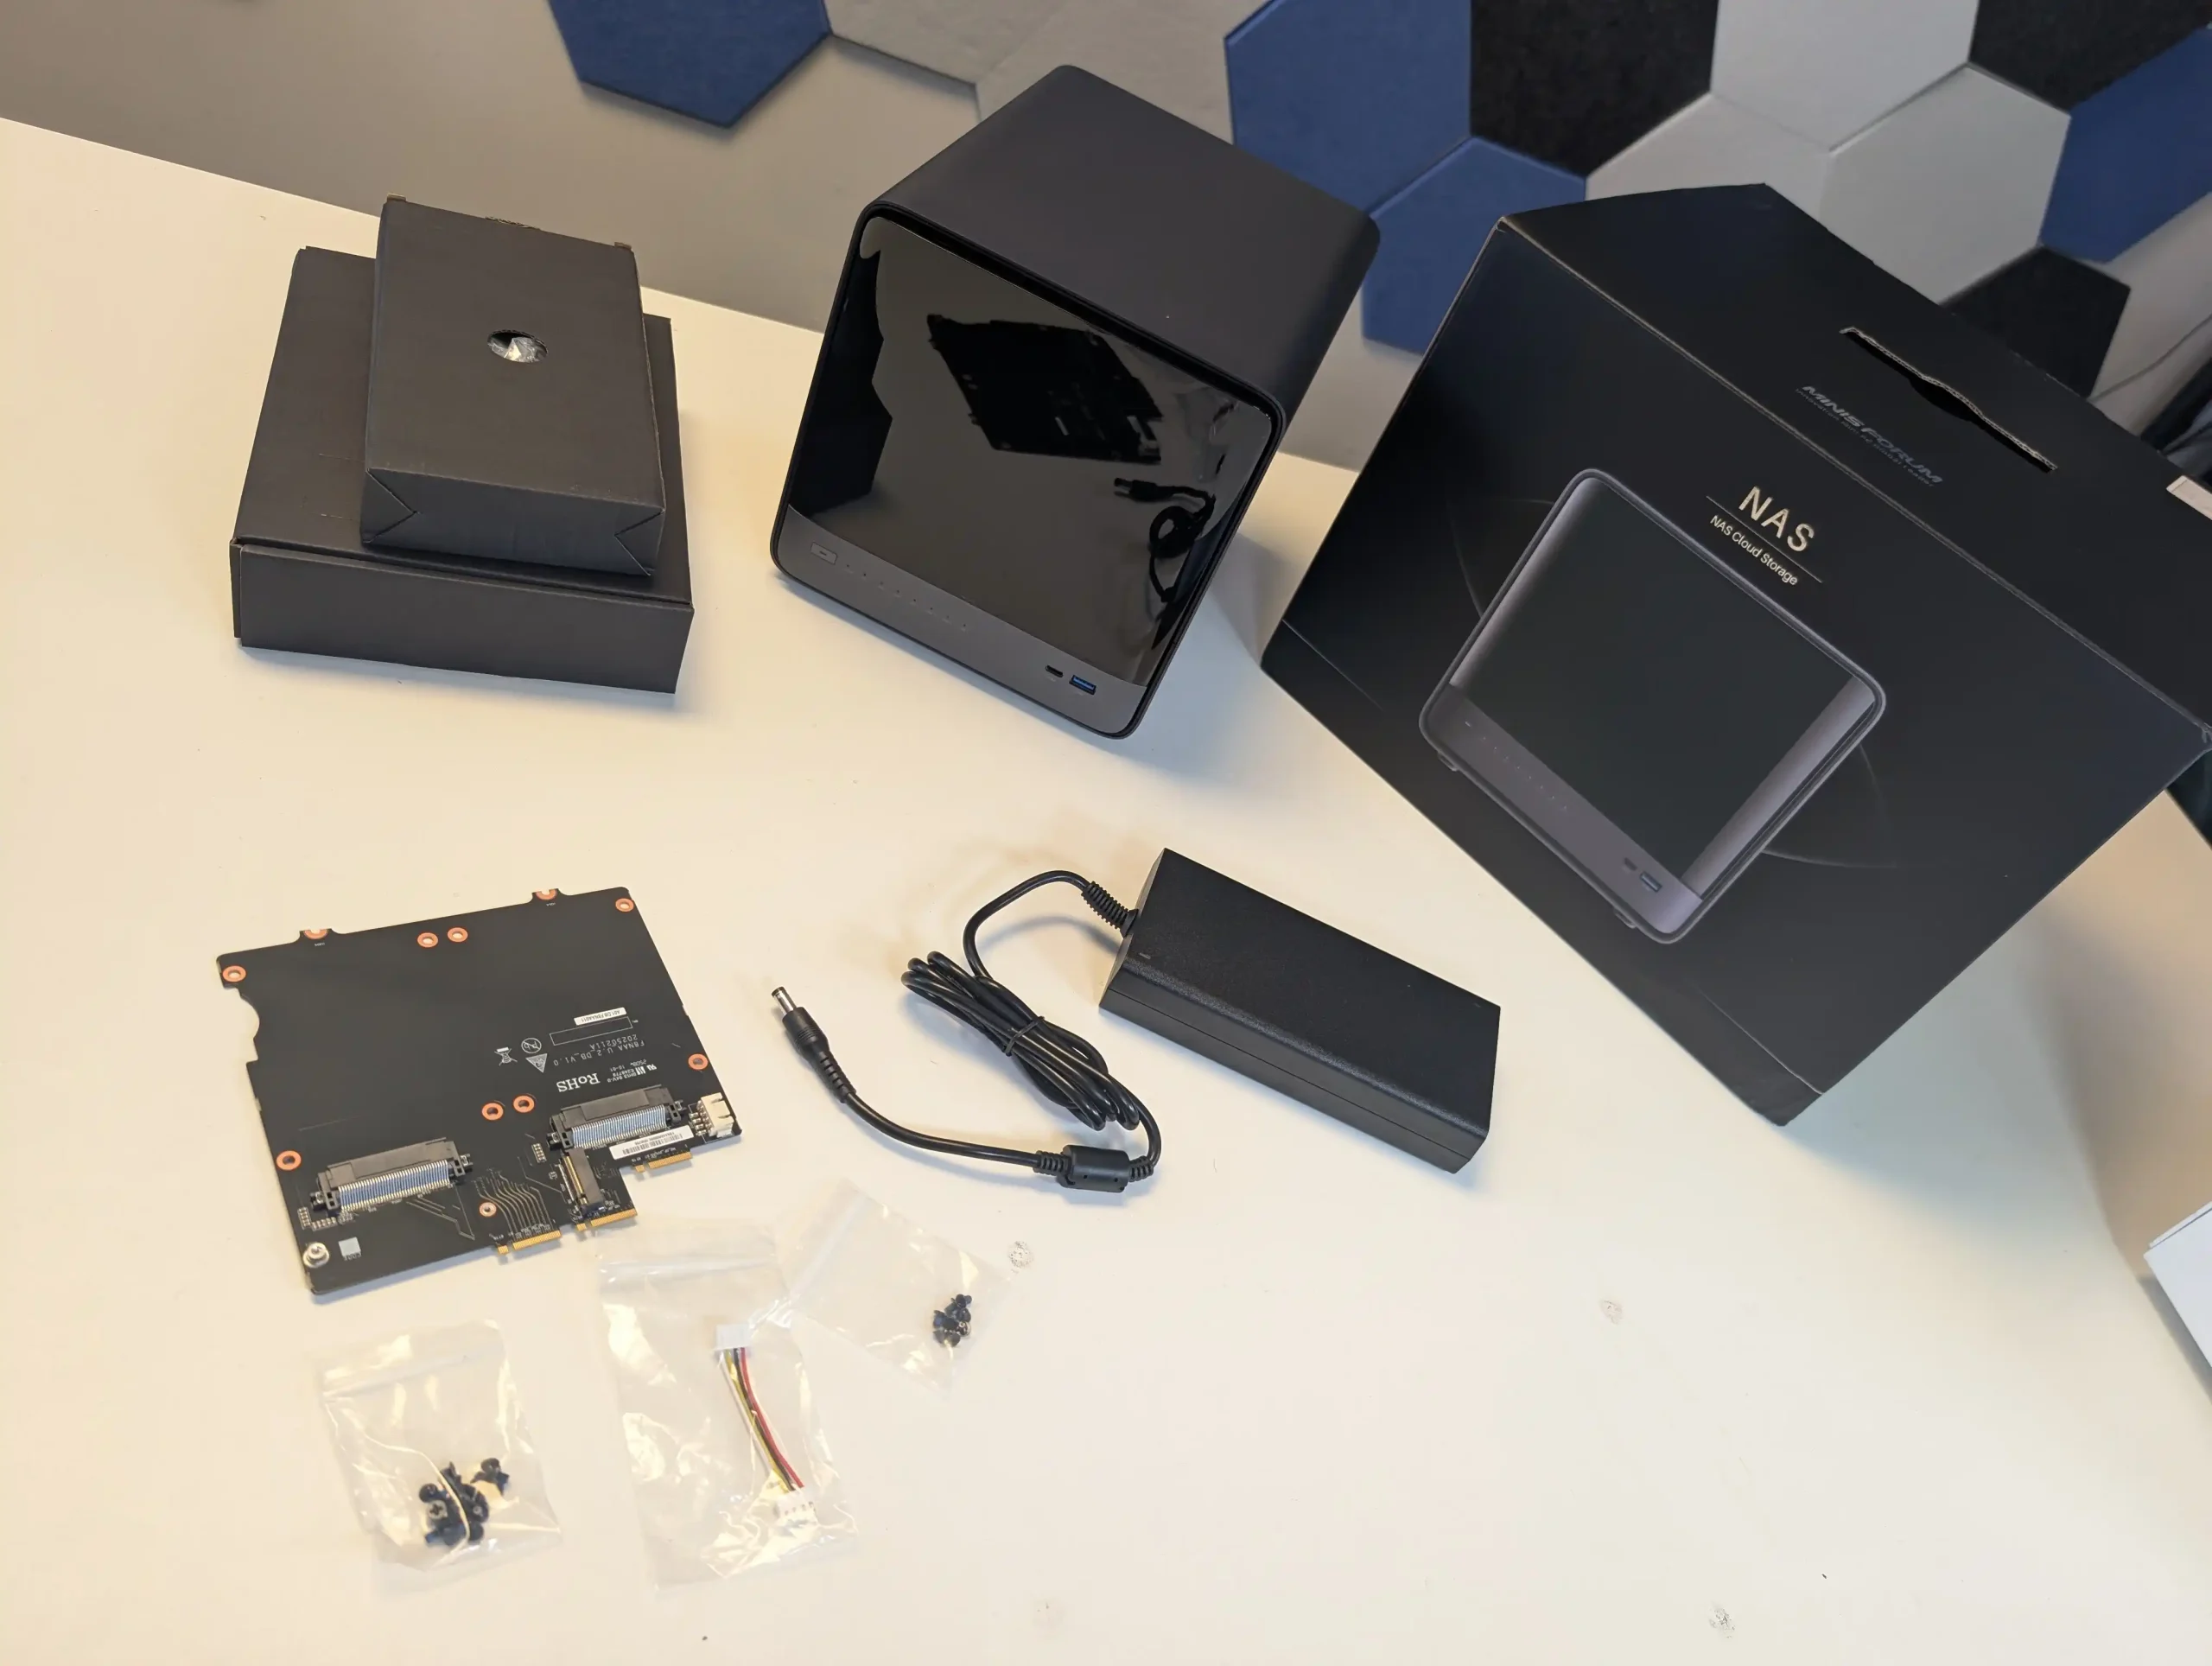
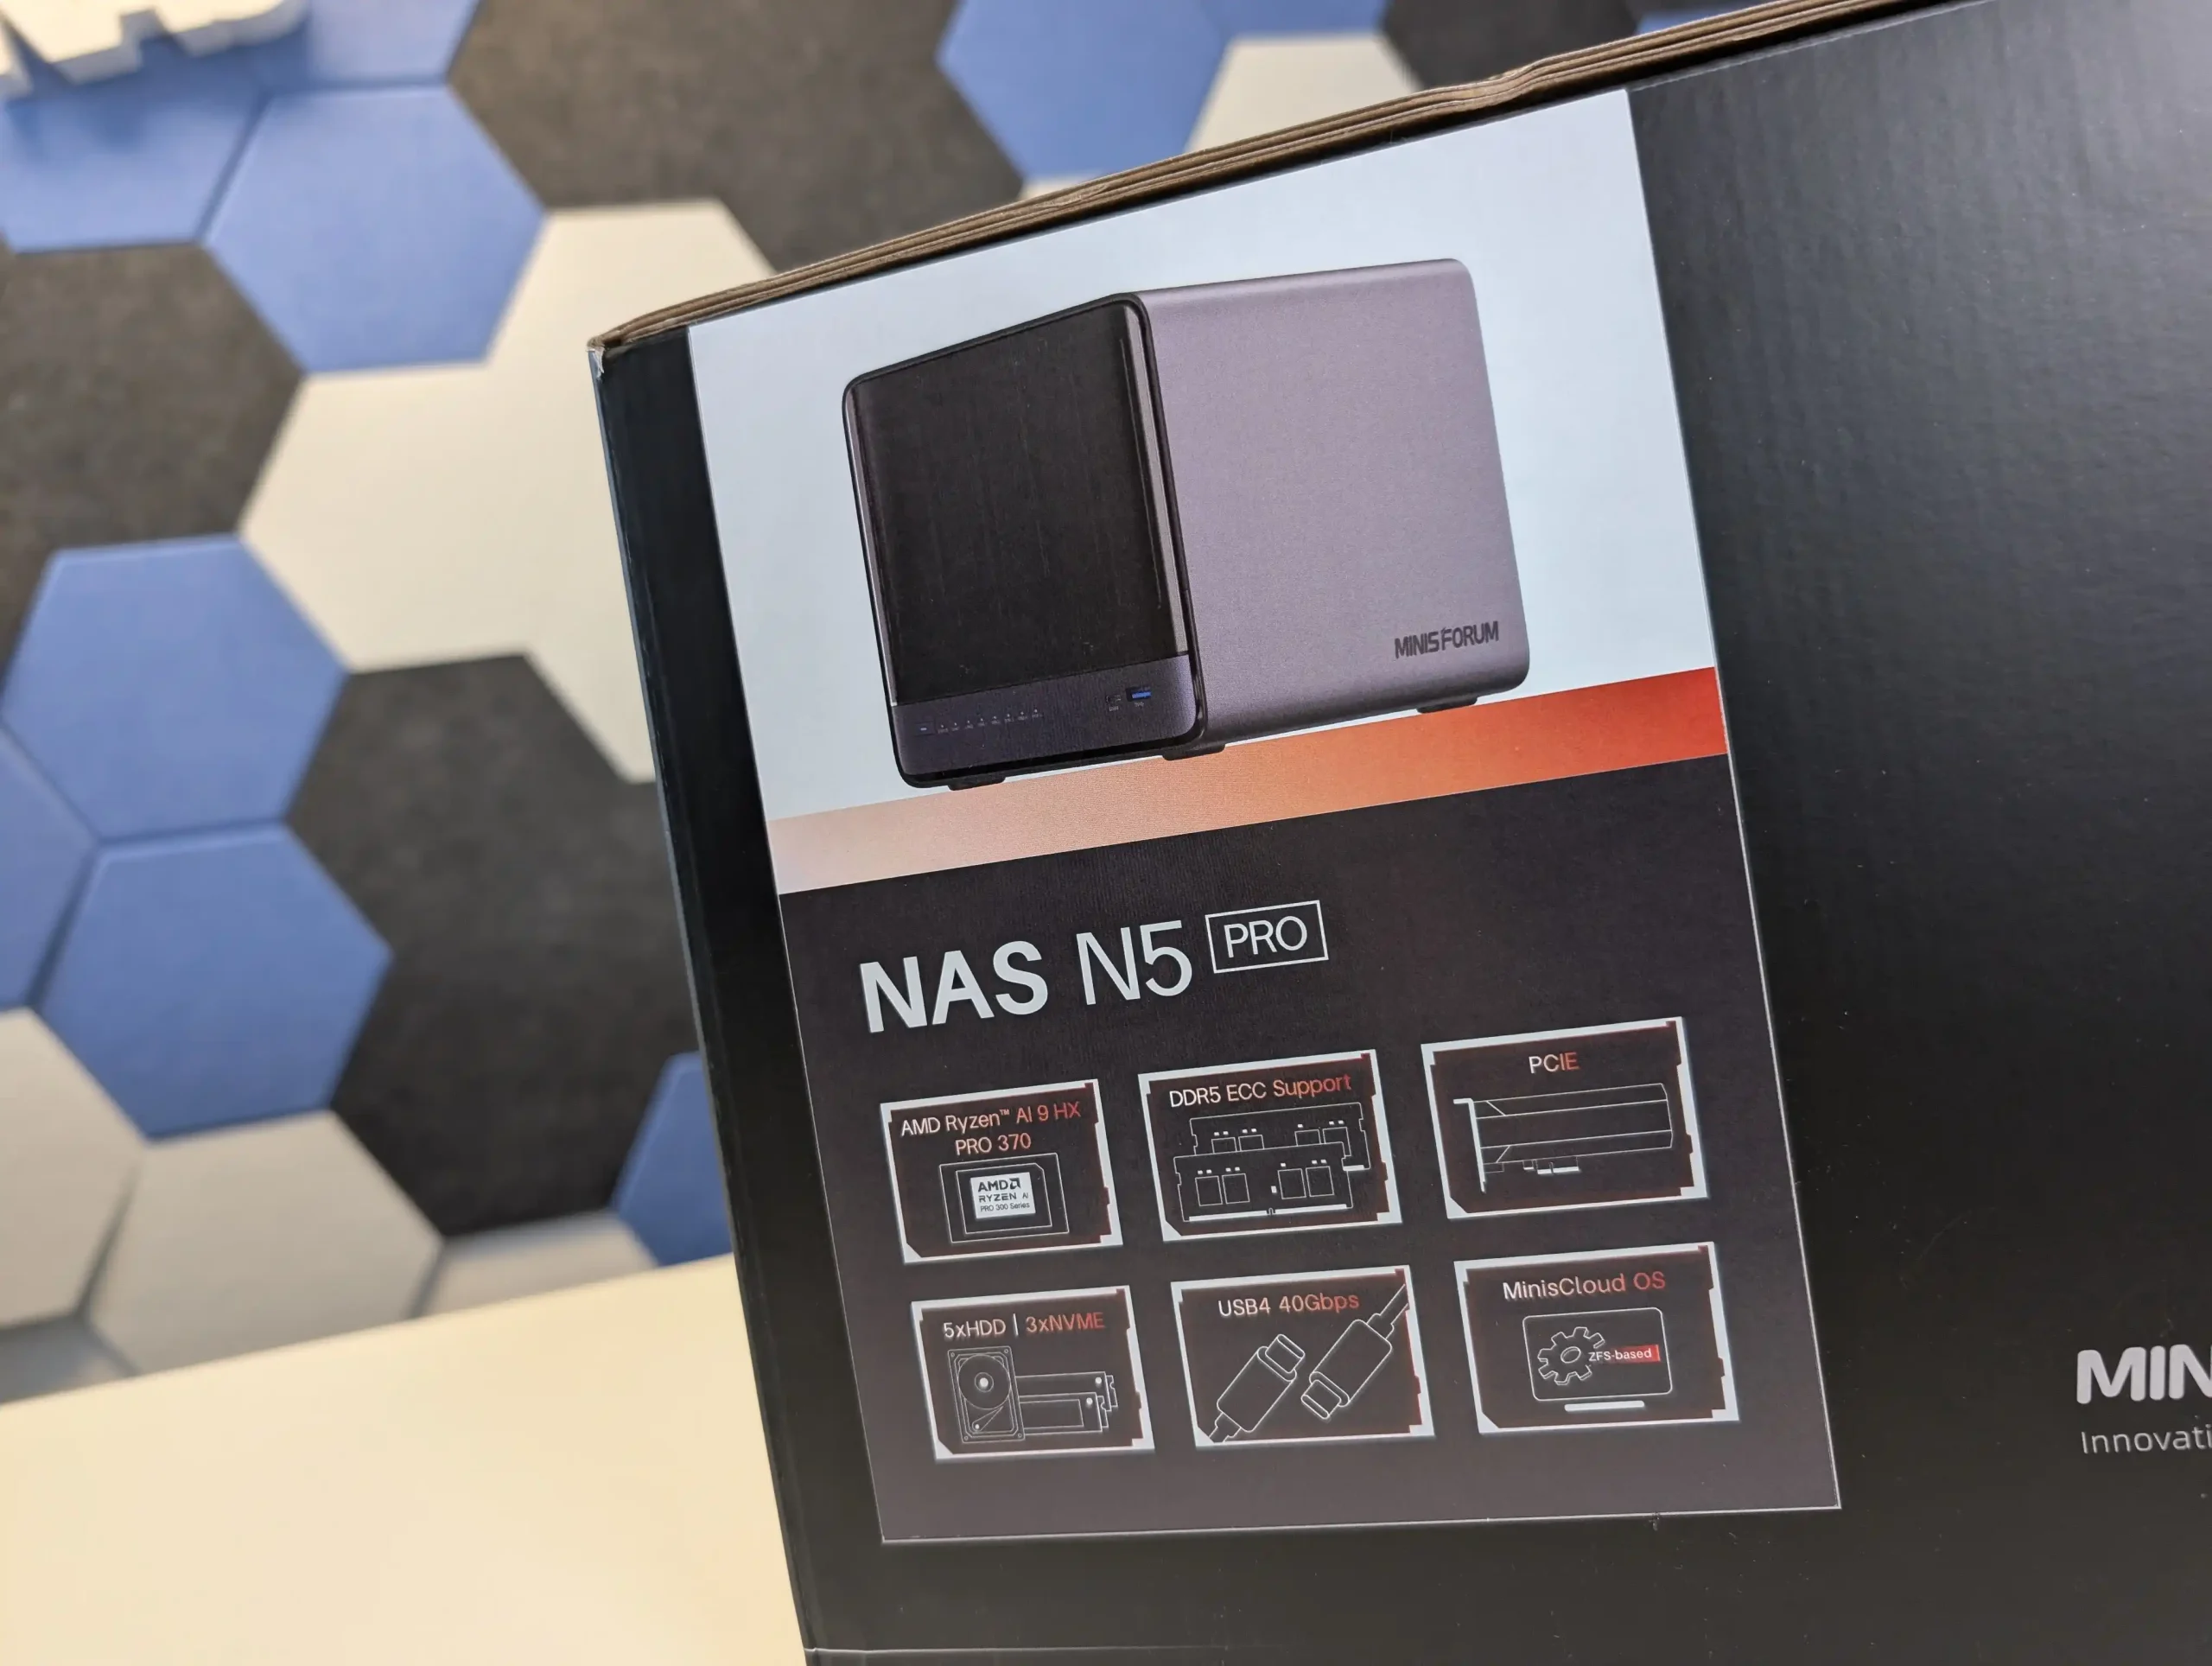
By comparison, the Minisforum N5 standard model enters at a lower price point of $583 in a similarly barebone configuration—also lacking RAM and user storage—but it does not include ECC memory support or a PRO-class CPU, which are key differences. The premium-tier Minisforum N5 Pro sits at a much higher entry price of $1,039, still barebone but featuring a far more capable Ryzen AI 9 HX PRO 370 CPU and ECC support. Users who prefer to have memory preinstalled can opt for a top-tier N5 Pro bundle, which includes 96GB ECC RAM and raises the total cost to $1,583.
 |
 |
| Aspect | Aoostar WTR Max | Minisforum N5 (Standard) | Minisforum N5 Pro | Best & Why/Note |
|---|---|---|---|---|
| Base Price (barebone) | $699 | $583 | $1039 | Aoostar WTR Max — cheapest base option |
| Optional ECC RAM | ✓ (supports ECC) | ✗ | ✓ | N5 Pro — ECC support only on Pro and Aoostar |
Relative to its competitors, the Aoostar WTR Max occupies a deliberate middle ground—costing more than the standard N5 but significantly less than the N5 Pro. This makes it a particularly appealing option for users who want enterprise-relevant features like ECC memory support and a balanced CPU without committing to the premium pricing of the Pro. The standard N5 clearly appeals to budget-conscious buyers who are willing to forgo ECC support and settle for a mid-tier CPU to save over $100 compared to the Aoostar.
 |
 |
Conversely, the N5 Pro is positioned for buyers who prioritize maximum multi-core performance, AI acceleration, and ECC memory—even if that means paying nearly 50% more than the Aoostar. For users who value the best balance of price and advanced functionality—including high storage density, good networking capabilities, and ECC support—the Aoostar WTR Max arguably delivers the most well-rounded value proposition among the three systems, particularly for general-purpose NAS or mixed-use home lab scenarios.
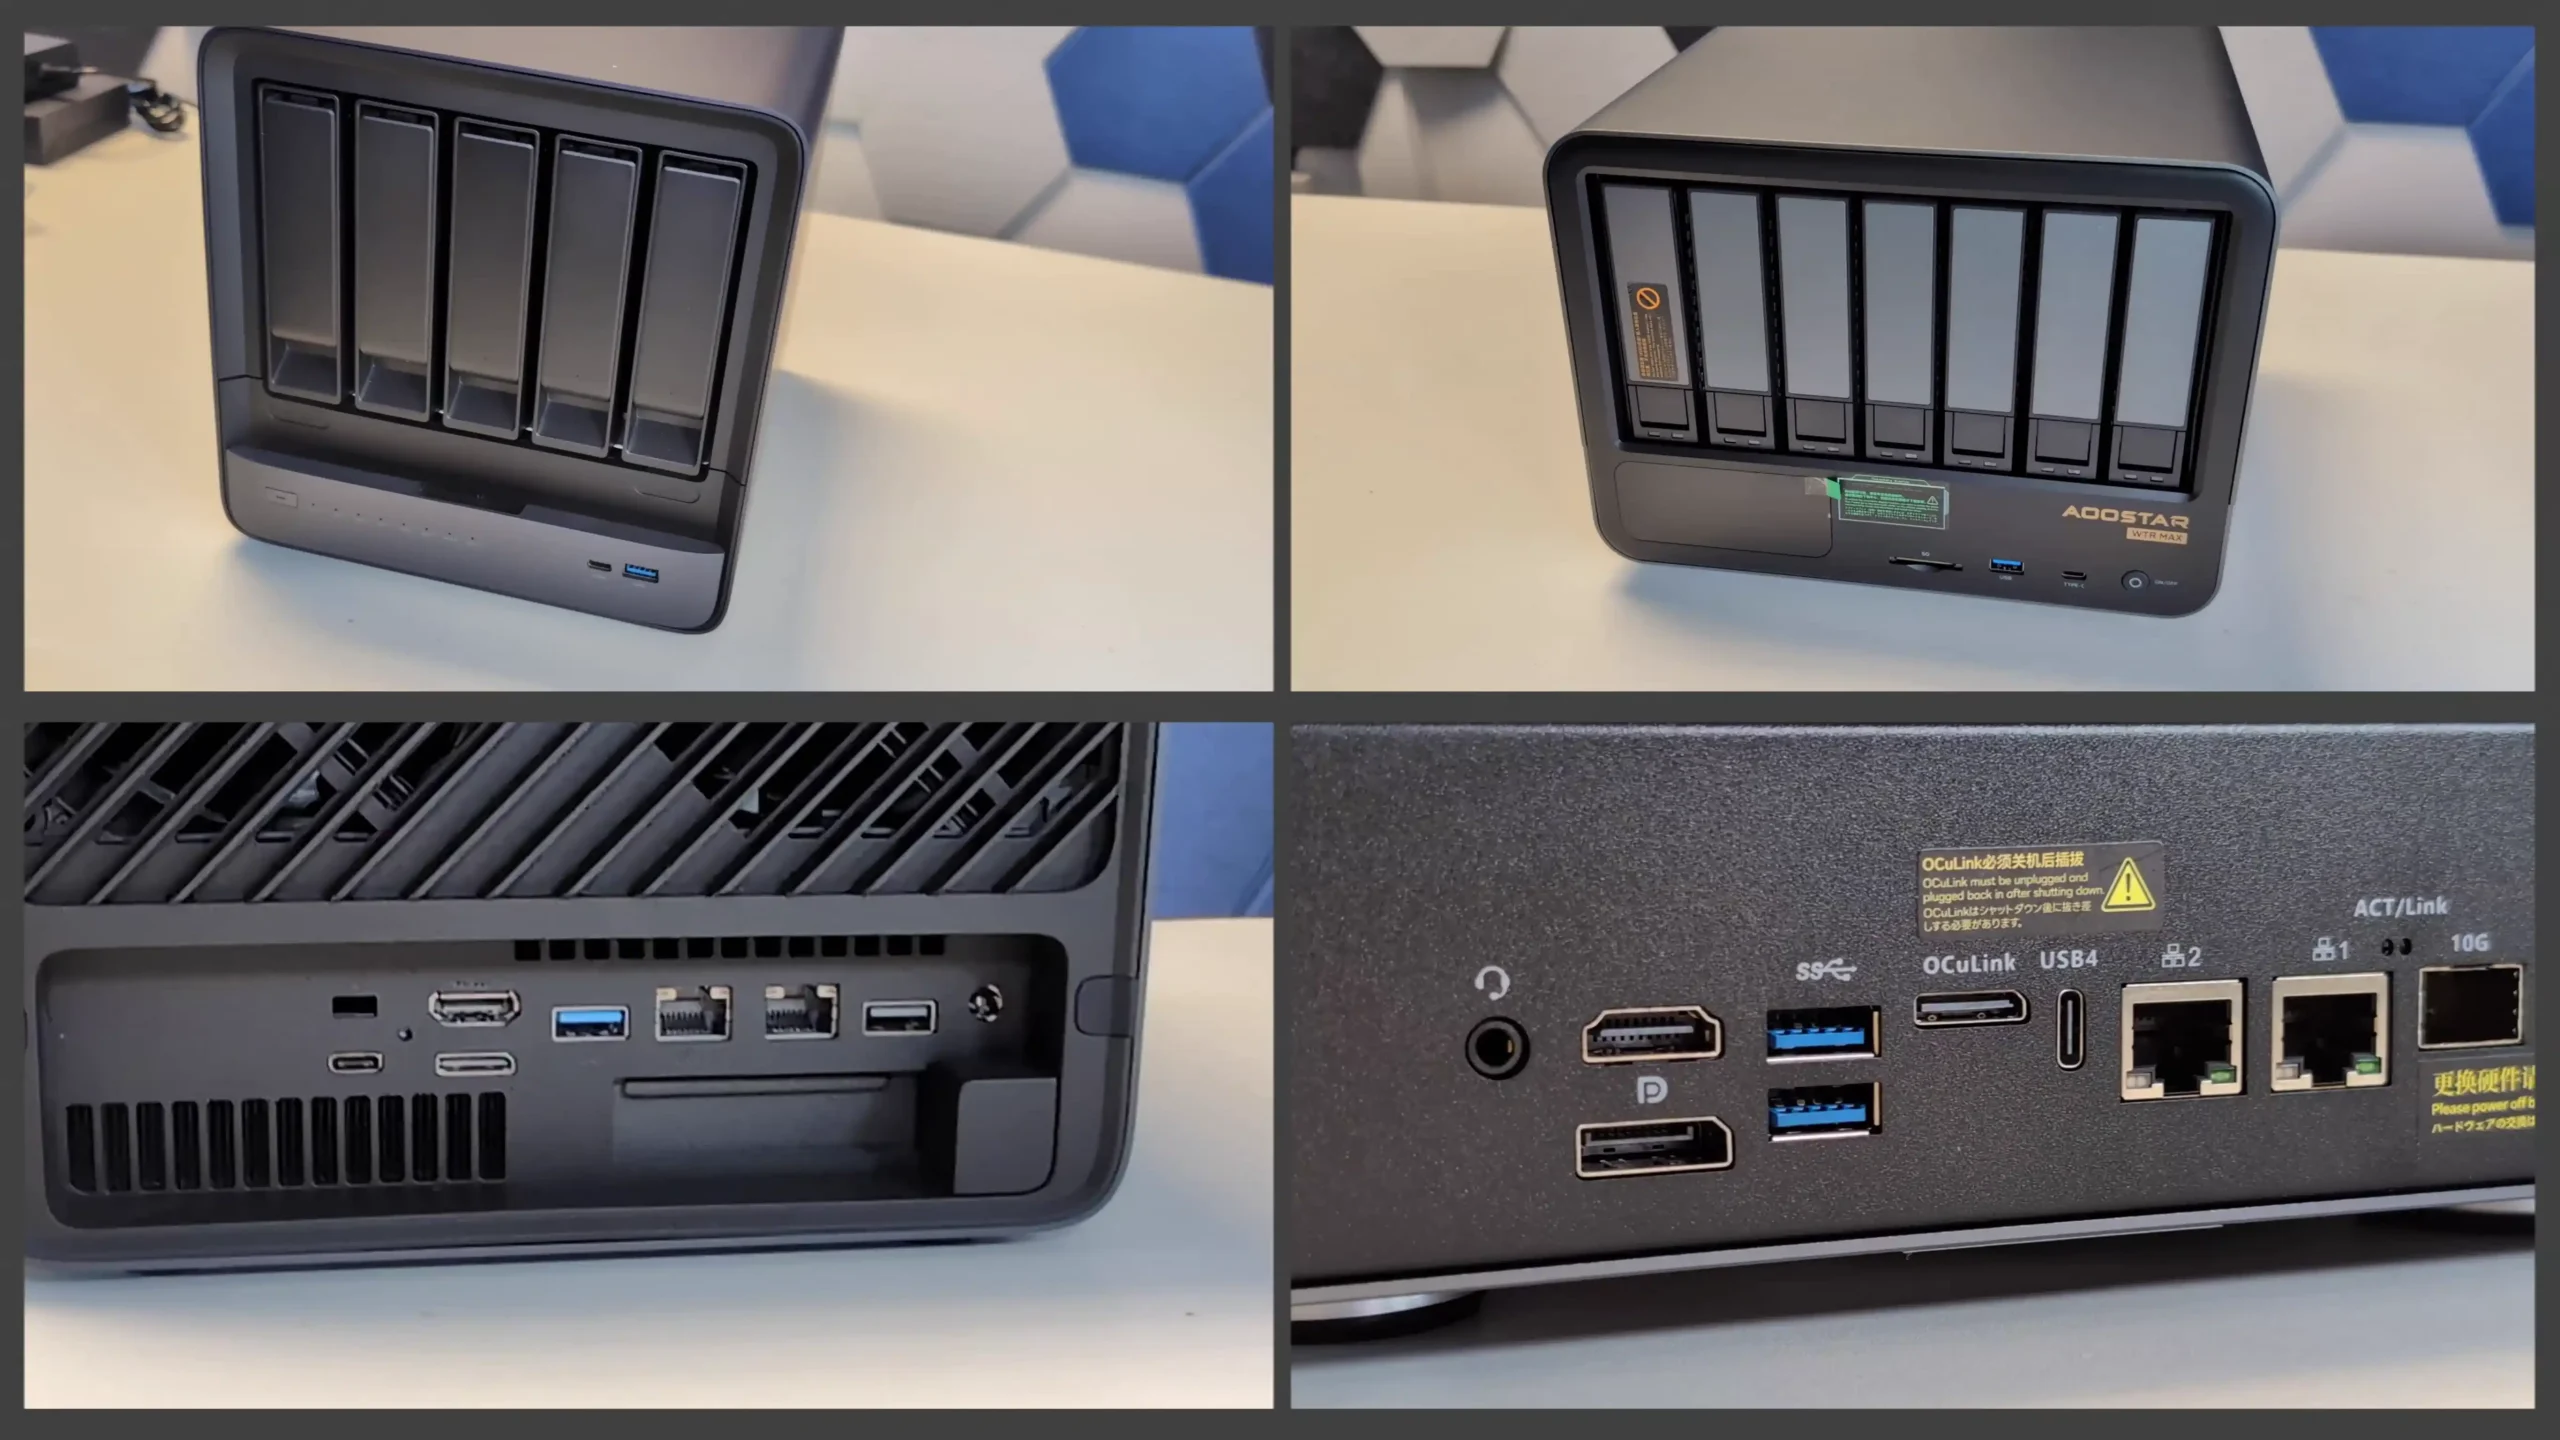
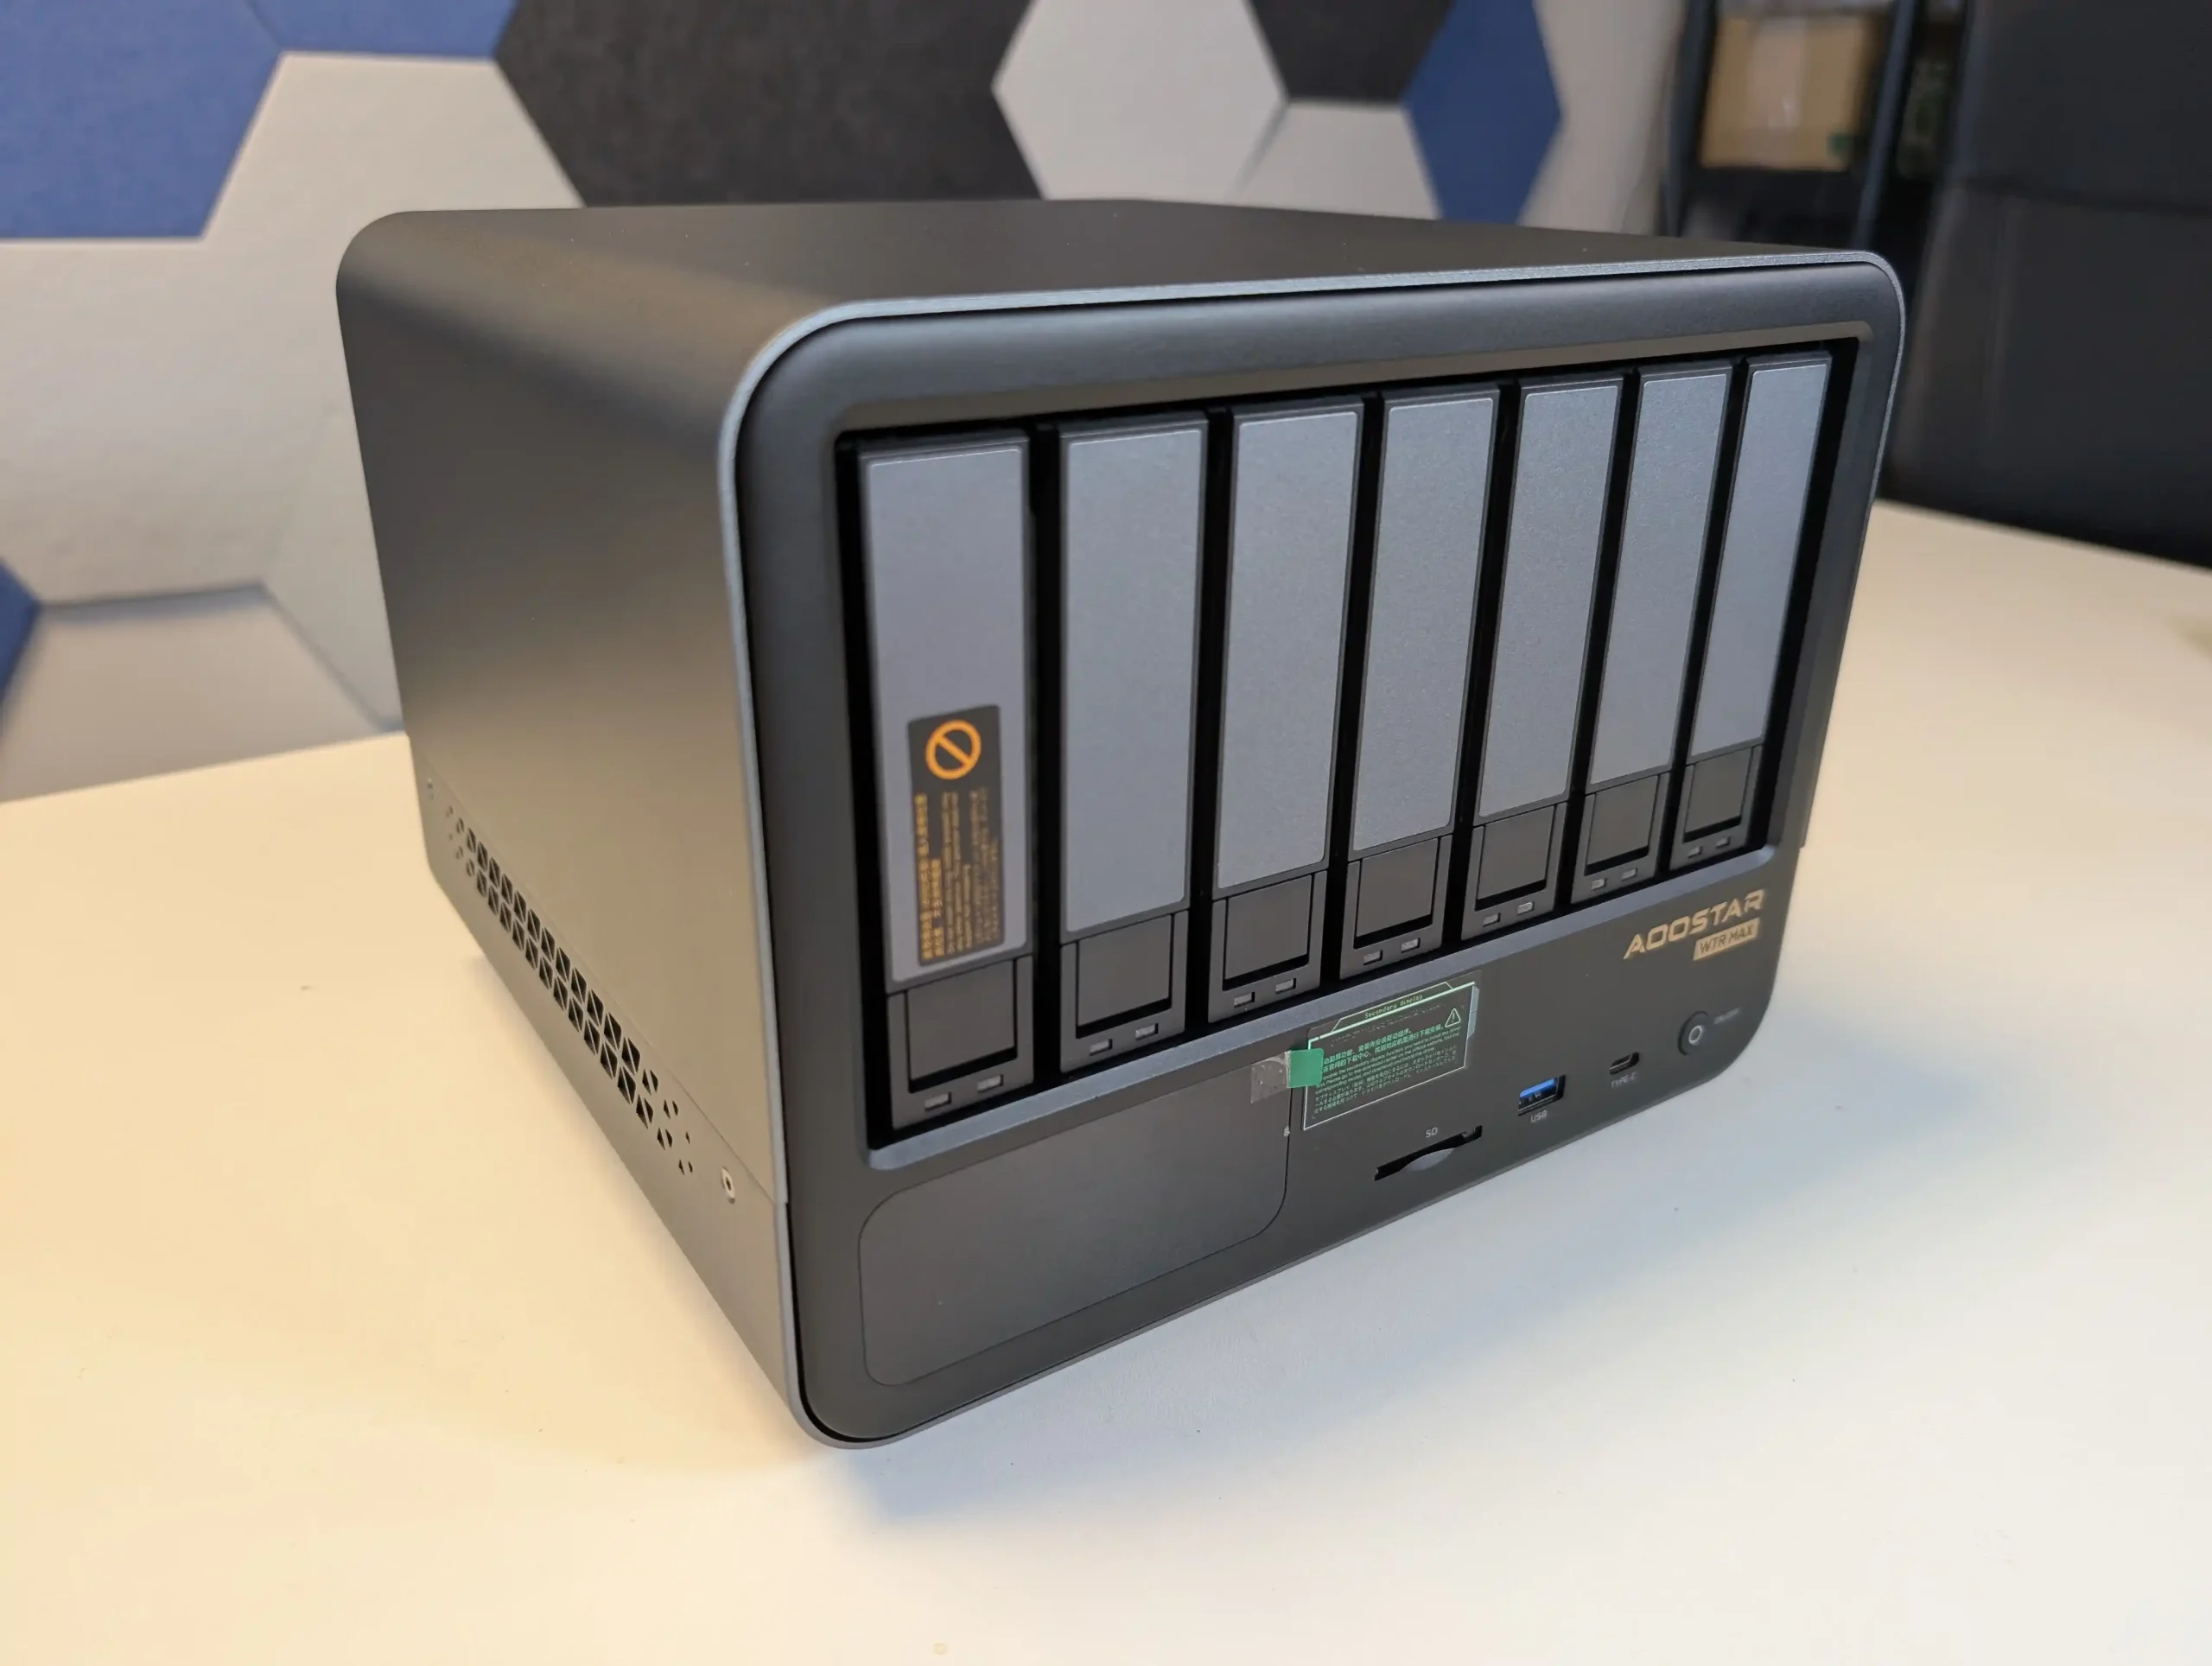
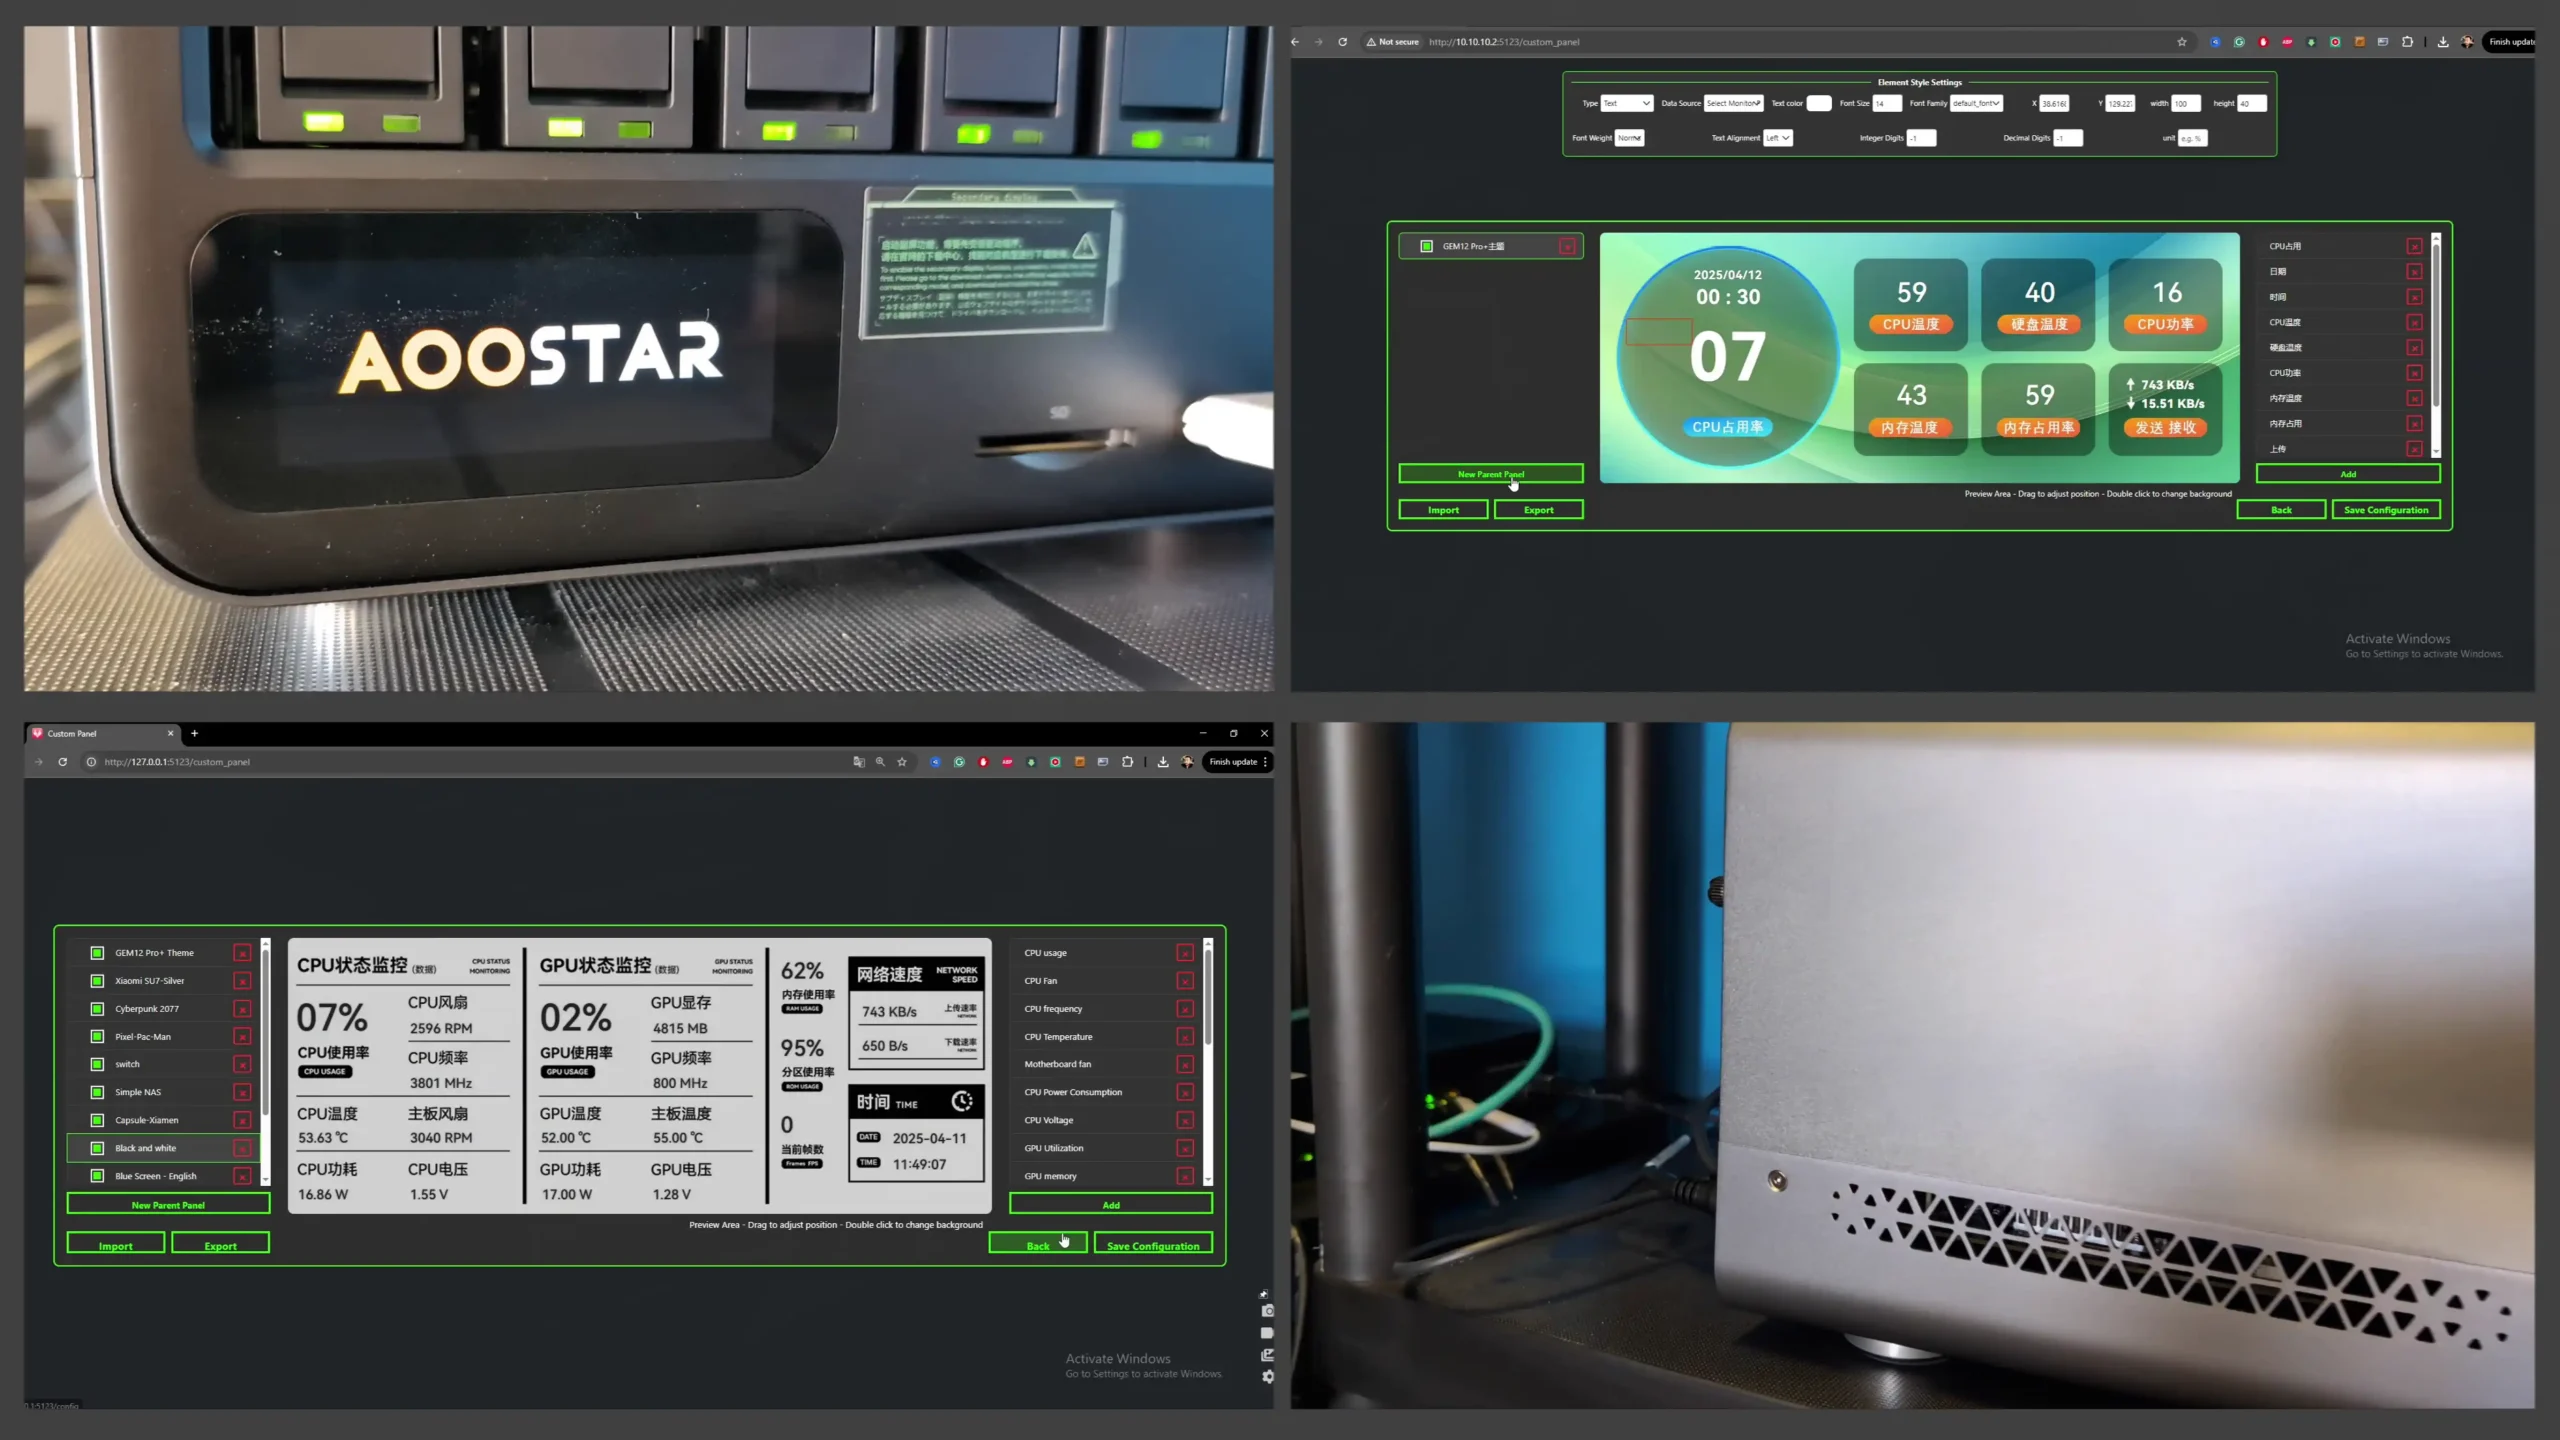
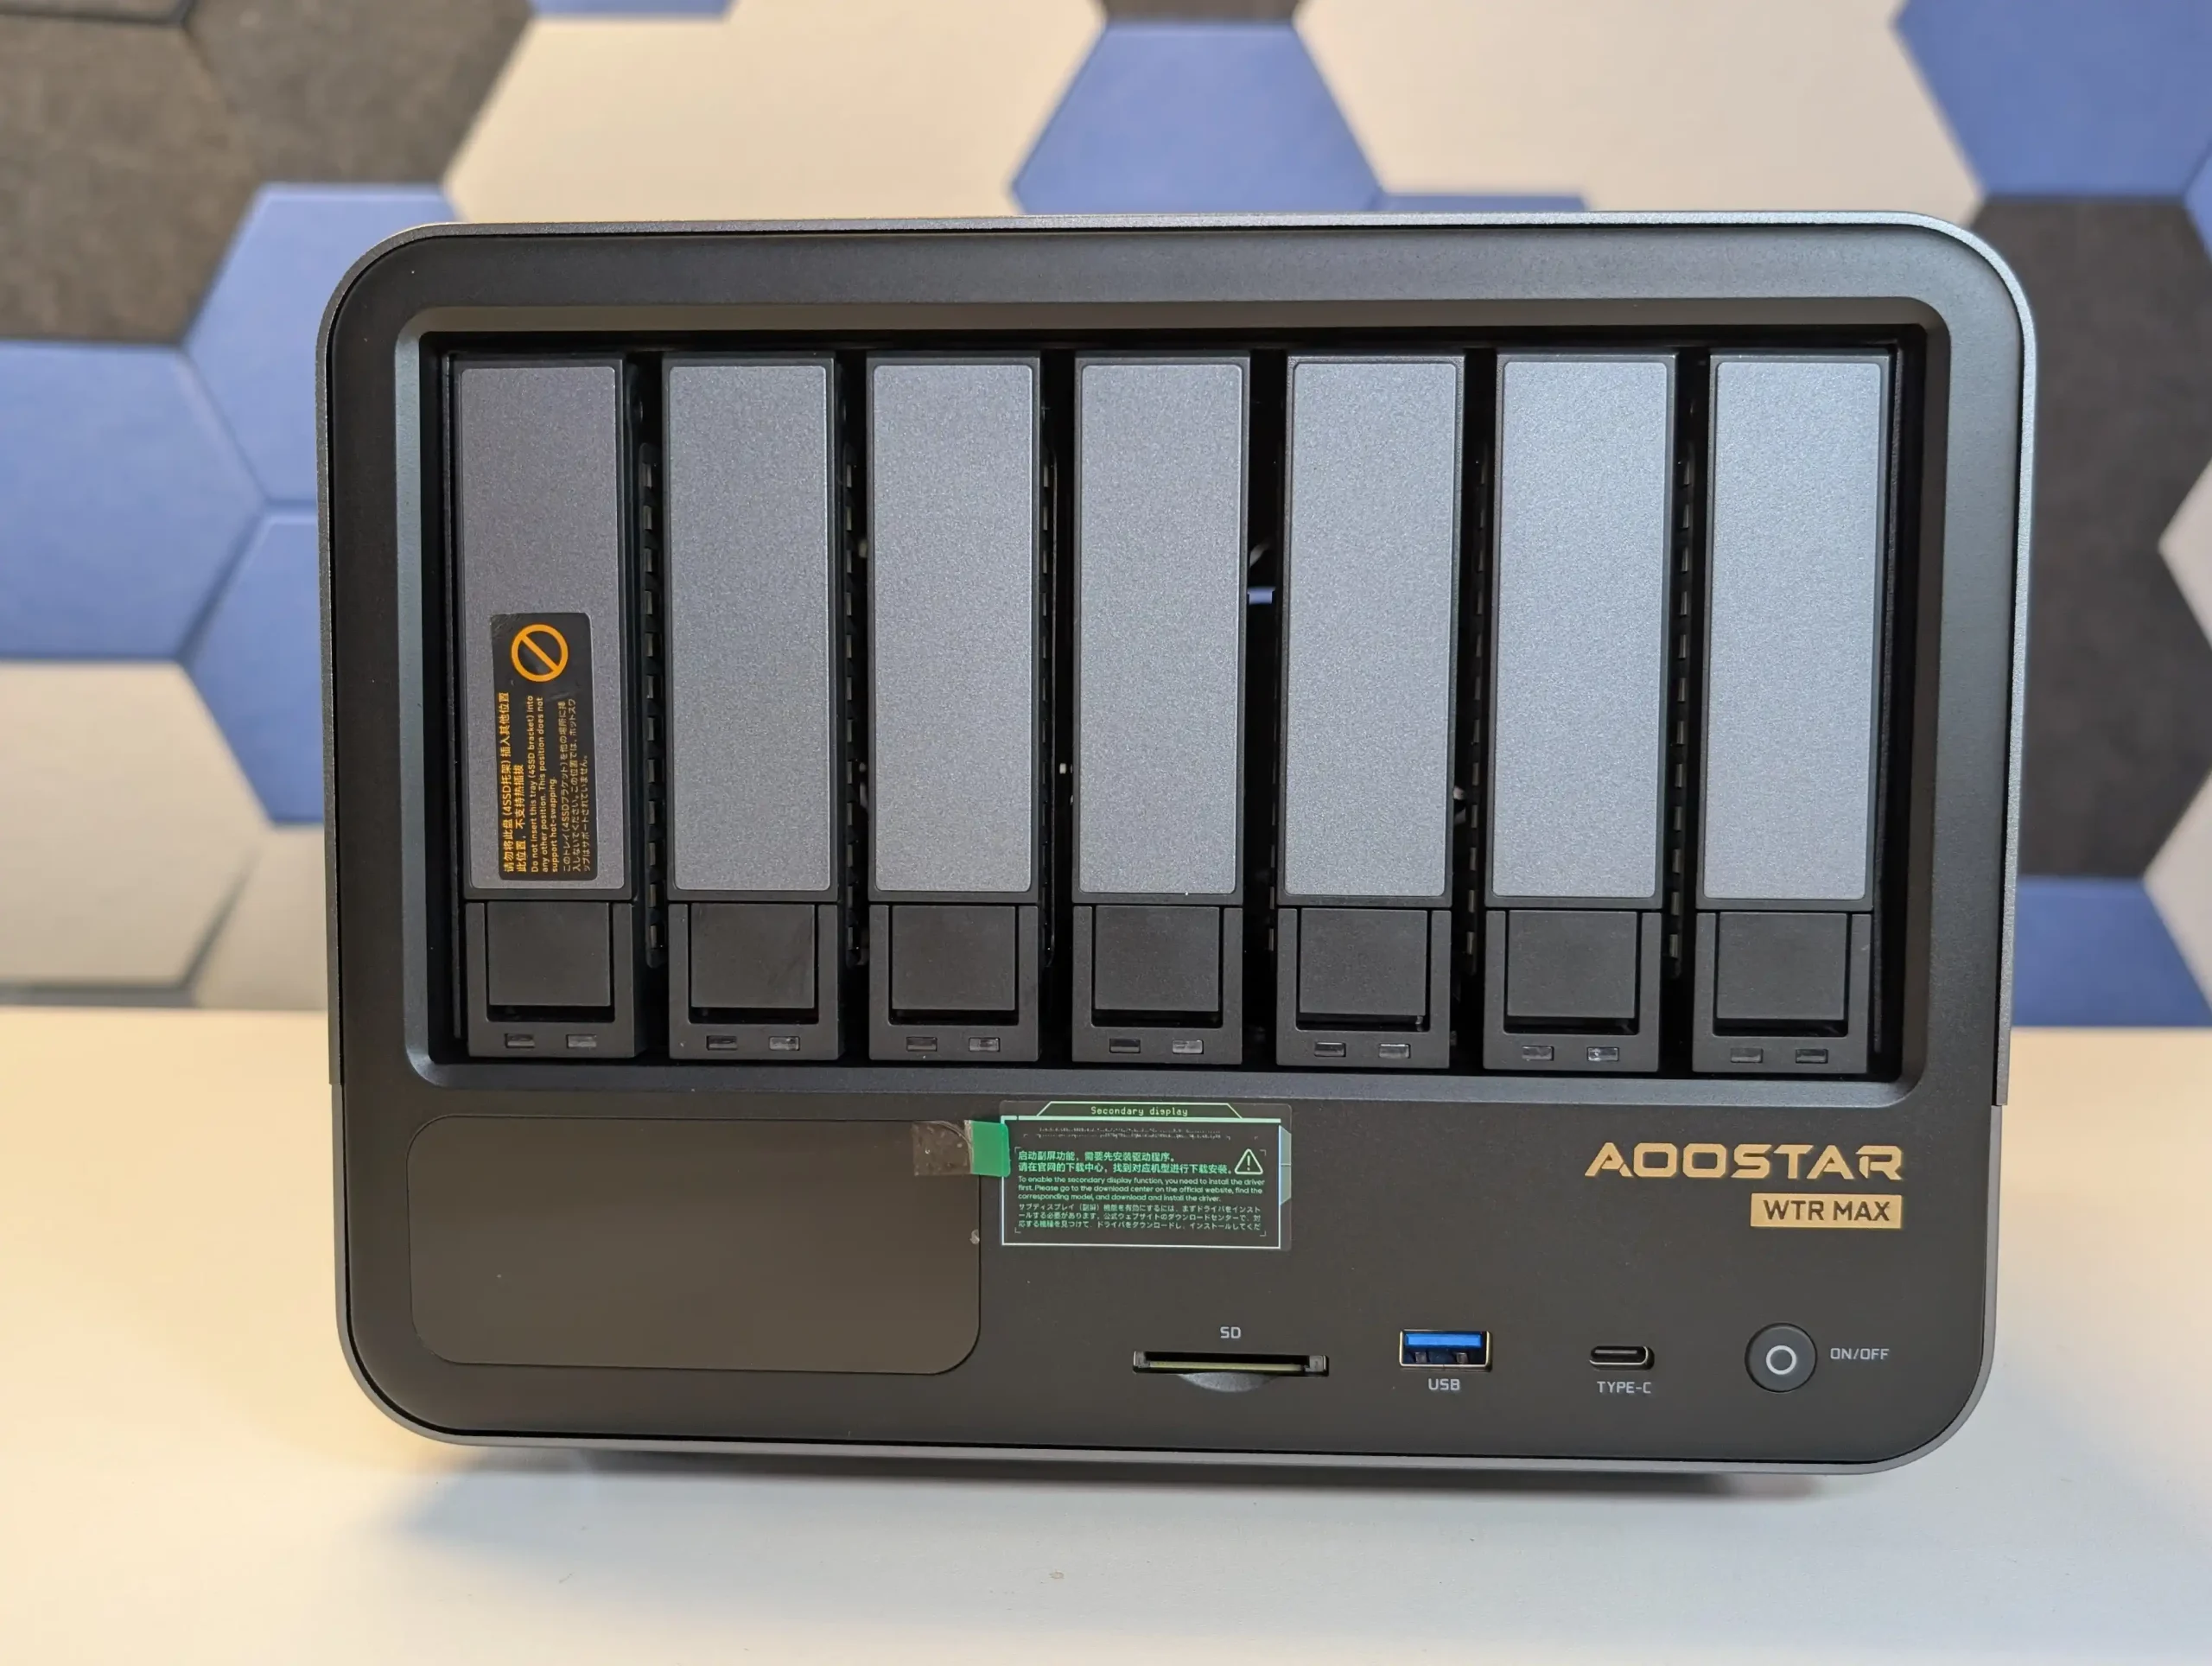
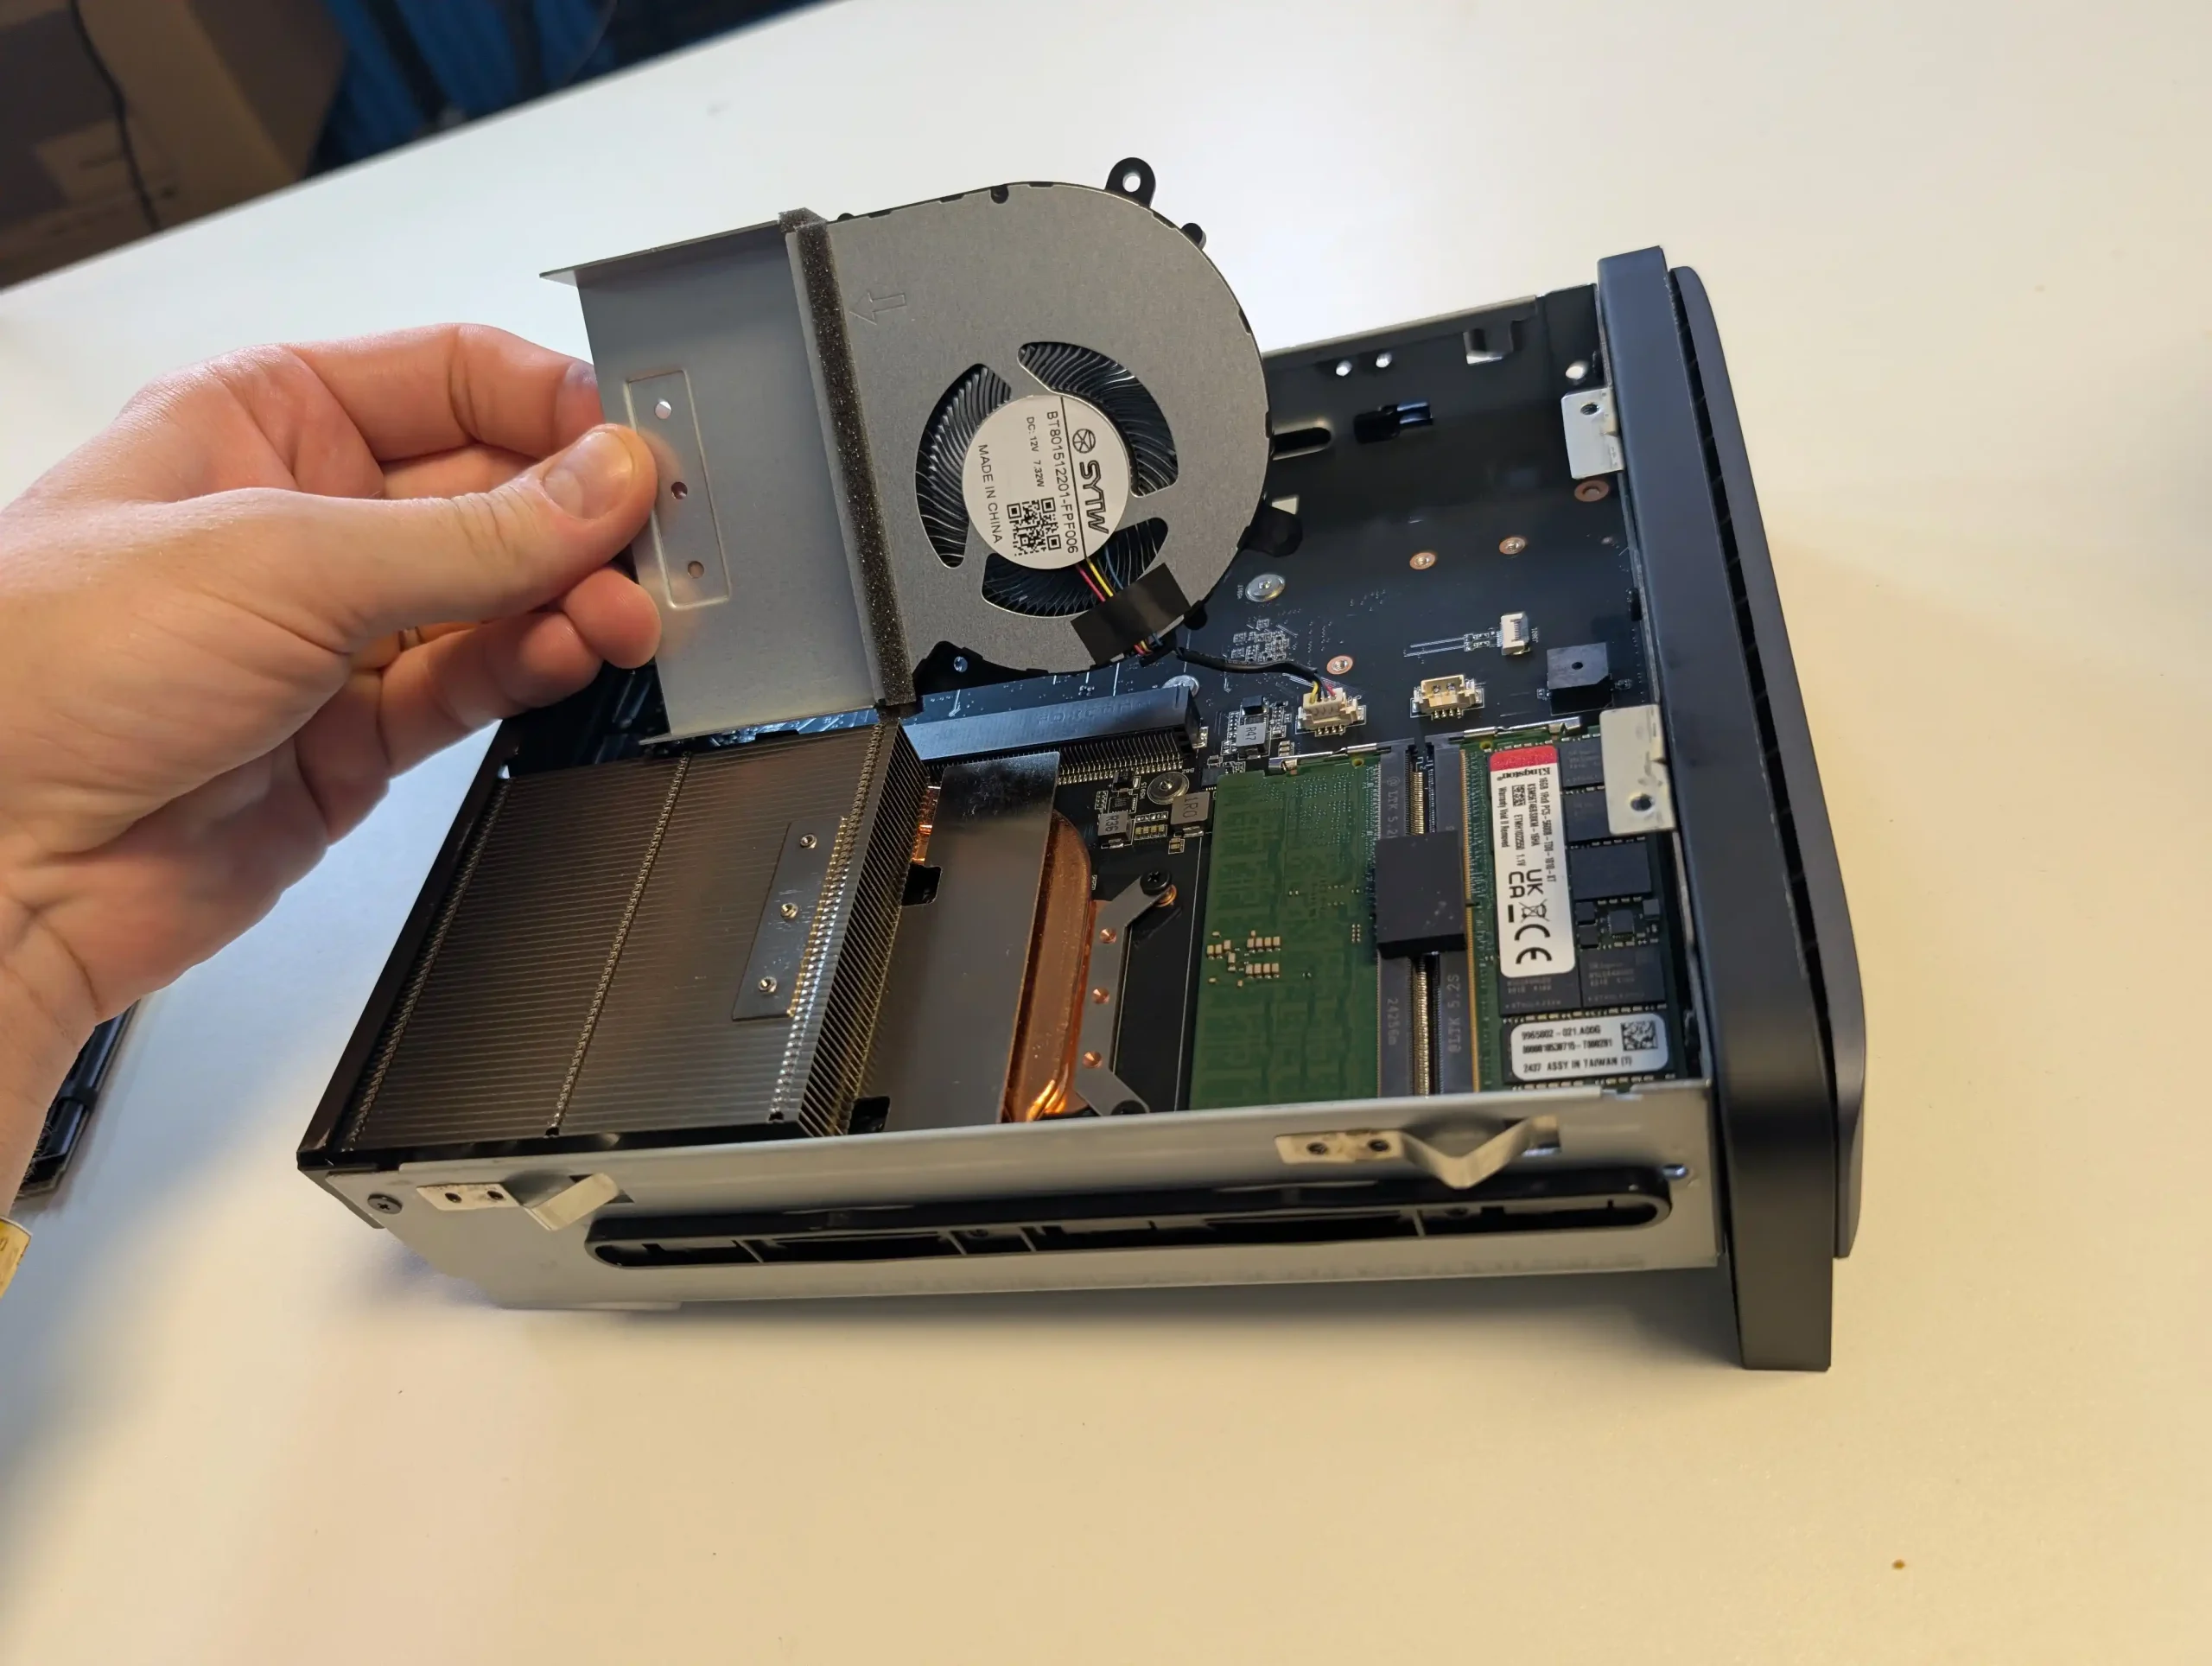
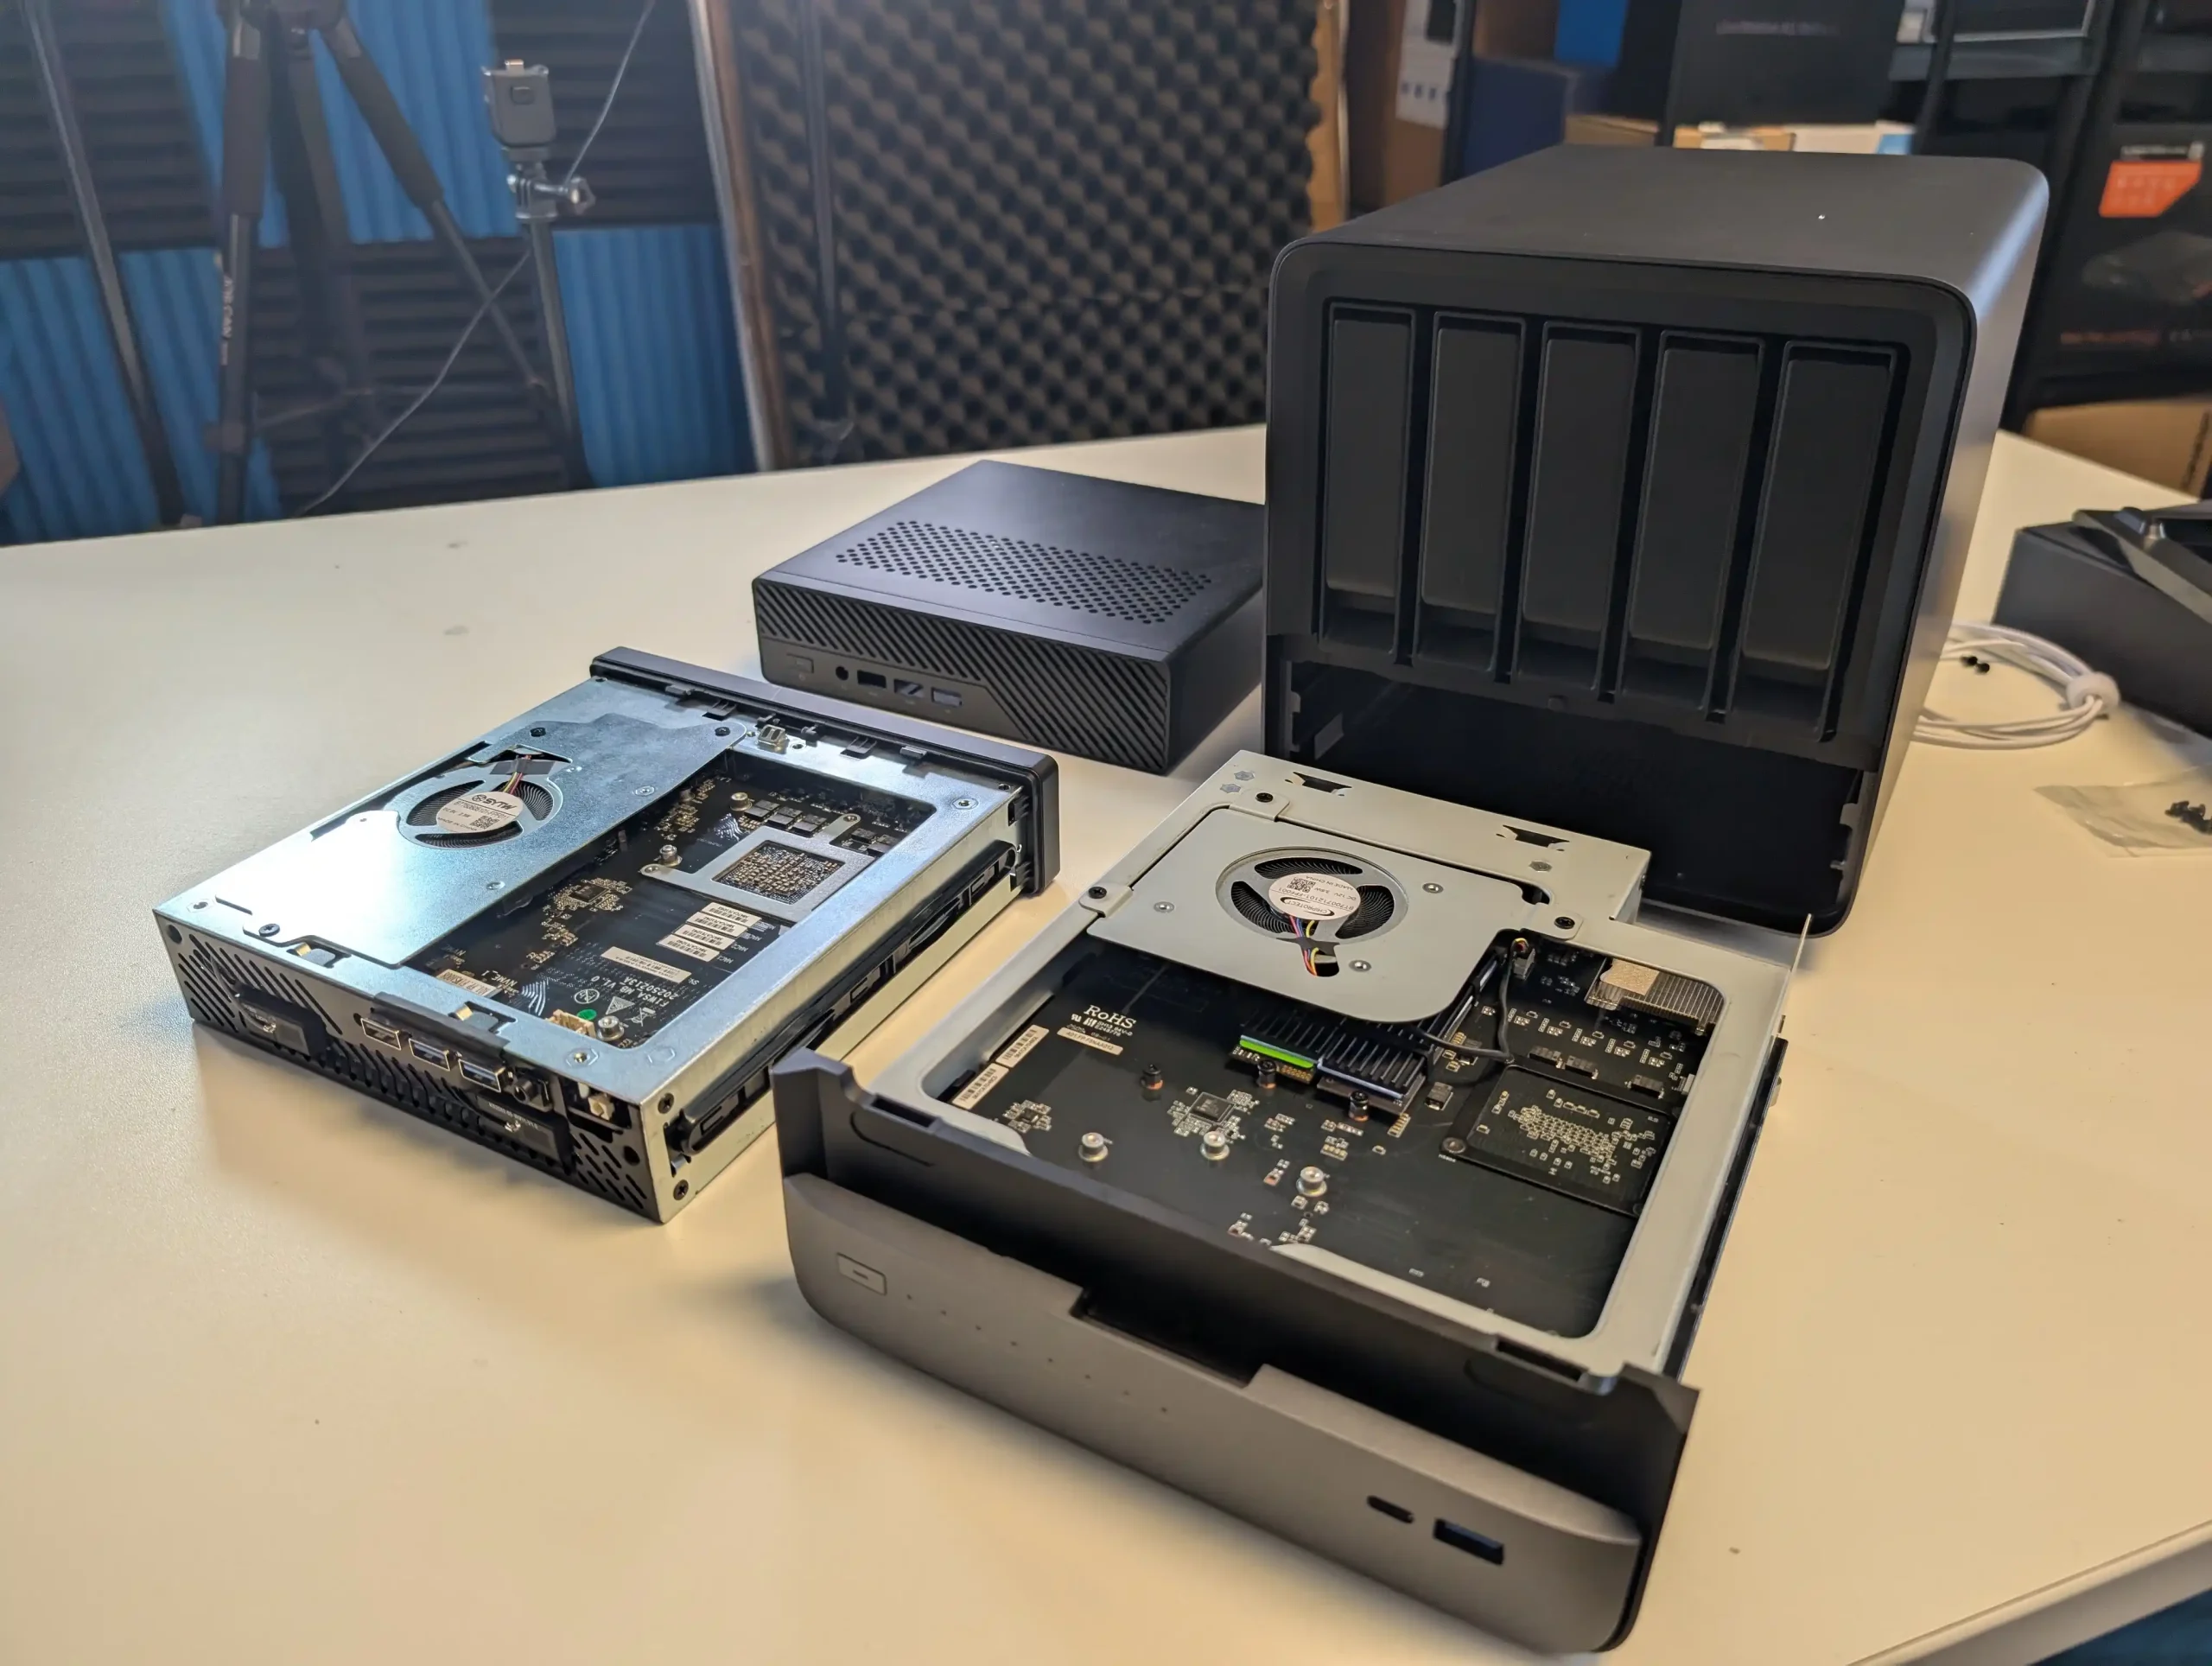
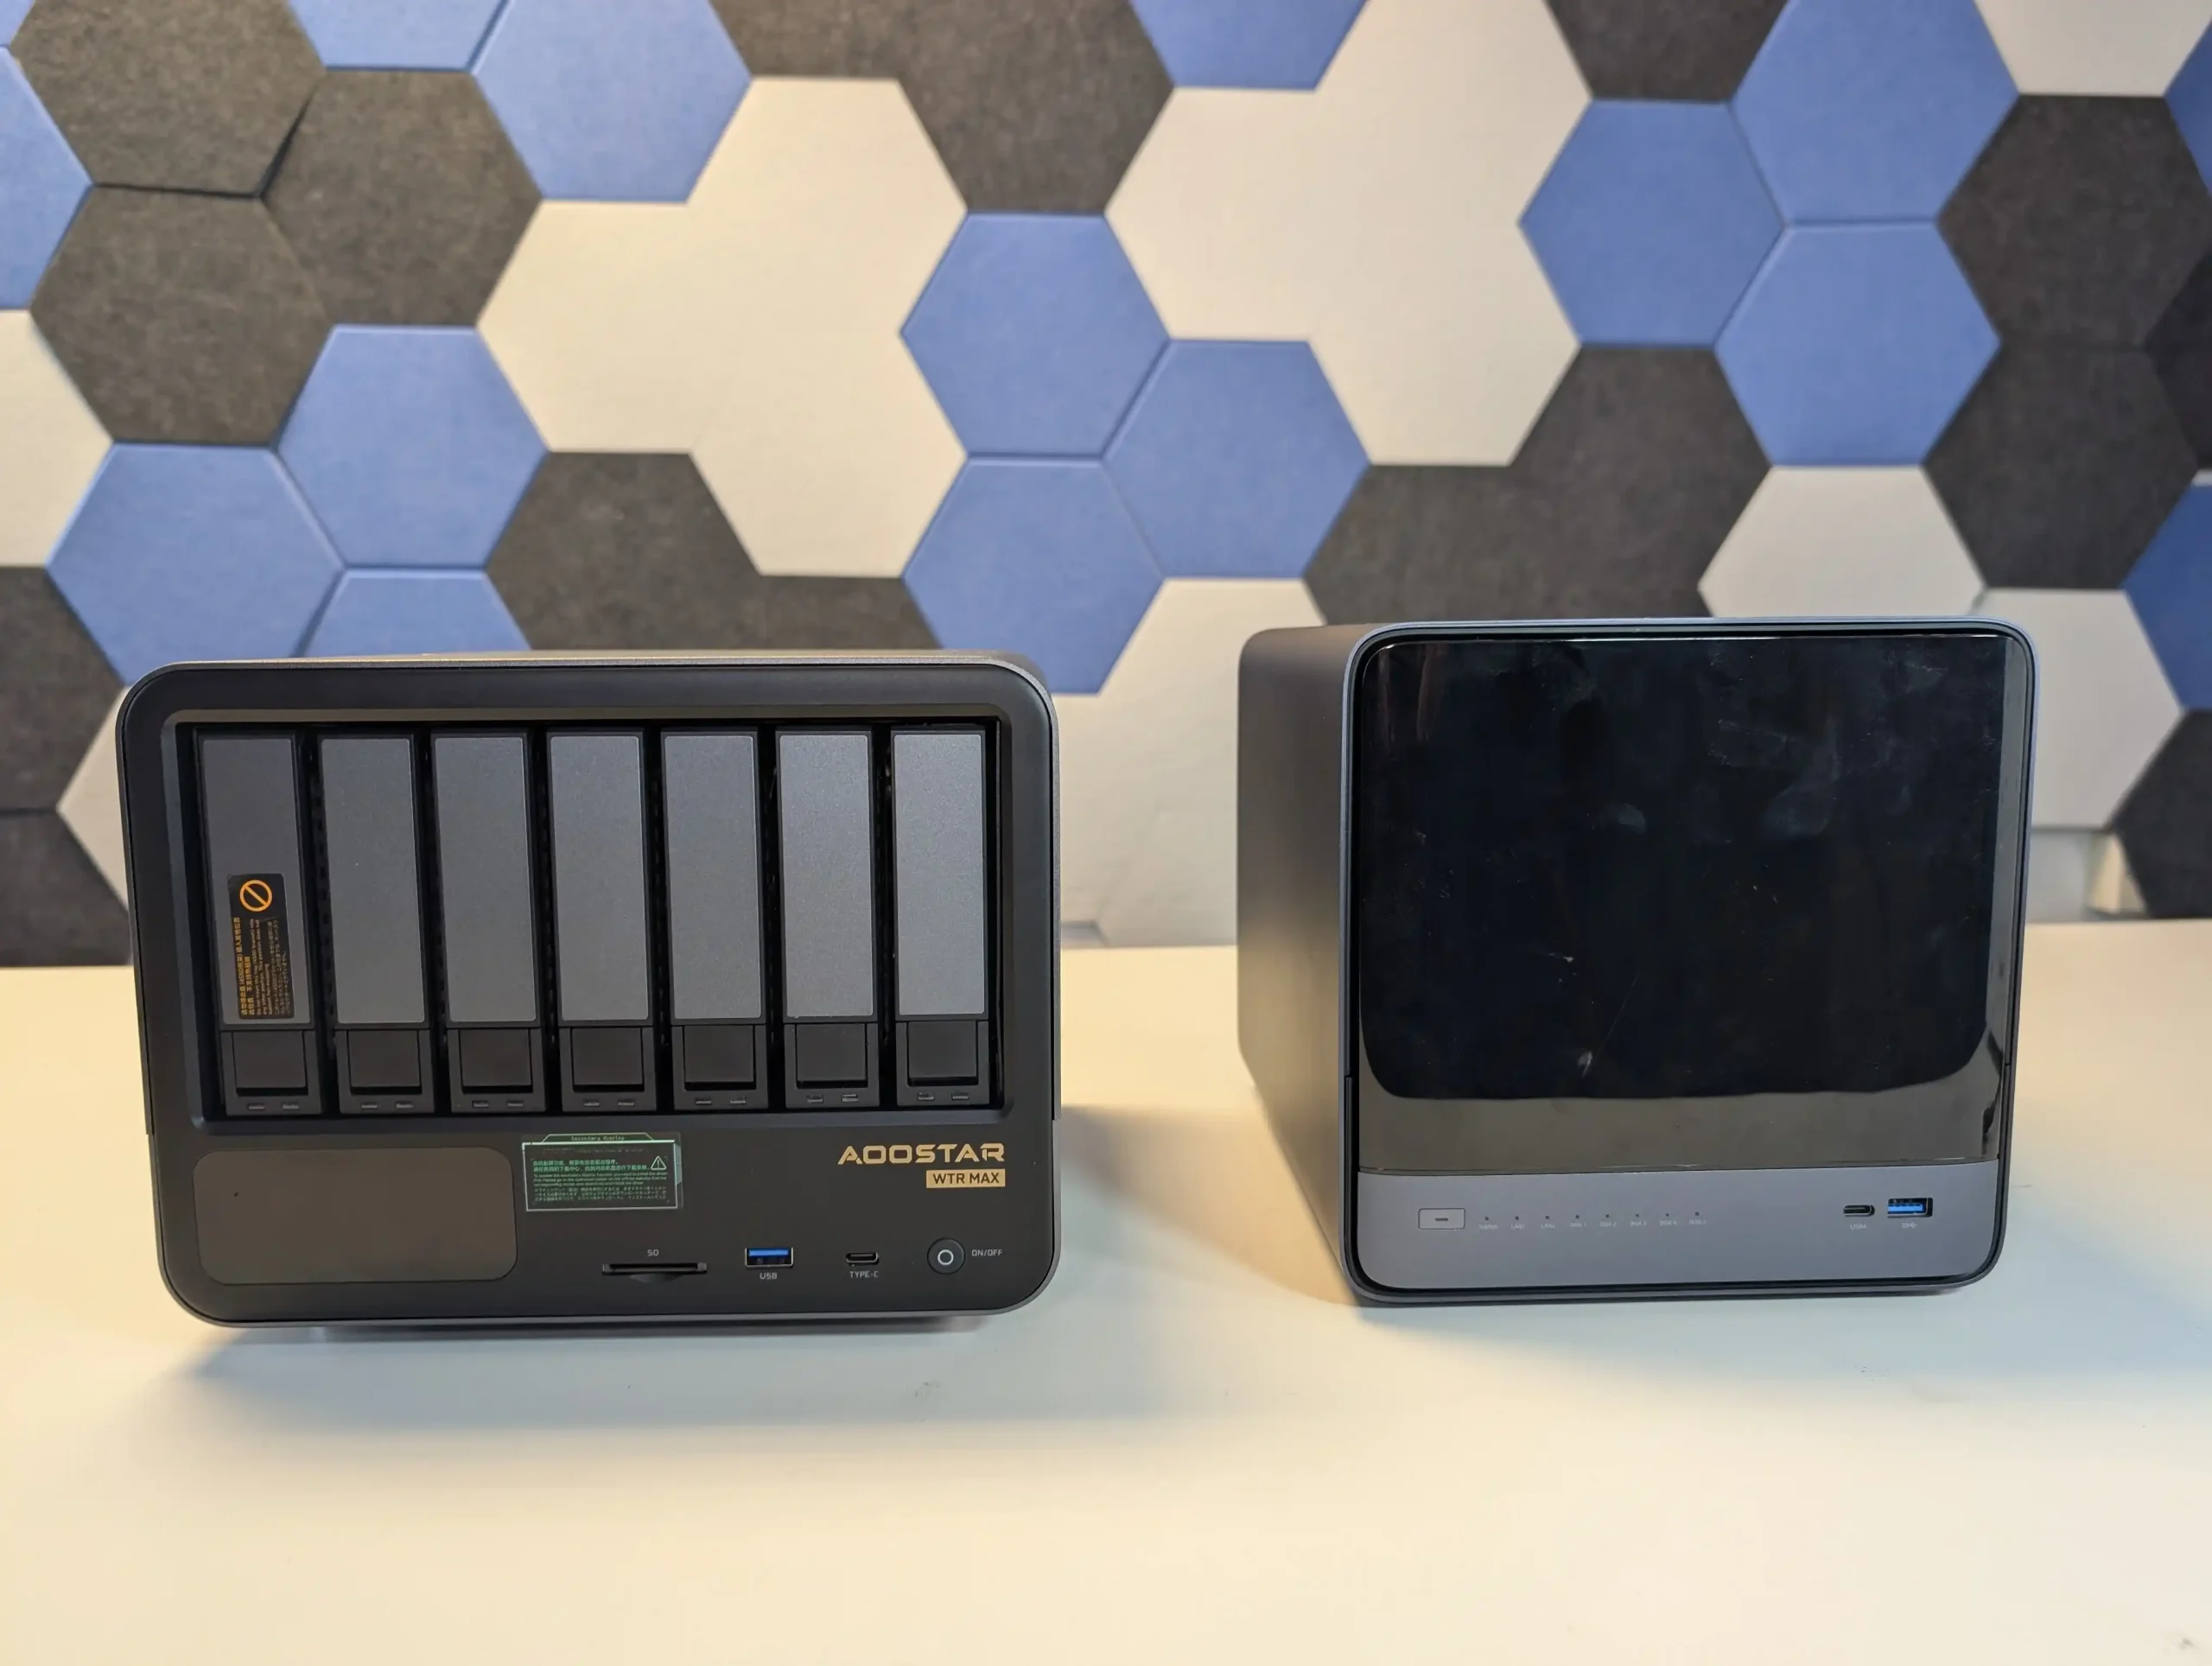
Both the Aoostar WTR Max and the Minisforum N5 series feature compact, all-metal chassis designs that prioritize serviceability, efficient internal space utilization, and professional-grade durability. The Aoostar WTR Max adopts a slightly larger rectangular footprint, accommodating six SATA bays, a dedicated seventh tray slot for up to four M.2 NVMe SSDs, and an integrated LCD display on the front panel for customizable real-time monitoring of system metrics such as temperature and network activity.
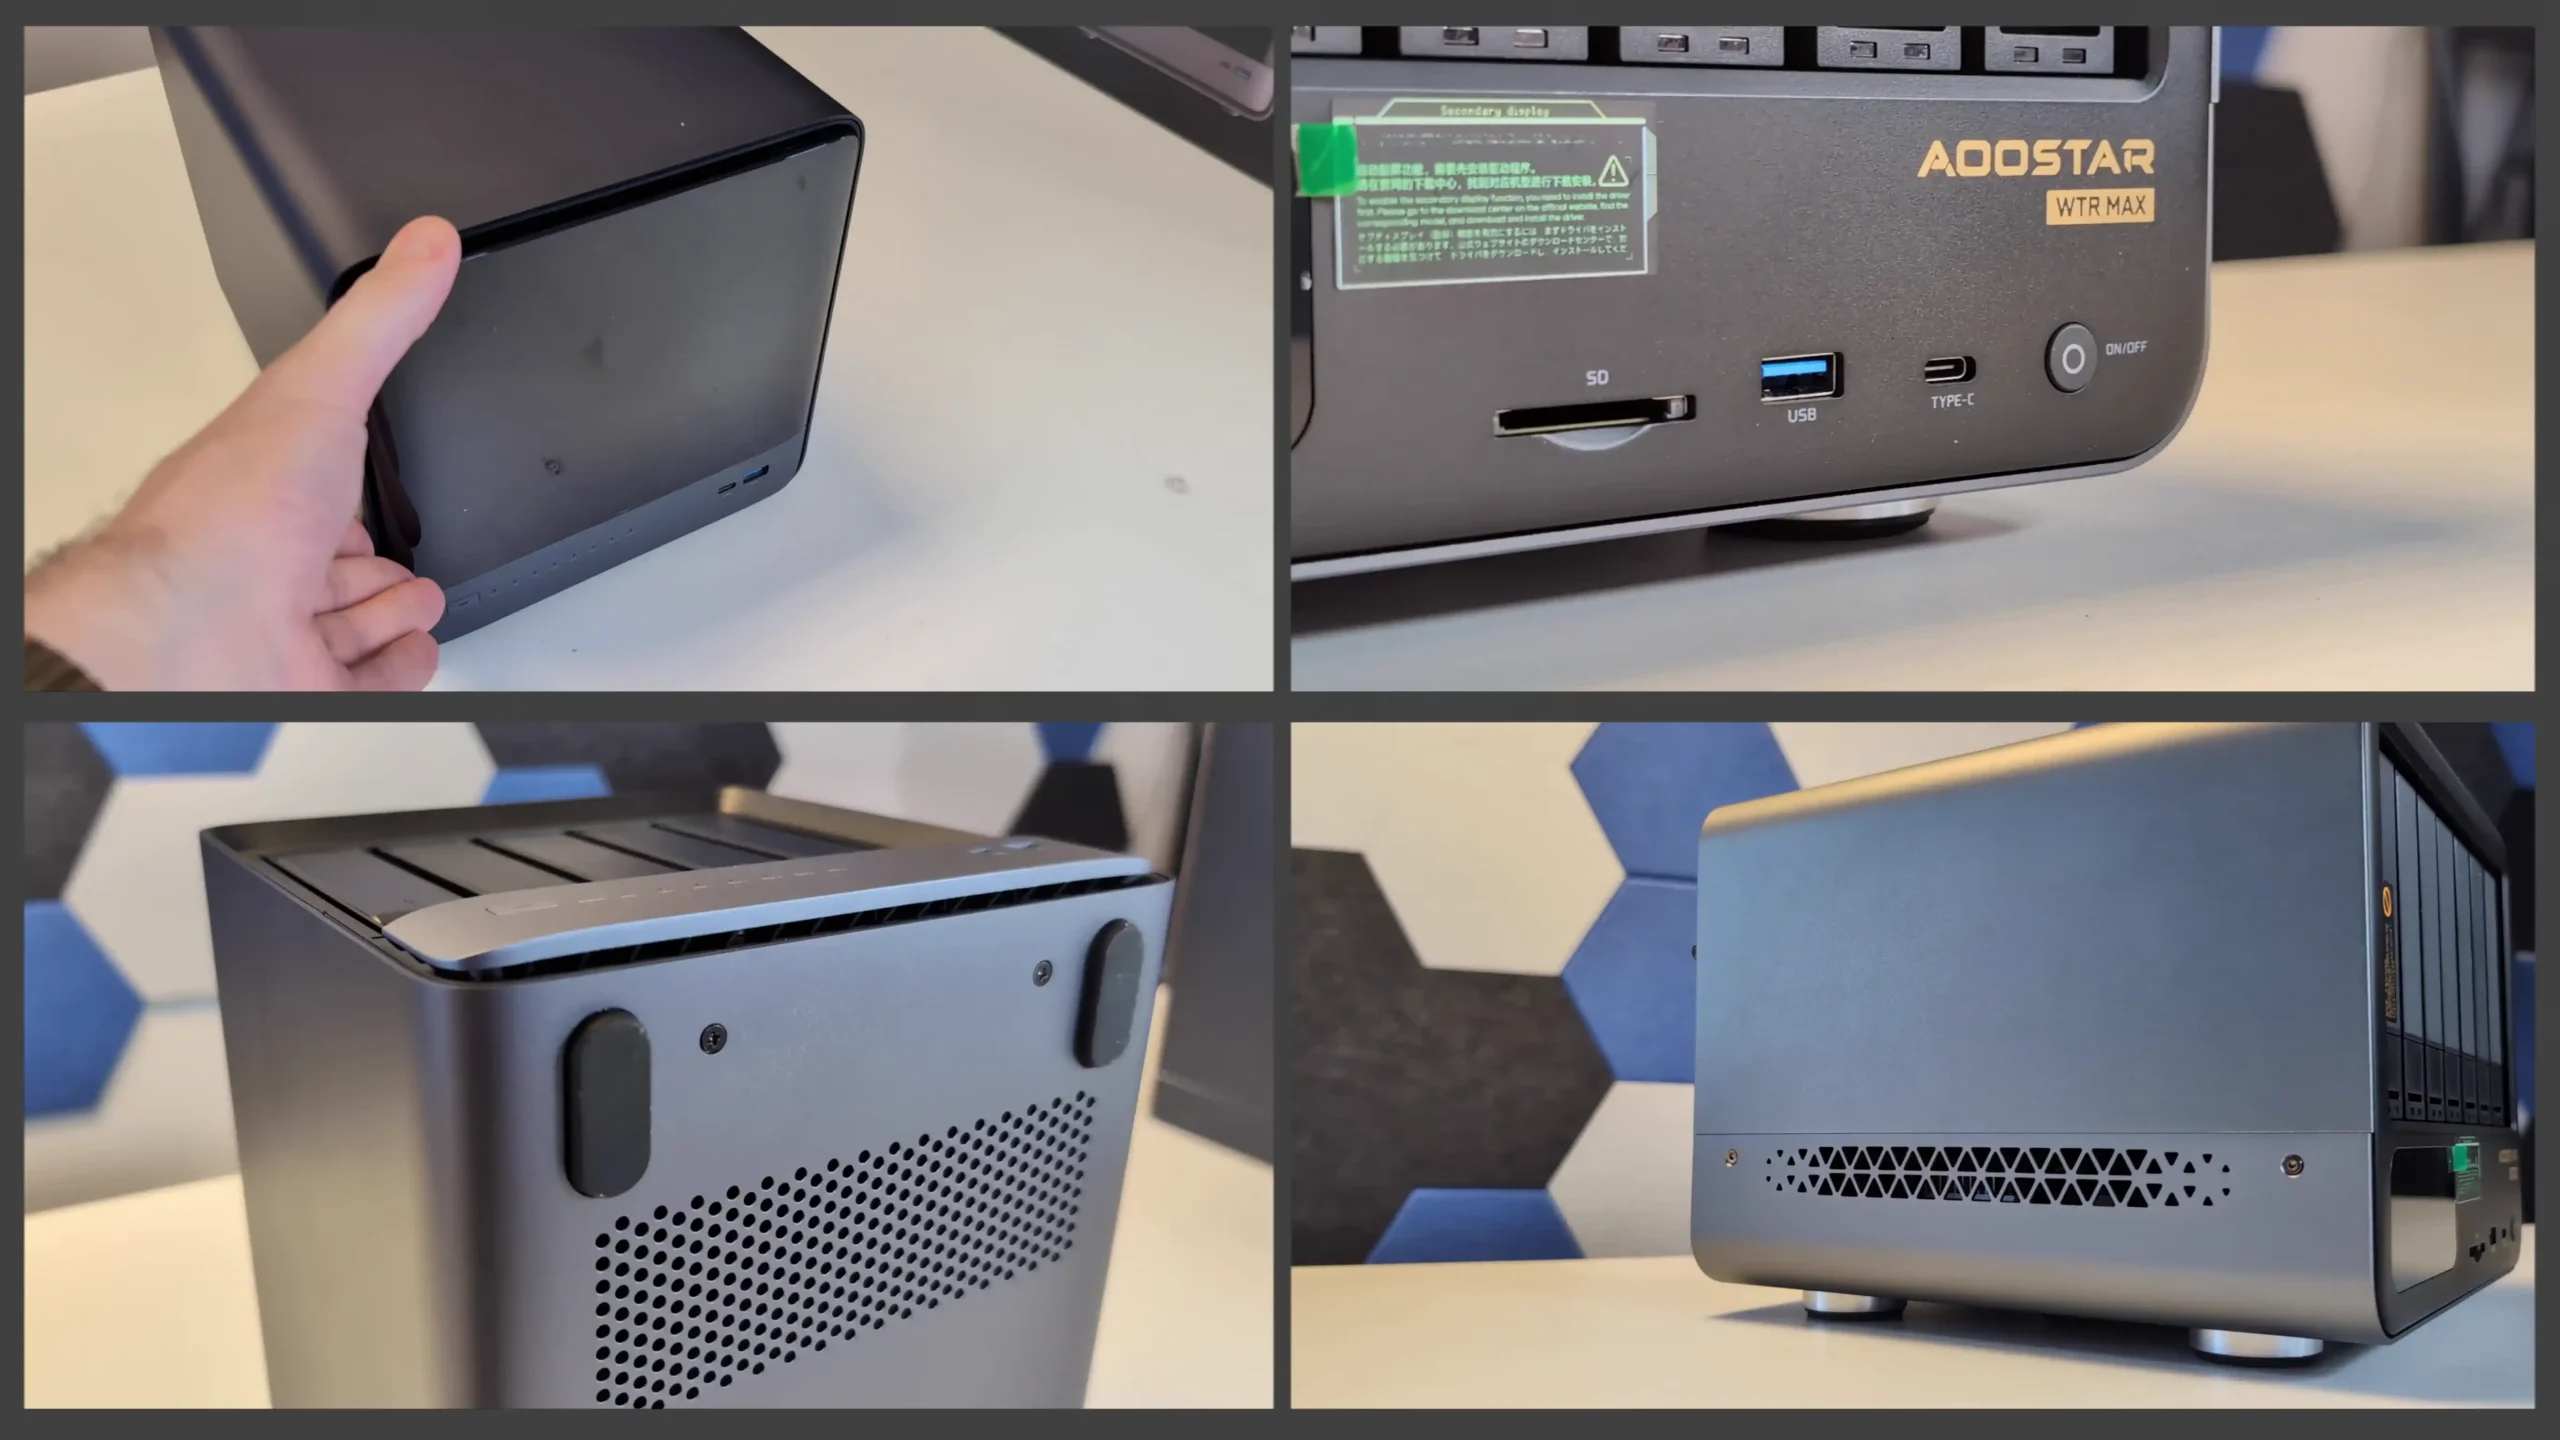
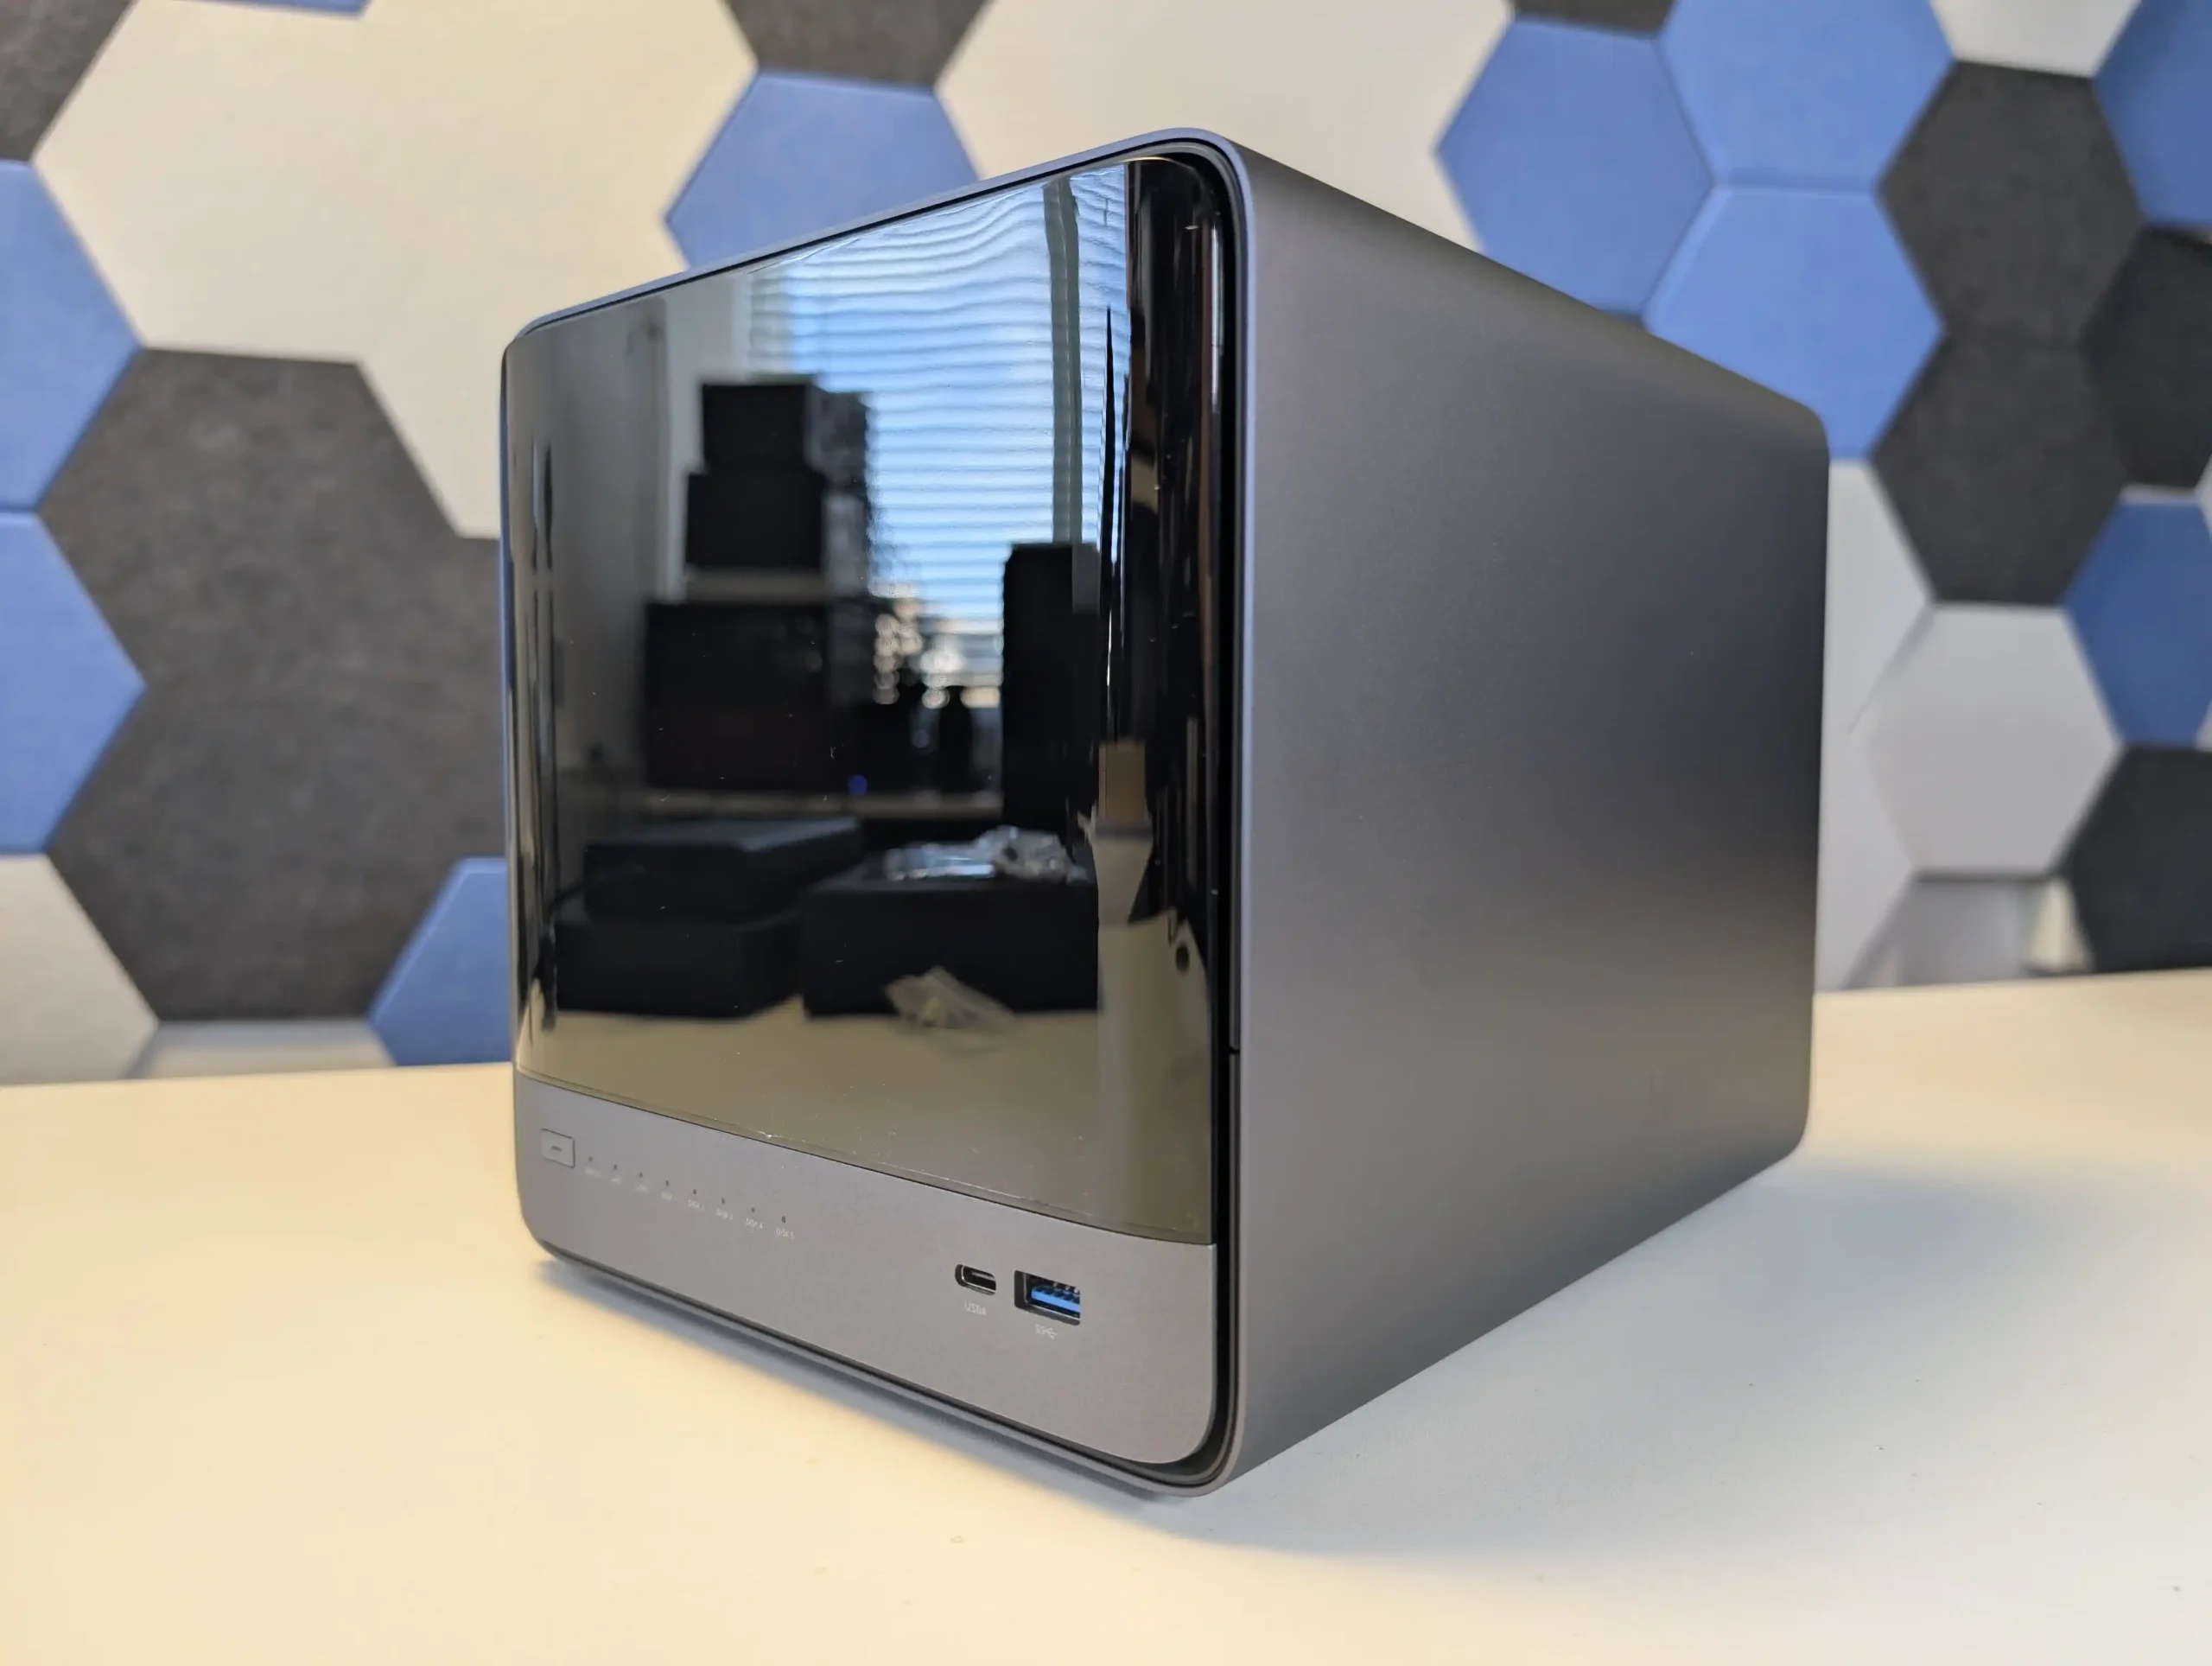
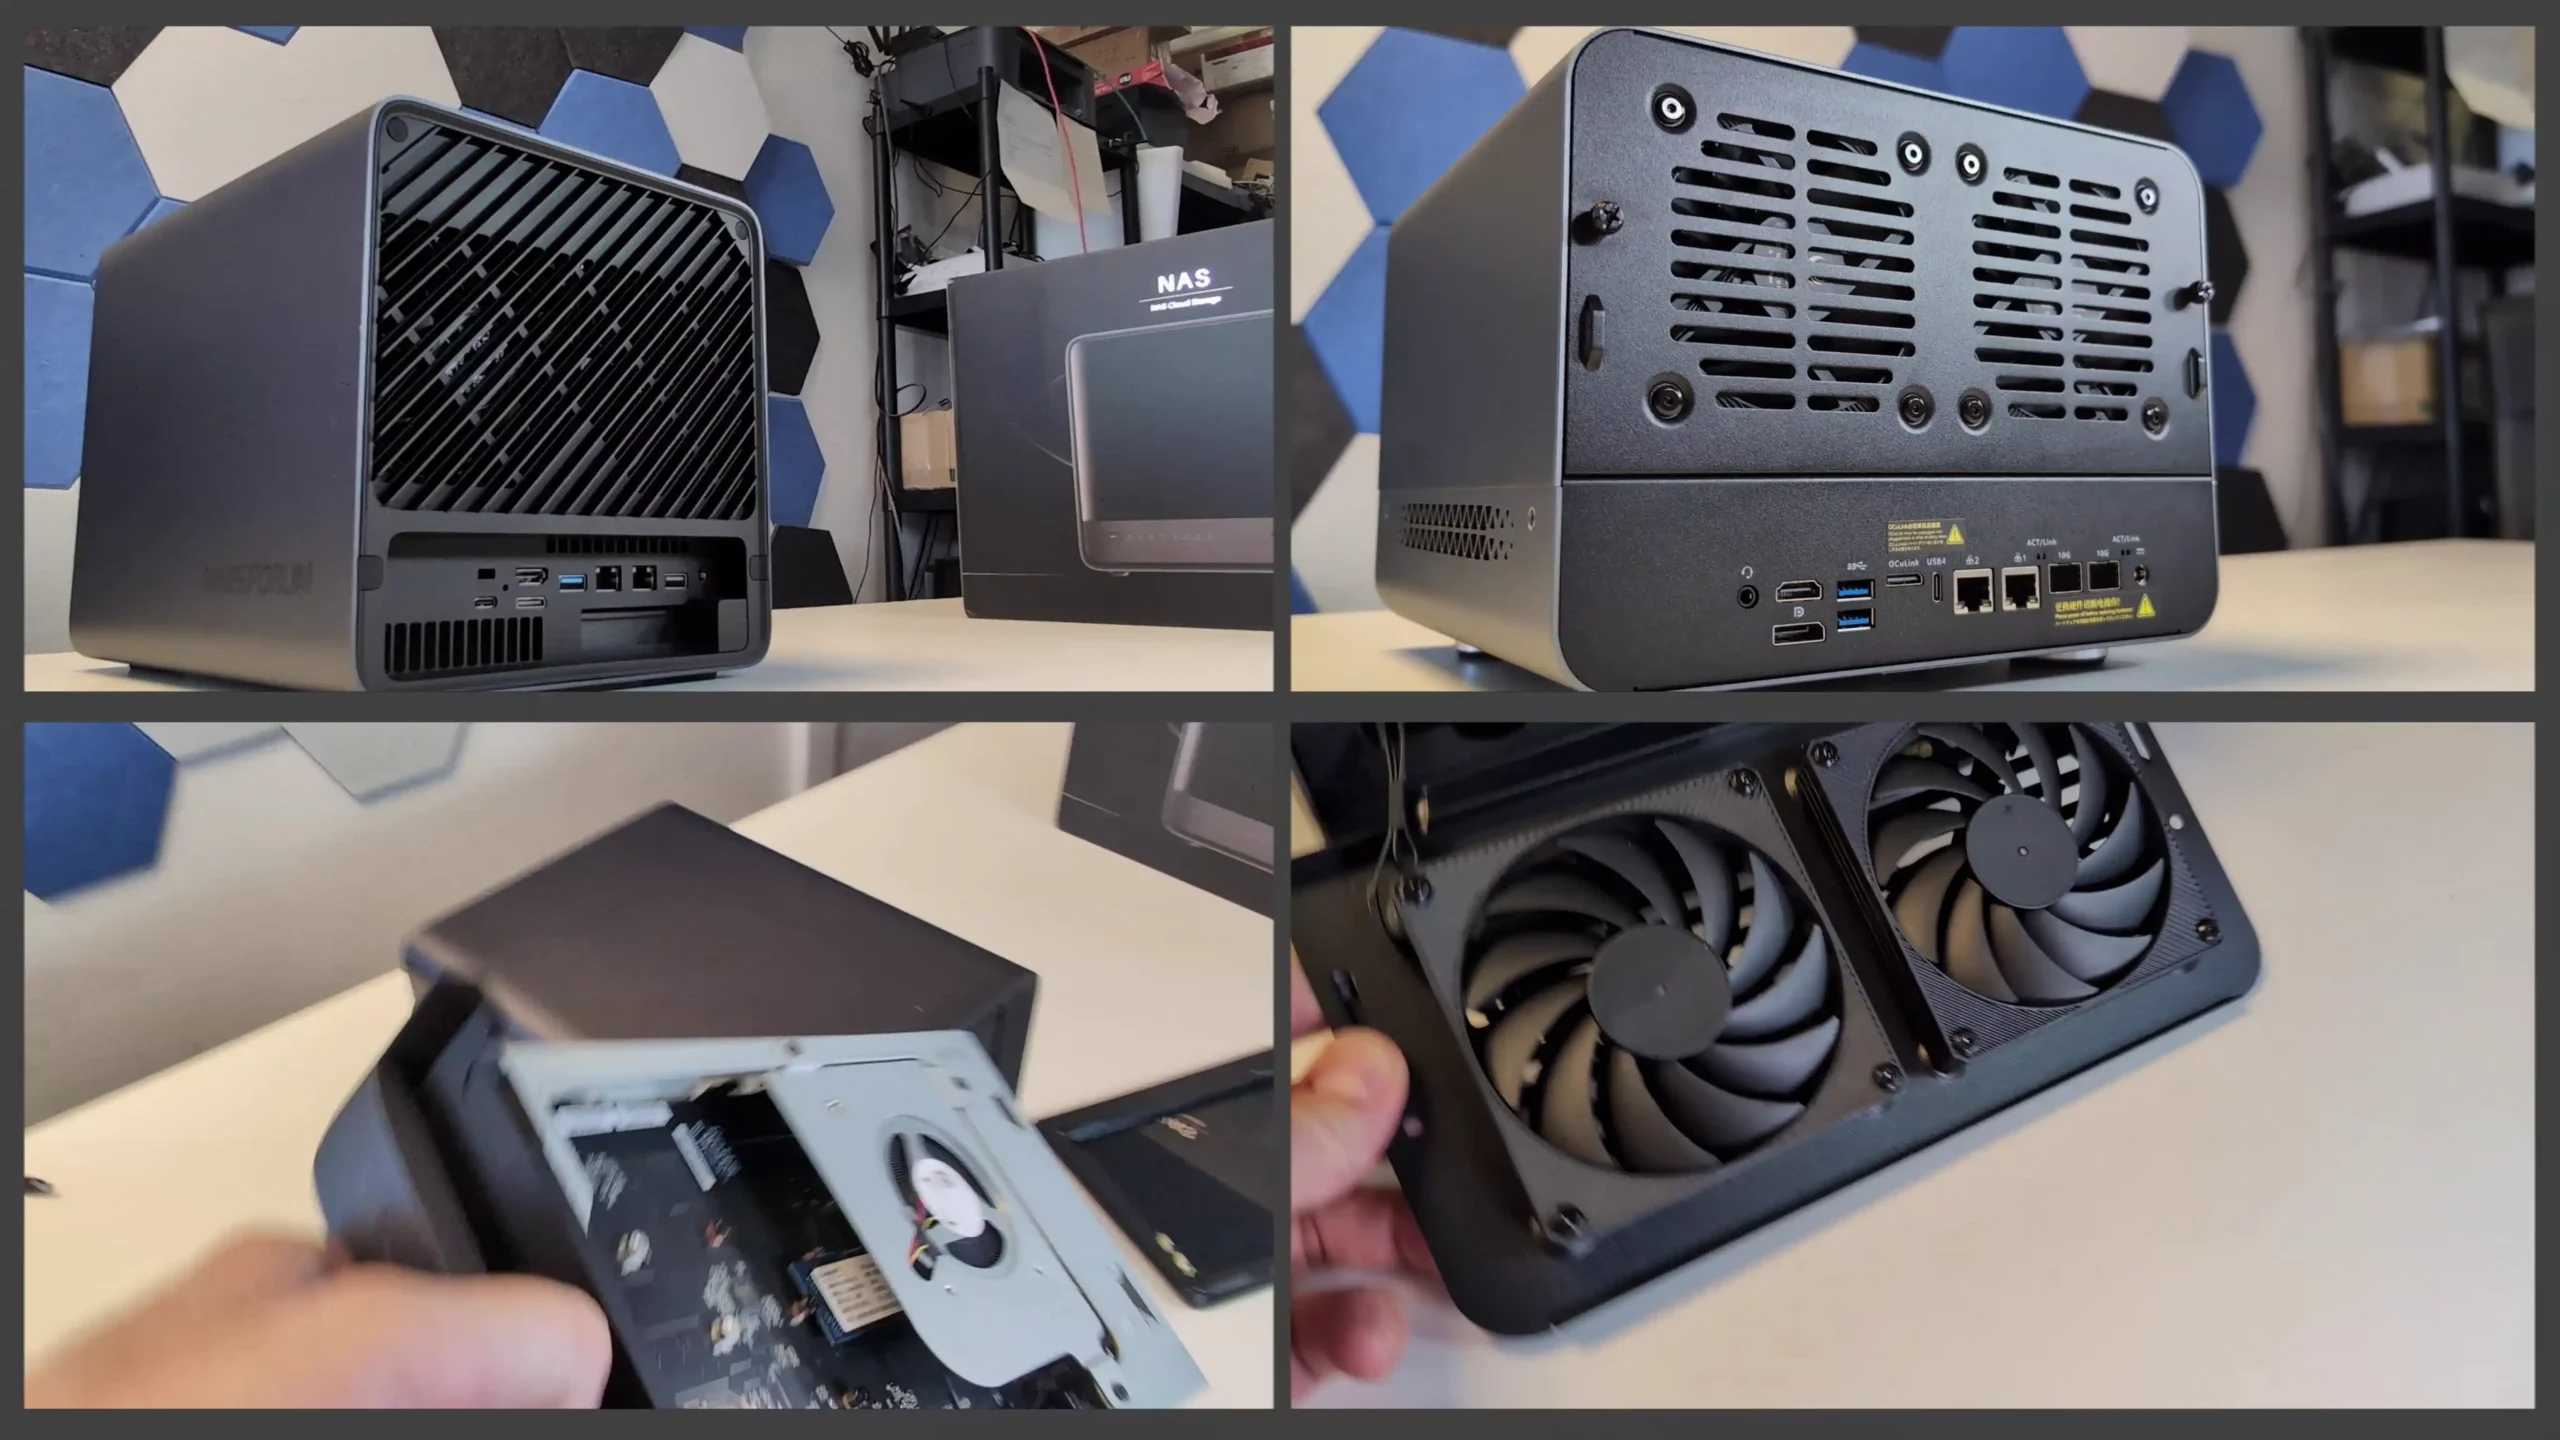
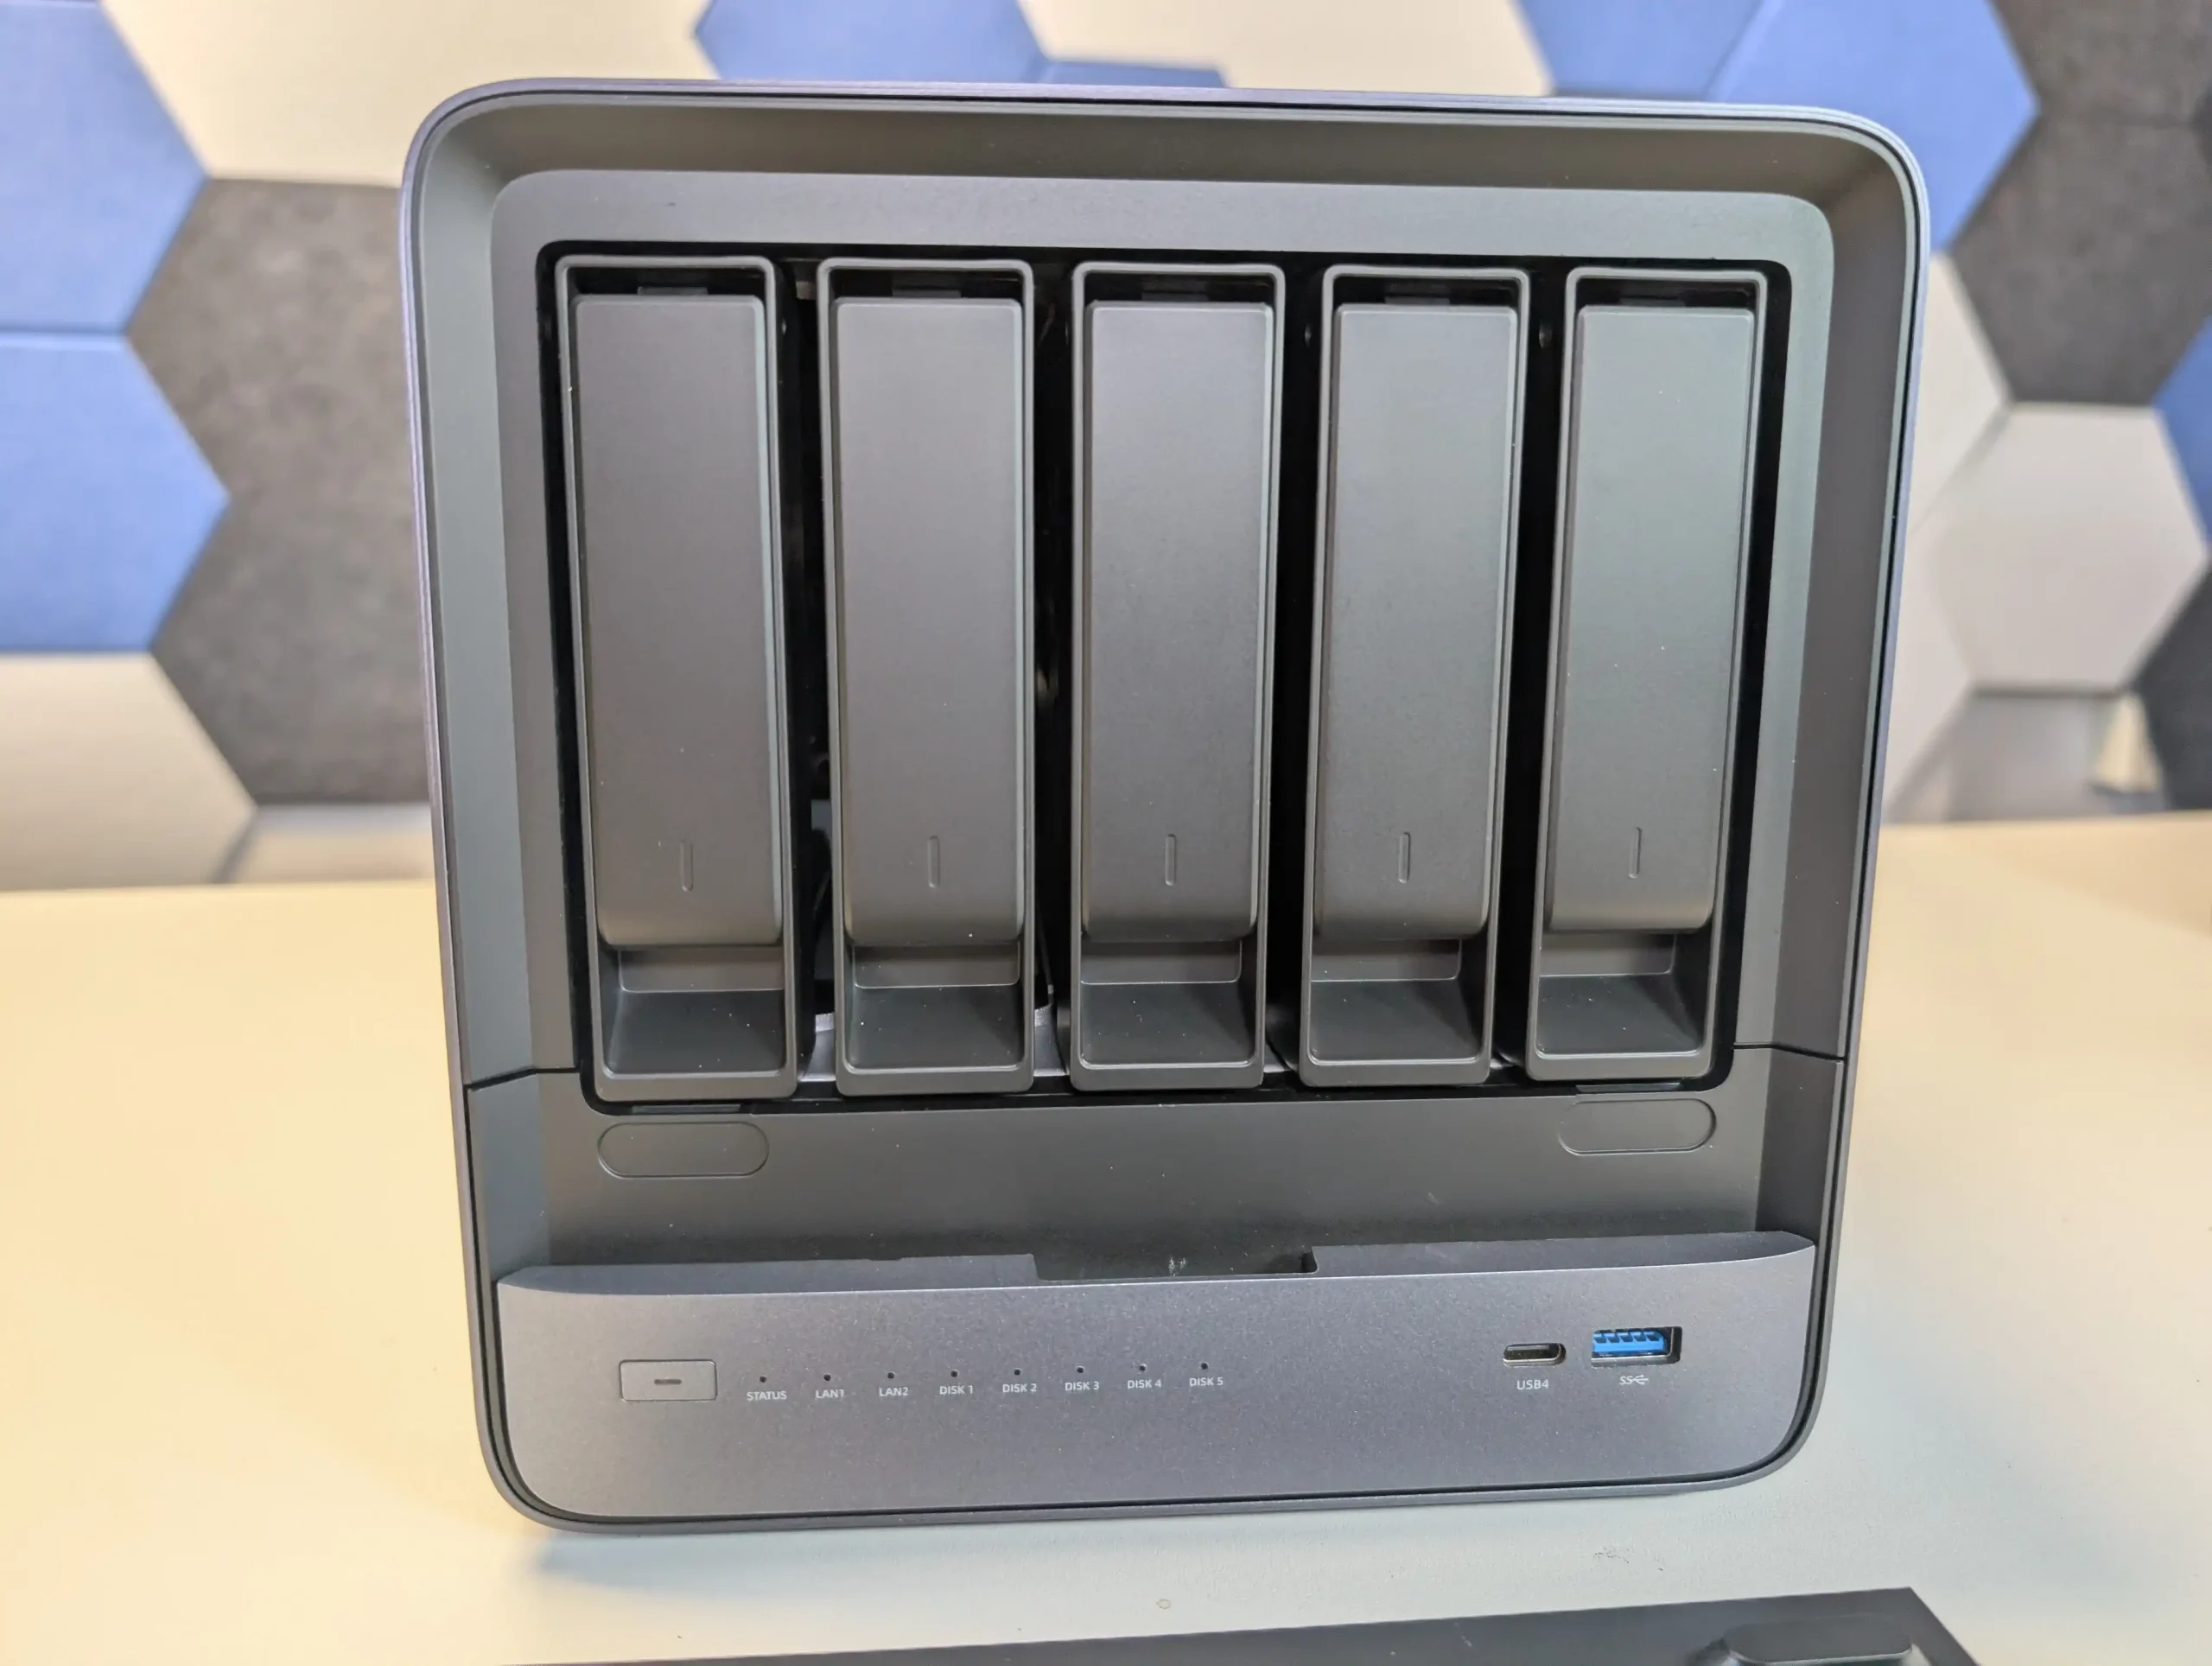
Ventilation on the Aoostar is extensive, with intake vents at the bottom, perforated panels on both sides, and dual rear-mounted exhaust fans drawing heat from the drive bays and CPU area. A vapor chamber heat spreader and a dedicated bottom-mounted cooling fan help distribute and evacuate thermal load evenly across internal components. The Minisforum N5 and N5 Pro, meanwhile, share a more compact and minimalist chassis with a slightly smaller footprint and a slide-out drive cage mechanism, making internal access and servicing more straightforward. Both Minisforum models include five SATA bays, a versatile three-slot M.2/U.2 arrangement, and a clean brushed-metal exterior that avoids visual distractions by omitting a front-facing display.
| Aspect | Aoostar WTR Max | Minisforum N5 (Standard) | Minisforum N5 Pro | Best & Why/Note |
|---|---|---|---|---|
| Chassis Material | Full Metal | Full Metal | Full Metal | Tie — similar high-quality builds |
| LCD Display | ✓ | ✗ | ✗ | Aoostar WTR Max — includes customizable LCD |
| Slide-Out Drive Cage | ✗ | ✓ | ✓ | N5/N5 Pro — easier drive servicing |
| Compact Size (approx.) | Compact (~same footprint) | Compact (~same footprint) | Compact (~same footprint) | Tie — equally compact and serviceable |
Where the Aoostar WTR Max shines is in raw storage density and front-panel functionality, with one additional SATA bay over the Minisforum design, plus its customizable LCD display for at-a-glance system information. Its more aggressive ventilation strategy—with side vents and larger intake paths—also suggests it can move slightly more air through densely packed storage configurations. However, the Minisforum chassis demonstrates superior internal organization, with its slide-out cage allowing faster upgrades and maintenance, and better separation of airflow channels for drives and CPU cooling.
The lack of an LCD display on the Minisforum may disappoint users who like direct front-panel readouts, but it contributes to a more understated aesthetic. In practice, the Aoostar’s design will appeal most to those who value maximum storage flexibility, high-density airflow, and immediate status feedback, while the Minisforum will suit users who prioritize tool-less servicing, quieter operation at idle, and a more refined, professional look. This category ultimately comes down to user priorities, but if judged solely on usability and build refinement, the Minisforum N5 and N5 Pro take a modest edge over the Aoostar WTR Max.
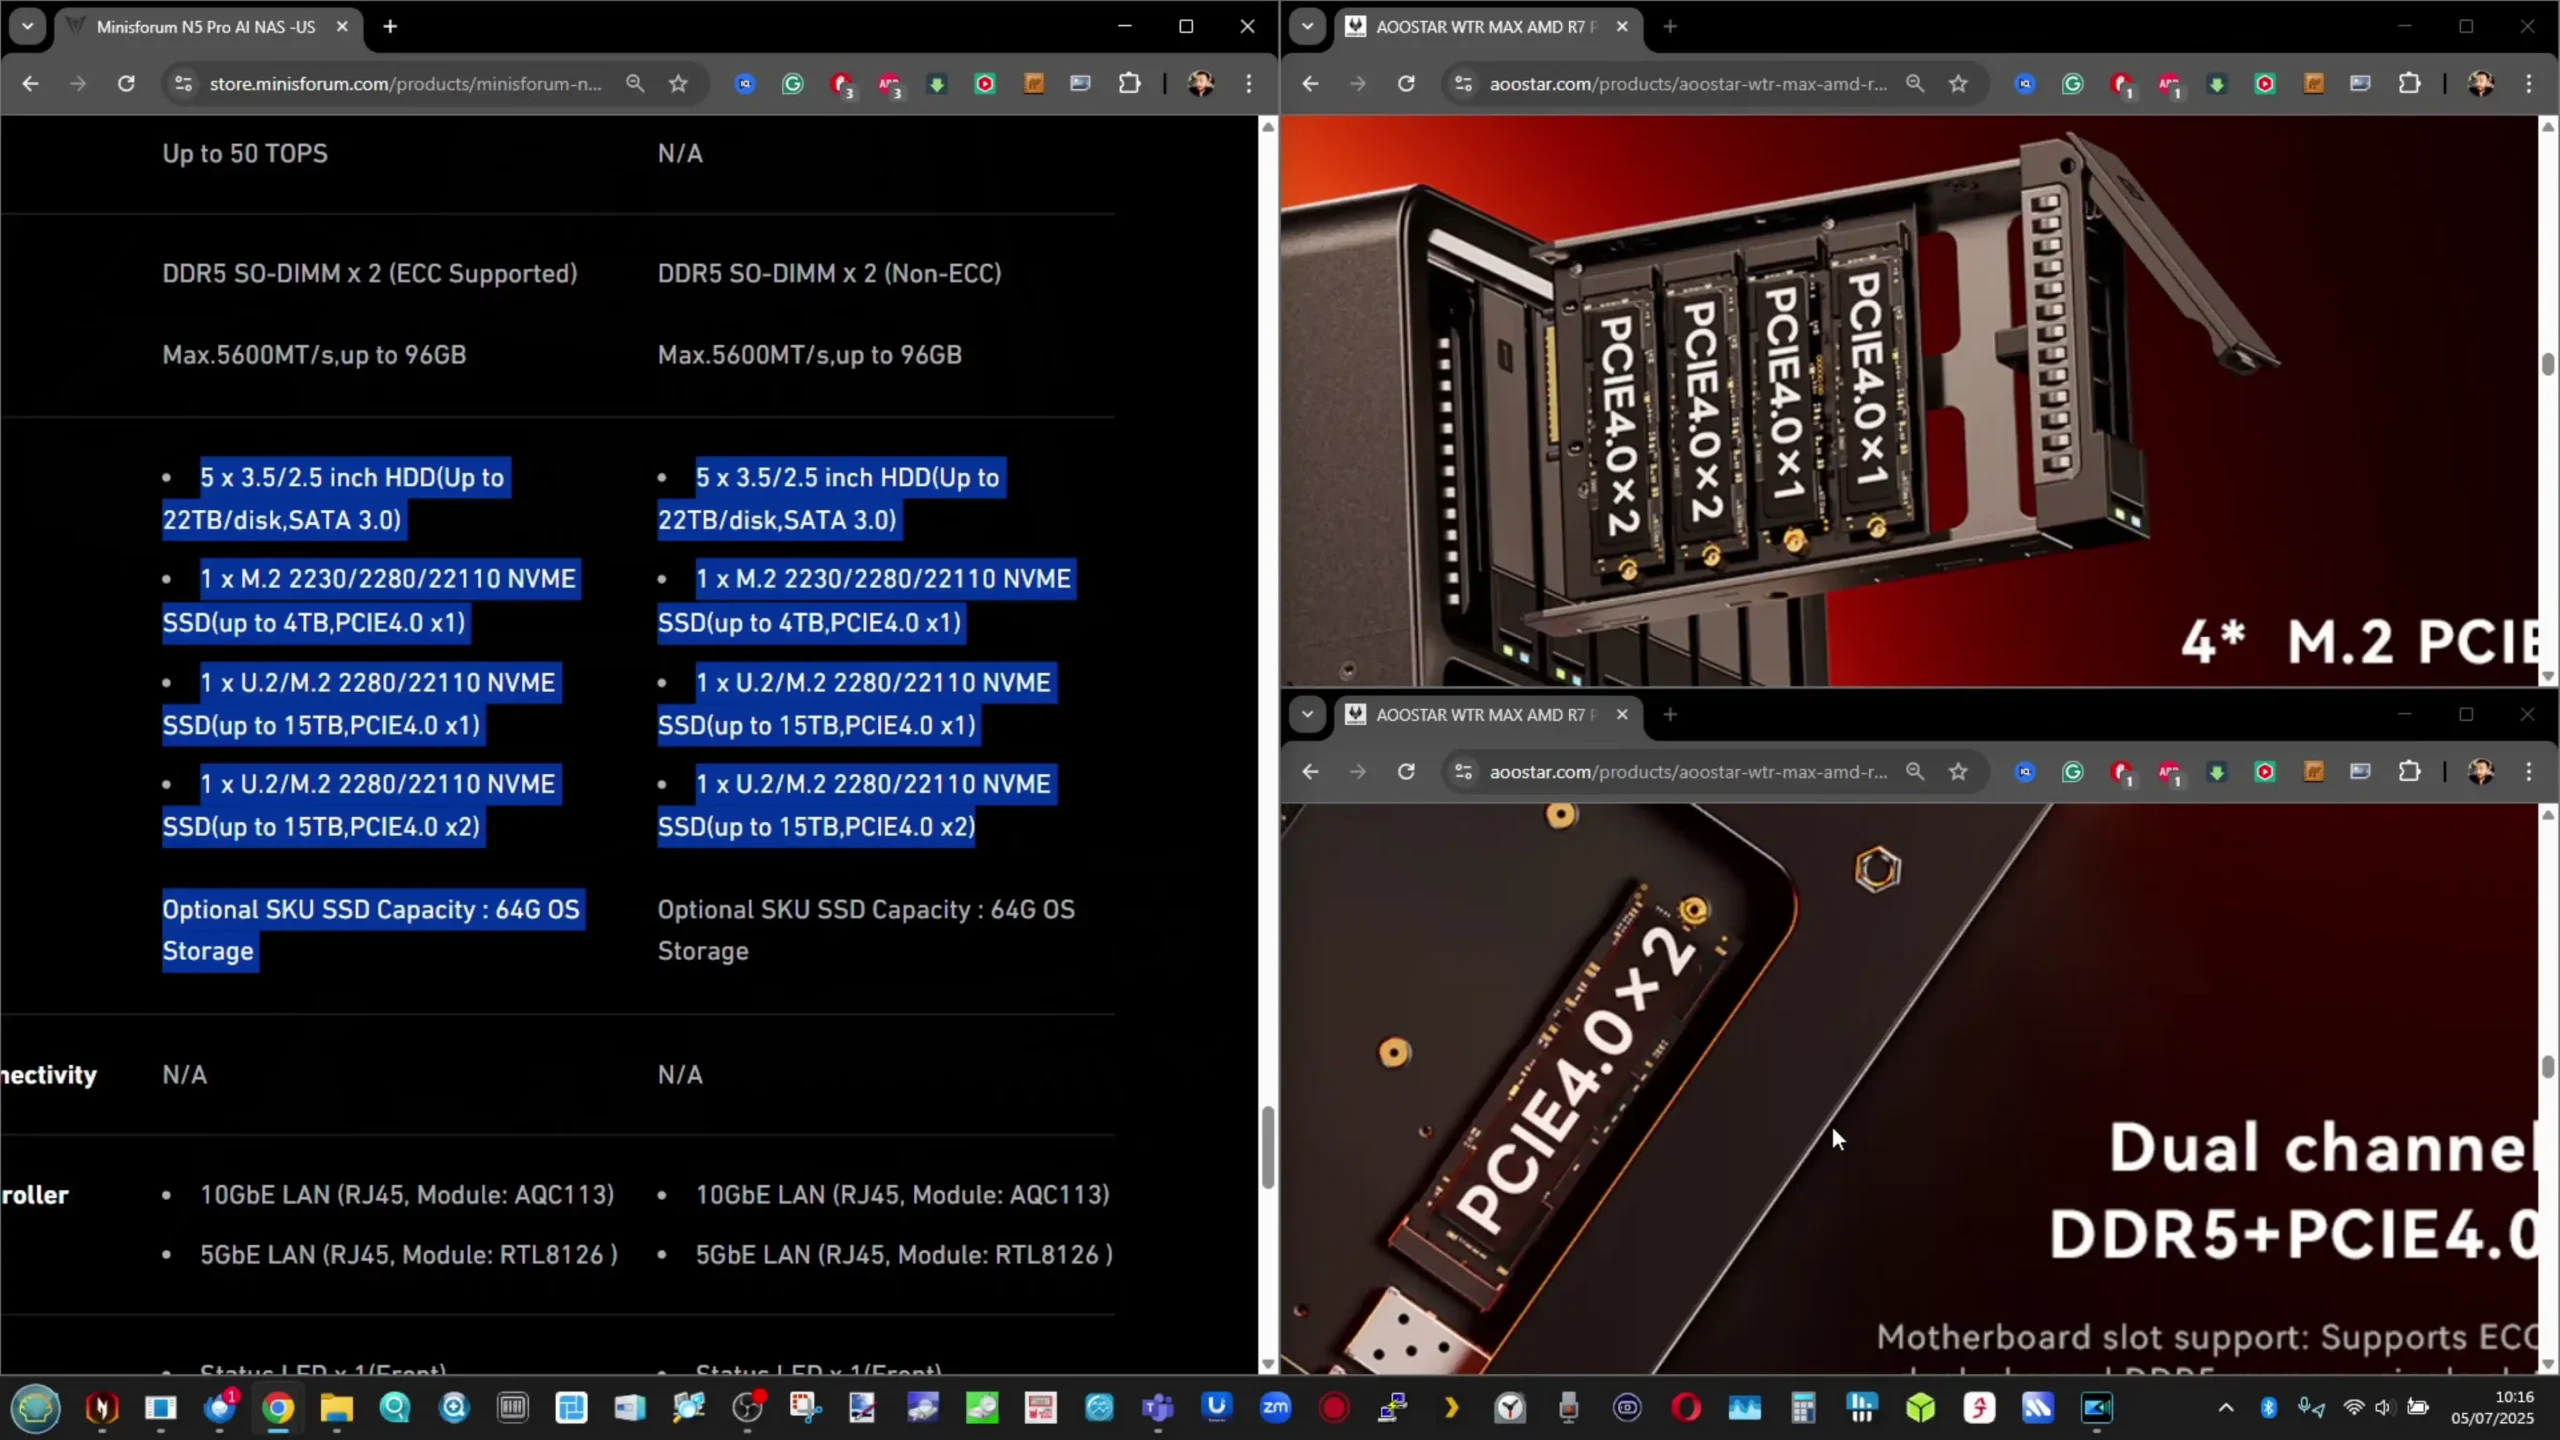
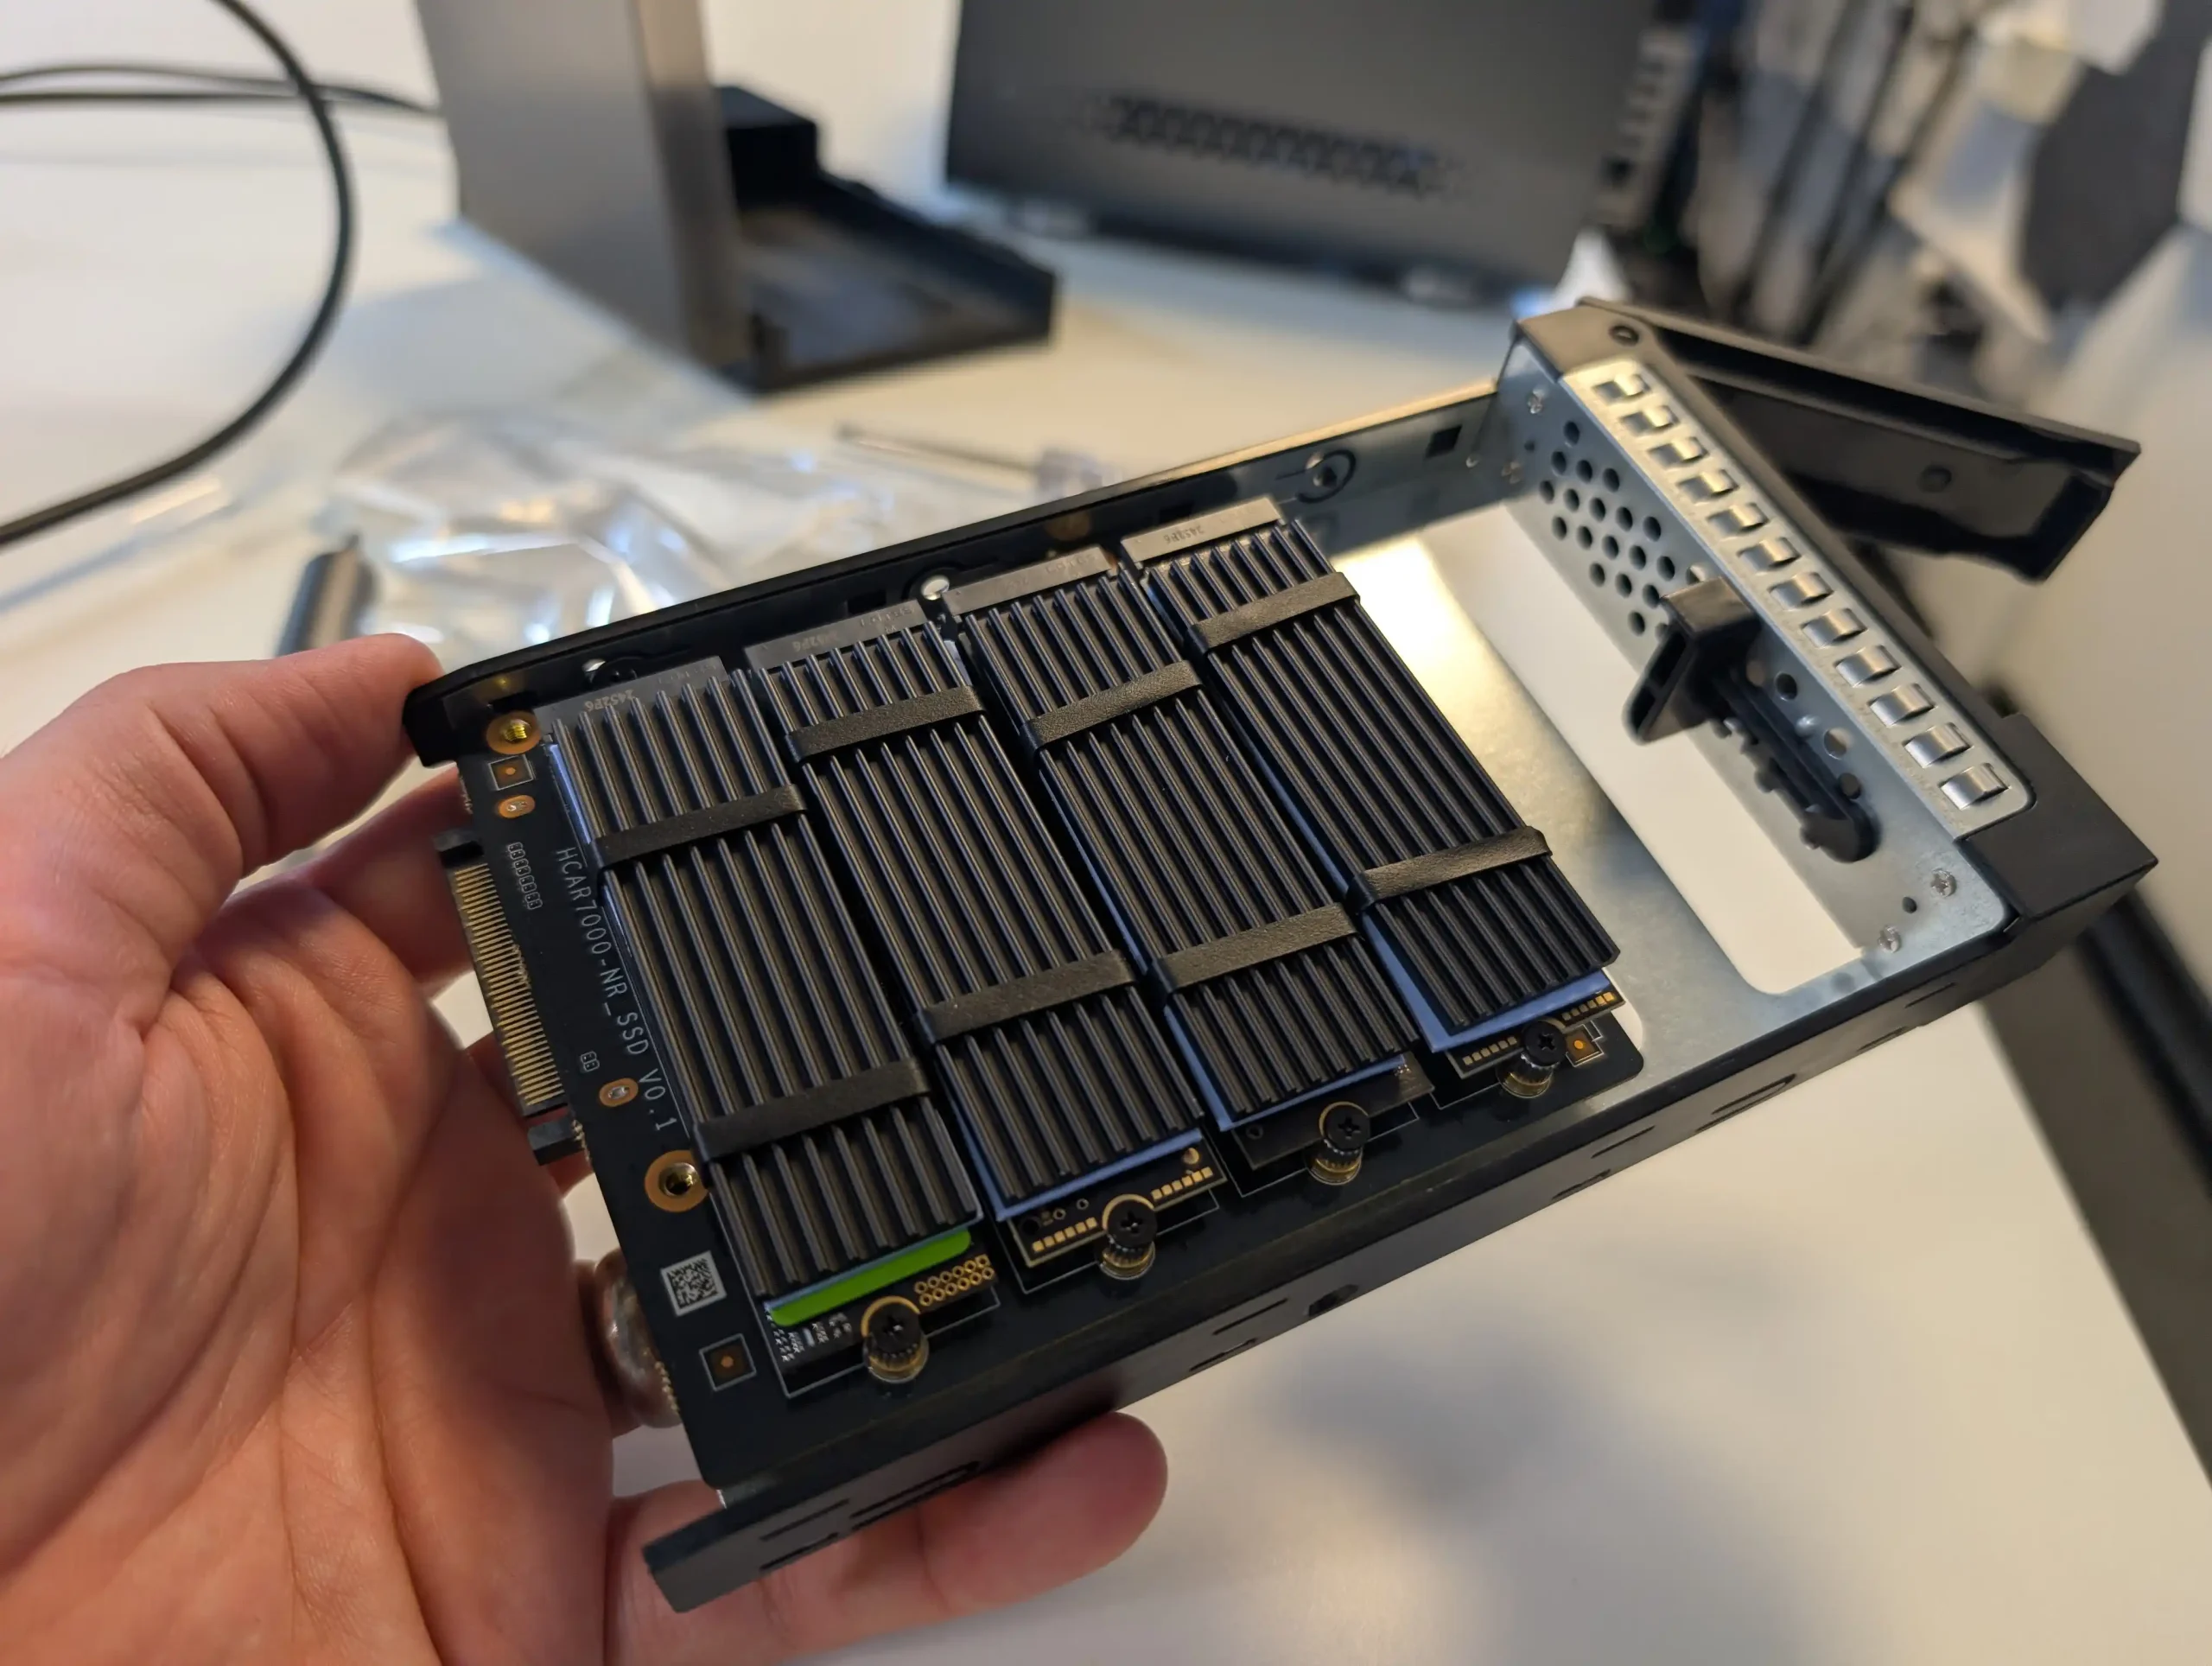
Storage capabilities represent one of the most significant differences between the Aoostar WTR Max and the Minisforum N5 series, reflecting divergent priorities in how each system balances density and simplicity. The Aoostar WTR Max delivers a standout total of eleven drive slots, composed of six 3.5”/2.5” SATA bays, a dedicated seventh tray supporting up to four M.2 NVMe SSDs. This architecture provides users with the ability to create sophisticated storage topologies, combining high-capacity mechanical drives for bulk cold storage and multiple high-speed NVMe SSDs for tiered caching, scratch disks, or performance-optimized pools.
The additional M.2 tray, which is unique to the Aoostar design, simplifies the installation of multiple NVMe drives without occupying space within the motherboard area, while still offering full Gen 4 speeds on select slots. In contrast, the Minisforum N5 and N5 Pro are more restrained, offering five SATA bays and three NVMe/U.2 slots, which can be configured either as three M.2 drives or as one M.2 with two U.2 drives using the supplied adapter card. The Minisforum setup also includes a dedicated M.2 slot for its 64GB OS SSD, but sadly, this slot consumes one of the three available NVMe positions. Both Minisforum models support hot-swapping on the SATA bays and flexible RAID modes, but the higher bay count and more independent storage interfaces of the Aoostar clearly cater to users with larger or more diverse storage needs.
| Feature | Aoostar WTR Max | Minisforum N5 / N5 Pro | Notes / Best |
|---|---|---|---|
| SATA Bays | 6 × 3.5″/2.5″ (SATA 3.0, up to 22TB each) | 5 × 3.5″/2.5″ (SATA 3.0, up to 22TB each) | Aoostar wins on total count |
| SATA Hot-swap | No | Yes | Minisforum wins |
| NVMe/U.2 Slots Total | 4 × M.2 in tray + 1 × OS M.2 slot | 3 × NVMe/U.2 + 1 × OS M.2 slot | Aoostar wins on total NVMe count |
| NVMe Slot PCIe Lanes / Speed | 2 × Gen4 x2, 2 × Gen4 x1 | 1 × Gen4 x2, 2 × Gen4 x1 | Aoostar provides more total bandwidth |
| OS Drive Impact | Separate dedicated M.2 slot for OS SSD | OS SSD occupies 1 NVMe slot | Aoostar wins here |
| NVMe Hot-swap | No | No | Neither supports hot-swap NVMe |
| Optional U.2 Support | Not natively supported | Via included adapter (2 × U.2 + 1 × M.2) | Minisforum offers flexibility |
| Reported Internal SSD Speeds | Gen4 x1 slots: ~1.6 GB/s read/write; Gen4 x2 slots: ~2.9–3.1 GB/s read/write | Gen4 x1 slots: ~1.7 GB/s read/write; Gen4 x2 slot: ~3.3 GB/s read, ~3.1 GB/s write | Comparable, slight edge Minisforum |
| Total Drive Capacity | 6 SATA + 4 NVMe + OS SSD = 11 drives | 5 SATA + 3 NVMe/U.2 + OS SSD = 8 drives | Aoostar wins on total drive count |
Storage capabilities represent one of the most significant differences between the Aoostar WTR Max and the Minisforum N5 series, reflecting divergent priorities in how each system balances density and simplicity. The Aoostar WTR Max delivers a standout total of eleven drive slots, composed of six 3.5”/2.5” SATA bays, a dedicated seventh tray supporting up to four M.2 NVMe SSDs. This architecture provides users with the ability to create sophisticated storage topologies, combining high-capacity mechanical drives for bulk cold storage and multiple high-speed NVMe SSDs for tiered caching, scratch disks, or performance-optimized pools.
 |
 |
The additional M.2 tray, which is unique to the Aoostar design, simplifies the installation of multiple NVMe drives without occupying space within the motherboard area, while still offering full Gen 4 speeds on select slots. In contrast, the Minisforum N5 and N5 Pro are more restrained, offering five SATA bays and three NVMe/U.2 slots, which can be configured either as three M.2 drives or as one M.2 with two U.2 drives using the supplied adapter card. The Minisforum setup also includes a dedicated M.2 slot for its 64GB OS SSD, this slot consumes one of the three available NVMe positions. Both Minisforum models support hot-swapping on the SATA bays and flexible RAID modes, but the higher bay count and more independent storage interfaces of the Aoostar clearly cater to users with larger or more diverse storage needs.
 |
 |
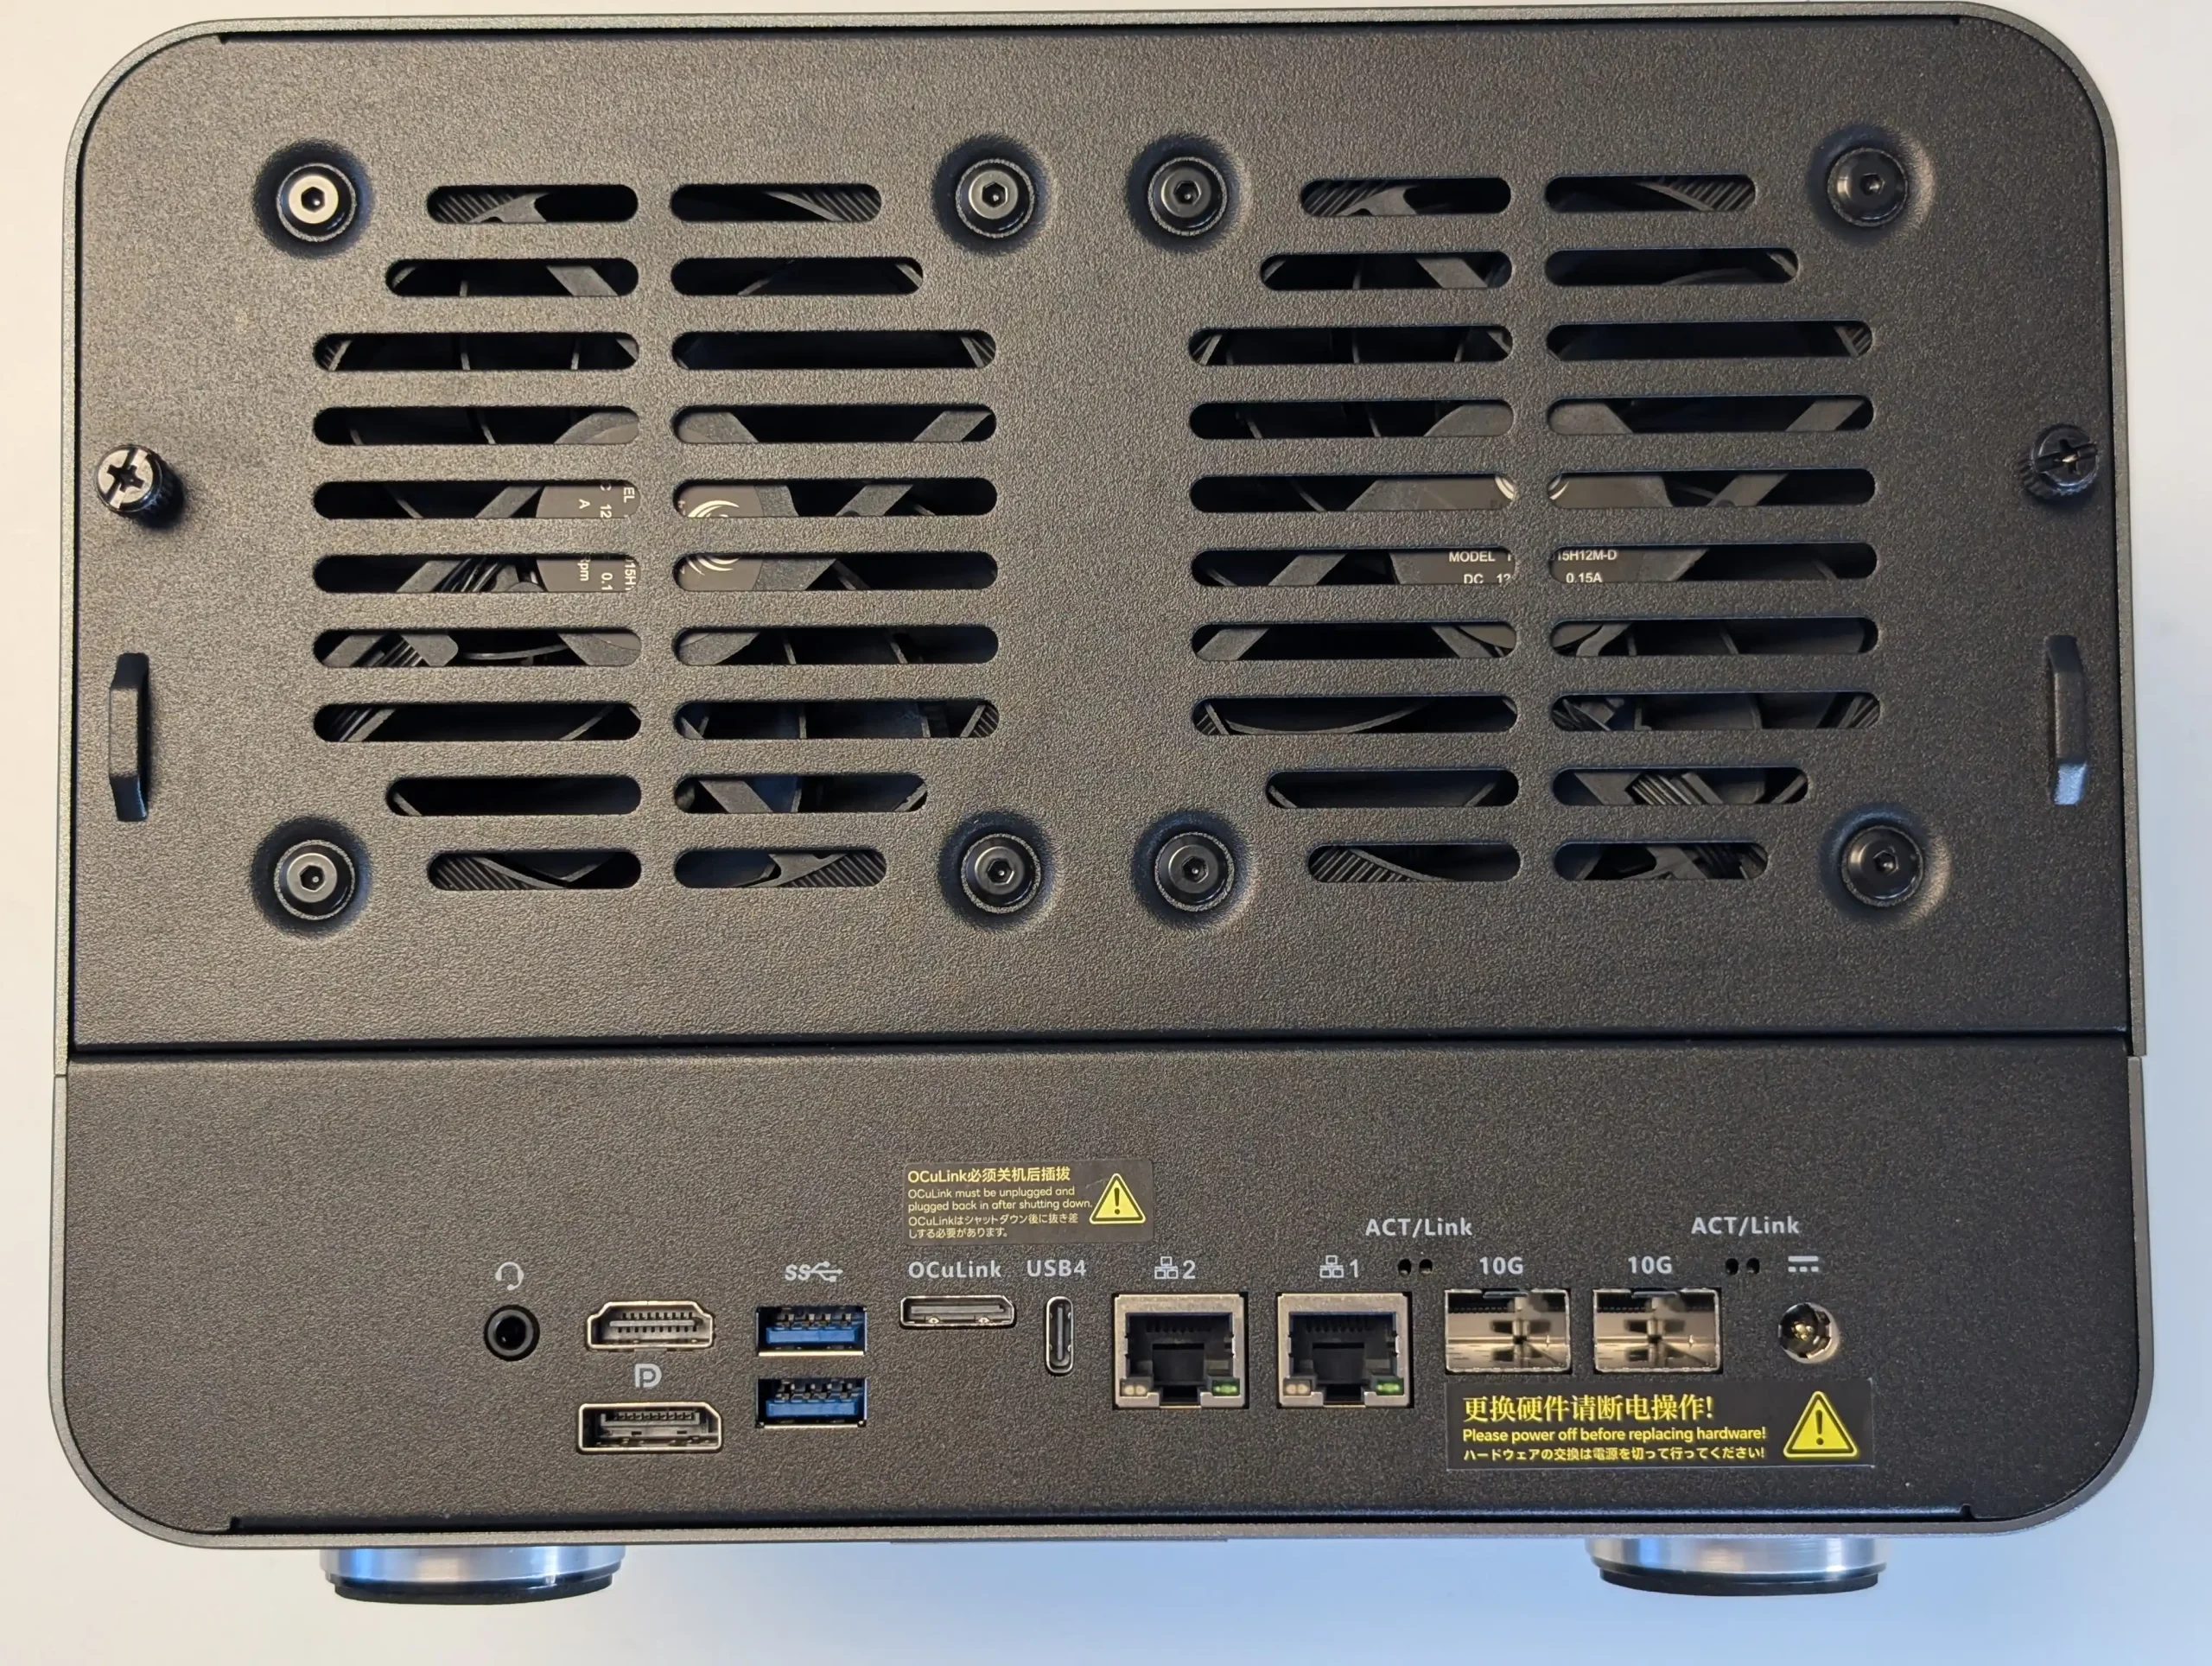
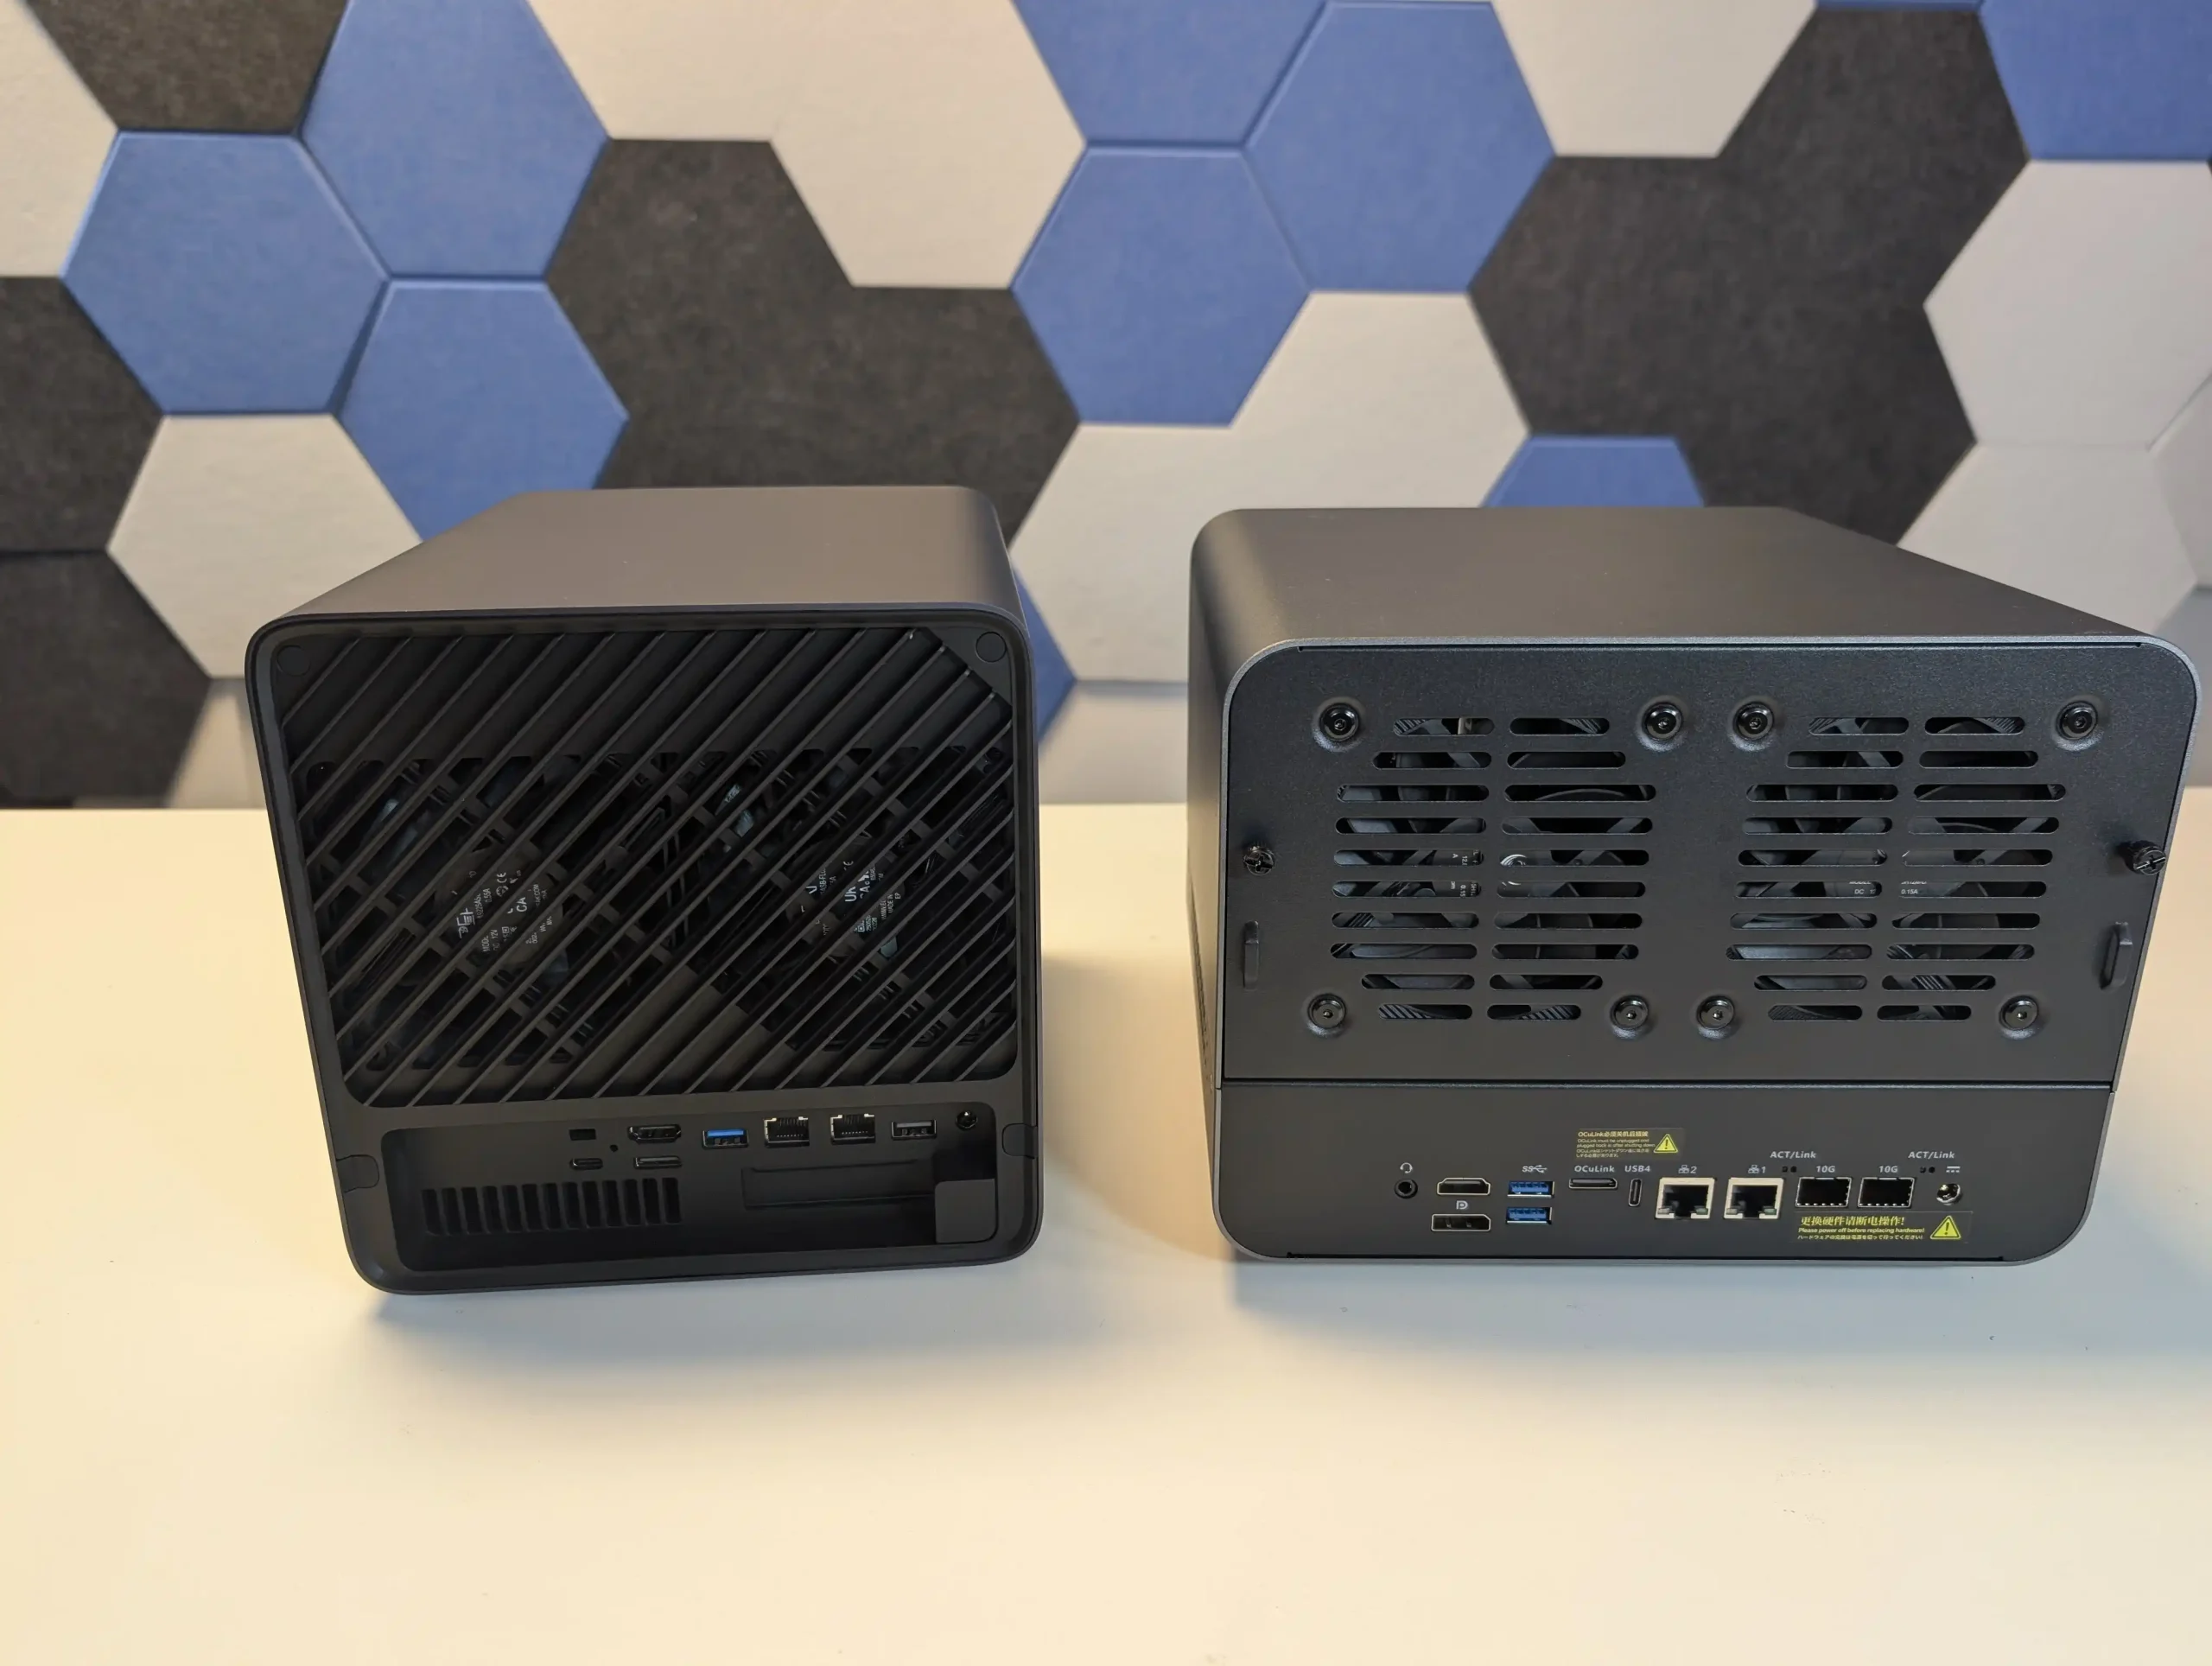
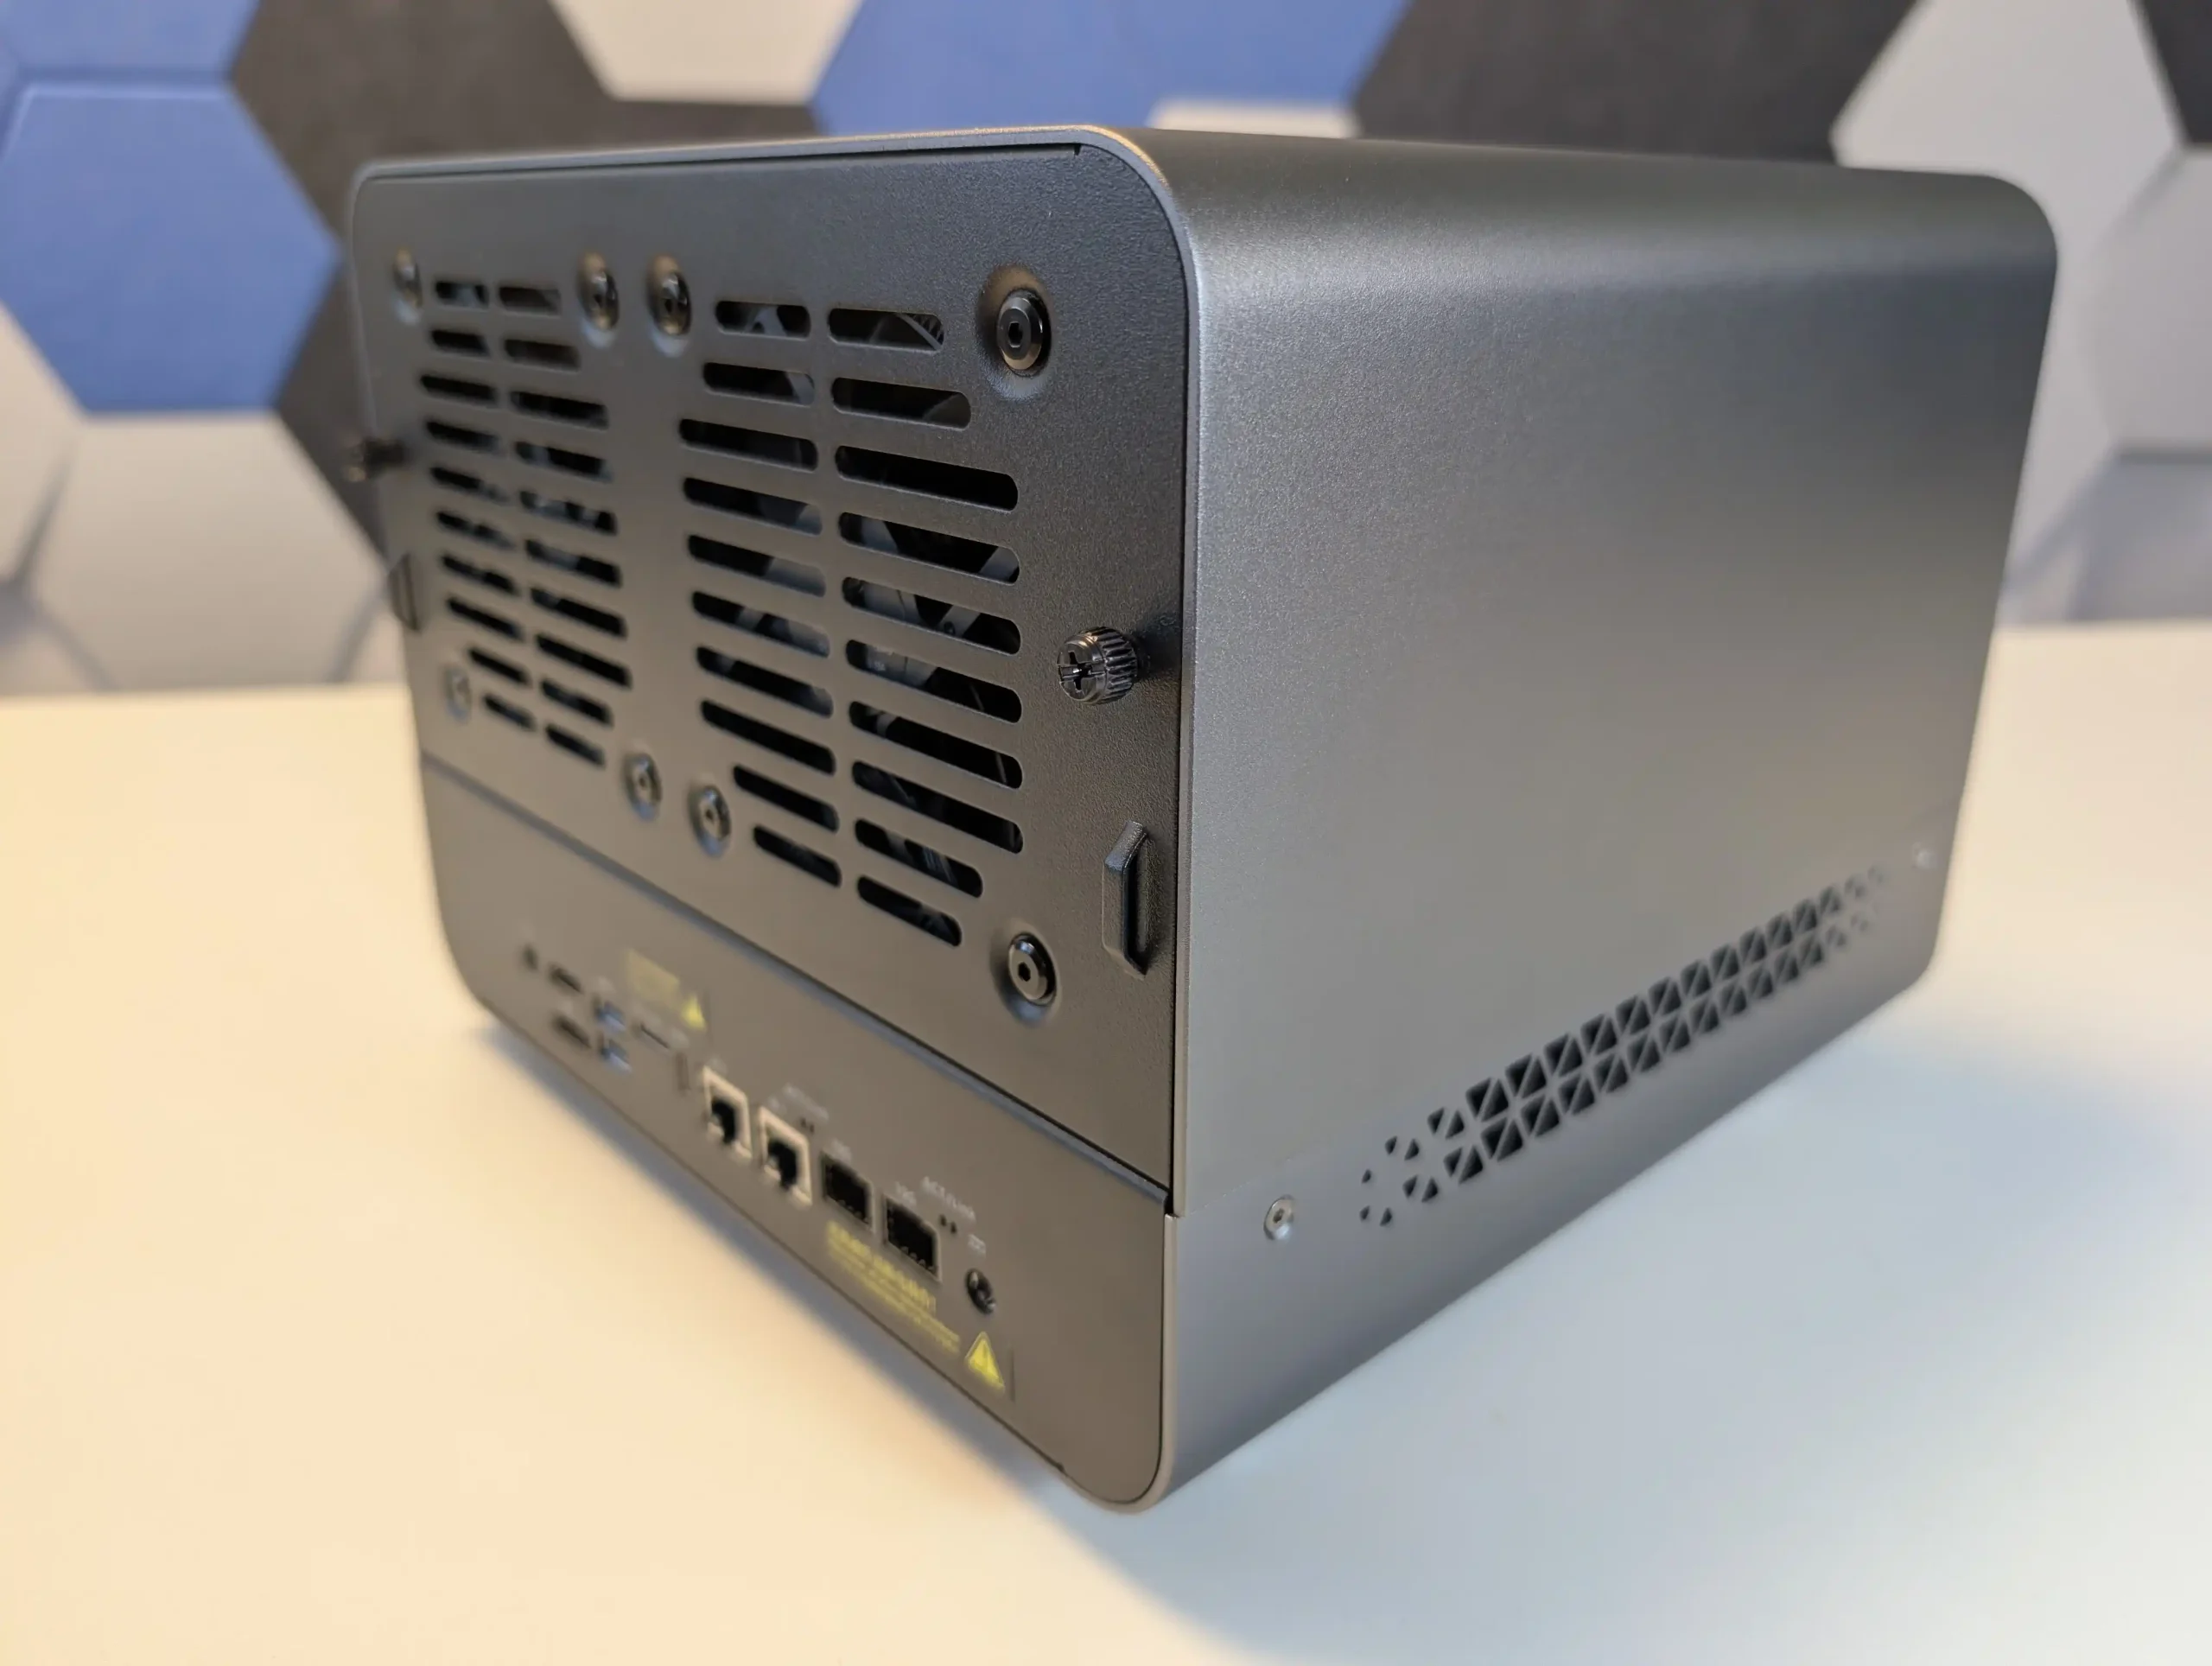
Both the Aoostar WTR Max and the Minisforum N5 series deliver a wide array of external ports and connectivity options, though their designs reflect different priorities and deployment philosophies. The Aoostar WTR Max is clearly oriented toward high-density, network-heavy environments, offering two 10GbE SFP+ fiber ports alongside two additional 2.5GbE RJ45 copper ports. This configuration enables up to four simultaneous physical network connections, making it well-suited to scenarios that demand redundant paths, segmented VLANs, or hybrid fiber-copper topologies.
 |
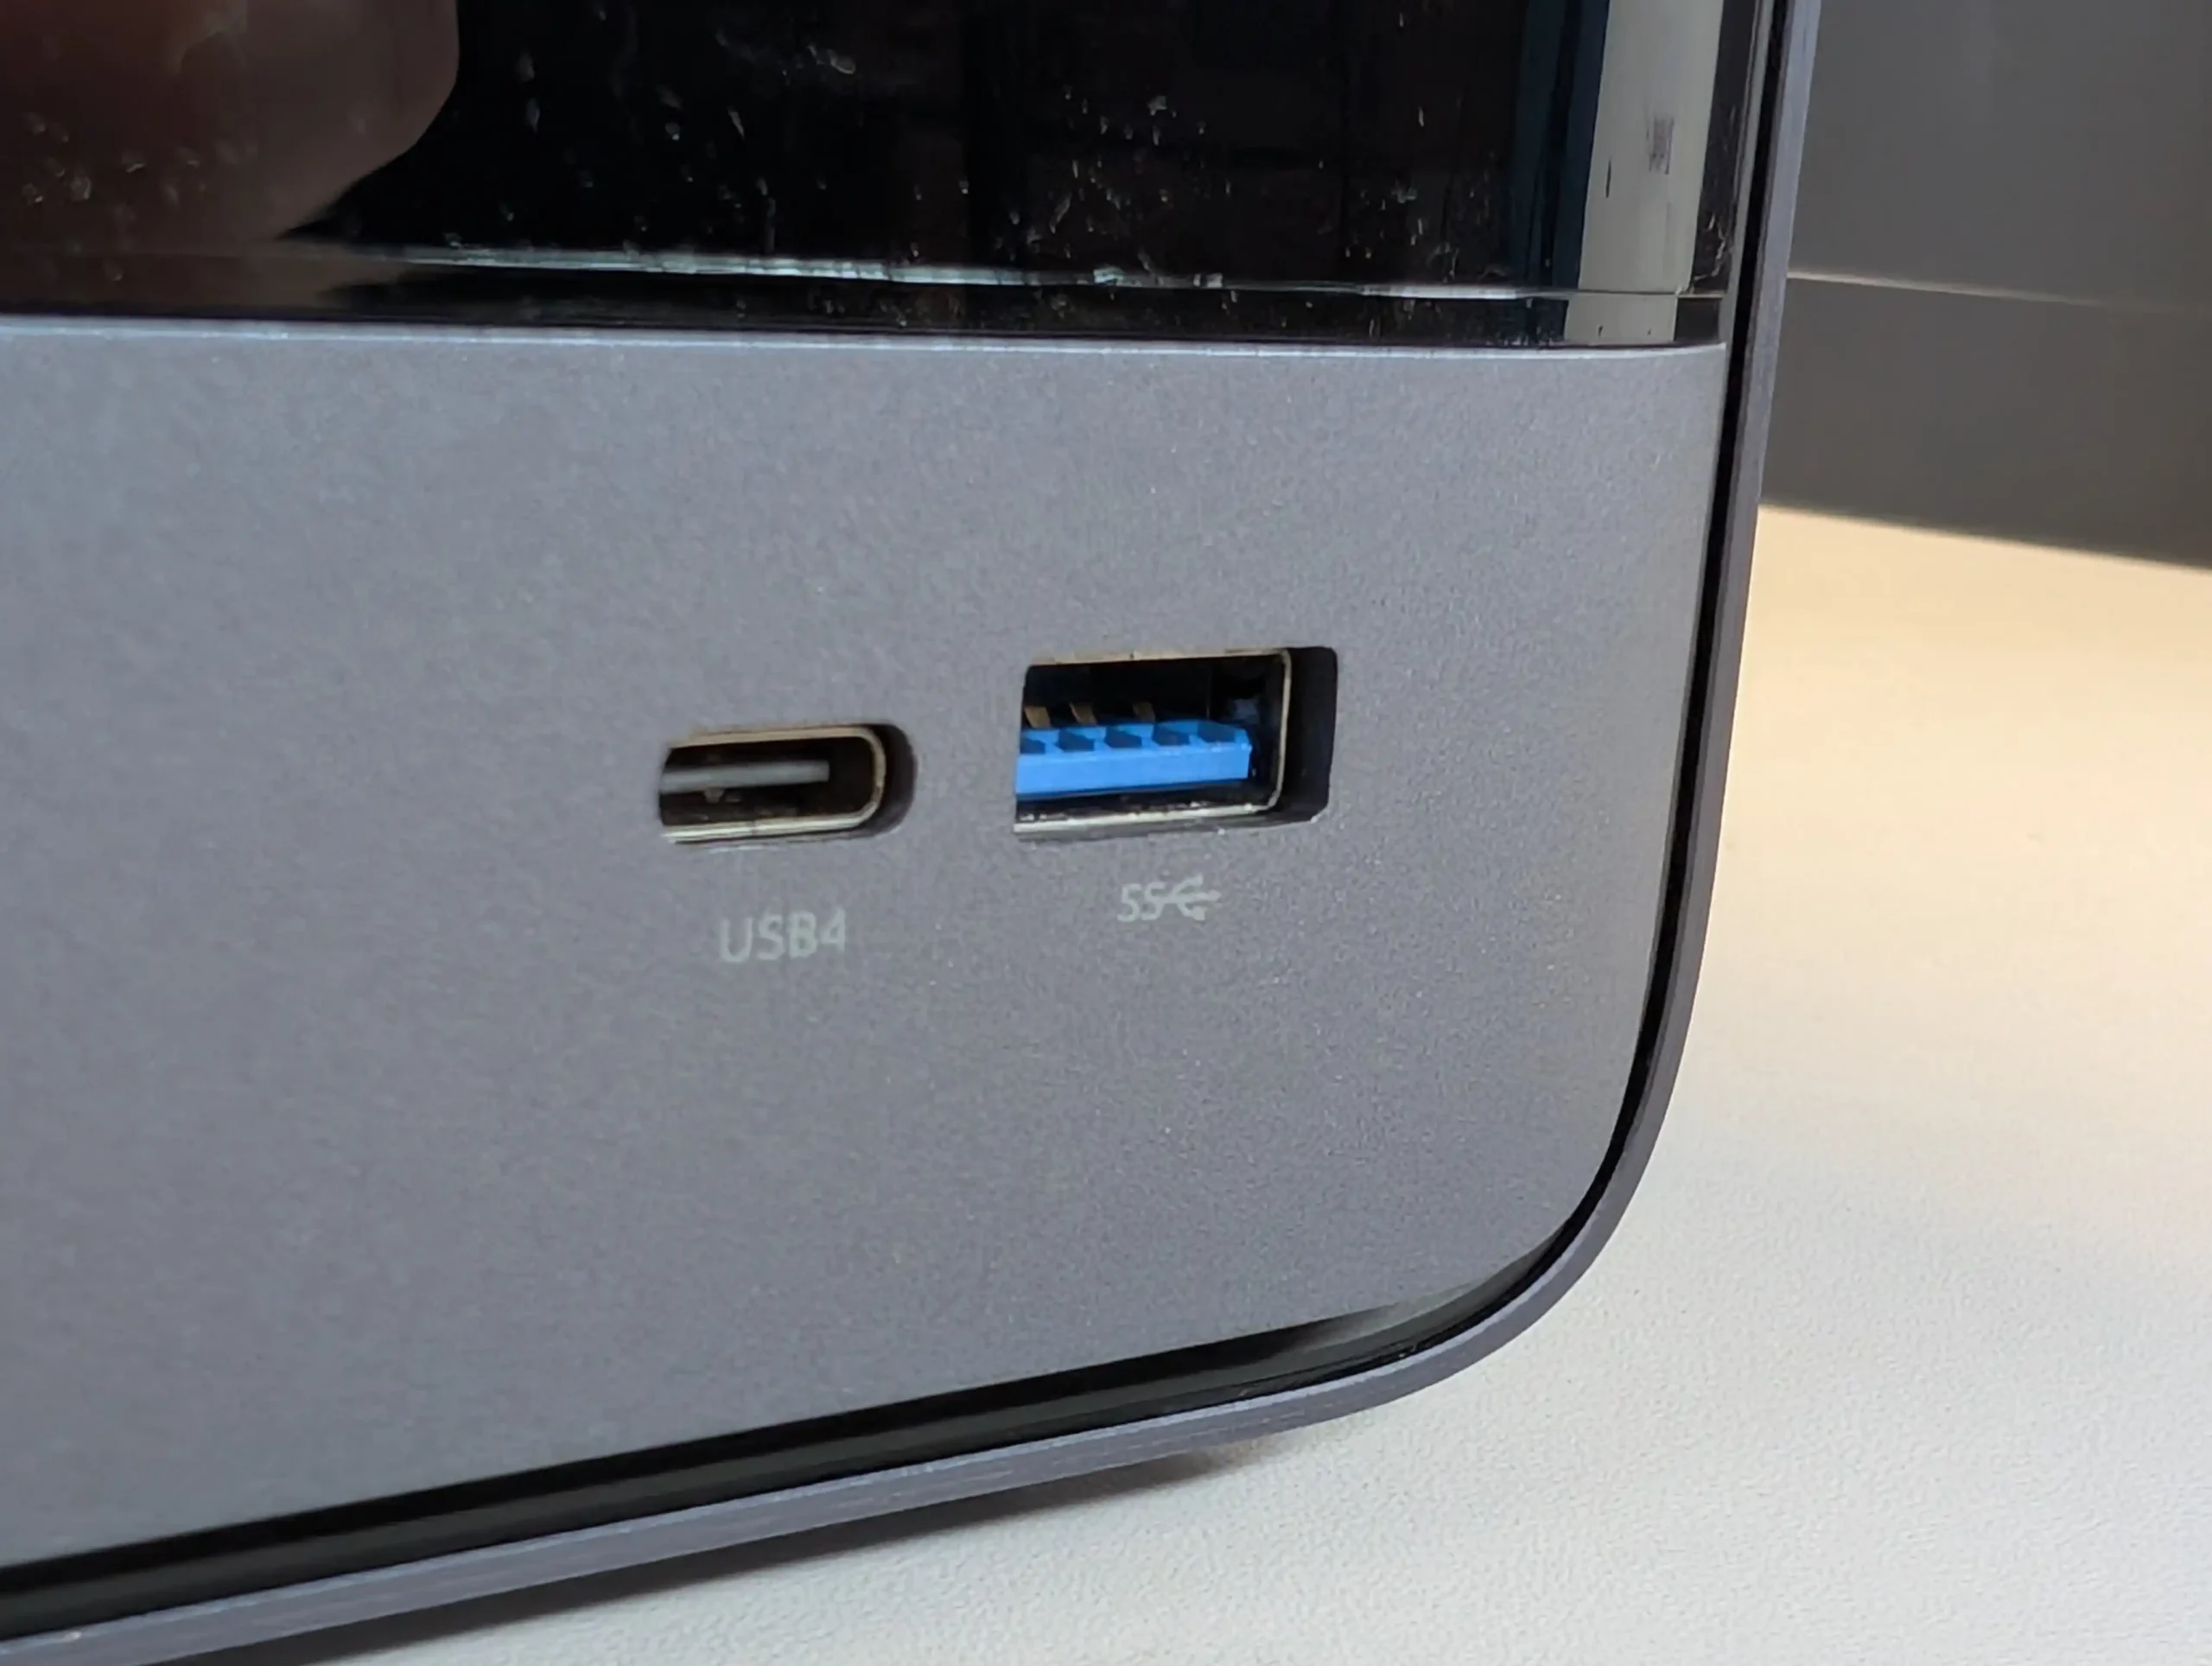 |
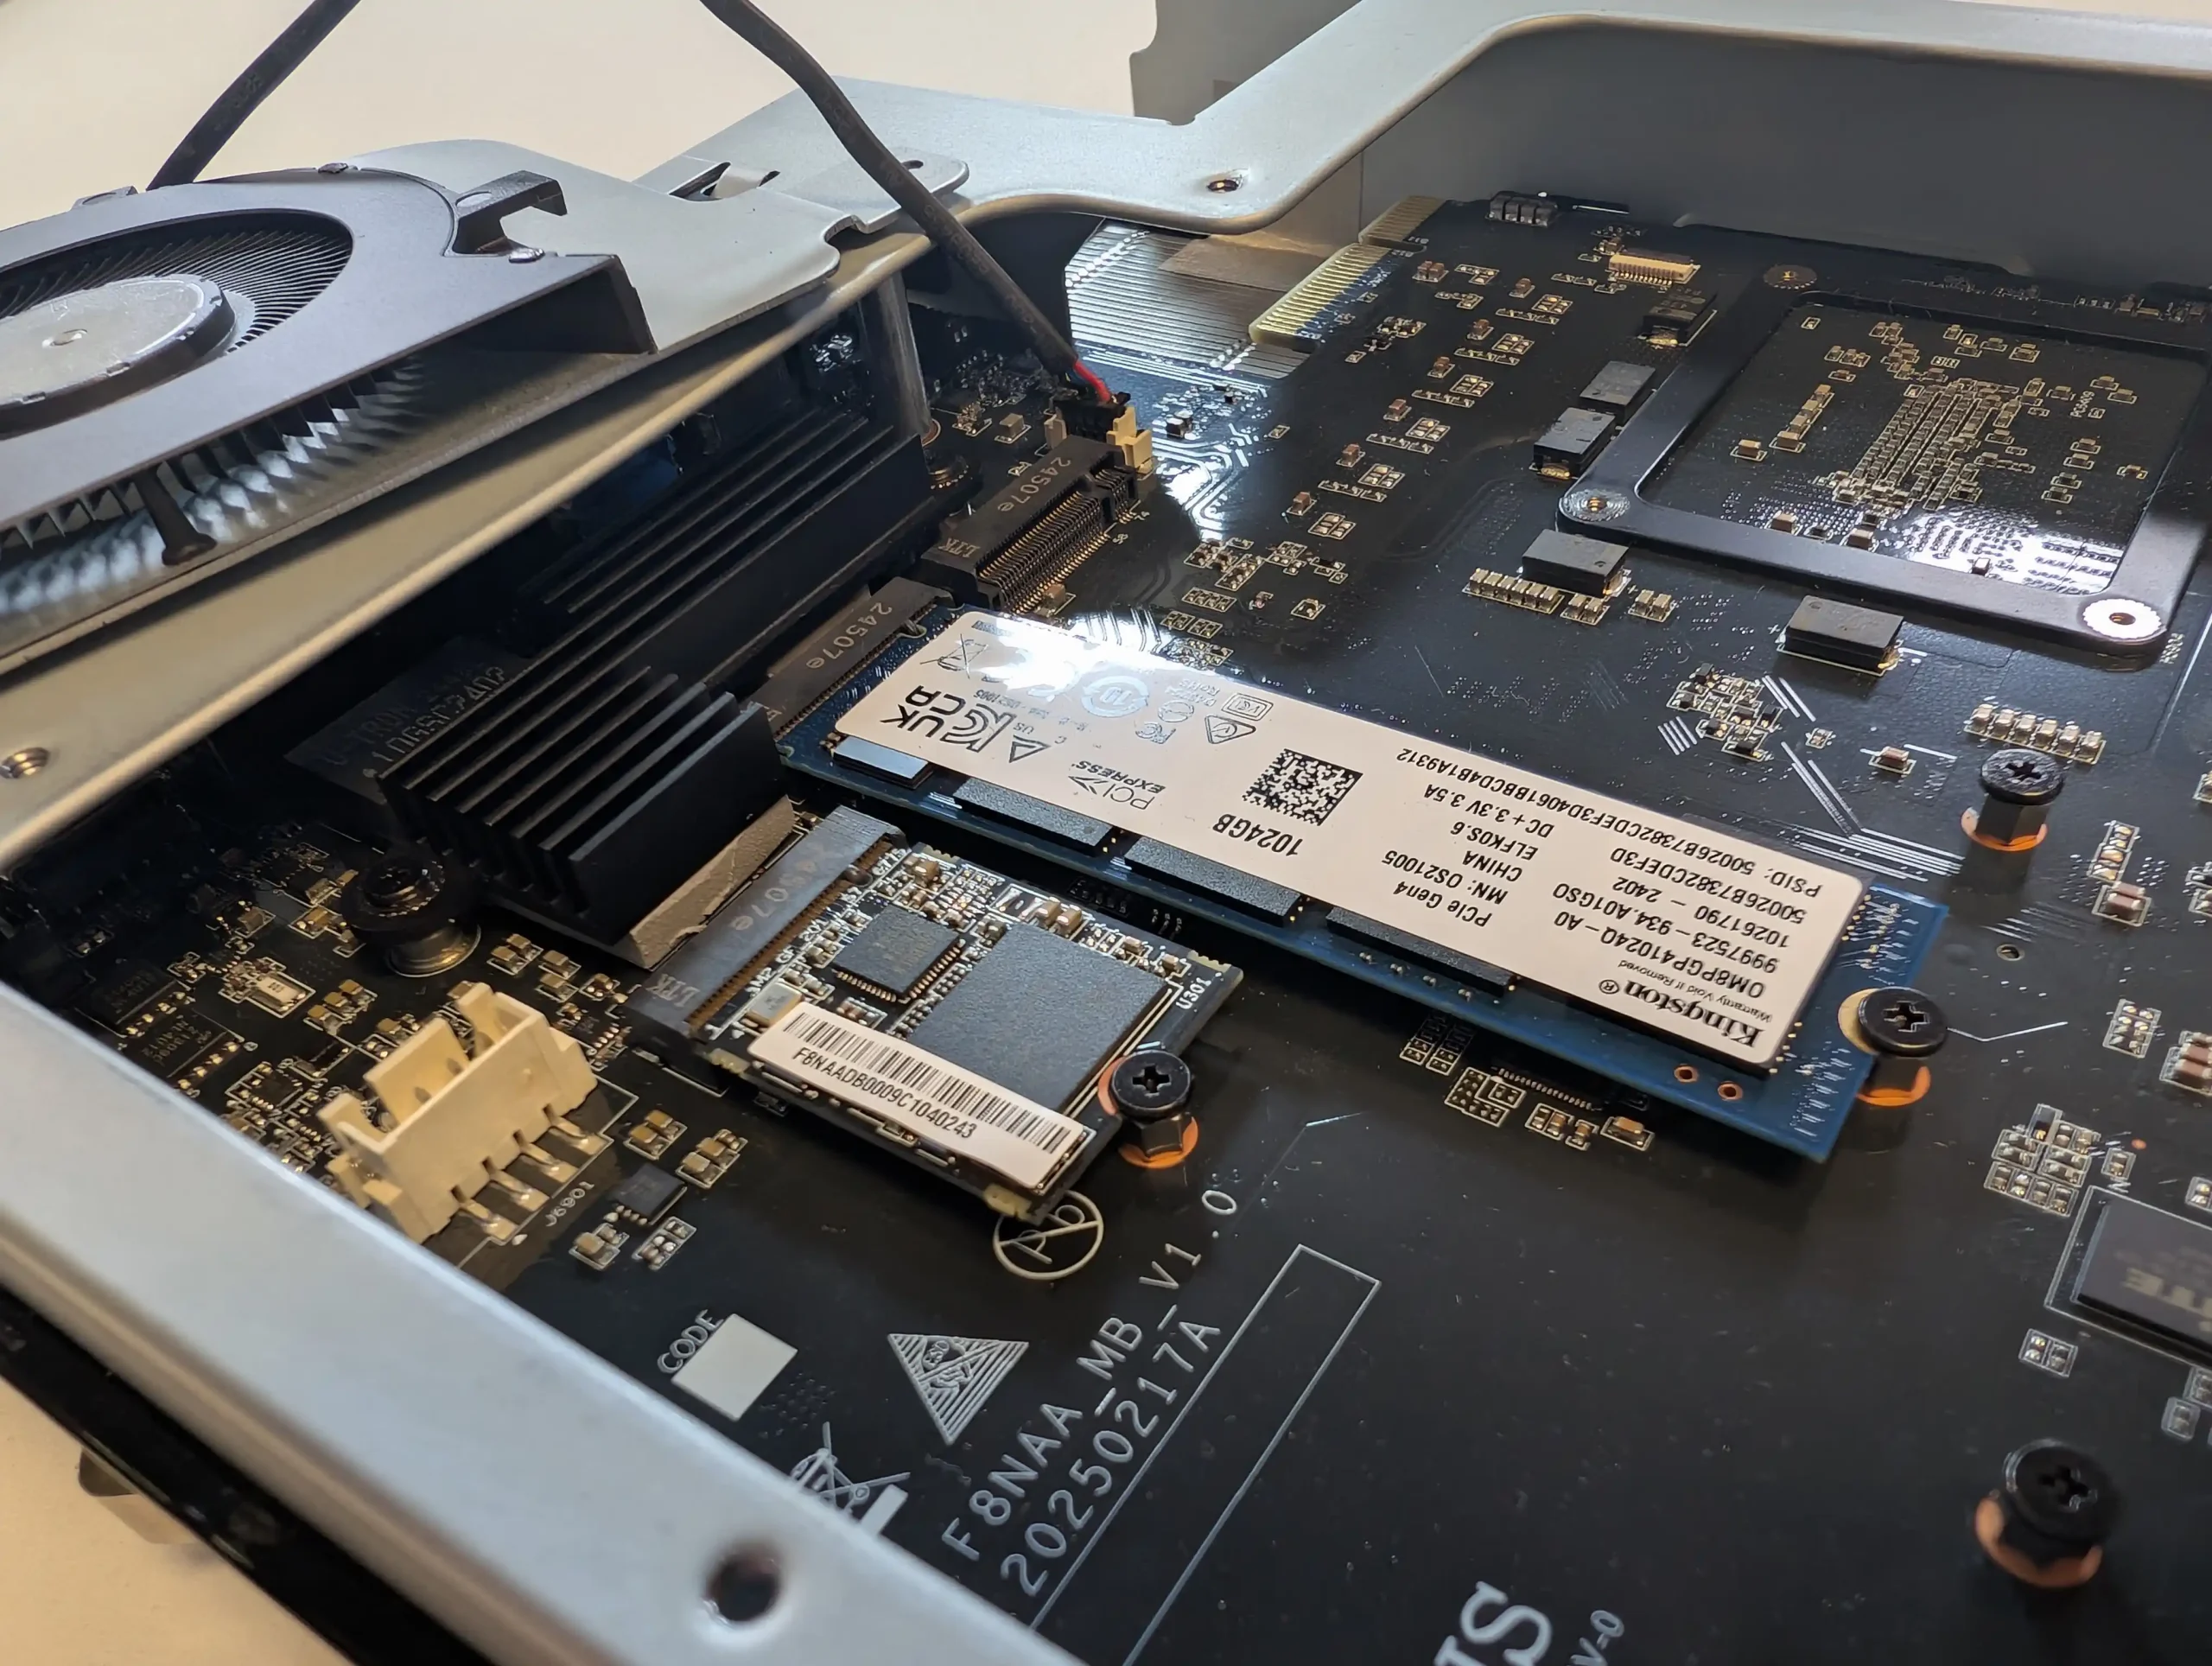
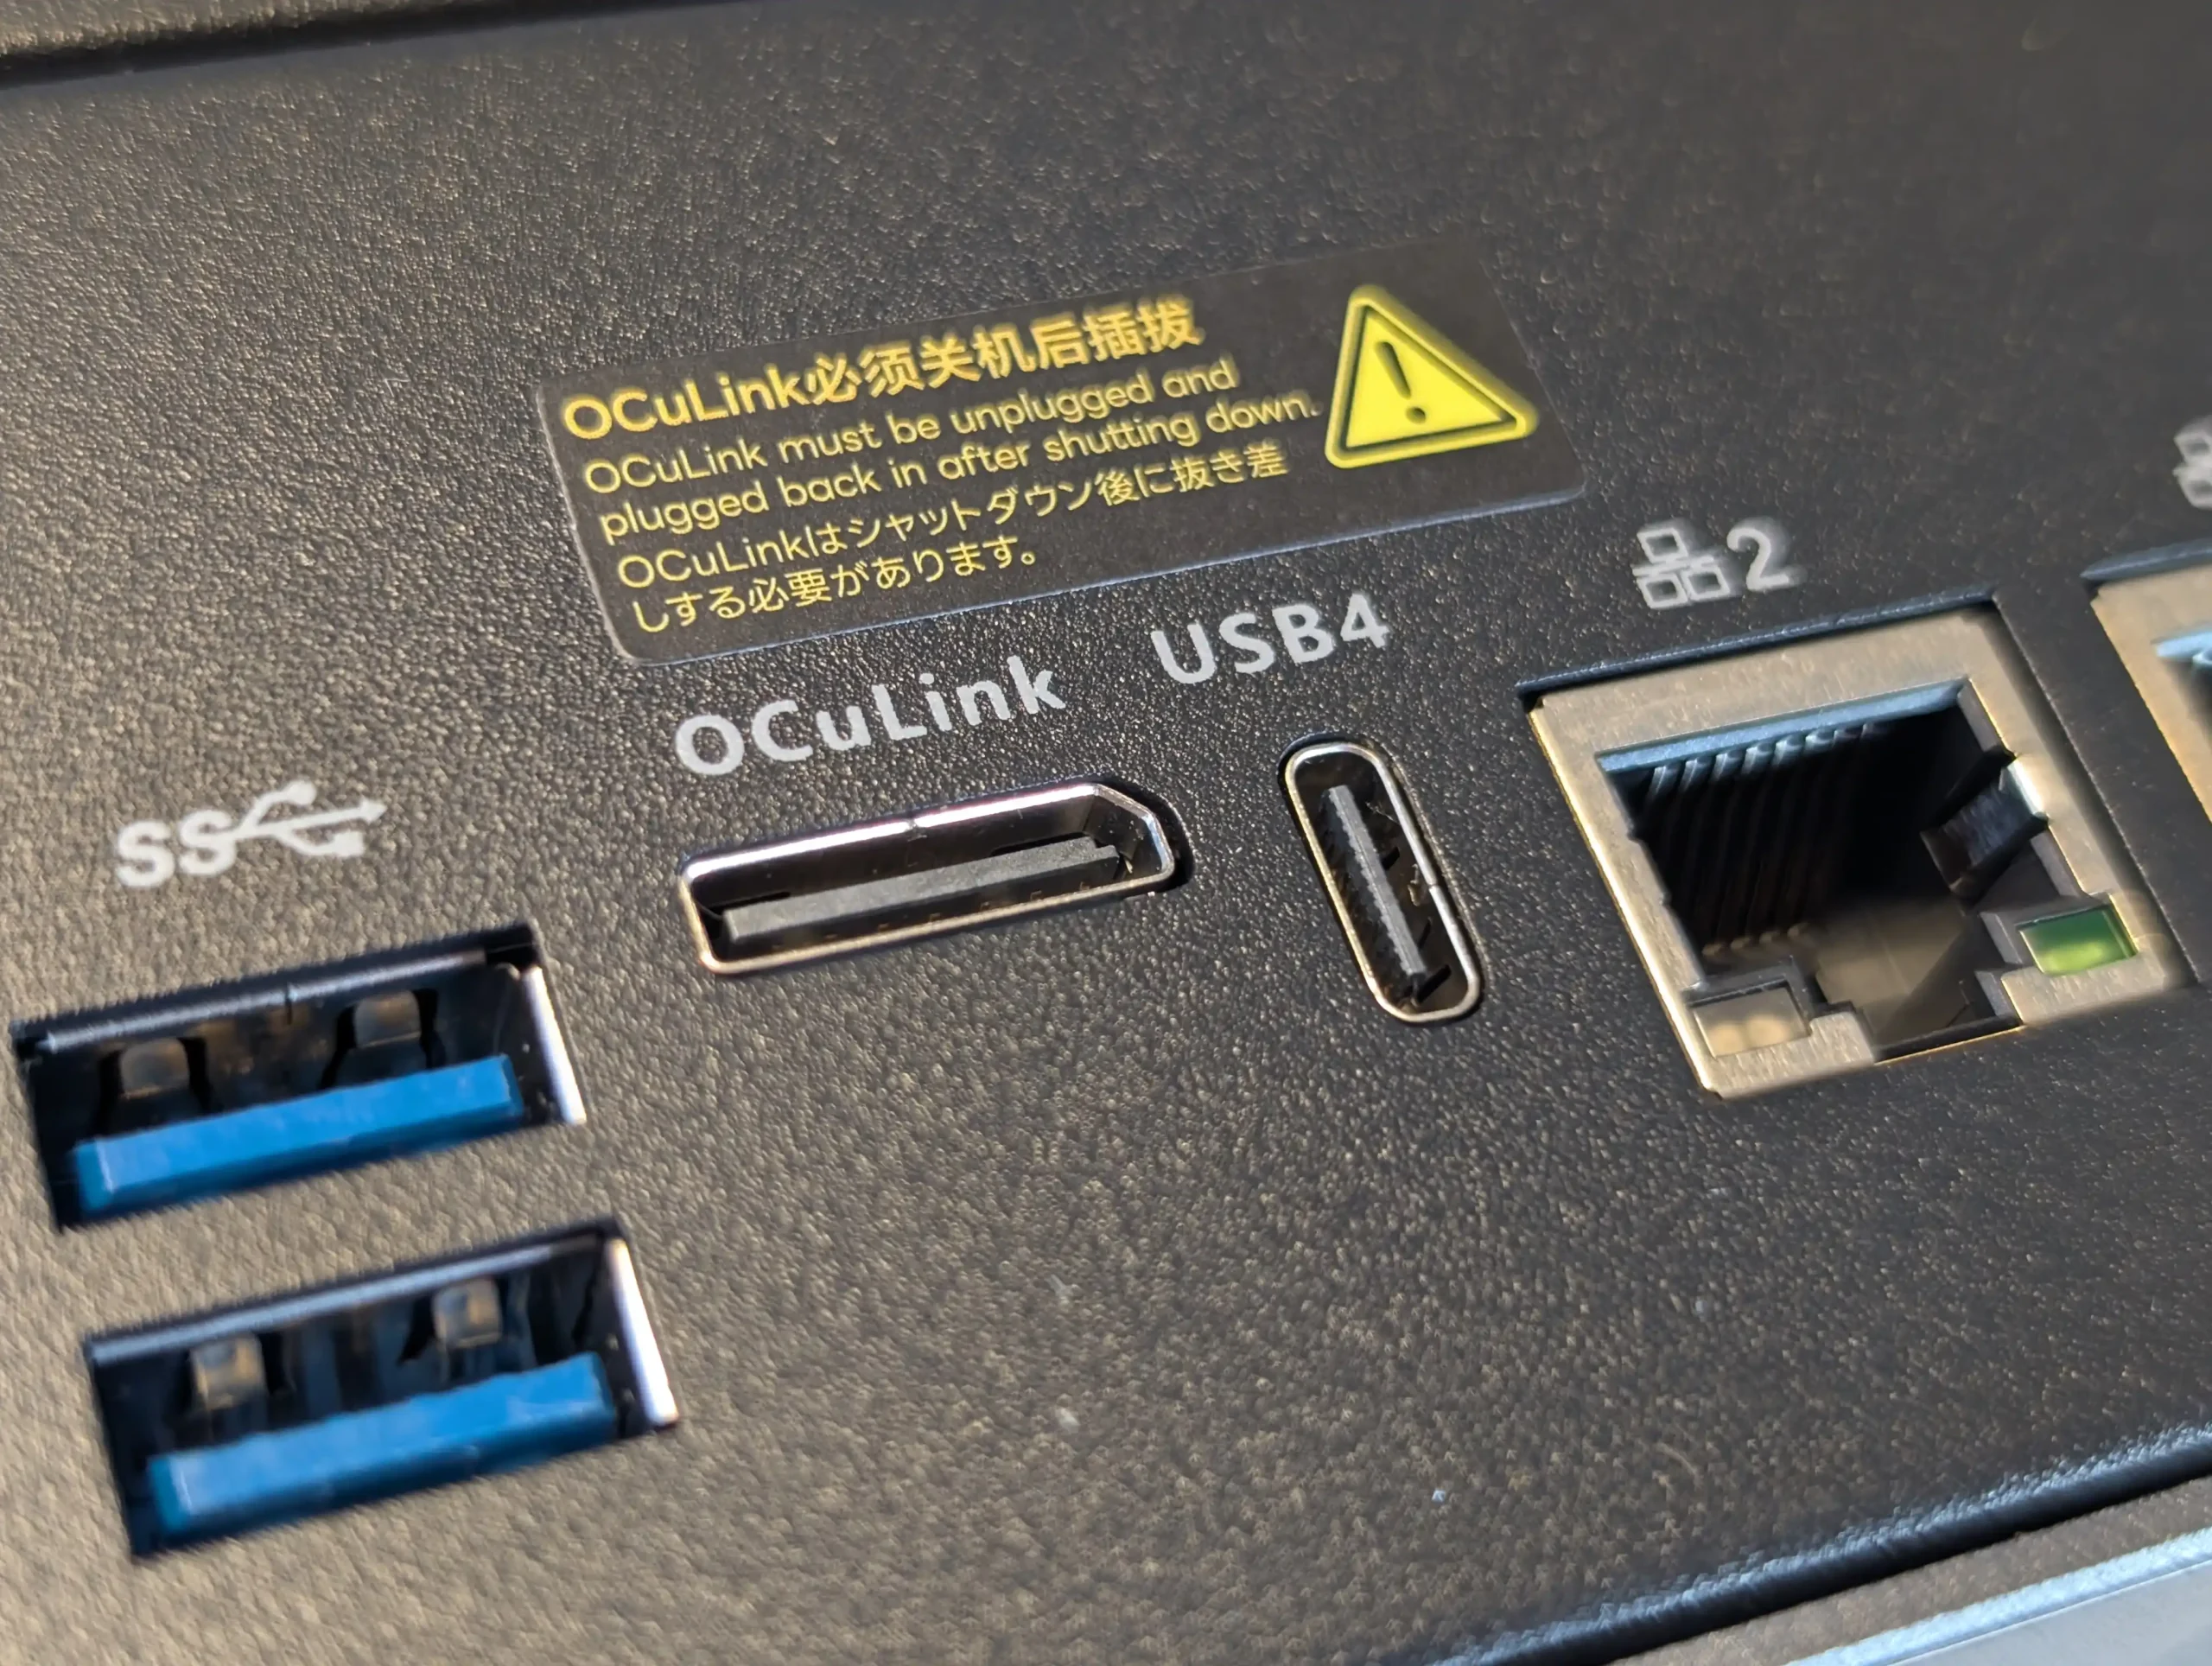
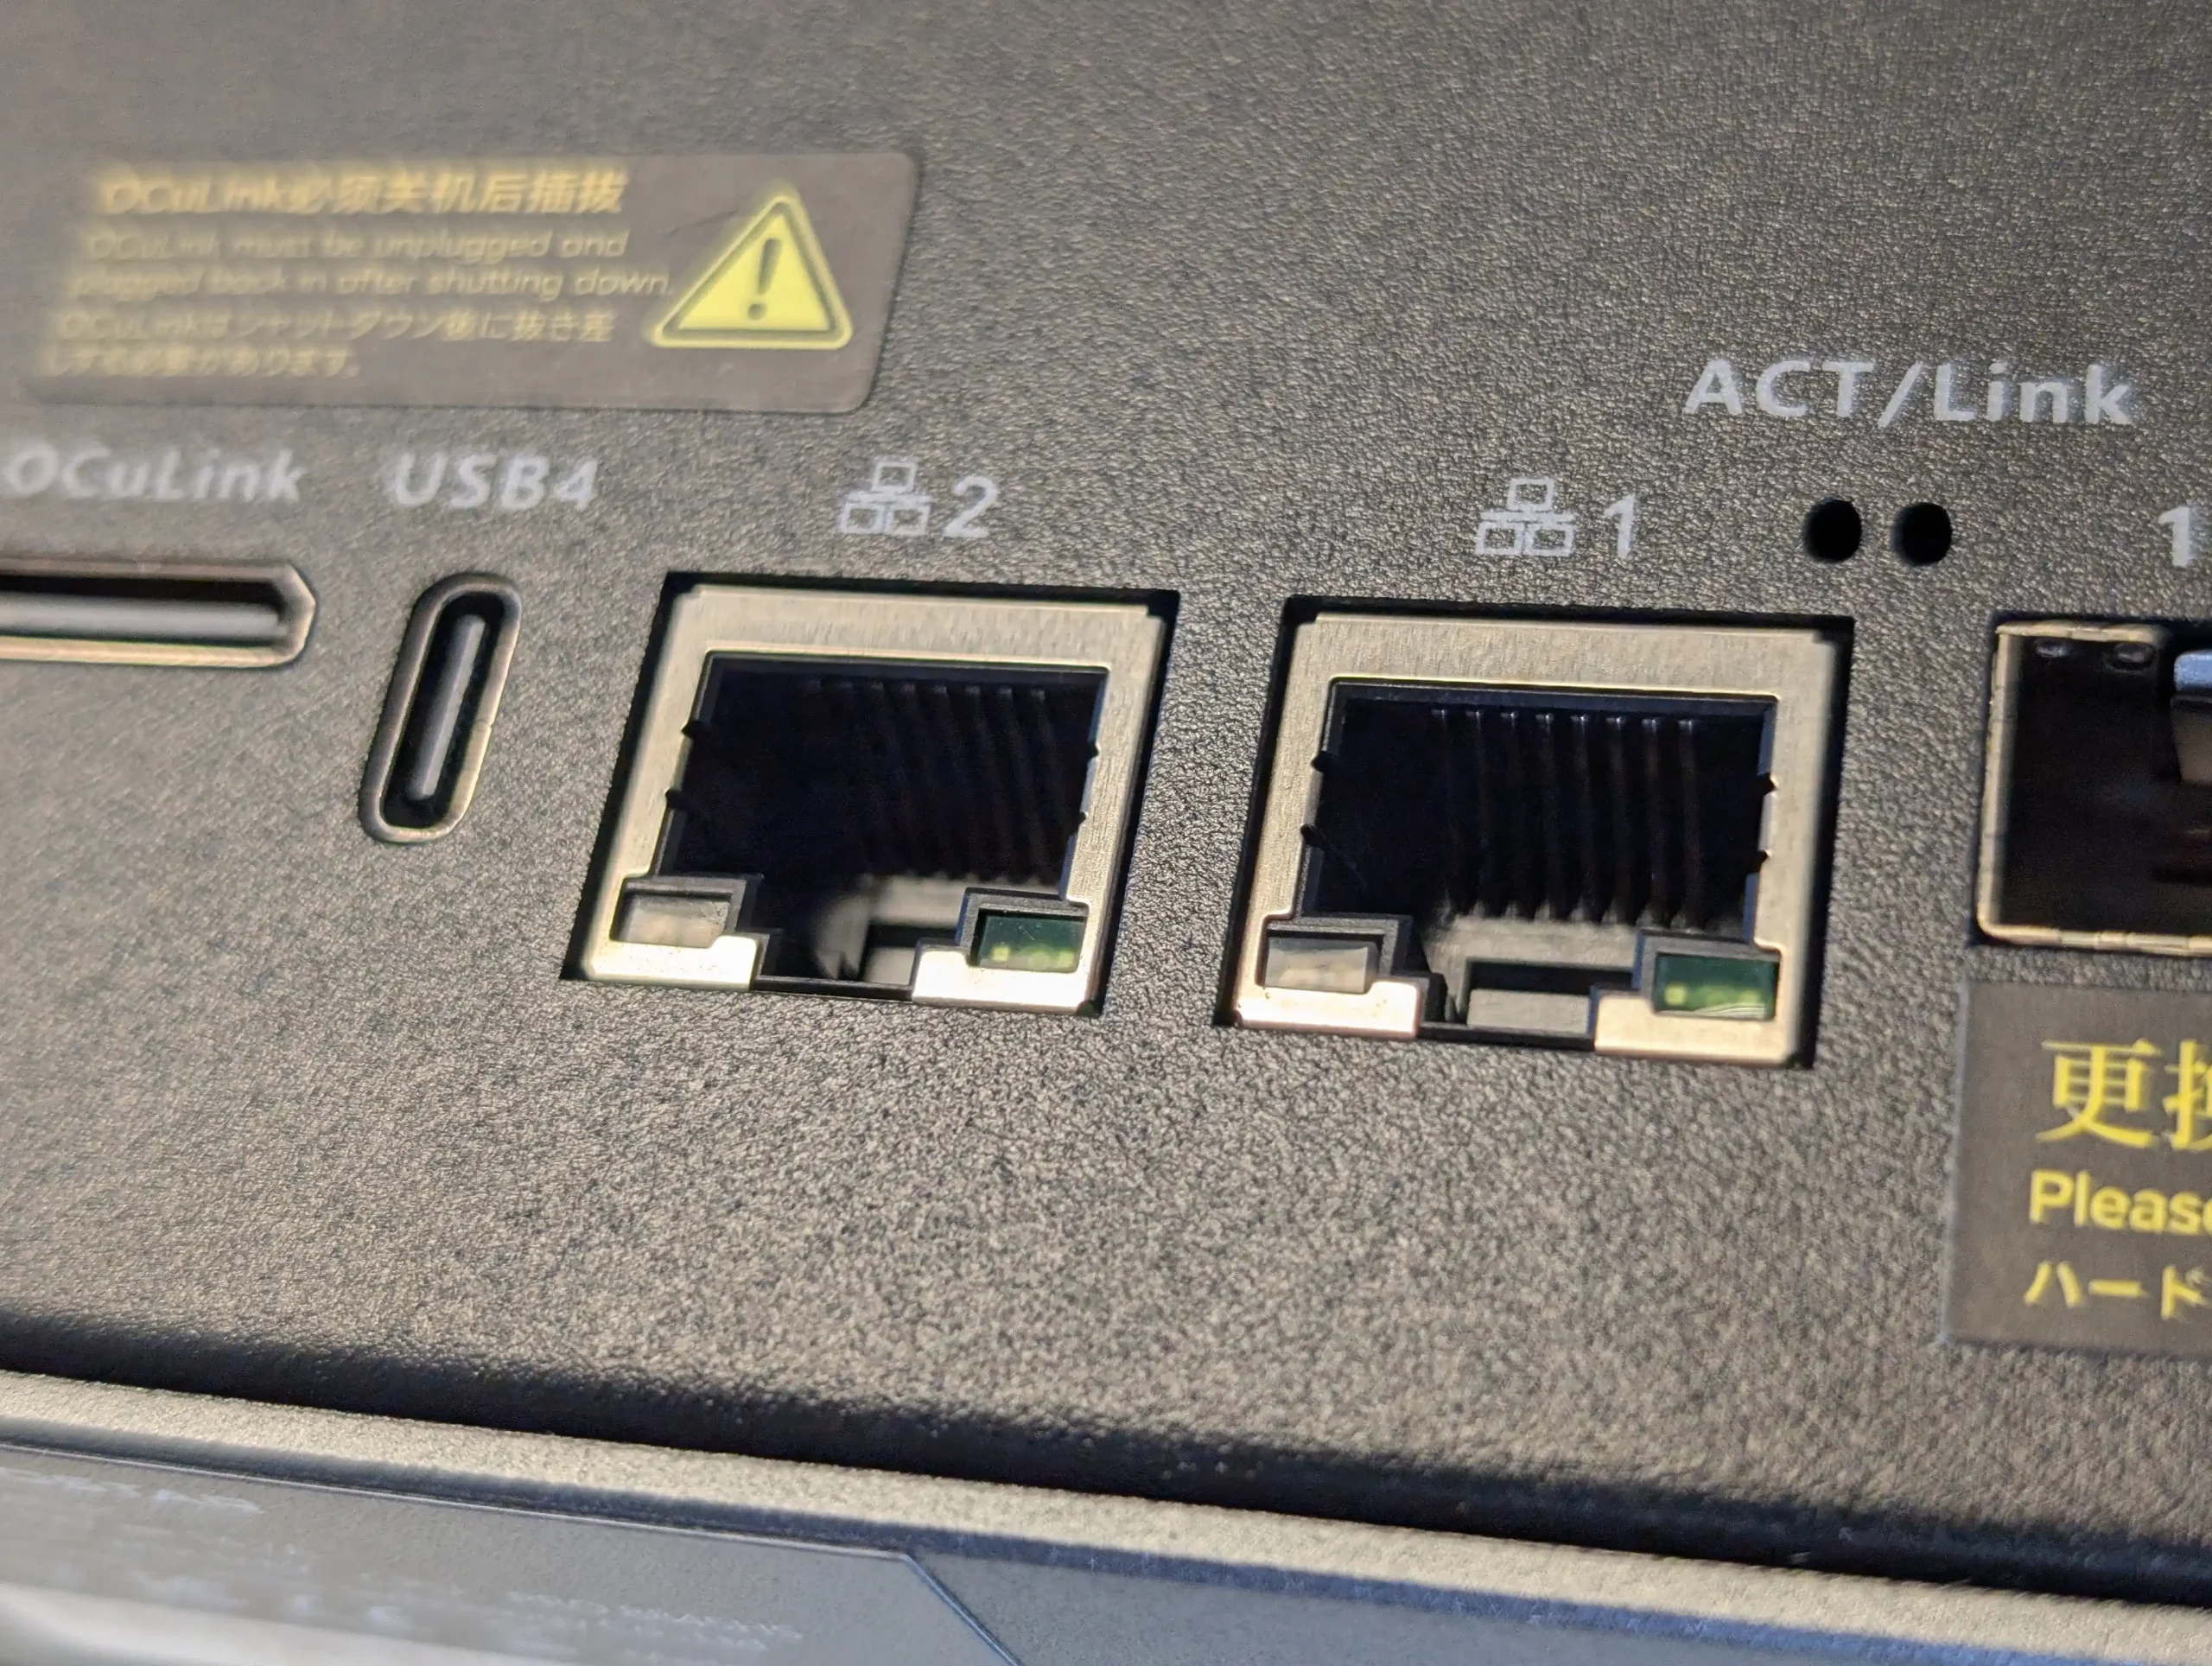
In addition, the Aoostar includes a front-mounted USB-C port, an SD card slot for quick local transfers, a rear USB4 port, an HDMI output for direct monitoring or console access, and an OCuLink port for external PCIe-based expansions. The SD card slot is an unusual but useful addition for media workflows, though the absence of any PCIe slot in the WTR Max’s internal layout limits upgrade options to what can be connected externally through OCuLink or USB4.
 |
 |
| Connection Type | Aoostar WTR Max | Minisforum N5 (Standard) | Minisforum N5 Pro | Best & Why/Note |
|---|---|---|---|---|
| 10GbE RJ45 | ✗ | ✓ | ✓ | N5/N5 Pro — standard copper 10GbE |
| 10GbE SFP+ | ✓×2 | ✗ | ✗ | Aoostar WTR Max — SFP+ for fiber |
| 5GbE RJ45 | ✗ | ✓ | ✓ | N5/N5 Pro — additional RJ45 flexibility |
| 2.5GbE RJ45 | ✓×2 | ✗ | ✗ | Aoostar WTR Max — more mid-tier ports |
| USB4 | ✓ | ✓×2 | ✓×2 | N5/N5 Pro — more USB4 ports |
| HDMI | ✓ | ✓ | ✓ | Tie — all include HDMI 2.1 |
| PCIe Gen4 Slot | ✗ | ✓ | ✓ | N5/N5 Pro — PCIe x16 expansion |
| OCuLink | ✓ | ✓ | ✓ | Tie — all include OCuLink |
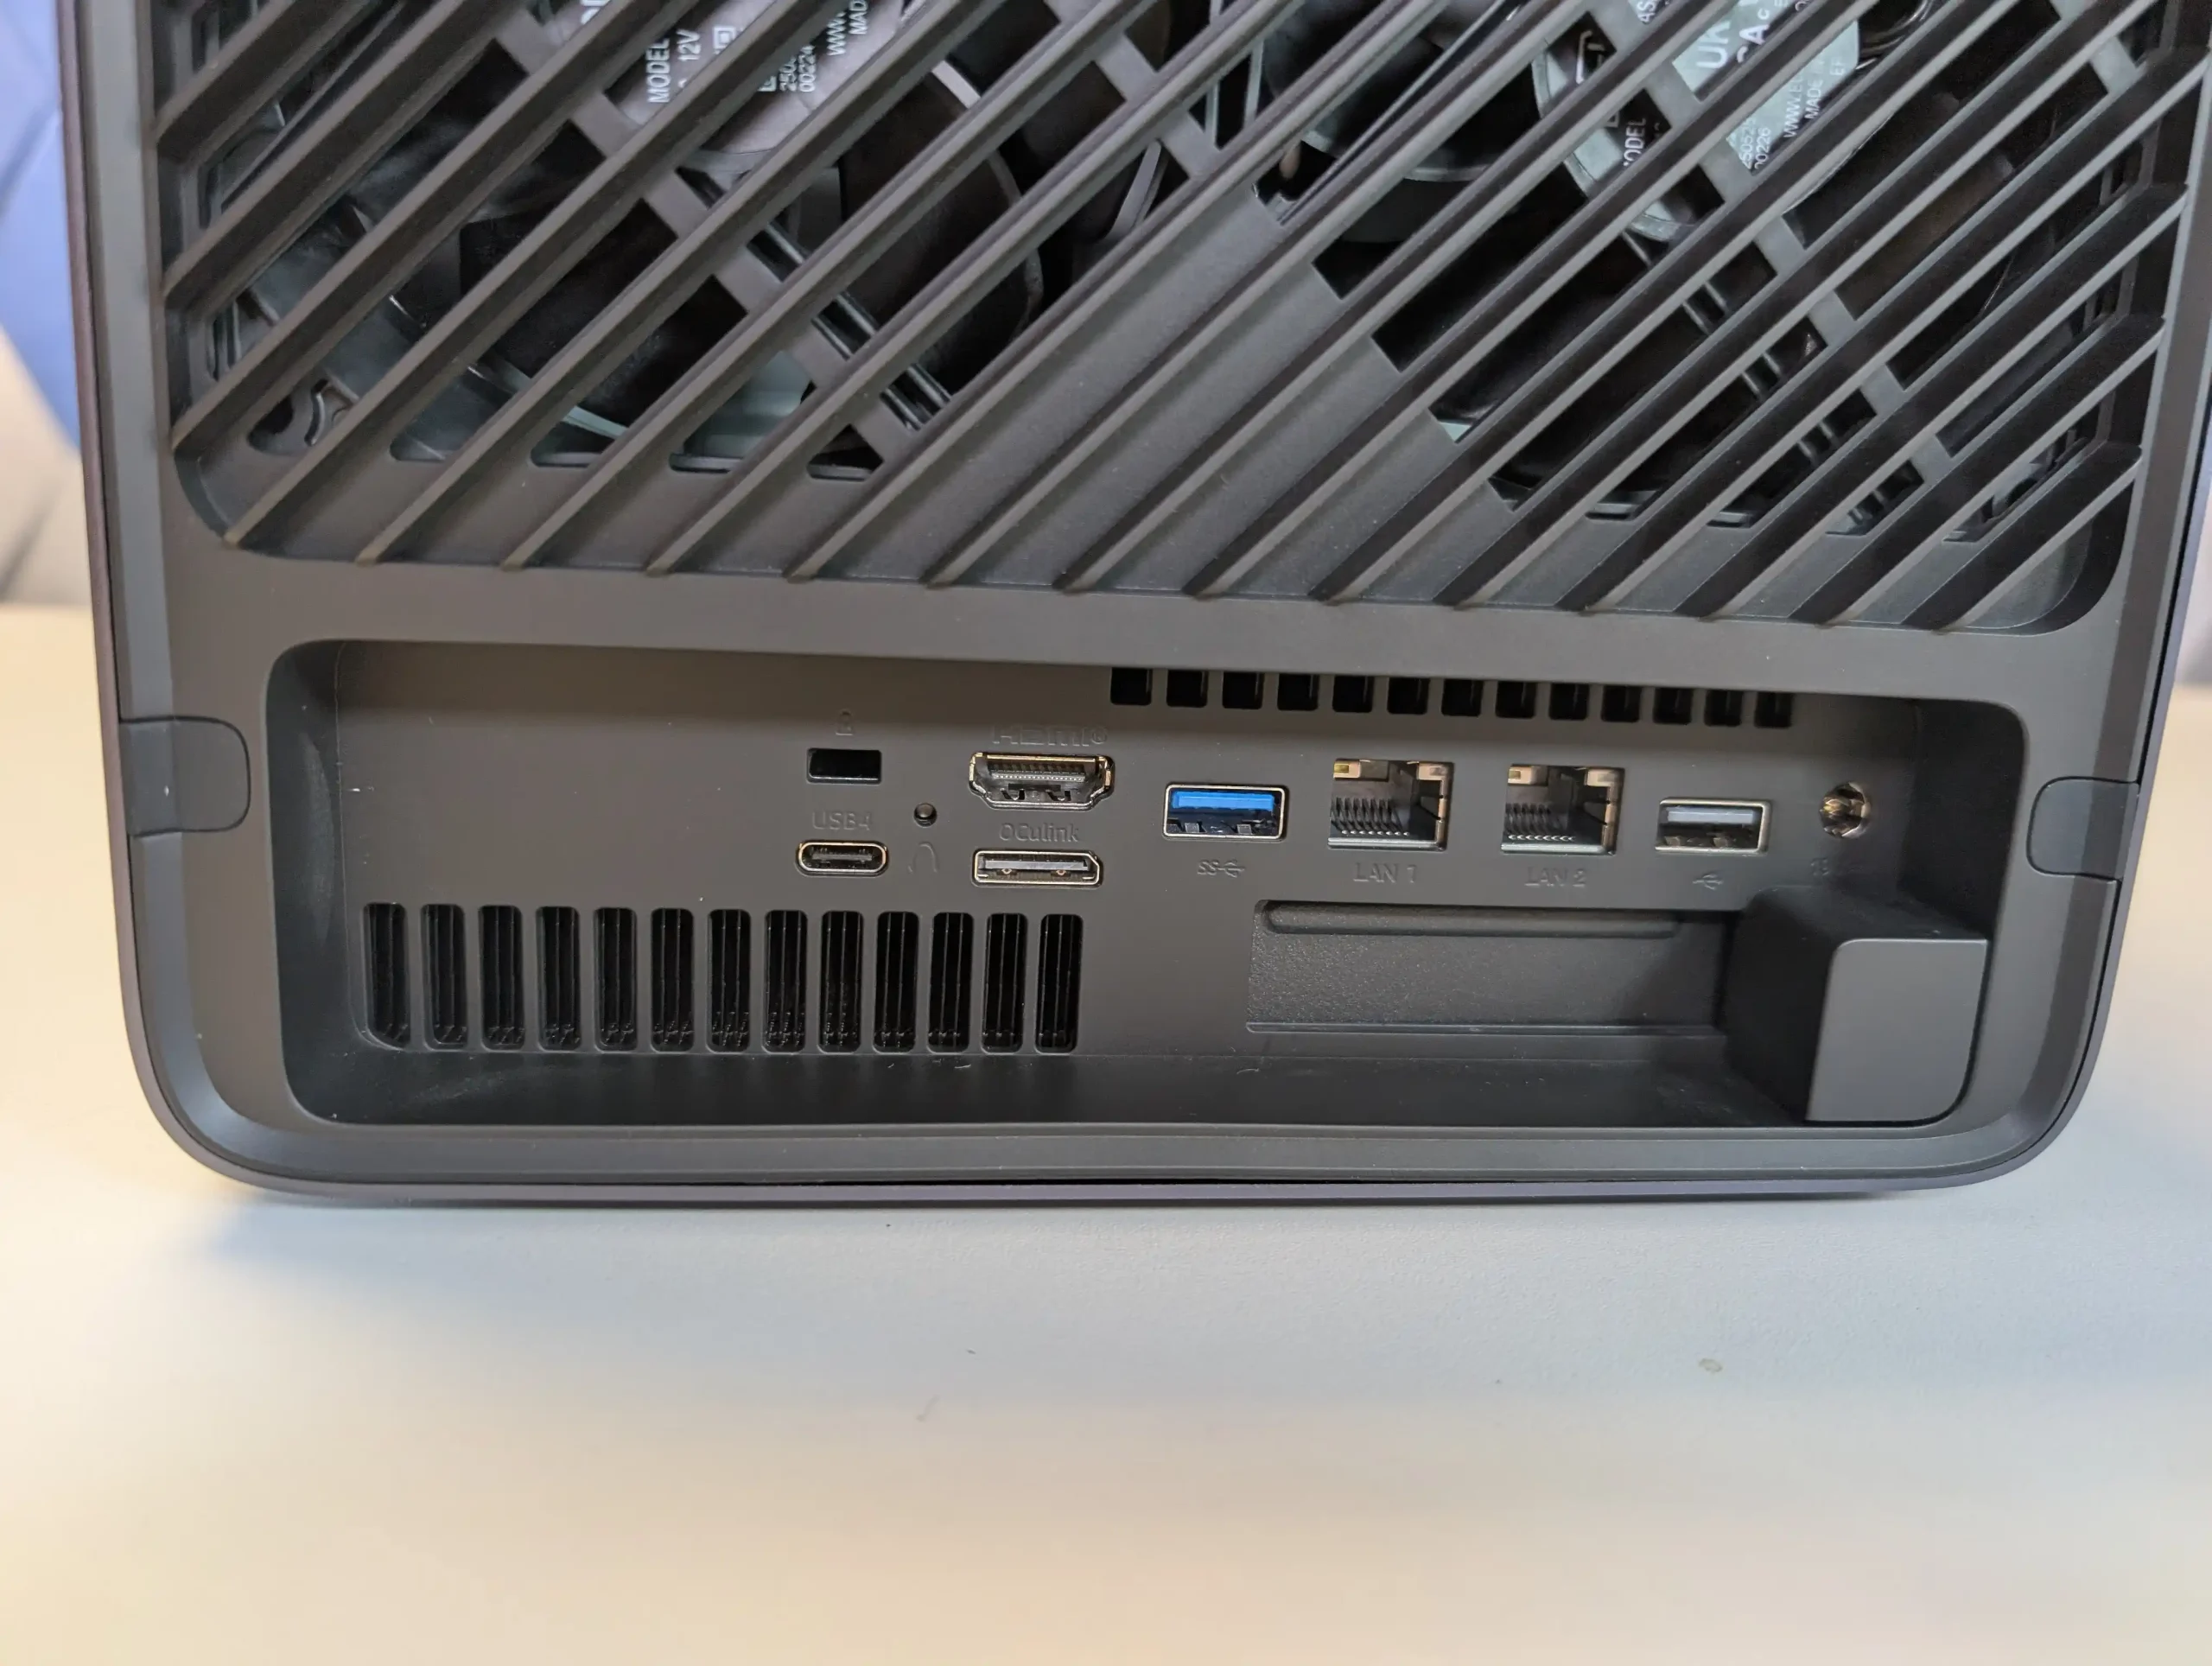
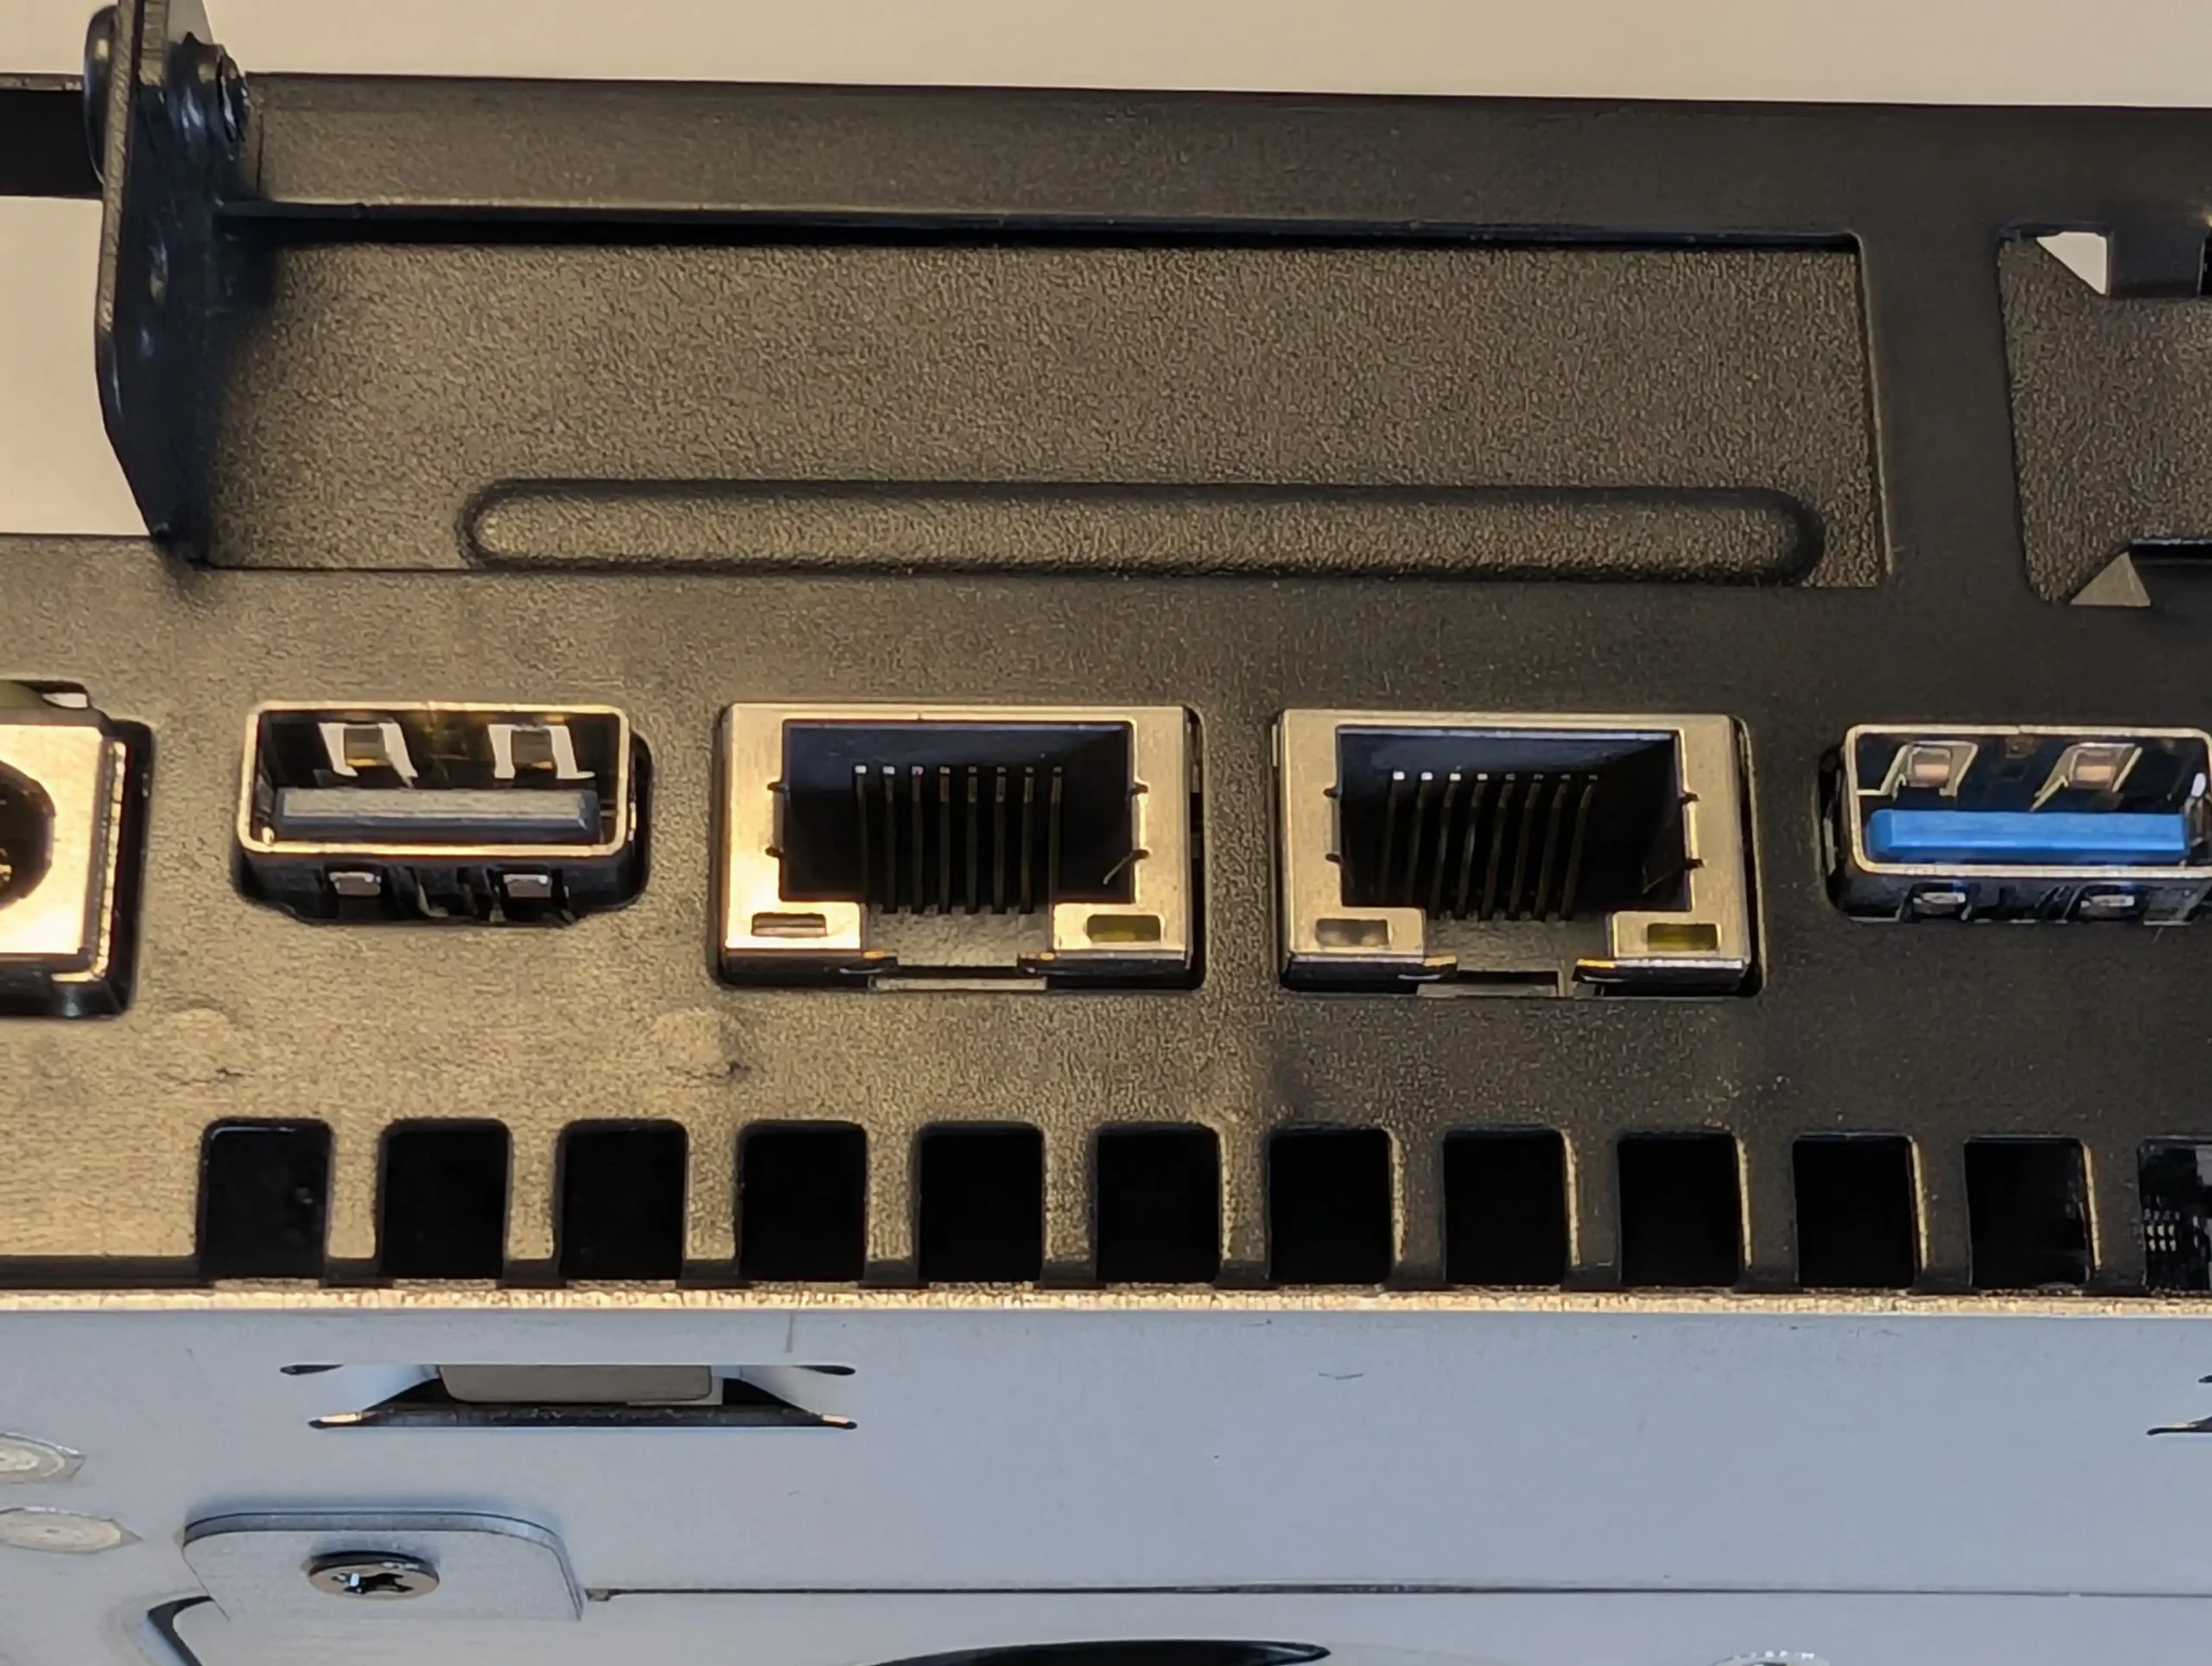
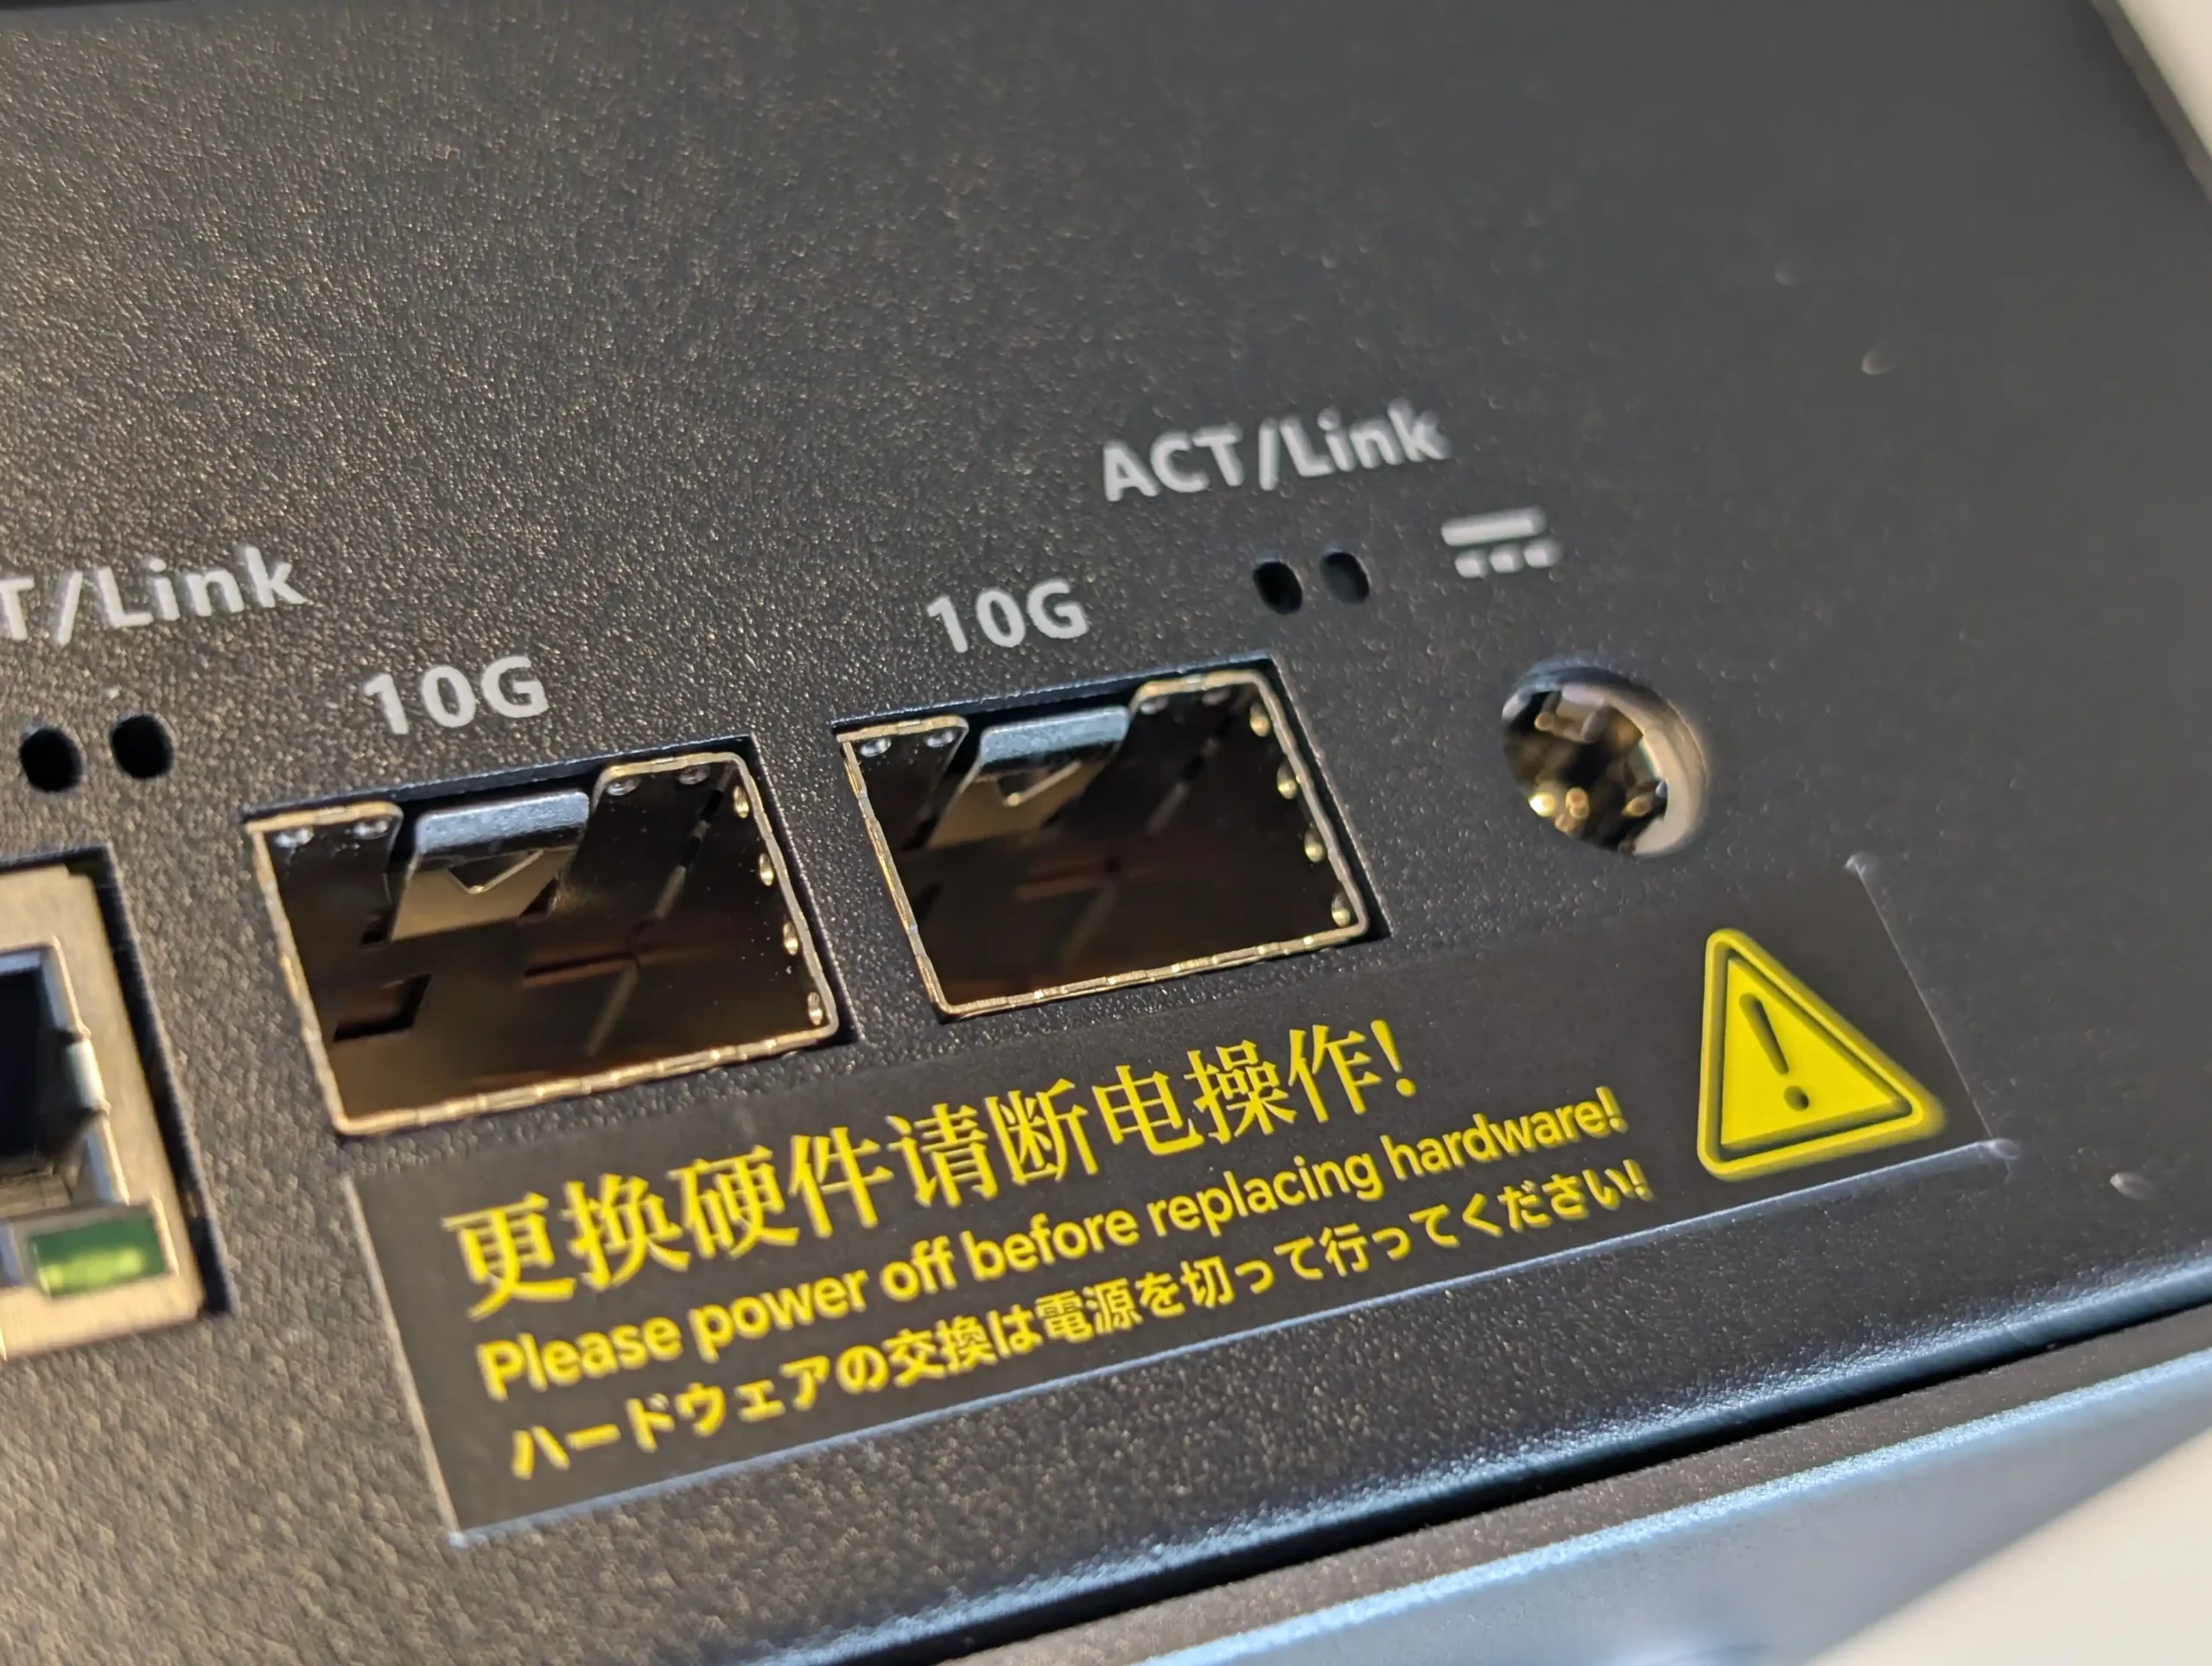
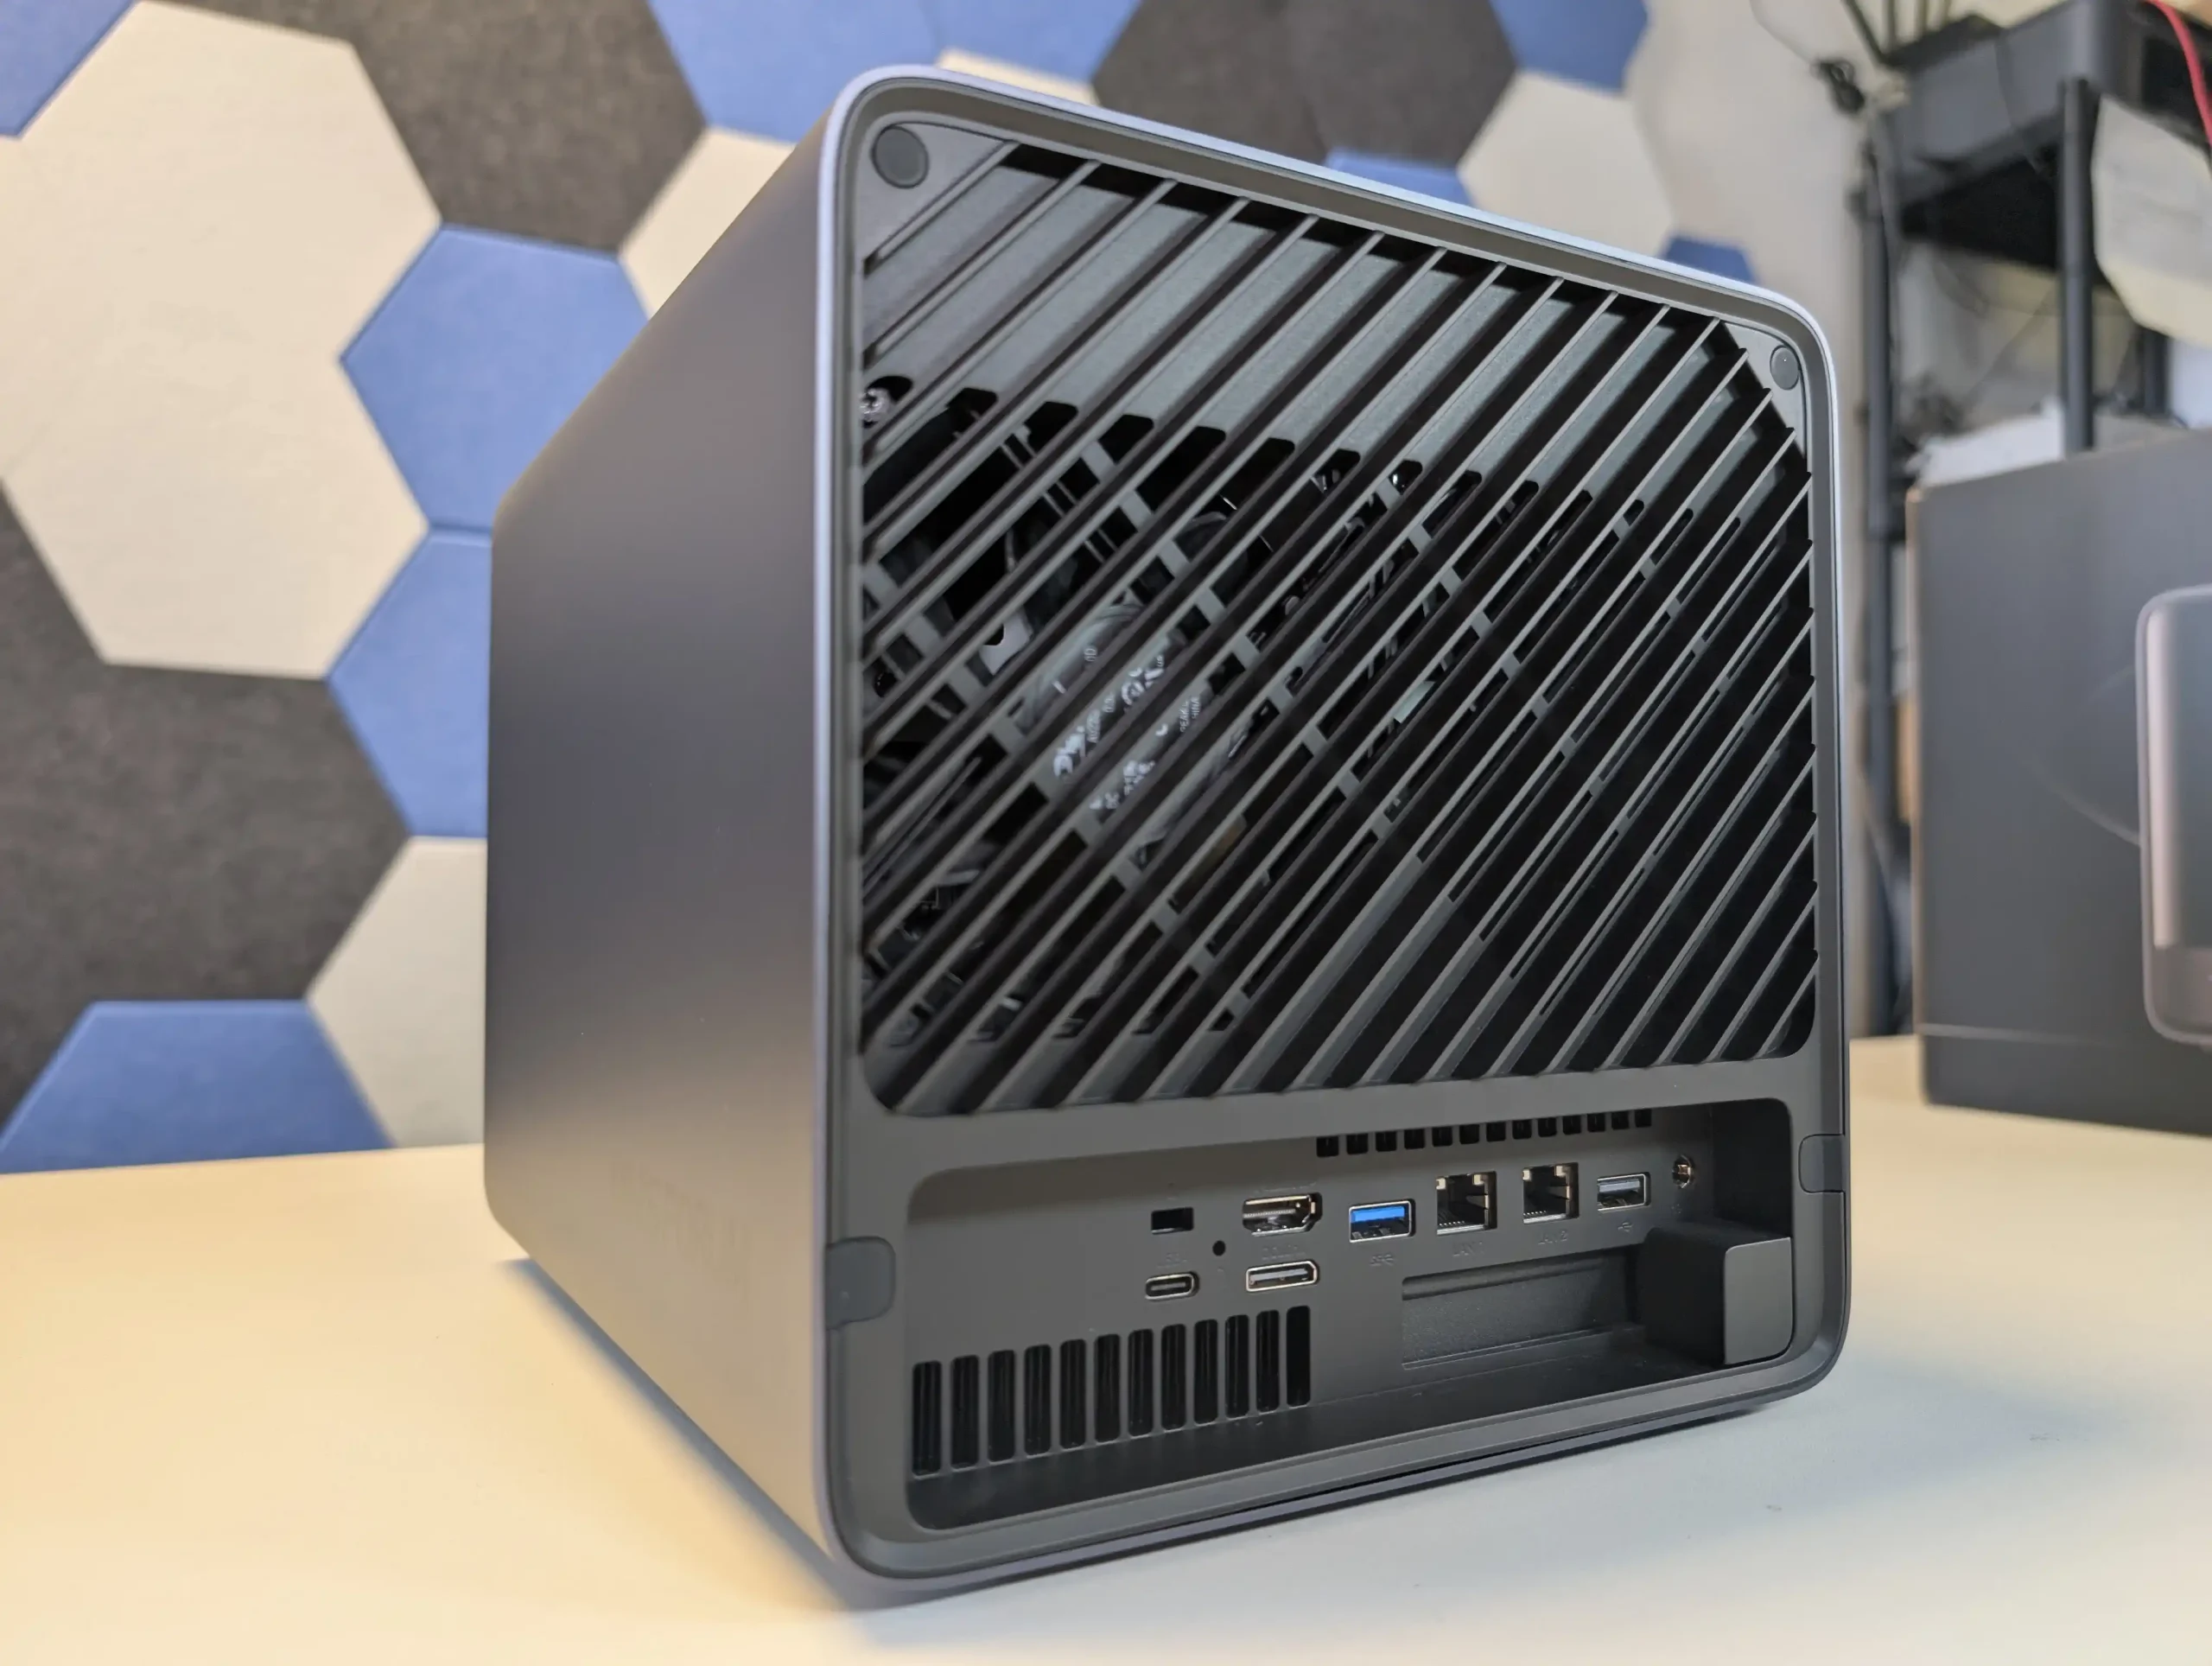
The Minisforum N5 and N5 Pro, by contrast, prioritize versatility and broader compatibility with typical IT infrastructure. Both models feature a 10GbE RJ45 copper port and a secondary 5GbE RJ45 port, allowing direct connection to high-speed copper backbones or standard multi-Gig switches without requiring transceivers. They also include two USB4 ports (one front, one rear), an HDMI 2.1 output, an OCuLink port for external PCIe-based devices, and crucially, a PCIe Gen4 x16 (x4 electrical) slot.
This PCIe slot unlocks possibilities for internal upgrades such as GPUs, additional NICs, AI accelerator cards, or other PCIe devices—a flexibility that the Aoostar lacks. This makes the Minisforum a more future-proof choice in environments where needs may change or grow, and where access to off-the-shelf PCIe hardware is desirable. Together with its more copper-friendly network ports and two USB4 connections, the Minisforum family aligns well with home labs, creative workstations, and hybrid environments that benefit from adaptable, modular expansion options.
On balance, the Minisforum N5 series edges ahead in overall versatility and general-purpose applicability. While the Aoostar WTR Max offers a greater total number of network interfaces and superior fiber capabilities out of the box, those features come with trade-offs, including reliance on SFP+ transceivers, higher fiber infrastructure costs, and reduced flexibility for other kinds of expansion. For users specifically targeting a fiber-based or multi-path network deployment, the Aoostar remains highly appealing. However, for broader scenarios that favor compatibility with standard copper networks, more USB4 bandwidth, and internal PCIe upgrade capabilities, the Minisforum N5 and N5 Pro offer a more balanced and adaptable external connectivity package – but just less ACTUAL external bandwidth for networking!
 |
 |
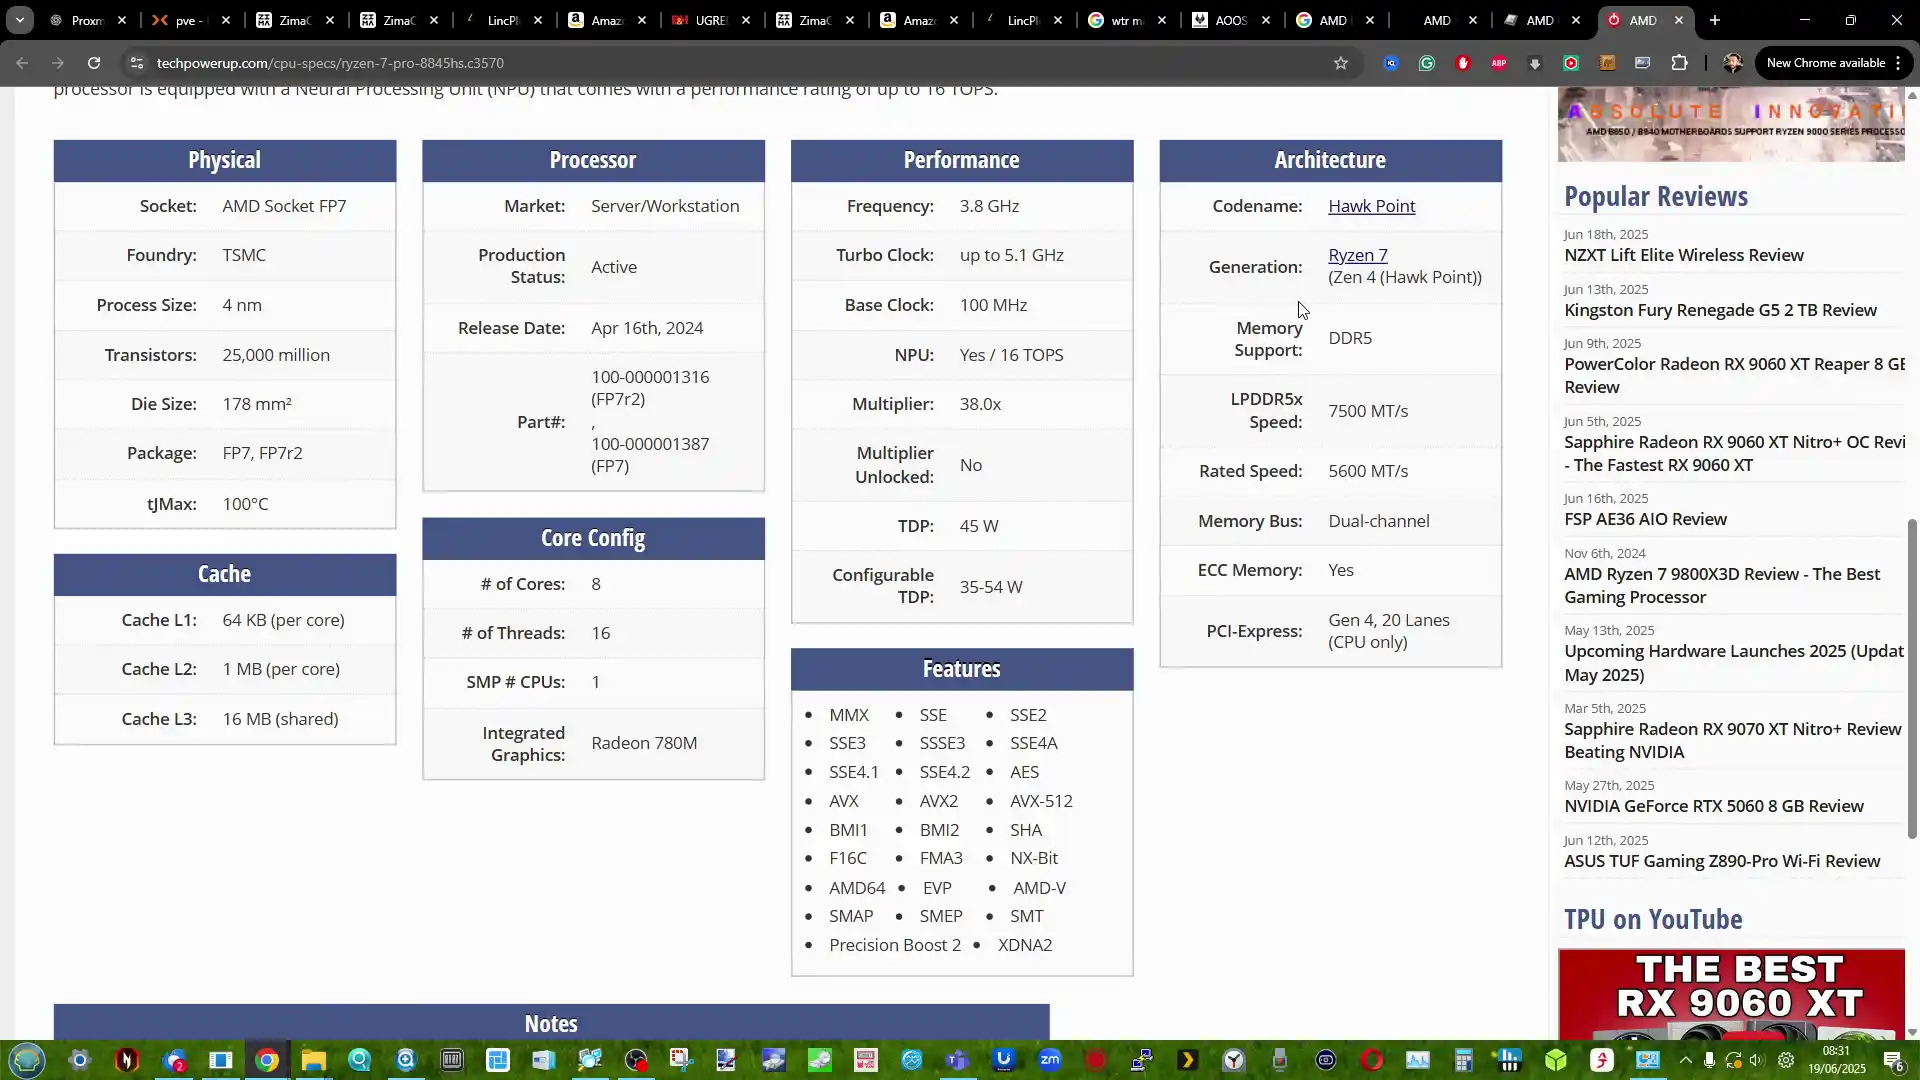
The Aoostar WTR Max and the Minisforum N5 series diverge substantially in processing power and memory capabilities, with the N5 Pro clearly at the high-performance end of the spectrum. The Aoostar WTR Max is equipped with an AMD Ryzen 7 Pro 8845HS, an 8-core, 16-thread processor based on AMD’s efficient Zen 4 architecture, and supports up to 128 GB of DDR5 memory with ECC. This makes the WTR Max a strong contender for users who need solid multi-threaded throughput, data integrity via ECC, and headroom for running many virtual machines or containerized workloads.
 |
 |
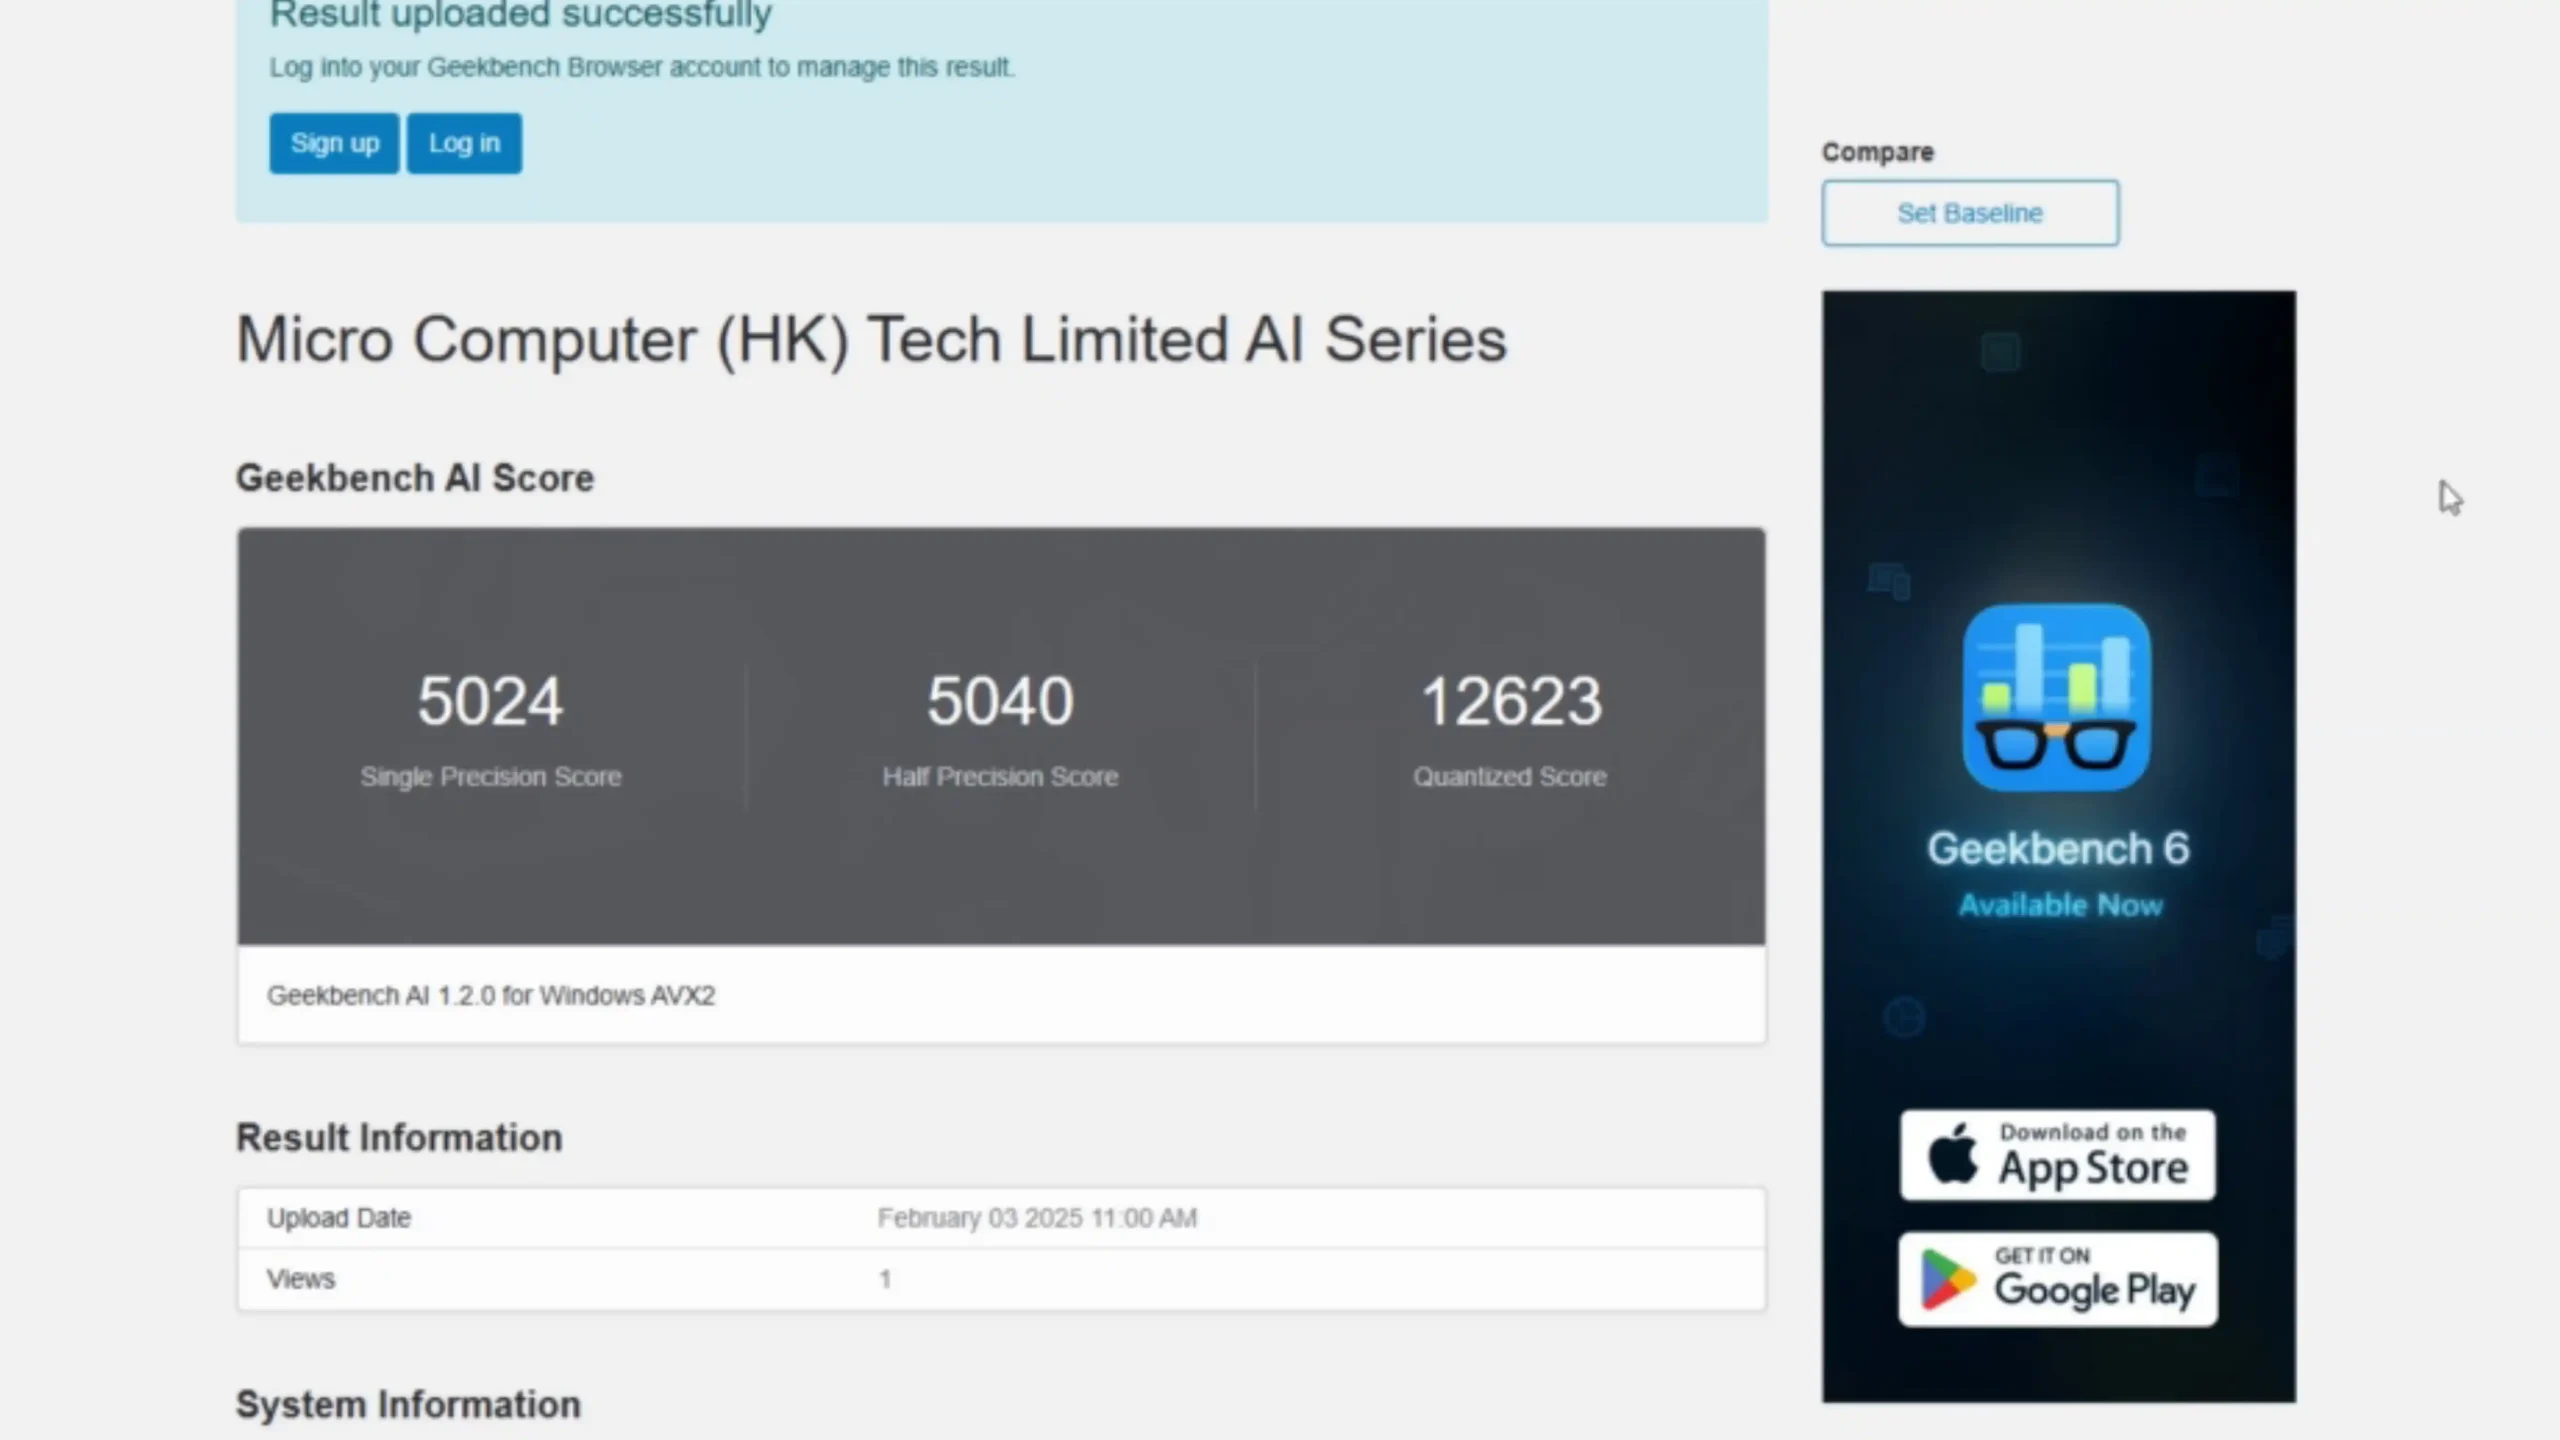
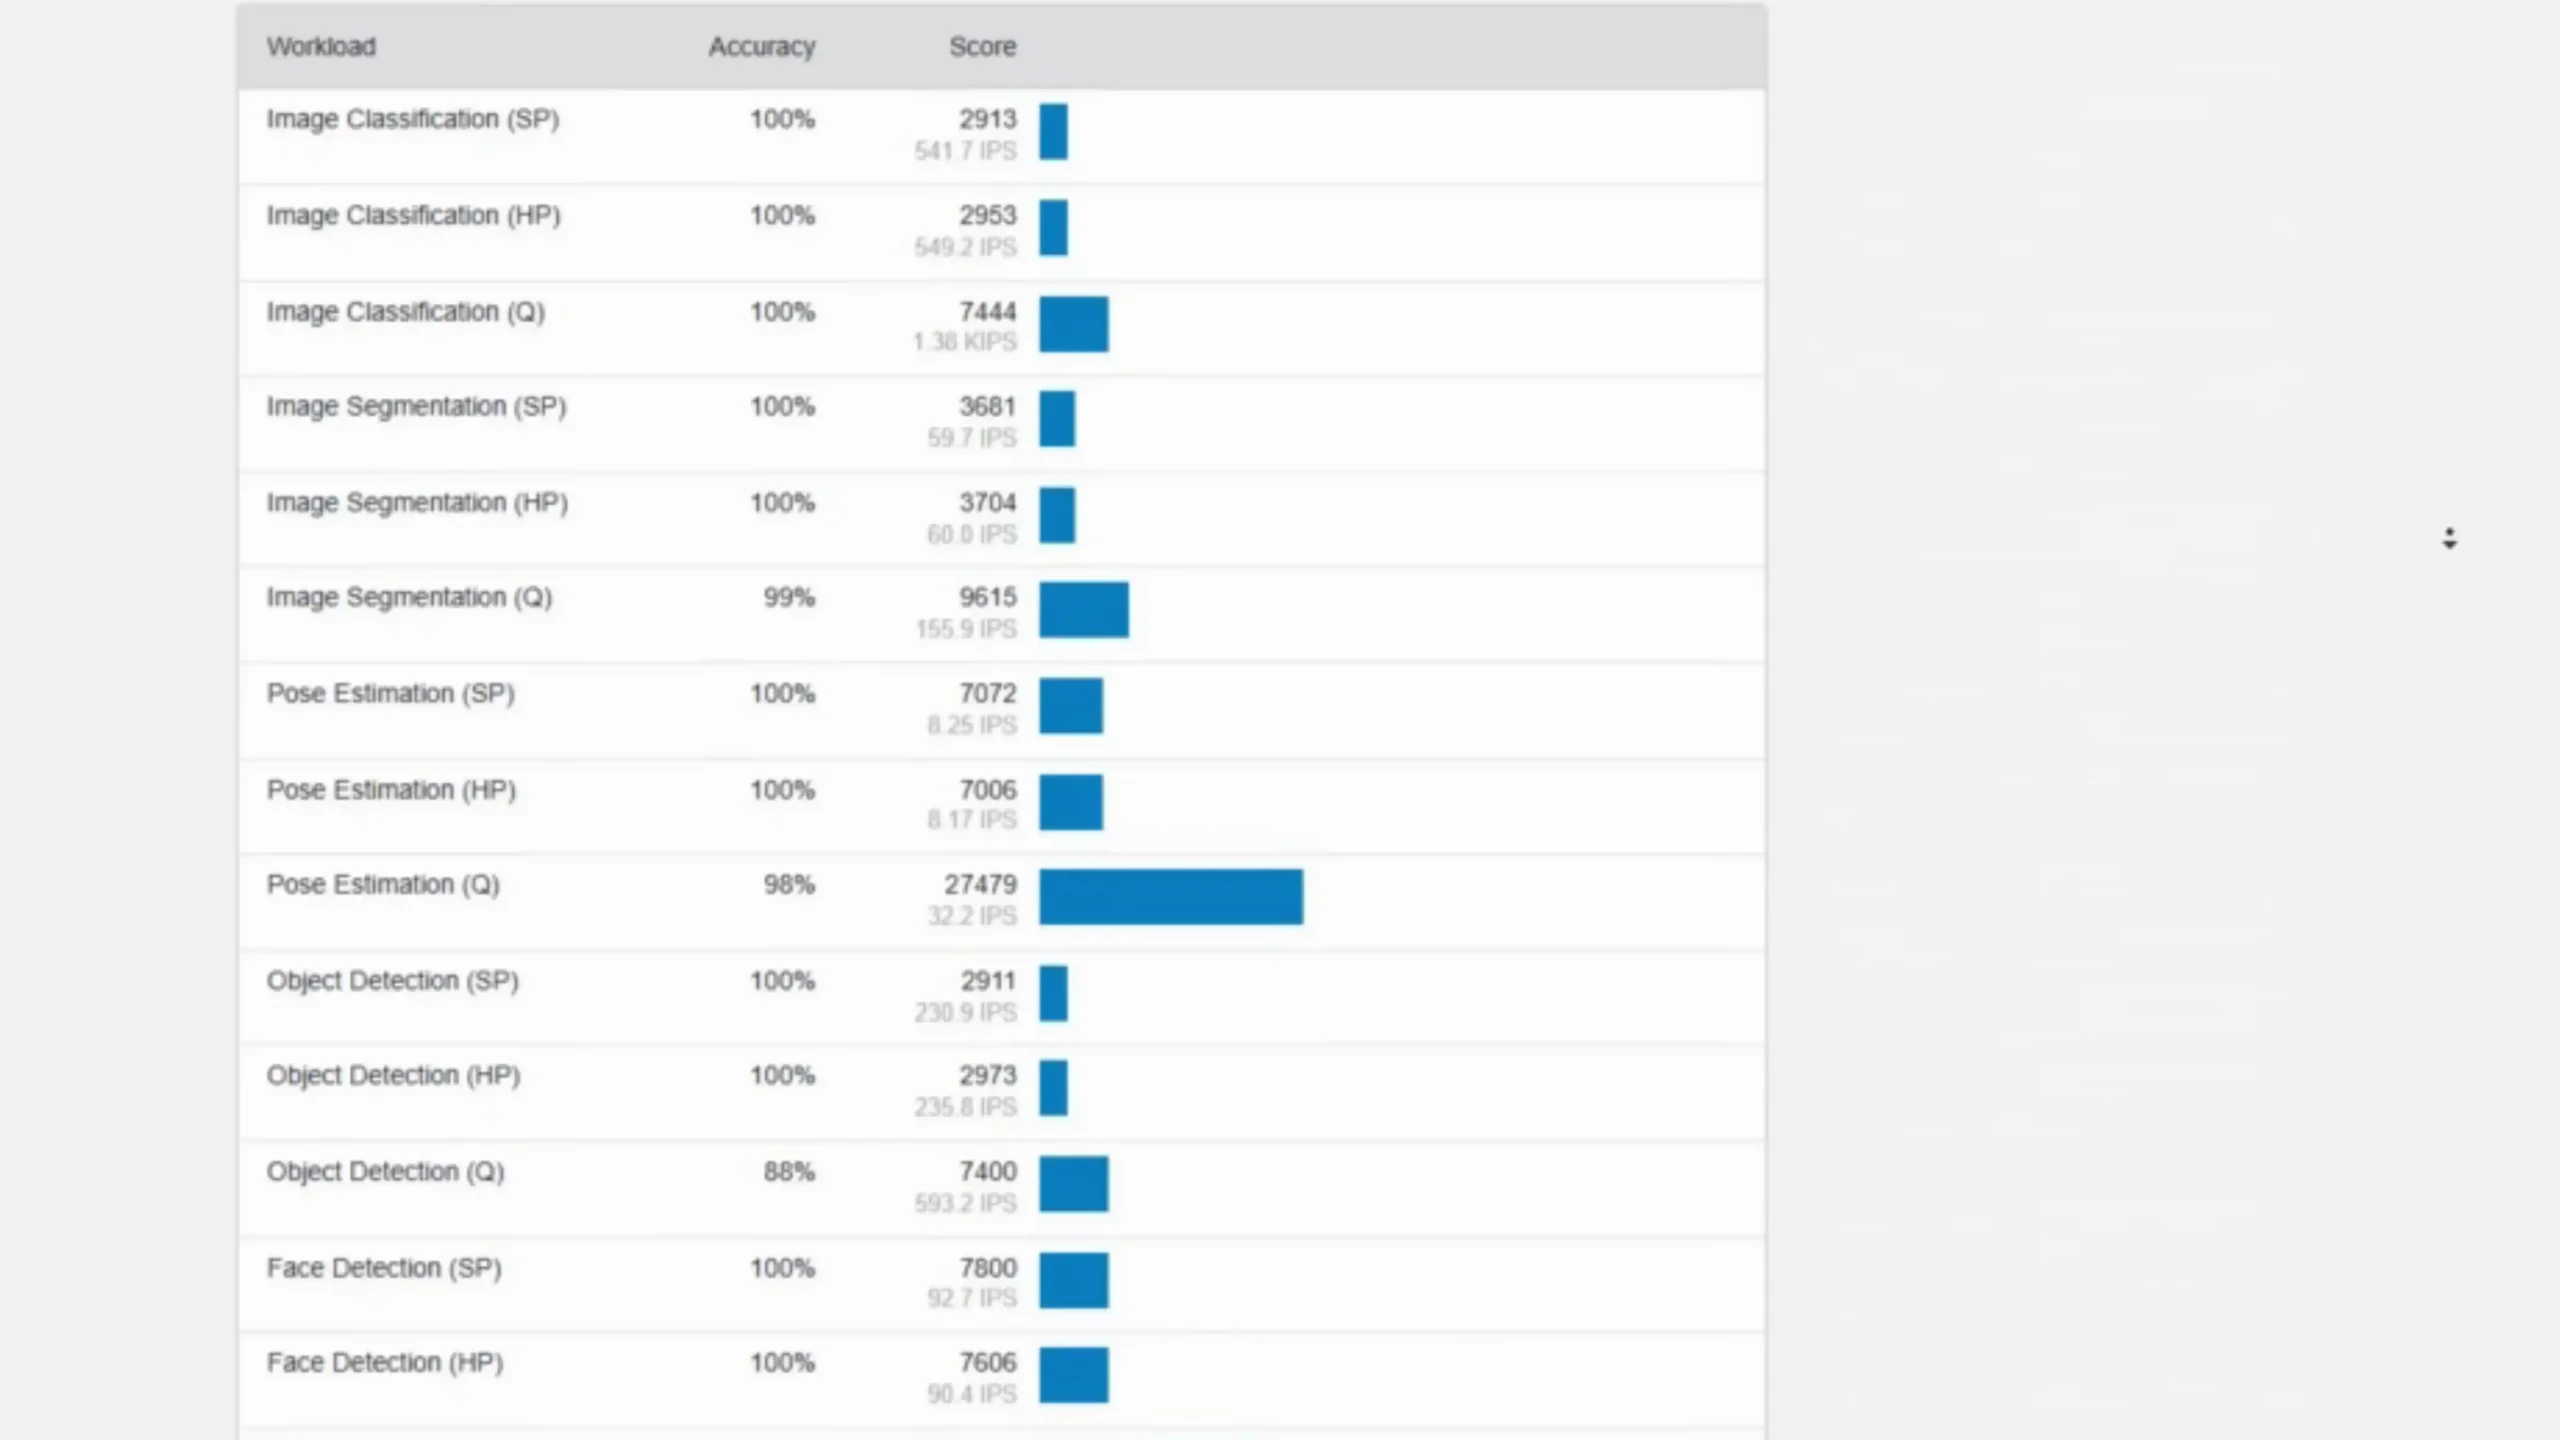
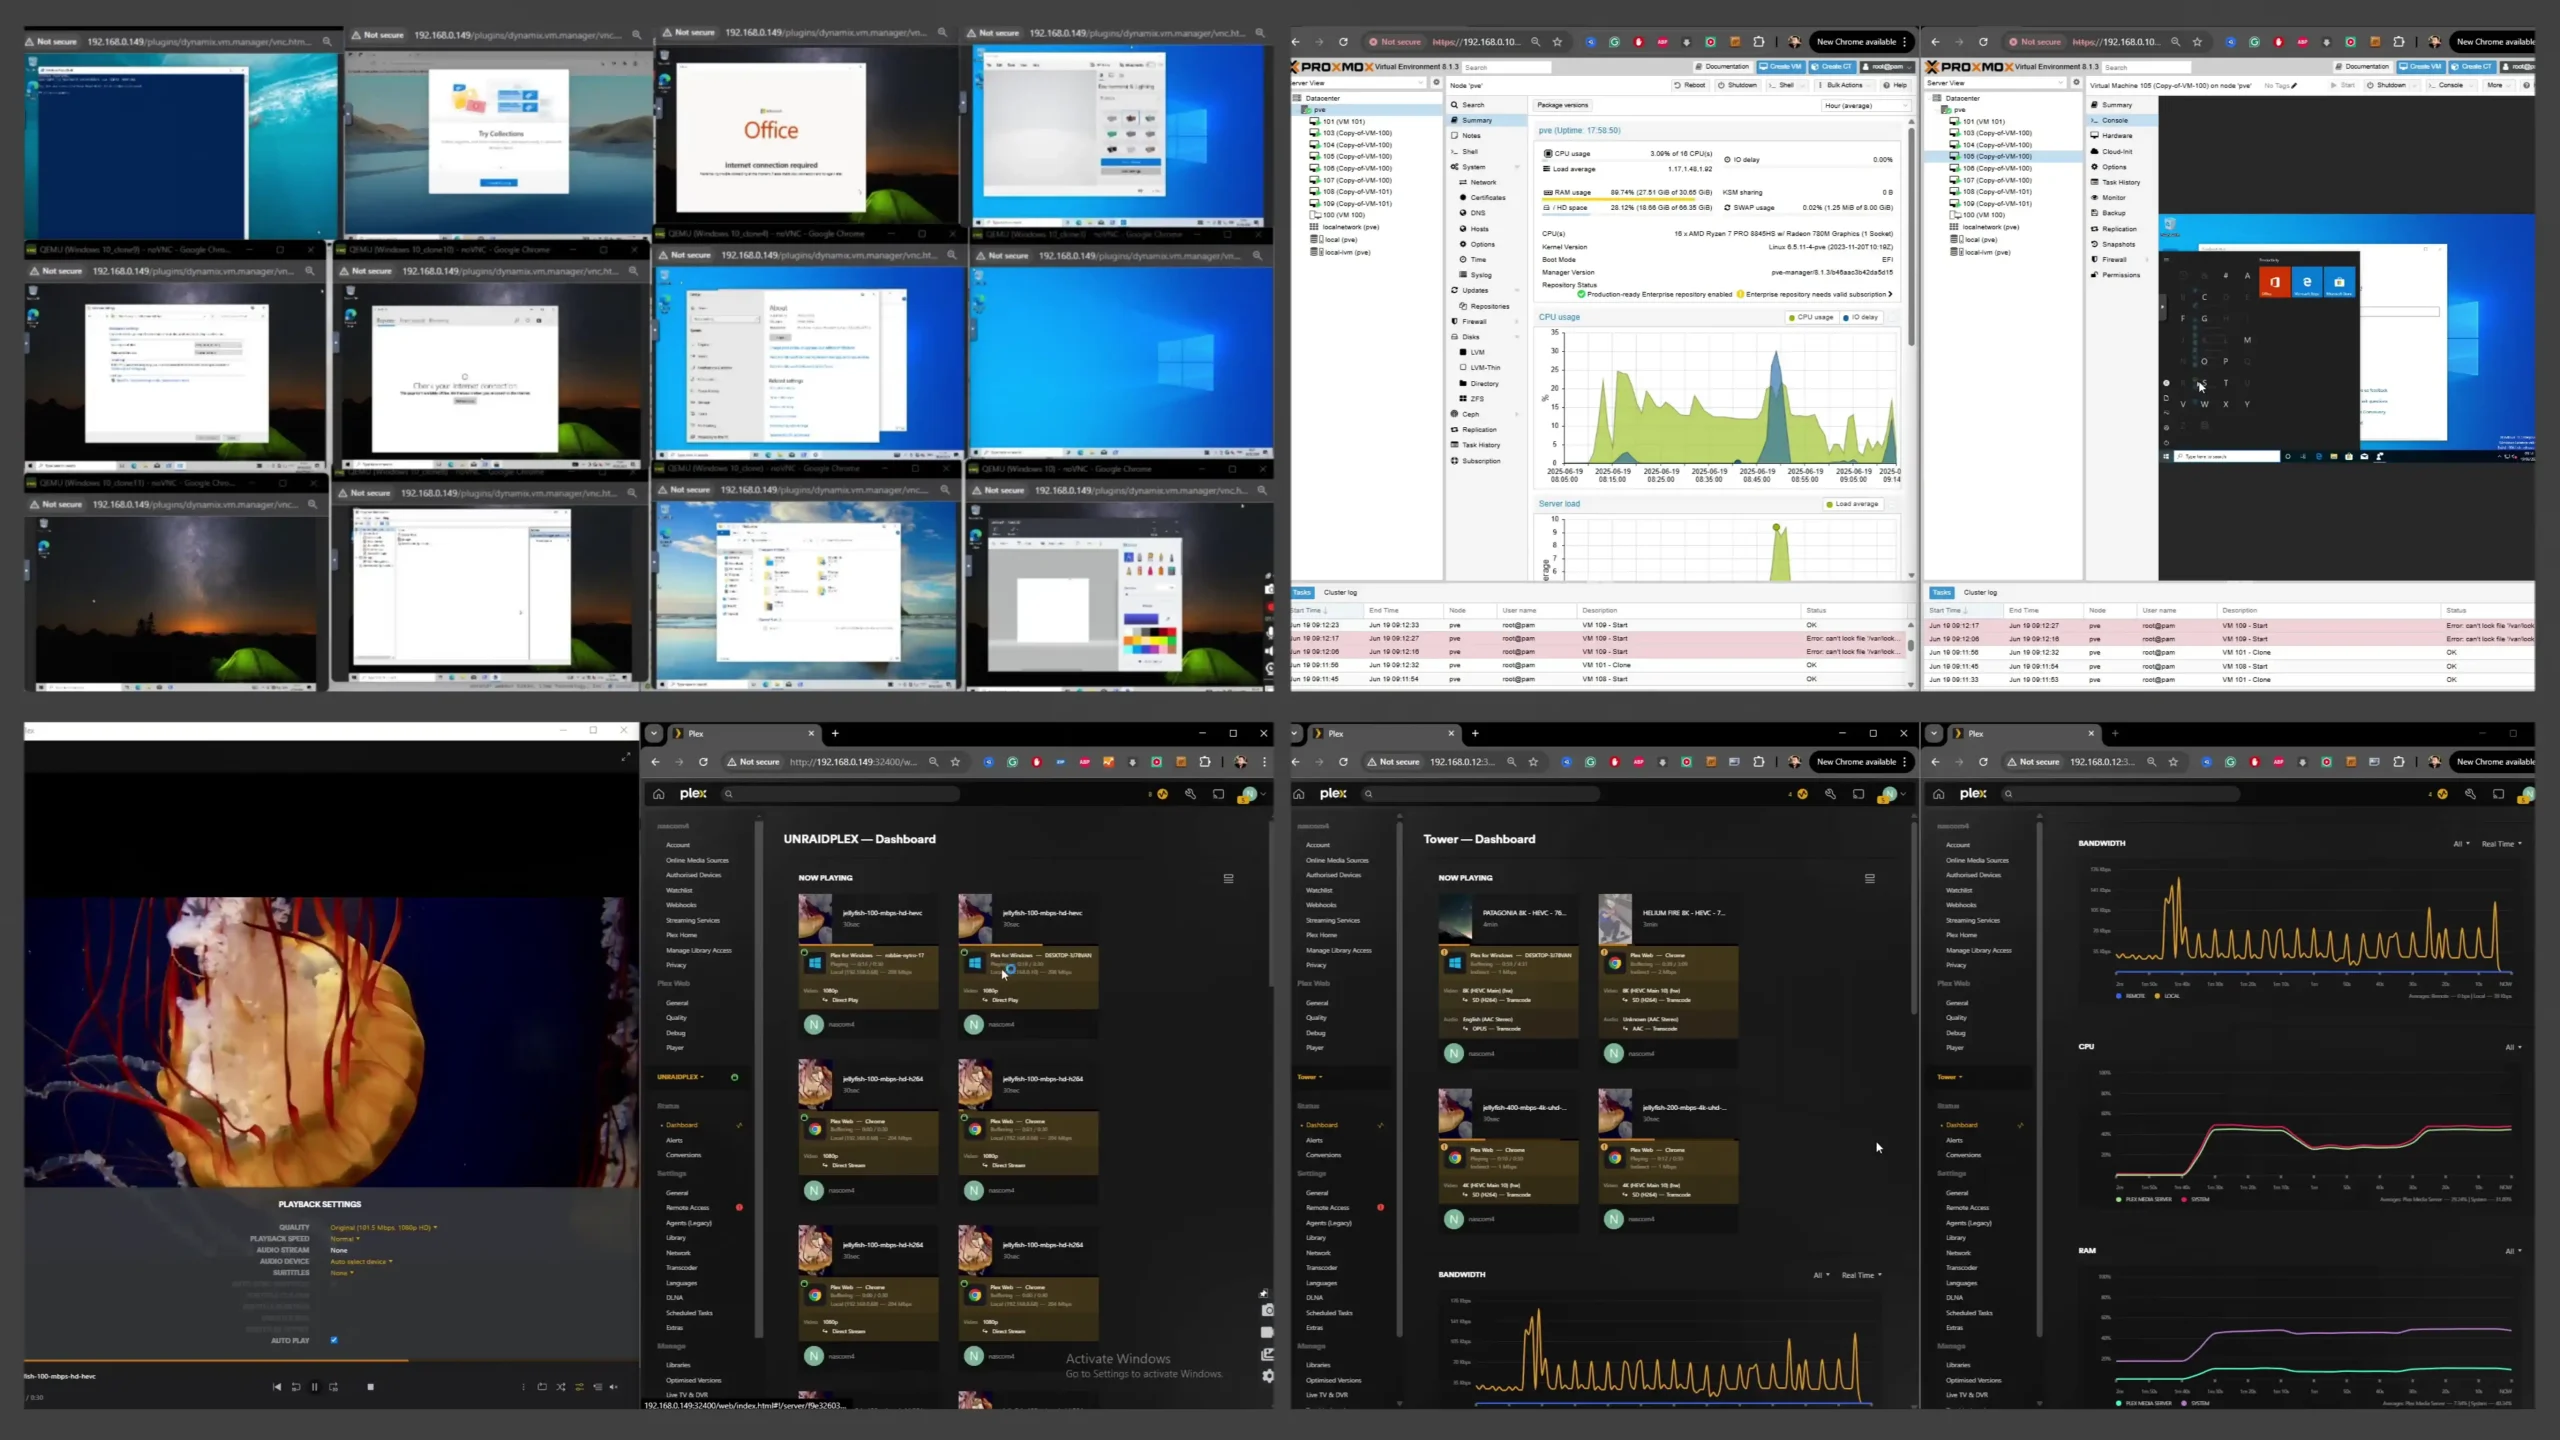
It is especially attractive in enterprise-like environments where reliability and memory capacity are priorities. The Minisforum N5 standard, by contrast, uses the older Ryzen 7 255, also with 8 cores and 16 threads, but based on the earlier Zen 3+ architecture, with a cap of 96 GB DDR5 and no ECC support. It remains competent for general NAS duties, file serving, light VM usage, and moderate multimedia tasks. Stepping up to the N5 Pro, however, brings a dramatic increase in compute and AI capabilities: its Ryzen AI 9 HX Pro 370 processor offers 12 cores, 24 threads, ECC support, and a built-in neural processing unit (NPU) delivering up to 50 TOPS for AI inferencing, while maintaining the same 96 GB DDR5 limit. This makes the N5 Pro ideal for highly concurrent workloads, virtualized environments, AI model hosting, and scenarios where raw CPU power and error resilience are critical.
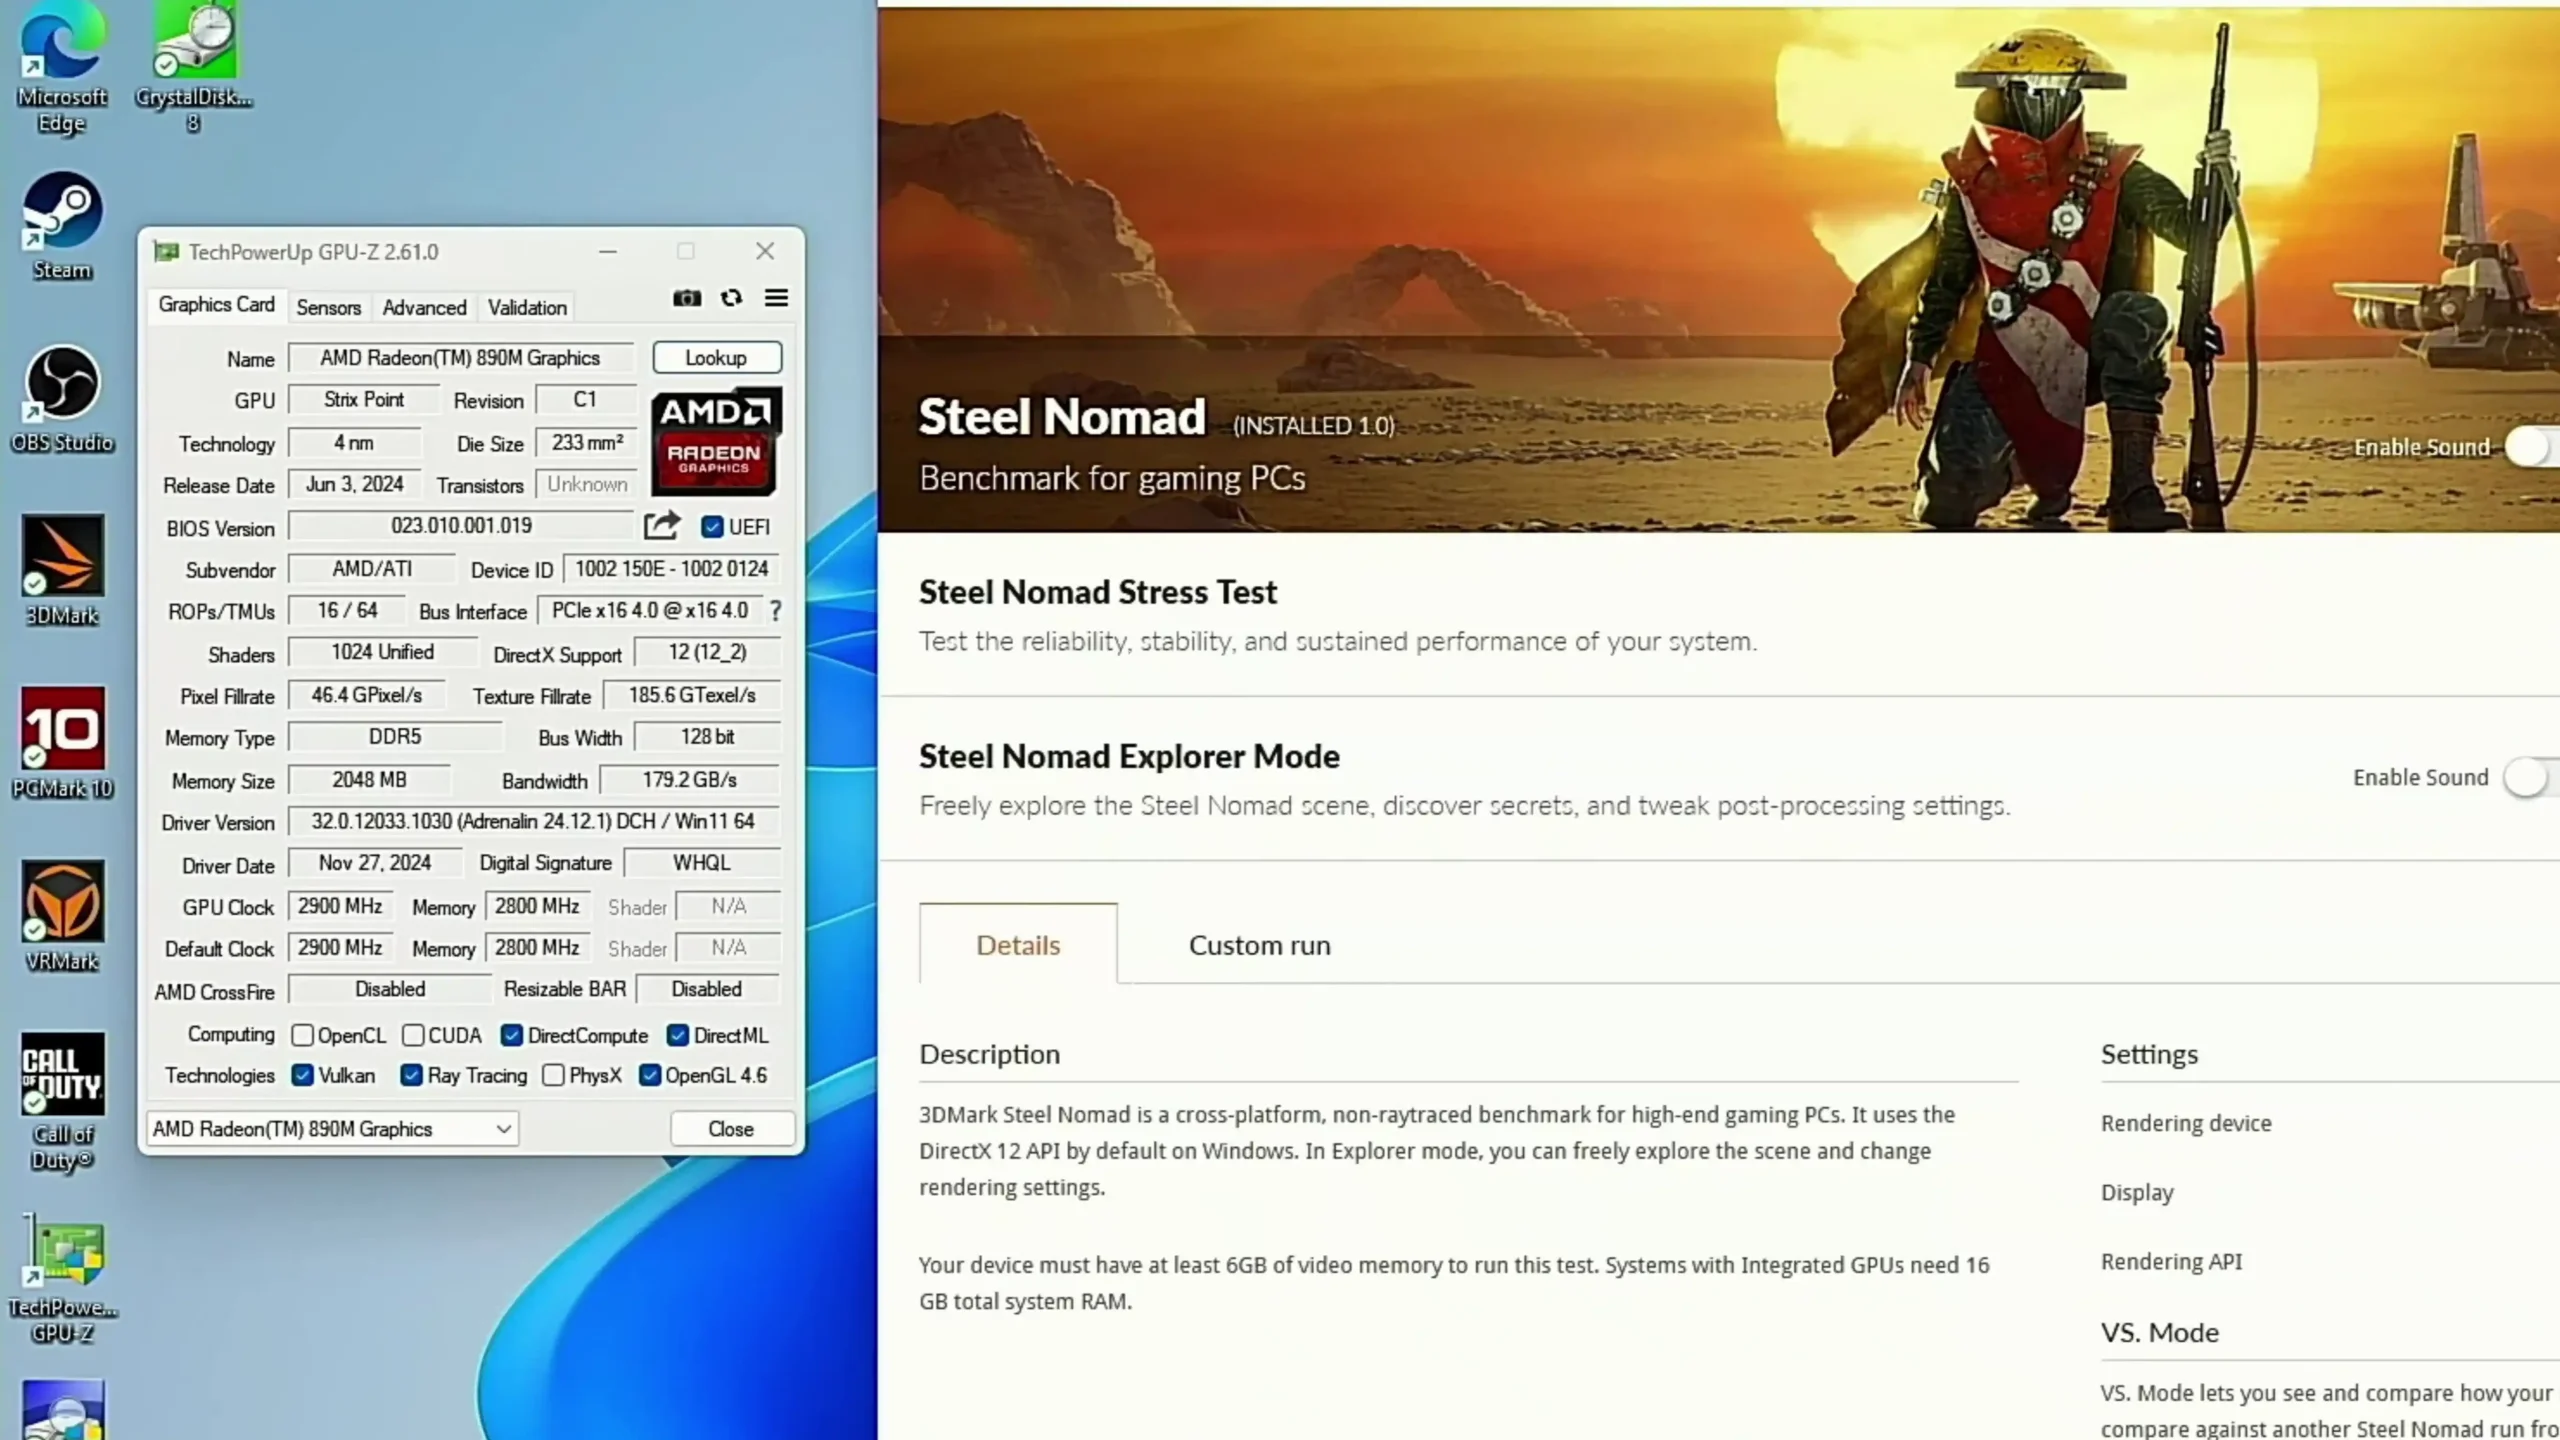
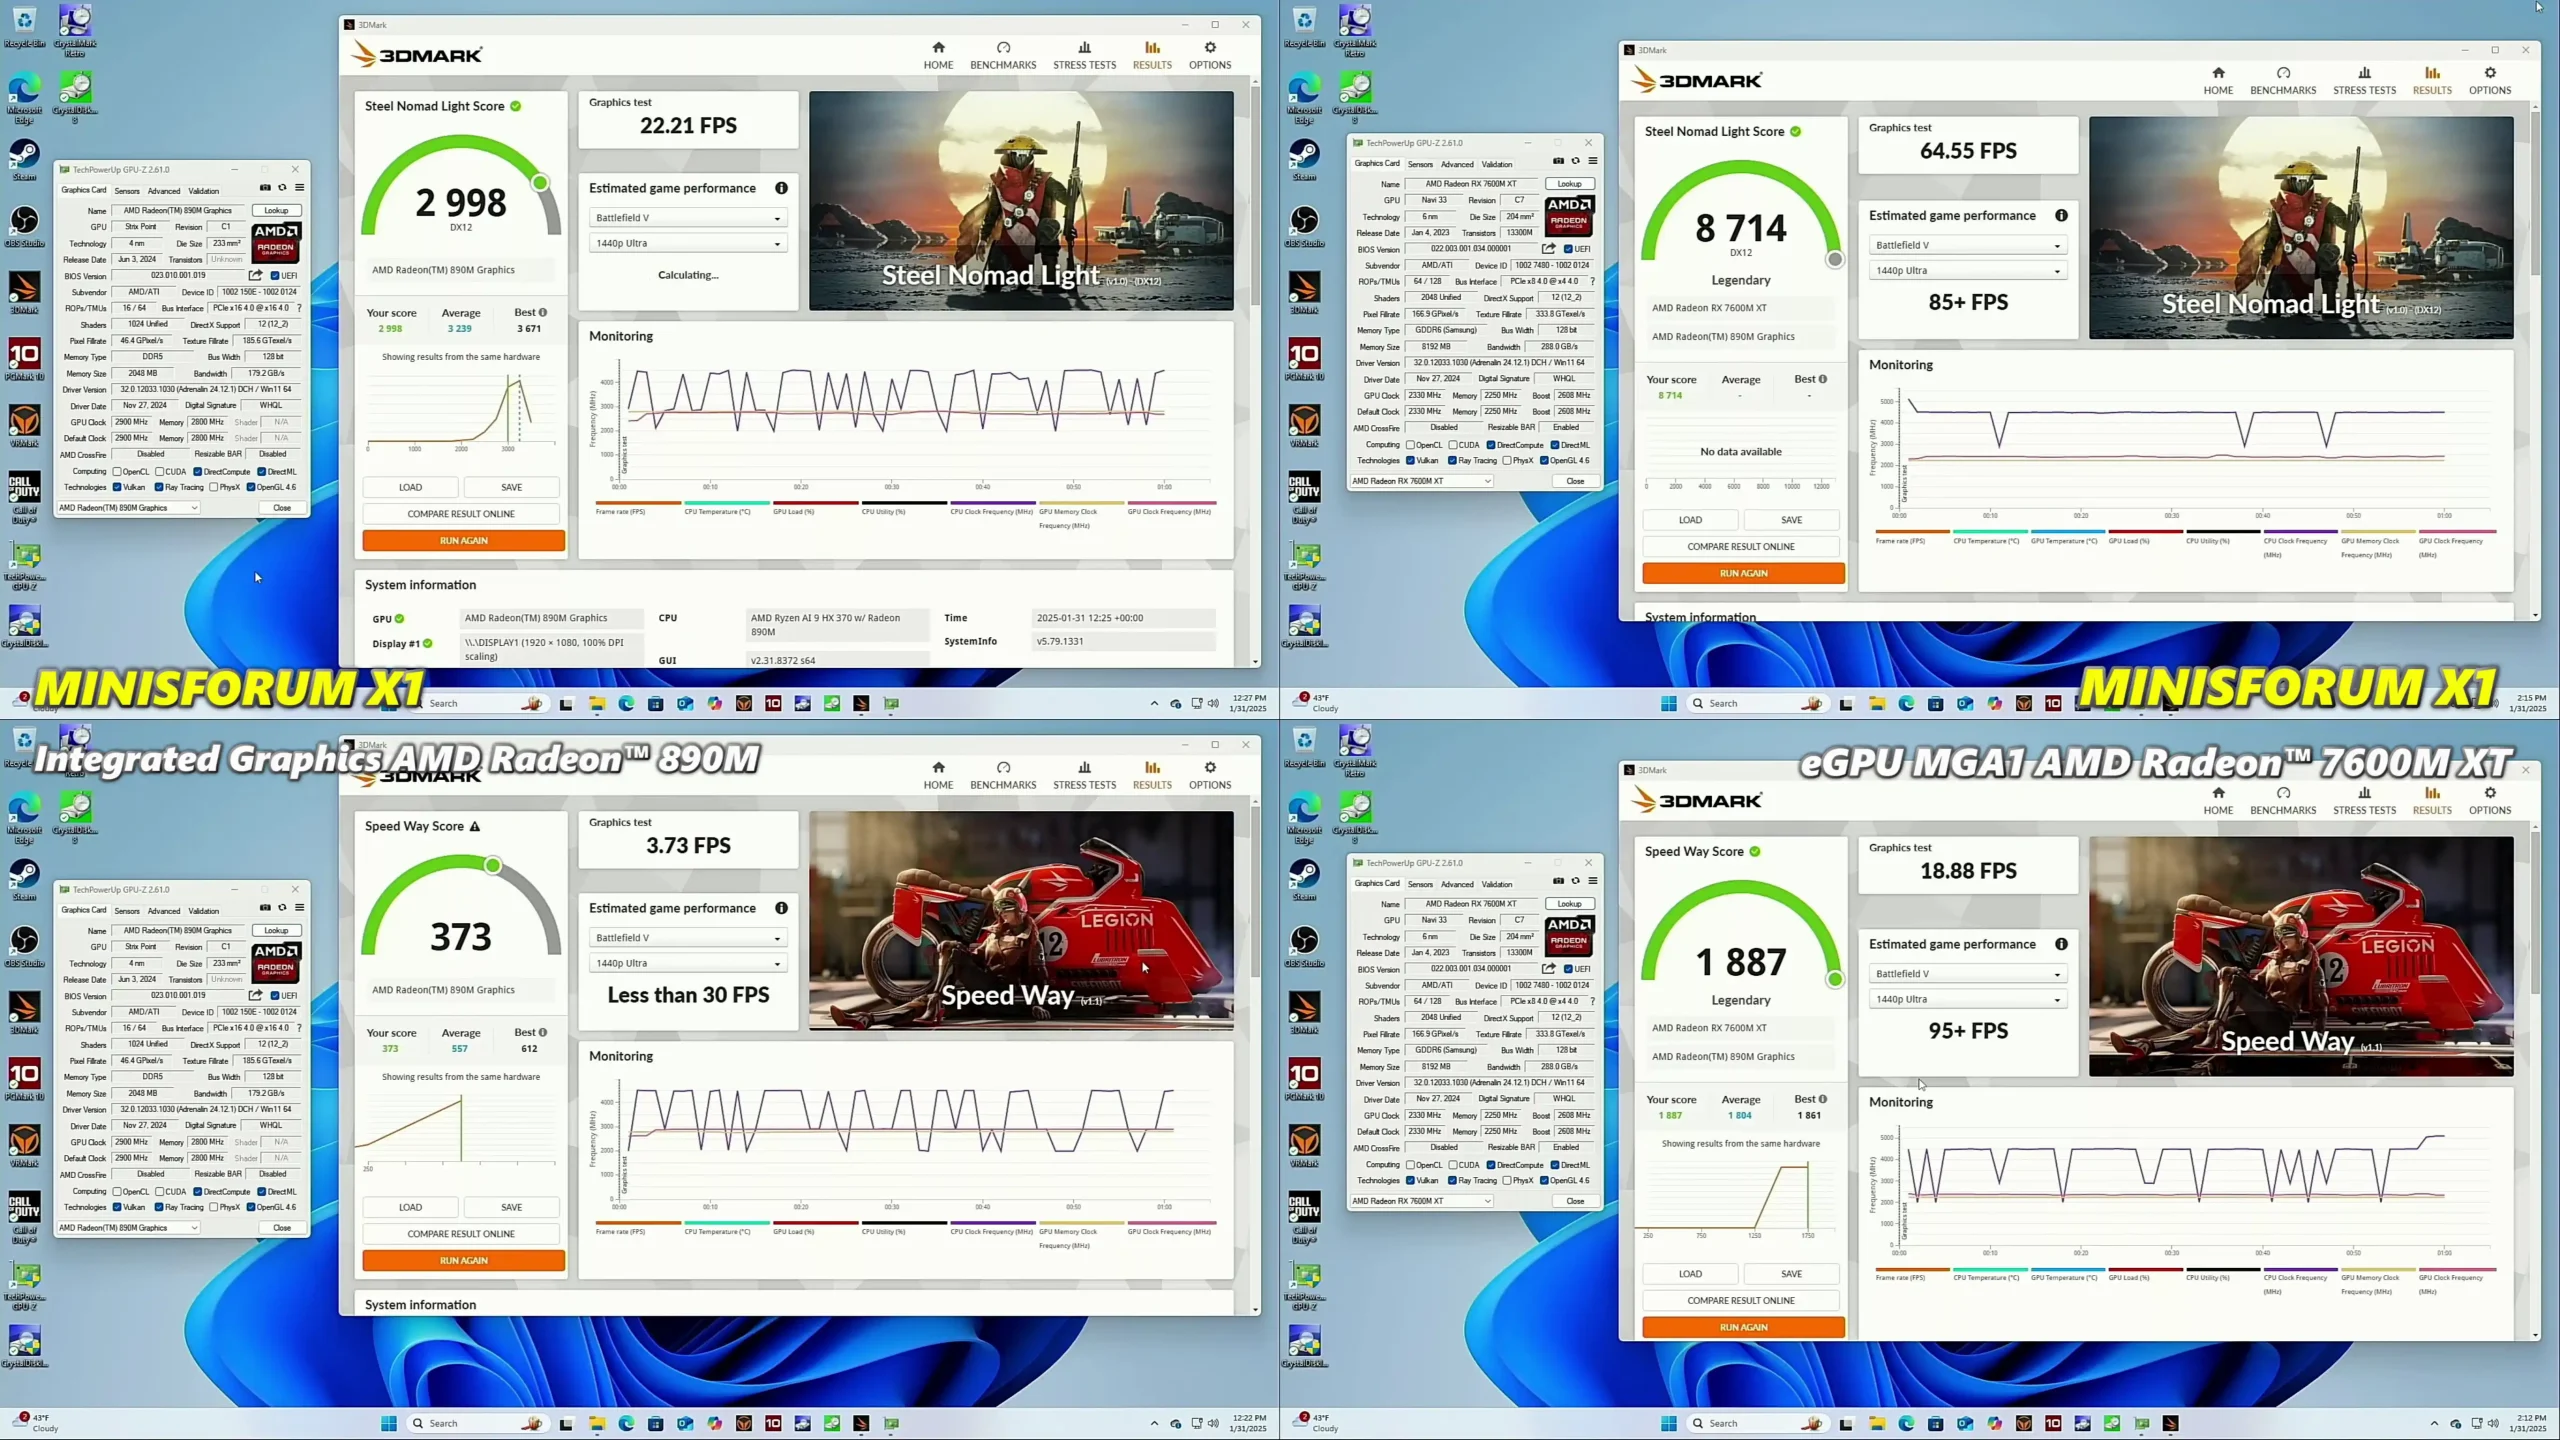
(The CPU in the Minisforum N5 Pro is also featured on the X1 Pro from Minsforum, so below you can see the GFX benchmarks of this processor vs the same CPU + an MGA1 External Oculink eGPU)
| Feature | Ryzen 7 255 | Ryzen 7 Pro 8845HS | Ryzen AI 9 HX PRO 370 |
|---|---|---|---|
| Architecture | Zen 3+ | Zen 4 | Zen 5 / Zen 5c hybrid |
| Cores / Threads | 8C / 16T | 8C / 16T | 12C / 24T |
| Base / Boost Clock | 3.3 GHz / 4.9 GHz | 3.8 GHz / 5.1 GHz | 2.0 GHz / 5.1 GHz |
| L3 Cache | 16 MB | 16 MB | 24 MB |
| GPU | Radeon 780M (12 CUs) | Radeon 780M (12 CUs) | Radeon 890M (16 CUs) |
| GPU Clock | ~2.5 GHz | Up to 2.7 GHz | Up to 2.9 GHz |
| NPU | UPTO 16 TOPS | upto 16 TOPS | Up to 50 TOPS |
| TDP Range | ~45 W | ~45 W | 28–54 W |
| PCIe Lanes | 20 PCIe Gen 4 | 20 PCIe Gen 4 | 16 PCIe Gen 4 |
| Memory Support | DDR5 (non‑ECC) | DDR5‑5600 ECC | DDR5‑5600 ECC |
Looking deeper at the individual CPUs, their architectures reflect different generational and market goals. The Ryzen 7 255 in the Minisforum N5 is a Zen 3+ part built on a 6 nm process, with a base clock of 3.3 GHz and turbo up to 4.9 GHz. It provides 16 MB of L3 cache and includes integrated Radeon 780M graphics with 12 RDNA 3 compute units. At ~45 W TDP, it is a capable midrange processor for general NAS use but lacks advanced enterprise features like ECC and AI. The Ryzen 7 Pro 8845HS in the WTR Max upgrades to Zen 4 at 4 nm, bumps the base clock to 3.8 GHz while maintaining the same 5.1 GHz boost, and delivers better power efficiency.
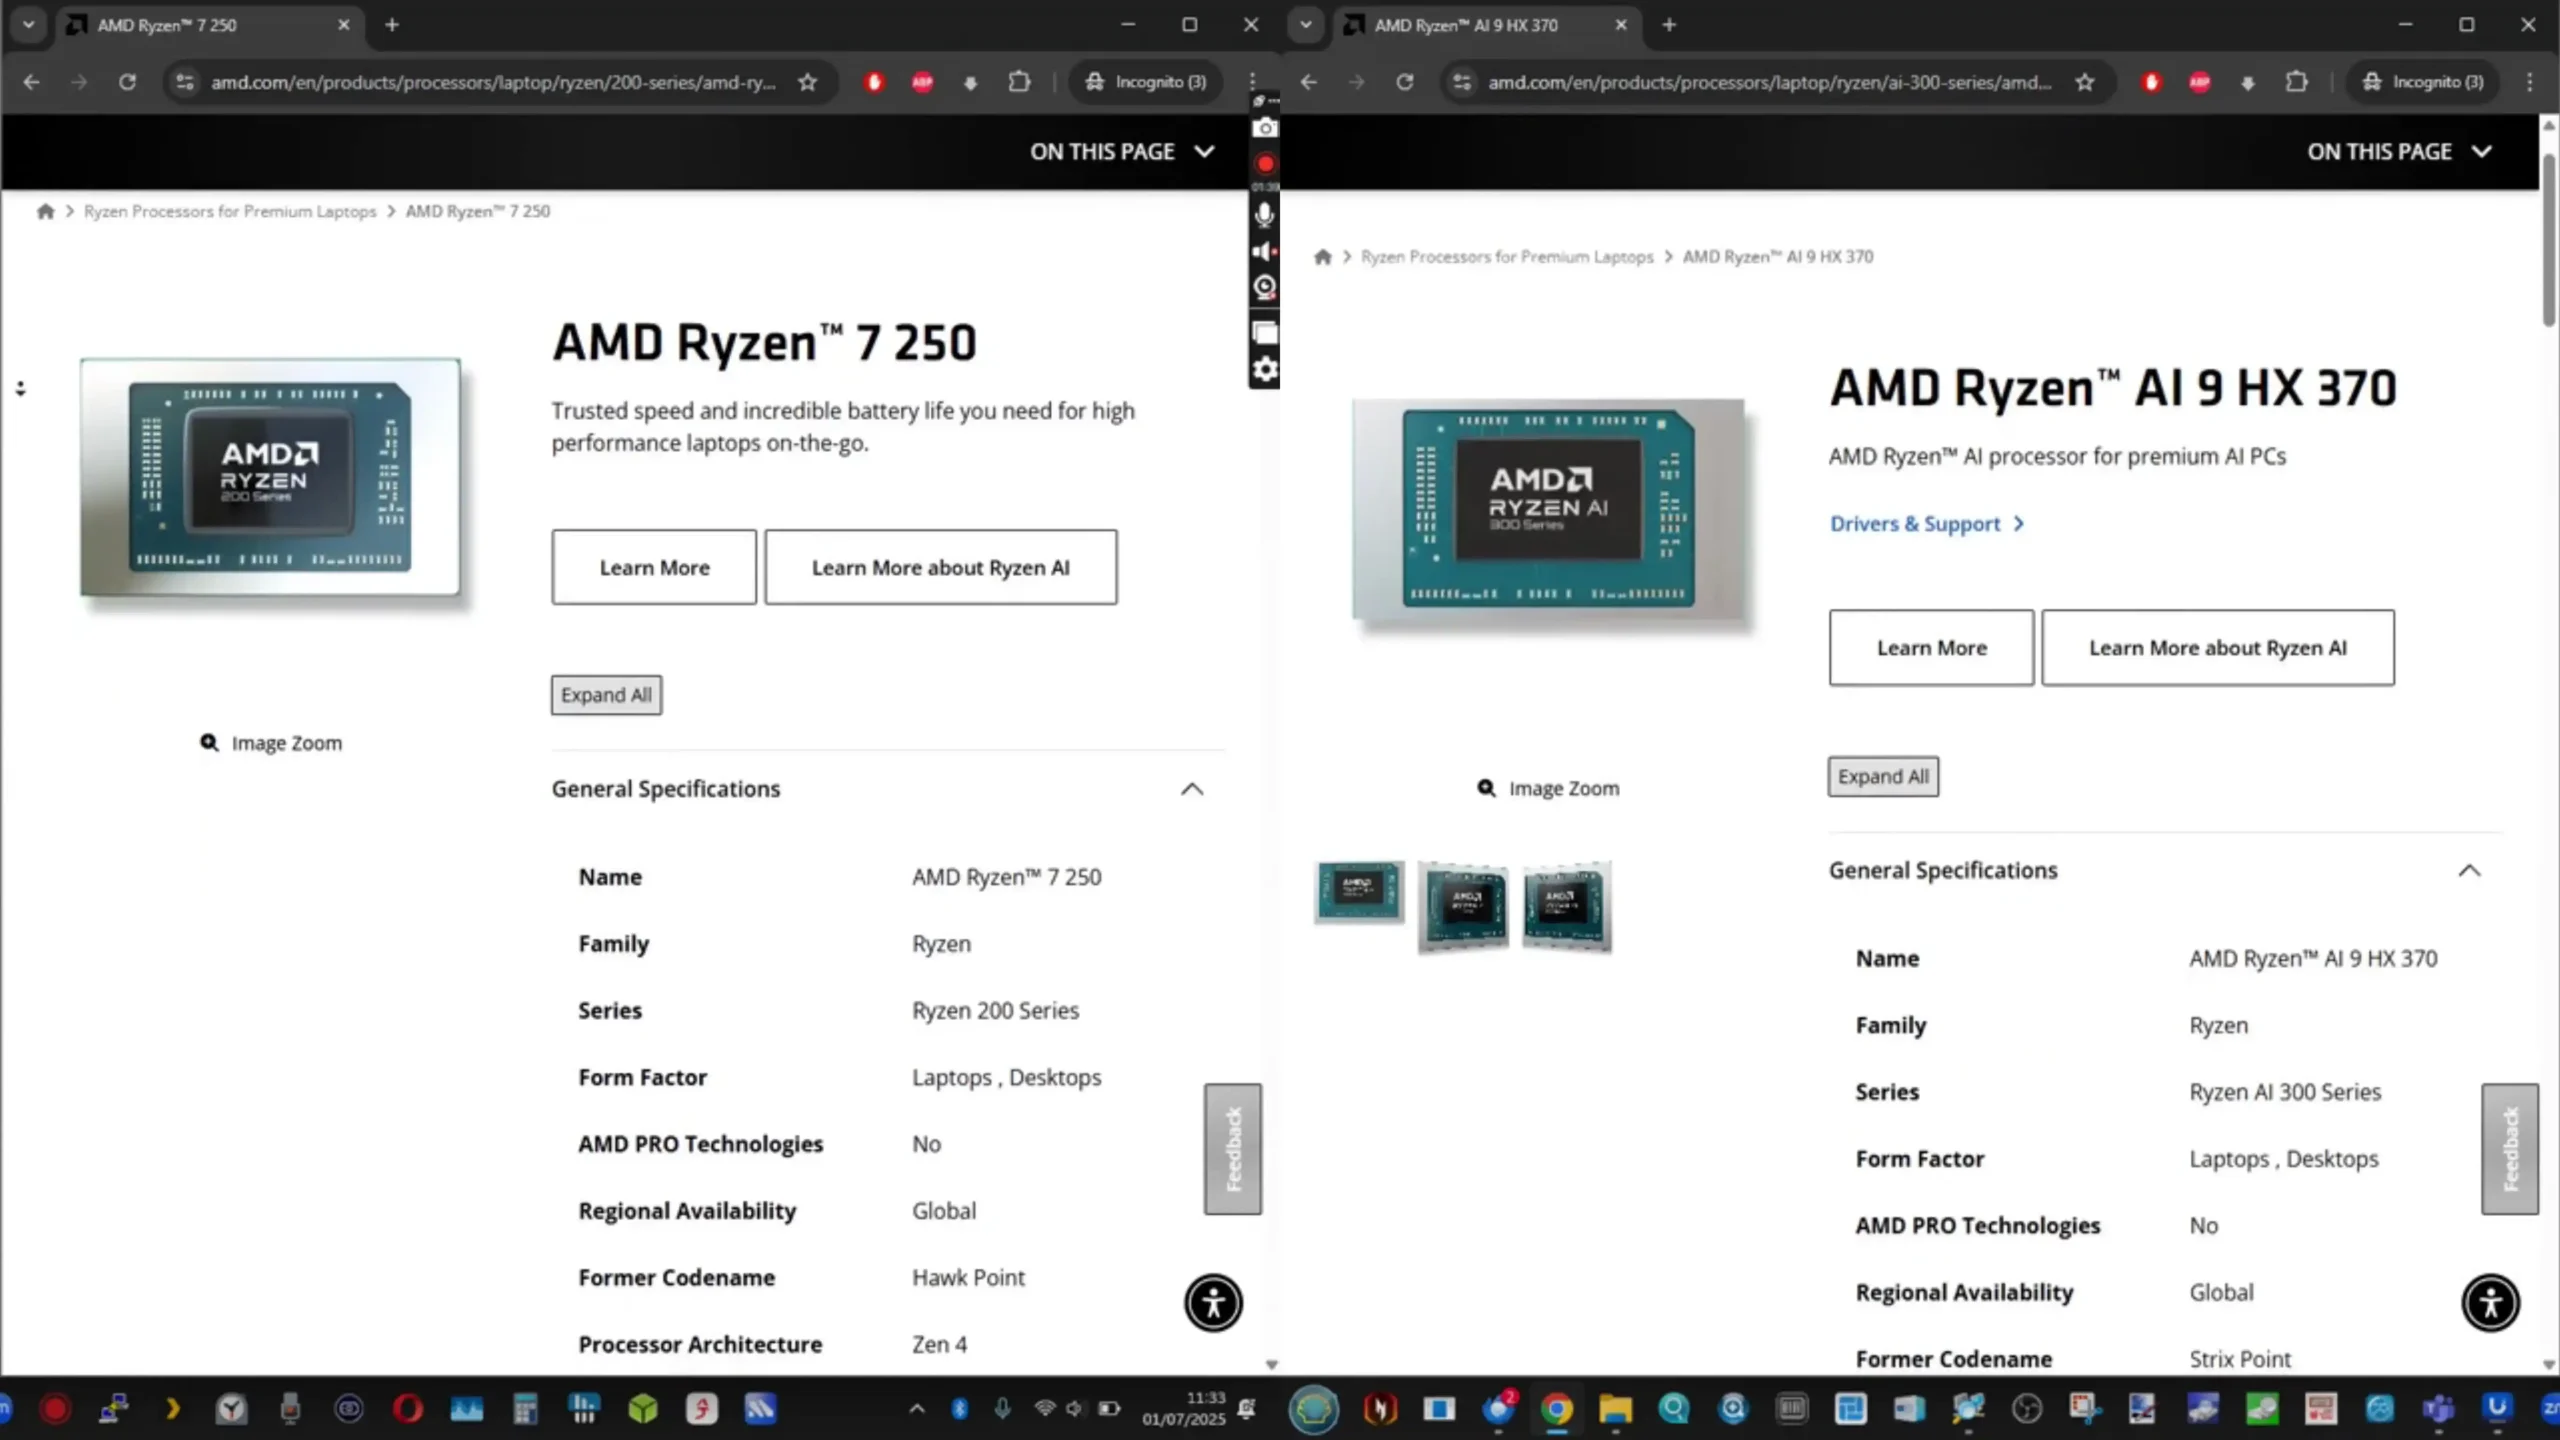
It retains the Radeon 780M GPU but with improved clocks and adds ECC memory support plus 20 PCIe Gen 4 lanes for broader connectivity options. At the top sits the Ryzen AI 9 HX Pro 370 in the N5 Pro, which leverages AMD’s Zen 5/5c hybrid architecture. Despite a lower base clock of 2.0 GHz (favoring efficiency) with the same 5.1 GHz turbo, it increases core count to 12 and thread count to 24, doubles L3 cache to 24 MB, and upgrades the GPU to Radeon 890M with 16 RDNA 3 compute units clocked up to 2.9 GHz. The Pro has a higher rated integrated NPU, capable of 50 TOPS, positioning it as an ideal candidate for on-premises AI inferencing and acceleration workloads, several times higher than the potential 16 TOPS rating on the CPUs of the N5 Standard and WTR ,Max. Its TDP range of 28–54 W also reflects its hybrid design’s balance of power and efficiency, although it offers slightly fewer PCIe lanes (16) than the WTR Max’s 20.
| Aspect | Aoostar WTR Max | Minisforum N5 (Standard) | Minisforum N5 Pro | Best & Why/Note |
|---|---|---|---|---|
| CPU Model | Ryzen 7 Pro 8845HS | Ryzen 7 255 | Ryzen AI 9 HX Pro 370 | N5 Pro — more cores, AI acceleration |
| Cores/Threads | 8C/16T | 8C/16T | 12C/24T | N5 Pro — highest core count |
| ECC Memory Support | ✓ | ✗ | ✓ | Tie between Aoostar & N5 Pro |
| Max RAM | 128GB DDR5 | 96GB DDR5 | 96GB DDR5 | Aoostar WTR Max — higher maximum RAM ceiling |
| AI NPU | ✓ (16 TOPS) | ✓ (16 TOPS) | ✓ (50 TOPS) | N5 Pro — higher TOPS rating |
In terms of choosing the best fit, the Minisforum N5 Pro stands out as the premium solution, delivering unmatched compute performance, higher concurrency, and dedicated AI hardware. Users deploying AI workloads, large-scale VM clusters, or needing the absolute highest processing headroom will find its premium justified. The Aoostar WTR Max, while trailing the N5 Pro in cores, threads, and AI acceleration, offers a more balanced middle-ground option: solid Zen 4 performance, ECC support, and greater maximum memory (128 GB) make it ideal for reliability-conscious users and memory-hungry environments at a lower cost than the N5 Pro. The standard N5 occupies the entry-level tier, with sufficient power for typical NAS and light VM duties but no ECC and limited future-proofing compared to its peers. In short, the N5 Pro dominates this category for high-end, AI-driven use cases, the Aoostar WTR Max excels for dependable performance and larger memory footprints at midrange pricing, and the standard N5 remains the best value for modest, general-purpose NAS applications.
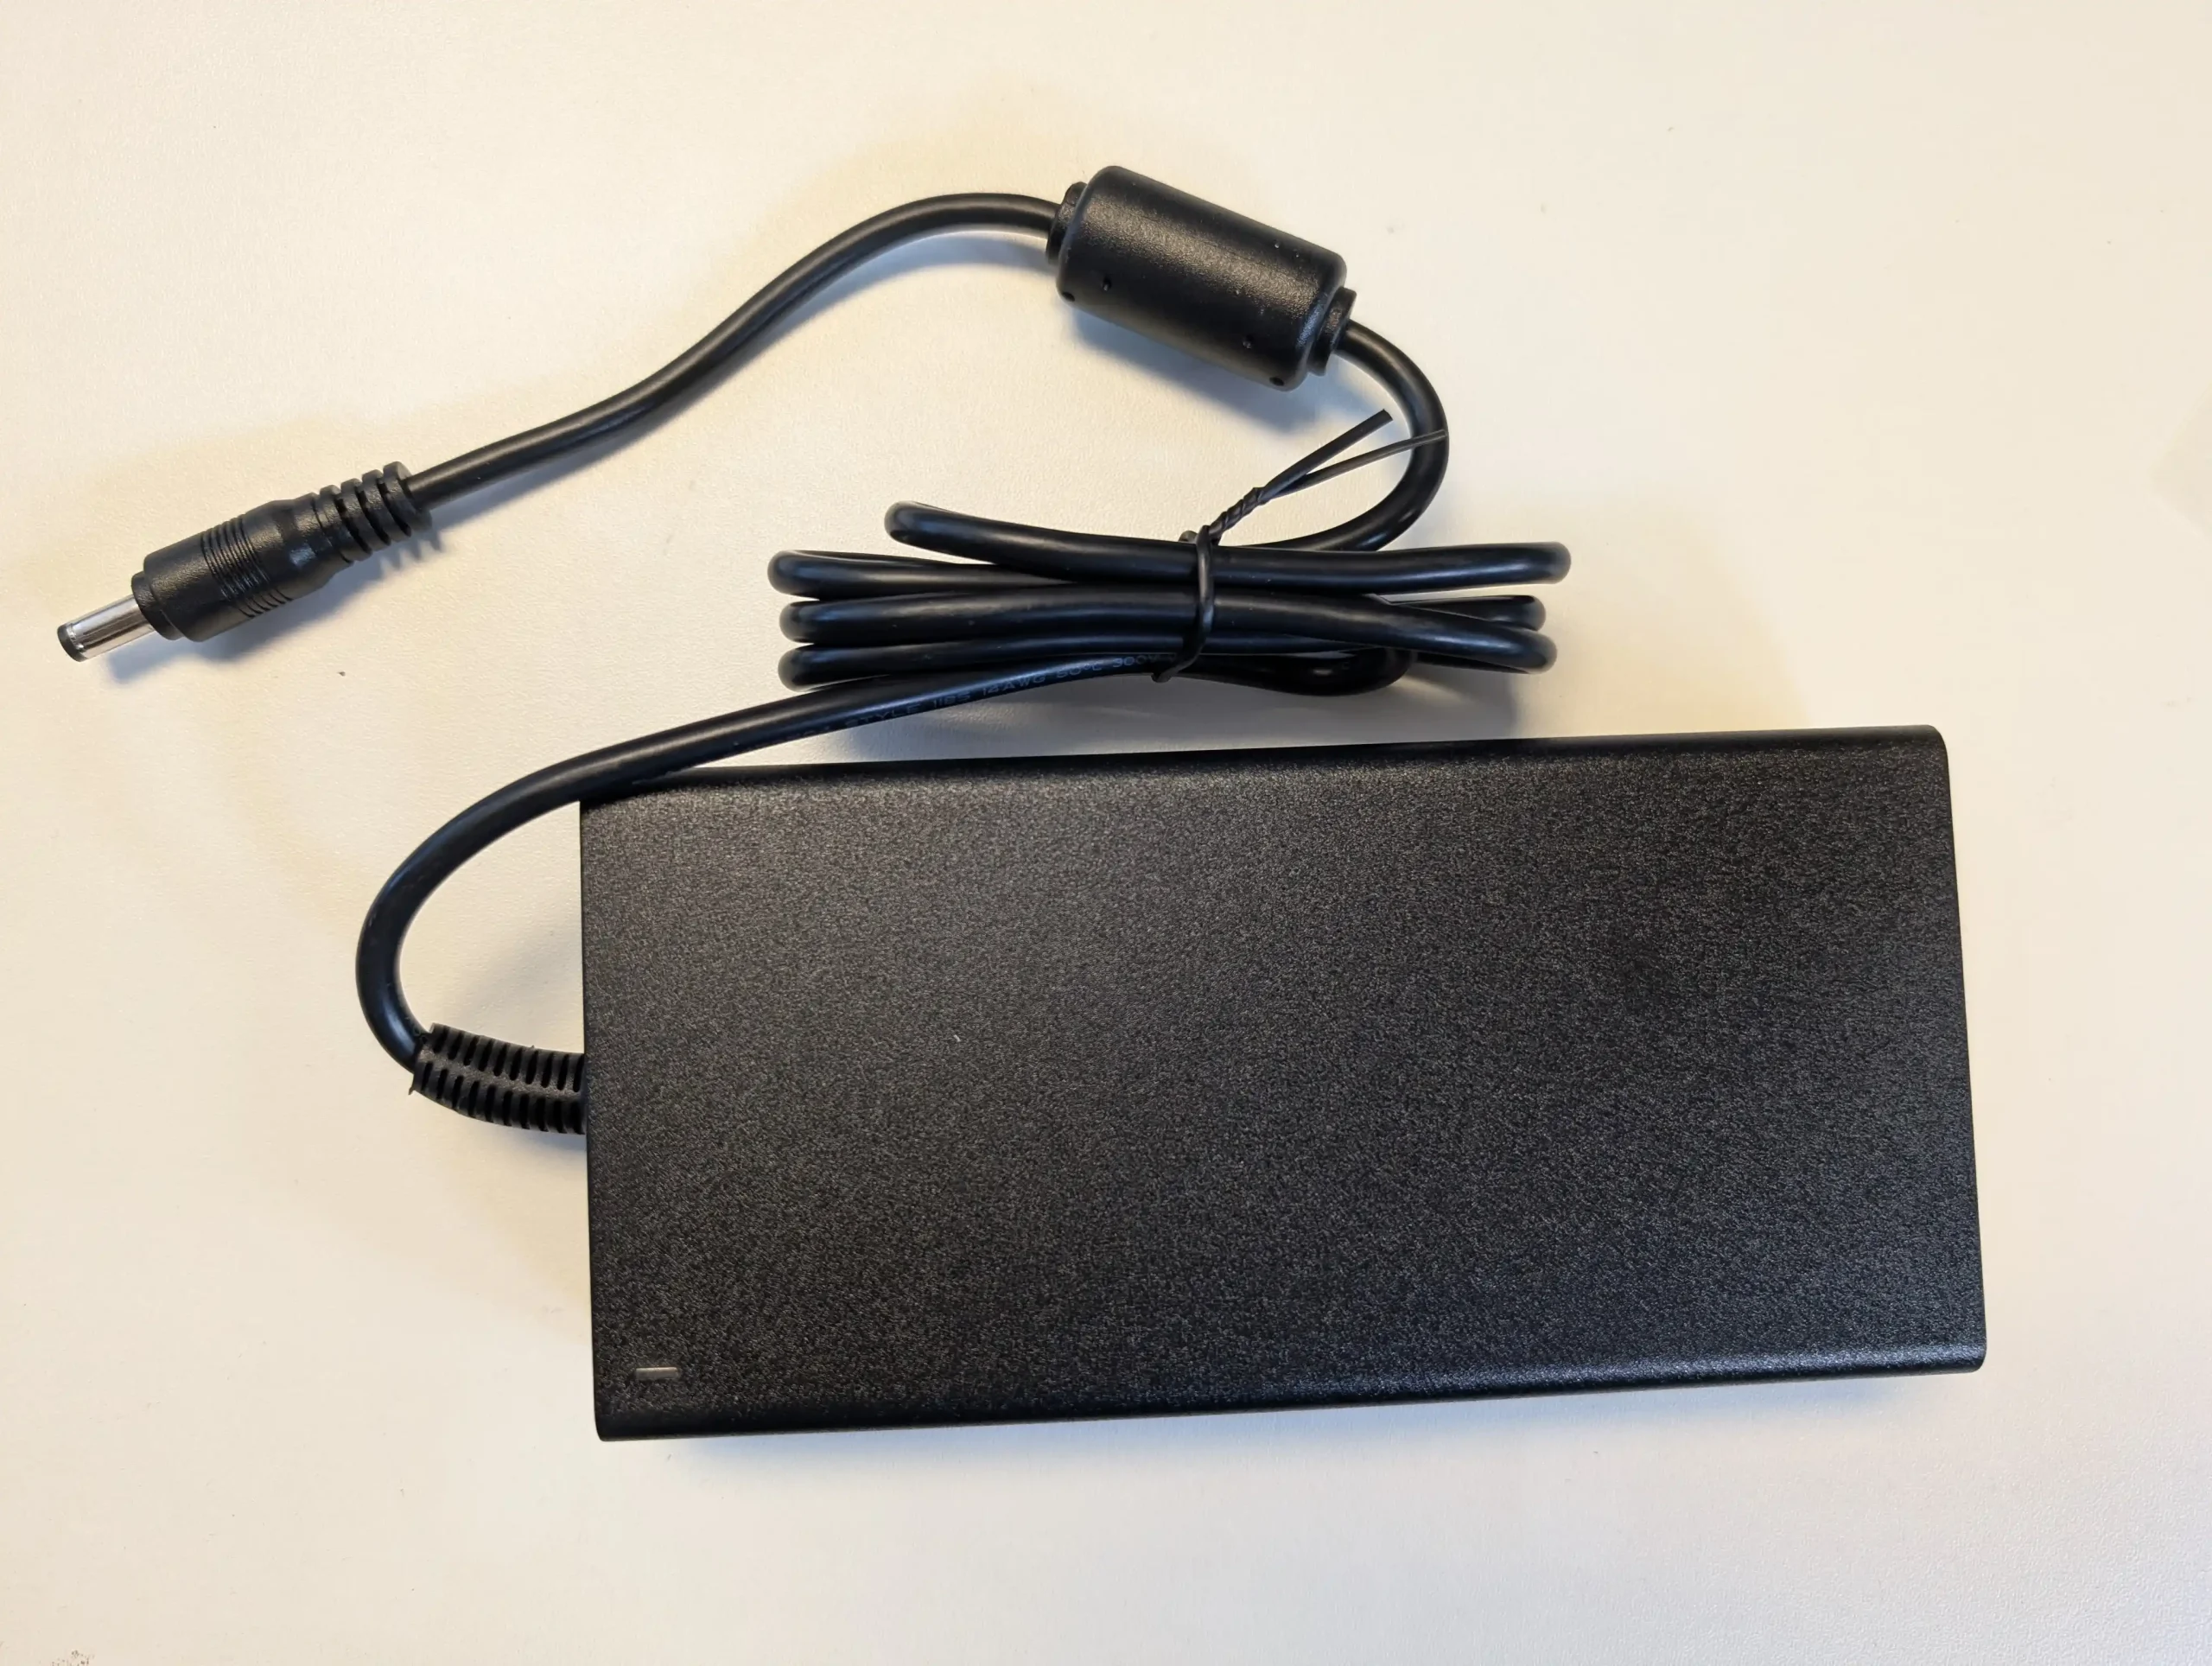
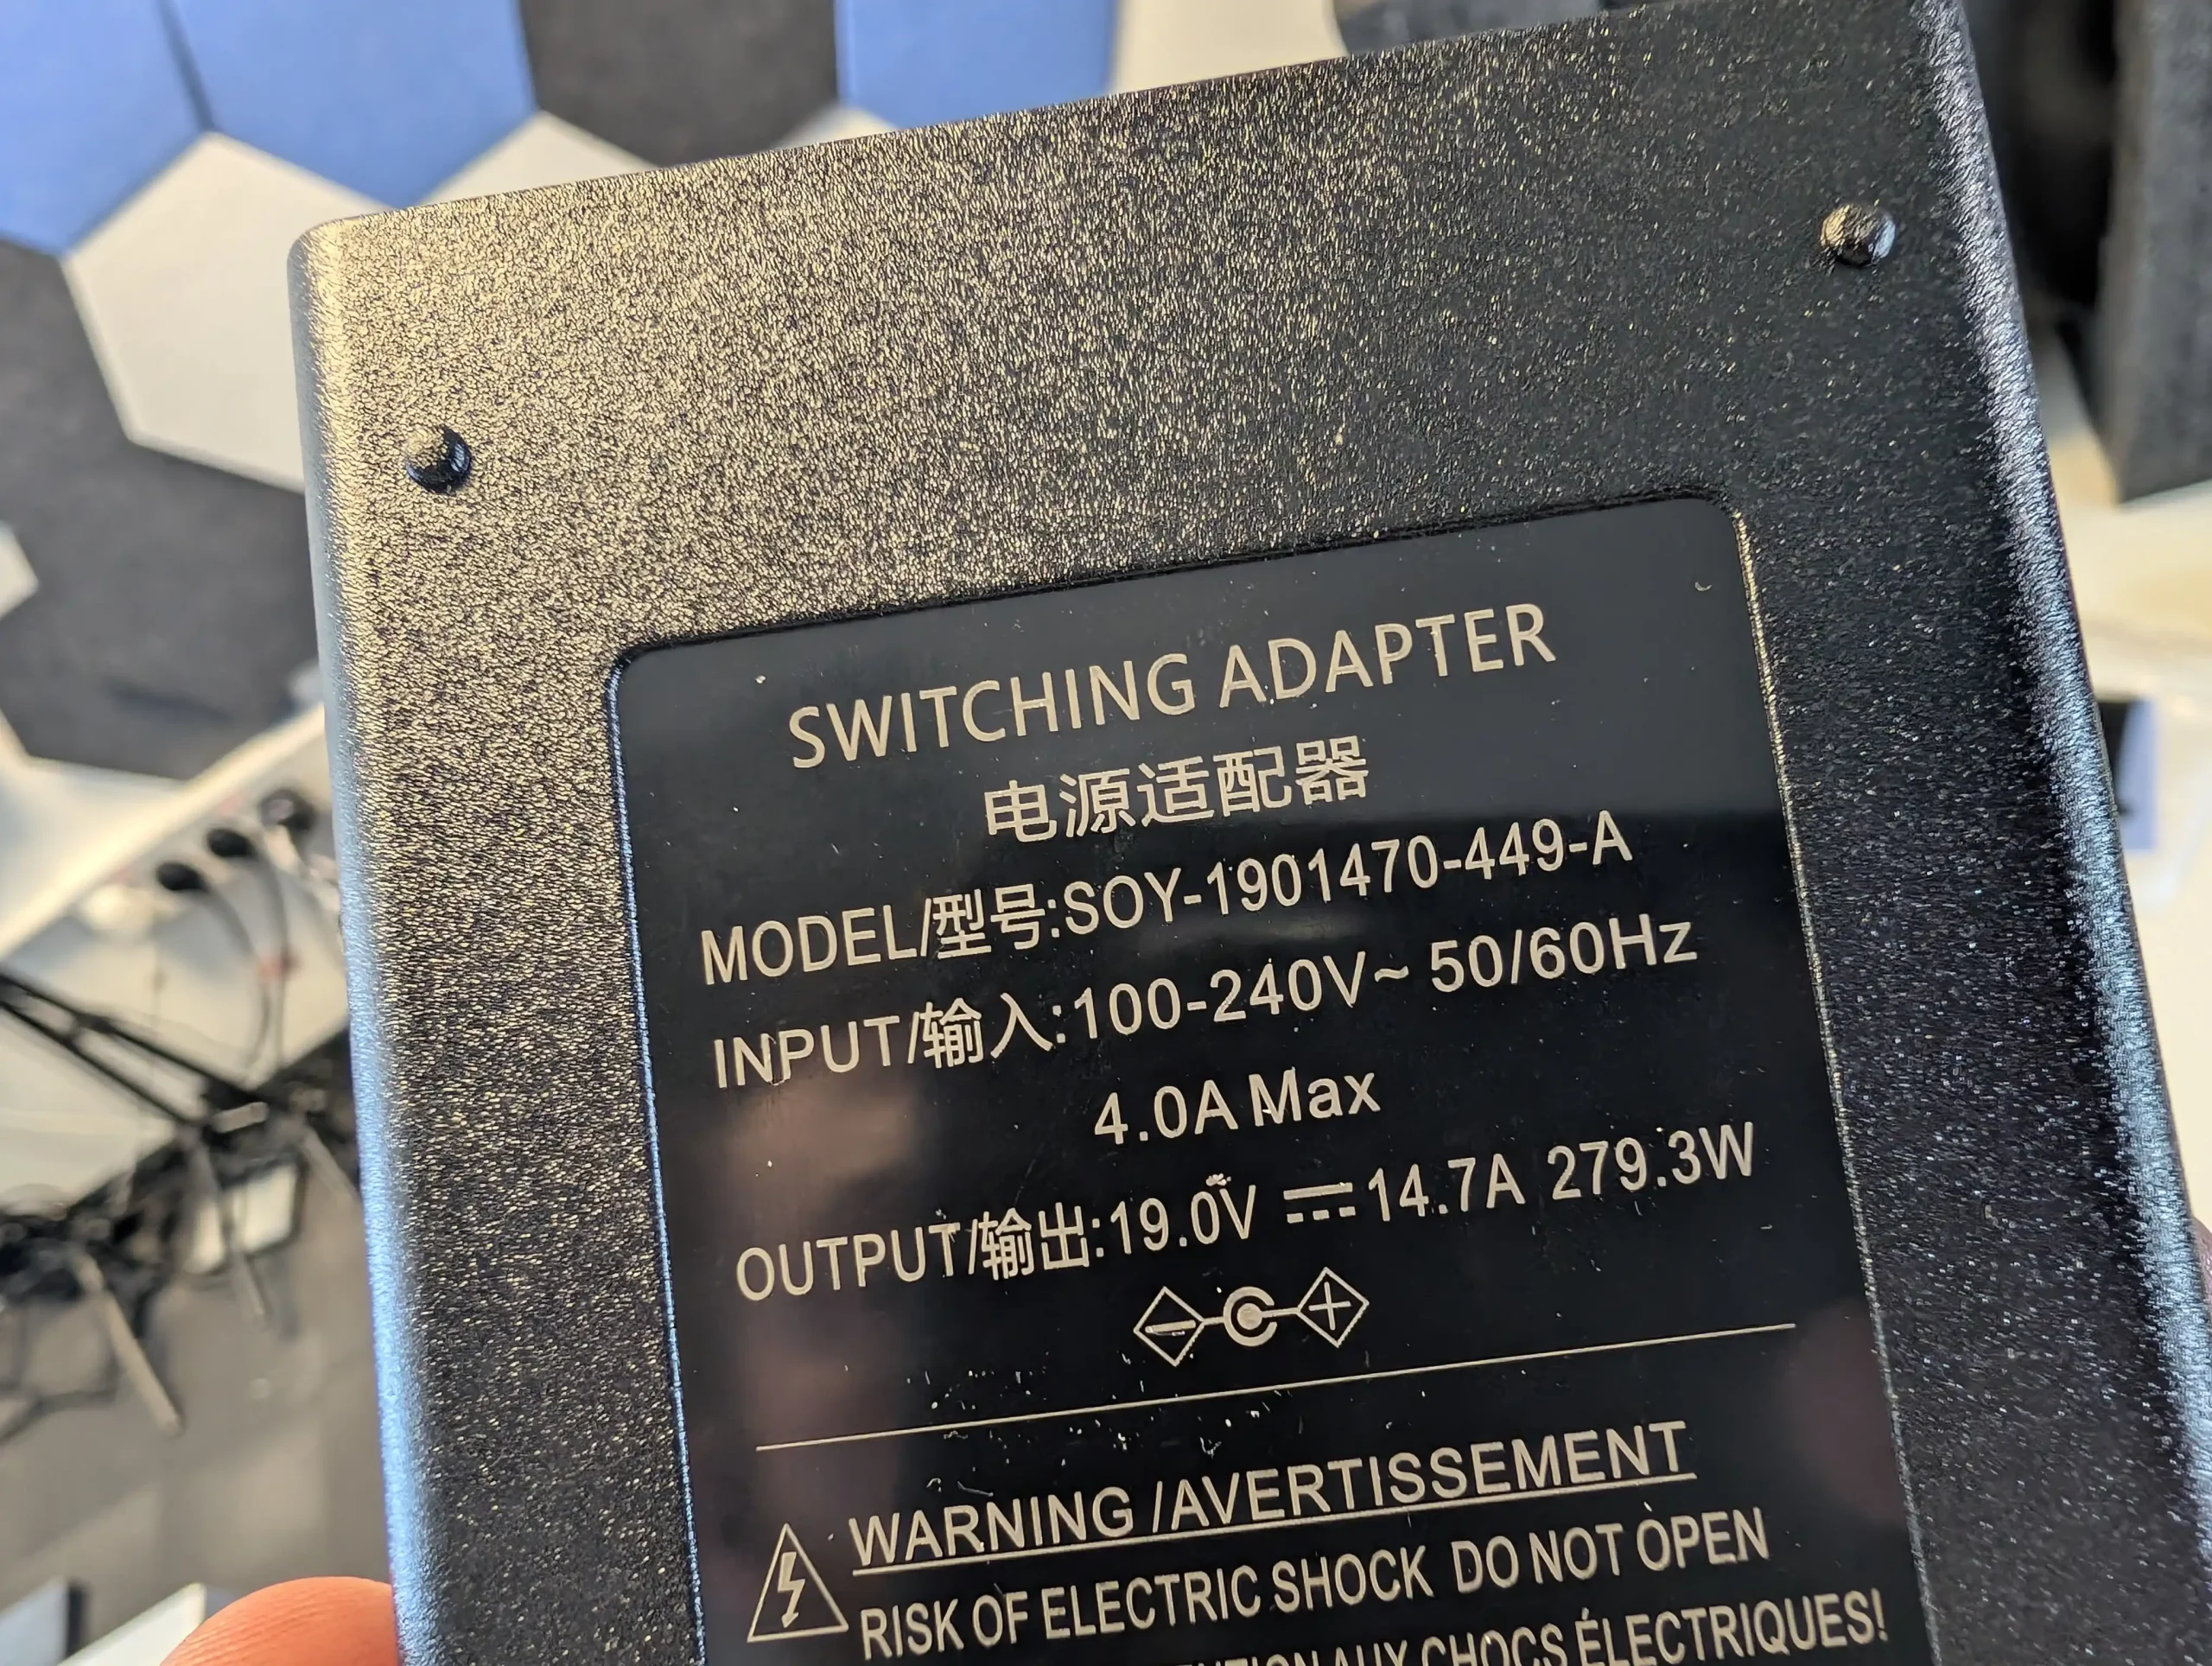
Both the Aoostar WTR Max and the Minisforum N5 series aim to strike a balance between capable performance, manageable power consumption, and acceptable noise levels, though they adopt distinct philosophies around power delivery and cooling. Both the Minisforum N5 and the Aoostar WTR Max feature external power supply unit (PSUs), of a pretty hefty 280W – these will almost certainly not be for everyone, but do allow for both systems to maintain a decent small-scale (however, be aware that they DO get warm)!
 |
 |
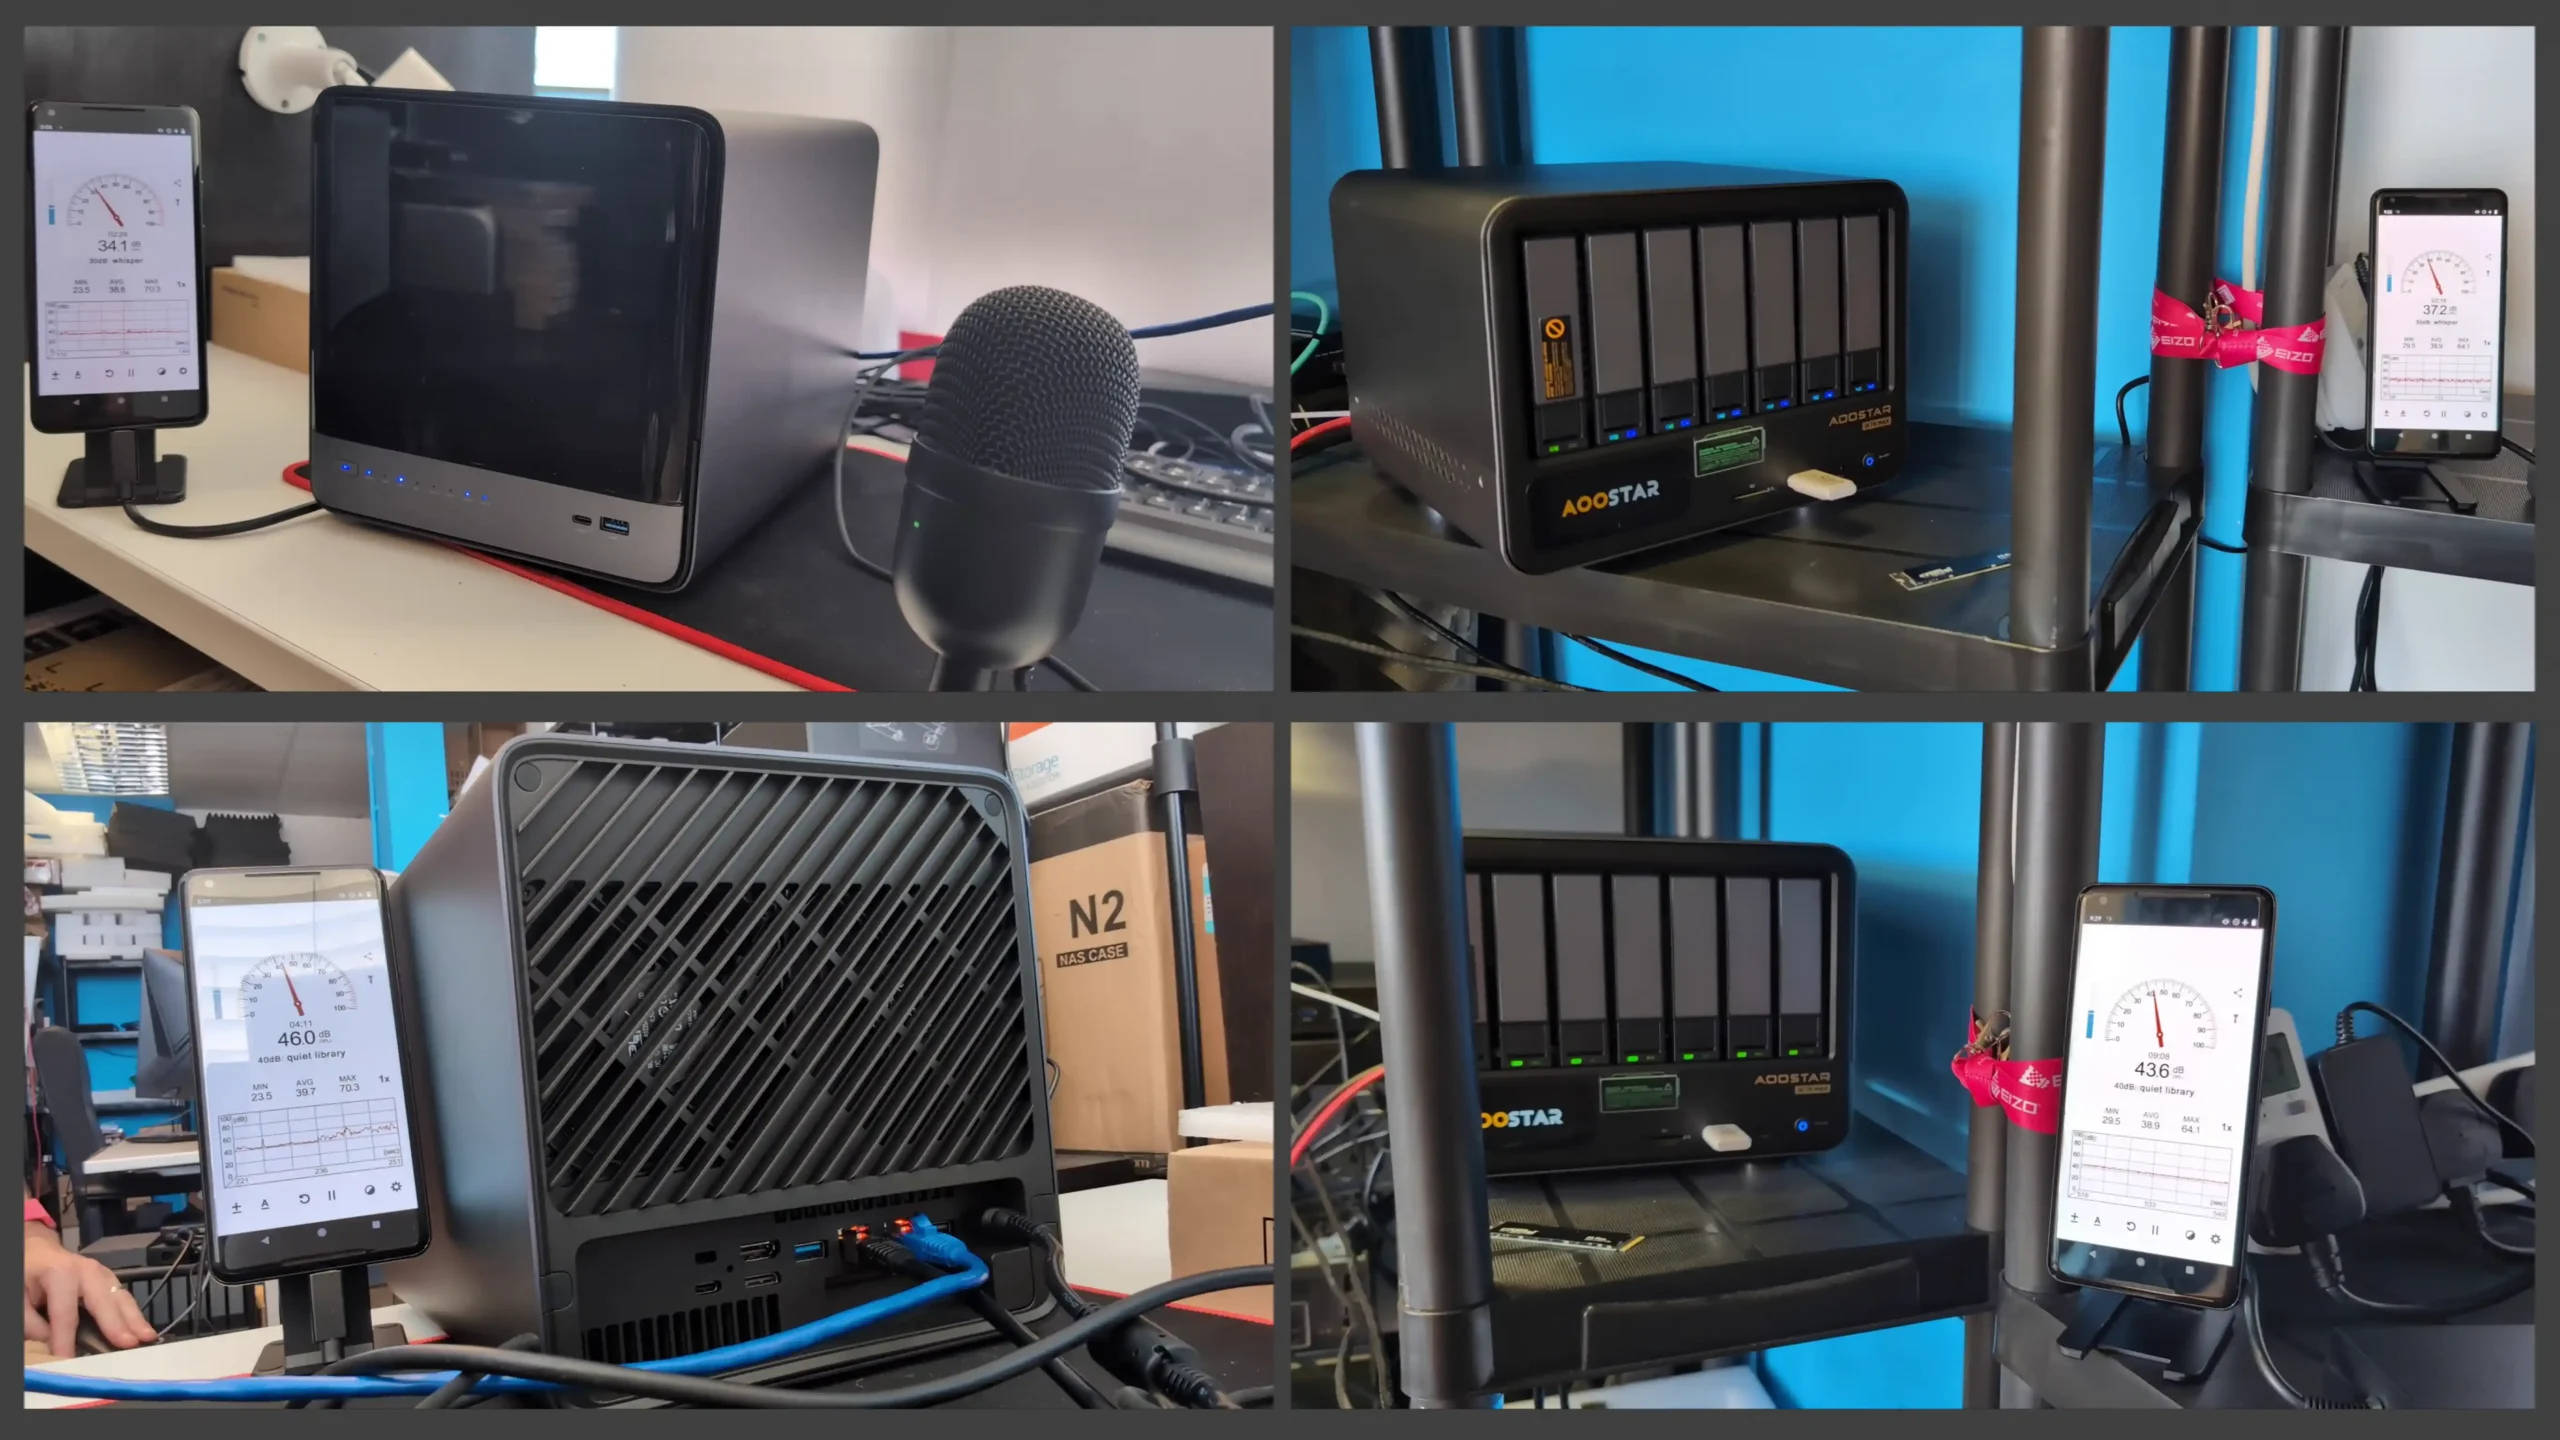
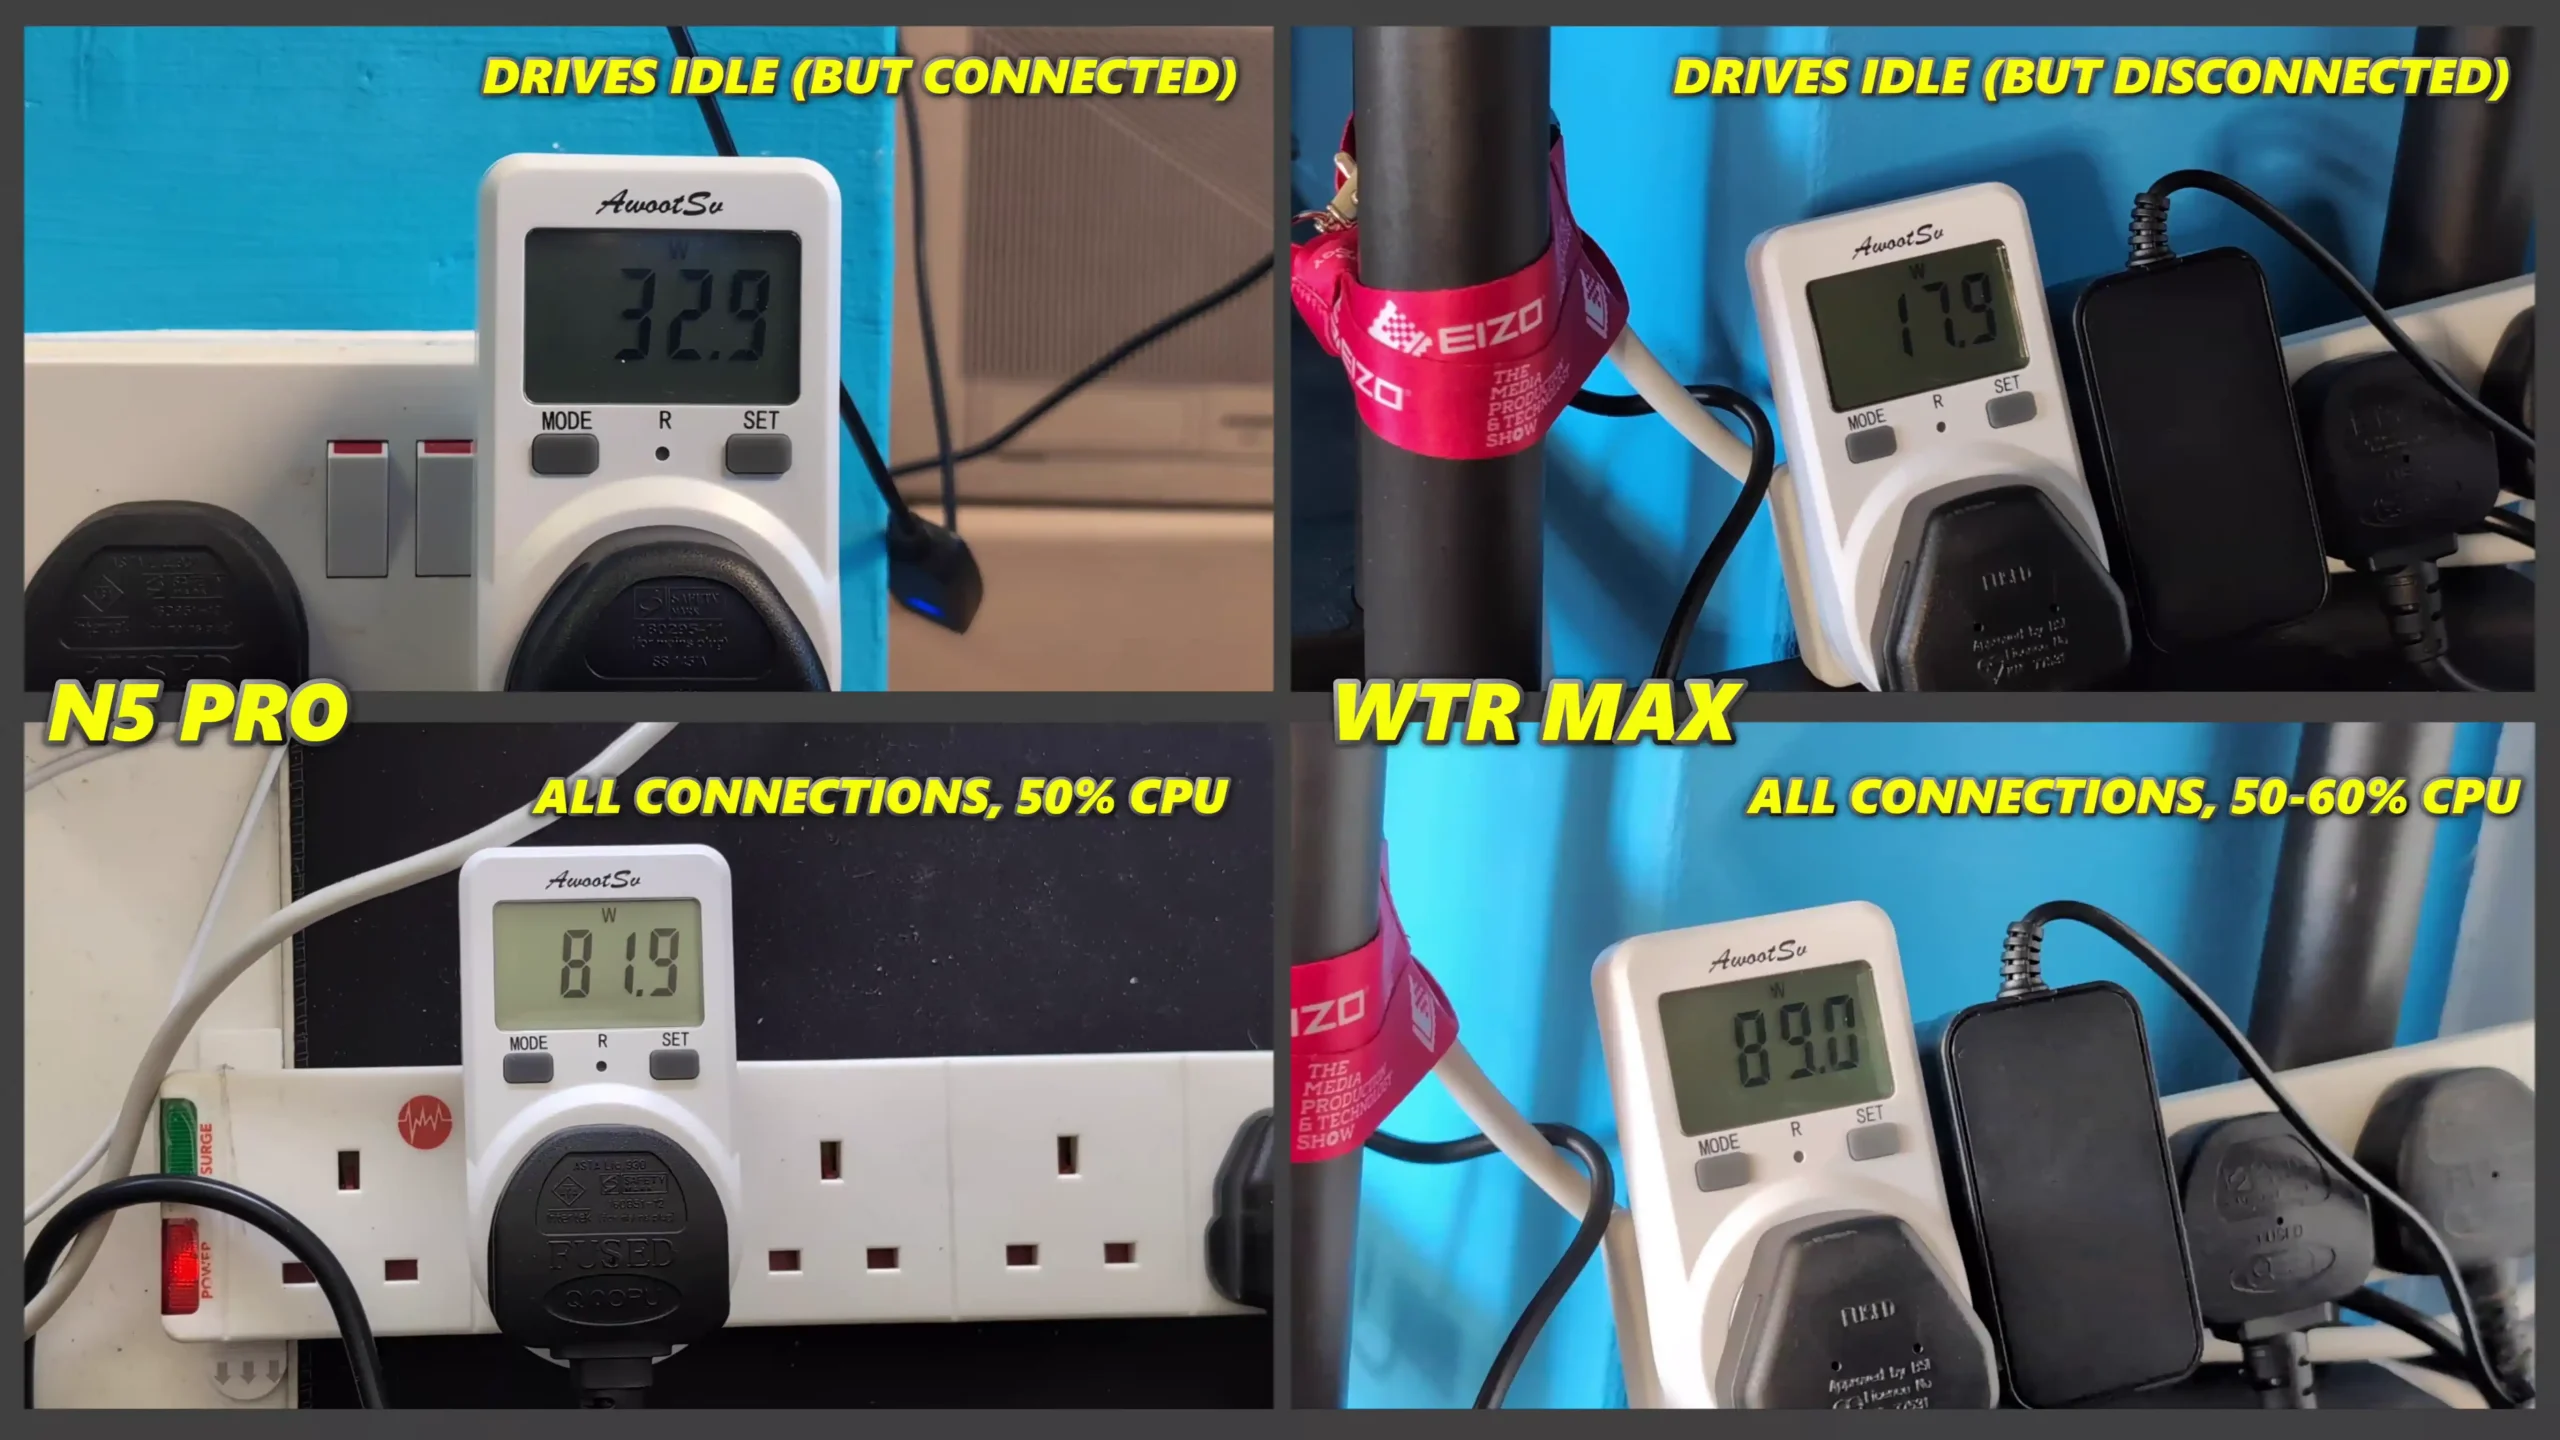
In terms of measured power consumption, the WTR Max idles at approximately 32–34 W even when fully populated with drives, and it ramps up to around 73–89 W under heavy load, such as during multi-VM and high-throughput testing.
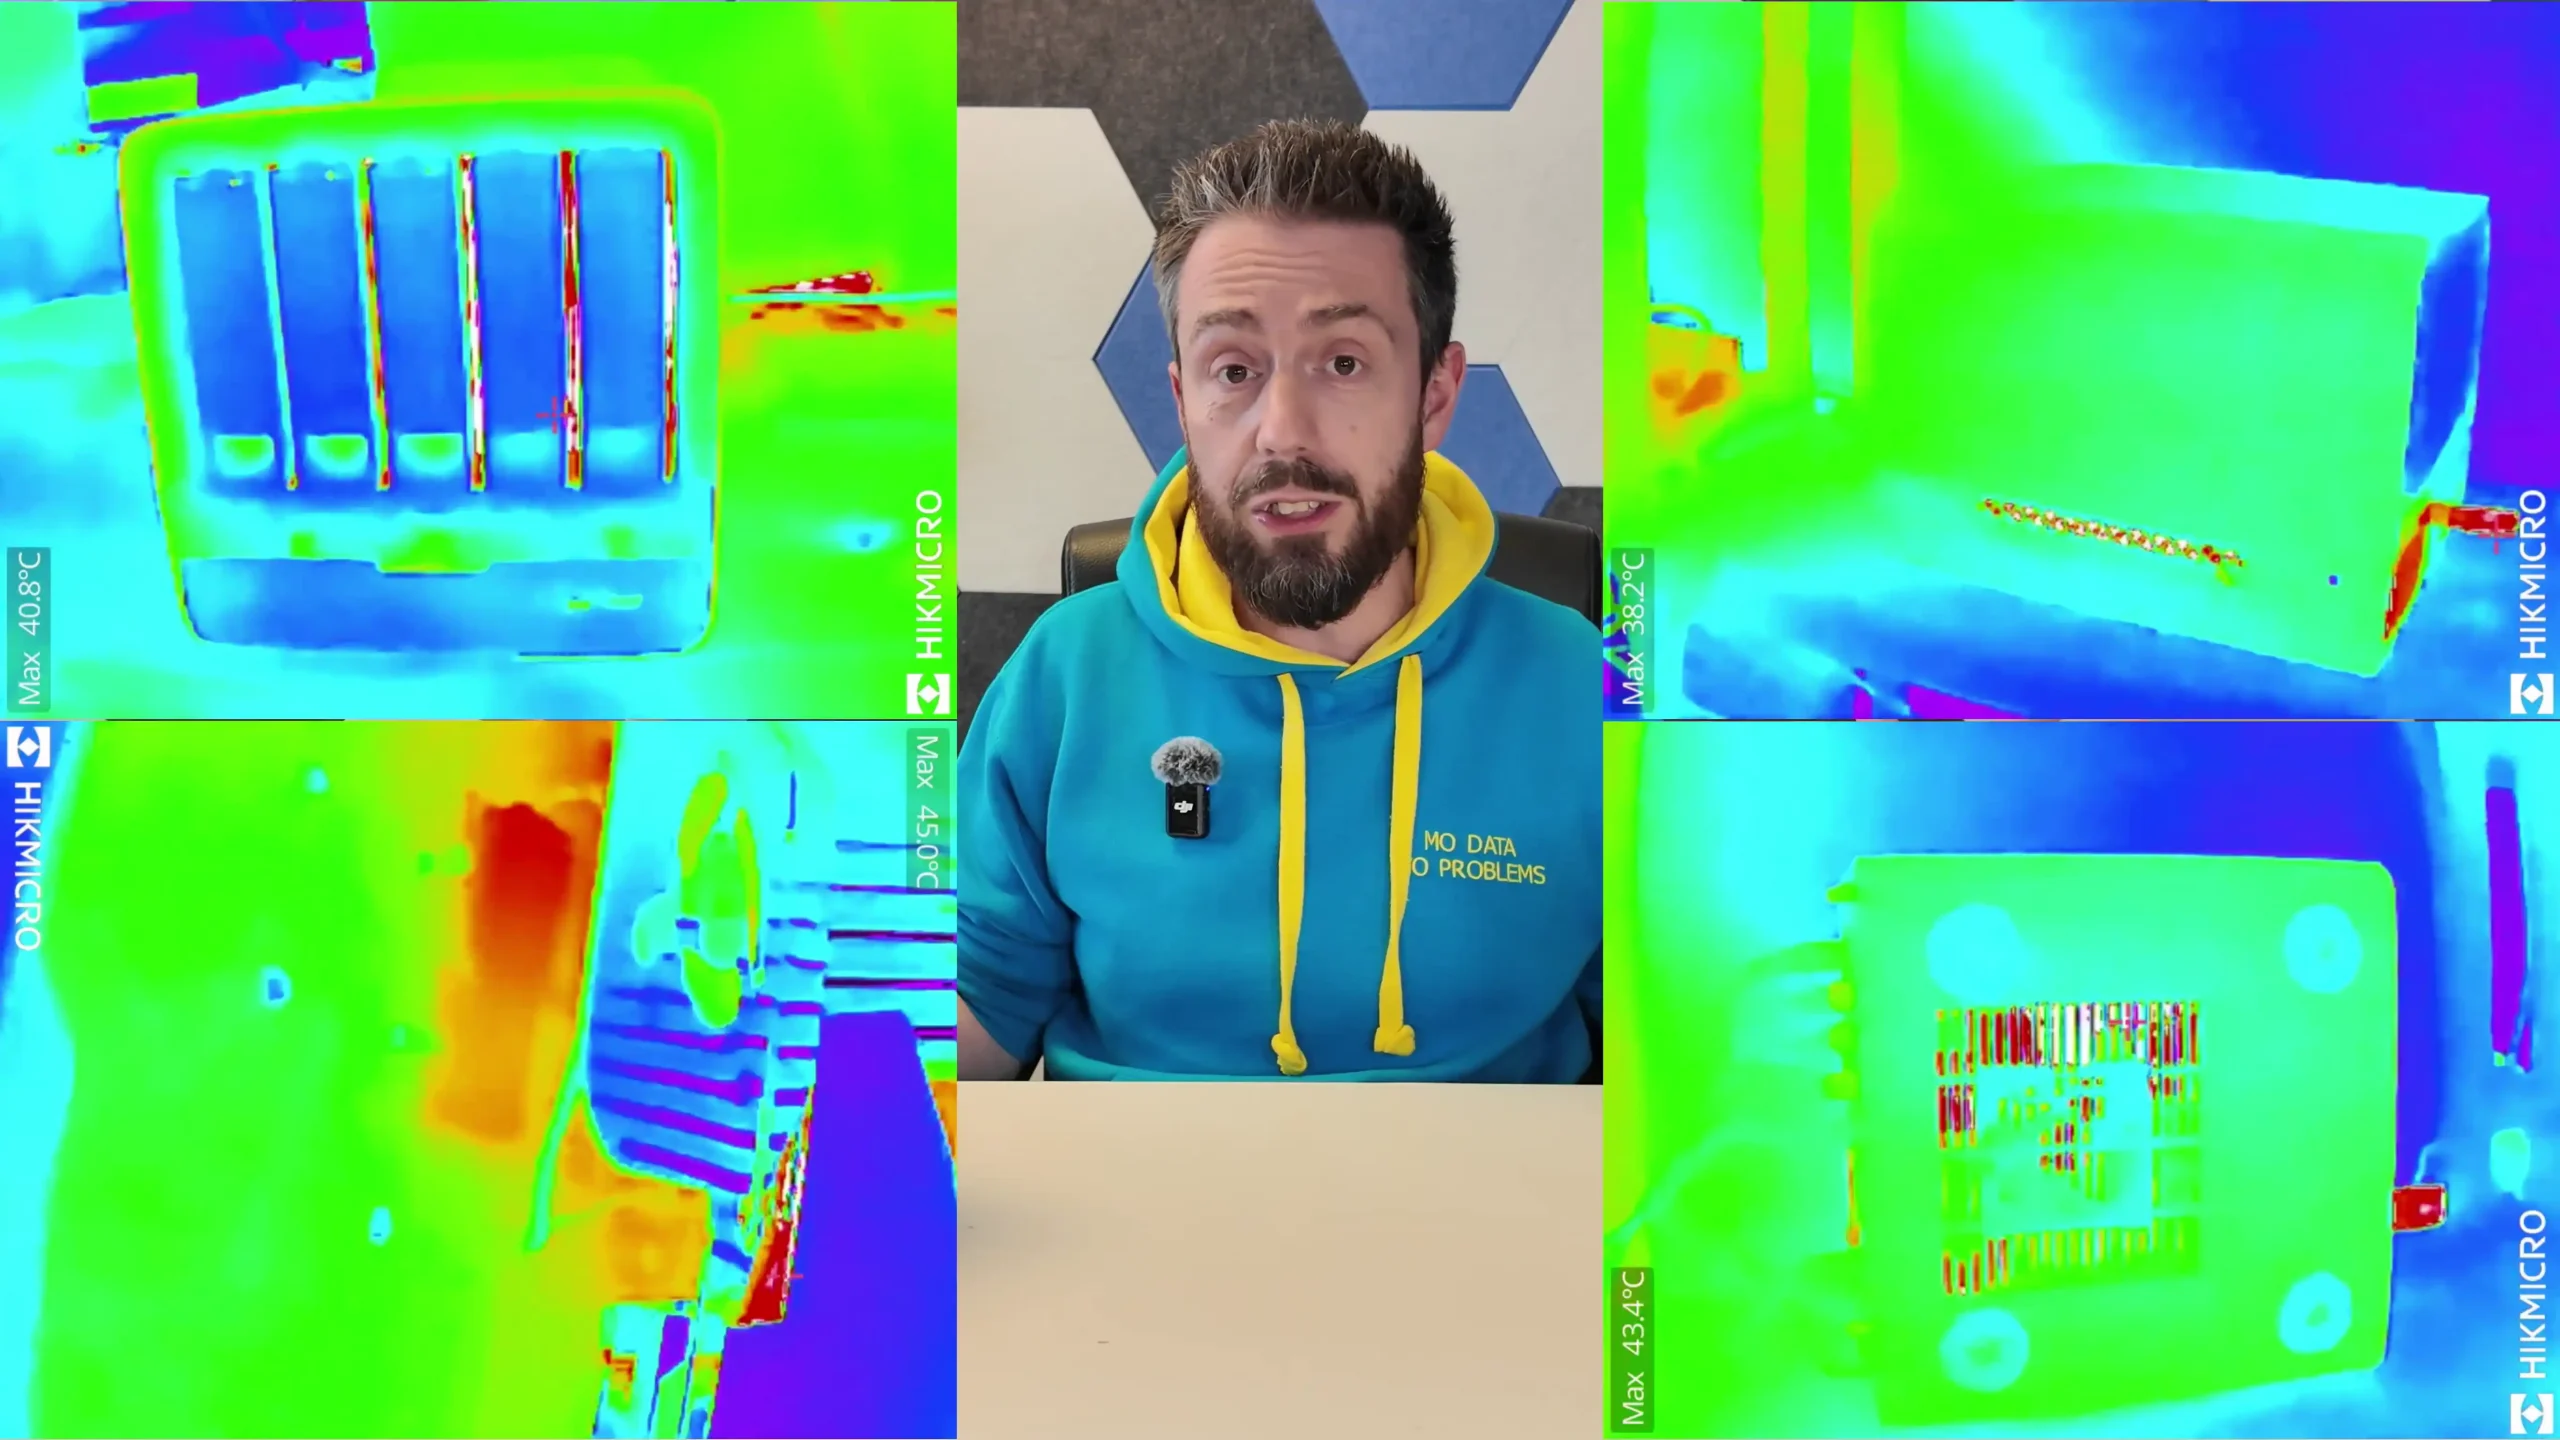
The chassis design favors airflow with strategically placed ventilation on the sides, rear, and bottom, a pair of large rear exhaust fans, and a dedicated internal fan that focuses specifically on the hard drive bays. This combination keeps temperatures steady under pressure, and even during sustained activity, noise output remains modest — around 35 dBA at idle and typically peaking near 44 dBA when heavily loaded, which is relatively quiet given its drive density and active cooling.
| Aspect | Aoostar WTR Max | Minisforum N5 (Standard) | Minisforum N5 Pro | Best & Why/Note |
|---|---|---|---|---|
| PSU Type | External | External | External | No Difference |
| Peak Power Consumption | ~73–89W | ~80W | ~80W | Tie — both in similar range |
| Idle Power Consumption | ~32–34W | ~32–34W | ~32–34W | Tie — similar efficiency |
| Noise at Idle | ~35 dBA | ~32–34 dBA | ~32–34 dBA | N5/N5 Pro — slightly quieter at idle |
| Noise at Load | ~44 dBA | ~48–51 dBA | ~48–51 dBA | Aoostar WTR Max — quieter at load |
The Minisforum N5 series has similar Power usage at idle to the Aoostar, sitting at 32–34 W with a standard configuration, and peak draw during demanding scenarios — such as AI inference on the N5 Pro or intensive virtualized workloads — topped out around 80 W. The N5 chassis relies on a refined internal cooling setup, with a base-mounted intake fan and two rear exhaust fans, arranged to direct airflow efficiently from front to back through the components. While thermally effective, this setup tends to produce slightly higher maximum noise than the WTR Max, registering 48–51 dBA during sustained full-load operation. At idle, the Minisforum systems are competitive, staying quiet at roughly 32–34 dBA, but the difference becomes more noticeable when fully stressed over longer periods.
In reviewing the Aoostar WTR Max and the Minisforum N5 series—including both the standard and Pro models—it becomes clear that each system was designed with a distinct user profile and set of priorities in mind, making direct comparisons nuanced rather than absolute. The Aoostar WTR Max distinguishes itself with a compelling balance of high storage density, strong CPU performance featuring ECC memory support, excellent chassis ventilation and a competitive mid-range price point.
 |
 |
Its combination of six SATA bays, five M.2 slots, quiet operation under sustained loads, and a tidy all-in-one form factor appeals to users who value storage flexibility, operational efficiency, and simplicity in deployment. The Minisforum N5 standard model carves out its niche as an affordable entry point for those with lighter needs—delivering solid, modern NAS performance in a compact chassis at the lowest price of the three. At the other end of the spectrum, the Minisforum N5 Pro targets advanced power users, offering the AI‑accelerated Ryzen AI 9 HX Pro 370 processor, ECC memory capability, and unmatched multi-threaded and inference performance, all of which position it squarely in the high-end category for workloads like intensive virtualization, heavy concurrent tasks, and AI-assisted applications. For those specific use cases, the N5 Pro’s premium price is justified by its unmatched compute capabilities and feature set.
Ultimately, choosing between these systems requires a careful assessment of workload demands, expansion expectations, and budget constraints. The Aoostar WTR Max delivers a well-rounded combination of storage capacity, compute power, noise and thermal efficiency, and ease of deployment at a price that is reasonable for most advanced home and small business NAS environments. Its blend of practical features and robust hardware makes it especially attractive for users who prioritize storage-heavy applications and quieter, more efficient operation. The Minisforum N5 standard model is best suited for users with modest requirements and tight budgets, offering a clean, capable NAS platform for general use without the advanced features or costs associated with its Pro sibling. The N5 Pro, however, remains the clear choice for users who need the highest possible performance, AI‑specific capabilities, and maximum concurrency—provided they are willing to pay a premium for these cutting-edge benefits. In short, while all three systems deliver strong value in their respective niches, the Aoostar WTR Max arguably offers the most versatile and cost-effective package for typical NAS workloads, striking a smart balance between affordability, capacity, and performance.
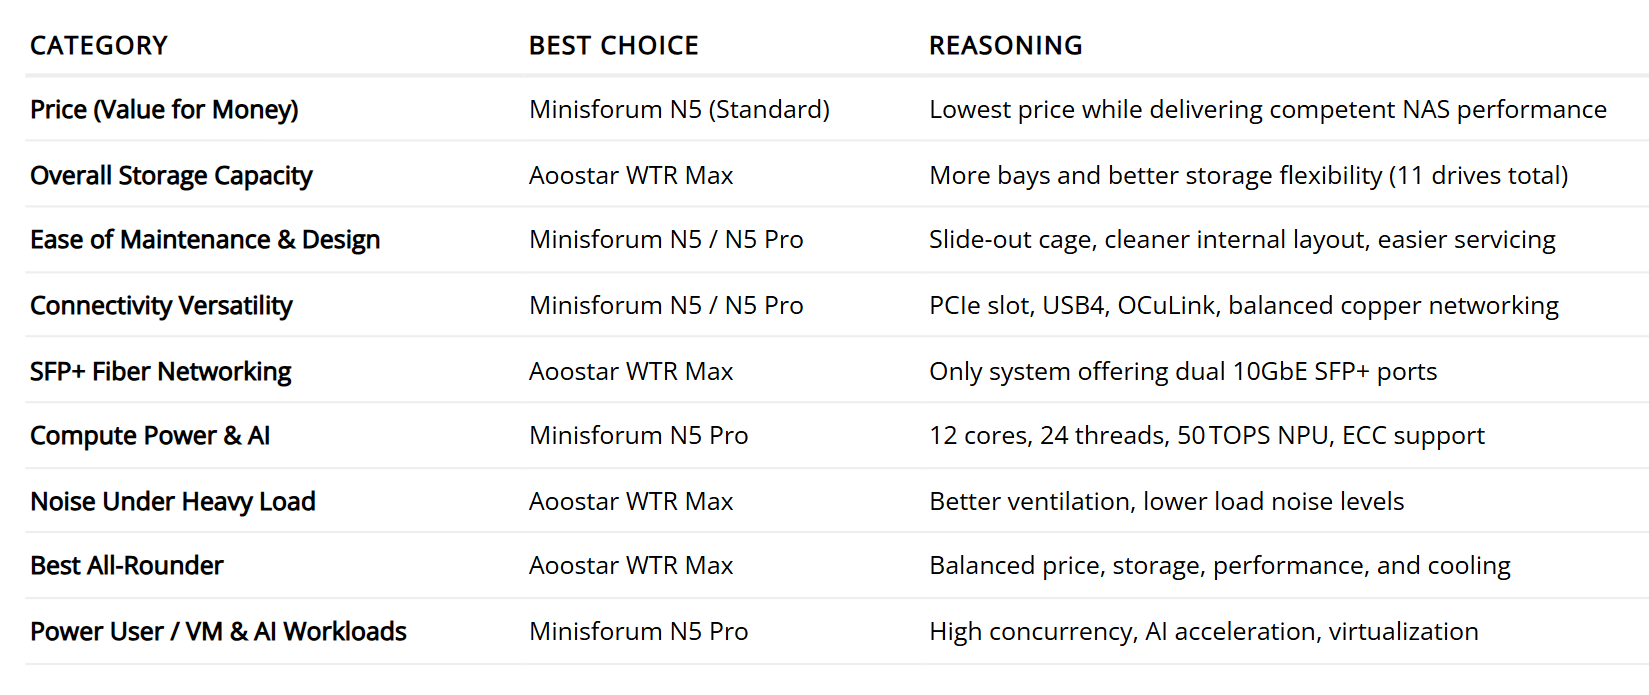
| Category | Best Choice | Reasoning |
|---|---|---|
| Price (Value for Money) | Minisforum N5 (Standard) | Lowest price while delivering competent NAS performance |
| Overall Storage Capacity | Aoostar WTR Max | More bays and better storage flexibility (11 drives total) |
| Ease of Maintenance & Design | Minisforum N5 / N5 Pro | Slide-out cage, cleaner internal layout, easier servicing |
| Connectivity Versatility | Minisforum N5 / N5 Pro | PCIe slot, USB4, OCuLink, balanced copper networking |
| SFP+ Fiber Networking | Aoostar WTR Max | Only system offering dual 10GbE SFP+ ports |
| Compute Power & AI | Minisforum N5 Pro | 12 cores, 24 threads, 50 TOPS NPU, ECC support |
| Noise Under Heavy Load | Aoostar WTR Max | Better ventilation, lower load noise levels |
| Best All-Rounder | Aoostar WTR Max | Balanced price, storage, performance, and cooling |
| Power User / VM & AI Workloads | Minisforum N5 Pro | High concurrency, AI acceleration, virtualization |
|
|
||
| Check Amazon for the WTR Pro MAX
|
Check AliExpress for the WTR Pro MAX
|
Check Amazon for the Minisforum N5
|
Check AliExpress for the Minisforum N5
|
SUBSCRIBE TO OUR NEWSLETTER Join Inner Circle Subscribe
This description contains links to Amazon. These links will take you to some of the products mentioned in today's content. As an Amazon Associate, I earn from qualifying purchases. Visit the NASCompares Deal Finder to find the best place to buy this device in your region, based on Service, Support and Reputation - Just Search for your NAS Drive in the Box Below
Need Help?
Where possible (and where appropriate) please provide as much information about your requirements, as then I can arrange the best answer and solution to your needs. Do not worry about your e-mail address being required, it will NOT be used in a mailing list and will NOT be used in any way other than to respond to your enquiry.
[contact-form-7]
Ko-fi or old school Paypal. Thanks!To find out more about how to support this advice service check HEREIf you need to fix or configure a NAS, check Fiver
Have you thought about helping others with your knowledge? Find Instructions Here
|
|
|
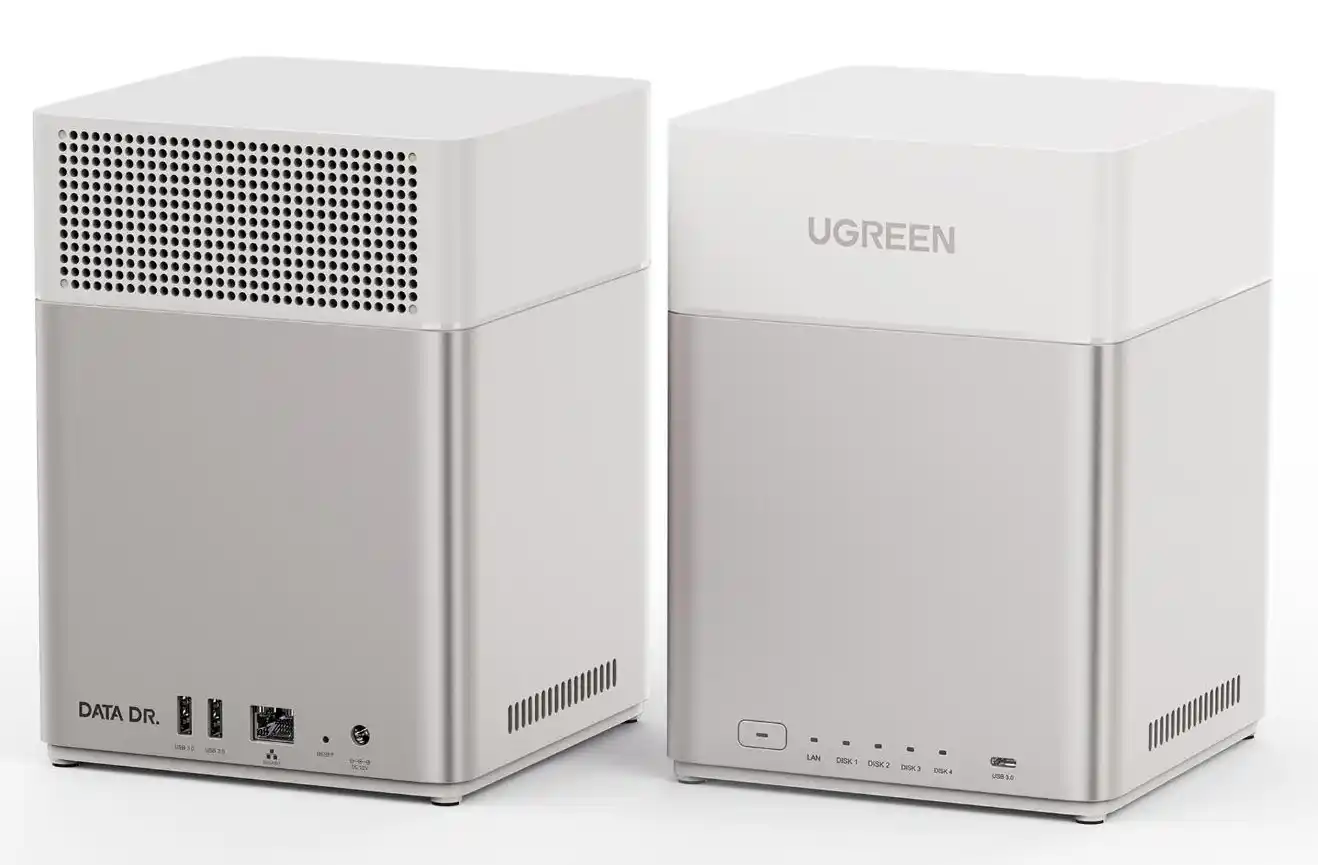
UGREEN has unveiled two new value-focused NAS devices, the DH3400 and DH3200, designed to meet the needs of home and small office users who want practical, low-power network storage without unnecessary complexity. The DH3400 is a 4-bay model, while the DH3200 offers a 2-bay configuration, both intended for those looking to implement efficient backups, multimedia streaming, and personal cloud storage at a more affordable price point. First revealed through the 2025 iF Design Awards and then quietly launched with a limited discount during Amazon Prime Day, these models occupy a lower tier in UGREEN’s NAS range, complementing rather than replacing their existing higher-end DXP series.
These two devices clearly target users who prioritize straightforward functionality over high-end processing power or advanced virtualization. Both systems are engineered with energy-efficient components and a compact design that makes them suitable for desktop environments where noise, heat, and power consumption need to be minimized. By offering a clear set of features—including RAID support, snapshot capabilities, and 4K multimedia output—at a modest price, the DH3400 and DH3200 aim to appeal to customers who need reliable, low-maintenance storage hardware that can integrate easily into a home network or small office setup.
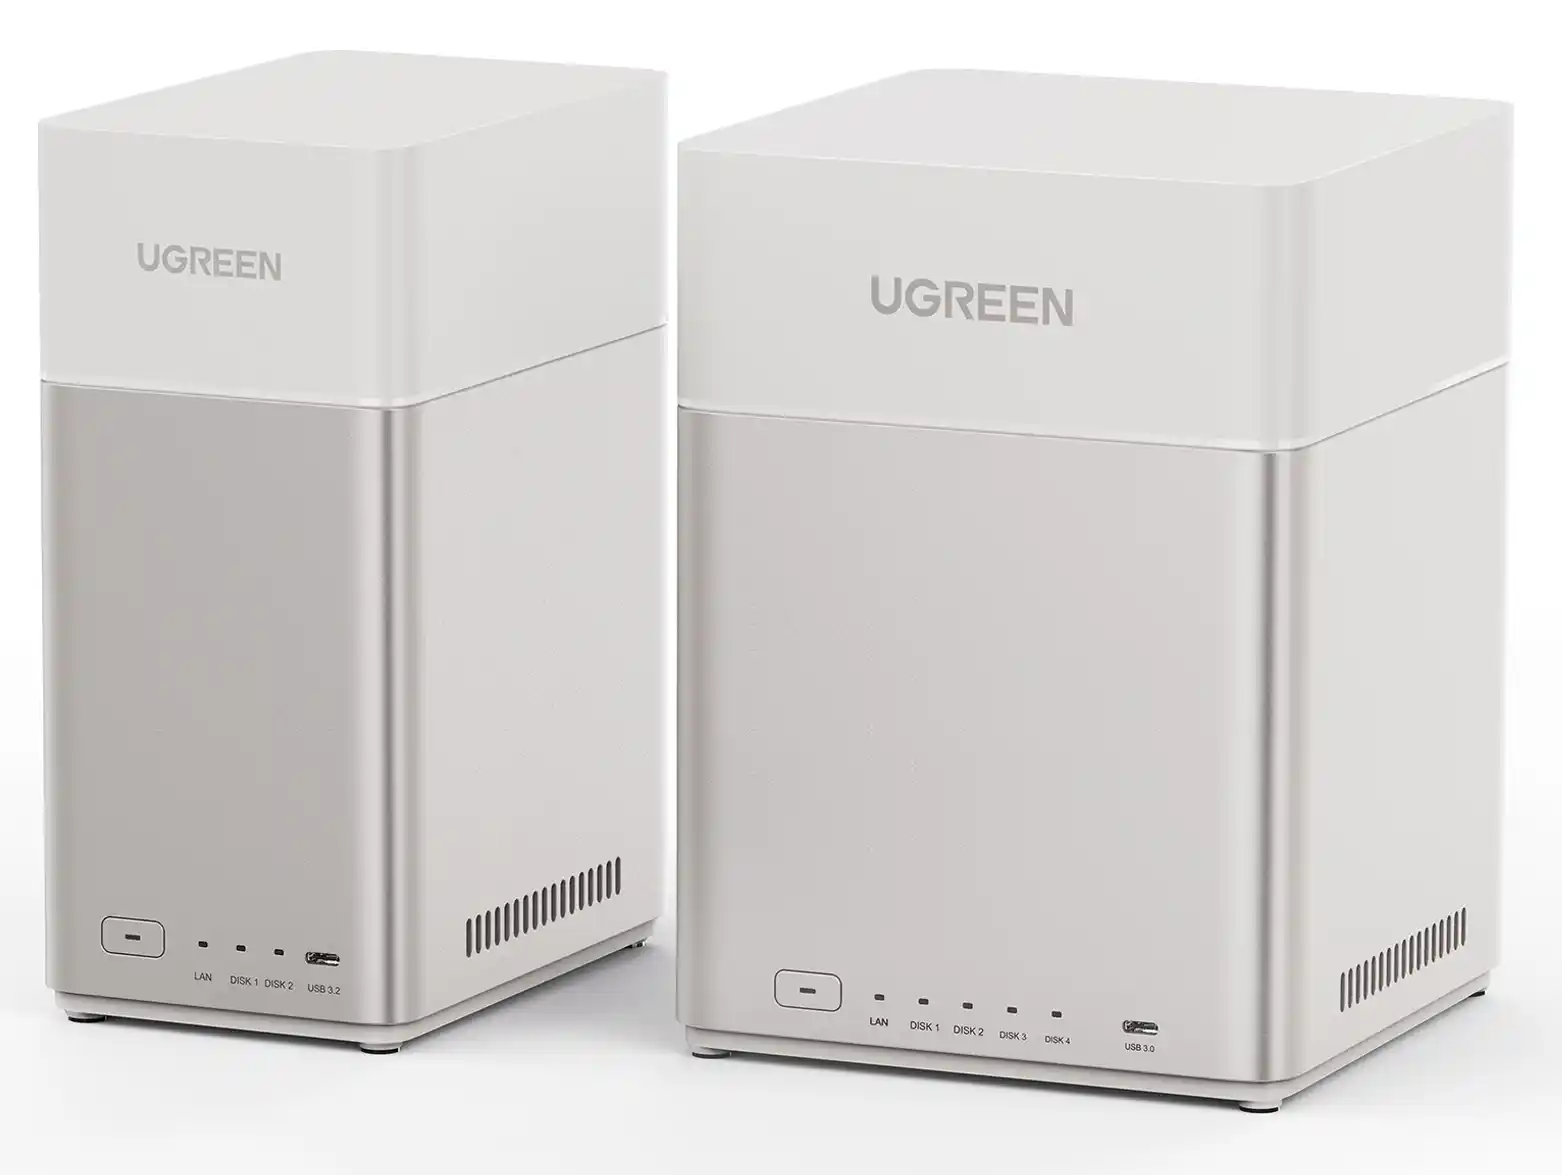
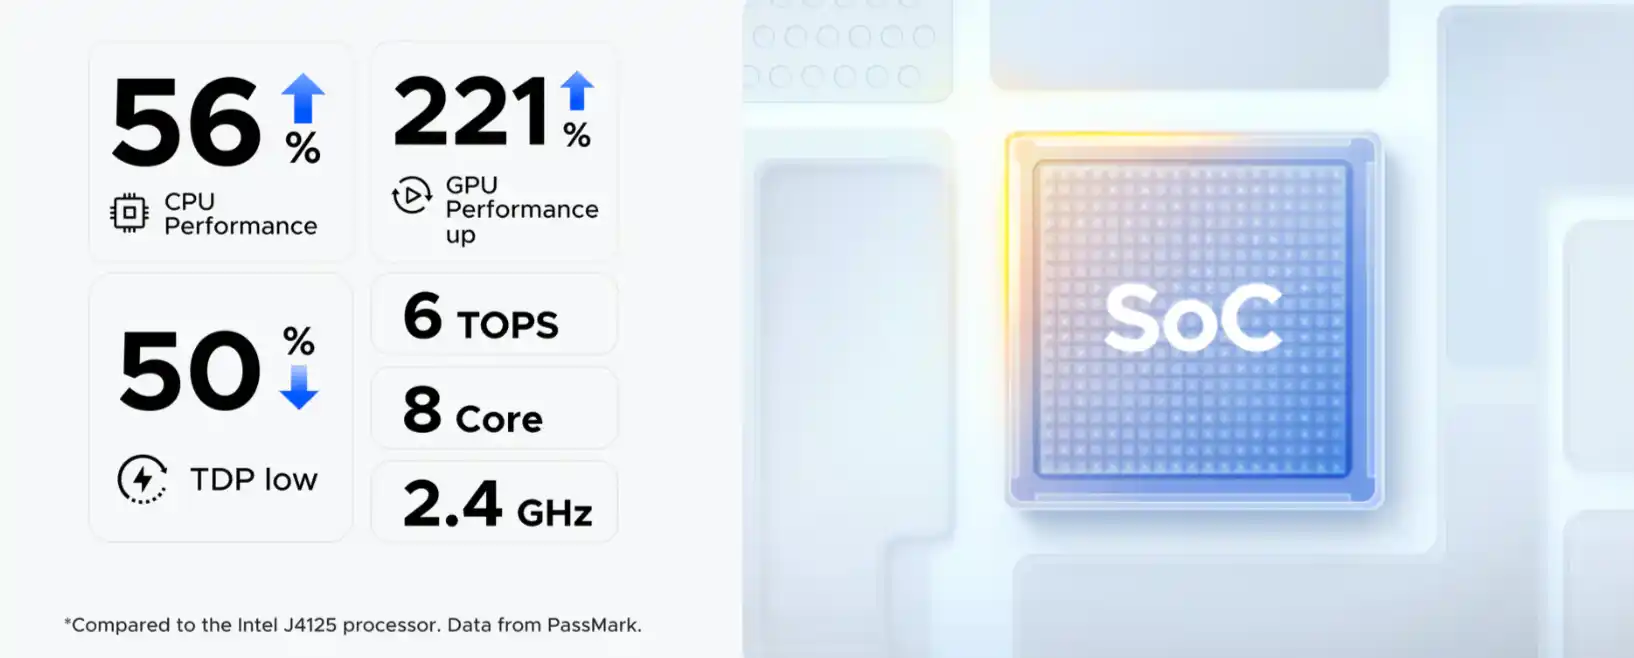
The UGREEN DH3400 and DH3200 are built on a shared hardware platform, with the key difference being drive bay count—four bays on the DH3400 and two on the DH3200. Both systems use the Rockchip RK3588C processor, an 8-core ARM-based SoC running at 2.4 GHz, designed to prioritize energy efficiency and low thermal output rather than raw performance. The RK3588C includes integrated Mali-G610 graphics and an AI engine capable of delivering up to six tera operations per second (TOPS), which enables features like facial recognition and semantic photo search without taxing the CPU as much as it would likewise ARM processors without it.
| Feature | DH3400 (4-Bay) | DH3200 (2-Bay) |
|---|---|---|
| CPU | Rockchip RK3588C, 8-core ARM, 2.4 GHz | Same |
| GPU | Mali-G610 integrated graphics | Same |
| AI Engine | Up to 6 TOPS | Same |
| Memory (RAM) | 8 GB LPDDR4X (non-upgradable) | Same |
| System Storage | 32 GB eMMC (OS pre-installed) | Same |
| Drive Bays | 4× SATA (3.5”/2.5”) | 2× SATA (3.5”/2.5”) |
| Maximum Capacity | 120 TB (4× 30 TB) | 60 TB (2× 30 TB) |
| Supported RAID | JBOD, Basic, RAID 0/1/5/6/10 | JBOD, Basic, RAID 0/1 |
| Ethernet | 1× 2.5 GbE | Same |
| USB Ports | 1× USB-C (10 Gb/s), 2× USB-A (10 Gb/s) | Same |
| HDMI Output | 1× HDMI 2.0 (4K@60Hz) | Same |
| Power Supply | 12V/6A | Same |
| Dimensions (mm) | 155 × 155 × 215.7 | Similar, slightly shorter |
| PCIe Expansion | Not supported | Not supported |
| M.2 NVMe Slots | Not supported | Not supported |
This processor choice underlines UGREEN’s intent to offer a quiet, cool, and power-conscious NAS for everyday workloads such as file storage, multimedia streaming, and light AI-assisted tasks – at least compared with their currently very successful DXP NASync Series. The architecture, however, does mean hefty hardware video transcoding and heavy virtualization are not part of its remit, which is appropriate for its role as an entry-level system or one designated as a network backup target for your current beefier NAS system!
Both units come equipped with 8 GB of soldered LPDDR4X memory, which cannot be upgraded. This is a typical limitation of ARM-based NAS systems, where memory is tightly coupled with the SoC for efficiency. The onboard memory is adequate for the included software stack, which supports multi-user environments, Docker containers, and AI-driven media management. For system storage, UGREEN integrates a 32 GB eMMC module to host the UGOS Pro operating system. This keeps the SATA bays fully available for user storage, though it does mean the system disk cannot be swapped or expanded.
 |
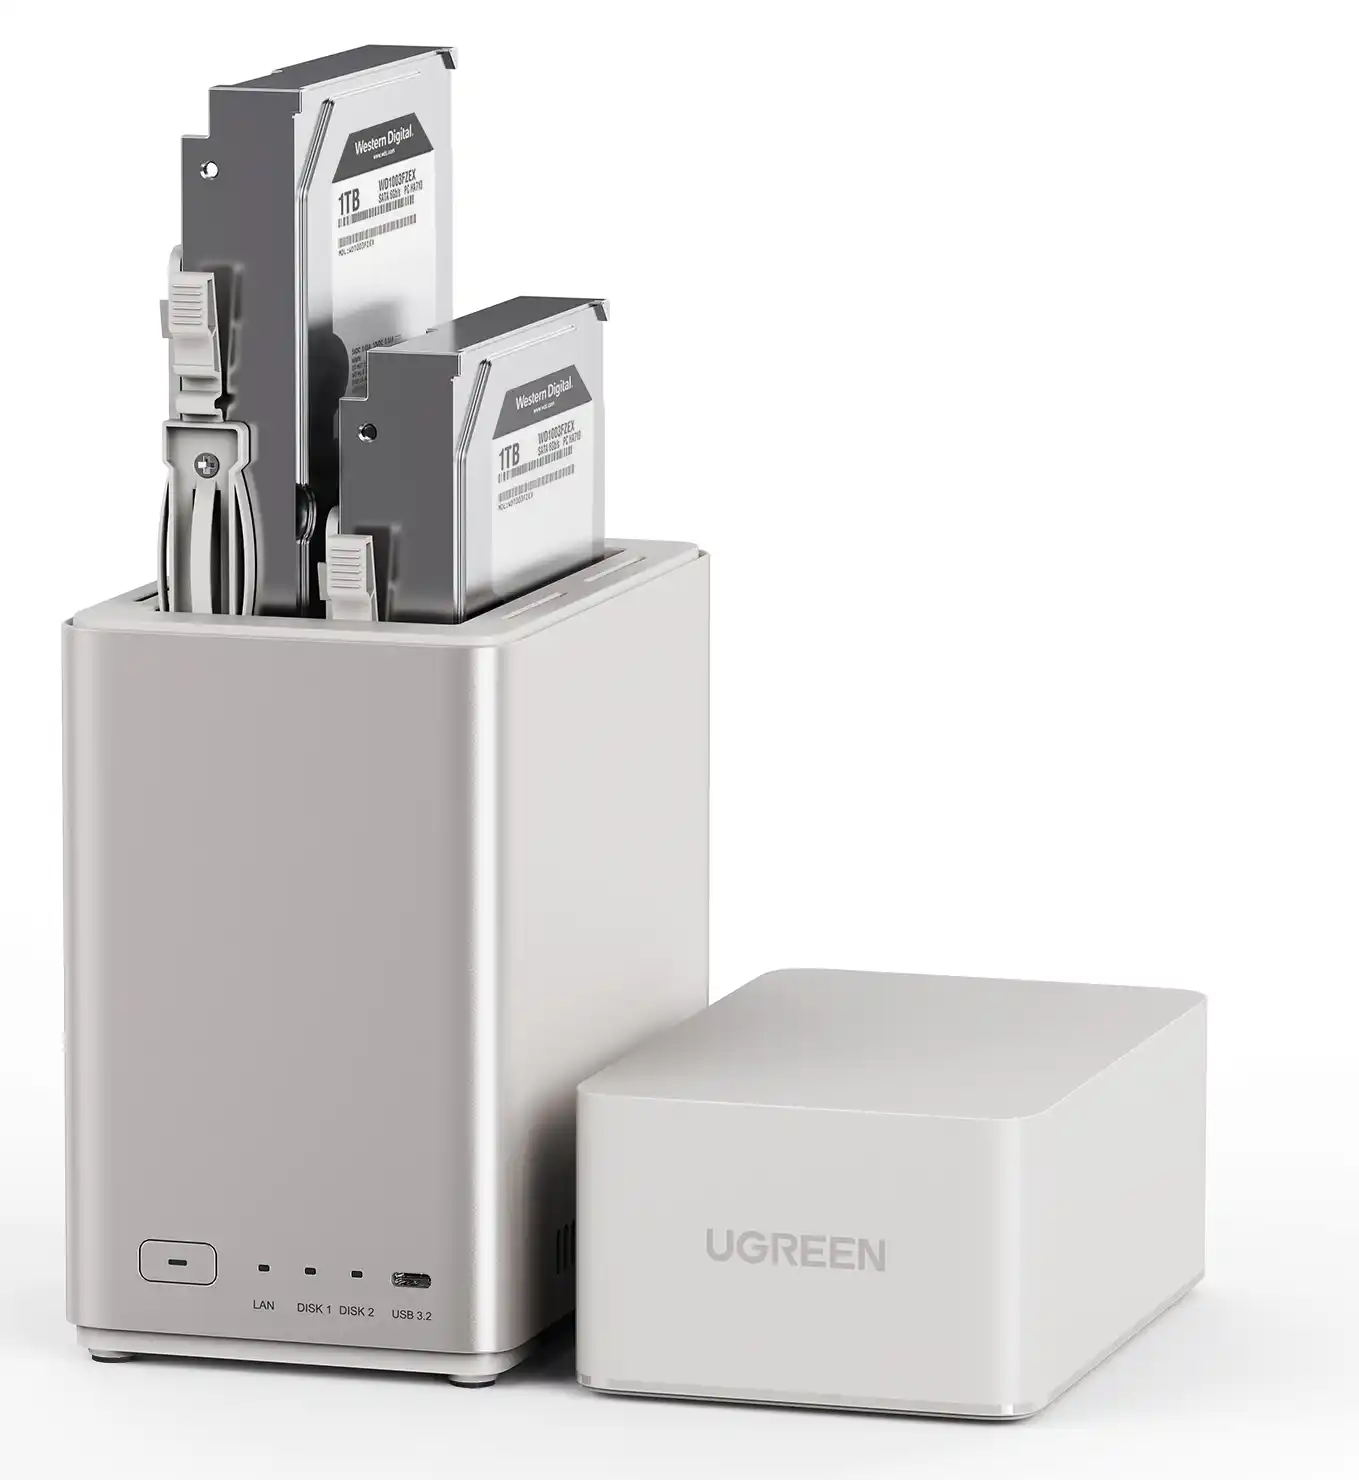 |
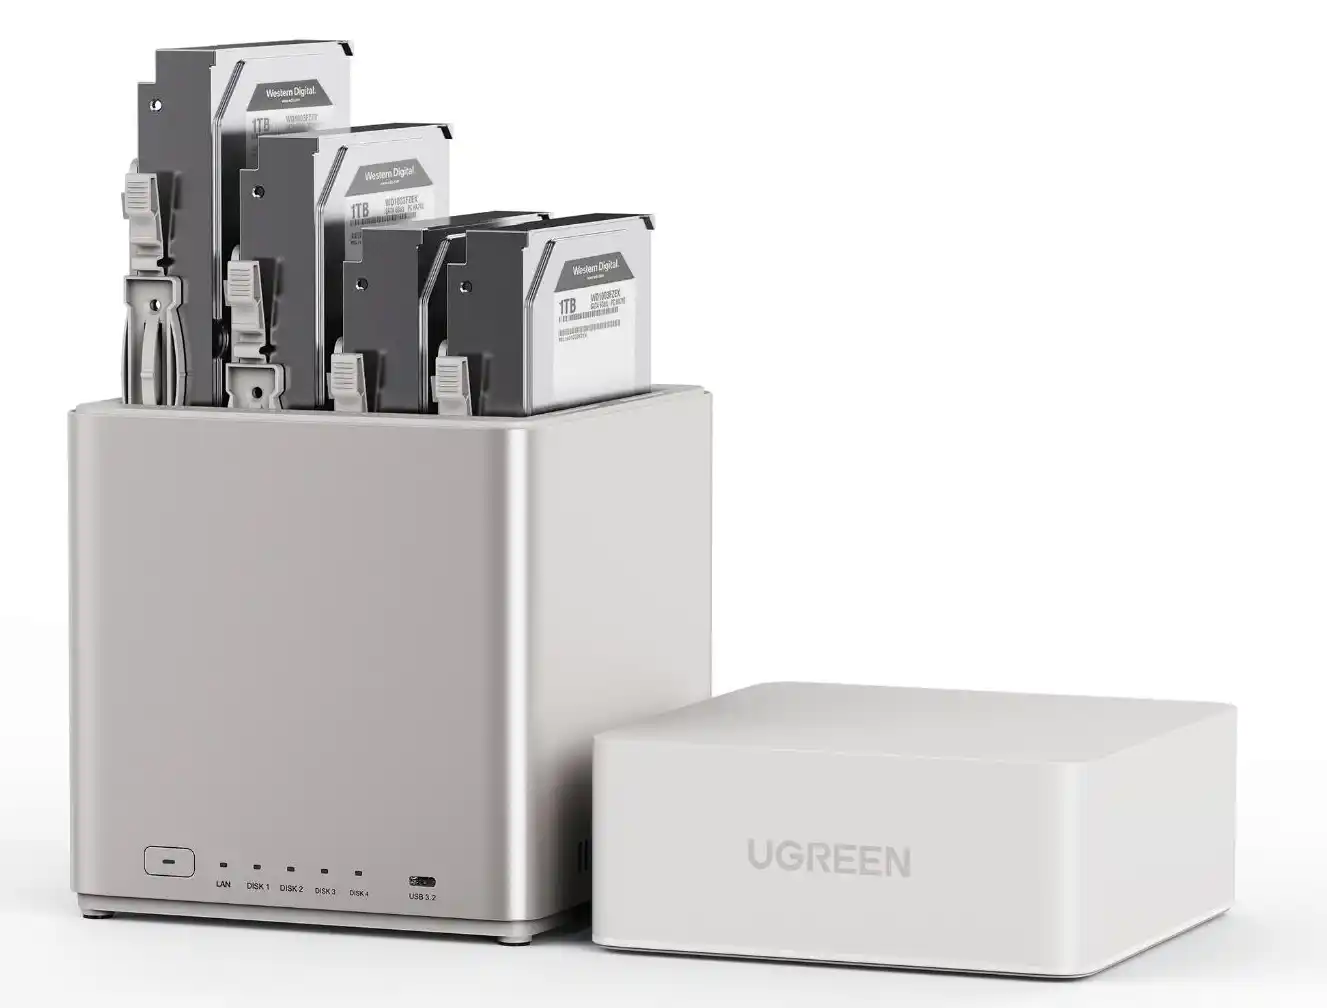
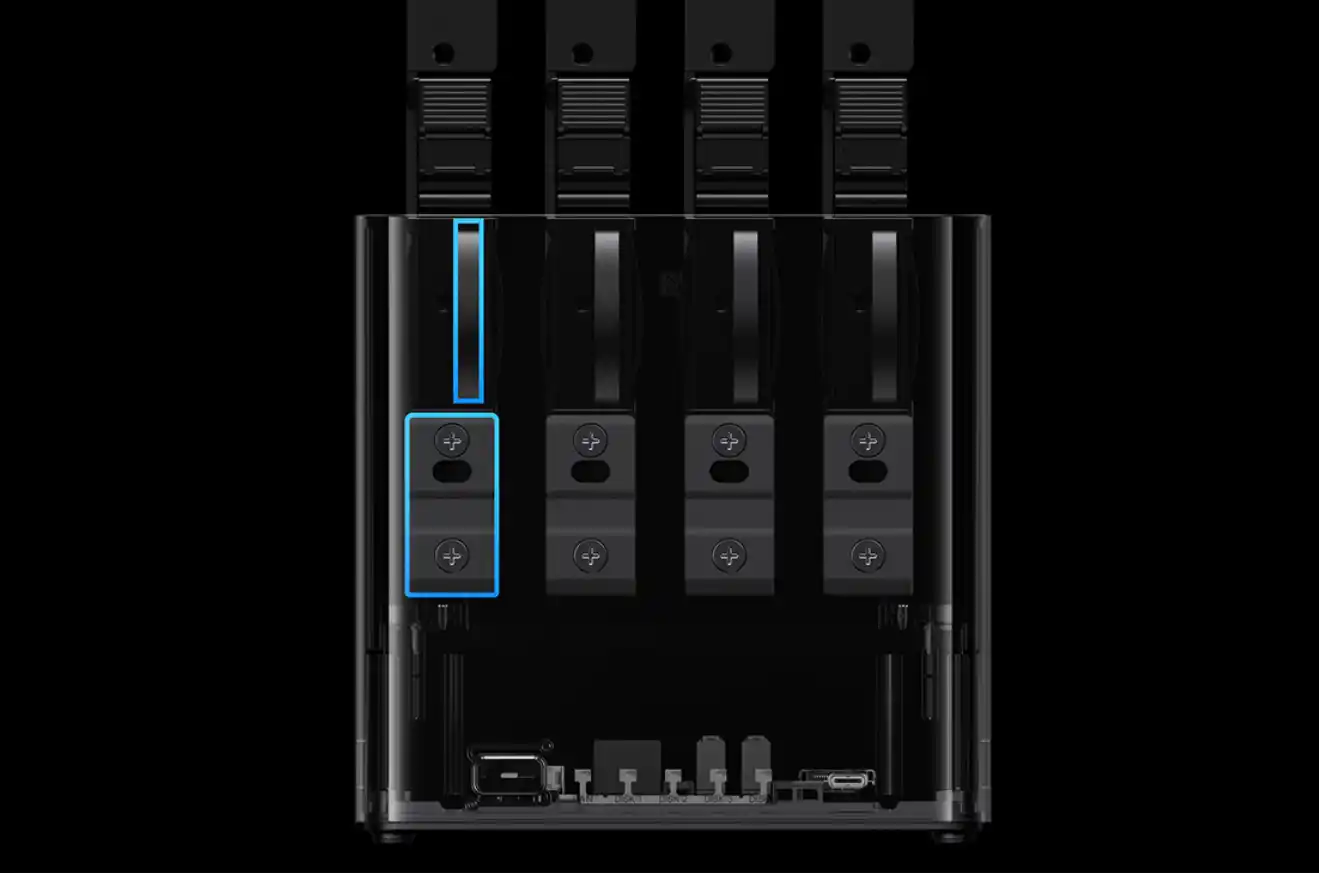
The DH3400 supports up to four 3.5” or 2.5” SATA drives, while the DH3200 supports two, and both models can accommodate up to 30 TB per bay, for a maximum of 120 TB on the DH3400 when fully populated. Supported RAID configurations include JBOD, Basic, RAID 0, 1, 5, 6, and 10, providing a range of data protection and performance options suited to home and SOHO environments.
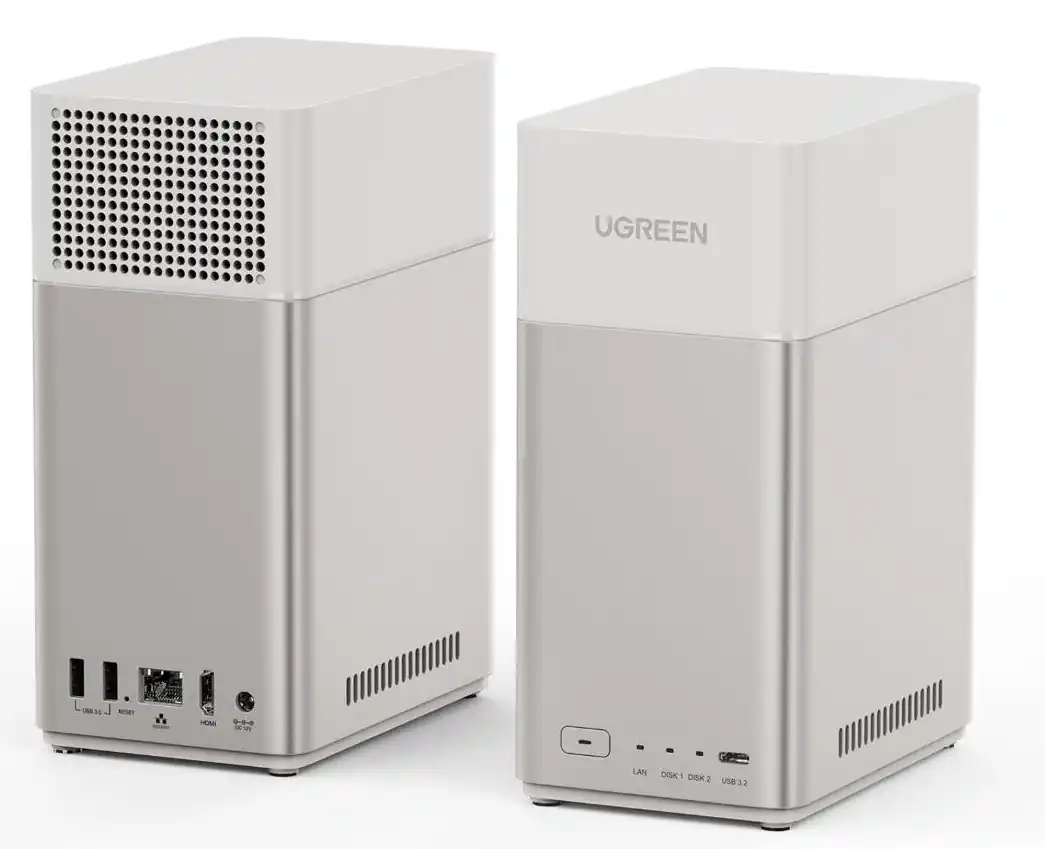
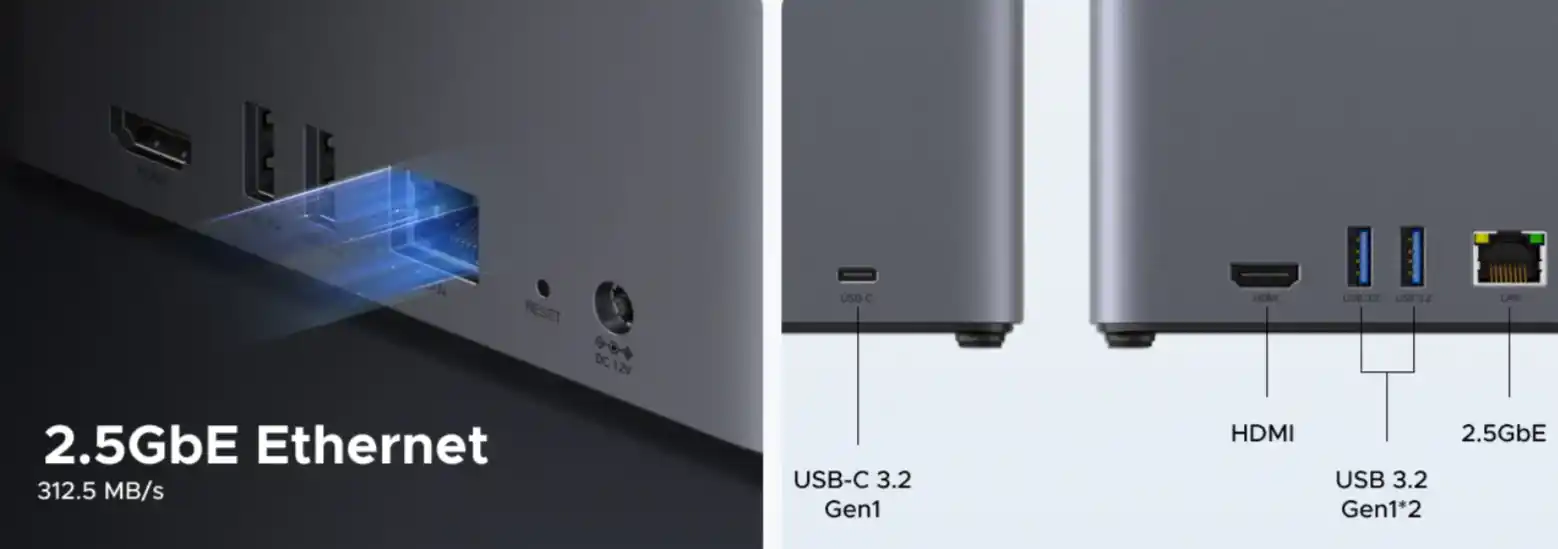
Networking and external connectivity are kept simple yet functional. Each system includes a single 2.5 GbE Ethernet port, which supports transfer speeds up to roughly 300 MB/s under optimal conditions. Although dual LAN ports for link aggregation or failover would have been welcome at this price point, the single-port setup is likely sufficient for the target audience.
Three USB ports are provided: one USB-C @ 5Gb/s and two USB-A @ 10 Gb/s. These are useful for connecting additional external drives, creating tiered backups, or quickly offloading data from portable devices. The inclusion of a full-size HDMI port capable of 4K/60Hz output is another notable feature, enabling direct connection to a monitor or TV for multimedia playback or system administration from a local display—something not all competing devices offer.
From a physical and design perspective, the DH series is clearly built to fit seamlessly into a home or small office. The DH3400’s chassis measures just 155 × 155 × 215.7 mm, and its vertical, injection-molded plastic design keeps its footprint compact and thermals manageable. Power consumption is modest at a rated 12V/6A, helping keep operational costs low and making the units suitable for 24/7 use.

The overall aesthetic is understated, drawing comparisons to earlier Western Digital consumer NAS devices, with a focus on quiet operation and minimal disruption to the workspace. While there is no support for PCIe expansion or M.2 NVMe storage—features found in higher-end UGREEN DXP models—the streamlined hardware specification aligns with the device’s role as an affordable, efficient, and easy-to-deploy file server for users who don’t require more advanced features.
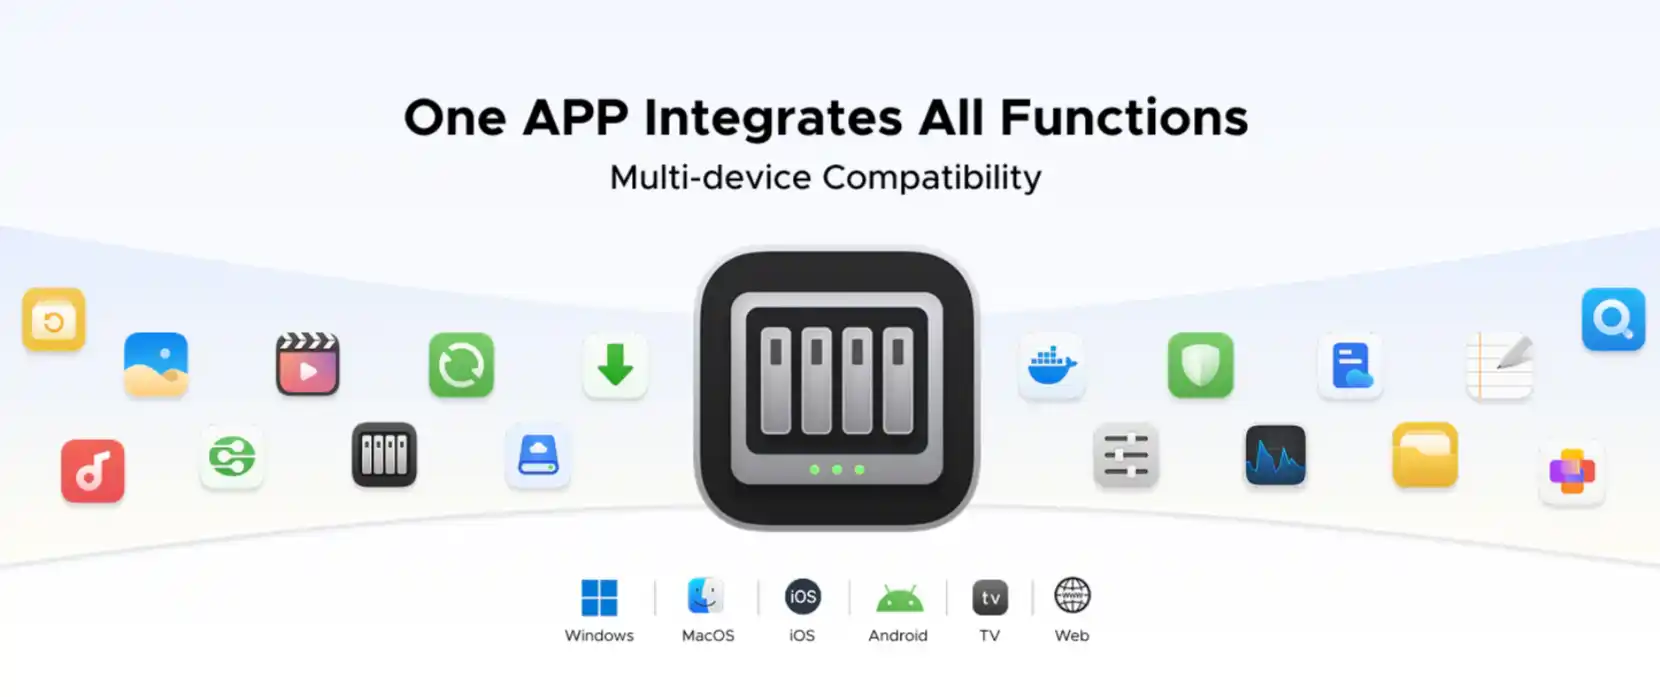
Both the DH3400 and DH3200 ship with UGREEN’s UGOS Pro operating system, a Linux-based NAS software platform designed to be user-friendly while offering a solid range of core functionality. UGOS Pro provides a clean, browser-based interface accessible from Windows, macOS, Android, iOS, web browsers, and even smart TVs, making it easy for users to manage their storage from almost any device. The OS supports secure multi-user access with advanced encryption, a built-in firewall, and two-factor authentication, ensuring that data remains protected from unauthorized access. Local data storage is emphasized over cloud reliance, though cloud backup targets are supported for redundancy.
In terms of features, UGOS Pro includes most of the essential applications expected of a modern NAS. File and folder management is straightforward, with support for SMB/CIFS, NFS, and WebDAV protocols. Users can set up scheduled or on-demand backups, including multi-tiered strategies spanning local drives, external USB storage, and supported cloud services. Snapshot functionality is included to help protect against accidental deletion or data corruption. Multimedia applications are also integrated, with tools for organizing and streaming photos, videos, and music, plus support for the HDMI output for direct 4K media playback on connected displays.

Despite being a value-oriented device, the DH3400 and DH3200 still offer some advanced capabilities thanks to the efficiency of the RK3588C CPU. These include AI-powered features such as photo recognition by faces, scenes, and locations, automatic duplicate removal, and the creation of personalized albums. Semantic search functionality helps users locate files more intuitively, and Docker is supported for lightweight containerized applications. However, resource-intensive functions like virtualization and more complex enterprise-grade apps are not included, in keeping with the intended role of these systems as affordable, entry-level NAS solutions. Plus, no doubt, the ease of integrating this more cost-effective solution with other, more powerful DXP NAS systems using the nativa backup sync application is going to be a breeze on the LAN!
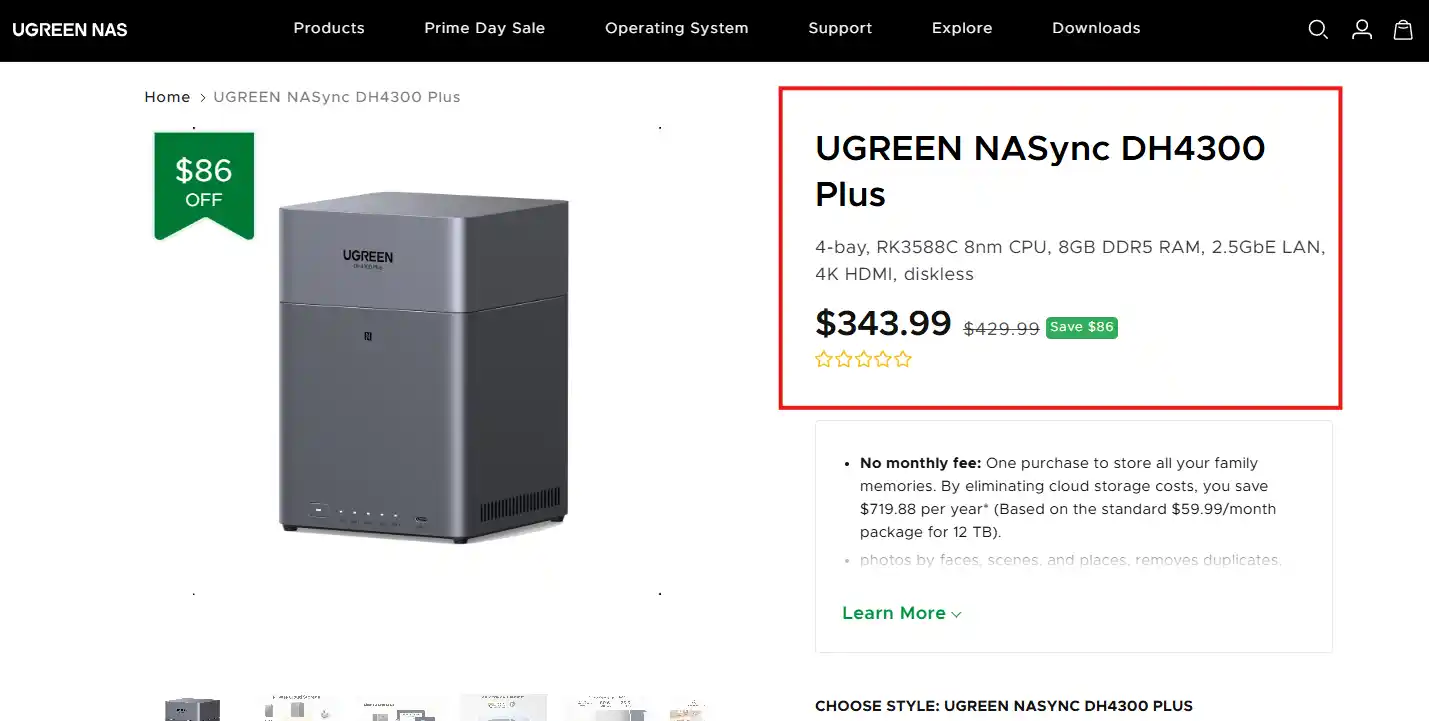
UGREEN’s new DH2300 and DH4300 NAS models have already quietly launched, with availability beginning during Amazon Prime Day 2025 in what can best be described as a stealth release. The DH4300, the 4-bay model, is currently listed at $429.99 diskless, although a temporary promotional discount during Prime Day dropped the price as low as $349.99. At the time of writing, UGREEN has not provided an official end date for the promotional pricing, so buyers should assume the standard price is $429.99 going forward. The DH2300, the 2-bay variant, has not yet been widely listed, and official pricing for that model has yet to be confirmed. Both models are expected to continue rolling out to major online retailers over the coming weeks, with broader global availability likely to follow given UGREEN’s previous product launch patterns. For now, early adopters in supported regions can purchase the DH4300 directly from platforms like Amazon, and keep an eye on listings for the DH2300 to appear soon. Buyers should note that, as with most diskless NAS products, storage drives are sold separately. These models are positioned as affordable, efficient storage solutions in UGREEN’s lineup, complementing rather than replacing their existing DXP series. By offering a lower barrier to entry, UGREEN appears to be catering to users looking for basic yet capable NAS hardware at an accessible price. Those interested in purchasing should monitor retailer listings closely for availability and any further discounts as stock becomes more widely distributed.
You can order from the Official UGREEN site via the banner below:
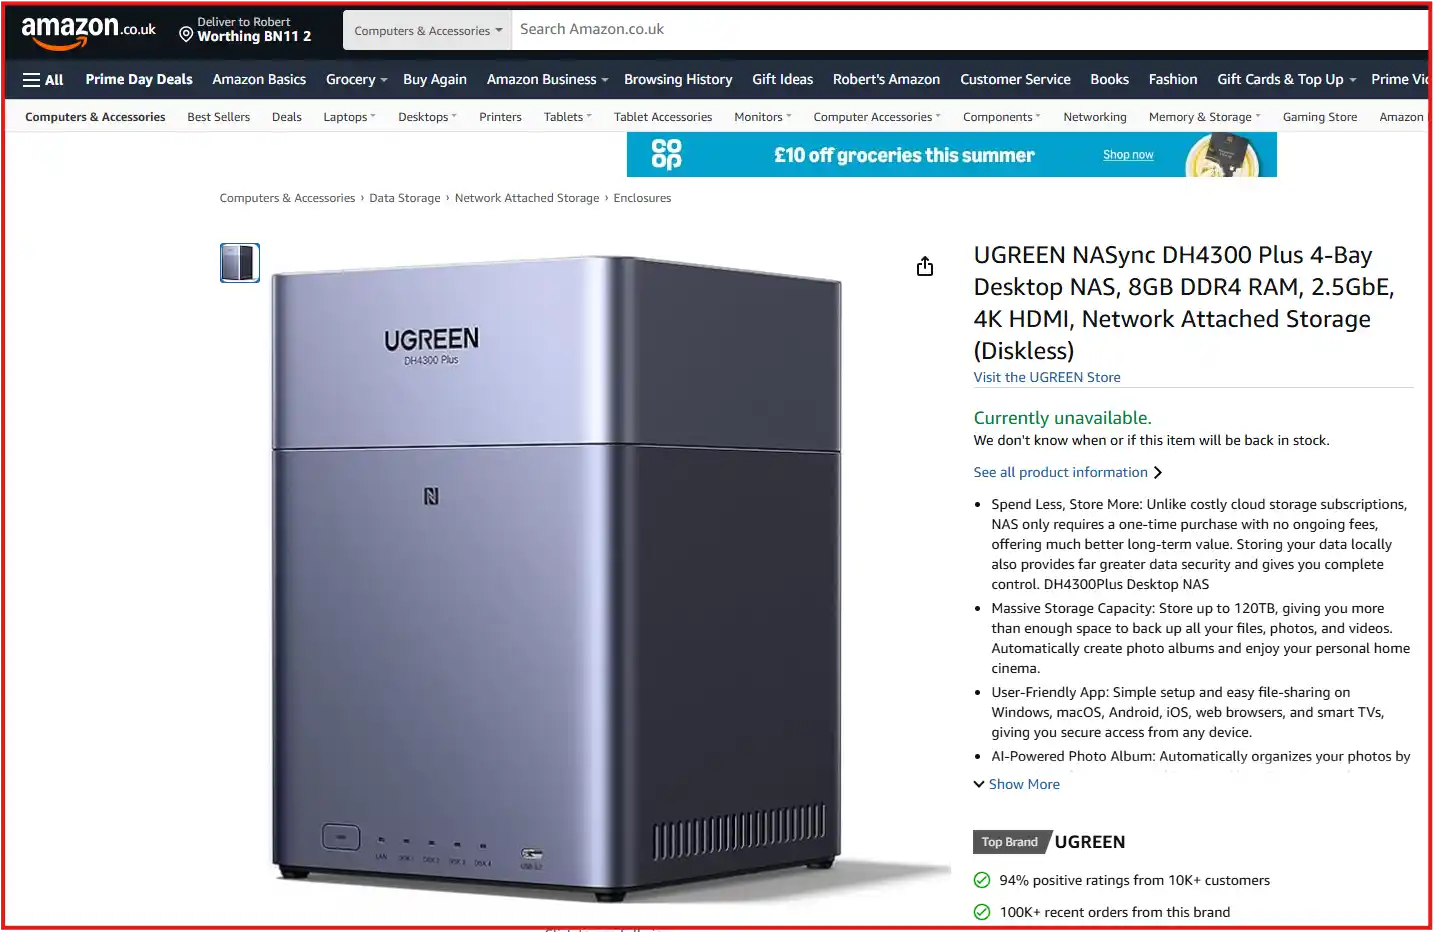
Alternatively, the UGREEN DH4300 has appeared on Amazon on Multiple locations. So you can check the Amazon store in your region by clicking the banner below.
Remember. We get a small commission from any sales that occur from using the links above, and these go directly into allowing us to keep doing what we do.
UGREEN Store – https://ugreen.pxf.io/jejy6Z/
Amazon Store – https://amzn.to/409Sckl/
SUBSCRIBE TO OUR NEWSLETTER Join Inner Circle Subscribe
This description contains links to Amazon. These links will take you to some of the products mentioned in today's content. As an Amazon Associate, I earn from qualifying purchases. Visit the NASCompares Deal Finder to find the best place to buy this device in your region, based on Service, Support and Reputation - Just Search for your NAS Drive in the Box Below
Need Help?
Where possible (and where appropriate) please provide as much information about your requirements, as then I can arrange the best answer and solution to your needs. Do not worry about your e-mail address being required, it will NOT be used in a mailing list and will NOT be used in any way other than to respond to your enquiry.
[contact-form-7]
Ko-fi or old school Paypal. Thanks!To find out more about how to support this advice service check HEREIf you need to fix or configure a NAS, check Fiver
Have you thought about helping others with your knowledge? Find Instructions Here
|
|
|
 Le Frame 5000D est une version revisitée du Frame 4000D. Corsair propose plus d’espace, de fonctionnalités et le support des radiateurs de 420.
Cet article Test FRAME 5000D de Corsair a été publié en premier par GinjFo.
Découvrez notre test complet du mini PC Geekom A5, édition 2025, un modèle évolutif et polyvalent, proposé à moins de 350 euros.
The post Test Geekom A5 2025 Edition : un mini PC polyvalent à moins de 350 euros first appeared on IT-Connect.
The Minisforum N5 Pro marks the company’s first deliberate step into the network-attached storage (NAS) segment, building upon its established experience in producing compact desktops, mini-PCs, and workstation-class hardware. First hinted at during industry discussions at IFA 2024 and formally revealed during CES 2025 in Nevada, the N5 Pro was later showcased in its near-final form at Computex 2025 in Taipei before entering production. Positioned as a high-performance NAS platform for advanced users, homelab enthusiasts, and small business operators, the N5 Pro aims to deliver server-class processing and expandability within a familiar, small-footprint chassis design. Alongside the N5 Pro, Minisforum released a standard N5 model at a lower price point, utilizing an 8-core processor without ECC memory support but retaining the same overall feature set and drive layout. Both systems ship with Minisforum’s proprietary MinisCloud OS pre-installed on a 64GB NVMe SSD, while remaining fully compatible with third-party NAS operating systems such as TrueNAS, Unraid, or Linux distributions. This review examines the N5 Pro model in detail, including its industrial design, internal hardware configuration, connectivity options, bundled software, real-world performance testing, and overall value proposition within the evolving NAS market.
The is now available to buy:
IMPORTANT – Below are the links to the OFFICIAL Minisforum site to buy the N5 and N5 Pro. However, using these links does not support us (i.e we do not get an affiliate fee). We want you to buy this device from whichever retailer best suits your needs, but we hope you are able to support the work we do (such as this review and our YouTube channel) but using the links above for your storage media, or any other data storage/network solution purchase. |
The Minisforum N5 Pro is an impressive and highly versatile NAS platform that successfully combines the core strengths of a storage appliance with the capabilities of a compact, workstation-class server, making it suitable for demanding and varied use cases. Its defining features include a 12-core Ryzen AI 9 HX PRO 370 CPU with 24 threads and onboard AI acceleration up to 50 TOPS, support for up to 96GB of ECC-capable DDR5 memory for data integrity, and a hybrid storage architecture offering up to 144TB total capacity through a mix of five SATA bays and three NVMe/U.2 slots. Additional highlights such as ZFS file system support with snapshots, inline compression, and self-healing, along with high-speed networking via dual 10GbE and 5GbE ports, and expansion through PCIe Gen 4 ×16 and OCuLink interfaces, position it well beyond the capabilities of typical consumer NAS systems. The compact, fully metal chassis is easy to service and efficiently cooled, enabling continuous operation even under sustained virtual machine, AI, or media workloads. At the same time, the bundled MinisCloud OS, while feature-rich with AI photo indexing, Docker support, and mobile integration, remains a work in progress, lacking some enterprise-grade polish, robust localization, and more advanced tools expected in mature NAS ecosystems. Minor drawbacks such as the external PSU, the thermally challenged pre-installed OS SSD, and the higher cost of the Pro variant relative to the standard N5 are important to weigh, particularly for users who may not fully utilize the Pro’s ECC and AI-specific advantages. For advanced users, homelab builders, and technical teams who require high compute density, flexible storage, and full control over their software stack, the N5 Pro delivers workstation-level performance and configurability in NAS form—offering one of the most forward-thinking and adaptable solutions available today in this segment.
 BUILD QUALITY - 10/10
HARDWARE - 9/10PERFORMANCE - 9/10PRICE - 7/10VALUE - 8/10
BUILD QUALITY - 10/10
HARDWARE - 9/10PERFORMANCE - 9/10PRICE - 7/10VALUE - 8/10

8.6
PROS
 High-performance AMD Ryzen
 AI 9 HX PRO 370 CPU with 12 cores, 24 threads, and AI acceleration (50 TOPS NPU) is INCREDIBLE for a compact desktop purchaseSupport for up to 96GB DDR5 memory with ECC, ensuring data integrity and stability in critical environmentsZFS-ready storage with numerous ZFS and TRADITIONAL RAID configurations, snapshots, and inline compressionHybrid storage support: five 3.5\\\"/2.5\\\" SATA bays plus three NVMe/U.2 SSD slots, with up to 144TB total capacityVersatile expansion options including PCIe Gen 4 ×16 slot (×4 electrical) and OCuLink port for GPUs or NVMe cagesDual high-speed networking: 10GbE and 5GbE RJ45 ports with link aggregation support + (using the inclusive MinisCloud OS) the use of the USB4 ports for direct PC/Mac connection!Fully metal, compact, and serviceable chassis with thoughtful cooling and accessible internal layout - makes maintenance, upgrades and troubleshooting a complete breeze!Compatibility with third-party OSes (TrueNAS, Unraid, Linux) without voiding warranty, offering flexibility for advanced users
CONS
AI 9 HX PRO 370 CPU with 12 cores, 24 threads, and AI acceleration (50 TOPS NPU) is INCREDIBLE for a compact desktop purchaseSupport for up to 96GB DDR5 memory with ECC, ensuring data integrity and stability in critical environmentsZFS-ready storage with numerous ZFS and TRADITIONAL RAID configurations, snapshots, and inline compressionHybrid storage support: five 3.5\\\"/2.5\\\" SATA bays plus three NVMe/U.2 SSD slots, with up to 144TB total capacityVersatile expansion options including PCIe Gen 4 ×16 slot (×4 electrical) and OCuLink port for GPUs or NVMe cagesDual high-speed networking: 10GbE and 5GbE RJ45 ports with link aggregation support + (using the inclusive MinisCloud OS) the use of the USB4 ports for direct PC/Mac connection!Fully metal, compact, and serviceable chassis with thoughtful cooling and accessible internal layout - makes maintenance, upgrades and troubleshooting a complete breeze!Compatibility with third-party OSes (TrueNAS, Unraid, Linux) without voiding warranty, offering flexibility for advanced users
CONS
 MinisCloud OS is functional but immature, with unfinished localisation and limited advanced enterprise features - lacks MFA, iSCSI, Security Scanner and More. Nails several key fundamentals, but still feels unfinished at this time.Despite External PSU design (will already annoy some users), it generates a lot of additional heat and may not appeal to all users overallPreinstalled 64GB OS SSD runs hot under sustained use and lacks dedicated cooling. Plus, losing one of the 3 m.2 slots to it will not please everyone (most brands manage to find a way to apply an eMMC into the board more directly, or use a USB bootloader option as a gateway for their OSPremium $1000+ pricing may be hard to justify for users who don’t need ECC memory or AI capabilities compared to the standard N5 at $500+
Where to Buy a Product


![]()
![]()

VISIT RETAILER ➤

![]()
![]()
VISIT RETAILER ➤
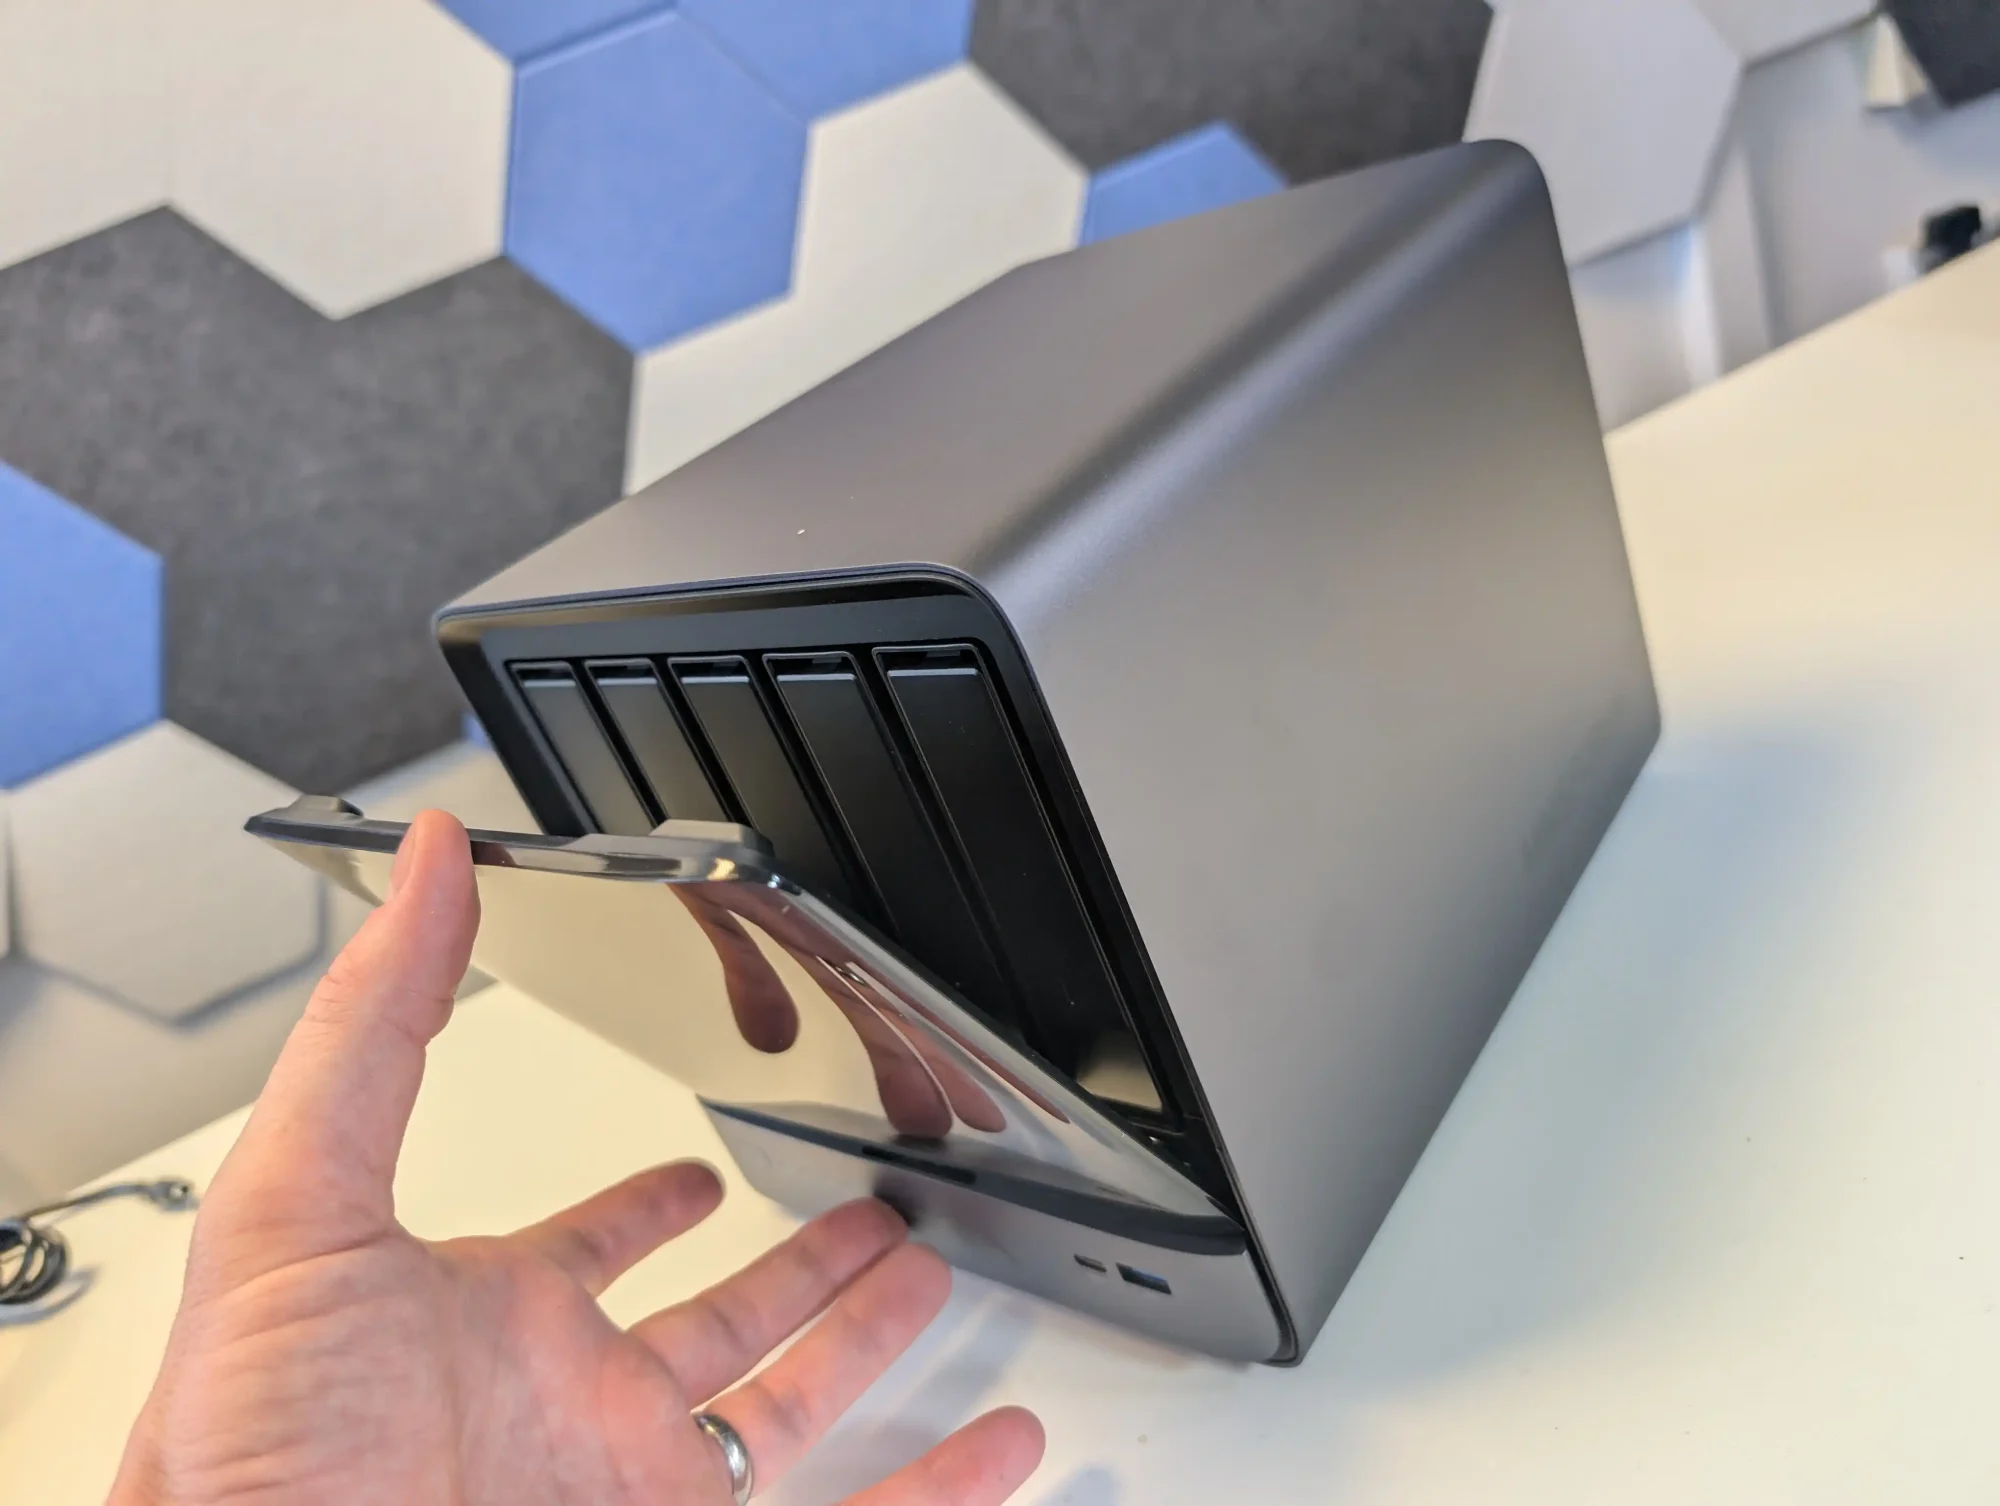
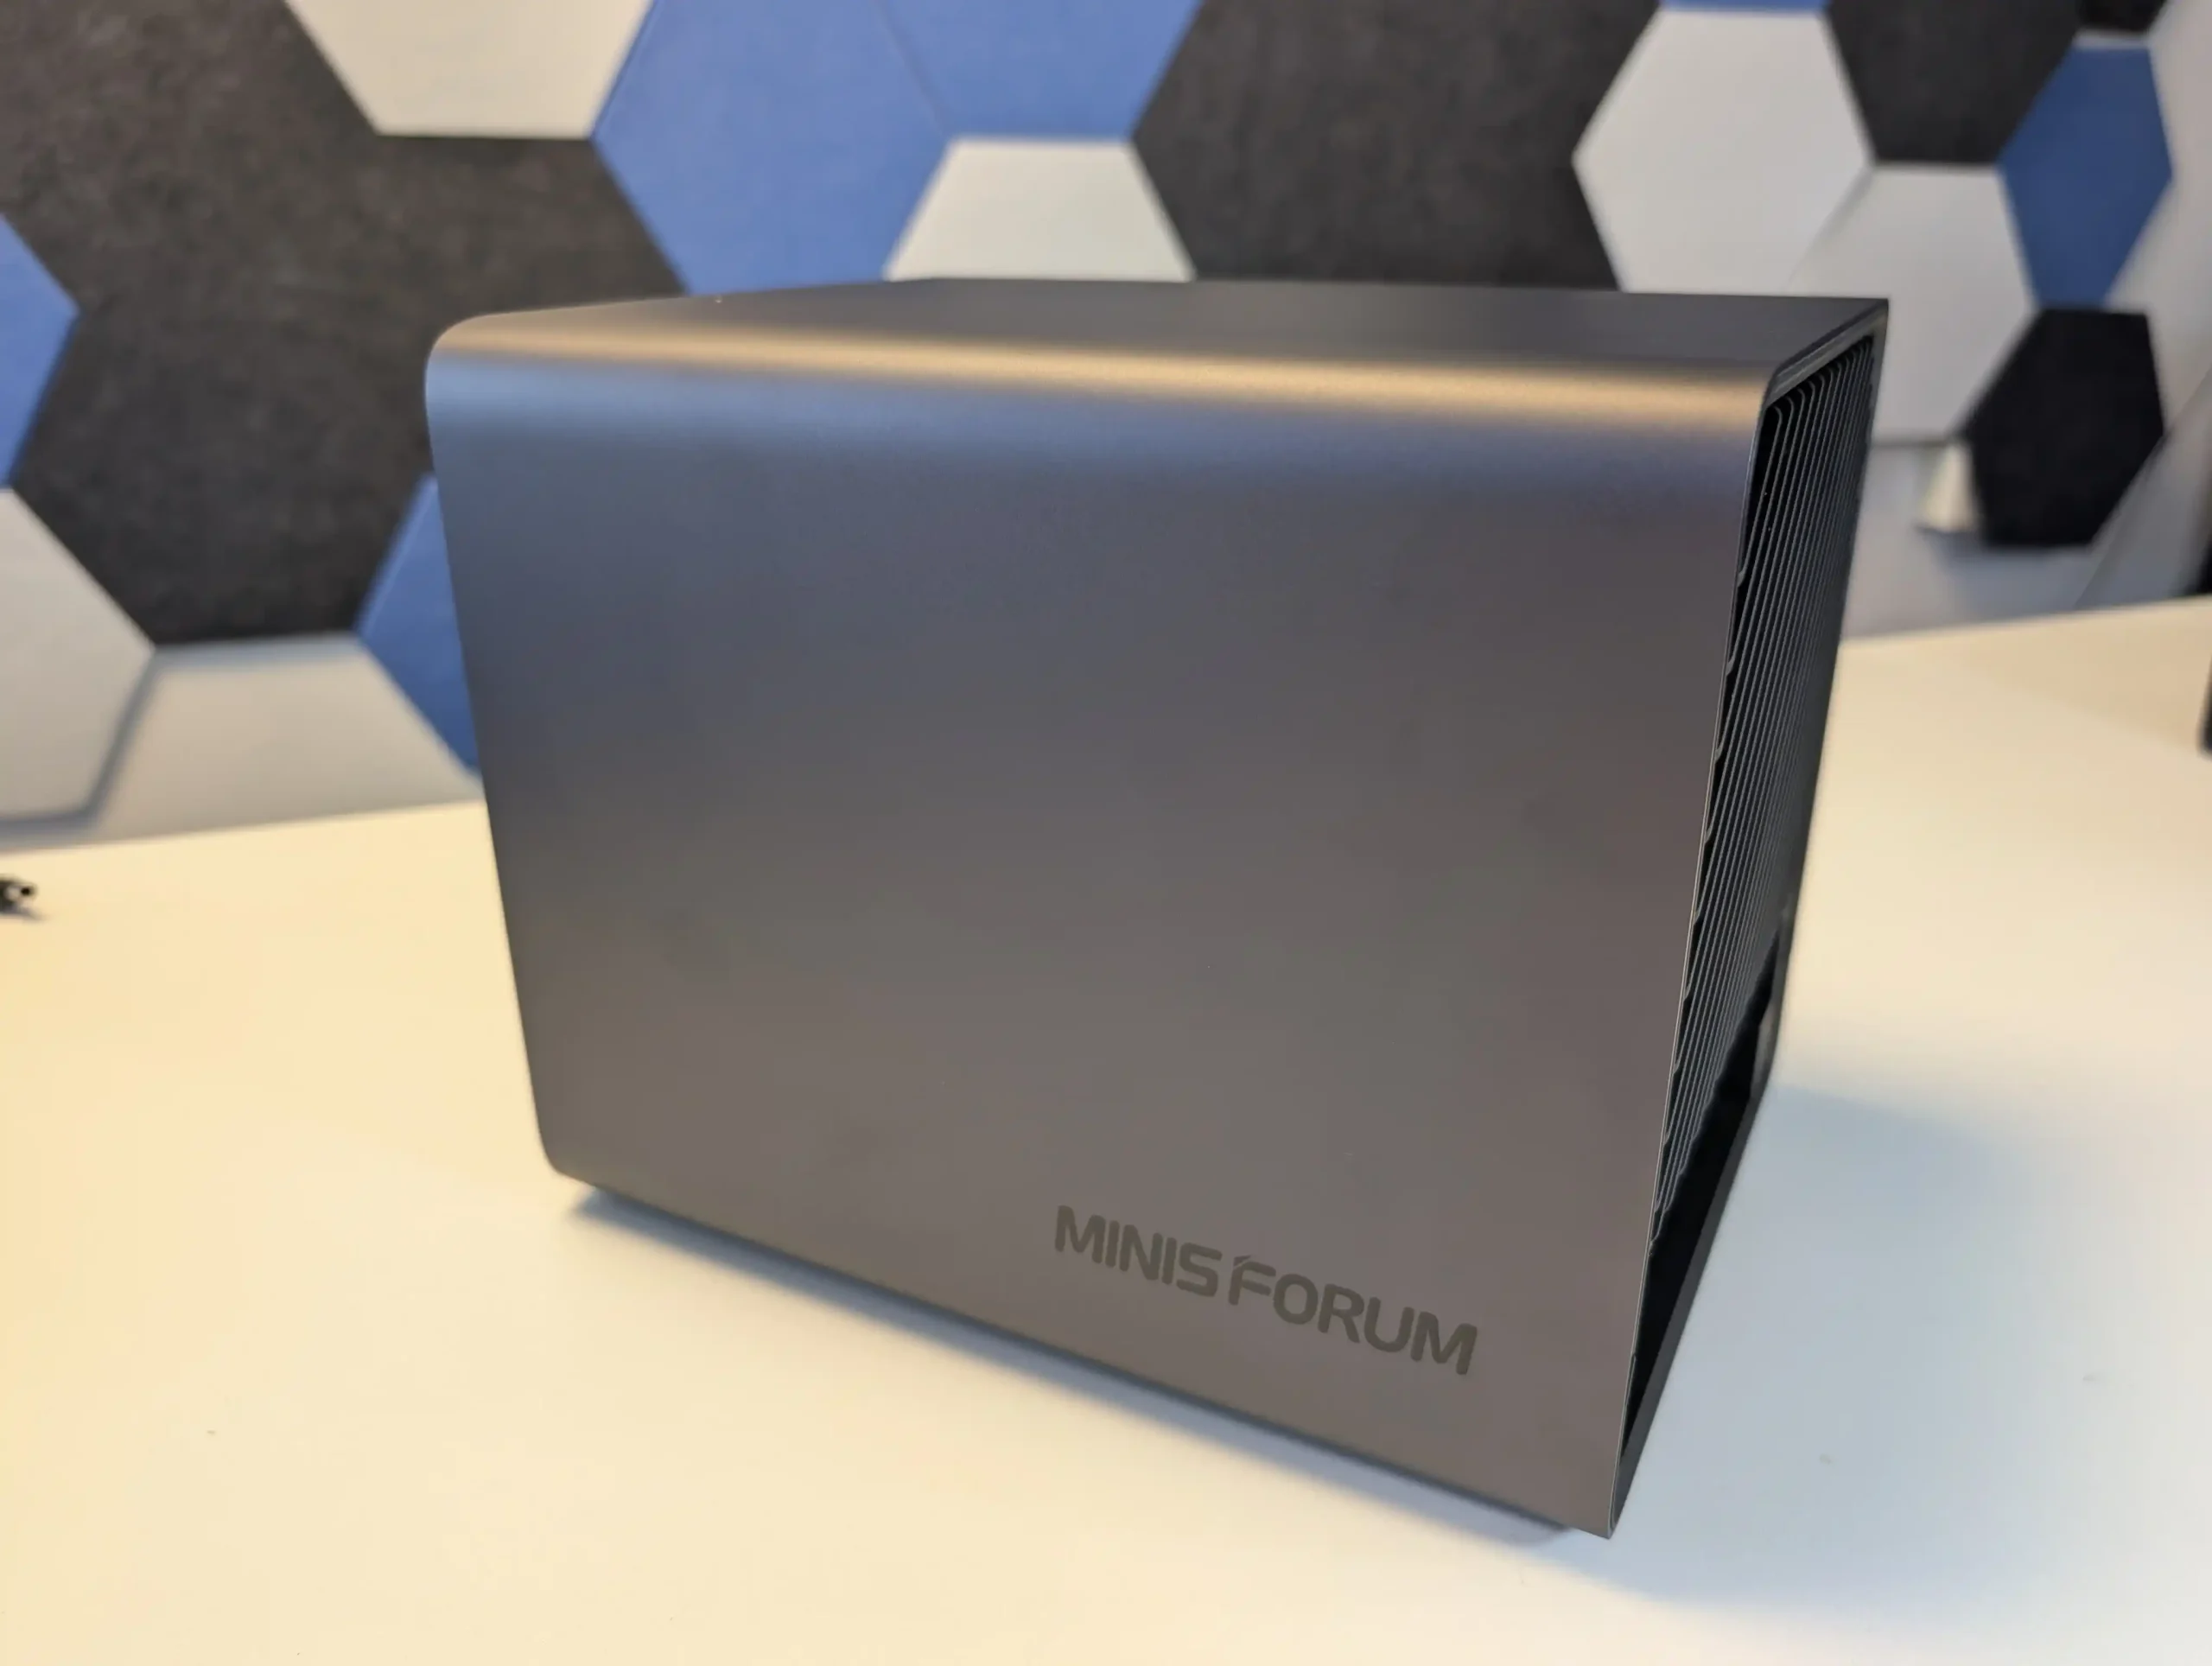
The Minisforum N5 Pro continues the company’s emphasis on compact yet industrial-grade hardware, retaining a desktop-friendly footprint of 199 x 202 x 252 mm and weighing just under 5 kg. Its exterior is constructed from anodized aluminum alloy, which not only enhances durability but also serves as part of the system’s passive thermal management by dispersing residual heat through the shell.
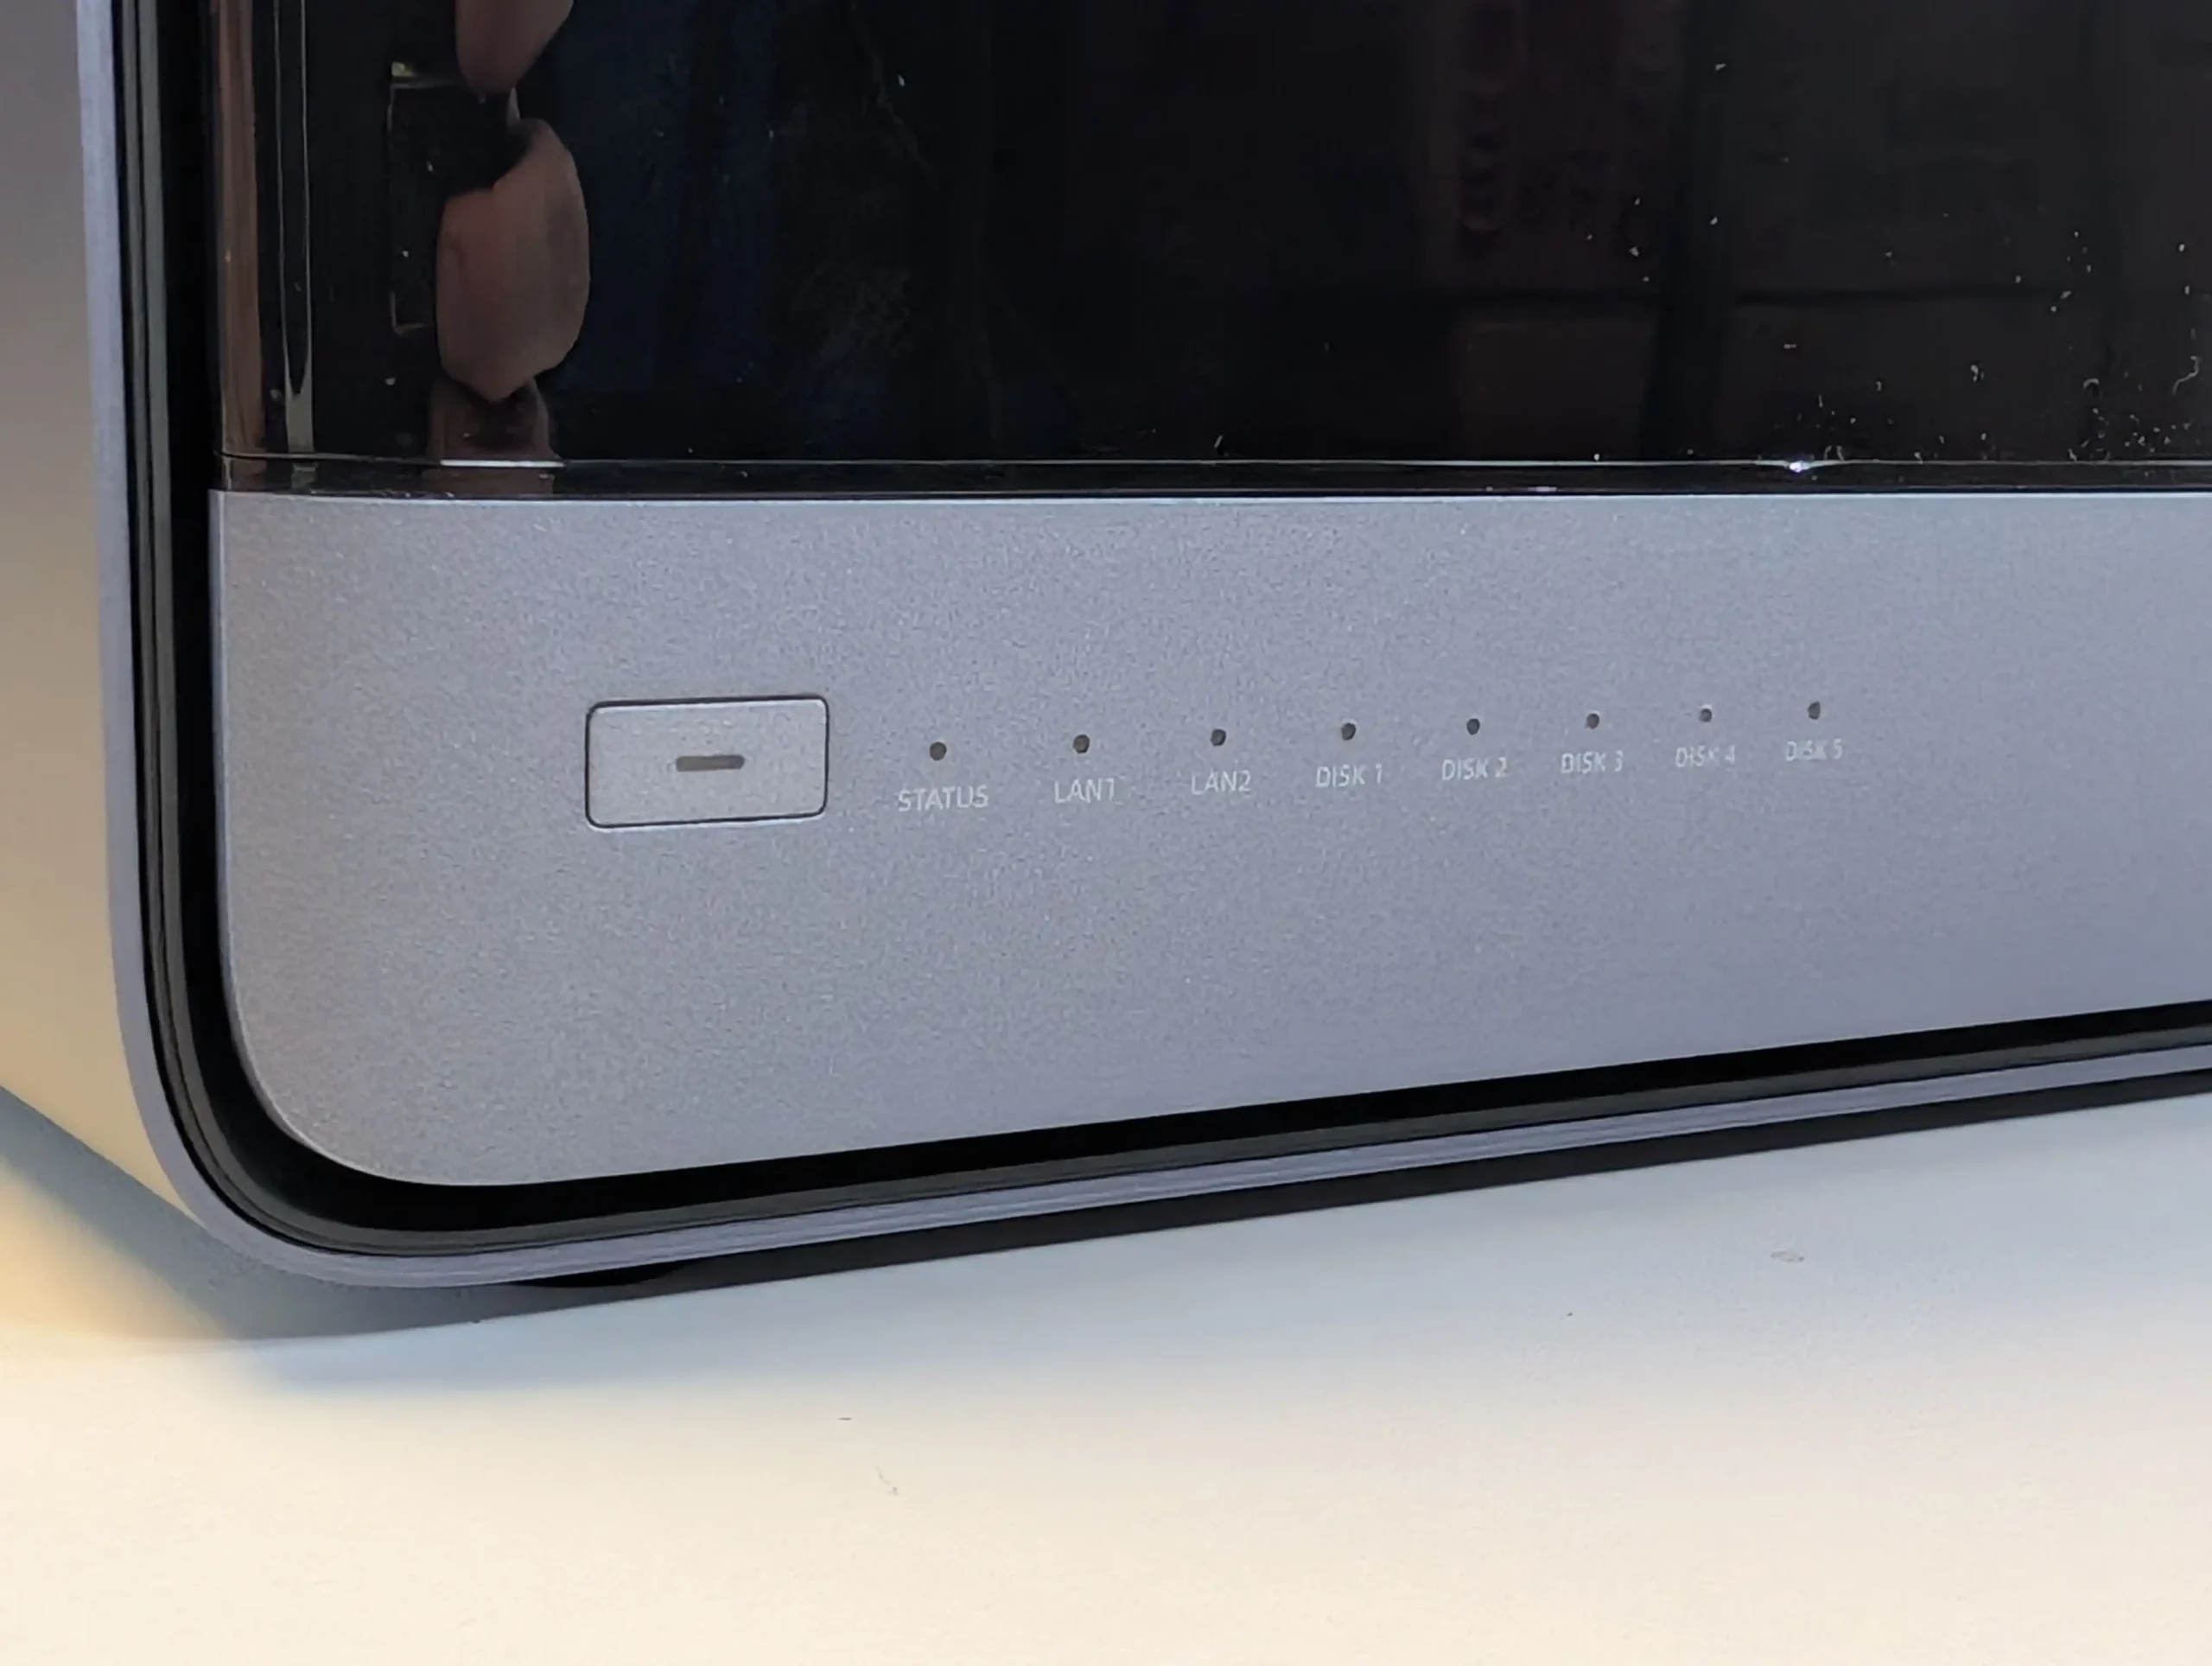
The front panel is understated, housing clearly labeled LEDs for system status, network activity indicators for both network interfaces, and separate activity lights for each of the five SATA bays.
A recessed power button with integrated LED, reset hole, and anti-theft lock slot round out the front-facing controls. The system’s modular internal structure divides the upper and lower sections cleanly, with the drive cage occupying the top tier and the motherboard and expansion slots housed below.
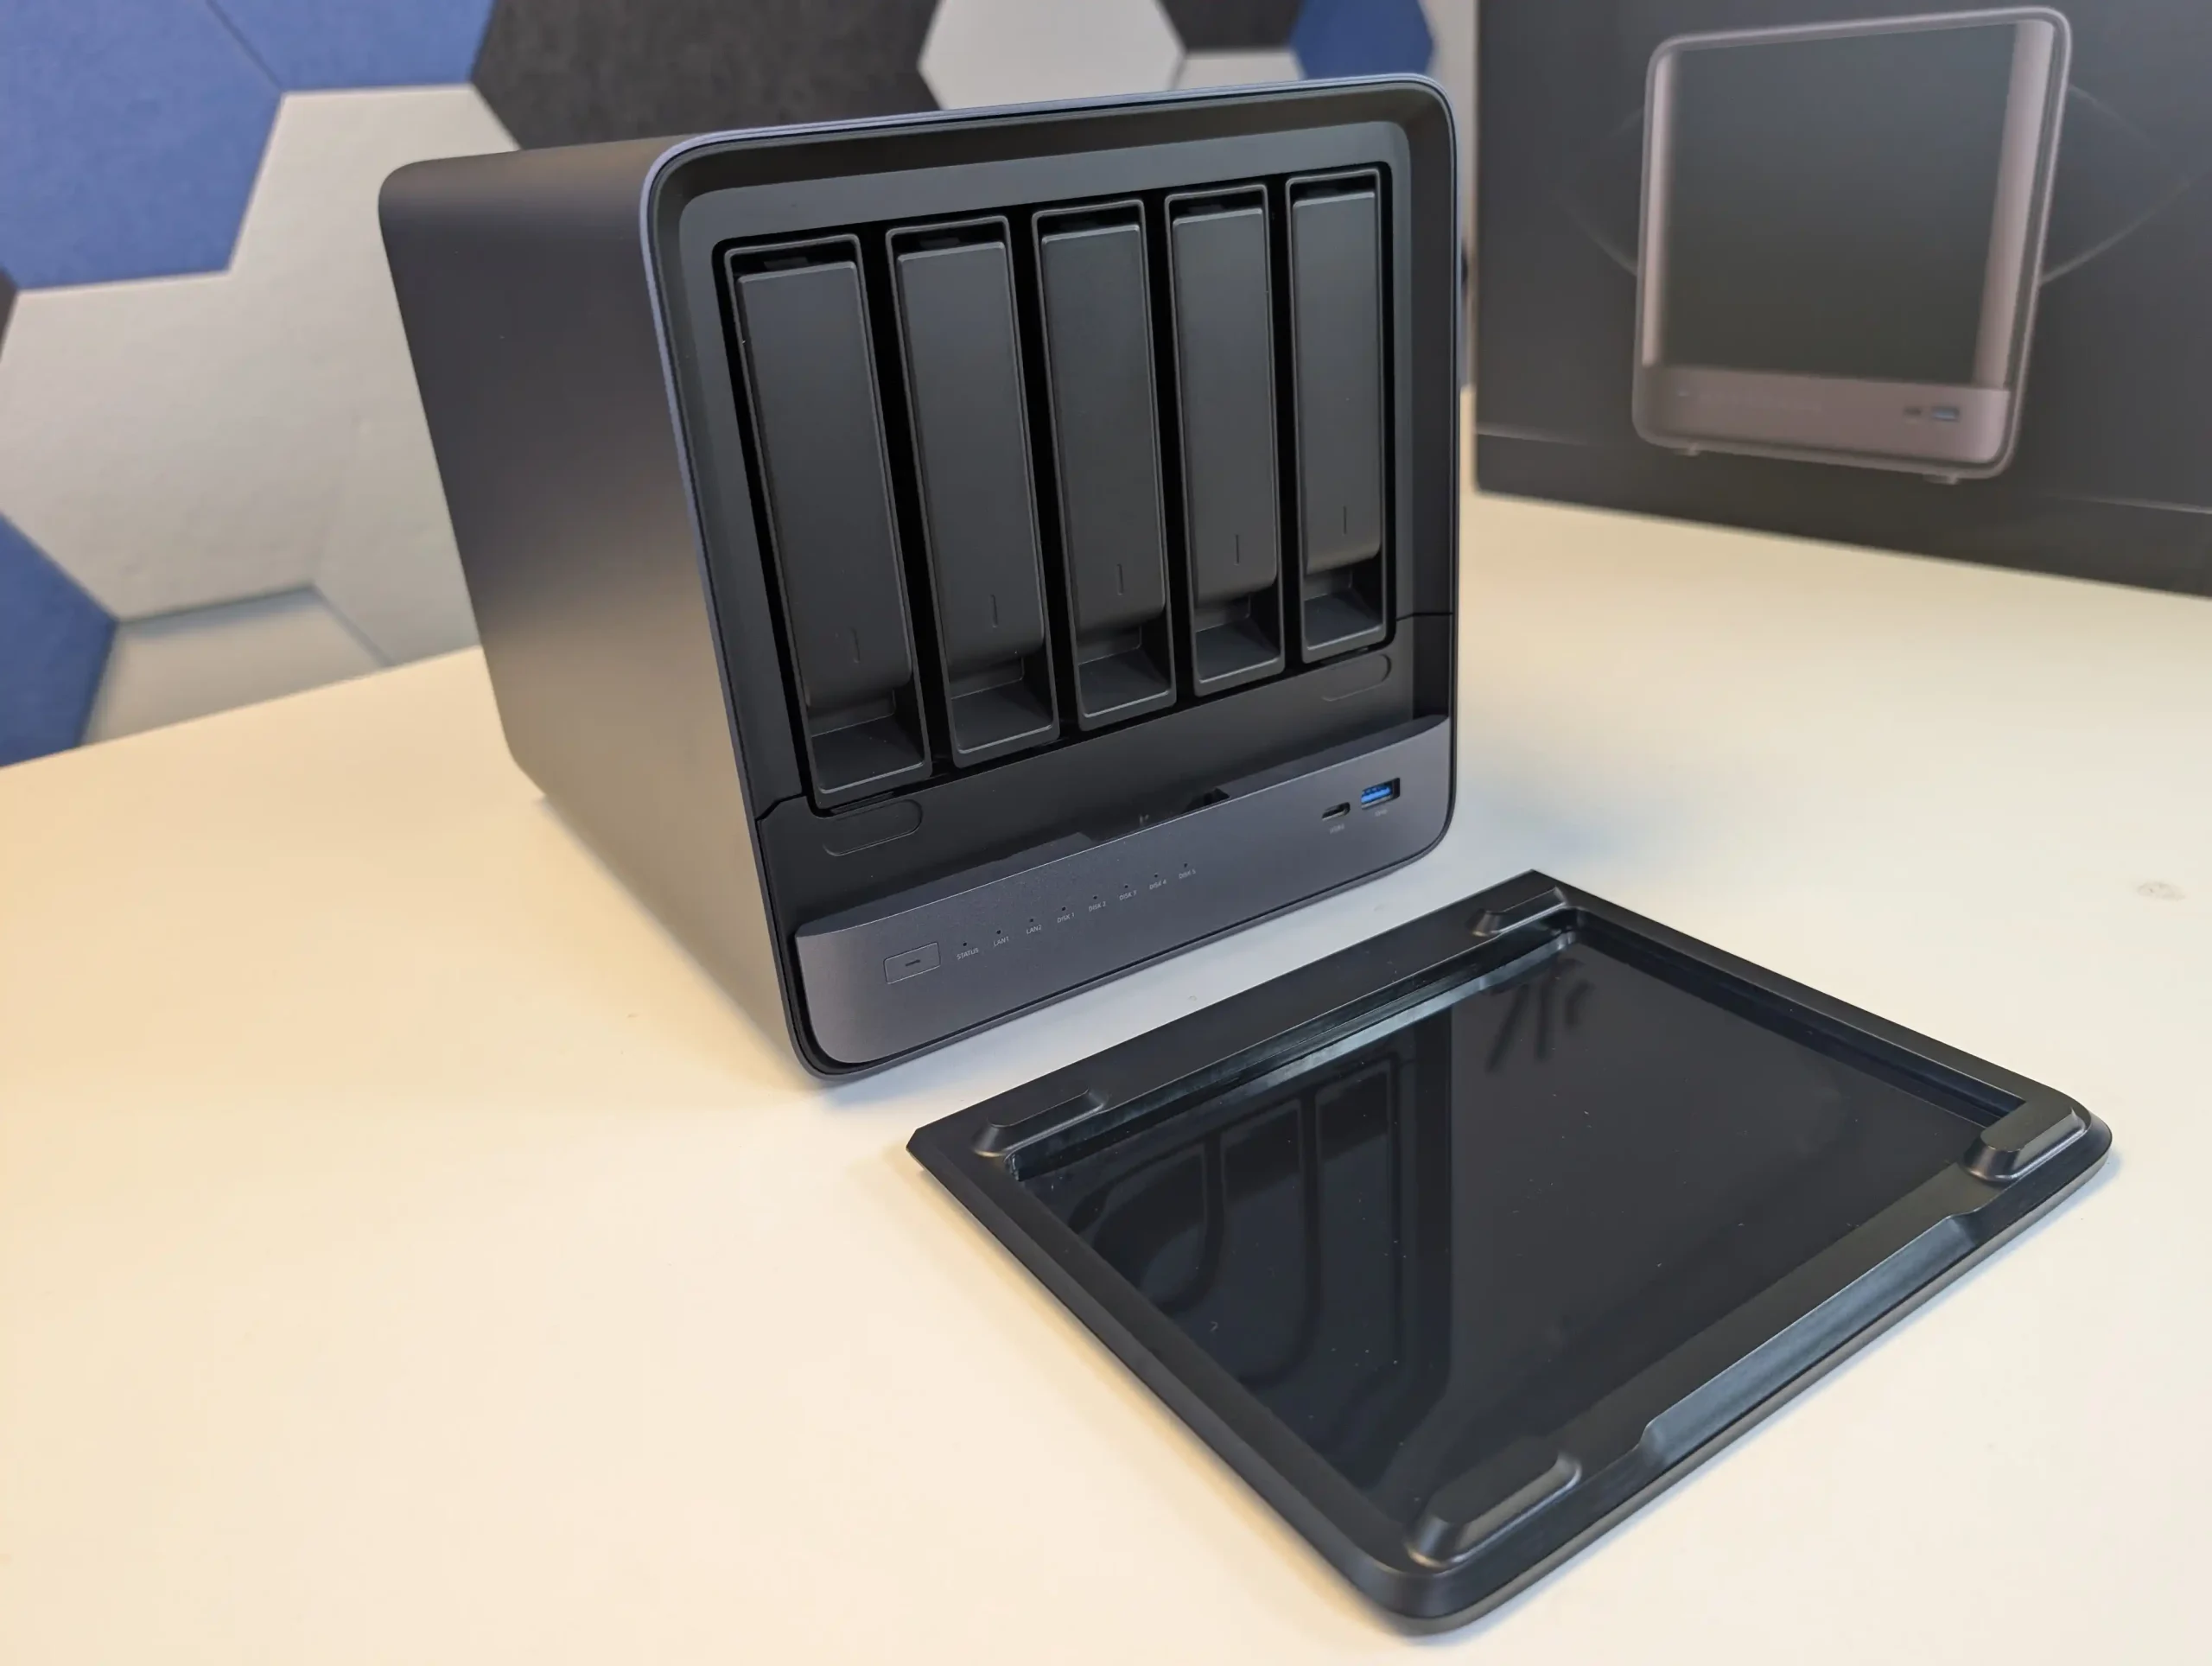
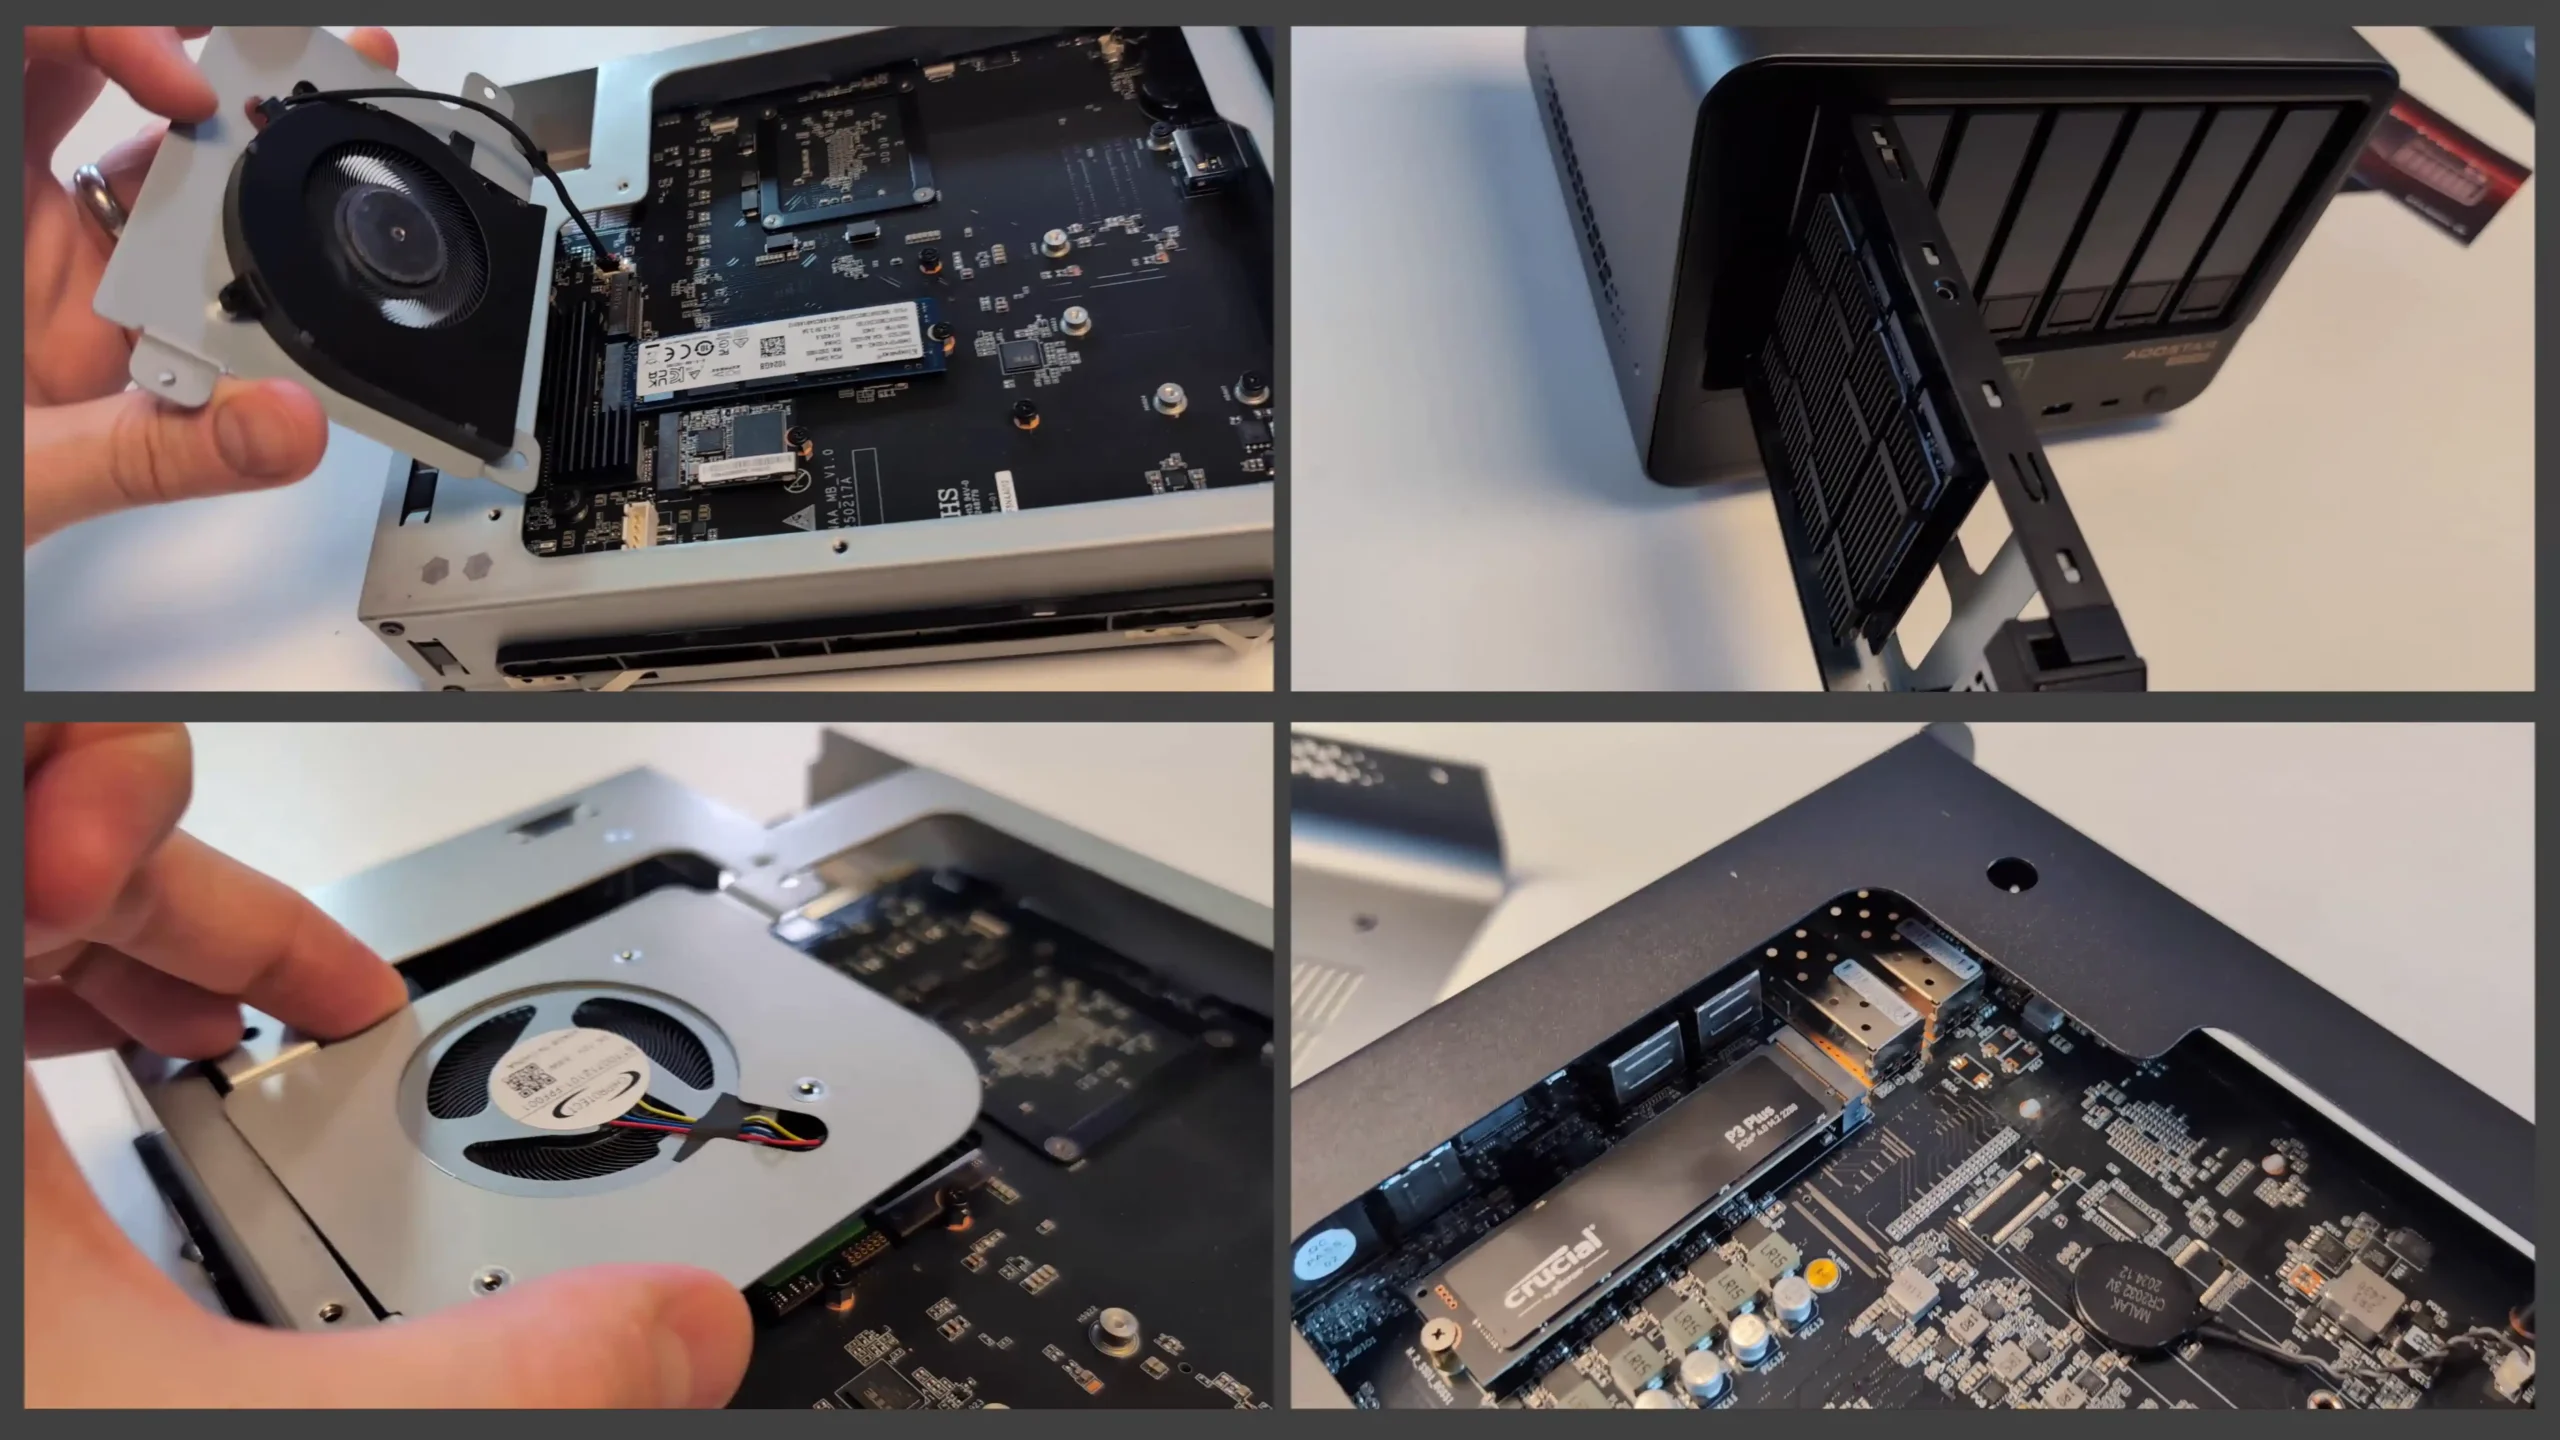
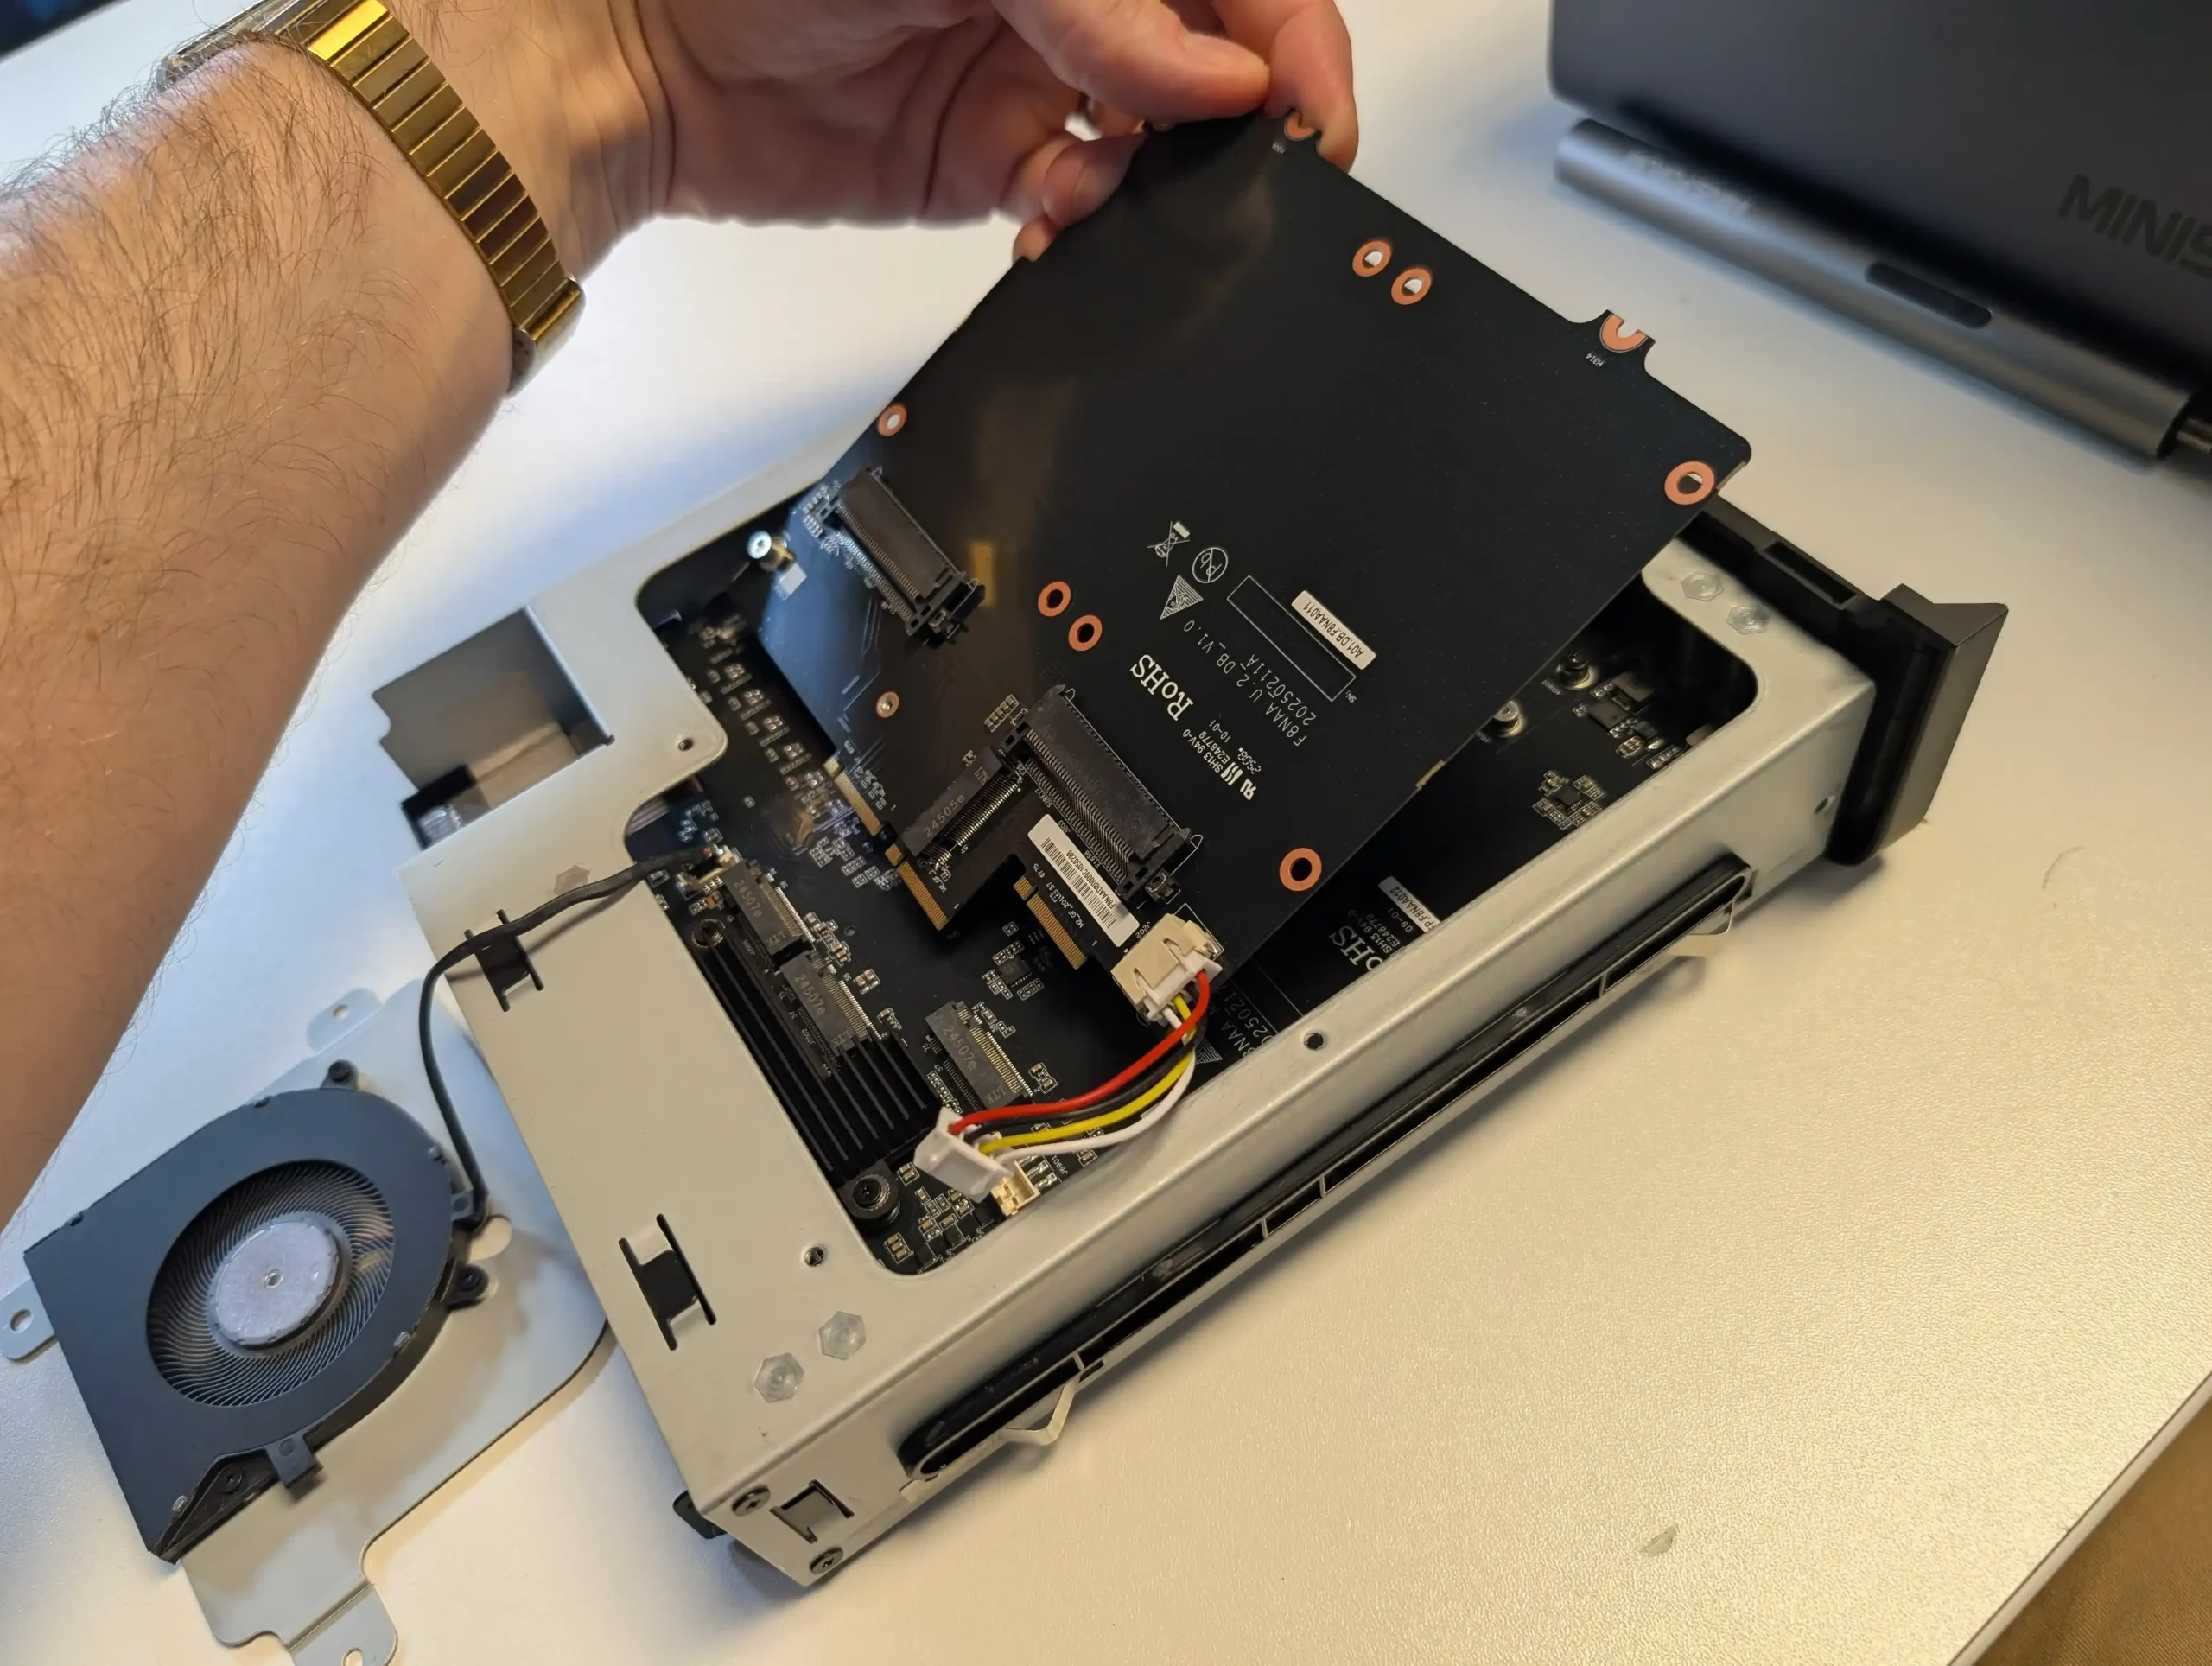
The slide-out tray design for the storage cage facilitates fast maintenance and upgrades, and access to all internal components requires minimal disassembly, aided by two easily removable rear screws and a fully detachable back panel. This thoughtful layout supports not only ease of serviceability but also helps maintain clean cable management for improved airflow.

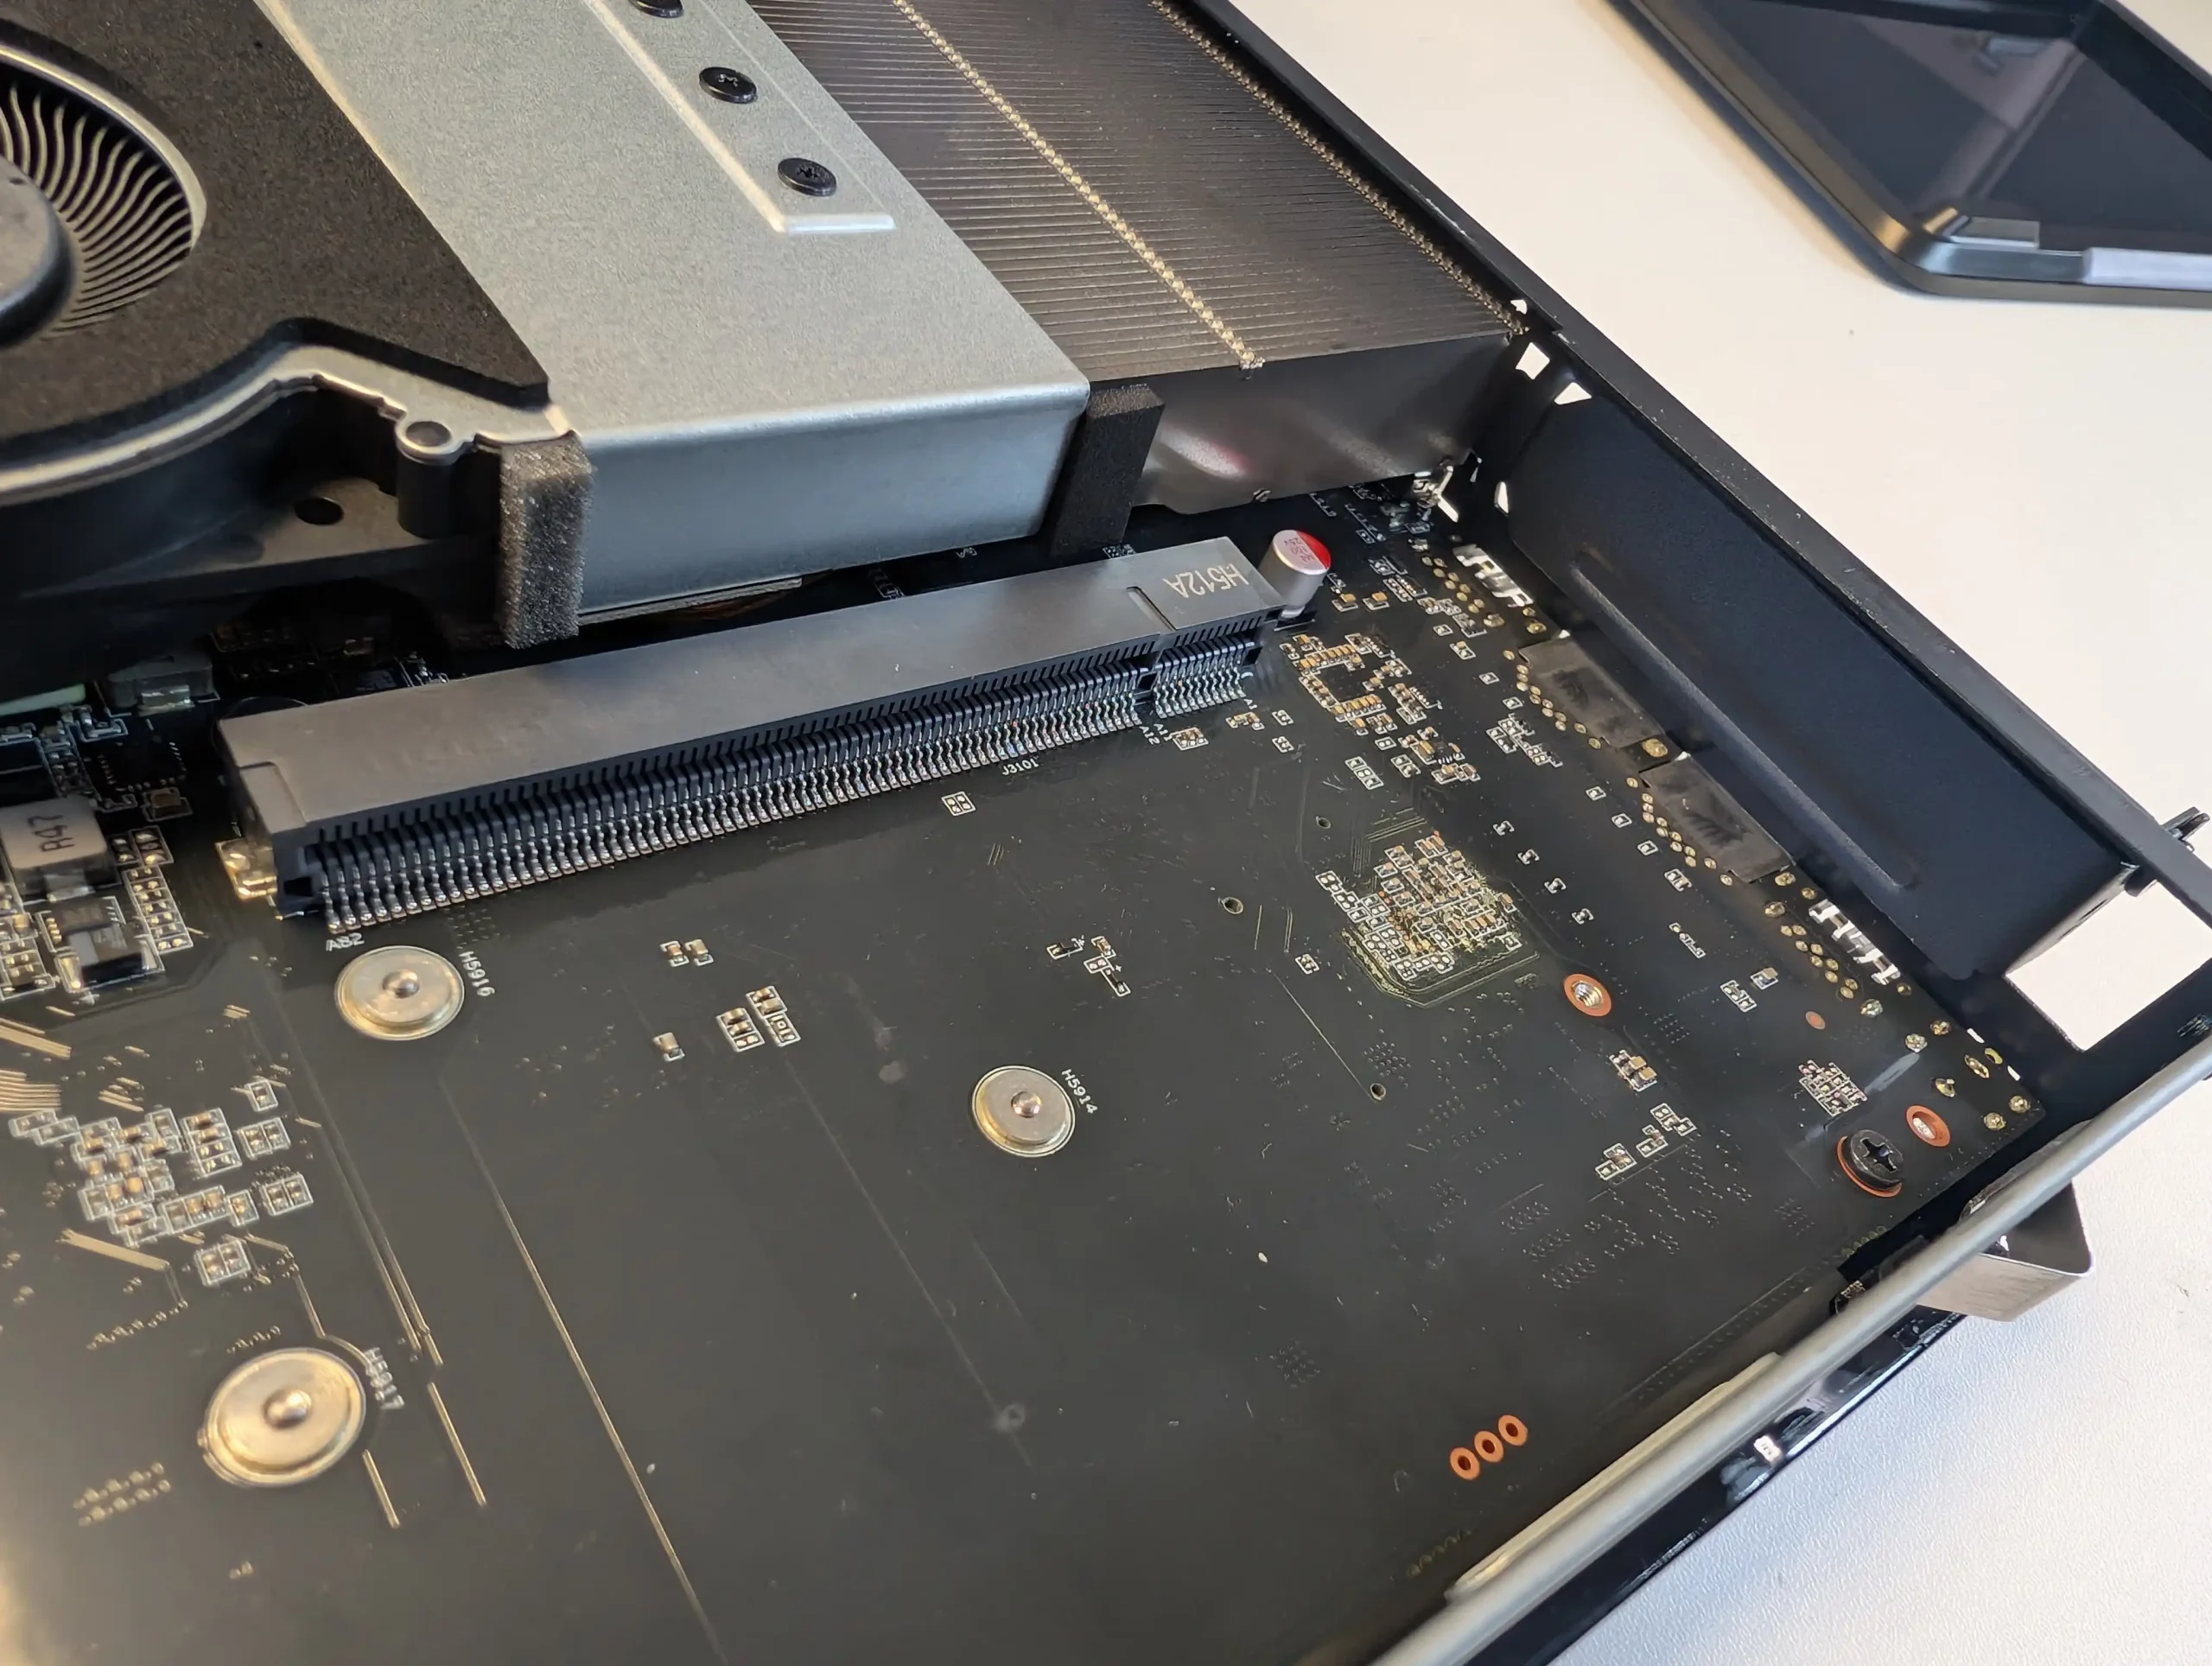
The N5 Pro’s storage architecture is designed for maximum flexibility and density within its size constraints. The primary storage array comprises five individual 3.5-inch or 2.5-inch SATA 3.0 bays arranged in a stacked configuration at the front of the chassis. Each bay supports drives of up to 22TB, allowing a maximum mechanical storage capacity of 110TB, which positions the N5 Pro among the most storage-dense NAS devices in its class.
Unlike some competing NAS designs that rely on port multiplexing, each SATA port on the N5 Pro is directly connected to the mainboard without oversubscription, ensuring consistent throughput per drive. Beyond the five SATA bays, the system includes three additional high-speed NVMe slots.
Two of these support either M.2 or U.2 SSDs up to 15TB each, while the remaining slot supports an M.2 SSD up to 4TB.

Minisforum includes an adapter to convert the two U.2-compatible slots to standard M.2 form factor if desired, which accommodates more commonly available SSDs without sacrificing future enterprise U.2 upgrade options.
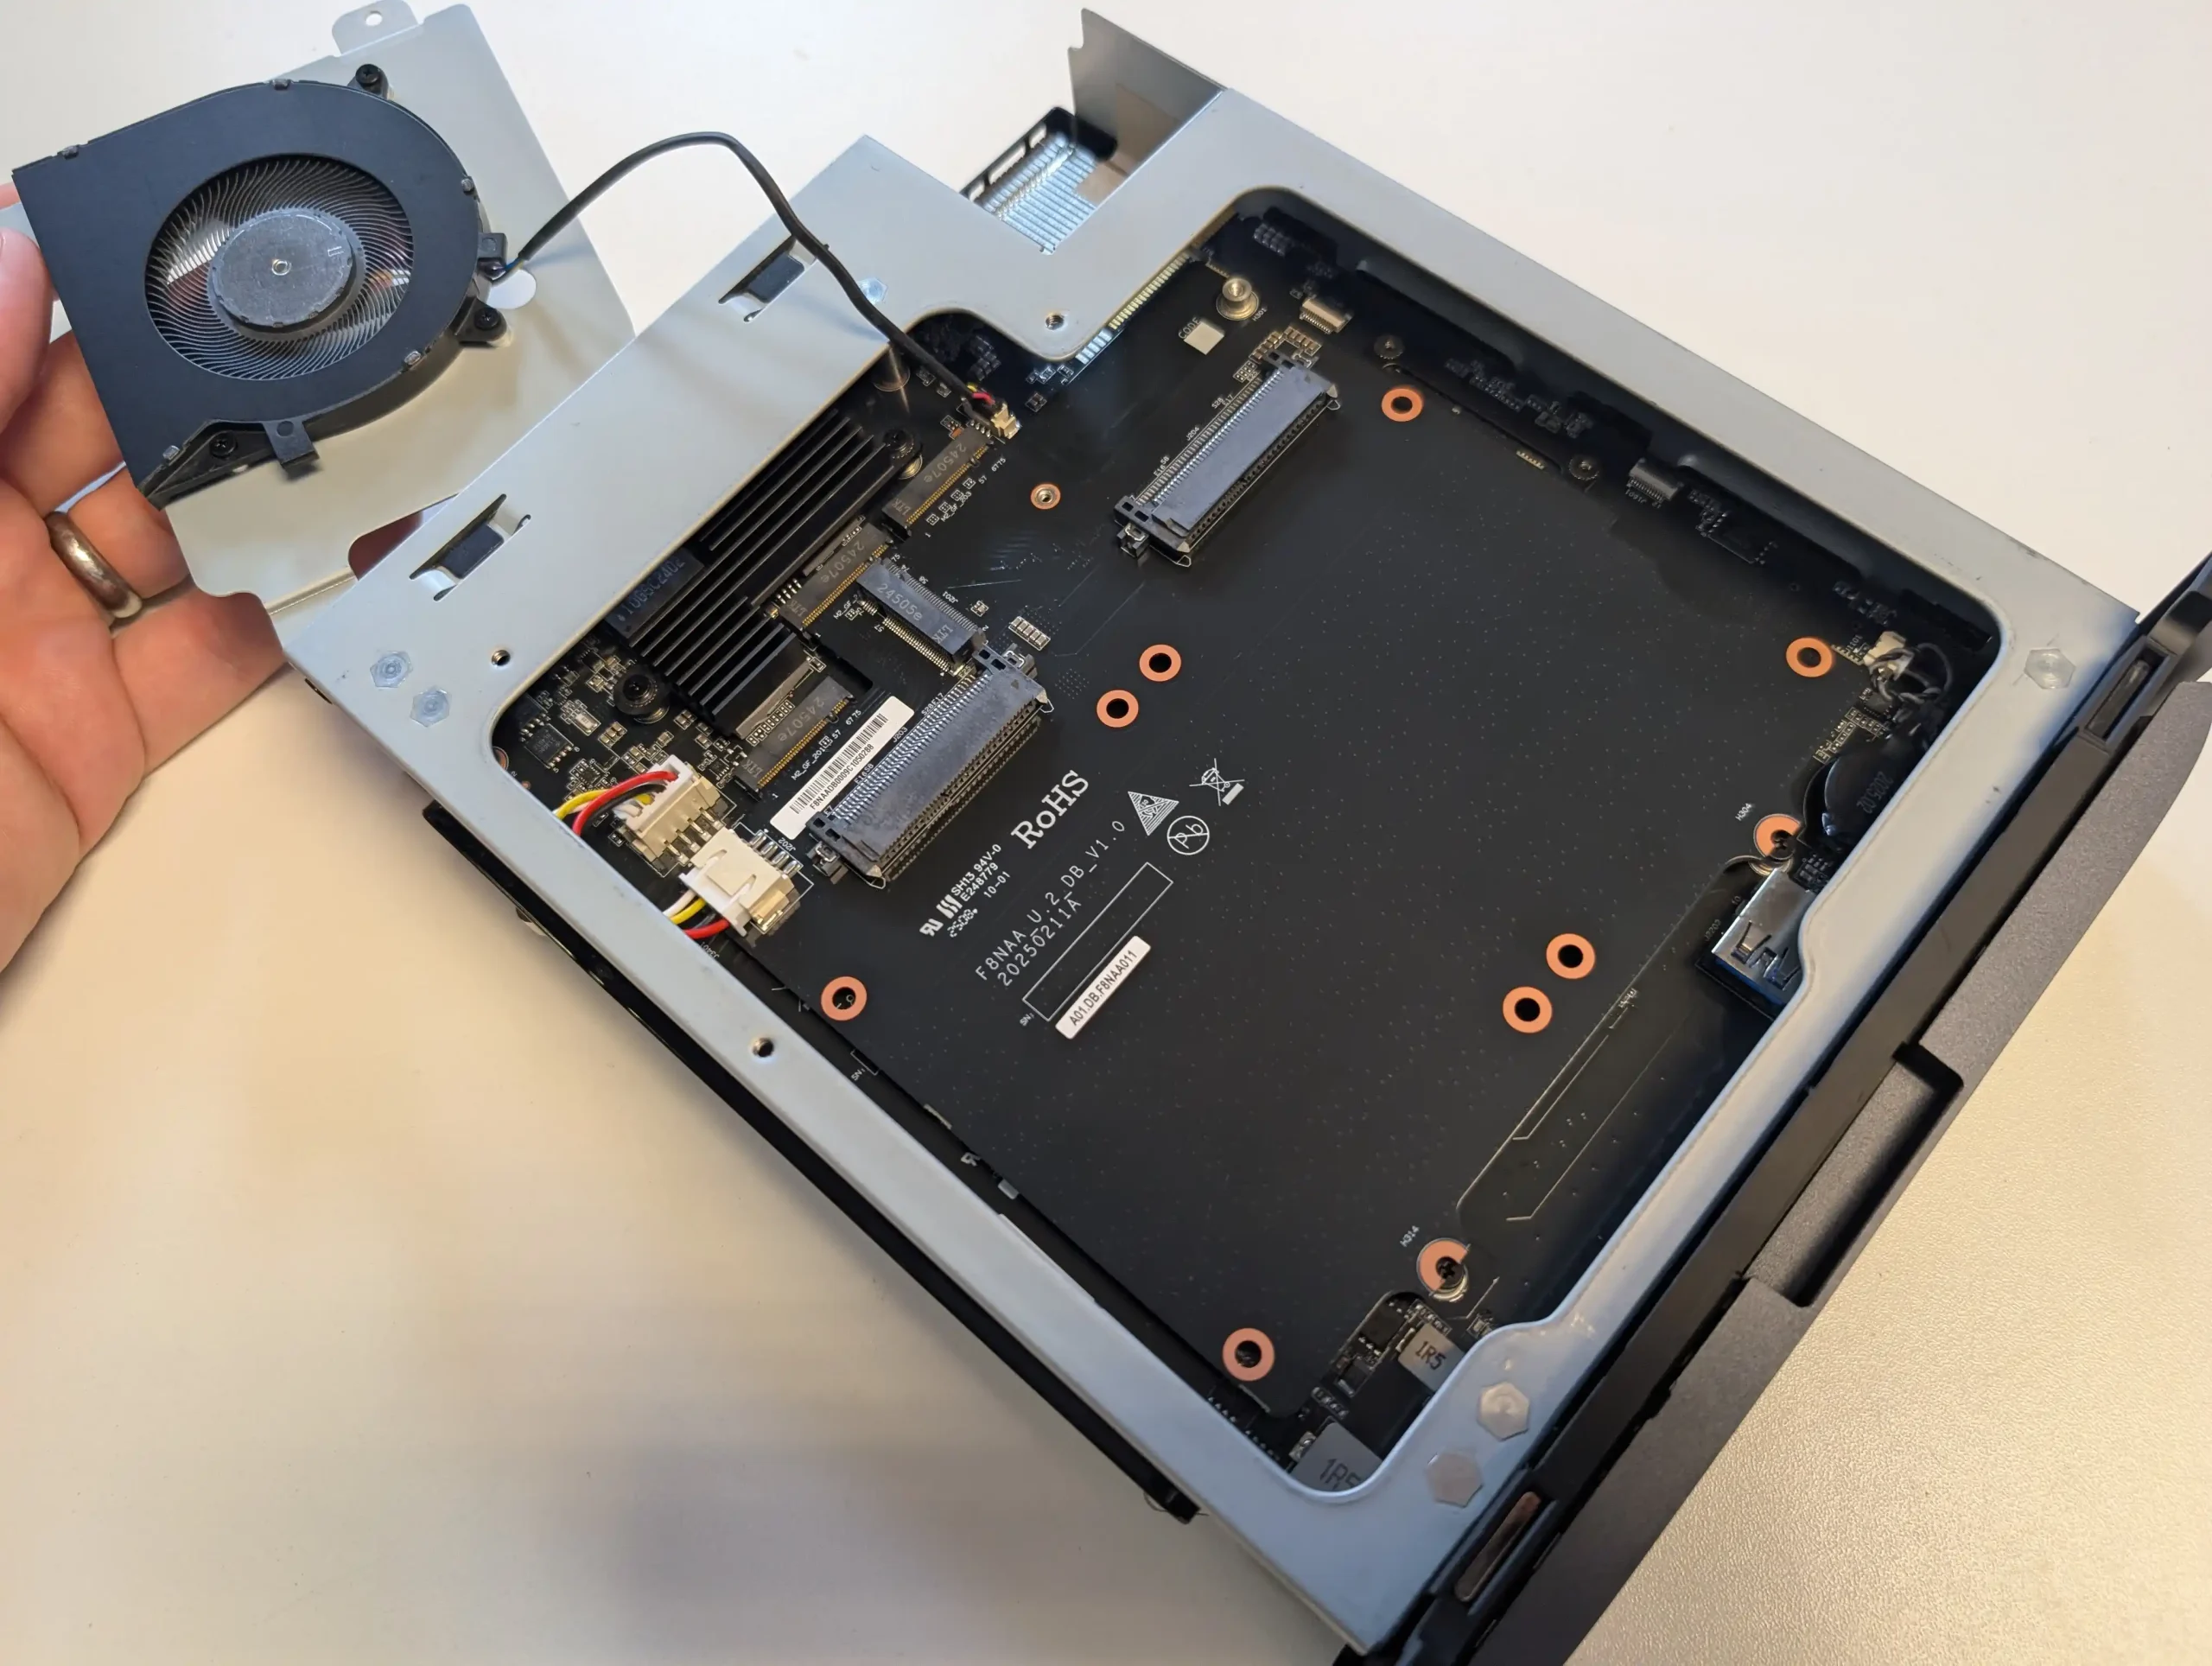
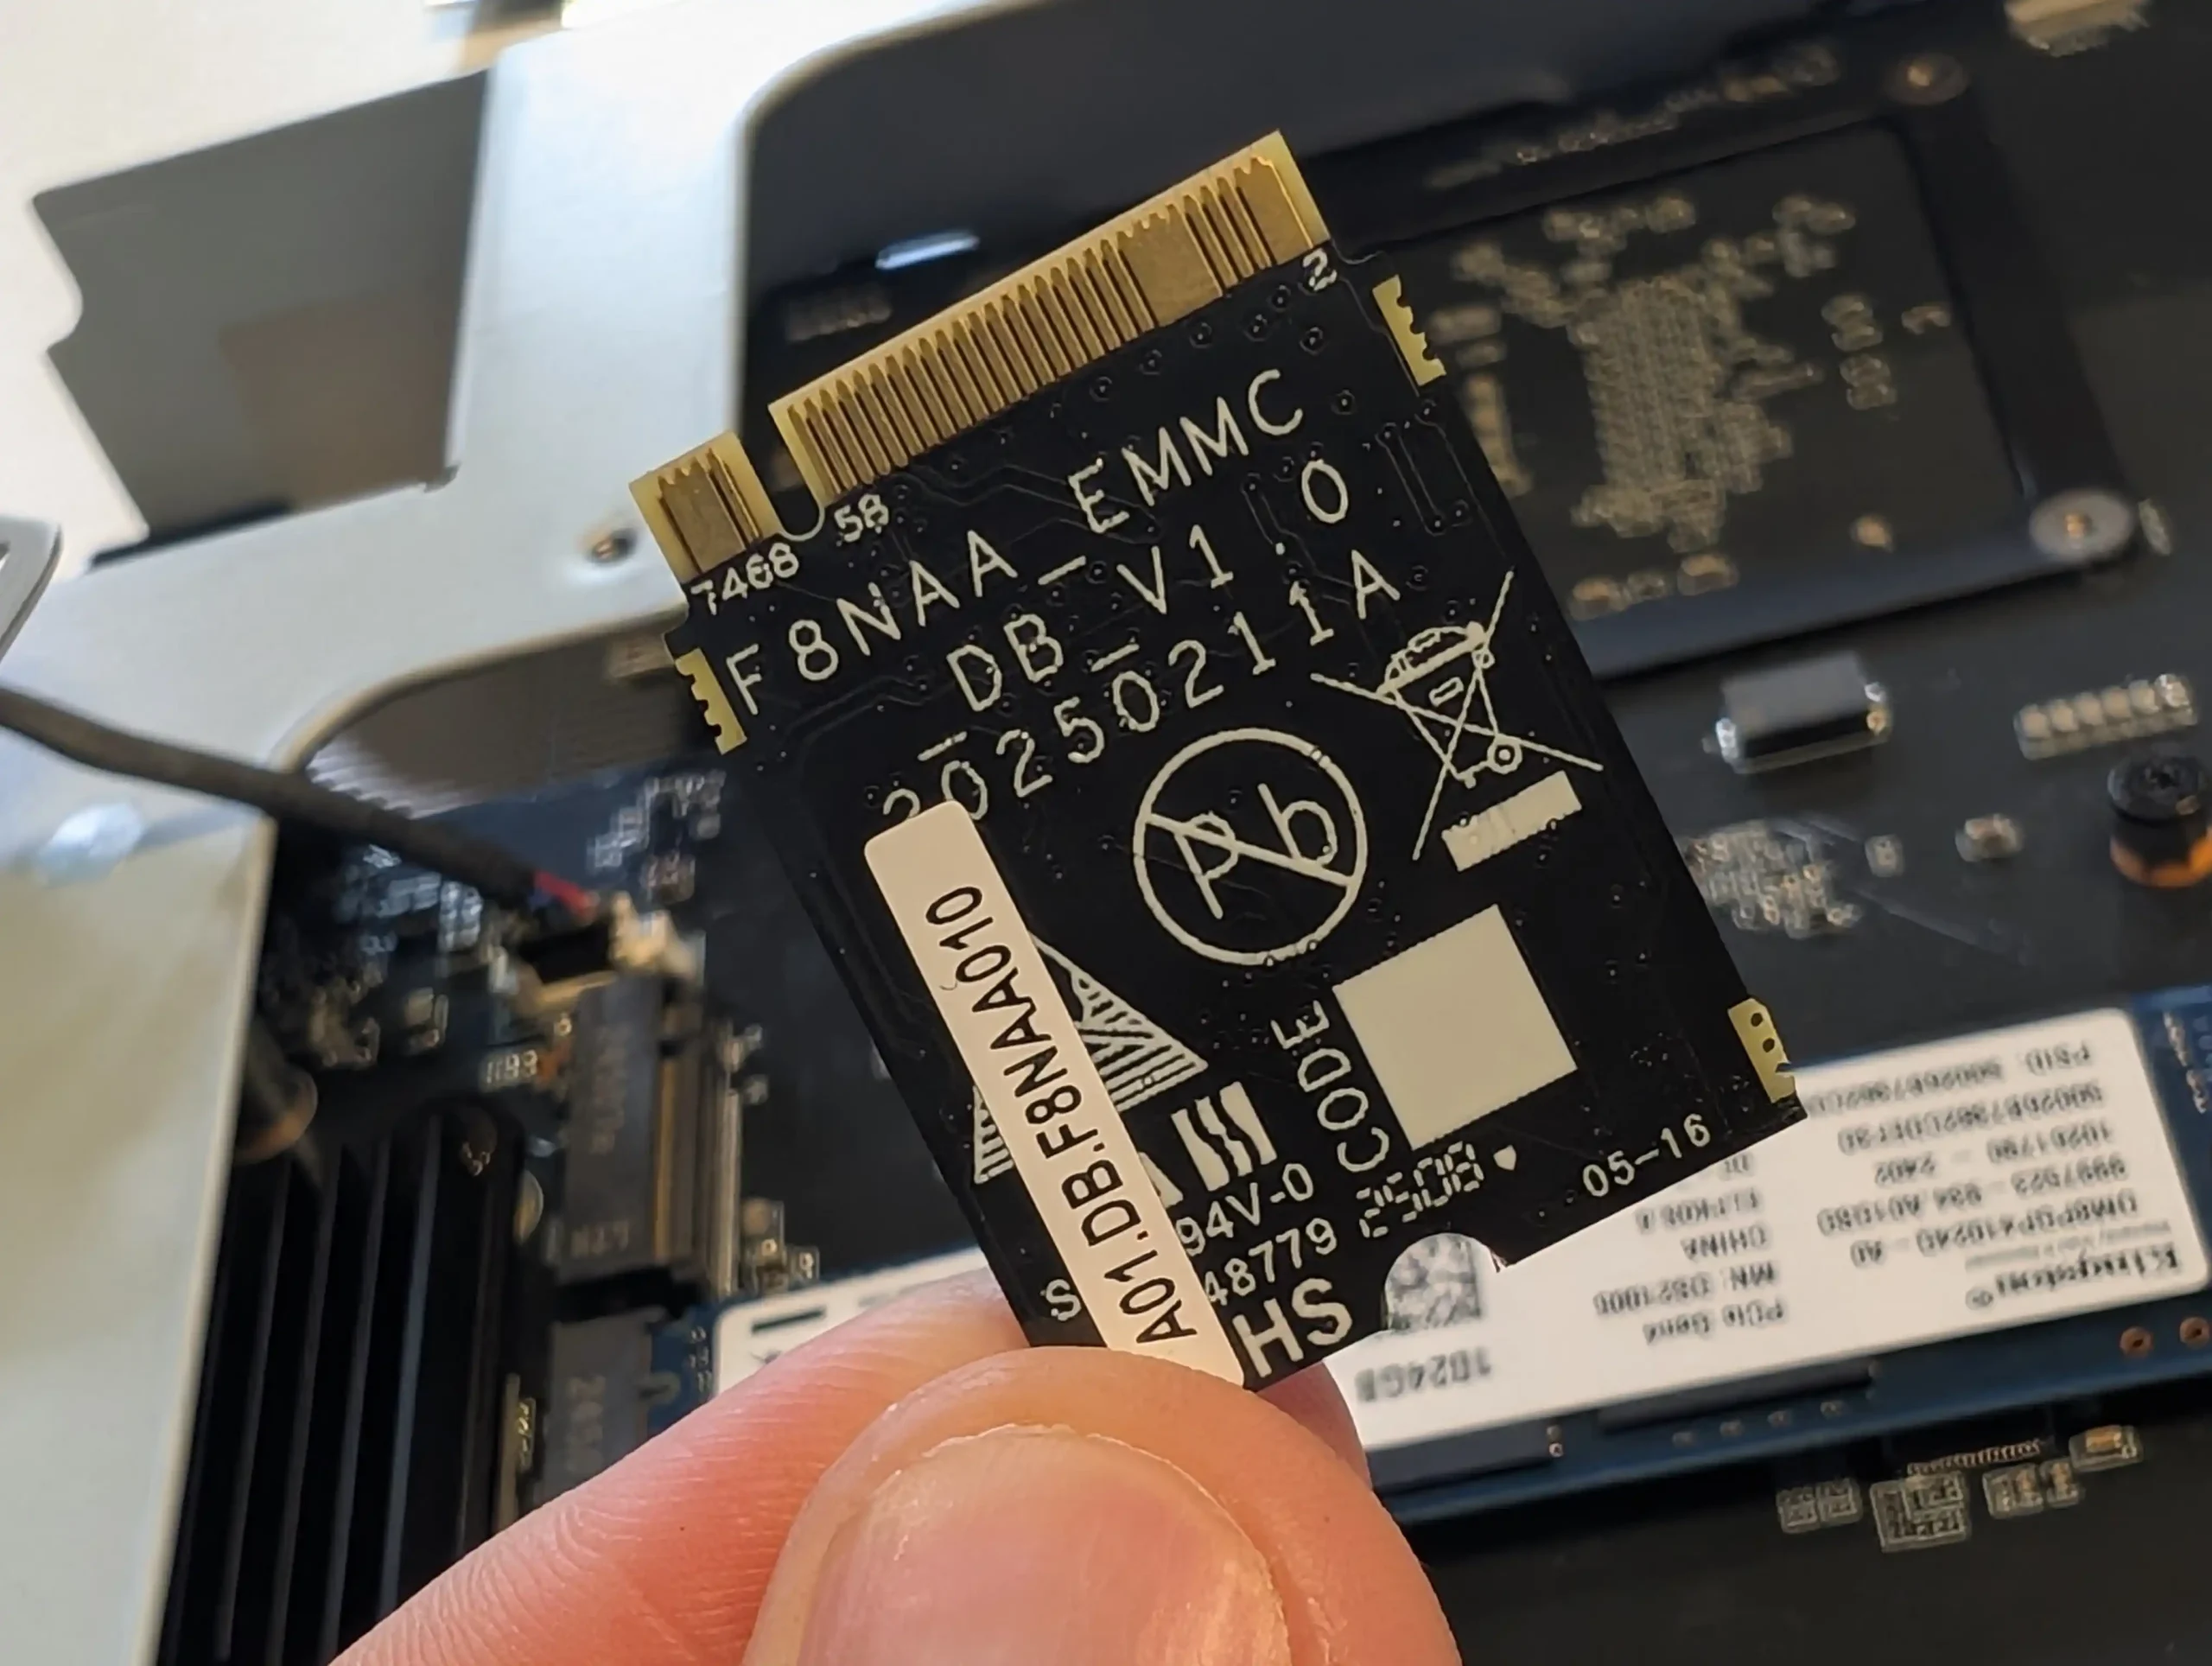
In its default shipping configuration, the N5 Pro arrives with a 64GB M.2 2230 SSD preinstalled, preloaded with MinisCloud OS. This small OS drive occupies one M.2 slot and can be replaced with a larger, higher-performance SSD if needed.
The device supports a full suite of RAID levels, both through hardware and software configuration, thanks to its ZFS-based storage stack within MinisCloud OS. Users can configure the five SATA bays in RAID 0 for maximum throughput, RAID 1 or RAID 10 for redundancy, or RAIDZ1/RAID5 and RAIDZ2/RAID6 for more advanced parity protection.
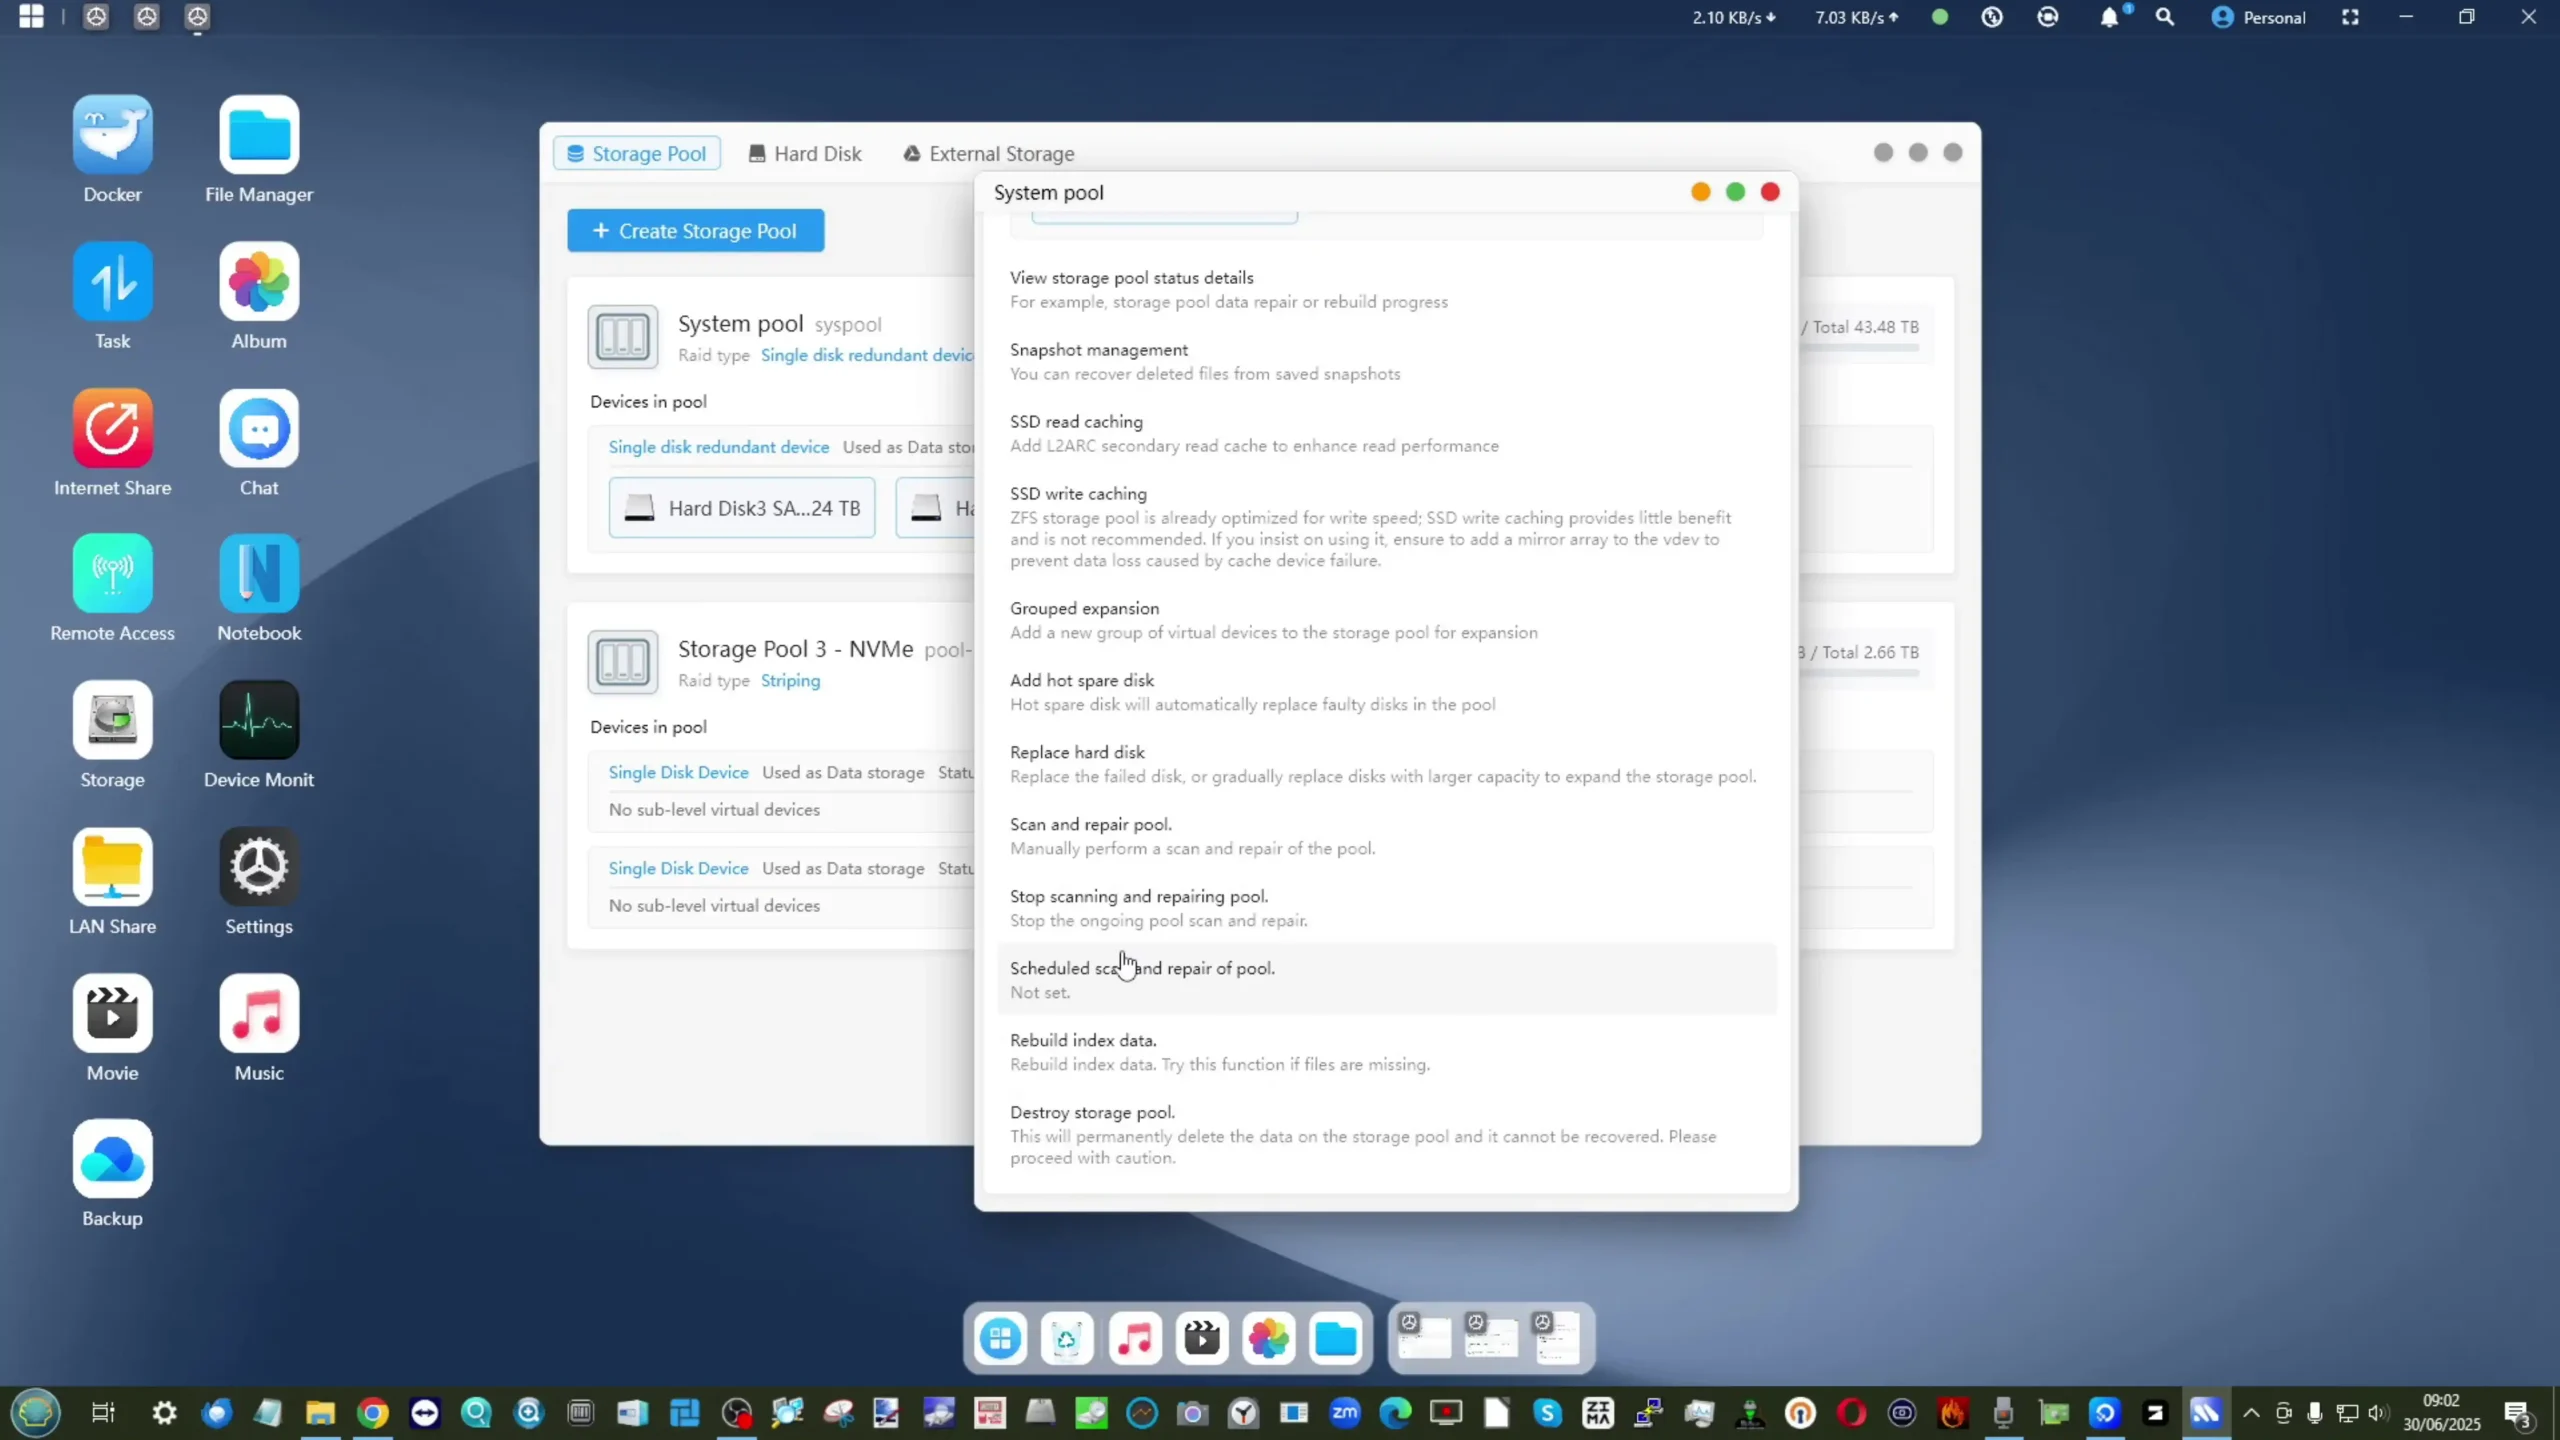
The combination of ZFS and hardware flexibility allows mixed configurations, where NVMe SSDs can be dedicated to cache or high-performance “hot” data pools while SATA disks serve as mass storage. This arrangement supports scenarios like virtual machine hosting alongside archival media storage in a single chassis. Notably, ZFS features such as inline LZ4 compression and snapshot-based recovery are natively supported in MinisCloud OS, enabling efficient storage utilization and simplified recovery workflows.
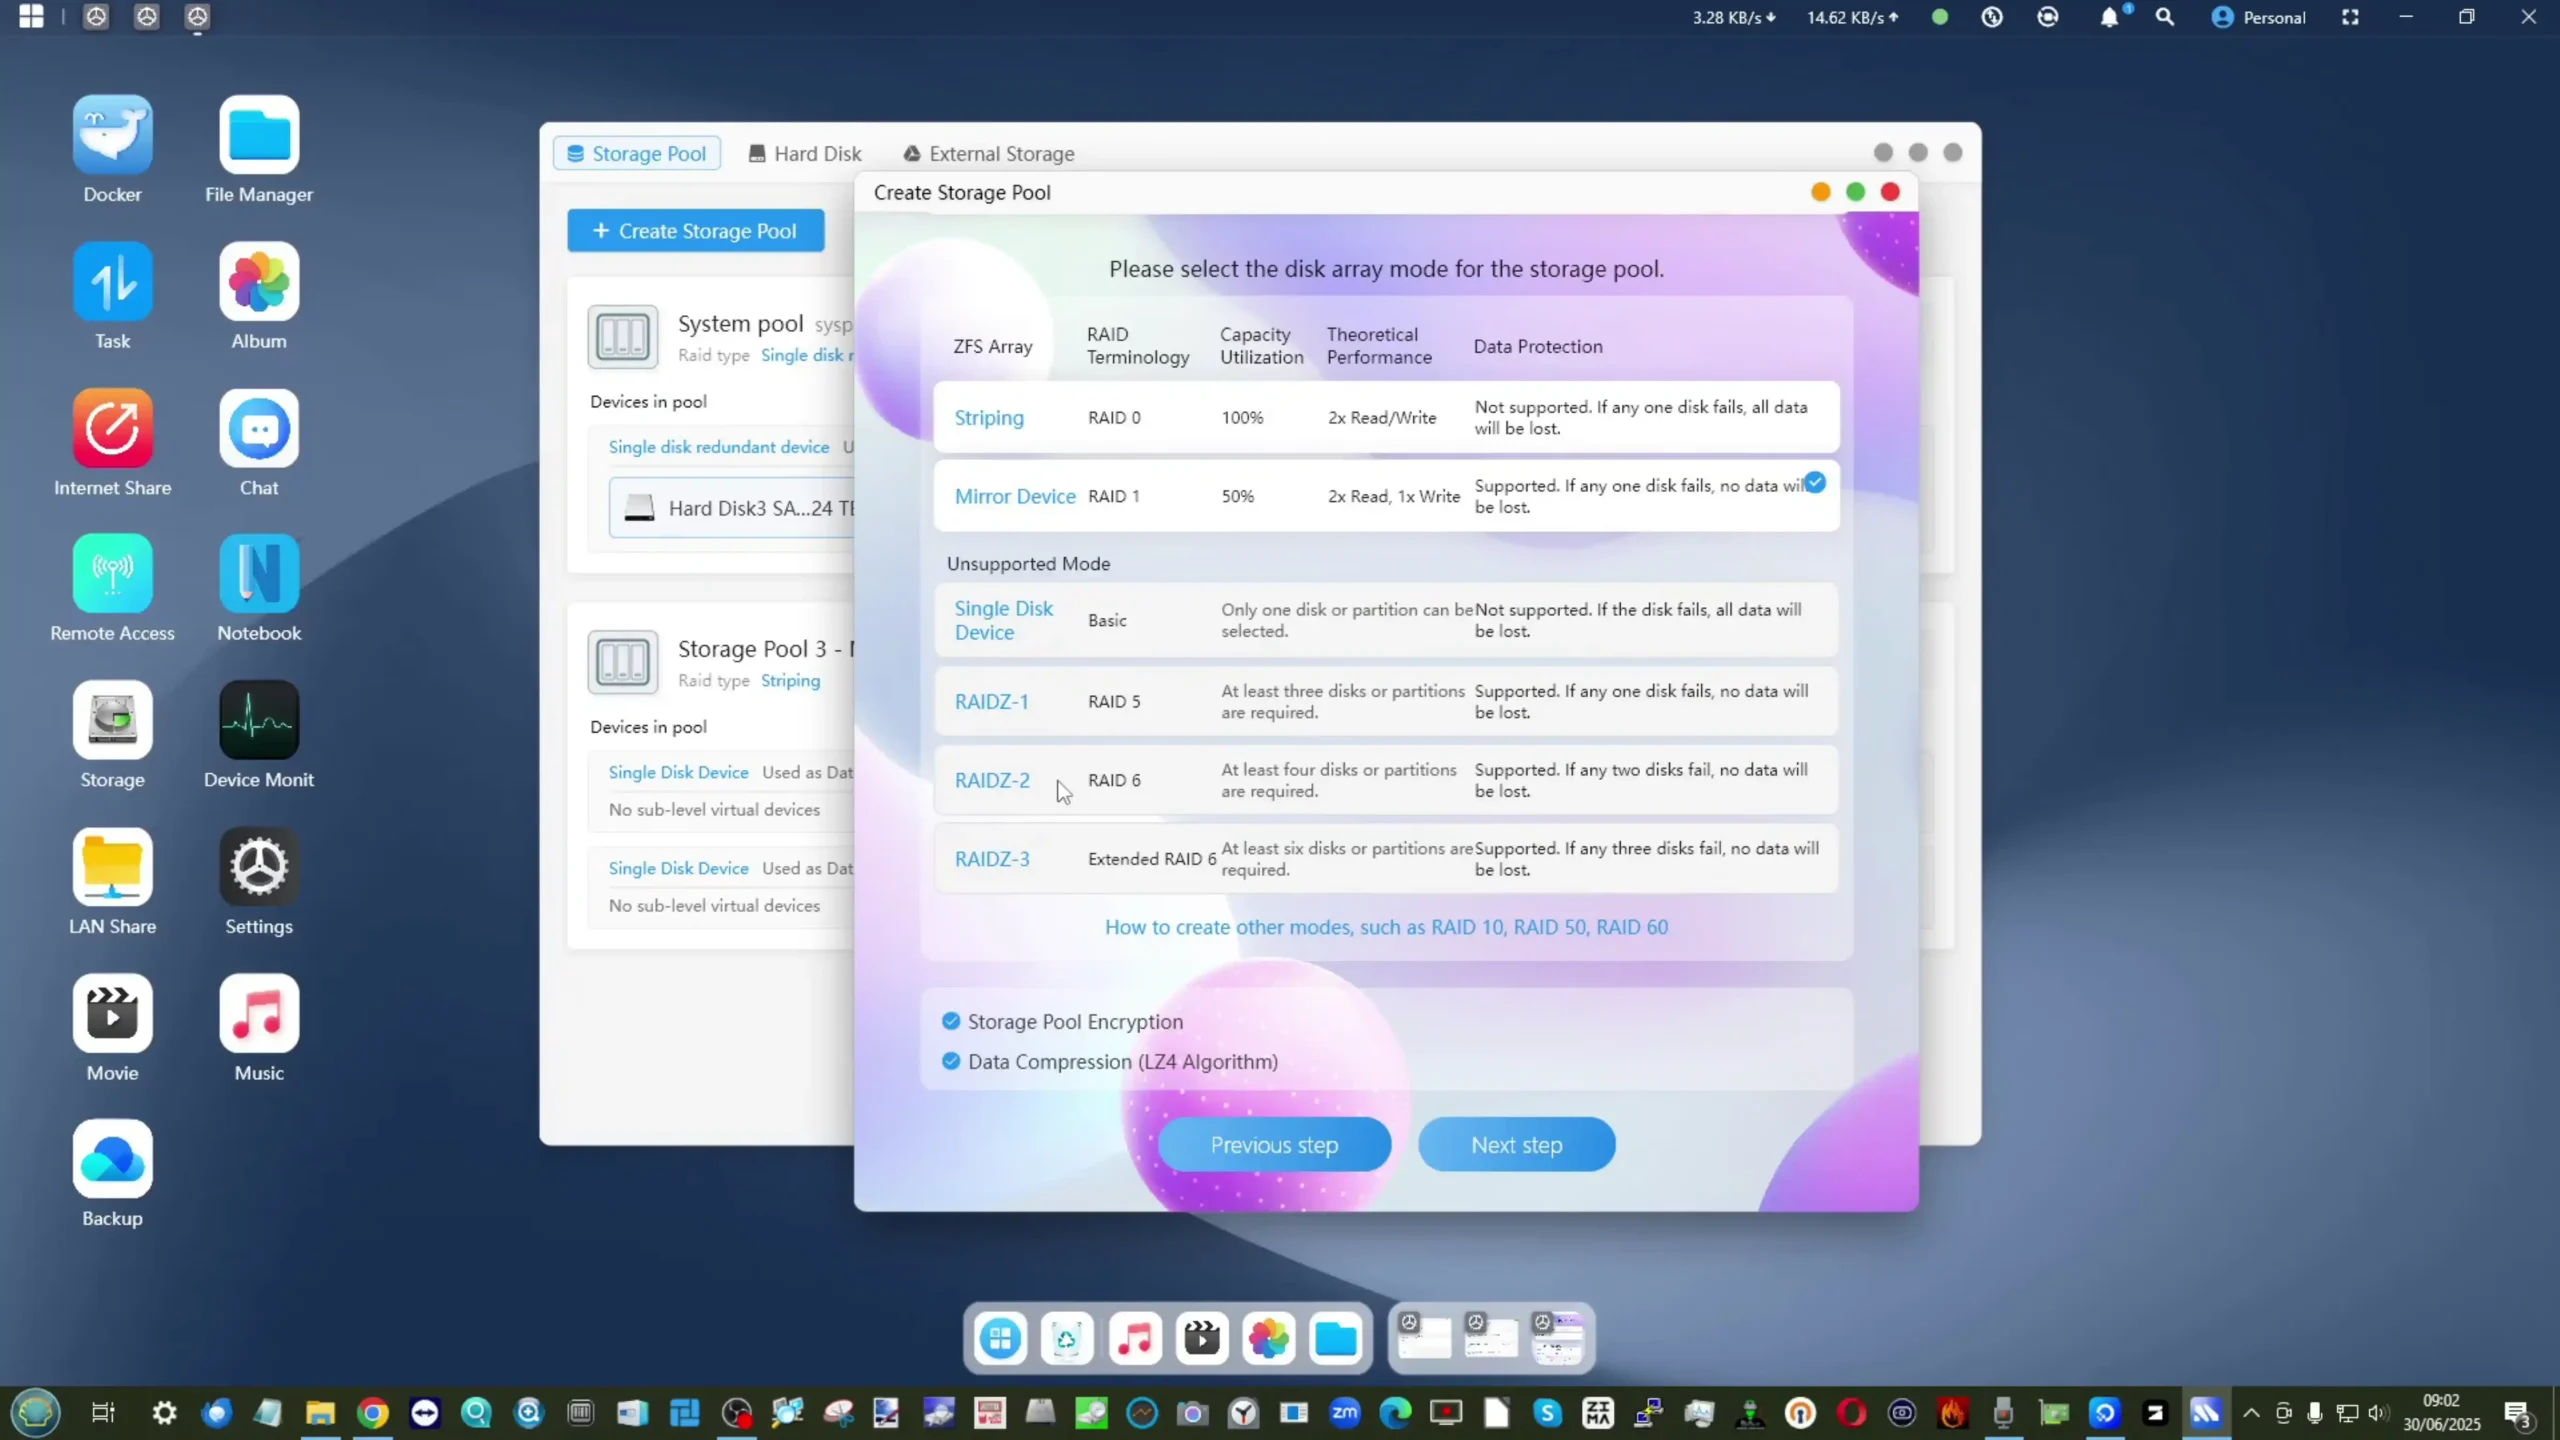
During extended operation with fully populated SATA bays and NVMe slots, the drives maintained expected IOPS and sustained throughput without any noticeable drop in performance, a reflection of the system’s balanced backplane and effective drive isolation.
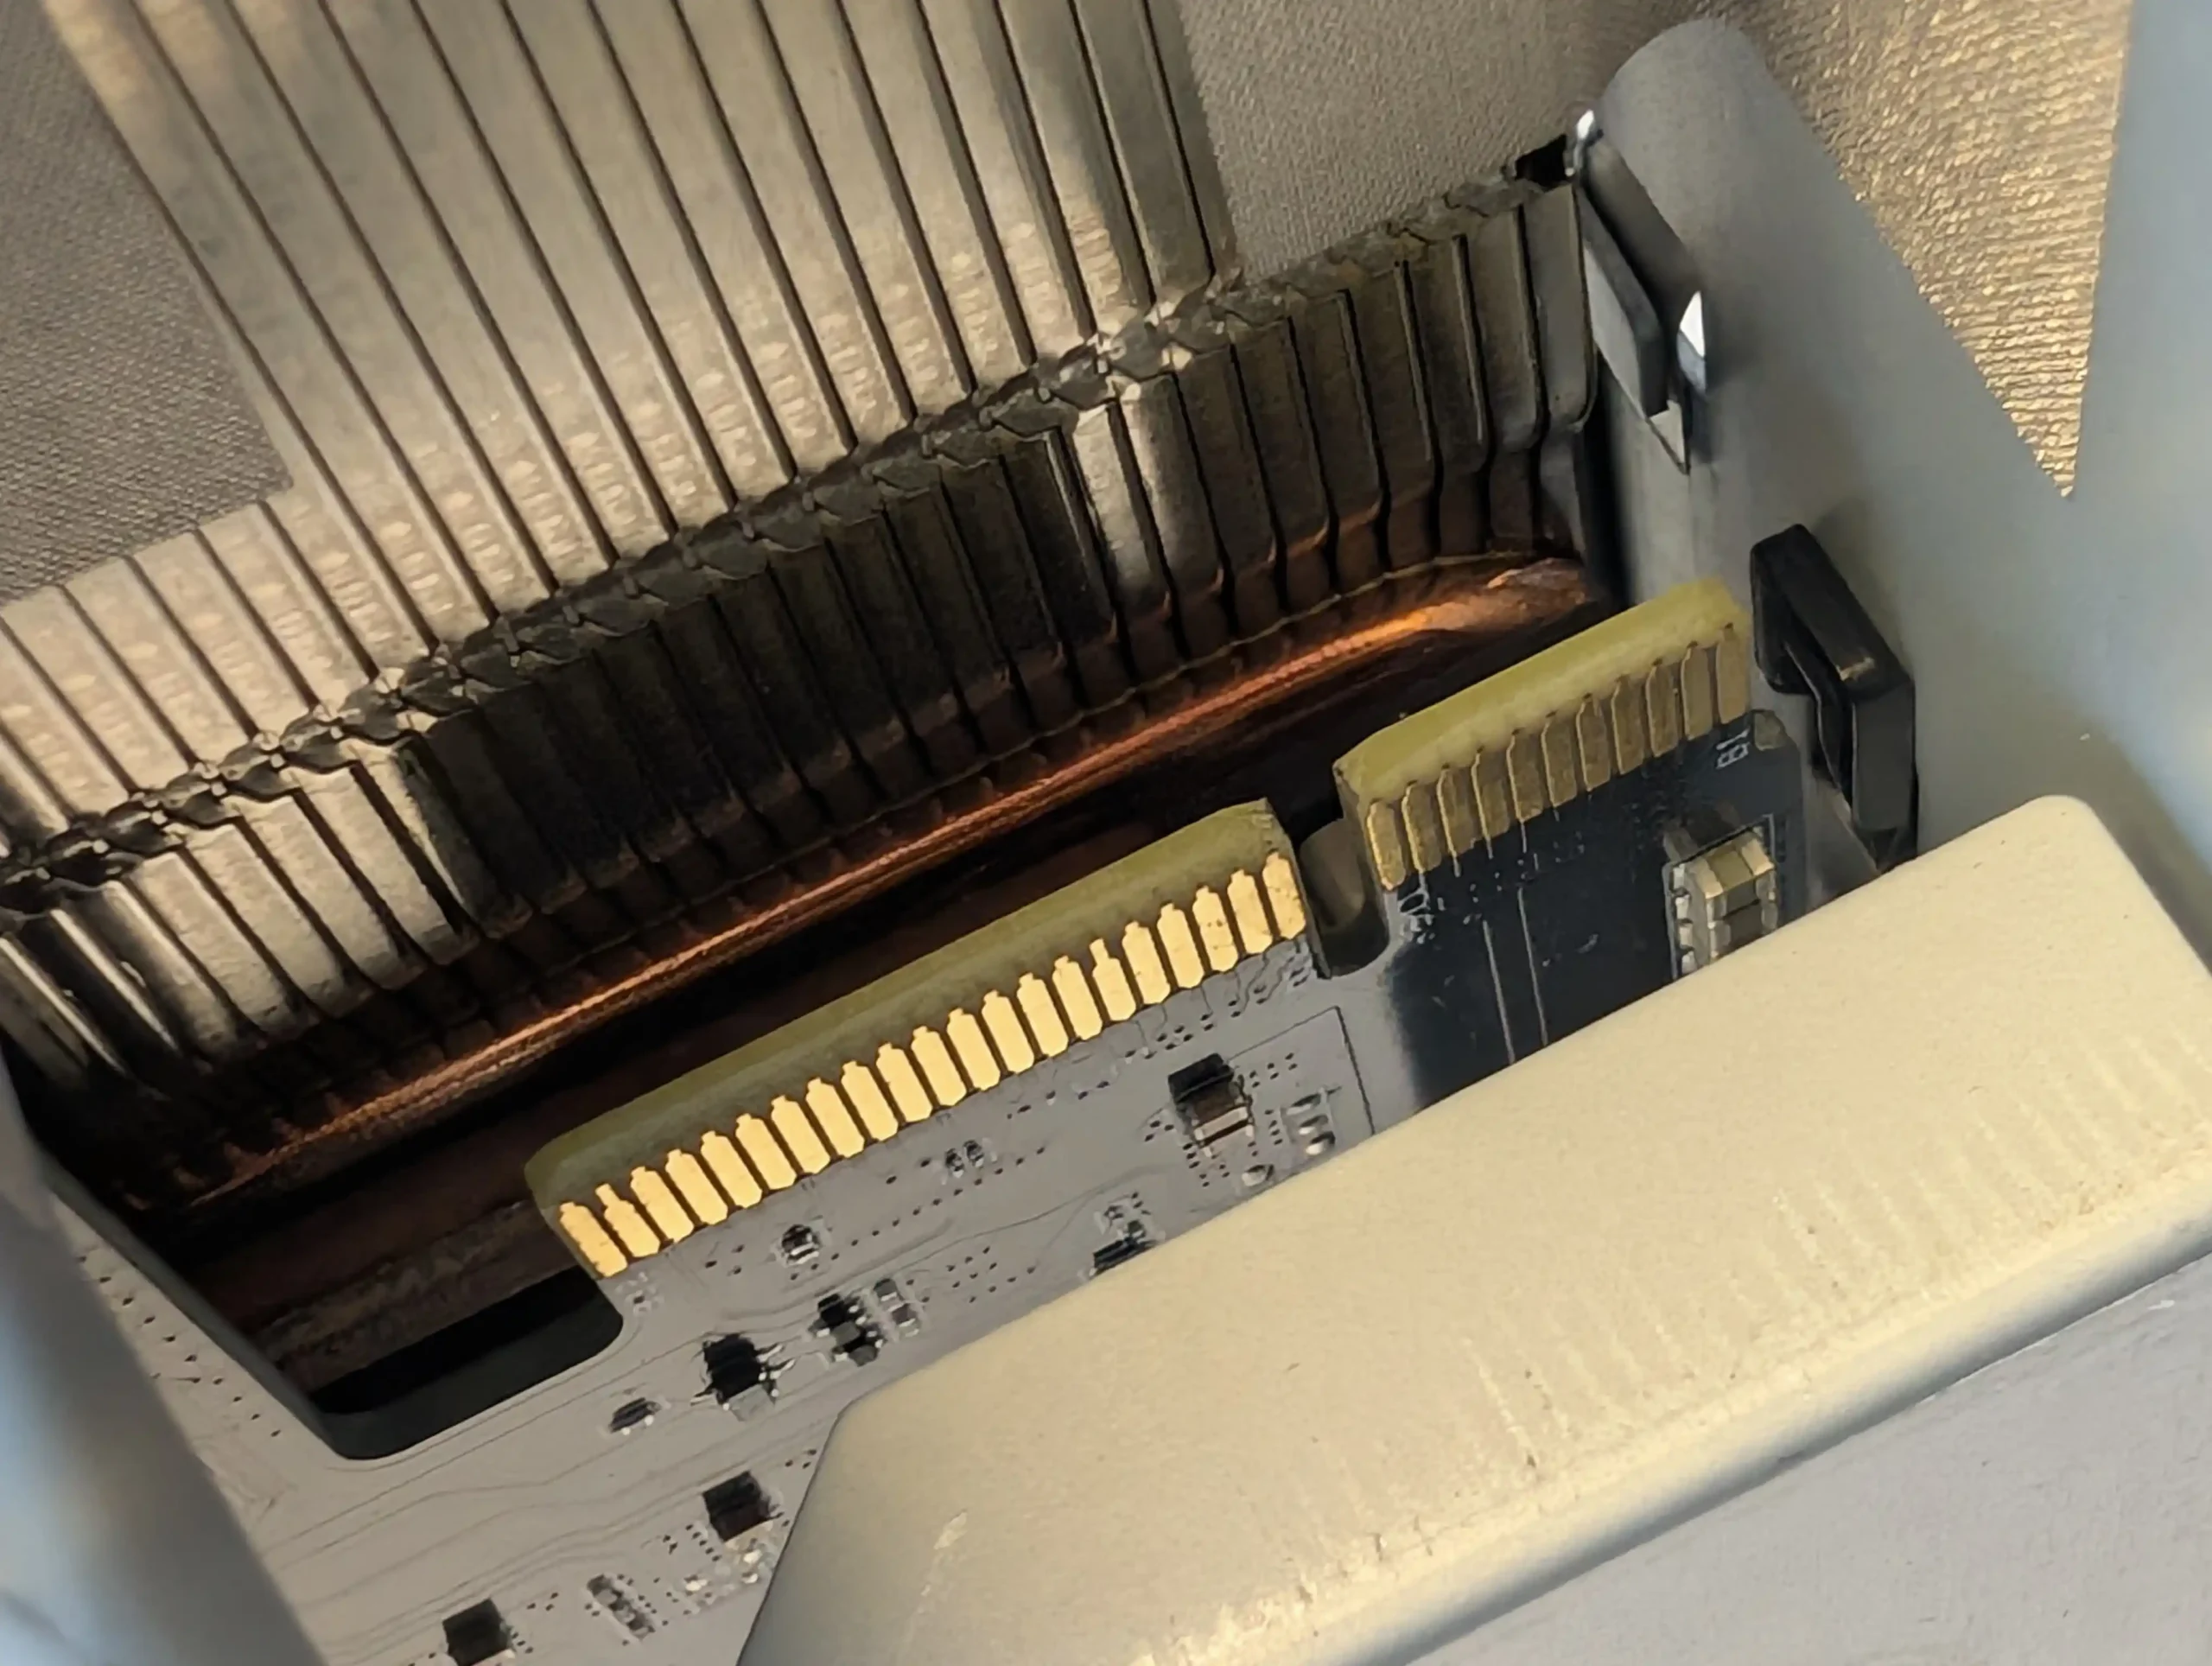
The 5 SATA Bay cage is connected to then main board with a 2GB/20Gb/s connection and is managed by the SATA sata JMicron Technology Corp. JMB58x

The physical implementation of drive installation is straightforward, with each SATA tray supporting toolless insertion and clearly numbered for easy identification. The trays are designed to accommodate both 3.5-inch and 2.5-inch drives securely, while the NVMe and U.2 slots are easily accessible on the motherboard side of the chassis. Importantly, the U.2 support provides access to enterprise-class SSDs, which offer higher durability, better thermal tolerance, and larger capacities compared to consumer NVMe drives.
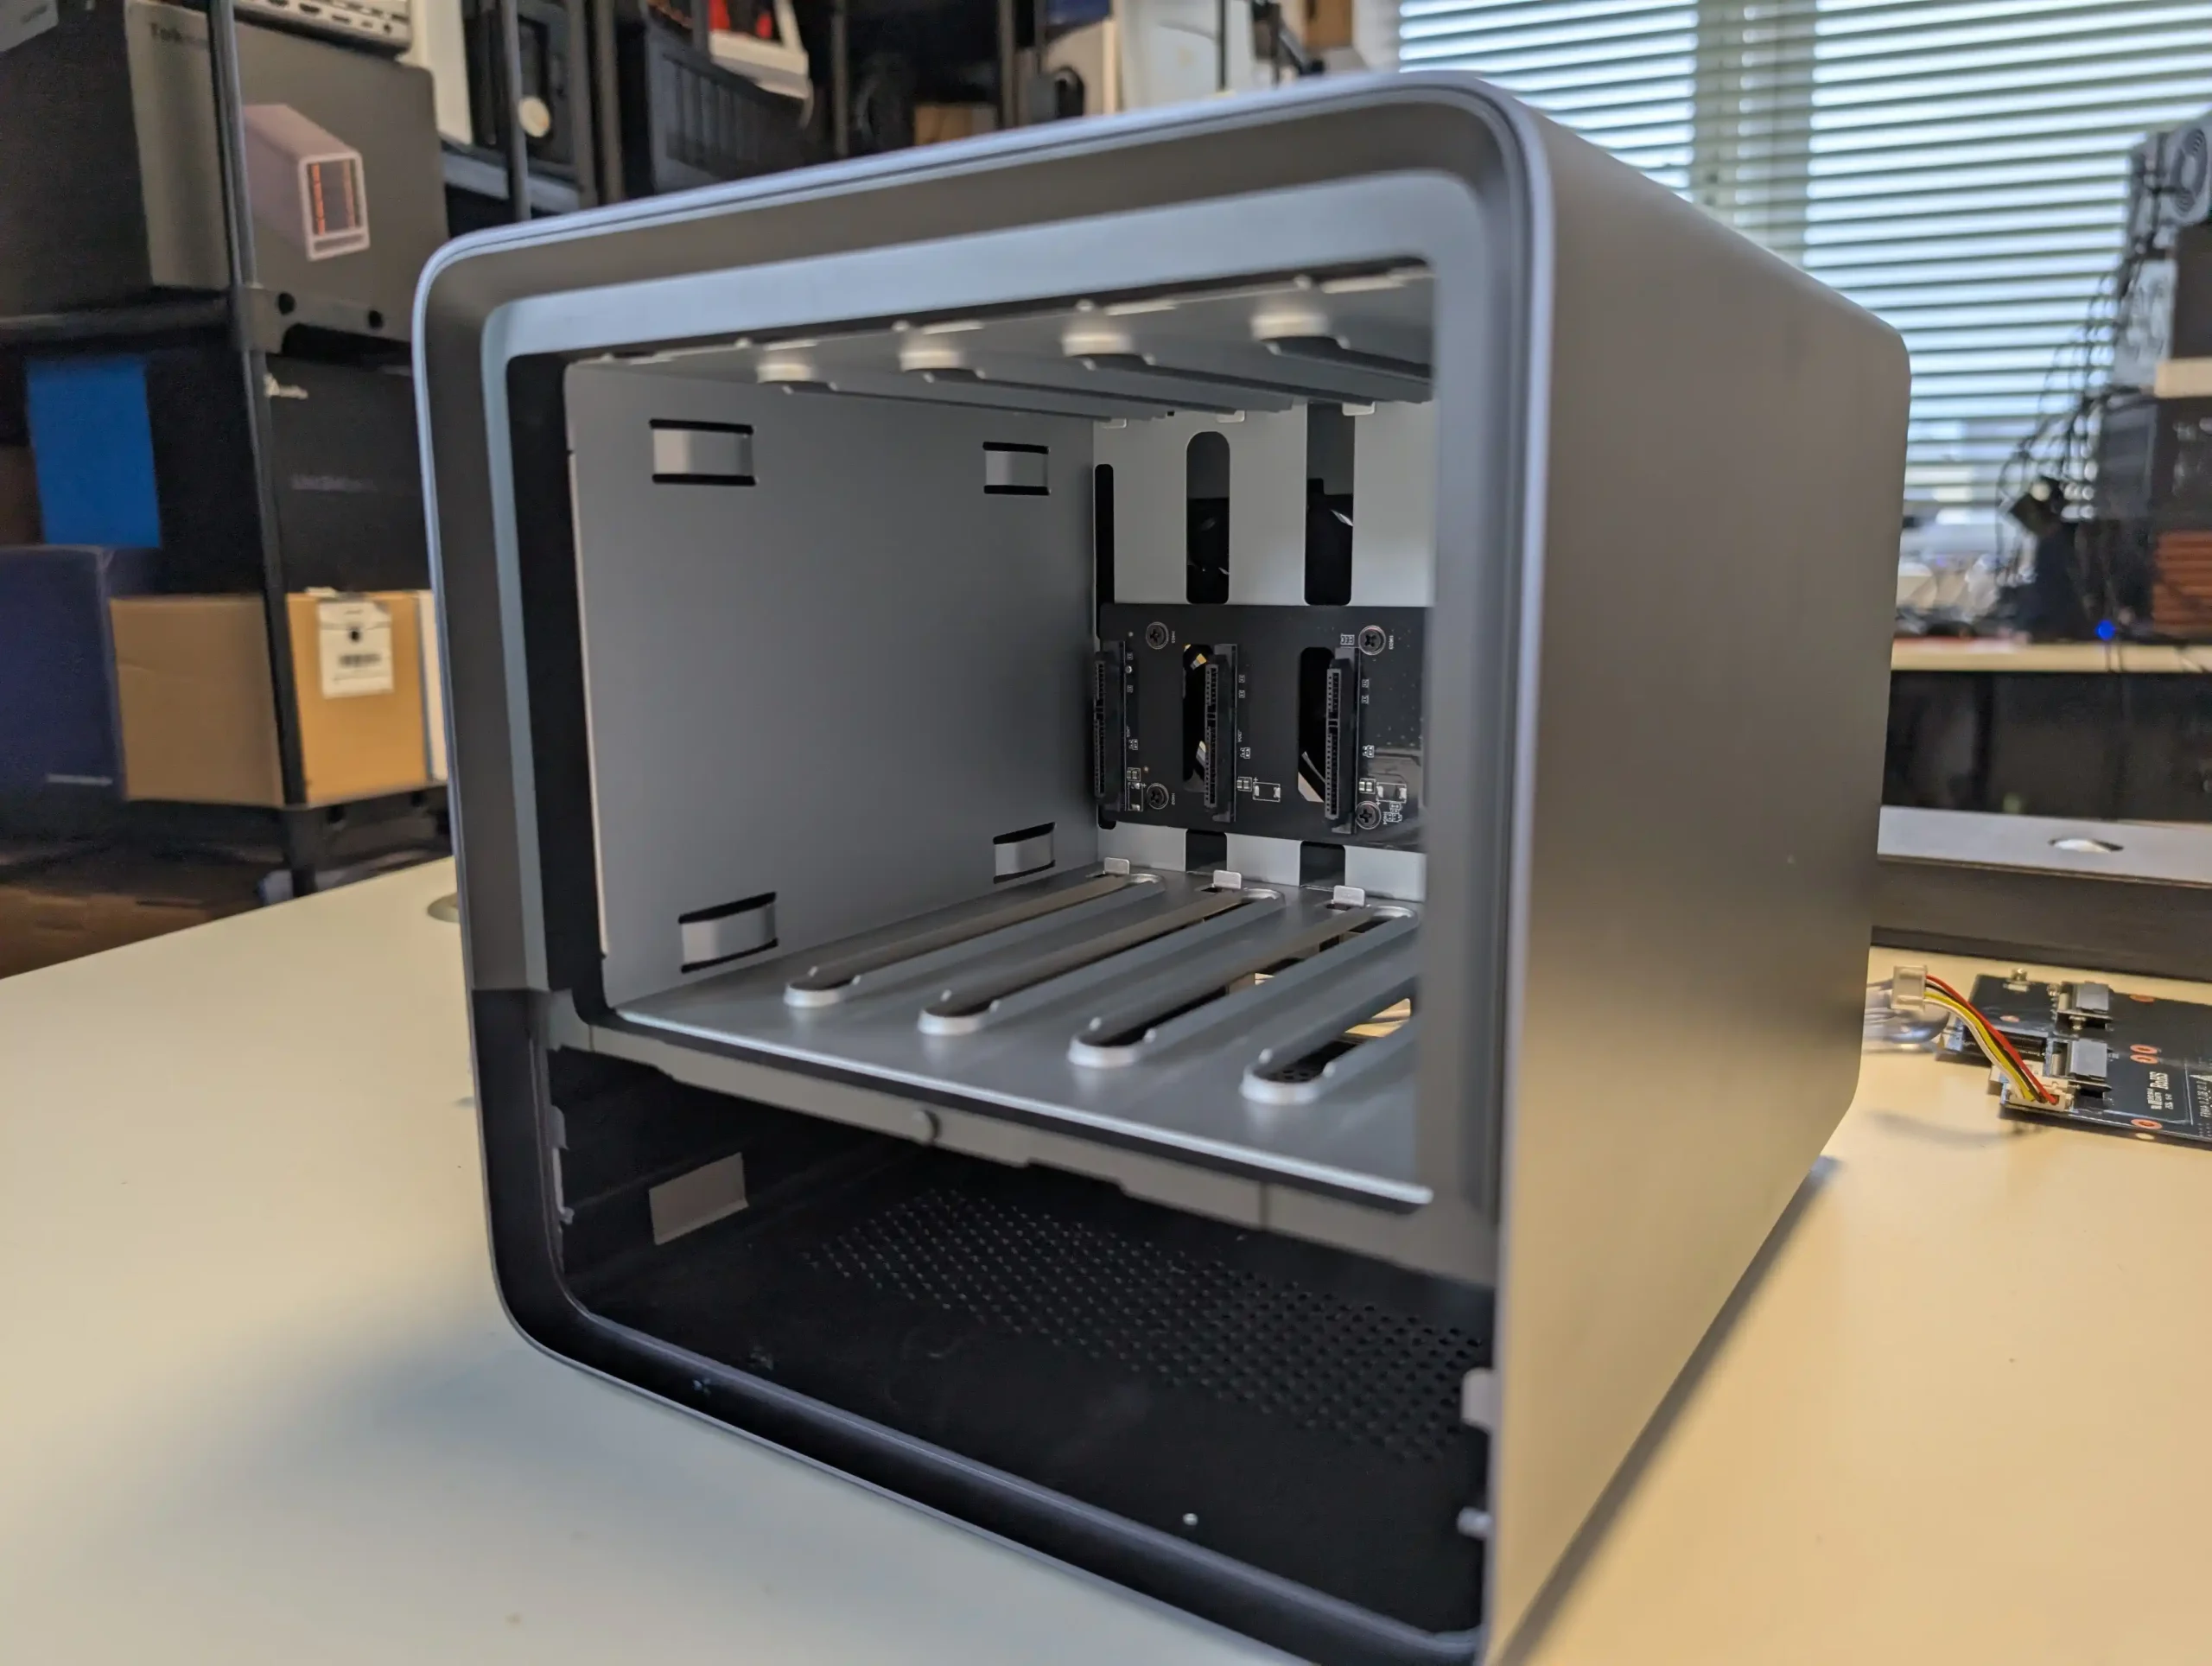
This feature caters to professional environments where storage write endurance is critical. The SATA backplane is integrated into the drive cage and connects cleanly to the motherboard with no loose cabling, simplifying airflow management and minimizing potential points of failure. Throughout the chassis, Minisforum has kept the cable routing tidy, with wiring harnesses anchored to prevent obstruction of airflow paths or contact with hot surfaces.
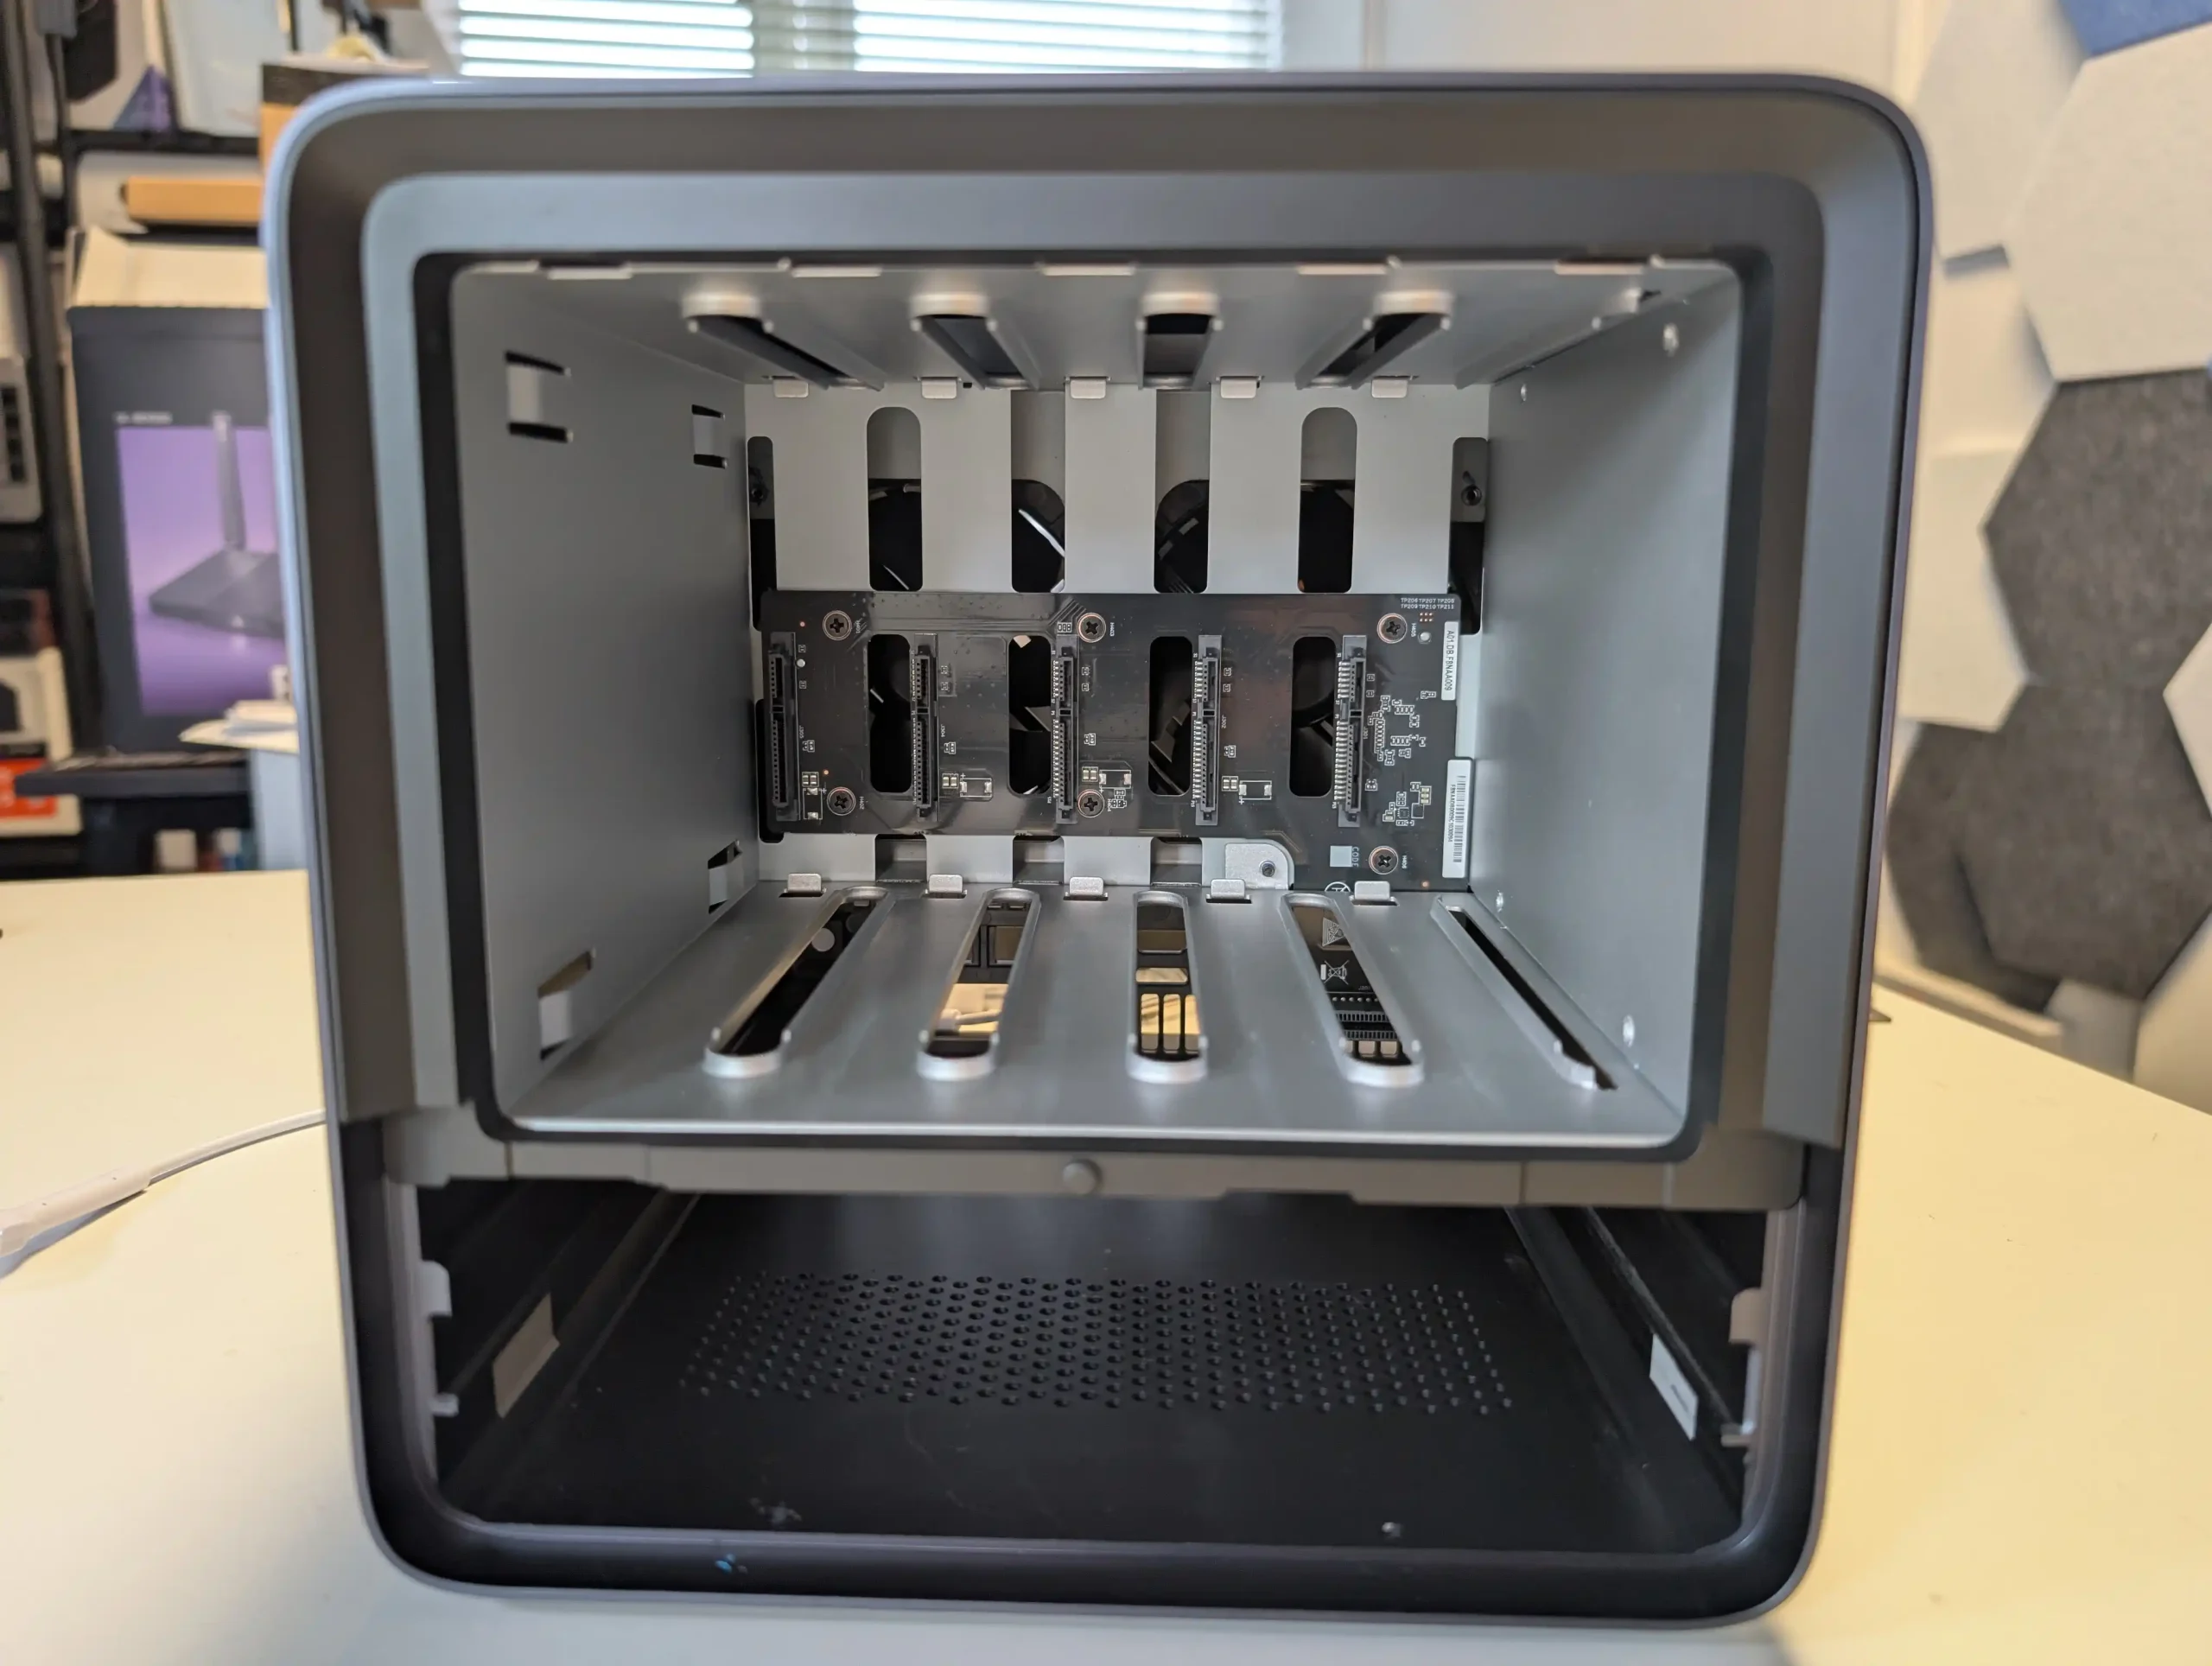
Cooling for the storage components is managed through a well-considered combination of passive and active elements. Front-side intake vents direct cool air across the SATA drives, while two dedicated rear-mounted exhaust fans draw heat away from the drive array and motherboard area.
The vented base panel assists with maintaining negative pressure and facilitating lateral airflow, preventing localized hot spots.
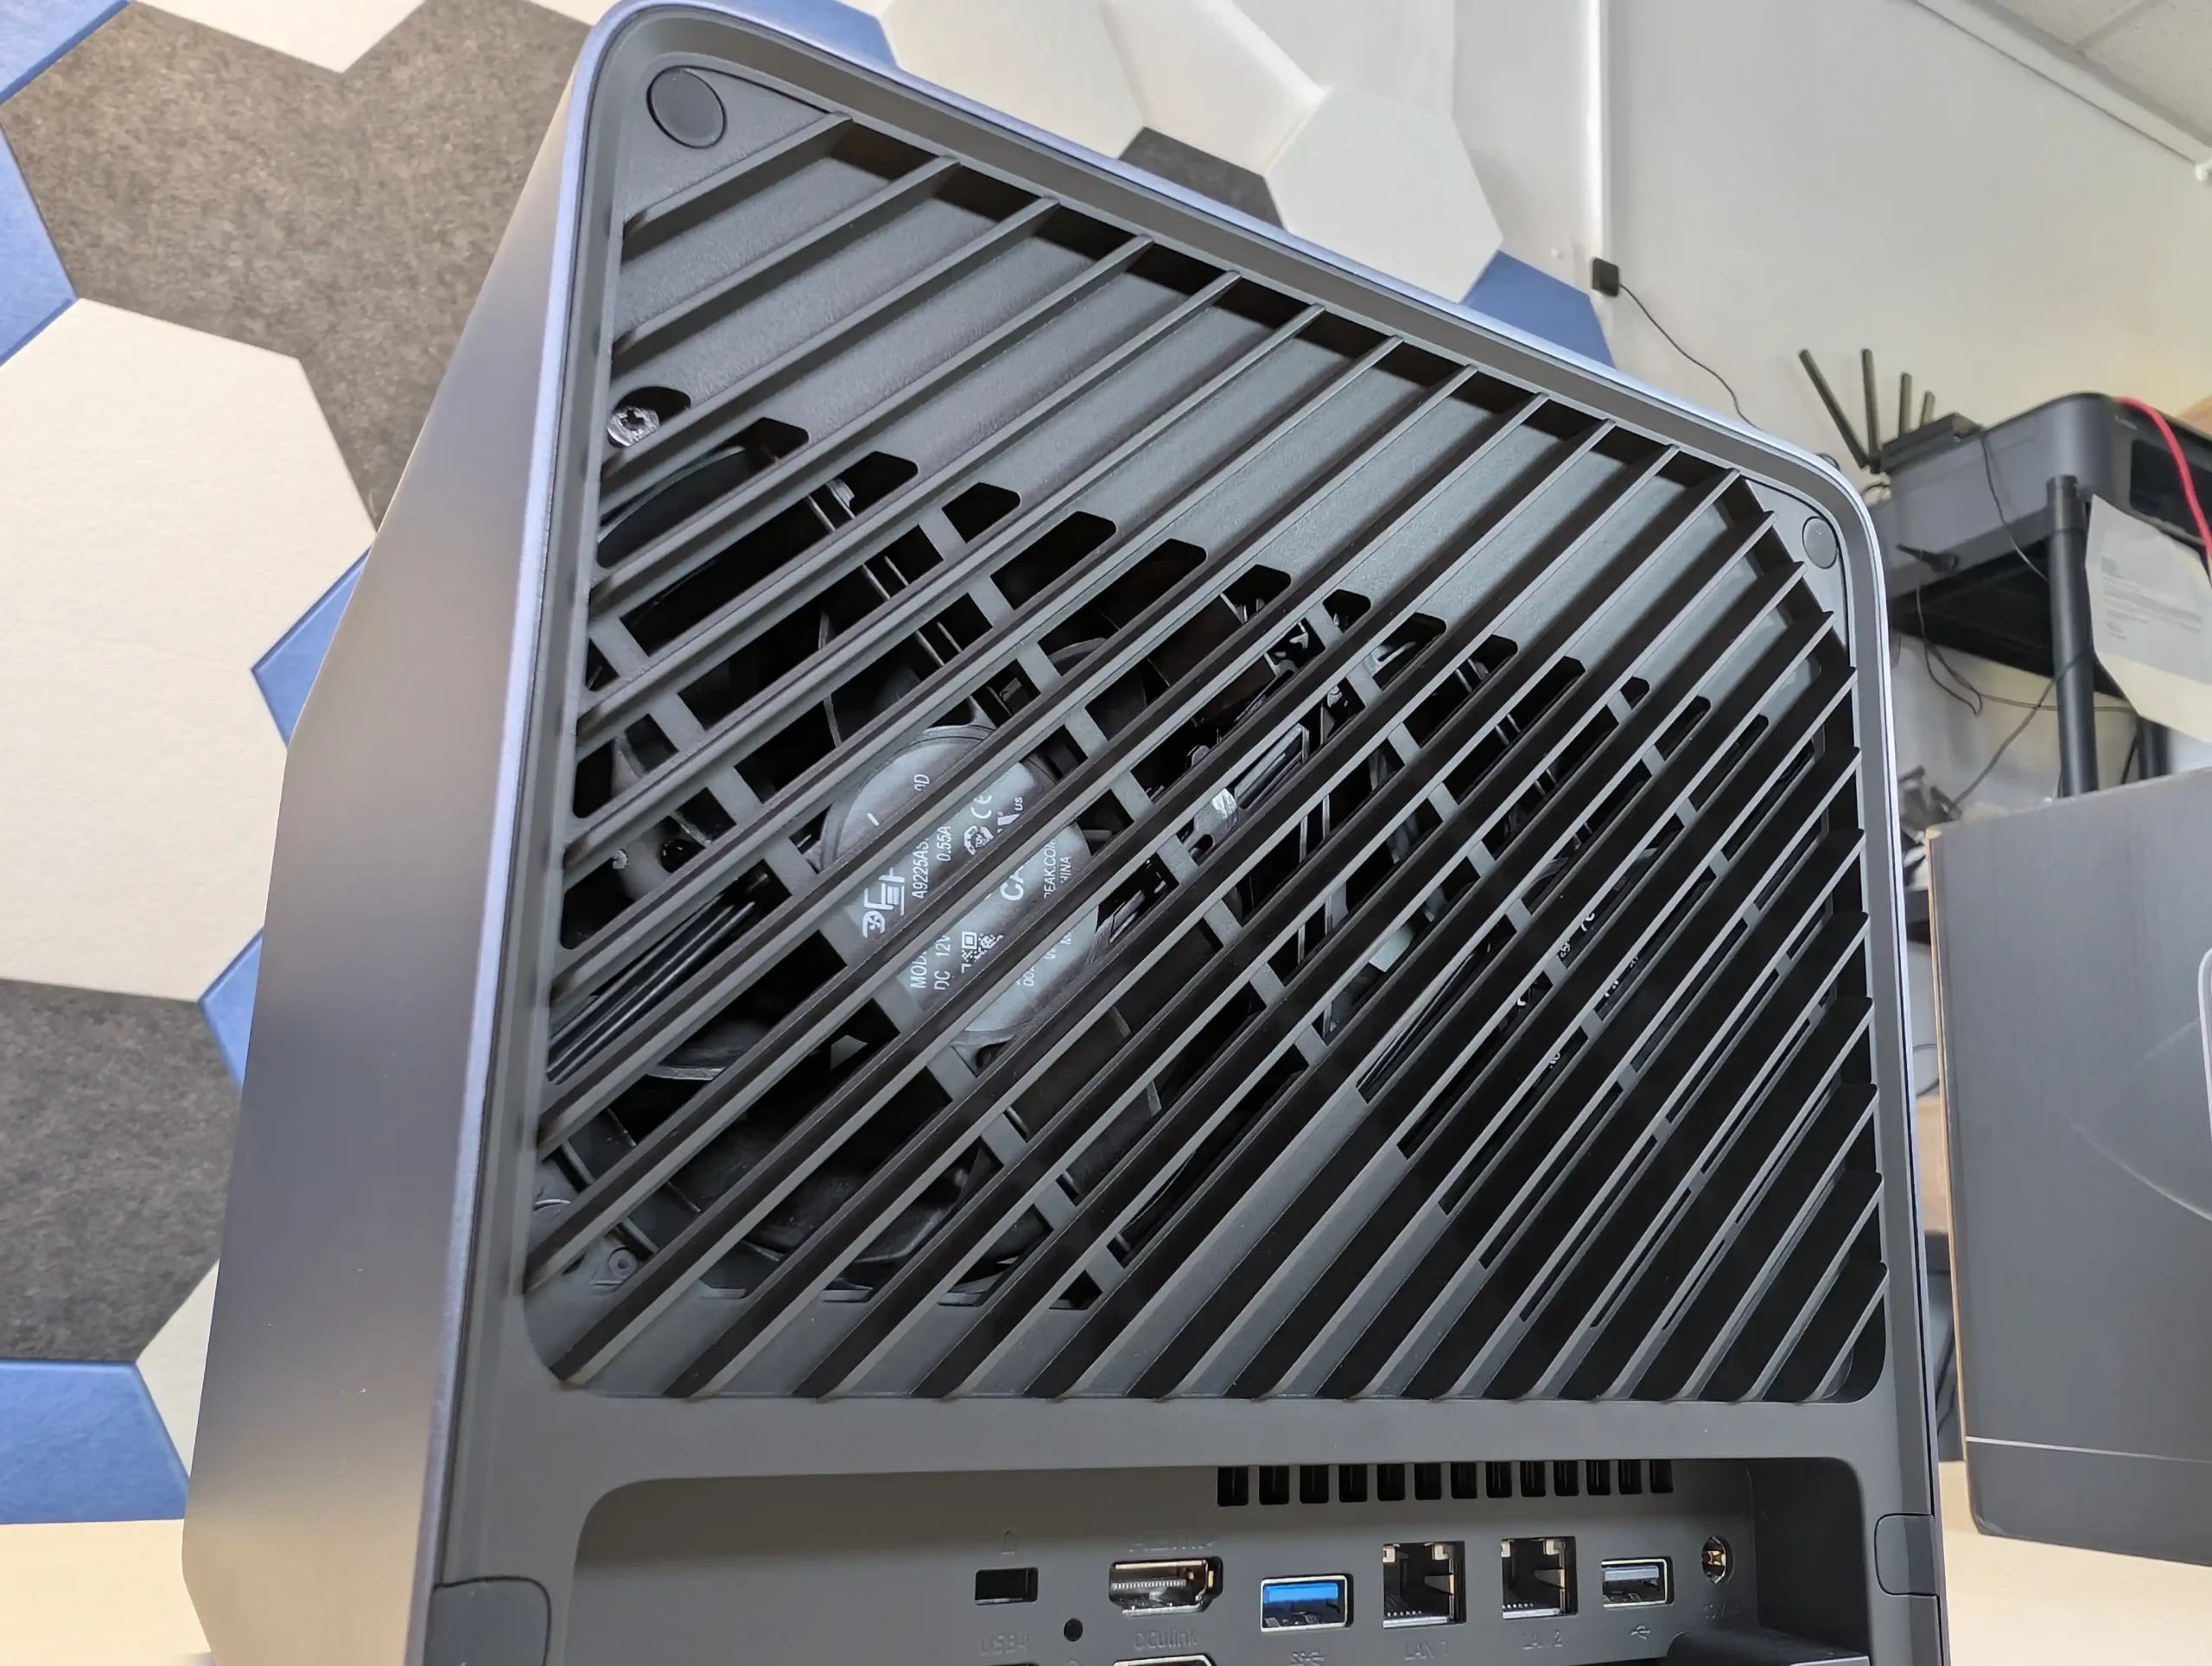
The NVMe and U.2 SSDs benefit from placement near the rear and bottom fans, maintaining acceptable temperatures under sustained workloads.
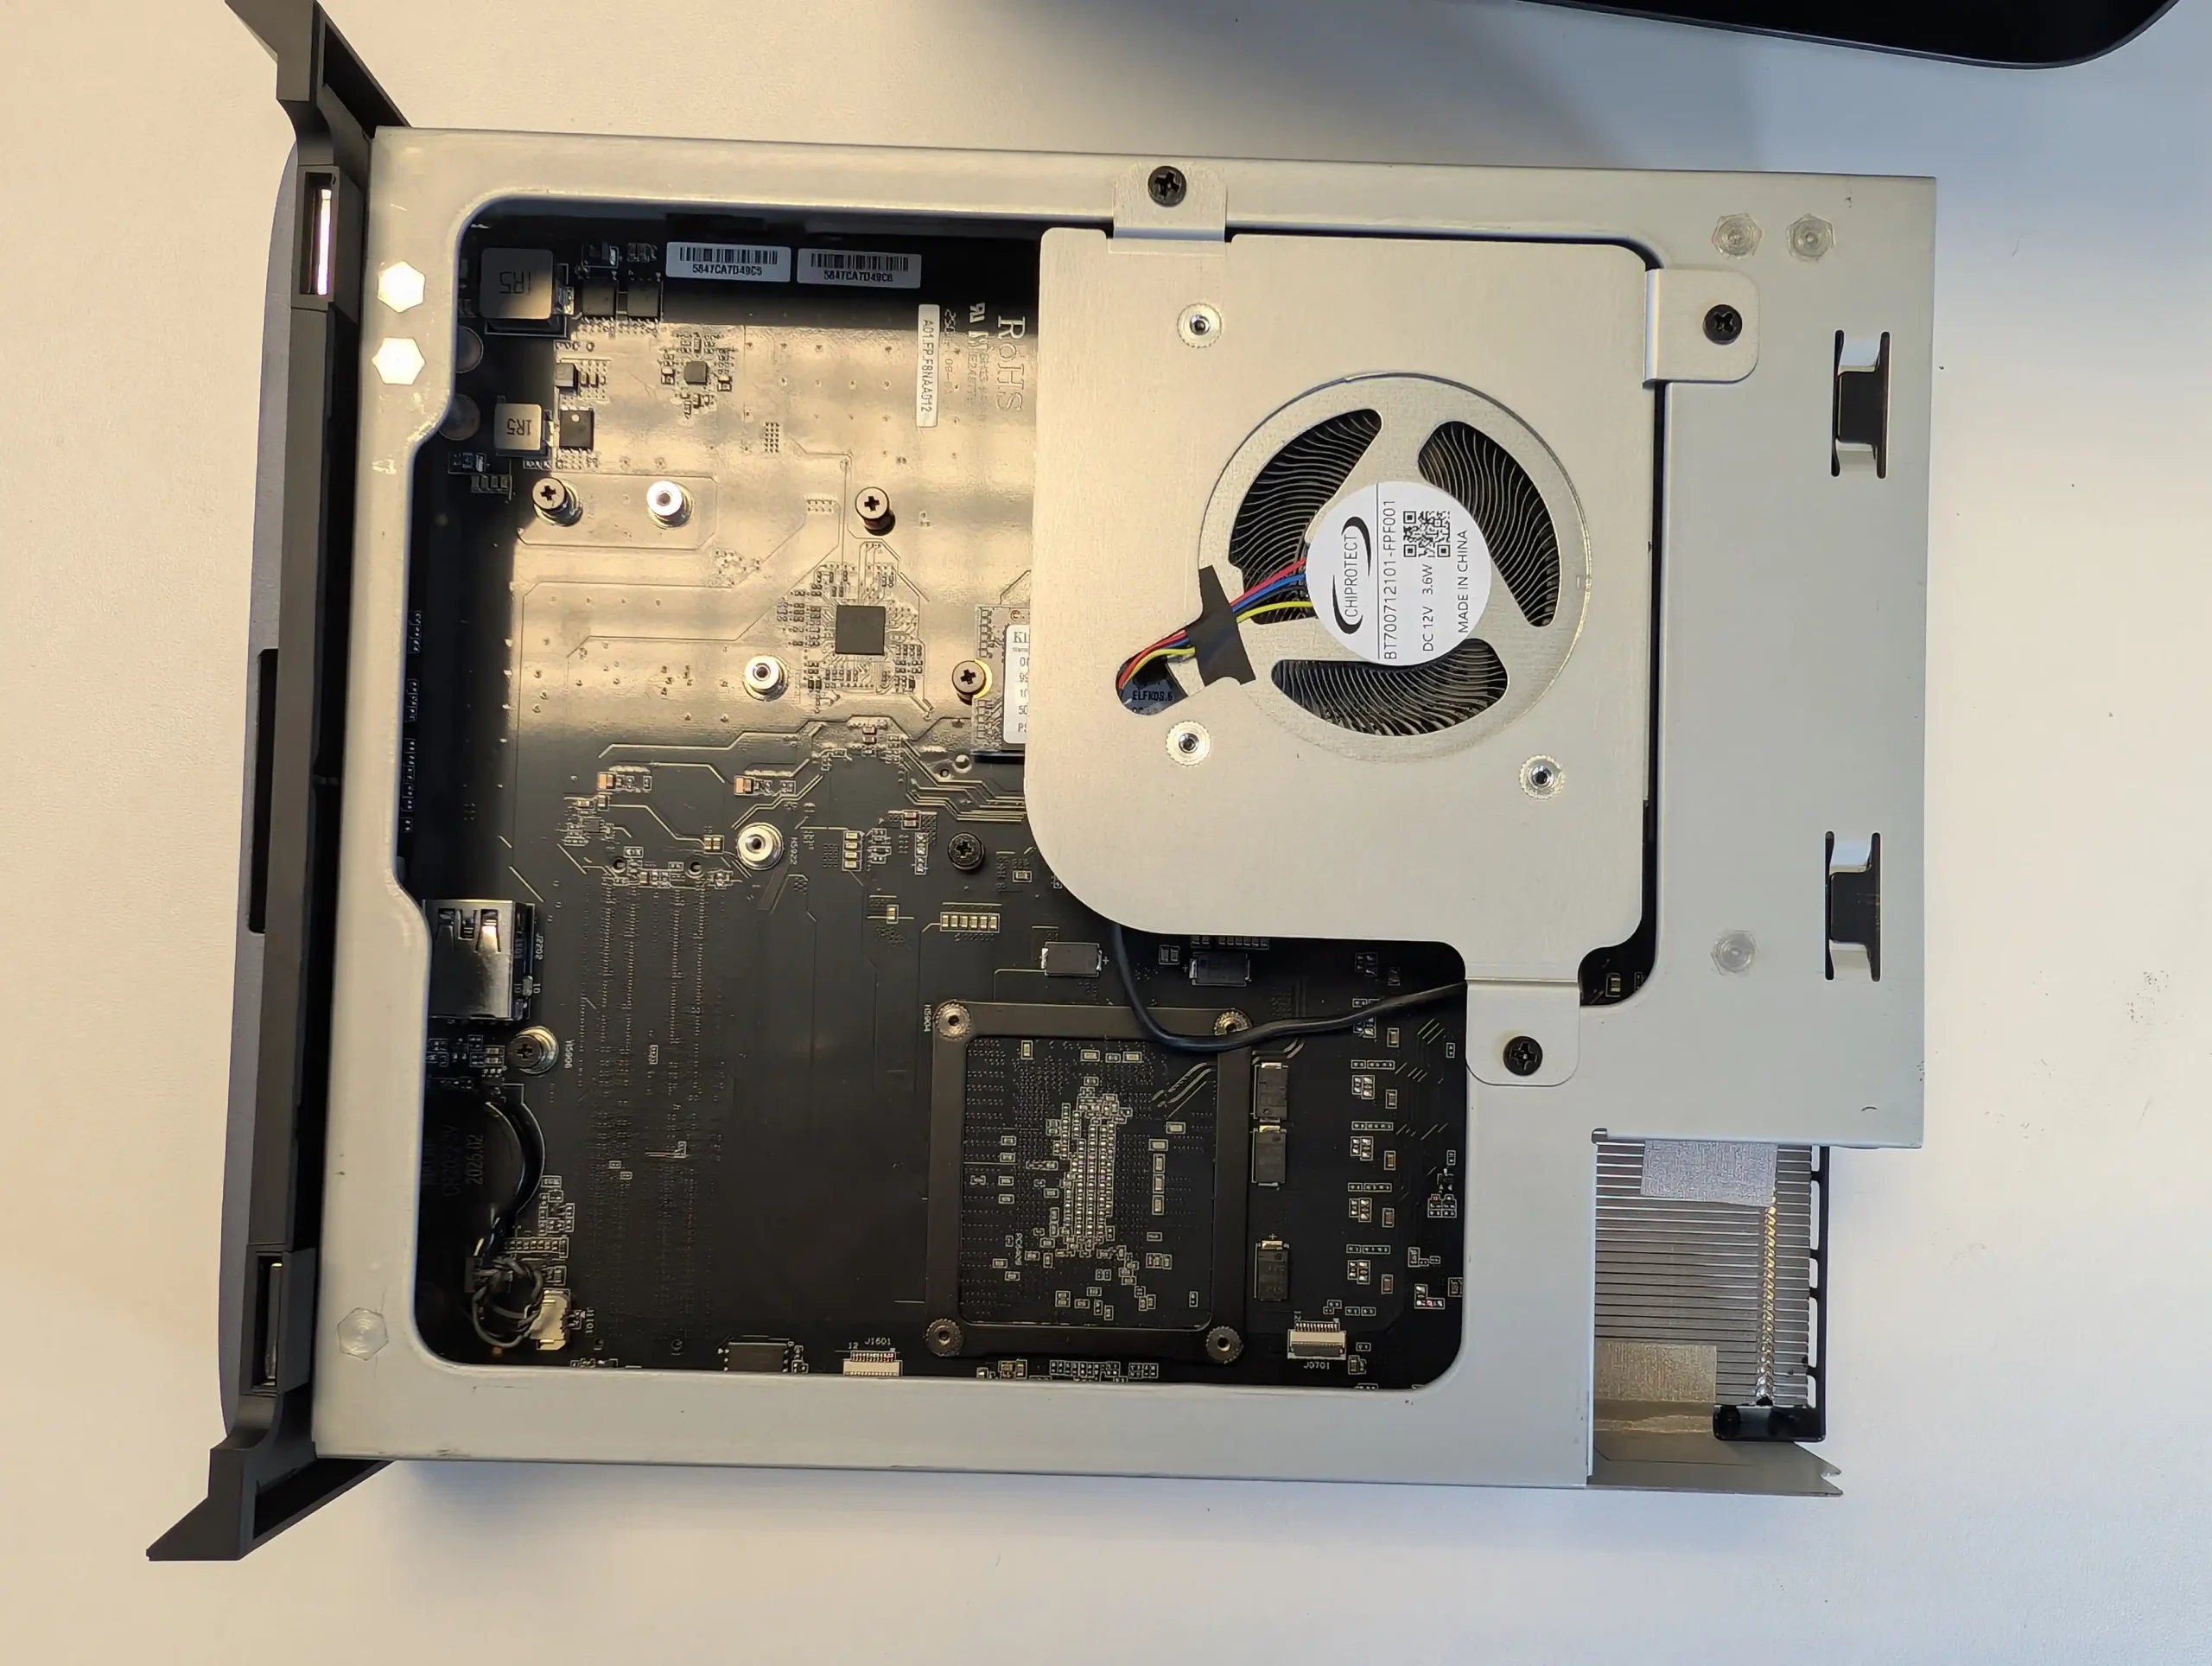 |
|
Interestingly, you can see the similarities in the design of the brand’s current smaller workstation systems, with their 2 fan (top and bottom) placement – they have just built on top of this by introducing the storage and it’s own dedicated cooling.
The 64GB OS SSD, however, does not feature a dedicated heatsink and was observed to operate at relatively high temperatures during stress testing—likely due to its compact 2230 form factor. Users opting to keep MinisCloud OS on this drive may consider upgrading to a larger, better-cooled SSD for improved thermal performance.

Despite its compact footprint, the system’s thermal behavior remained predictable during long periods of mixed I/O, demonstrating that Minisforum’s chassis and airflow design are effective at keeping the storage subsystem within operational limits.
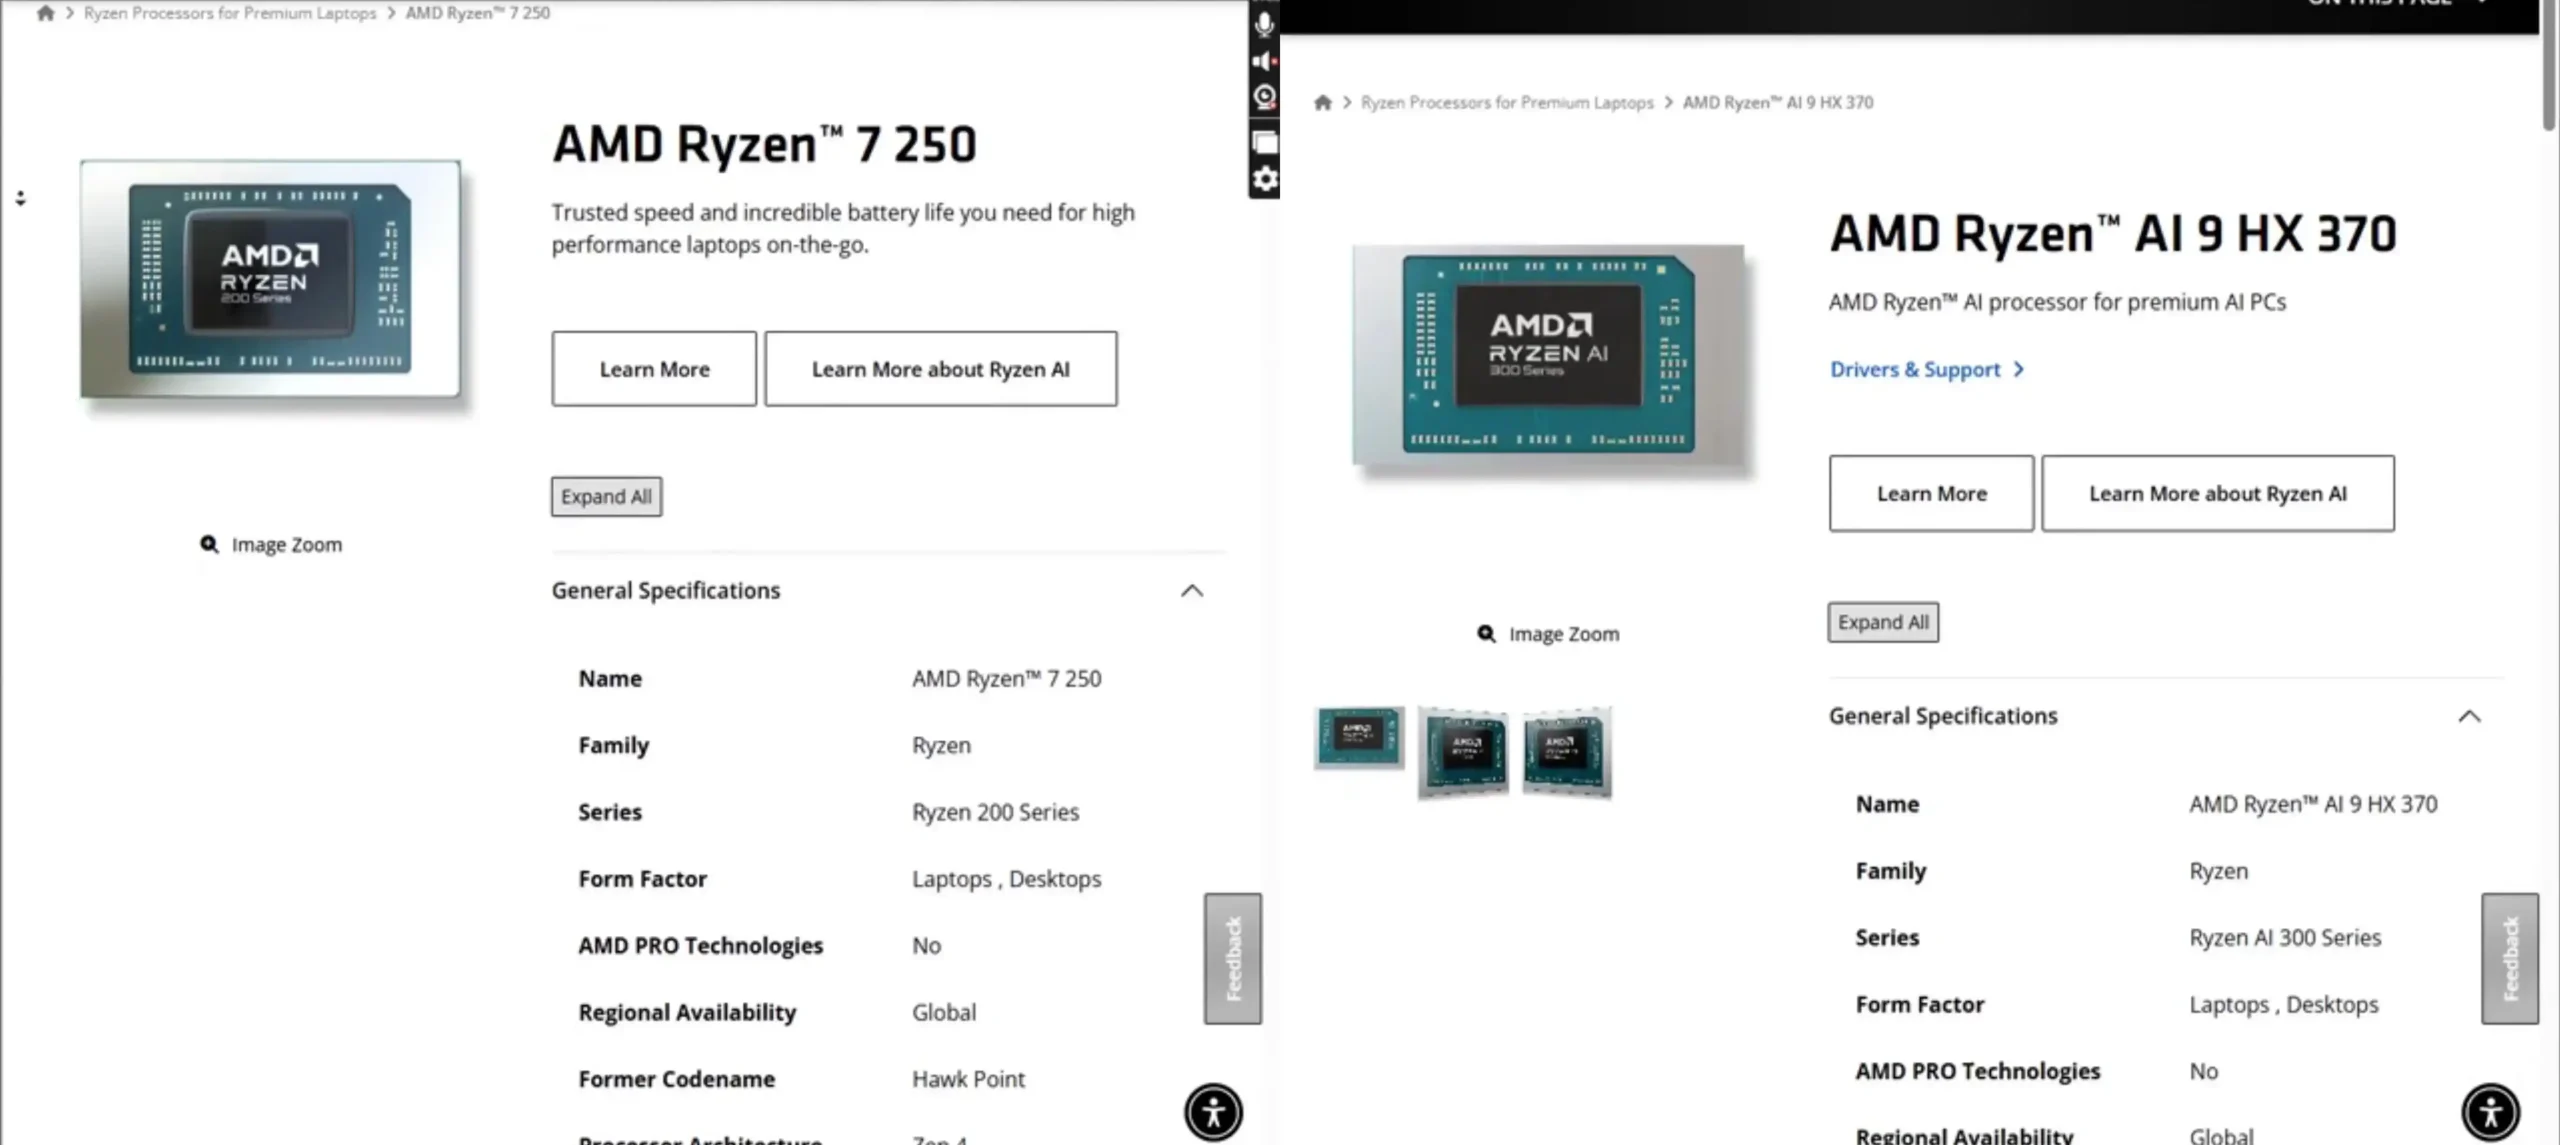
Internally, the Minisforum N5 Pro differentiates itself from its standard N5 counterpart primarily through its more powerful processor, memory capabilities, and additional AI acceleration hardware. At the heart of the system is the AMD Ryzen AI 9 HX PRO 370, a Zen 5-based CPU offering 12 cores and 24 threads, with a base clock as low as 2.0 GHz for low-power states and a maximum boost clock of up to 5.1 GHz under peak loads.
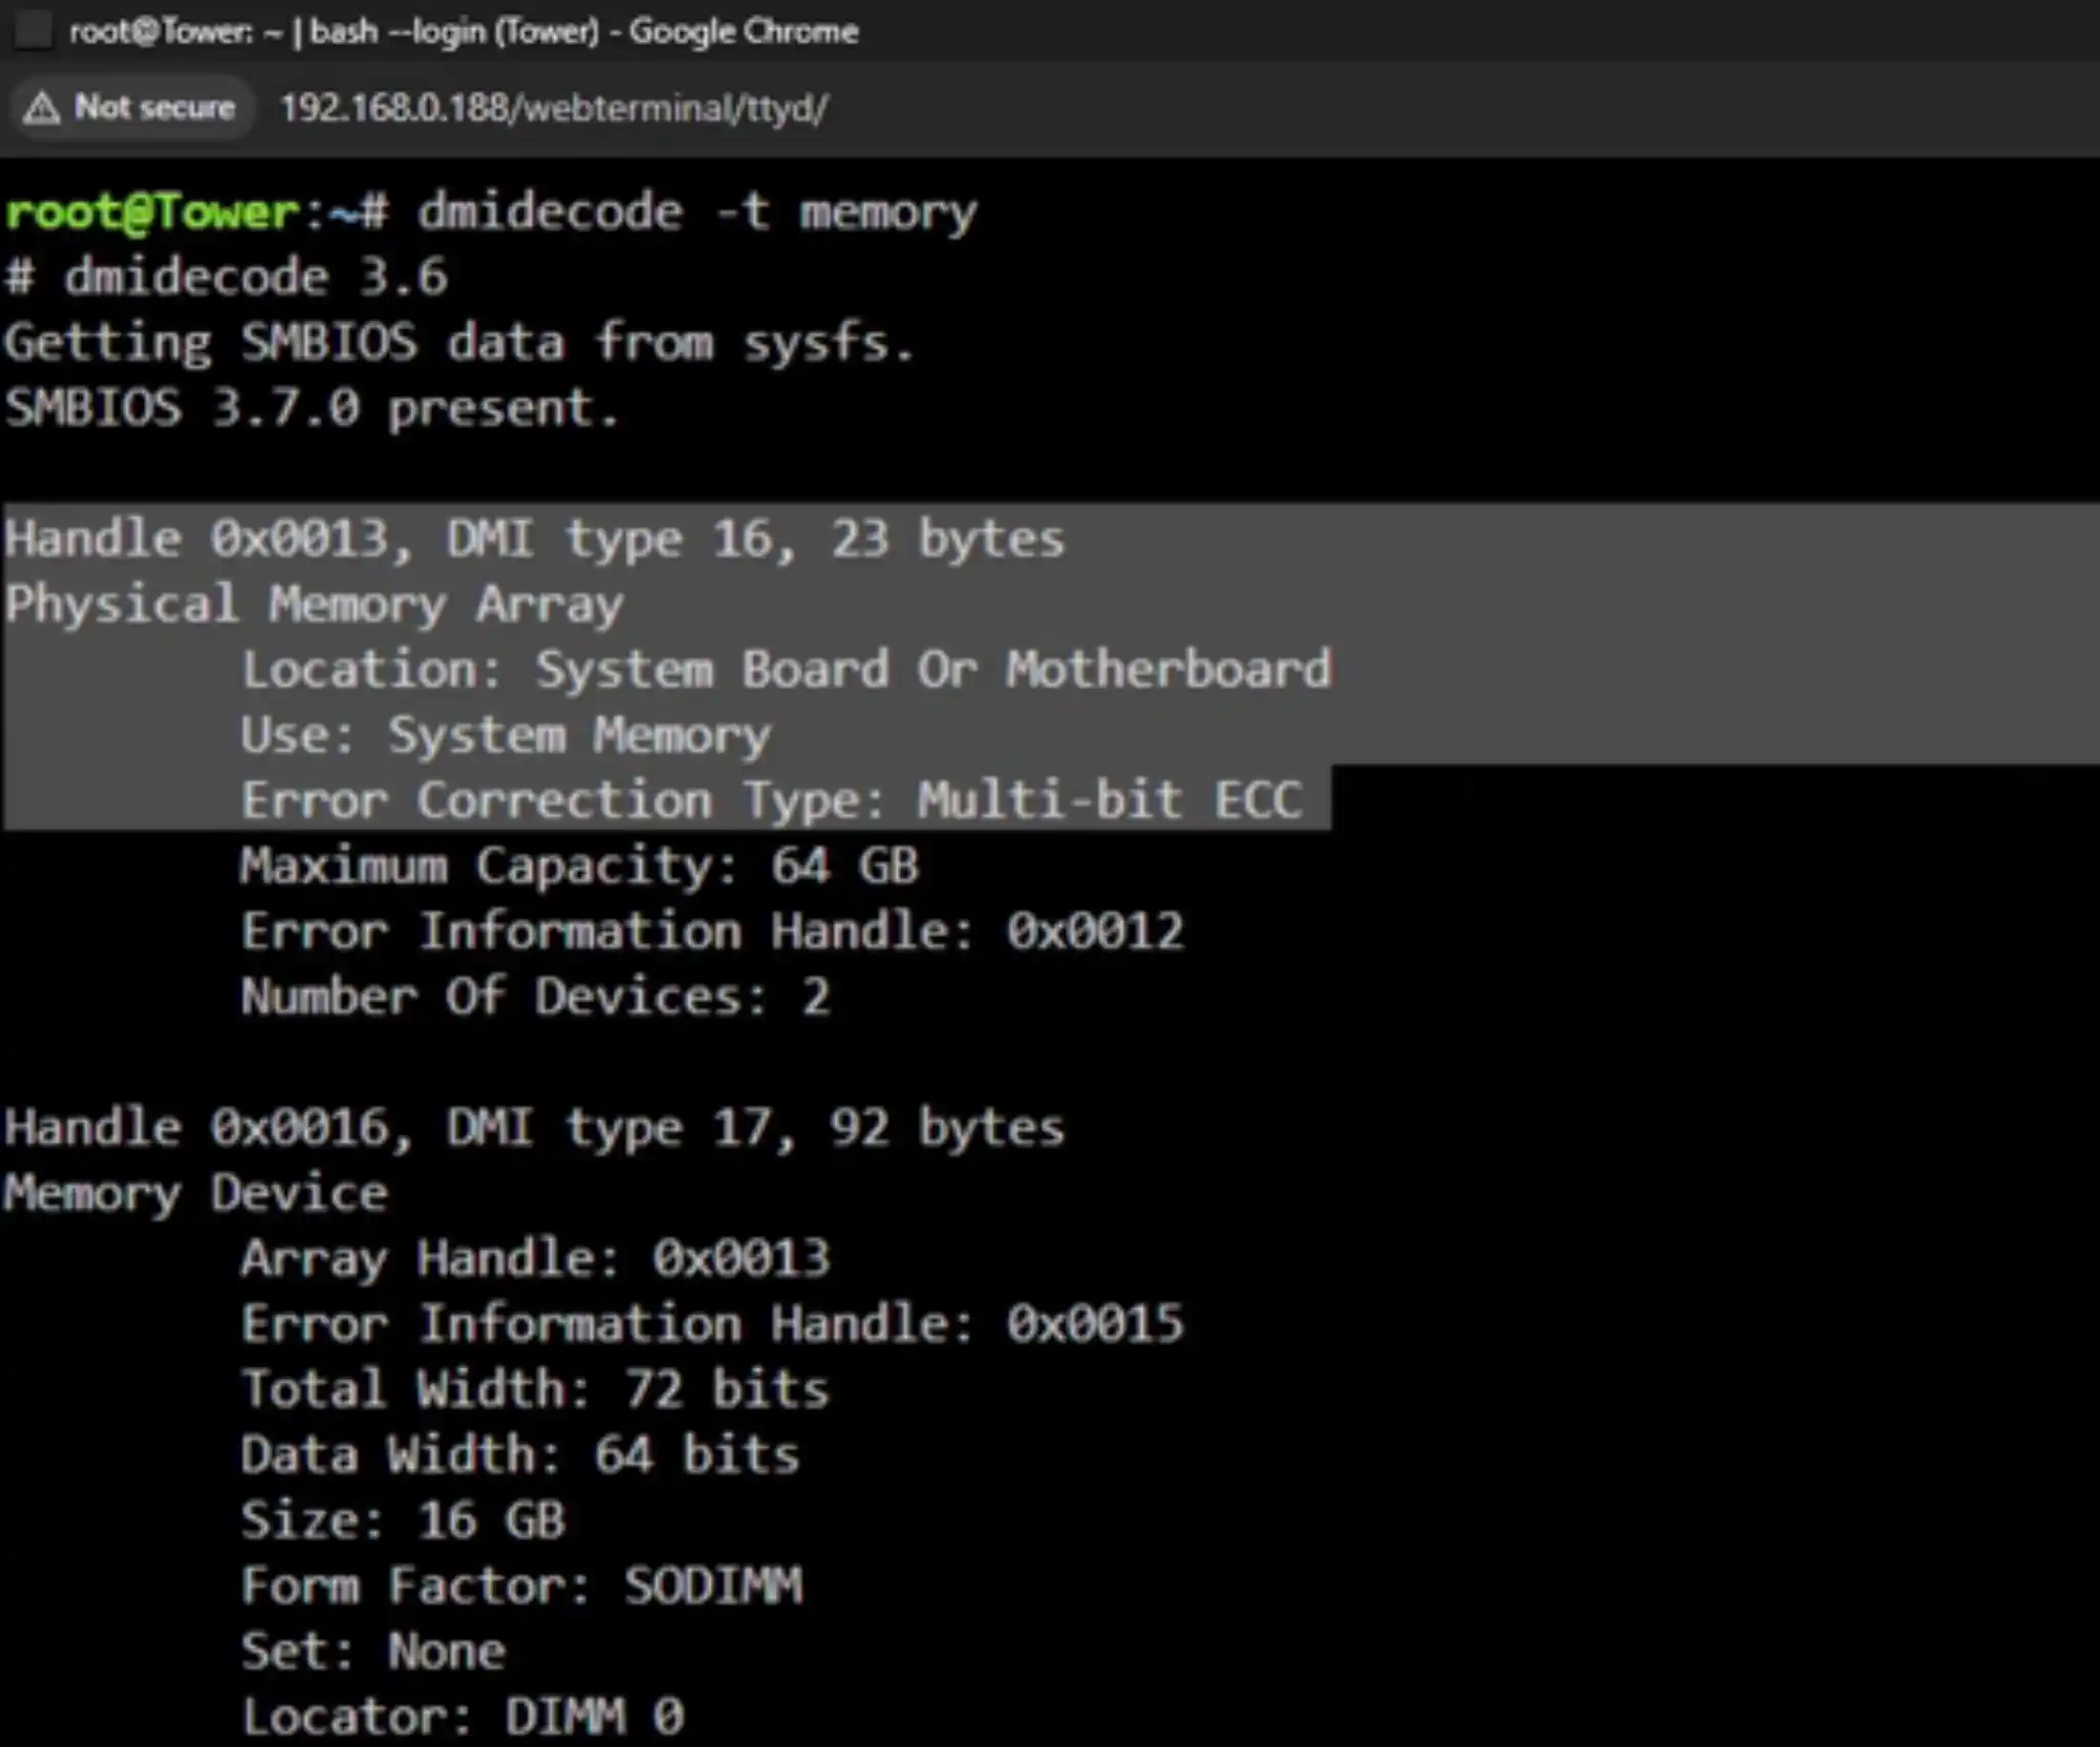
The inclusion of ECC support in the Pro variant enables the use of error-correcting DDR5 memory modules—essential in mission-critical environments where data integrity is a priority. The non-Pro model, by contrast, is equipped with an AMD Ryzen 7 255, offering 8 cores and 16 threads, a slightly higher base clock at 3.3 GHz, but no support for ECC memory.
This choice in processors reflects different target audiences: the Pro version is designed for advanced workloads, AI model inference, and demanding multi-threaded tasks, whereas the standard N5 targets more conventional NAS and multimedia use cases. Both CPUs have a very similar integrated GPU architecture (only around 0.1Ghz of difference and similar engine design), however the non-PRO CPU R7 255 CPU actually has 20 PCIe Lanes, compared with the 16 Lanes of the HX370. Despite this, both the Pro and Non Pro have the exact same Ports, connections and lane speeds for the SSD bays and PCIe upgrade slot! So, unsure if these additional lanes are picking up slack somewhere I cannot see, or are insured (likely the former).
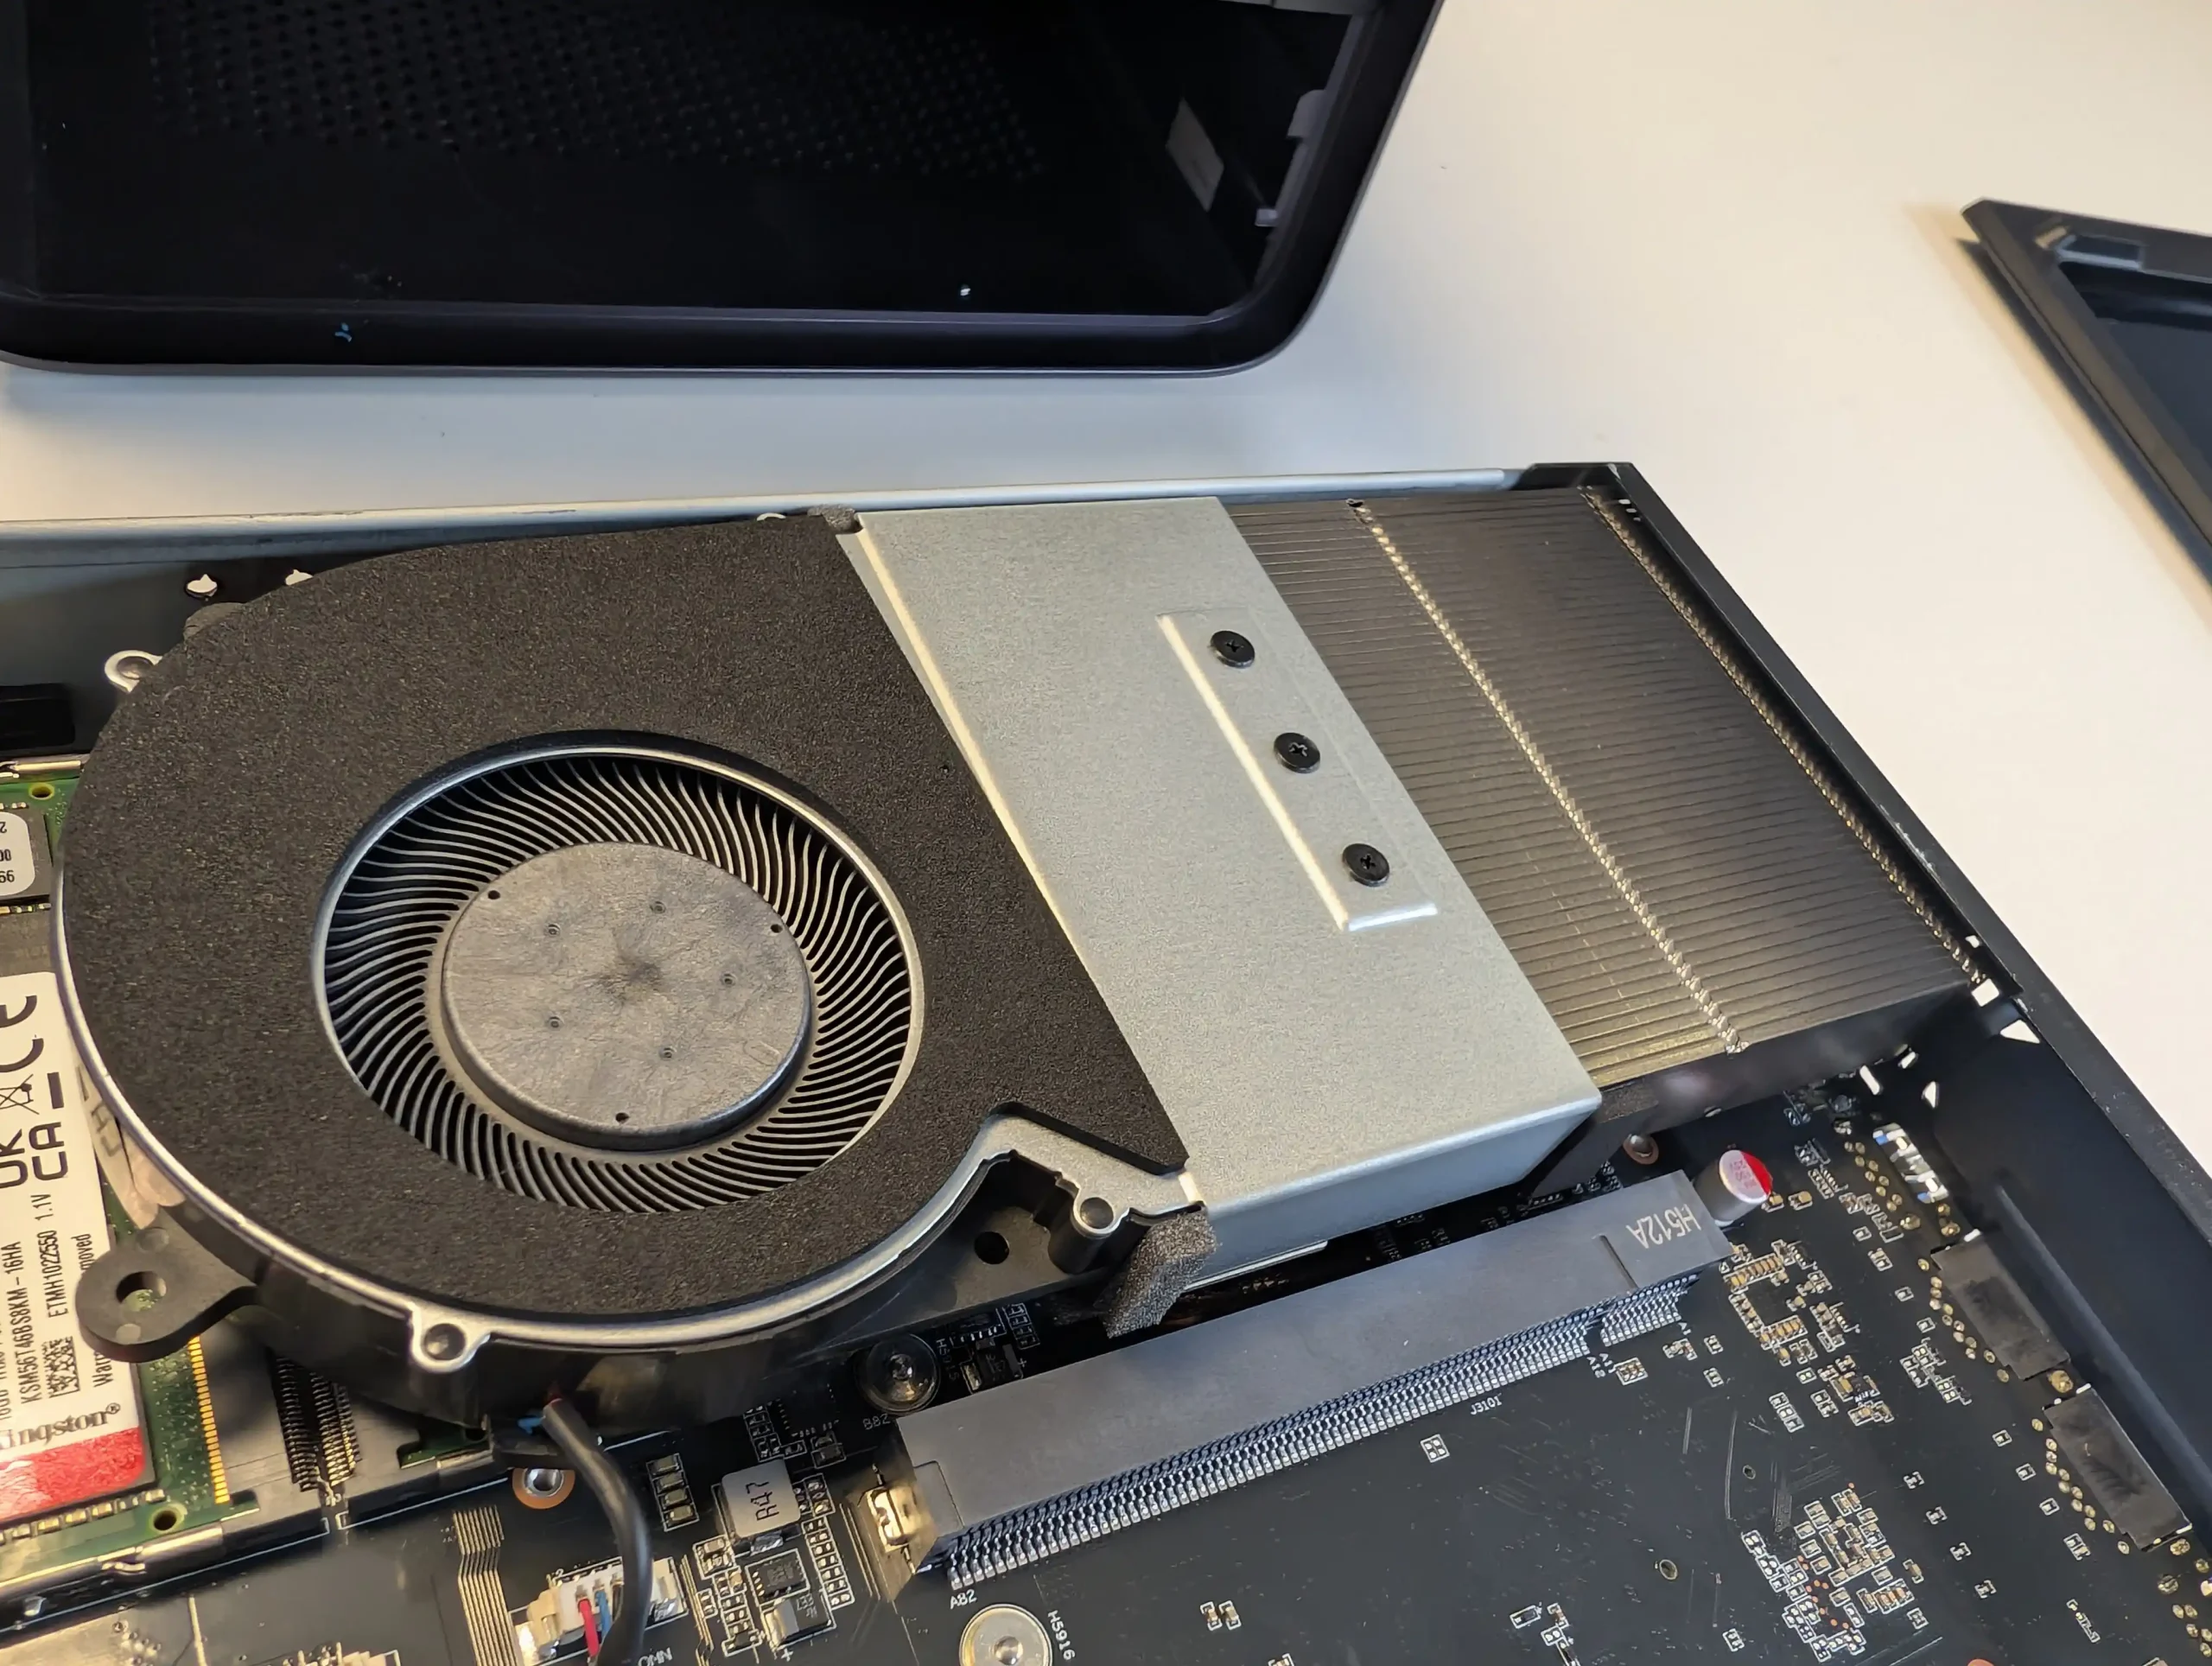
The Pro variant also integrates AMD’s Radeon 890M integrated graphics with 12 compute units based on the RDNA 3 architecture, supporting burst frequencies up to 2.9 GHz, which is advantageous for tasks requiring GPU-accelerated transcoding or light graphical workloads. This is a small step up from the Radeon 780M present in the standard N5, which tops out at 2.7 GHz and features fewer compute units. Notably, the N5 Pro includes a dedicated AI Neural Processing Unit (NPU) rated up to 50 TOPS (trillions of operations per second), which is absent in the standard N5. This NPU is leveraged by MinisCloud OS for AI-based features such as photo recognition and intelligent indexing, and may also benefit advanced users deploying AI workloads in containerized environments or VMs – but REALISTICALLY the main draw for this CPU and in AI deployment would be true edge-AI and LOCALLY deploying an LLM/AI on the system effectively (ChatGPT, Deepseek, etc). Together, these enhancements give the Pro configuration a performance and feature set closer to workstation-class hardware while maintaining NAS functionality.
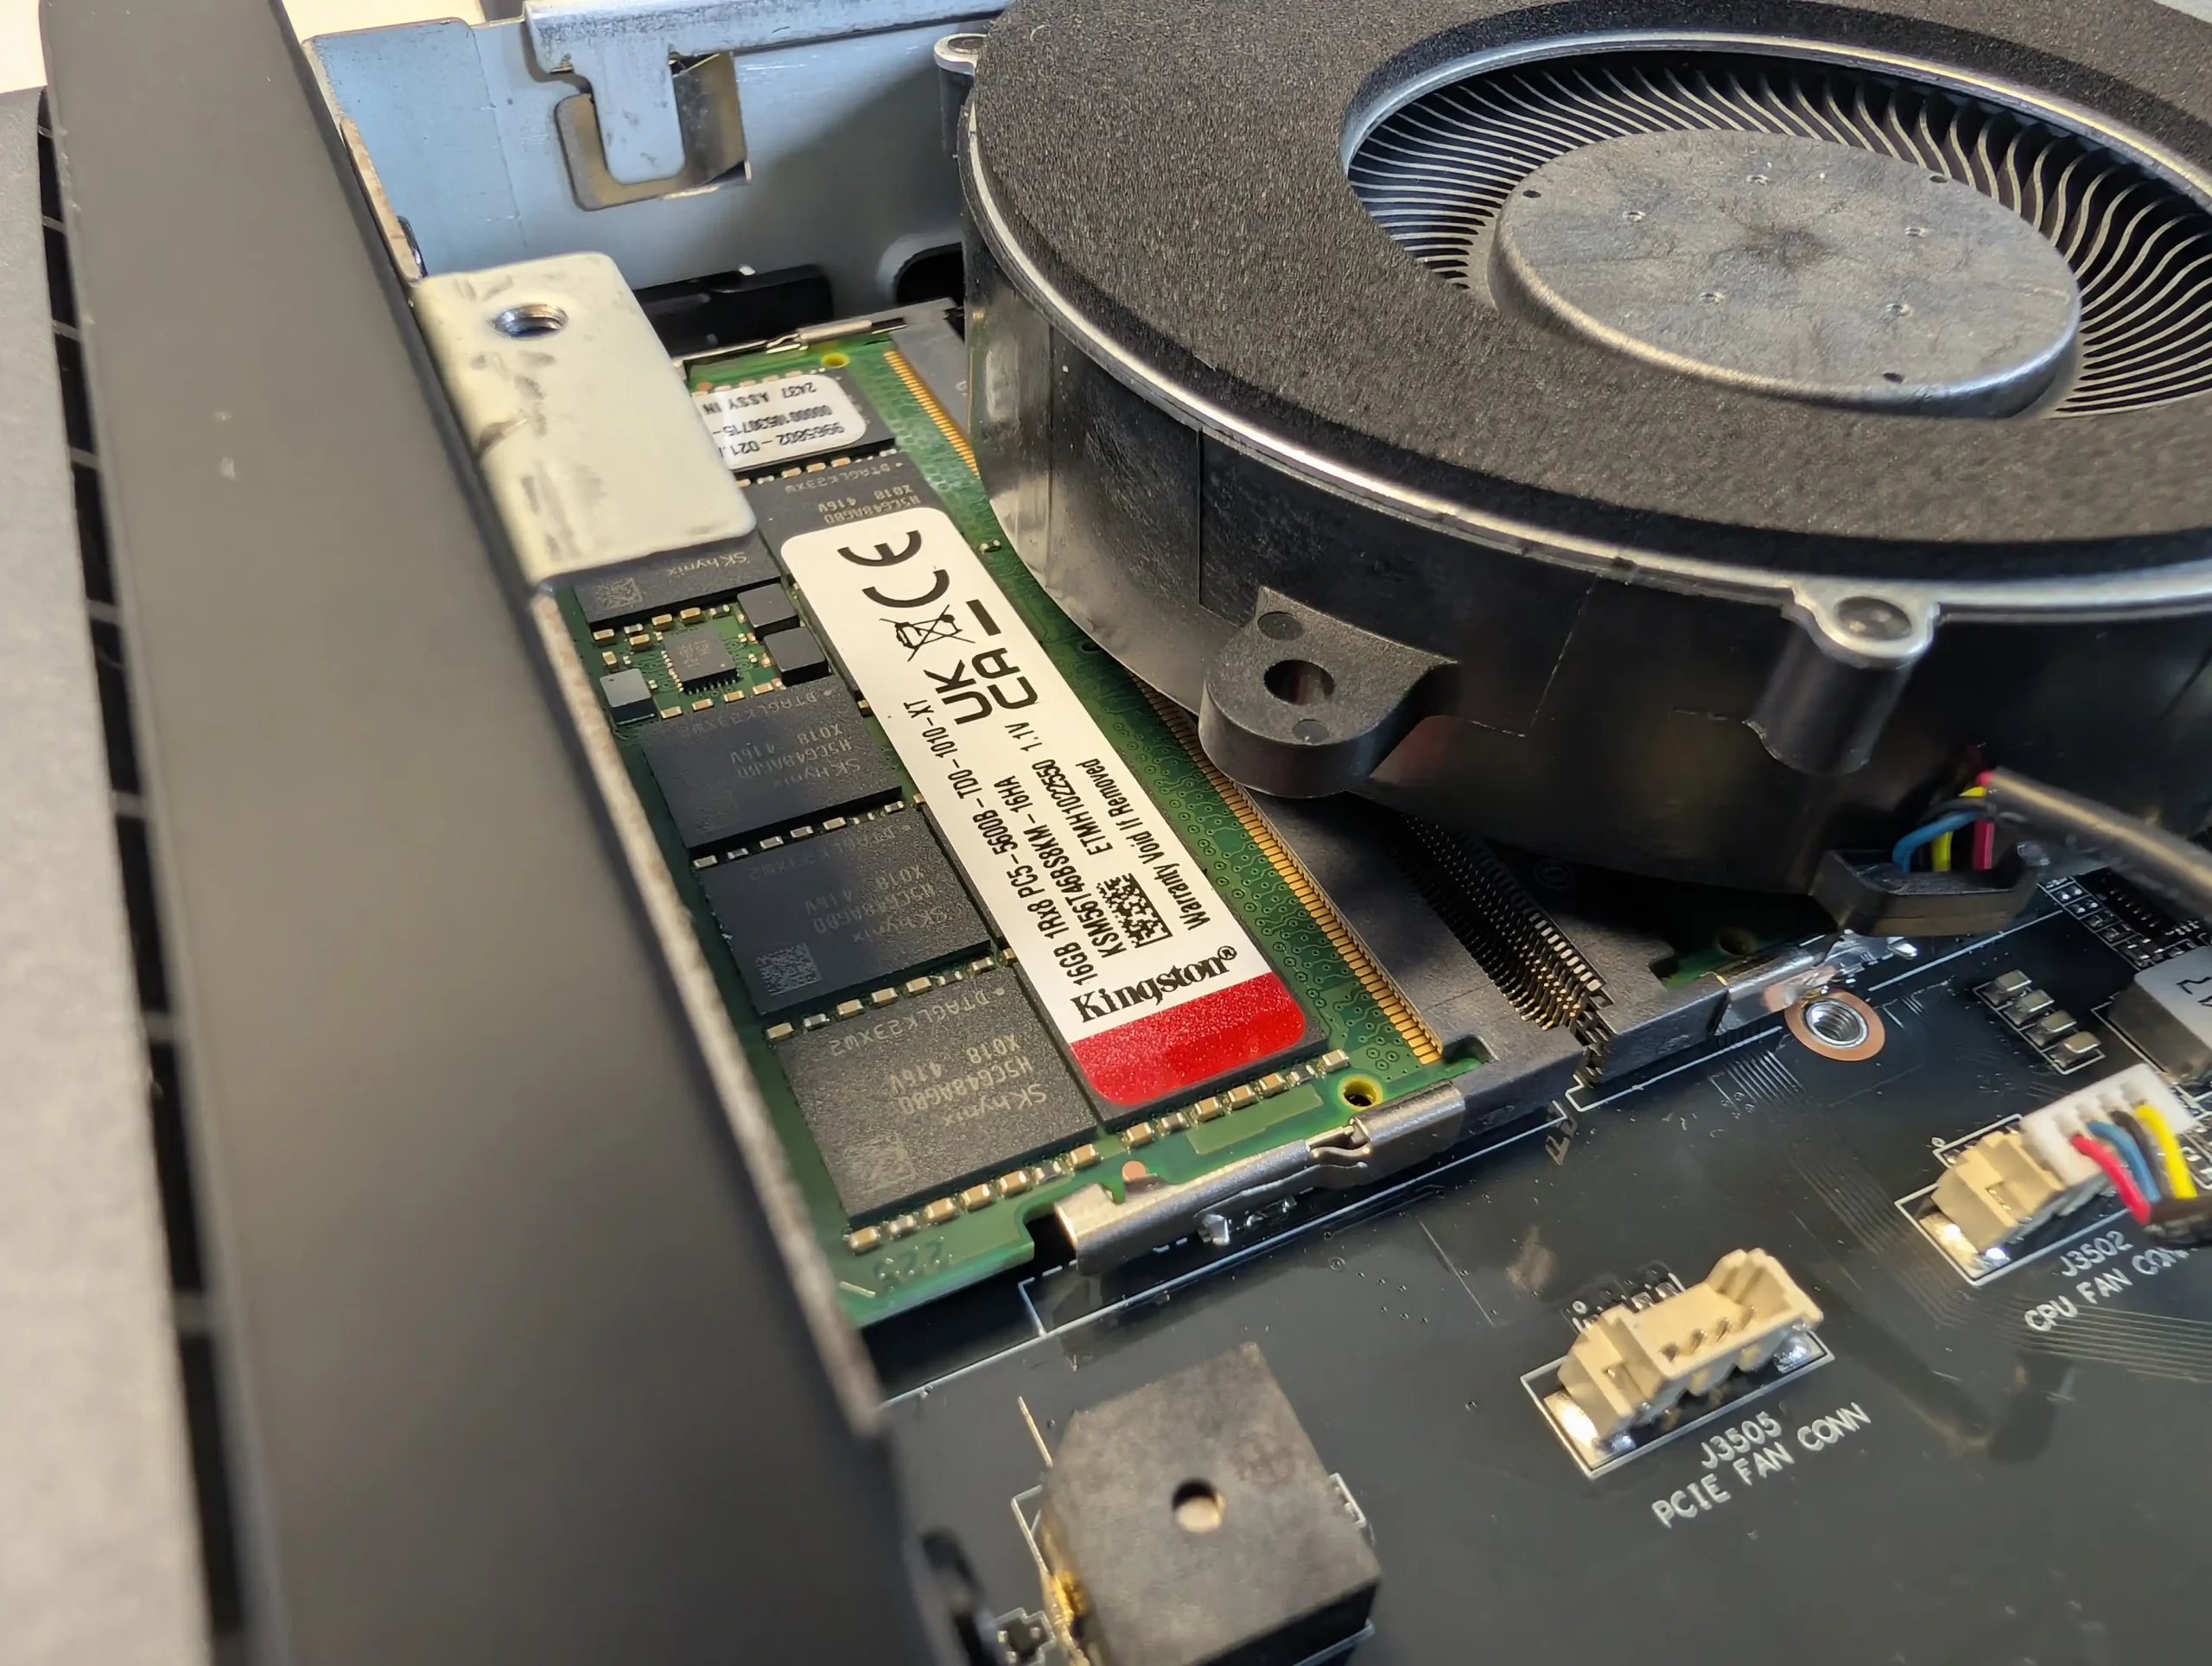
Memory capacity and bandwidth are also noteworthy. Both variants of the N5 support up to 96GB of DDR5 memory across two SO-DIMM slots, operating at up to 5600 MT/s. In the Pro, ECC modules can be installed for error correction, while the standard model is limited to non-ECC DDR5. ECC memory is an important differentiator in enterprise and data-centric scenarios, preventing silent data corruption and improving long-term system stability.
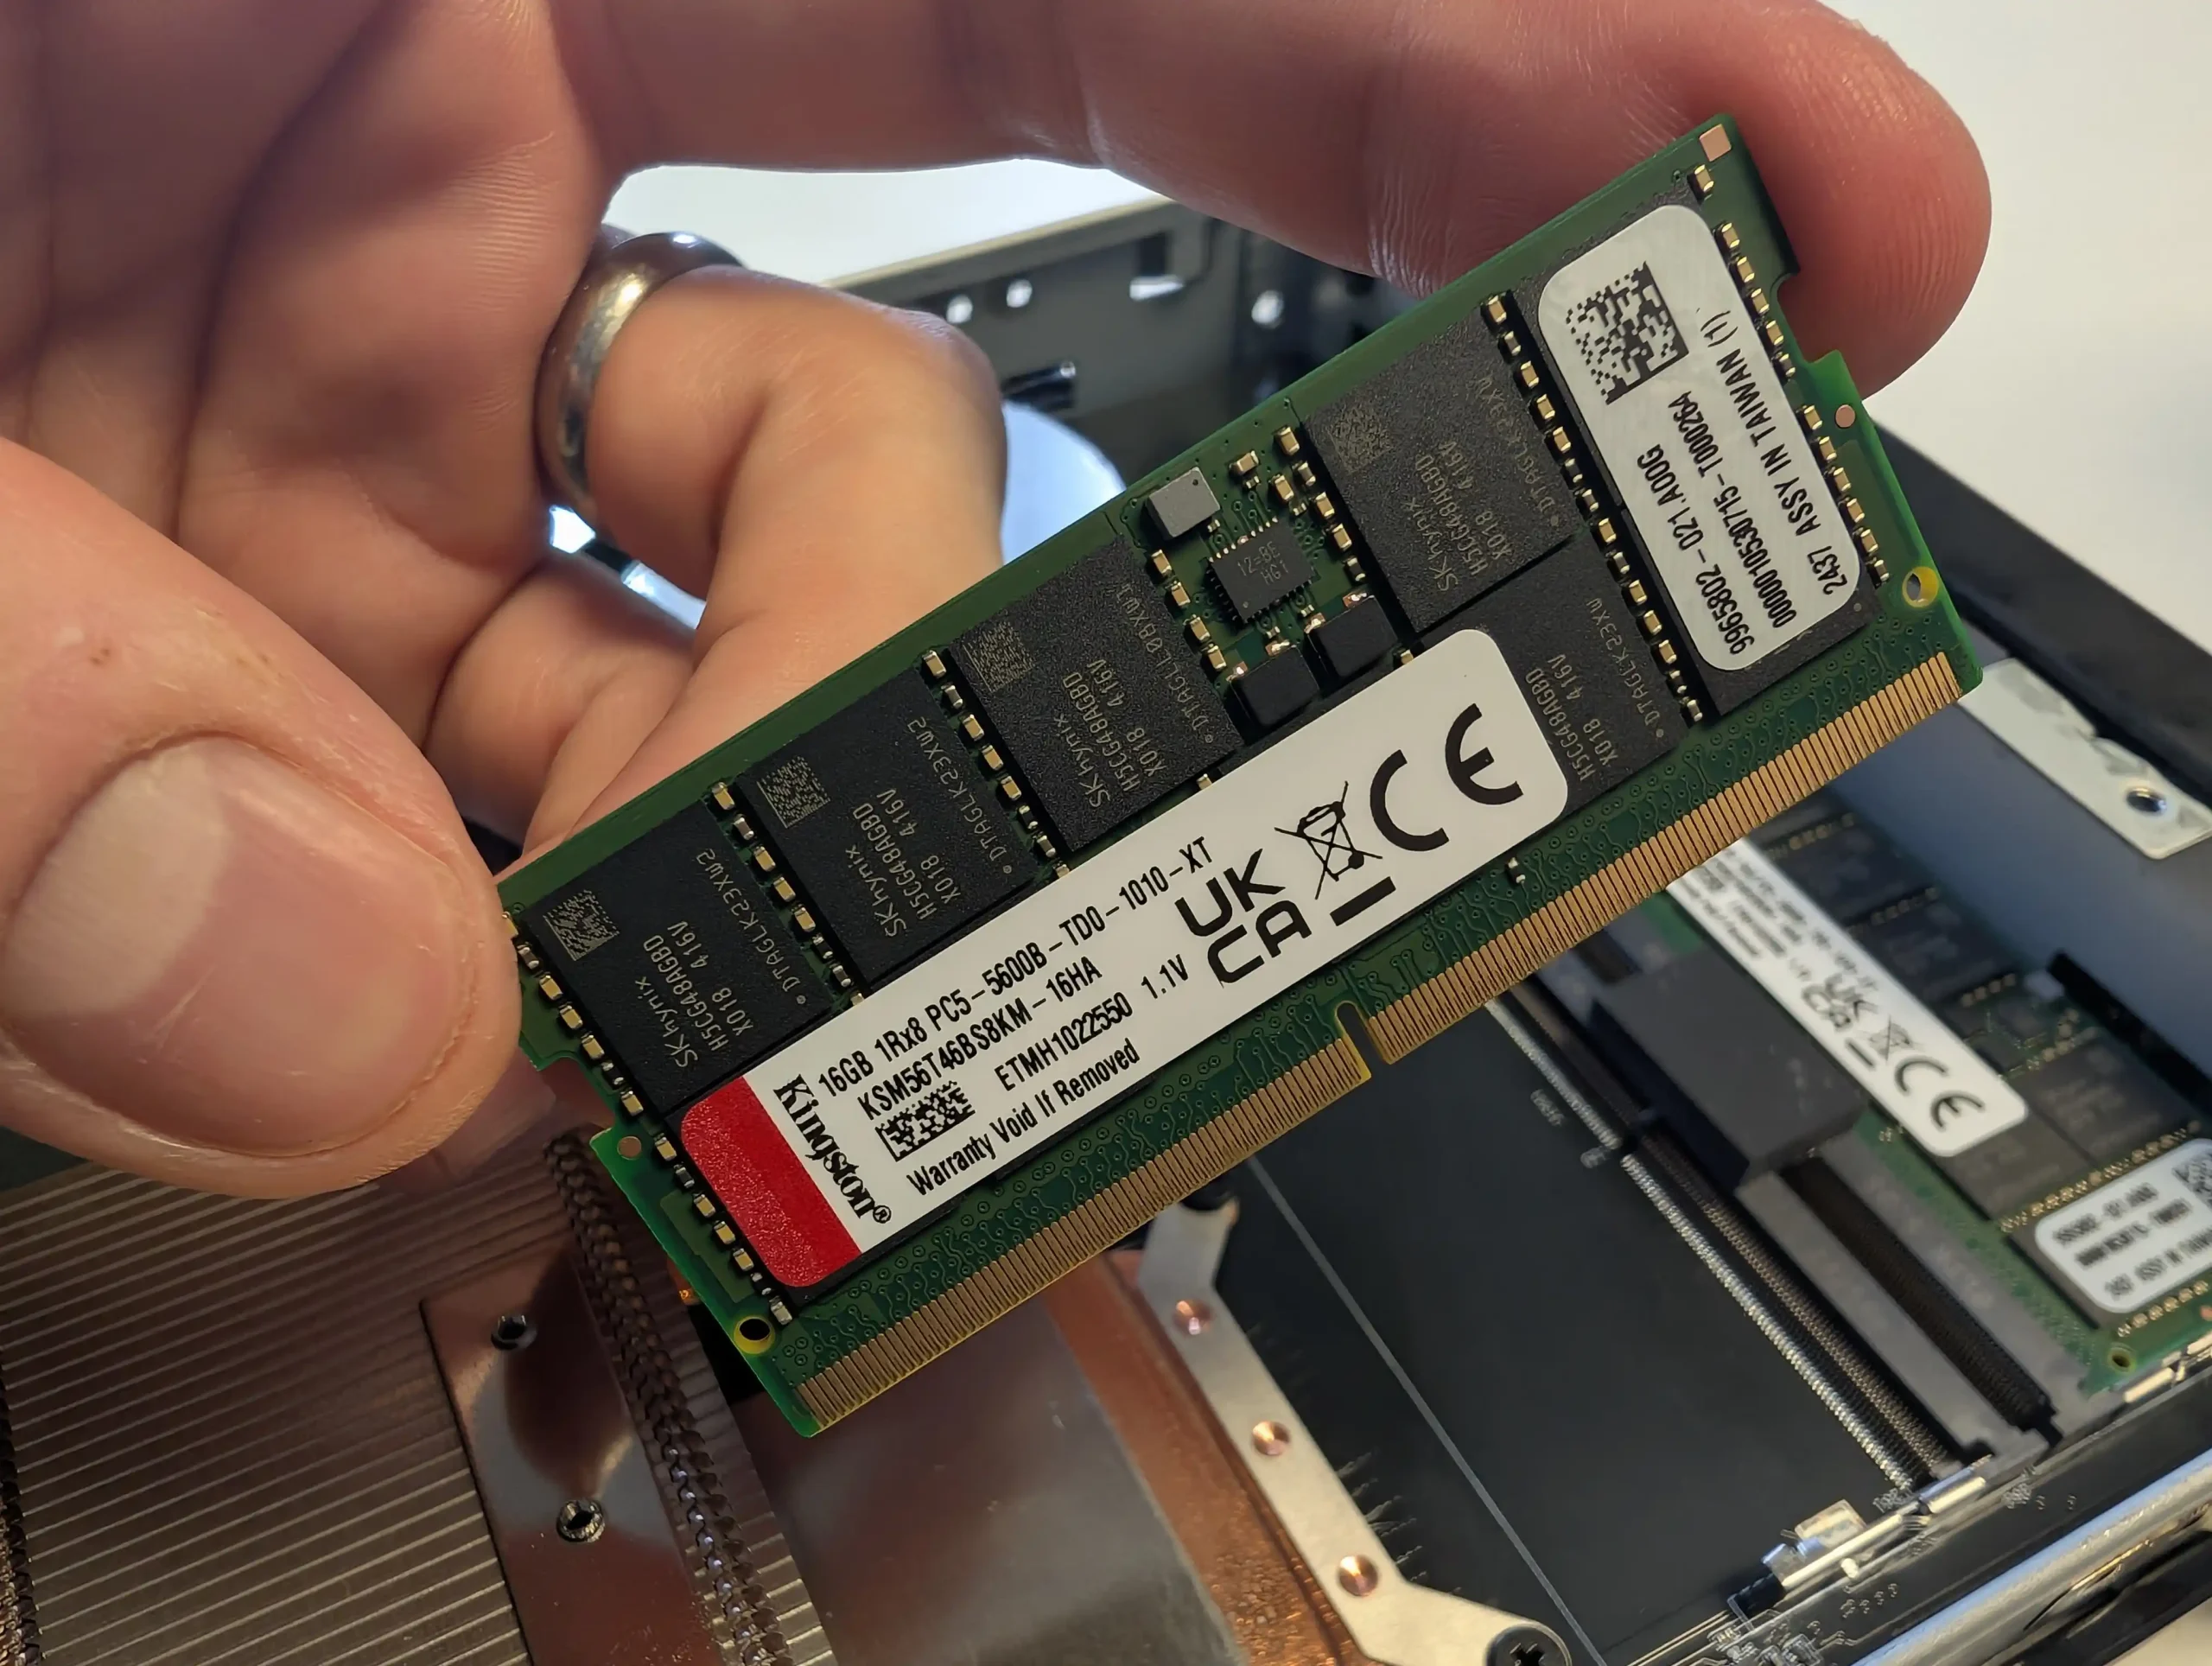
The unit tested for this review was populated with 96GB of ECC DDR5, which performed consistently and without detectable error events during extended uptime tests. The system’s DDR5 architecture provides approximately 75% more bandwidth than equivalent DDR4 configurations, which is beneficial for high-concurrency operations, ZFS scrubbing, and virtual machine memory allocation. In effect, this memory flexibility makes the N5 Pro adaptable for both small office file sharing and more advanced computational tasks such as AI training or multi-VM deployments.
Minisforum’s choice to pair these components with a full range of storage and expansion interfaces ensures that none of the hardware is bottlenecked under realistic workloads. The PCIe Gen 4×16 slot and OCuLink port are physically accessible from within the chassis and are routed directly to CPU lanes, ensuring optimal throughput for expansion cards or external GPU enclosures. Thermal management of the internal hardware is also carefully designed: copper heatpipes, a dedicated CPU fan on the base, rear exhaust fans, and airflow channels work in tandem to keep CPU, GPU, and memory temperatures in line, even under sustained heavy usage. In testing, the CPU maintained stable boost clocks without throttling, and the DIMM temperatures remained within specification. This level of hardware specification in a NAS-class device positions the N5 Pro well beyond the scope of typical consumer NAS appliances, edging into workstation territory while retaining the flexibility and storage capabilities of a dedicated file server.
| Component | N5 Pro | N5 Standard |
|---|---|---|
| Processor | AMD Ryzen AI 9 HX PRO 370 (12C/24T, 2.0–5.1 GHz, Zen 5) |
AMD Ryzen 7 255 (8C/16T, 3.3–4.9 GHz, Zen 5) |
| Integrated GPU | Radeon 890M (12CU, RDNA 3, up to 2.9 GHz) |
Radeon 780M (RDNA 3, up to 2.7 GHz) |
| Neural Processing Unit | Up to 50 TOPS | Not available |
| Memory Support | DDR5 ECC or Non-ECC, up to 96GB, 5600 MT/s | DDR5 Non-ECC only, up to 96GB, 5600 MT/s |
| PCIe Slot | PCIe 4.0 ×16 (wired as ×4) | PCIe 4.0 ×16 (wired as ×4) |
| OCuLink Port | PCIe 4.0 ×4 | PCIe 4.0 ×4 |
| Cooling Features | Base CPU fan, copper pipes, rear dual fans | Base CPU fan, copper pipes, rear dual fans |
The Minisforum N5 Pro offers a broad set of connectivity options designed to cater to a variety of deployment scenarios, from conventional NAS file sharing to more specialized compute and expansion use cases. On the rear panel, the system includes two dedicated Ethernet ports: one 10GbE RJ45 port based on the AQC113 controller, and a secondary 5GbE RJ45 port driven by a Realtek RTL8126.
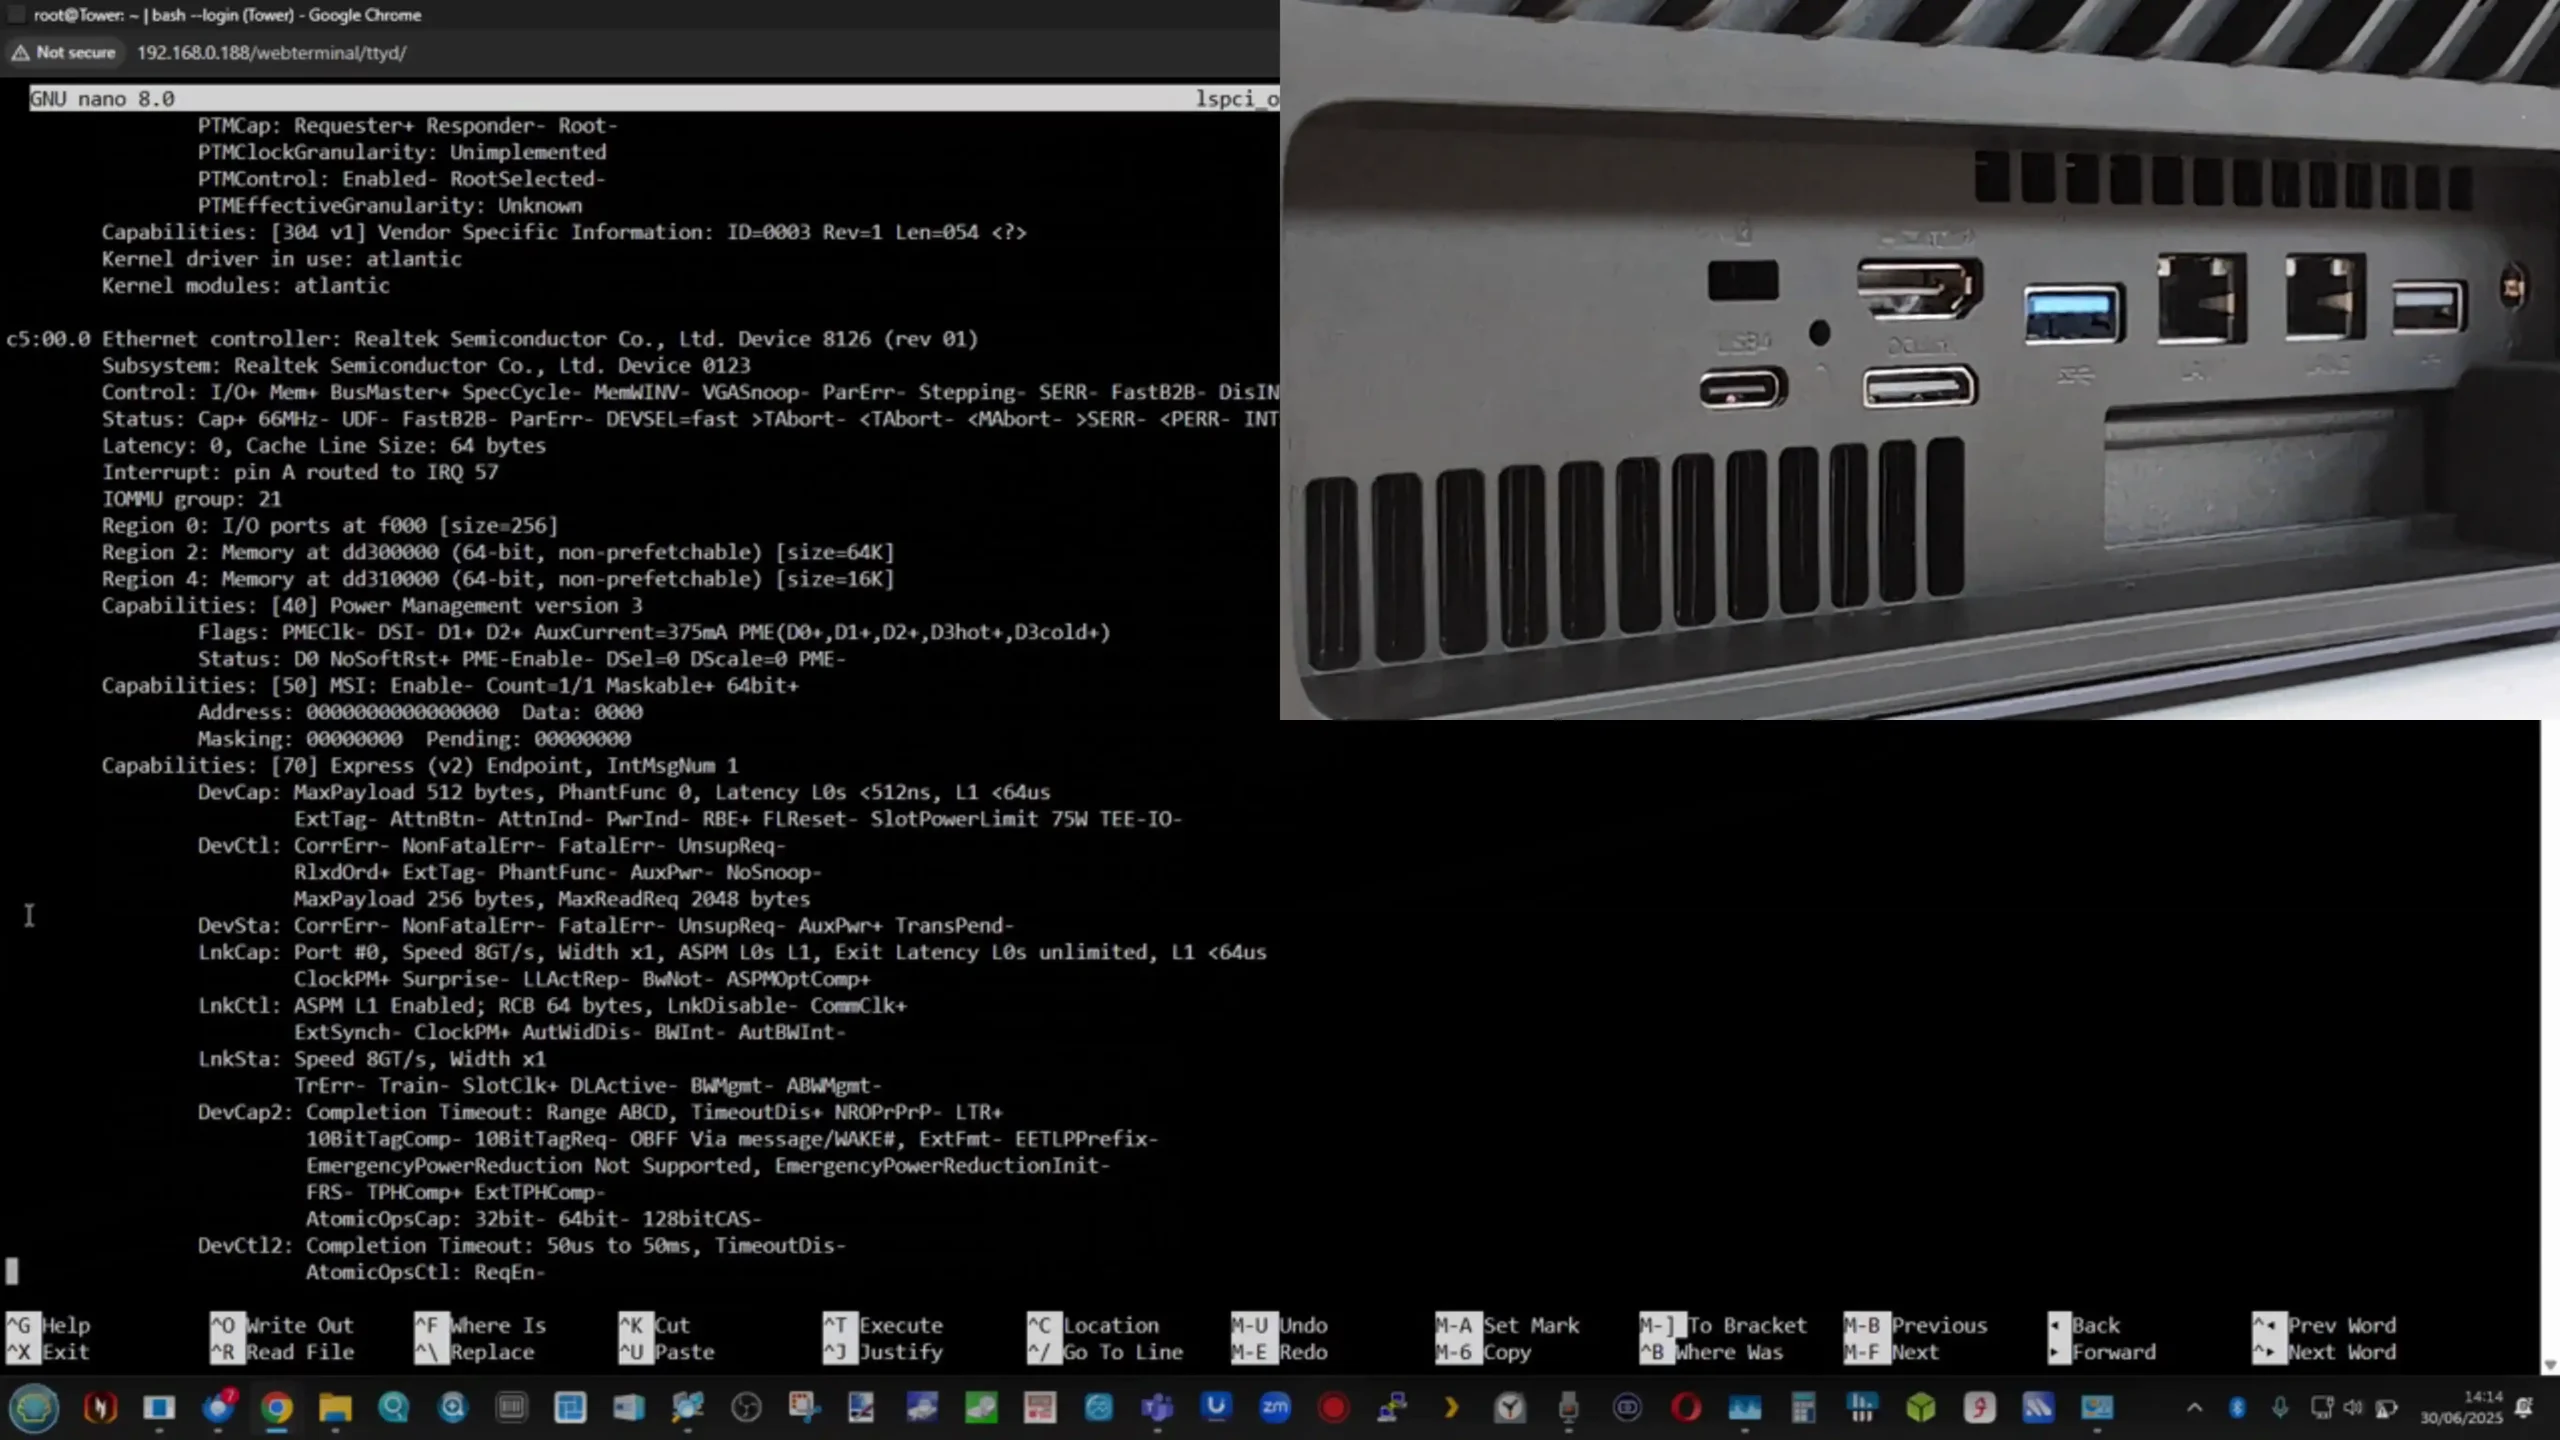
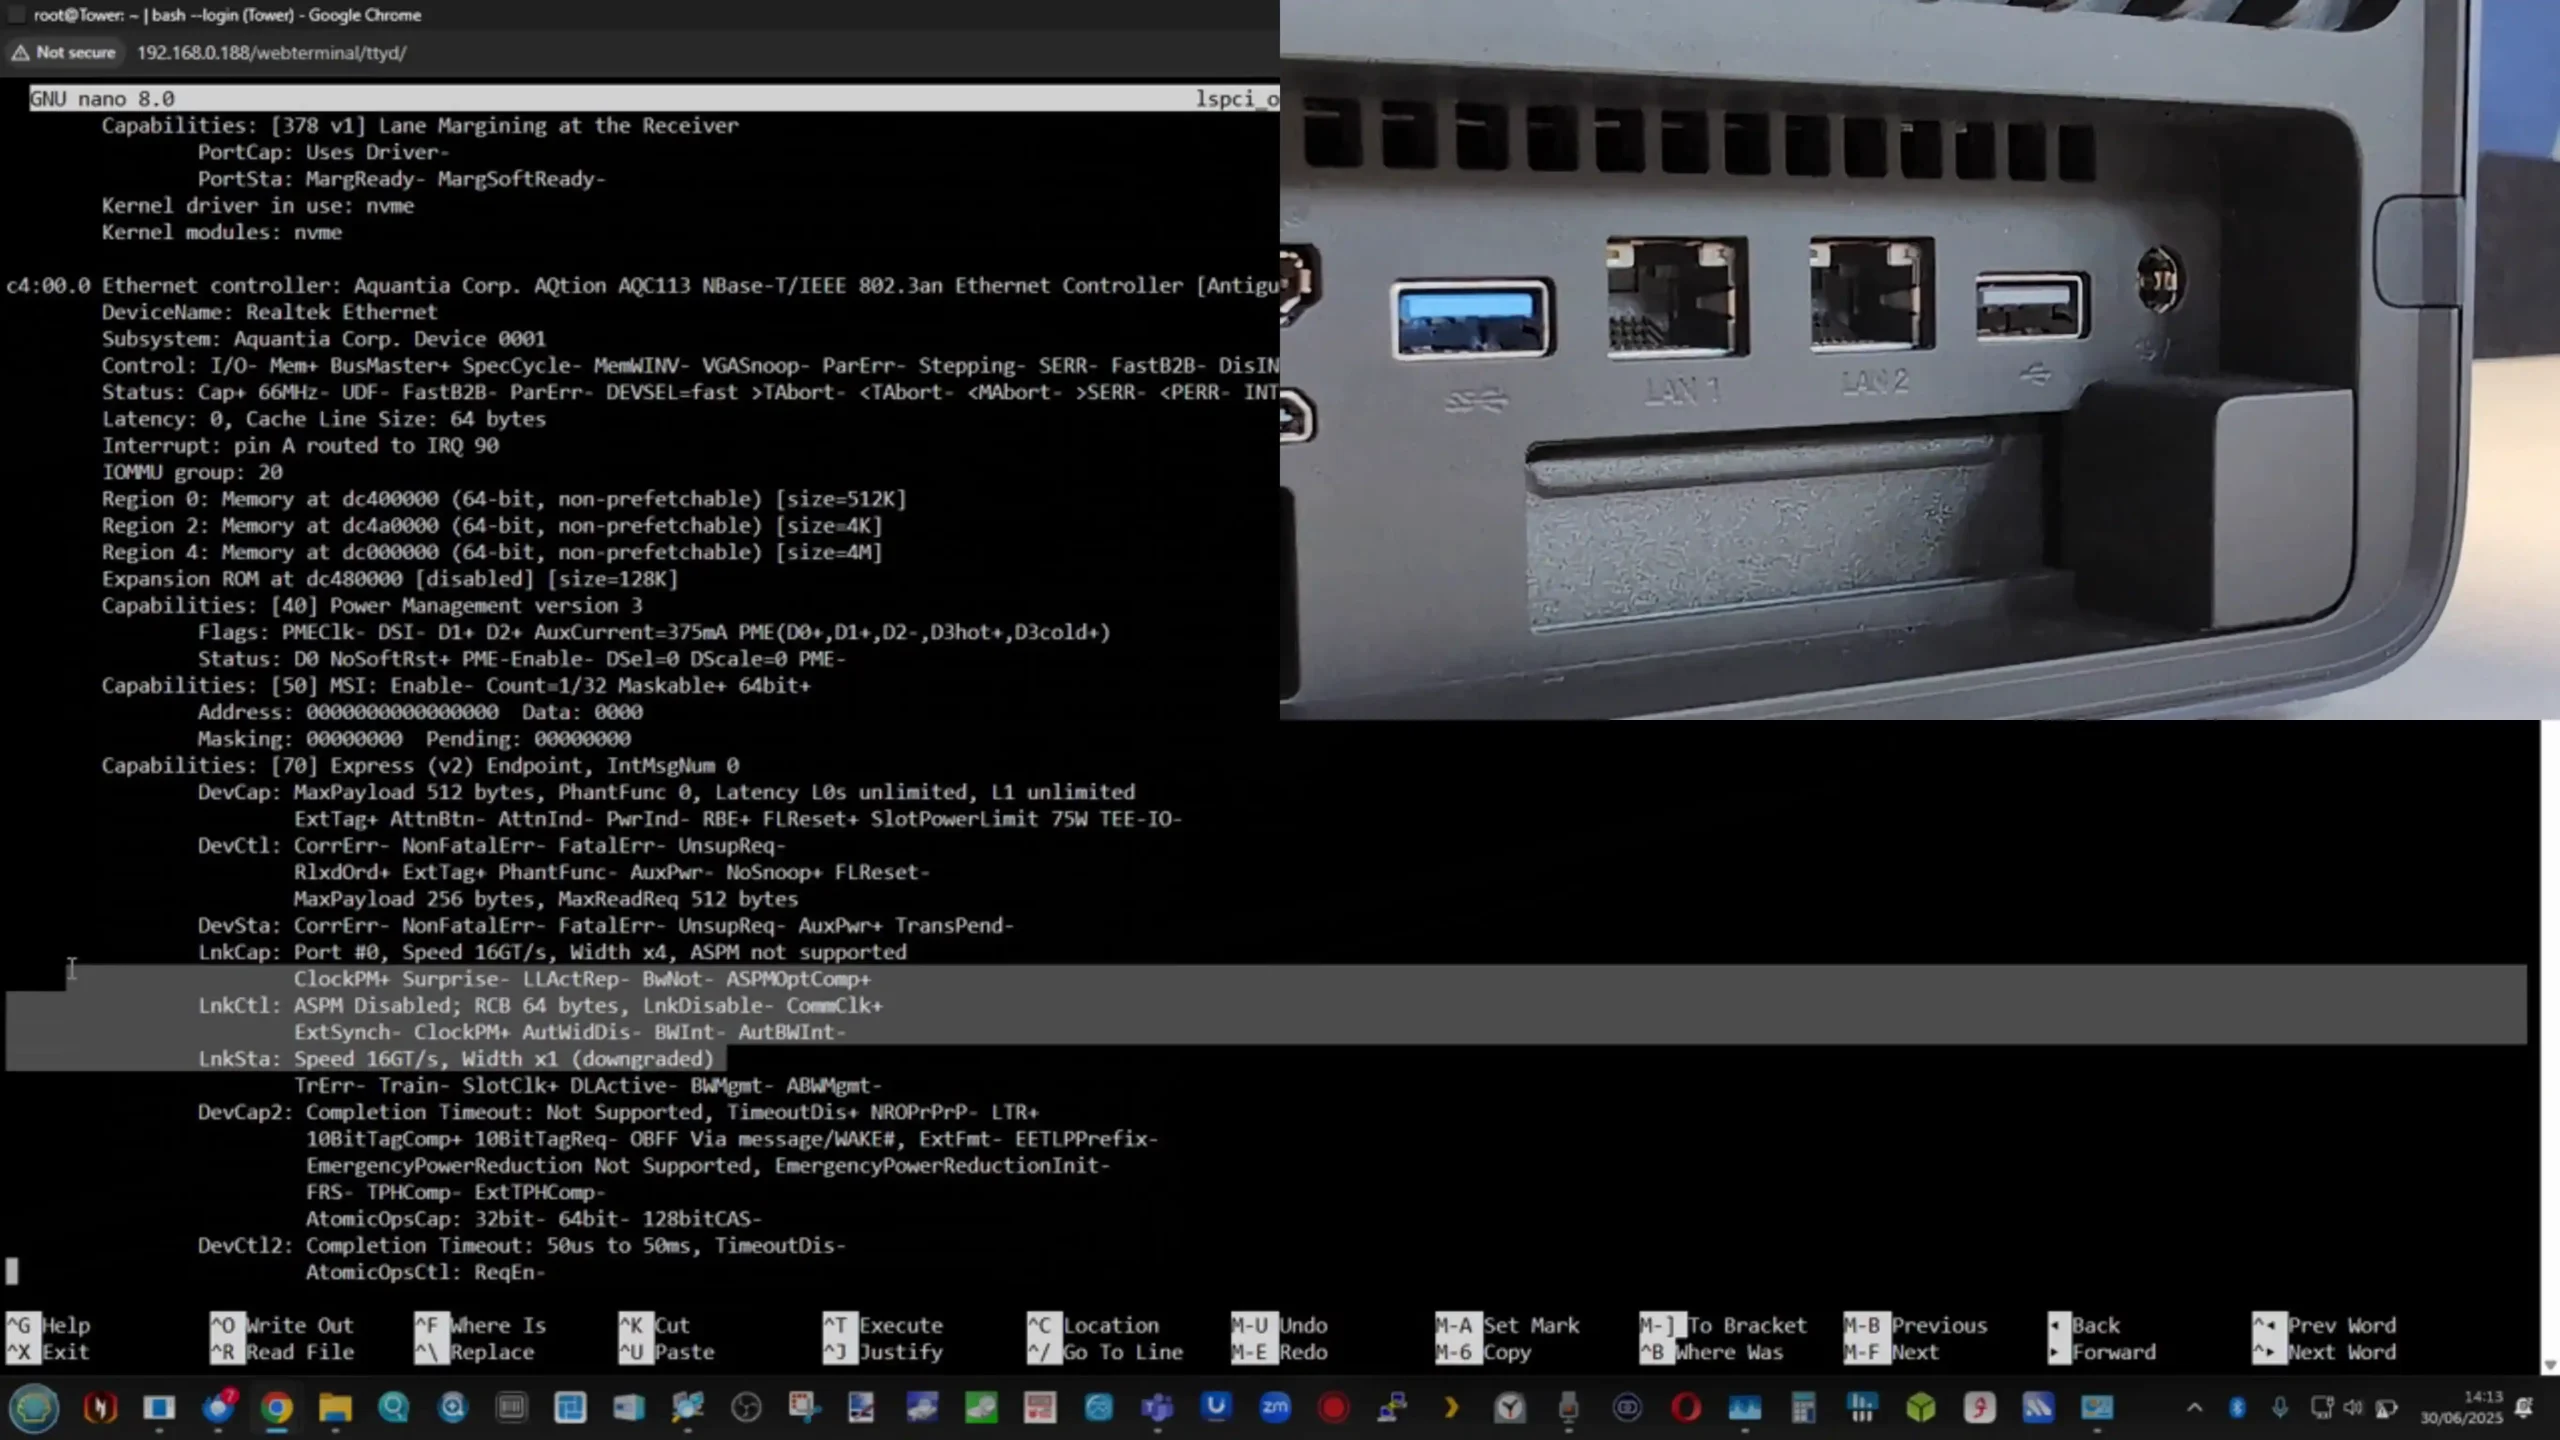
Both ports support auto-negotiation and full-duplex operation, with the 10GbE interface capable of saturating high-speed networks for demanding workloads like multi-user file access, virtual machine networking, or high-resolution media streaming. Testing confirmed the ports could operate independently or together under link aggregation protocols provided by the installed OS. NIC activity LEDs are also front-mounted, providing clear visual feedback on link state and throughput. This dual-port setup makes it feasible to separate public and private subnets or configure failover for improved reliability in critical environments.
Beyond networking, the N5 Pro provides extensive high-speed peripheral and display interfaces. Two USB4 ports (with Alternate Mode DisplayPort 2.0 support) are located on the rear panel, each capable of delivering up to 20 Gbps and supporting external storage enclosures or even GPU enclosures over Thunderbolt/USB4. A single HDMI 2.1 FRL output is present, supporting up to 8K@60Hz or 4K@144Hz resolution for administrators who wish to attach a local display directly to the NAS for maintenance, media playback, or monitoring.
Additional USB ports include two USB 3.2 Gen2 ports and a legacy USB 2.0 port for basic peripherals. The USB4 interfaces can also facilitate high-speed direct transfers to and from supported devices, though these capabilities are more fully realized under MinisCloud OS than third-party platforms. This is a big deal and allows for 2 more DIRECT 20Gb/s clients to connect to the system via the 2x USB4 ports, as well as the 5GbE and 10GbE connection!
![]()
Additionally, the USB4 Port, thanks to earlier testing of this setup on the Minisforum X1 AI Pro, allow for a USB4 SSD drive to comfortably deliver 3000/1500MB/s for backups as needed.
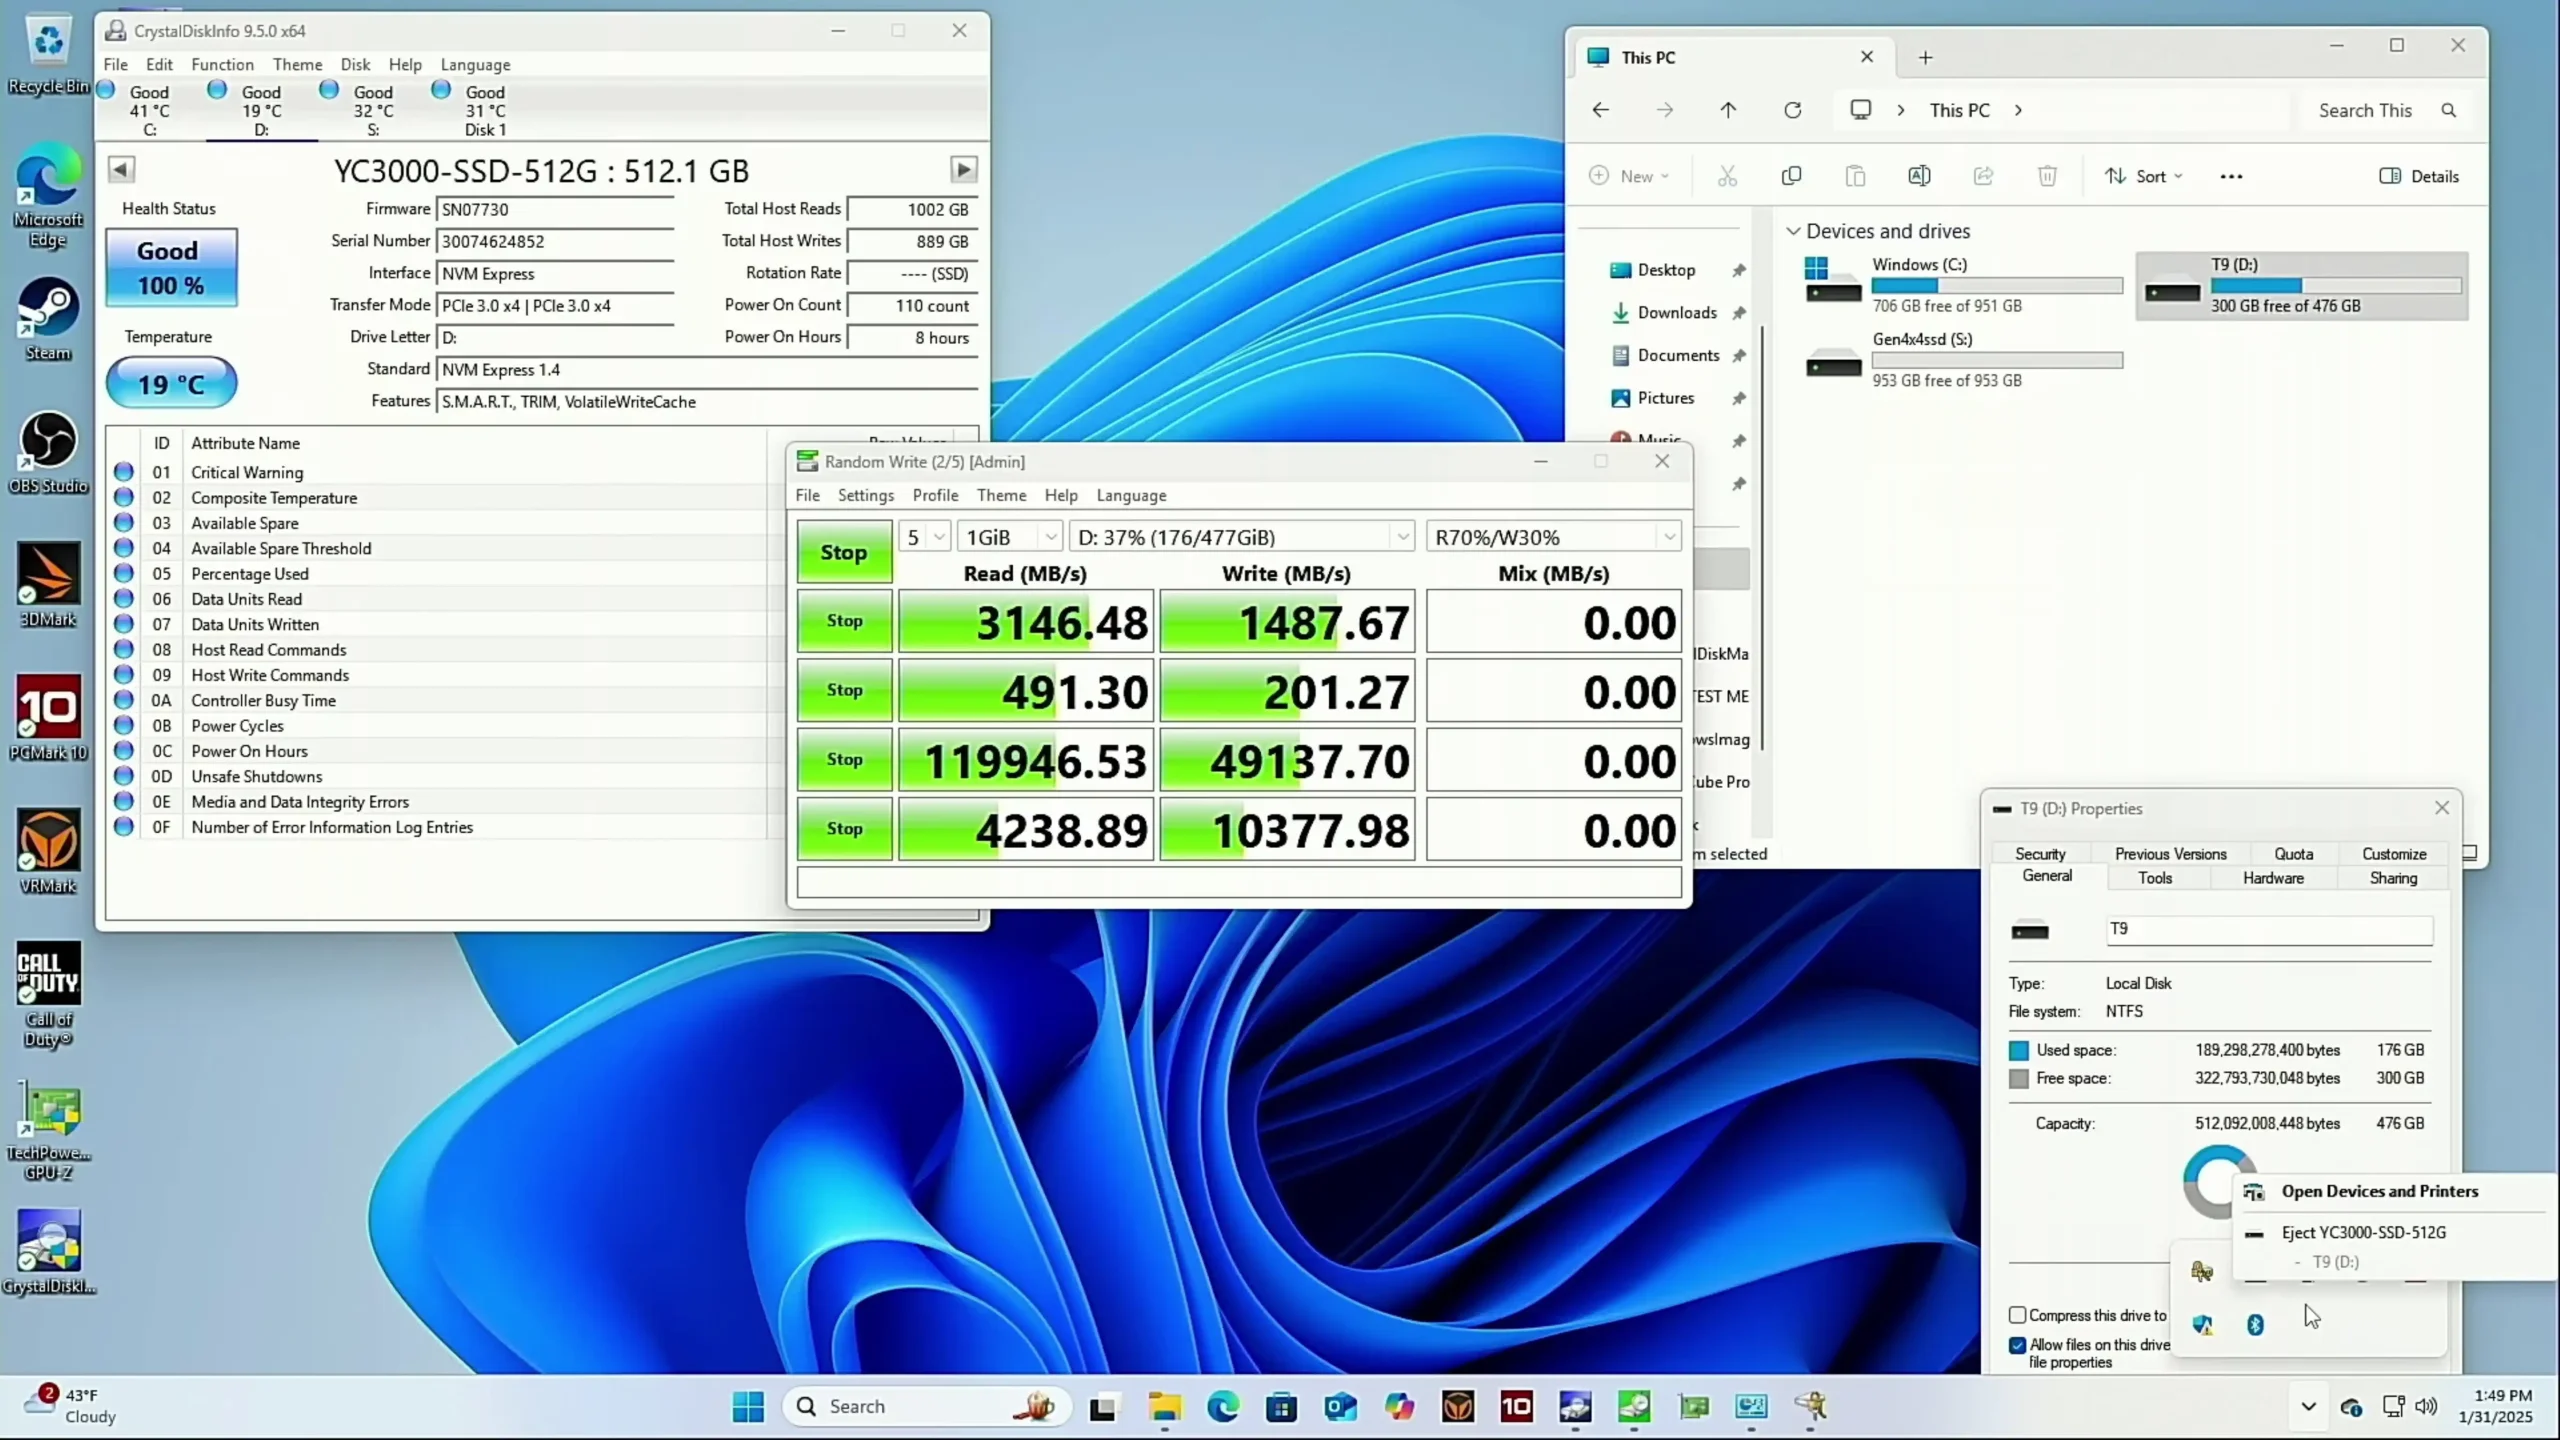
Together, these ports make the N5 Pro unusually versatile compared to typical NAS devices that tend to offer only basic USB and HDMI output.
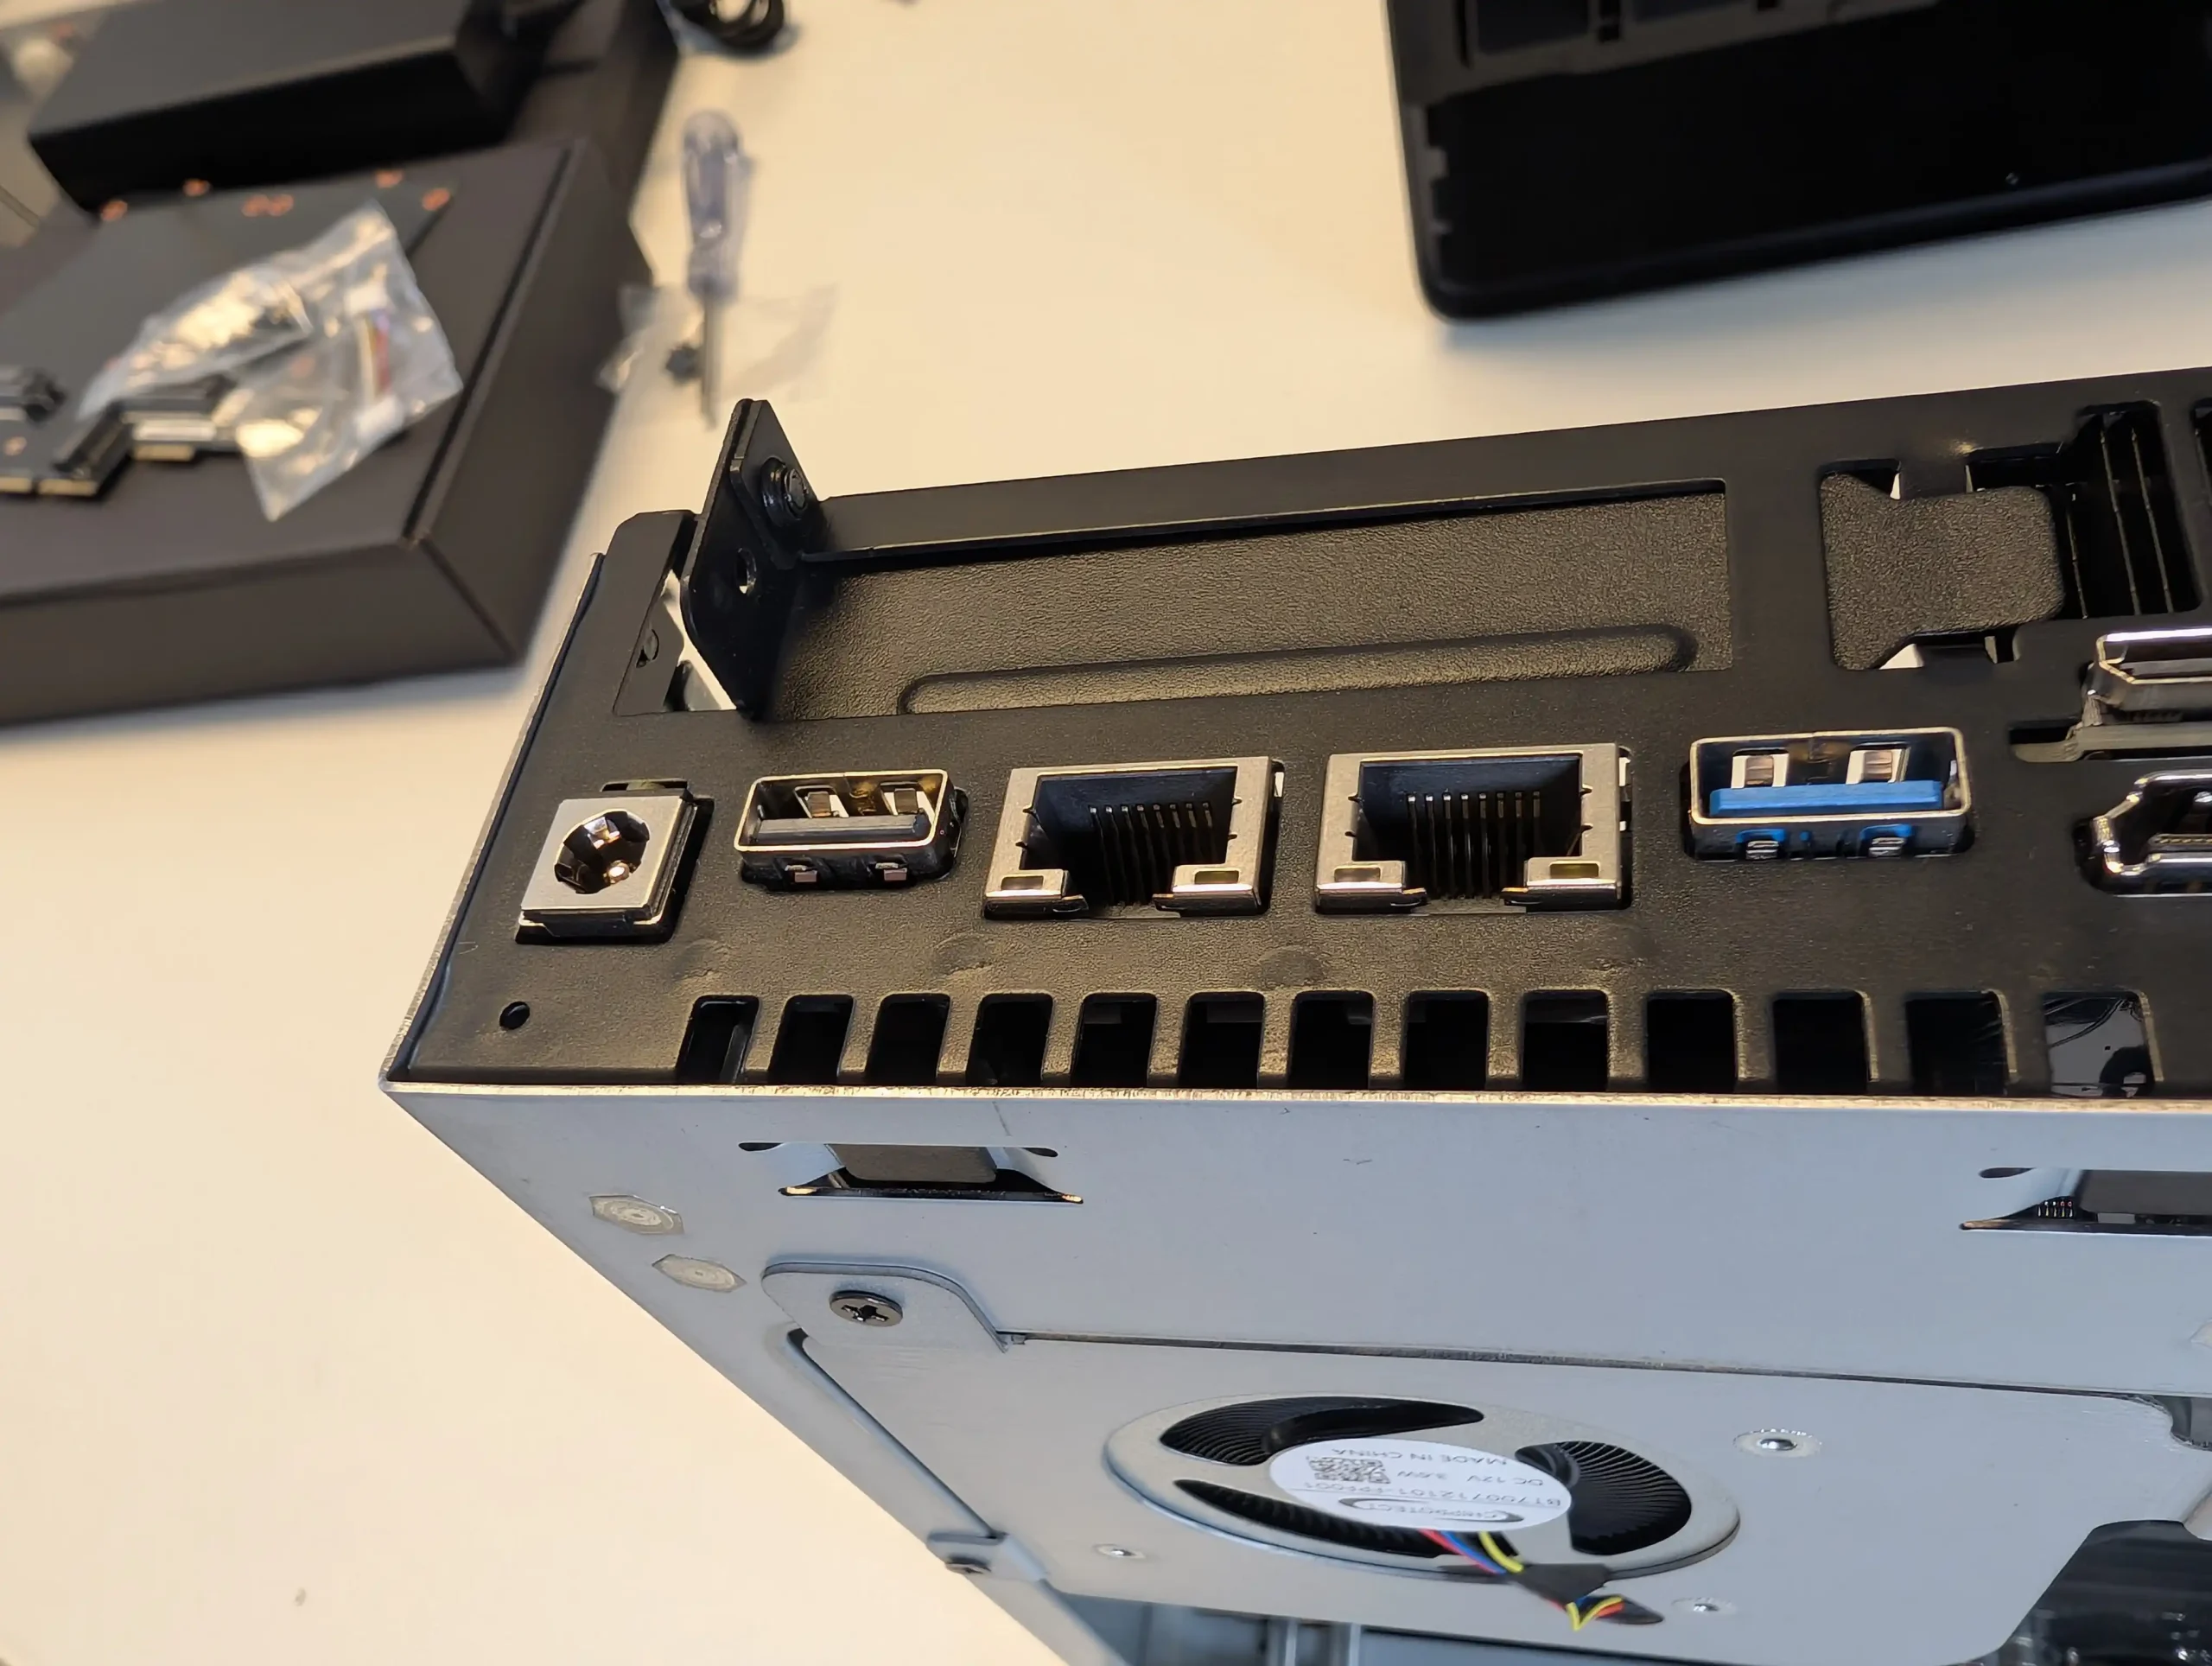 |
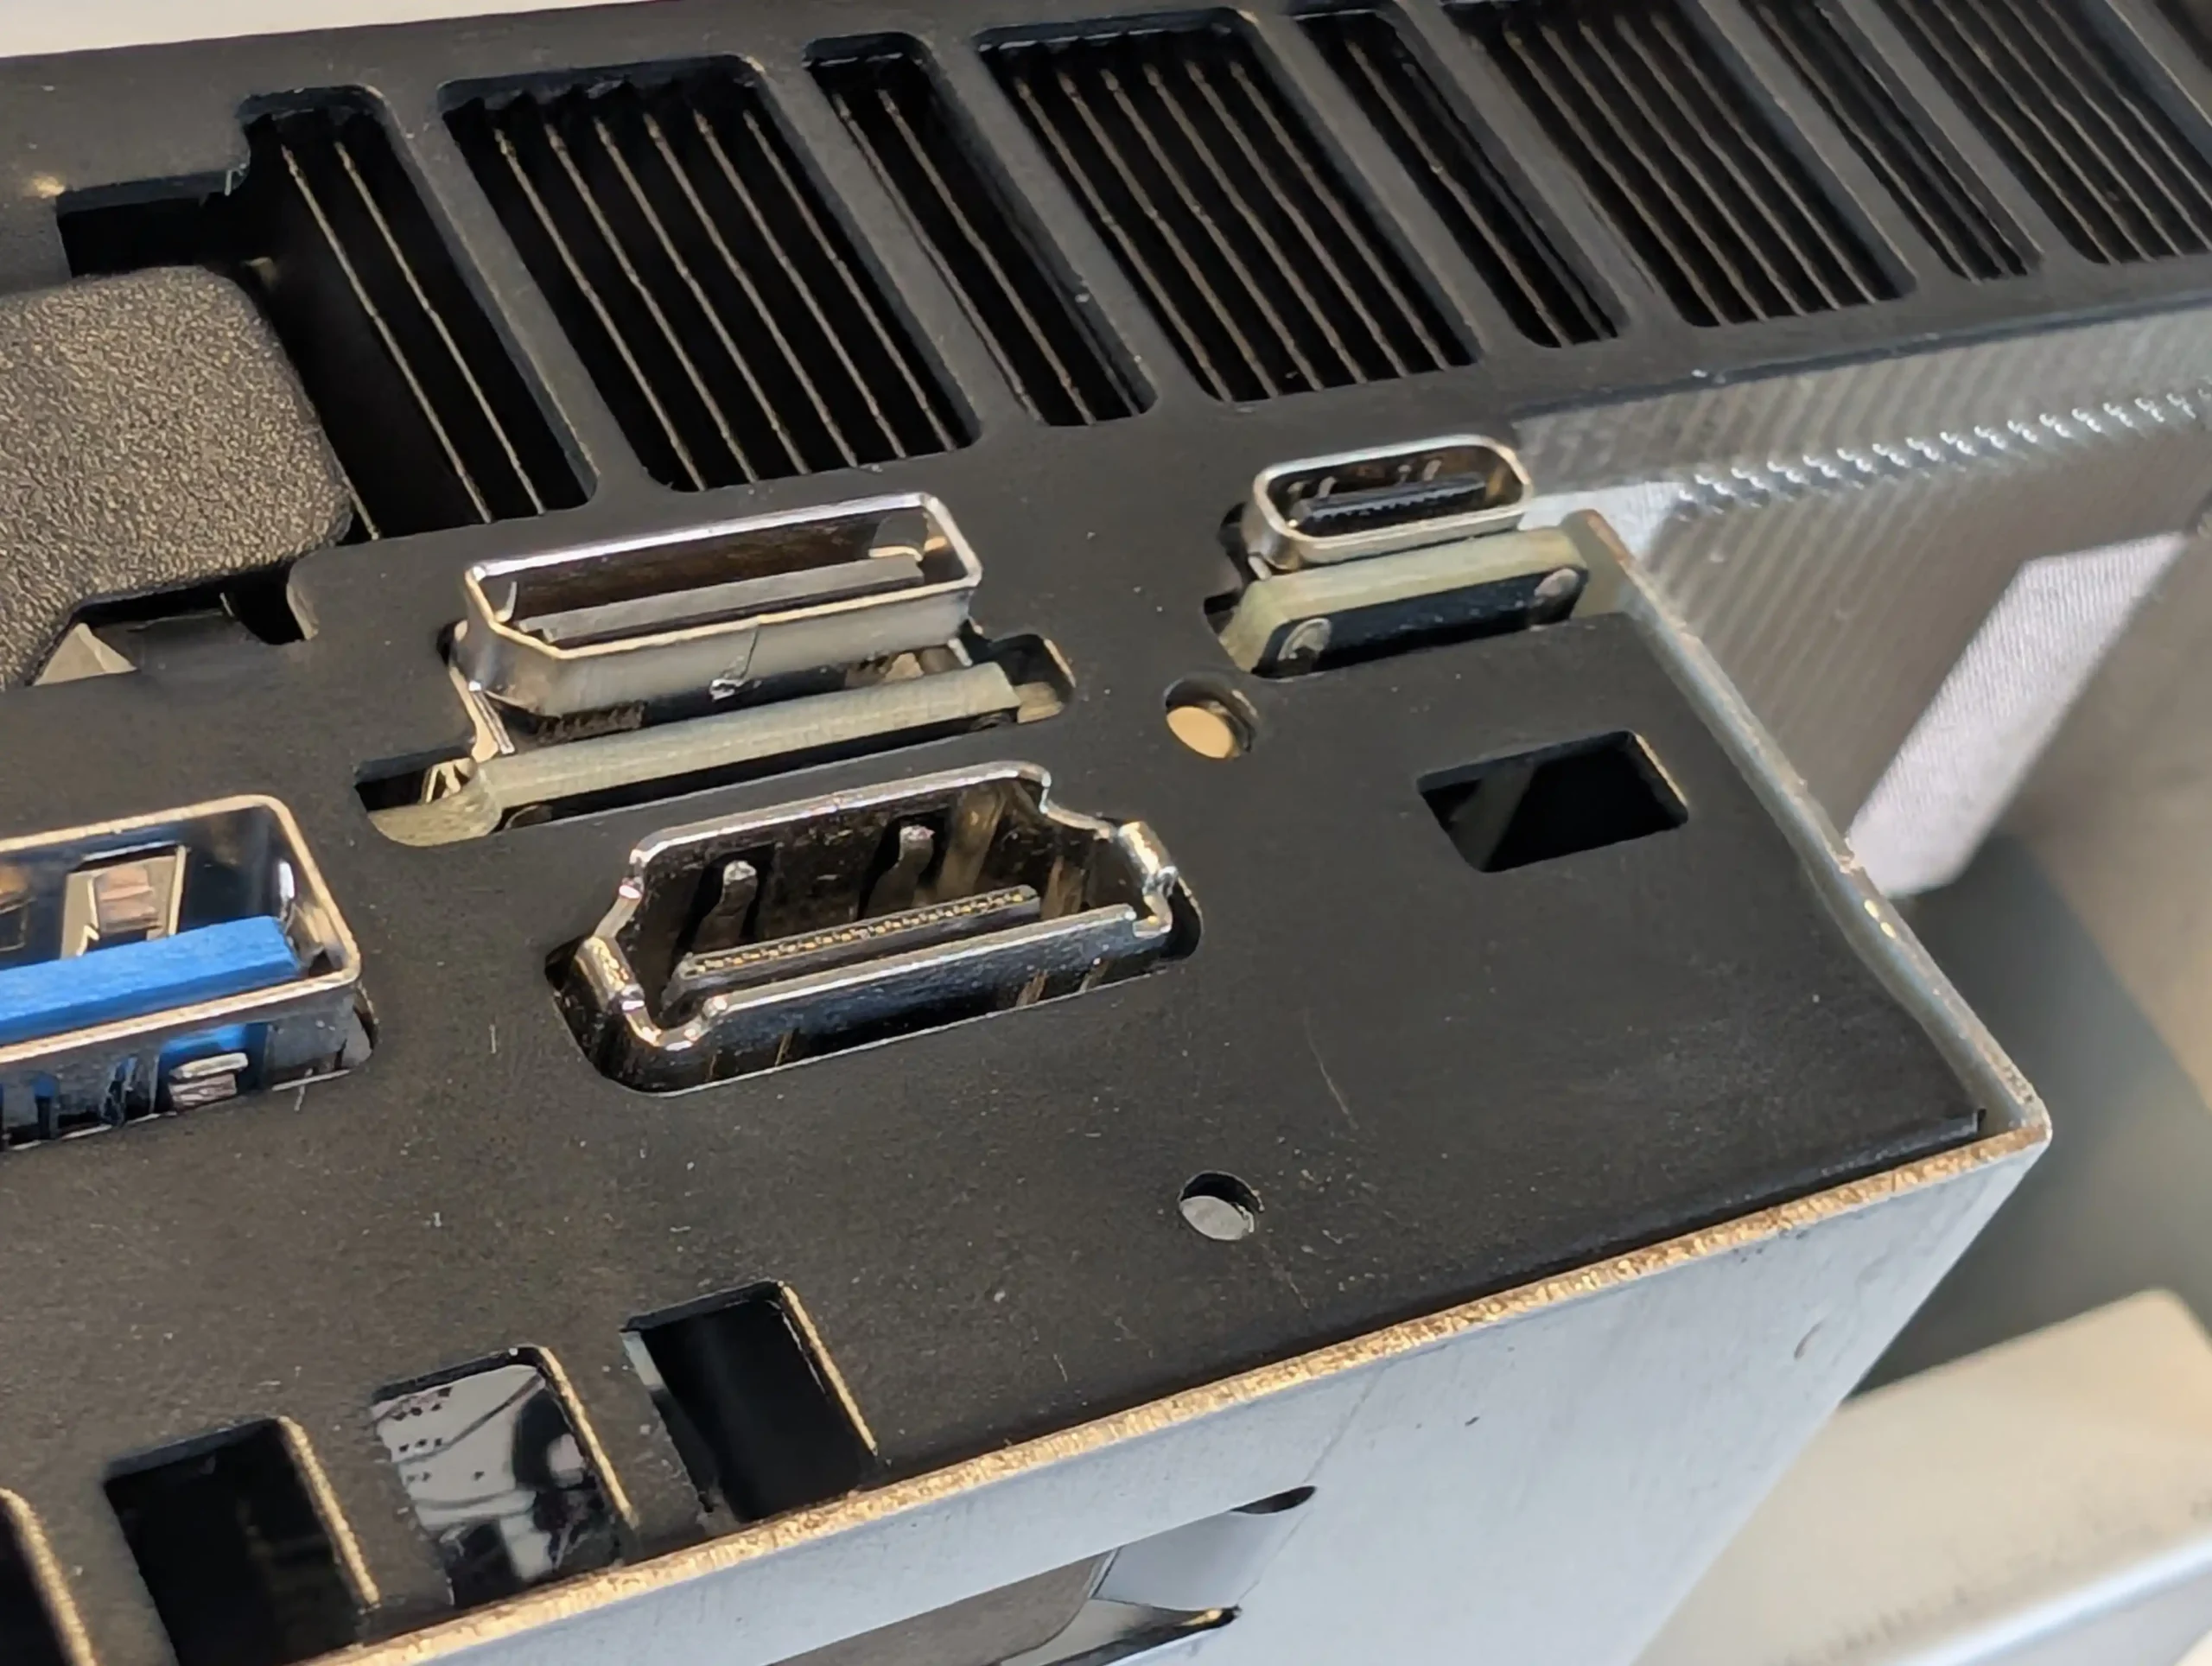 |
For users who require expansion beyond the system’s standard storage and networking options, the inclusion of a full-length PCIe Gen 4 ×16 slot (electrically wired as ×4) and an OCuLink PCIe Gen 4 ×4 port provides meaningful flexibility. The PCIe slot is accessible from within the chassis and supports a variety of cards, including additional NICs, AI accelerators, or storage controllers, while the OCuLink port offers external PCIe expansion for GPU enclosures or dedicated NVMe drive cages. I was able to install a 2x 10GbE NIC card into the PCIe slot AND still use the Oculink port for the Minisforum MGA1 eGPU! Software and SDriver support will be important, but nonetheless, this is some fantastic expandability and flexibility!
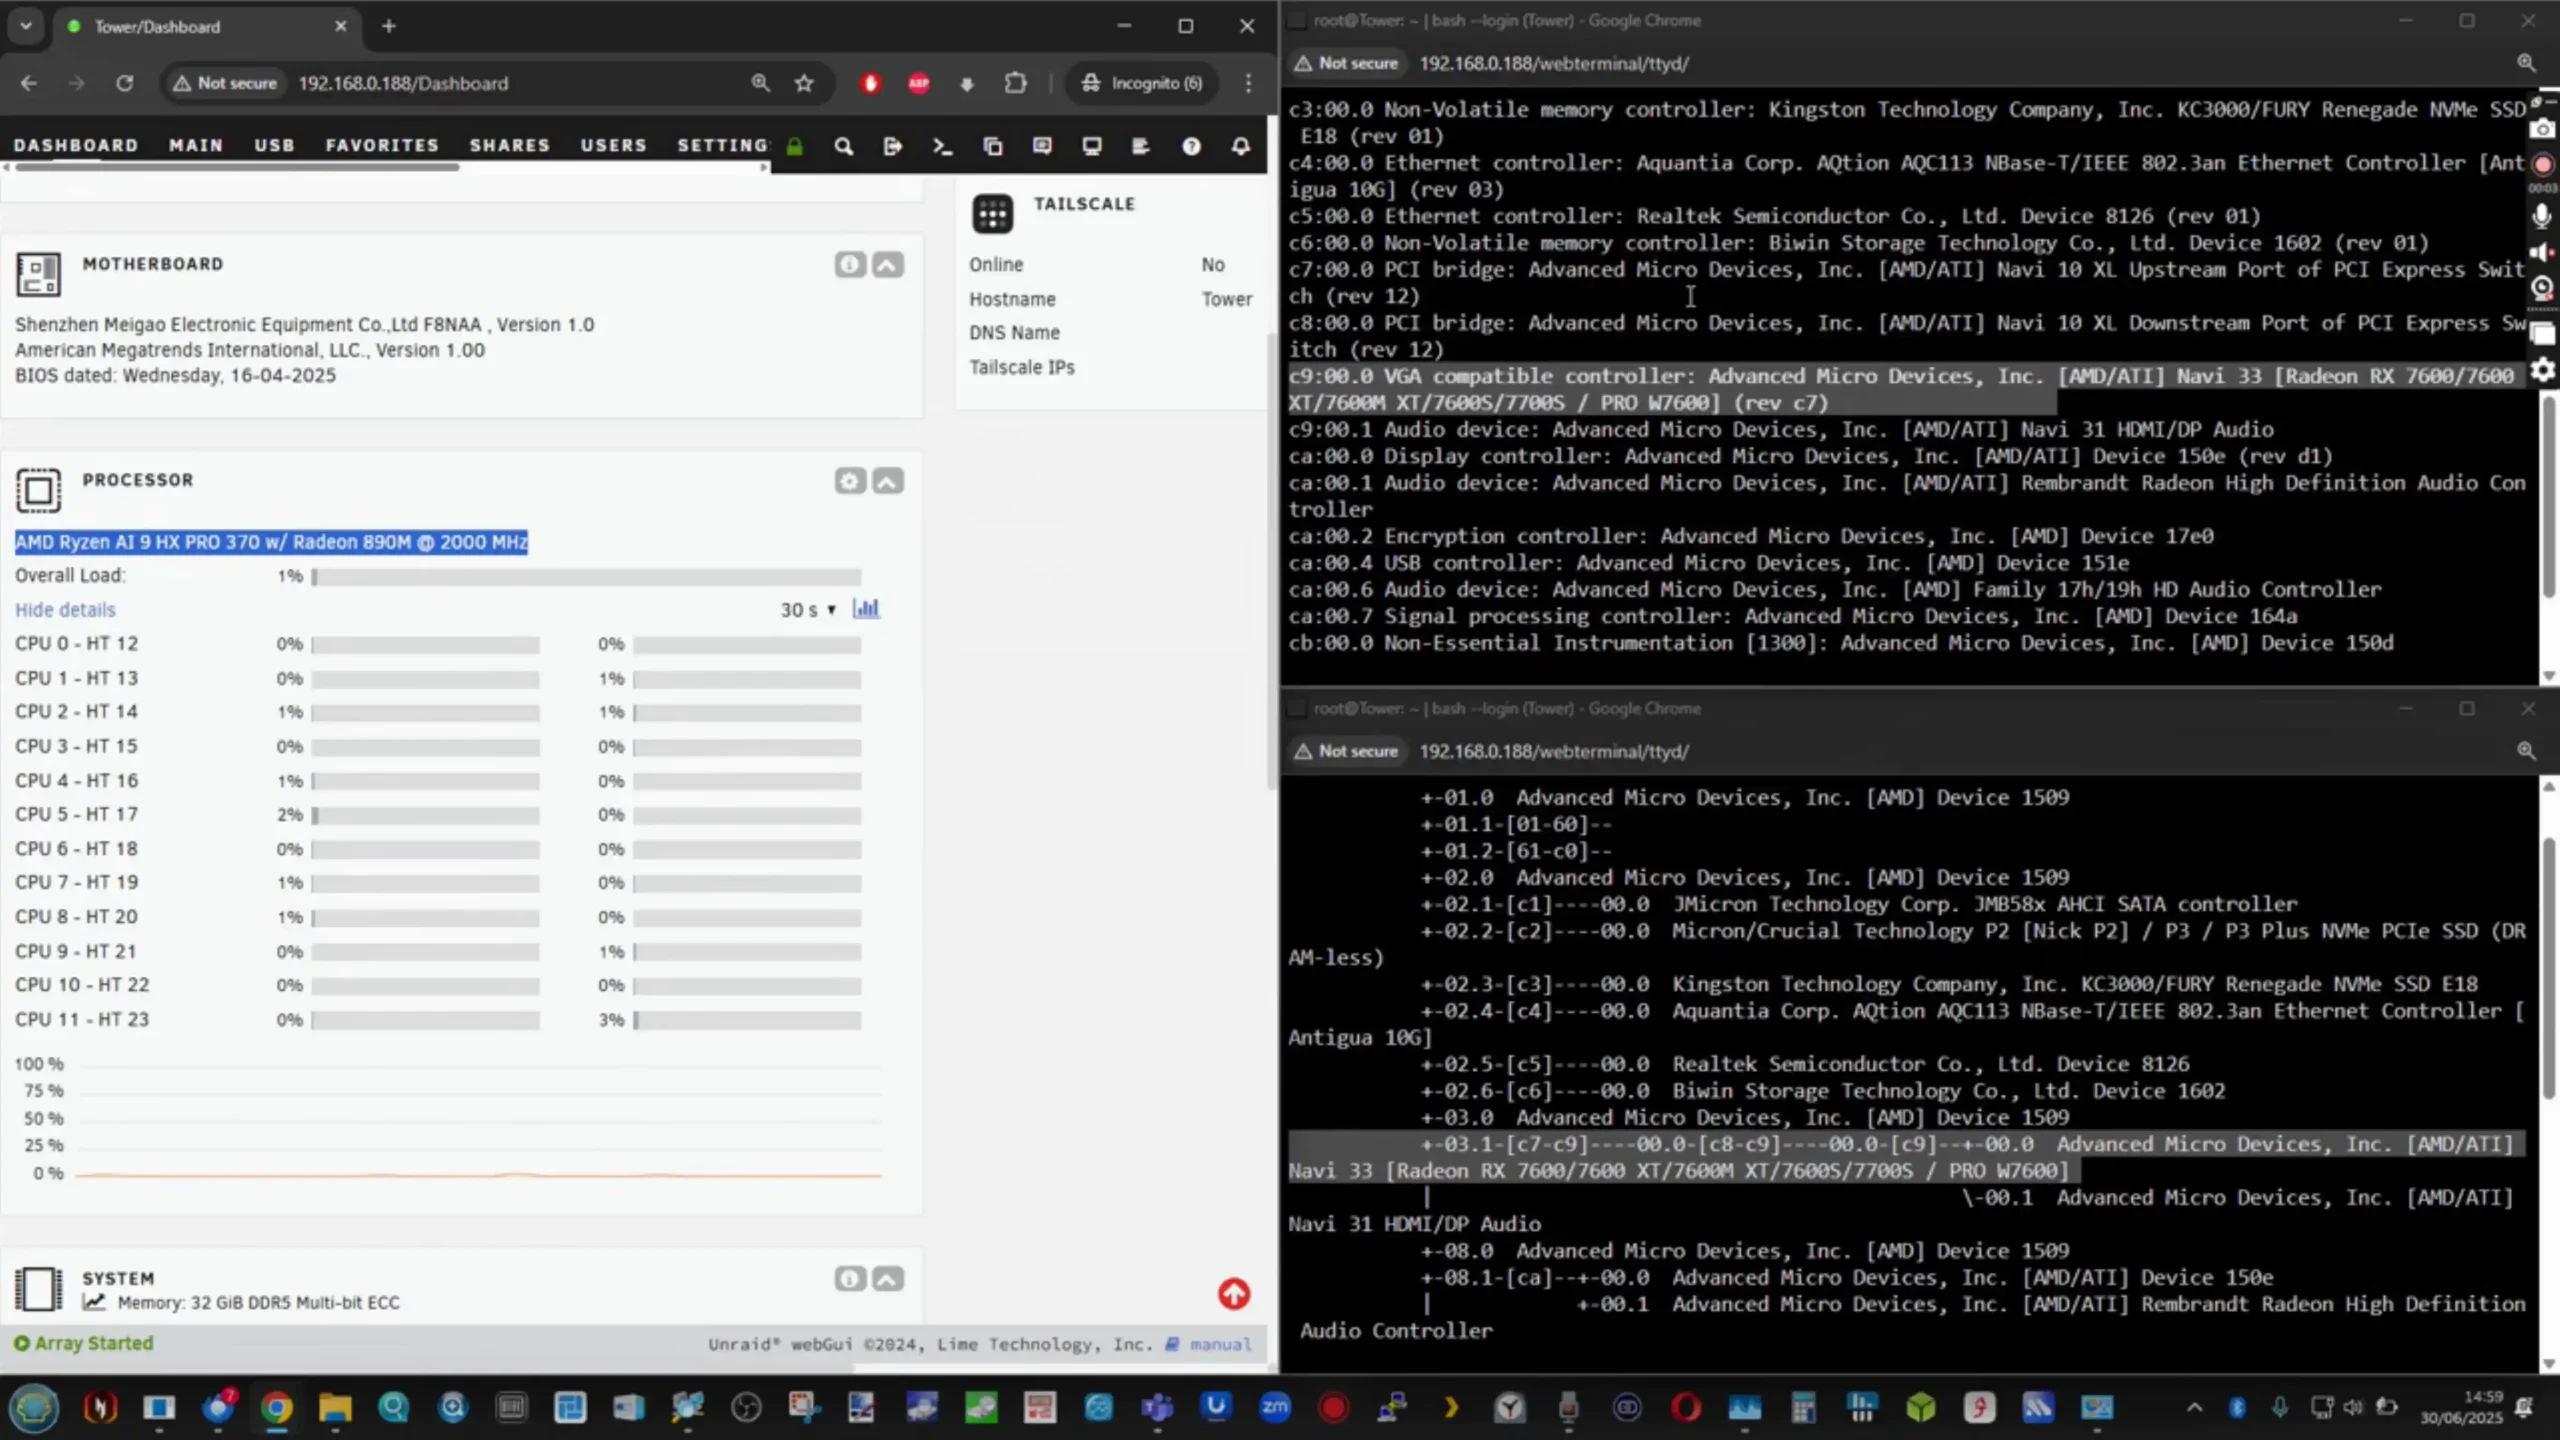
During testing, the OCuLink interface successfully interfaced with an external GPU, and appeared in the OS for passthrough to VMs, confirming its utility in advanced configurations. Minisforum’s choice to include both conventional PCIe and OCuLink enables users to adapt the system to evolving needs, whether for rendering tasks, AI workloads, or extending storage beyond the internal bays. This combination of high-speed networking, display output, and expansion interfaces demonstrates the system’s hybrid role as both a NAS and a general-purpose compute platform.
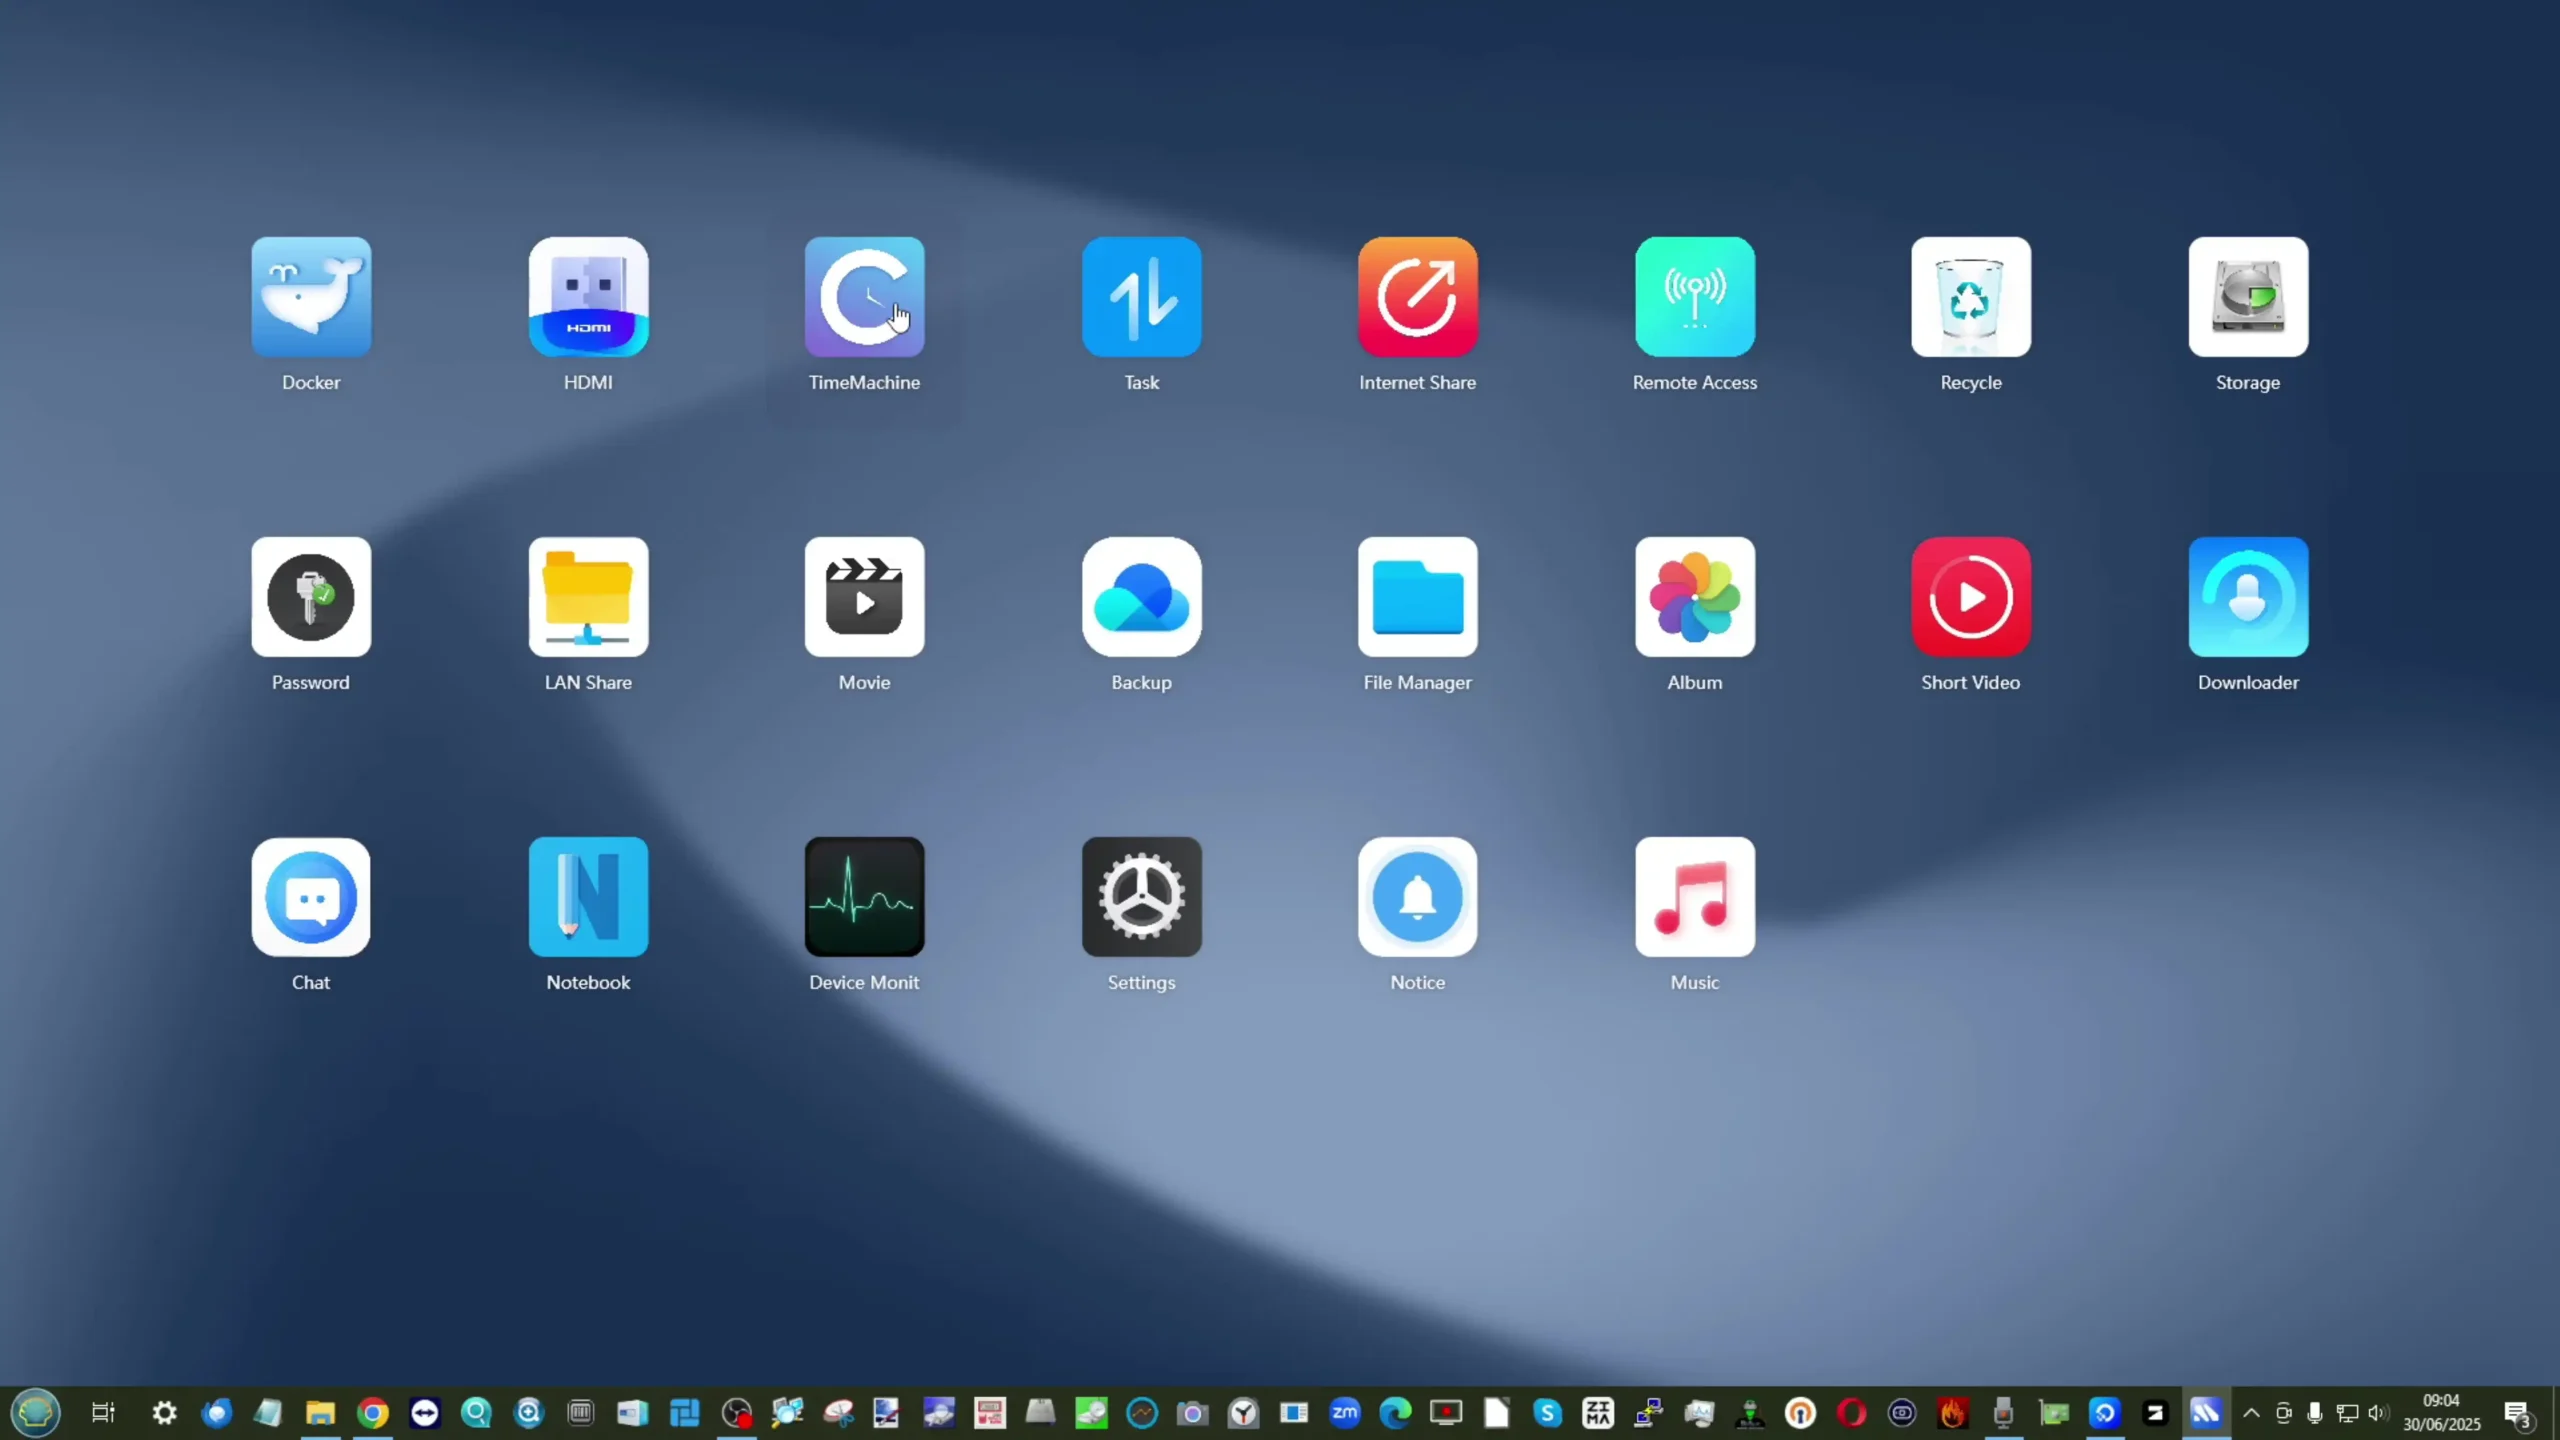
The Minisforum N5 Pro ships with a pre-installed operating system called MinisCloud OS, which runs from the included 64GB M.2 2230 SSD. Based on the FNOS platform, MinisCloud OS is a ZFS-enabled NAS operating system with a graphical web interface, mobile app support, and built-in services for media, backup, and collaboration. Users can choose to use MinisCloud OS out of the box or replace it entirely with third-party solutions such as TrueNAS, Unraid, or other Linux-based NAS distributions without voiding warranty coverage.
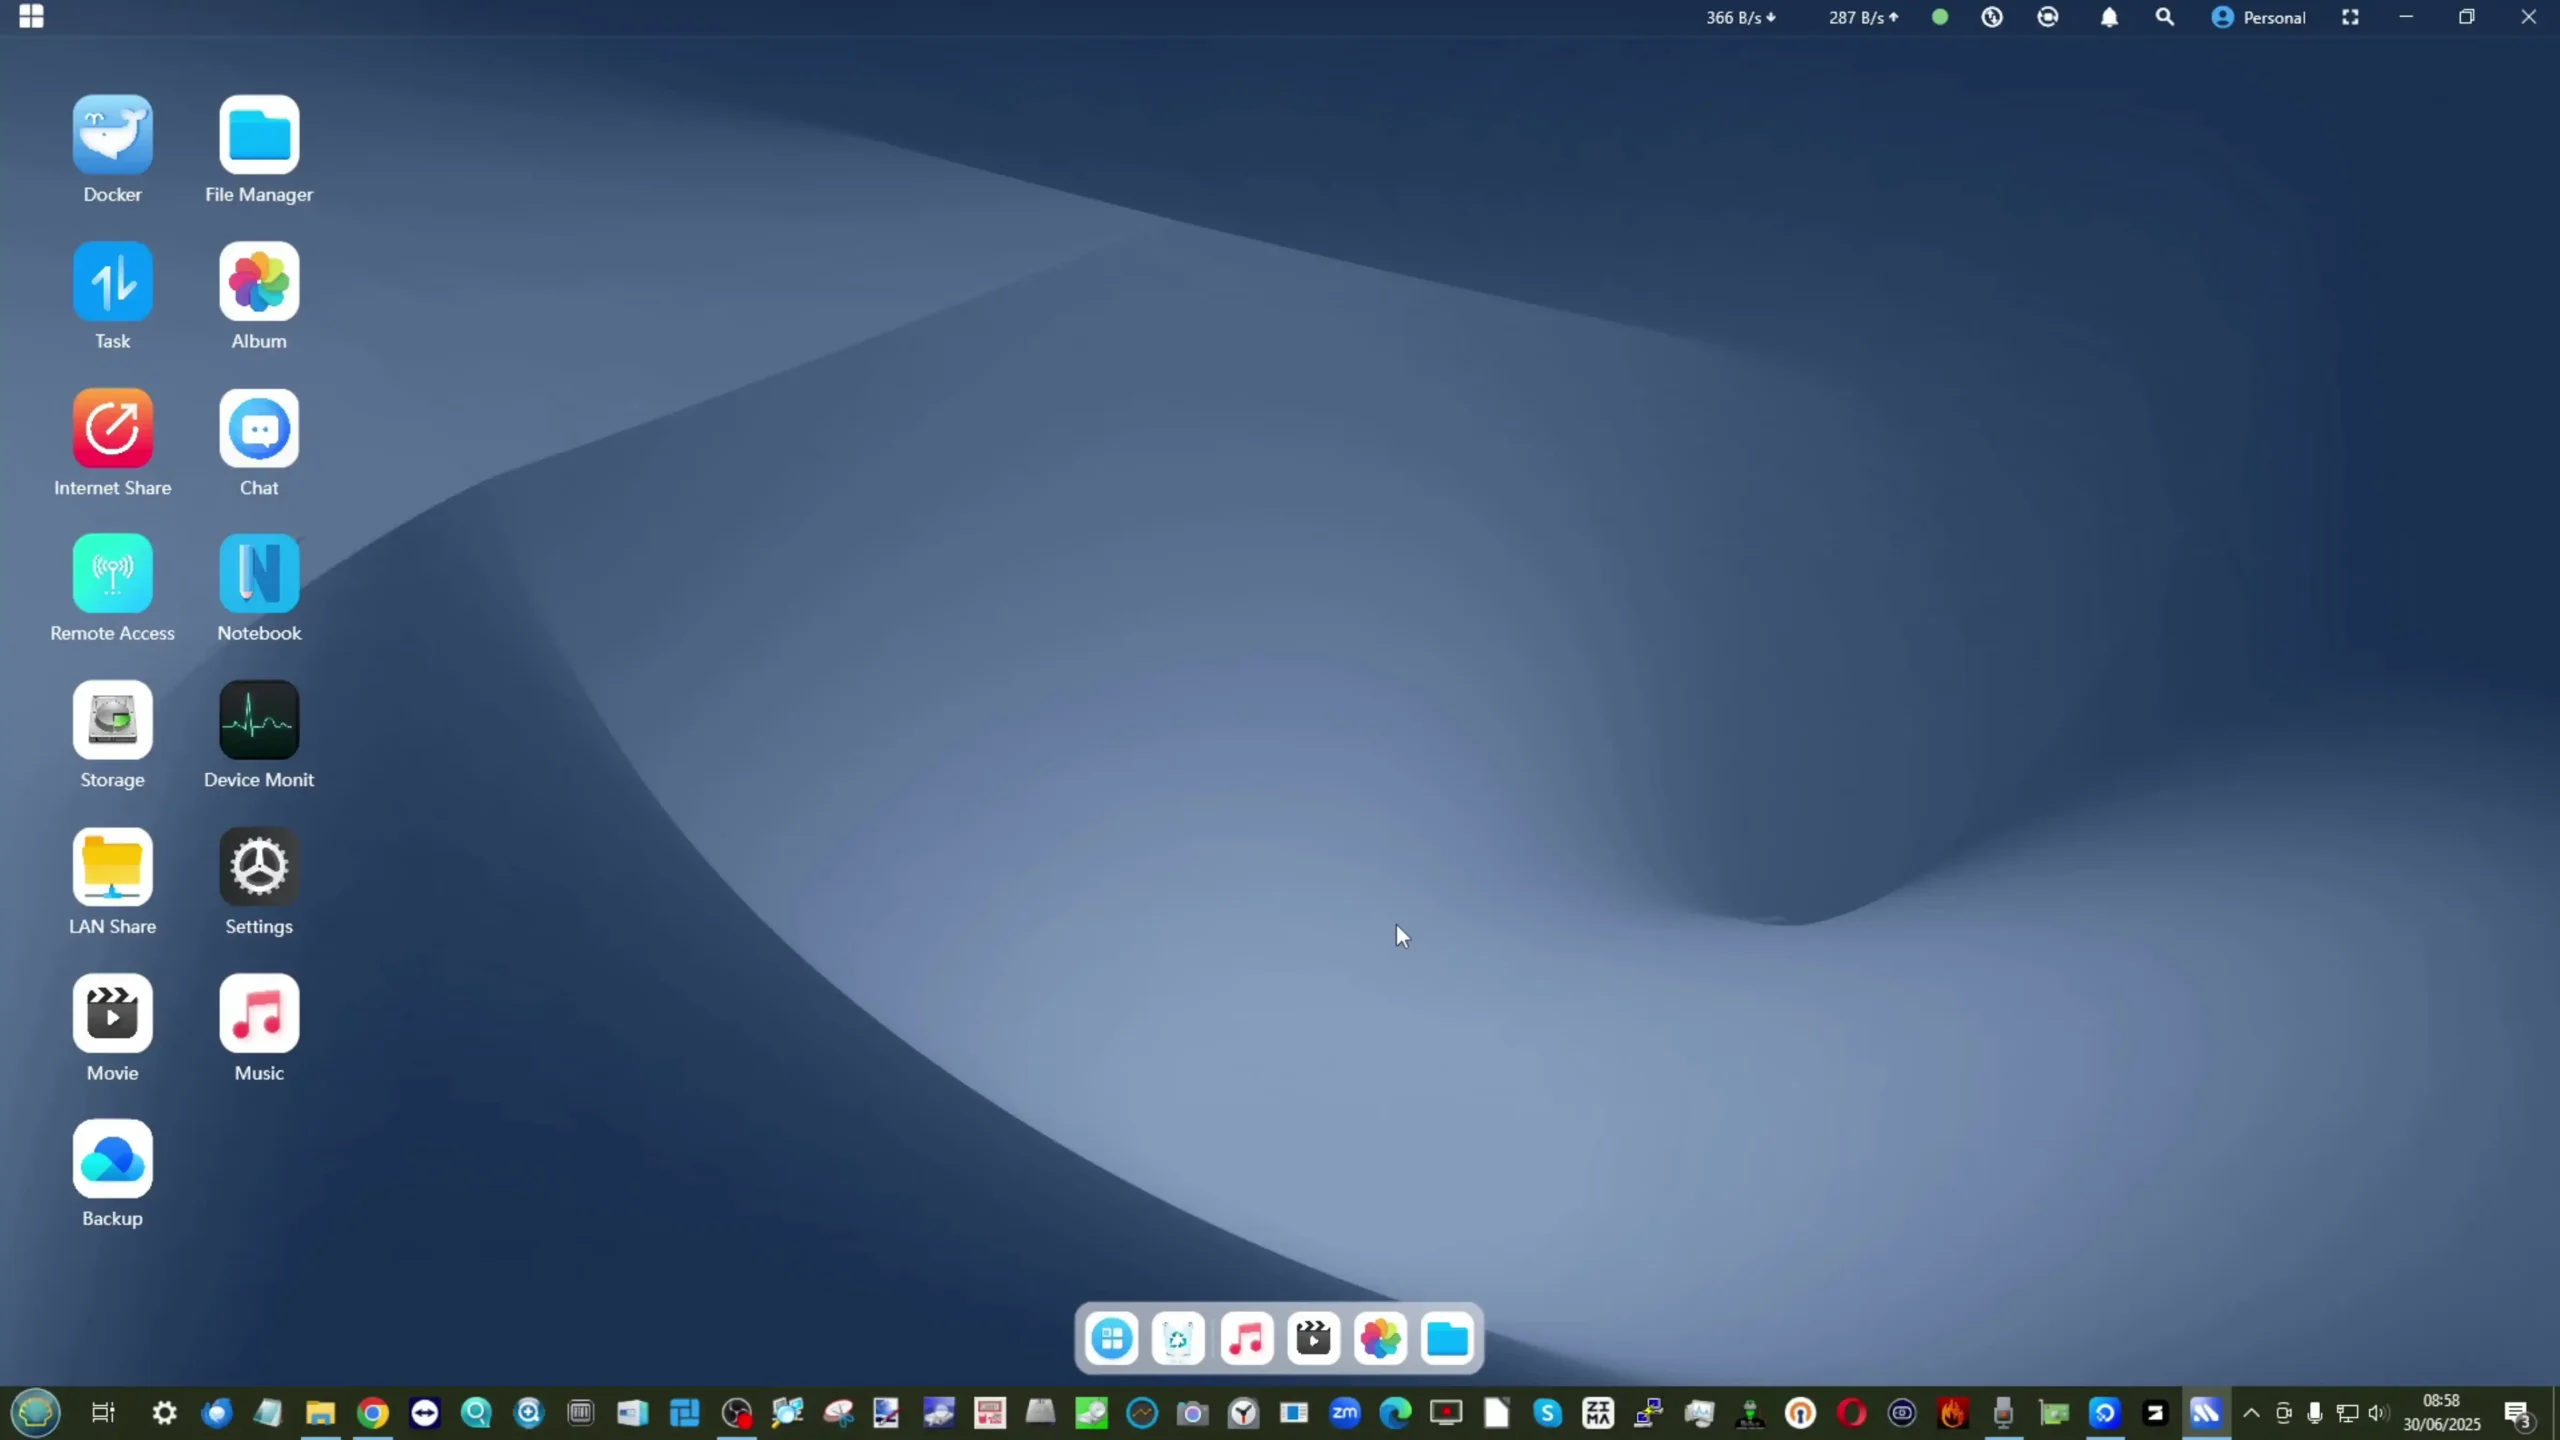
MinisCloud OS includes a desktop-accessible GUI, with menus covering storage management, RAID/ZFS pool creation, user and group permissions, Docker container deployment, and real-time monitoring. For users who prefer a turnkey NAS experience with minimal setup, MinisCloud OS provides a convenient starting point. However, it is worth noting that the OS is still maturing; some parts of the interface, particularly language localization and advanced feature polish, are clearly in active development.
At the core of MinisCloud OS is its ZFS-based storage engine, which enables advanced features such as snapshots, inline LZ4 compression, self-healing integrity checks, and instant rollback of data pools. The snapshot interface is intuitive and responsive, allowing users to schedule, lock, and restore snapshots at a per-pool level with minimal steps. Compression is enabled by default, improving storage efficiency, particularly for highly repetitive or archival datasets.

While ZFS support is a welcome inclusion, the implementation of some monitoring features—such as SSD temperature and SMART data for NVMe drives—remains inconsistent, as noted during testing. Despite these limitations, MinisCloud OS is capable of handling mixed drive types in flexible RAID configurations (RAID 0/1/5/6/10/RAIDZ), combining high-speed NVMe SSDs with large-capacity SATA drives for tiered storage strategies. The OS also supports secure access controls, allowing administrators to segment personal, shared, and public storage spaces.
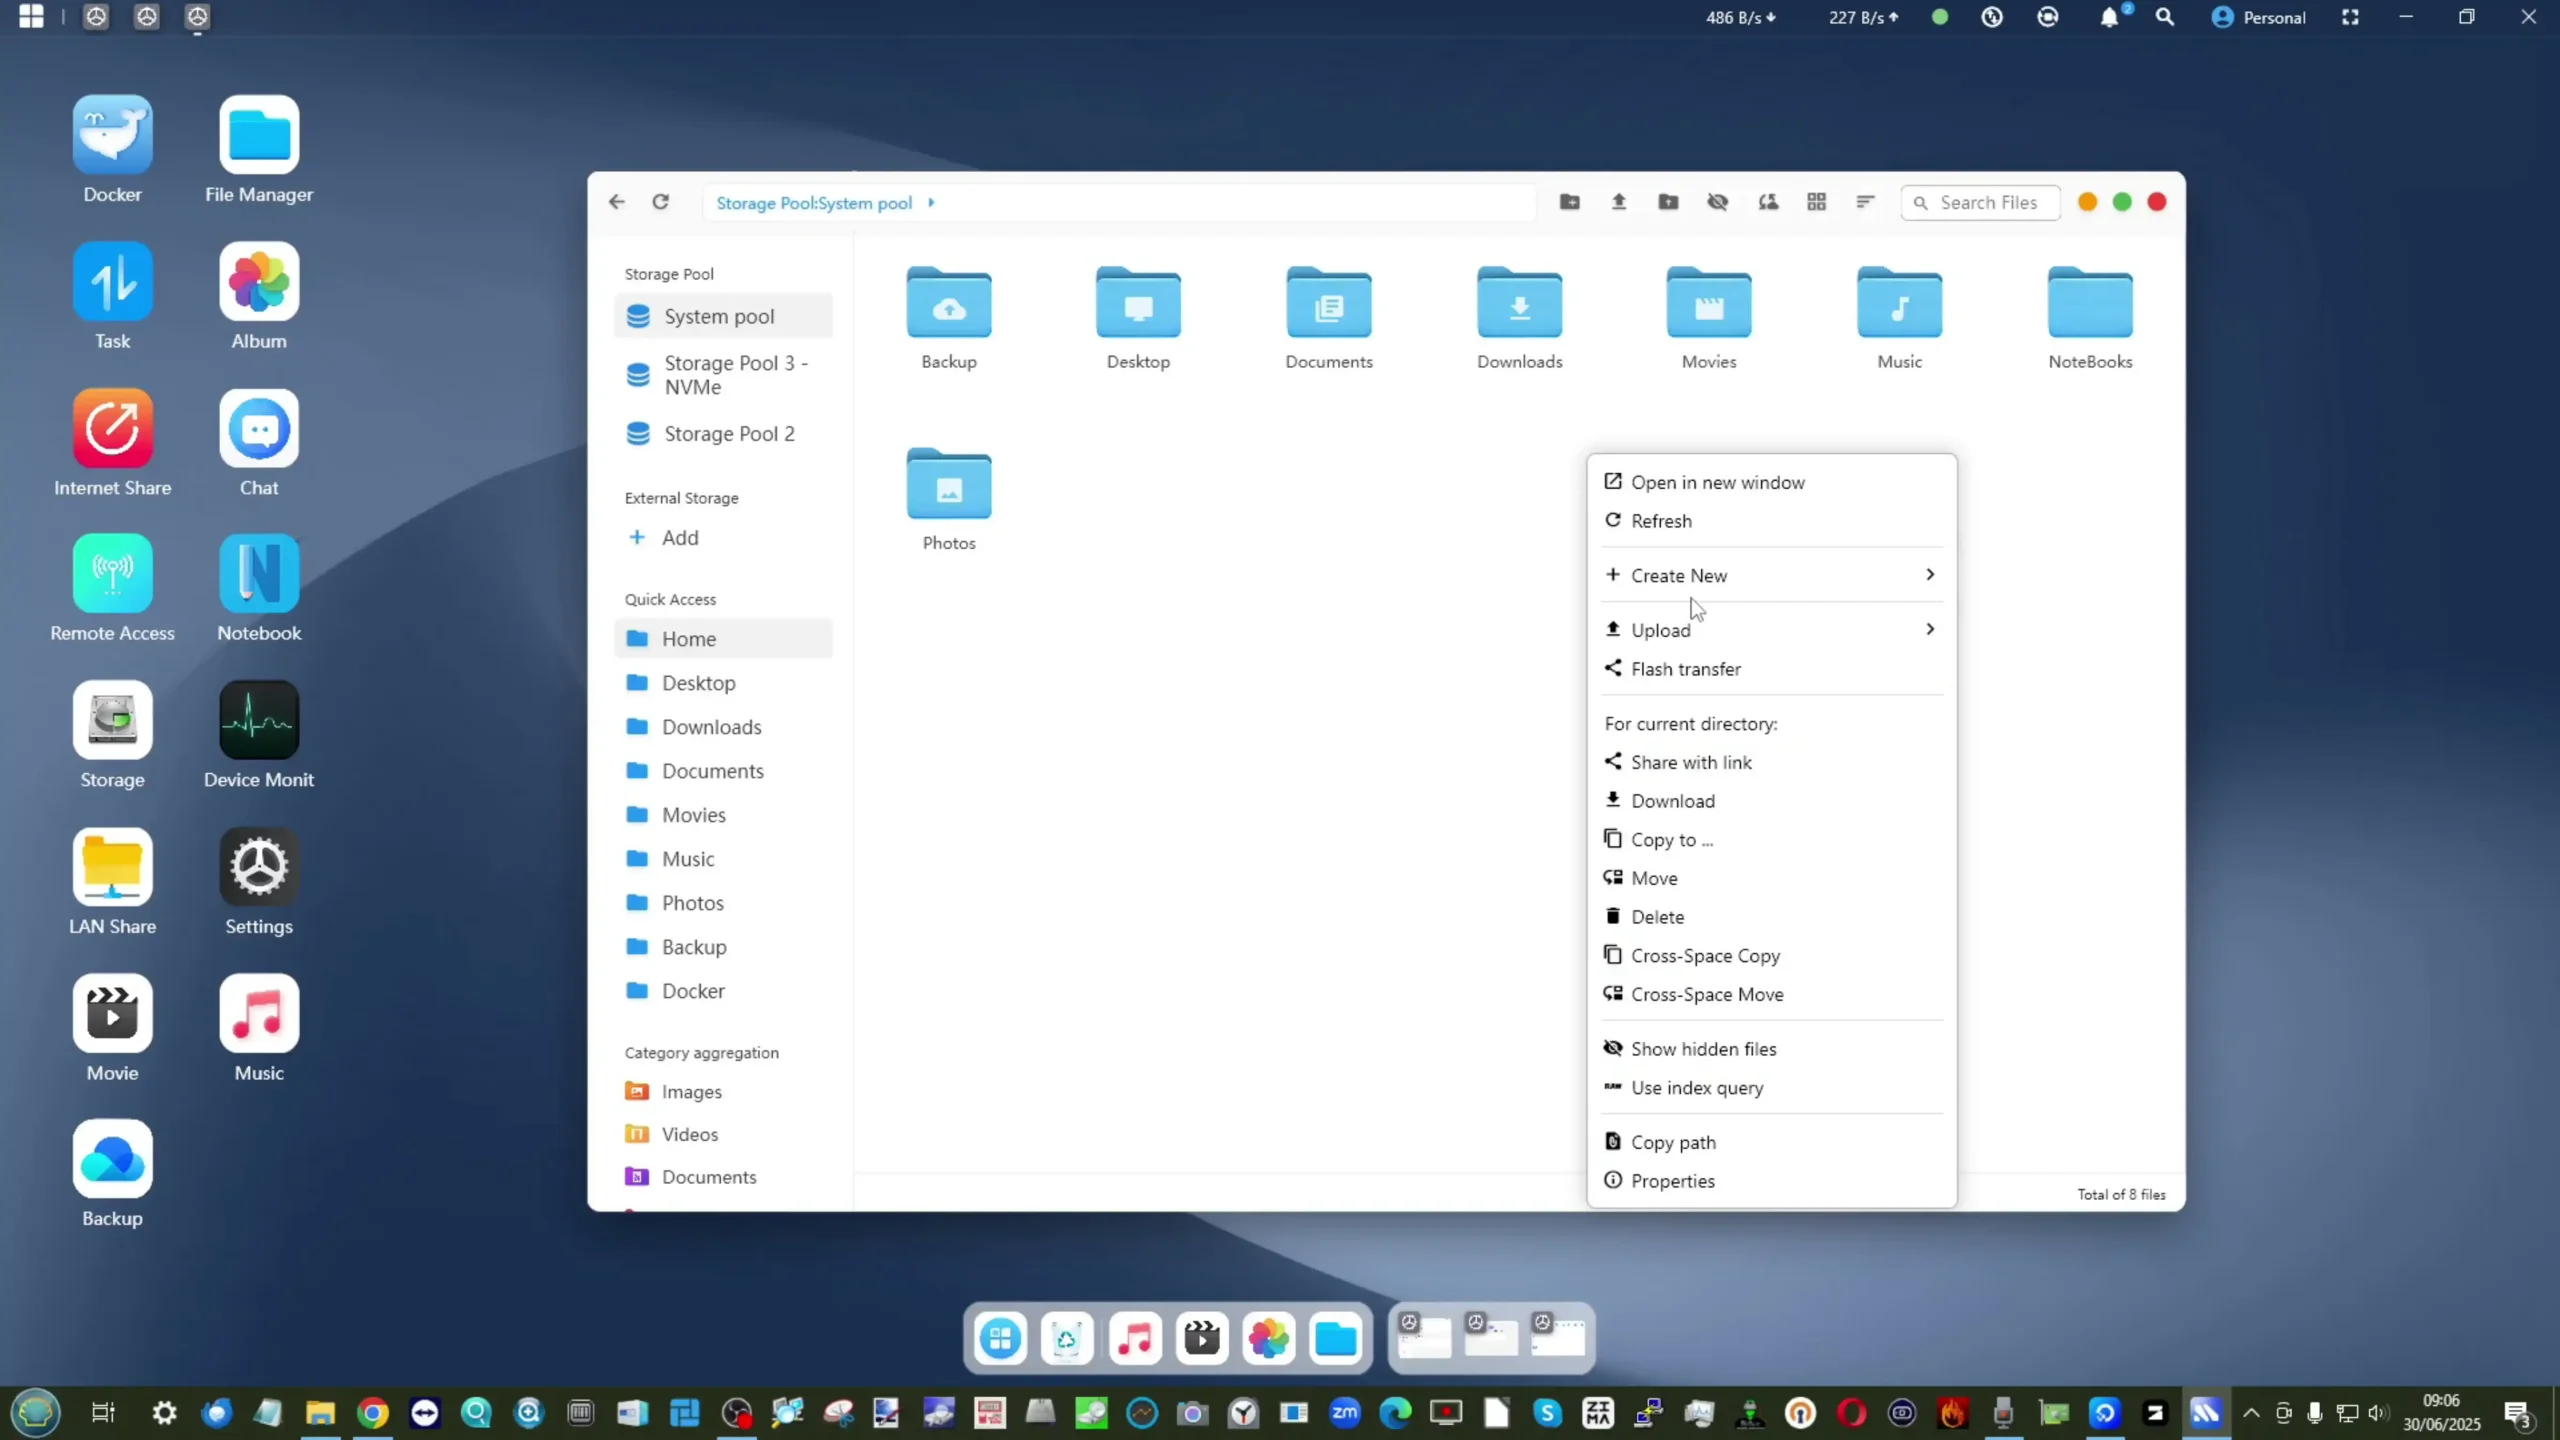
Beyond storage, MinisCloud OS offers a suite of applications targeting home and small office users. Media services include a basic DLNA server, AI-driven photo library with face and object recognition, and a music streaming module. While the AI photo library benefits from the NPU in the N5 Pro, testing showed mixed accuracy in object recognition and indexing. Backup services include one-click PC/Mac backups, scheduled sync jobs, and encrypted sharing via link-based access.
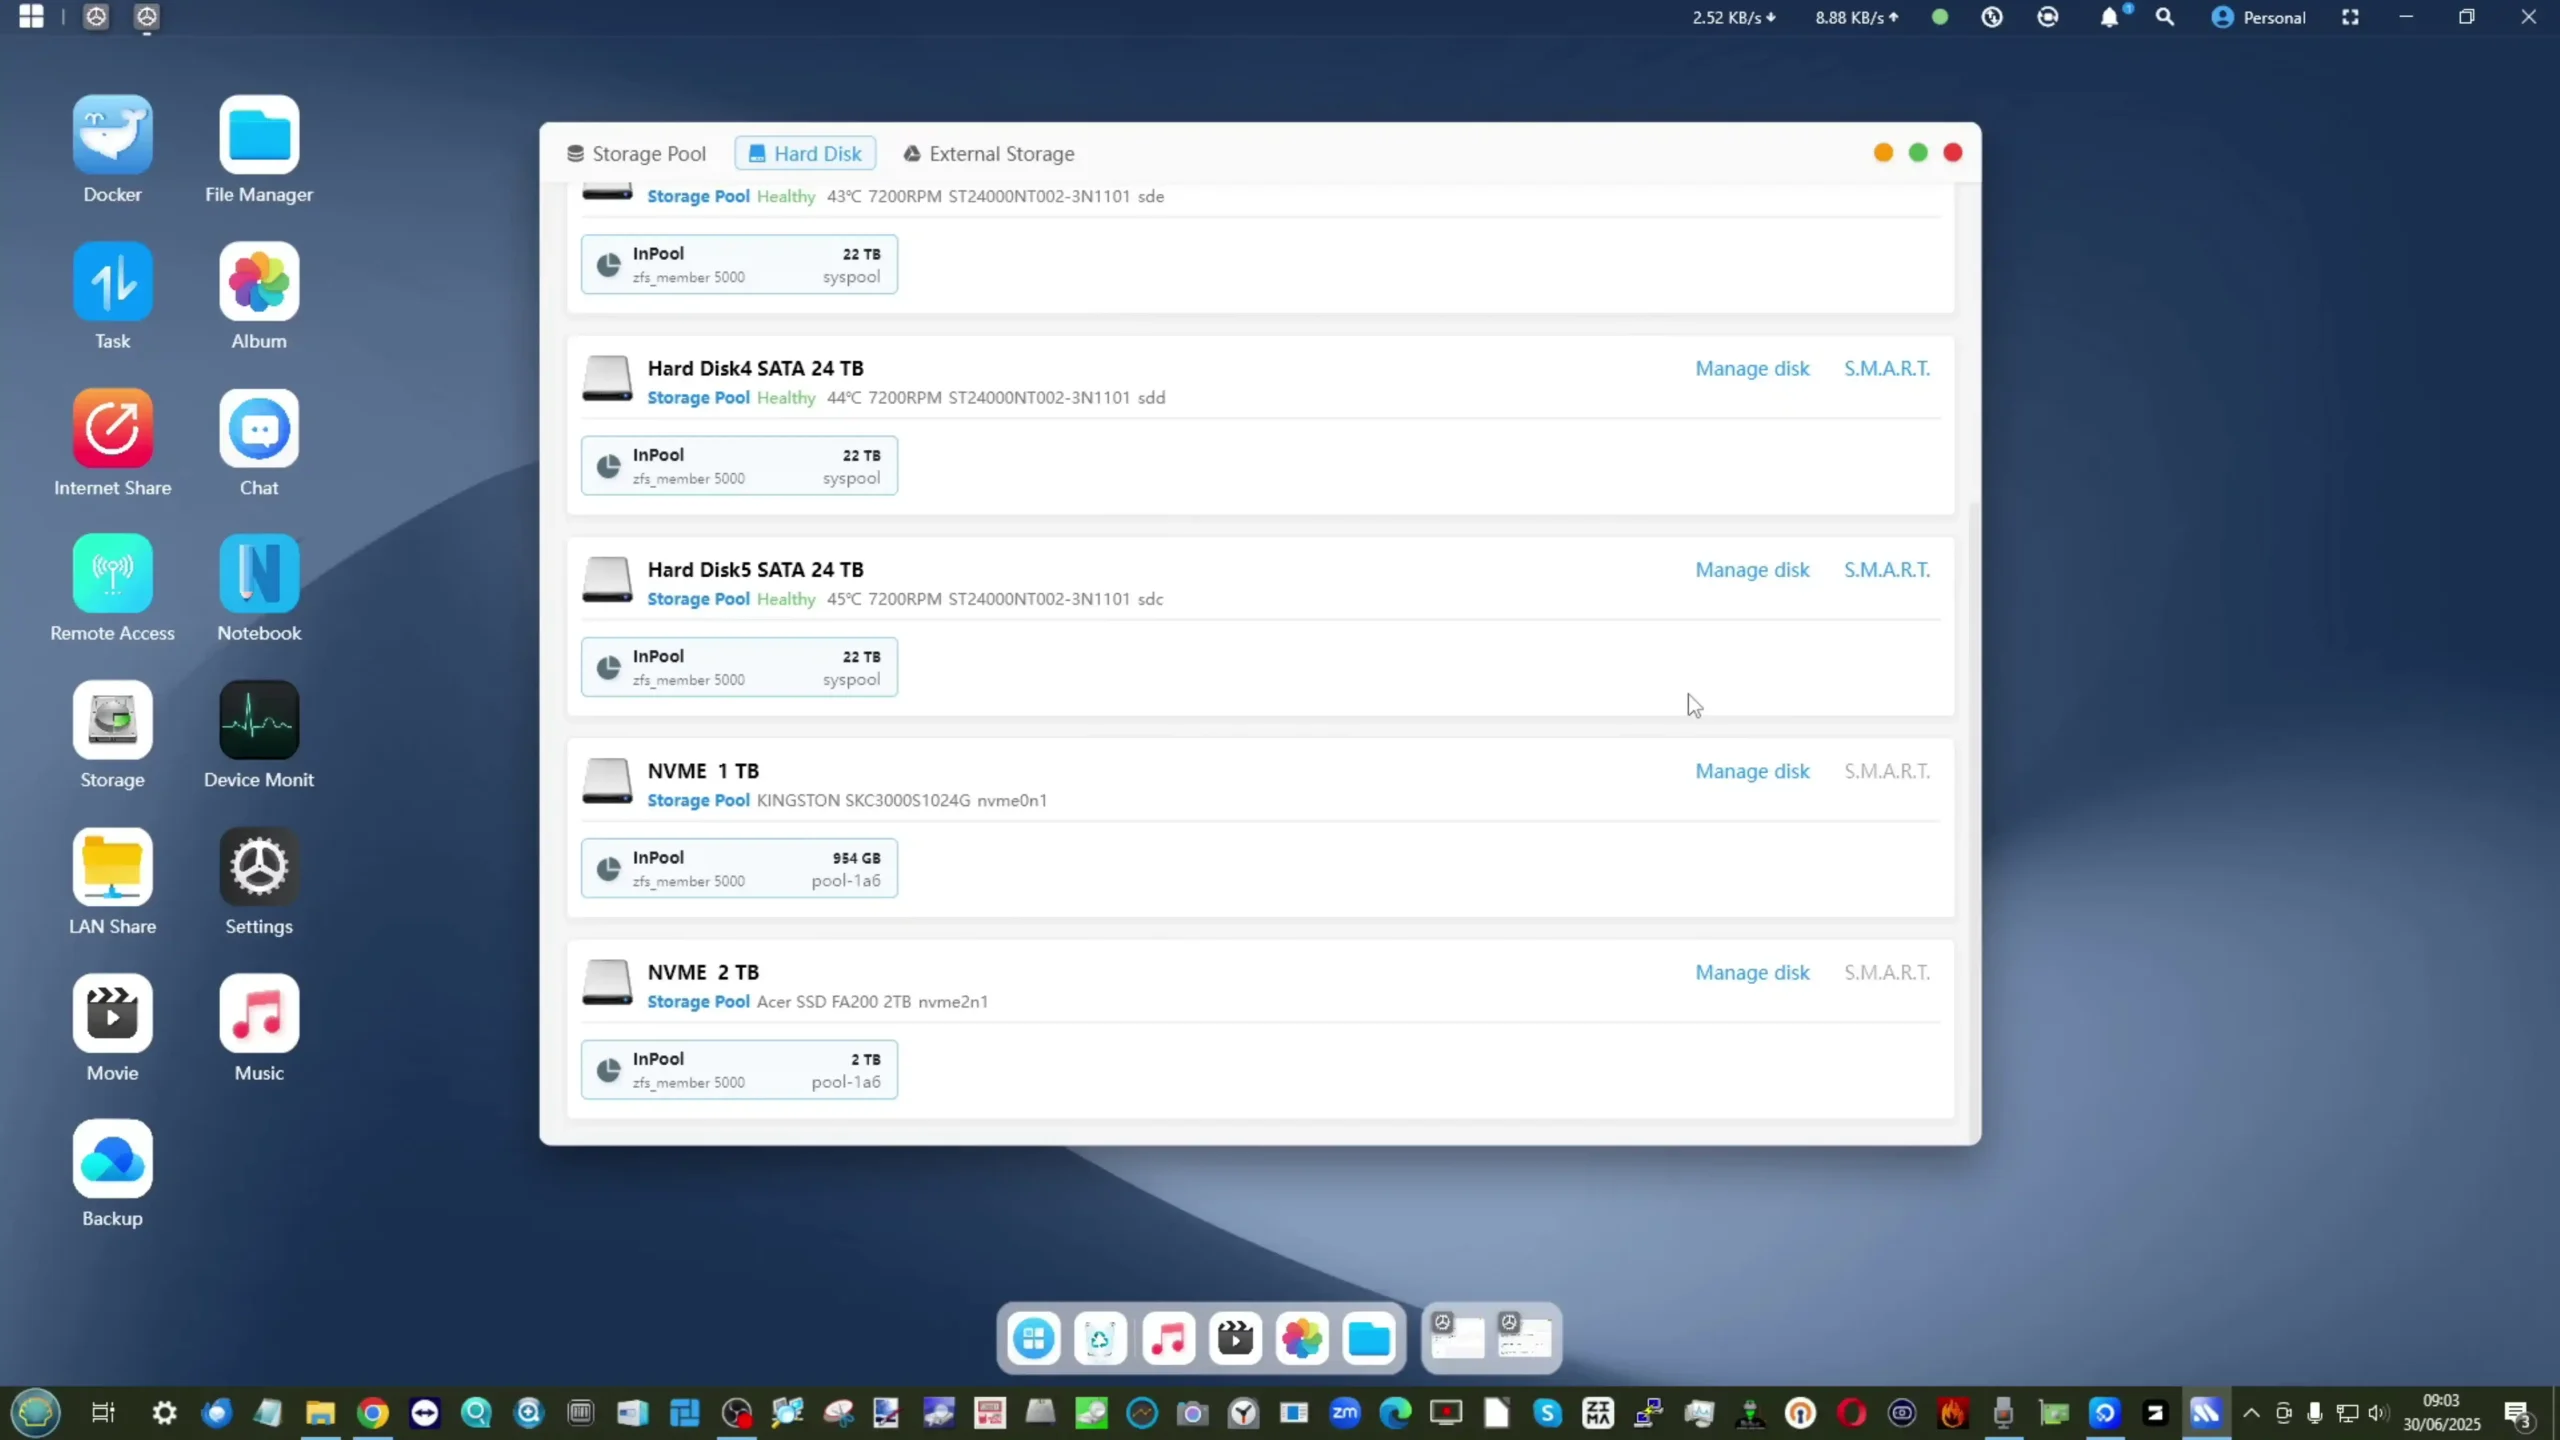
Docker support is also integrated, enabling users to deploy isolated containers for third-party apps and services. While these features align the OS with other consumer NAS ecosystems, they do feel less polished than more mature platforms from competitors, and gaps such as lack of native iSCSI target creation or advanced security scanning were noticeable. MinisCloud OS seems best suited as a lightweight, user-friendly option for those who do not wish to invest time configuring a third-party OS but may not satisfy advanced enterprise users.
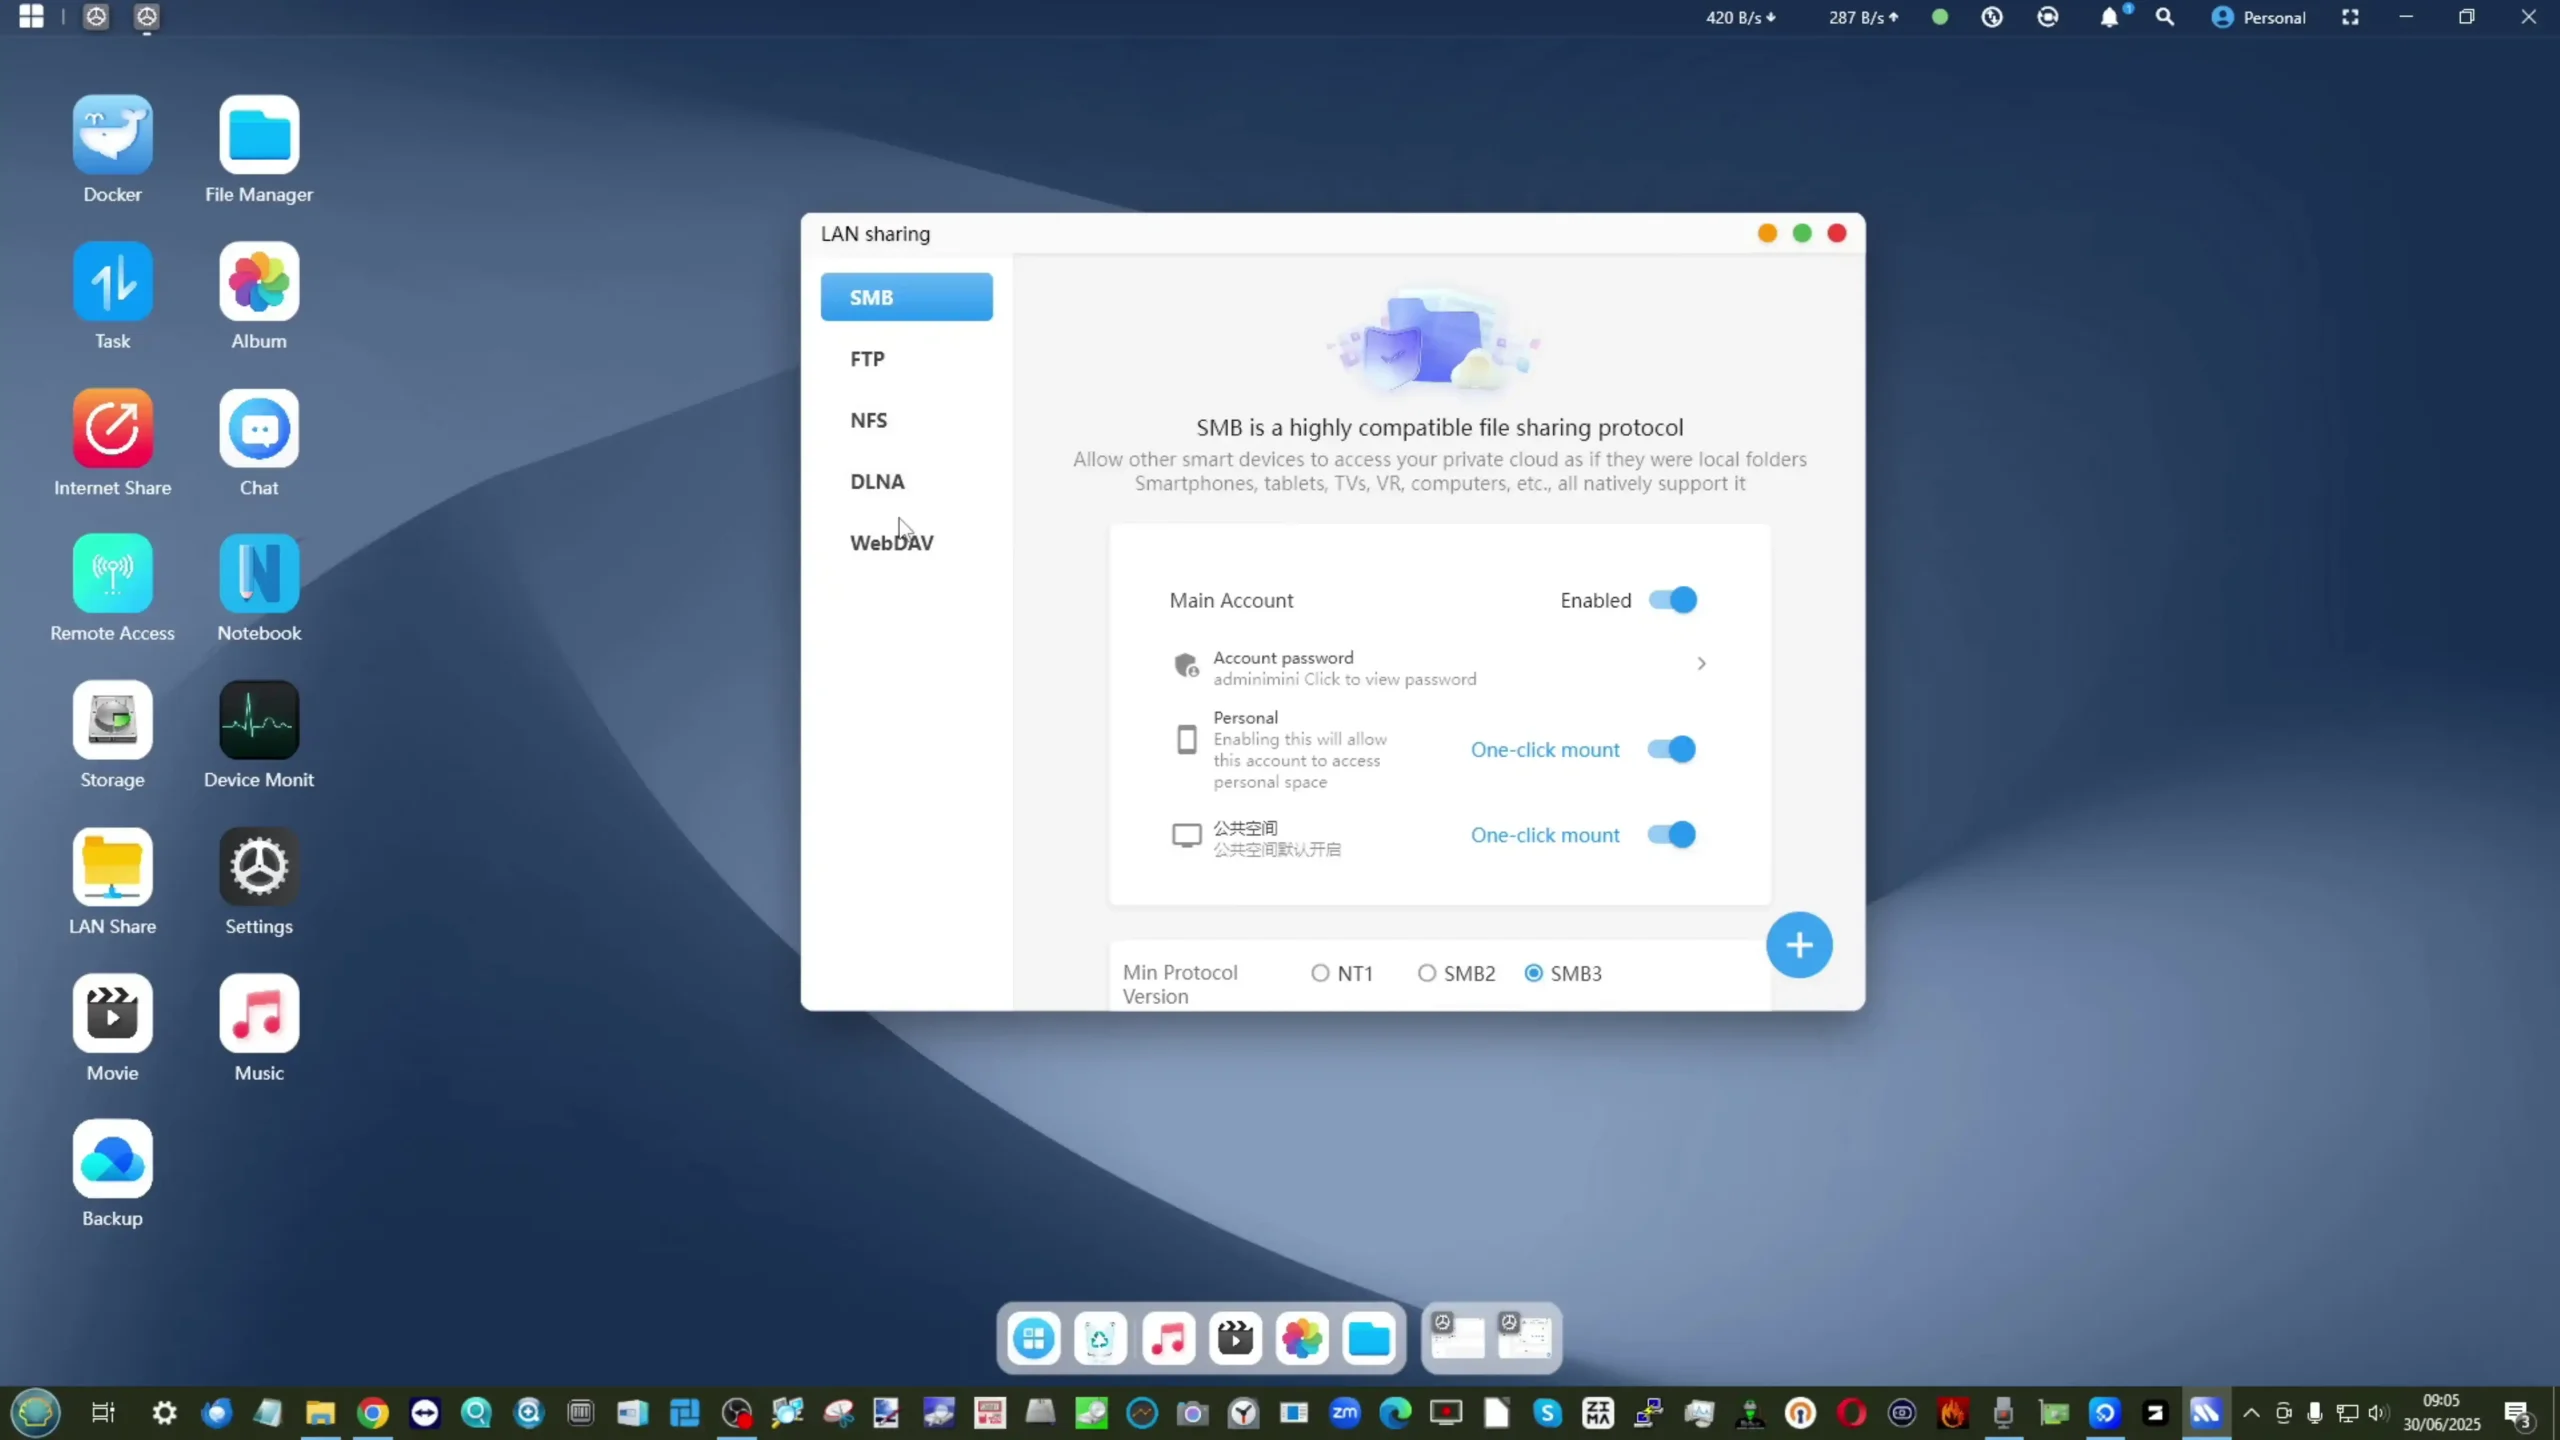
The inclusion of fully offline account creation and per-user container isolation demonstrates Minisforum’s efforts to balance privacy and flexibility. No cloud account is required to use the OS, and user isolation ensures that data in Docker containers remains segregated across different accounts. Public network traversal and encrypted external sharing are supported through the web portal, making it possible to access data from outside the local network securely.
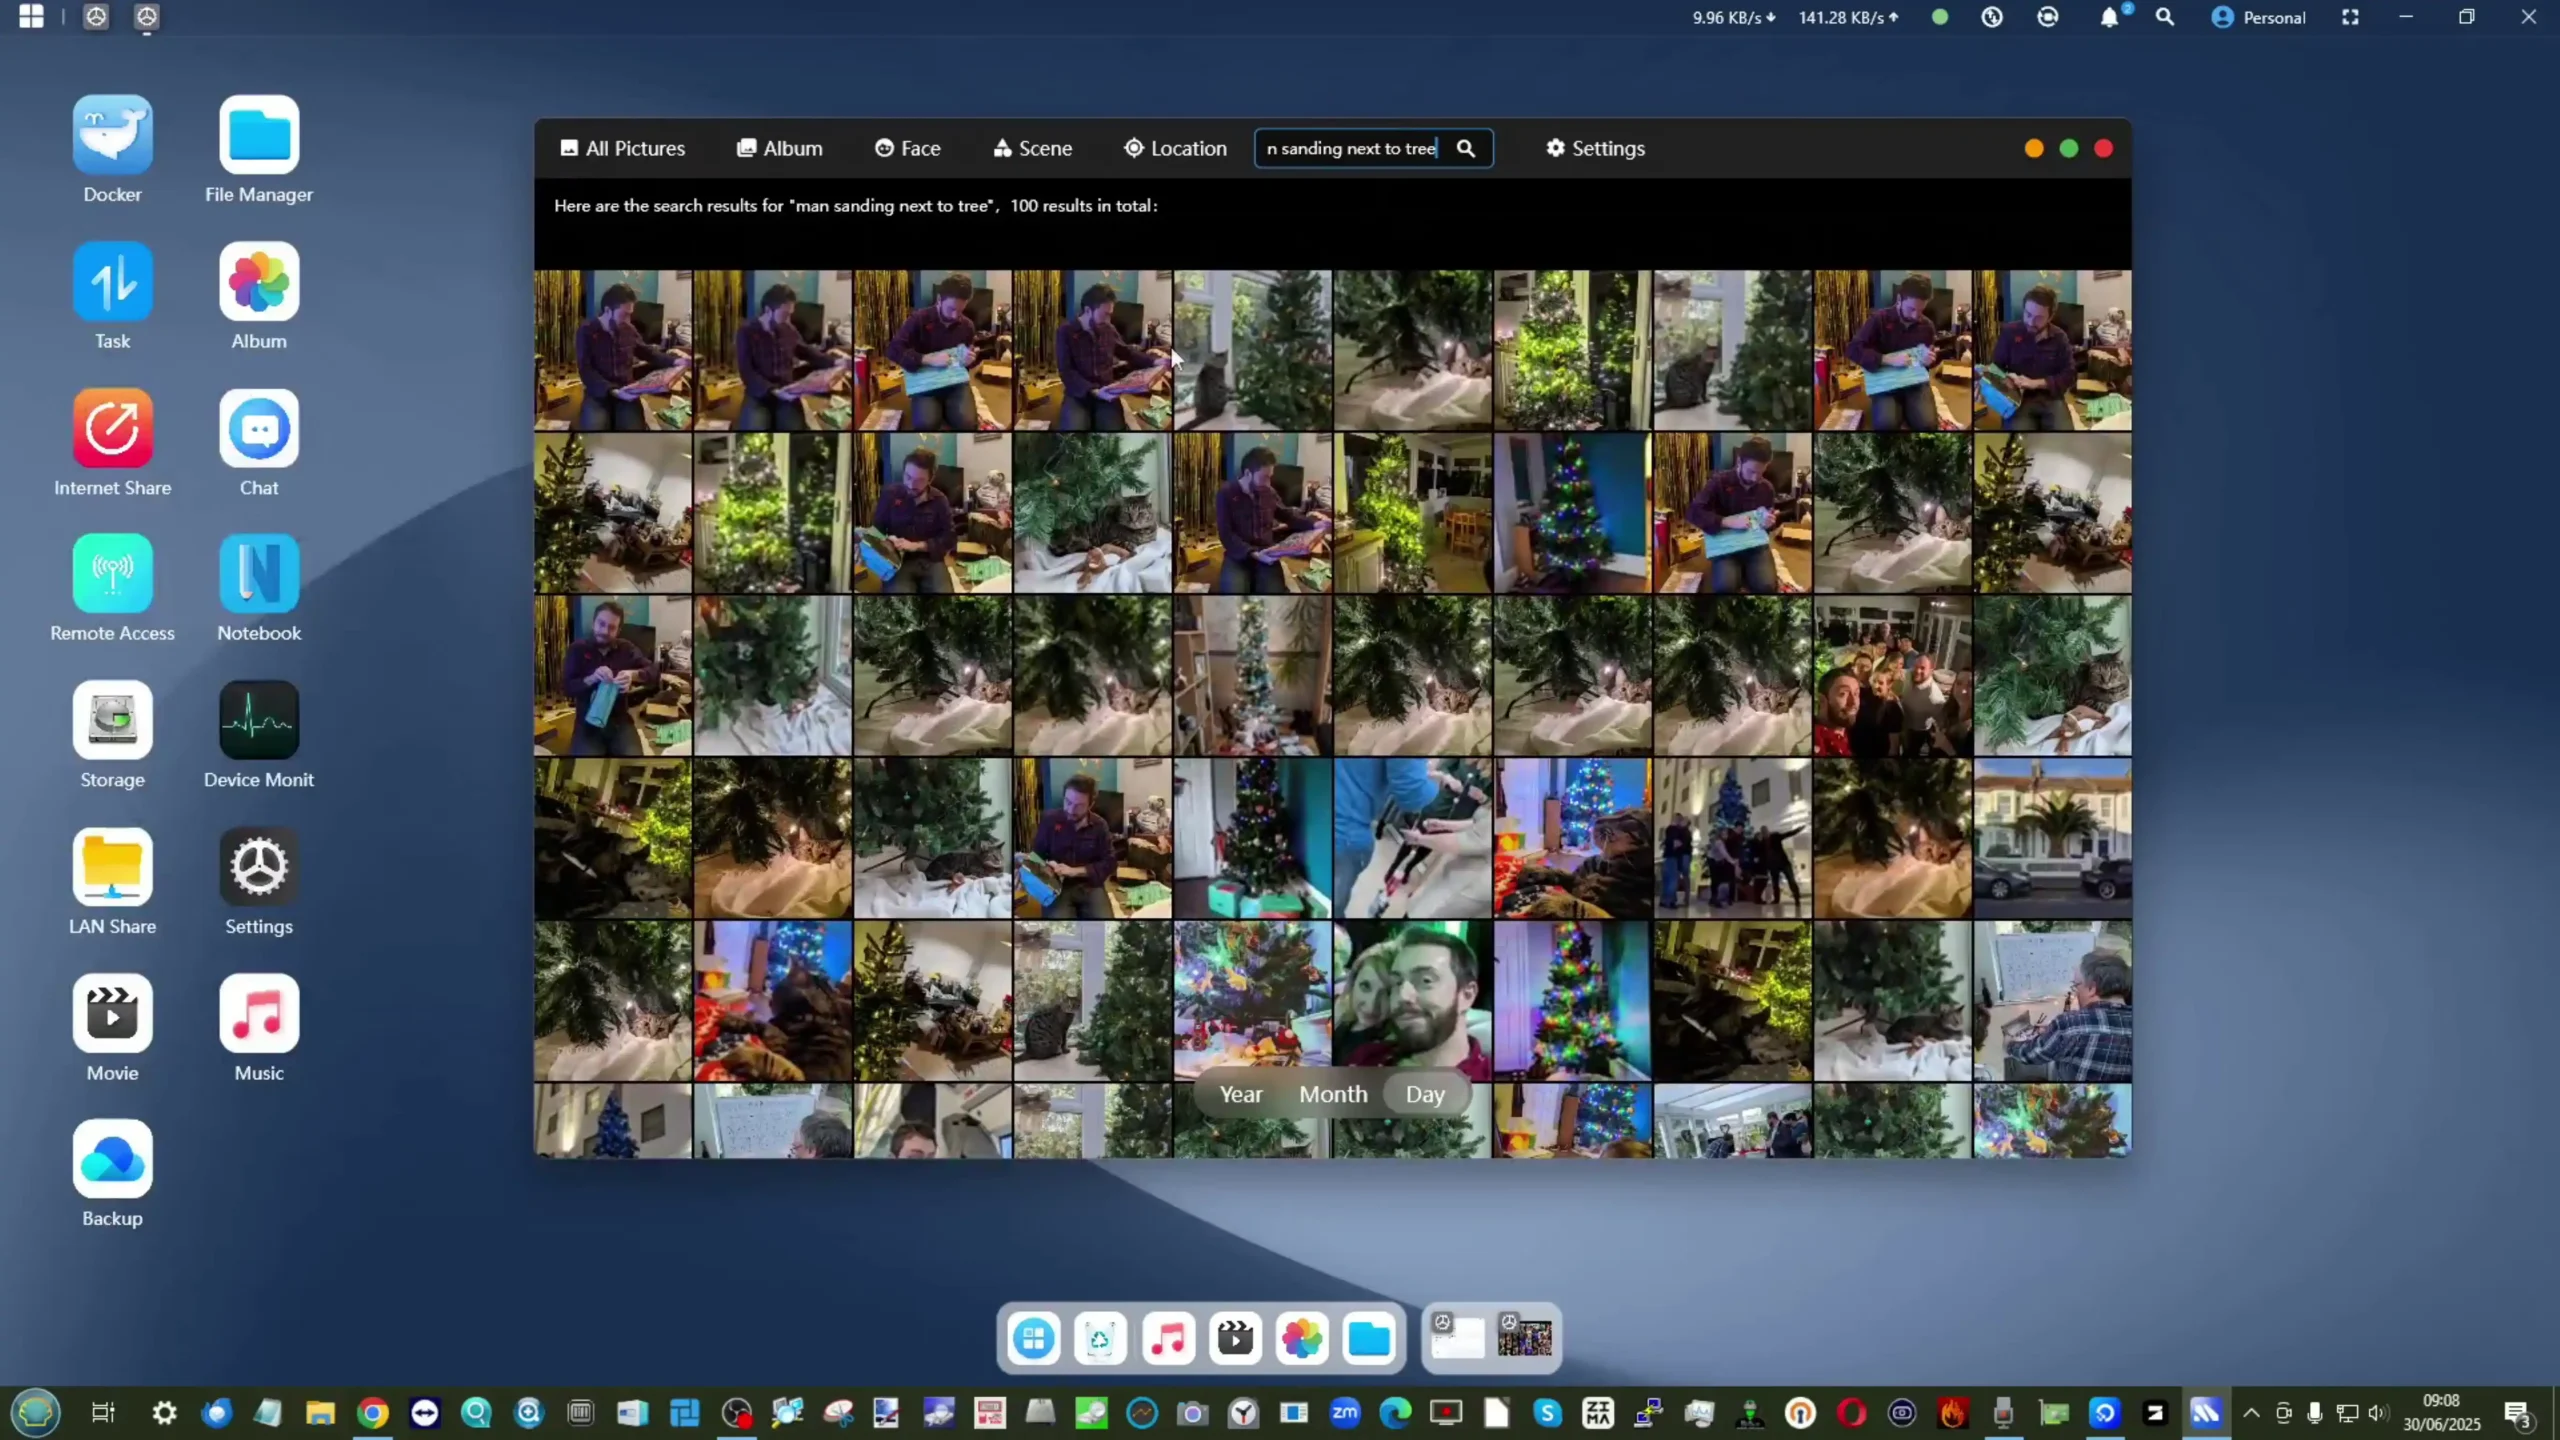
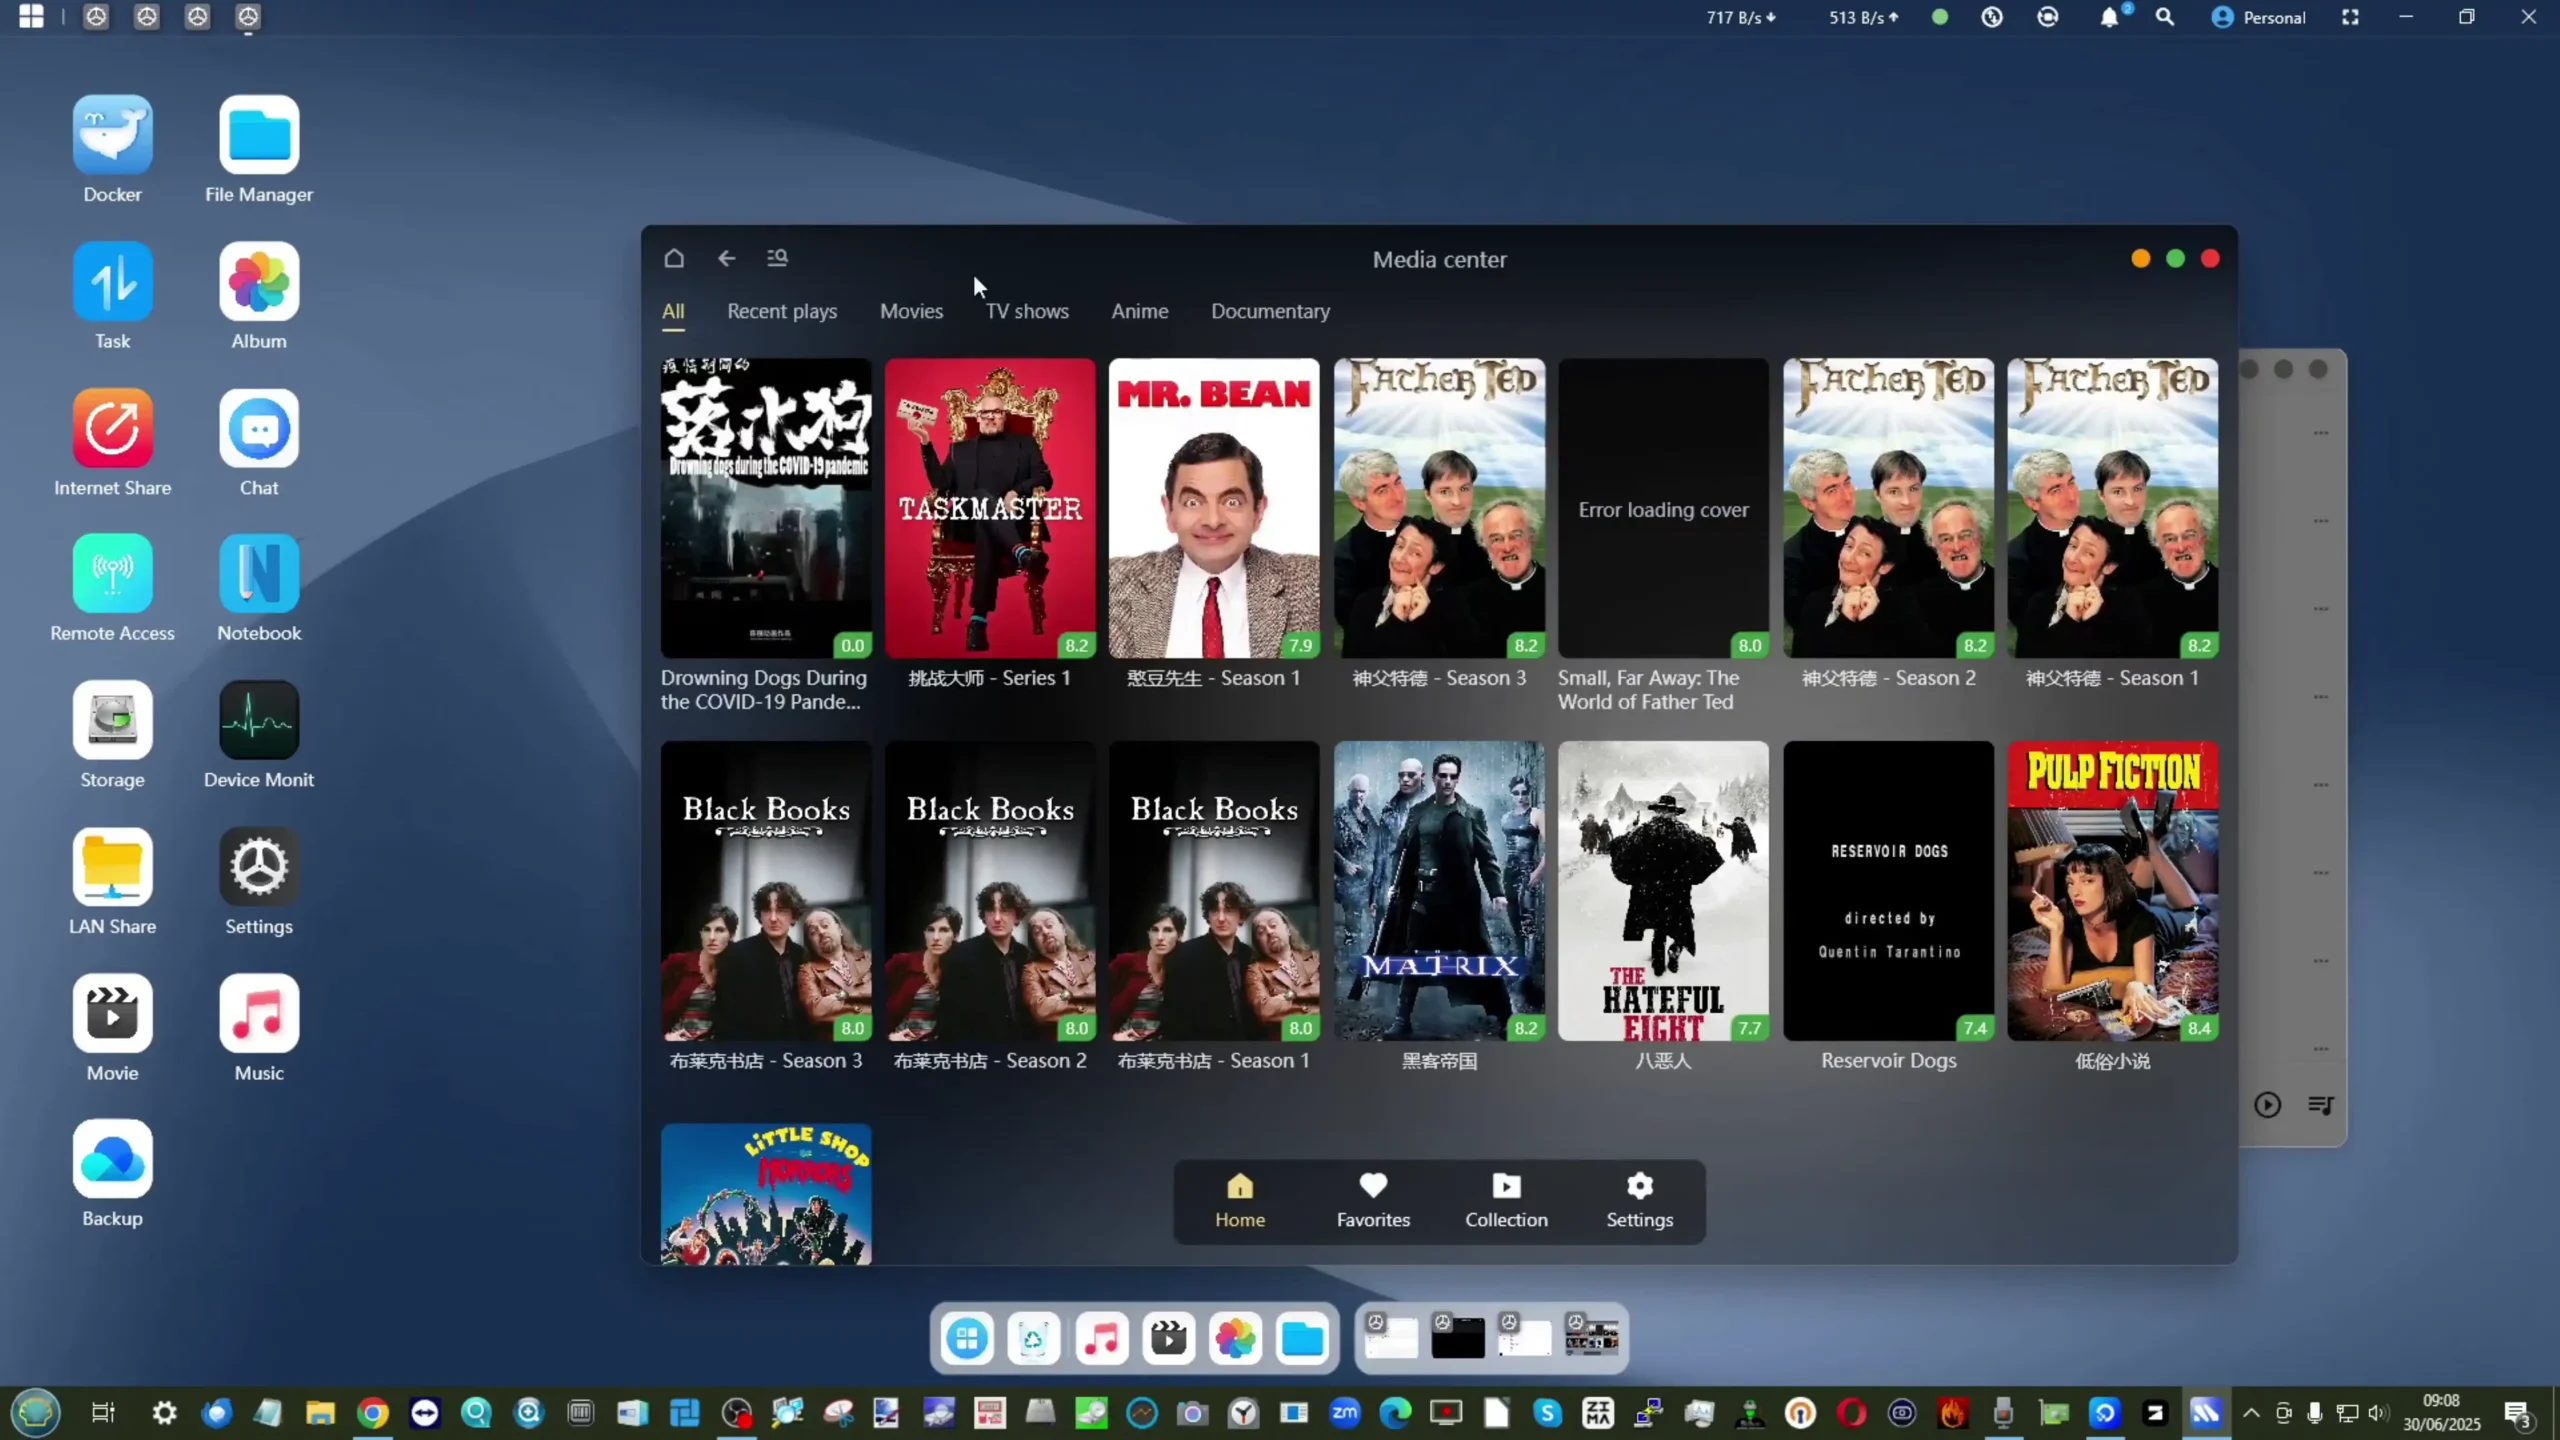
Mobile apps for Android and iOS mirror the desktop web interface and allow remote access and basic administrative tasks. Nevertheless, limitations in feature depth and the still-developing language localization suggest that while MinisCloud OS is functional and a helpful starting point, serious users will want to transition to platforms like TrueNAS or Unraid to unlock the full potential of the hardware.
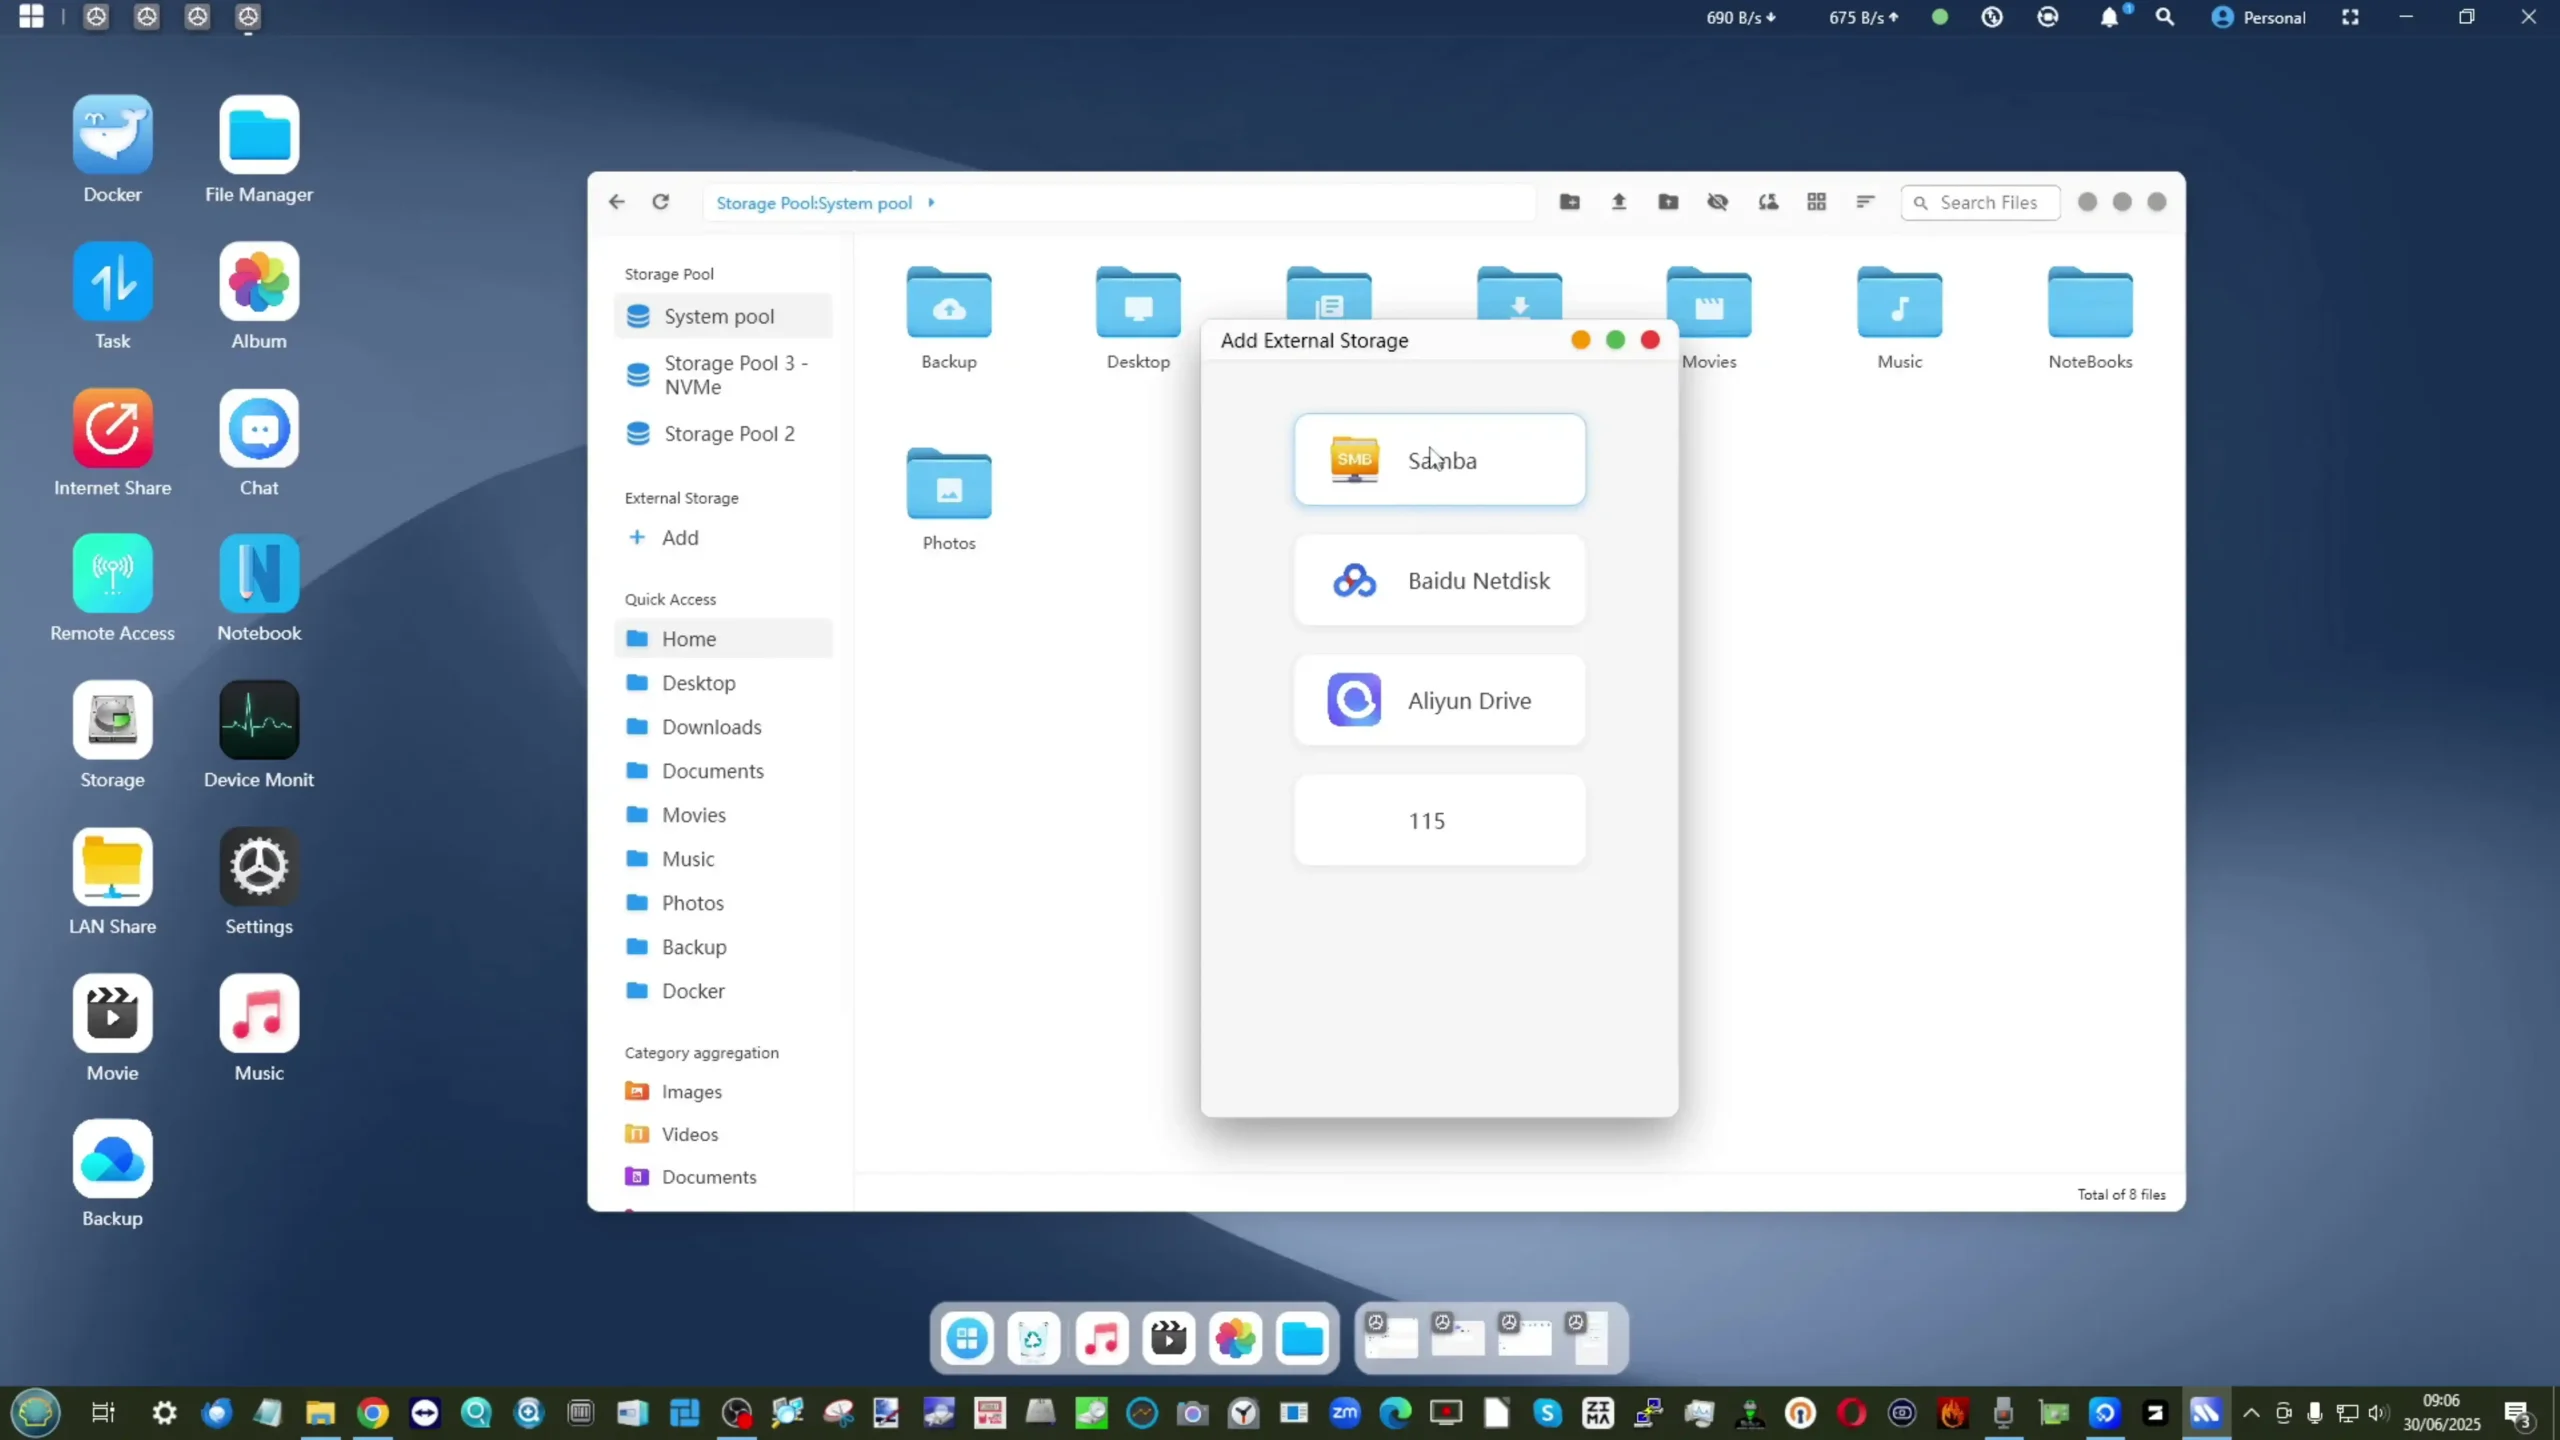
| Feature | Details |
|---|---|
| Pre-installed OS | MinisCloud OS (based on FNOS, ZFS-based, Linux-compatible) |
| File System | ZFS with snapshots, inline LZ4 compression, self-healing checks |
| RAID Modes Supported | RAID 0/1/5/6/10/RAIDZ1/RAIDZ2, mixed tiered strategies |
| Account Management | Fully offline, per-user isolation, QR code setup |
| Backup & Sync | One-click PC/Mac backup, cloud sync, encrypted link sharing |
| Applications | AI photo library, DLNA media server, Docker container deployment |
| Mobile Apps | iOS and Android remote access clients |
| Expansion Ready | Compatible with TrueNAS, Unraid, Linux distros, no warranty void |
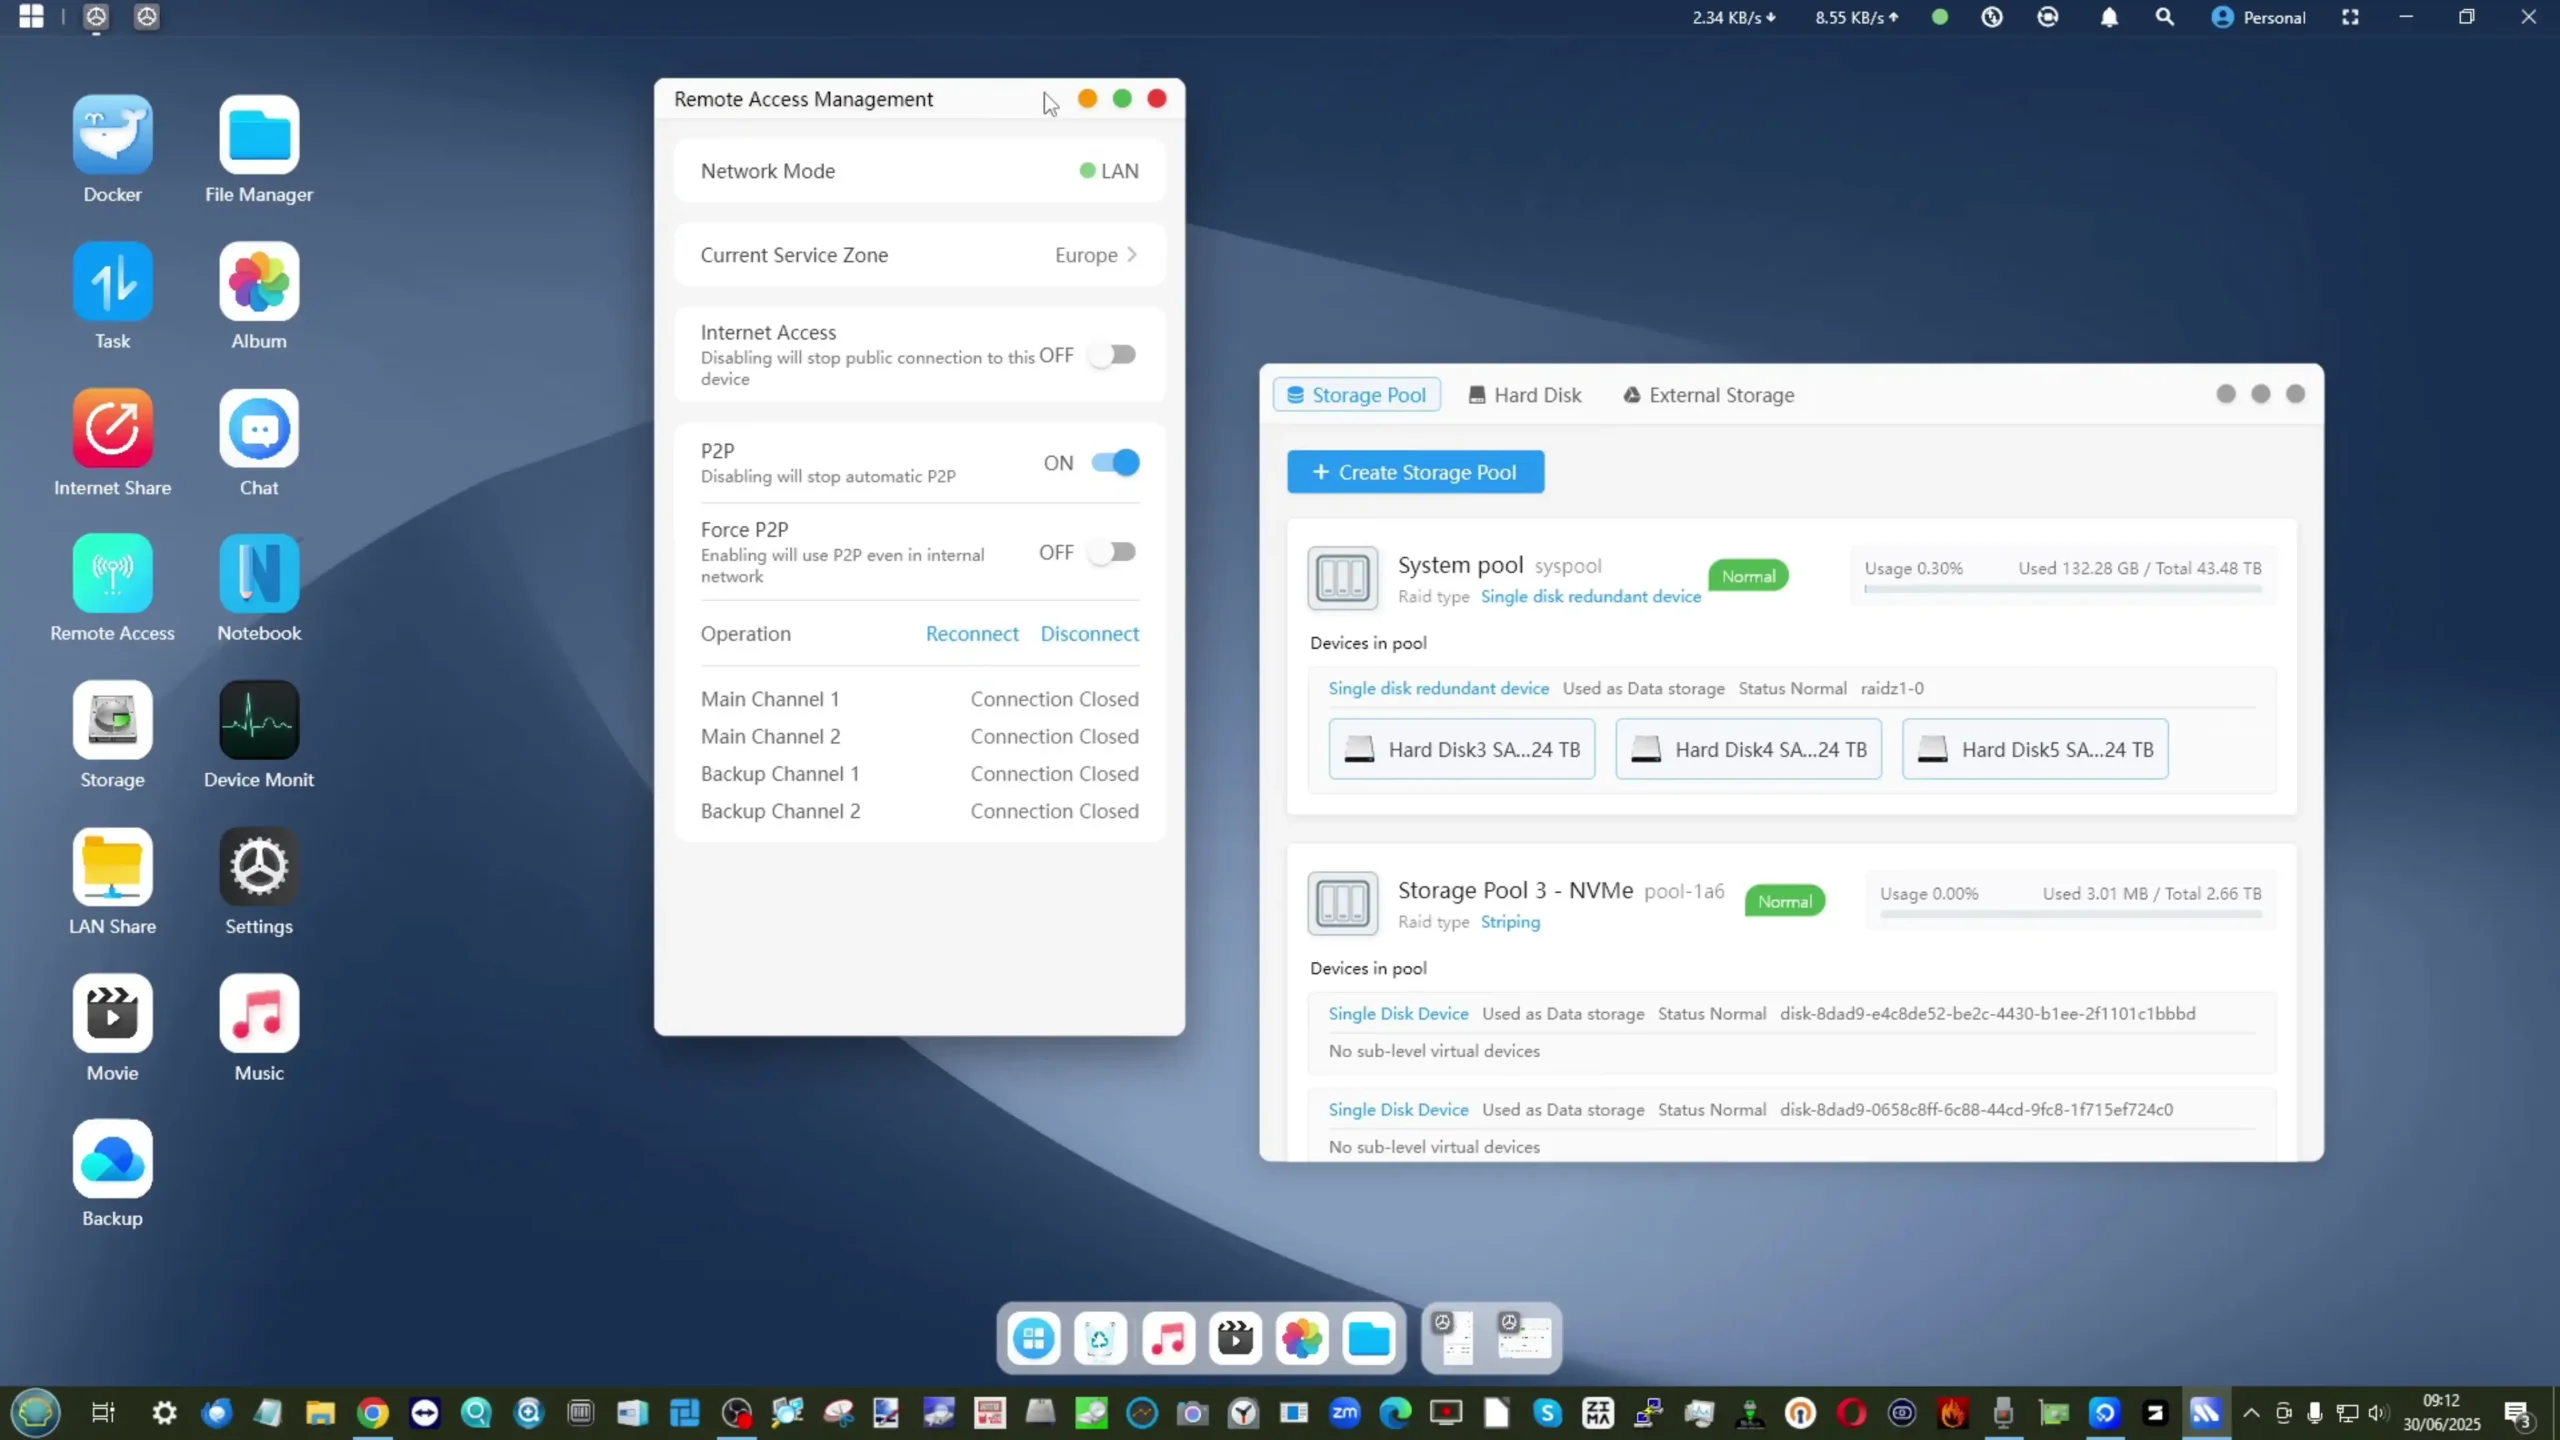
In testing, the Minisforum N5 Pro demonstrated performance levels consistent with its workstation-class specifications, particularly in multi-threaded CPU tasks and mixed storage operations. Using TrueNAS and Unraid as alternative OS options during benchmarks, the system was able to sustain heavy virtual machine (VM) workloads without instability. The Ryzen AI 9 HX PRO 370 CPU maintained its advertised boost clocks of up to 5.1 GHz during short burst operations, while sustaining a lower but stable frequency under extended full-load scenarios. The 12 cores and 24 threads allowed deployment of up to 12 Windows VMs and multiple Linux containers concurrently, each with dedicated vCPUs and memory. Even with the CPU loaded at approximately 50%, overall system responsiveness remained acceptable, thanks in part to the large 96GB DDR5 memory pool available in the tested configuration. ECC support ensured no uncorrected memory errors were recorded throughout a 7-day continuous stress test, affirming the platform’s suitability for 24/7 environments.
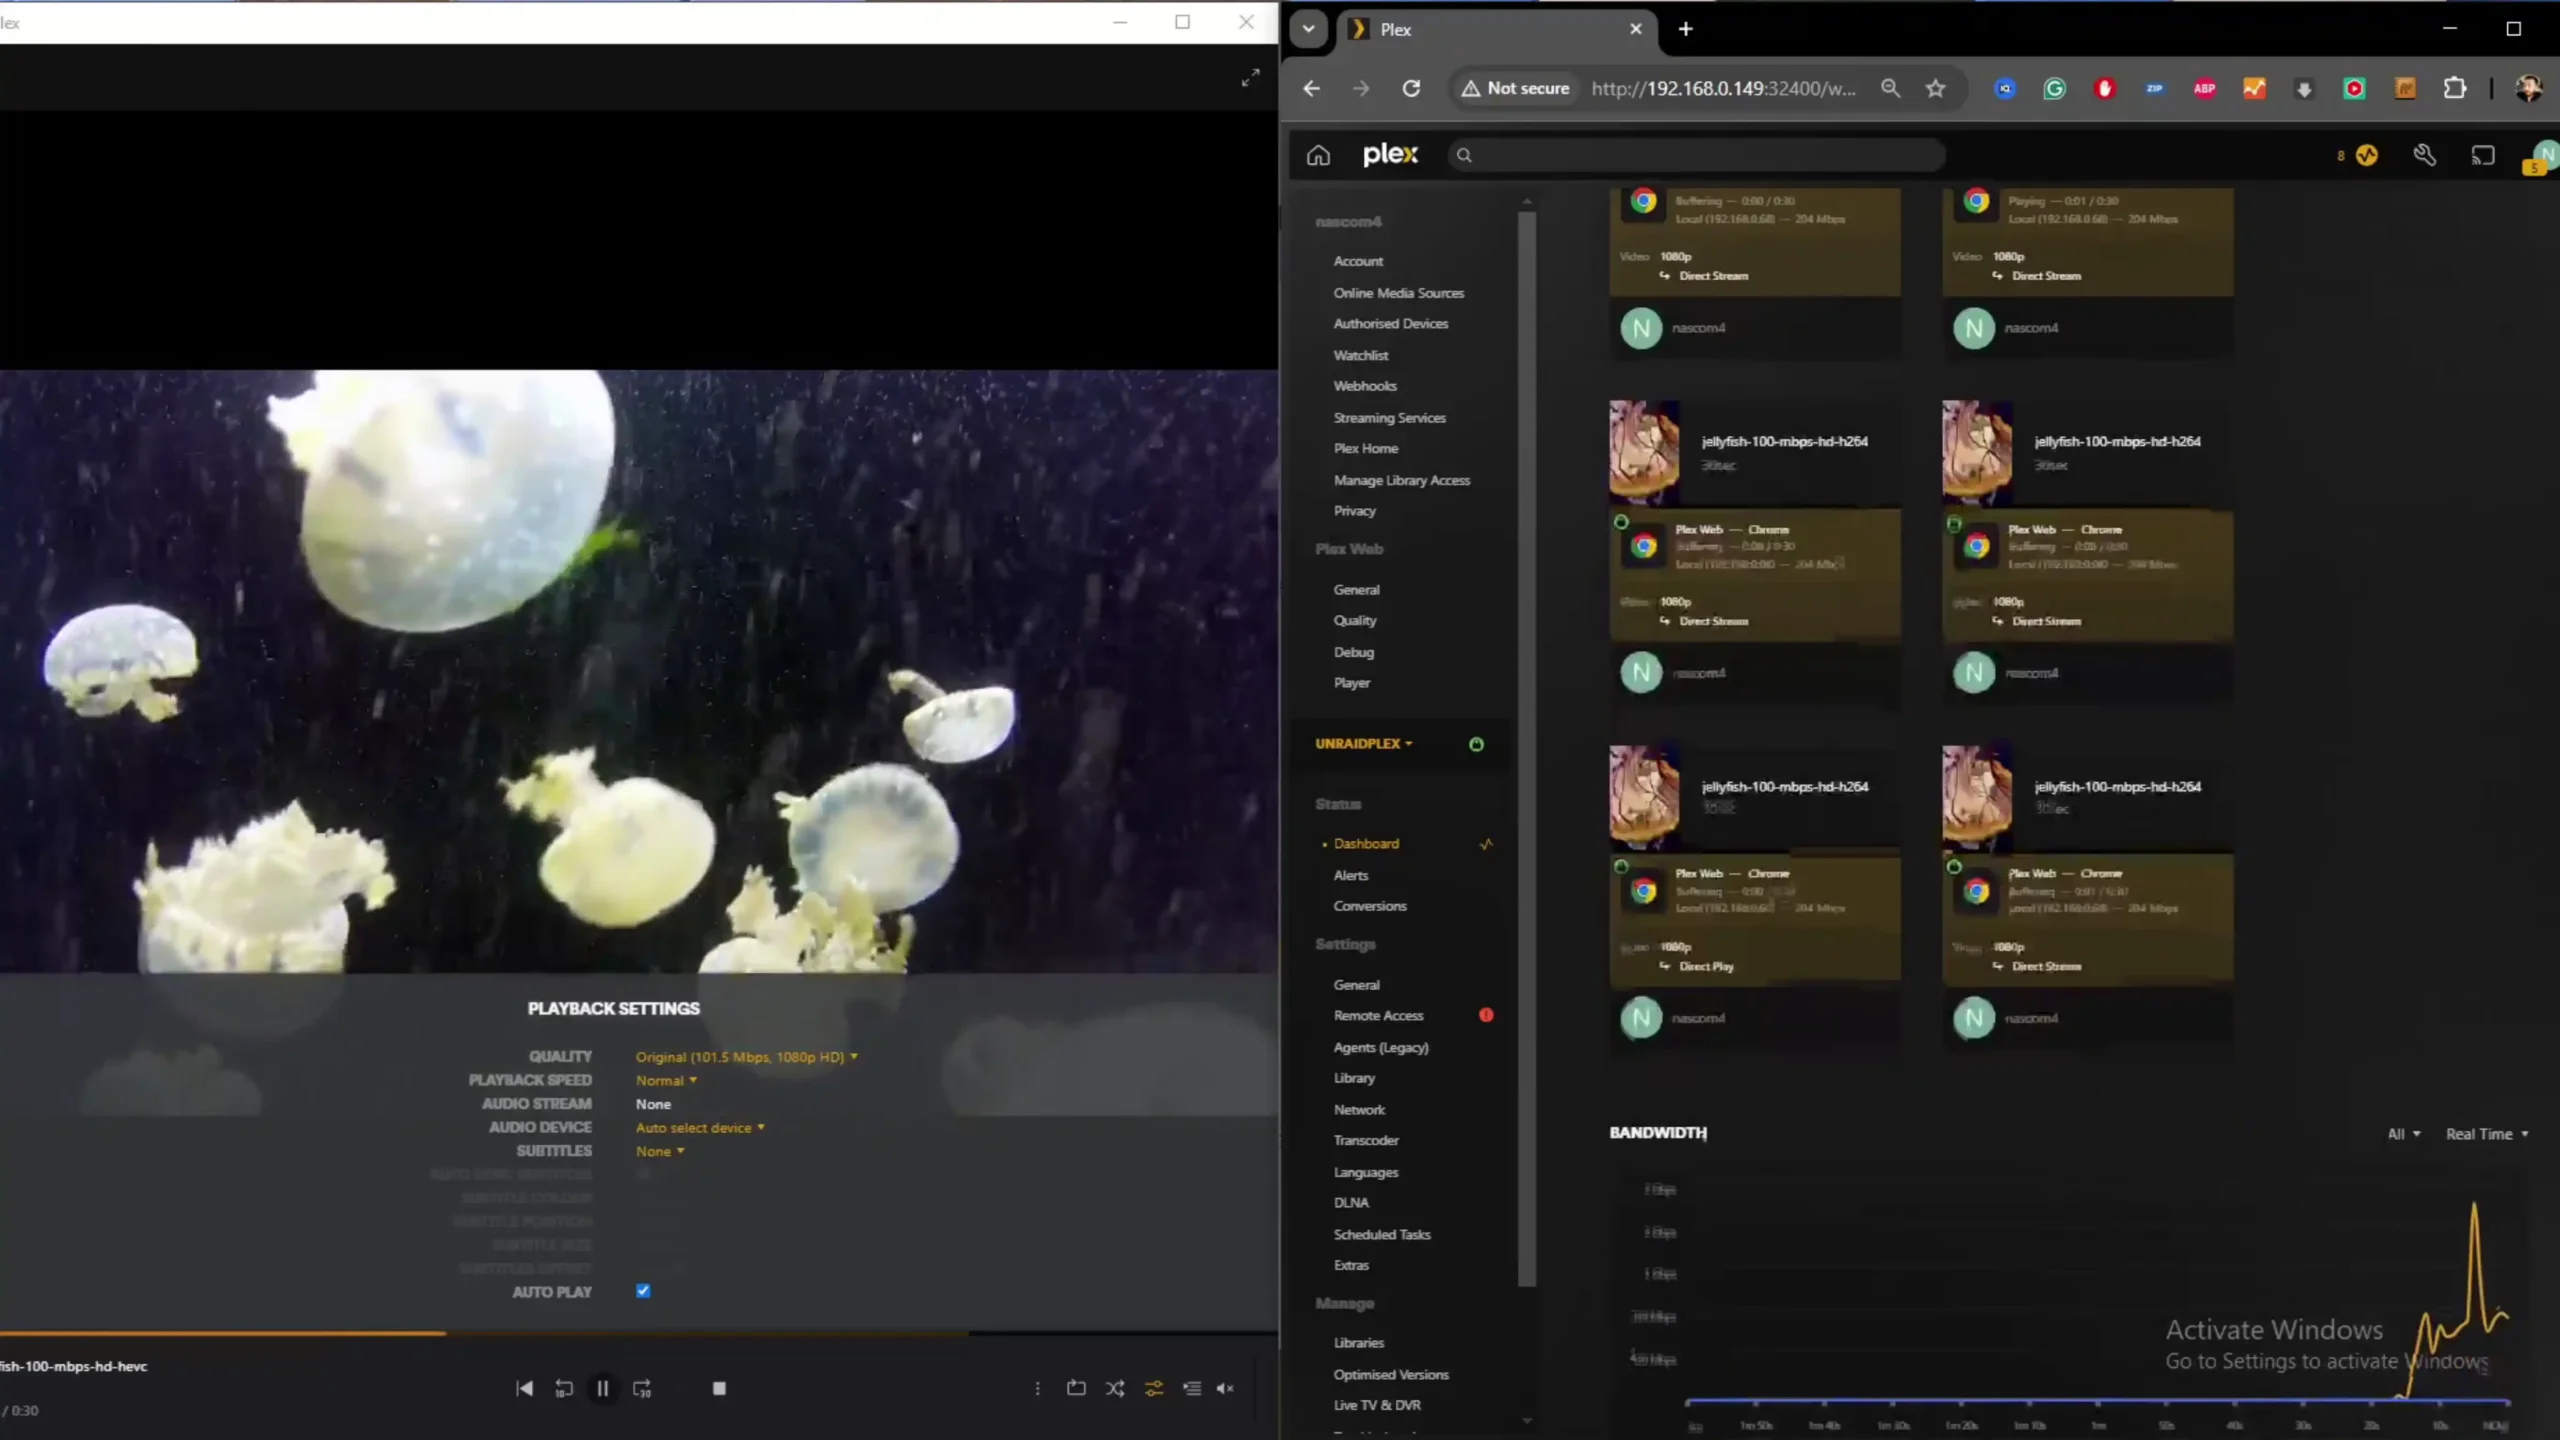

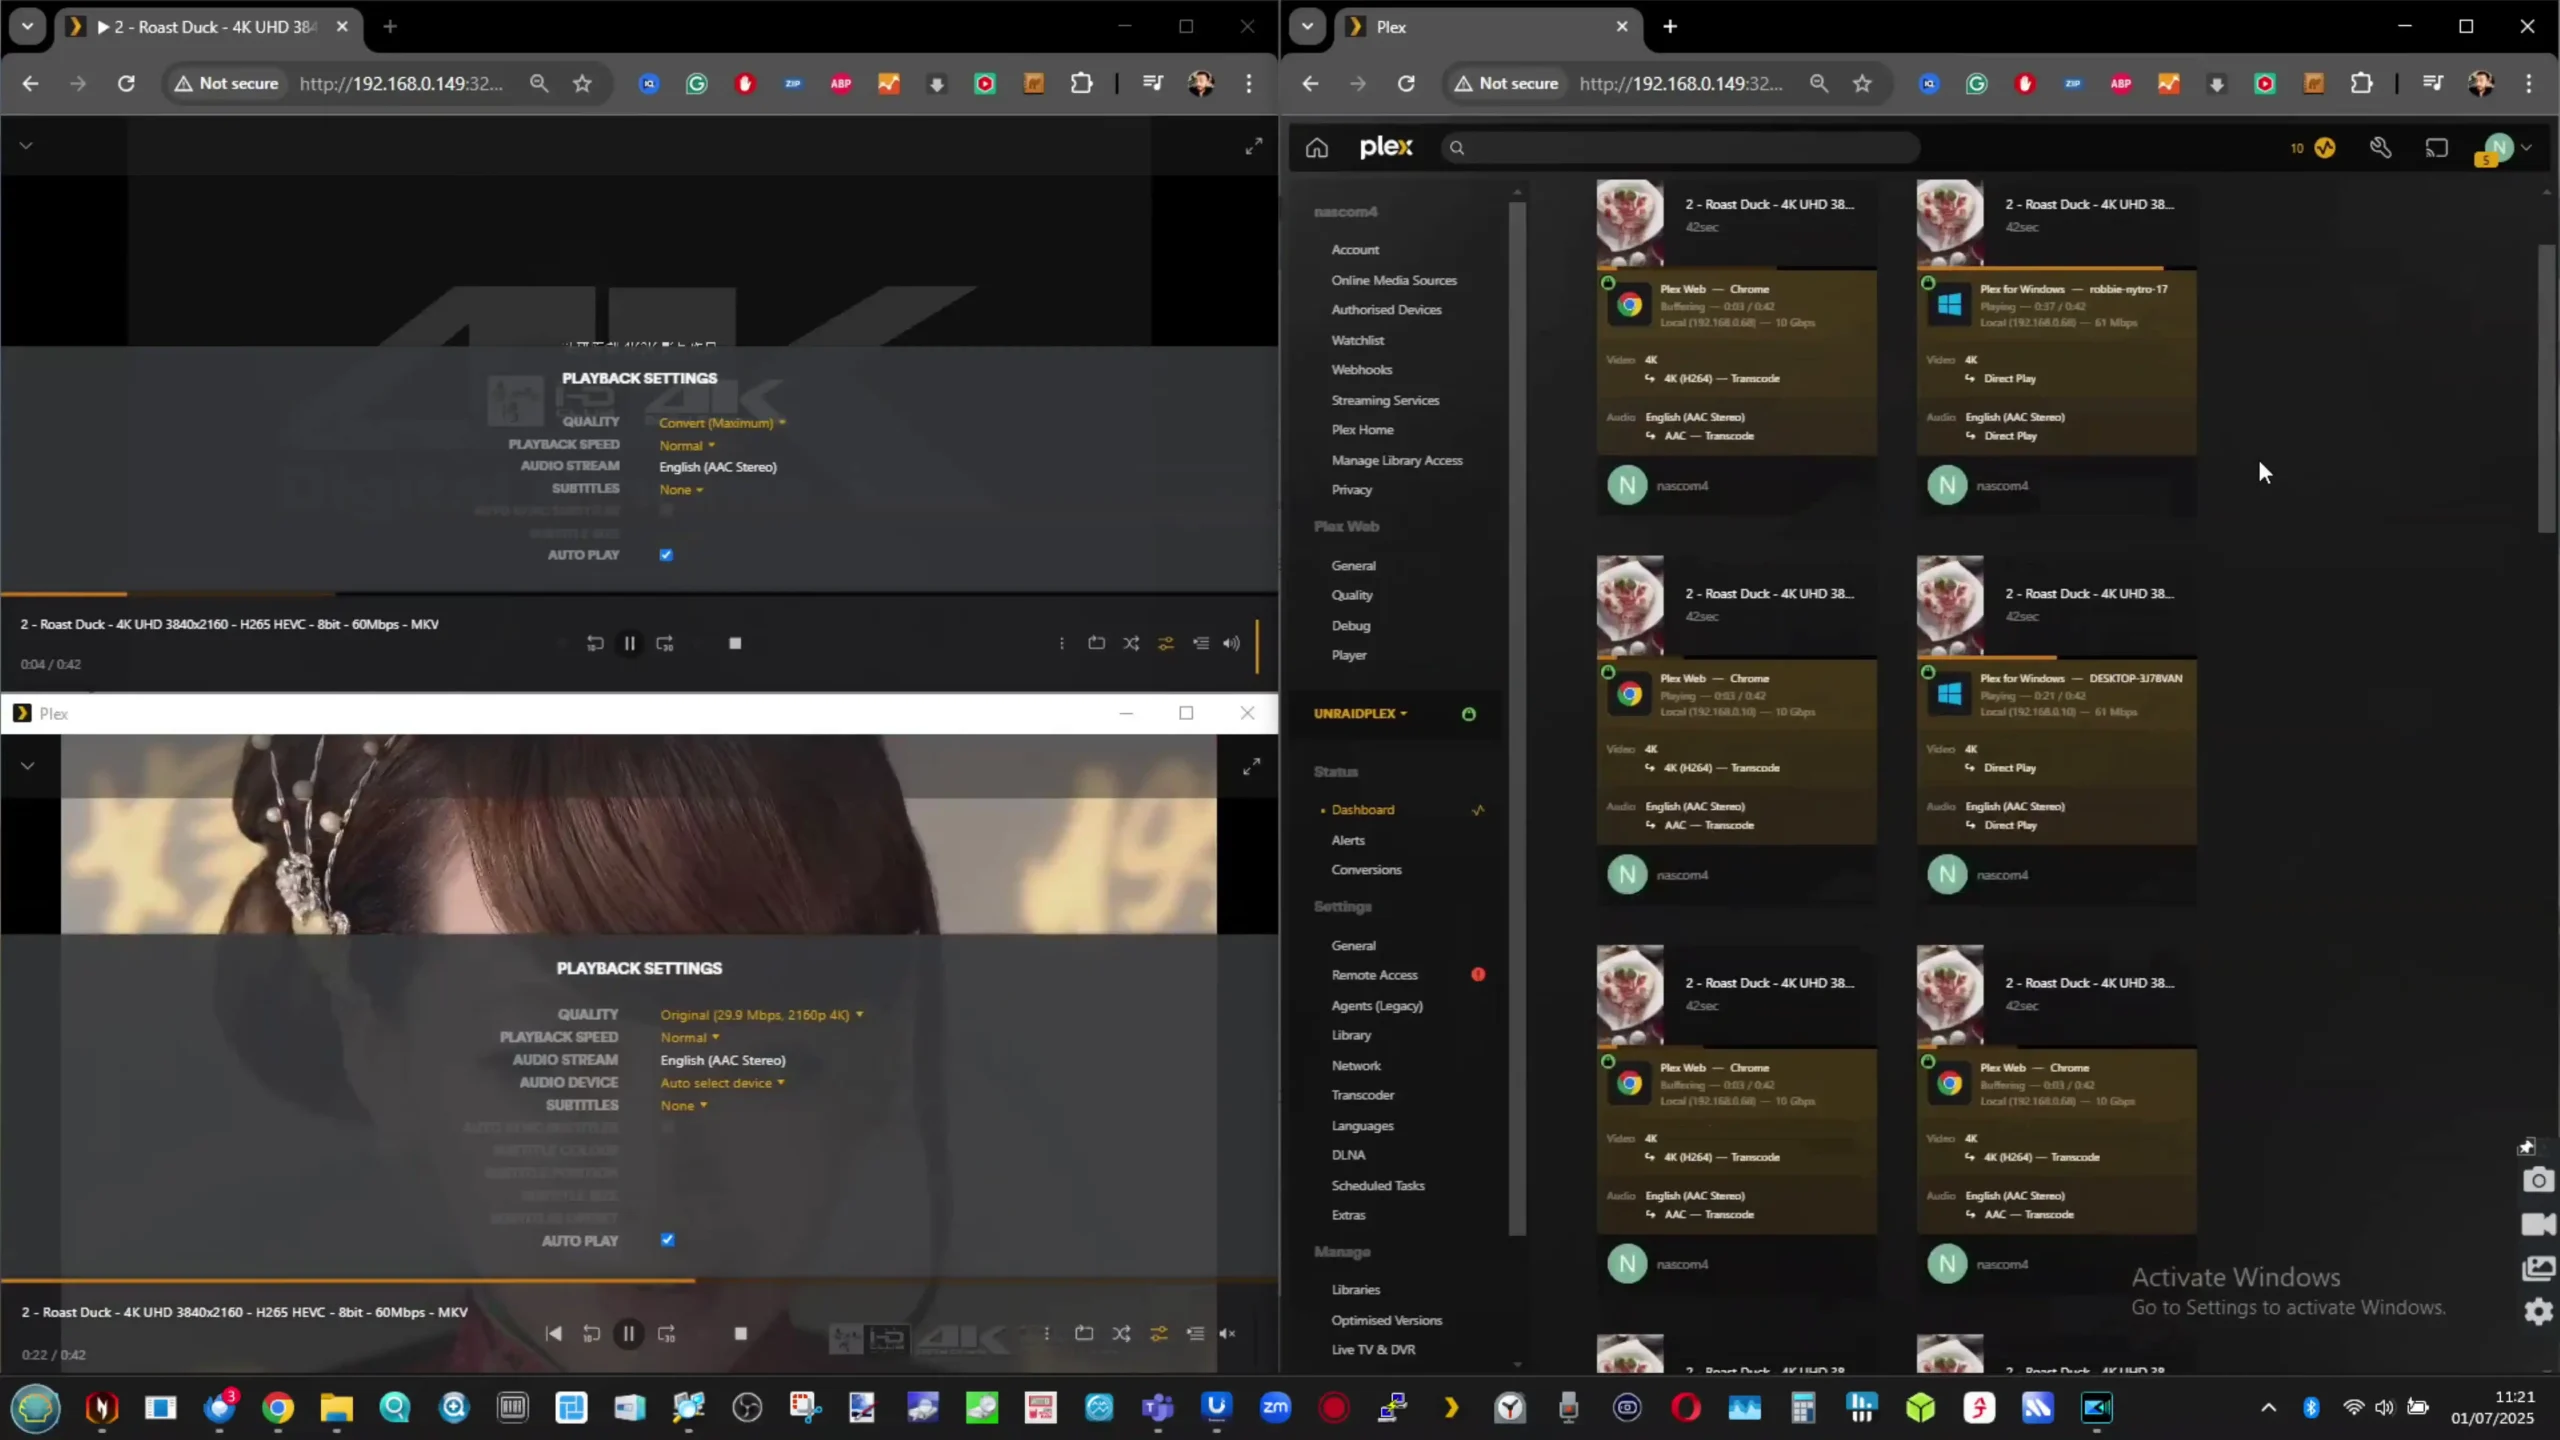
Storage performance also met expectations, though it varied depending on drive type and configuration. The five SATA bays, populated with Seagate IronWolf HDDs and SATA SSDs, delivered consistent throughput in RAID 5 and RAID 6 pools, with sequential read speeds averaging 900–1000 MB/s and writes around 800 MB/s under ZFS.
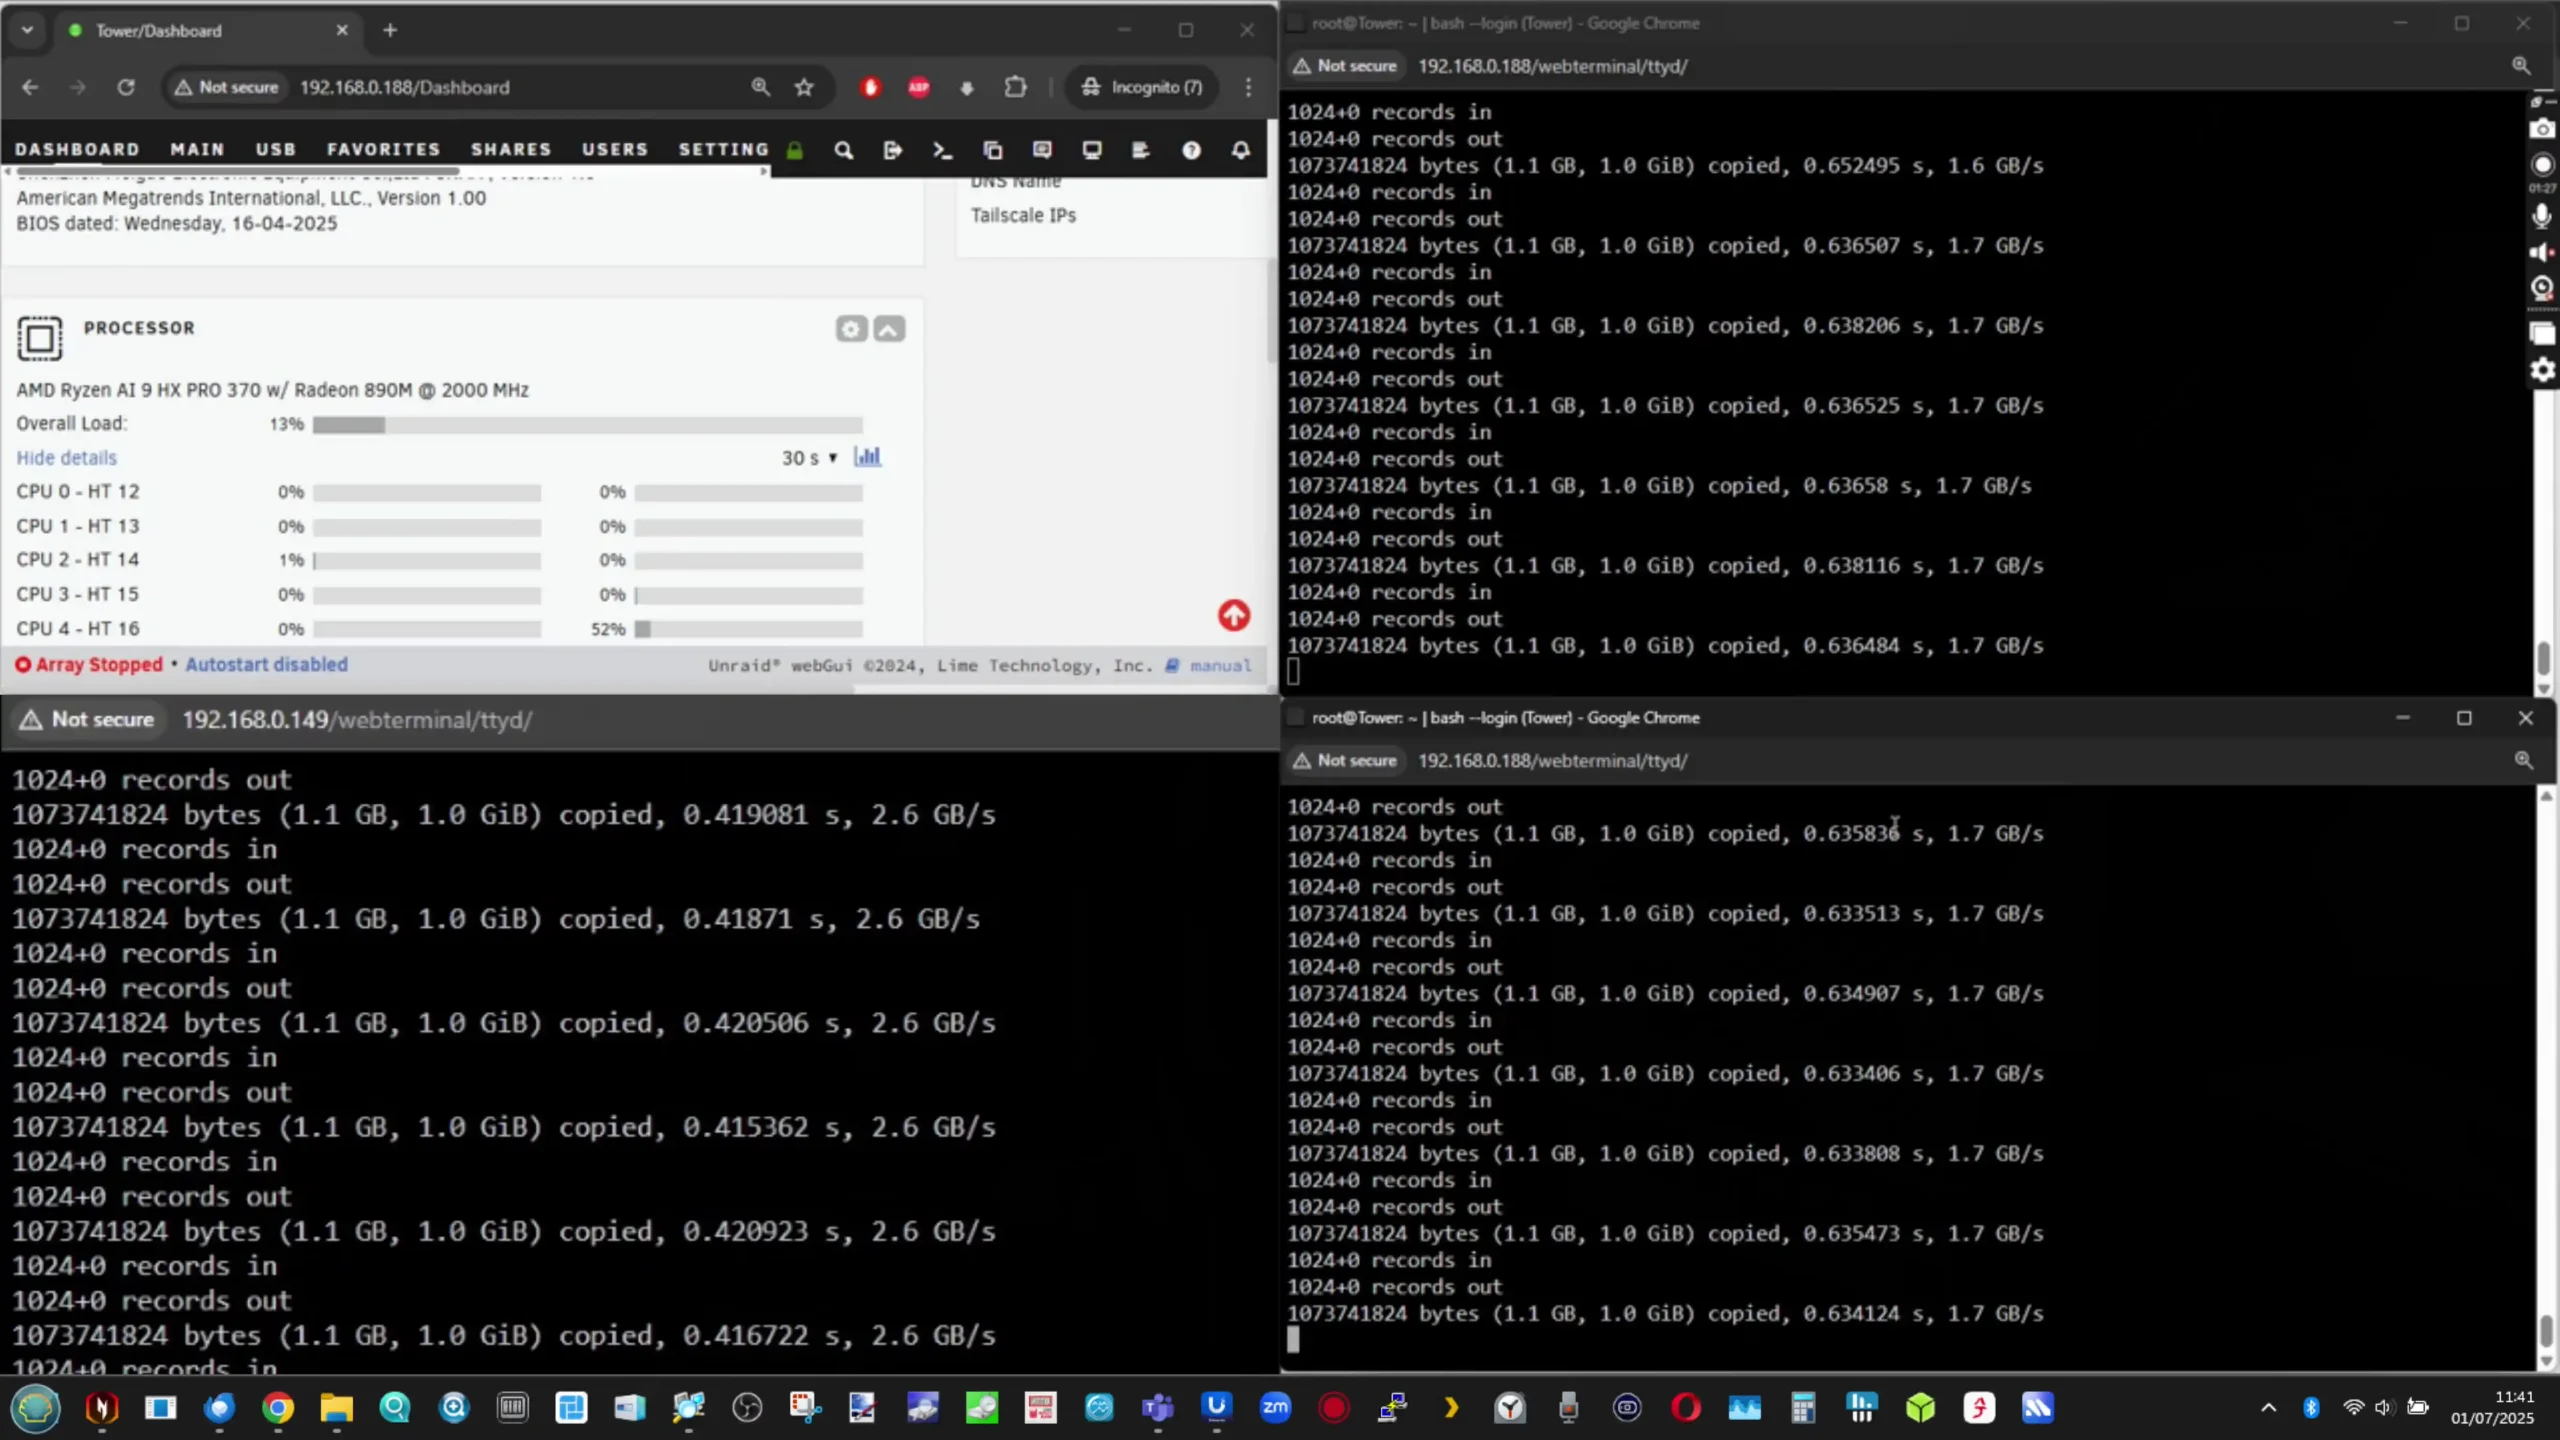
NVMe performance was significantly higher: the two Gen 4 ×1 M.2 slots achieved sustained reads of approximately 1.7 GB/s and writes of 1.6 GB/s, while the single Gen 4 ×2 M.2 slot reached peak reads of 3.3 GB/s and writes of 3.1 GB/s, approaching the theoretical limits of the interface.
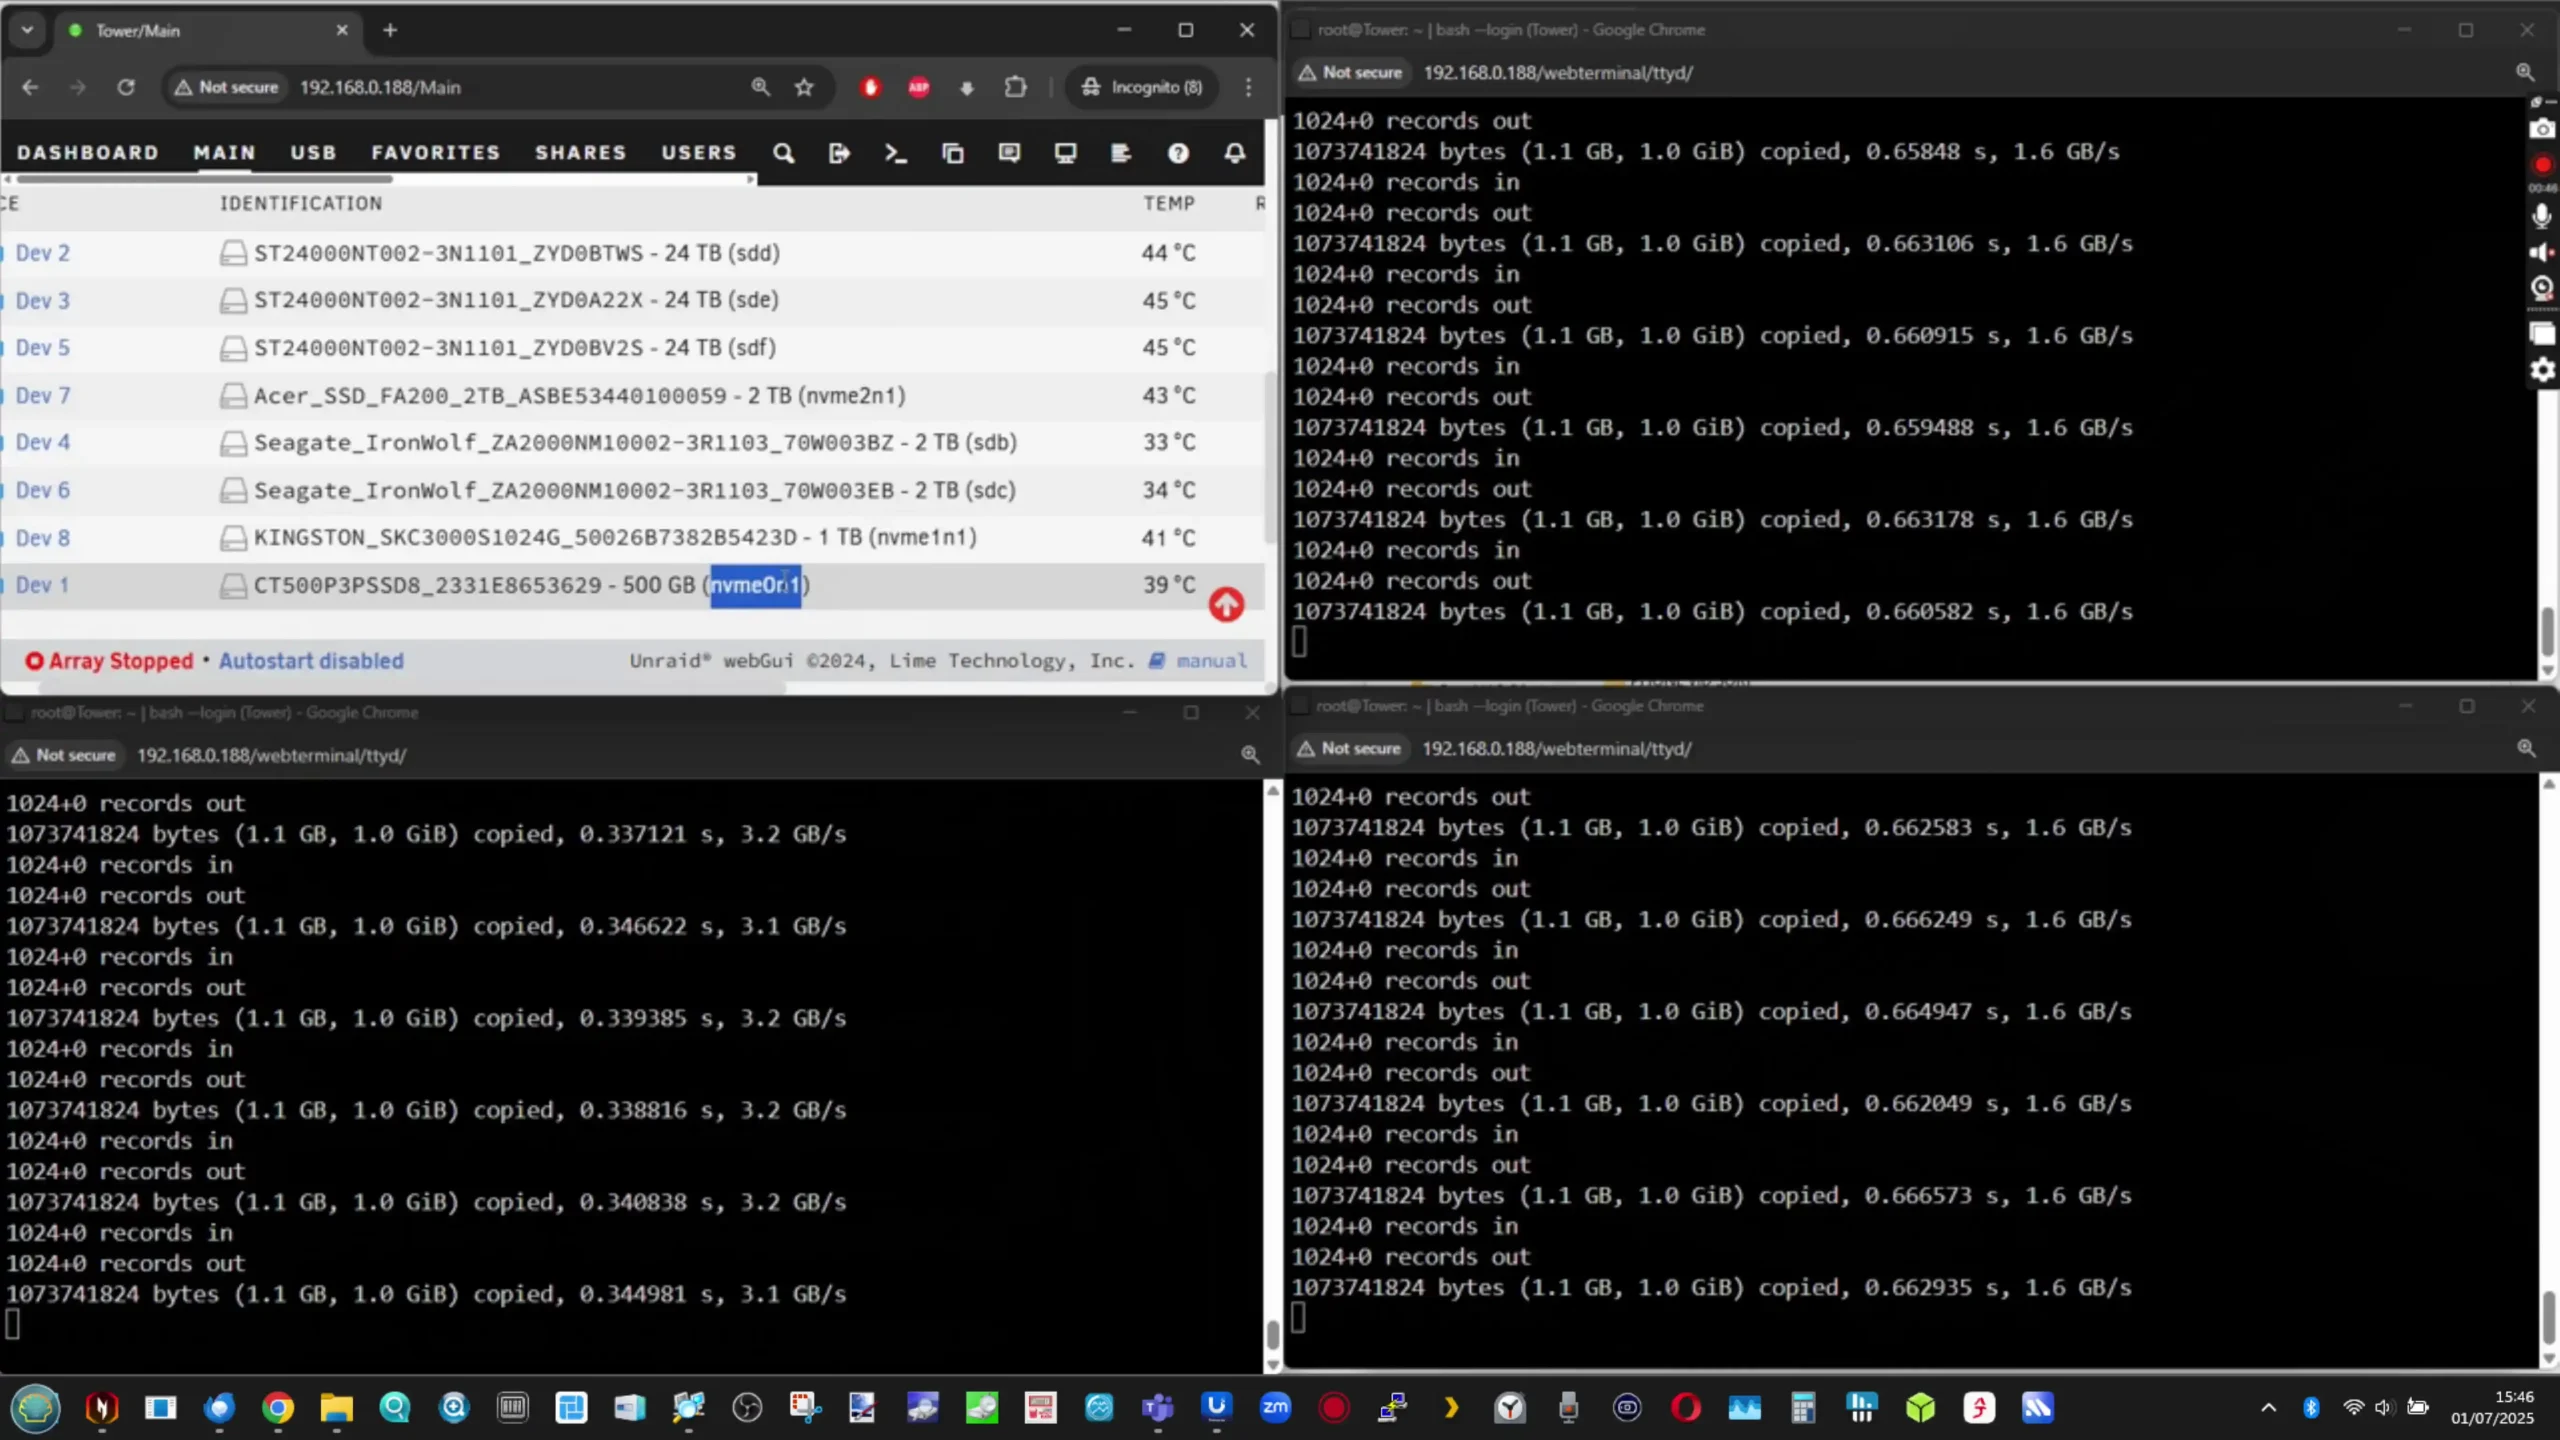
Transfer speeds between SSDs in mixed-slot configurations were observed at 1.2–1.3 GB/s, indicating some internal contention or chipset limitation at the aggregate level.
![]()
The U.2 adapter included with the unit allowed testing of enterprise-class SSDs, which performed within expected parameters, though thermals for these drives require attention in prolonged heavy write scenarios.
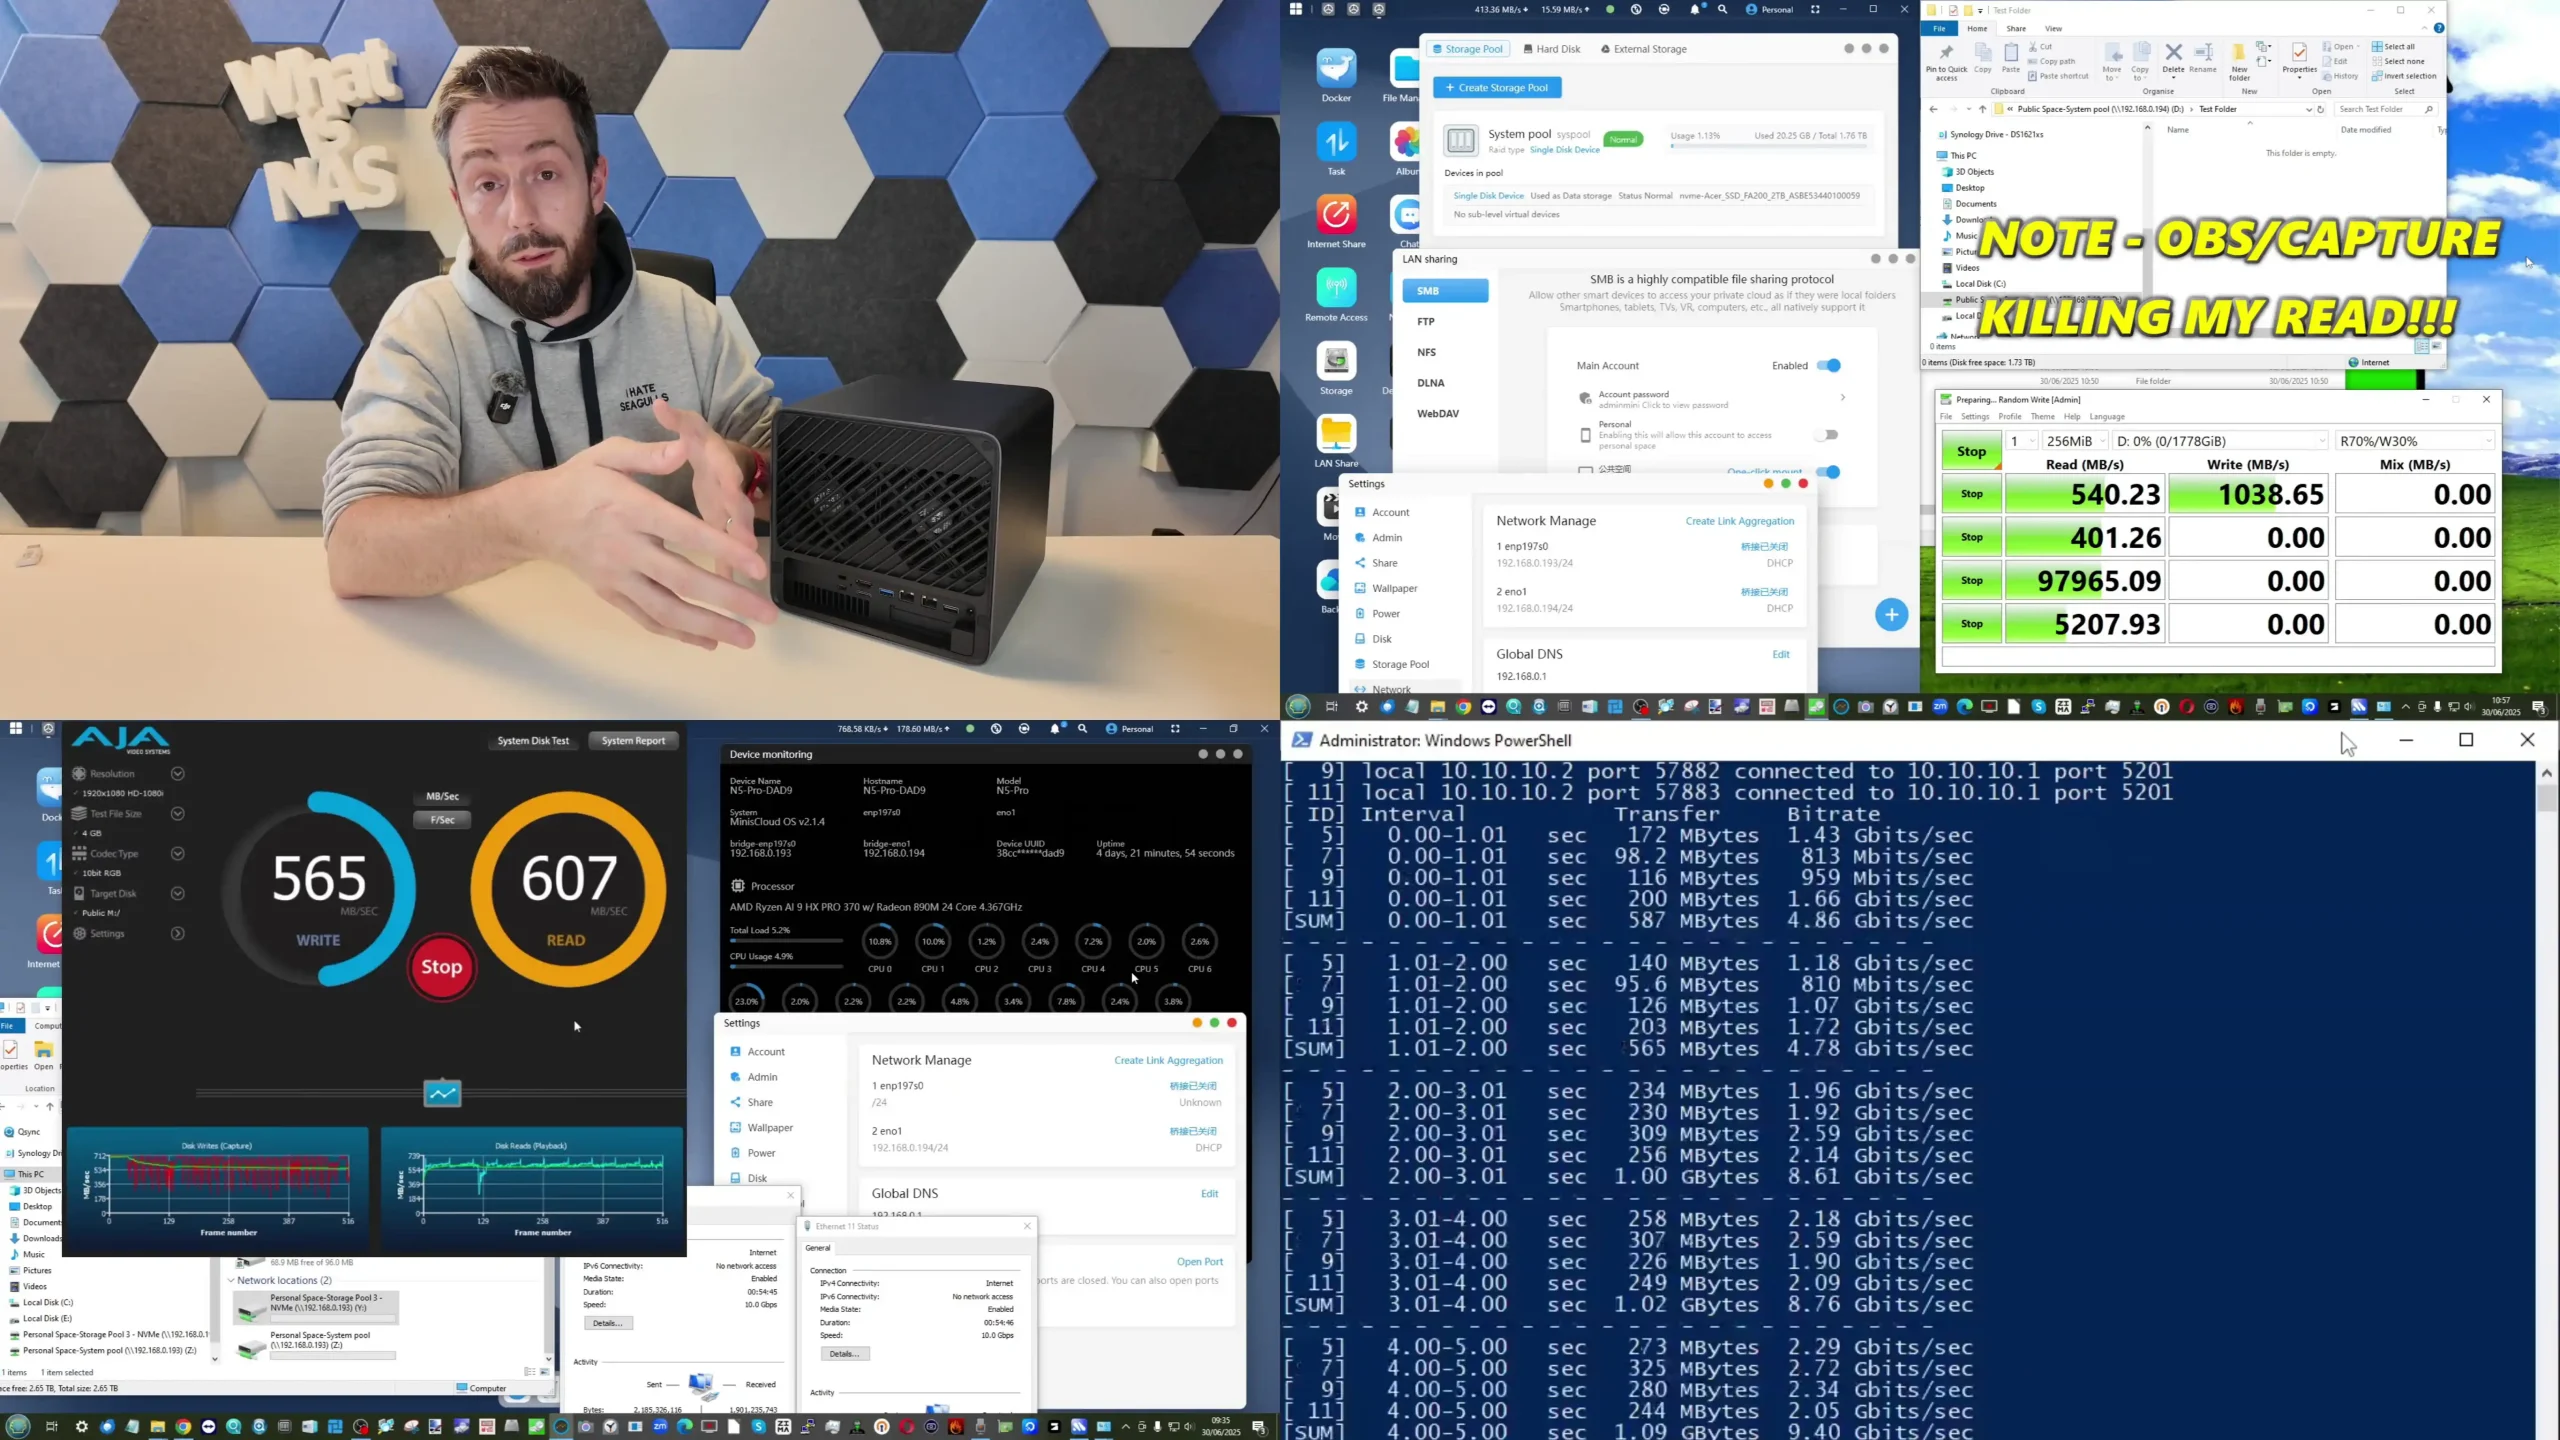
Network performance aligned with the hardware’s 10GbE and 5GbE capabilities. The AQC113-based 10GbE NIC saturated its link easily during single and multi-stream transfers, maintaining over 900 MB/s sustained throughput in SMB and iSCSI workloads. The secondary 5GbE port also performed well, delivering consistent ~480 MB/s transfers in environments where full 10GbE infrastructure was unavailable. Link aggregation configurations were tested using LACP, though practical benefits were limited due to single-client testing constraints. USB4 and OCuLink connections were tested using external NVMe enclosures and a GPU eGPU box, both of which enumerated properly in the OS and achieved PCIe-level throughput. These features open possibilities for specialized use cases, such as GPU passthrough to VMs or offloading compute-intensive tasks to external accelerators.
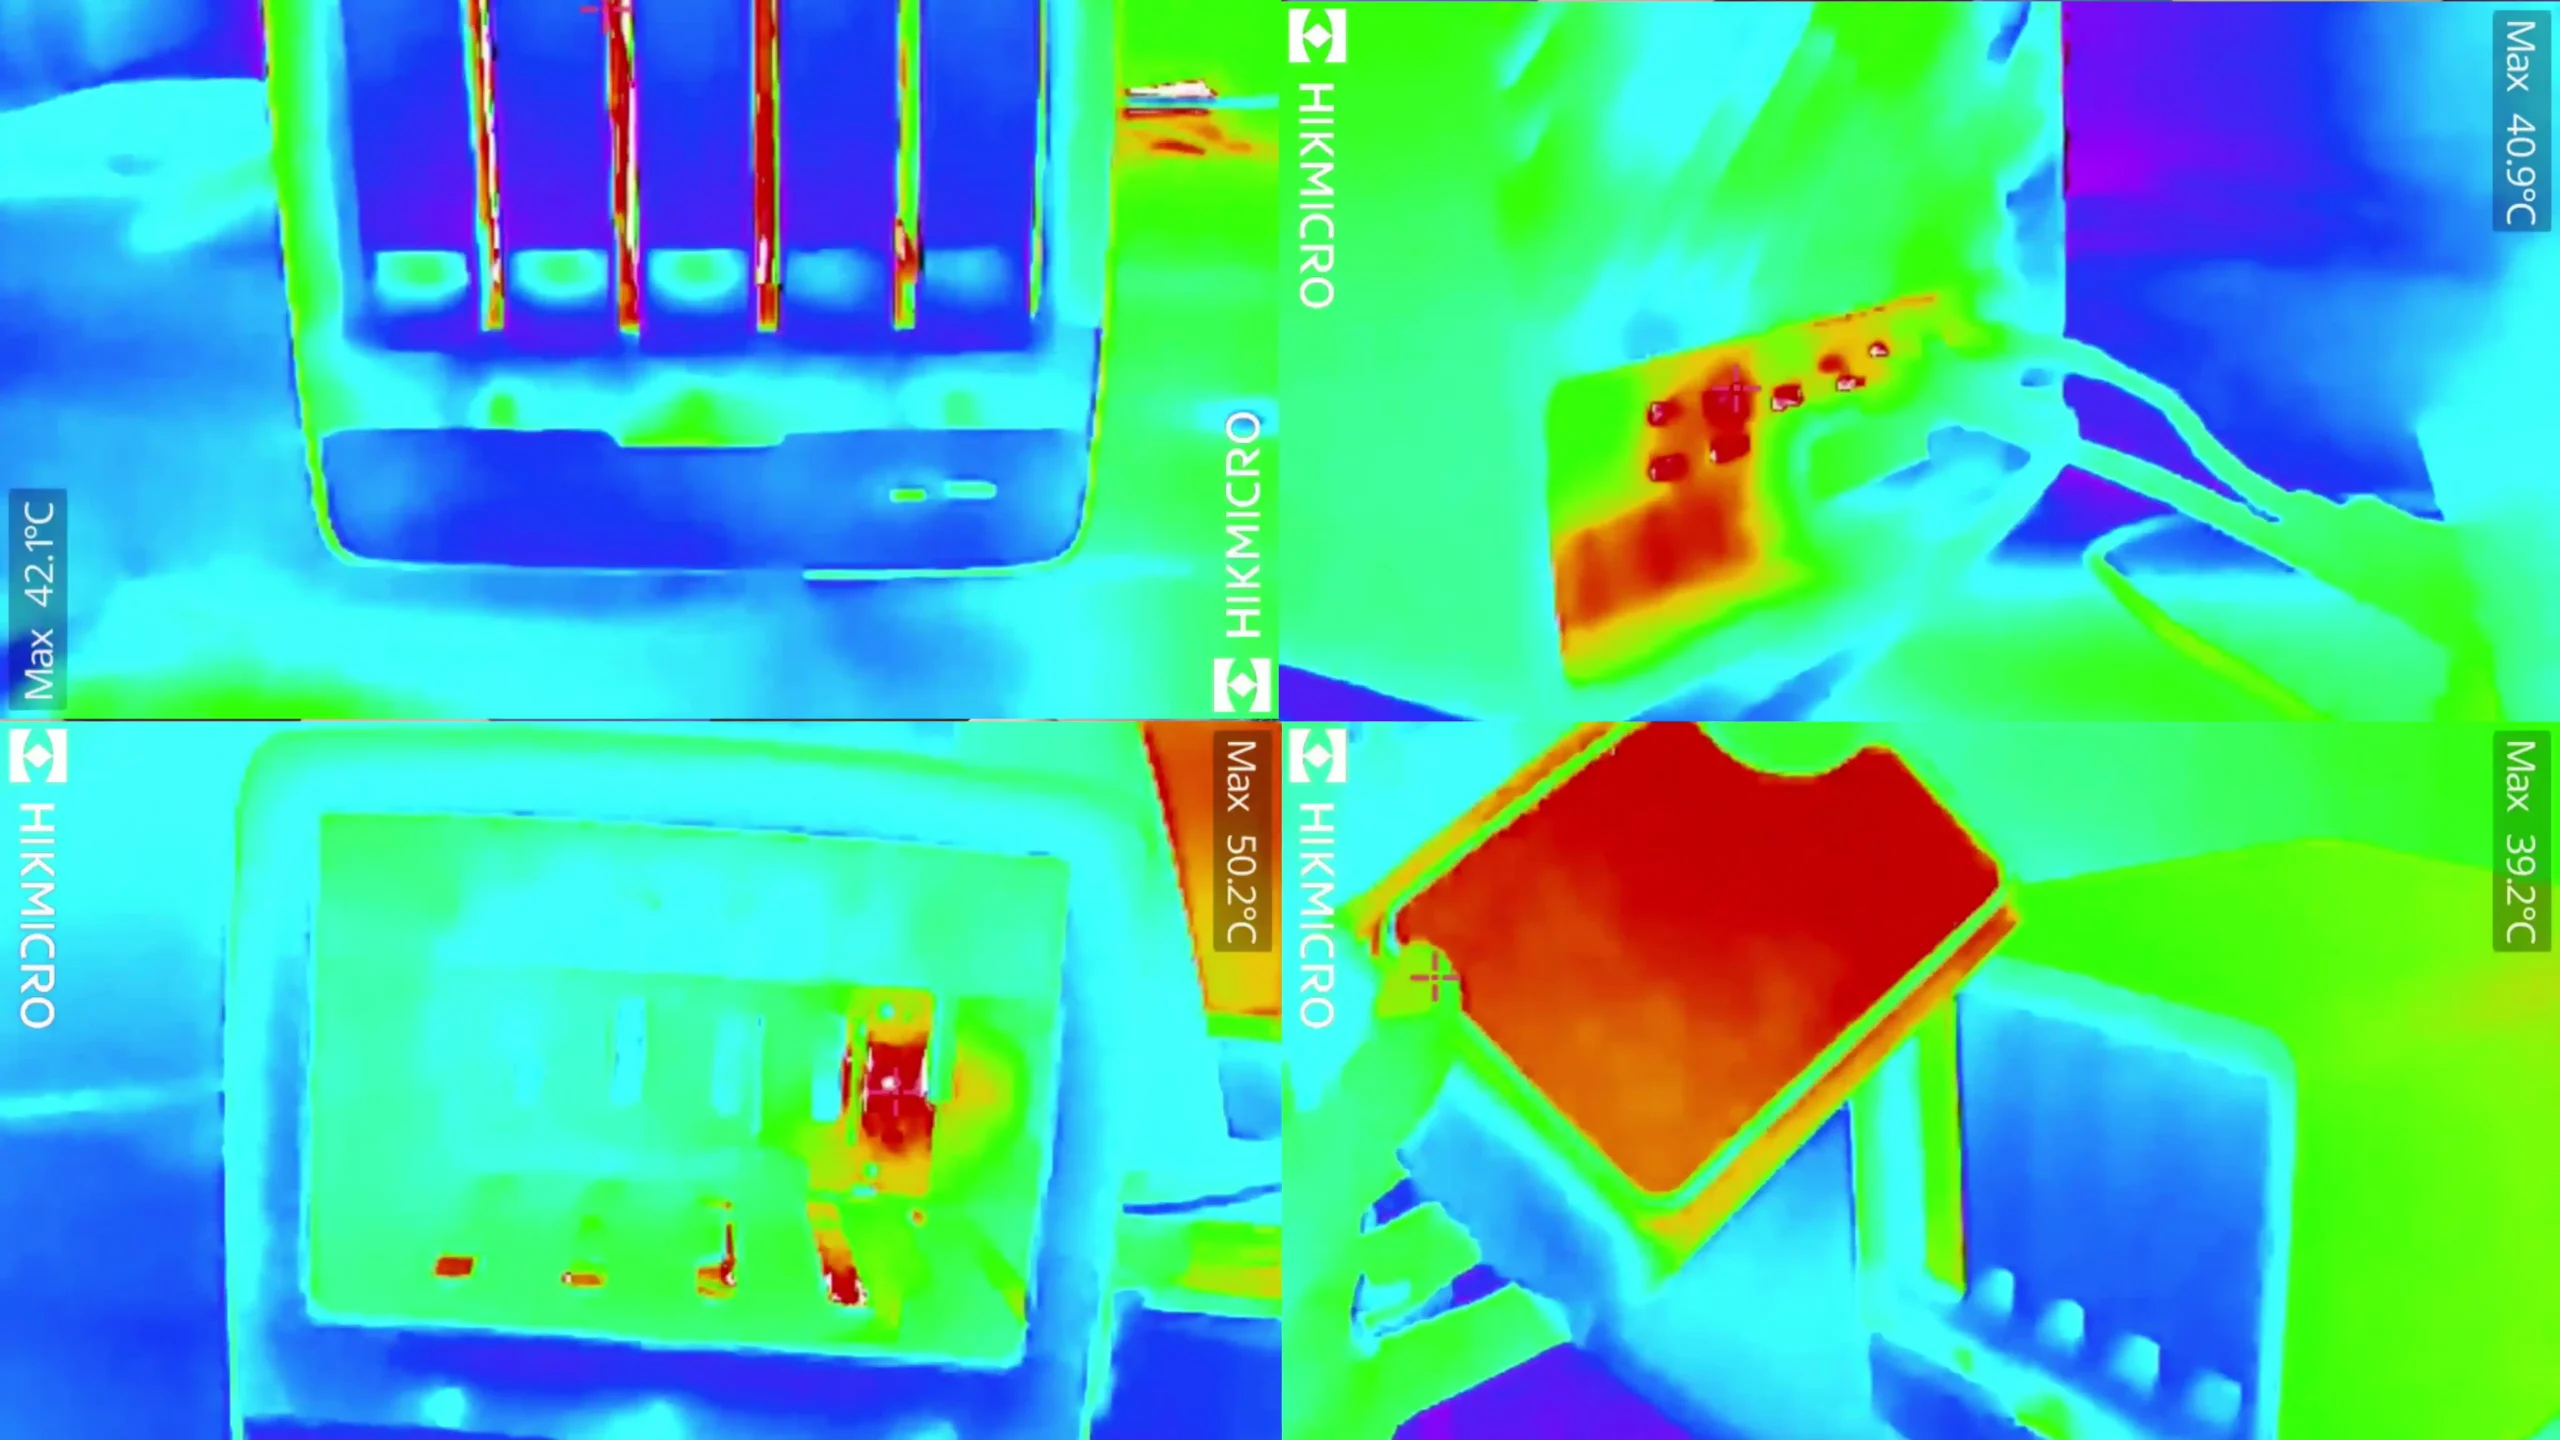
Thermal and acoustic performance were also evaluated under a variety of workloads. At idle, the N5 Pro maintained a noise floor of approximately 32–34 dBA with fans set to automatic, rising to 48–51 dBA when forced to maximum. This places it within an acceptable range for small office or homelab deployments. CPU temperatures stayed within safe operating limits, averaging 40–42°C at idle and peaking at 78–80°C under full load during VM and Plex transcoding stress tests.
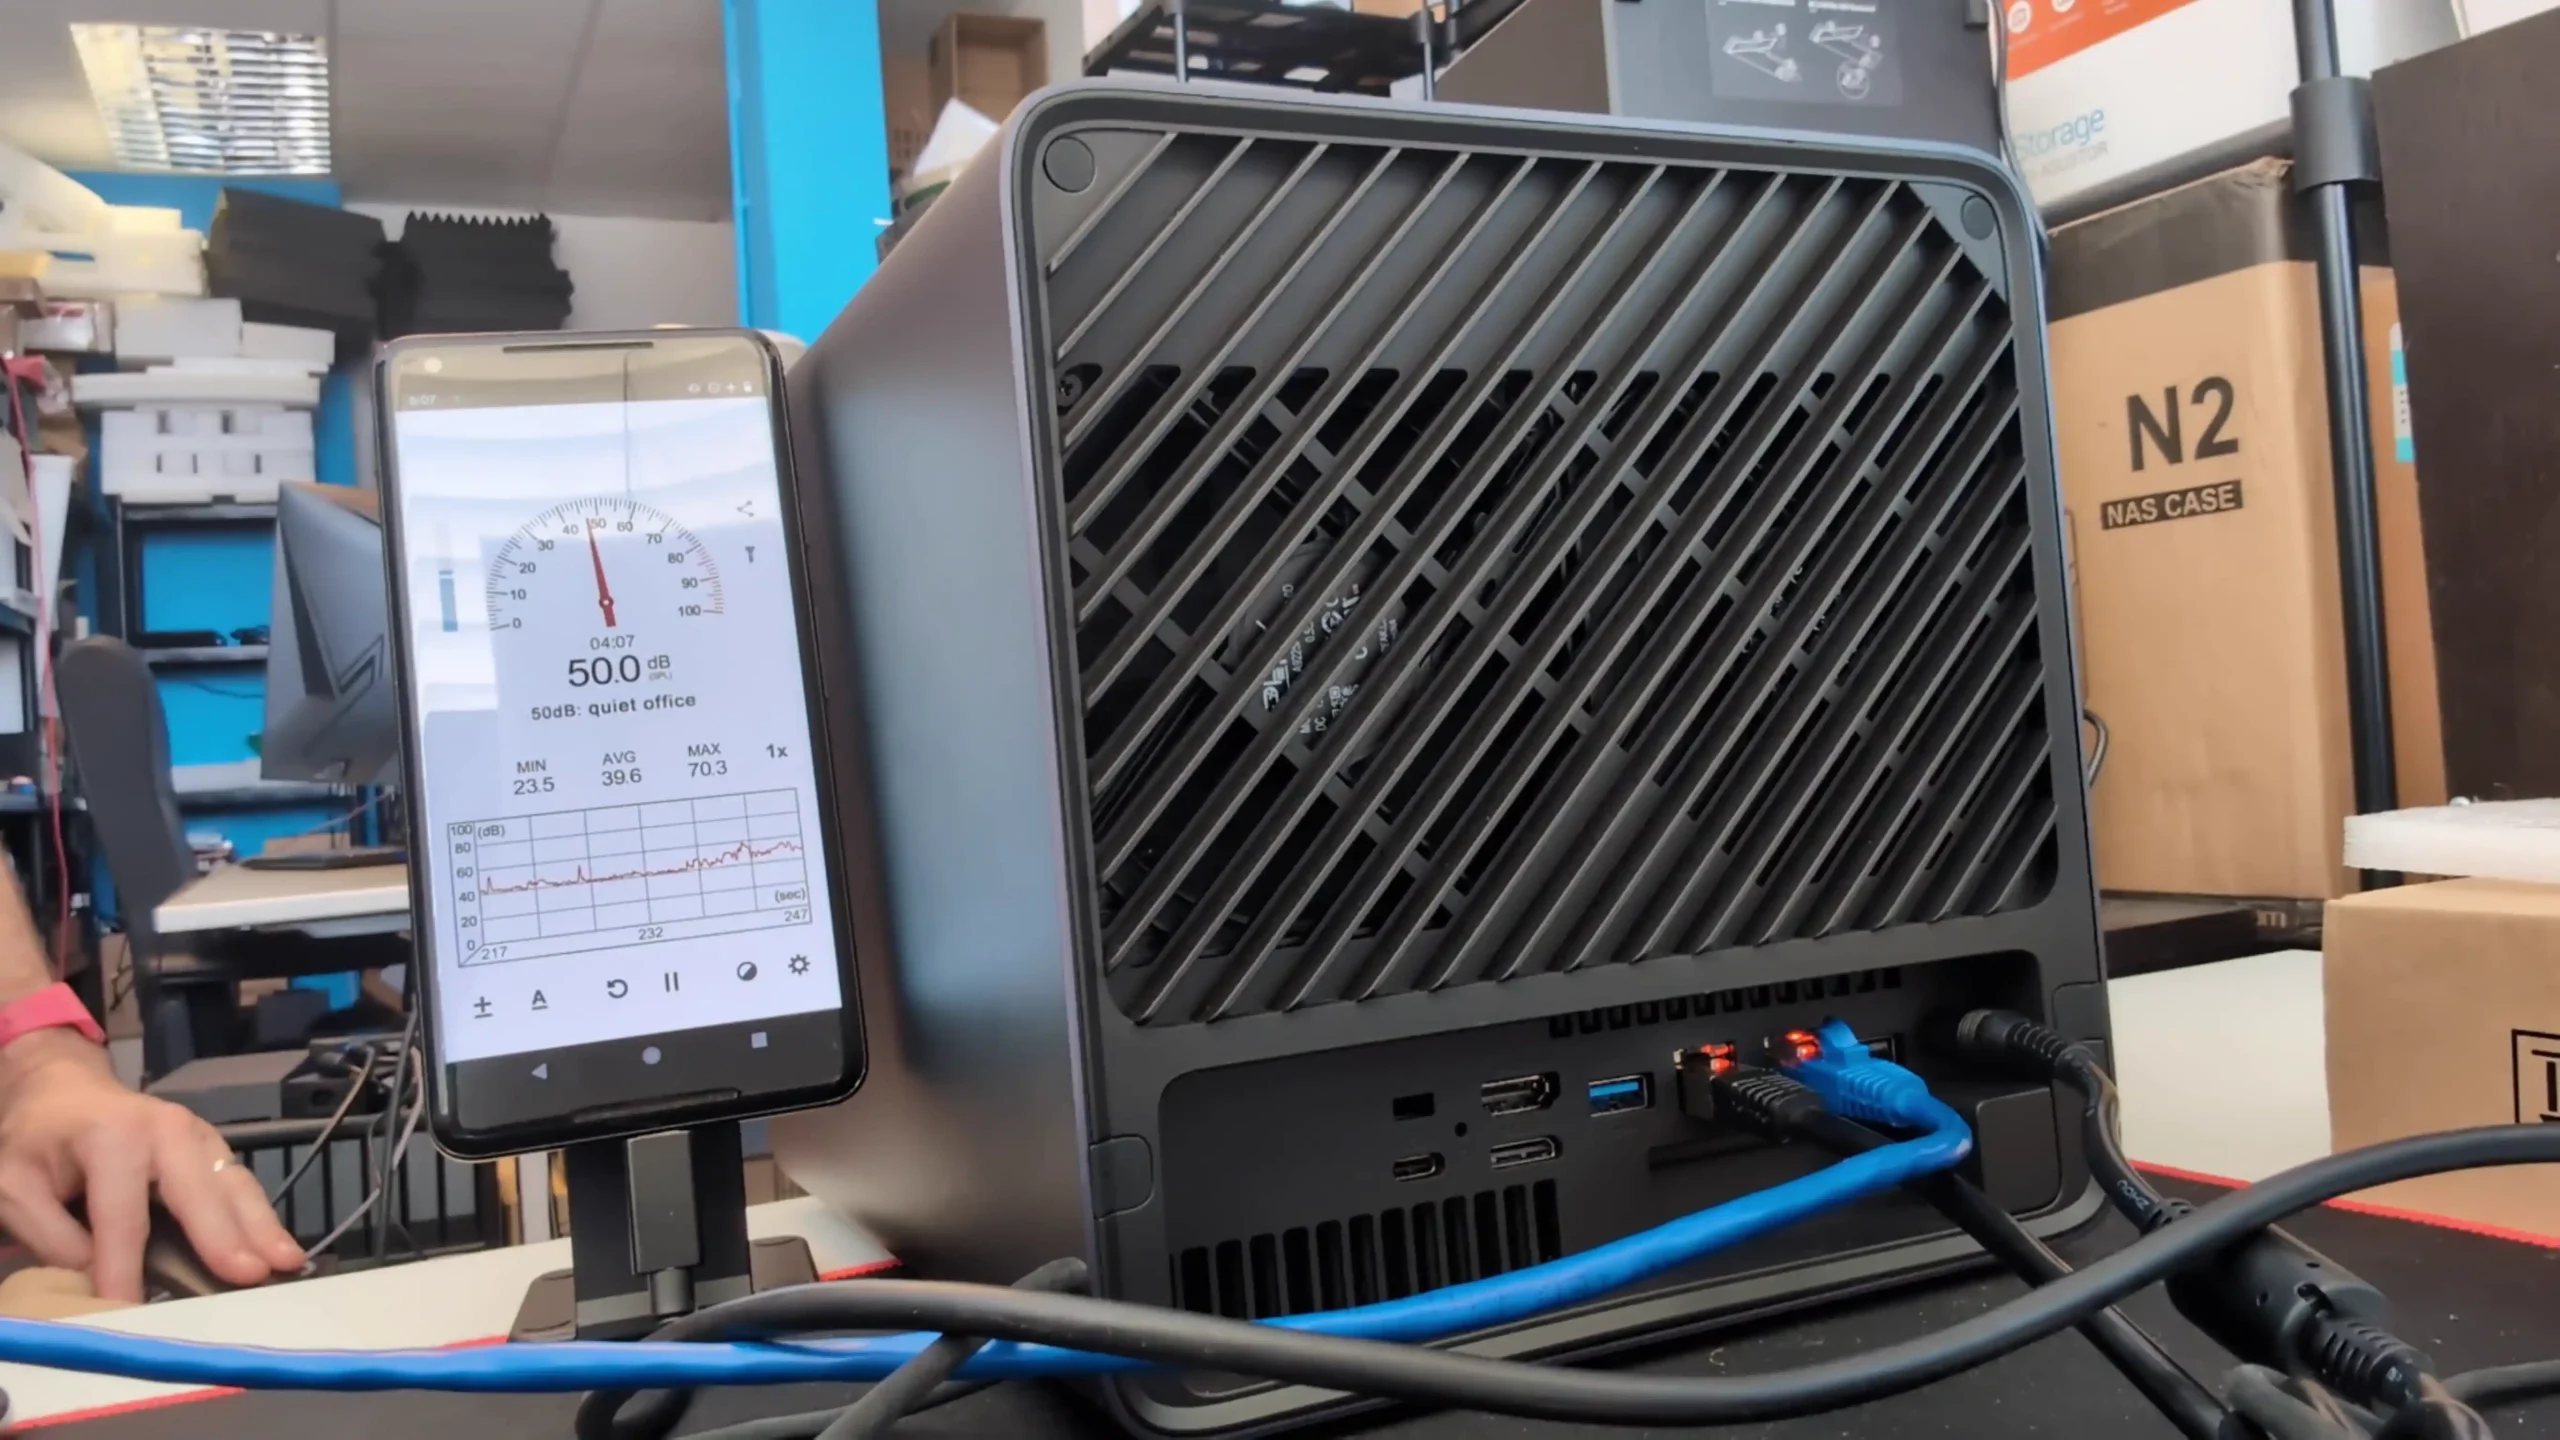
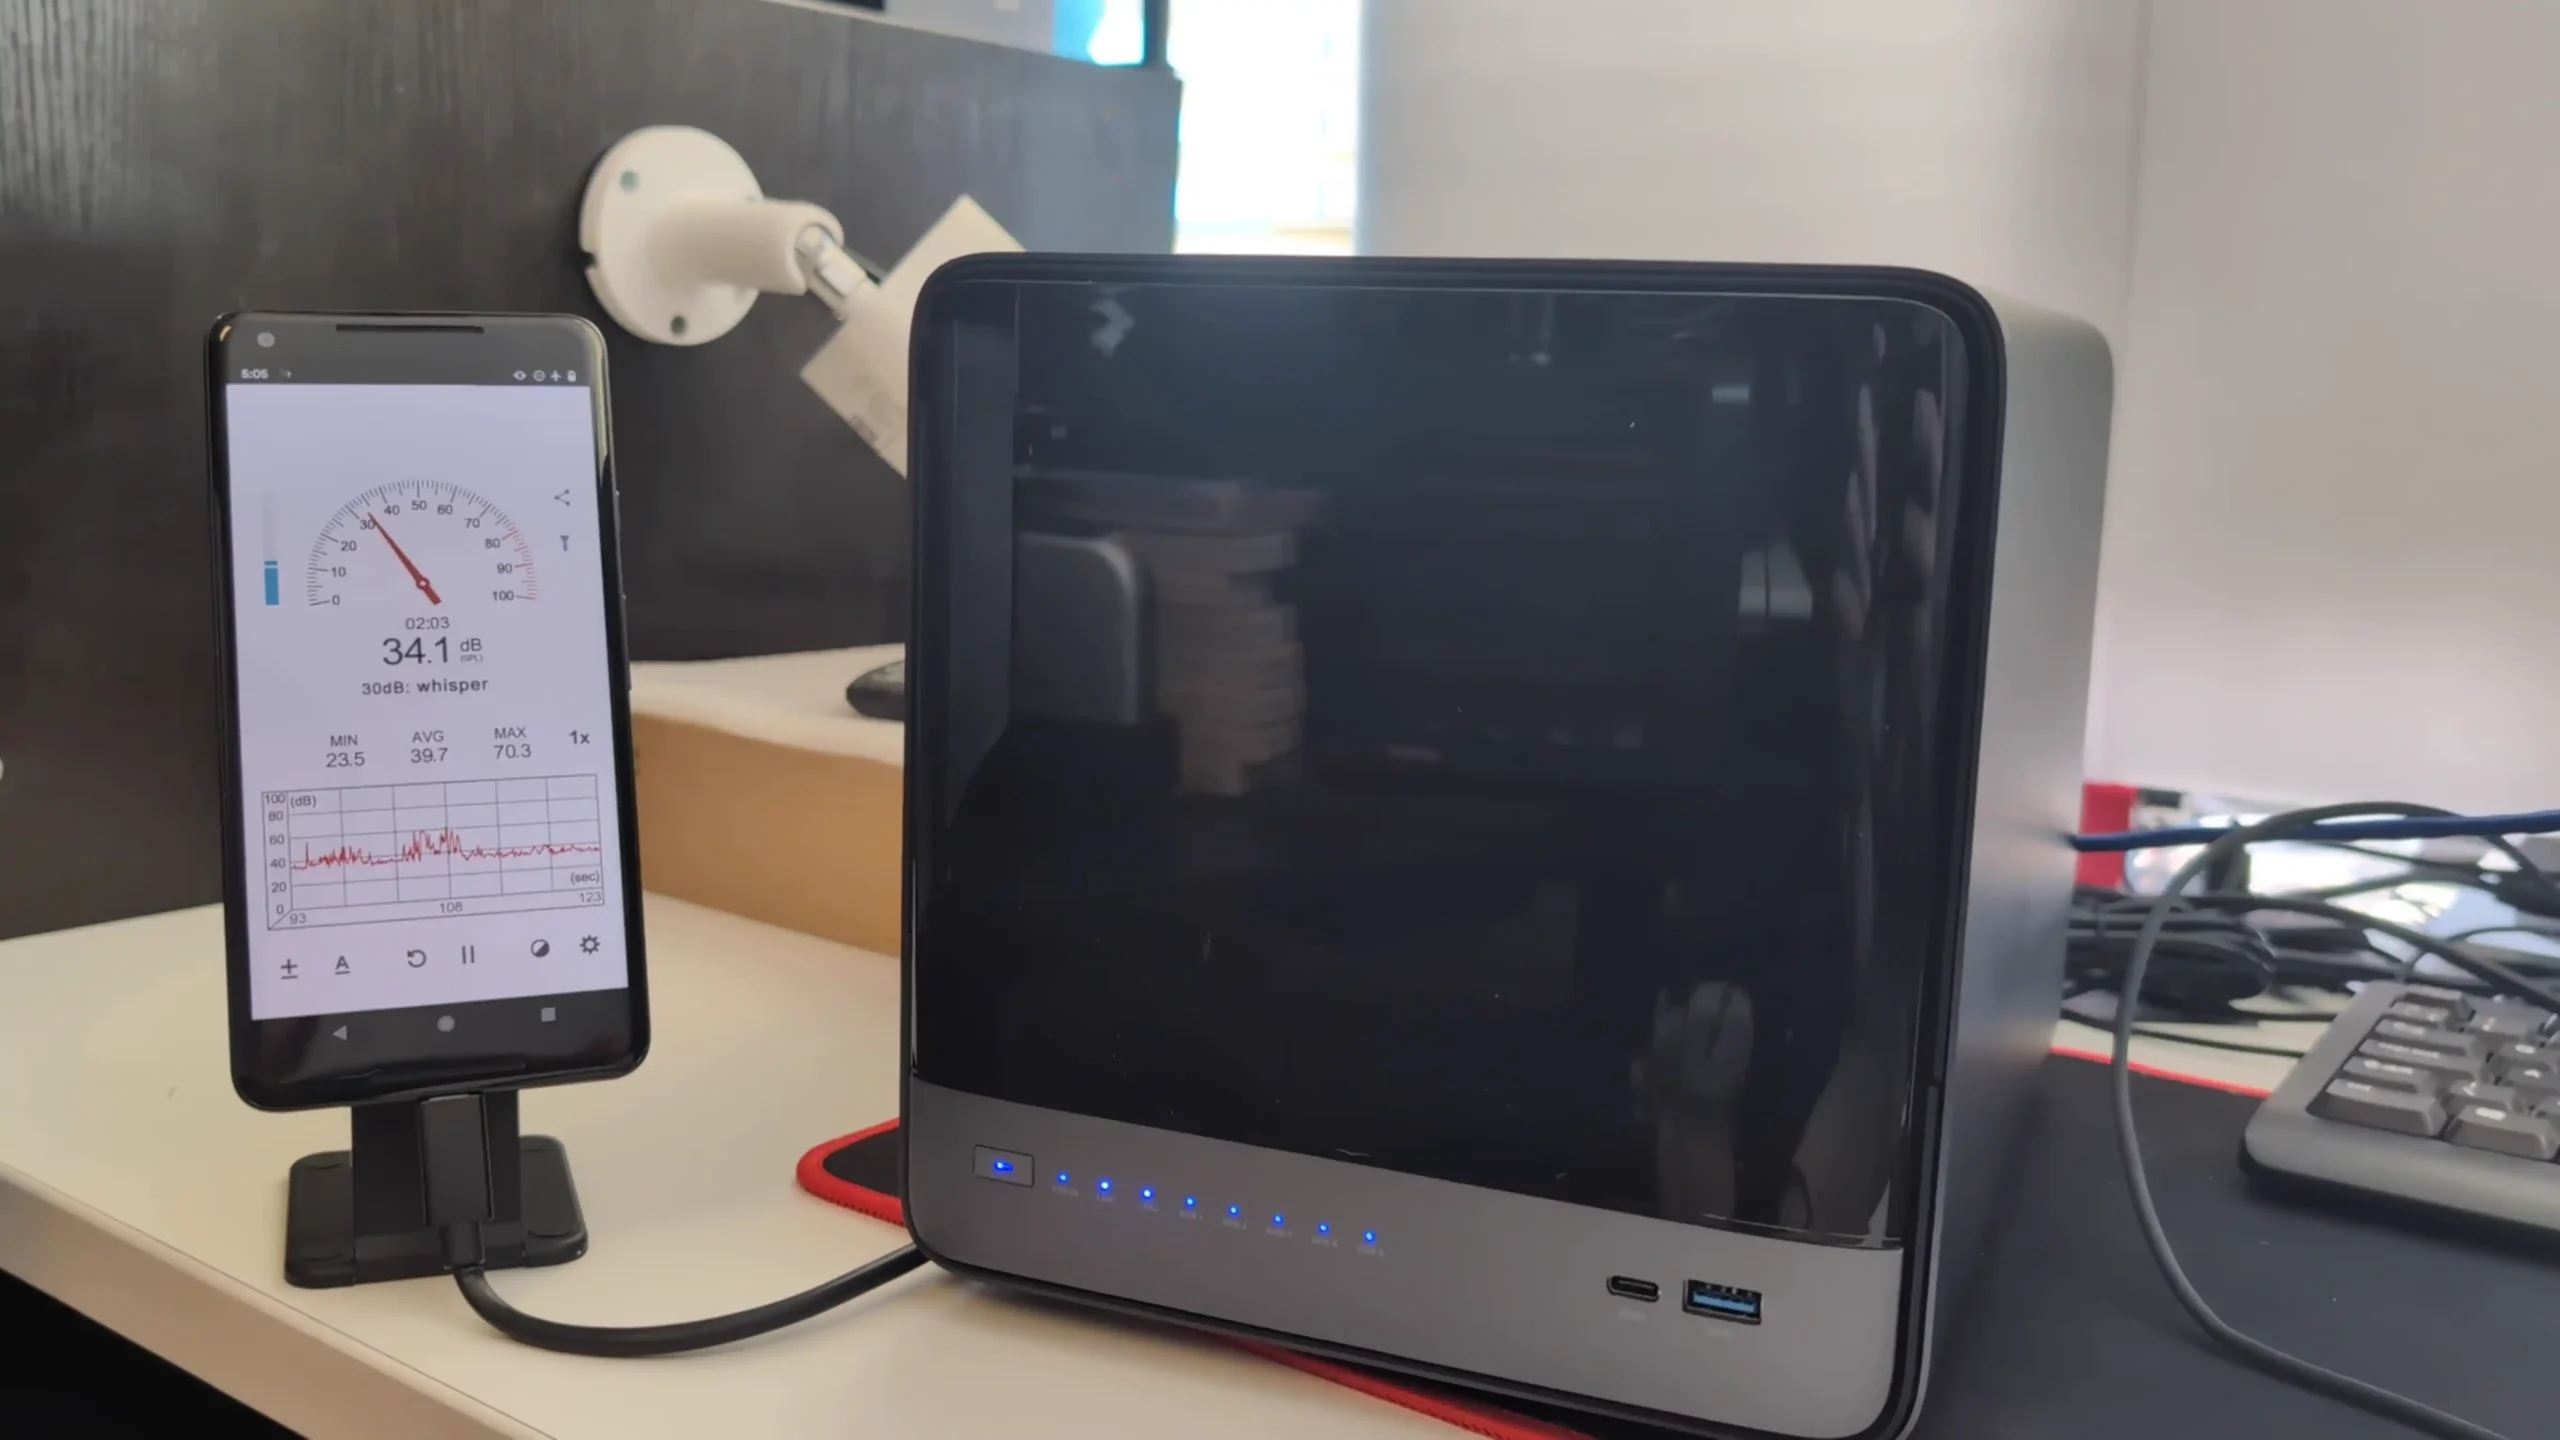
Drive temperatures were generally stable, although the pre-installed 64GB OS SSD exhibited higher than ideal temperatures, reaching 60°C under prolonged access. Power draw varied significantly with workload: idle power consumption was around 32–34W, increasing to roughly 80W under combined heavy CPU, storage, and 10GbE load. These results confirm that the system is both efficient at idle and capable of scaling up when fully utilized.
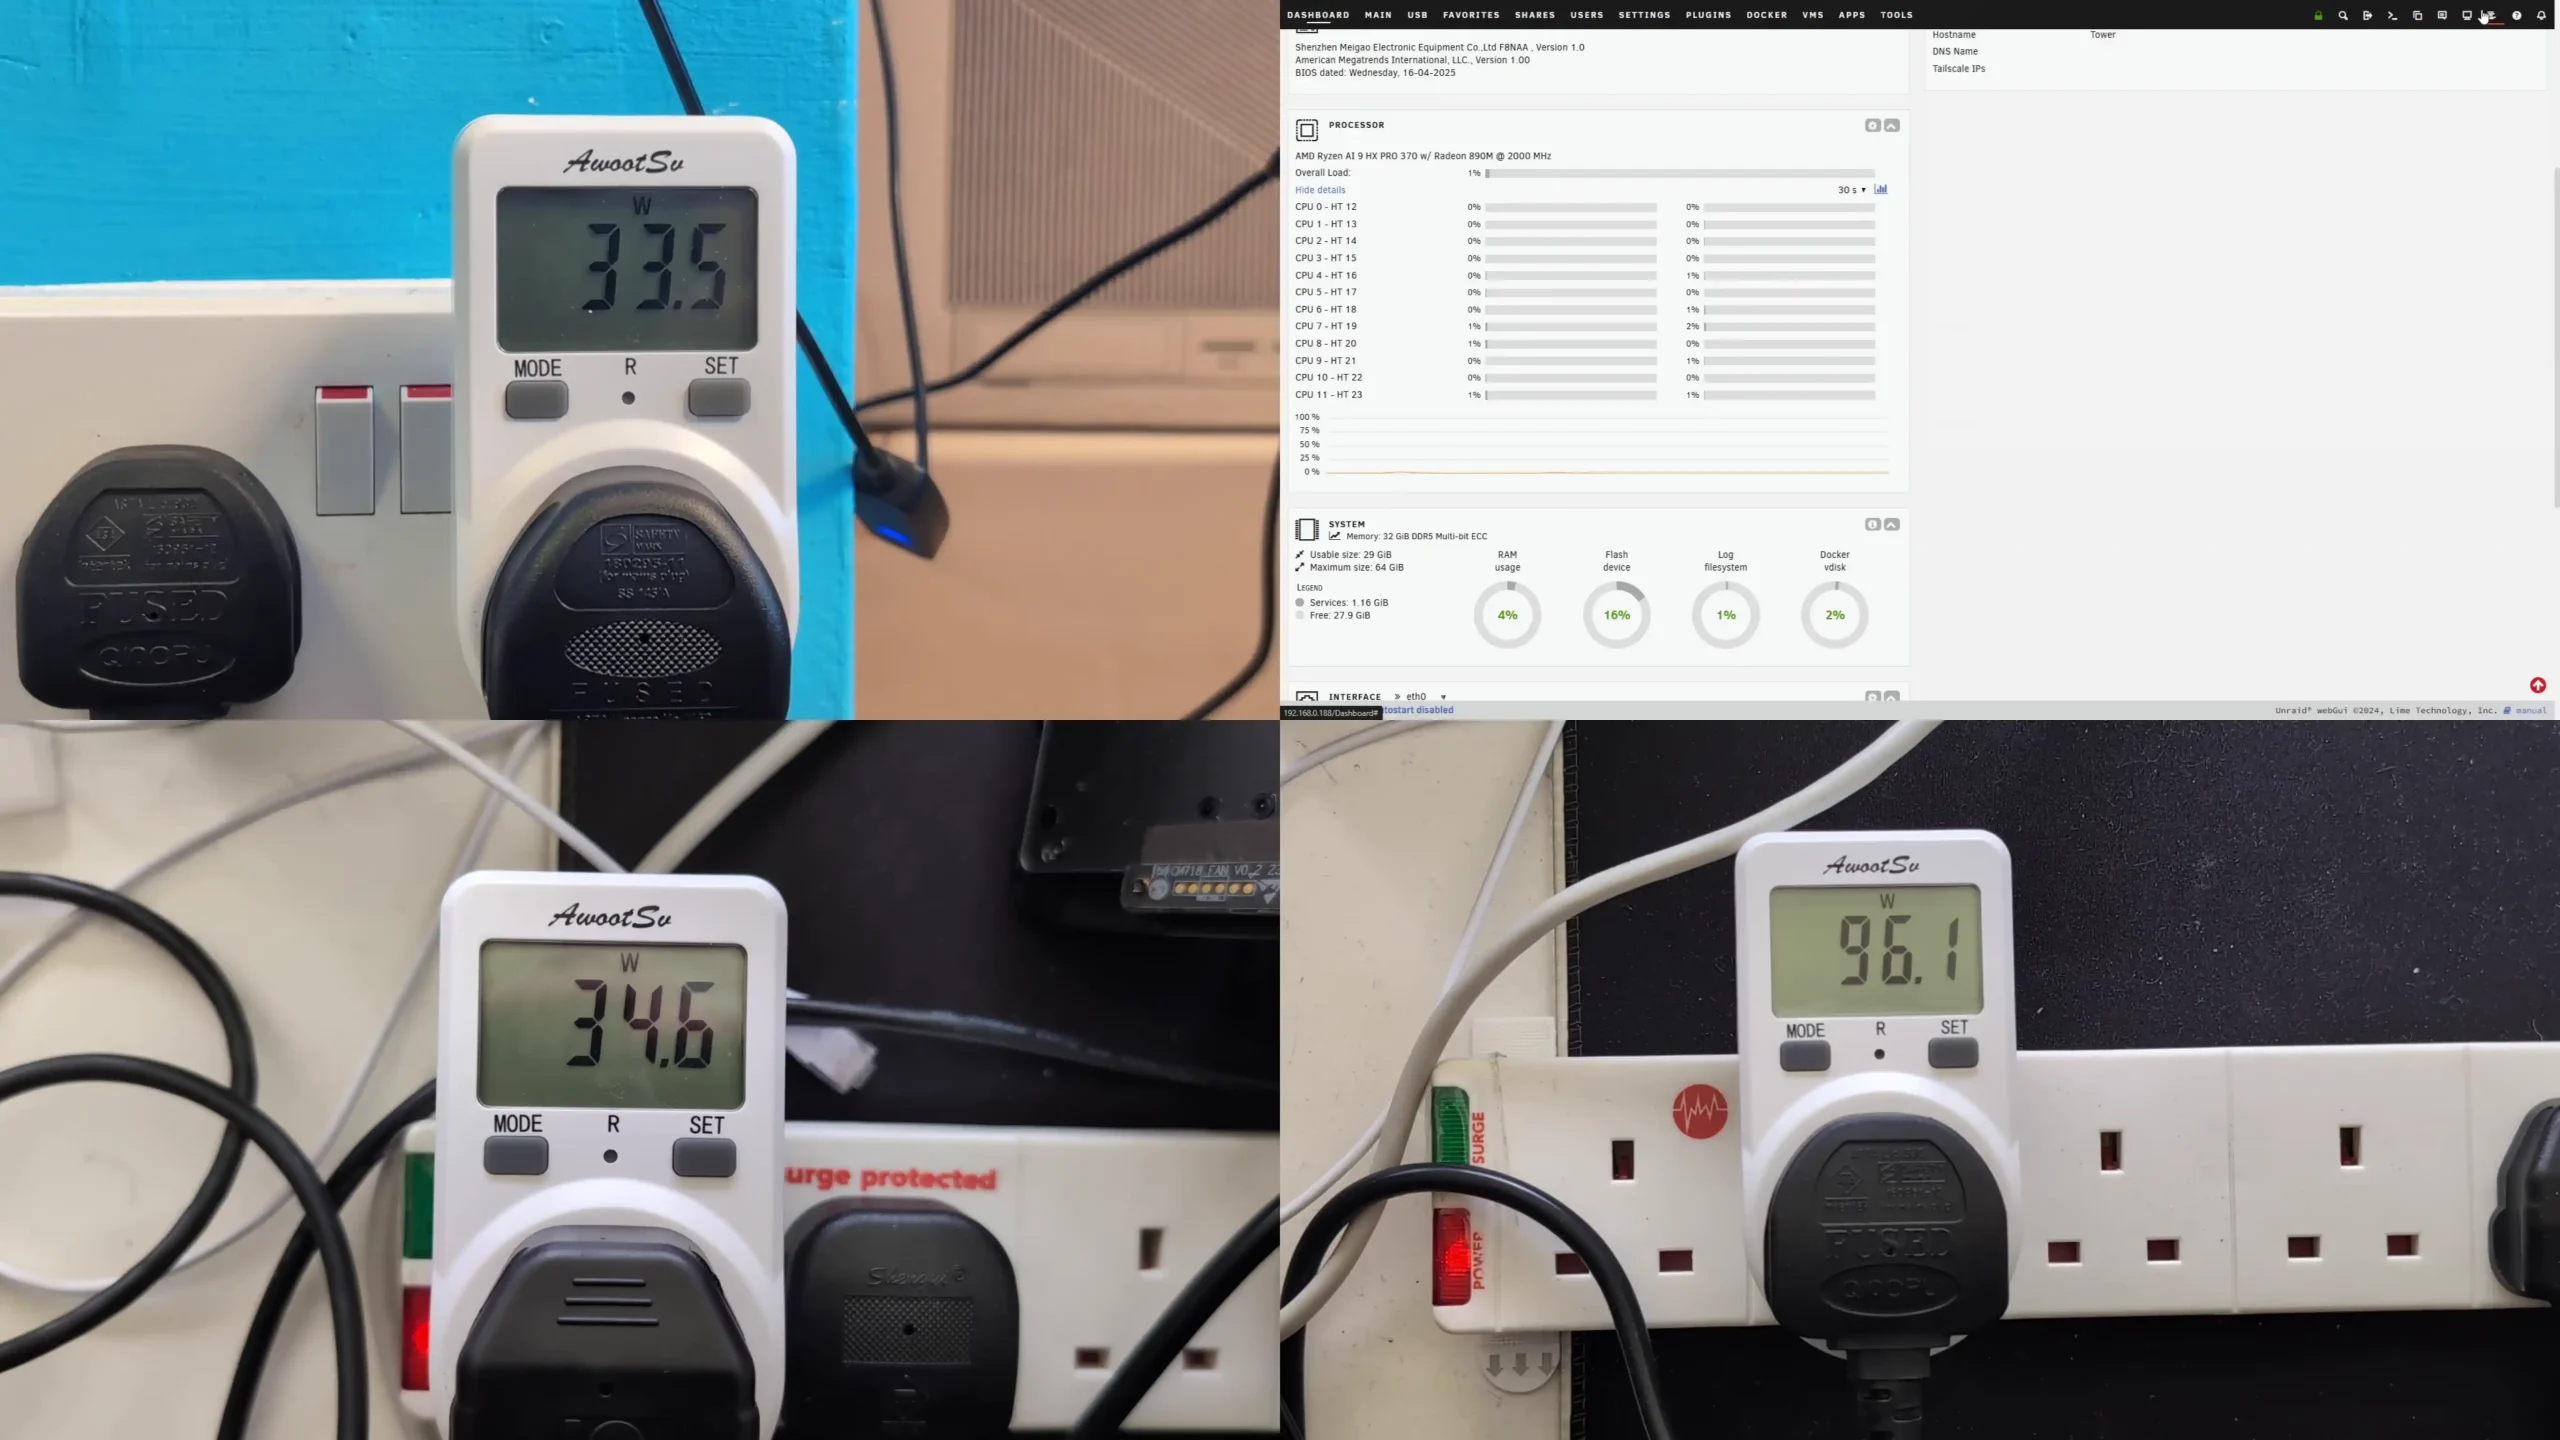
| Test Area | Results (N5 Pro, tested) |
|---|---|
| CPU Performance | Sustained 12 VMs + containers, ~50% CPU utilization at load |
| Media Performance | Played/supported 10 4K streams / 4 8K Streams / 8 200Mbps 4K |
| SATA Throughput | RAID 5: ~900–1000 MB/s read, ~800 MB/s write (5x SATA SSD) |
| NVMe Throughput | Gen4×1: ~1.7 GB/s read, ~1.6 GB/s write; Gen4×2: ~3.3/3.1 GB/s |
| 10GbE Network | Saturated link at ~900 MB/s sustained SMB/iSCSI |
| Acoustics | 32–34 dBA idle; 48–51 dBA max fan |
| Thermals | CPU idle: ~40–42°C; peak: ~78–80°C |
| Power Draw | Idle: ~32–34W; peak: ~80W (I imagine this will comfortably/easily crack 100W with all threads assigned, but was unable to test this effectively in time for this review. I will add further to this later when it is tested and update/reflect it accordingly.) |

The Minisforum N5 Pro firmly establishes itself as a hybrid solution that blurs the lines between a high-performance NAS appliance and a compact workstation-class server. It combines server-grade processing, memory integrity features, and robust storage options in a footprint comparable to many consumer NAS systems. Equipped with the 12-core Ryzen AI 9 HX PRO 370 CPU, ECC-capable DDR5 memory support, an intelligent ZFS-ready storage architecture, and an unusually broad range of expansion options—including PCIe Gen 4 and OCuLink—the N5 Pro is clearly targeted at advanced users and small professional teams with more demanding and diversified workloads than those served by entry-level NAS units. In practical testing, the system proved capable of maintaining high multi-threaded performance during intensive virtualized environments, delivering consistent high-throughput over 10GbE networking, and retaining stable thermals even under extended peak activity. The compact, fully metal chassis design provides excellent serviceability and sufficient cooling despite the dense hardware configuration, while the support for both U.2 and M.2 enterprise-class SSDs further broadens its application to mixed storage, caching, and high-availability scenarios. However, while the bundled MinisCloud OS offers a wide feature set—including snapshots, AI-driven indexing, and containerization—it remains a relatively immature platform compared to industry standards like TrueNAS and Unraid. Users looking for long-term OS maturity and advanced ecosystem integration will likely opt to replace it with one of these more established alternatives, which is fully supported without affecting warranty coverage.

Potential buyers should consider carefully whether the specific advantages of the N5 Pro—namely, its additional CPU cores, ECC memory support, and AI-specific compute capabilities—justify its higher price over the standard N5 model, which offers identical storage and connectivity at a lower cost by using a more modest processor and omitting ECC. For workloads that include high-density virtualization, multi-user environments where data integrity is paramount, or AI-enhanced workflows such as photo indexing or local inference tasks, the Pro variant’s premium hardware is likely to pay dividends. On the other hand, for simpler NAS duties such as centralized backups, media streaming, and file sharing, the standard N5 offers nearly all of the same physical functionality for significantly less. It is also worth noting the few limitations that arose during testing: the external PSU design may not appeal to all users; the thermal behavior of the bundled 64GB OS SSD suggests it should be upgraded for sustained use; and the unfinished aspects of MinisCloud OS—particularly its localization, advanced monitoring, and some missing enterprise-grade protocols—leave room for refinement. None of these are deal-breaking, but they highlight that this system is best suited for technically confident users who plan to fully exploit its hardware capabilities. Taken together, the N5 Pro stands out as a capable and flexible NAS platform, offering a level of performance and configurability rarely seen at this scale. For those willing to invest the time to install and tune their preferred OS and storage strategy, it represents one of the more forward-thinking and technically ambitious NAS options currently available. For users seeking a fully polished, plug-and-play appliance experience, however, more mature offerings from Synology, QNAP, or Asustor may still be the better fit for their needs.
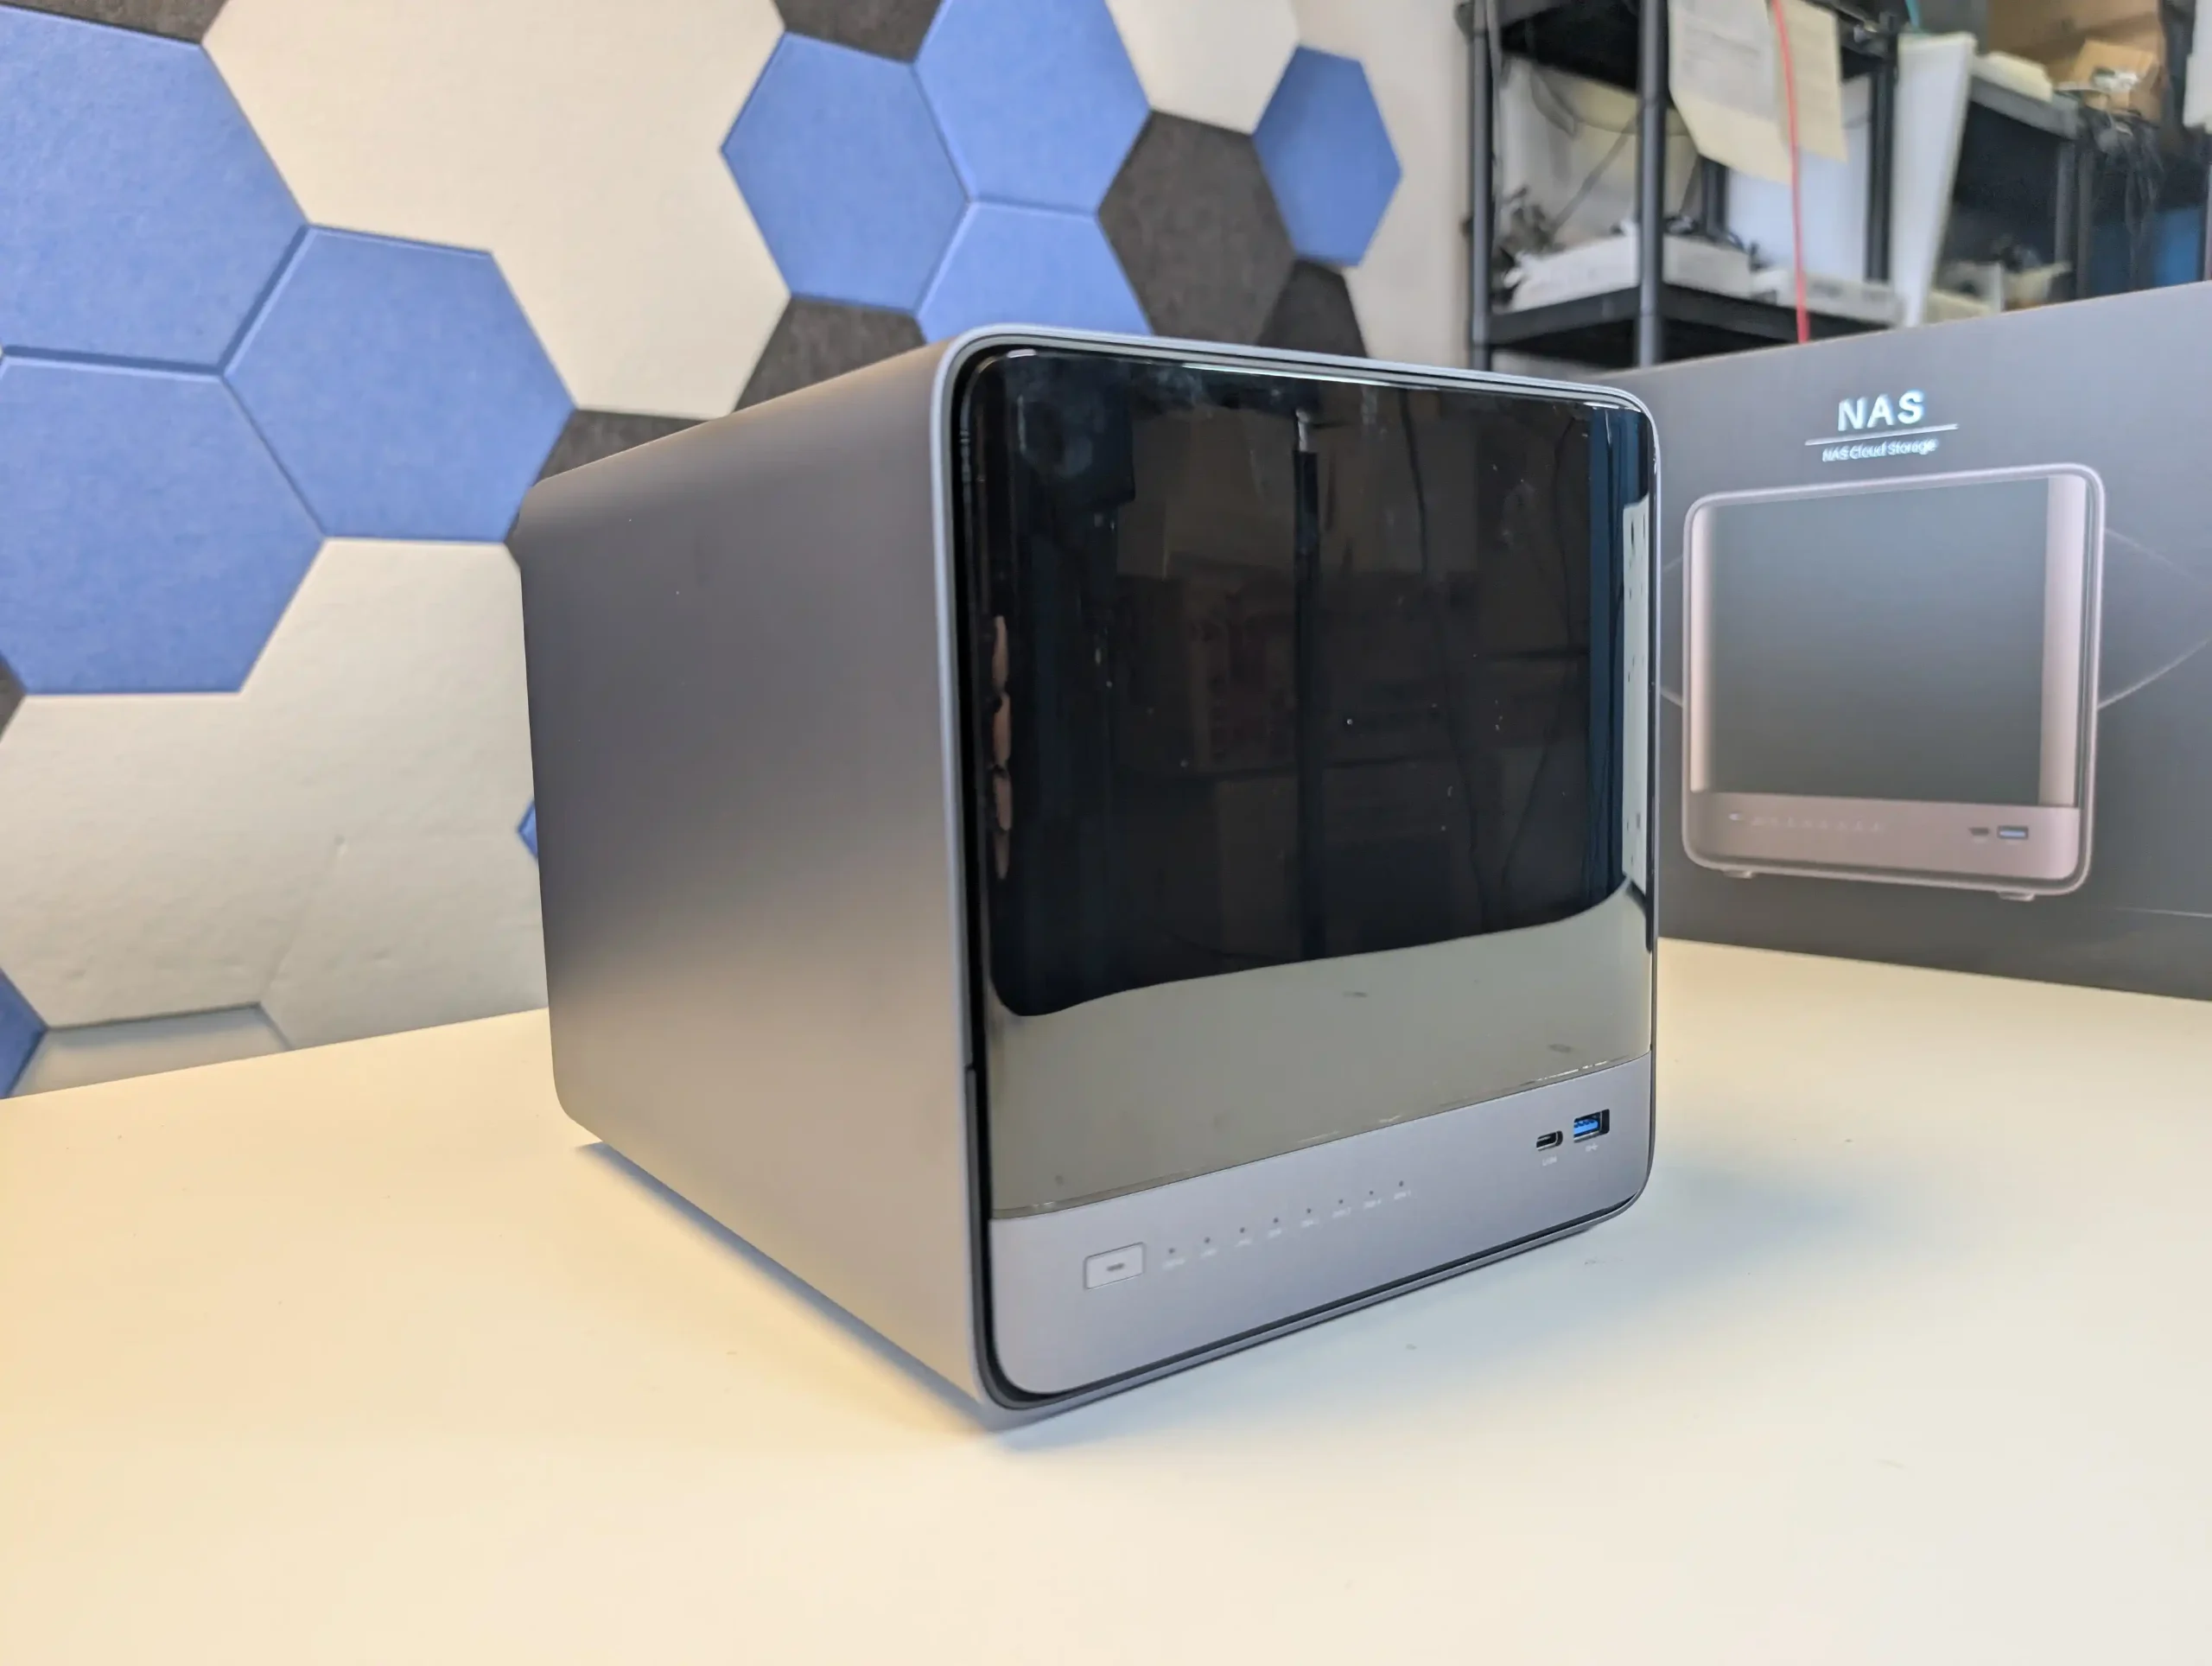
| PROS of the Minisforum N5 Pro | CONS of the Minisforum N5 Pro |
|
|
|
The is now available to buy:
IMPORTANT – Below are the links to the OFFICIAL Minisforum site to buy the N5 and N5 Pro. However, using these links does not support us (i.e we do not get an affiliate fee). We want you to buy this device from whichever retailer best suits your needs, but we hope you are able to support the work we do (such as this review and our YouTube channel) but using the links above for your storage media, or any other data storage/network solution purchase. |
SUBSCRIBE TO OUR NEWSLETTER Join Inner Circle Subscribe
This description contains links to Amazon. These links will take you to some of the products mentioned in today's content. As an Amazon Associate, I earn from qualifying purchases. Visit the NASCompares Deal Finder to find the best place to buy this device in your region, based on Service, Support and Reputation - Just Search for your NAS Drive in the Box Below
Need Help?
Where possible (and where appropriate) please provide as much information about your requirements, as then I can arrange the best answer and solution to your needs. Do not worry about your e-mail address being required, it will NOT be used in a mailing list and will NOT be used in any way other than to respond to your enquiry.
[contact-form-7]
Ko-fi or old school Paypal. Thanks!To find out more about how to support this advice service check HEREIf you need to fix or configure a NAS, check Fiver
Have you thought about helping others with your knowledge? Find Instructions Here
|
|
|
 Voici le test complet du H9 Flow RGB+, le boitier vitrine de NZXT. Il s’arme de 7 ventilateurs et propose une vue panoramique sur la configuration.
Cet article Test H9 Flow RGB+ de NZXT a été publié en premier par GinjFo.
The Aoostar WTR Max is a compact, AMD-powered NAS platform aimed at advanced users seeking a balance between high-density storage and compute capabilities. Designed as a substantial upgrade over the earlier WTR Pro model, it offers support for up to eleven total drives, including six SATA bays and five M.2 NVMe slots, all within a small desktop-style chassis. At its core is the AMD Ryzen 7 PRO 8845HS processor, featuring eight cores and sixteen threads, a 5.1 GHz boost clock, and integrated Radeon 780M graphics. The system also supports ECC memory configurations and is cooled by a multi-zone, vapor-chamber-based solution designed to accommodate extended uptime. Unlike many branded NAS systems, the WTR Max does not ship with a proprietary OS, instead encouraging users to install Linux-based distributions such as TrueNAS SCALE or Proxmox. With features like dual 10GbE SFP+ ports, an OCuLink expansion port, and USB4, the unit is aimed at homelab operators, multimedia professionals, and technically proficient users looking for a customizable and high-performance alternative to locked-down NAS appliances.
| The Aoostar WTR MAX Nas is available from the following places: |
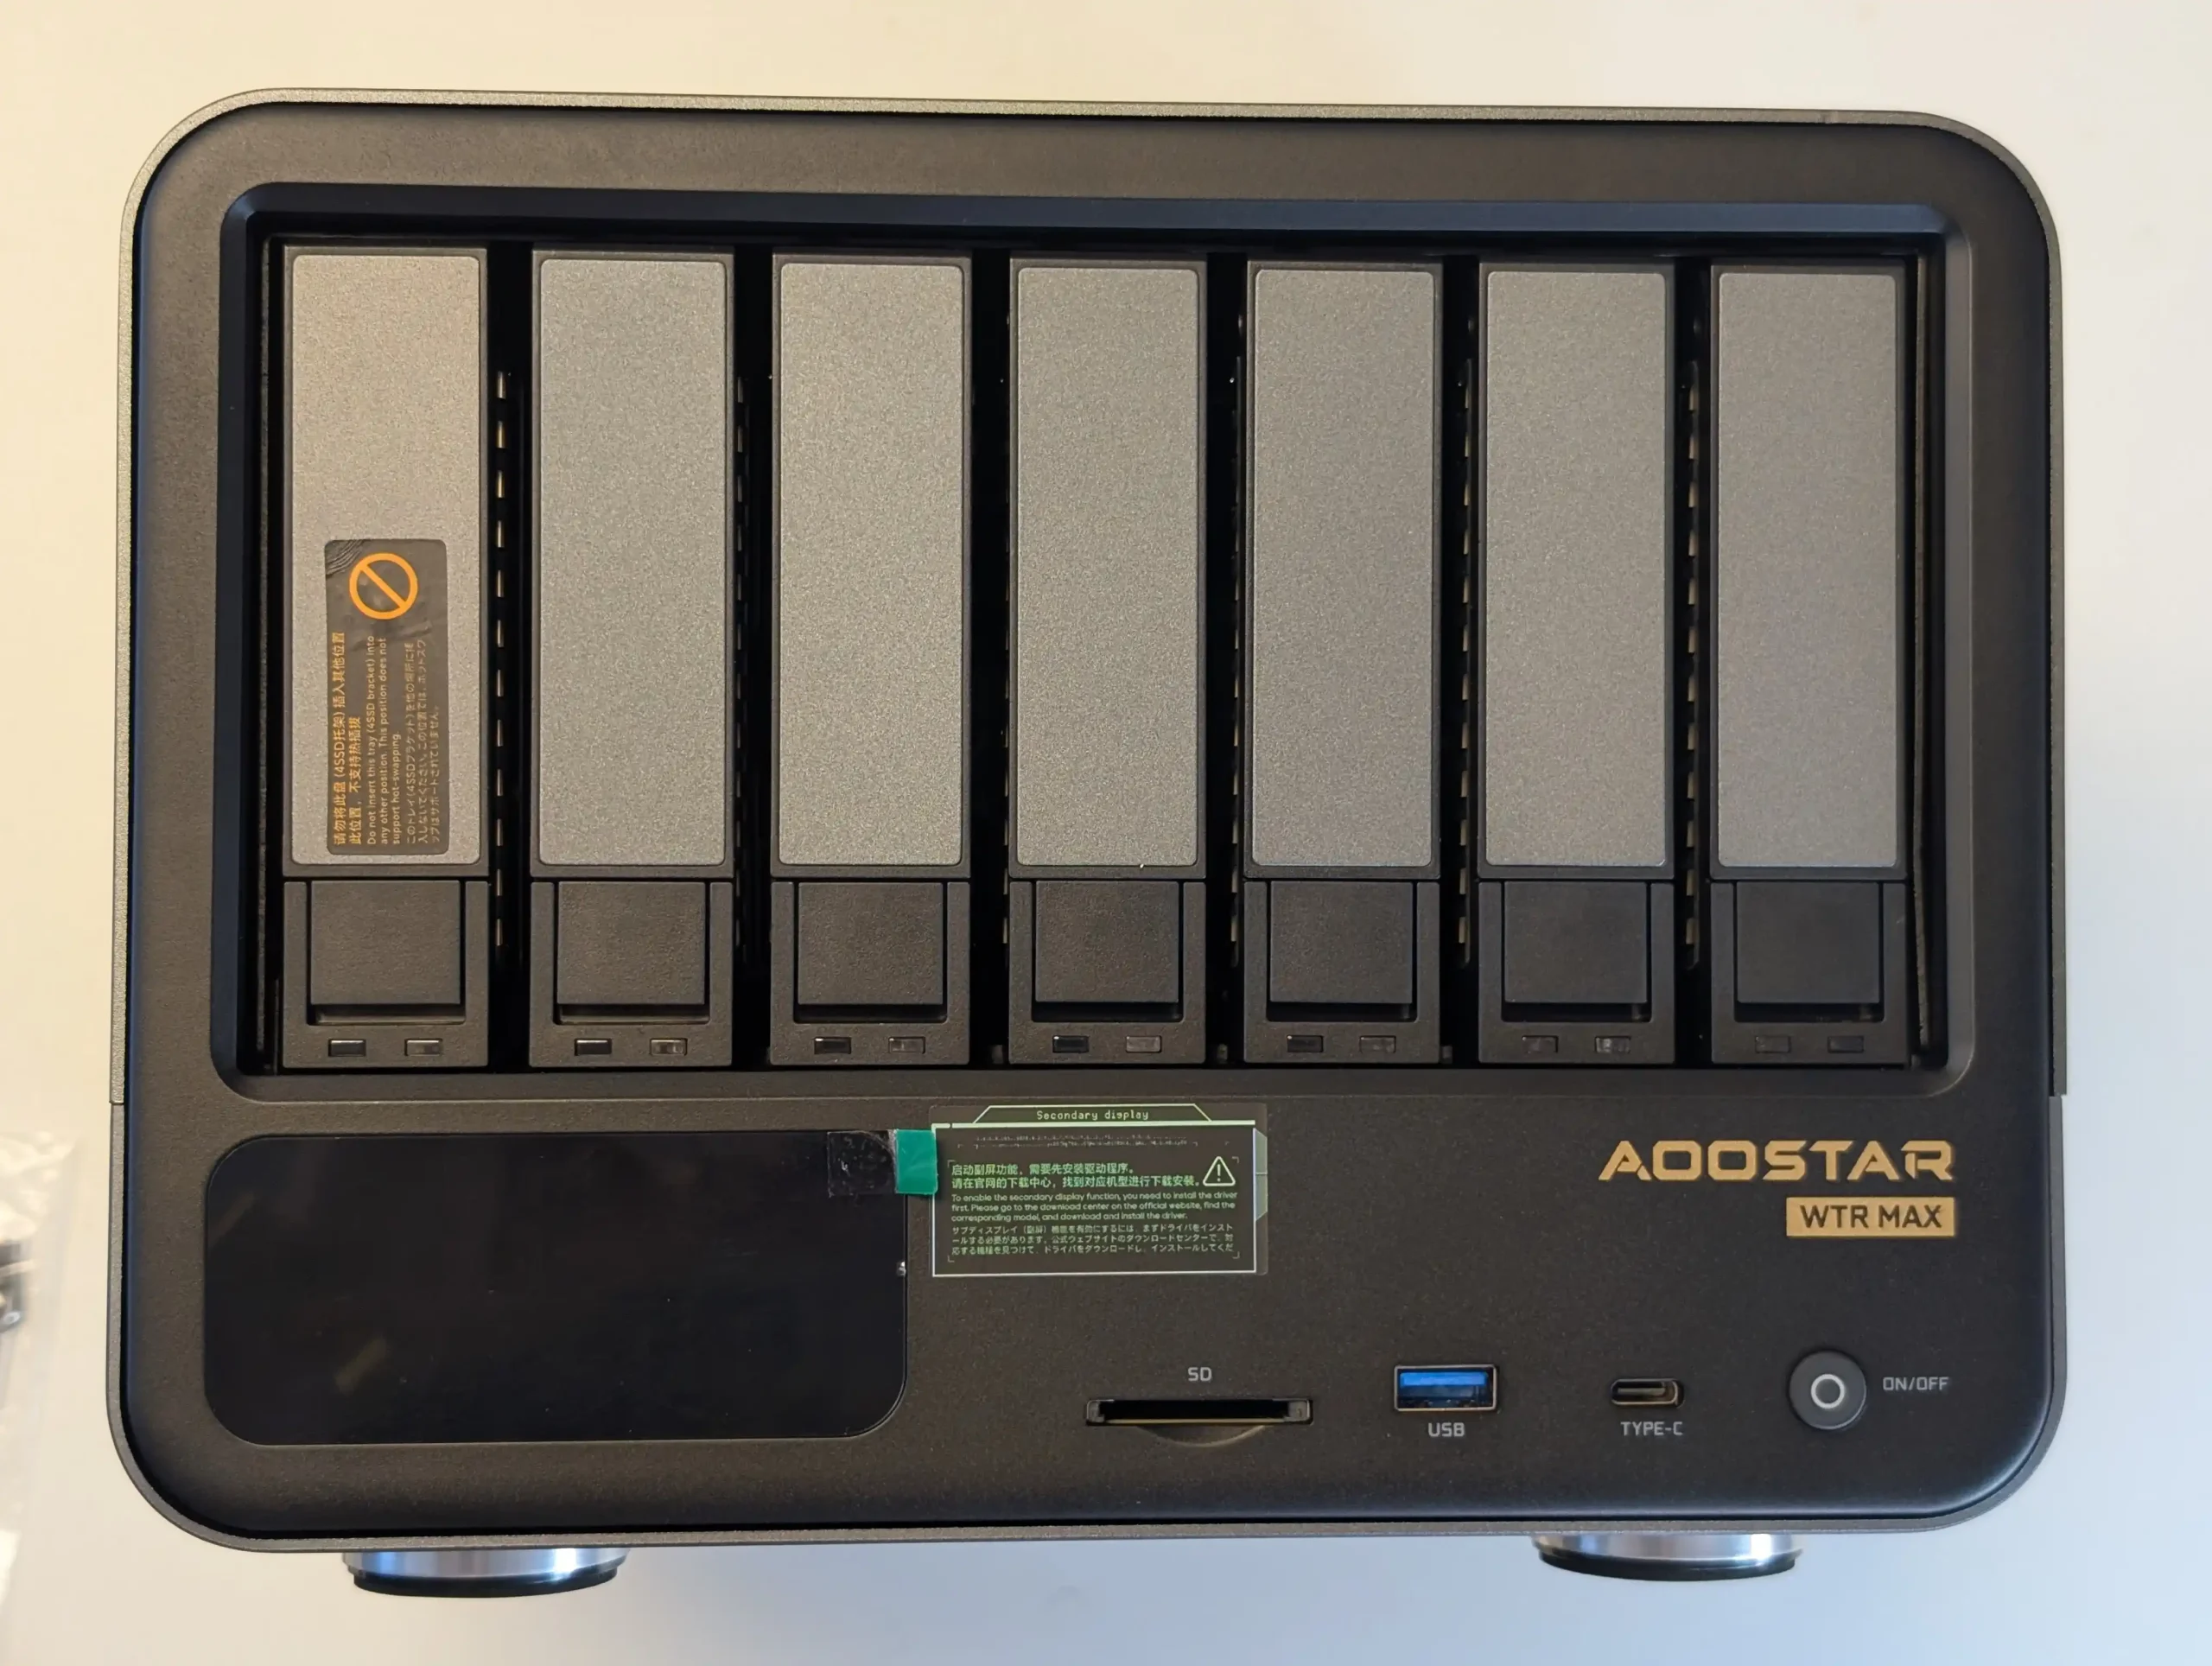
The Aoostar WTR Max stands out as a rare blend of high storage density, advanced connectivity, and raw compute performance in a compact NAS form factor, making it well-suited for experienced users seeking a versatile, self-managed platform. With support for up to 11 drives—six SATA and five NVMe Gen 4—paired with an enterprise-grade Ryzen 7 PRO 8845HS CPU and ECC memory compatibility, the system offers workstation-class capabilities for storage-heavy workflows, including virtualization, multimedia processing, and hybrid file serving. Dual 10GbE SFP+ and dual 2.5GbE ports provide ample bandwidth for multi-user access or isolated subnet roles, while the OCuLink interface enables high-speed external expansion, compensating for the absence of a traditional PCIe slot. Additional benefits like a fully customizable LCD status display, low fan noise, and consistently low thermals under load reinforce the system’s value in 24/7 deployments.
However, the WTR Max does present some caveats—namely, internal NVMe cross-performance appears constrained by shared bandwidth, and the lack of an internal PCIe slot could be limiting for users requiring more conventional upgrade paths. The LCD panel’s configuration software also proved cumbersome, raising security flags and requiring manual IP client setup, which may deter less technically inclined users. Lastly, the use of an external 280W PSU—while effective—won’t appeal to those expecting internal power integration in a workstation-style chassis. Nonetheless, for users who value full control over their NAS stack and want to avoid restrictive ecosystems, the WTR Max delivers a rare combination of hardware freedom and scalability that few turnkey systems offer in this price and size category.
 BUILD QUALITY - 10/10
HARDWARE - 10/10PERFORMANCE - 8/10PRICE - 9/10VALUE - 9/10
BUILD QUALITY - 10/10
HARDWARE - 10/10PERFORMANCE - 8/10PRICE - 9/10VALUE - 9/10
9.2
PROS
High Storage Density in Compact FormSupports up to 11 drives (6x SATA + 5x NVMe) in a desktop-sized chassis, ideal for users with large-scale storage needs but limited physical space.Enterprise-Class CPU with ECC SupportAMD Ryzen 7 PRO 8845HS offers 8C/16T performance, ECC memory support, and integrated RDNA 3 graphics—rare at this price and size.Dual 10GbE SFP+ and Dual 2.5GbE NetworkingProvides flexible, high-throughput networking for content creators, virtual environments, or advanced home labs.Strong Virtualization and Transcoding PerformanceSmooth Proxmox VM hosting and real-time Plex 4K/8K transcoding using Radeon 780M hardware acceleration.OCuLink PCIe Expansion PortEnables high-speed external storage or GPU support without sacrificing internal NVMe bandwidth.Customizable LCD Monitoring PanelReal-time display of system metrics (CPU, RAM, network, storage) with theme options, useful for headless setups.Robust Cooling System with Vapor ChamberGlacier Pro 1.0 design keeps thermals in check across four fans and distinct airflow zones; low fan noise even under load.Open Software EcosystemNo proprietary OS or restrictions; supports TrueNAS, Unraid, Proxmox, or Linux-based setups for full admin control.
CONS
Limited Internal NVMe Cross-ThroughputInter-M.2 transfer speeds are capped (~500–600 MB/s), possibly due to shared chipset lanes or controller design.No Internal PCIe SlotExpansion is limited to OCuLink; users needing traditional PCIe cards (e.g., GPUs or HBAs) may find this restrictive.LCD Panel Software Can Be ProblematicConfiguration software raised browser security flags and requires static IP client setup, making it less accessible.External Power Brick Only280W external PSU is functional but not ideal for rackmount or integrated enclosures; some users may prefer internal ATX power.
Where to Buy a Product
![]()
![]()
VISIT RETAILER ➤
![]()
![]()
VISIT RETAILER ➤
 DEAL WATCH – Is It On Offer Right Now? DEAL WATCH – Is It On Offer Right Now?UGREEN DXP4800 PLUS NAS (US) UGREEN STORE  USA 25% $519.99 PRIME [LINK] USA 25% $519.99 PRIME [LINK] GMKTec G9 Nucbox 4x NVMe NAS Amazon  UK 24% OFF - PRIME [LINK] UK 24% OFF - PRIME [LINK] Terramaster F8 SSD NAS Amazon UK -25% OFF, Now £412.49 PRIME [LINK] Seagate 20TB Ironwolf Pro NAS HDD Amazon UK 8% £372.99 (RRP: £405.55RRP) PRIME [LINK] UGREEN NAS- 20% OFF 6th July - 10th July UGREEN STORE USA 20-25% OFF UGREEN NAS (NON PRIME) [LINK] These Offers are Checked Daily
|
Physically, the Aoostar WTR Max is housed in a full-metal anodized aluminum alloy chassis that balances structural rigidity with passive thermal conductivity. The exterior finish is minimal but functional, offering side ventilation cutouts and removable access panels secured with thumb screws. Despite its relatively compact form factor for an 11-bay NAS system, the unit features six front-facing drive trays, each supporting 3.5-inch or 2.5-inch SATA drives.
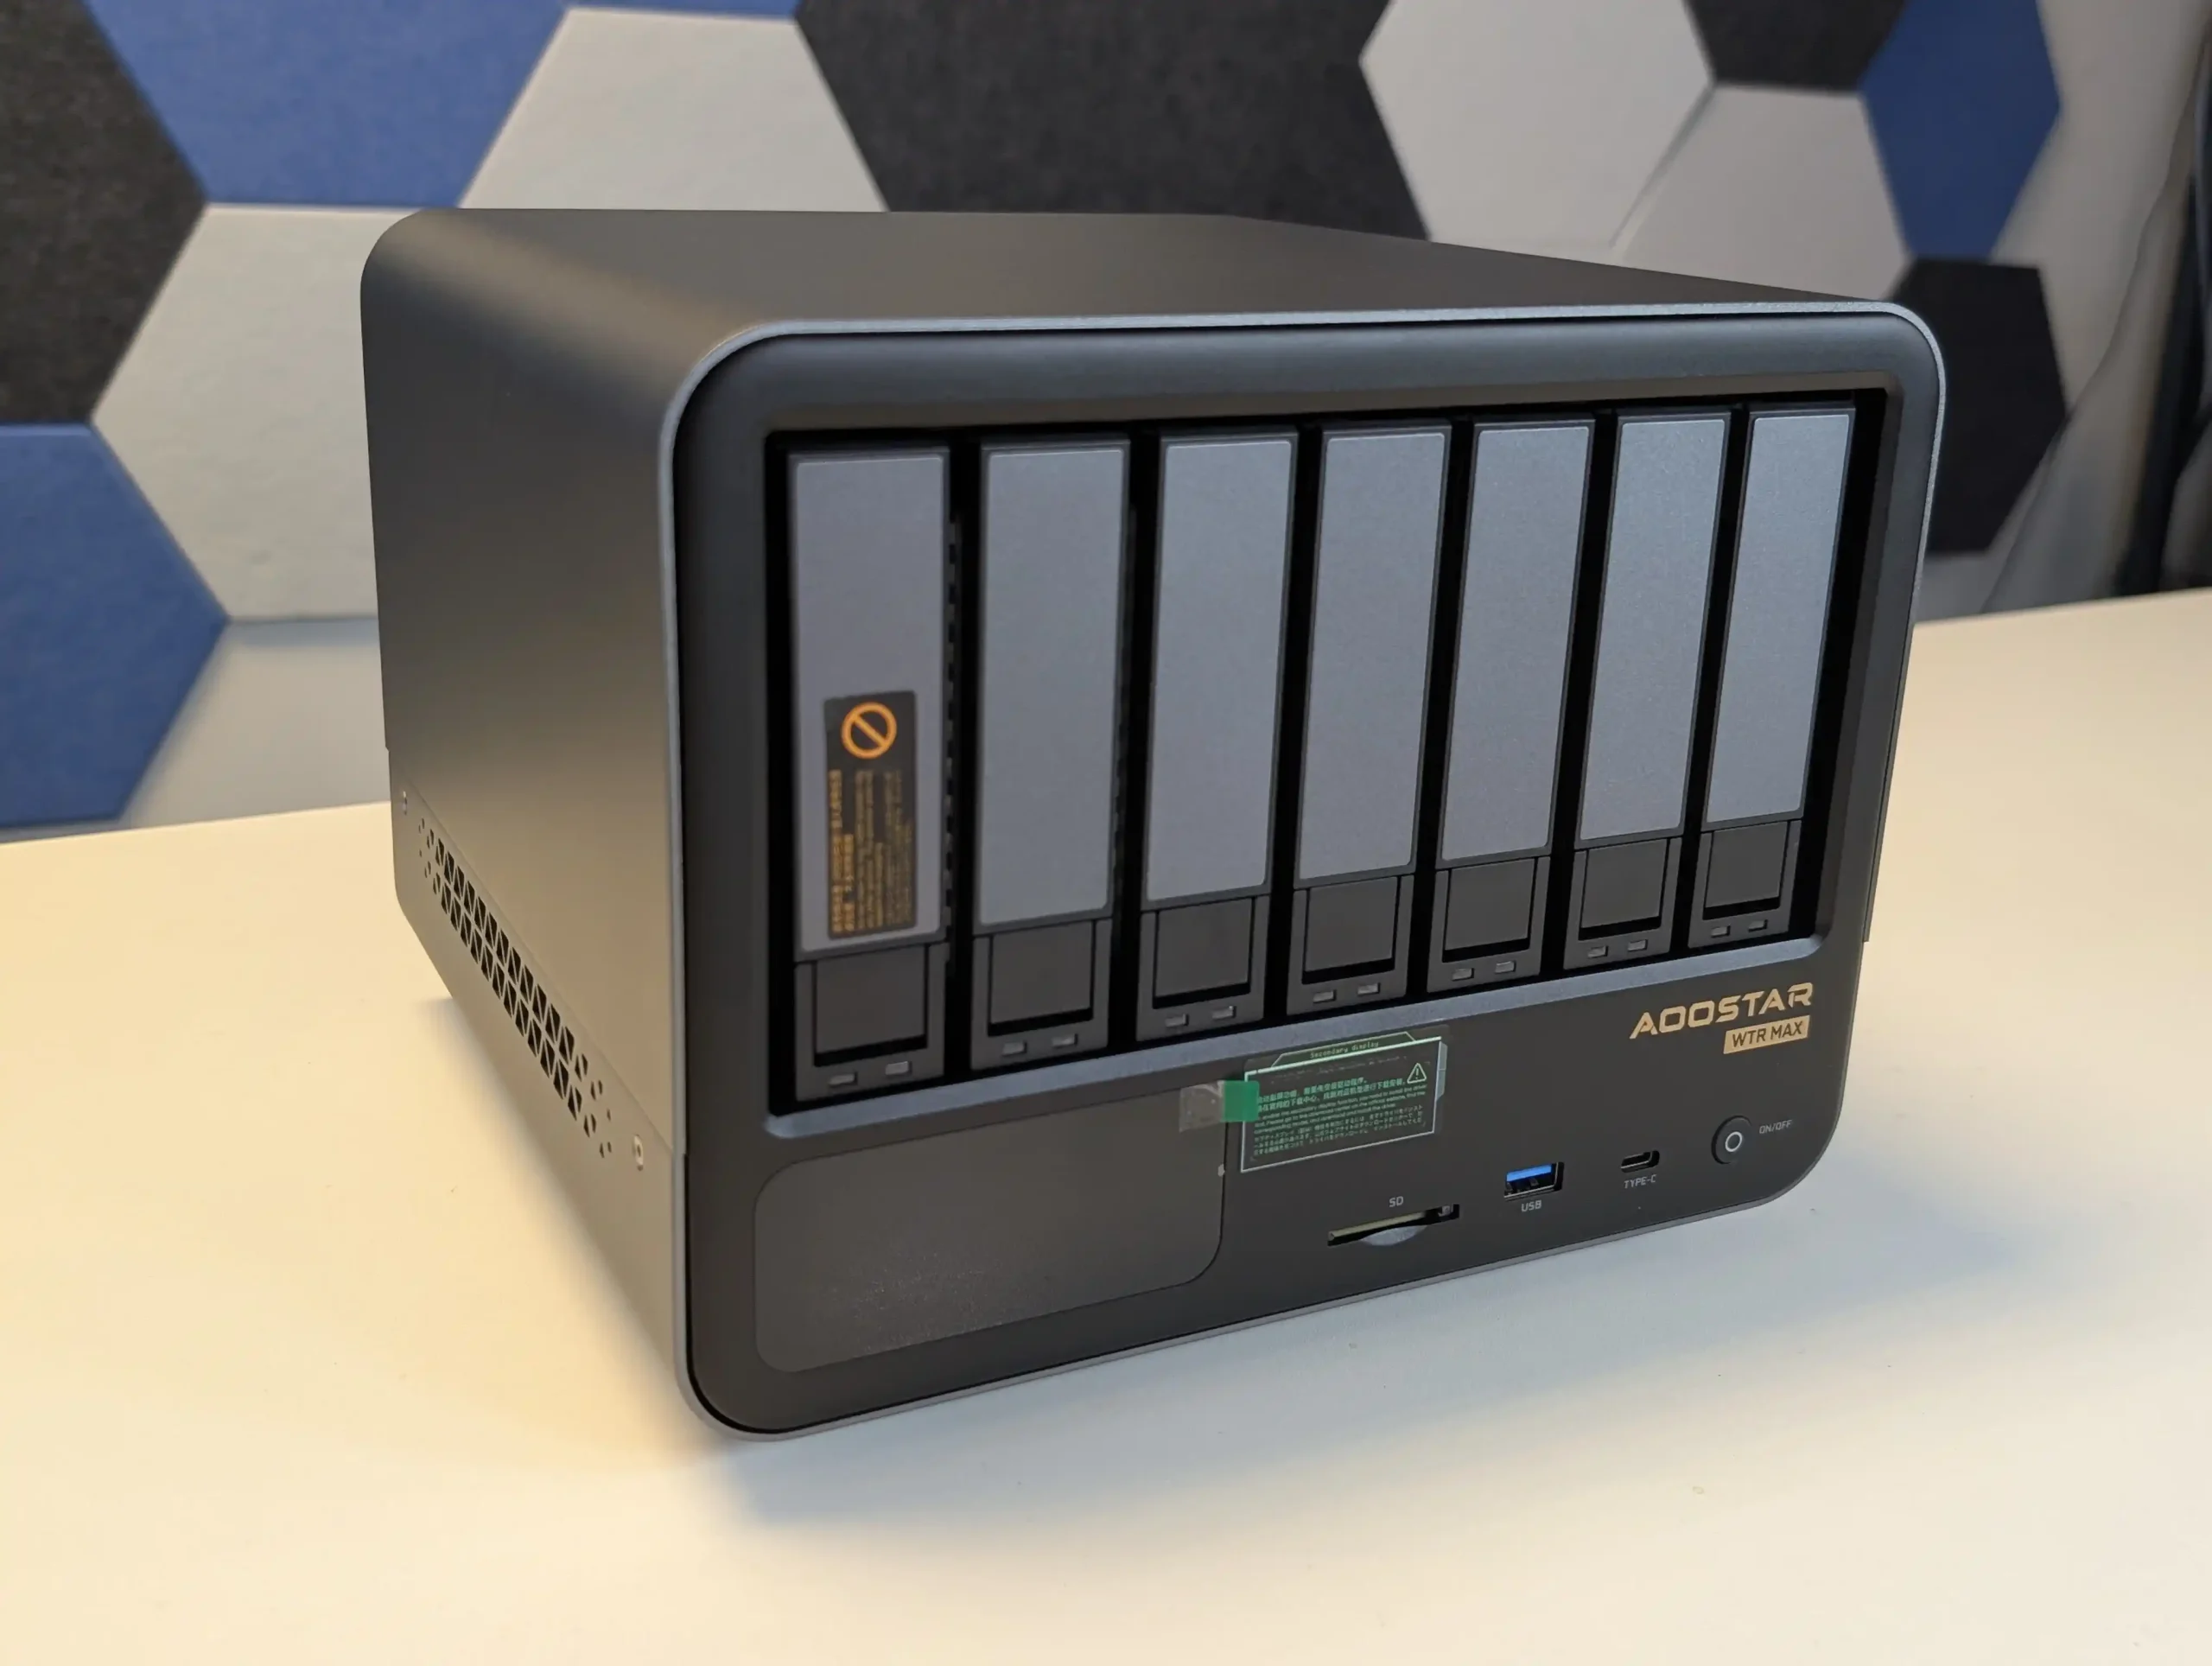
These trays use a click-and-load design—no tools required—which simplifies drive installation and replacement. During prolonged hands-on testing, the trays handled both consumer-grade HDDs and Synology enterprise-class drives without mechanical or airflow restricting conflict, making compatibility a non-issue for most users. The structural alignment of the trays channels cool air from bottom-front intake vents across the drives and out the rear via dual exhaust fans, ensuring thermal separation between the storage and compute areas even during continuous multi-drive operation.
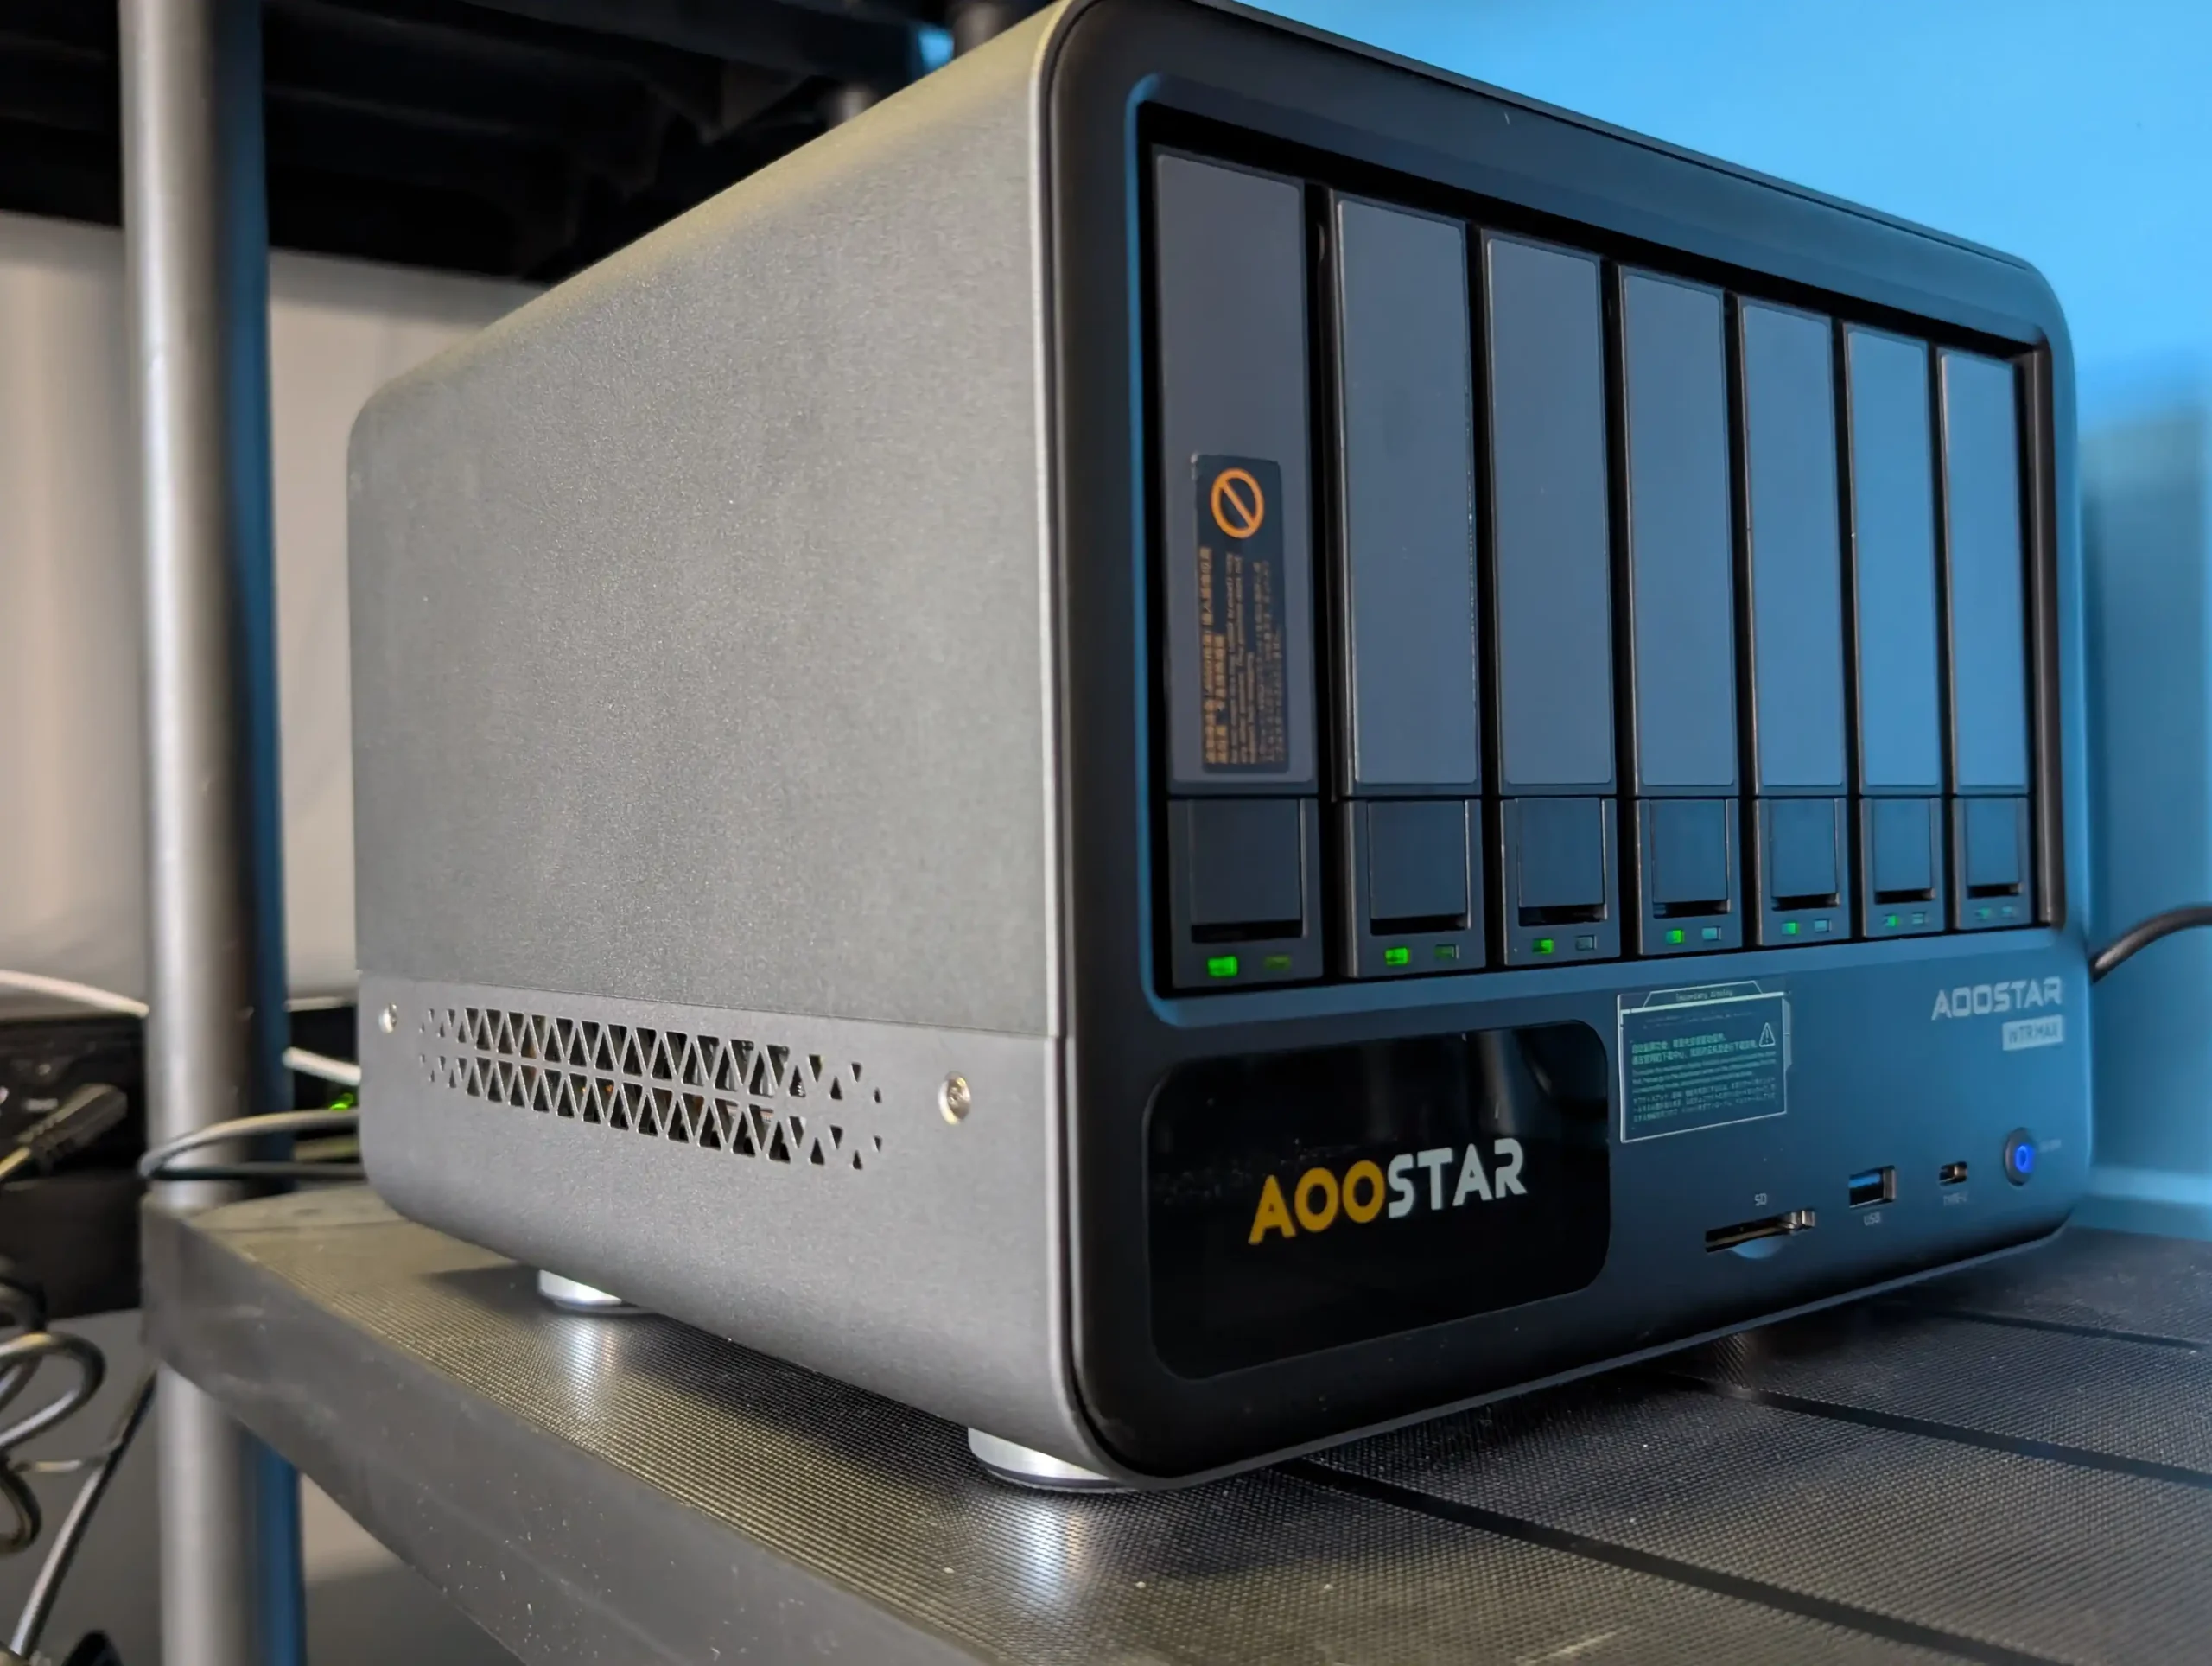
Beyond the six SATA bays, the WTR Max incorporates five PCIe Gen 4 M.2 NVMe 2280 slots, enabling dense solid-state storage directly on the mainboard and modular trays. Four of these are mounted within a vertically oriented, removable tray situated at the end of the main drive bay stack. This spring-loaded tray resembles modular SSD carriers found in more expensive enterprise-grade systems and allows for rapid SSD swaps or upgrades. Also, each of the 4 m.2 slots on this 7th bay still had room for a standard m.2 heatsink too!
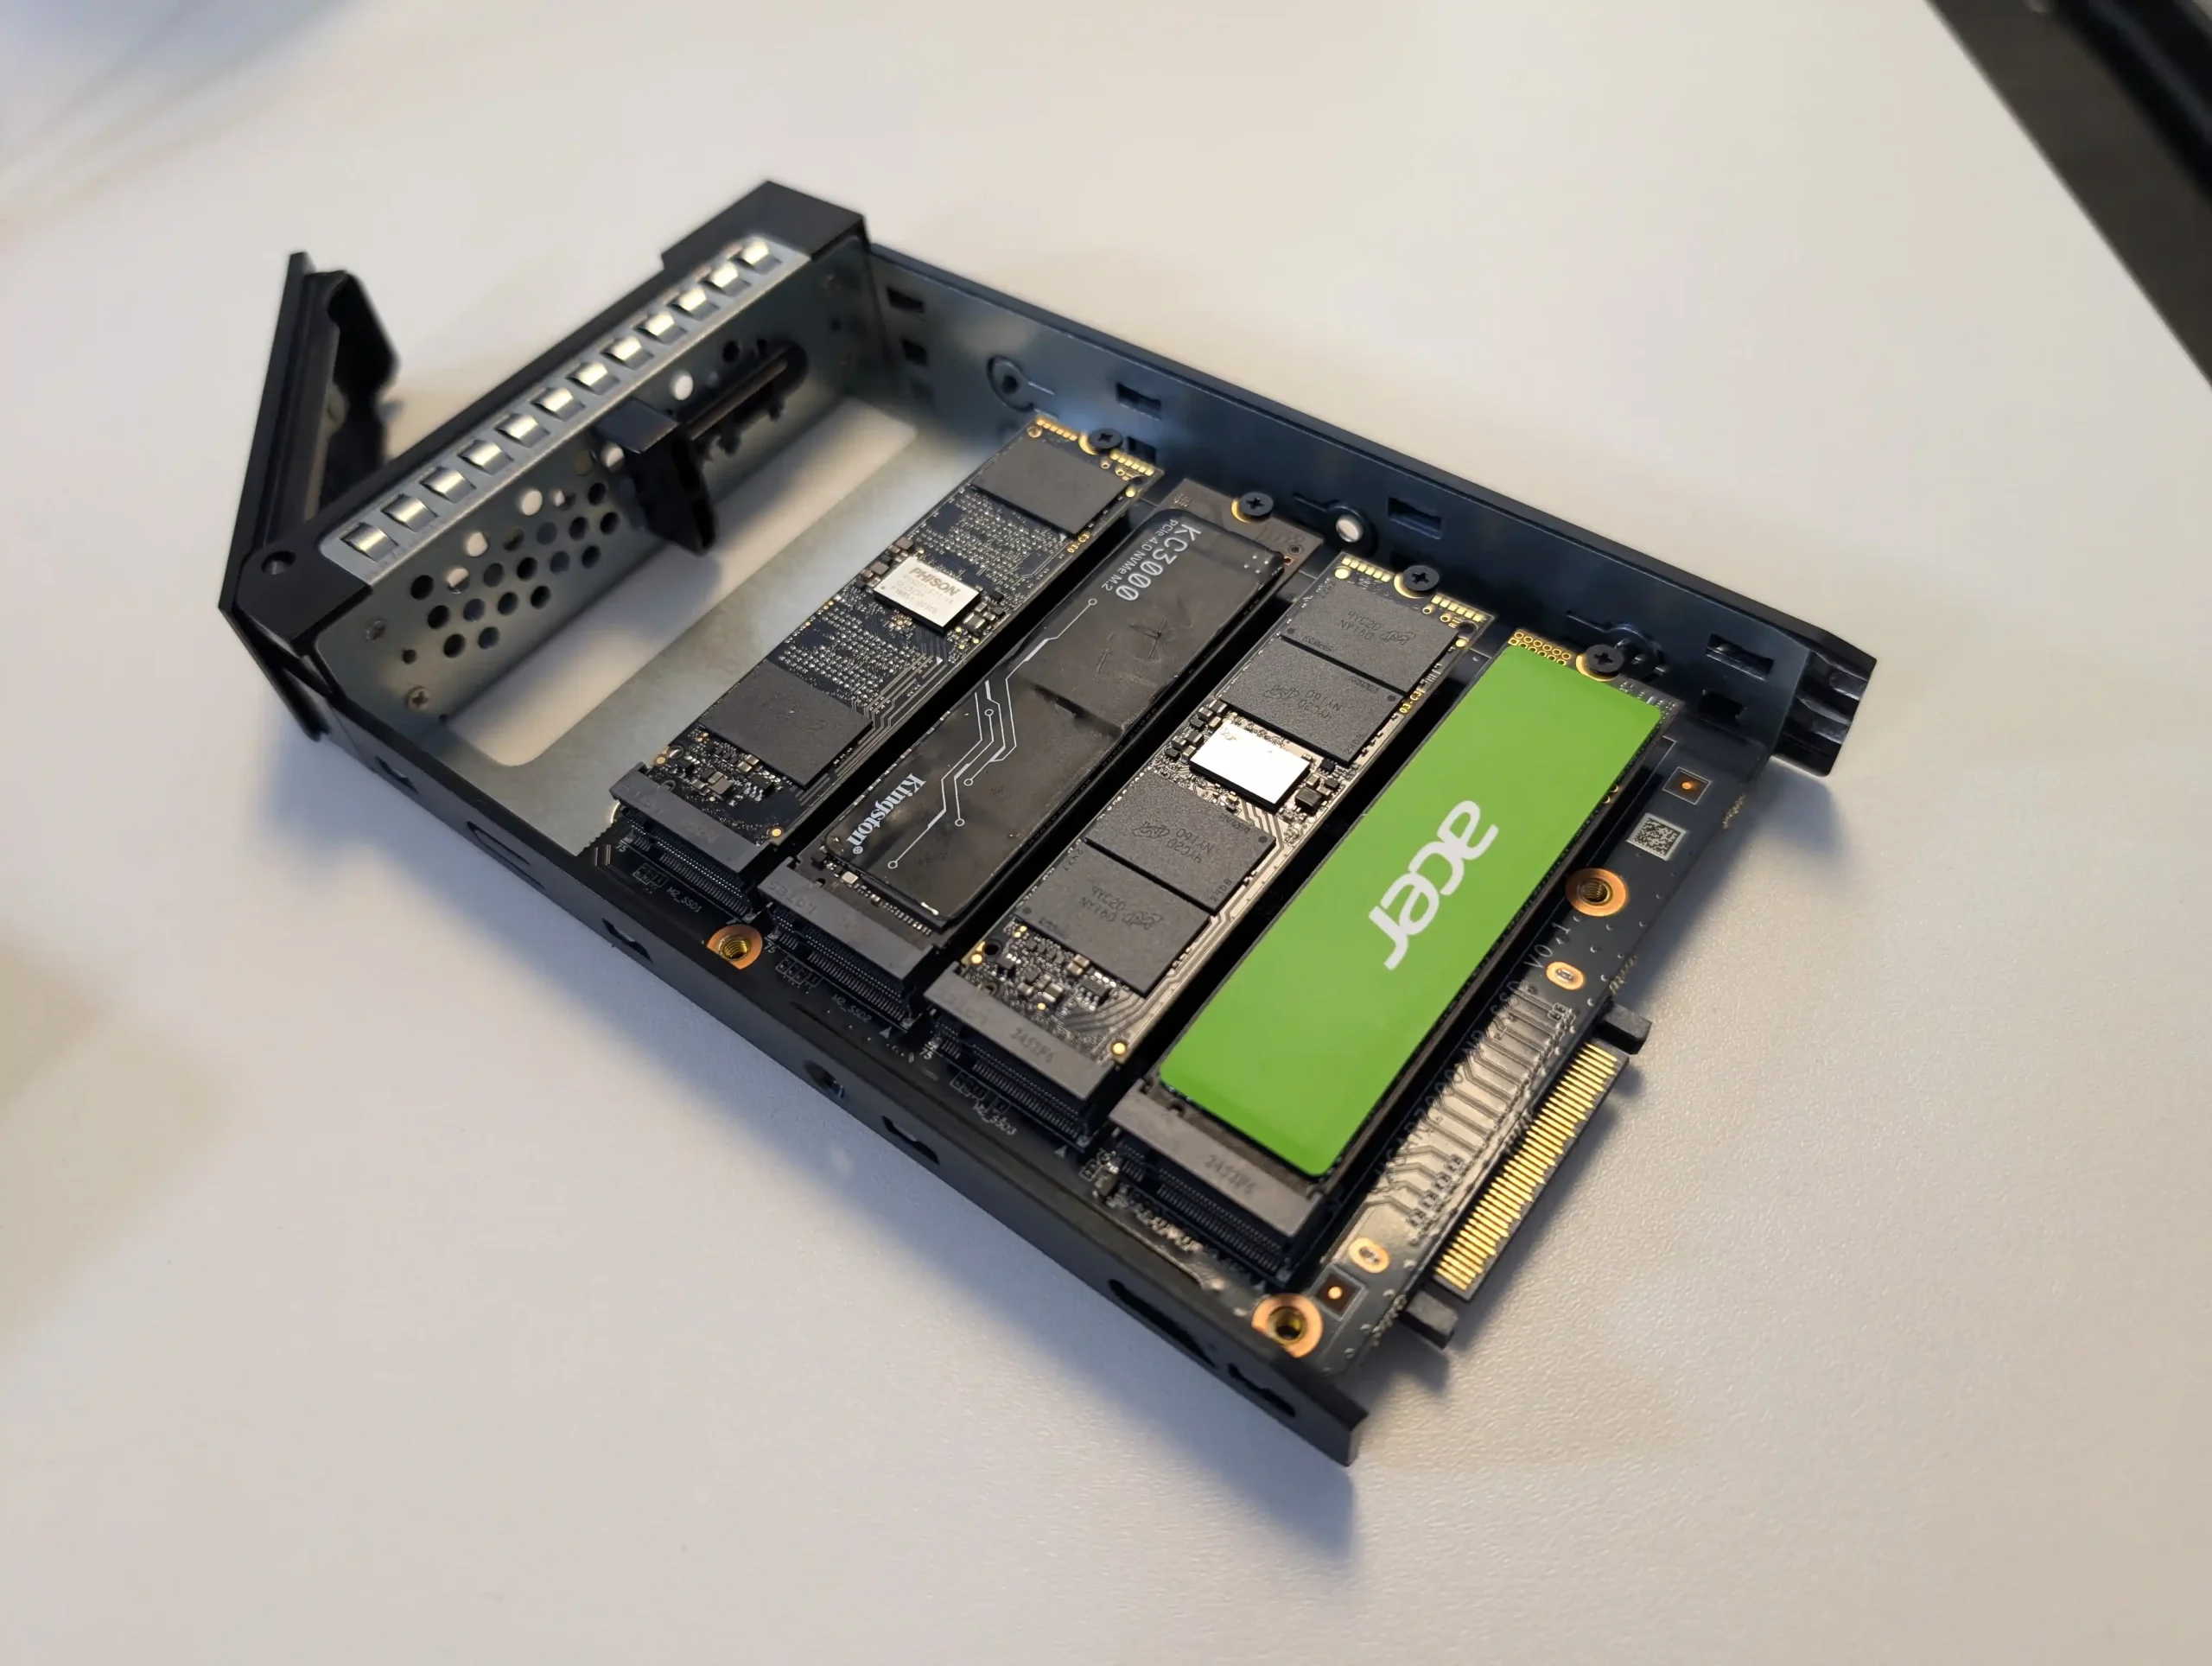
The fifth M.2 slot is positioned horizontally on the motherboard base, adjacent to the DDR5 SODIMM slots and covered by an active cooling fan. Of the five slots, two run at PCIe Gen 4 x1 and two at Gen 4 x2, with the fifth—on the motherboard—also supporting Gen 4 x2. Testing confirmed sufficient physical clearance for installing large NVMe heatsinks on all slots, and SSDs remained within optimal temperature ranges even under sustained I/O workloads.
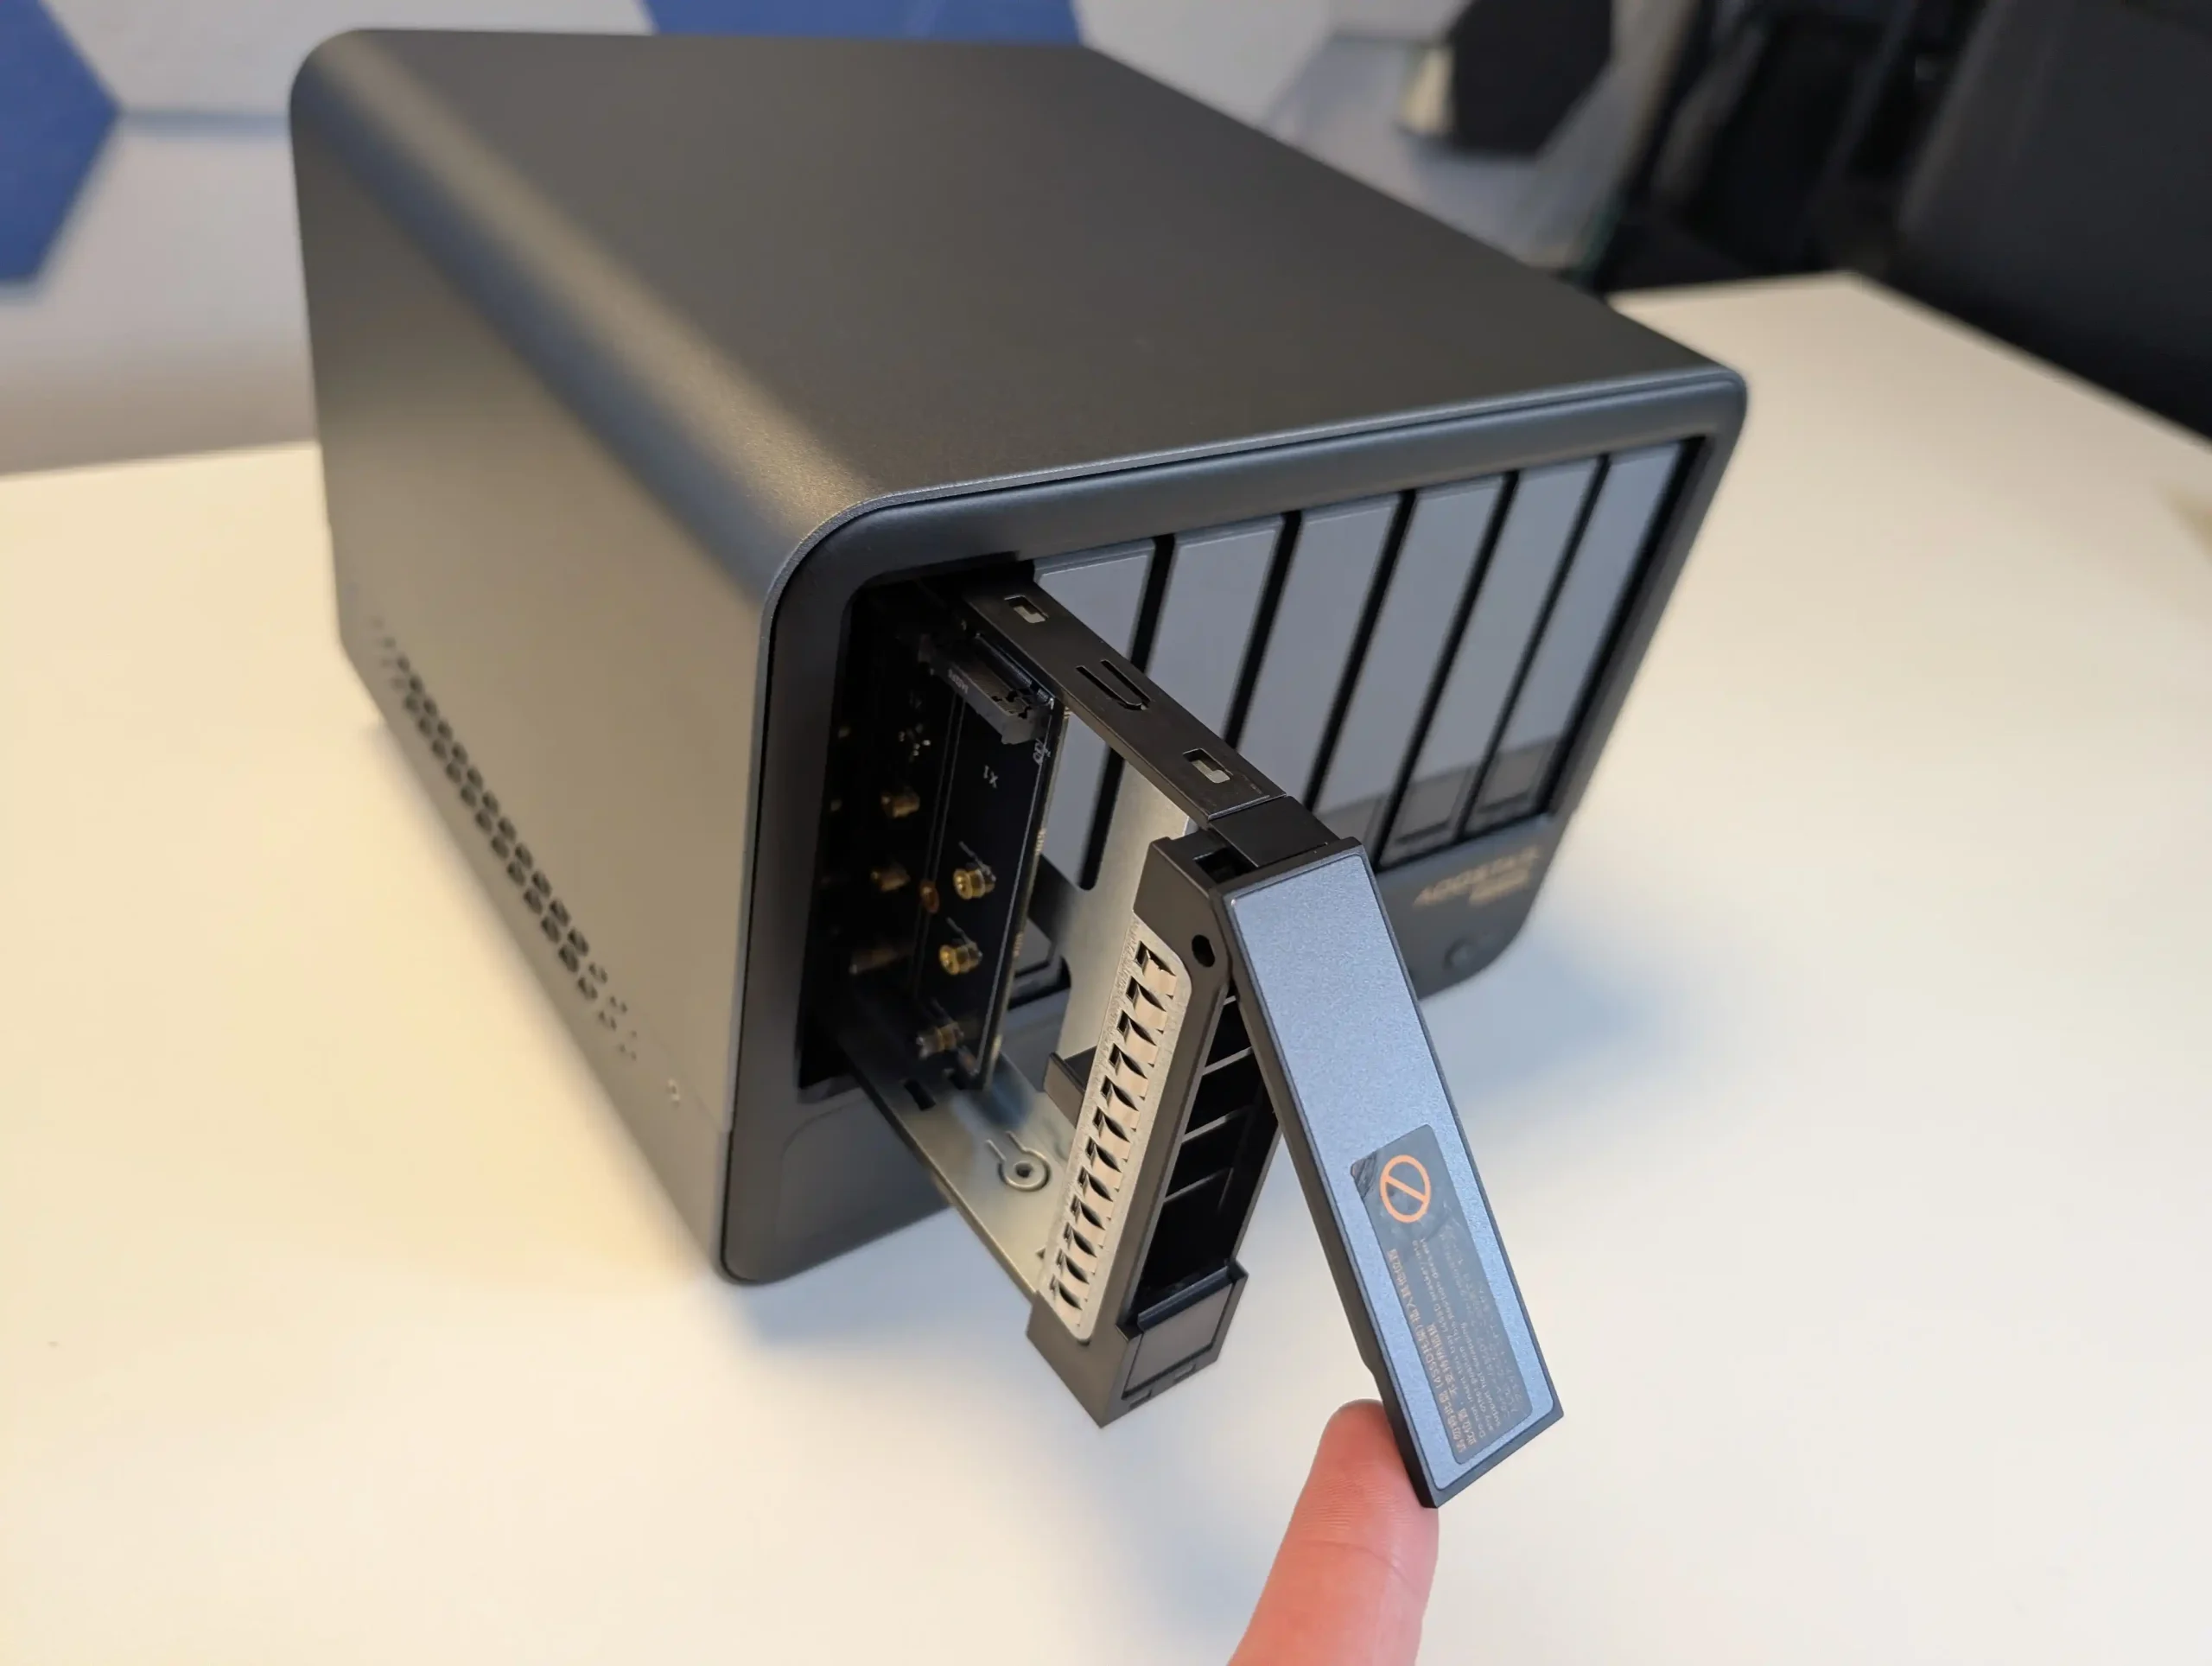
Internally, the SATA subsystem is controlled via an ASMedia ASM1166 controller operating over a PCIe Gen 3 x2 interface, capable of delivering up to 2GB/s total throughput across all six bays. This bandwidth is sufficient for both HDD arrays and SATA SSDs, and is particularly well-suited for software-managed RAID configurations in Linux-based OSes such as Unraid, TrueNAS, or OpenMediaVault.
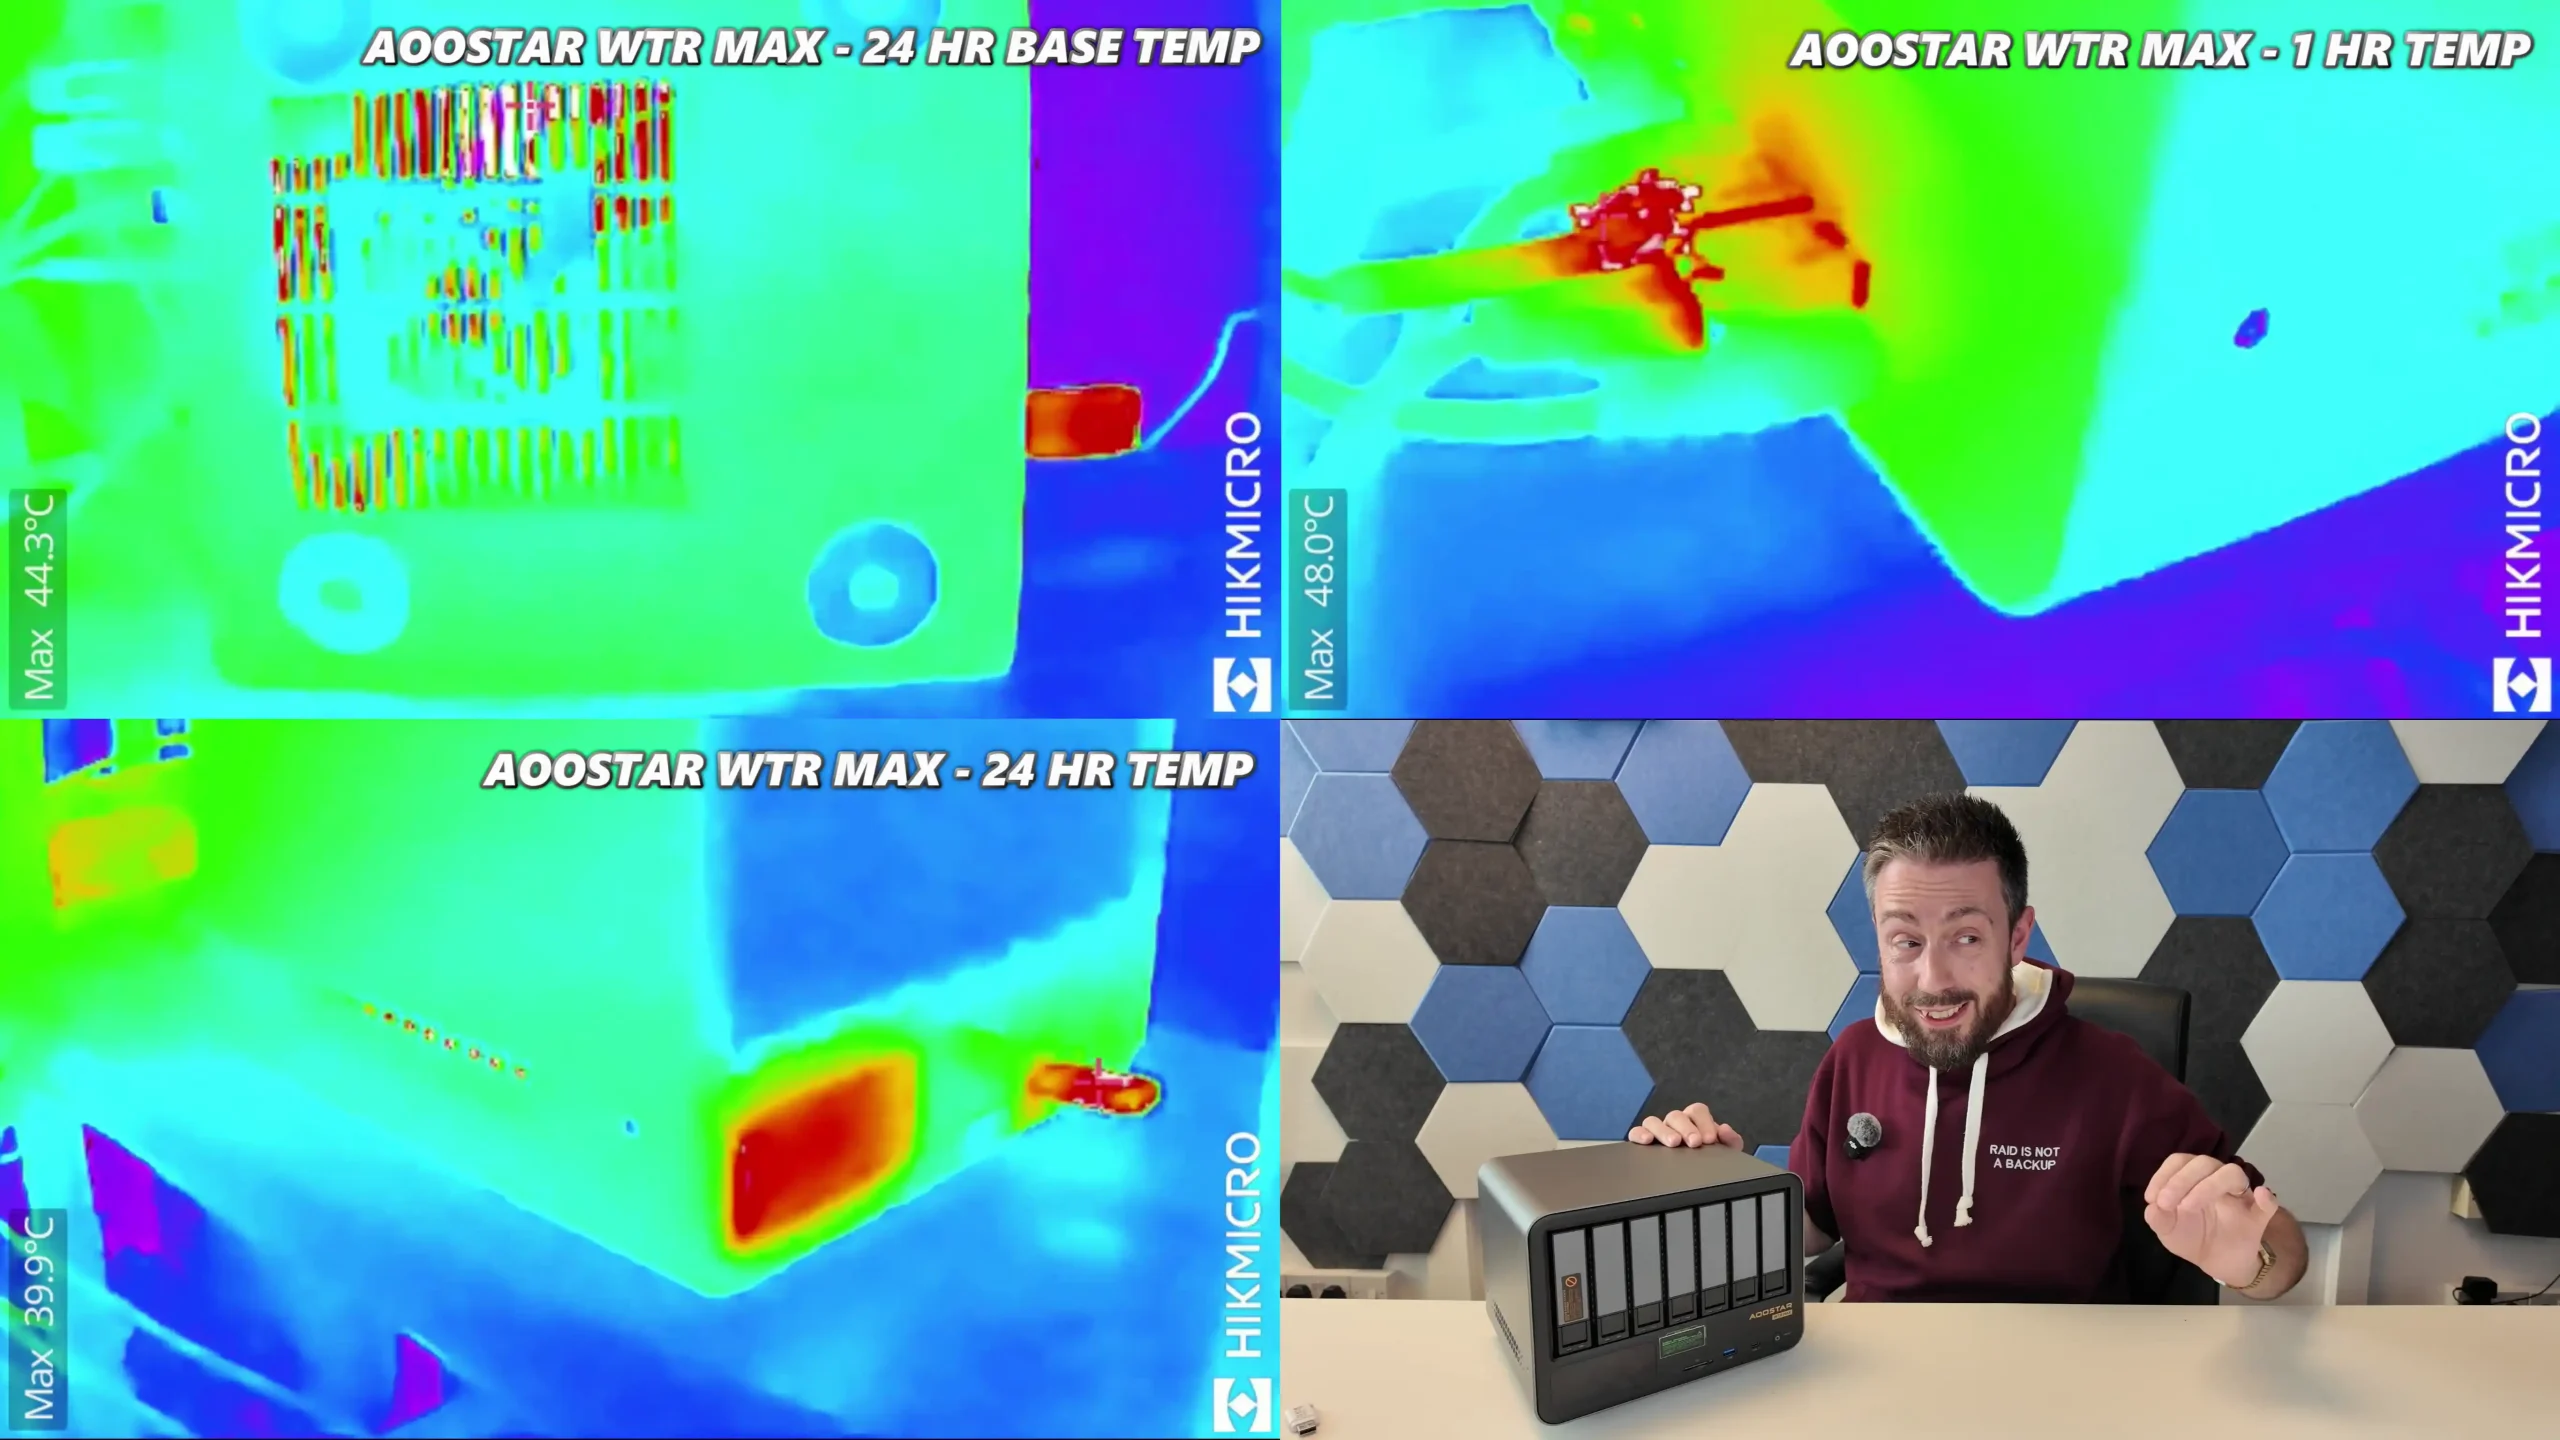
During testing, mixed workloads involving simultaneous read/write access across multiple HDDs and SSDs were handled without observable I/O queueing or temperature spikes. Drive temperatures averaged between 38°C and 45°C during a 24-hour benchmark run, with airflow guided from the bottom intake and over the storage chamber by the dual rear exhaust fans—ensuring consistent cooling across all drive positions, even during power-on-demand cycles triggered by scheduled remote backups.
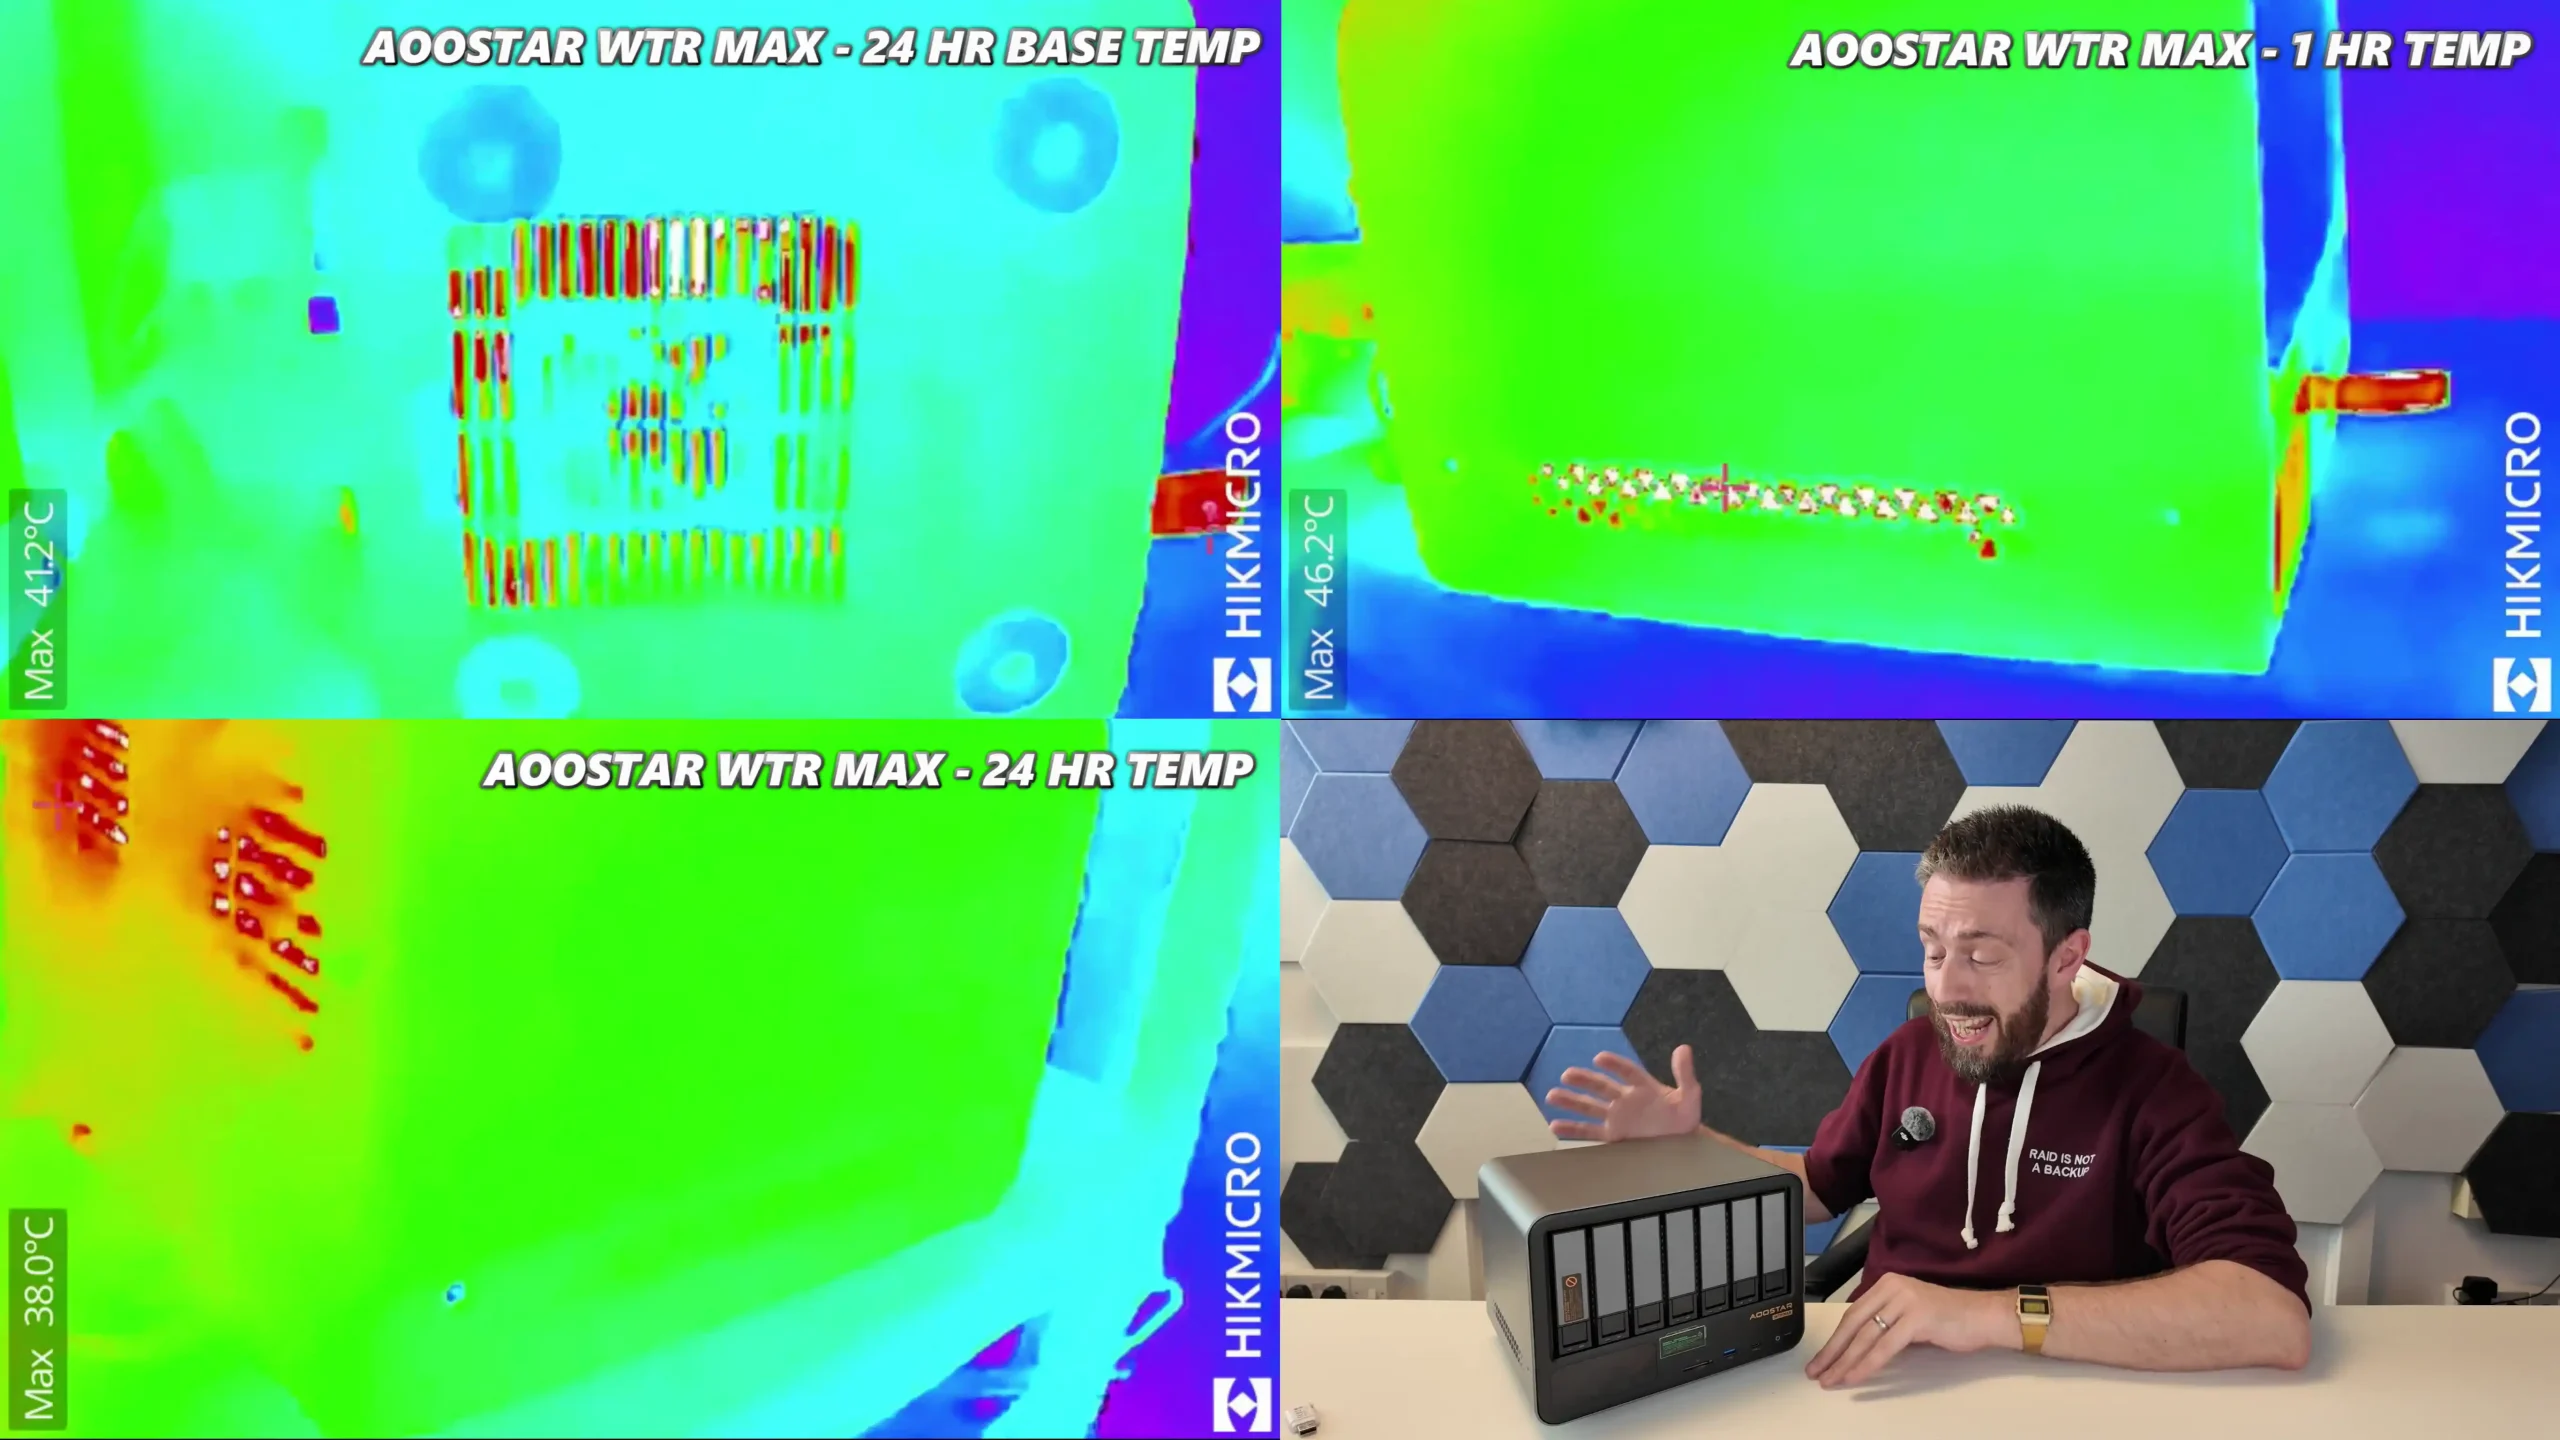
The design of the seventh modular tray holding four of the M.2 NVMe slots is particularly noteworthy. Rather than opting for fixed PCB slots that require full disassembly for access, Aoostar implemented a removable cartridge system similar to those found in rack-mounted server appliances. This tray locks in place without screws, and its spring-loaded retention system provides firm pressure on runners inside once installed beneath the SSDs. This is a very smooth ejection and injection system for this extra bay!
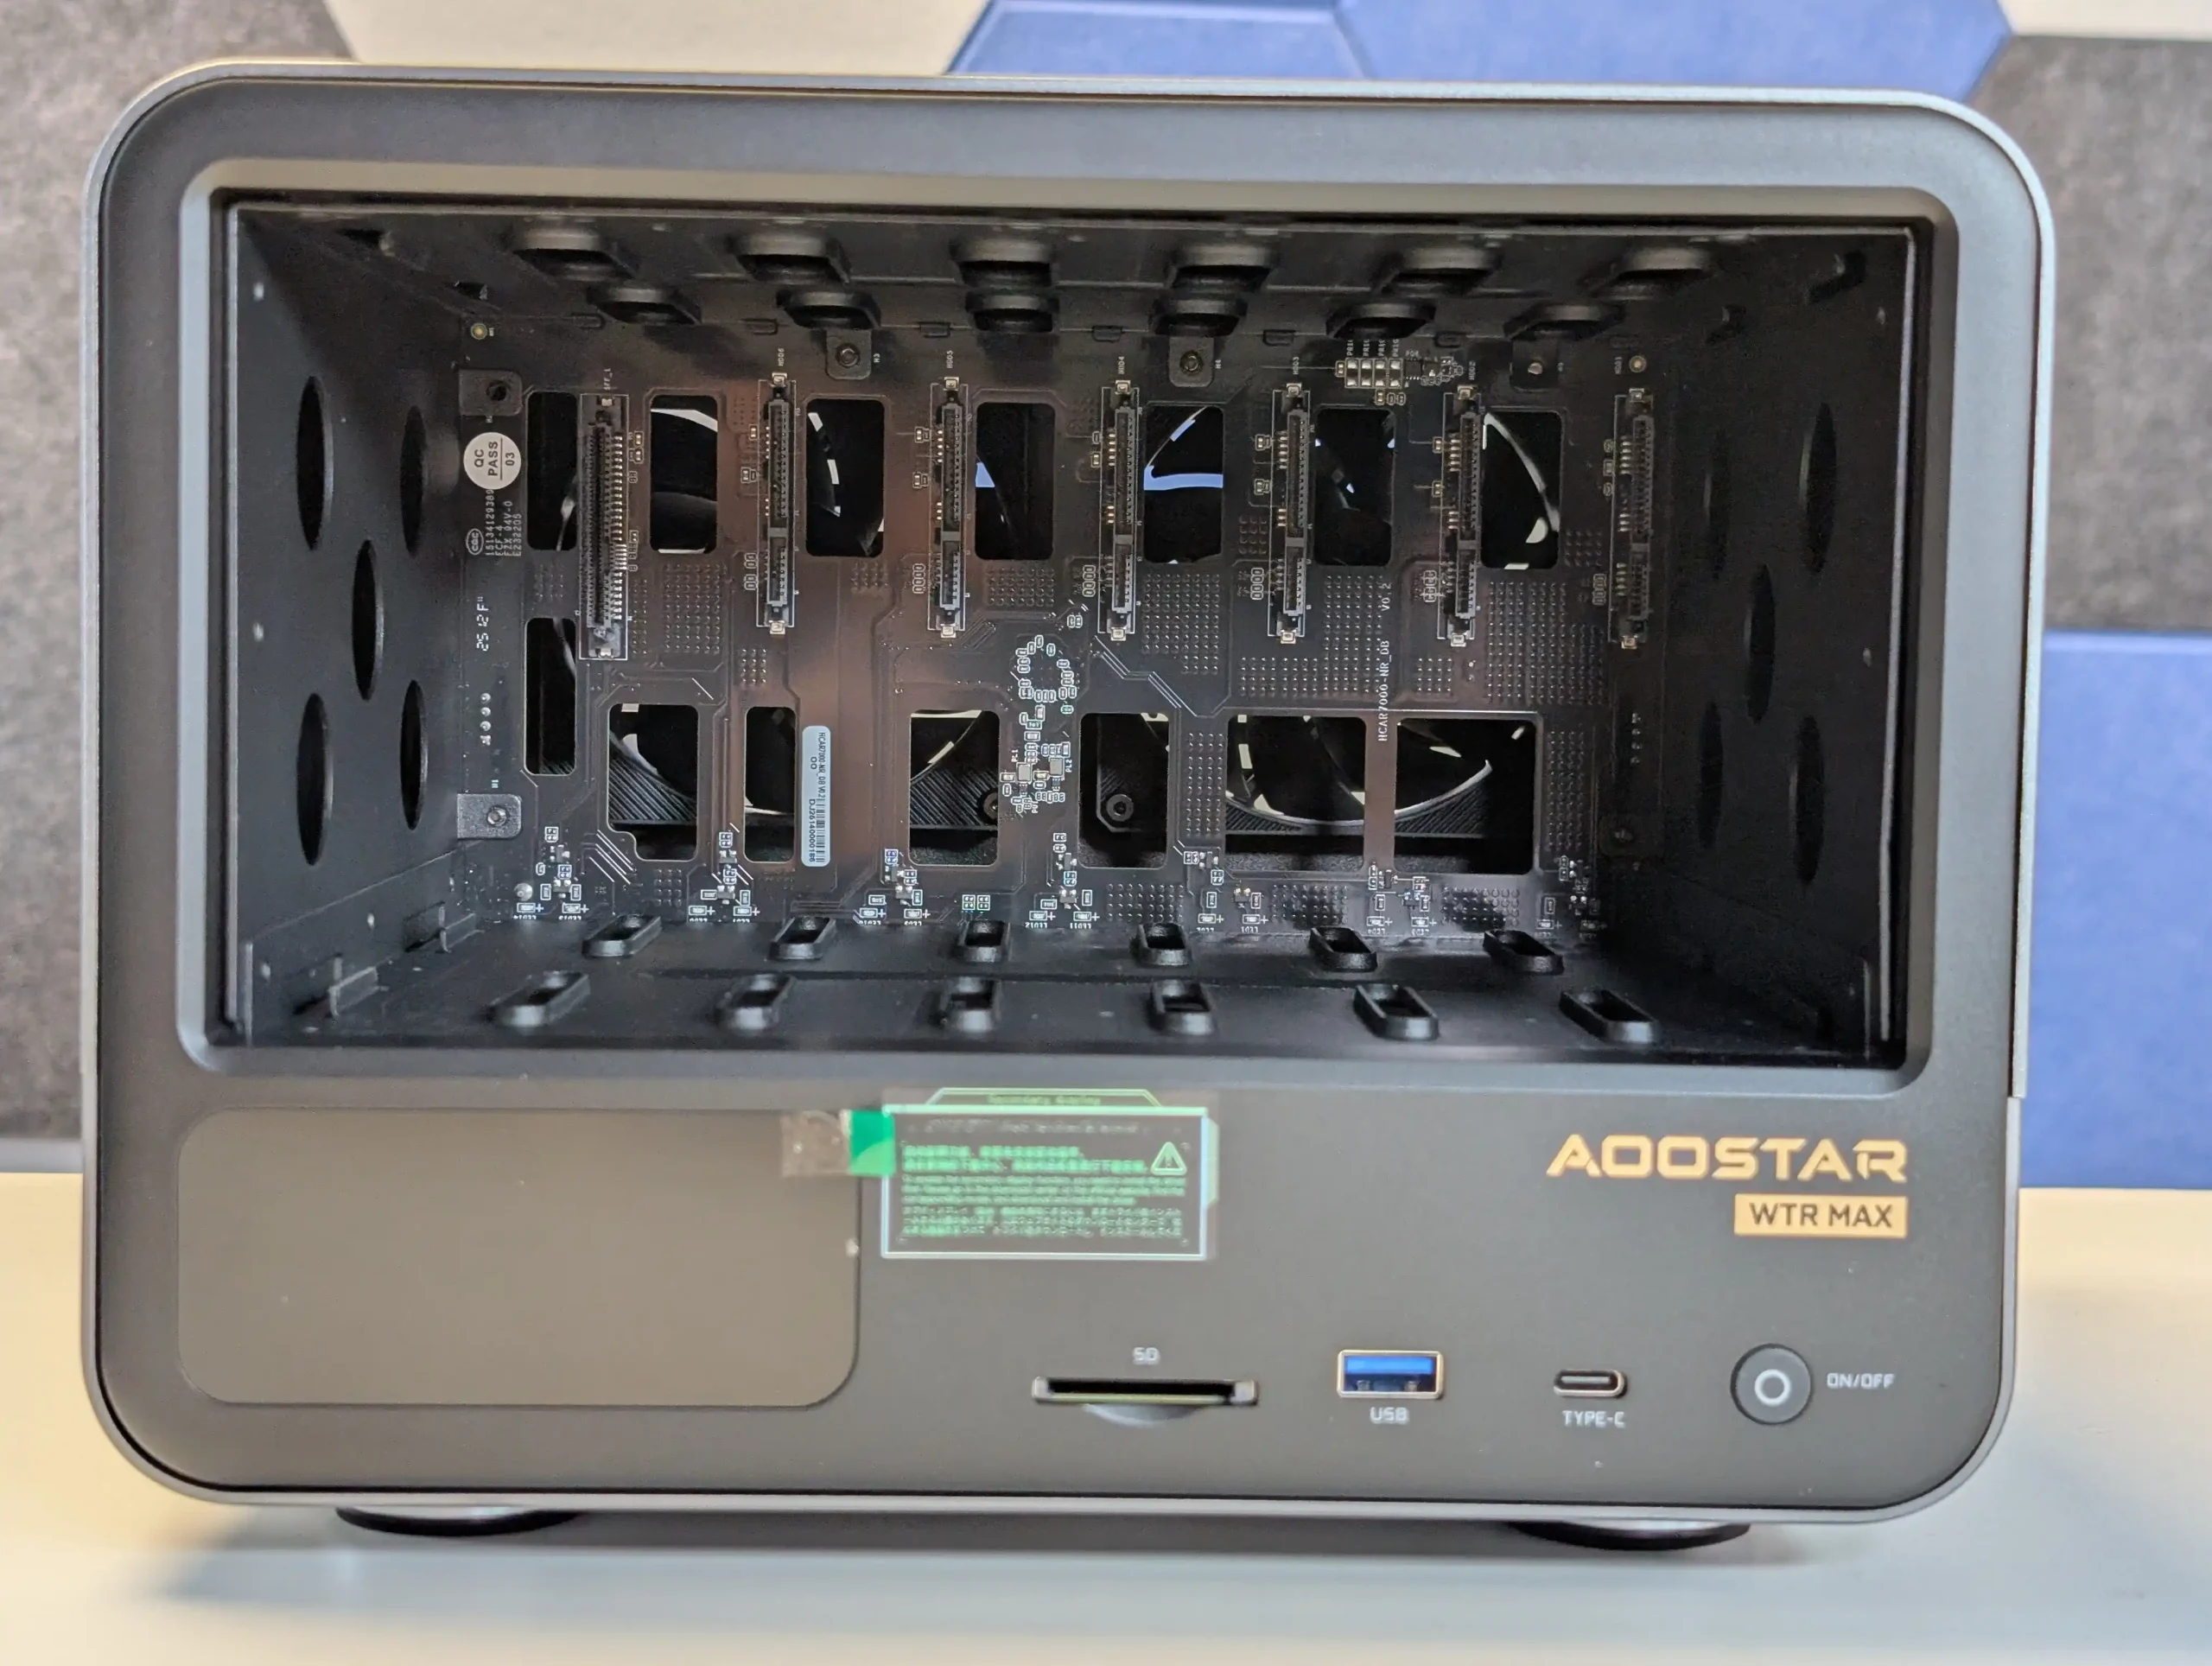
Air is directed over this tray by the two rear-mounted fans, with additional airflow routed from below via the central fan on the base of the chassis. In testing, even under back-to-back file transfer tests using Unraid’s file mover and native benchmark tools, SSD temperatures rarely exceeded 48°C. The inclusion of independent airflow for the NVMe zone demonstrates thoughtful separation of thermal domains within the small enclosure, reducing the chance of thermal throttling during concurrent high-speed transfers.
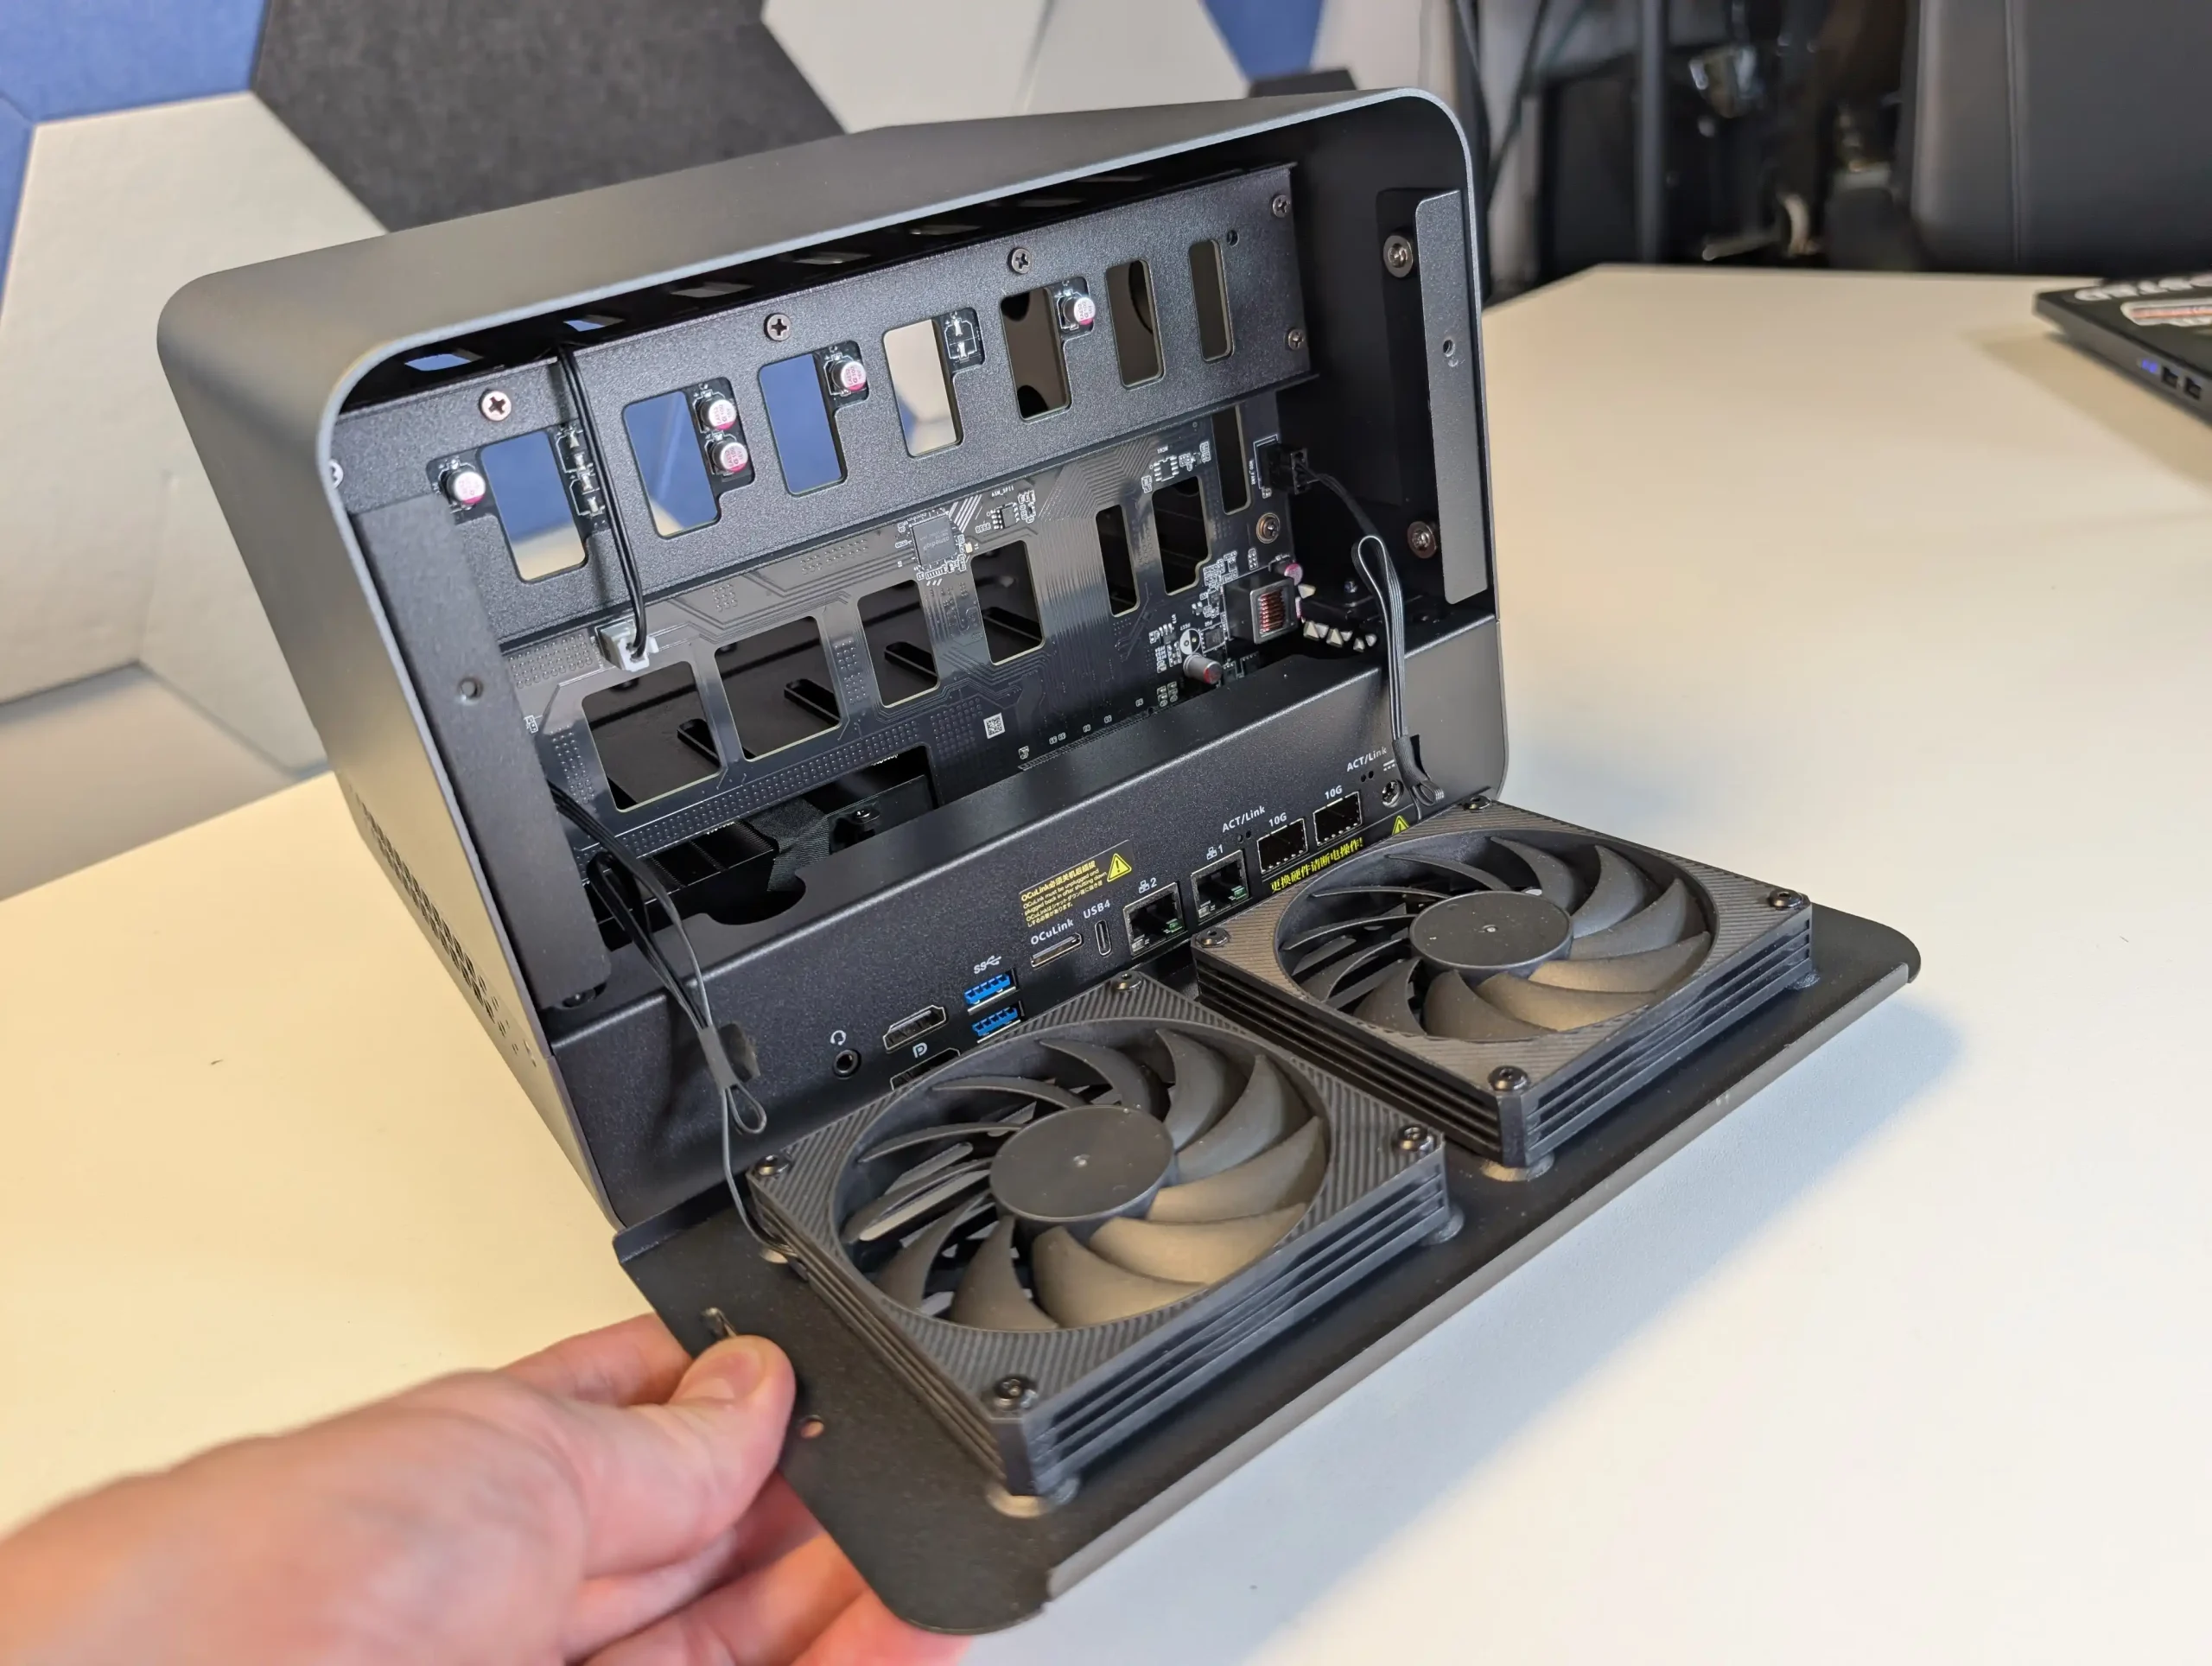
The drive configuration options available on the WTR Max support a flexible tiered storage approach—useful in both home lab and small office environments. For instance, the six SATA bays can accommodate high-capacity HDDs (up to 24TB each), suitable for media archiving or surveillance video, while the M.2 slots can be allocated for fast read/write operations, app deployments, or SSD caching layers. Real-world bandwidth testing of these drives showed the Gen 4 x1 slots achieving around 1.6GB/s read speeds and the Gen 4 x2 slots reaching 2.9GB/s, aligning with their advertised capabilities.
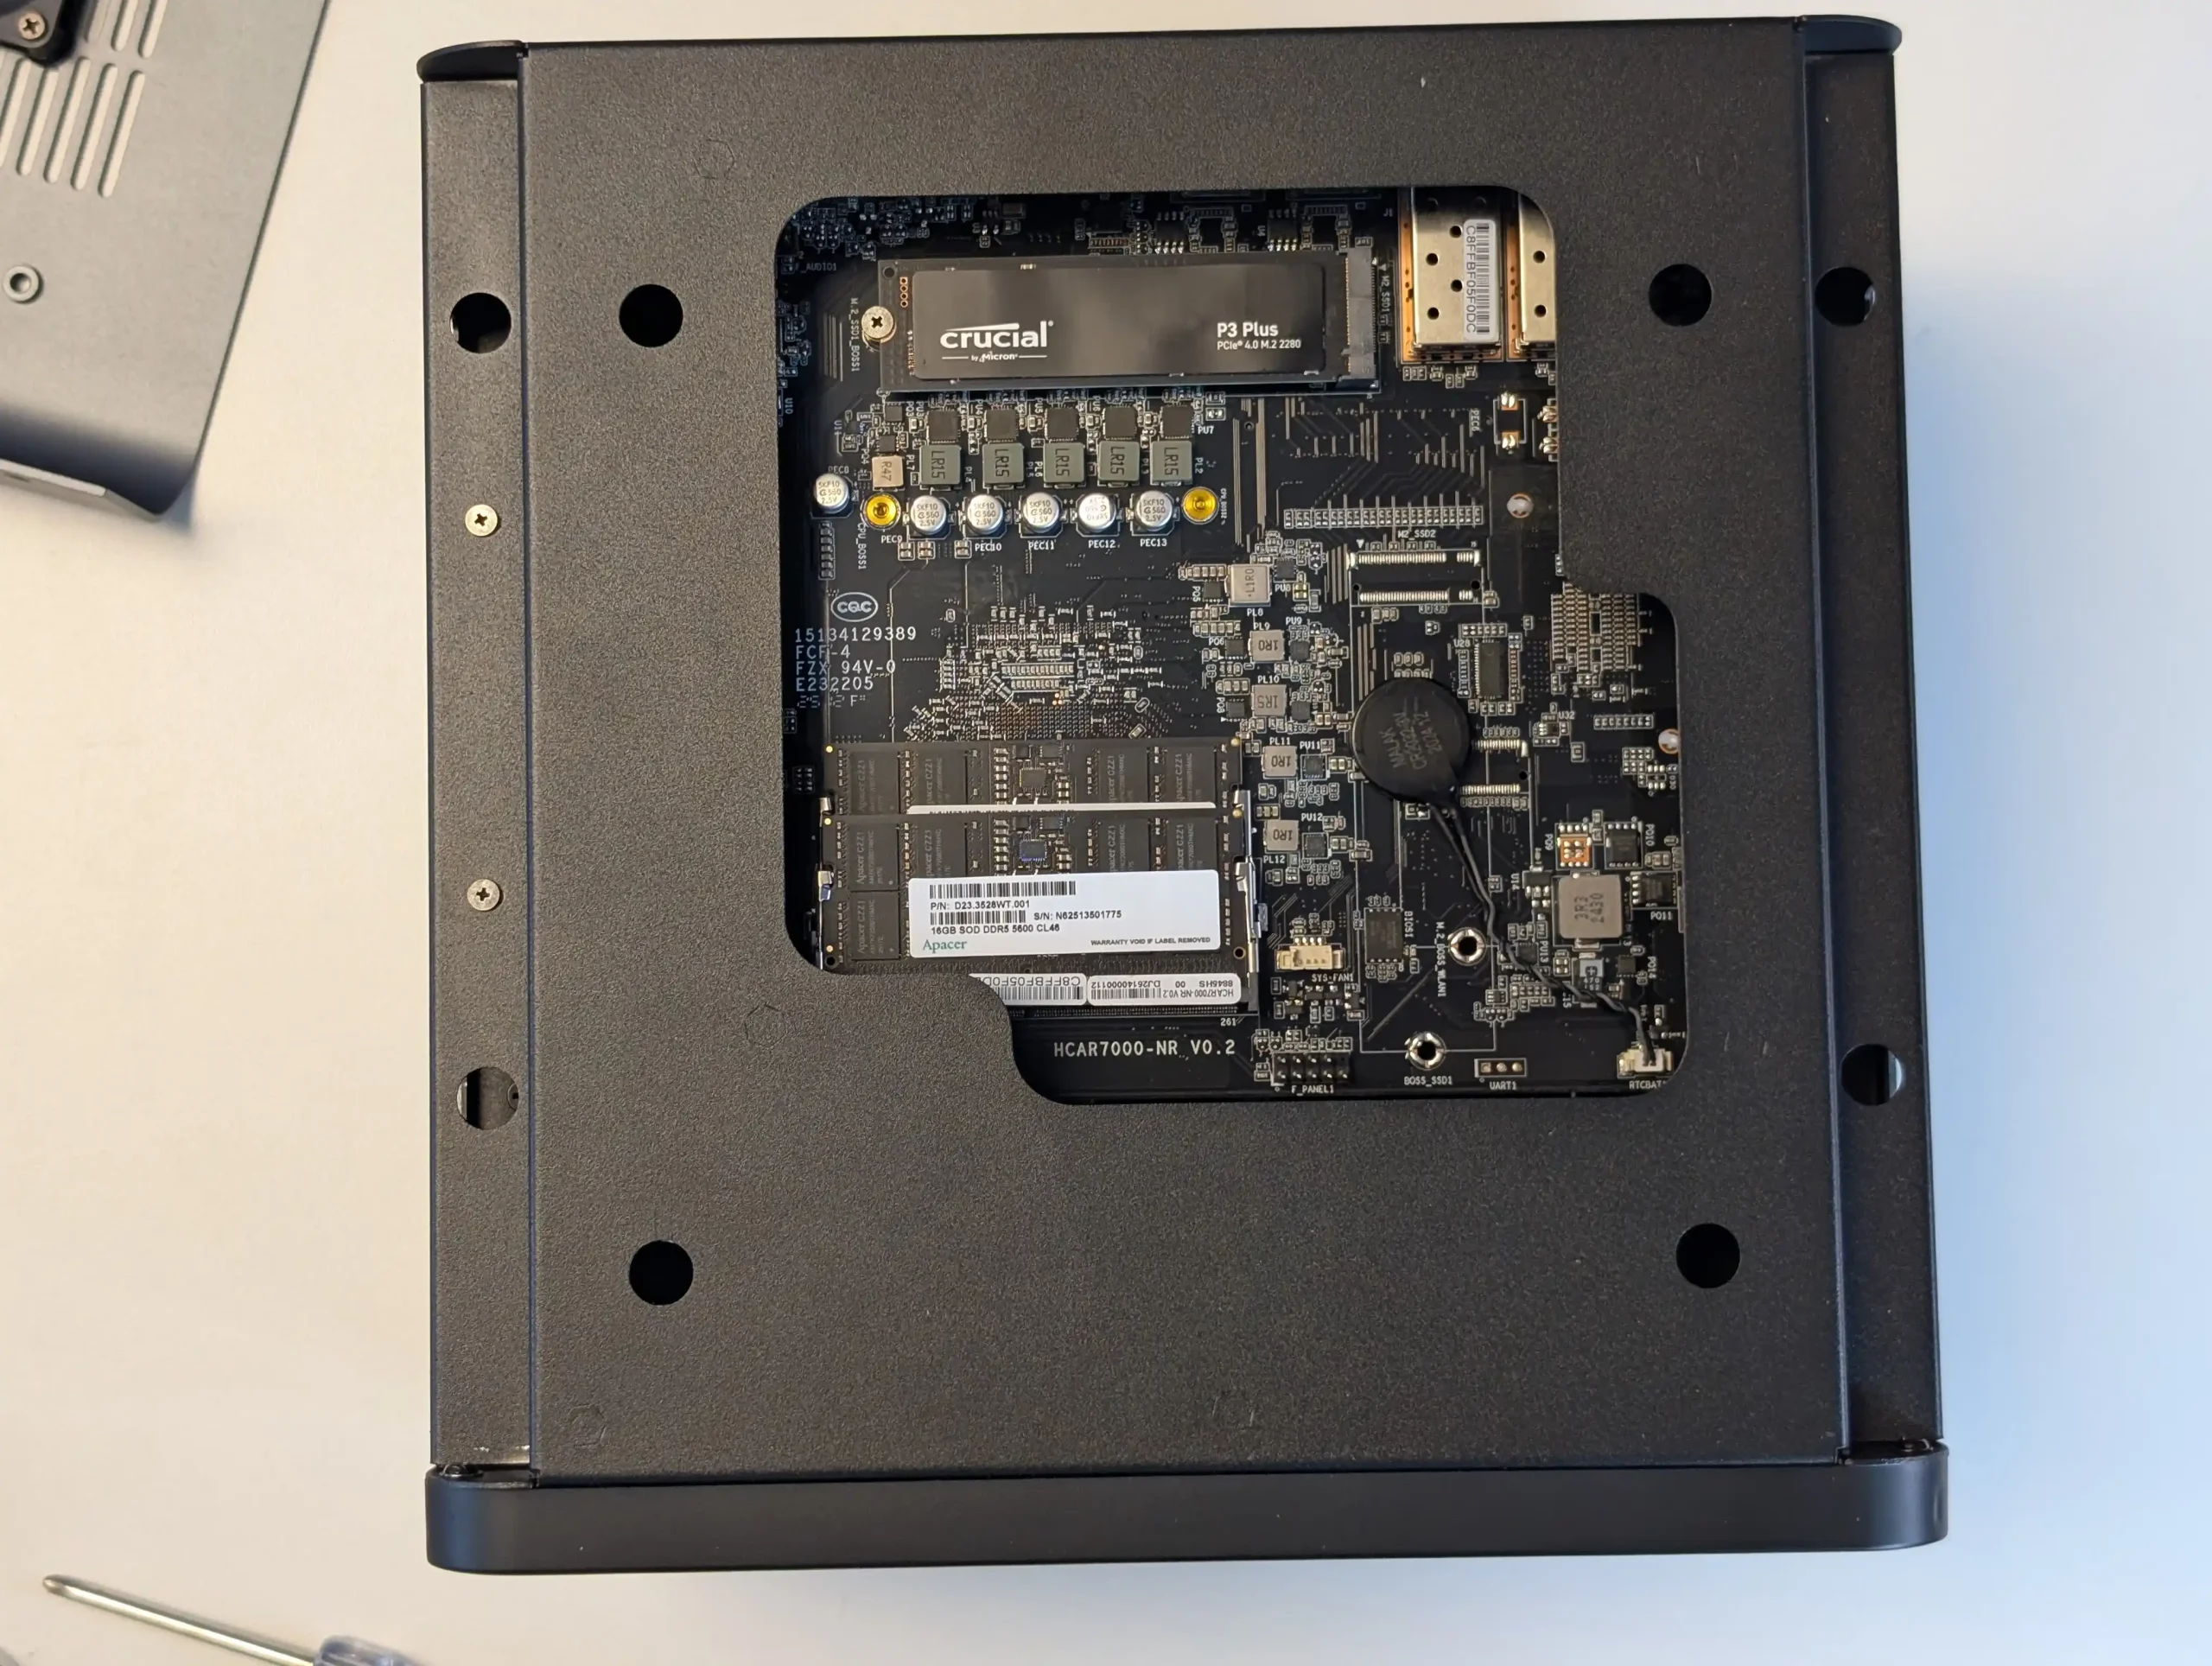
Although inter-M.2 transfer rates peaked at 500–600MB/s—suggesting internal lane bottlenecks (i.e sending data between each of the 4 m.2 on this 7th bay) —the system still provided consistent and predictable performance. This architecture supports phased upgrades, allowing users to populate the system gradually based on workload growth without disassembling core components or compromising airflow design.
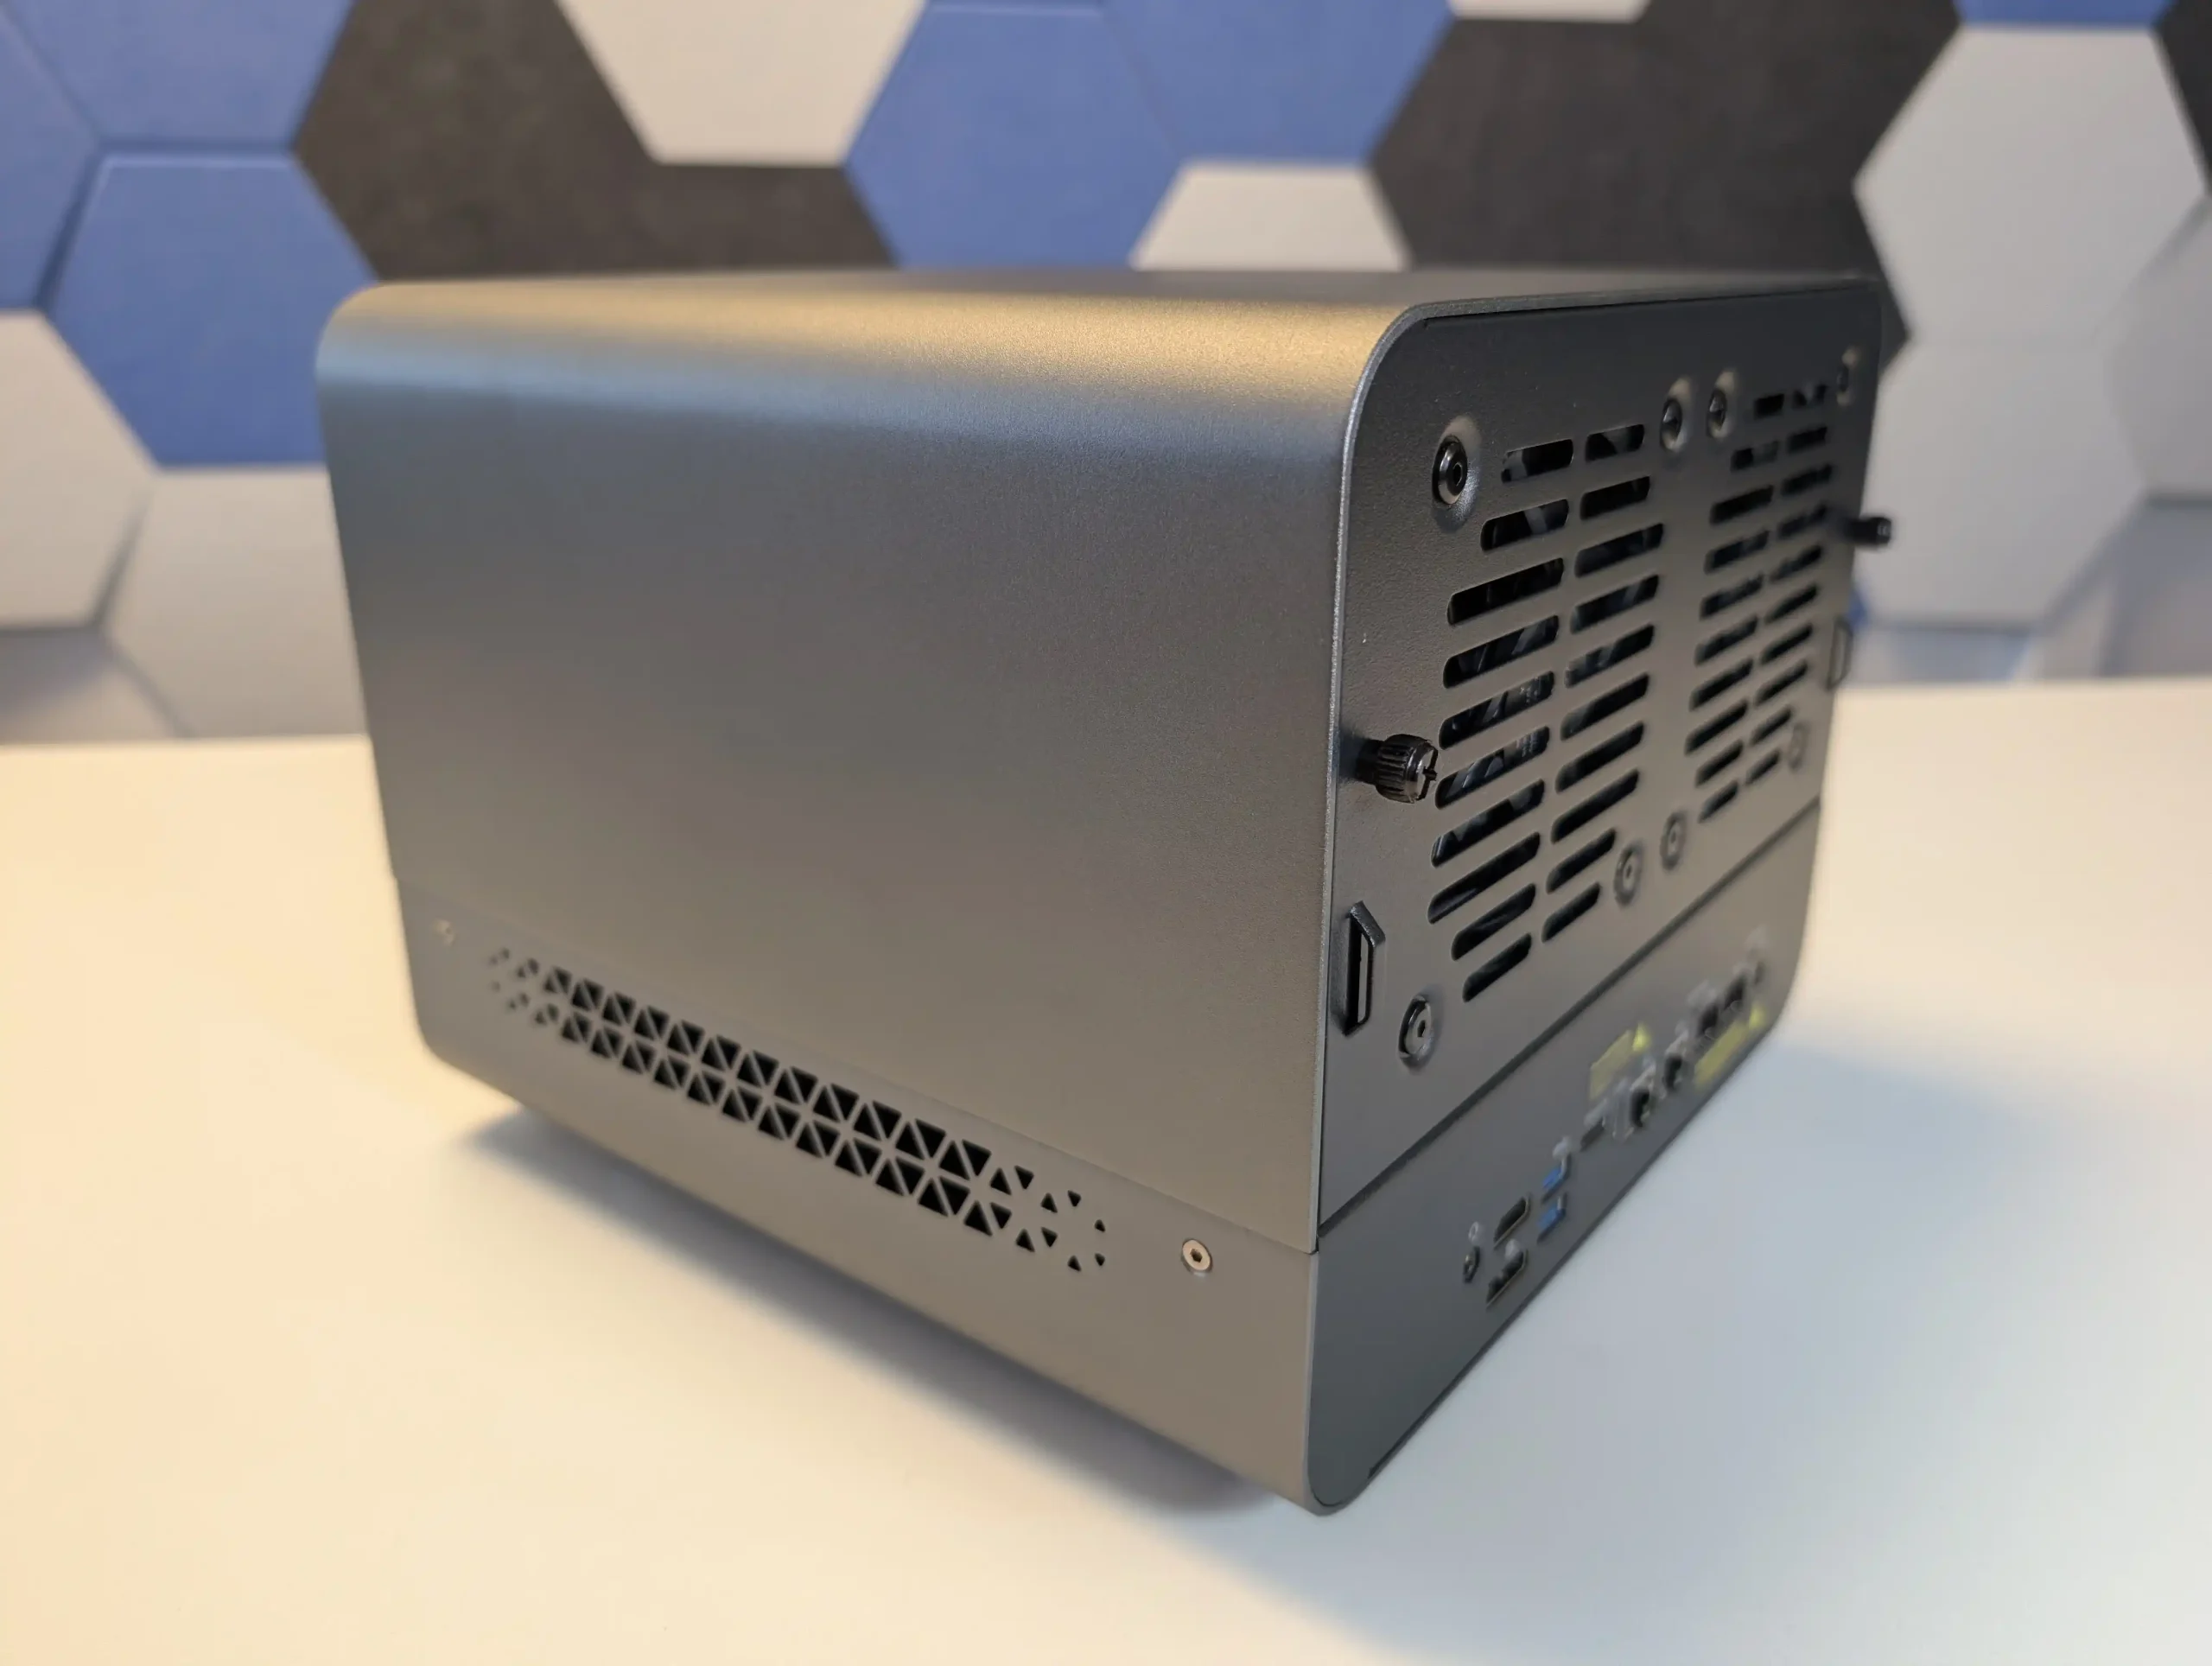
At the core of the Aoostar WTR Max lies the AMD Ryzen 7 PRO 8845HS processor, an 8-core, 16-thread chip built on the Zen 4 architecture using TSMC’s 4nm process. This processor, operating with a base clock of 3.8 GHz and boosting up to 5.1 GHz, is typically found in business-class notebooks and embedded workstations. Its inclusion in a NAS-oriented device marks a shift toward more versatile and compute-intensive roles for compact systems.
It also supports configurable TDPs of 35W, 45W, and up to 54W, depending on cooling and power profiles, allowing the system to balance efficiency and performance based on workload. Integrated Radeon 780M graphics, based on the RDNA 3 architecture with 12 compute units, deliver hardware-accelerated AV1, HEVC, and H.264 encoding and decoding. During stress testing, the WTR Max handled simultaneous 4K and 8K video transcoding jobs in Plex with CPU usage remaining below 50%, thanks in part to hardware transcoding support via the integrated GPU. This level of onboard media processing is rare in NAS systems, even among high-end appliances.

In terms of memory support, the device offers two DDR5-5600 SODIMM slots, allowing for up to 128GB of total RAM. More notably, the platform supports ECC (Error Correcting Code) memory when paired with compatible modules—an enterprise-grade feature typically limited to workstation-class motherboards. While the review unit shipped with 32GB of standard DDR5 memory, ECC compatibility was verified via low-level SSH diagnostics and BIOS interrogation, confirming that ECC is fully operational at the hardware level.
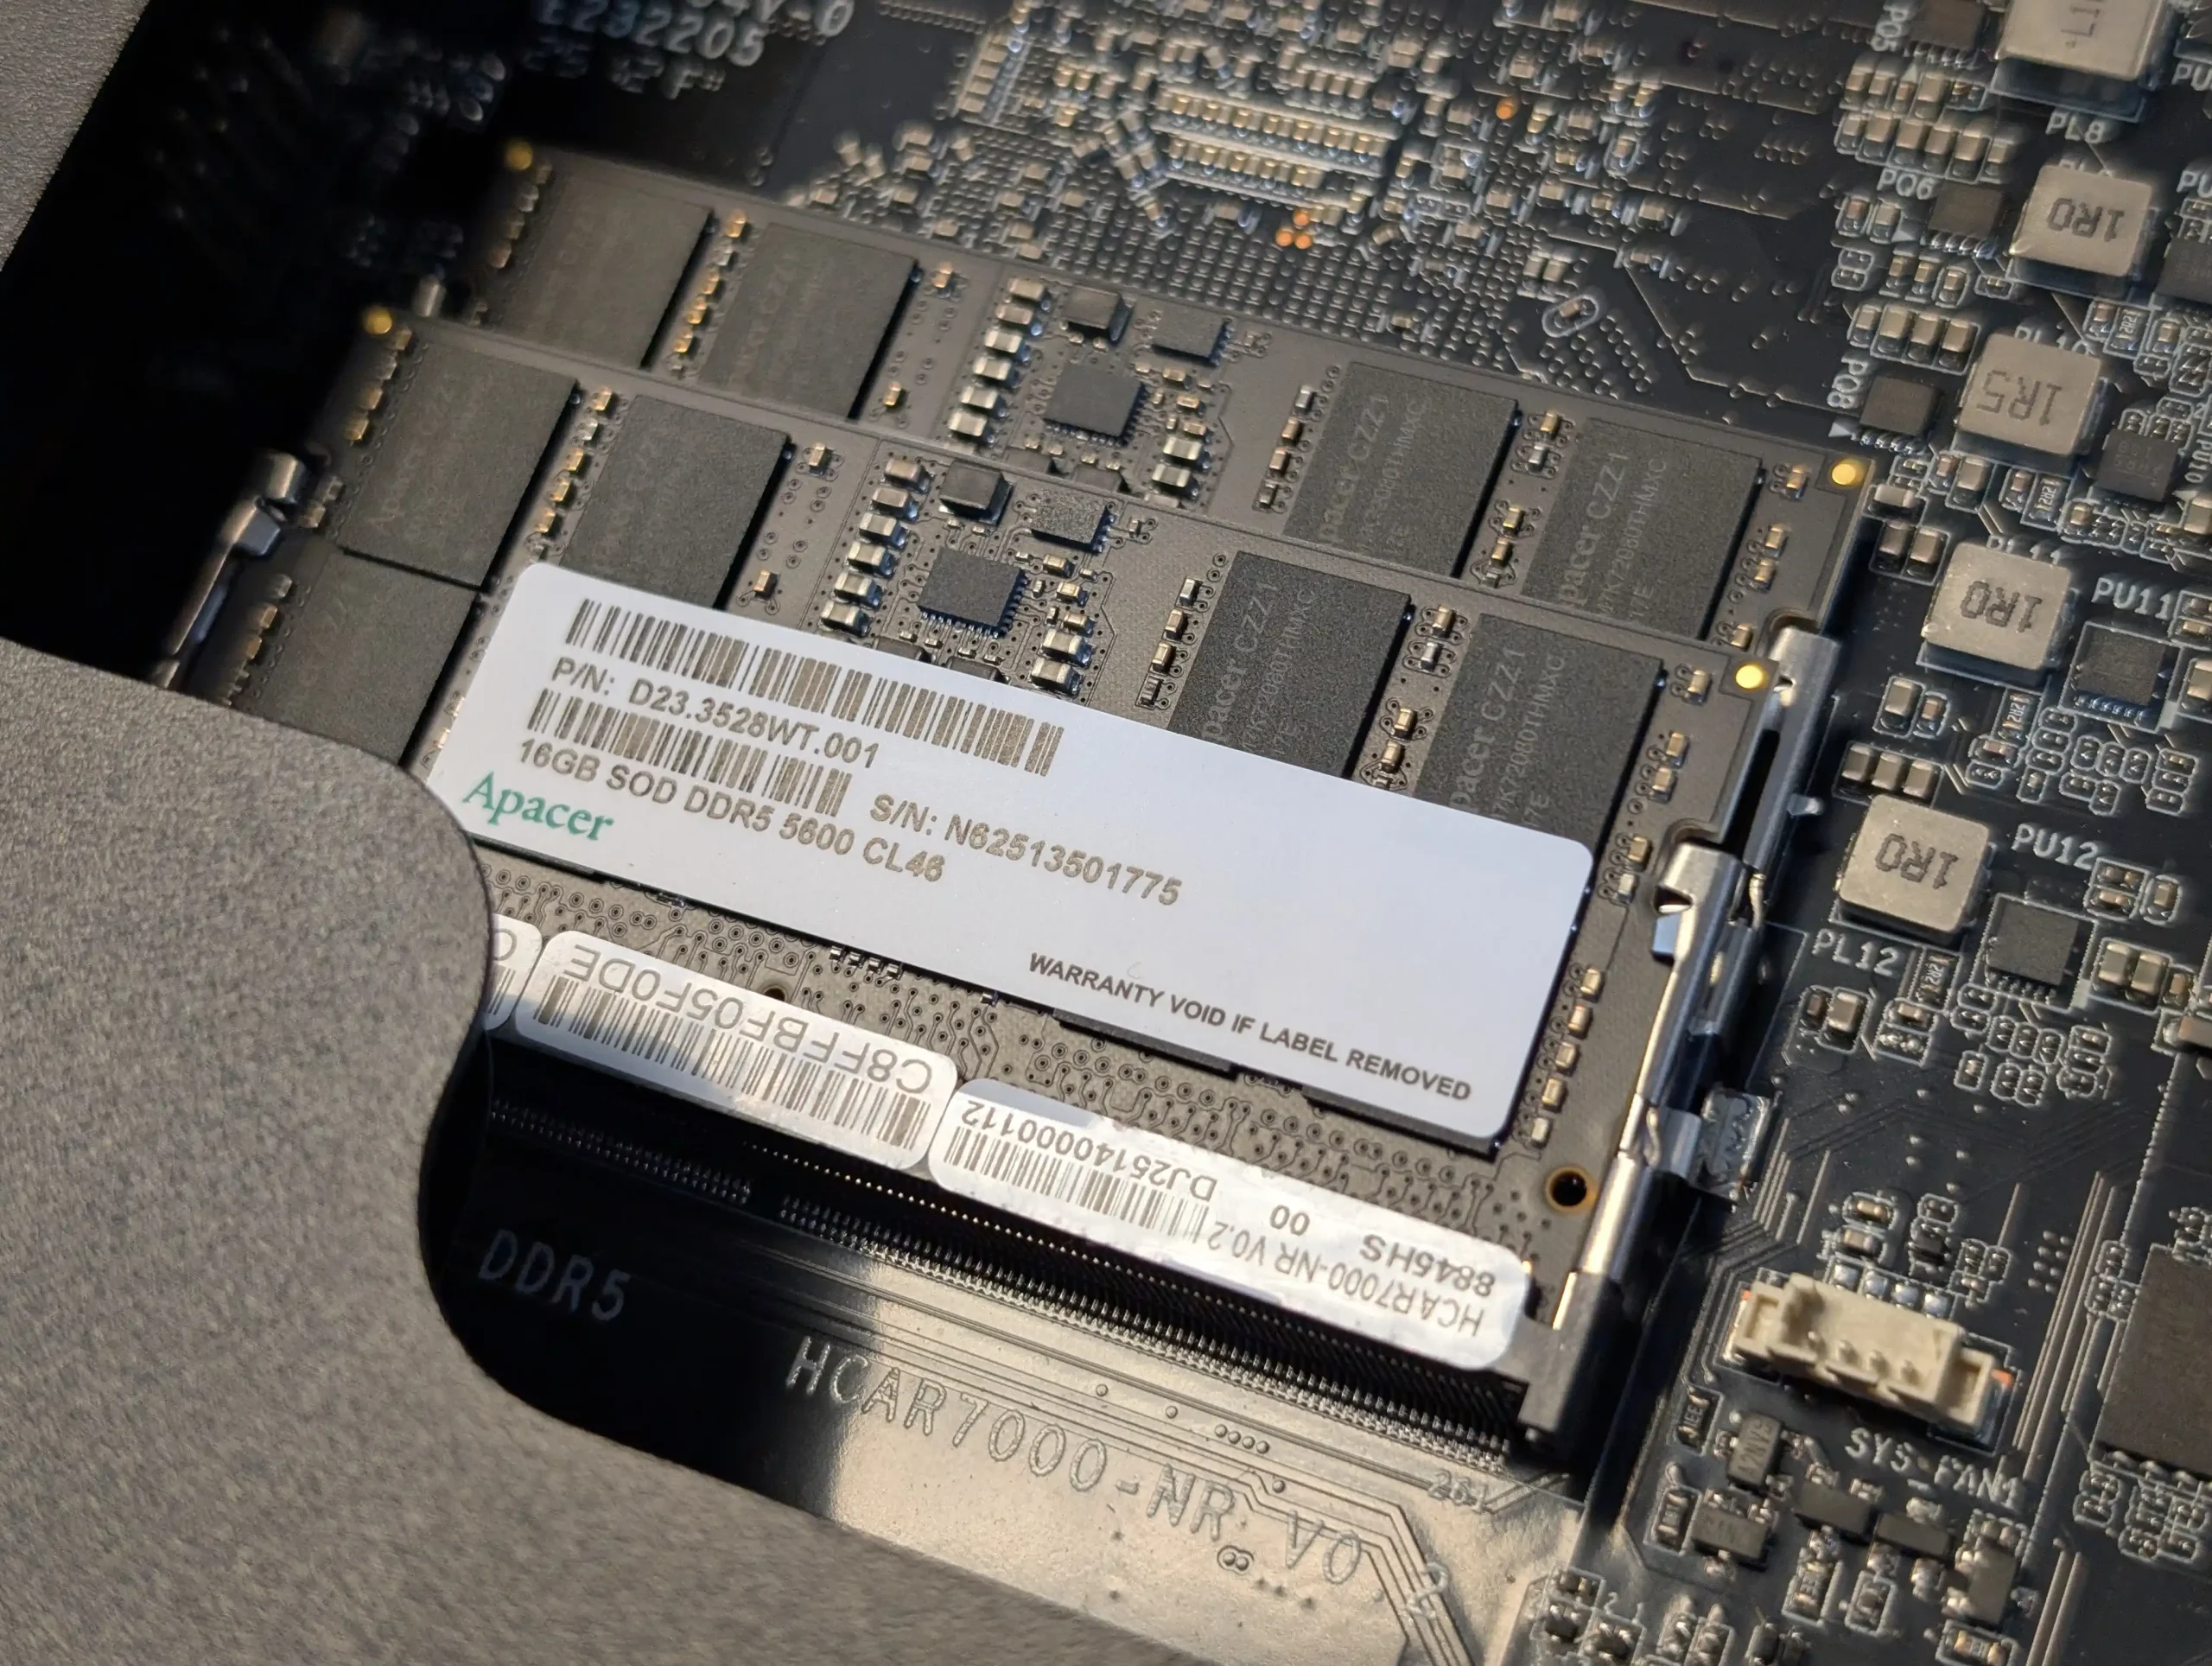
During tests involving Proxmox, six Windows 10 virtual machines and two Ubuntu VMs ran concurrently, with each VM allocated 2 to 4 vCPUs and 2 to 4 GB of memory. No instability or memory-related errors were recorded, and the system maintained consistent performance under variable load conditions. The side-by-side DIMM slot arrangement benefits from direct airflow via the base intake fan, which also provides passive cooling to the adjacent motherboard-mounted NVMe SSD slot.
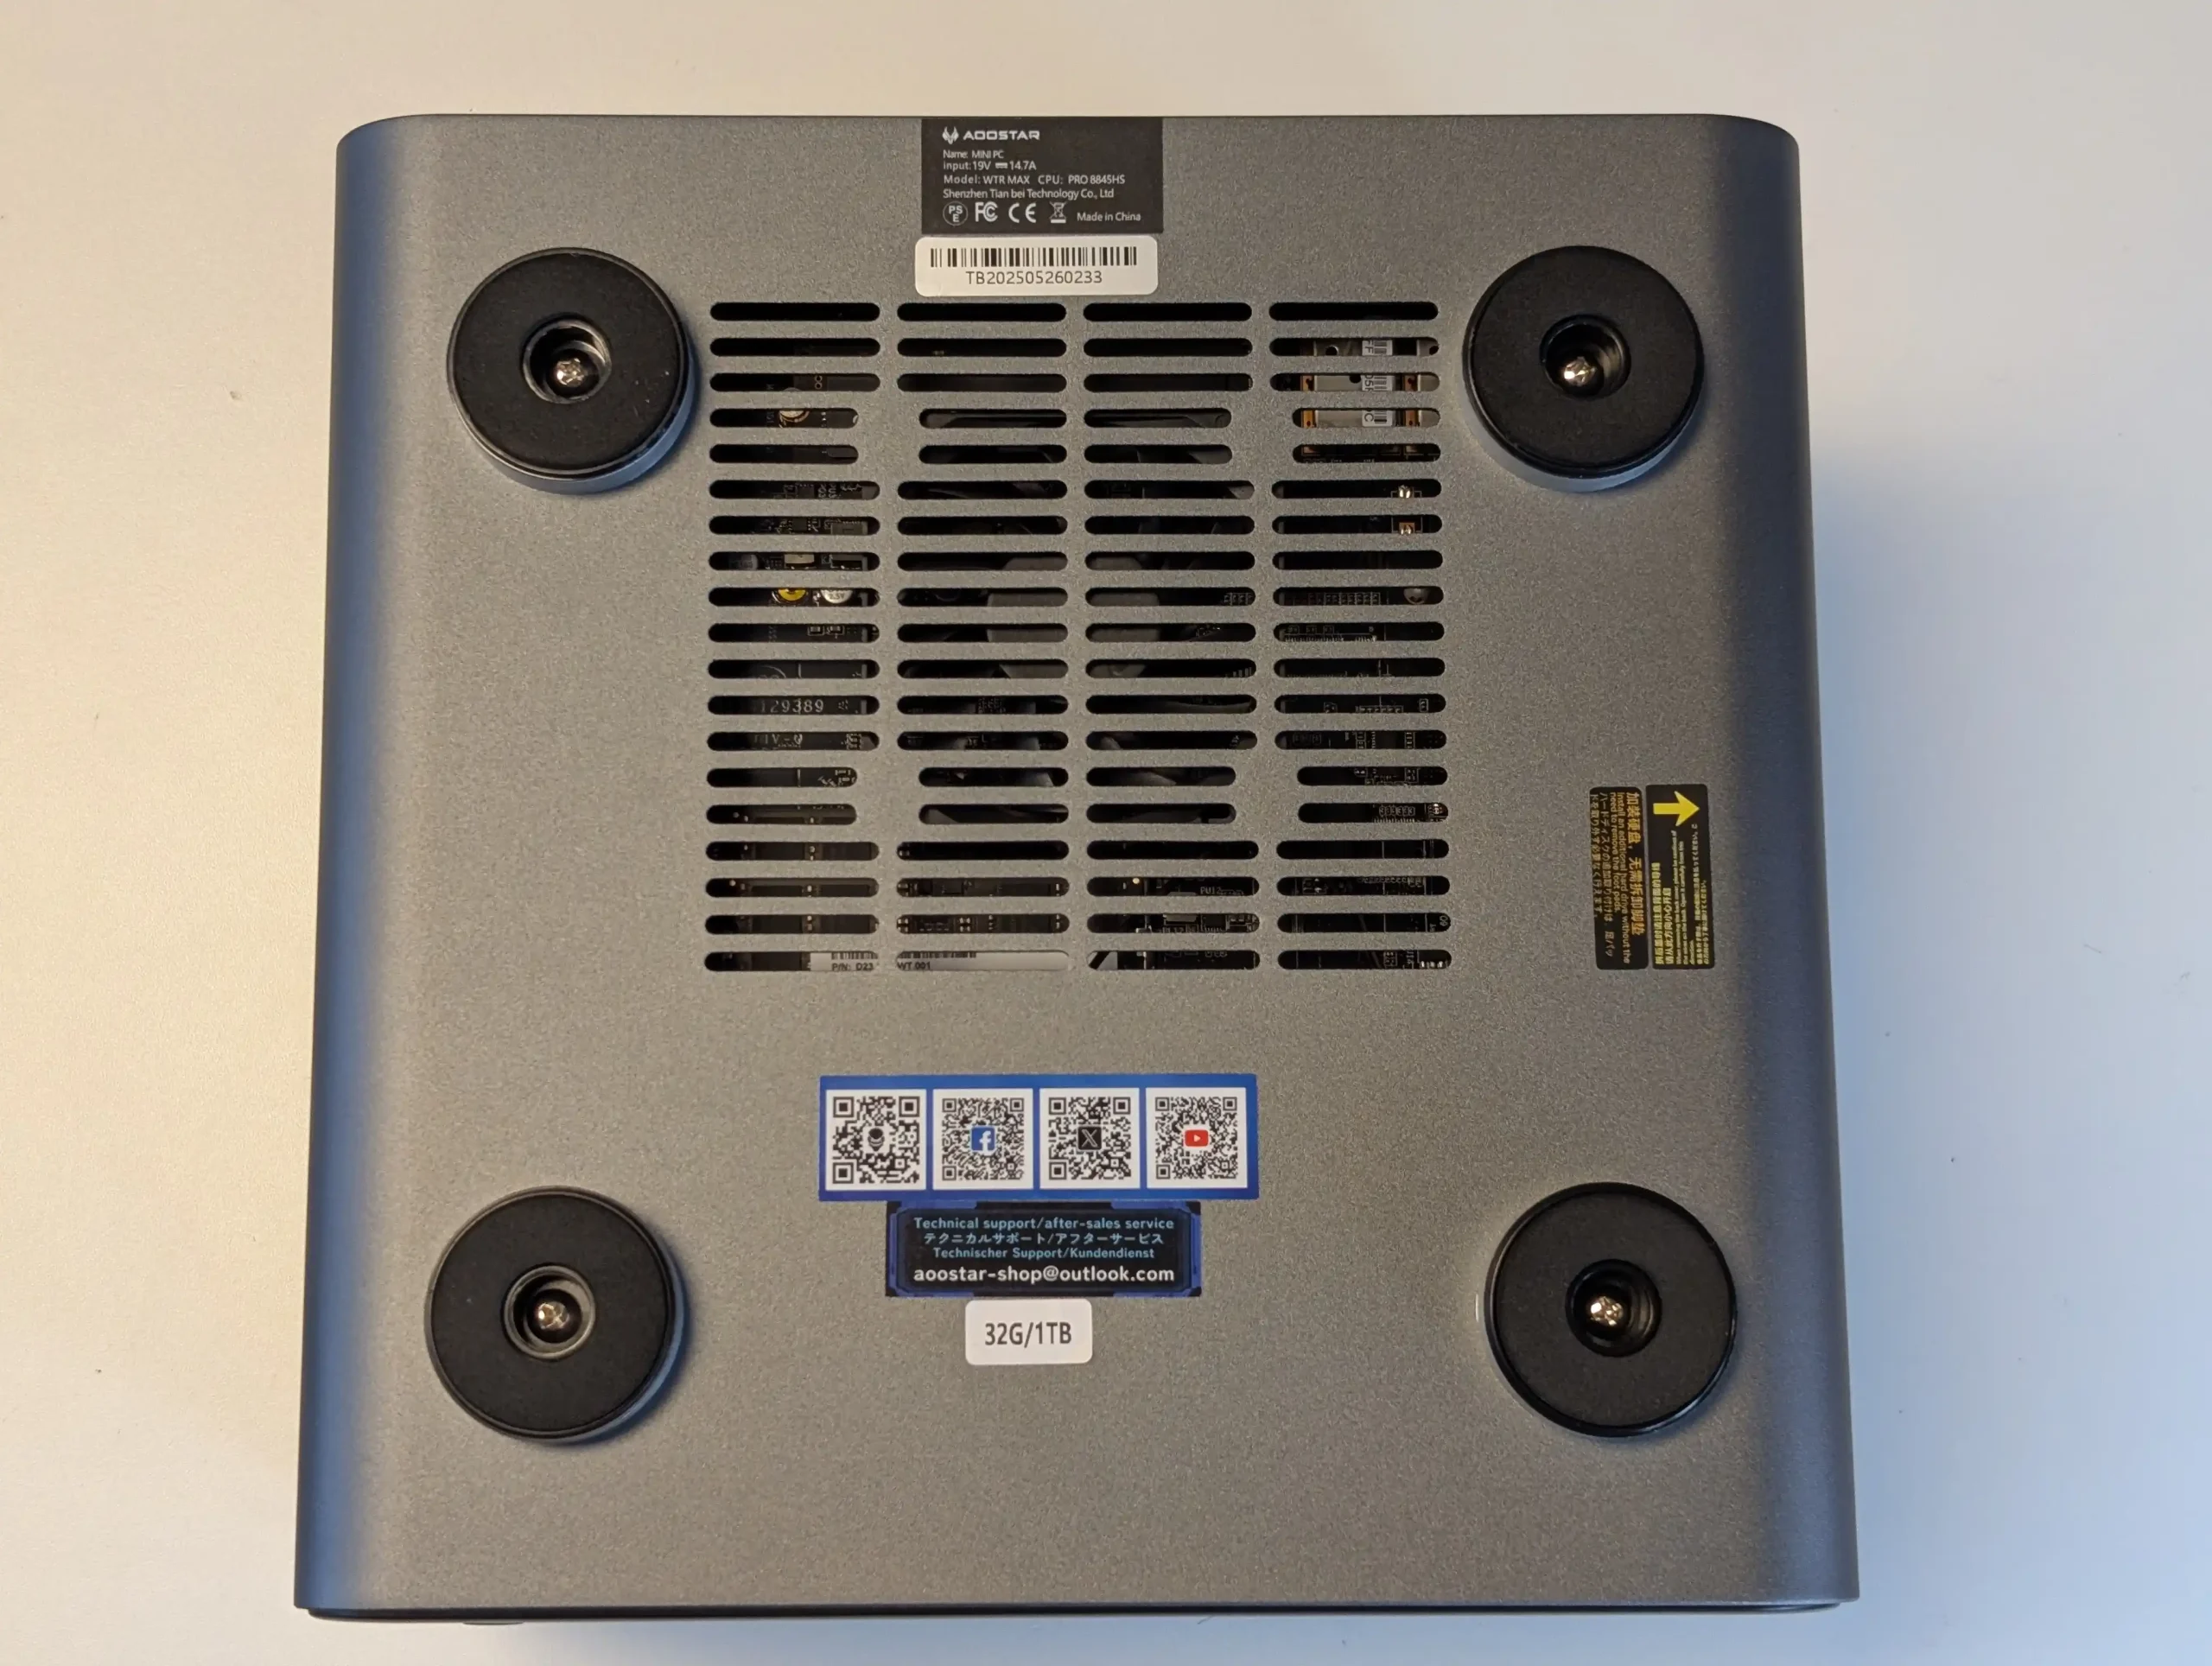
Thermal performance is managed by Aoostar’s proprietary Glacier Pro 1.0 cooling solution, which integrates a vapor chamber heat spreader on the CPU and a multi-fan chassis ventilation layout. The vapor chamber, paired with a low-profile active cooler, rapidly disperses thermal load from the CPU across the copper plate, minimizing heat concentration during burst operations. The system features four fans: one at the base pulling intake air upward across the motherboard, two rear-mounted exhaust fans, and one CPU-mounted blower. Each thermal zone—CPU, NVMe tray, and SATA chamber—benefits from isolated airflow paths.
During a 24-hour access schedule test simulating hourly user activity, CPU temperatures ranged from 35°C at idle to 49°C under peak load with 10GbE transfers and active virtual machines. Even when pushing the system with forced maximum fan speed and high CPU utilization, recorded noise output remained within 43–44 dBA, with a base idle level of 35–38 dBA.
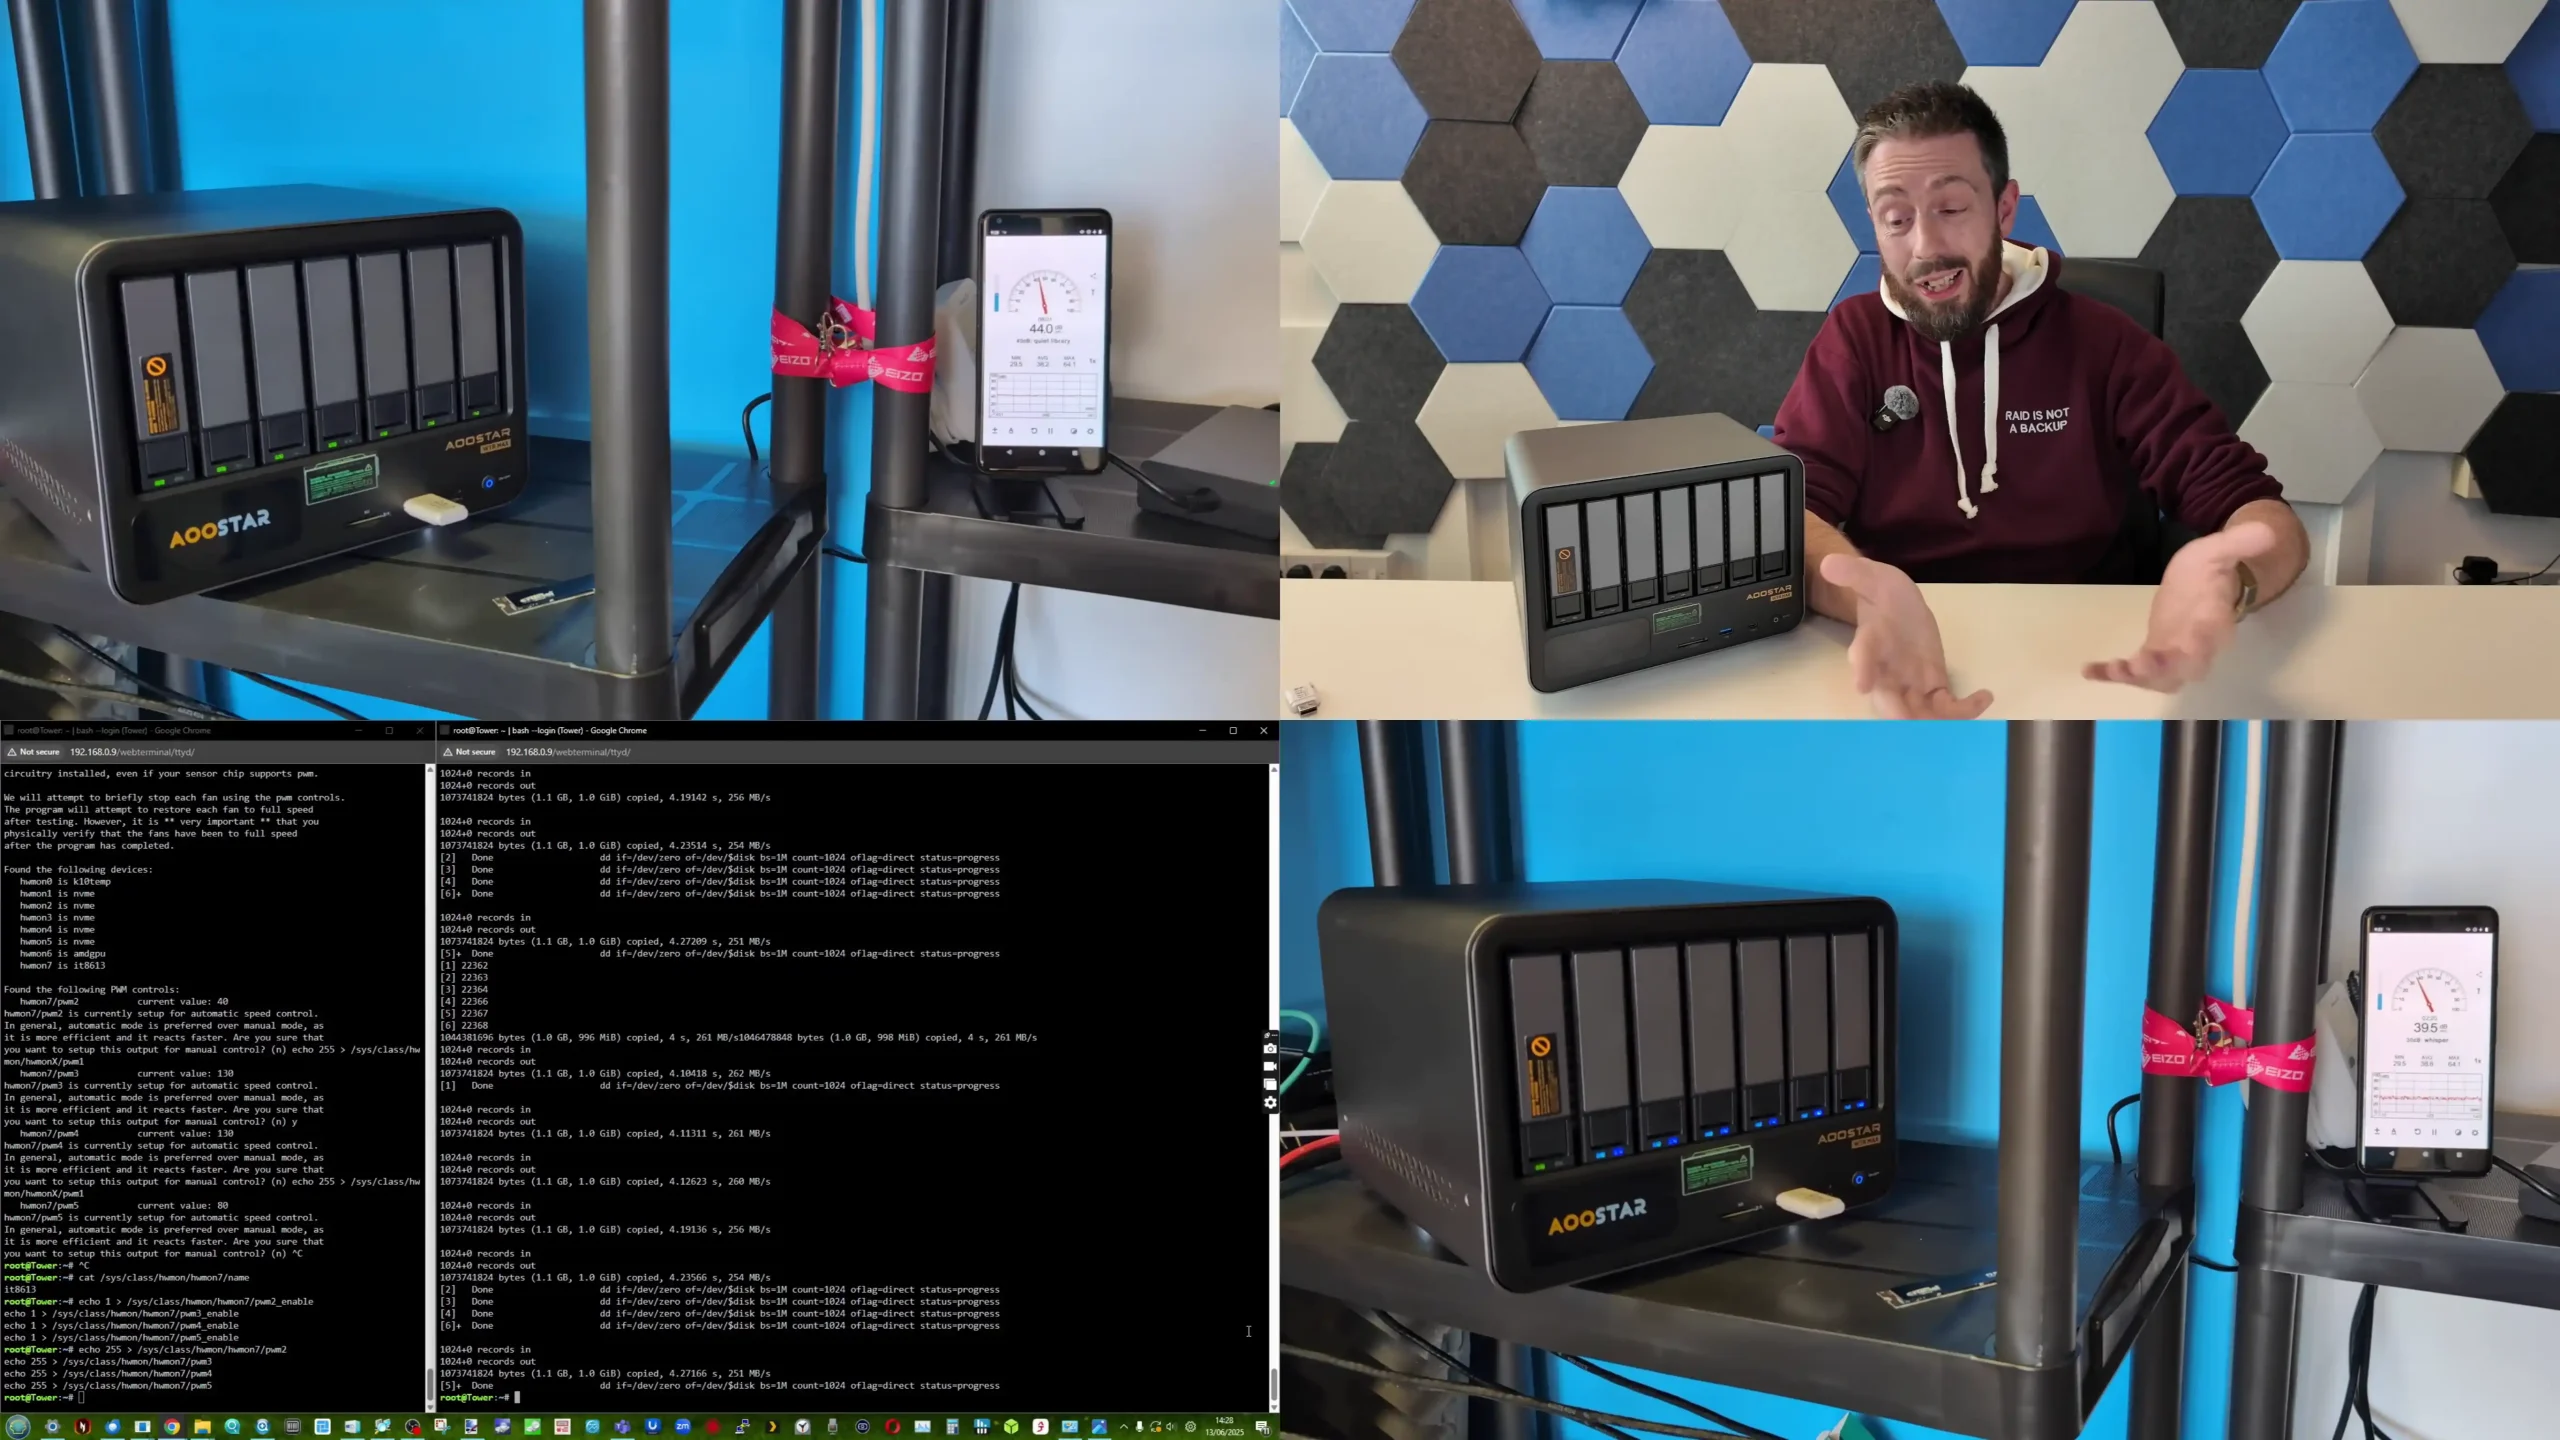
For a system with this many internal components—including six HDDs, five SSDs, and four fans—the acoustic footprint was relatively modest, especially considering the close thermal spacing and the volume of air moved internally.
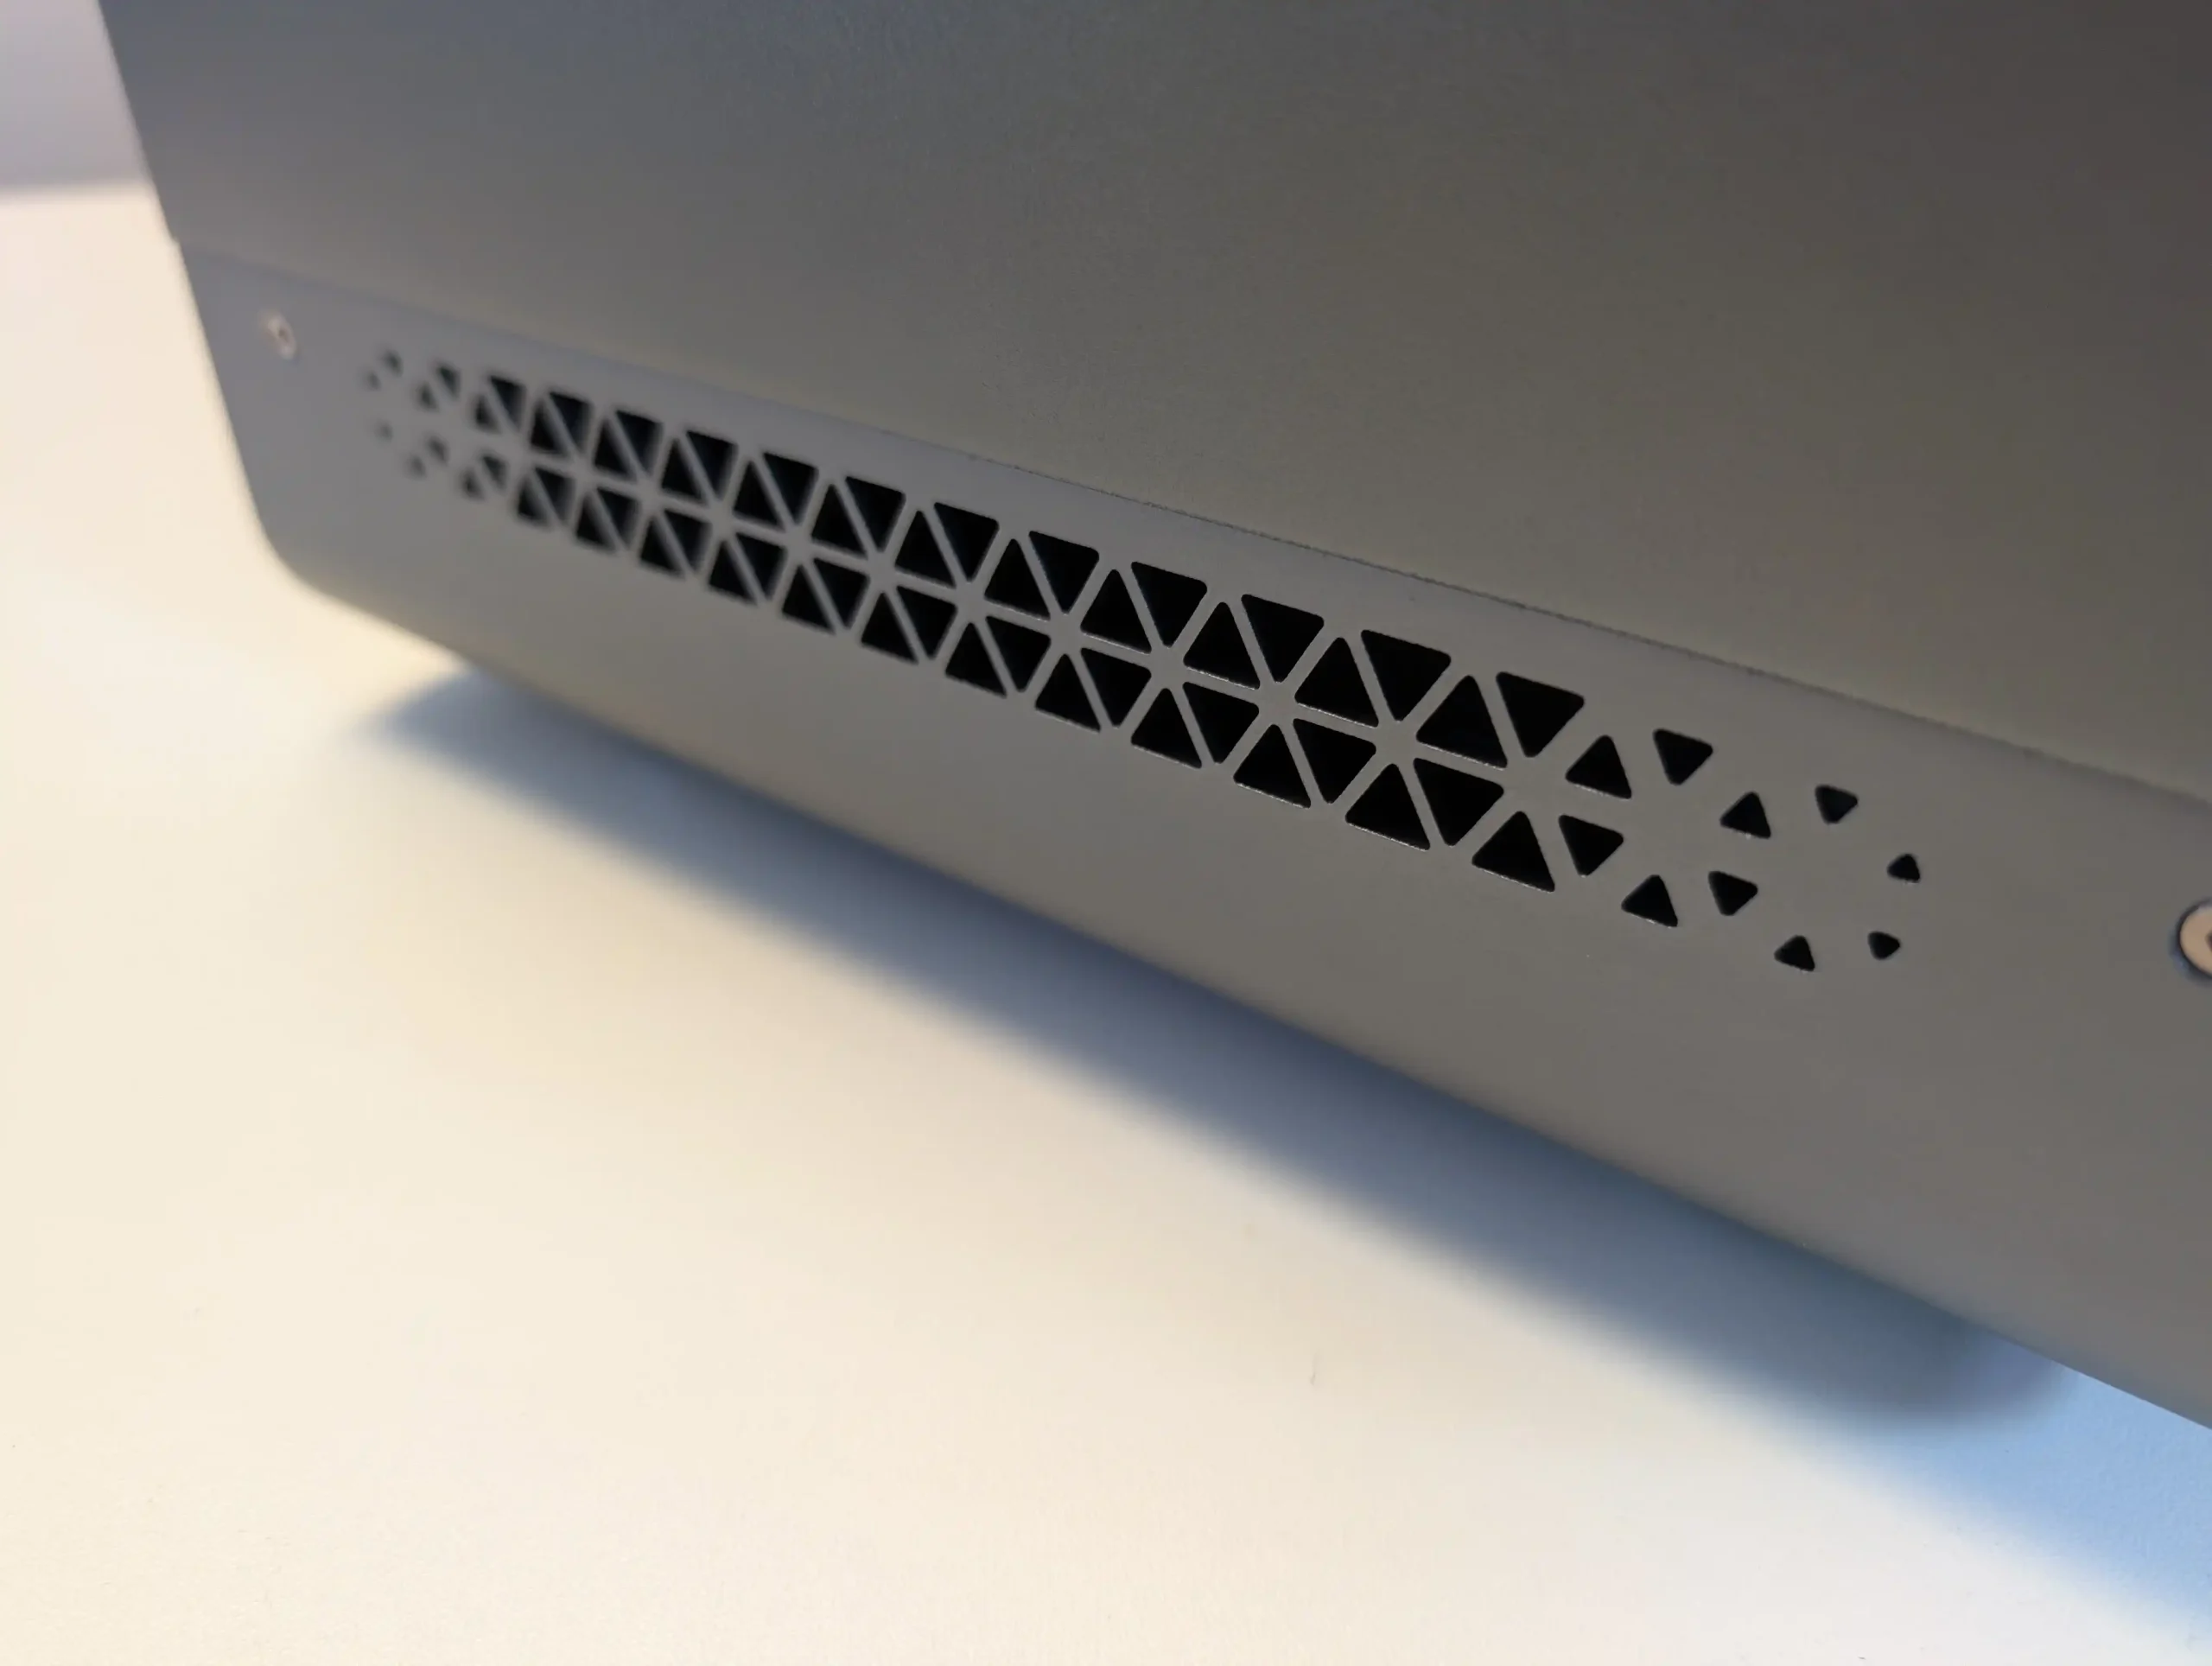
| Component | Specification |
|---|---|
| CPU | AMD Ryzen 7 PRO 8845HS (8C/16T, 3.8–5.1 GHz, Zen 4, 4nm, 35–54W configurable TDP) |
| Integrated Graphics | Radeon 780M (RDNA 3, 12 CUs, up to 2.7 GHz, AV1/HEVC/H.264 support, HW transcoding) |
| Memory | 2x DDR5-5600 SODIMM slots, up to 128GB total, ECC support (validated) |
| Cooling System | Glacier Pro 1.0: Vapor chamber, 4 fans (rear x2, base intake x1, CPU x1) |
| Thermal Range | 35°C idle, 47–49°C under load; 43–44 dBA max, 35–38 dBA typical fan noise |
| Power Supply | 280W external PSU; power draw tested: 18W (idle, no drives), 73–89W peak loaded |
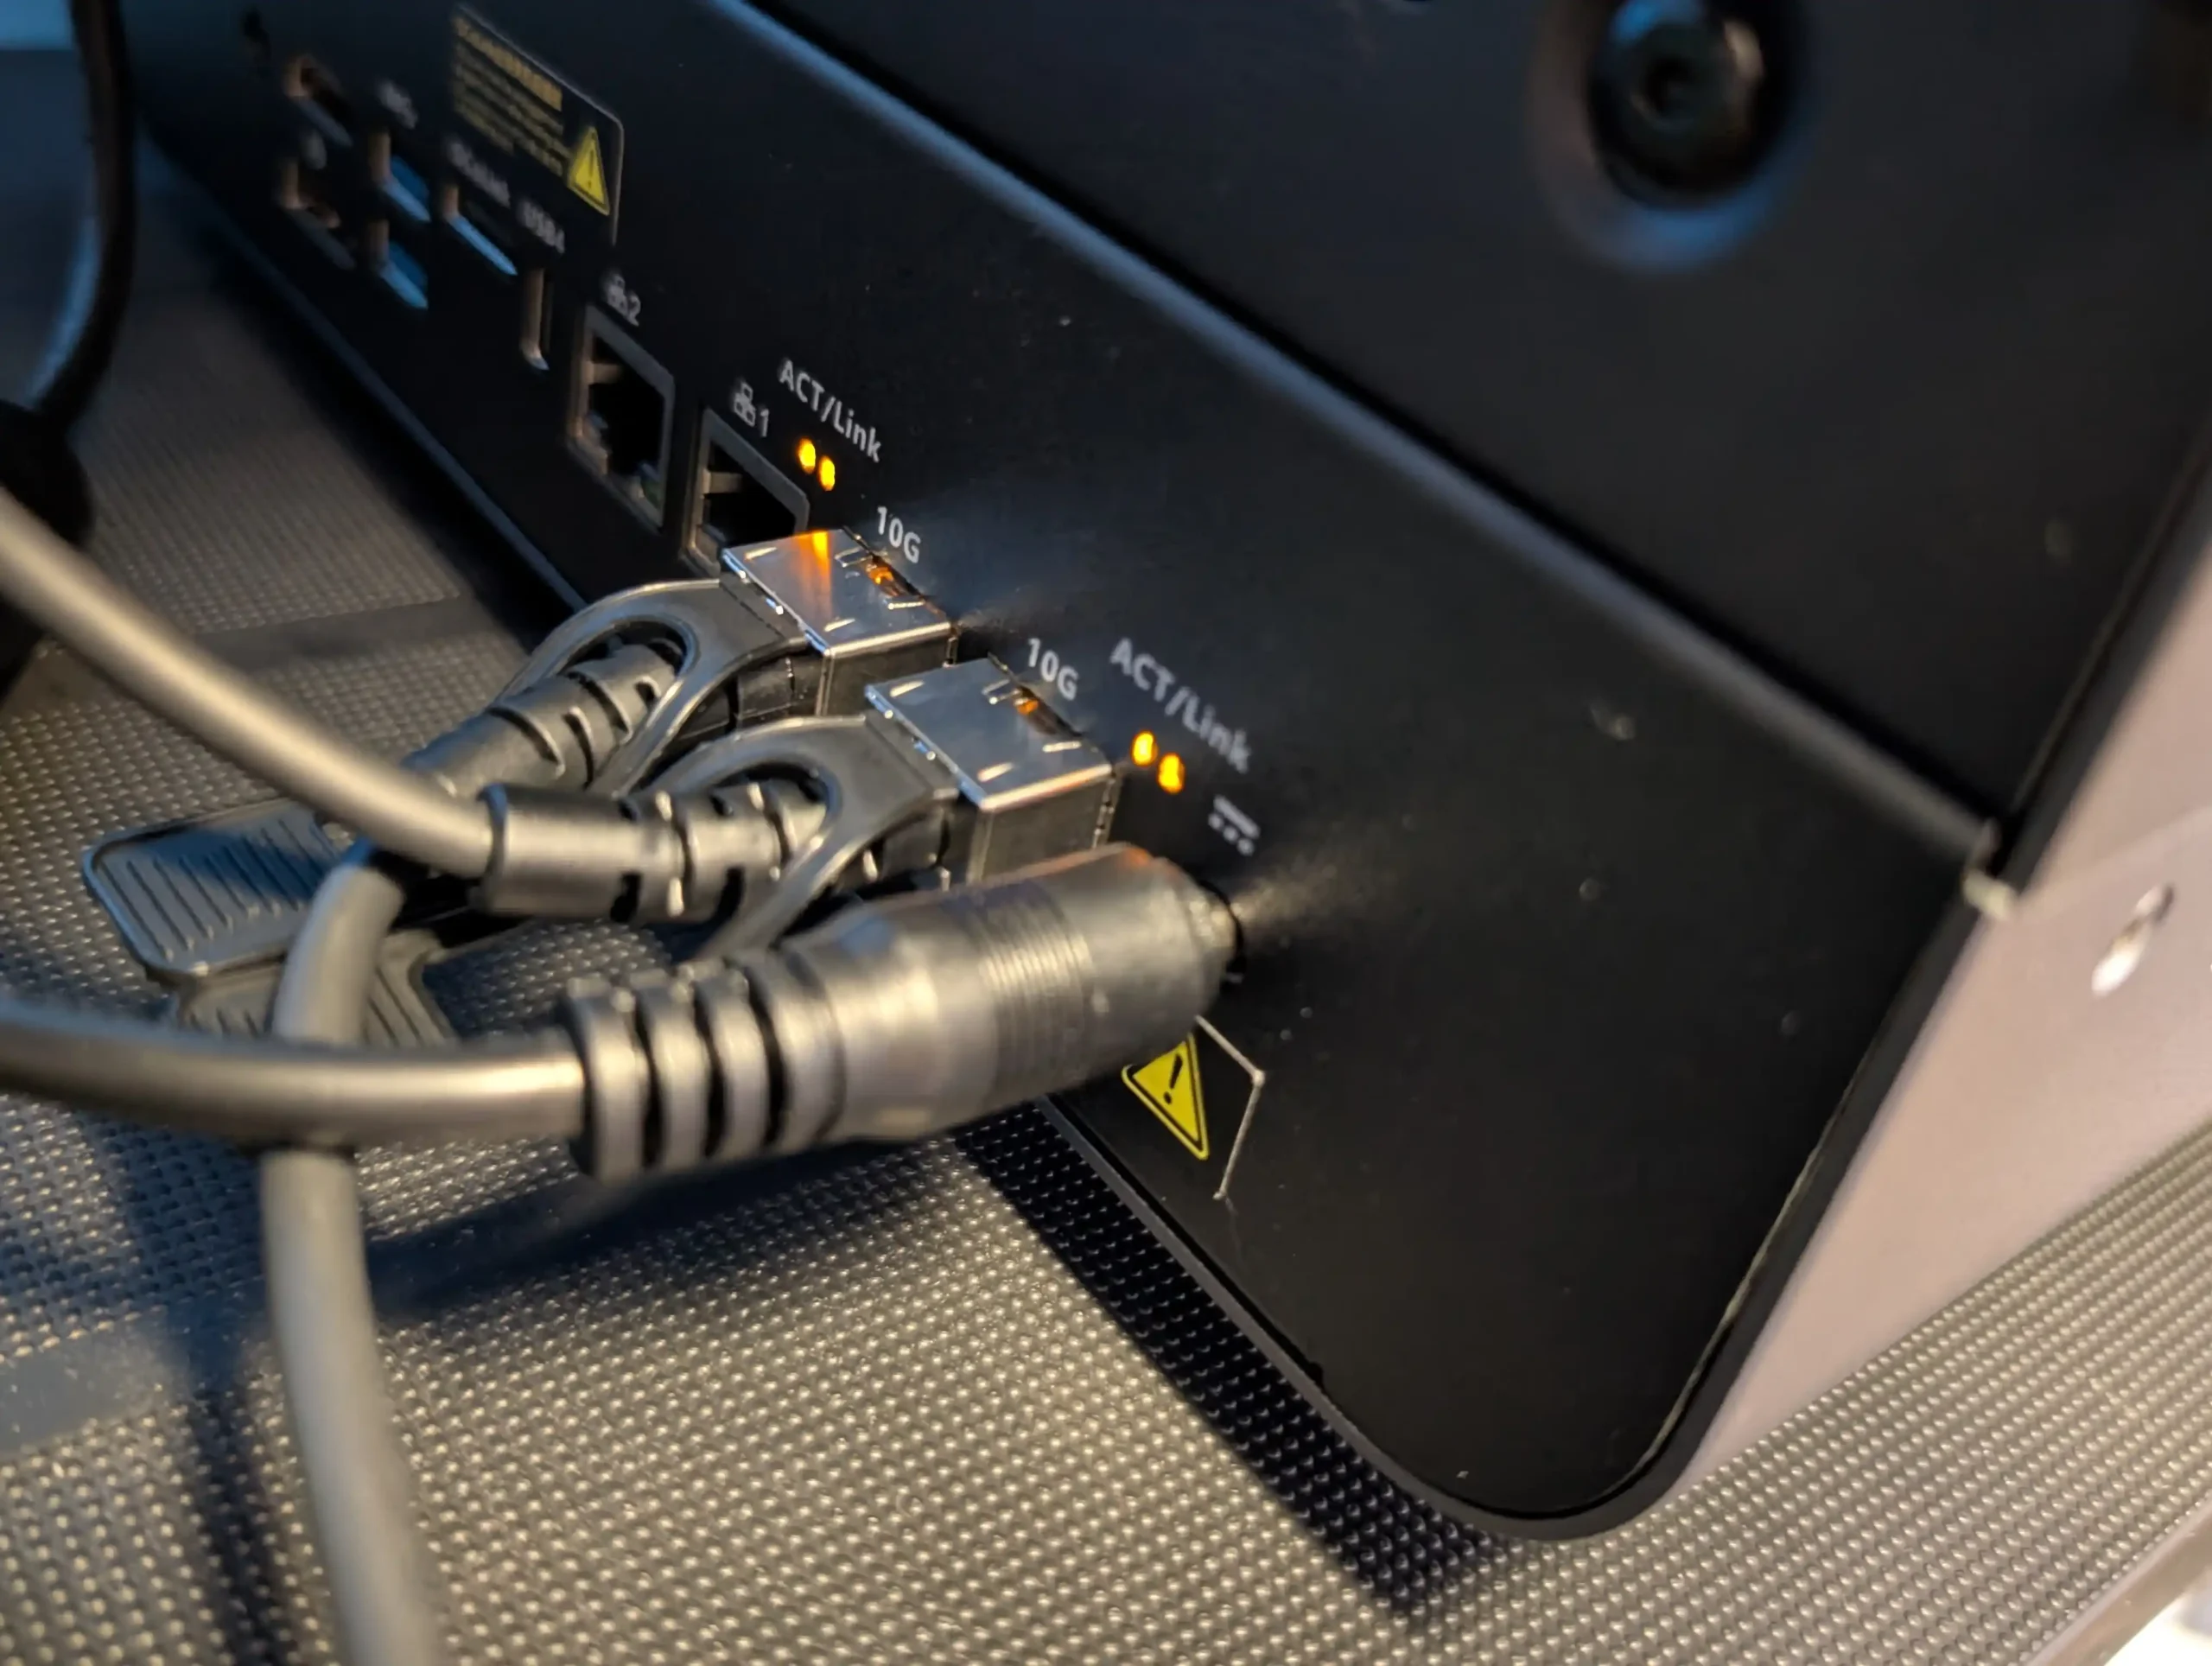
The Aoostar WTR Max provides an unusually extensive networking suite for a system of its size, offering both high-speed and multi-interface flexibility. The two Intel X710-based 10GbE SFP+ ports support full duplex operation, making them ideal for NAS-to-NAS replication, large-scale Plex libraries, or multi-user editing environments via shared storage. These ports were tested using iPerf3 and real-world file transfers between NVMe pools and a 10GbE-connected workstation, showing stable saturation of the interface without fluctuation. As these are SFP, users are going to have to factor in tranceivers or DAC cables with tranceivers included), but as these two ports are so close together, using SFP-to-RJ45 adapters is going to be a question of temperature monitoring.
In addition, two 2.5GbE RJ45 Ethernet ports are available, which can be used in a variety of configurations including link aggregation, VLAN assignment, or as out-of-band management interfaces. The coexistence of fiber-based and copper-based networking within the same unit opens deployment to both consumer and prosumer setups. During tests, the user assigned one 2.5GbE interface to general network access while isolating 10GbE traffic to storage-only communication, demonstrating flexibility in segmentation.
USB and high-speed peripheral connectivity is equally comprehensive. The front of the device houses a USB 4.0 port, which supports Thunderbolt-like bandwidths (up to 40Gbps), display passthrough, and power delivery—making it suitable for external drive arrays, video output, or even docking stations. Next to it, a standard USB-C port and USB 3.2 Gen 1 Type-A port provide backward compatibility for legacy peripherals. On the rear, two USB 3.2 Gen 2 Type-A ports were used during testing for attaching external backup drives and a keyboard/mouse combo during Proxmox installation.
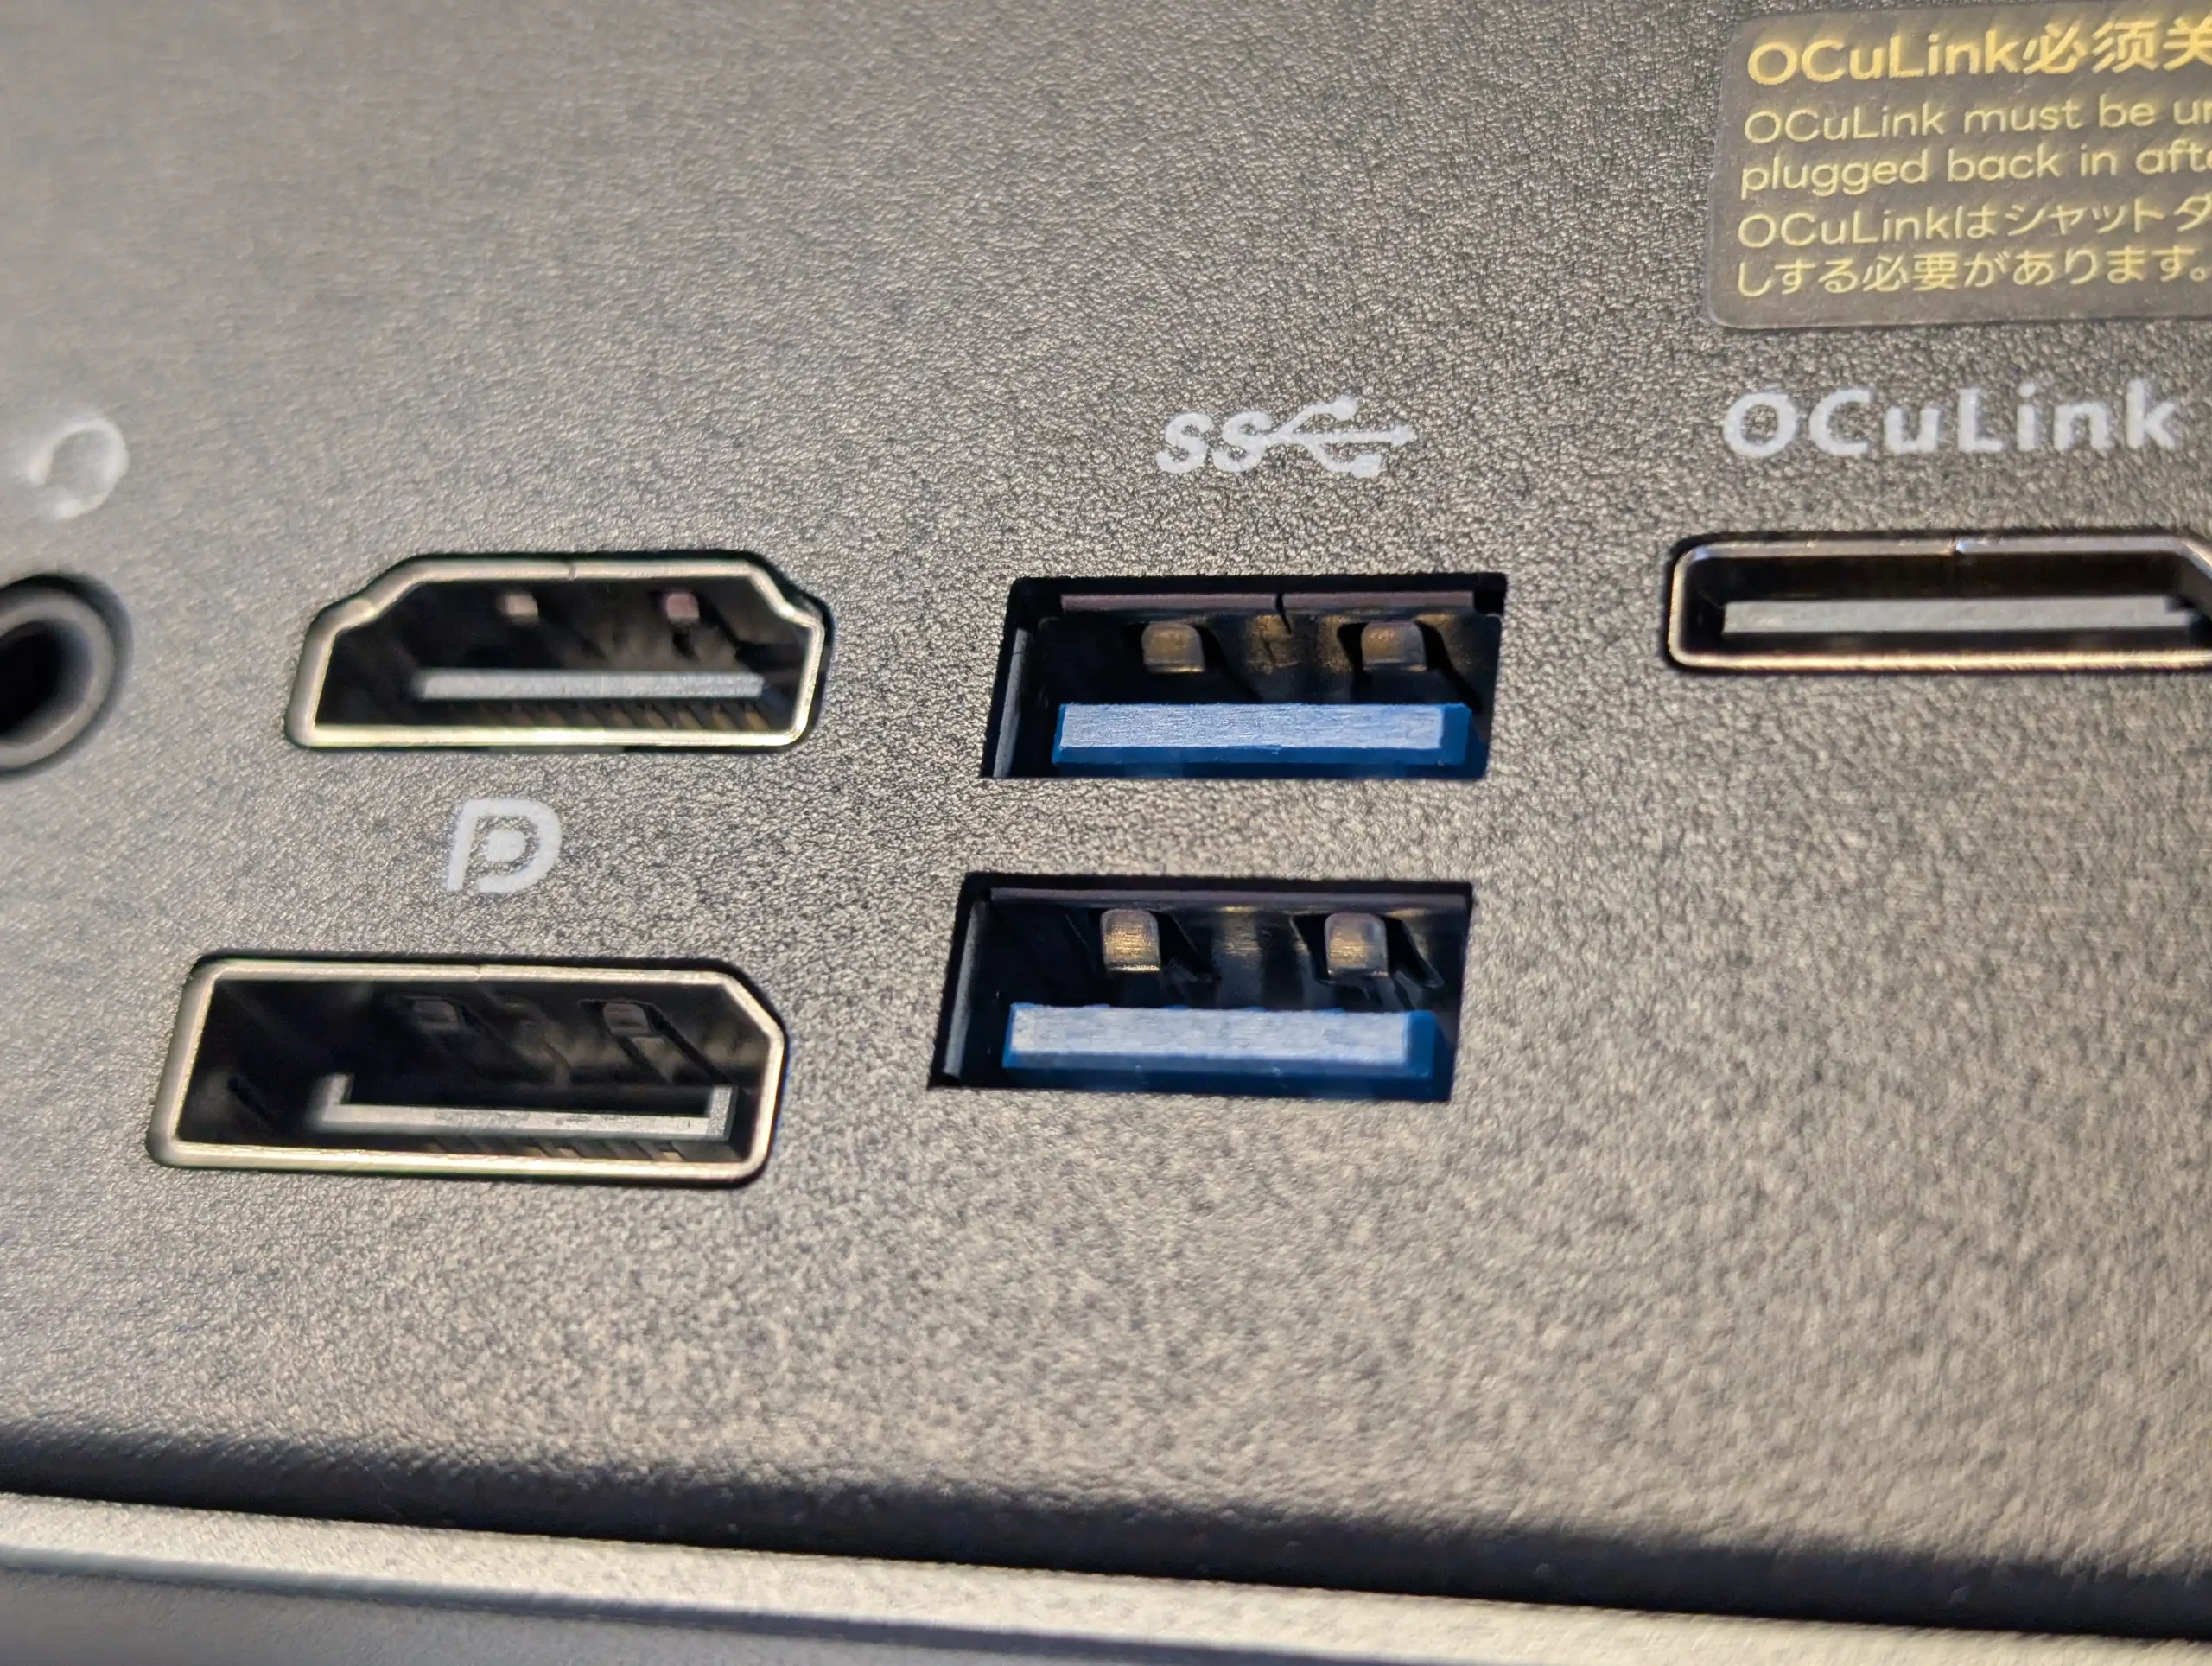
All ports were recognized without driver conflicts in both Linux and Windows-based environments. The device also includes a microSD slot on the front, which proved useful for OS boot media, diagnostics, or fast access to camera footage. In the test scenario, the slot was used to quickly transfer small image files to the Plex container, and performance aligned with UHS-I speeds. This wide array of port options allows users to operate the WTR Max in both network-only and semi-local scenarios, such as multimedia servers with attached peripherals.
A standout feature in this device’s connectivity suite is the OCuLink port, which provides a PCIe 4.0 x4 interface for external expansion. This port was successfully used to attach an NVMe enclosure using a M.2-to-OCuLink bridge, allowing high-speed external storage without interfering with internal NVMe bandwidth allocation. Although hot-swapping is not supported, the stability and speed of the external connection matched internal Gen 4 performance. This is a notable advantage for users who require flexible expansion or temporary scratch drives without opening the chassis.
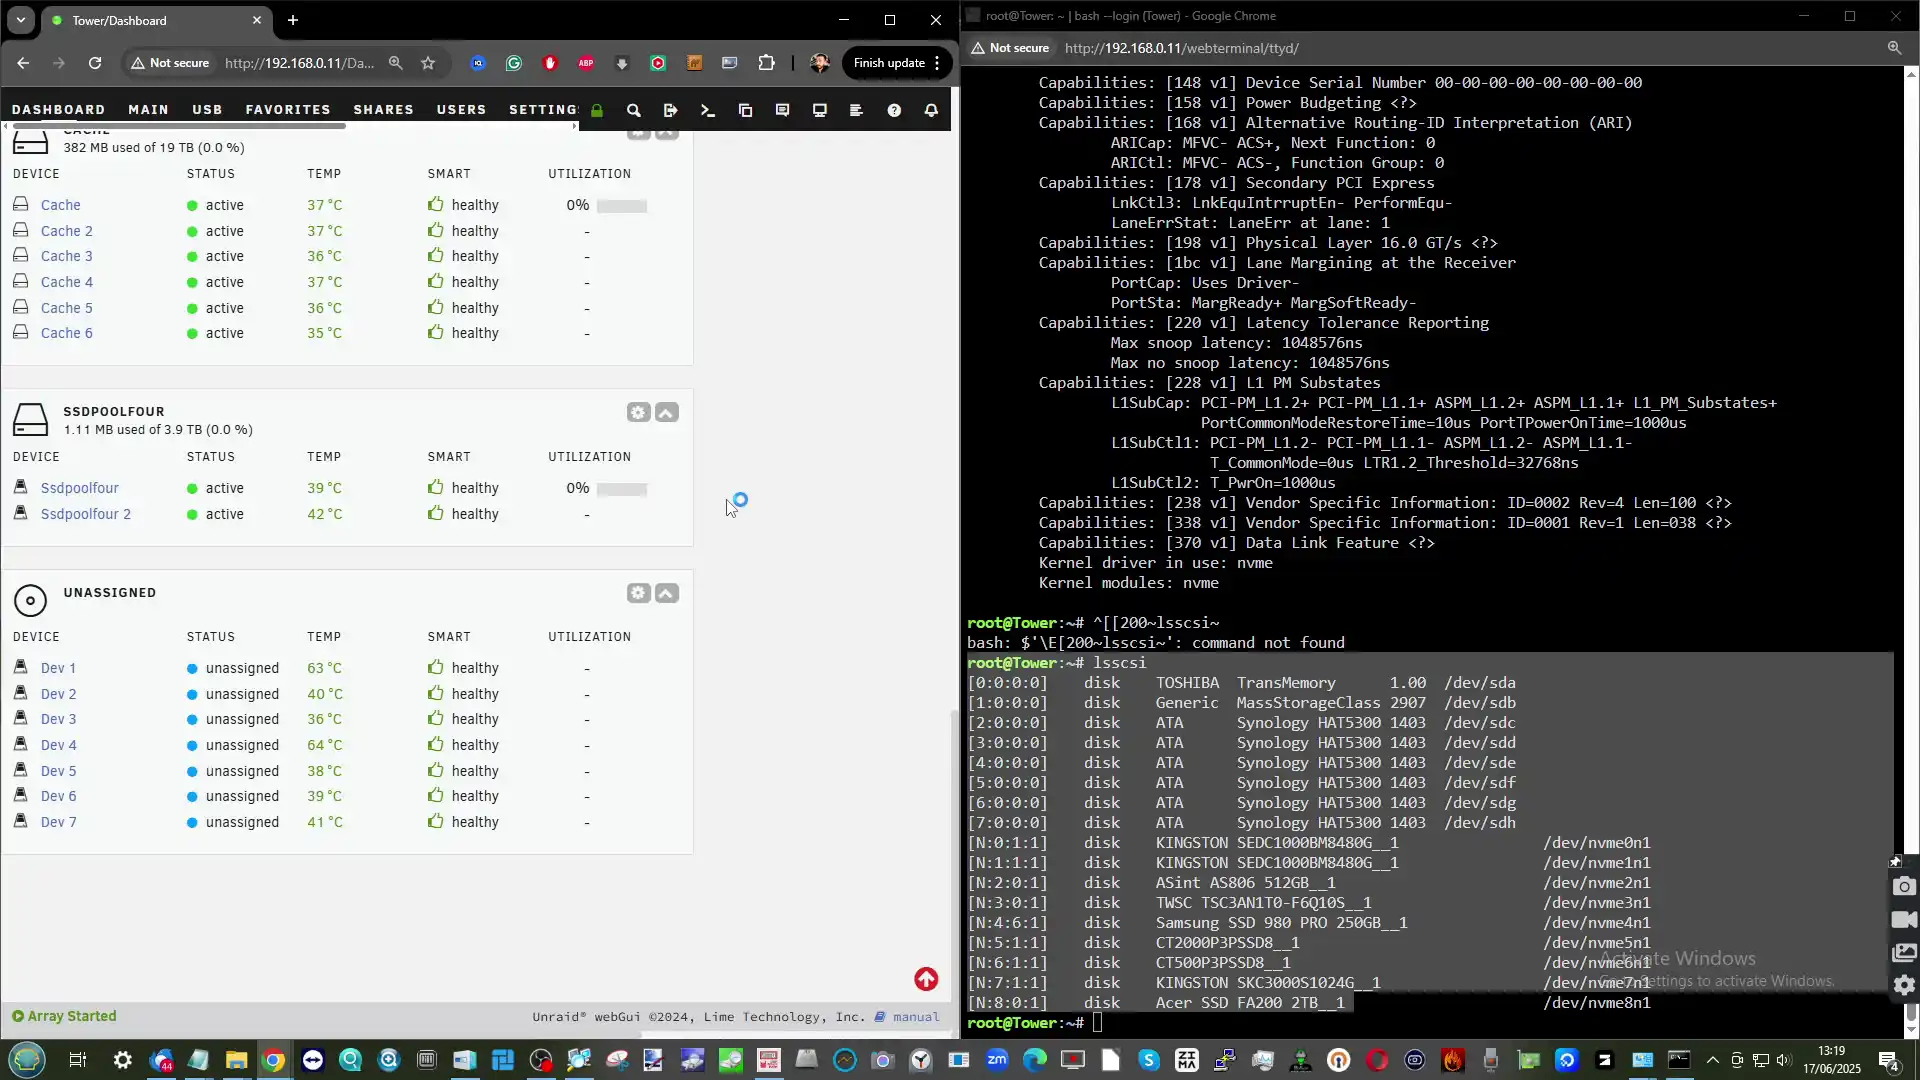
In the review scenario, the OCuLink port was also noted as a potential bridge to add GPU acceleration, external PCIe networking, or SAS HBA expansion—though Aoostar provides no internal PCIe slot, making the external route the only PCIe-level expansion path. This design choice reflects a compromise between size and flexibility, prioritizing I/O density over internal modularity. That said, oculink is not for everyone! And additional adapters such as eGPU are going to be needed if you are looking at upgrading network performance and are going to drastically increase your spend compared with traditional PCIe upgrades!
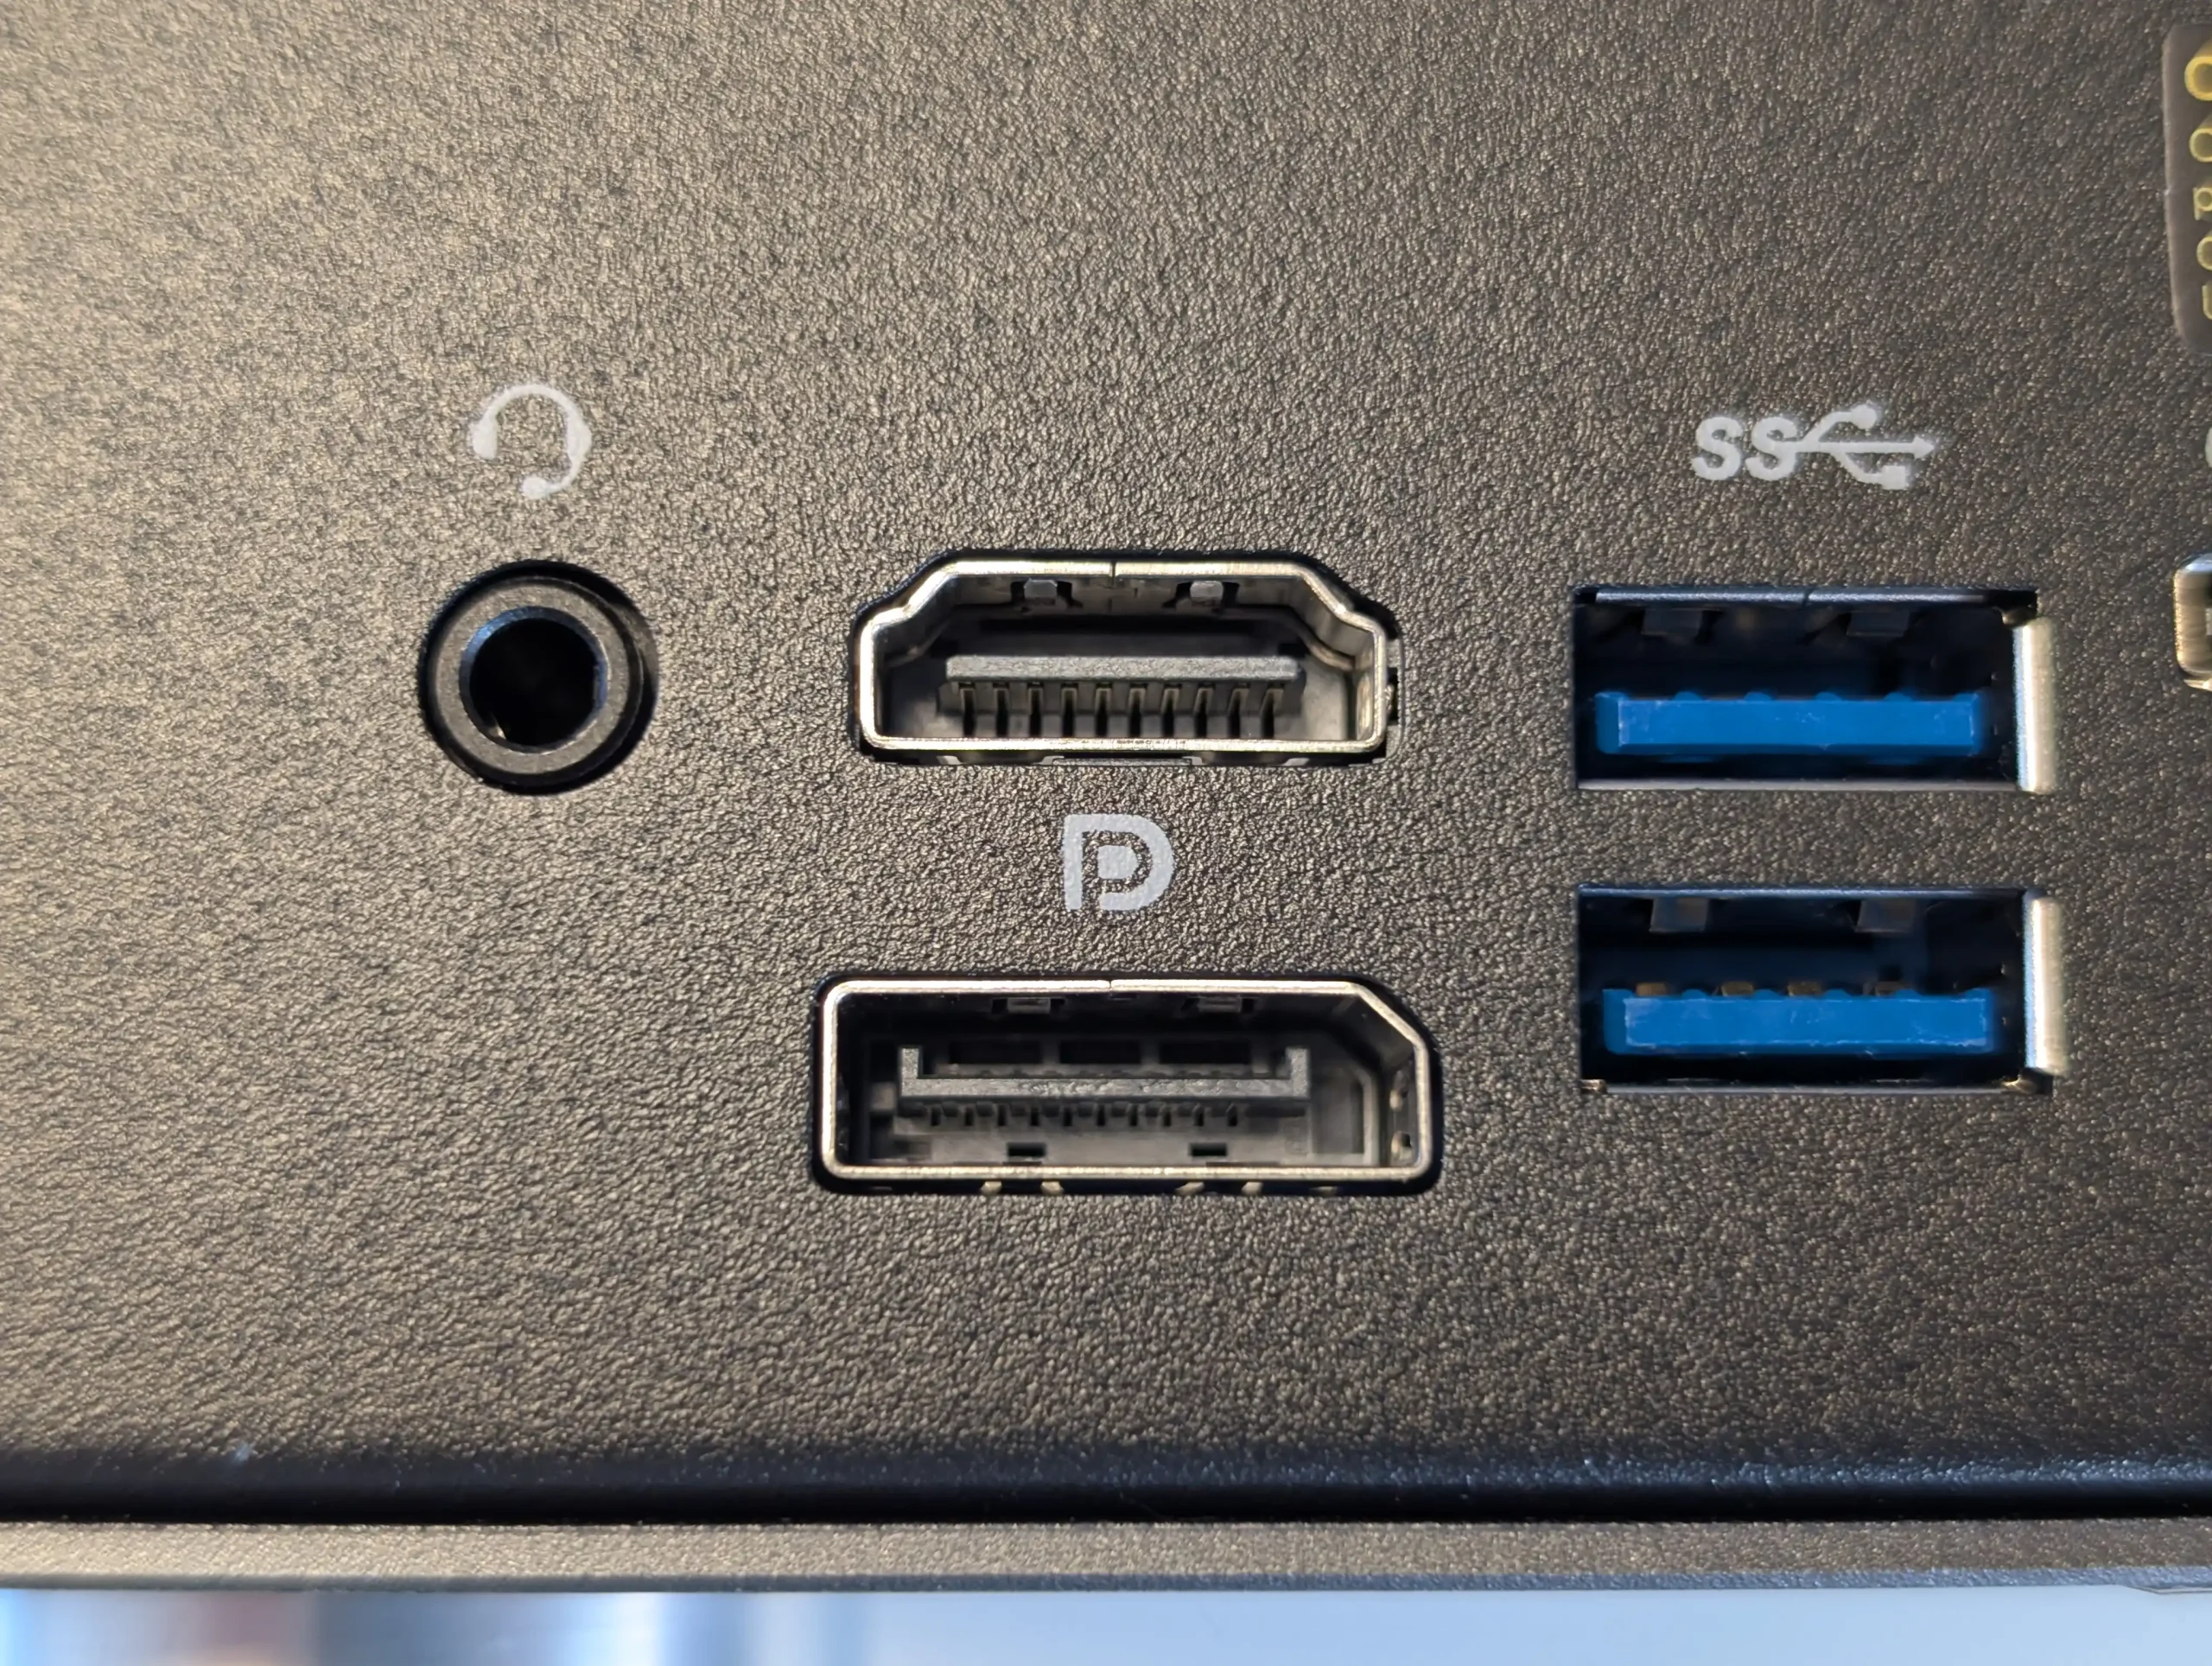
For users requiring local video output or dual-purpose NAS/workstation functionality, the WTR Max includes a rear-mounted HDMI 2.1 port supporting up to 4K at 240Hz, in addition to display-capable USB4 and USB-C ports depending on OS support. In practice, during Proxmox and Unraid testing, HDMI video output was used for initial OS installation and local monitoring. This can be useful for deployments involving virtual desktops, docker-based dashboards, or kiosk-style media servers. Audio is handled through a 3.5mm output jack, functional in Linux environments once the relevant drivers are installed.
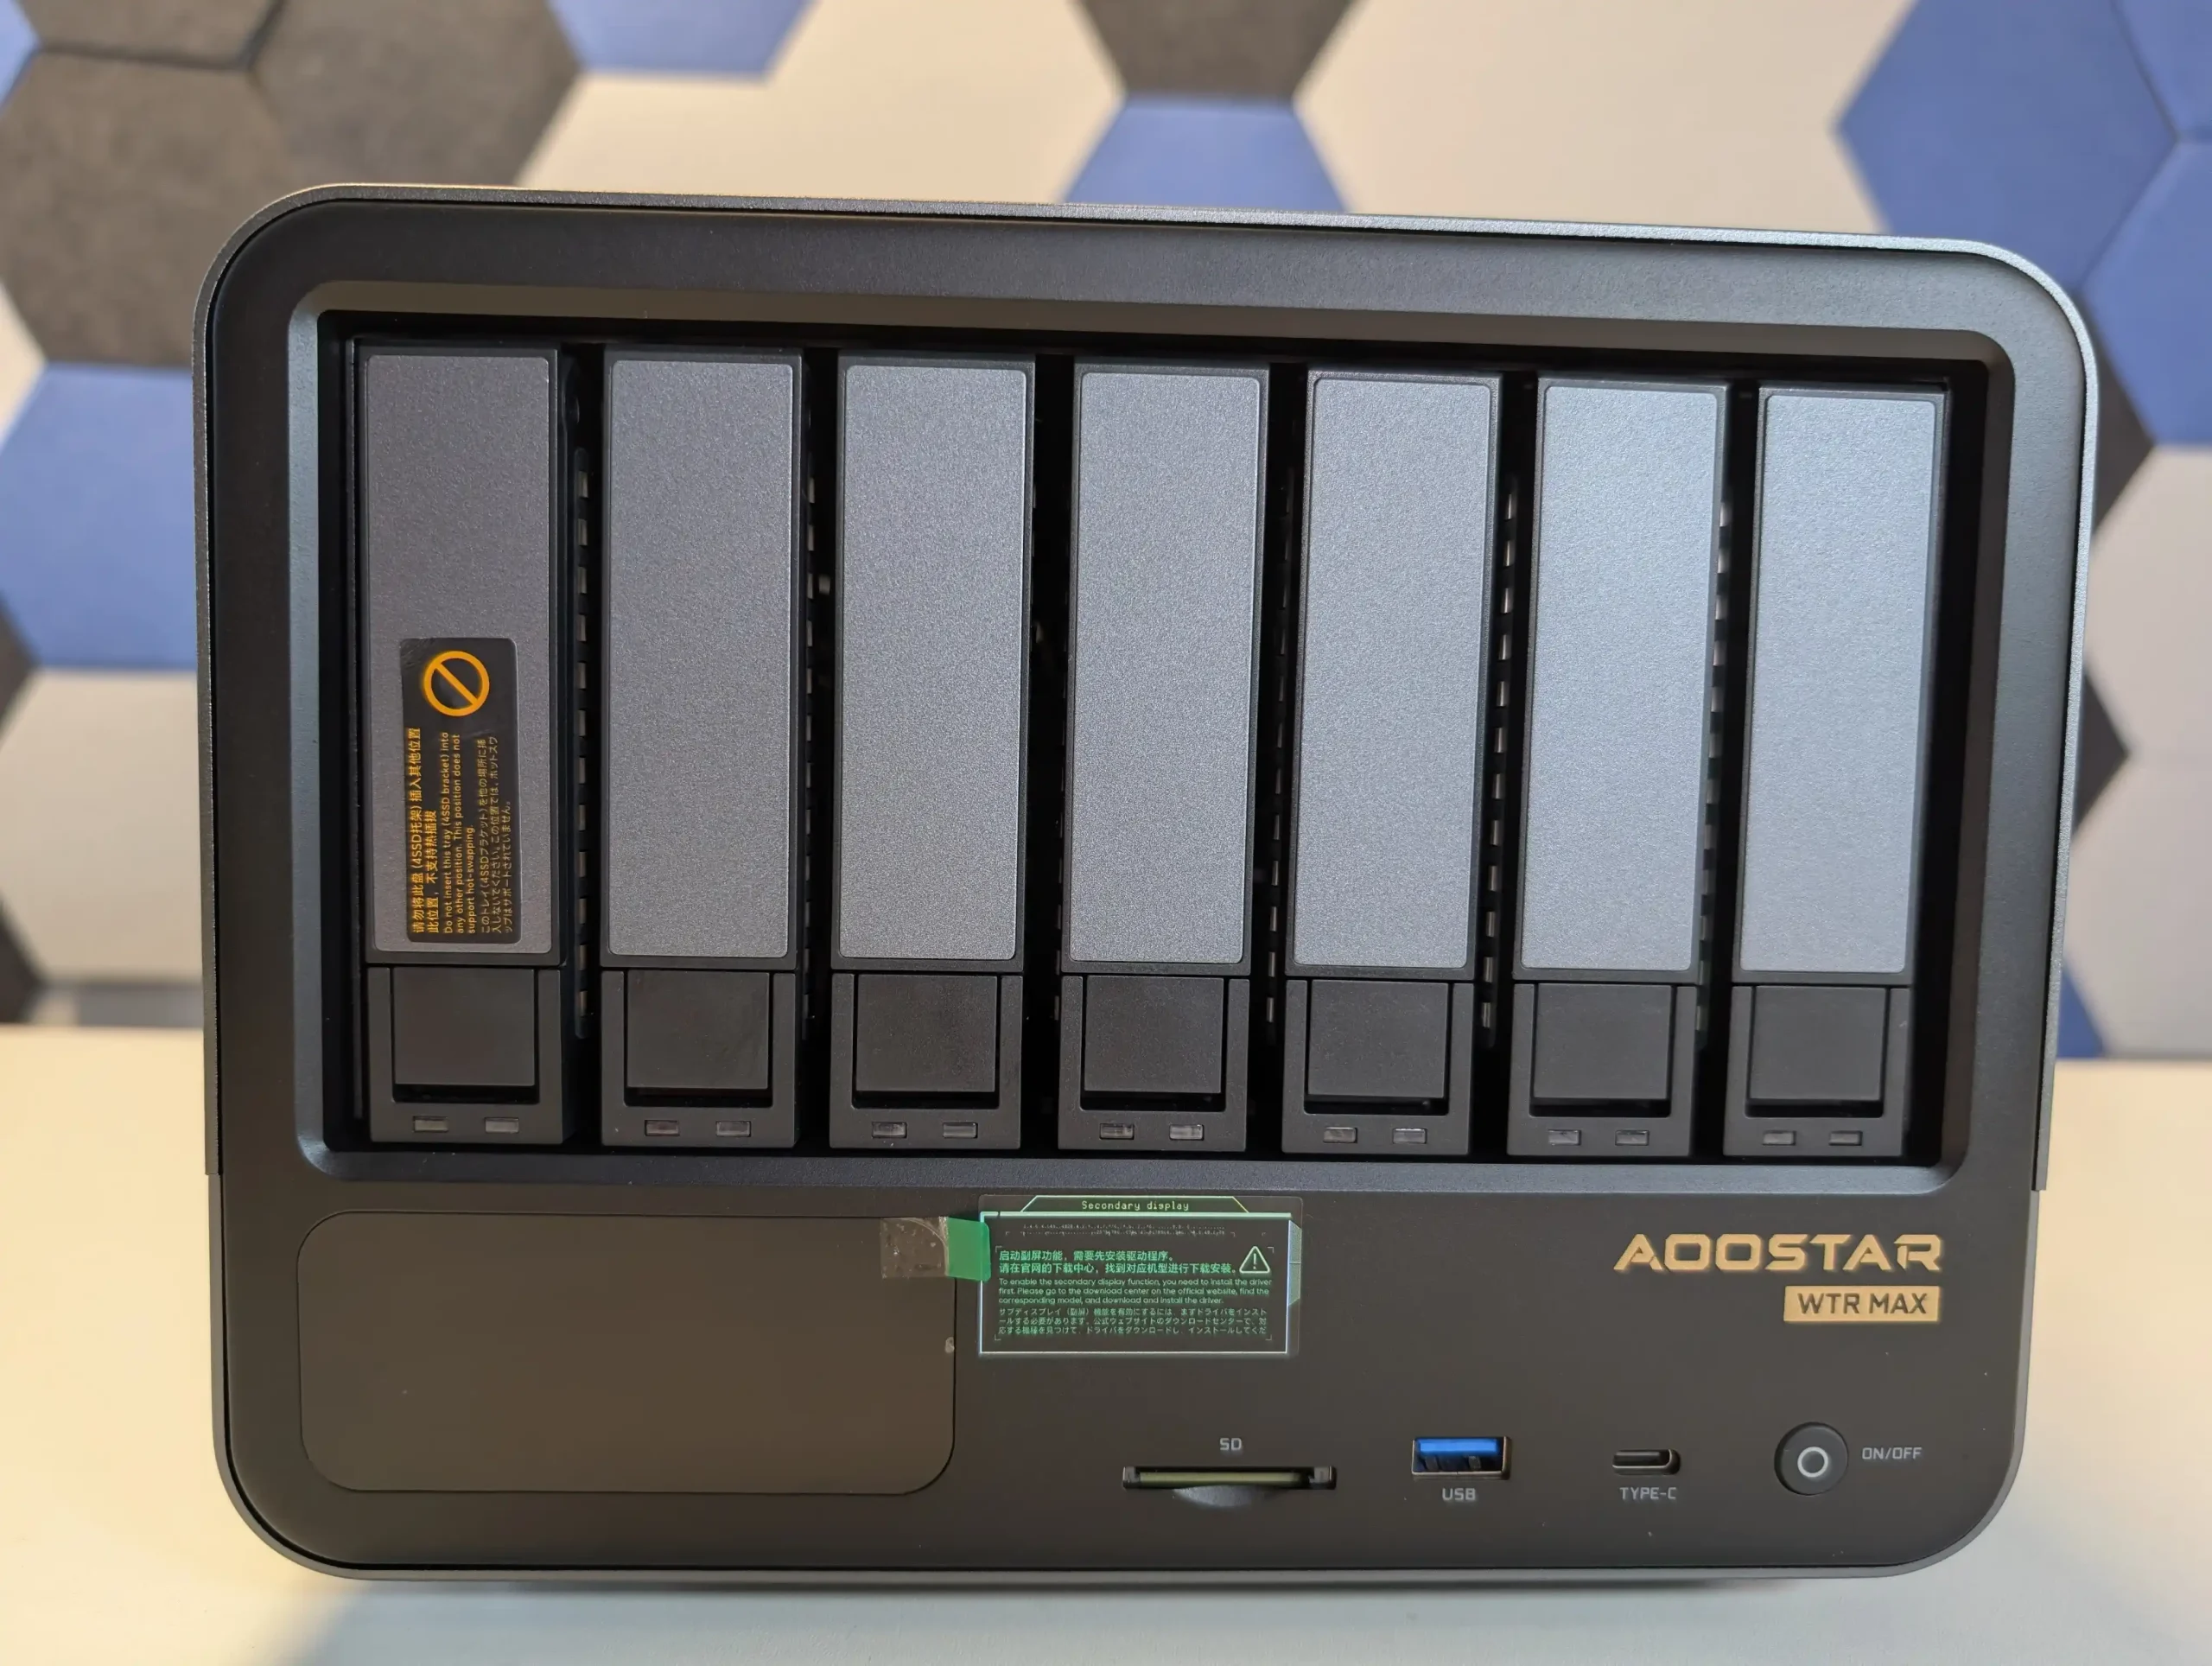
On the front of the unit, Aoostar has implemented a customizable LCD display, accessible via proprietary software. While the software itself presented download warnings in some browsers and required IP-specific client setup, once configured it displayed real-time statistics such as CPU temperature, RAM usage, network throughput, and storage status. Multiple themes are included (e.g., cyberpunk, minimal, and stat-based), and the panel can be toggled on/off depending on user preference. Although not essential, the display provides a level of visual diagnostics uncommon in this product tier. This was the only area of the review that I found inconsistent and messy! Tapping into this specific internal IP, as well as using an application that was being flagged constantly by my windows system, AND trying to do this with the NAS behind 3 layers of network (my own setup) was not smooth. Additionally, although the LCD panel templates were useful, they did seem to contain a lot of copyright imagery (Cyberpunk, Pacman, etc) and I would question the comiance from their source! Hopefully this LCD control and customization gets smoothed out soon, as well as the app finishes it’s windows certification at least.
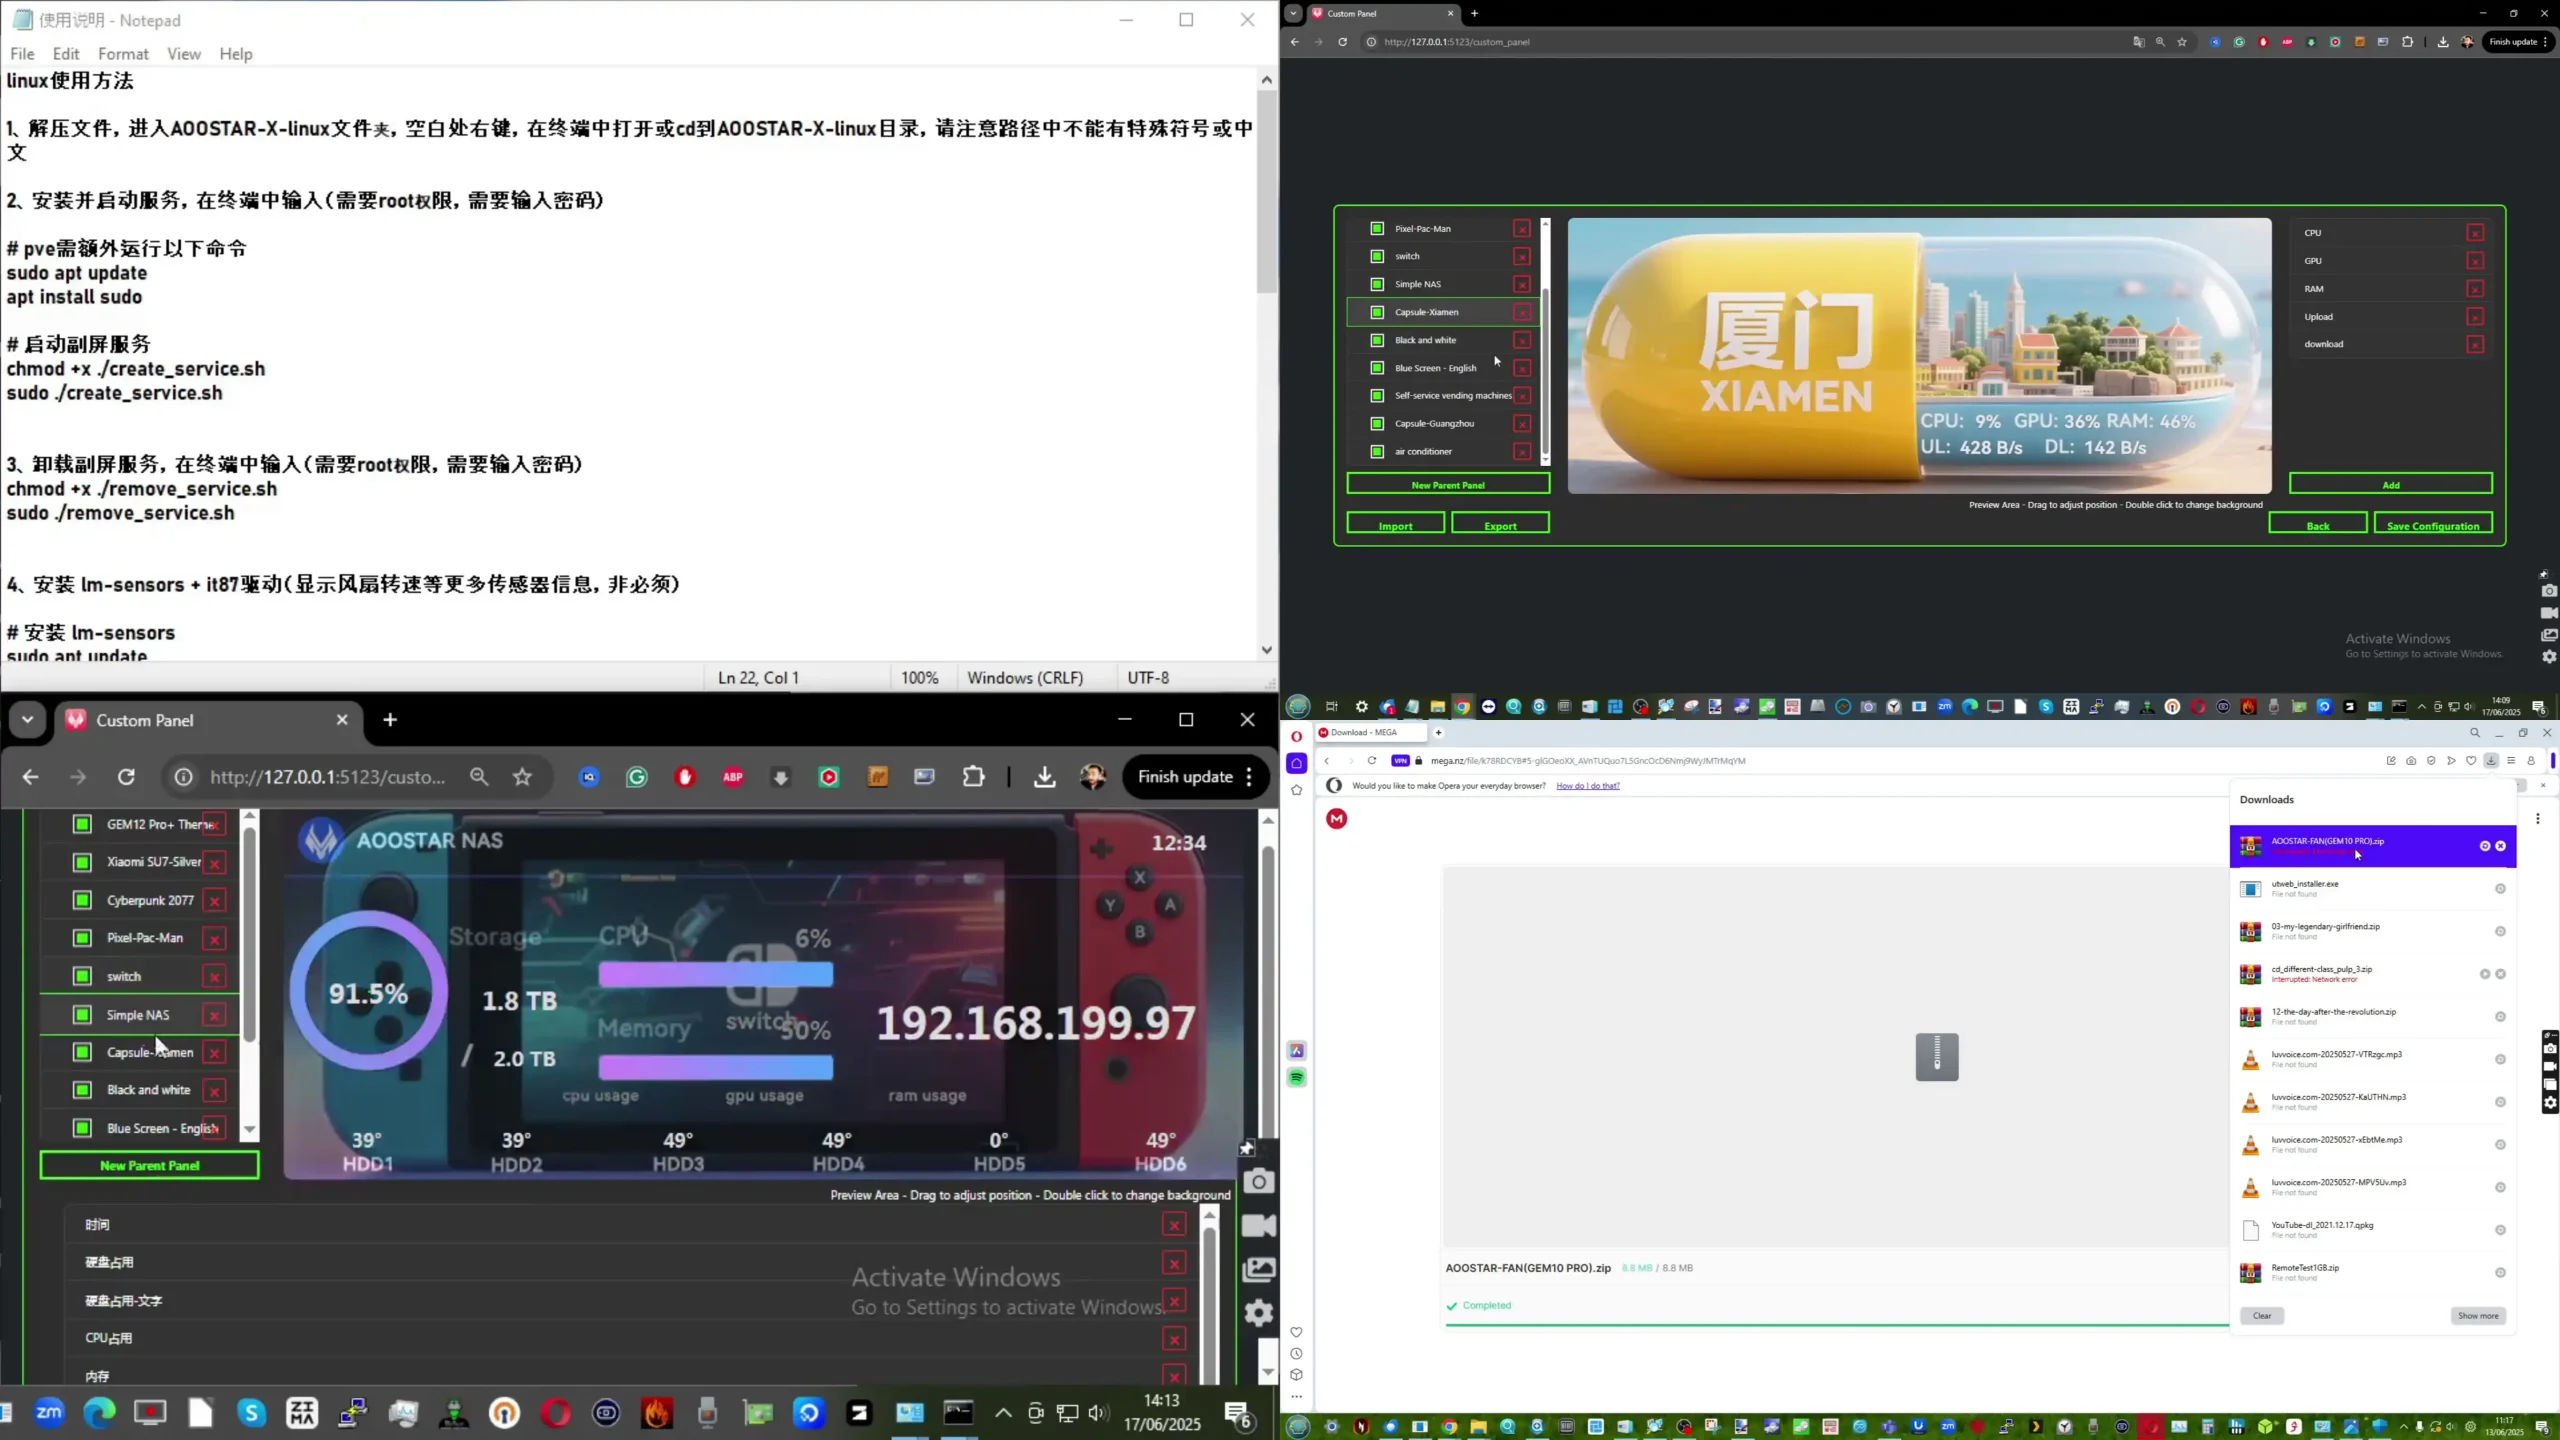
| Networking | 2x 10GbE SFP+ (Intel X710), 2x 2.5GbE RJ45 (aggregatable, isolated, or bridged) |
|---|---|
| USB Interfaces | 2x USB 3.2 Gen 2 Type-A (rear), 1x USB 3.2 Gen 1 Type-A (front), 1x USB4 (front), 1x USB Type-C |
| Expansion Ports | 1x OCuLink (PCIe 4.0 x4, external NVMe or GPU support, not hot-swappable), 1x MicroSD slot |
| Video Output | 1x HDMI 2.1 (up to 4K @ 240Hz), USB4 and USB-C video-out supported by OS |
| Audio | 1x 3.5mm headphone jack (Linux compatible with correct drivers) |
| Front Panel Display | LCD screen with real-time stats, theme selection, IP-based configuration client |
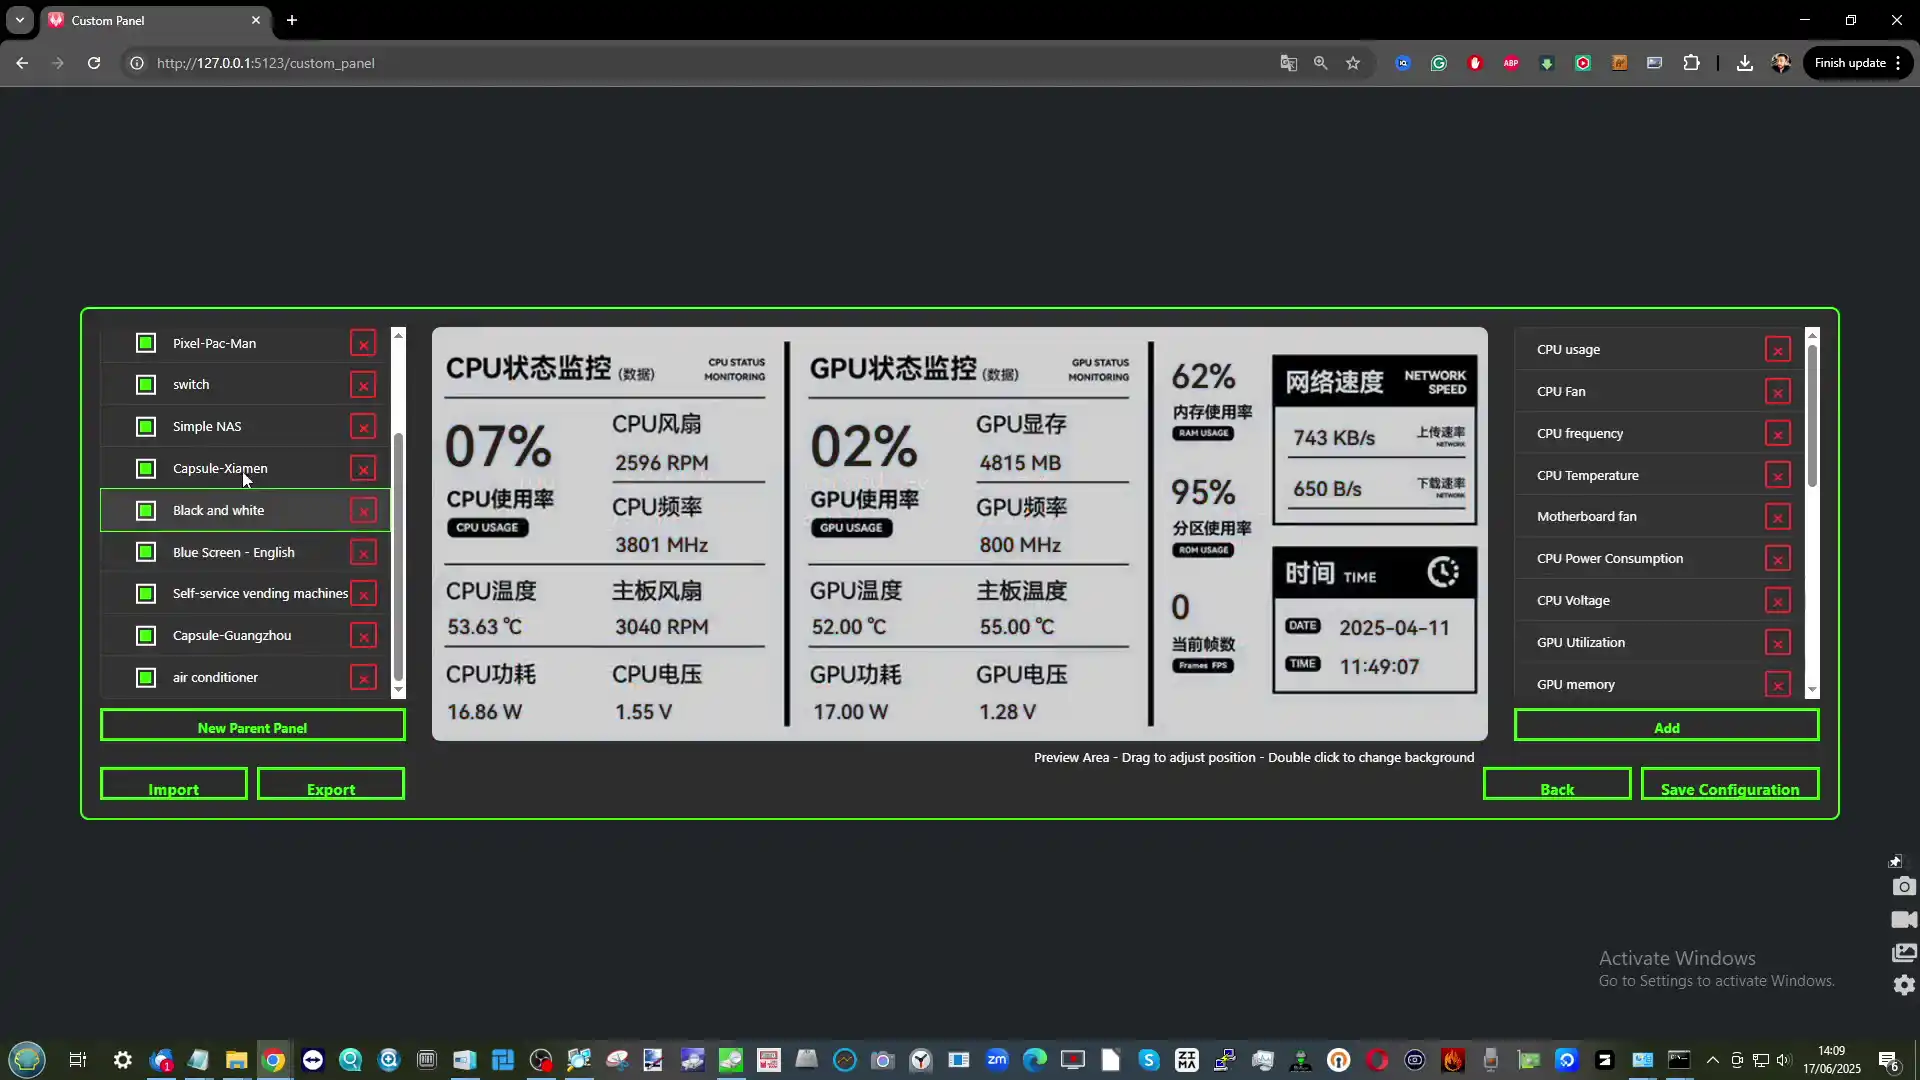
The Aoostar WTR Max underwent a series of tests spanning disk benchmarks, live file transfers, mixed storage scenarios, and sustained uptime evaluations to assess its practical capabilities across NAS, virtualization, and media applications. In synthetic disk tests, the PCIe Gen 4 x1 NVMe slots delivered consistent read speeds of ~1.6 GB/s and write speeds just under 1.5 GB/s, while the Gen 4 x2 slots achieved peak sequential performance of ~2.9 GB/s read and ~2.8 GB/s write, aligning well with expected lane bandwidth.
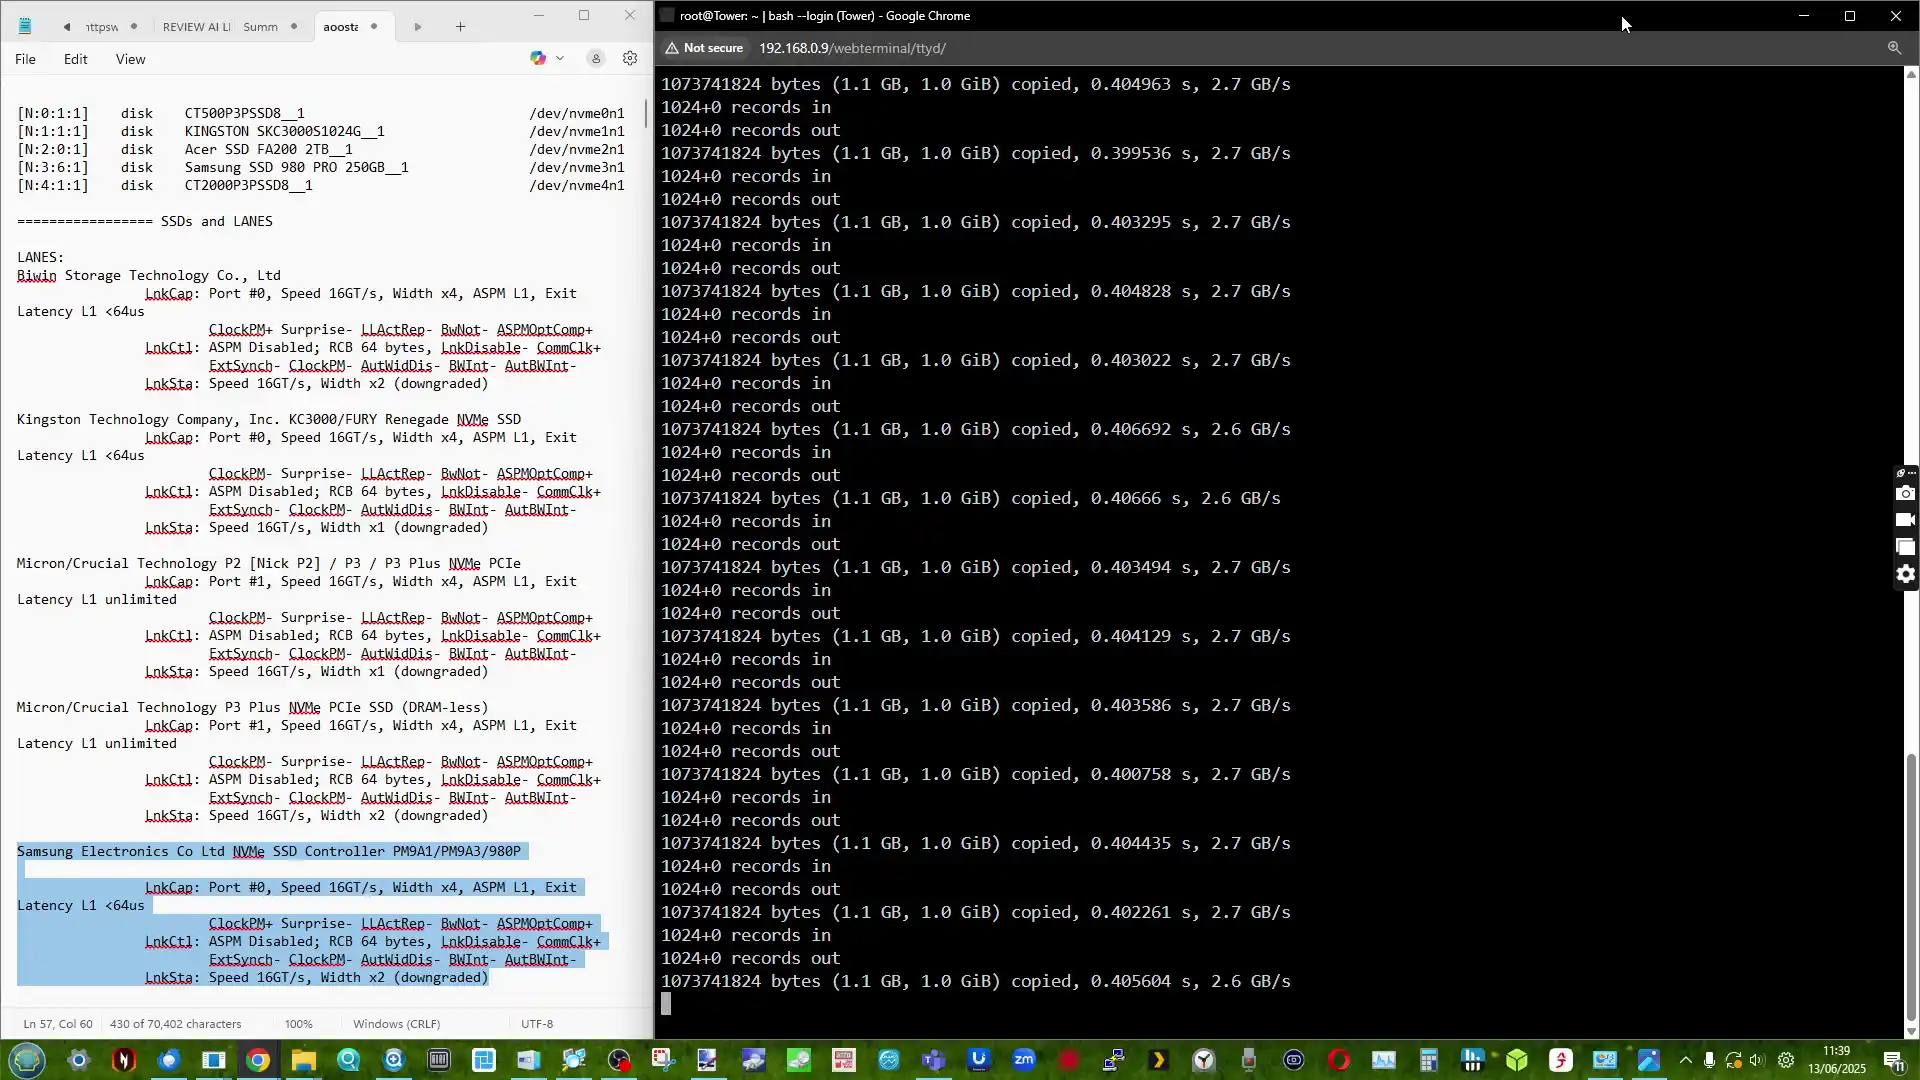
These figures were observed under both Windows and Linux environments, using CrystalDiskMark and ATTO. However, during internal NVMe-to-NVMe copy operations—across both like-for-like (x2 to x2) and mixed (x1 to x2) configurations—transfer rates plateaued around 550 MB/s. This suggests the presence of a shared bus or controller limitation not disclosed by the vendor, though the speeds remained consistent with no unexpected drops. Importantly, SSD temperatures stayed within thermal spec, typically ranging from 38°C to 45°C under sustained use, aided by both airflow and full-sized heatsink compatibility.
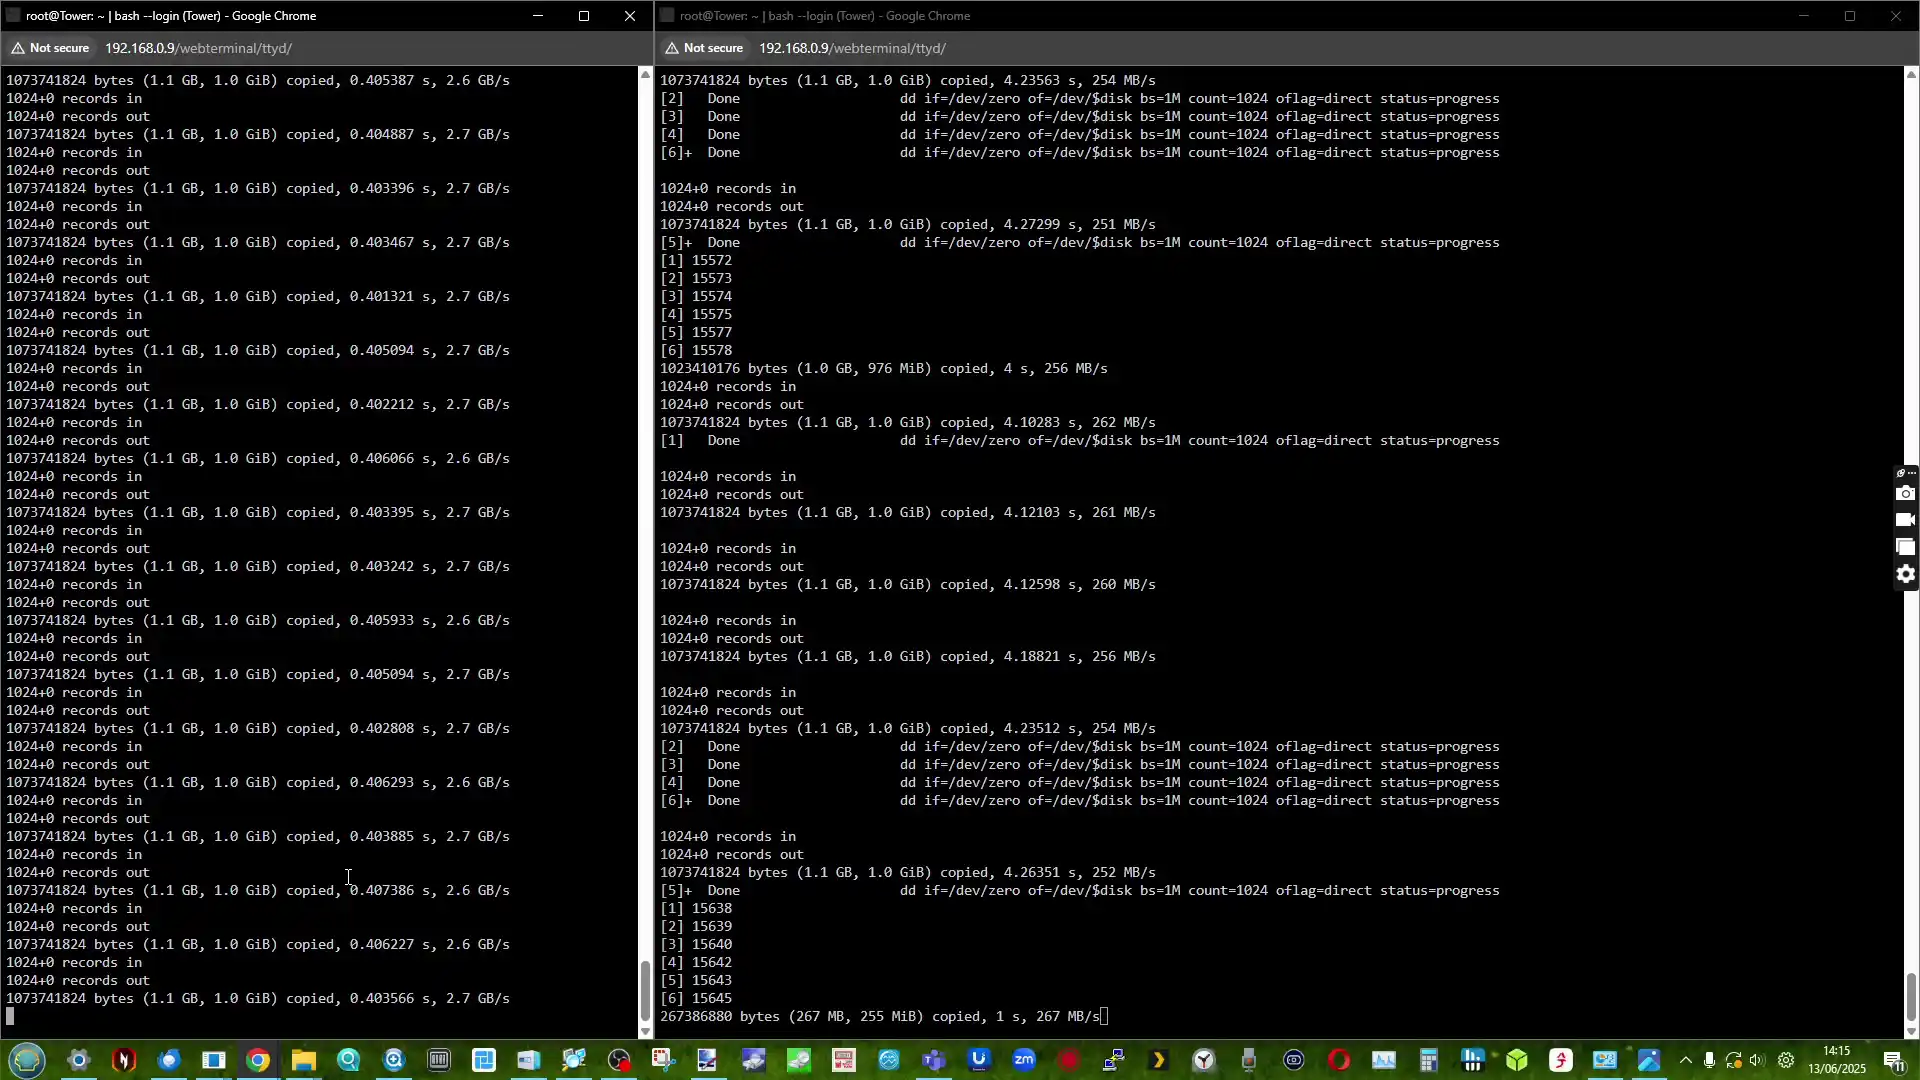
For networking performance, the system’s dual 10GbE SFP+ interfaces were subjected to direct iPerf3 stress tests and real-world copy operations involving both SATA and NVMe-based storage arrays. Both ports reached saturation—approximately 9.5 Gbps—under bidirectional iPerf3 tests with no jitter or packet loss, even during simultaneous Plex streaming and background drive activity. SMB transfers of large 4K video files to a remote 10GbE-equipped workstation routinely exceeded 1.1 GB/s sustained, indicating that the system’s storage and network layers were well-aligned.

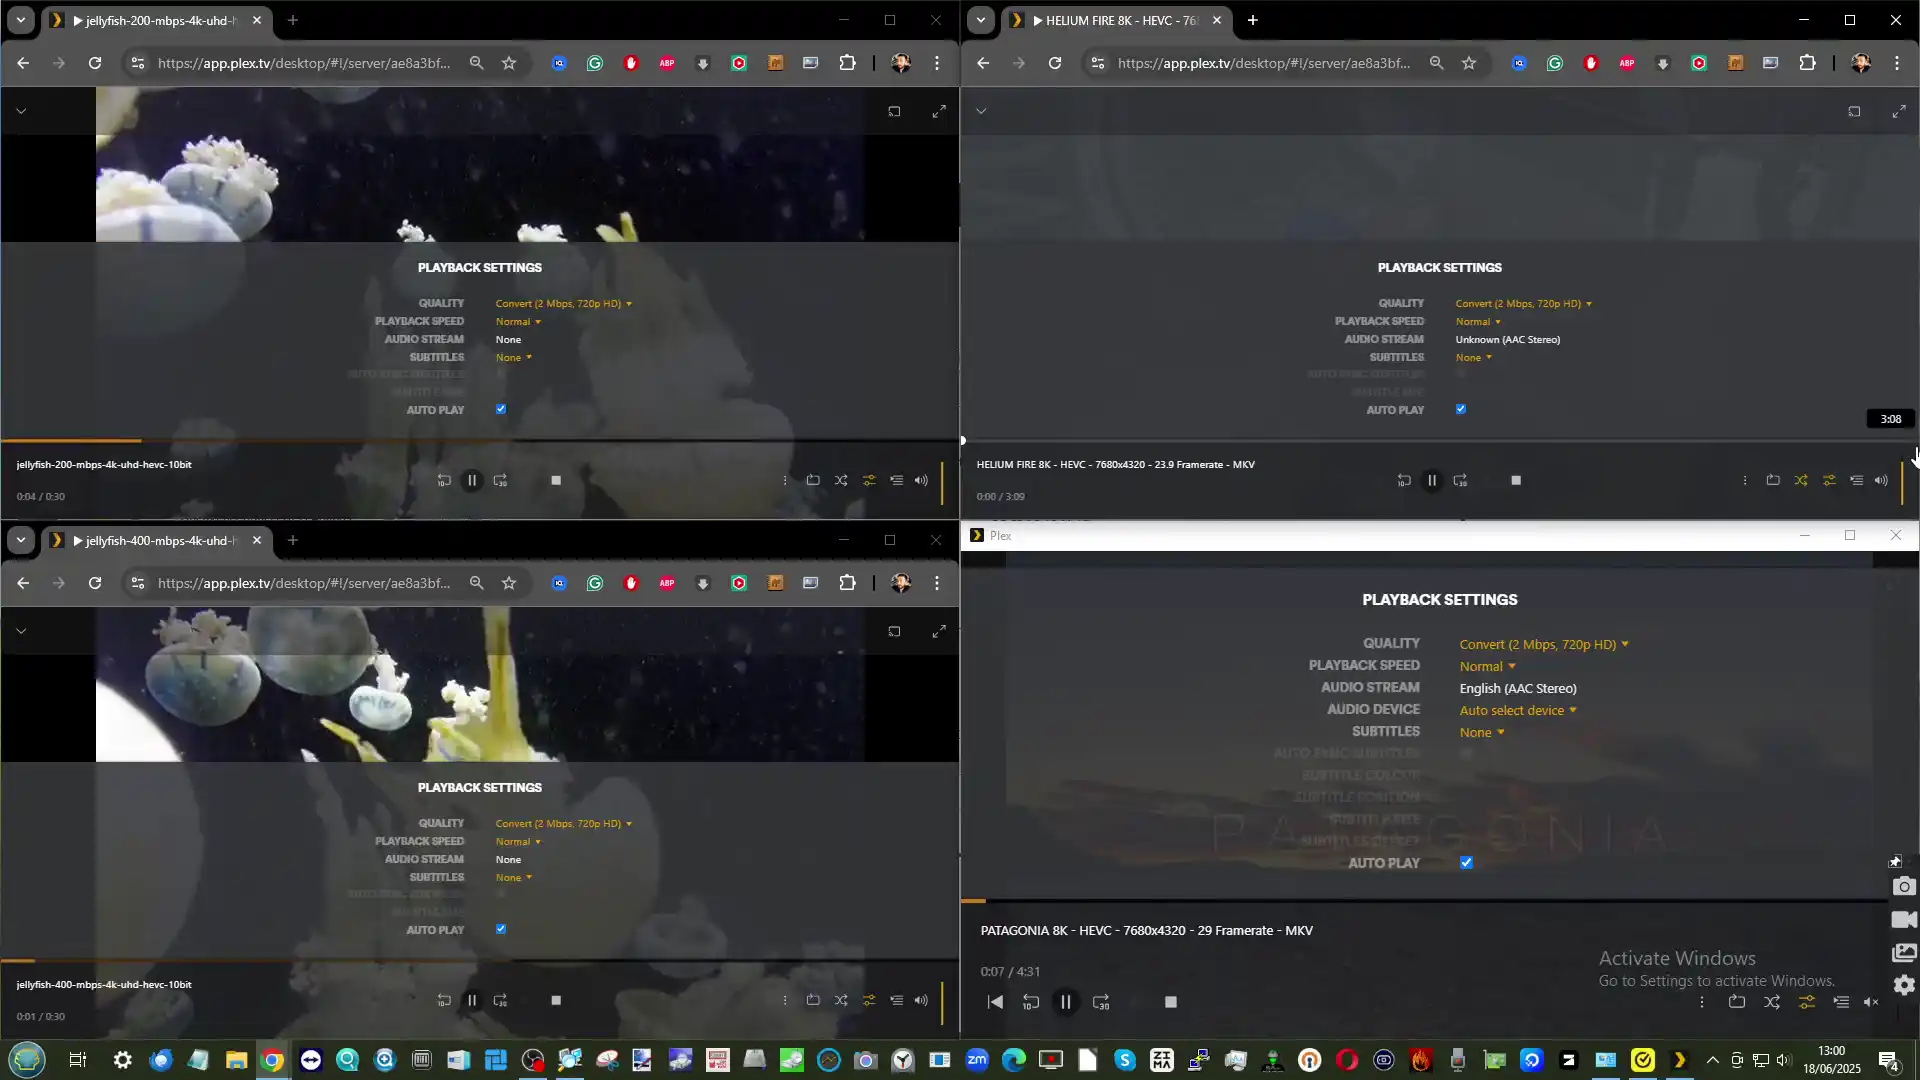
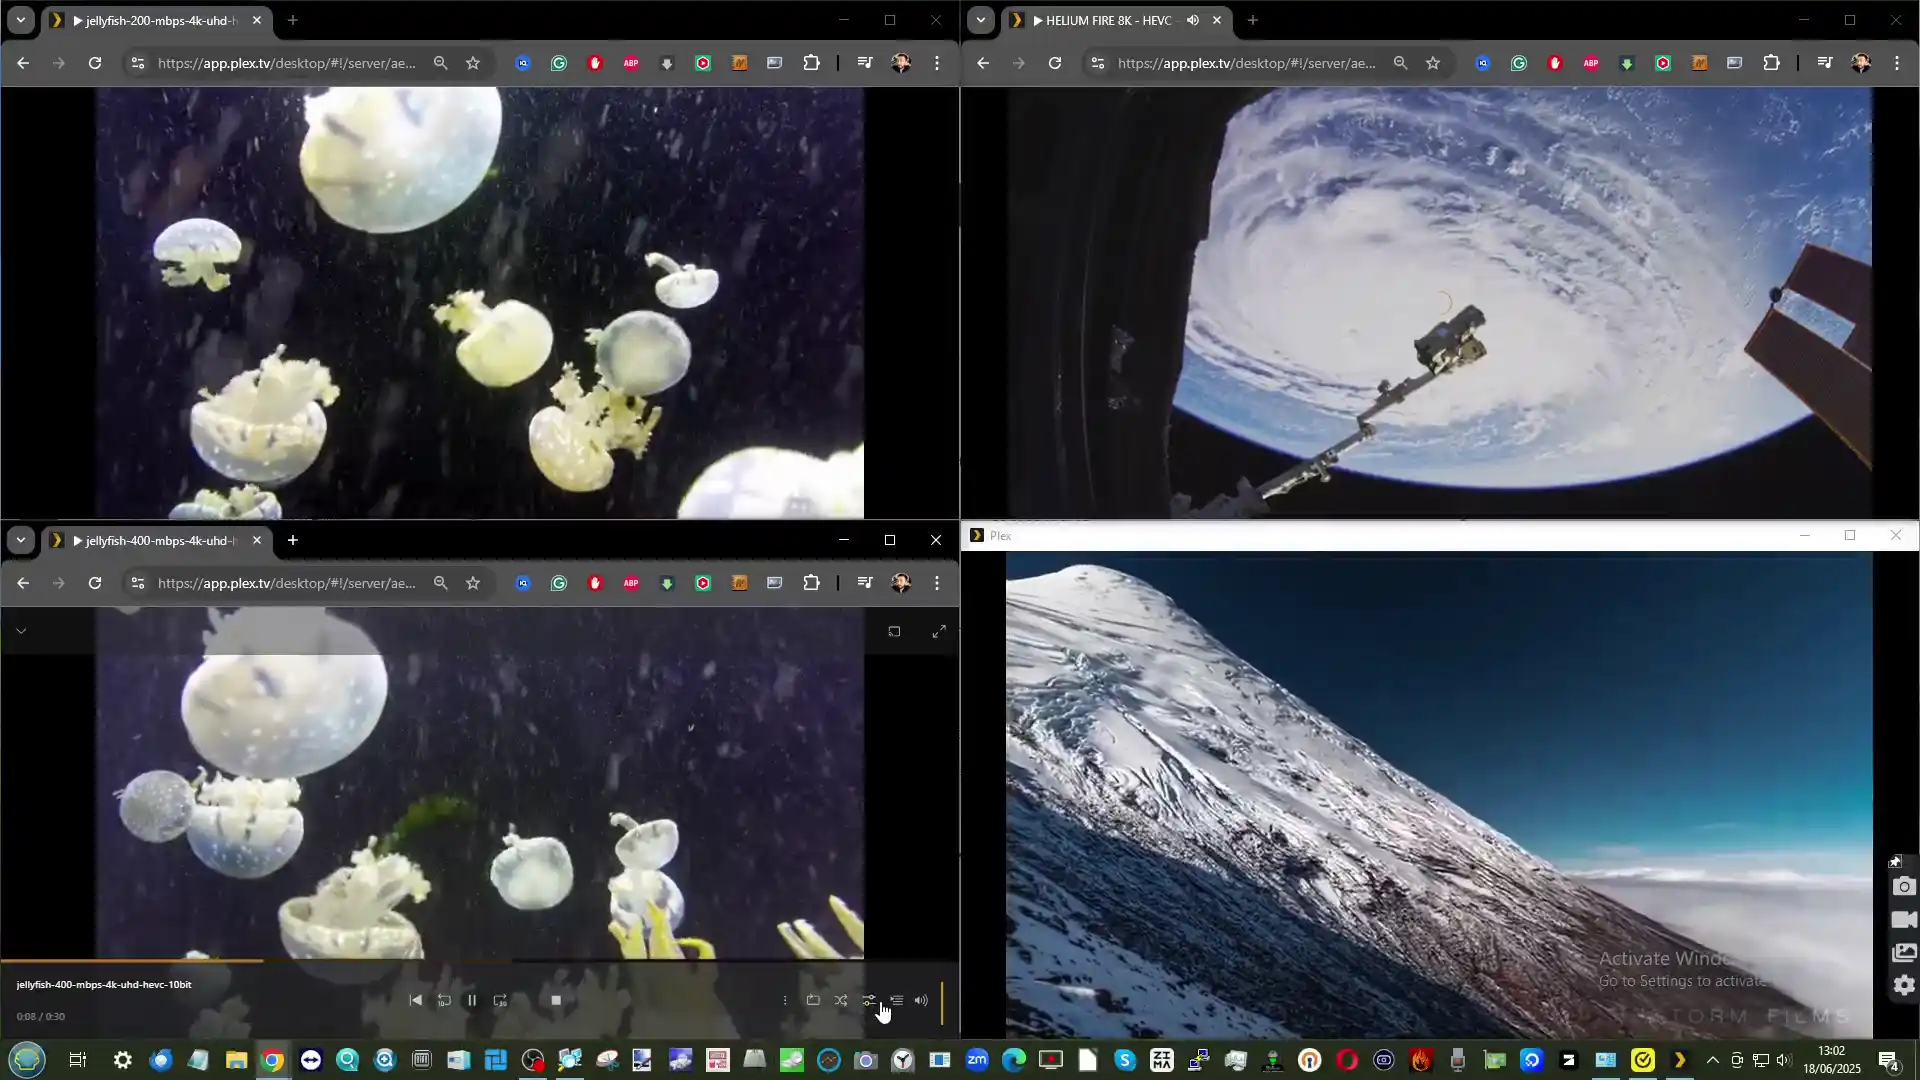
The two 2.5GbE RJ45 ports were also tested as either bridged interfaces in Proxmox or as failover backups, with VLAN tagging and static routing configured via systemd-networkd. No conflicts or bottlenecks were detected, even when running scheduled backups over one NIC while media was streamed through another. This concurrent multi-interface performance demonstrates how the WTR Max can comfortably handle mixed workloads across different network zones or physical infrastructure types.
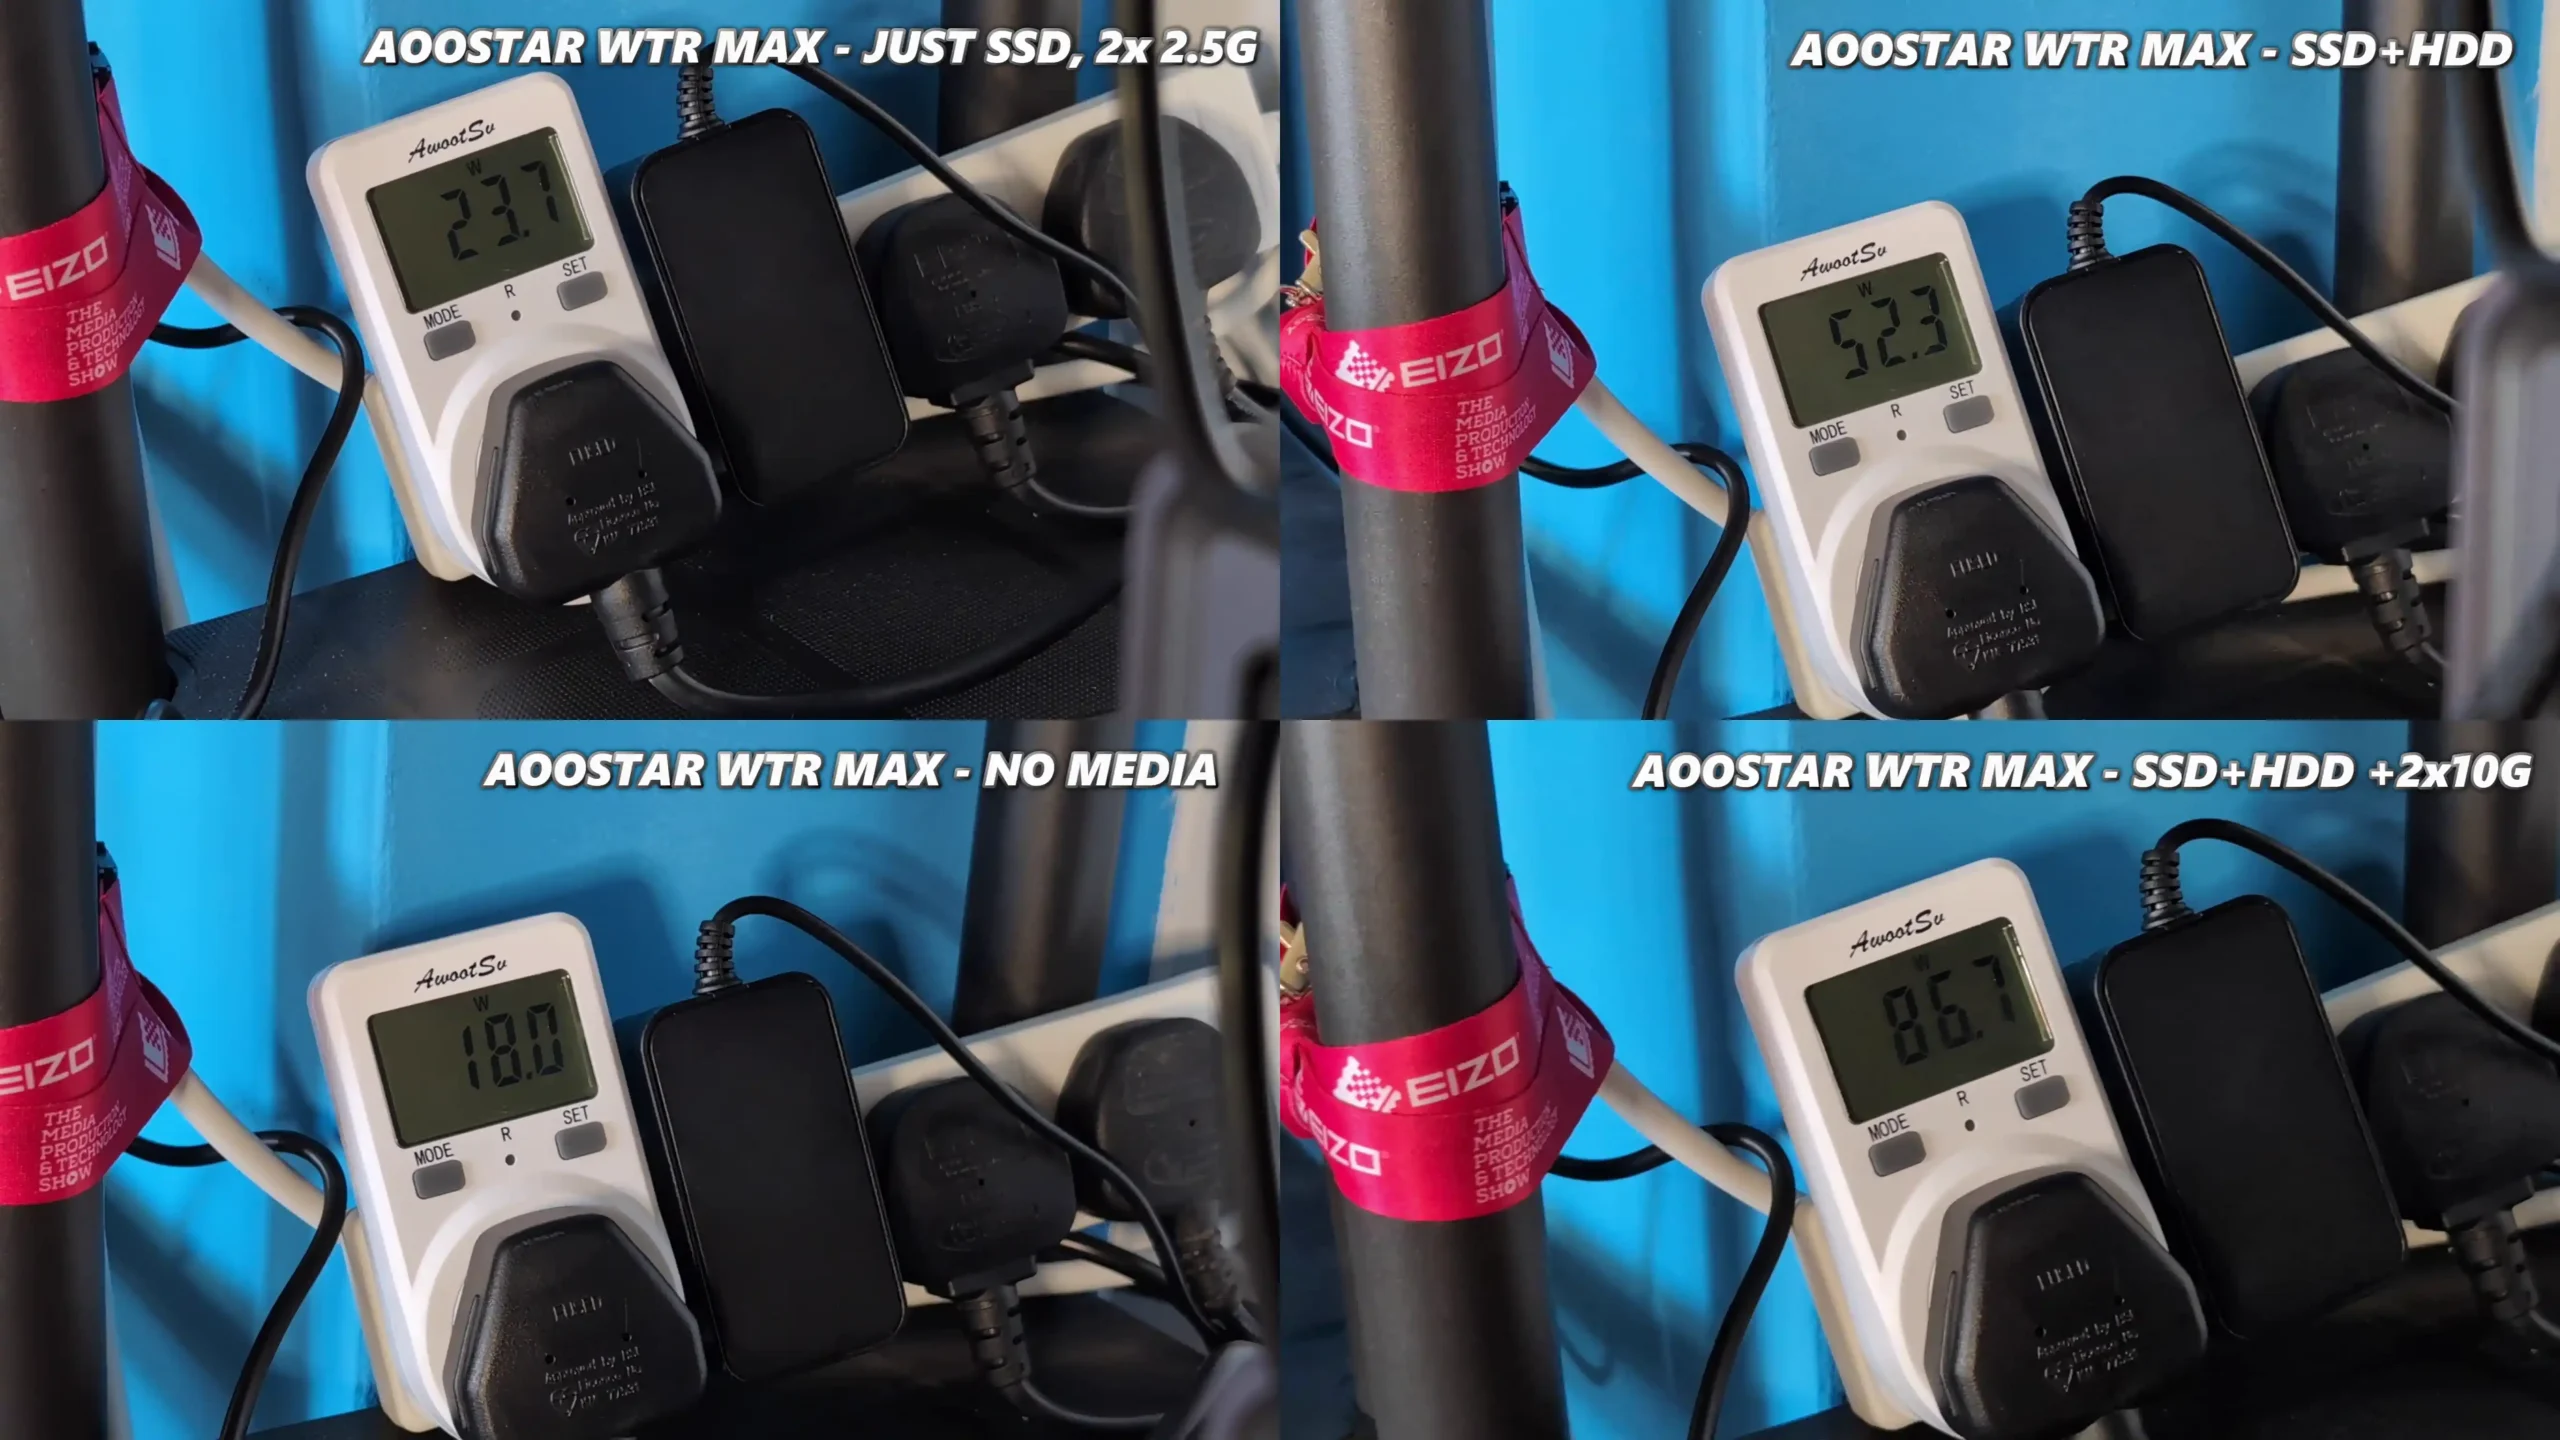
Power consumption testing covered four defined usage scenarios to gauge idle and active draw under realistic conditions. With no drives installed and only the OS running from the onboard NVMe SSD, the system idled at just 18W, largely due to the mobile efficiency of the Ryzen 7 PRO 8845HS and lack of mechanical components. Installing five M.2 SSDs increased baseline consumption to around 24W. With all six SATA bays populated using 8TB–18TB HDDs alongside five SSDs, power draw under passive load settled at approximately 52–53W. During full-load testing—consisting of active read/write operations on all drives, high-bitrate Plex streaming, dual 10GbE saturation, and 40–50% CPU usage—system draw fluctuated between 73W and 89W. These numbers fall within reasonable bounds for a 12-core-equivalent server system with 11 drives, four fans, and integrated GPU transcode activity. The external 280W power supply never exhibited instability and has sufficient overhead for adding expansion enclosures or OCuLink-powered peripherals like an eGPU or NVMe array.
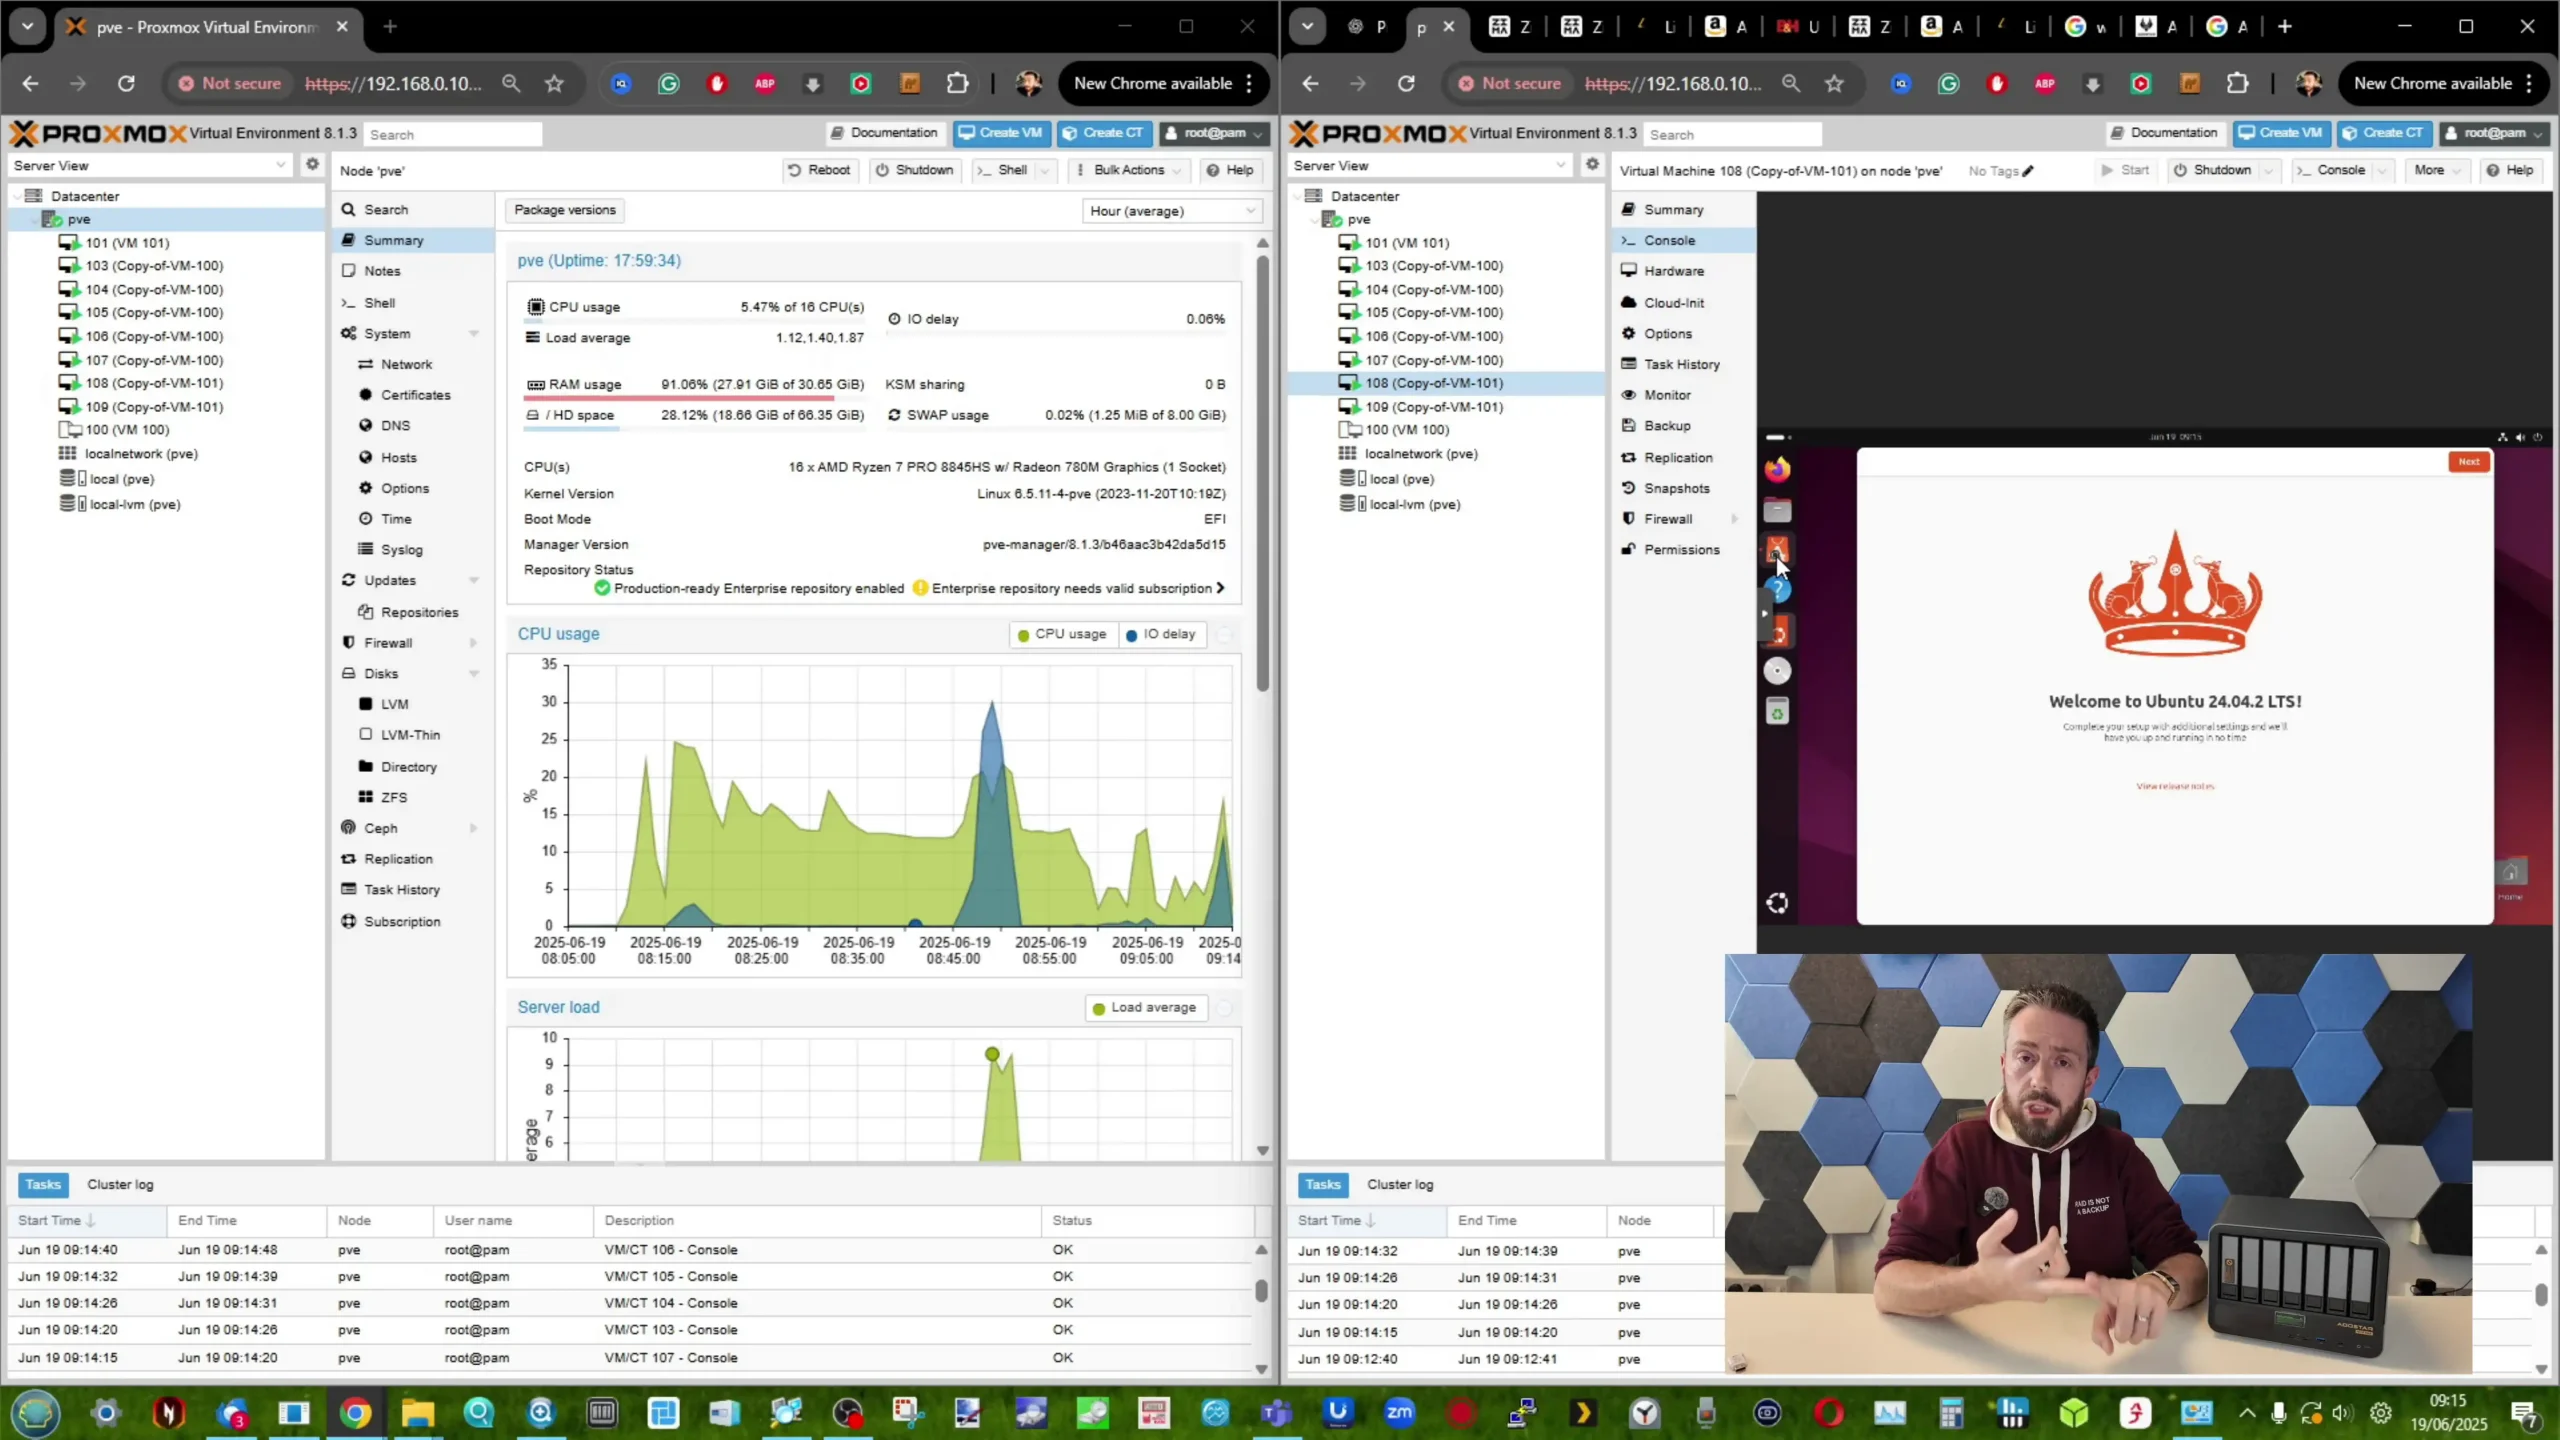
Application testing further underscored the platform’s ability to support a hybrid range of tasks. In multimedia scenarios, Plex Media Server was configured to transcode a 400 Mbps 4K file, a 200 Mbps 4K stream, and two simultaneous 80 Mbps 8K/4K sources—all while maintaining fluid playback and system responsiveness. The integrated Radeon 780M handled these loads using hardware transcoding (VAAPI), keeping CPU load under 50% throughout. In a separate deployment, Proxmox was used to launch six Windows 10 VMs and two Ubuntu LTS servers, with each VM receiving 2–4 vCPUs and 2–4 GB of memory. All machines remained responsive under simultaneous browser, terminal, and light media workloads. Importantly, the LCD panel continued to provide accurate telemetry even during these test periods, showing live RAM, CPU, and storage activity. No kernel-level instability, drive timeouts, or system hangs were observed during multi-day operation. This level of consistency positions the WTR Max as a capable platform not just for data storage, but also for virtualized desktop hosting, container orchestration, or edge-processing scenarios where performance and uptime are equally critical.
| SSD Benchmark | Gen 4 x1: ~1.6 GB/s read / ~1.5 GB/s write; Gen 4 x2: ~2.9 GB/s read / ~2.8 GB/s write |
|---|---|
| Internal Transfers | M.2 to M.2 mixed or matched: ~500–600 MB/s (sustained), likely limited by shared lanes |
| 10GbE Throughput | Full saturation on both SFP+ ports: ~9.5 Gbps, sustained 1.1+ GB/s file transfer |
| Power Consumption | 18W (idle, no drives), 24W (SSDs only), 52–53W (fully populated idle), 73–89W (peak load) |
| Transcoding (Plex) | 4 concurrent streams (4K/8K), HW transcoding (Radeon 780M), <50% CPU load, stable output |
| Virtualization | 6x Win10 (4GB RAM/2 vCPUs), 2x Ubuntu (2GB RAM/2 vCPUs); responsive multi-session use |
| Thermal Behavior | 35–40°C idle, 47–49°C under stress, SSDs remained below 48°C, no thermal throttling |
The Aoostar WTR Max presents a rare combination of compact form factor, enterprise-aligned specifications, and hardware flexibility that places it apart from both consumer-grade NAS appliances and DIY server builds. With support for eleven total storage devices—including six SATA bays and five Gen 4 NVMe slots—plus ECC memory compatibility and dual 10GbE networking, it delivers a feature set typically reserved for much larger or more expensive systems. Its Ryzen 7 PRO 8845HS processor offers sufficient compute power for a wide range of workloads, from virtualization and containerization to media encoding and storage routing. Real-world performance during testing confirmed that the WTR Max could handle multiple simultaneous high-bitrate video transcodes, multi-VM operation, and 10GbE network saturation, all while maintaining consistent thermals and manageable power usage. While internal bandwidth sharing across NVMe slots may limit some inter-disk operations, this did not impact external throughput or sustained application performance.
For users seeking a flexible platform to host their own NAS operating system—whether TrueNAS, Unraid, or Proxmox—the WTR Max provides considerable value, assuming a willingness to configure and manage the software stack independently. It does not include a proprietary OS or vendor-specific ecosystem, which may be a drawback for those expecting turnkey functionality but a strength for users looking to avoid software licensing limitations or drive compatibility locks. The LCD front panel, OCuLink expandability, and support for up to 128GB of DDR5 RAM further extend its potential across use cases that include hybrid desktop/NAS roles, edge compute appliances, or lab environments. While priced above entry-level NAS systems, its performance, thermal behavior, and hardware access align more closely with workstation-class systems. A future comparison with devices like the Minisforum N5 Pro will offer more context, but based on current observations, the Aoostar WTR Max establishes itself as a serious option for self-hosters demanding both storage density and processing headroom.
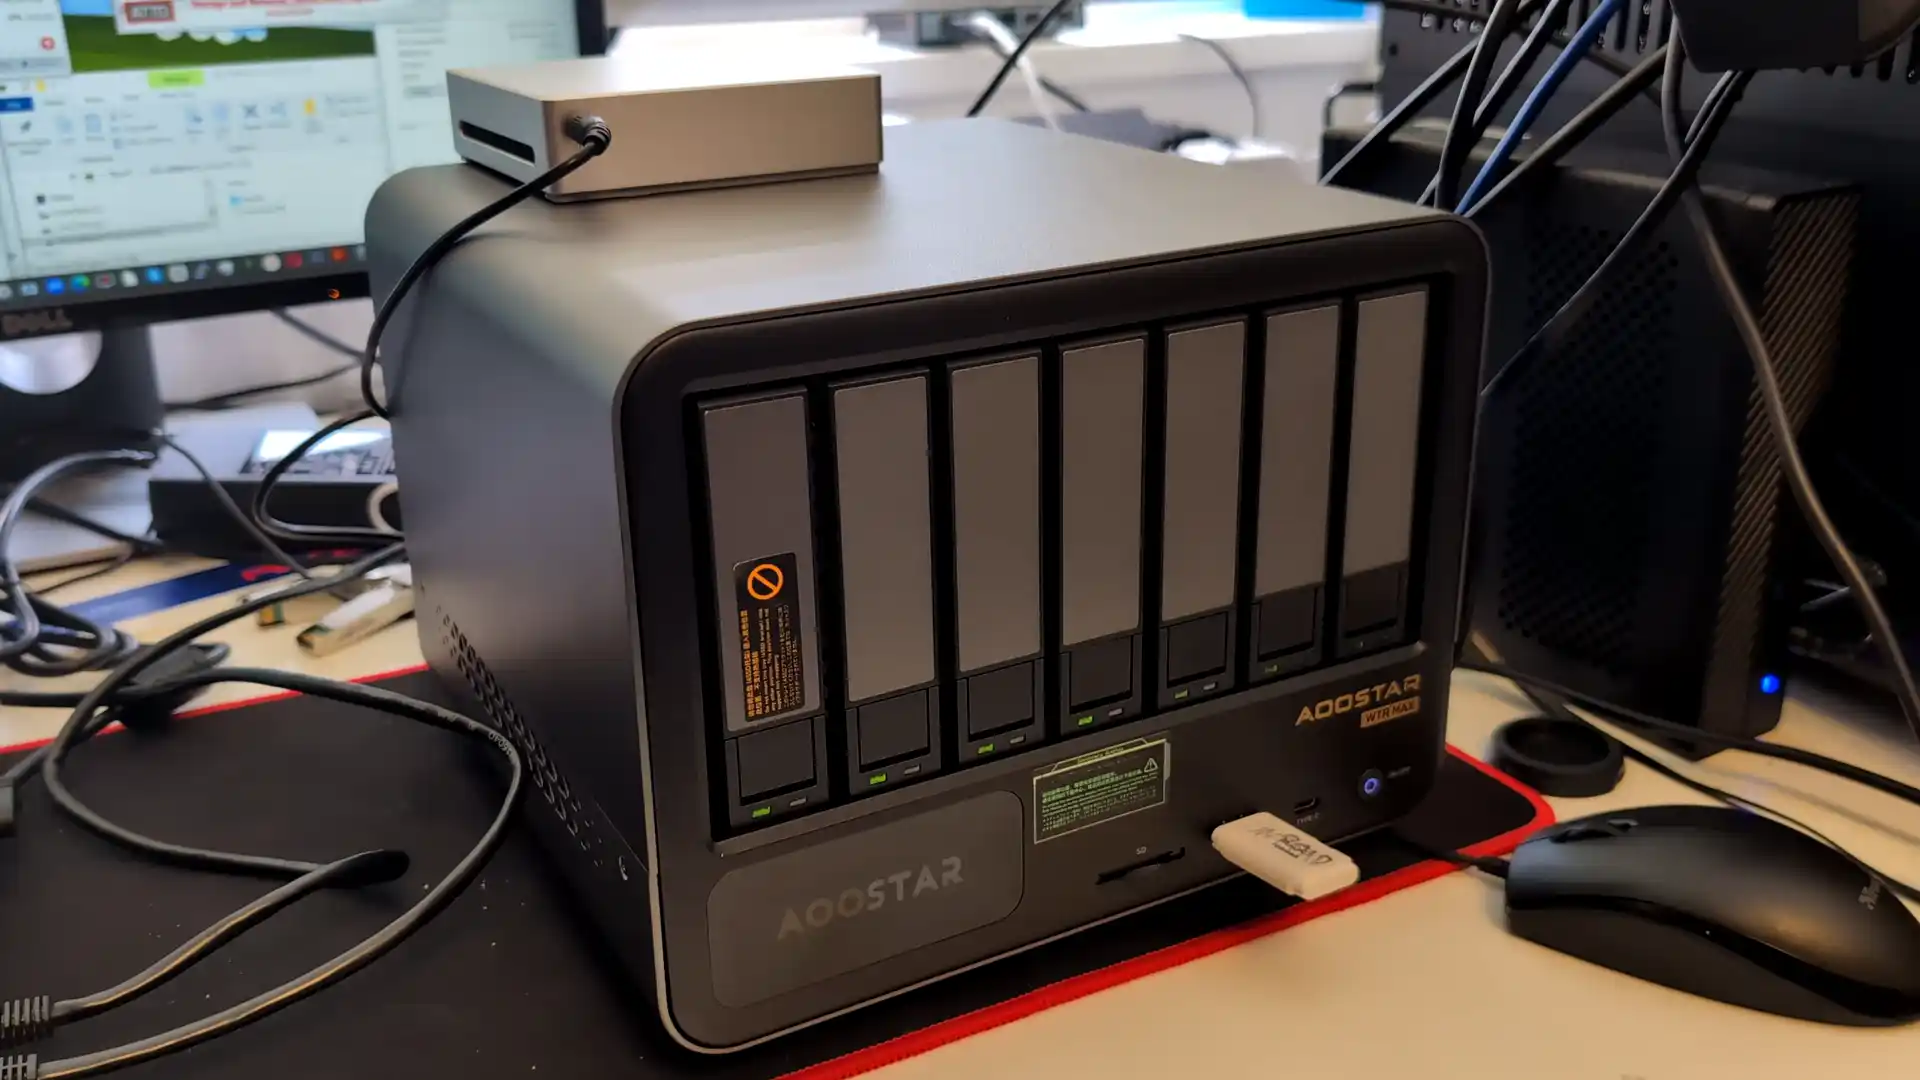
| The Aoostar WTR MAX Nas is available from the following places: |
| Aoostar WTR Max NAS Pros | Aoostar WTR Max NAS Cons |
|
|
SUBSCRIBE TO OUR NEWSLETTER Join Inner Circle Subscribe
This description contains links to Amazon. These links will take you to some of the products mentioned in today's content. As an Amazon Associate, I earn from qualifying purchases. Visit the NASCompares Deal Finder to find the best place to buy this device in your region, based on Service, Support and Reputation - Just Search for your NAS Drive in the Box Below
Need Help?
Where possible (and where appropriate) please provide as much information about your requirements, as then I can arrange the best answer and solution to your needs. Do not worry about your e-mail address being required, it will NOT be used in a mailing list and will NOT be used in any way other than to respond to your enquiry.
[contact-form-7]
Ko-fi or old school Paypal. Thanks!To find out more about how to support this advice service check HEREIf you need to fix or configure a NAS, check Fiver
Have you thought about helping others with your knowledge? Find Instructions Here
|
|
|
The 45Drives HL8 is an 8-bay desktop NAS chassis developed for users who want professional-grade storage hardware without committing to the rigid ecosystems of traditional NAS vendors. Designed and manufactured in North America, the HL8 is available in several configurations, with this review focusing specifically on the chassis, backplane, and power supply model. This version includes a precision-built steel enclosure, a direct-wired 8-bay SATA backplane, and a 500W 80 Plus Gold-rated Flex ATX power supply. It omits bundled motherboards, CPUs, and pre-installed operating systems, appealing to users who prefer to build or customize their NAS hardware environment while still benefiting from an integrated power and storage foundation. The HL8 aims to bridge the gap between low-cost DIY NAS enclosures, which often suffer from poor thermals and awkward layouts, and locked-down consumer appliances that limit software choices and upgrade potential. With a hinged open-frame design, support for full-height PCIe cards, and internal layout optimized for accessibility and cooling, the HL8 is positioned as a platform for long-term use and adaptability rather than a quick-start solution. While its price point is significantly higher than generic imported chassis, its construction and modular focus suggest it’s intended for serious users seeking more control, not simply more convenience.
45Drives is a Canadian storage hardware manufacturer based in Nova Scotia, operating as a division of Protocase, a custom enclosure and prototyping company. The brand has built a reputation among system integrators, IT professionals, and homelab enthusiasts for delivering modular, open-platform storage solutions. Unlike many NAS vendors that focus on vertically integrated ecosystems, 45Drives offers systems built around industry-standard components, designed to be user-serviceable and adaptable. Their catalog includes high-density rackmount systems like the Storinator, hybrid flash-HDD systems such as the Stornado, and more recently, a range of compact desktop NAS chassis under the “HL” or HomeLab label. The HL8, HL4, and HL15 models are part of this effort to scale down enterprise-grade build quality into a form factor more appropriate for deskside or small office deployment.
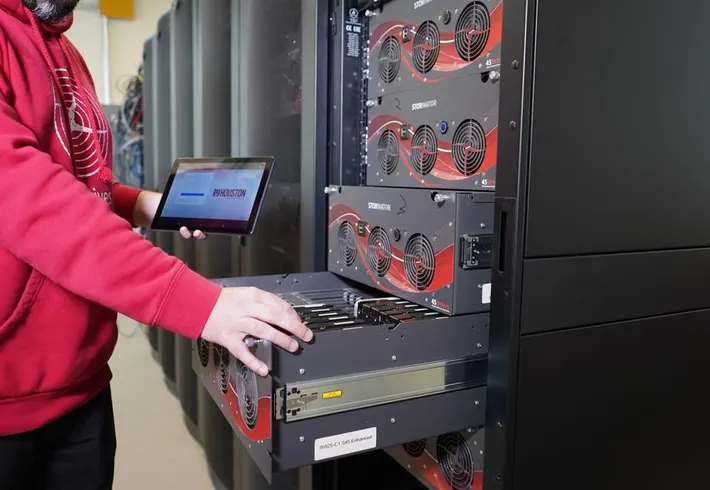
A core part of 45Drives’ identity is its commitment to open-source principles, not just through hardware compatibility but also in software tooling and education. The company develops and maintains Cockpit-based management modules—such as their ZFS and Samba interfaces—for Linux distributions like Rocky Linux, which they often preinstall with their systems. These modules are freely available on GitHub, and the company encourages users to modify, self-host, or adapt them as needed. In addition to their software work, 45Drives actively engages with the community through regular YouTube content, documentation portals, and technical support that continues even when customers deviate from default hardware or software configurations. This combination of enterprise durability, user empowerment, and open development has earned 45Drives a dedicated following among those who want to retain full control over their infrastructure without sacrificing reliability or support.
 BUILD QUALITY - 10/10
NOISE - 8/10COOLING - 8/10PRICE - 6/10VALUE - 8/10
BUILD QUALITY - 10/10
NOISE - 8/10COOLING - 8/10PRICE - 6/10VALUE - 8/10

8.0
PROS
1. Exceptional build quality using 2mm thick powder-coated steel2. Unique hinged design allows full interior access without disassembly3. Integrated 12Gb/s SATA/SAS-compatible hot-swap backplane4. Designed for Mini-ITX motherboards with full PCIe x16 slot suppor0t5. Tool-less and tray-less drive bays improve maintenance and upgrades6. Outstanding documentation and support from 45Drives7. Fully open-source-friendly chassis with non-proprietary layout
CONS
1. Significantly more expensive than typical DIY NAS cases2. No native 2.5\" SSD bays included (requires 3D-printed or addon tray)3. Only compatible with Flex ATX PSUs, limiting choice and increasing cost
The HL8’s exterior sets it apart from typical consumer NAS enclosures through its bold and unique industrial construction – practically enterprise grade, at a homelab and desktop level. Built from 16-gauge powder-coated steel, the chassis weighs approximately 22 lbs even before drives are installed, conveying a sense of structural rigidity that clearly aligns more with enterprise hardware than with mass-market desktop cases.
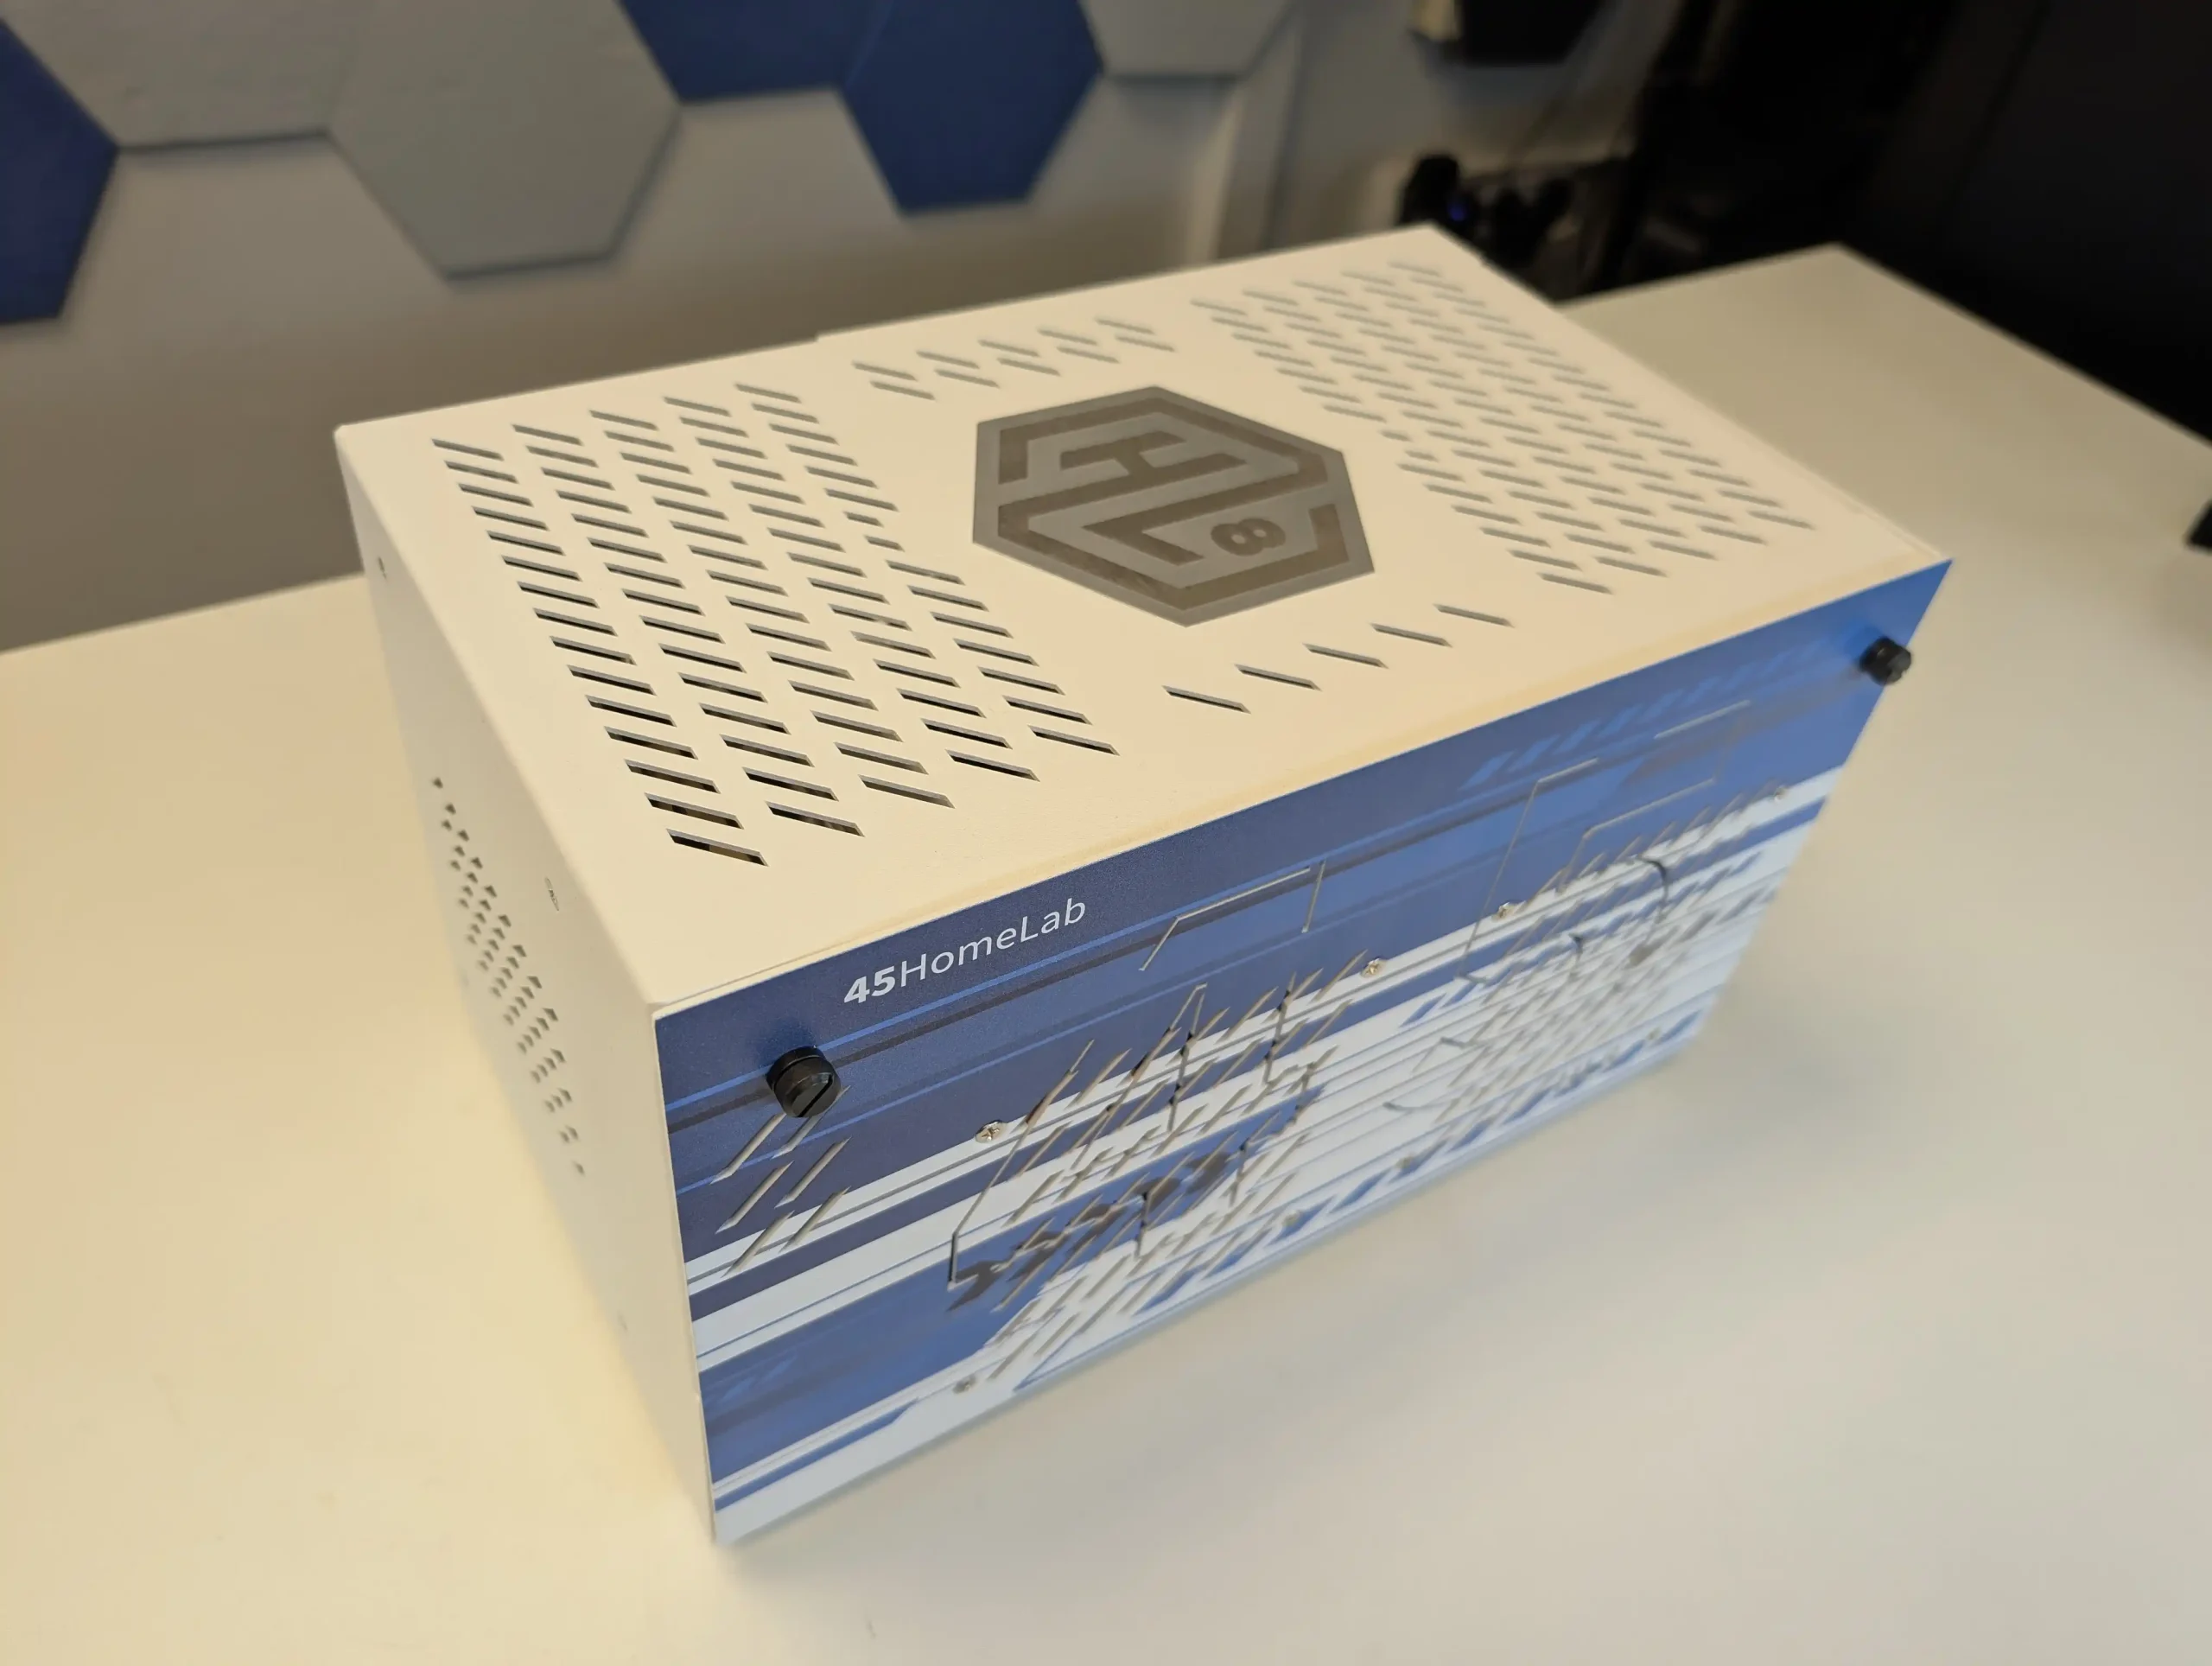 The finish is matte and durable, avoiding cheap plastics or decorative panels. Buyers can choose between metal and acrylic front plates, and several color options are available, offering some degree of personalization—something rarely seen at this tier. Branding is subtle, with the HL8 model designation etched into the top panel and a logo plate on the front face.
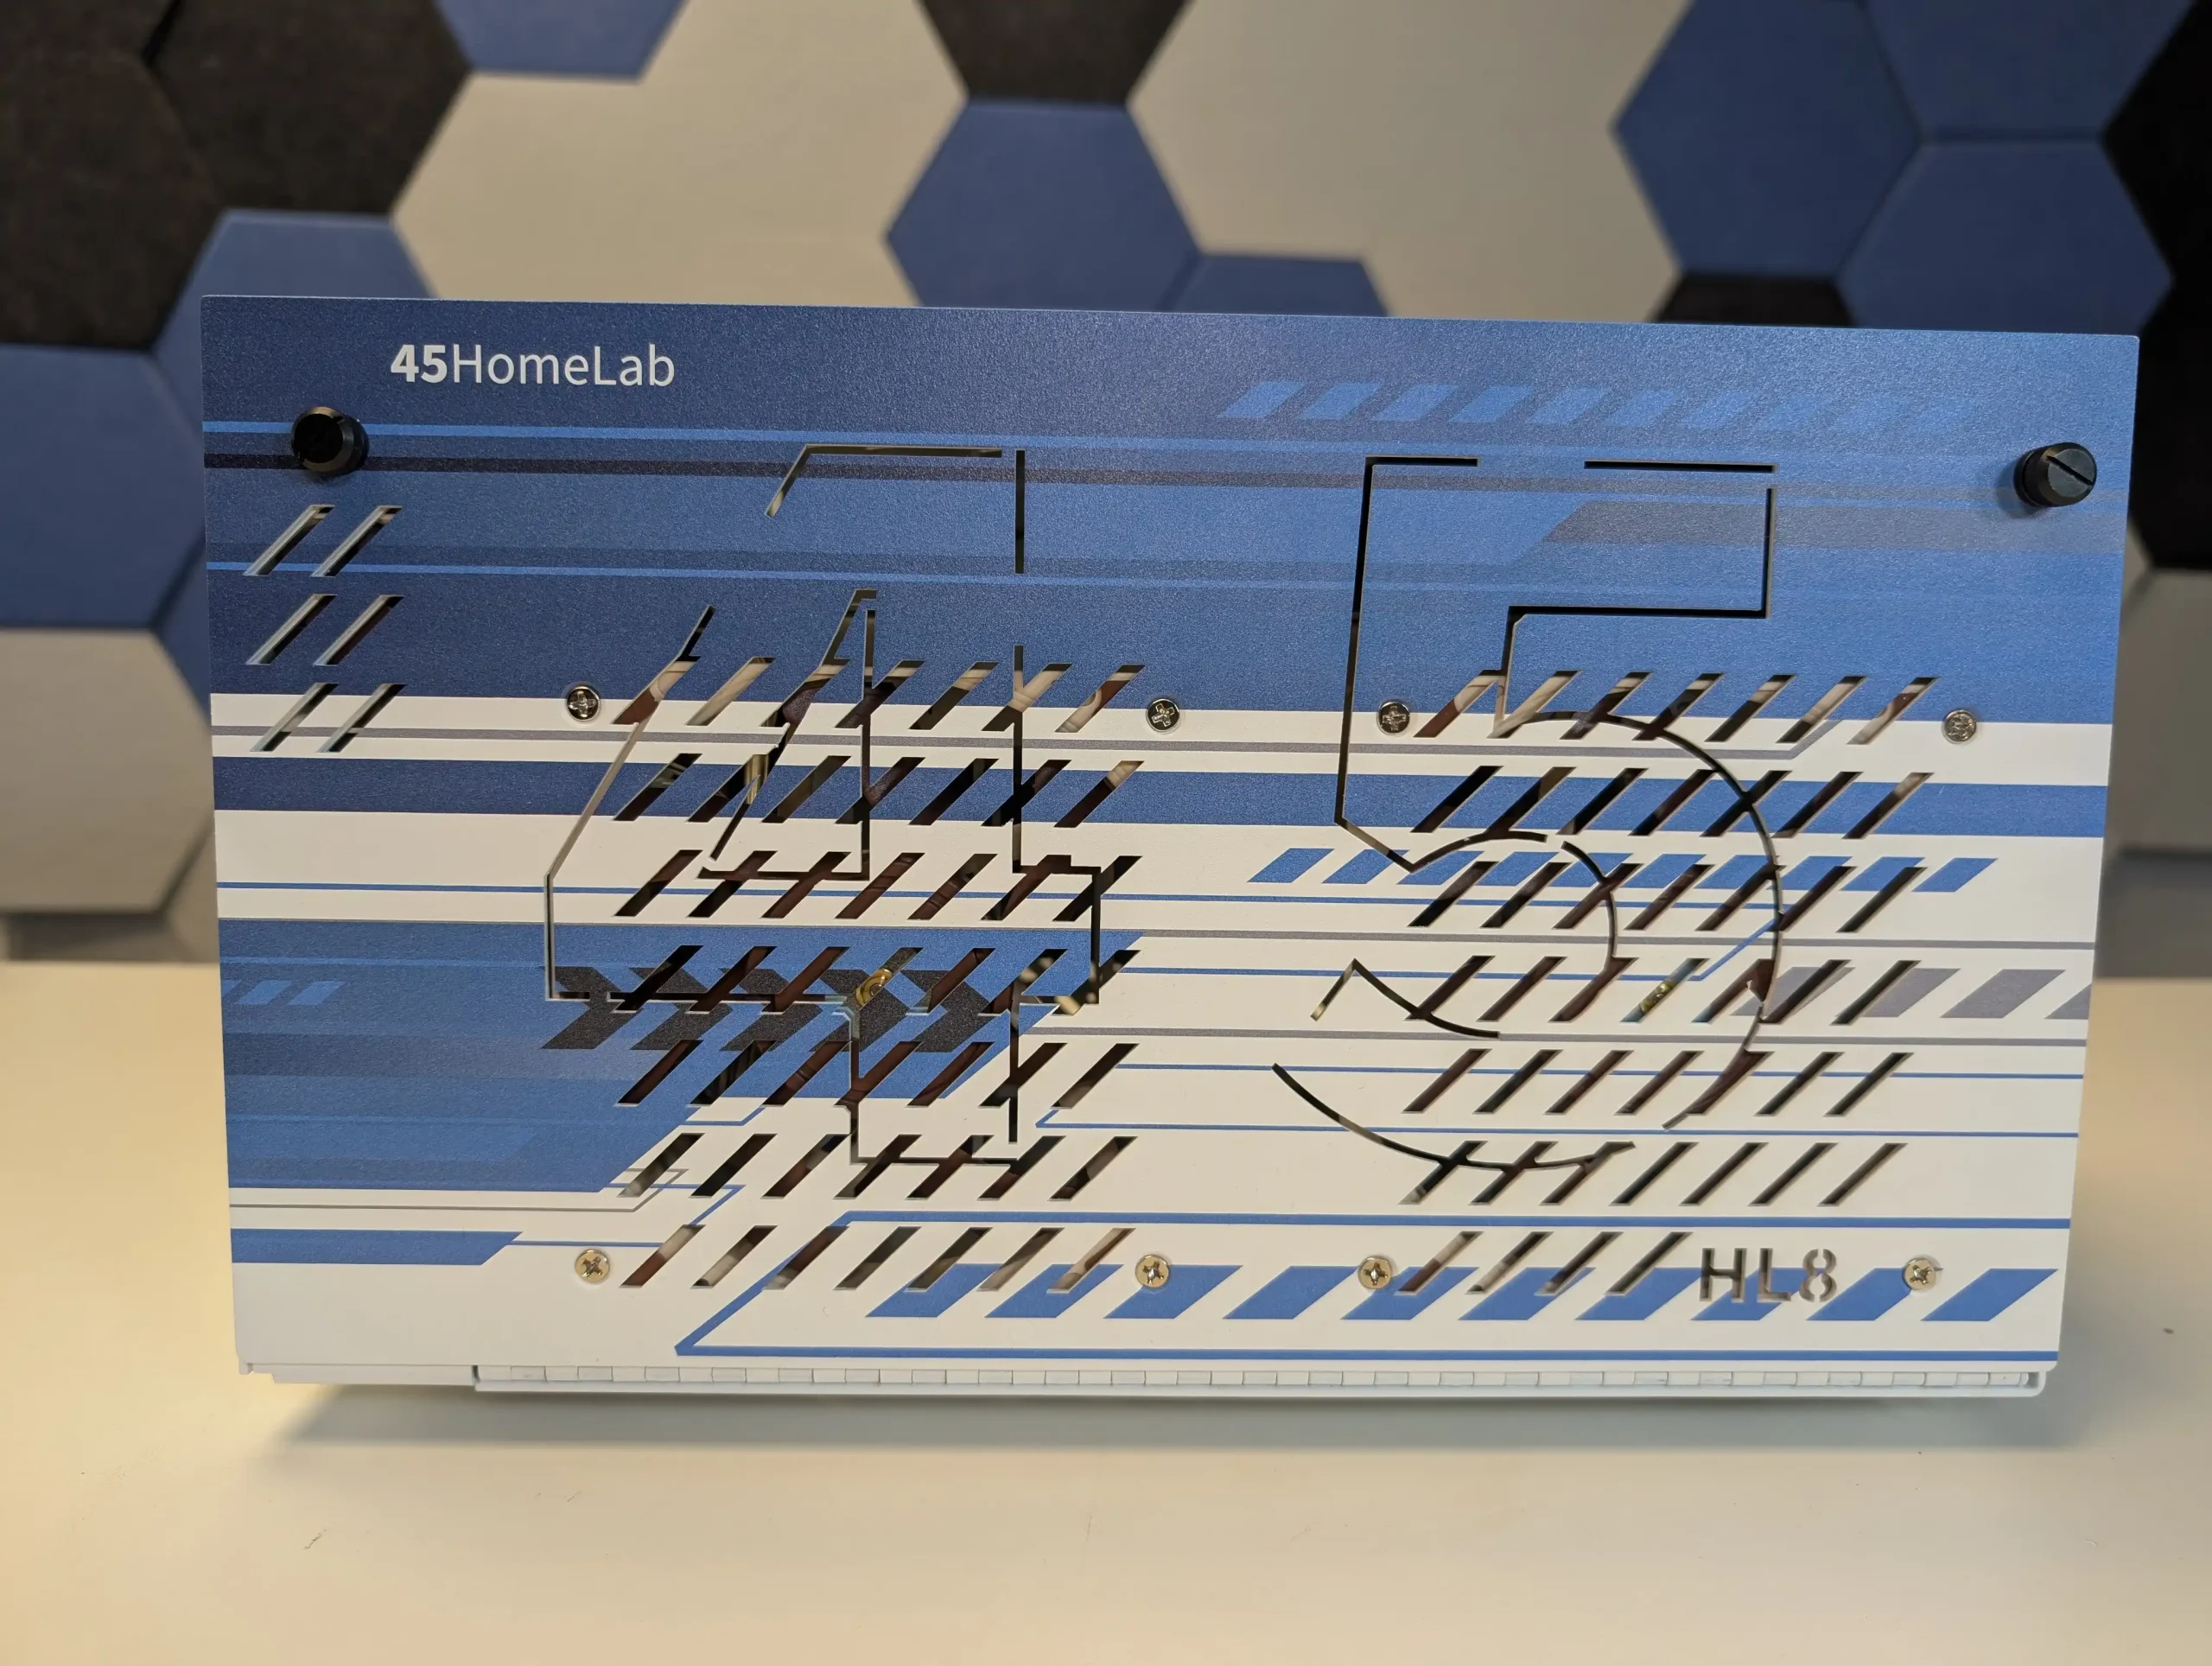
Unlike most enclosures that rely on removable panels or sliding trays, the HL8 features a hinged “clam shell” design. The entire upper shell lifts open via captive thumb screws, granting immediate access to internal components without needing to remove the drives or disconnect cabling.
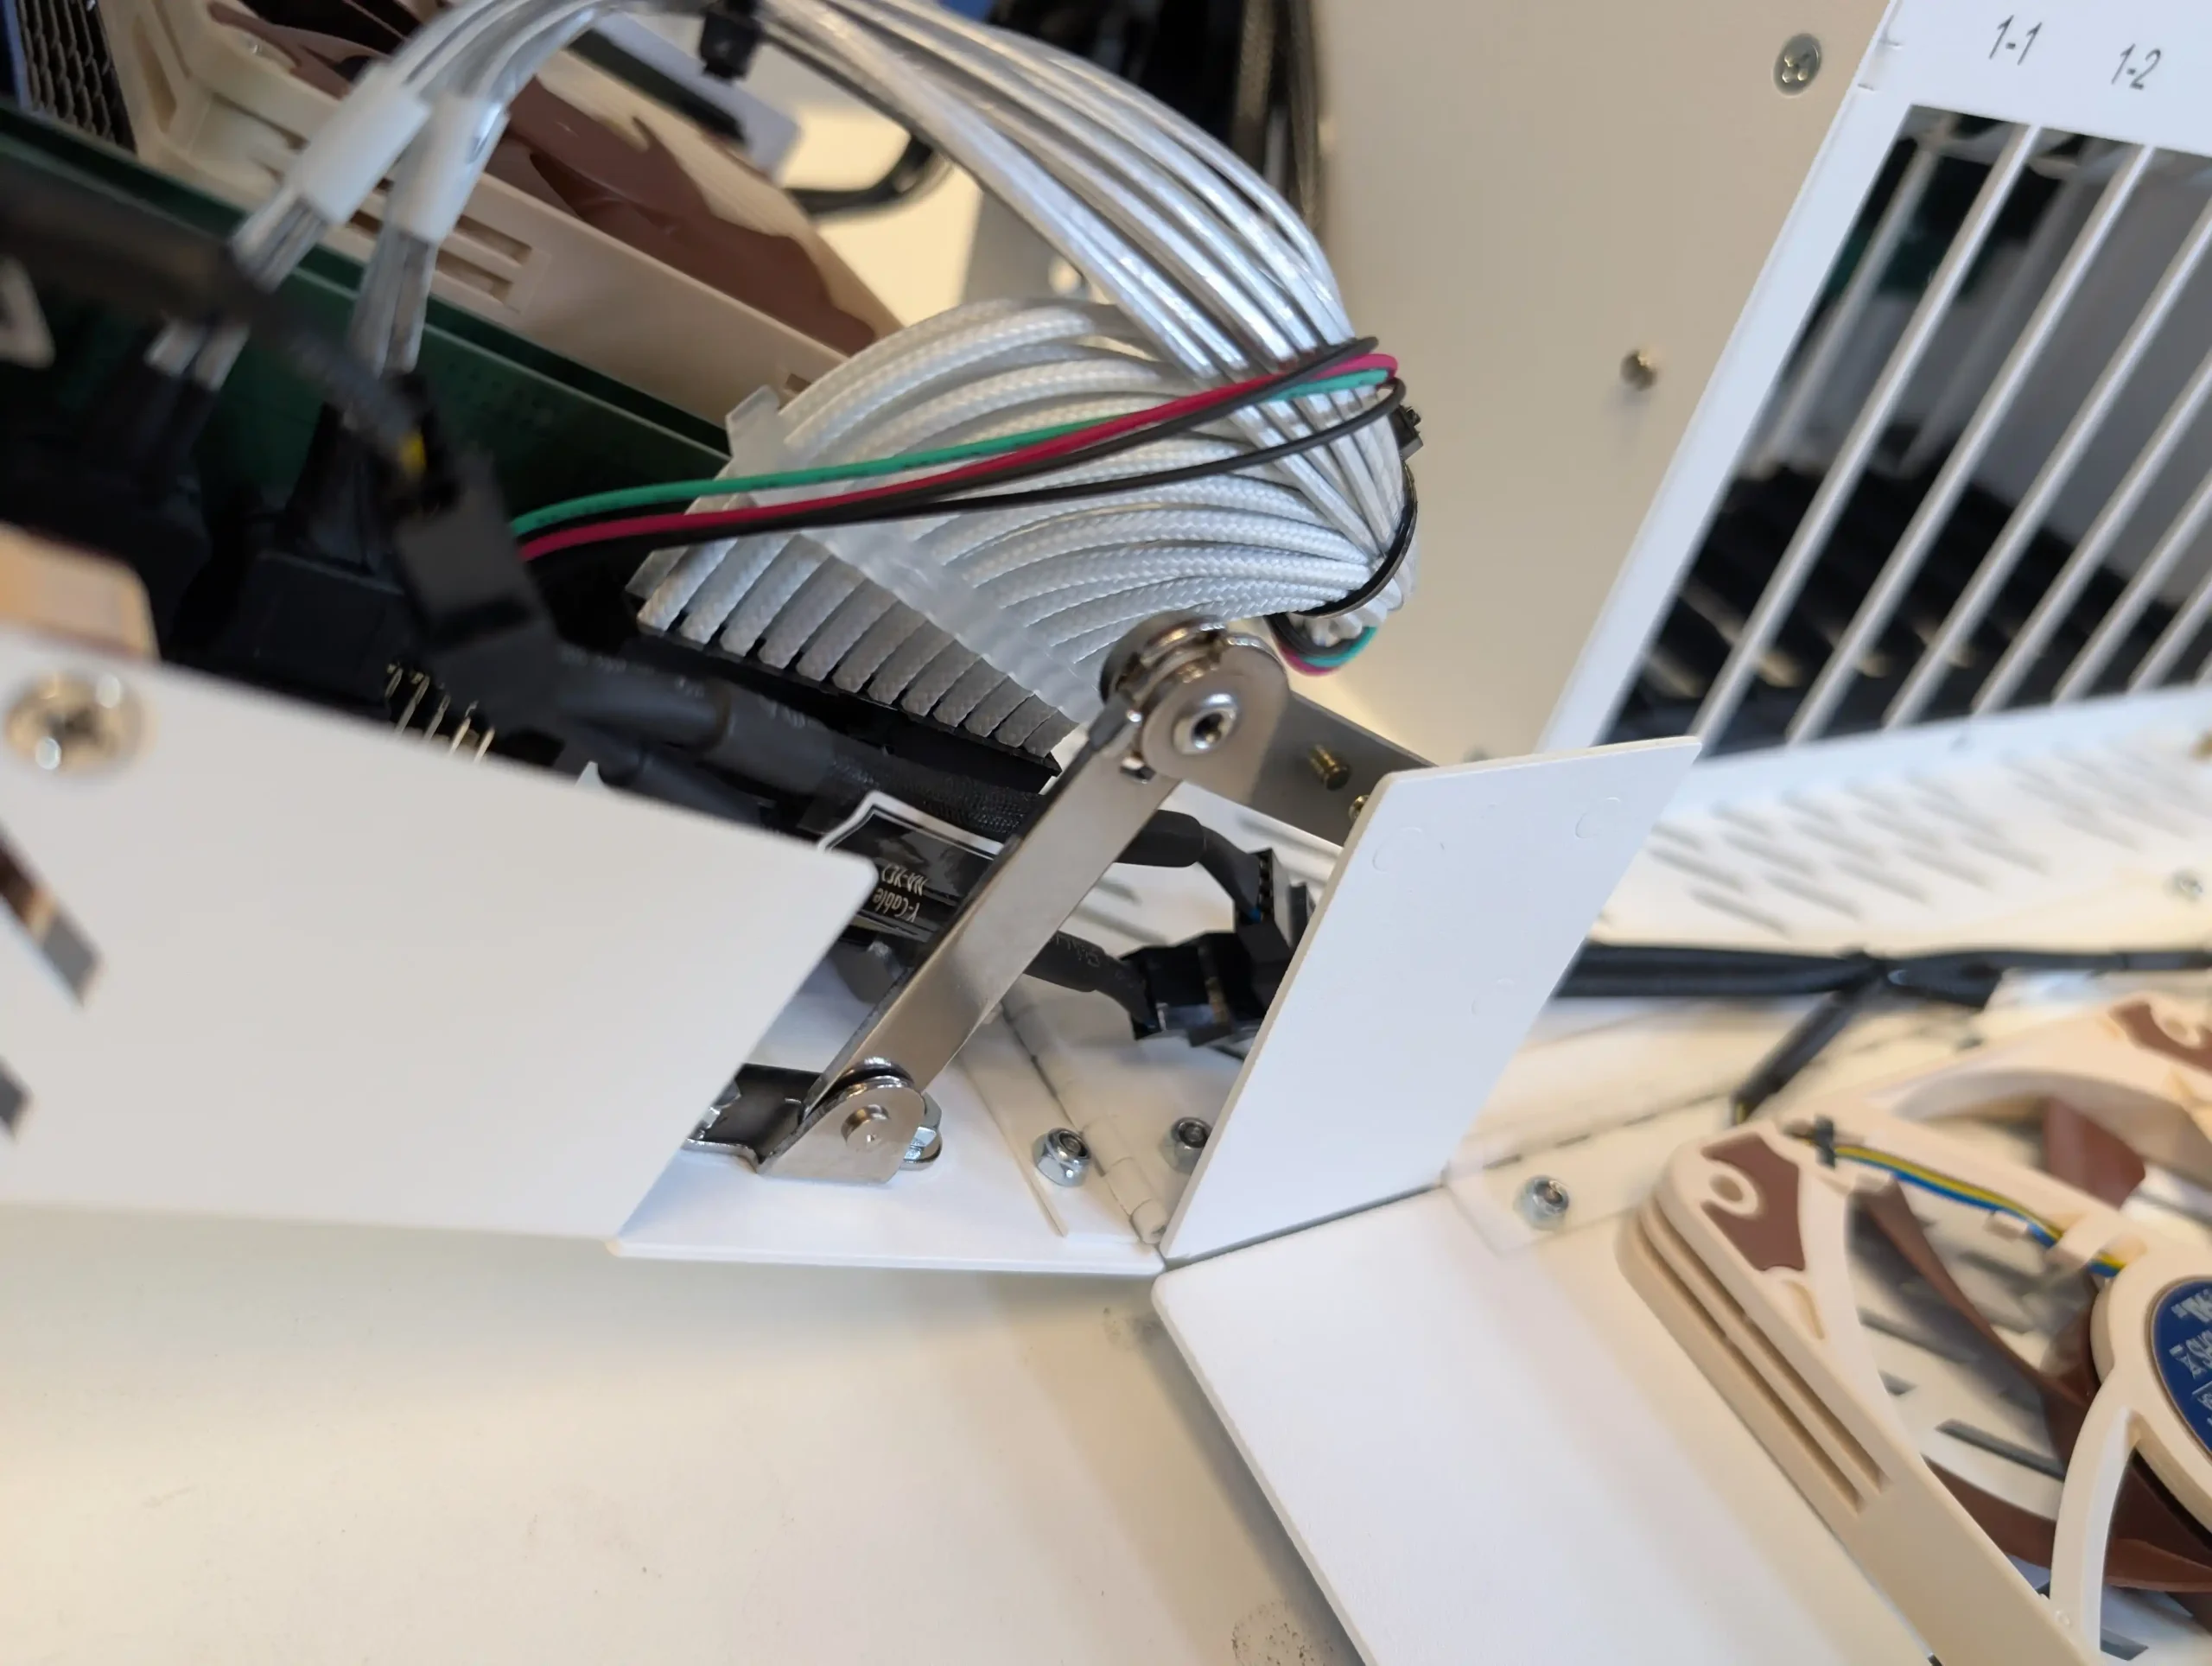 This mechanism provides real-time visibility into the system’s interior during operation, making it easier to perform diagnostics, replace fans, or adjust cabling. It’s particularly helpful for users who regularly service or upgrade their systems, and it avoids many of the frustrations associated with cramped or tool-dependent access panels.
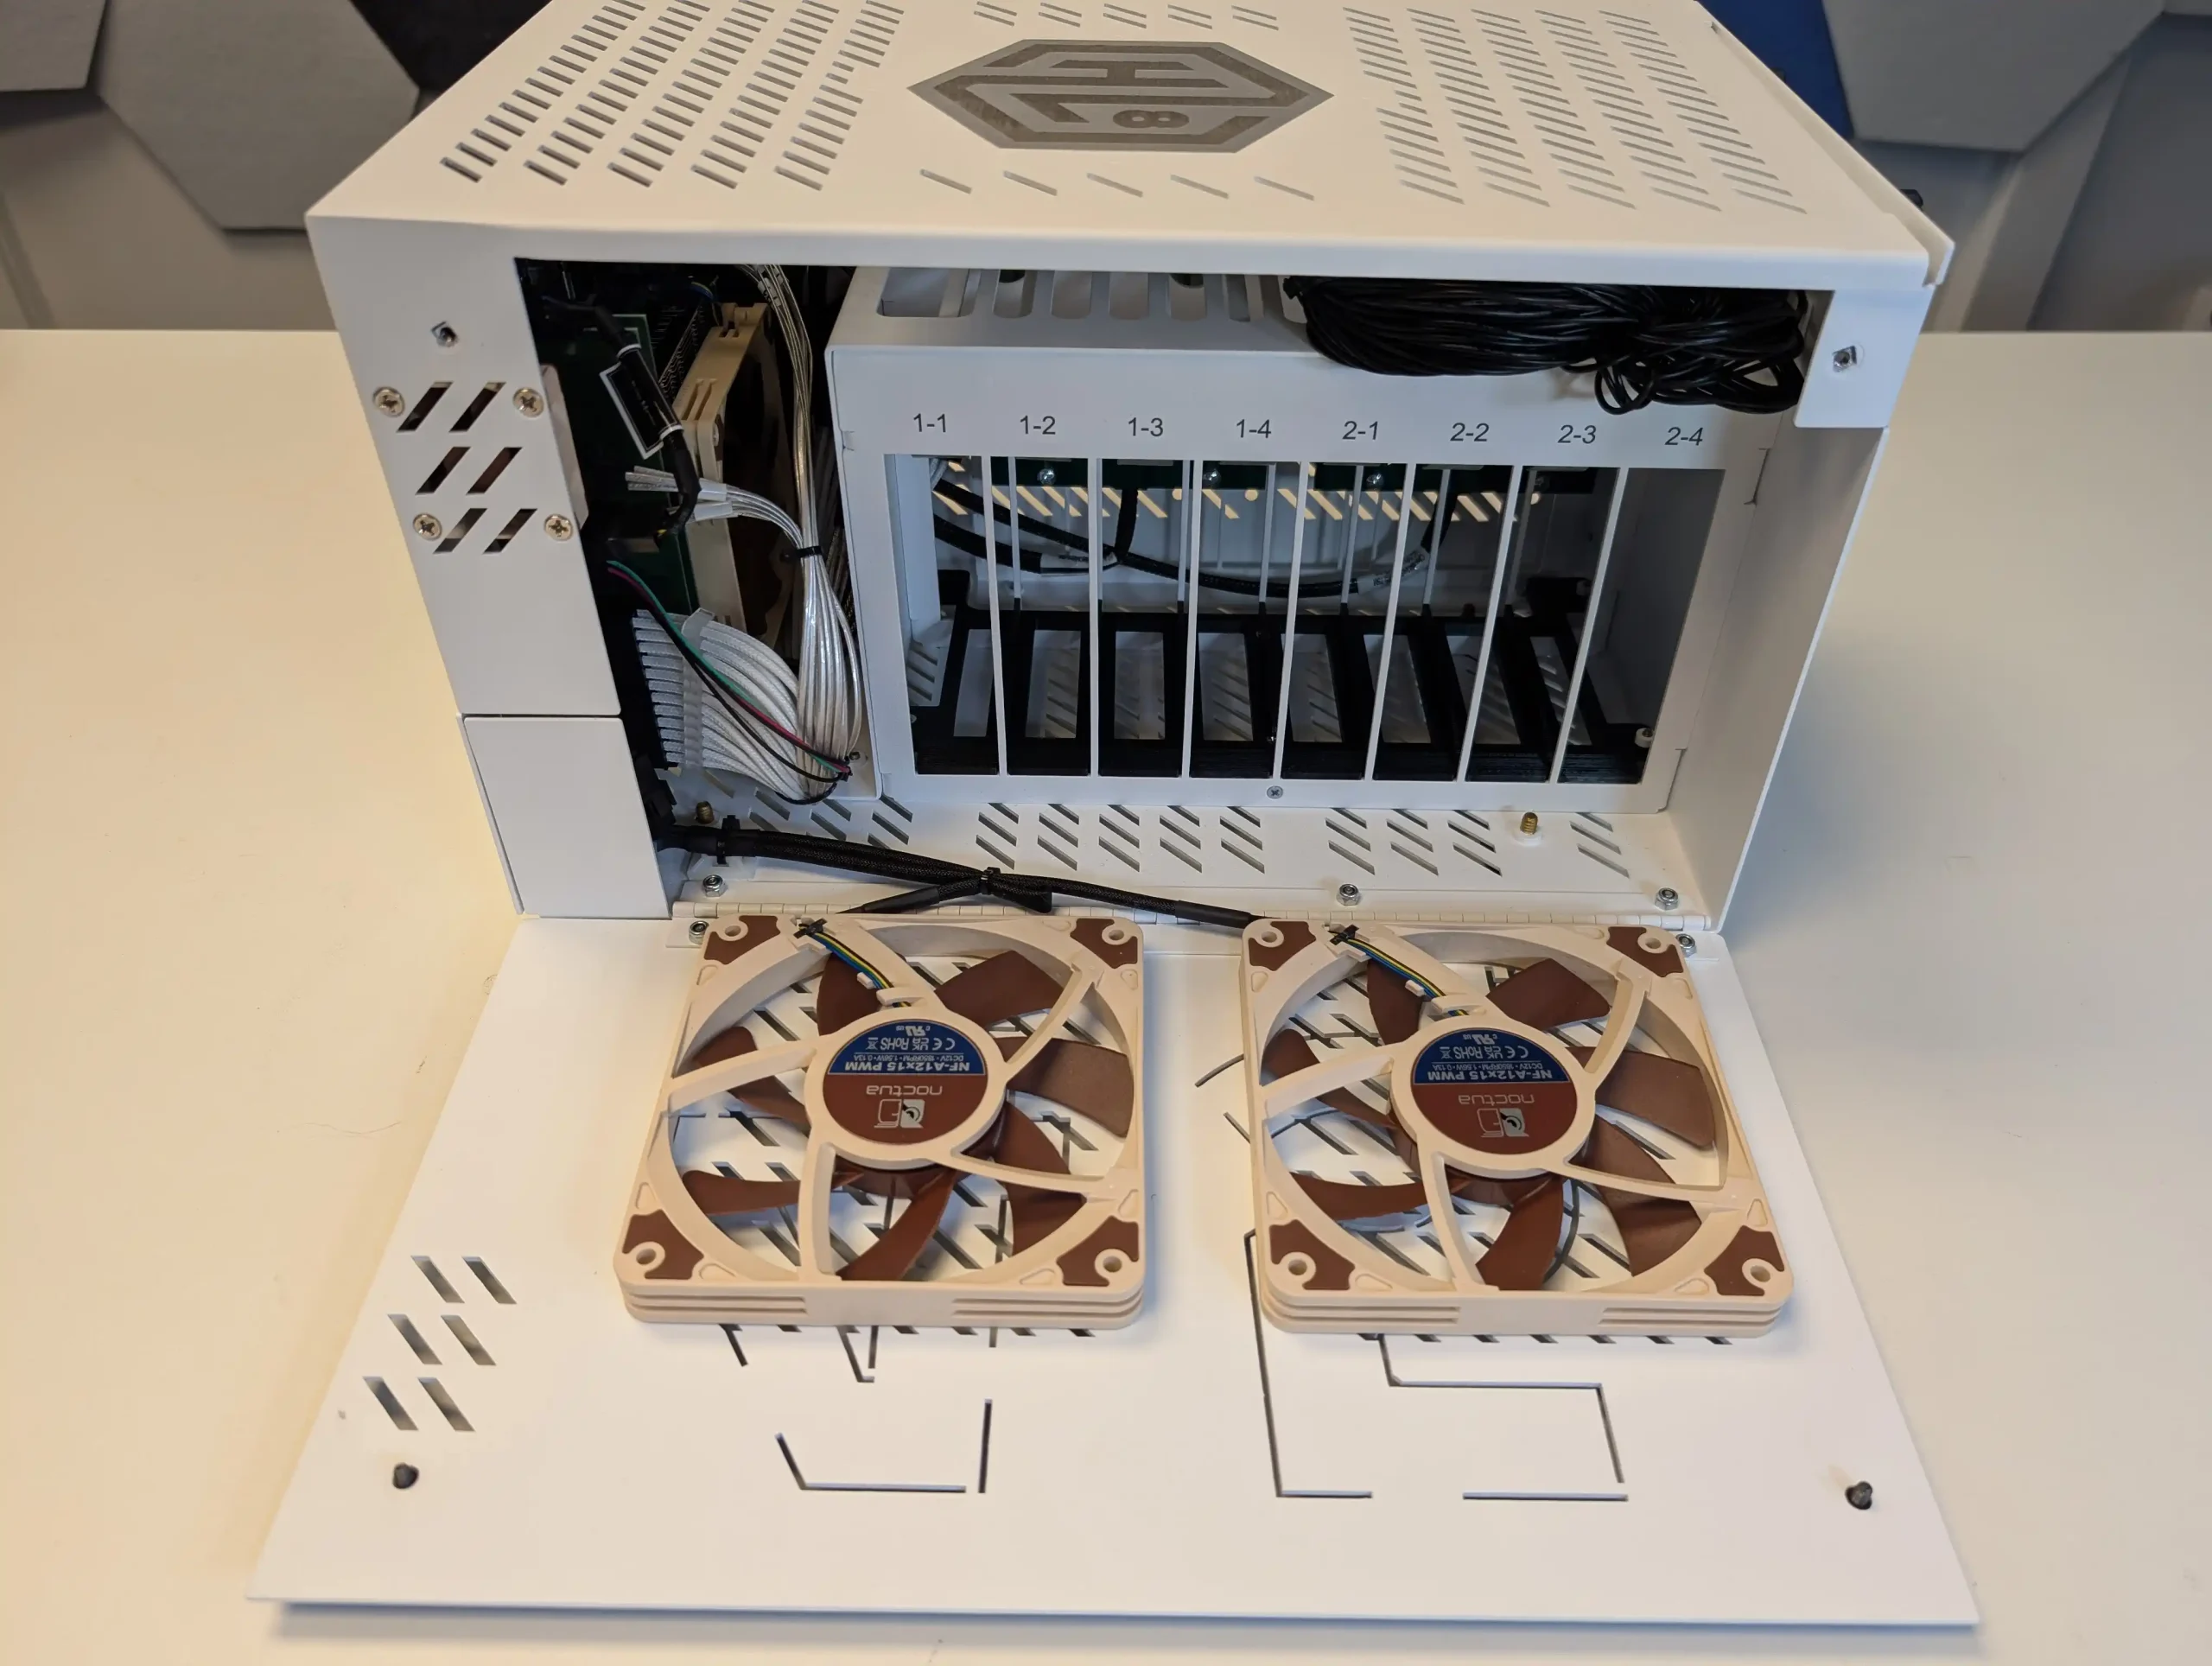
The front of the case houses eight hot-swap 3.5” bays in a vertical arrangement, accessible without tools and pre-wired via the internal backplane. These bays are trayless and rely on drive guides for alignment, secured by the structural frame rather than individual plastic sleds. This design allows for rapid drive installation and removal while minimizing potential points of mechanical failure. The front ventilation is cut directly into the steel fascia, and airflow is directed through the drive bays by internal Noctua fans located behind them. There are no visible indicators or LCD panels on the front panel—minimalism is favored over visual clutter.
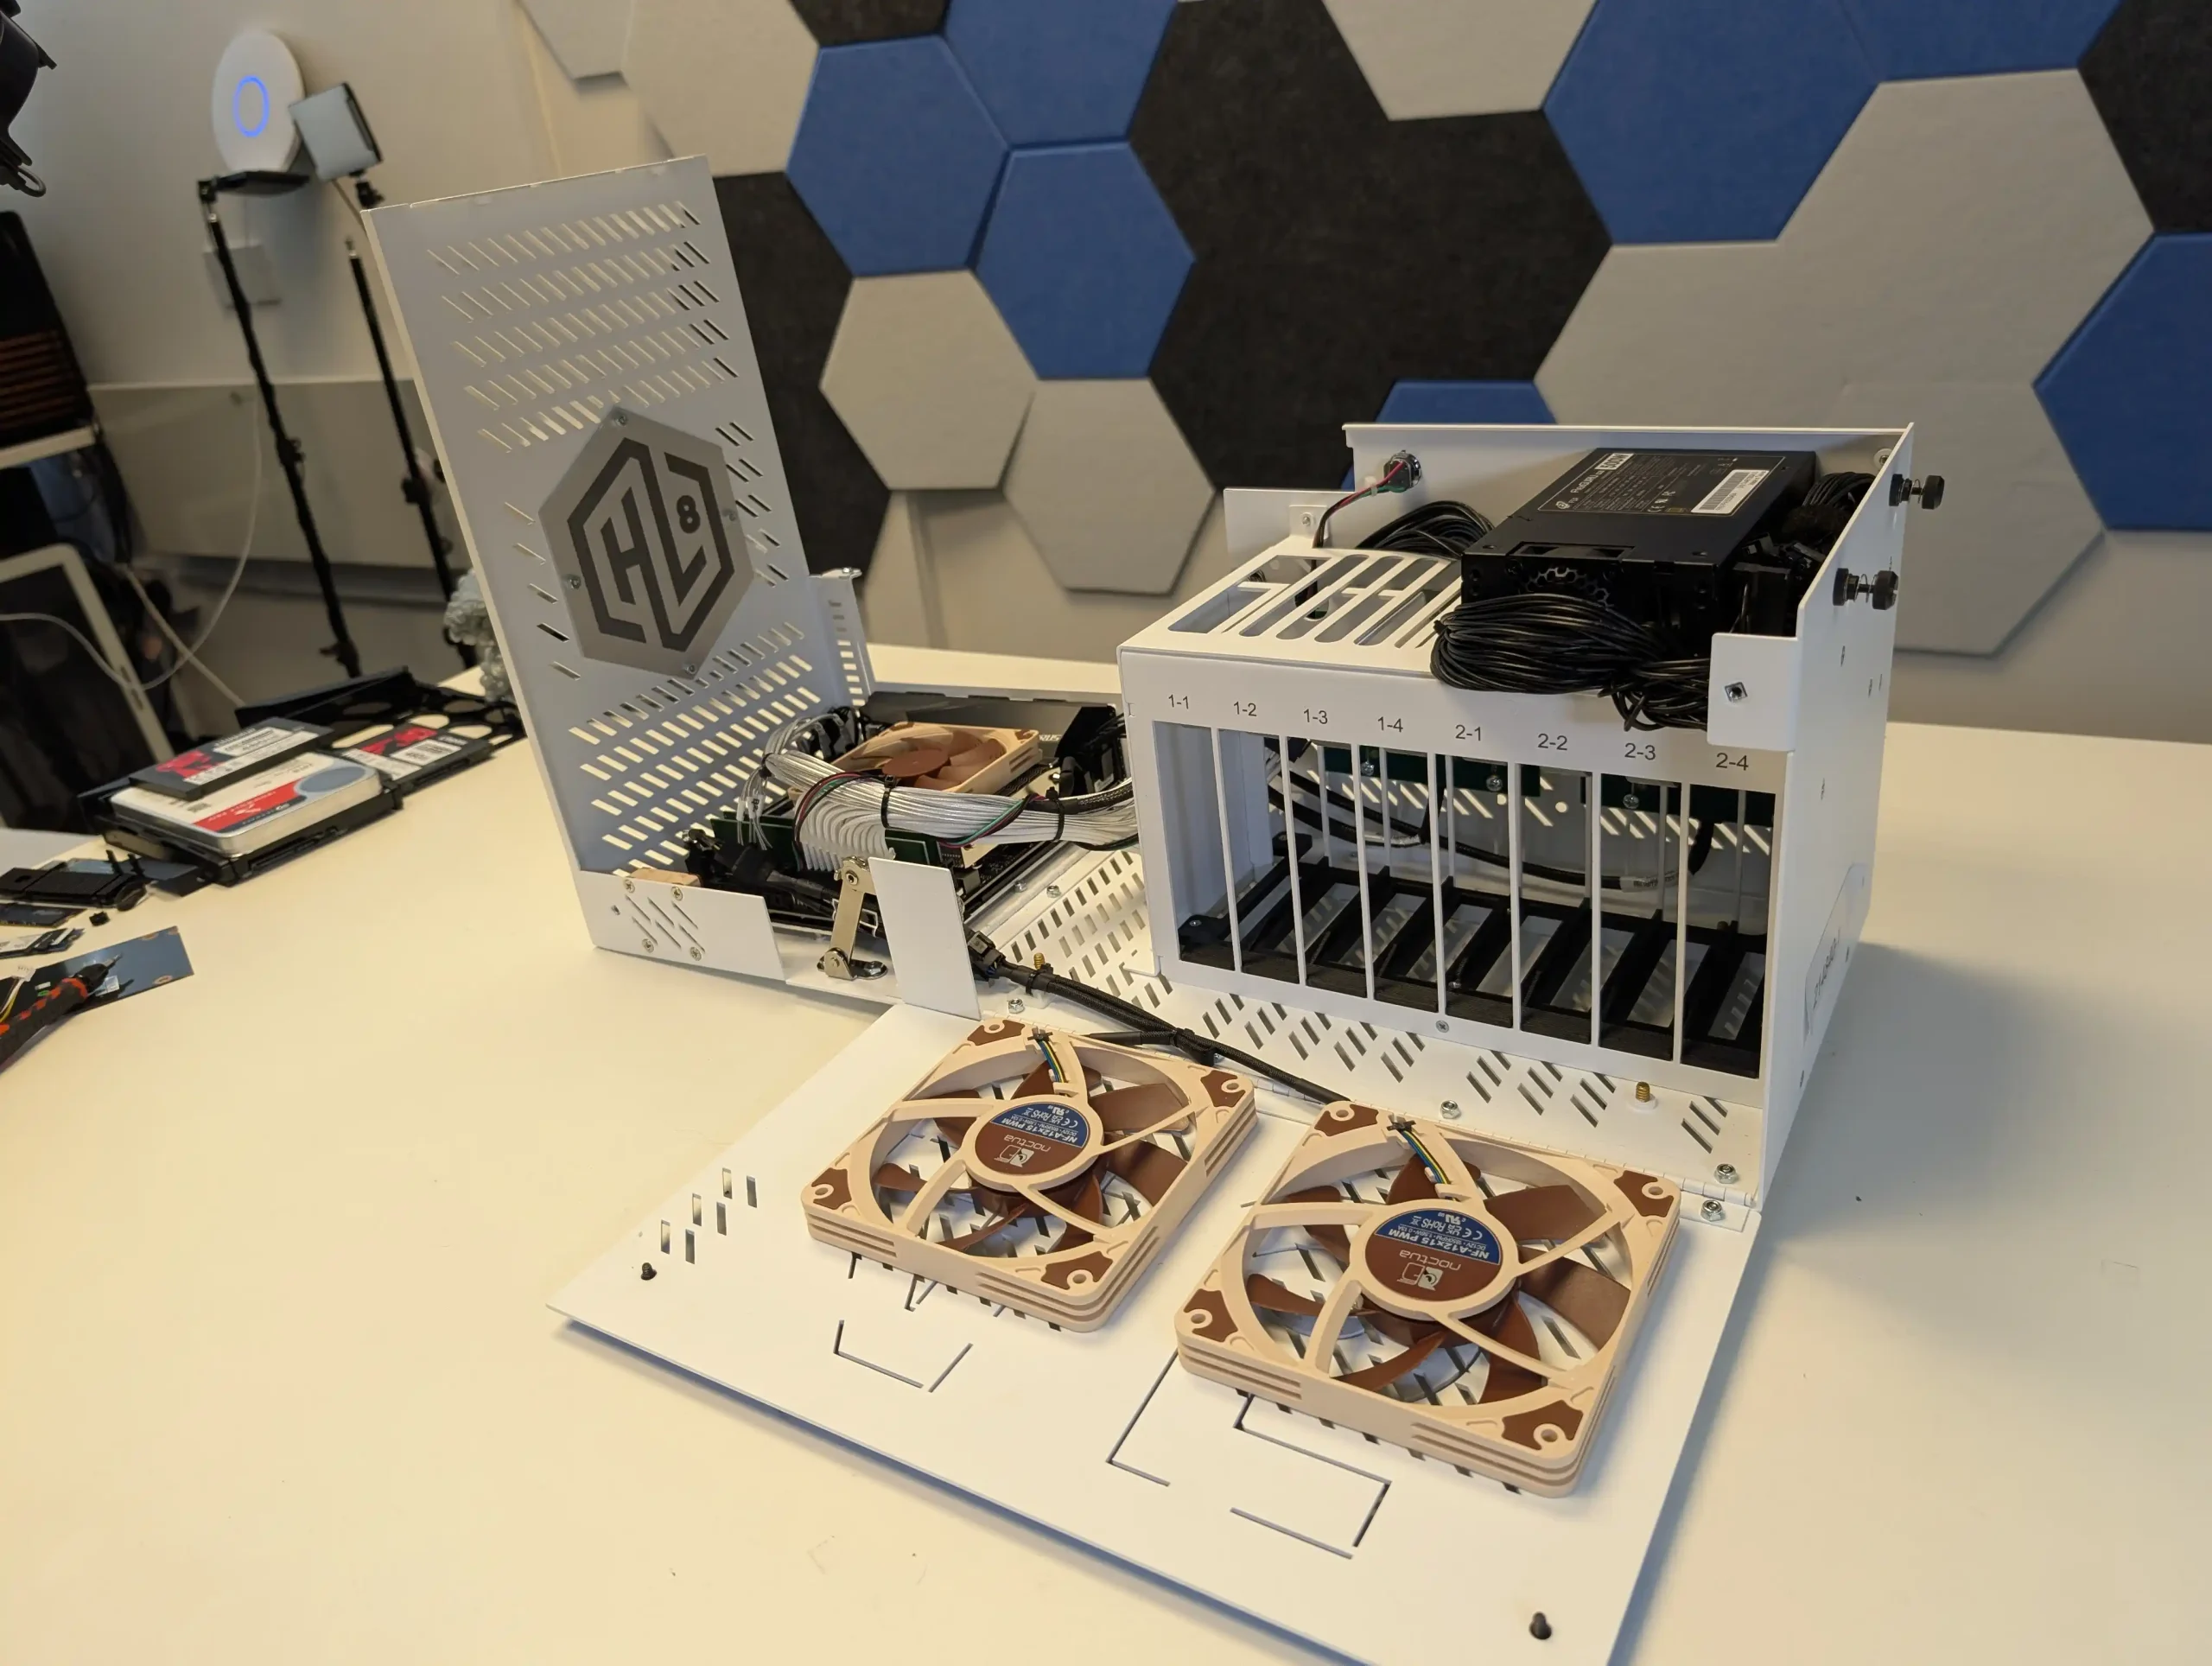
Around the rear, the layout remains conventional but clean. The rear I/O cutout accommodates standard mini-ITX motherboard layouts, and the single expansion slot supports a full-height PCIe card up to 72mm in height. The integrated Flex ATX power supply sits beside the motherboard area with its own exhaust fan, and ample passive ventilation is provided via additional steel cutouts. While visually understated, the HL8’s outer design prioritizes durability, accessibility, and functional airflow—traits that reflect its enterprise lineage more than its homelab label might suggest.
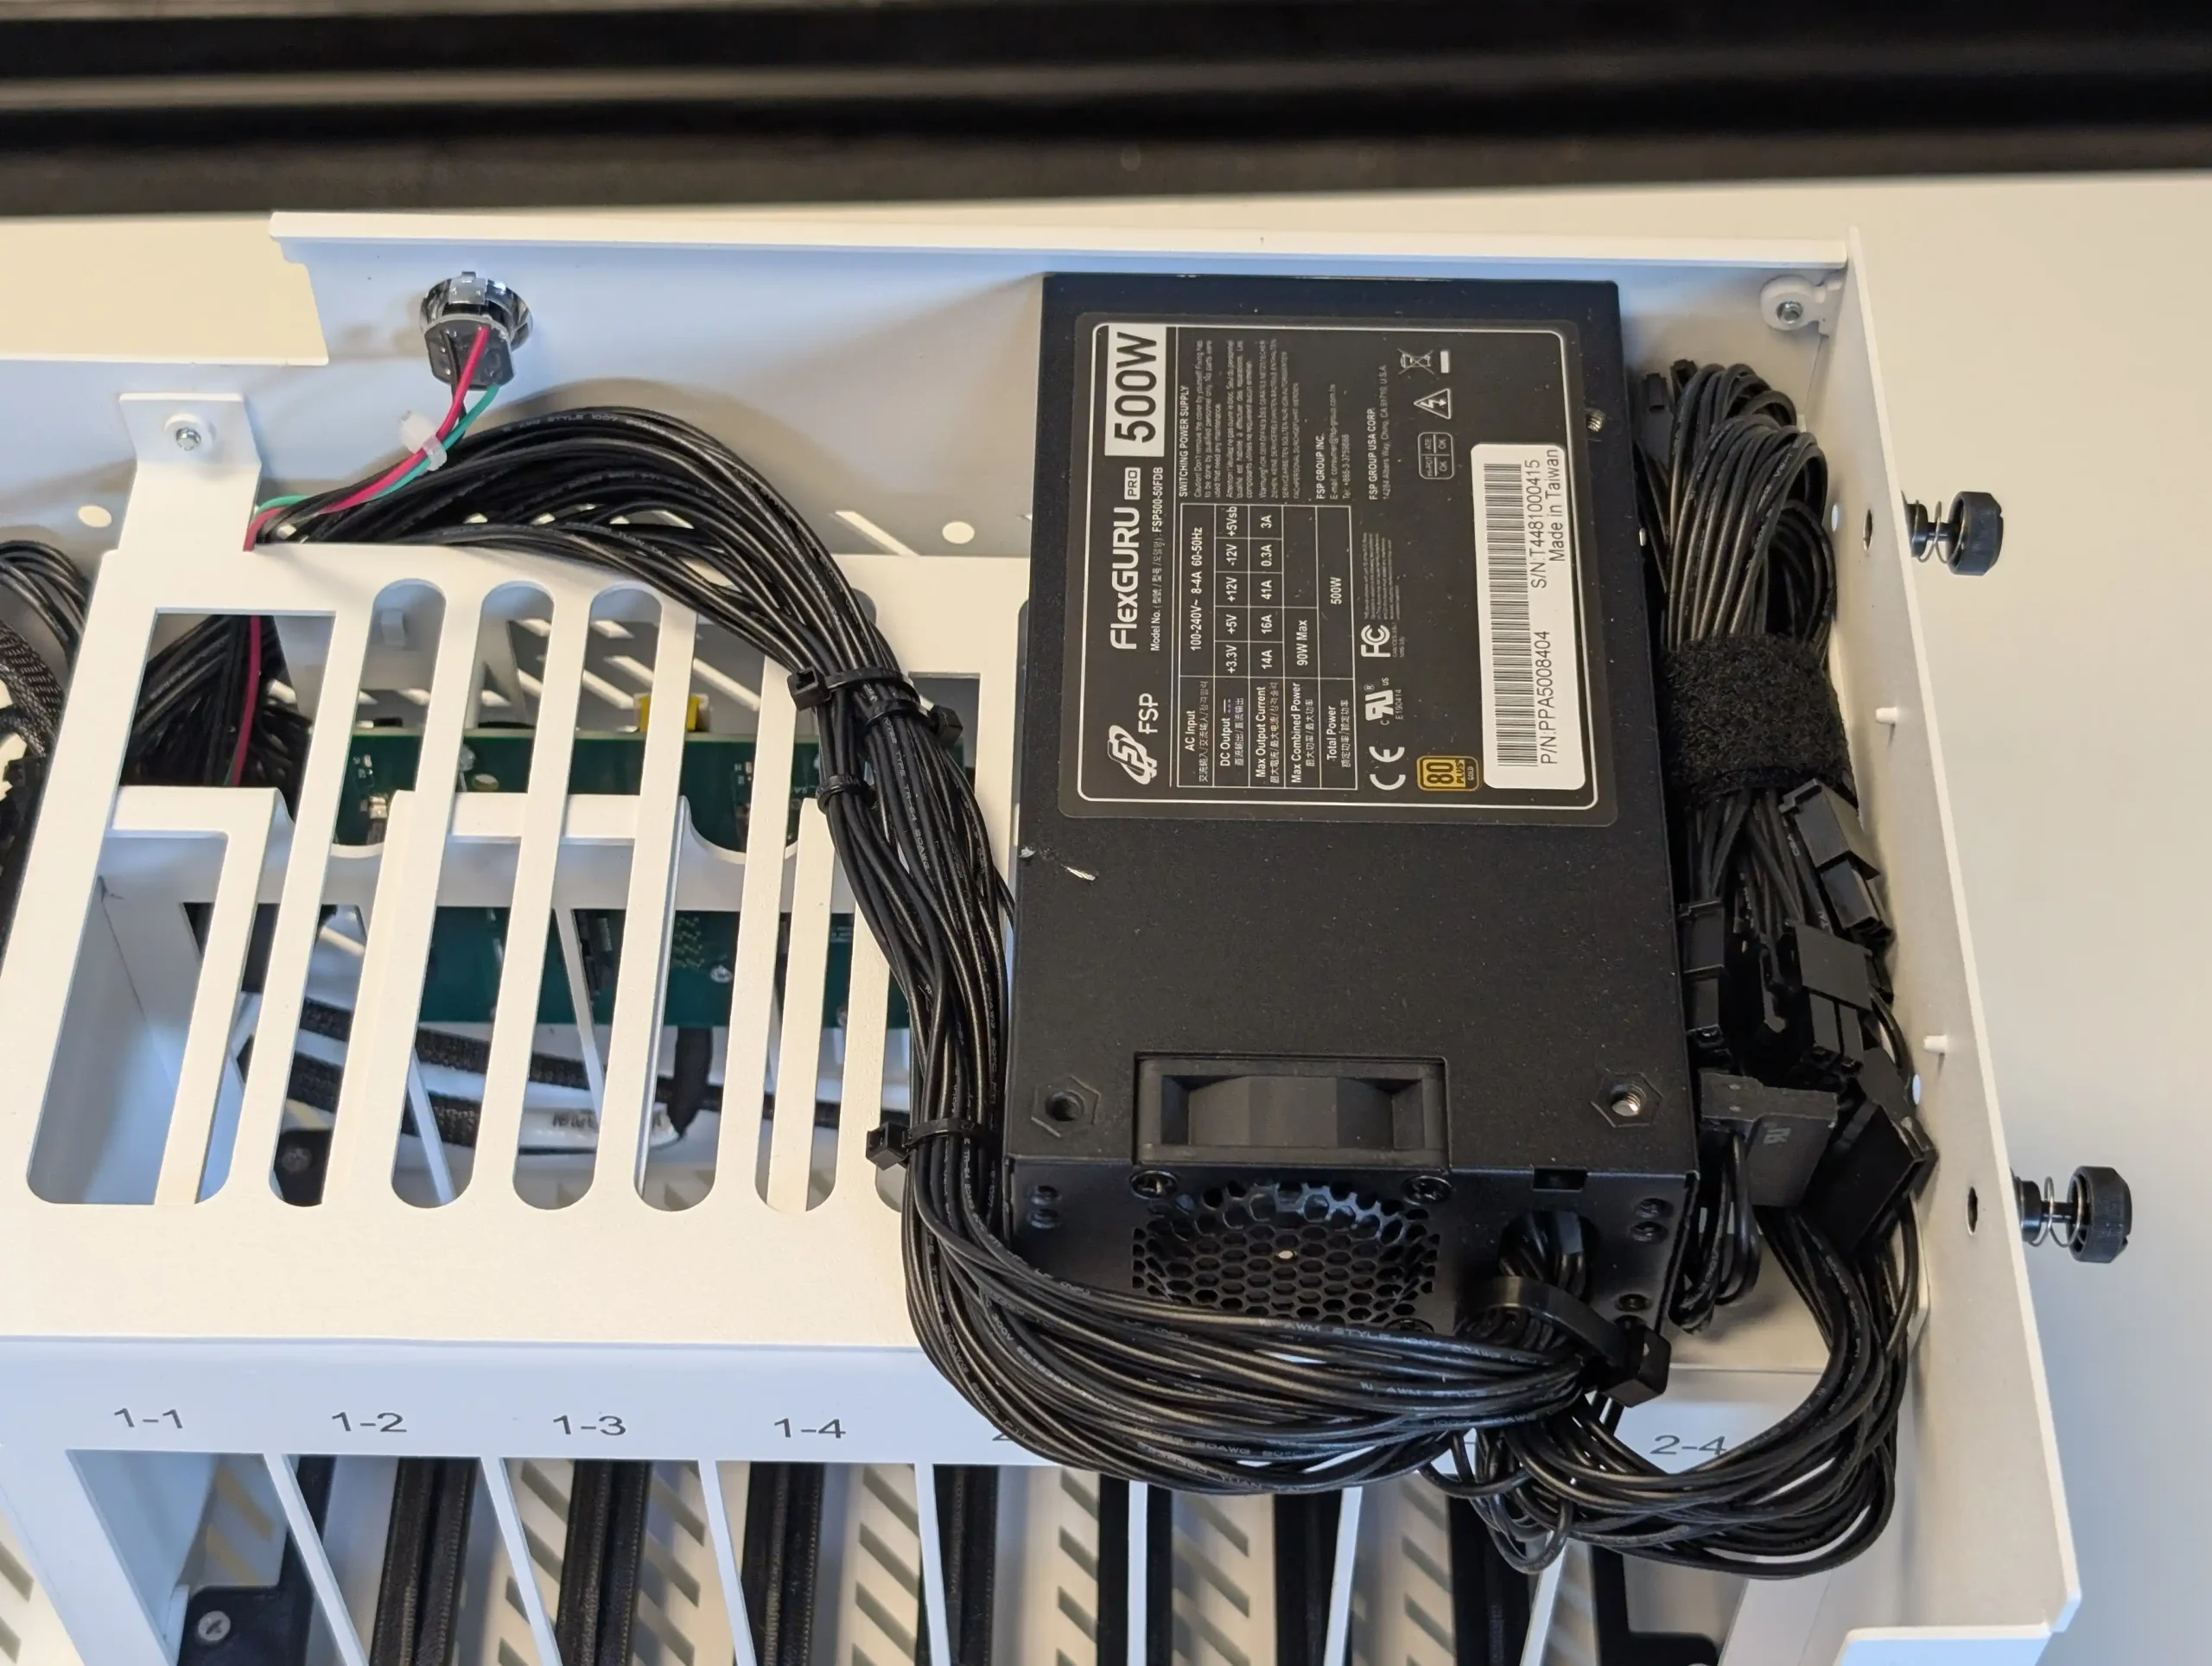
| Category | HL8 (Chassis + Backplane) | HL8 (Chassis + Backplane + PSU) |
|---|---|---|
| Model Name | HL8 | HL8 with PSU |
| Drive Bays | 8x 3.5″ Tool-less, Trayless Bays | 8x 3.5″ Tool-less, Trayless Bays |
| Drive Compatibility | SATA & SAS (12Gb/s) via backplane | SATA & SAS (12Gb/s) via backplane |
| Hot-Swap Support | Yes | Yes |
| Backplane Interface | Mini-SAS HD (SFF-8643) | Mini-SAS HD (SFF-8643) |
| Motherboard Support | Mini-ITX | Mini-ITX |
| PCIe Expansion Slot | 1x Full-height, full-length | 1x Full-height, full-length |
| PSU Form Factor | Not included | Flex ATX (pre-installed) |
| PSU Rating | – | 500W, 80 Plus Gold (SilverStone FX500) |
| Cooling | 3x 80mm Noctua Fans (pre-installed) | 3x 80mm Noctua Fans (pre-installed) |
| CPU Cooler Clearance | Approx. 75mm (depends on board layout) | Approx. 75mm (depends on board layout) |
| GPU Length Support | Up to ~270mm | Up to ~270mm |
| Chassis Material | 2mm Powder-Coated Steel | 2mm Powder-Coated Steel |
| Front I/O | None (uses motherboard rear I/O) | None (uses motherboard rear I/O) |
| Drive Activity LEDs | Optional (headers on backplane) | Optional (headers on backplane) |
| Tool-less Design | Yes – Hinged Folding Design | Yes – Hinged Folding Design |
| Dimensions (W x D x H) | ~305mm x 370mm x 260mm (approx.) | ~305mm x 370mm x 260mm (approx.) |
| Weight (Unpopulated) | ~7.8kg | ~9.5kg (with PSU) |
| Made In | Canada (Chassis), USA (via Protocase partner) | Canada (Chassis), USA (via Protocase partner) |
| Typical Price (USD) | $599 | $799 |
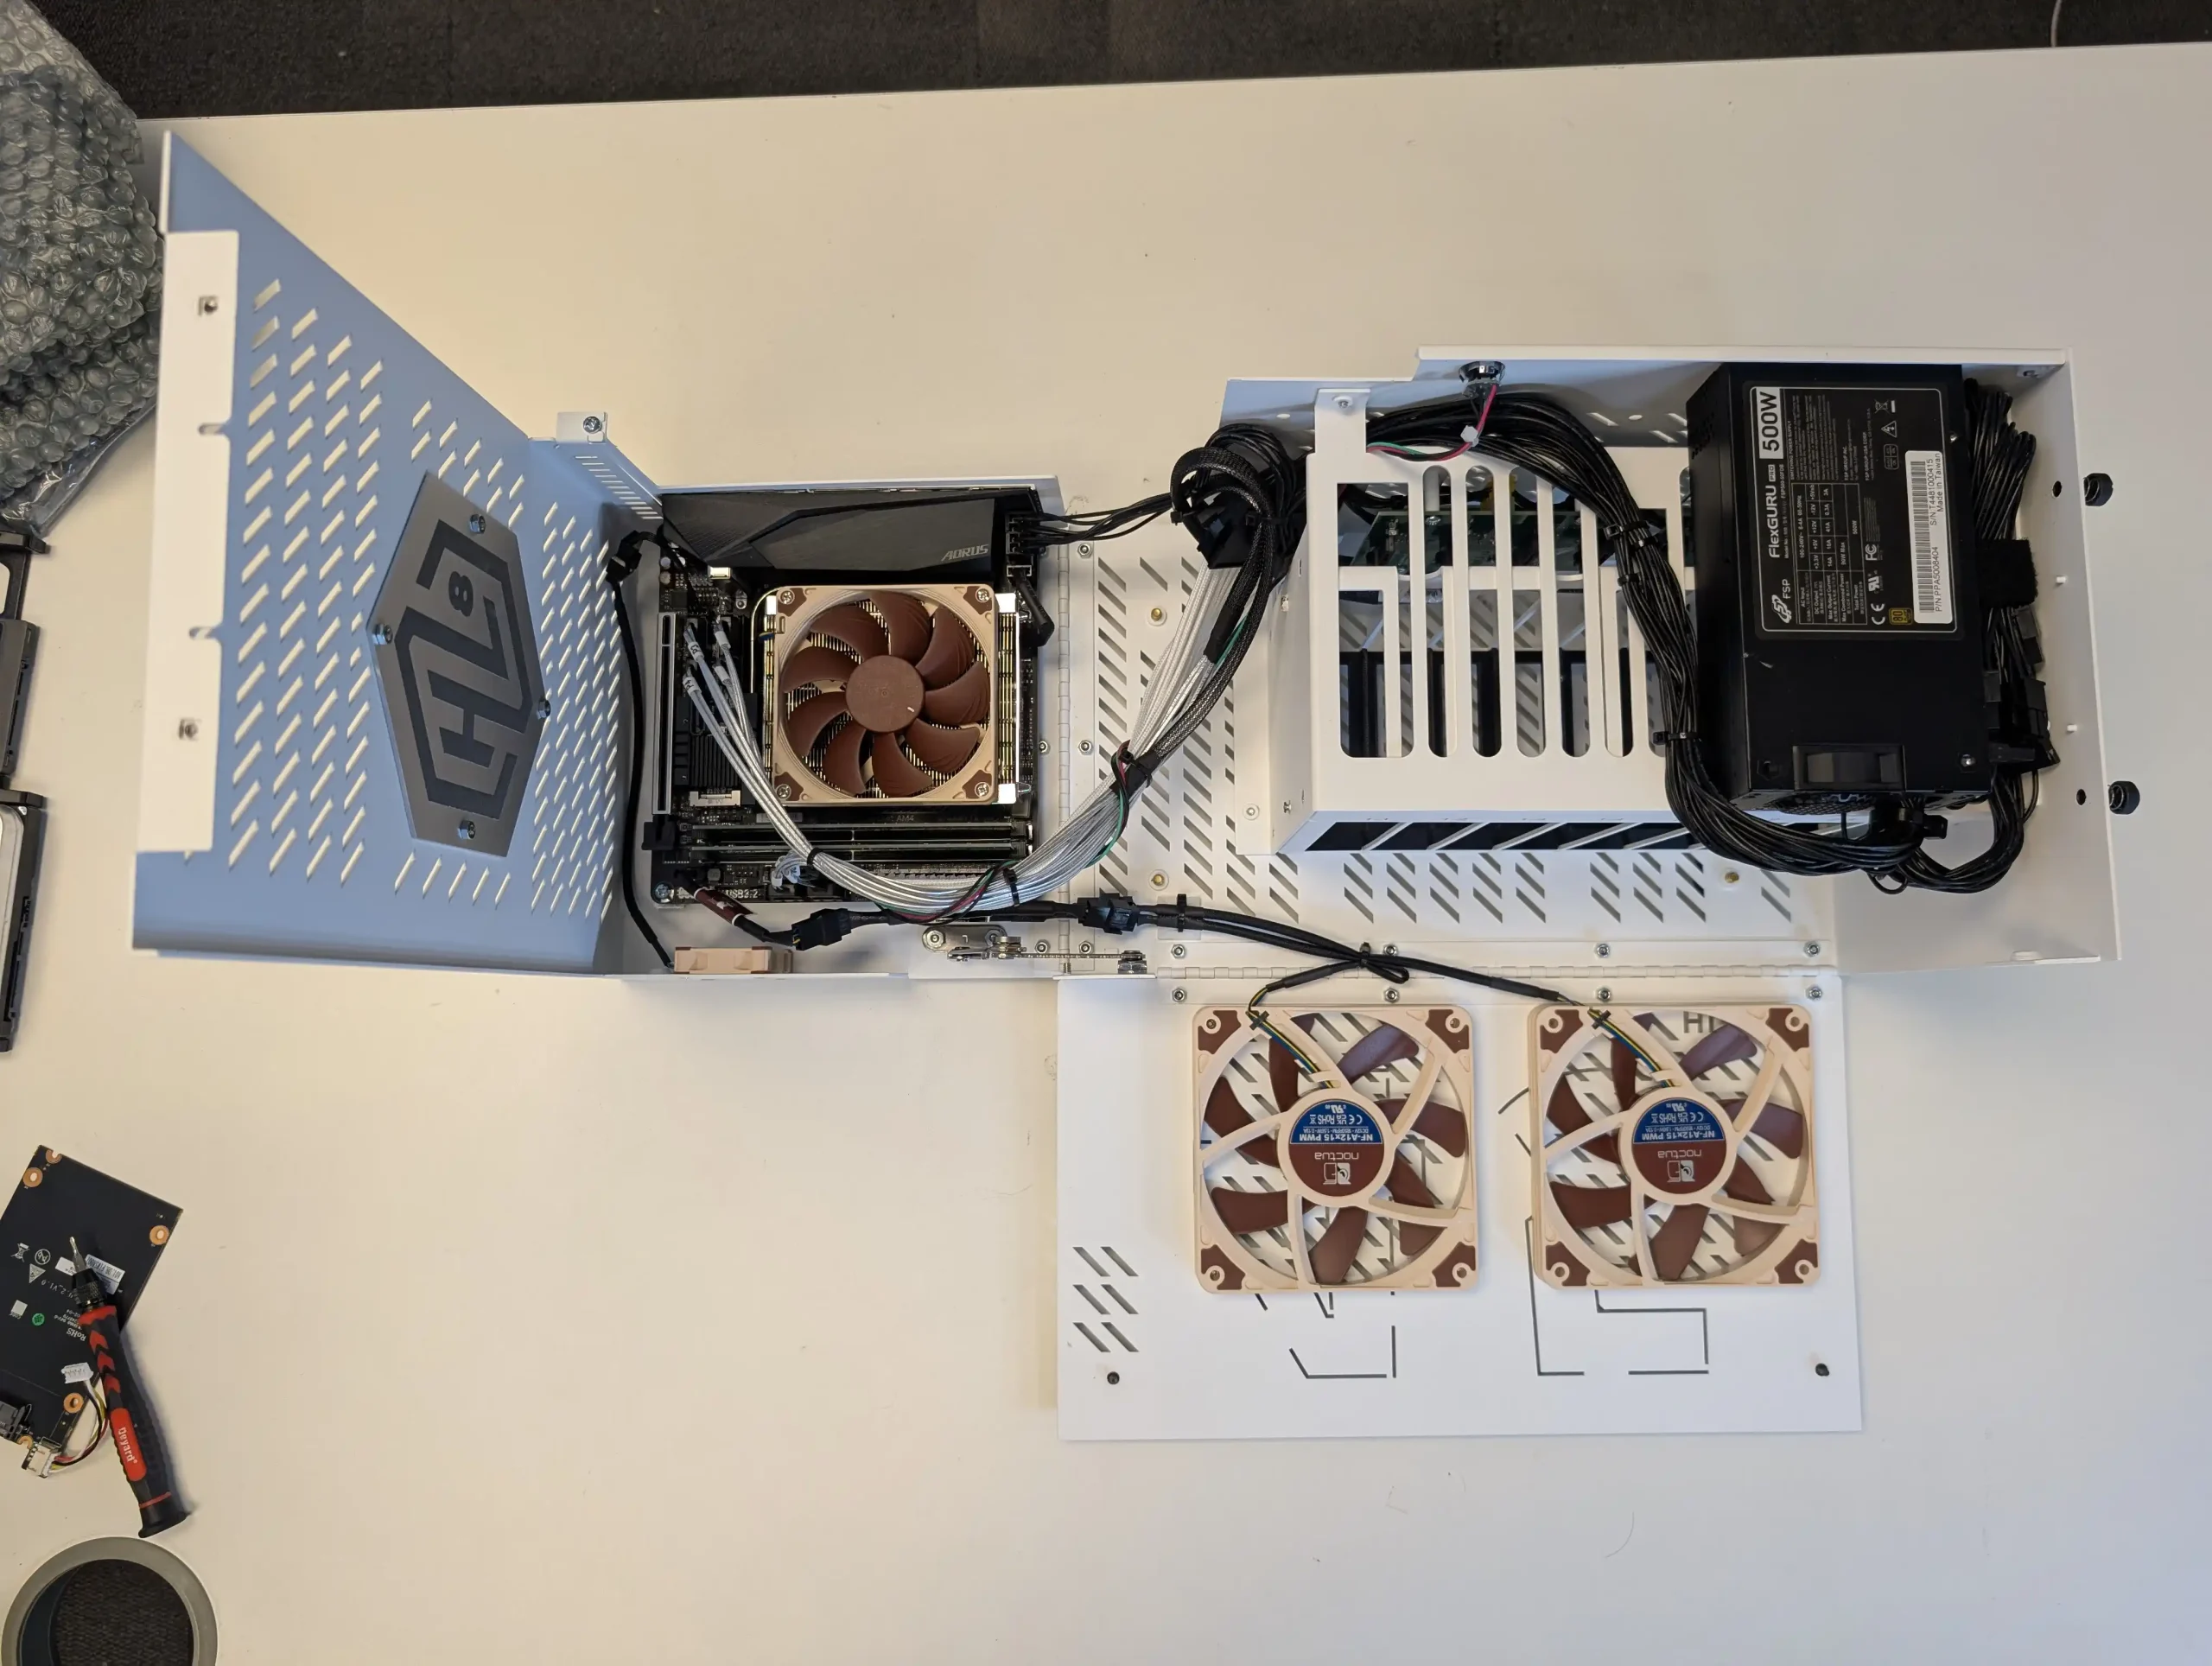
Internally, the HL8 case is engineered for both accessibility and structured airflow, with a layout that avoids many of the compromises found in smaller or mass-produced enclosures. The most notable feature is its fully hinged body, which allows the entire top and side panel assembly to lift upward without removing the drives. This open-access approach separates the drive chamber from the motherboard compartment without creating restrictive airflow barriers. It’s a significant advantage for users who need to inspect, troubleshoot, or upgrade internal components, especially when working with larger cooling units or dense cable configurations.
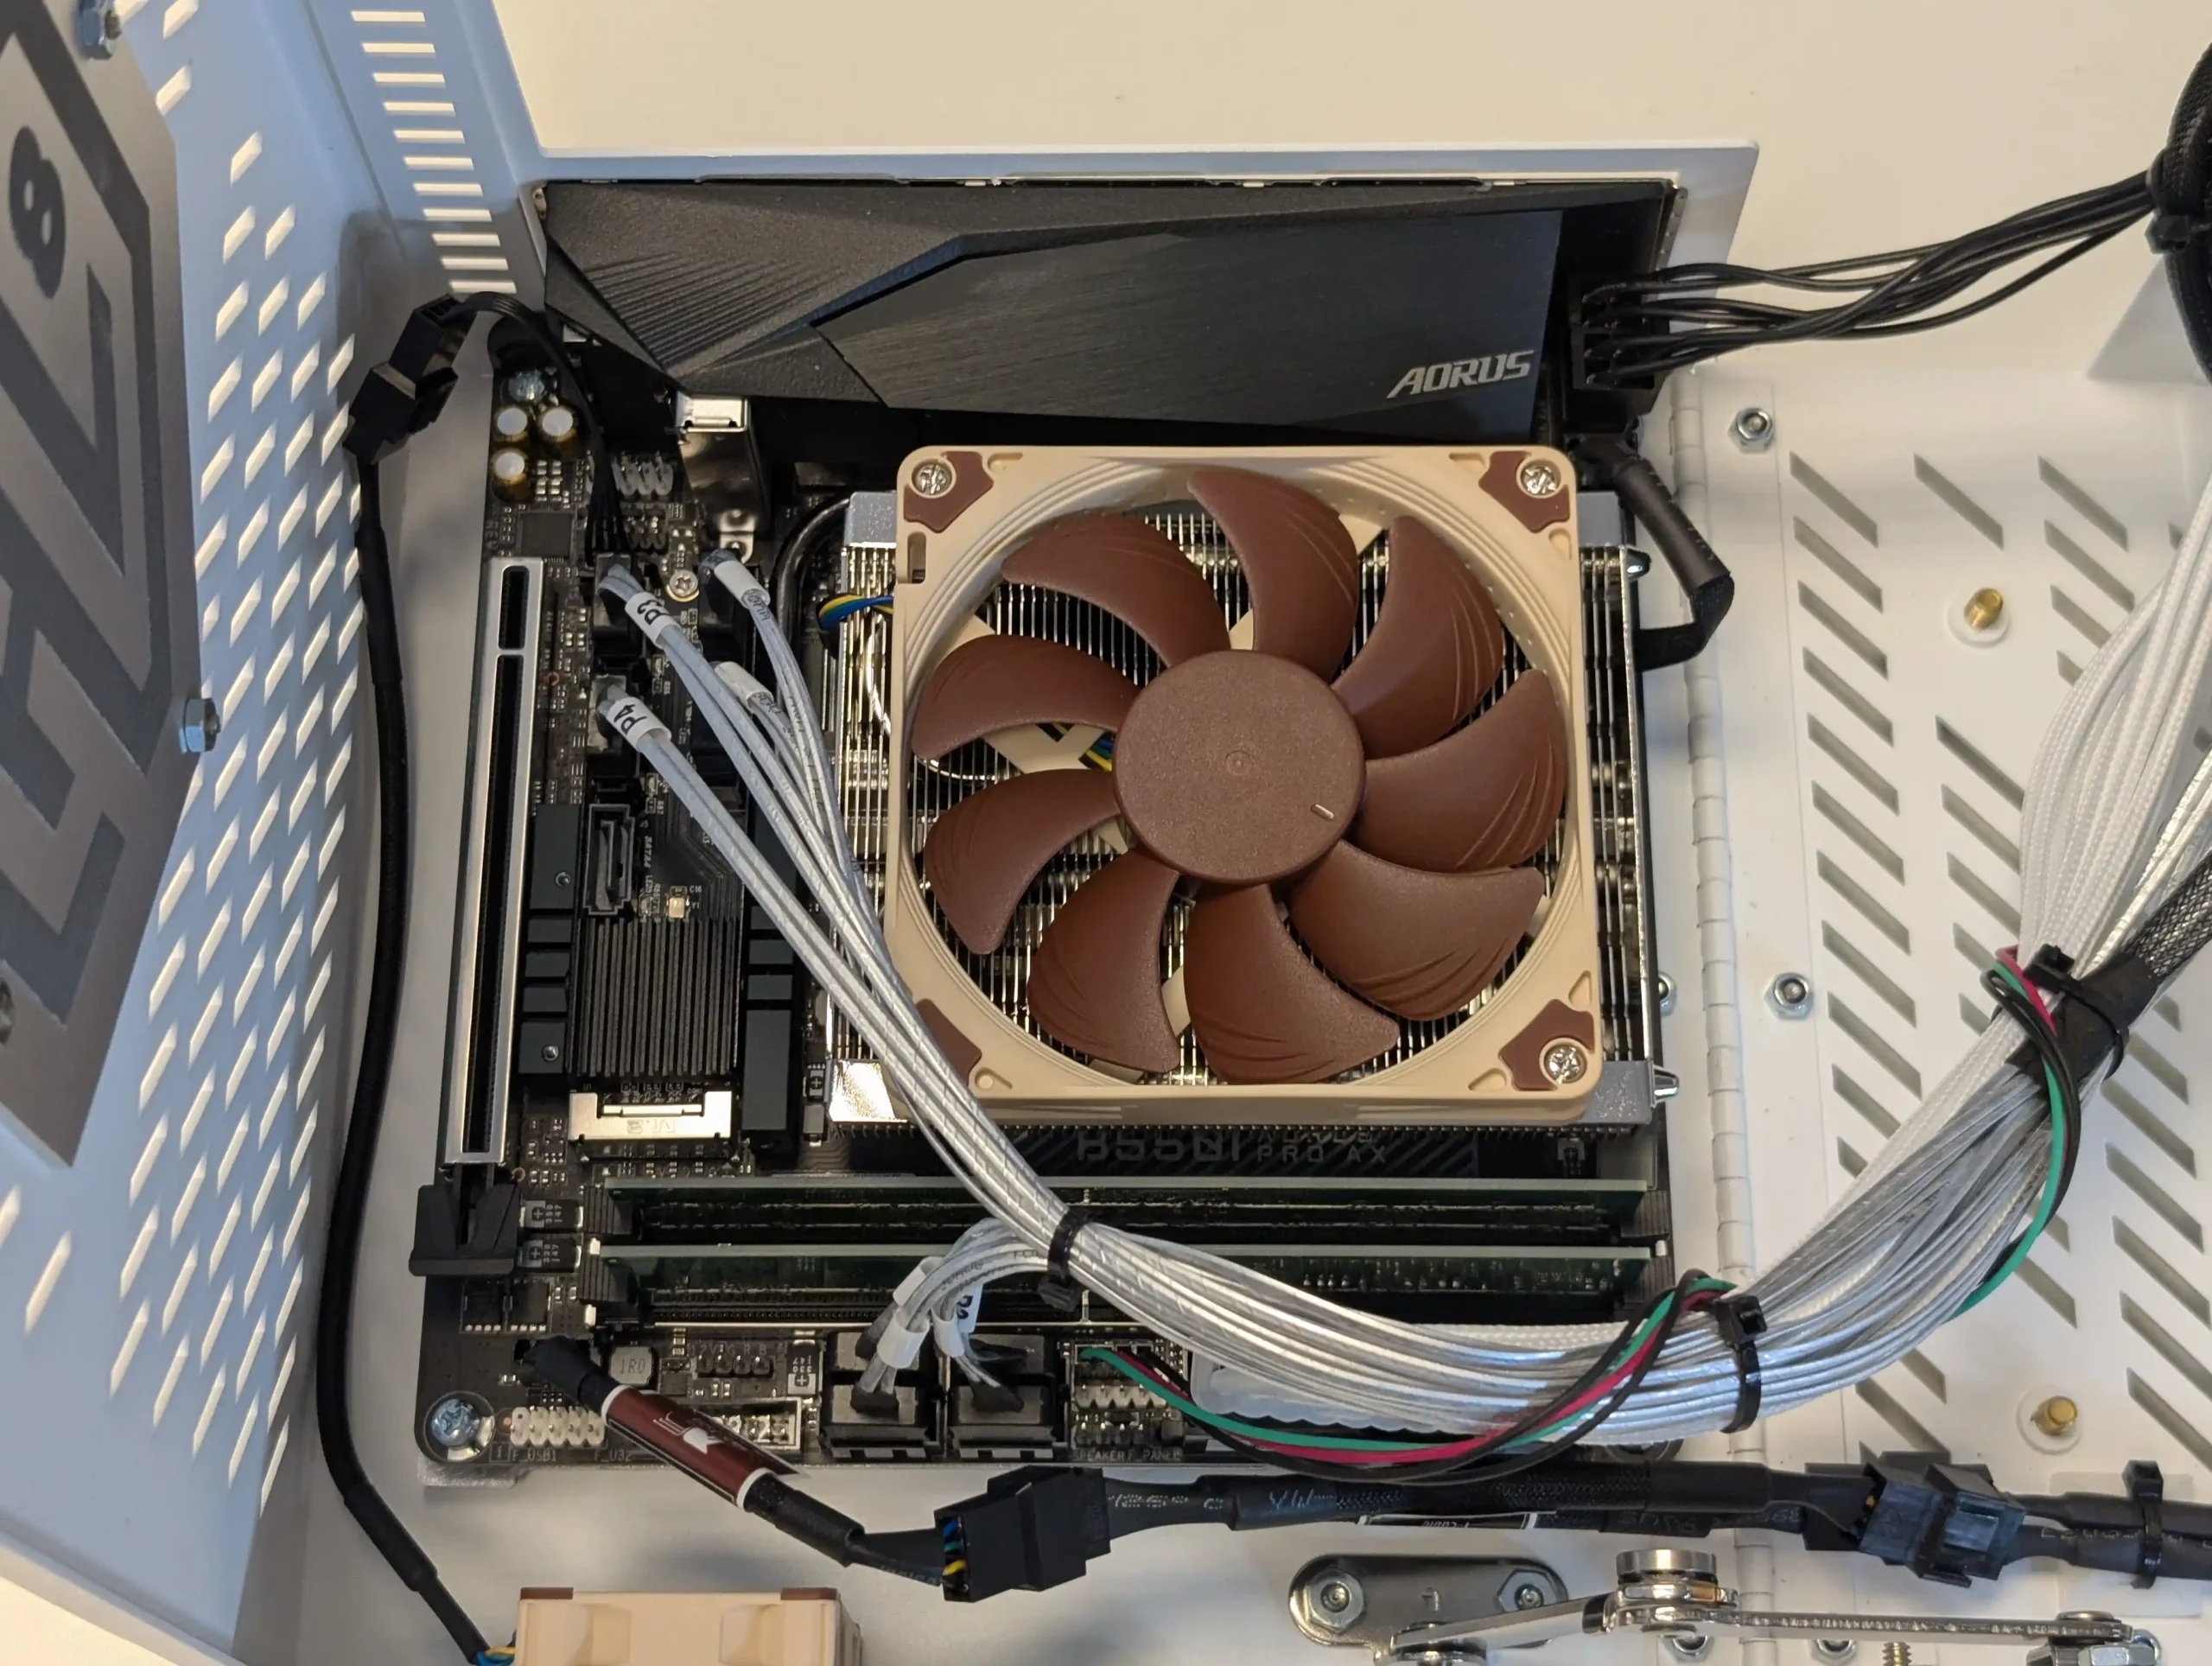
The motherboard area is positioned on the right side of the chassis, aligned horizontally to the drive plane, which prevents any obstruction by drive trays or cabling. This layout supports standard mini-ITX boards and allows full visibility of memory slots, M.2 sockets, and power headers even with drives installed. The motherboard is flanked by routing space that supports organized cabling, including SATA or power leads. This spacing is particularly useful when working with non-modular PSUs or when routing SATA cables from alternative controllers or add-in cards. The case does not limit users to any specific board vendor or layout beyond the mini-ITX size constraint.
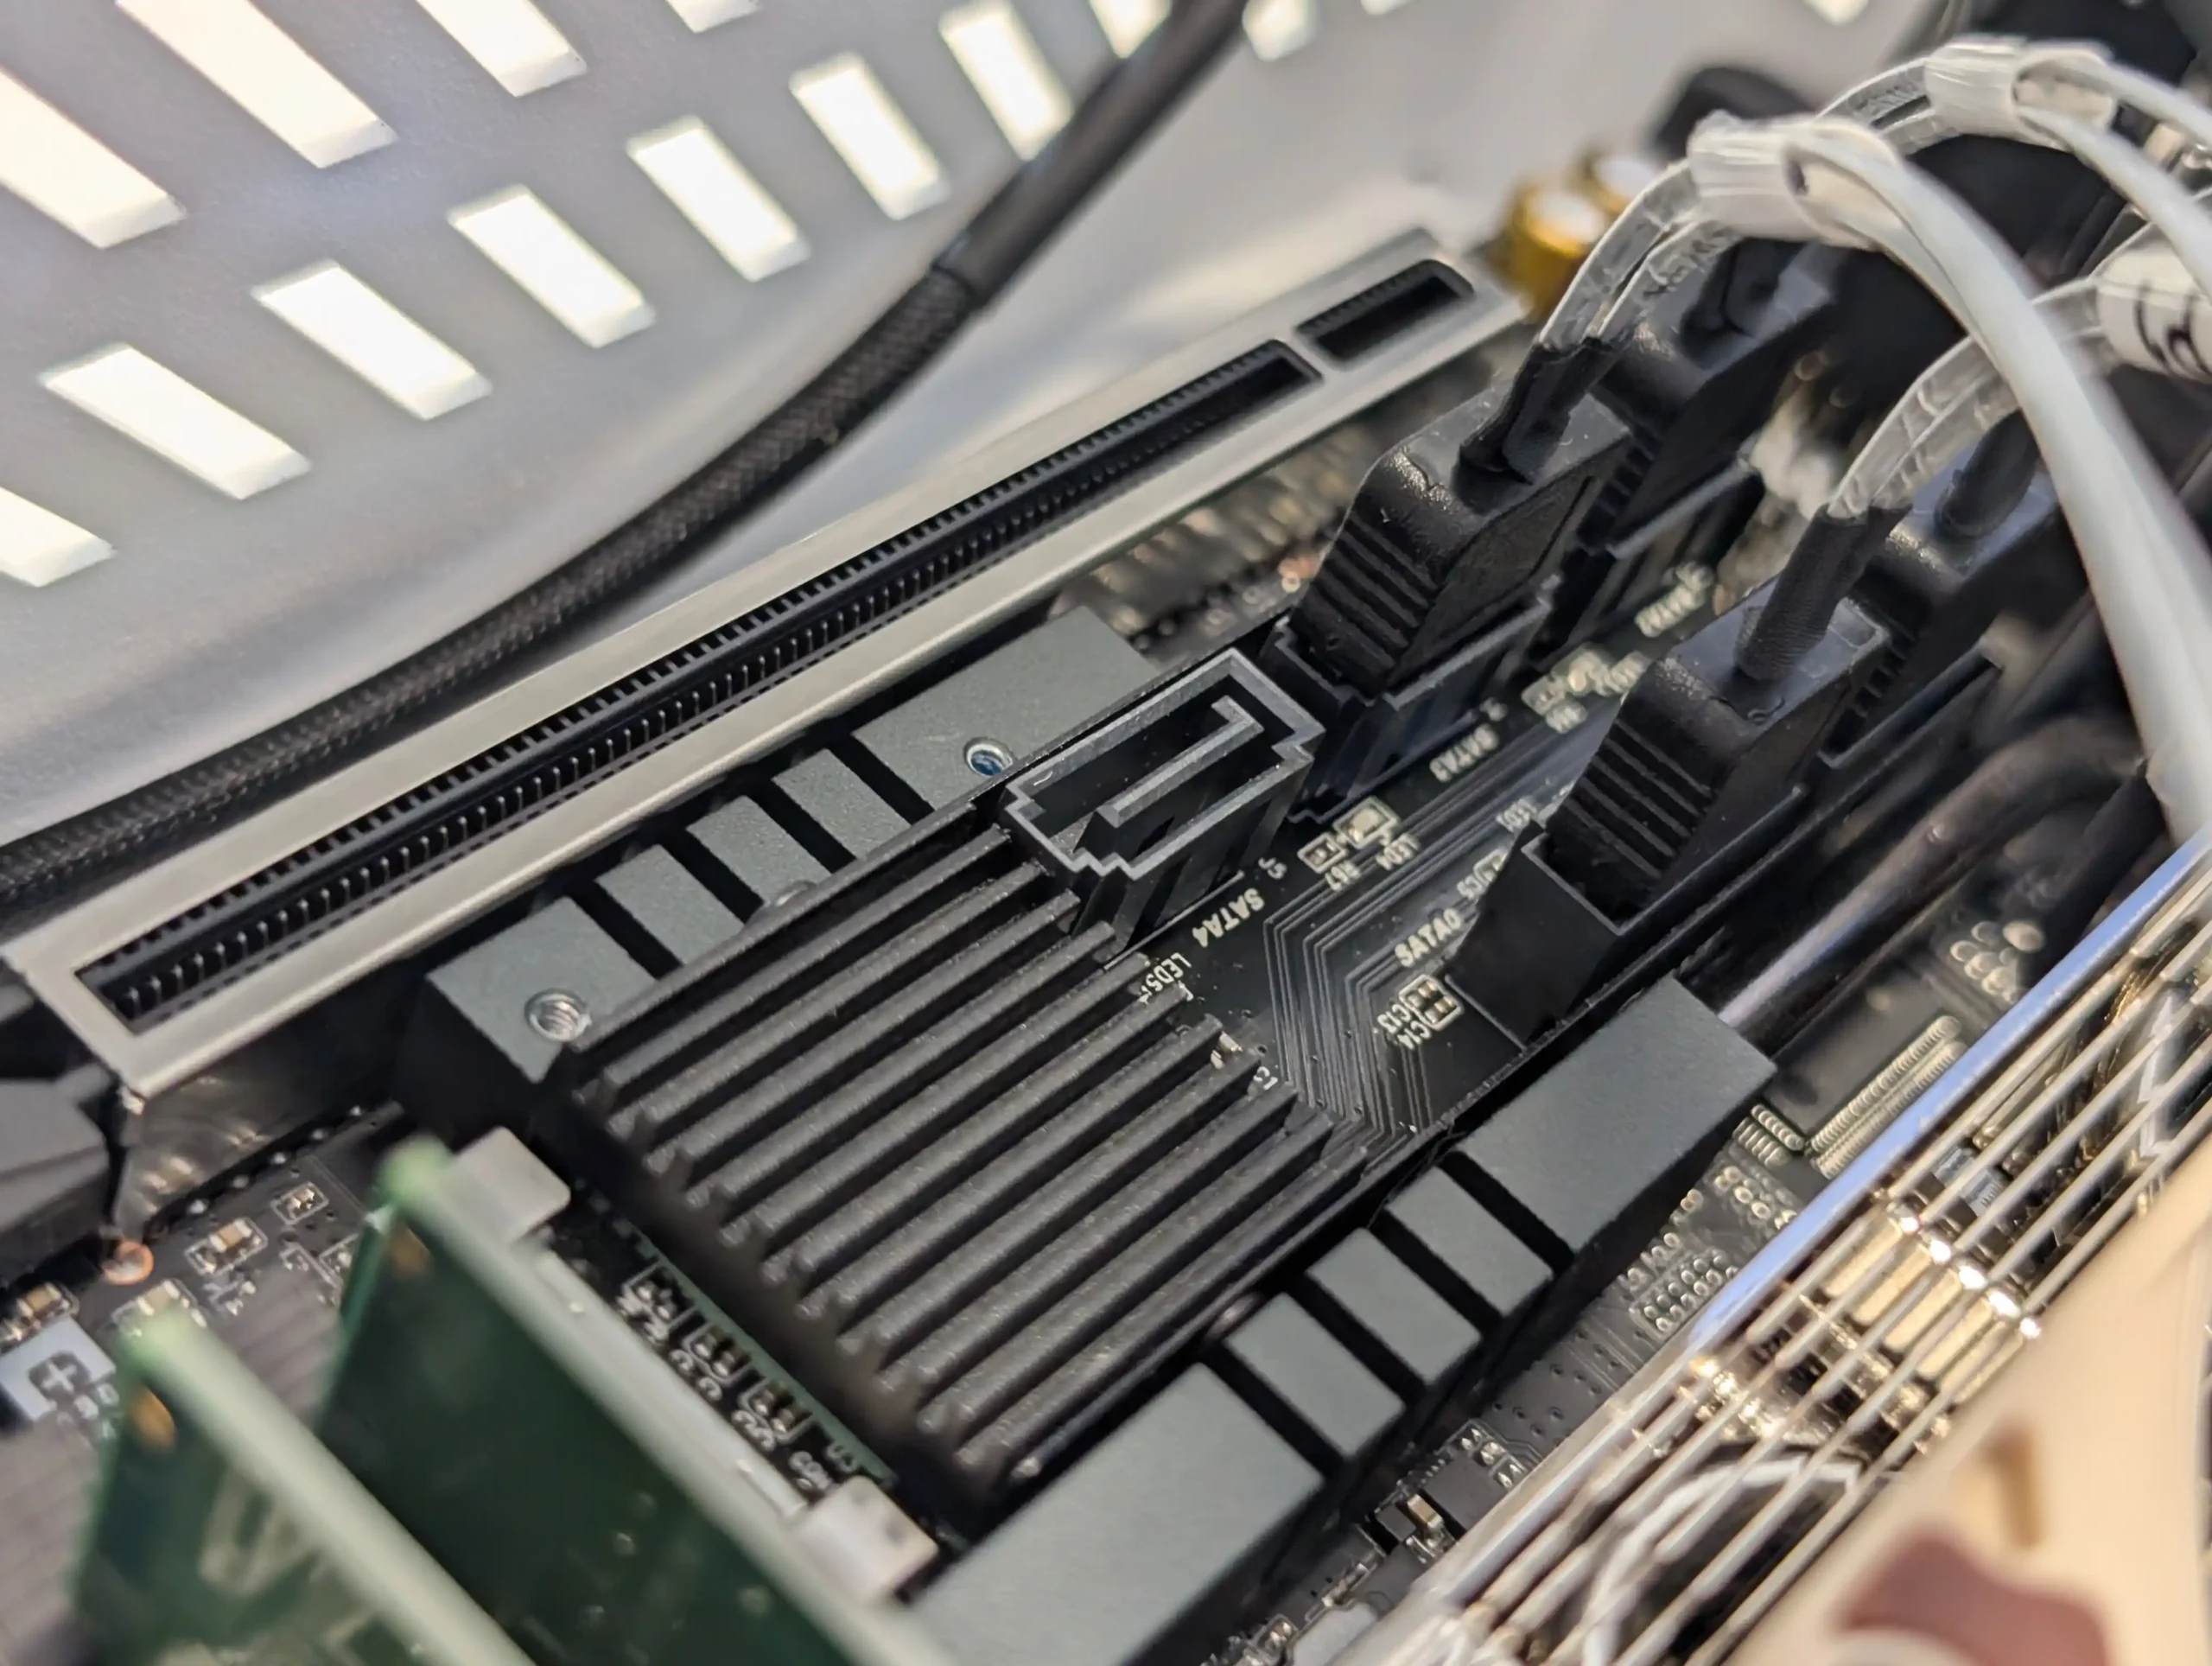
Cabling for the backplane is pre-installed in the PSU model, which simplifies setup considerably. The backplane itself is a direct-wired design supporting up to eight SATA drives without requiring SAS expander cards or proprietary interfaces. This approach ensures compatibility with a wide range of consumer and enterprise SATA drives and avoids the long-term risks of vendor-specific drive bay lock-ins. It also makes replacing or troubleshooting individual cables far easier than in systems using multipath or bundled connectors. Power and data connections are cleanly routed through the side of the case, keeping airflow clear and minimizing vibration interference.
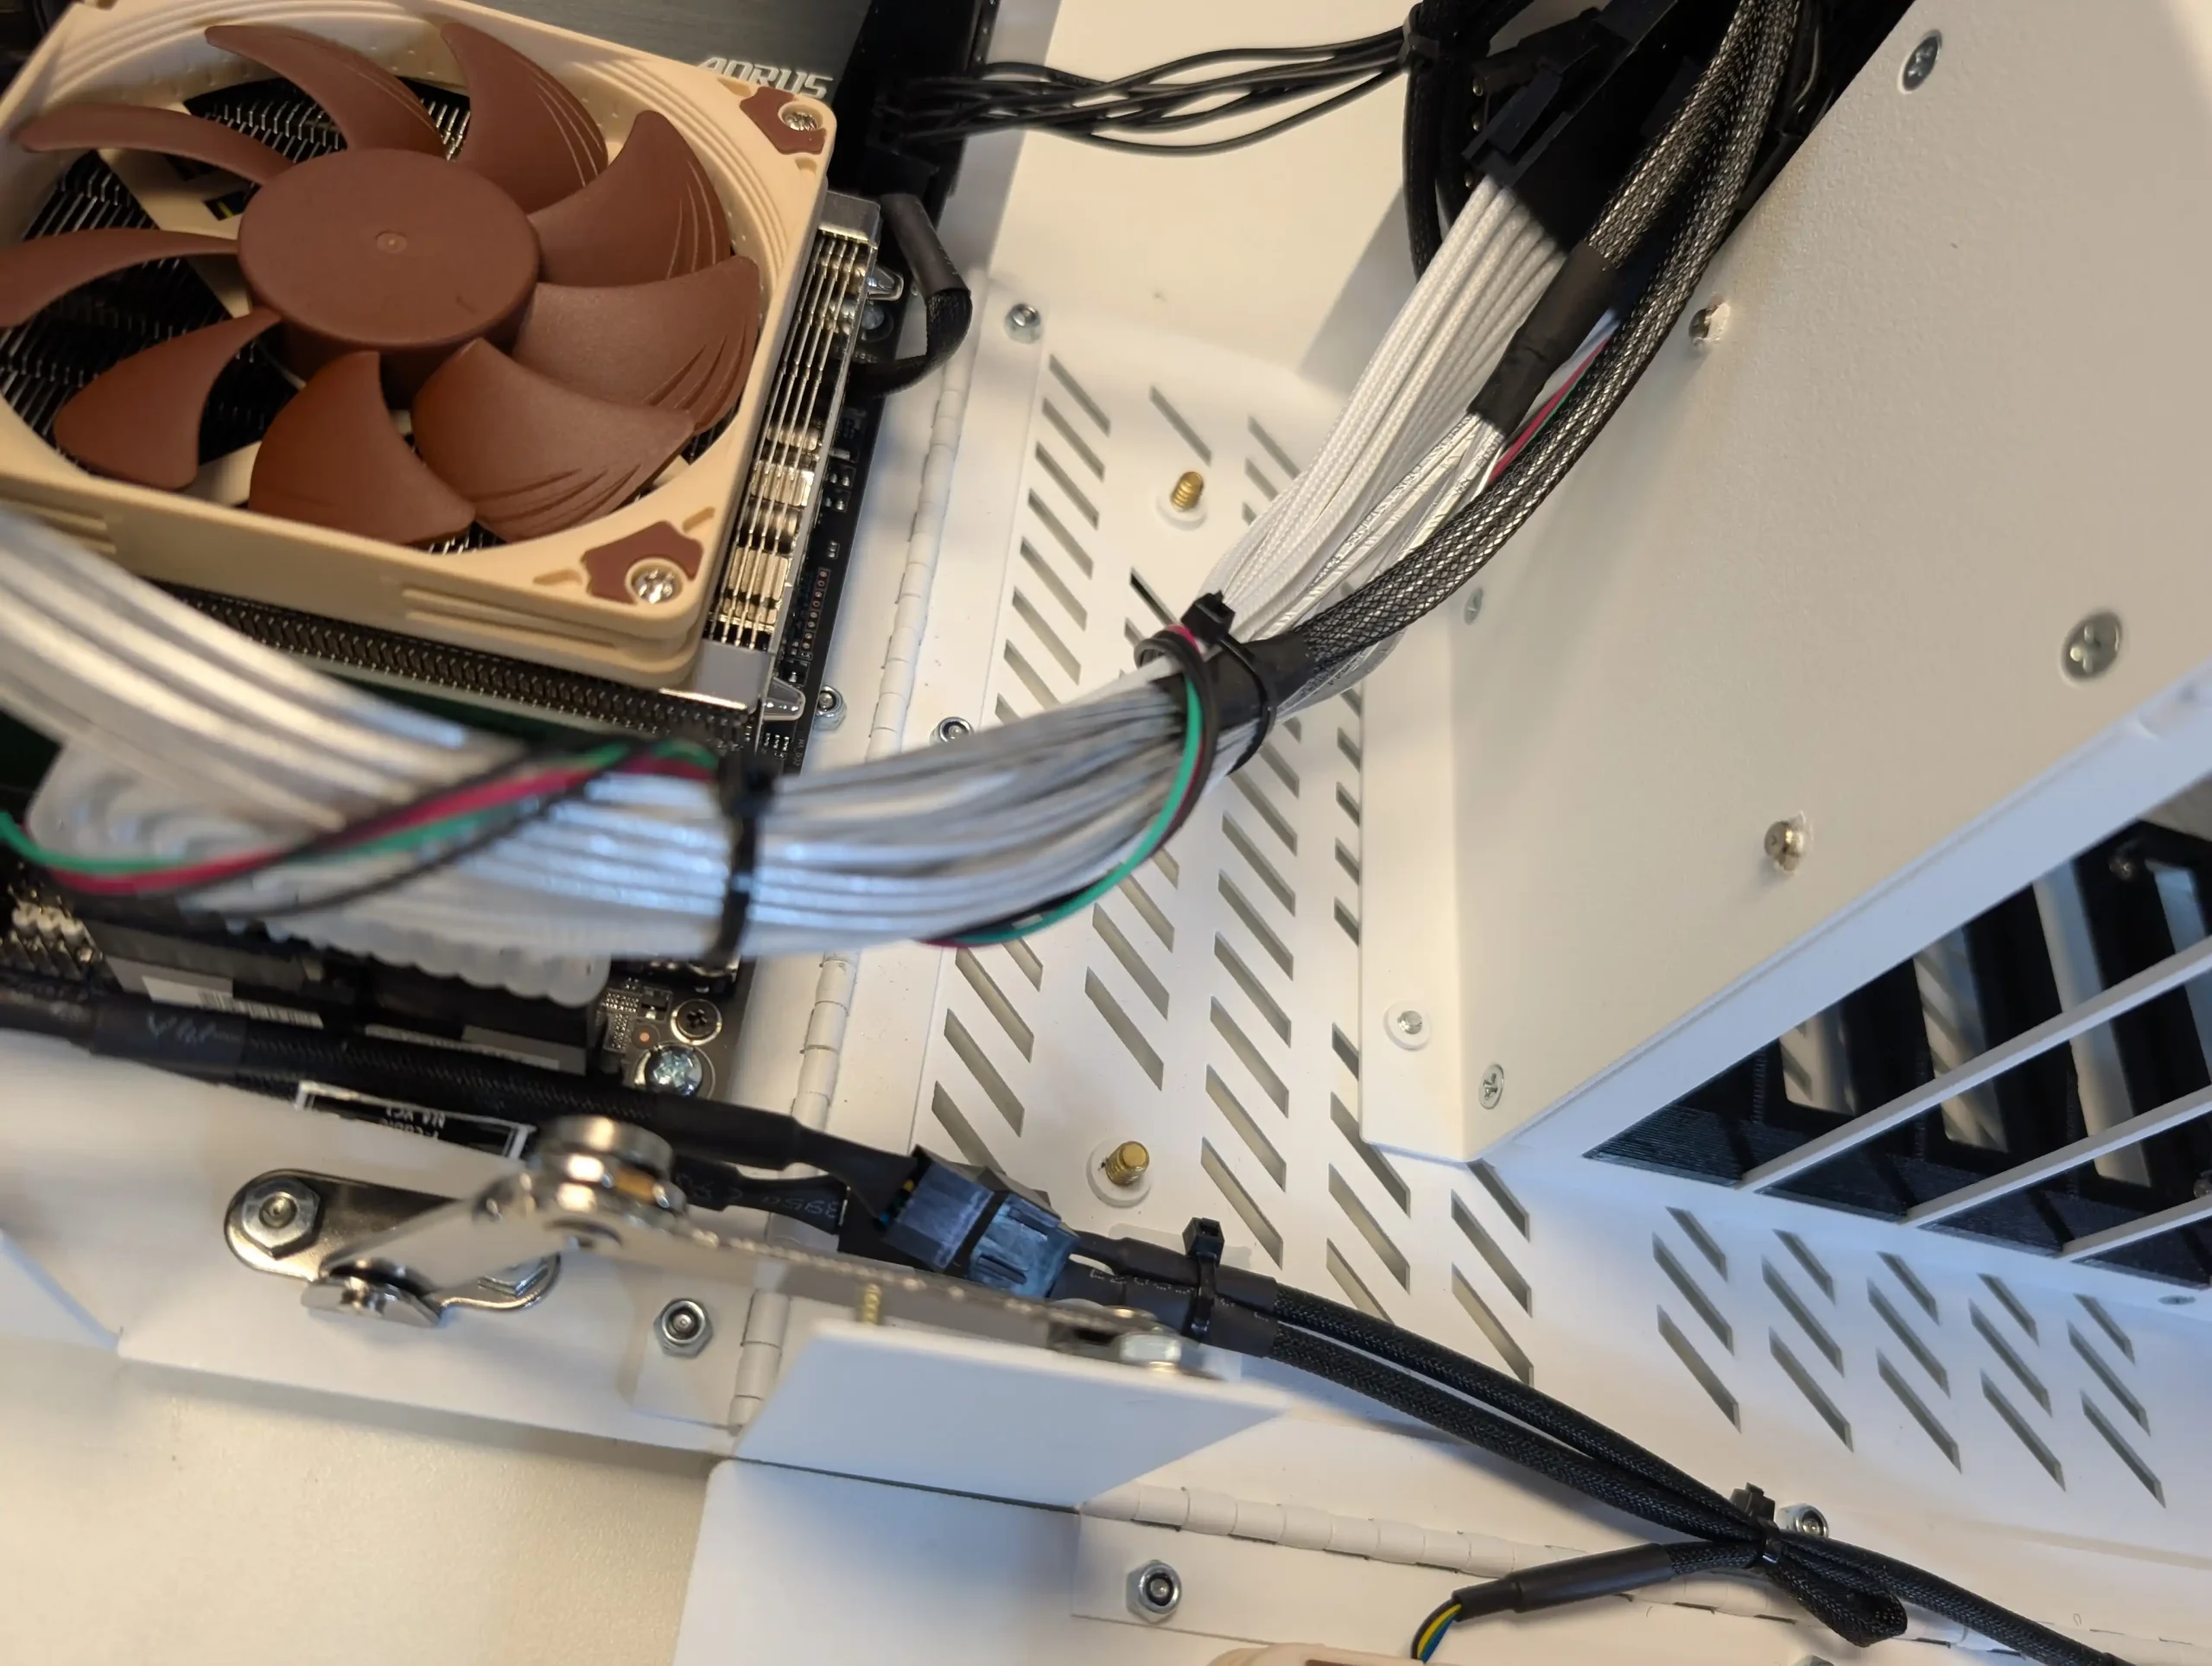
The Flex ATX PSU sits at the rear left and is mounted horizontally, drawing air through its own intake and exhausting separately from the main airflow path. This compact configuration leaves the bulk of the case’s lower chamber available for future expansion or airflow tuning. Additional internal fan mounts and brackets are preinstalled, and 45Drives includes all necessary mounting screws and documentation—even down to port-specific manuals for the pre-installed PSU. The internal design of the HL8 shows clear thought toward ease of maintenance and modularity, reflecting an expectation that users will revisit and modify their system over time rather than treat it as a sealed appliance.
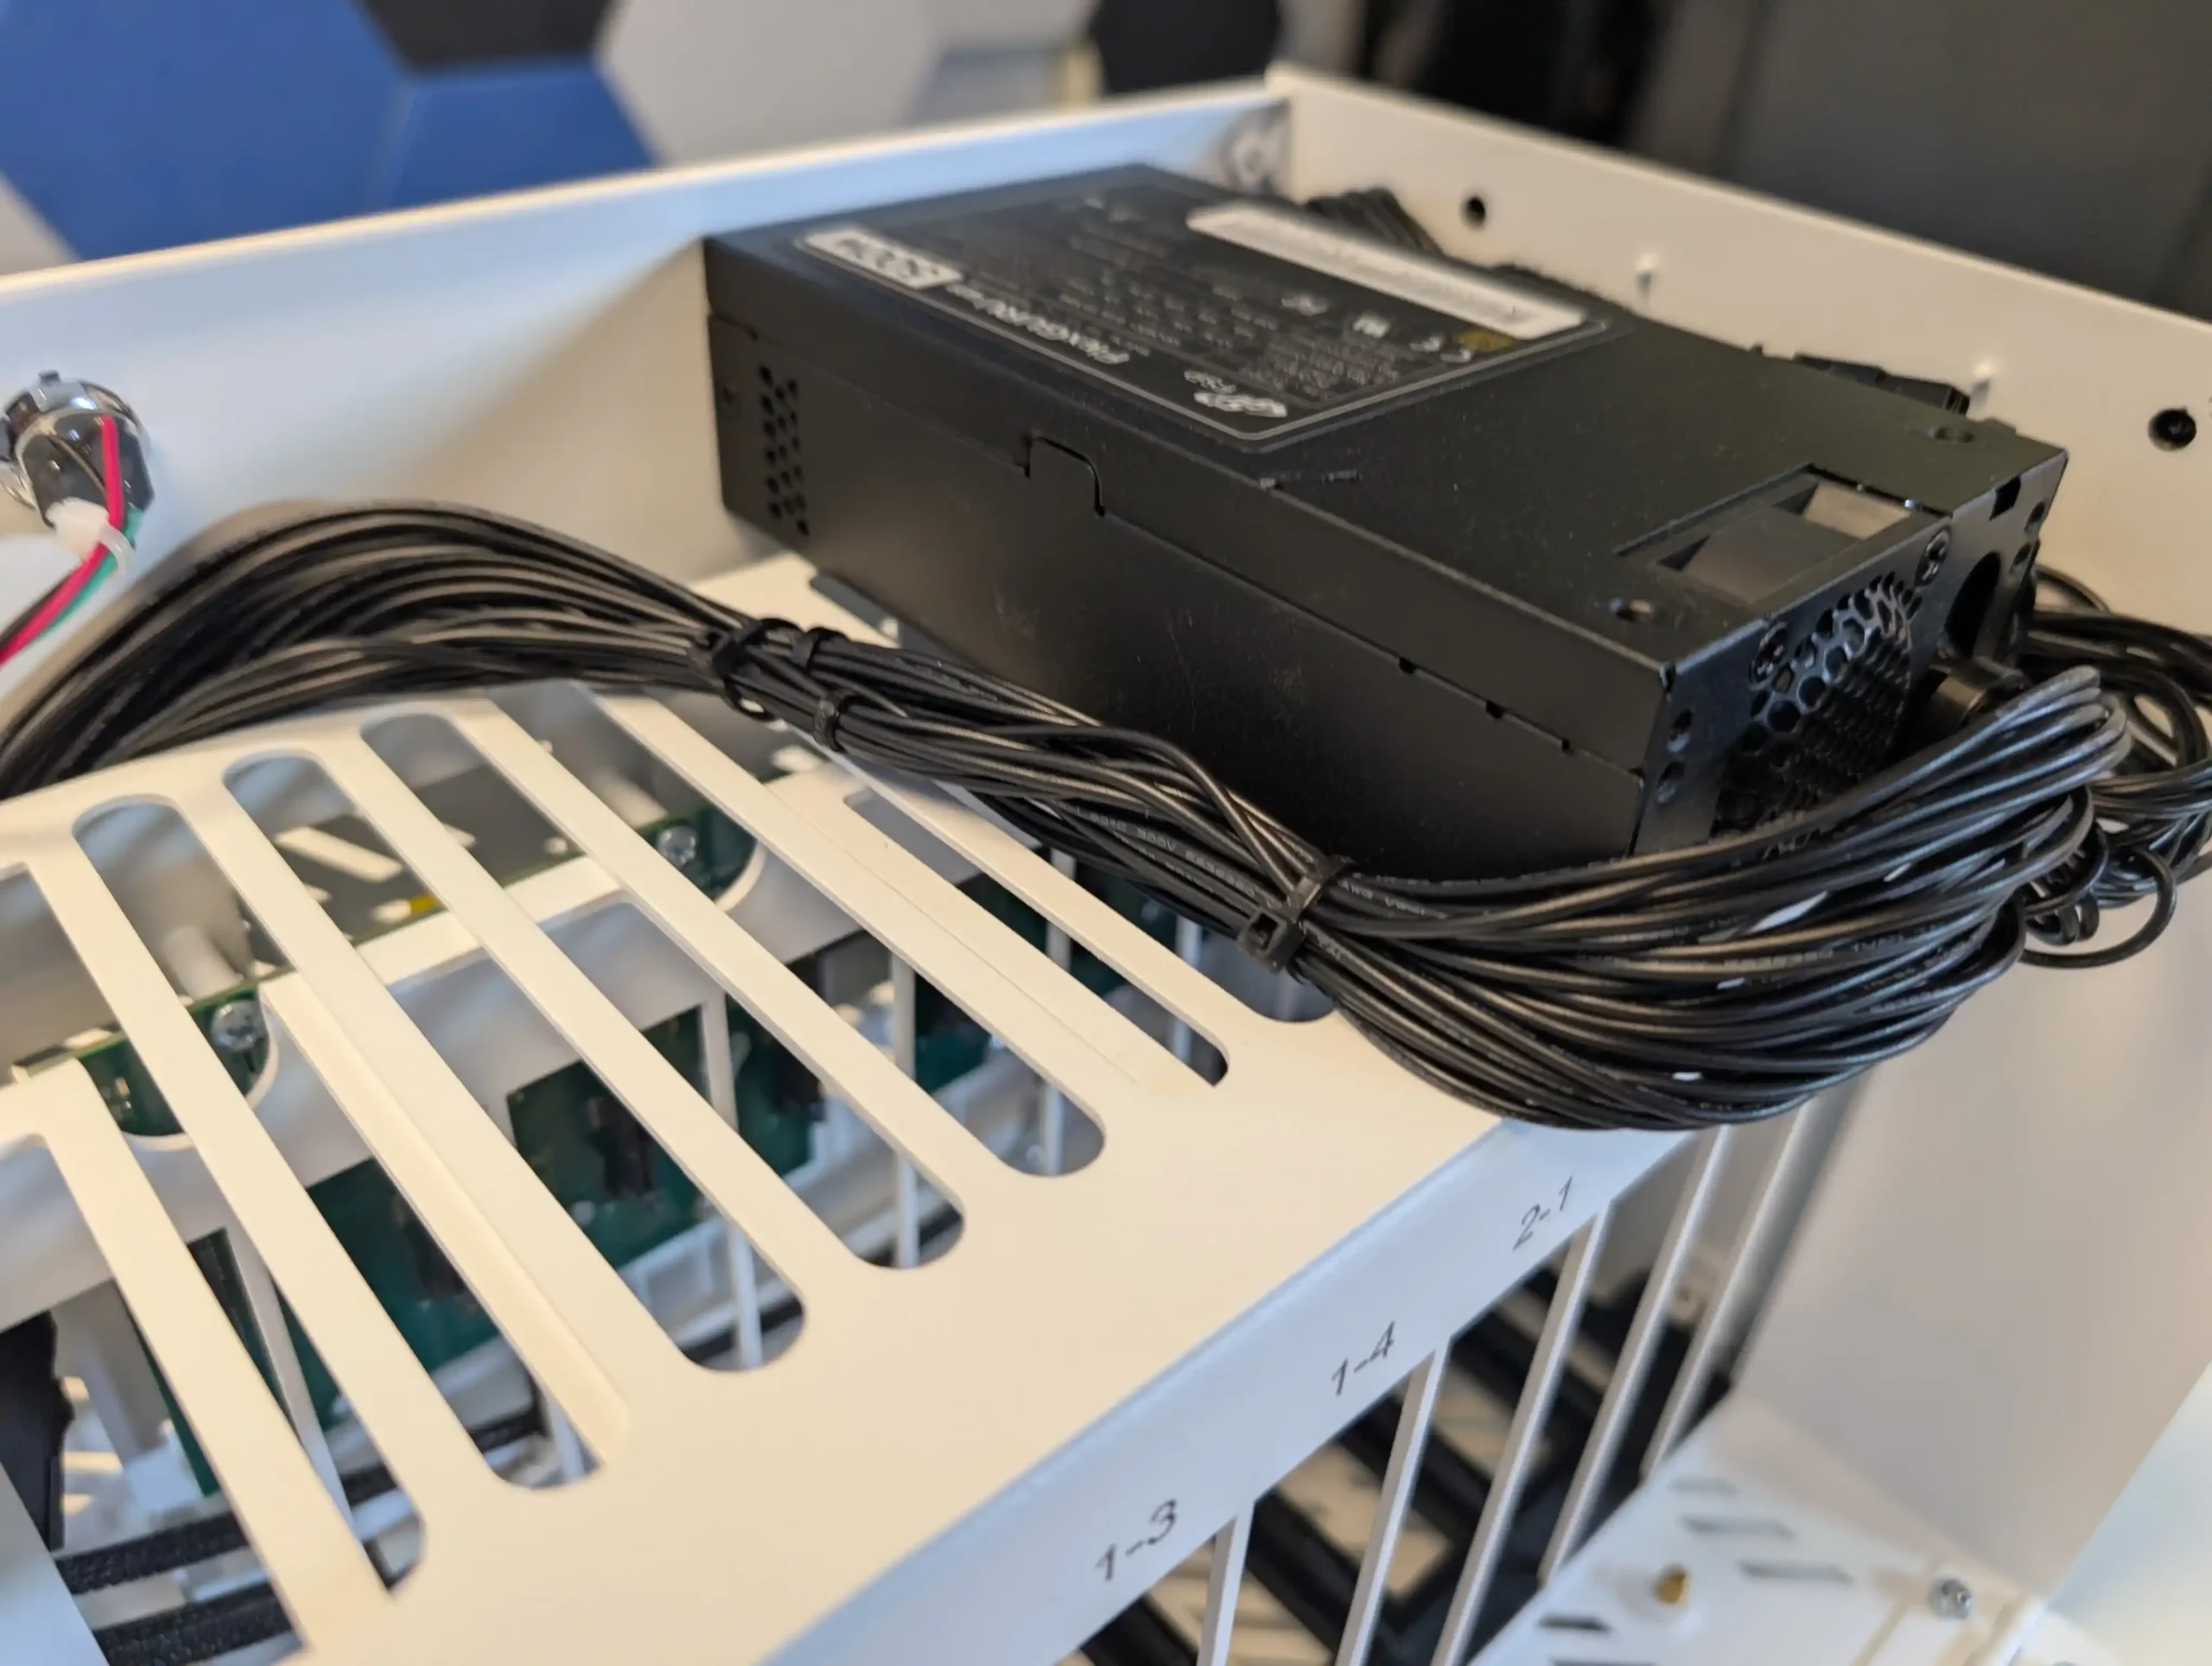
The HL8’s cooling design reflects a balance between thermal efficiency and acoustic performance, especially in its PSU-included configuration. By default, this model ships with multiple Noctua fans—specifically, two NF-A12x15 fans for intake and one NF-A4x10 for exhaust—which are widely regarded for their low noise output and long-term reliability.

Combined with the direct airflow path created by the open drive cage layout, the HL8 maintains effective cooling of both hard drives and system components without requiring high-RPM, high-noise fan profiles. Even under load, thermal tests show the drive temperatures hovering around 50°C in a 20°C ambient environment—well within safe operating margins for mechanical disks.
In real-world usage, the system produces around 33–34 dBA at idle and 42 dBA under full fan load during tasks such as ZFS pool creation or sustained disk activity. These levels are consistent with what you would expect from a quiet desktop PC and are significantly lower than typical rackmount systems or budget enclosures using unbranded high-speed fans.
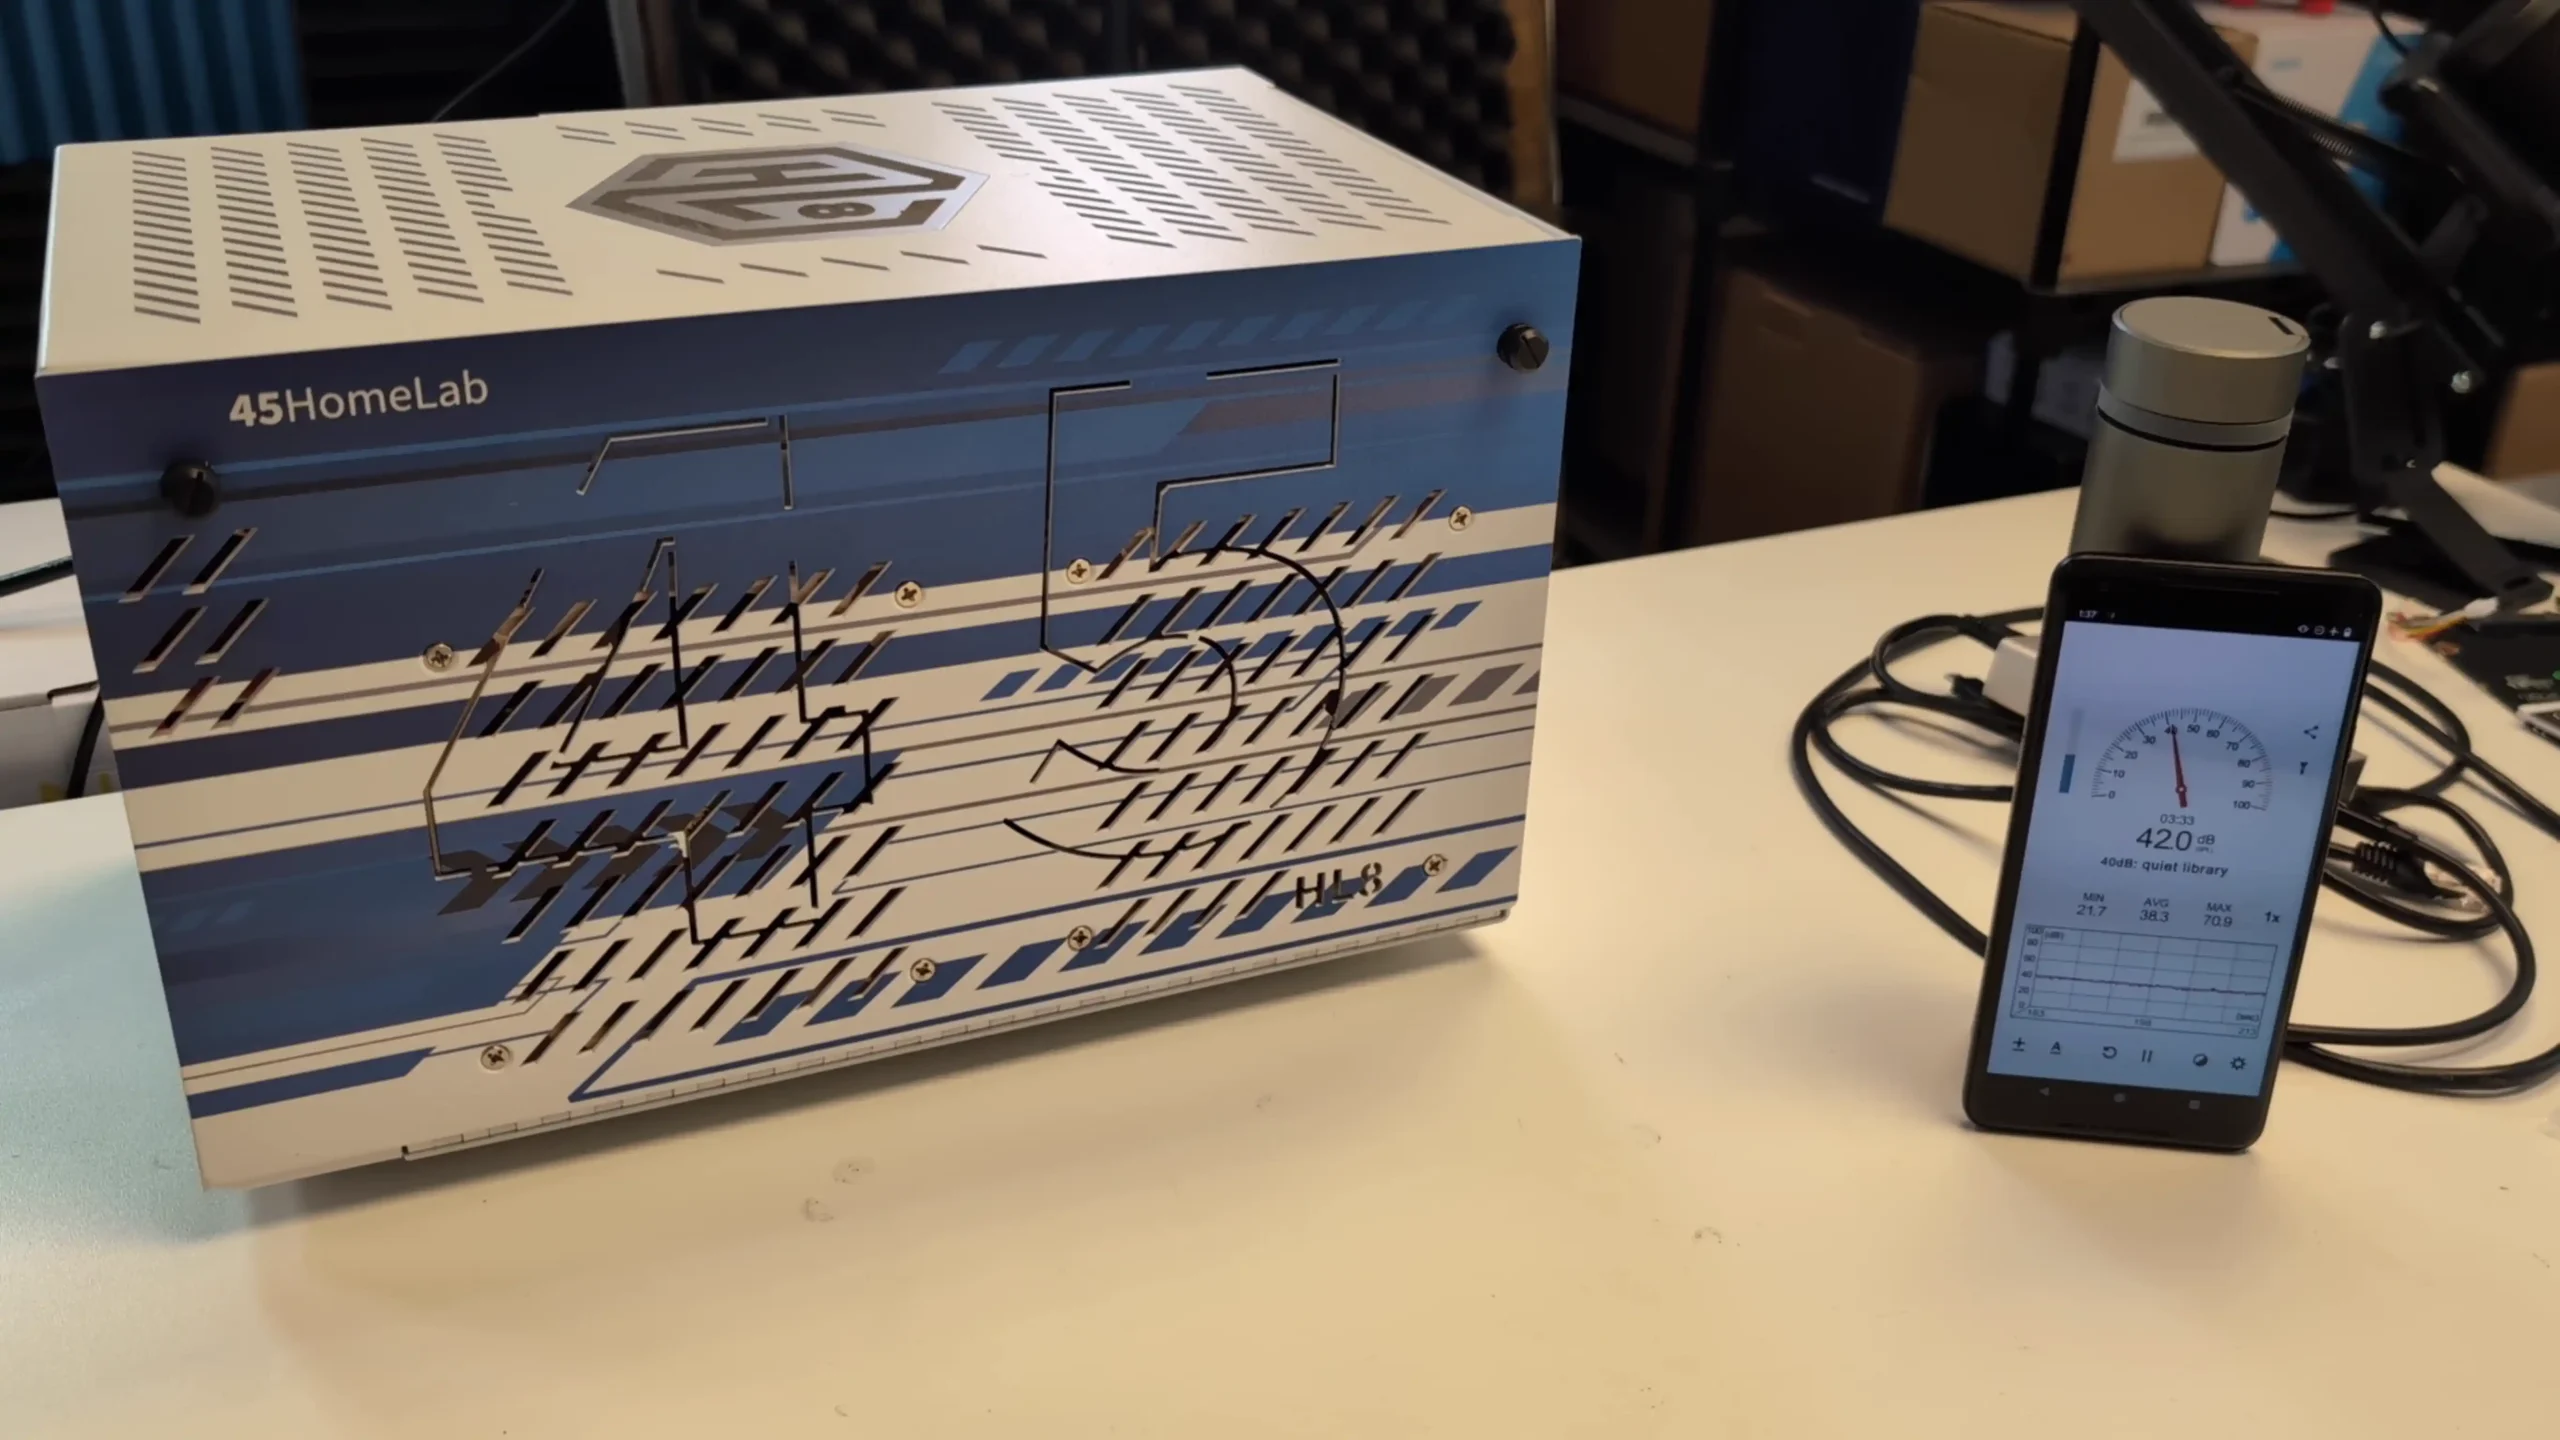
The use of steel panels throughout the chassis also contributes to noise dampening, reducing vibration resonance from spinning drives. Overall, the HL8’s thermal and acoustic profile is well-suited for deployment in office or home environments where audible noise is a concern, without sacrificing long-term cooling performance.
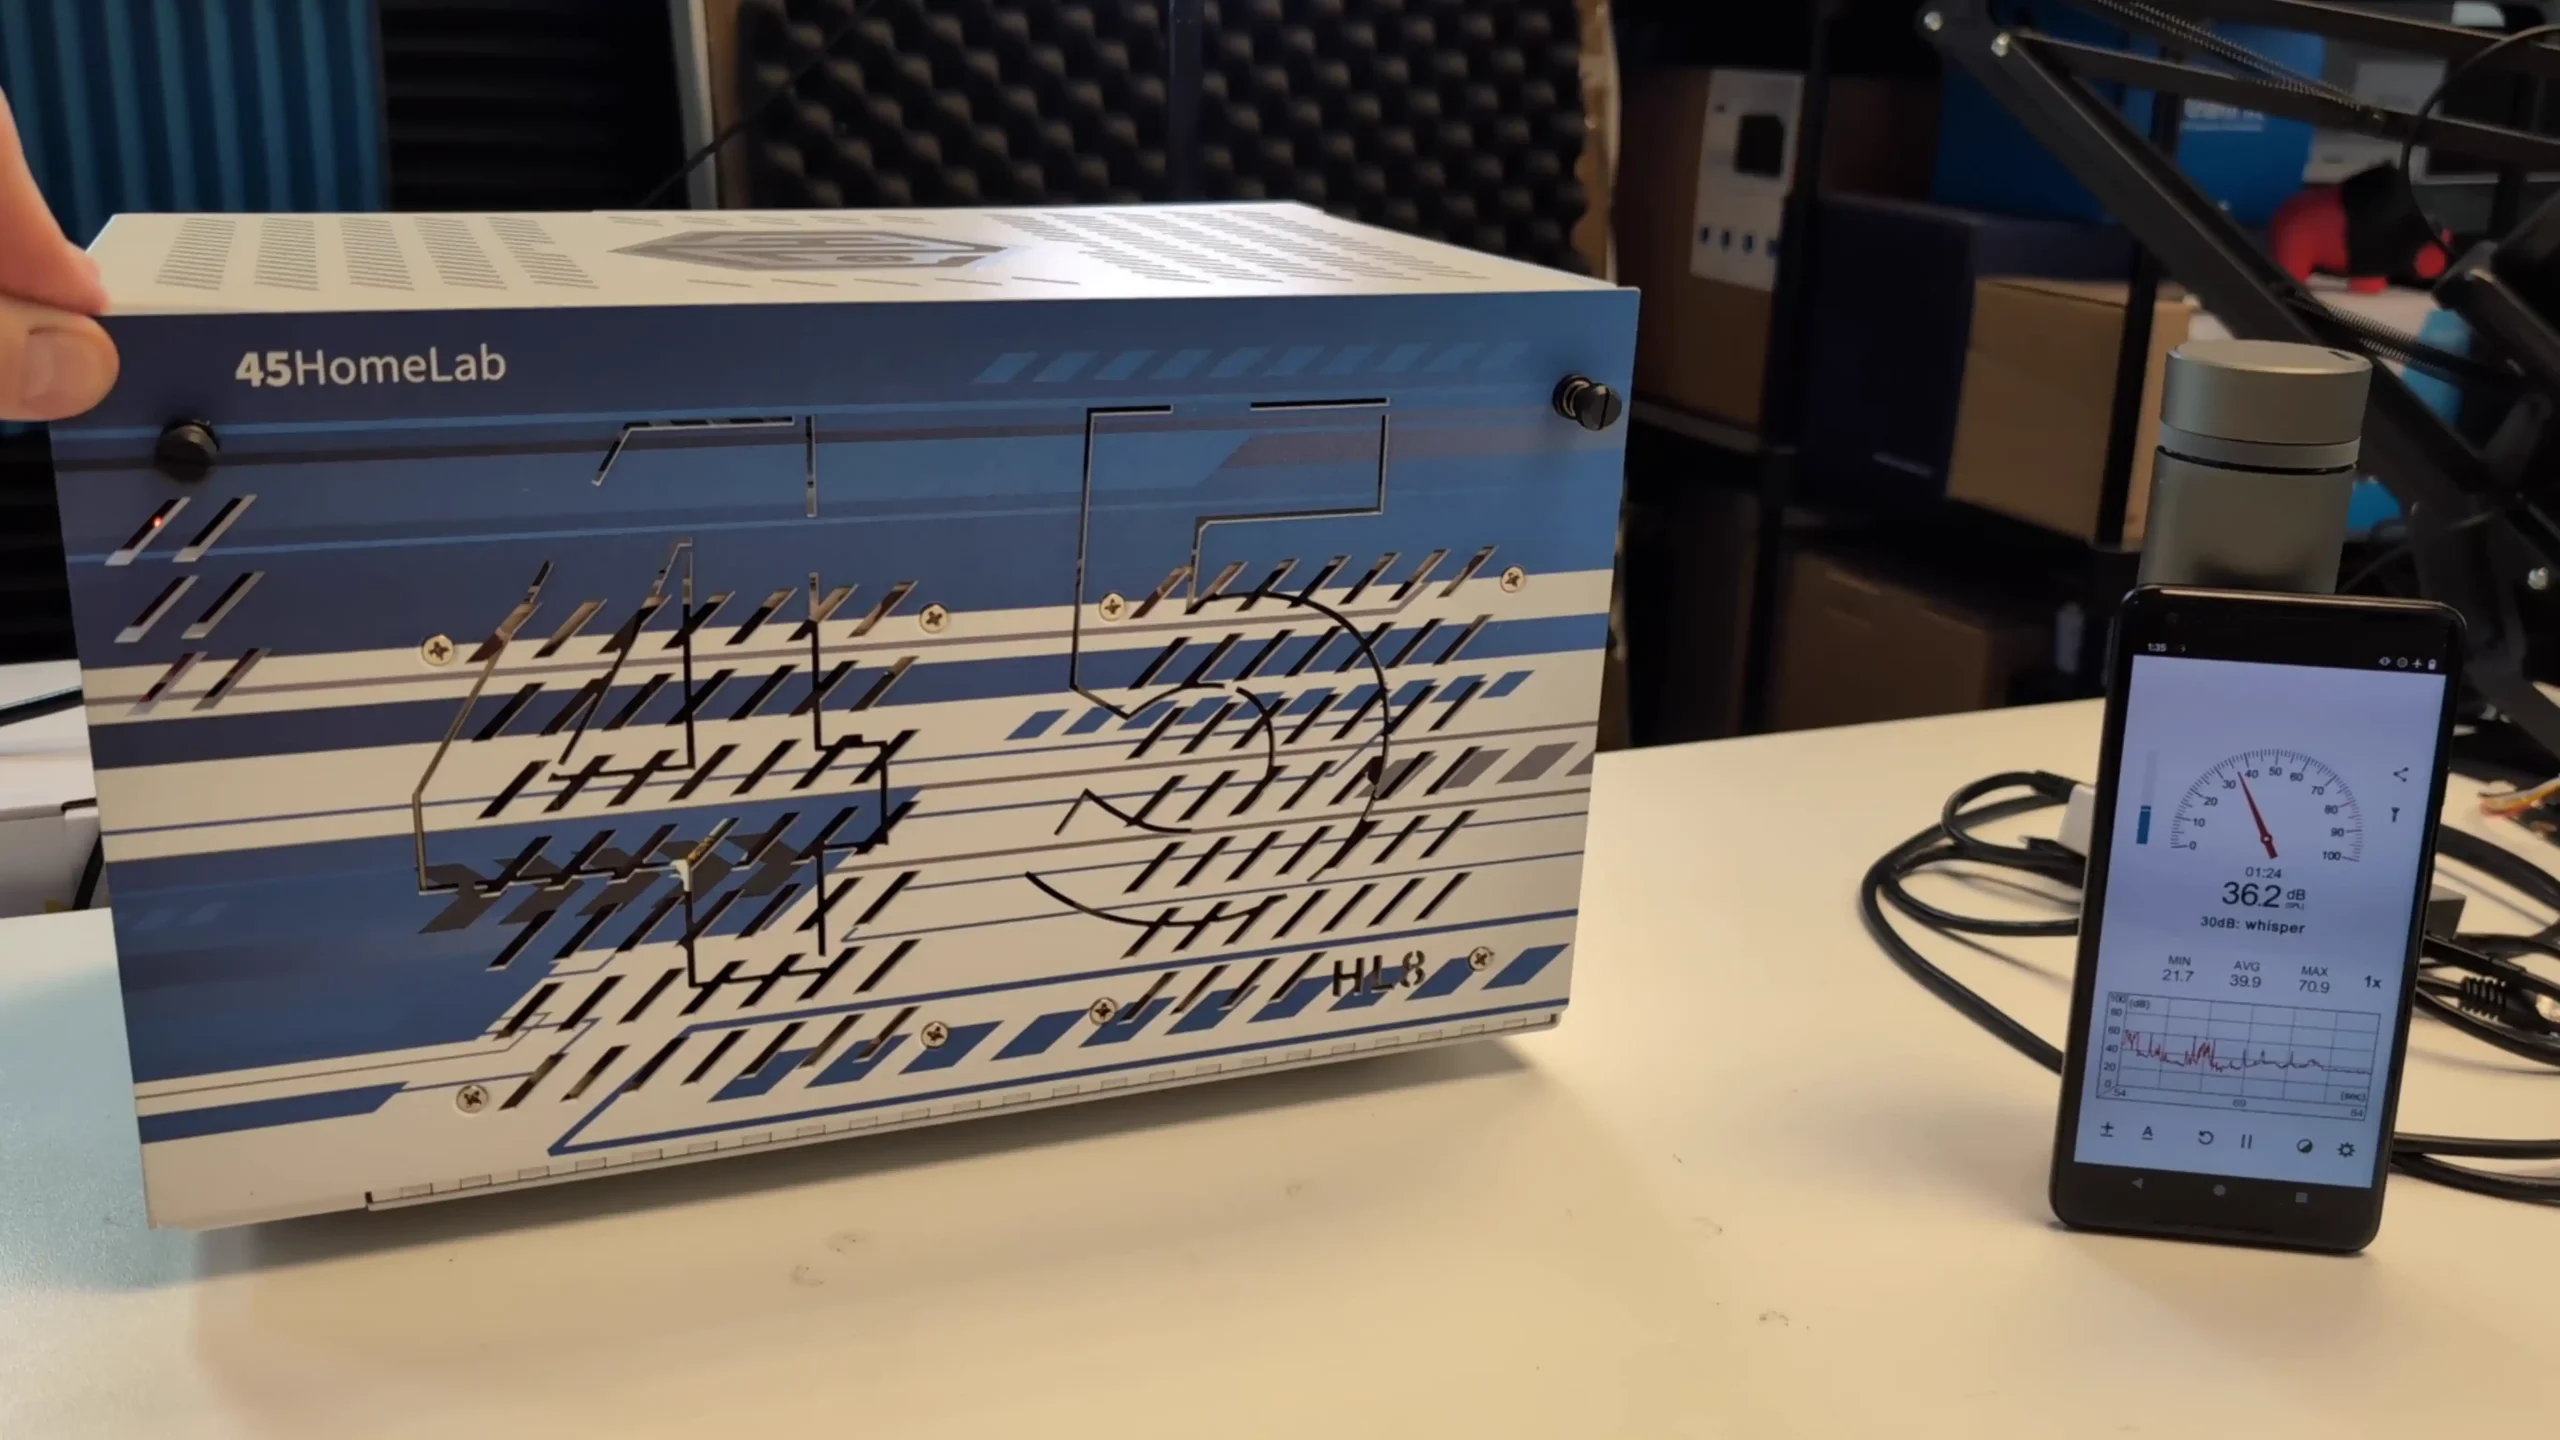
The 45Drives HL8 and the Jonsbo N3 both offer 8-bay NAS enclosures for mini-ITX builds, but they cater to very different tiers of the DIY NAS market. The HL8 is positioned as a premium, enterprise-grade enclosure built entirely from 16-gauge steel and manufactured in Canada. It includes a fully integrated backplane, Noctua fans, and a Flex ATX PSU—features aimed at maximizing serviceability, thermal control, and long-term reliability.
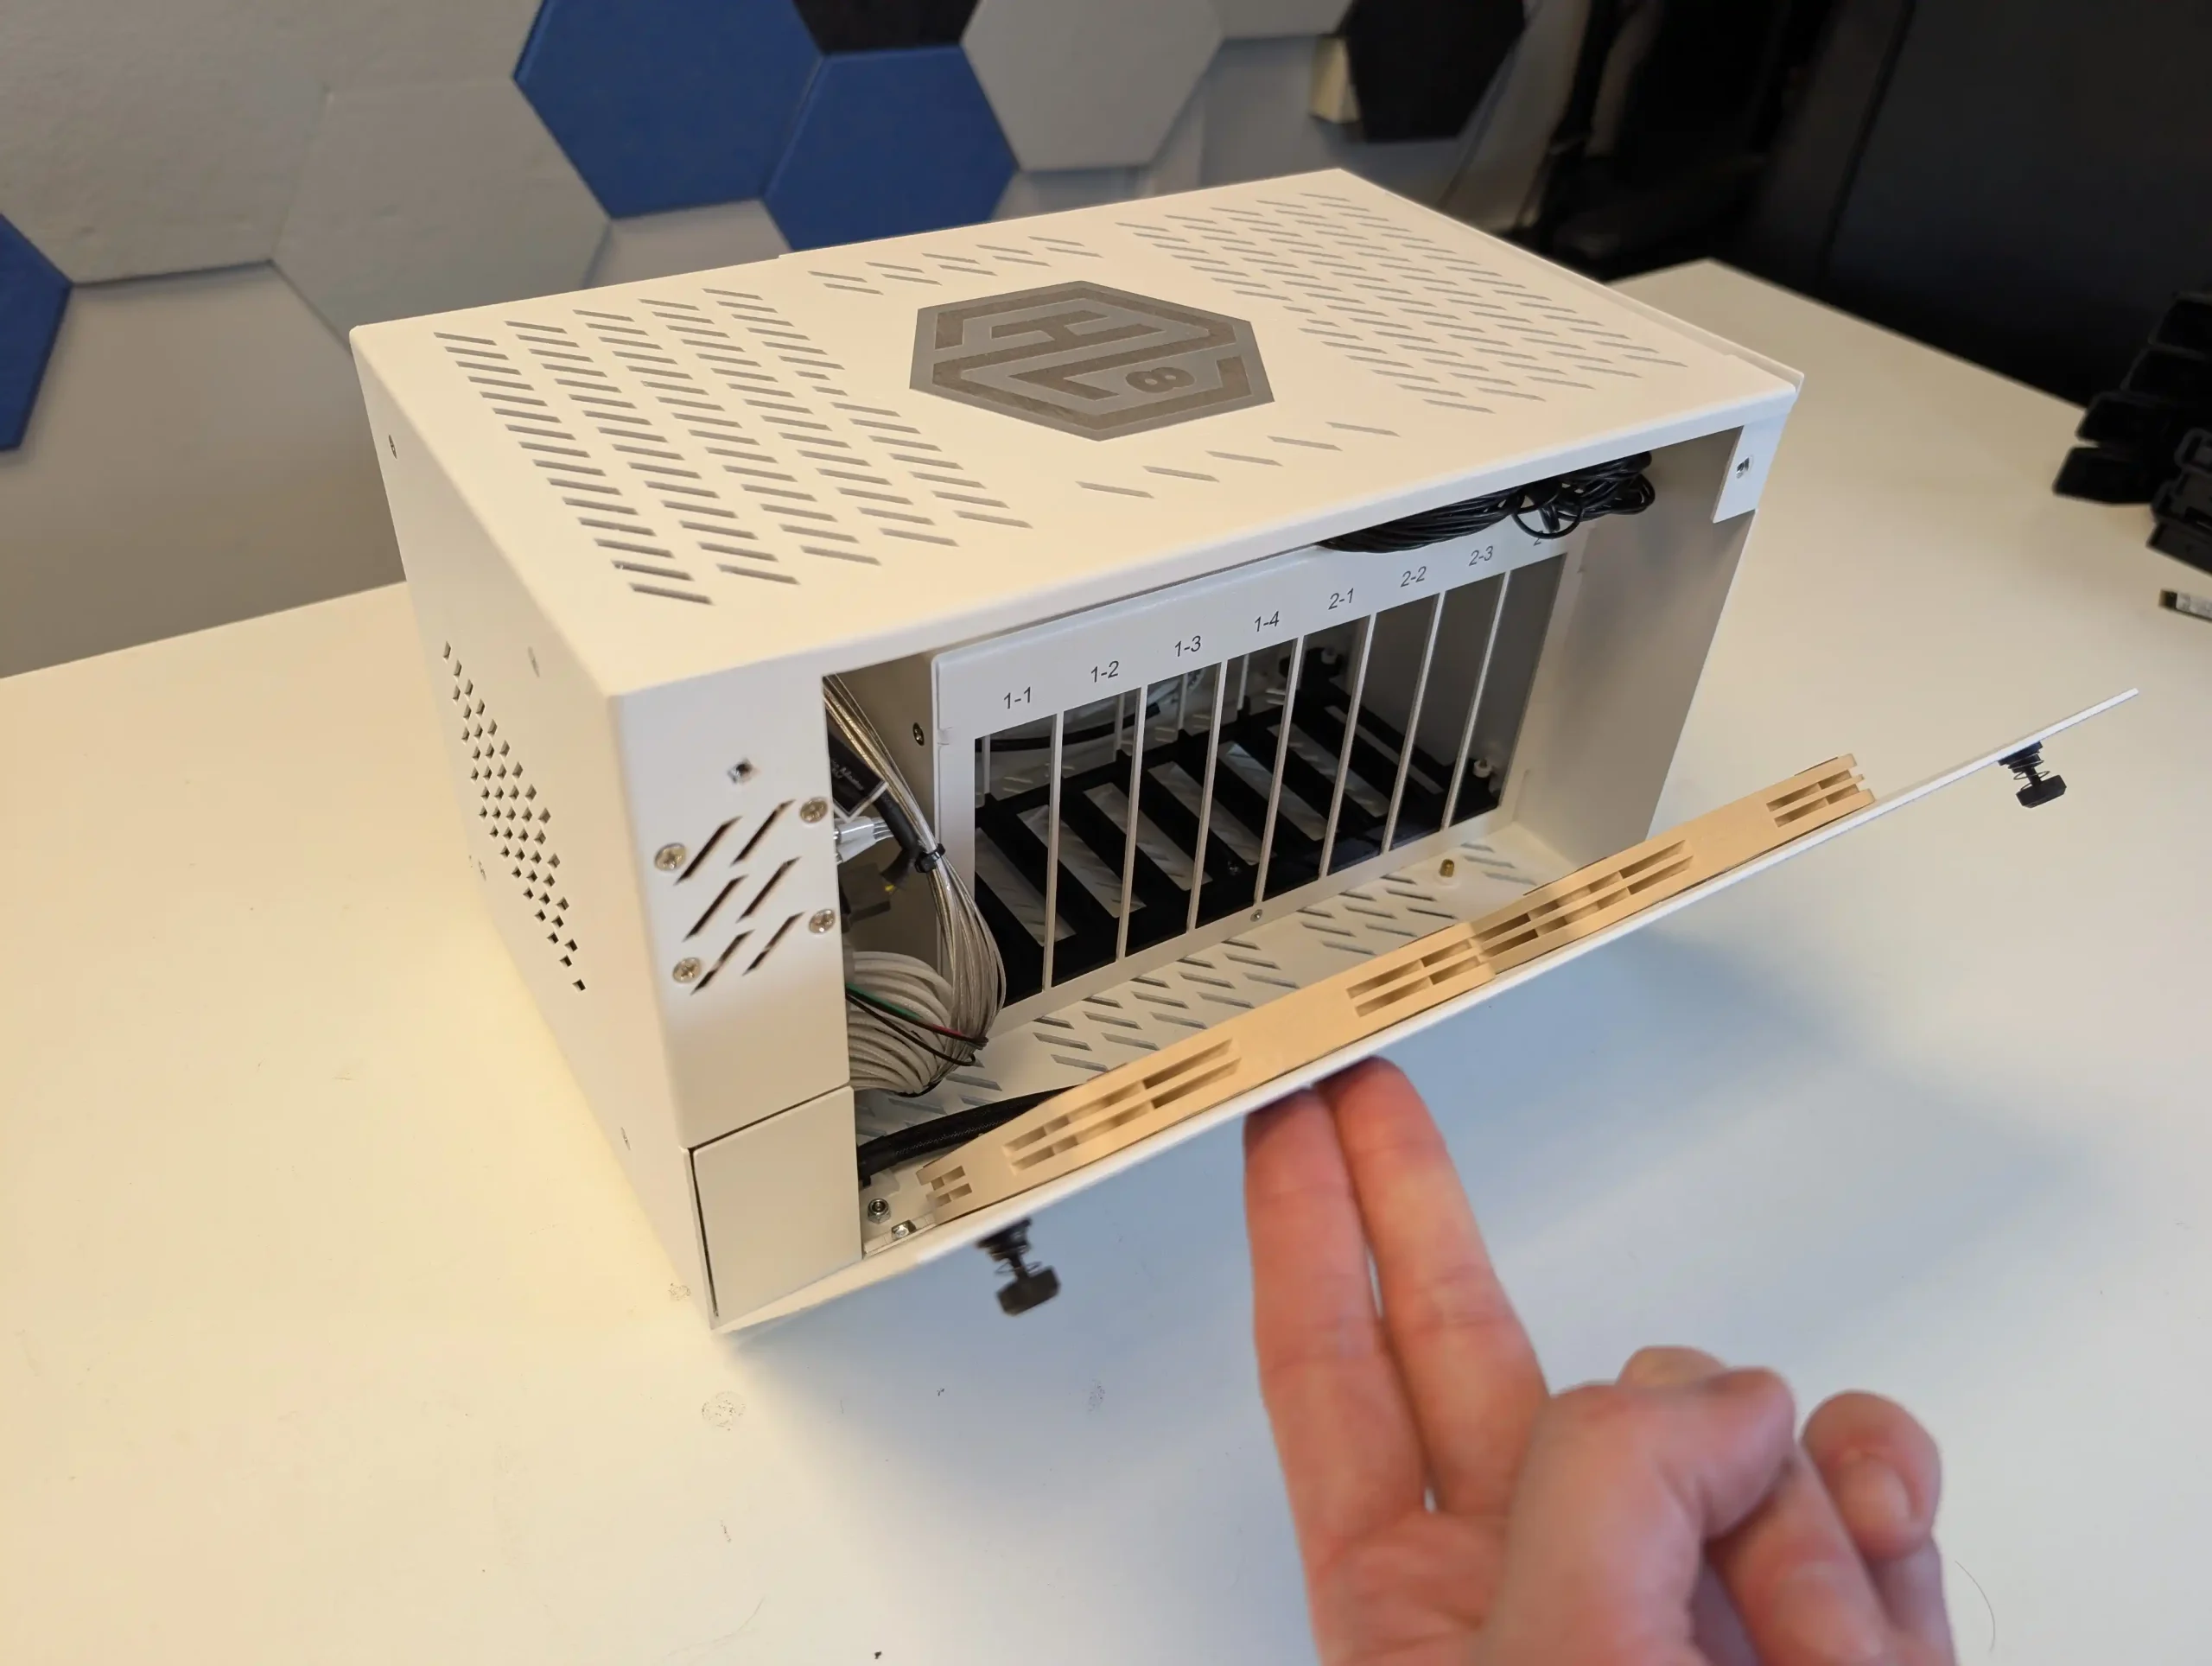 |
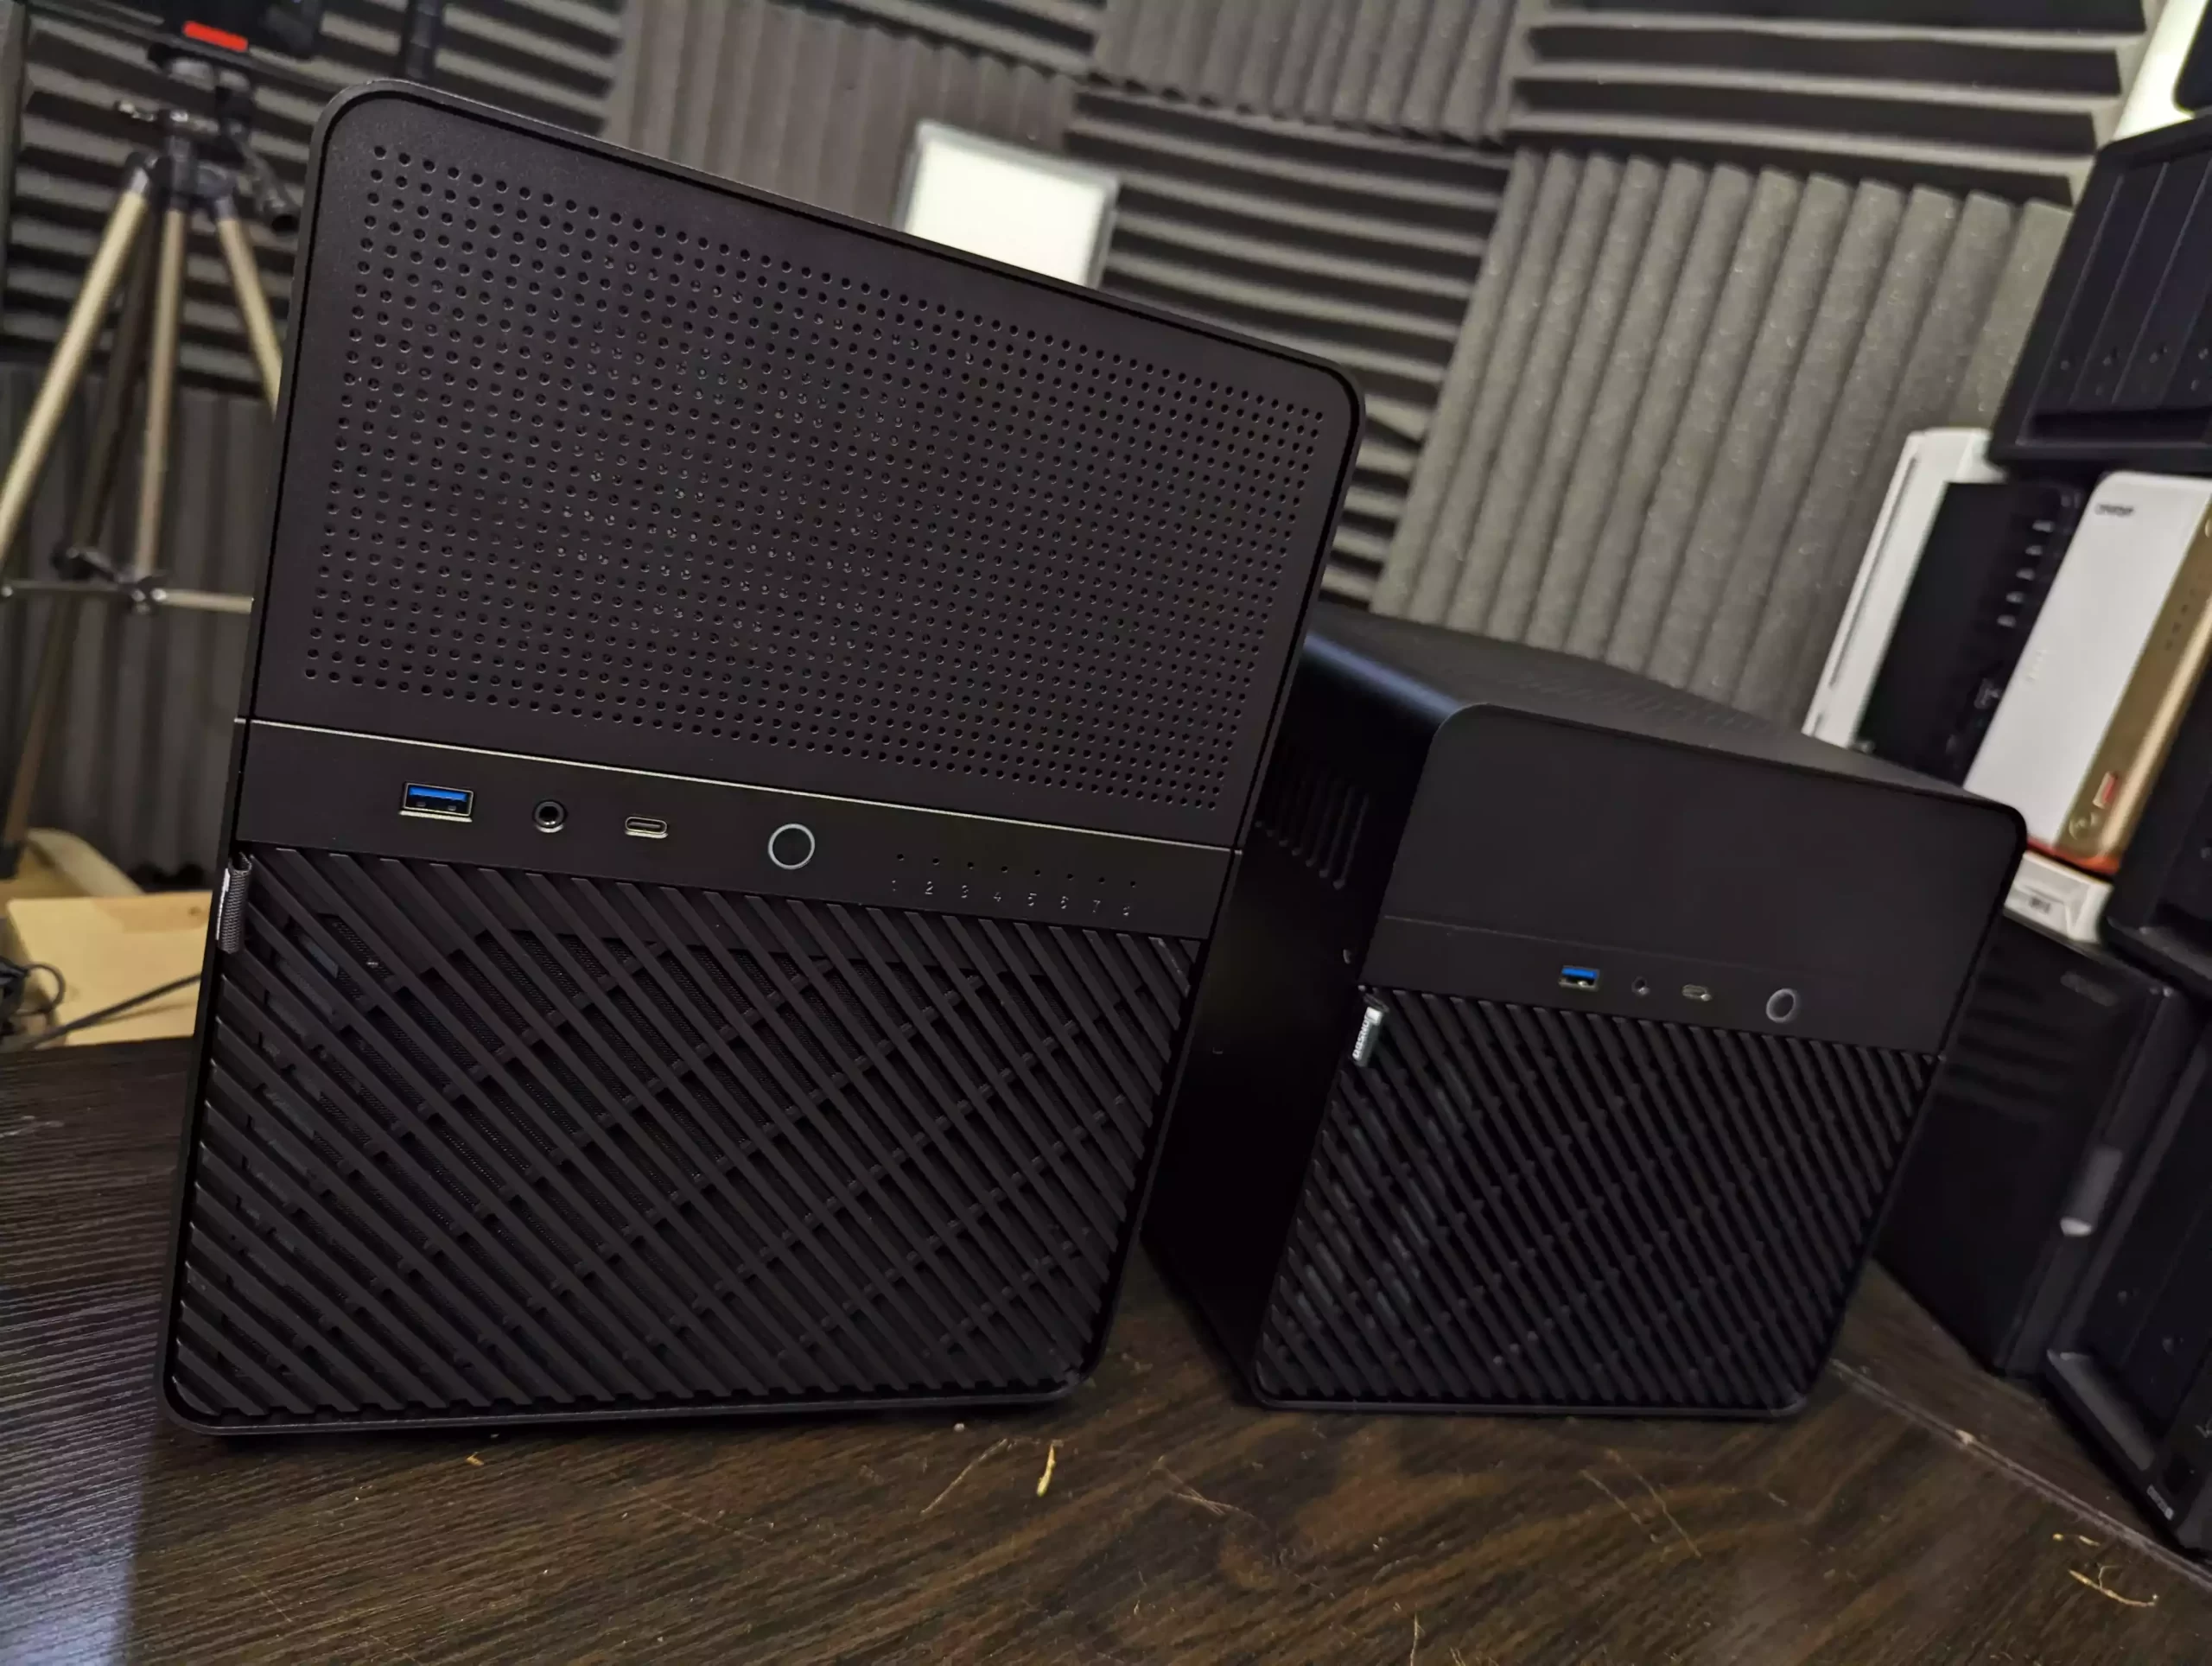 |
Priced at roughly $880 USD for the chassis, backplane, and PSU combo, it targets users who demand industrial standards in a desktop form factor. The Jonsbo N3, in contrast, is a Chinese-manufactured enclosure constructed from 2.0mm aluminium alloy with 1.0mm steel internals.
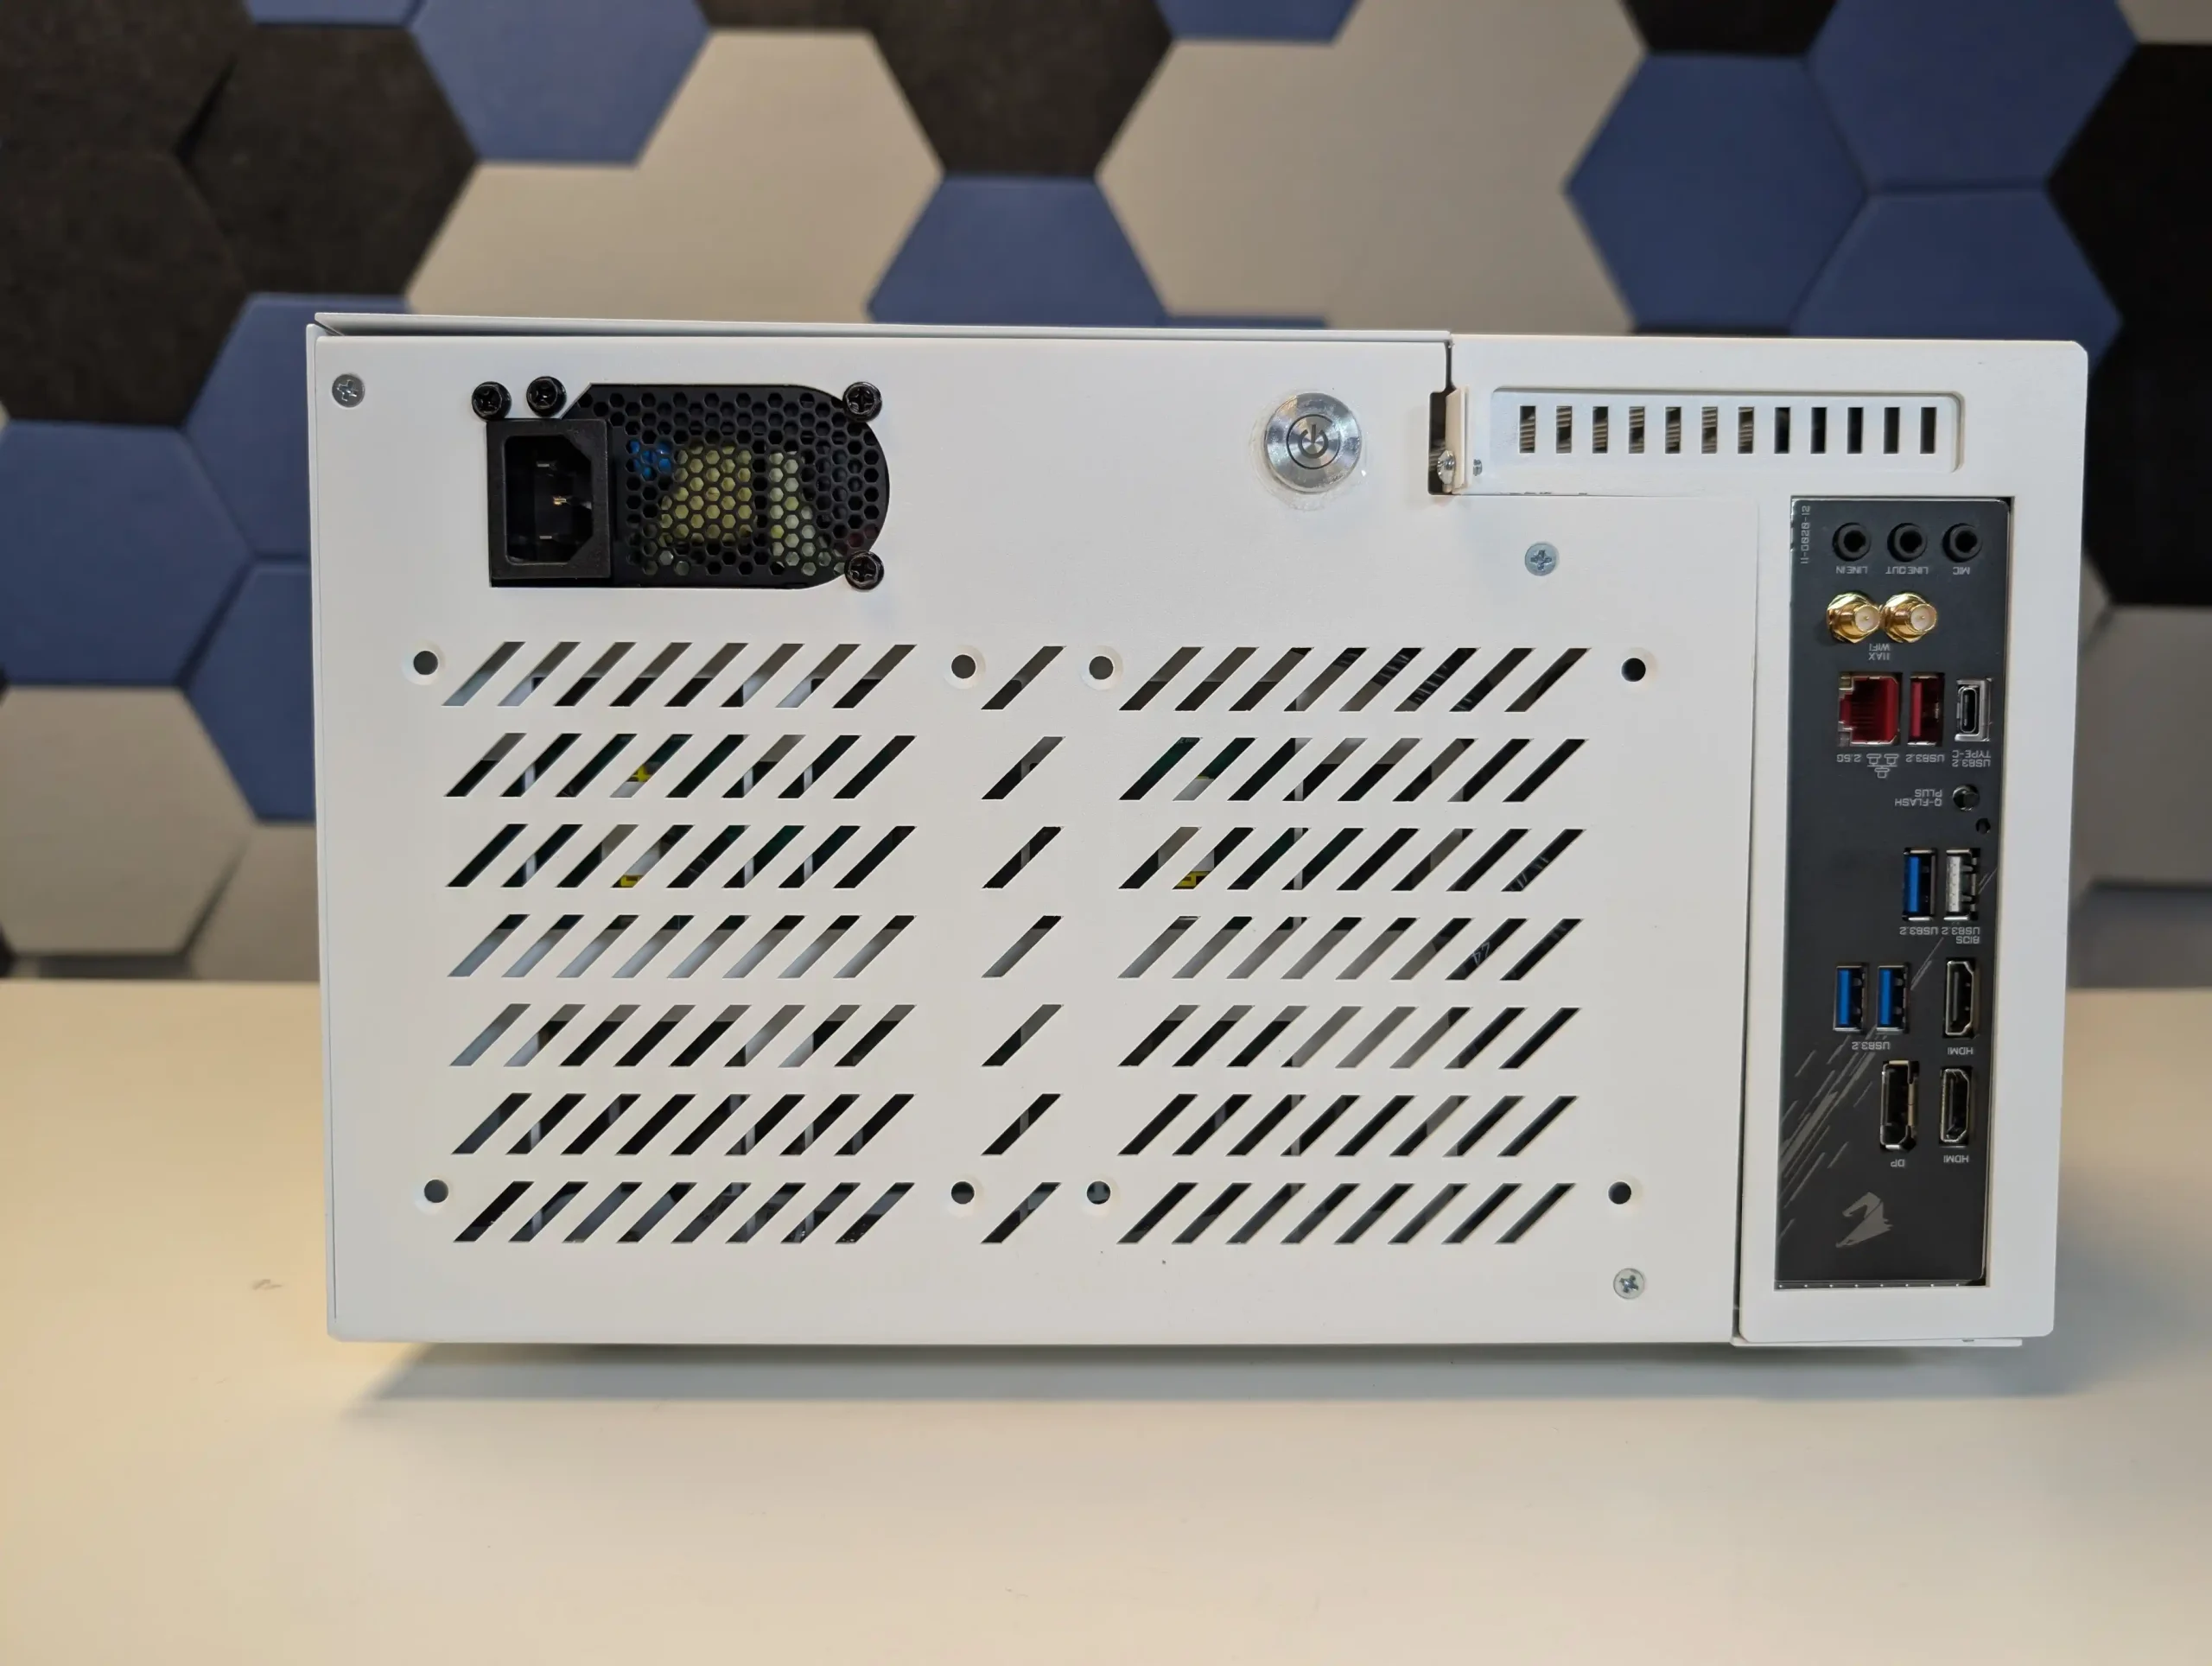 |
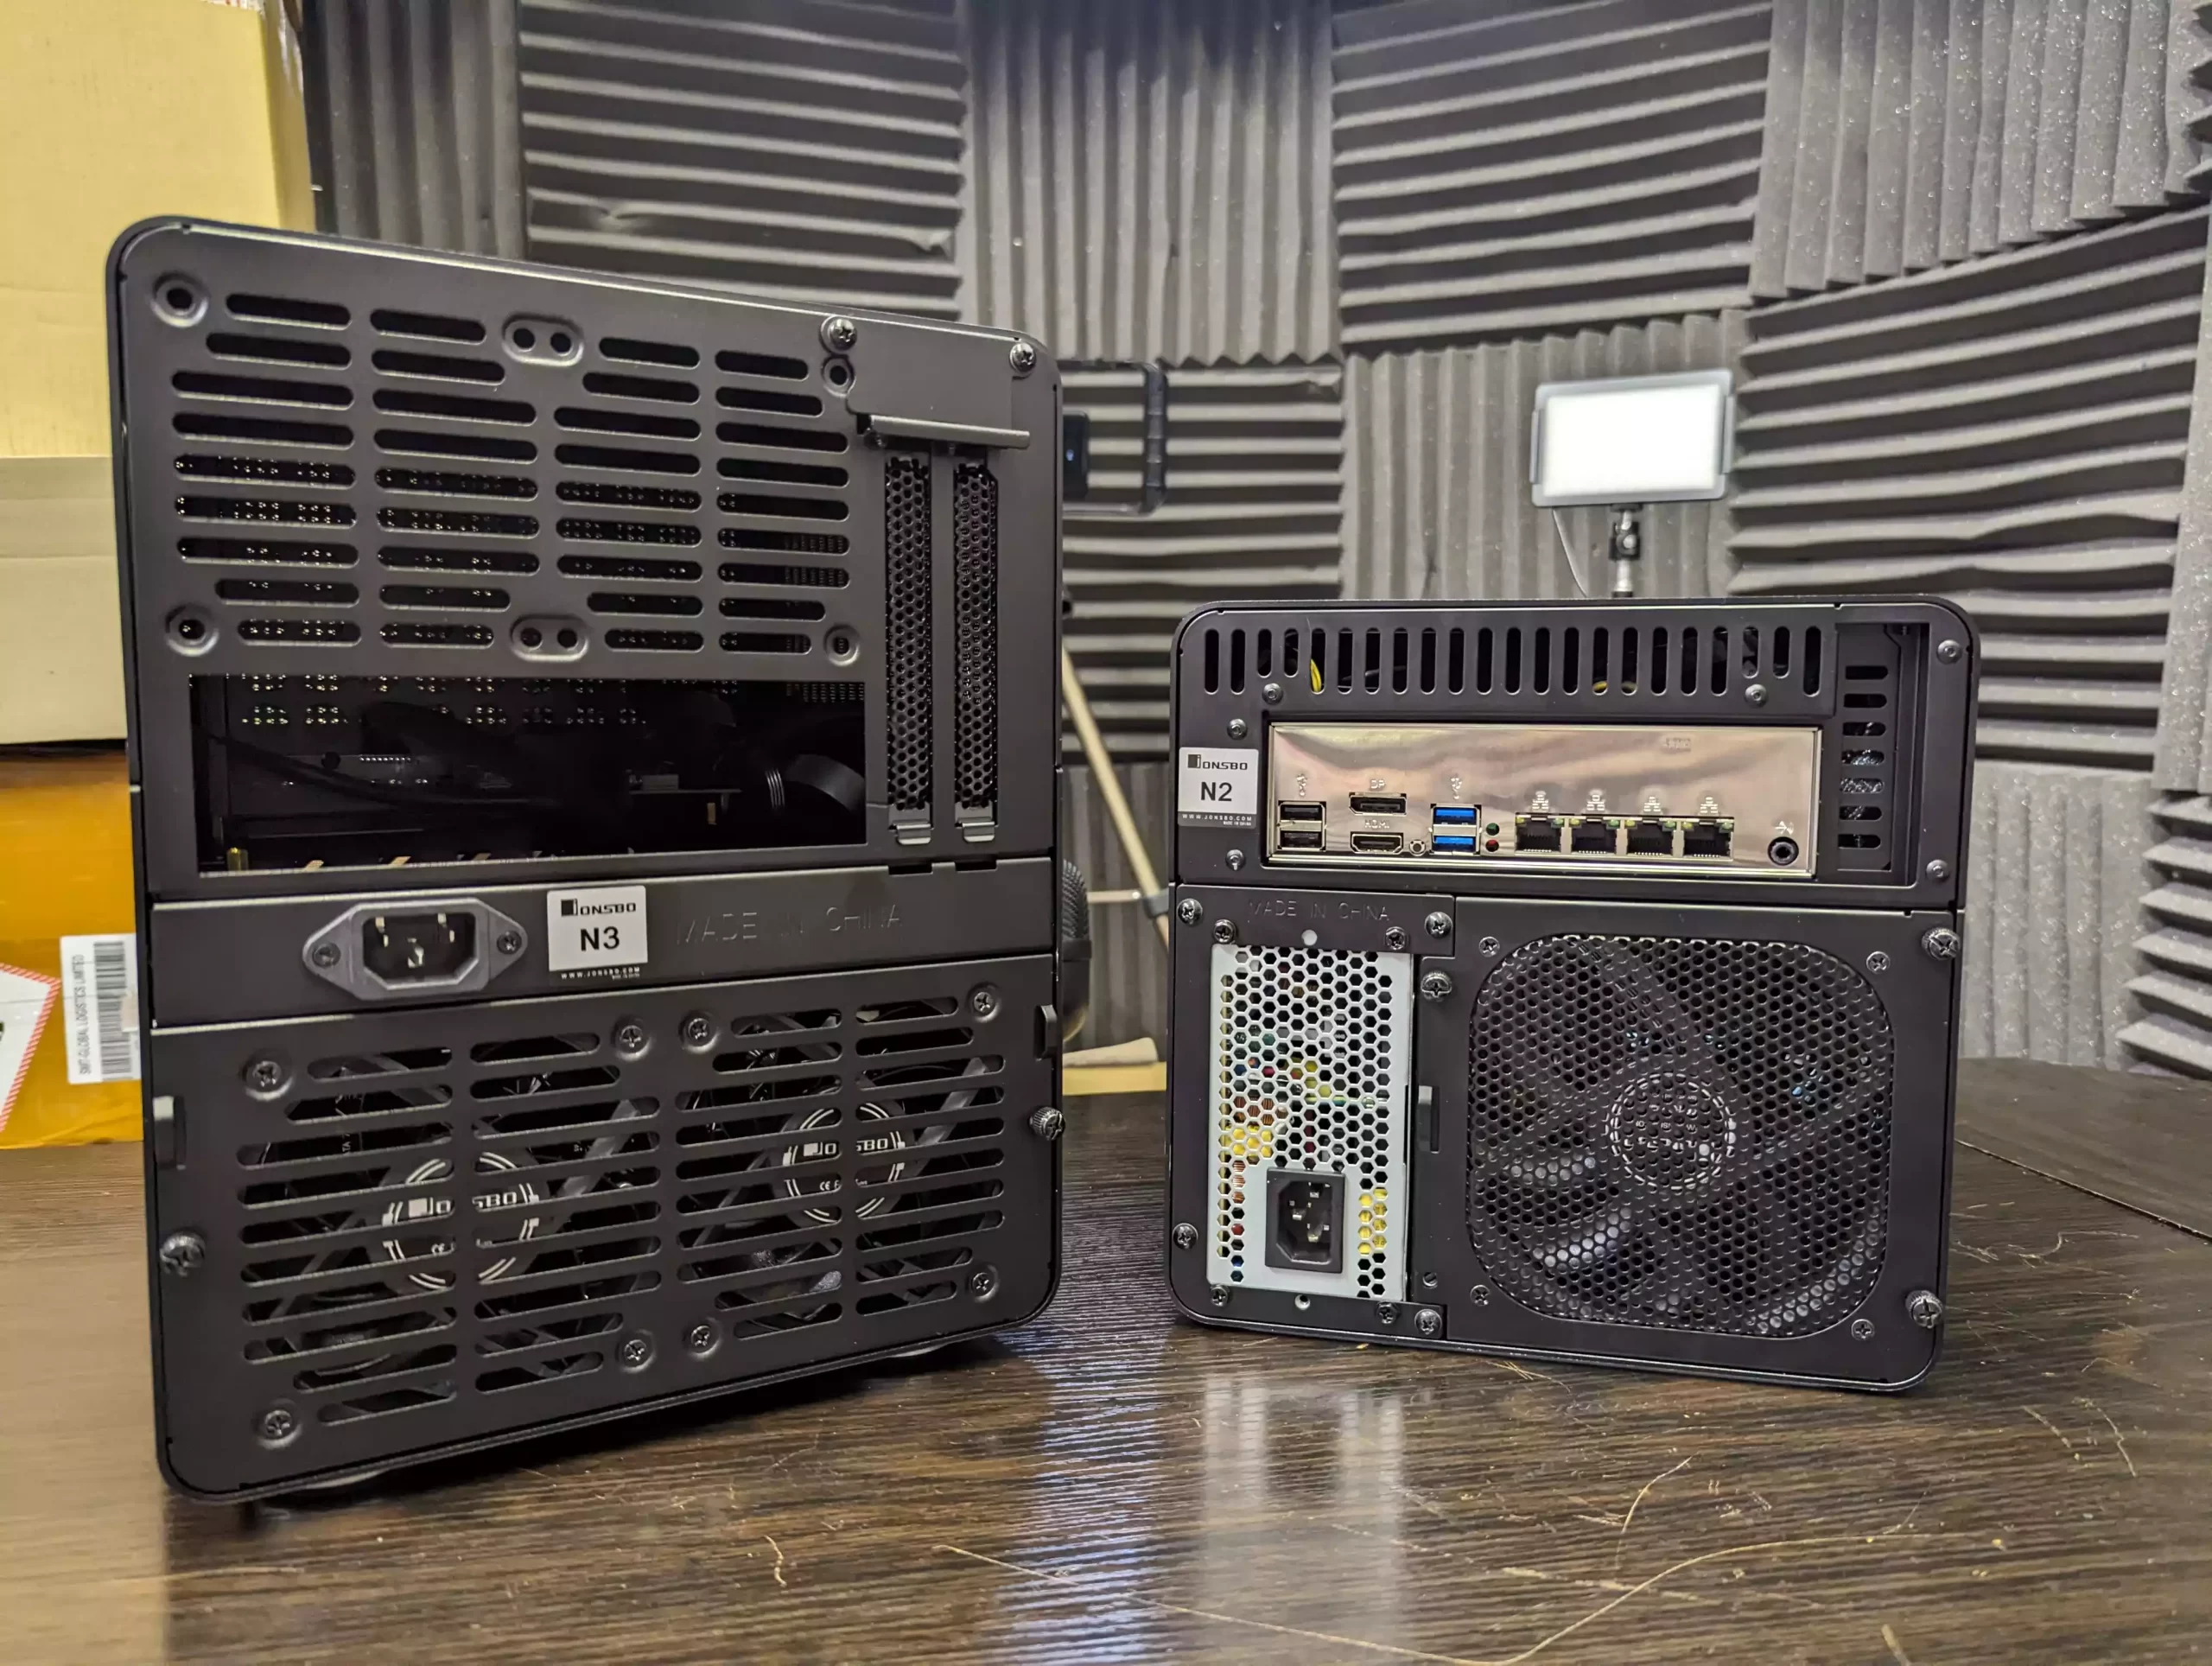 |
It focuses on maximizing functionality in a compact and aesthetically refined format, with average retail pricing ranging between $150–$170 USD, though occasional sales and unpredictable shipping costs on platforms like AliExpress can make pricing volatile.
| Category | 45Drives HL8
|
Jonsbo N3
|
|---|---|---|
| Drive Bays | 8x 3.5″ (tool-less trays, SATA/SAS via backplane) | 8x 3.5″ (hot-swap, SATA only via passive backplane) |
| Backplane Type | Integrated 12Gb/s SATA/SAS backplane | Passive SATA backplane (individual ports) |
| Motherboard Support | Mini-ITX | Mini-ITX, DTX |
| PCIe Slots | 1x Full-height, full-length (up to ~270mm) | 2x expansion slots (supports 1x double-width card) |
| PSU Support | Flex ATX | SFX (≤105mm) with internal extension cable routing |
| CPU Cooler Clearance | Up to 75mm (depends on board layout) | Up to 130mm |
| GPU/PCIe Card Clearance | Up to ~270mm (1 slot) | Up to 250mm (double-width supported) |
| Construction Material | 2mm Powder-Coated Steel | 2mm Aluminium (exterior), 1mm Steel (interior) |
| Cooling | 3x 80mm Noctua fans included (chassis & CPU area) | 2x 100mm fans included (HDD area), 2x 90mm optional |
| Front I/O Ports | None (depends on motherboard I/O) | USB 3.0 Type-A, USB 3.2 Gen2 Type-C, Audio Combo |
| LED Indicators | Optional drive activity LEDs | 8x front panel drive activity LEDs |
| Toolless Access | Yes – hinged “flower” folding design | No – top secured by Allen screws |
| Chassis Dimensions (WxDxH) | ~305mm x 370mm x 260mm (approx., rectangular shape) | 233mm x 262mm x 298mm |
| Weight | ~9.5kg (with PSU and backplane) | 3.9kg (no PSU) |
| Hot Swap Support | Yes | Yes |
| Price (avg.) | $658 (chassis + backplane) | $150–$170 USD (no PSU, varies by seller/region) |
| Manufacturing Origin | Canada (with some imported components IN PRE-BUILT NAS models) | China |
In terms of hardware layout and user experience, the HL8 emphasizes modularity and ease of access. Its unique “flower-style” hinged chassis allows for complete servicing of drives, motherboard, cabling, and PSU without disassembly. The built-in backplane supports both SATA and SAS, reducing the need for messy cabling or additional HBA cards unless required for scale-out. Meanwhile, the Jonsbo N3 offers a two-chamber design separating drives and the motherboard/PSU area, supporting 8 hot-swap drives via an included SATA-only backplane. However, the power delivery system relies on two Molex and one SATA connector—an odd combination that may require more planning for power distribution. The N3 also employs a PSU passthrough cable from the back to a front-mounted internal SFX PSU, saving space but potentially restricting airflow and complicating installation. Unlike the HL8’s enterprise cable routing, the N3 requires tight cable management due to its smaller internal volume, and is more prone to cable congestion near the motherboard tray.
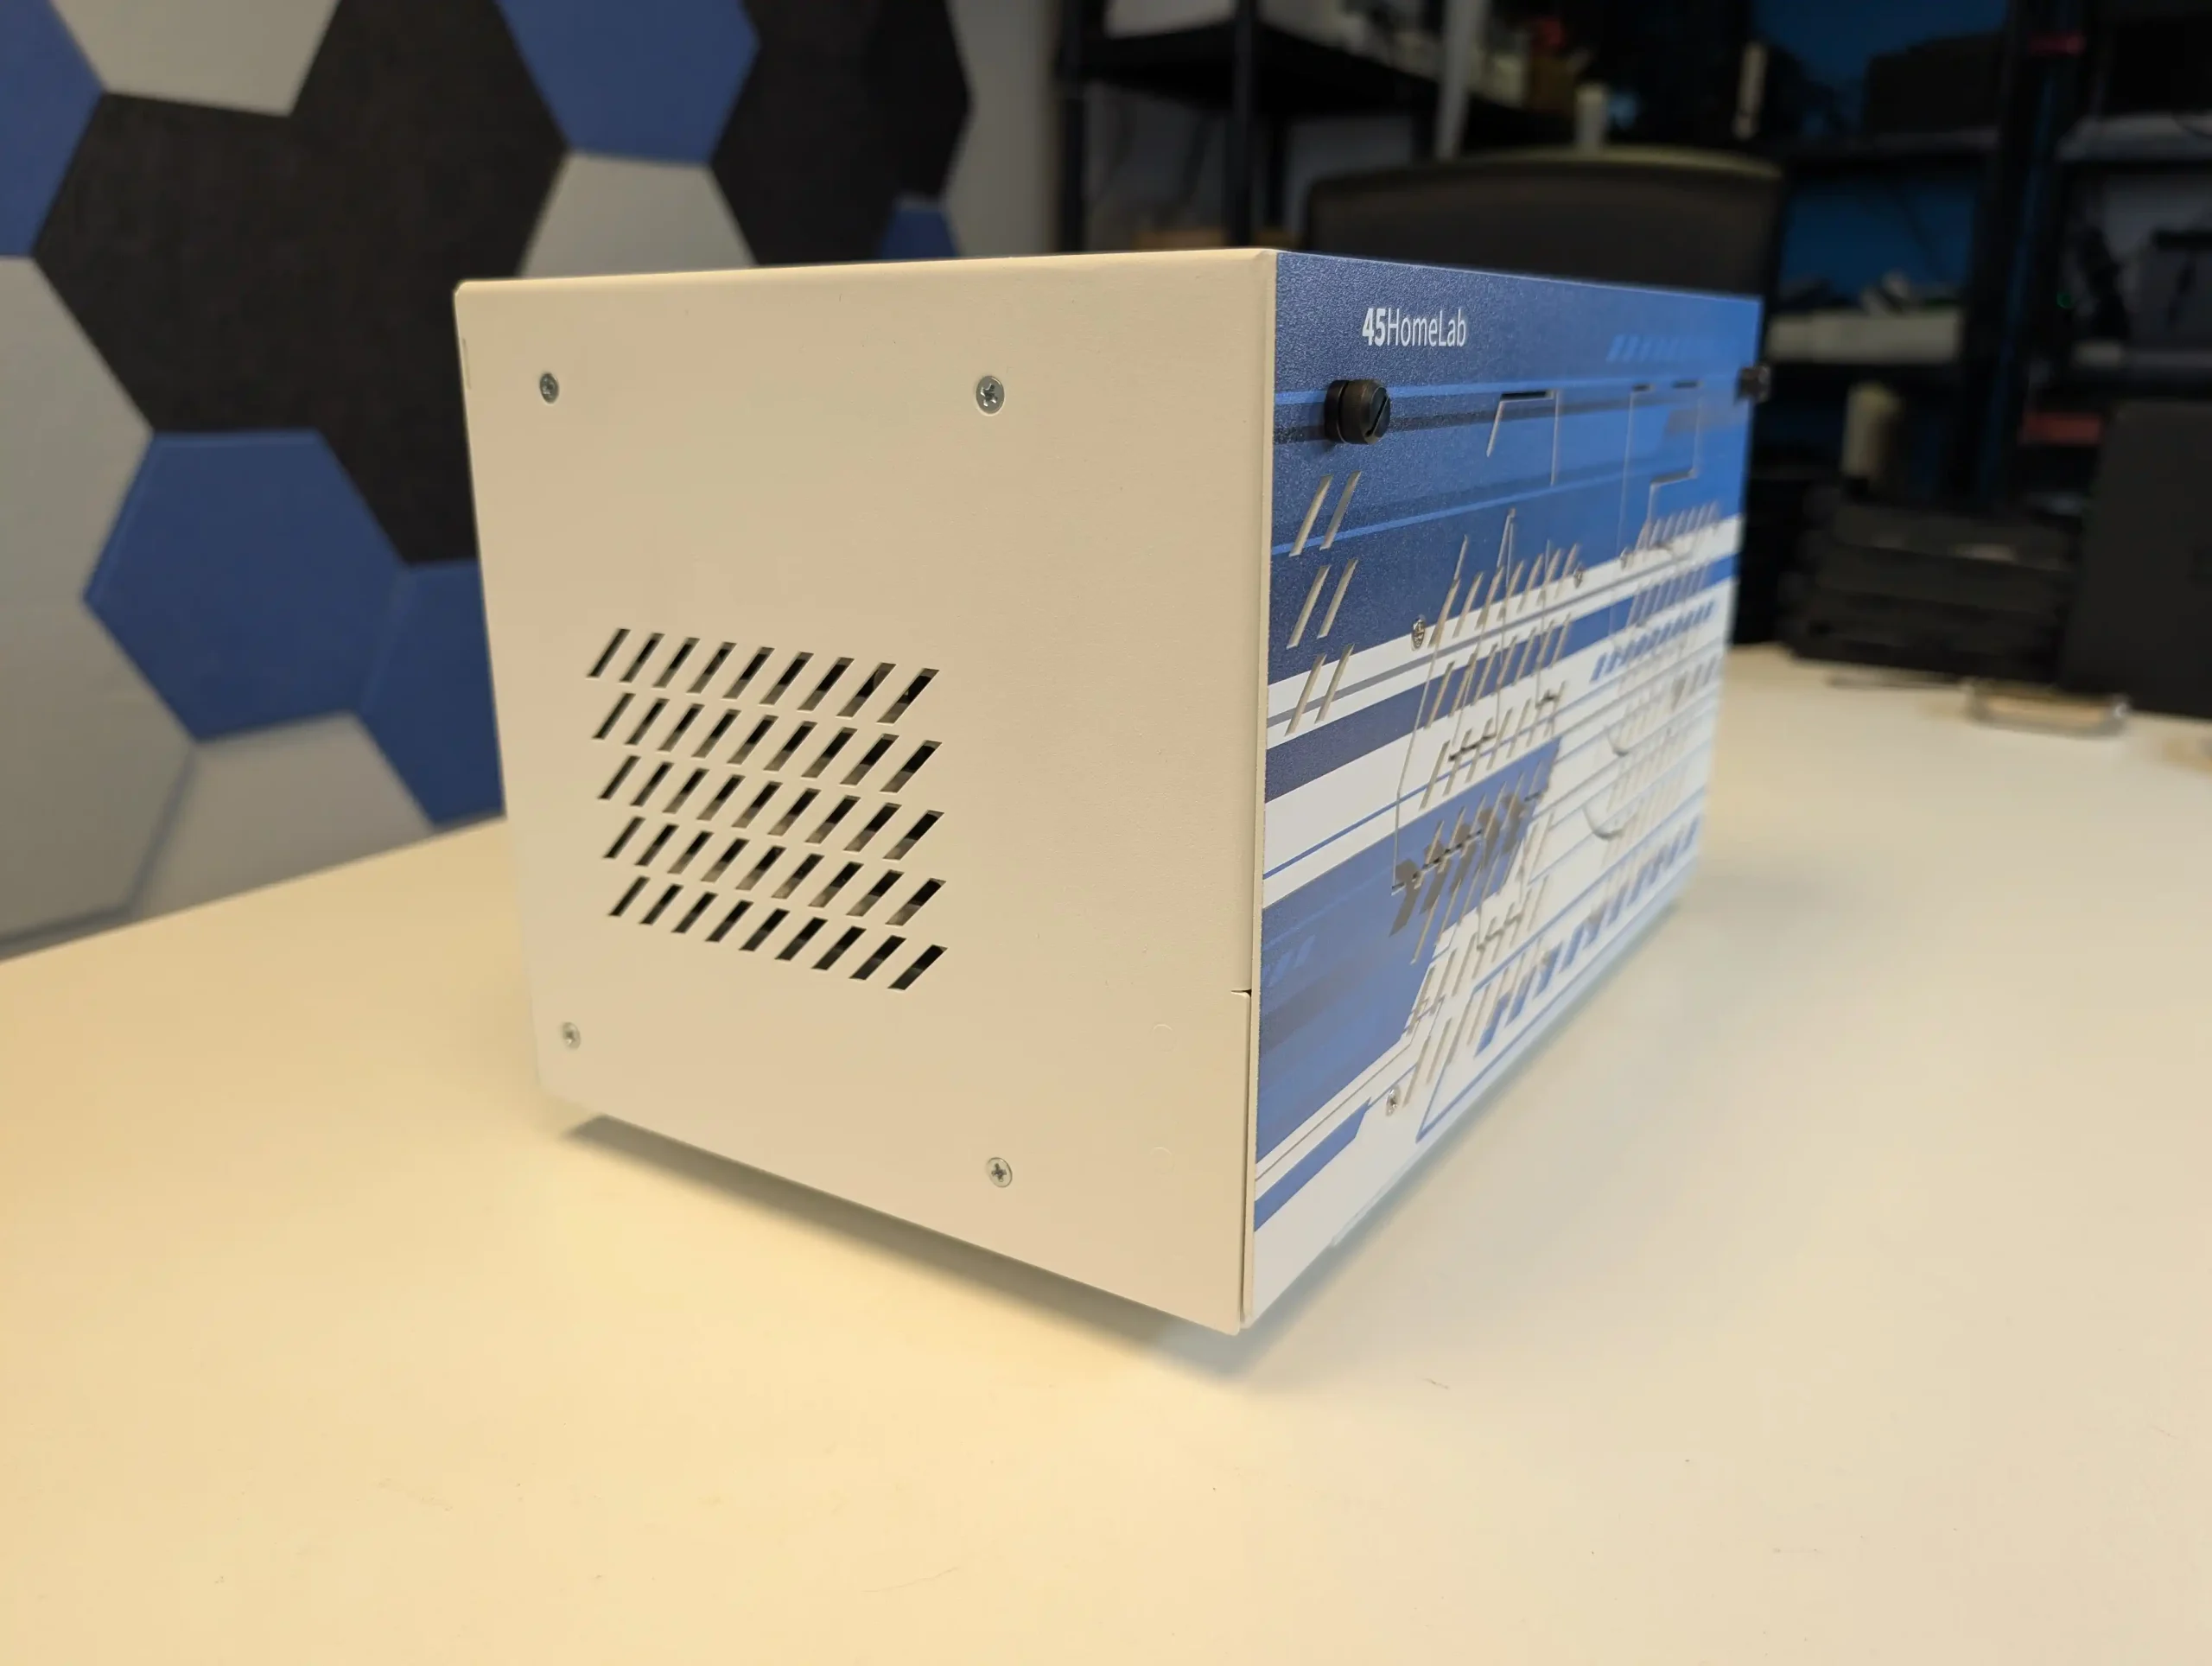 |
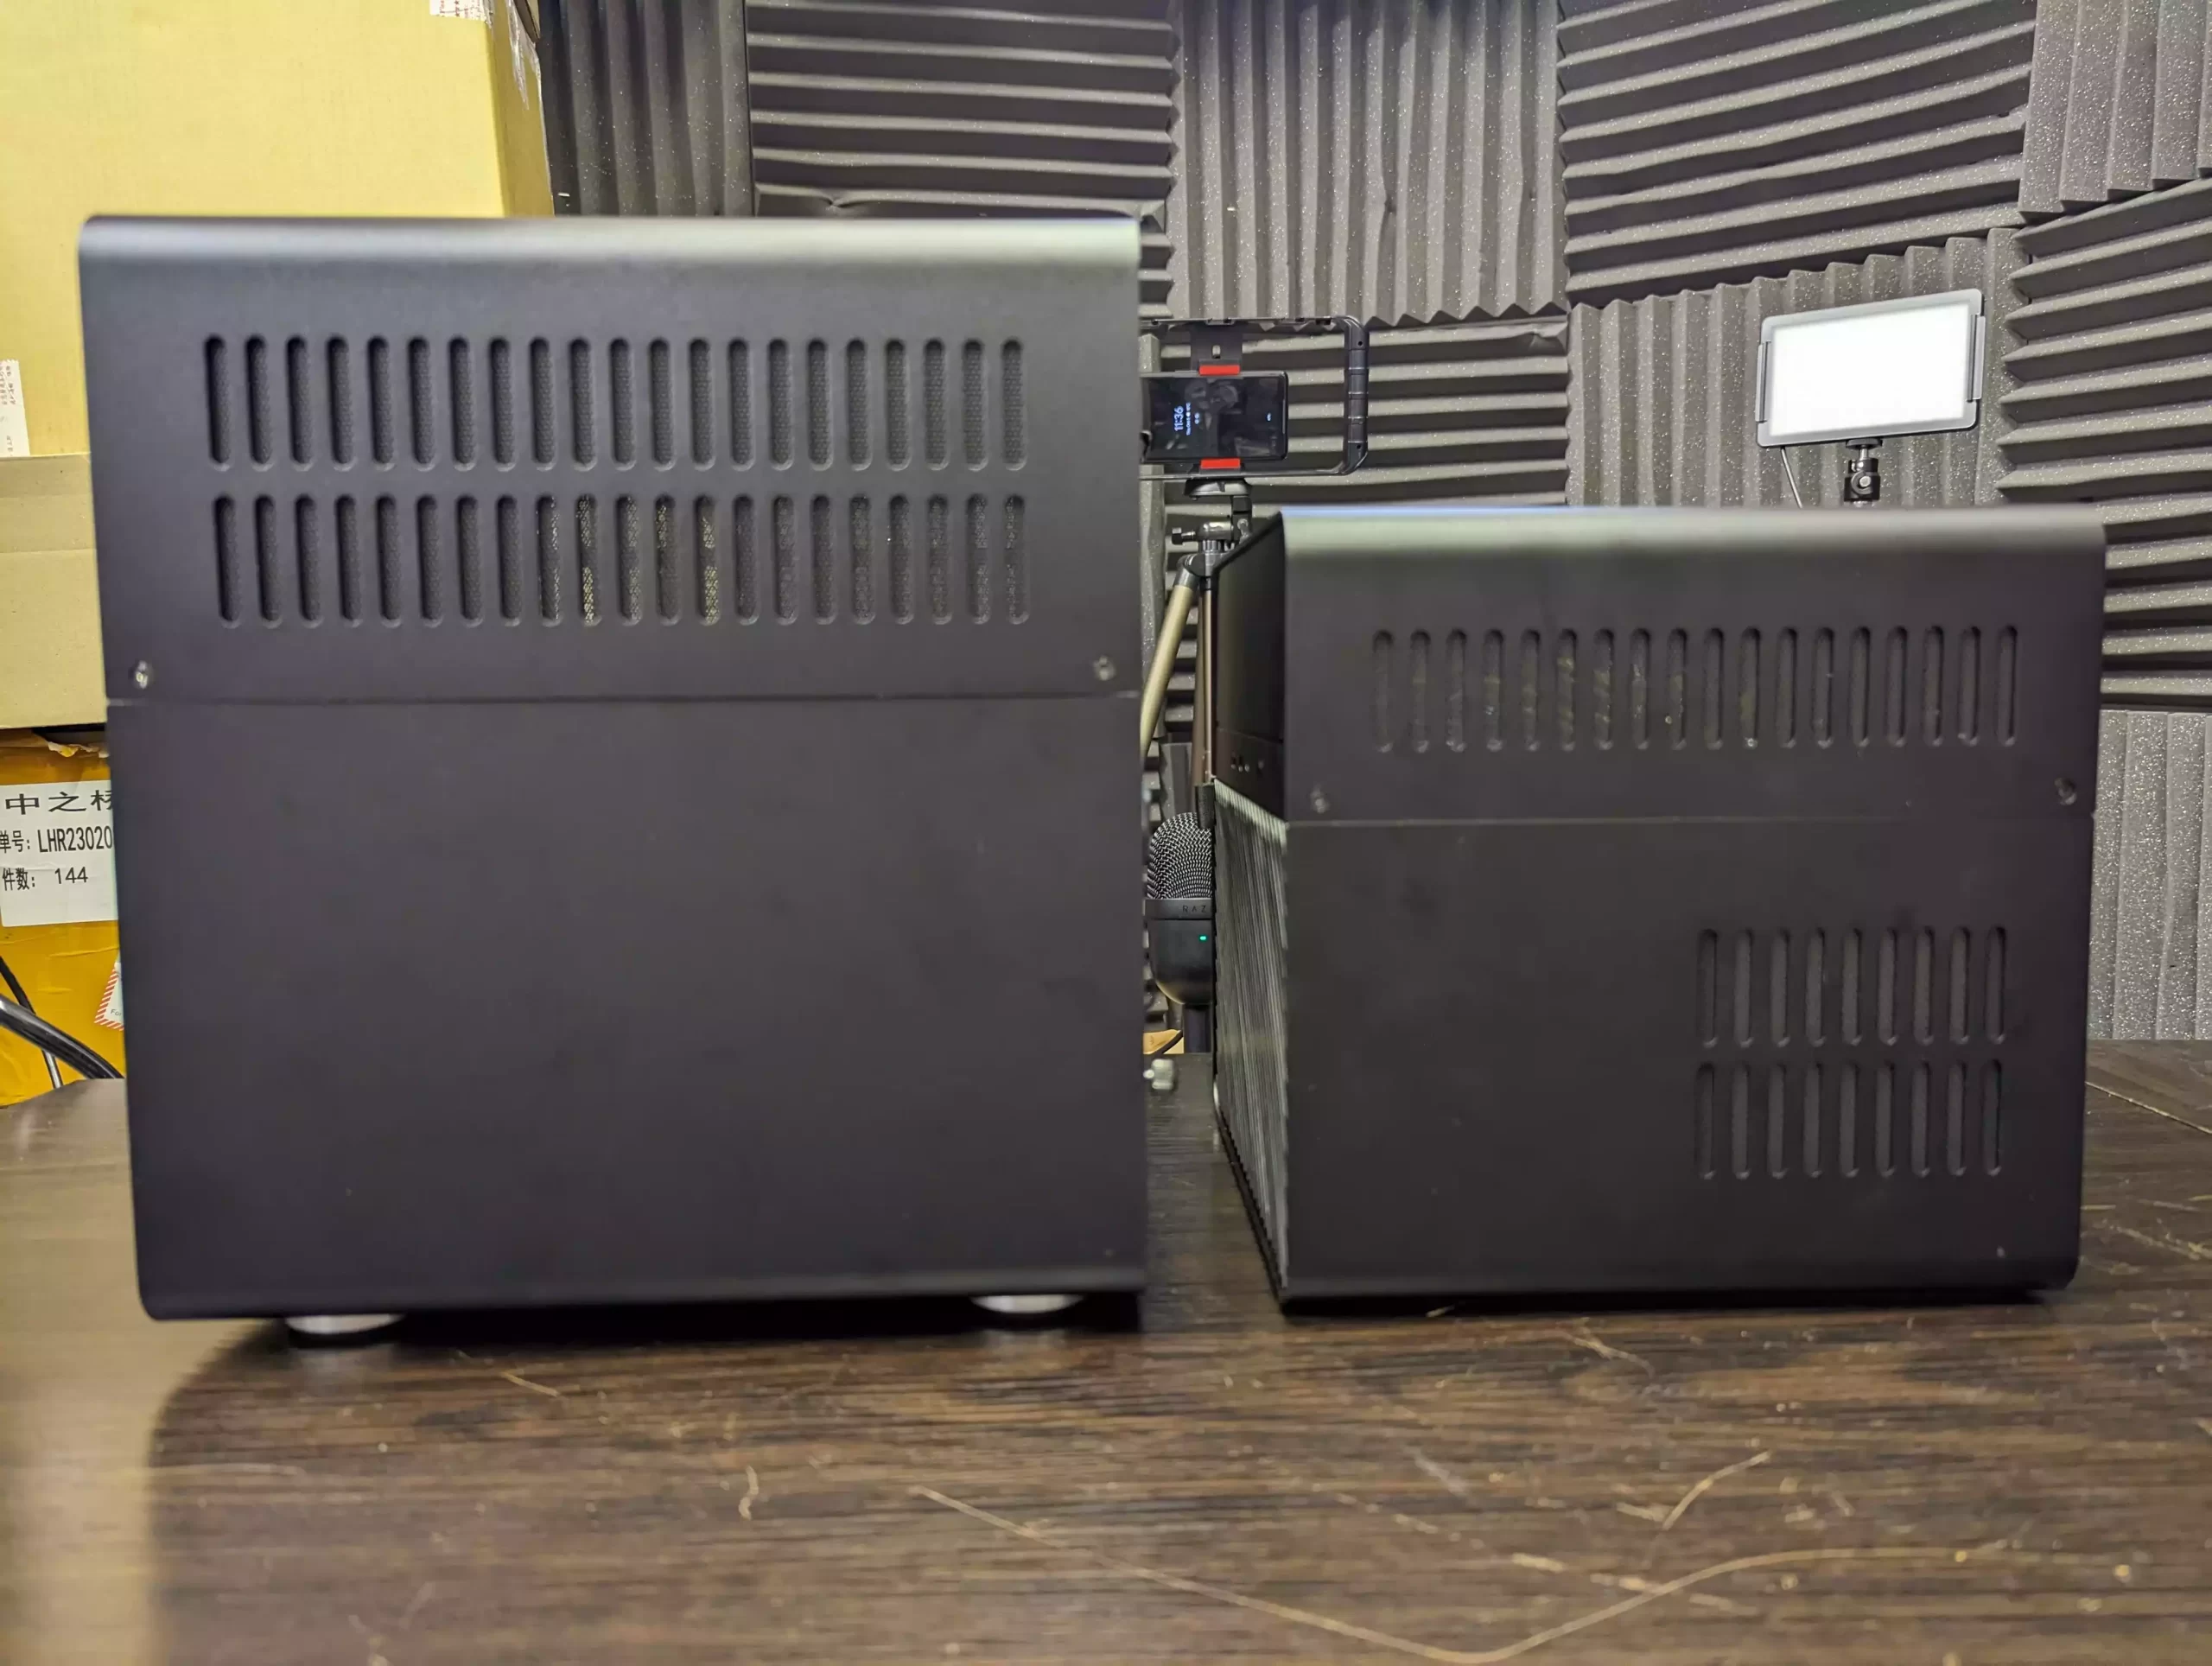 |
Where the HL8 wins in build quality and professional usability, the N3 counters with surprising features at its price point. The N3 includes dual rear fans, 8 LED indicators for drive activity, USB 3.2 Gen 2 Type-C front I/O, and support for large PCIe GPUs or network cards up to 250mm. However, it uses rubber grommet-mounted drive holders instead of trays—a cost-saving measure that may reduce vibration but introduces concerns about long-term durability and ease of drive removal. It also lacks tool-less panels for the main lid, requiring an Allen key for access, which, while flush and neat, isn’t practical for regular service. By comparison, the HL8 is fully toolless throughout. Ultimately, the HL8 is ideal for users who prioritize low-maintenance reliability and modular enterprise design in a desktop form, while the N3 offers excellent value for cost-conscious DIY builders willing to trade some serviceability and airflow flexibility for size, aesthetics, and affordability.
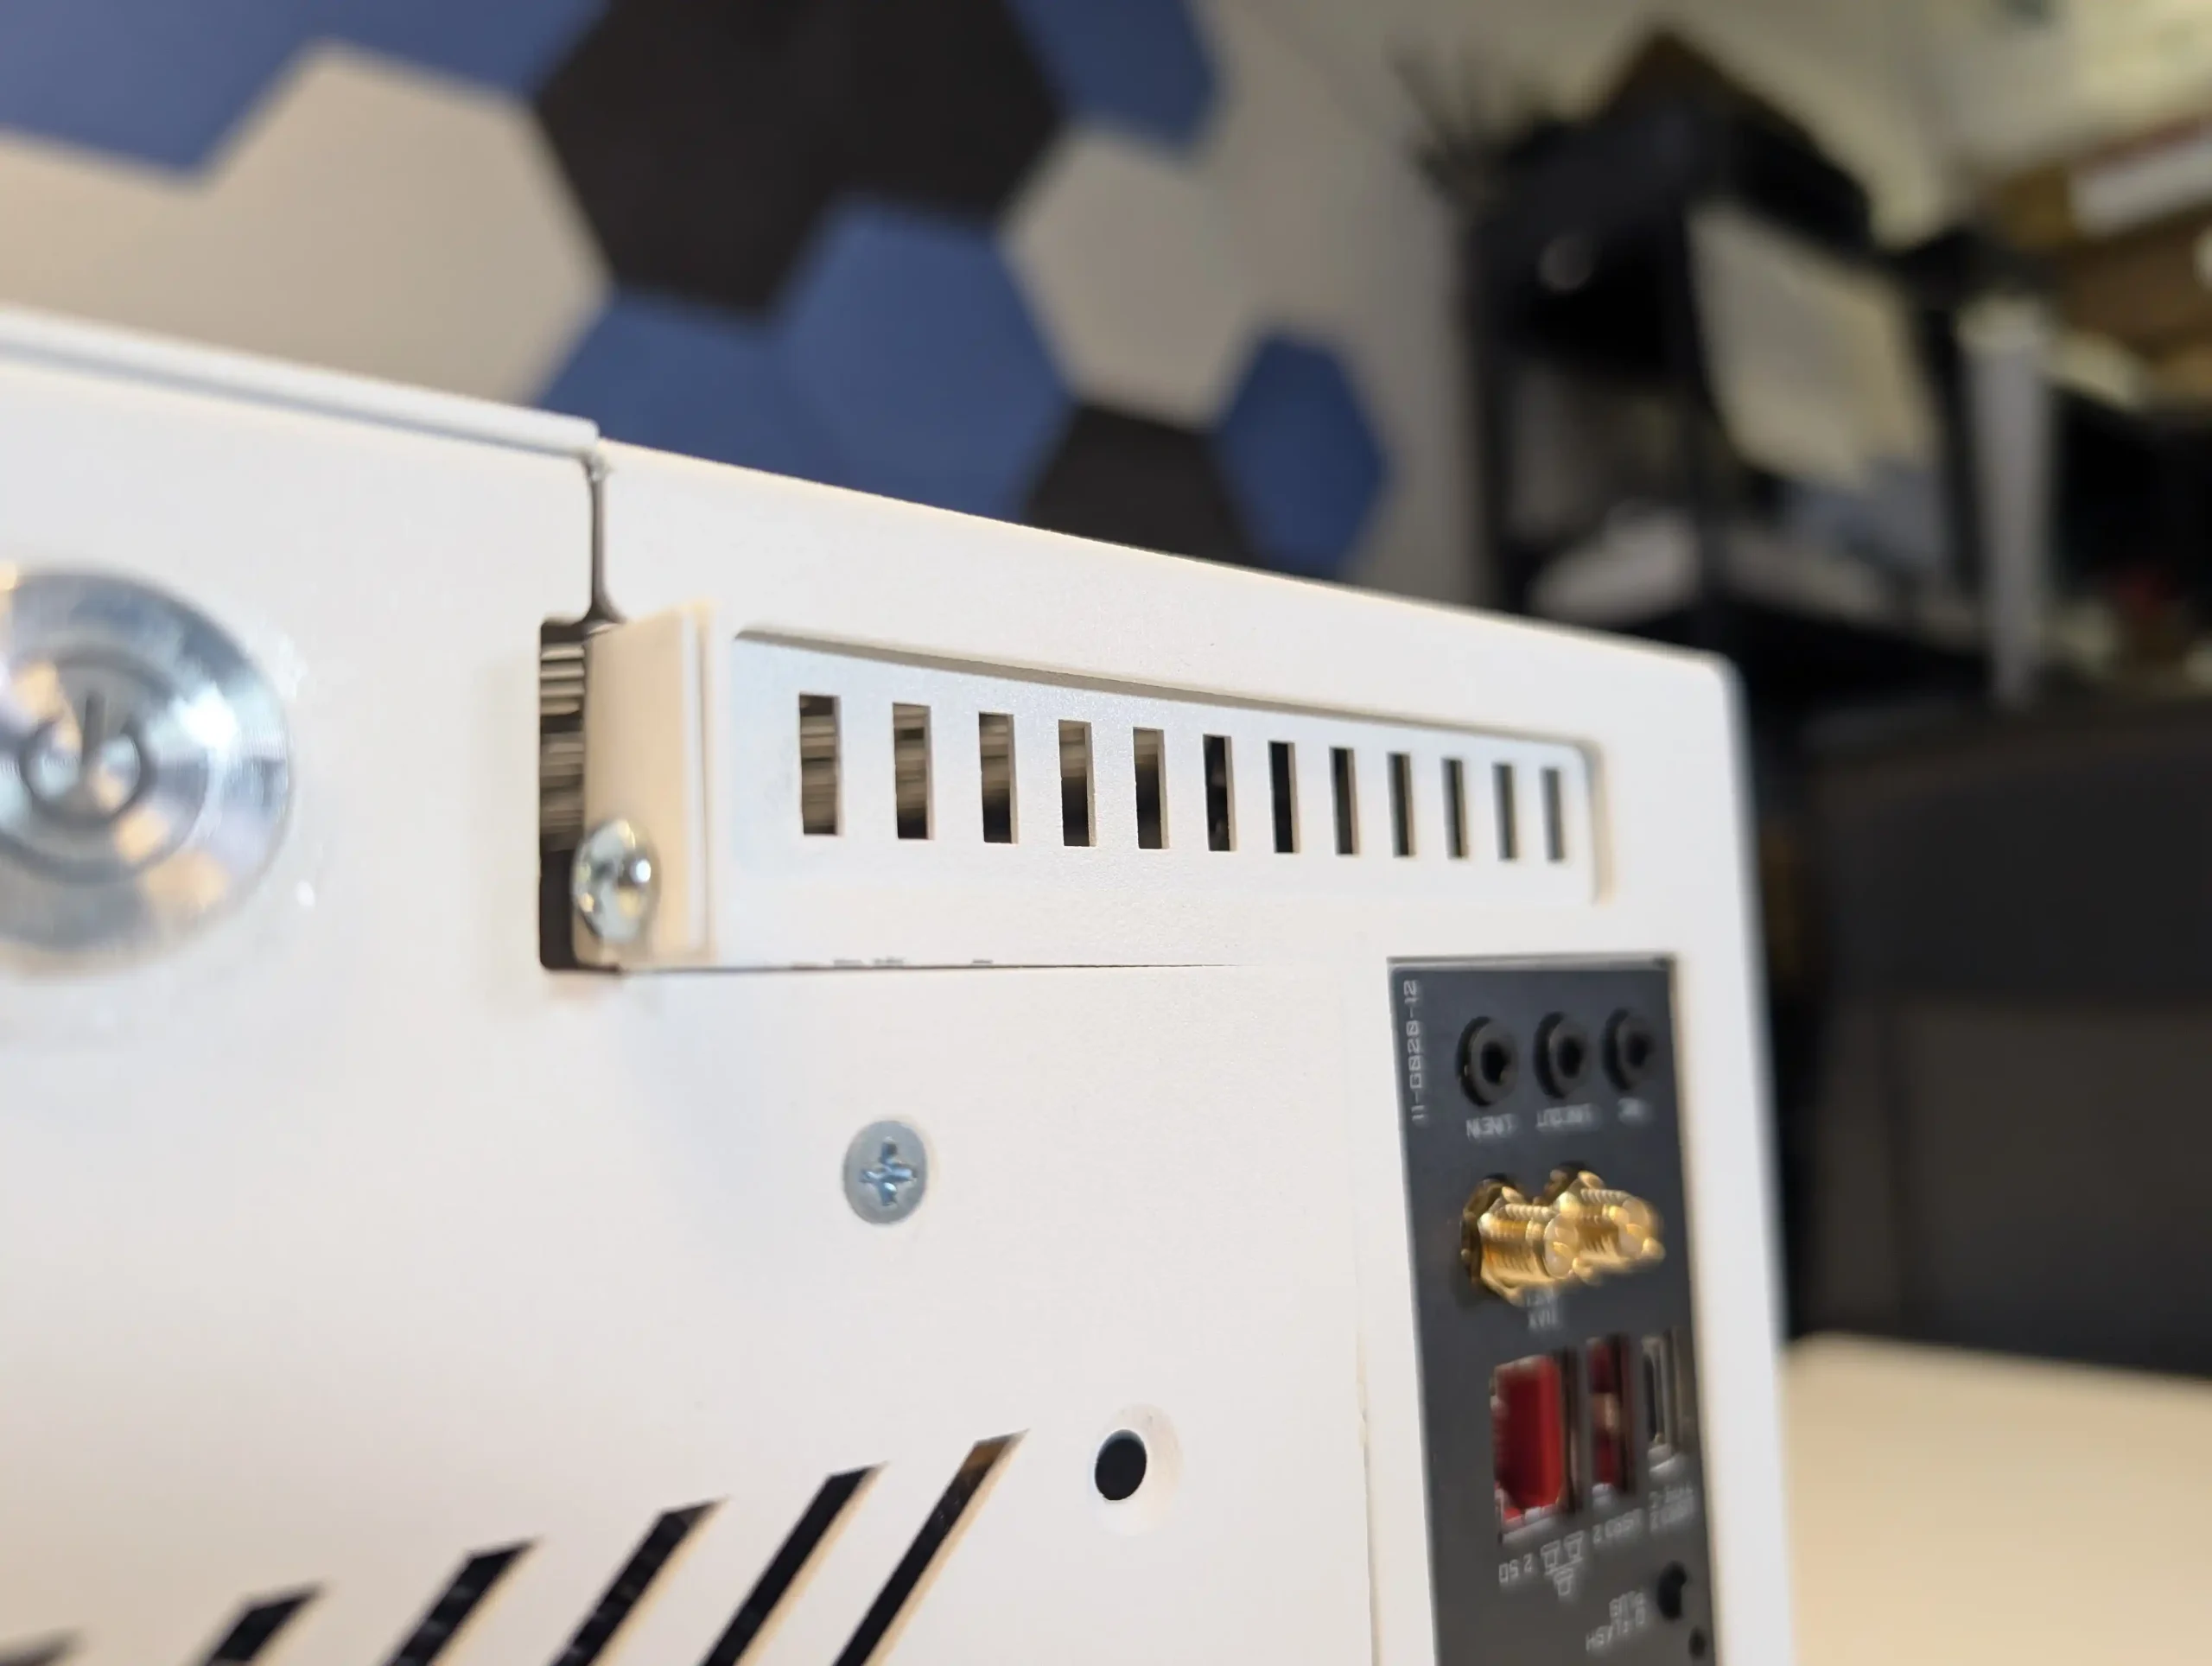 |
 |
In addition to offering the HL8 as a chassis with backplane and power supply, 45Drives also sells a fully assembled, tested, and burn-in validated configuration for users who prefer a turnkey deployment. The current prebuilt model typically includes a Gigabyte B550I AORUS Pro AX mini-ITX motherboard, paired with either an AMD Ryzen 5 5500GT (6-core, 12-thread) or Ryzen 7 5700G (8-core, 16-thread) processor. These CPUs offer solid single- and multi-threaded performance, integrated graphics for transcoding or light GUI workloads, and efficient power profiles.
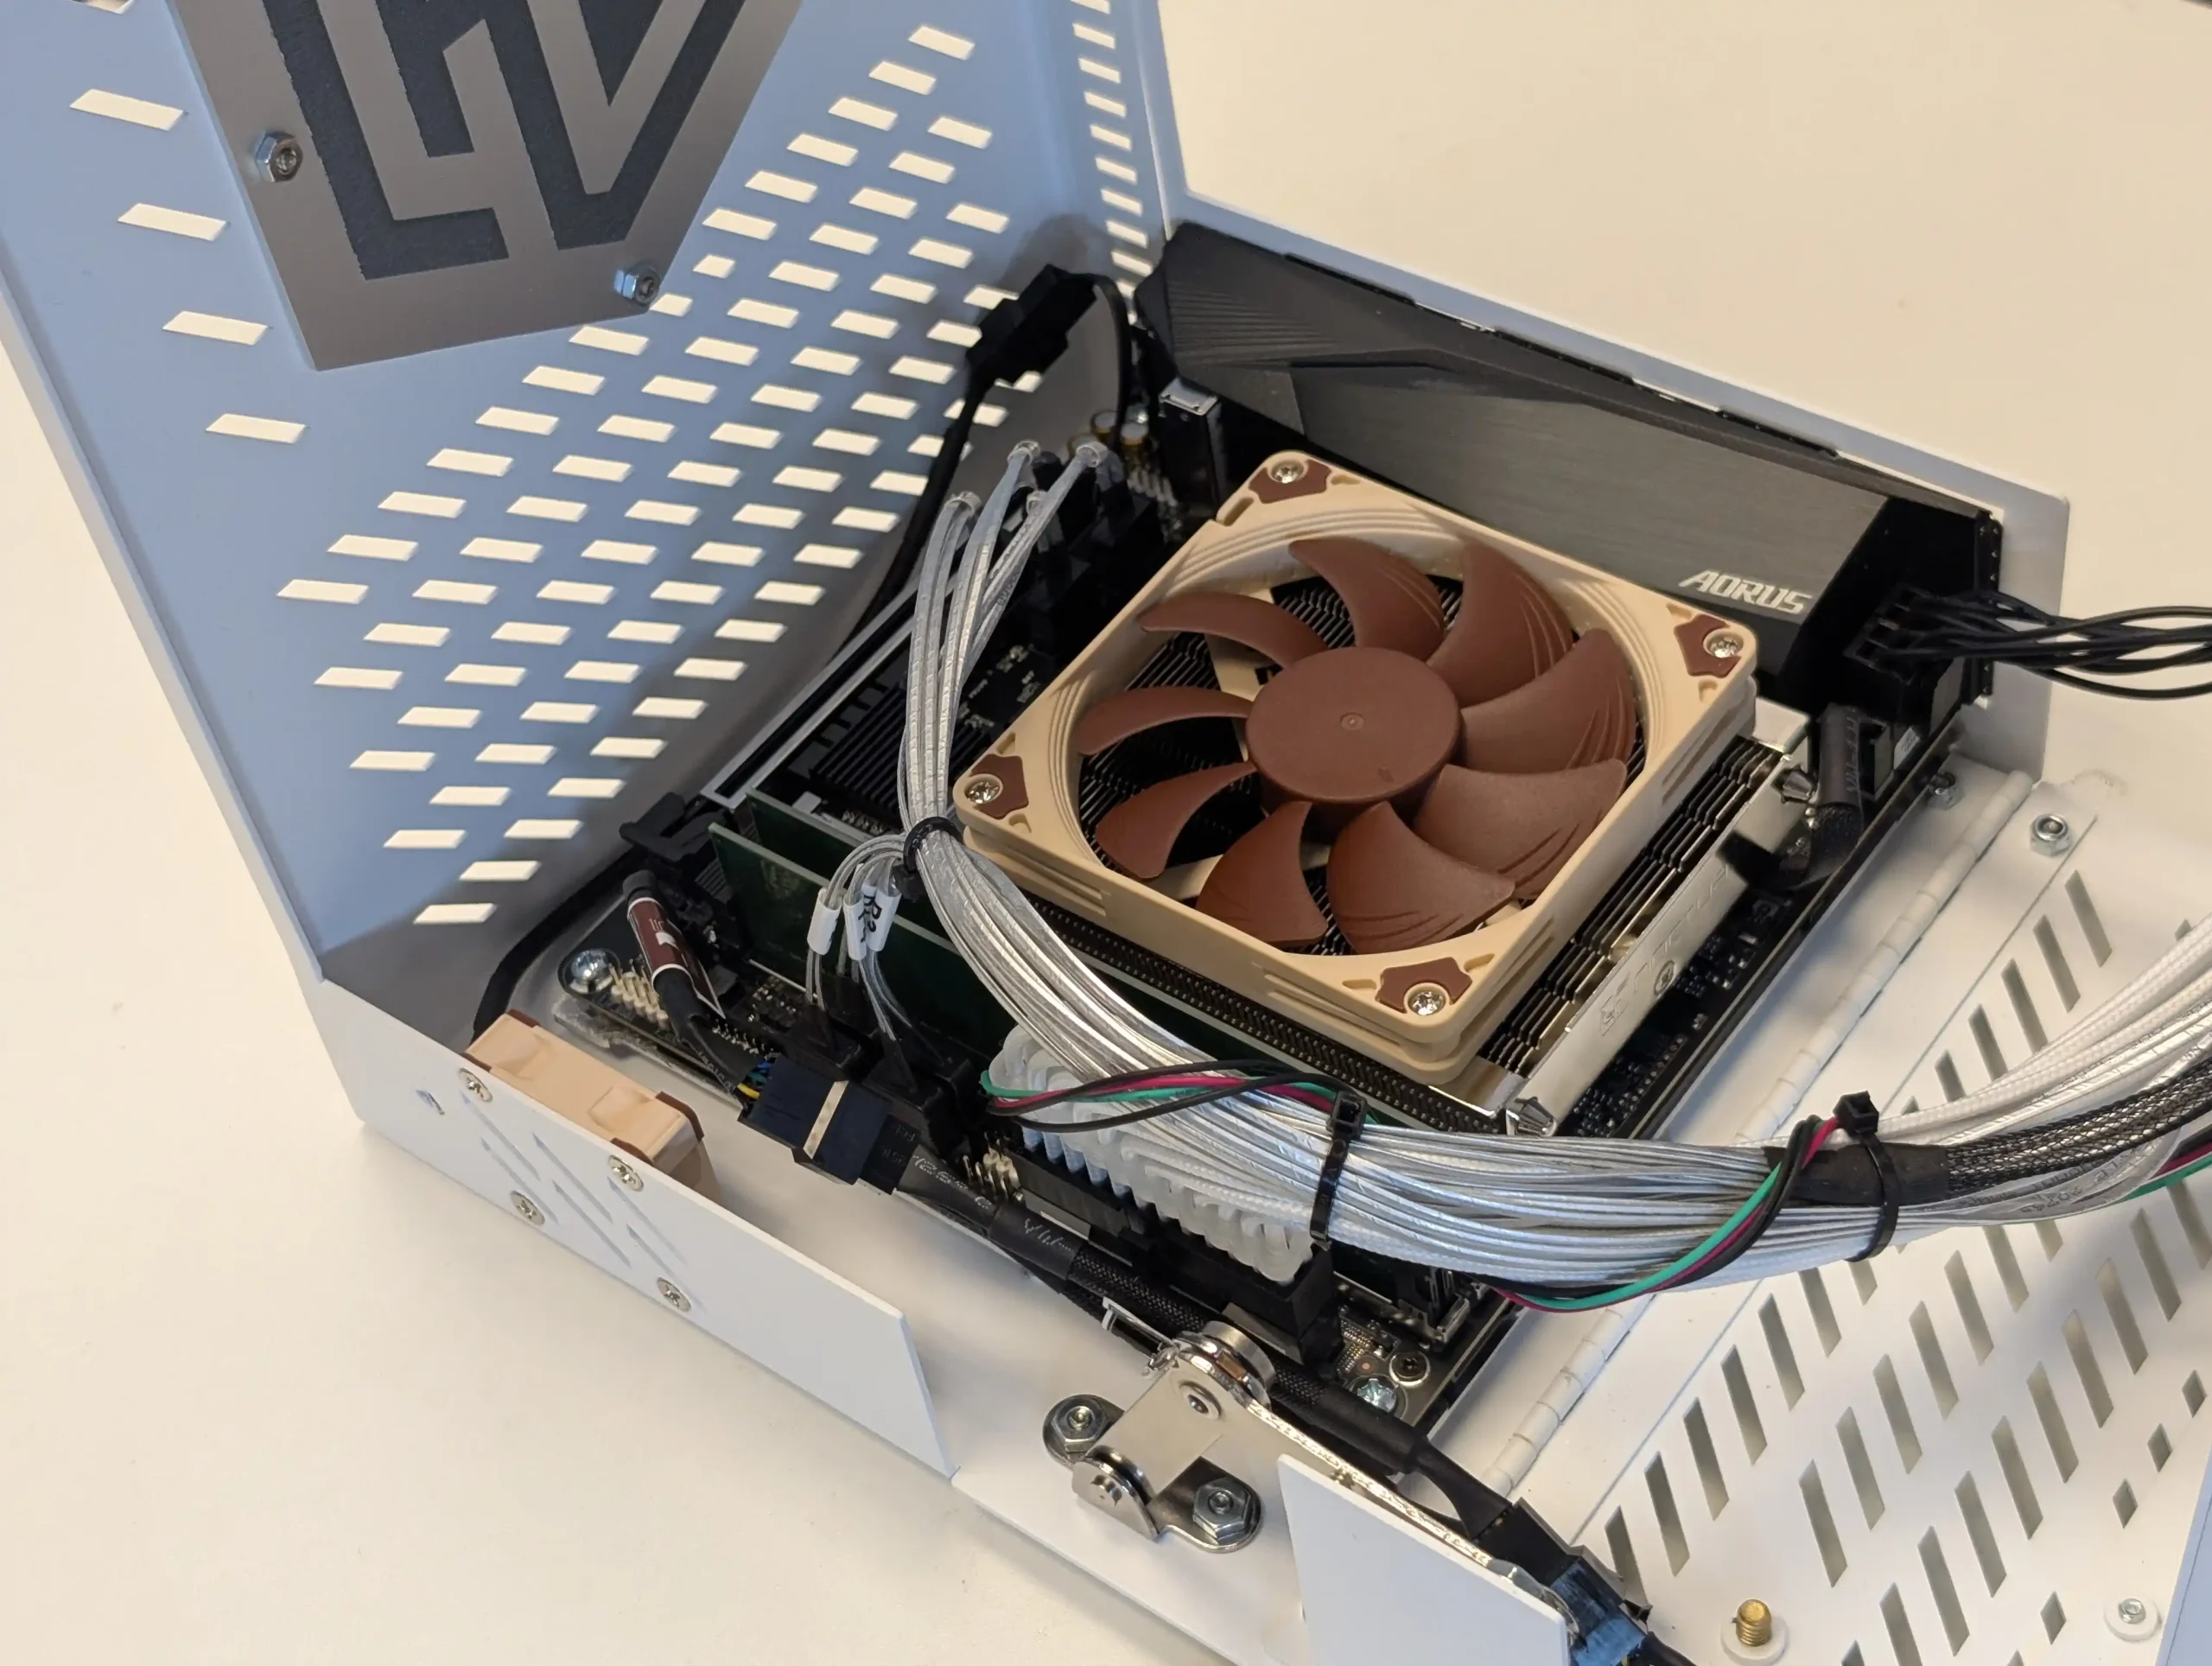
The build also comes with up to 64GB of DDR4 UDIMM memory, a 1TB NVMe SSD (typically Gen 4), Noctua NH-L9a-AM4 low-profile CPU cooler, and factory-installed Noctua case fans. All internal wiring is professionally routed, and the system arrives with Rocky Linux and the Houston UI preinstalled for immediate setup.
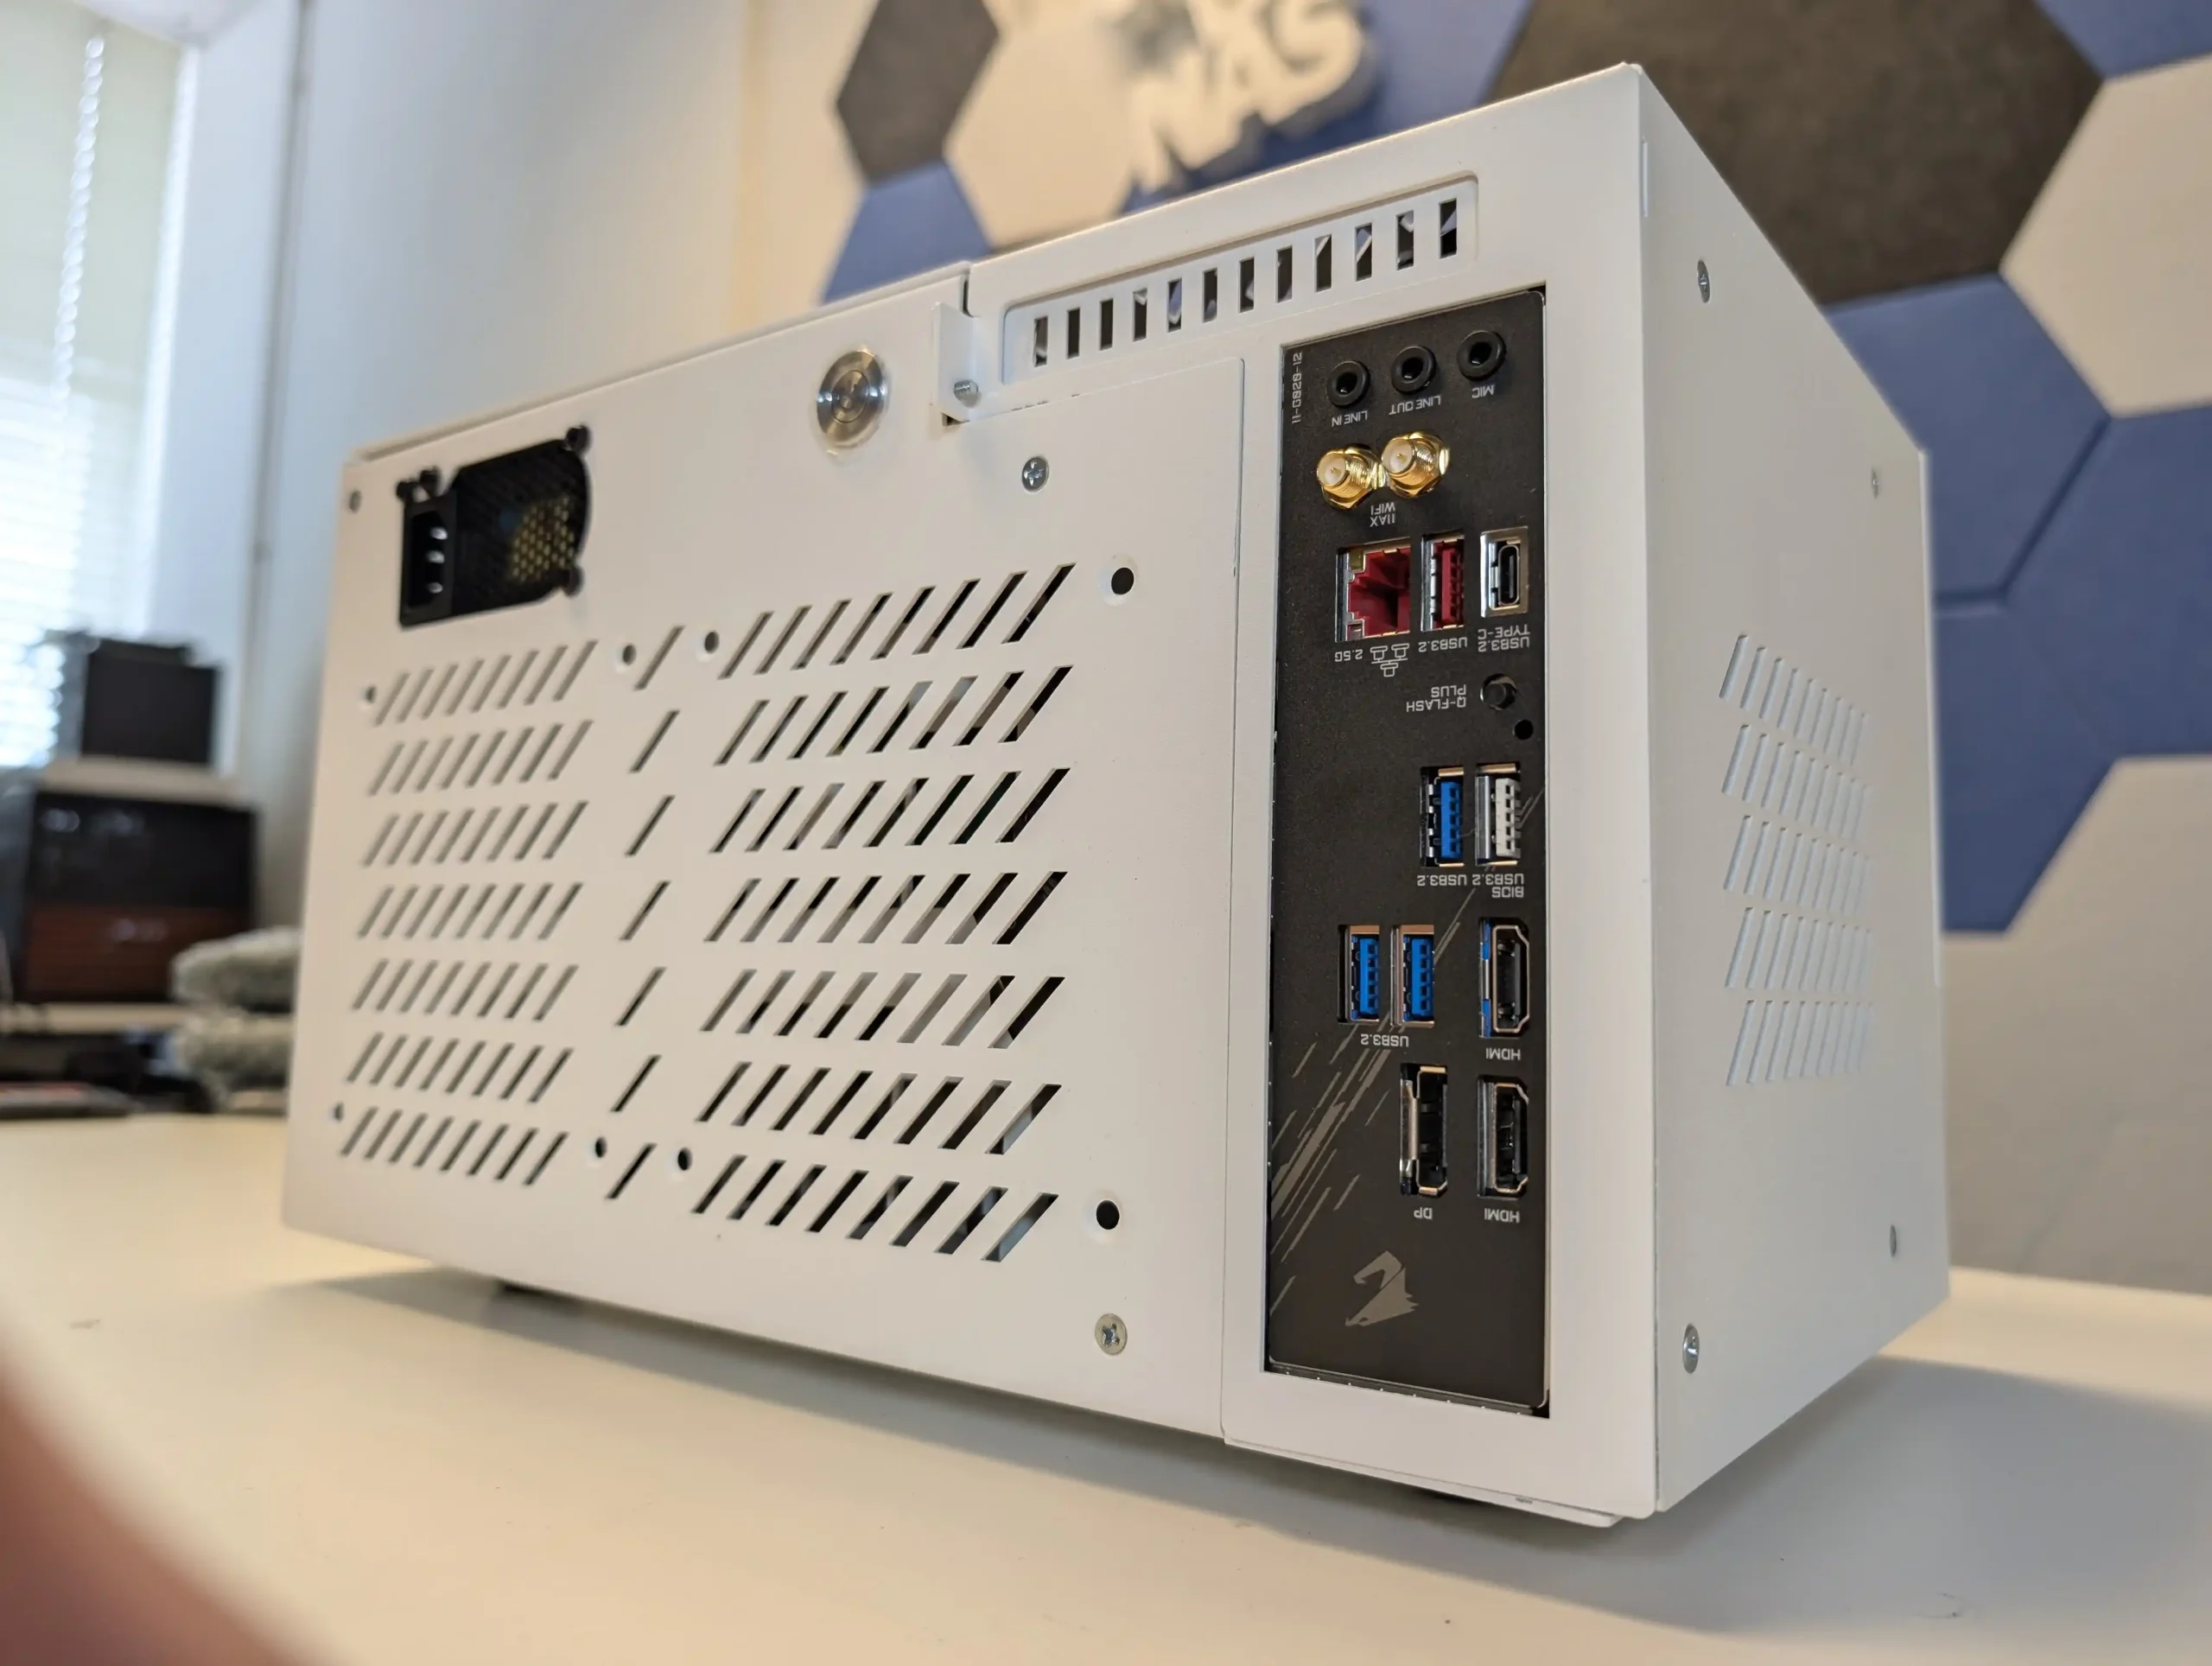
| Category | HL8 Prebuilt Model (Full Configuration) |
|---|---|
| Model Name | HL8 (Prebuilt by 45Drives) |
| Chassis Material | 2mm Powder-Coated Steel (Same as enterprise rackmount line) |
| Motherboard | Gigabyte B550I AORUS Pro AX (Mini-ITX) |
| CPU | AMD Ryzen 5 5500 GT (6 cores / 12 threads, Zen 3, 3.6GHz base, 4.4GHz boost) |
| Memory (Default) | 16GB DDR4-3200 Unbuffered ECC (Expandable to 64GB) |
| SSD (OS Drive) | 1TB Kingston NVMe Gen 4 x4 |
| Drive Bays | 8x 3.5″ Trayless Tool-less Bays (SATA/SAS 12Gb/s Backplane) |
| Hot-Swap Support | Yes |
| Backplane Interface | Mini-SAS HD (SFF-8643 to SATA breakout) |
| PSU | SilverStone FX500 (500W Flex ATX, 80 Plus Gold) |
| Cooling Fans | 3x 80mm Noctua (pre-installed) + CPU: Noctua NH-L9a cooler |
| Expansion Slot | 1x PCIe 4.0 x16 (Supports full-height, full-length GPU or NIC) |
| M.2 Slots | 2x (One used for OS drive, One used with SATA controller) |
| SATA Ports (Onboard) | 4x SATA III (From motherboard) |
| Additional SATA | 4x via M.2 SATA controller (occupies second M.2 slot) |
| Networking | 1x 2.5GbE (Realtek 8125B) + Wi-Fi 6 (802.11ax) |
| USB Ports (Rear) | 4x USB 3.2 Gen 1, 2x USB 3.2 Gen 2 (1x Type-A, 1x Type-C) |
| Audio Ports | 3.5mm Mic In / Line Out / Line In |
| Dimensions (W x D x H) | ~305mm x 370mm x 260mm (approx.) |
| Weight (Unpopulated) | ~9.5kg |
| Operating System | OS not included by default; compatible with TrueNAS, Rocky Linux + Houston UI, Proxmox |
| Typical Price (USD) | $1,399 (at time of writing) |
At the time of writing, the total cost of the prebuilt HL8 with the Ryzen 5700G configuration is $1,538 USD. In contrast, a self-built system using comparable off-the-shelf components can be assembled for approximately $875–$900. A rough cost breakdown would be: Ryzen 7 5700G and B550I motherboard combo ($260), 64GB DDR4 UDIMM ($103), 1TB NVMe SSD ($60), 500W Flex ATX Gold PSU ($90), Noctua CPU and case fans ($75), plus an equivalent MITX 8-bay chassis with SATA backplane ($159–$180). While this approach offers clear cost savings, it comes with multiple delivery sources, fragmented warranties, and no factory testing—factors that may be important to users prioritizing reliability and vendor accountability over price.
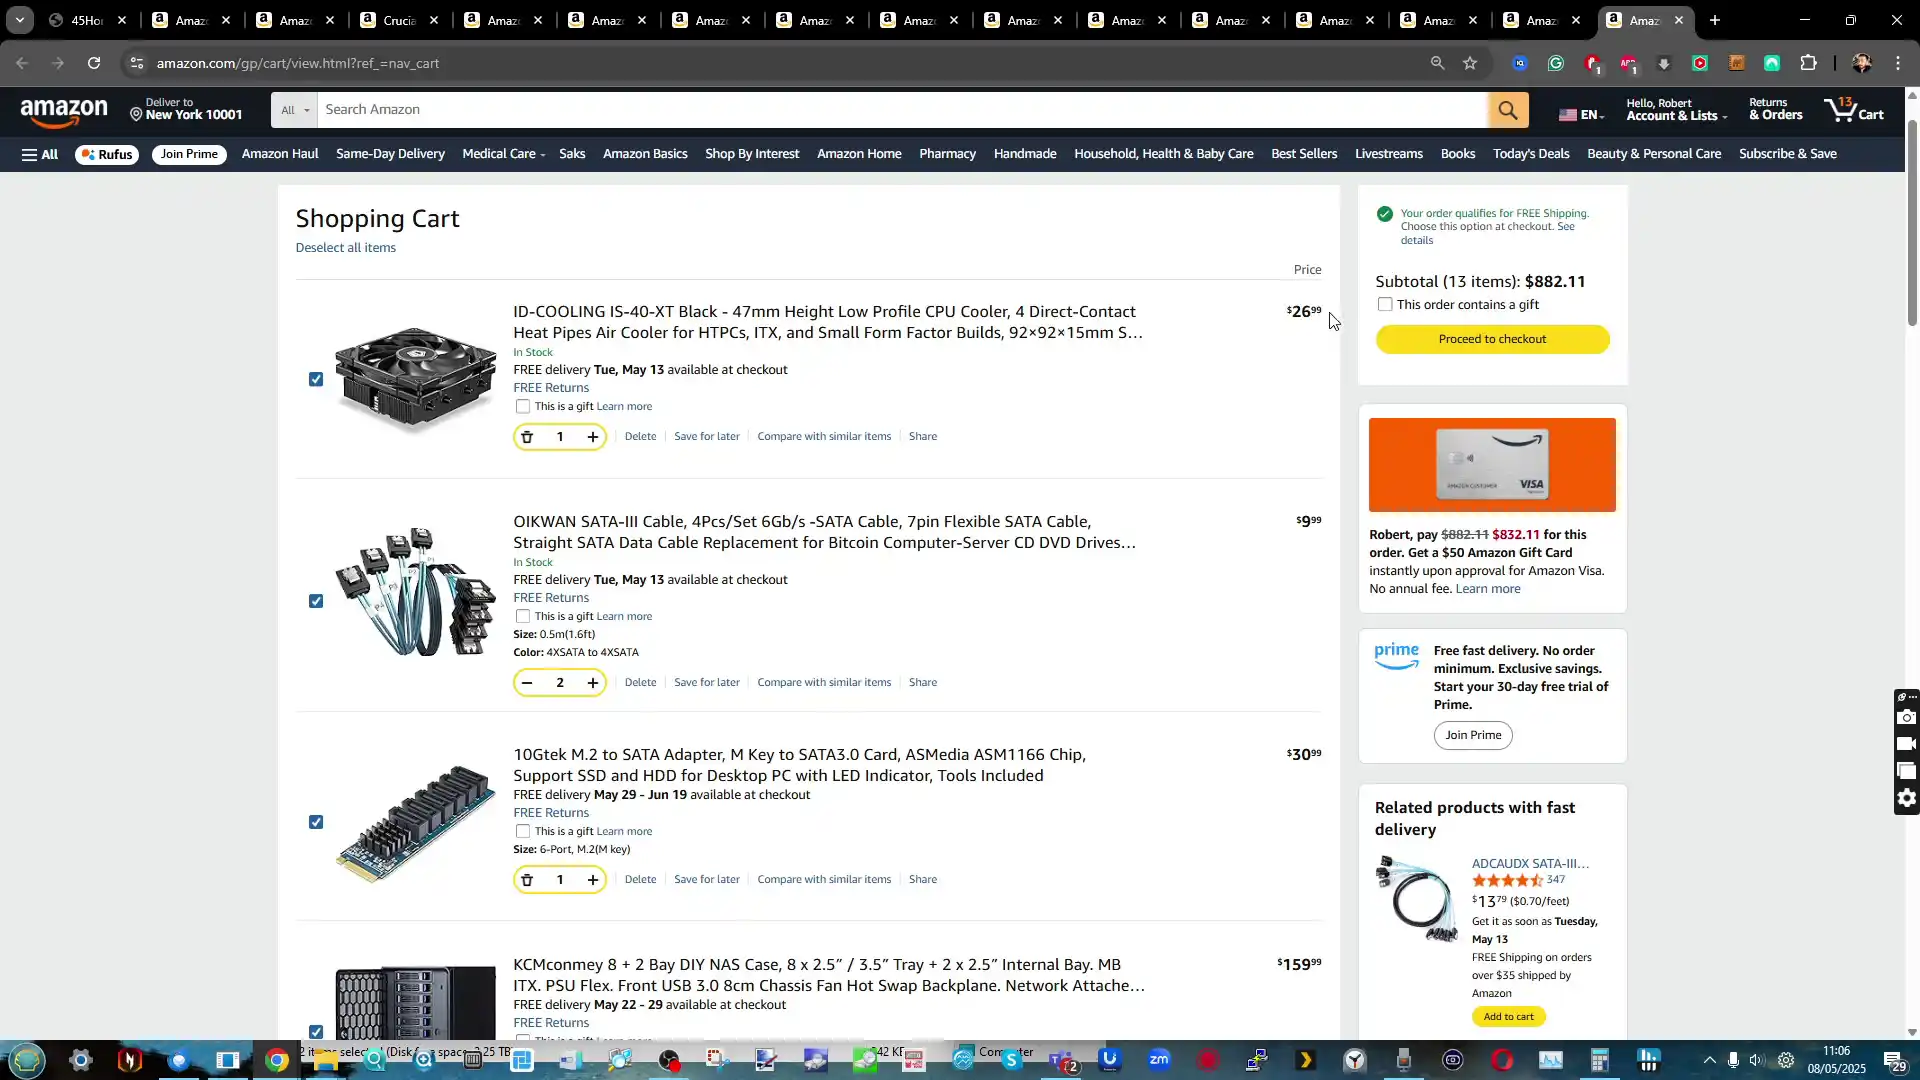

The prebuilt model is best suited to users who want predictable performance, reduced setup time, and consolidated post-sale support. It removes the need for component sourcing, physical assembly, and initial troubleshooting. However, it also imposes some limitations, such as the use of a single 2.5GbE network port and lack of configuration flexibility. Users requiring more advanced networking or GPU options will need to expand via the PCIe slot manually. Overall, the prebuilt HL8 fills a niche for those who want an enterprise-adjacent storage server without the learning curve or integration work required by a ground-up build, but it may be over-specified or overpriced for more self-sufficient users.
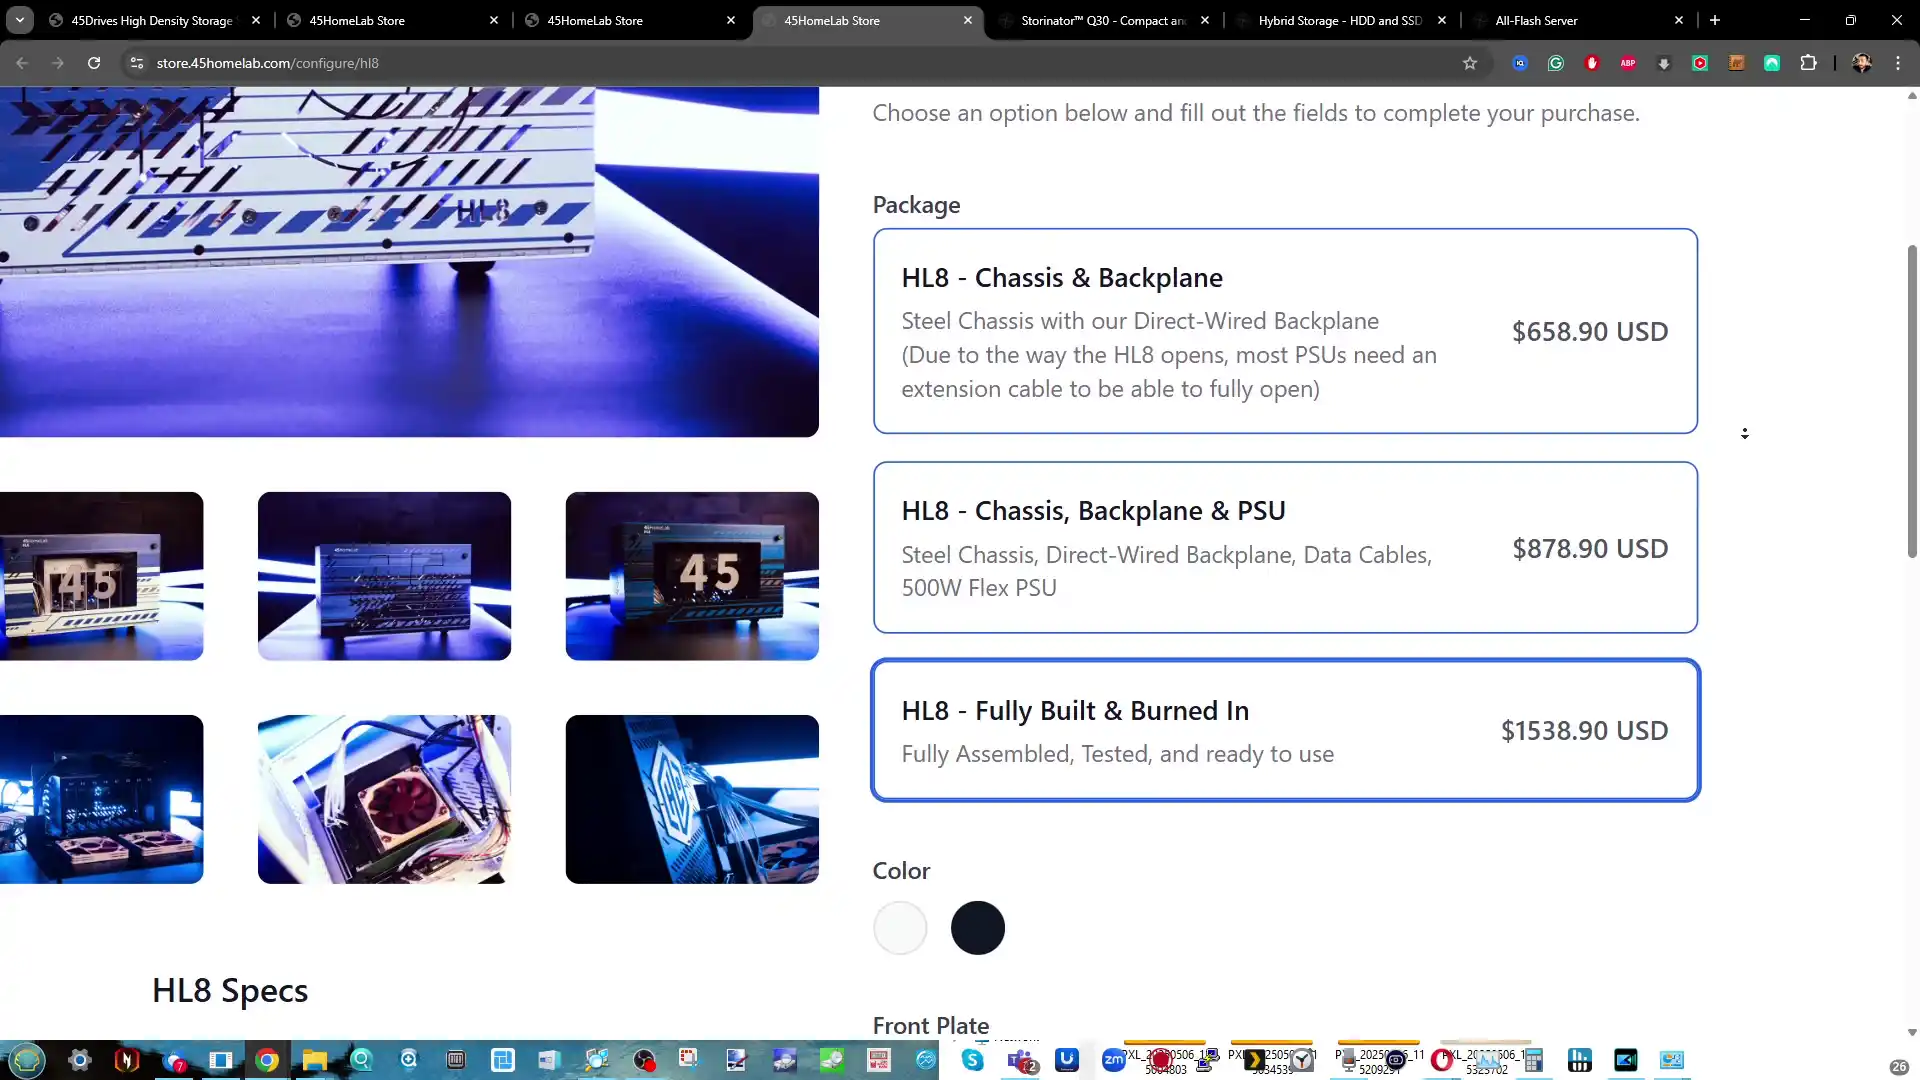
The Houston UI platform from 45Drives is built on top of the open-source Cockpit Project, designed to offer users a web-based server management interface with a lightweight footprint.
Its browser-based GUI makes it accessible from any device on the network, and it supports multiple Linux distributions, including Rocky Linux, which is often used as the default OS with Houston UI.
One of the primary strengths of Houston UI is its ZFS management interface. Users can easily create, modify, and monitor ZFS storage pools without needing to interact directly with the command line.
The system allows for selection of RAID types (RAIDZ1, Z2, etc.), VDEV expansion, record size configuration, deduplication, encryption, and adjustable compression — all accessible within a guided, GUI-based setup.
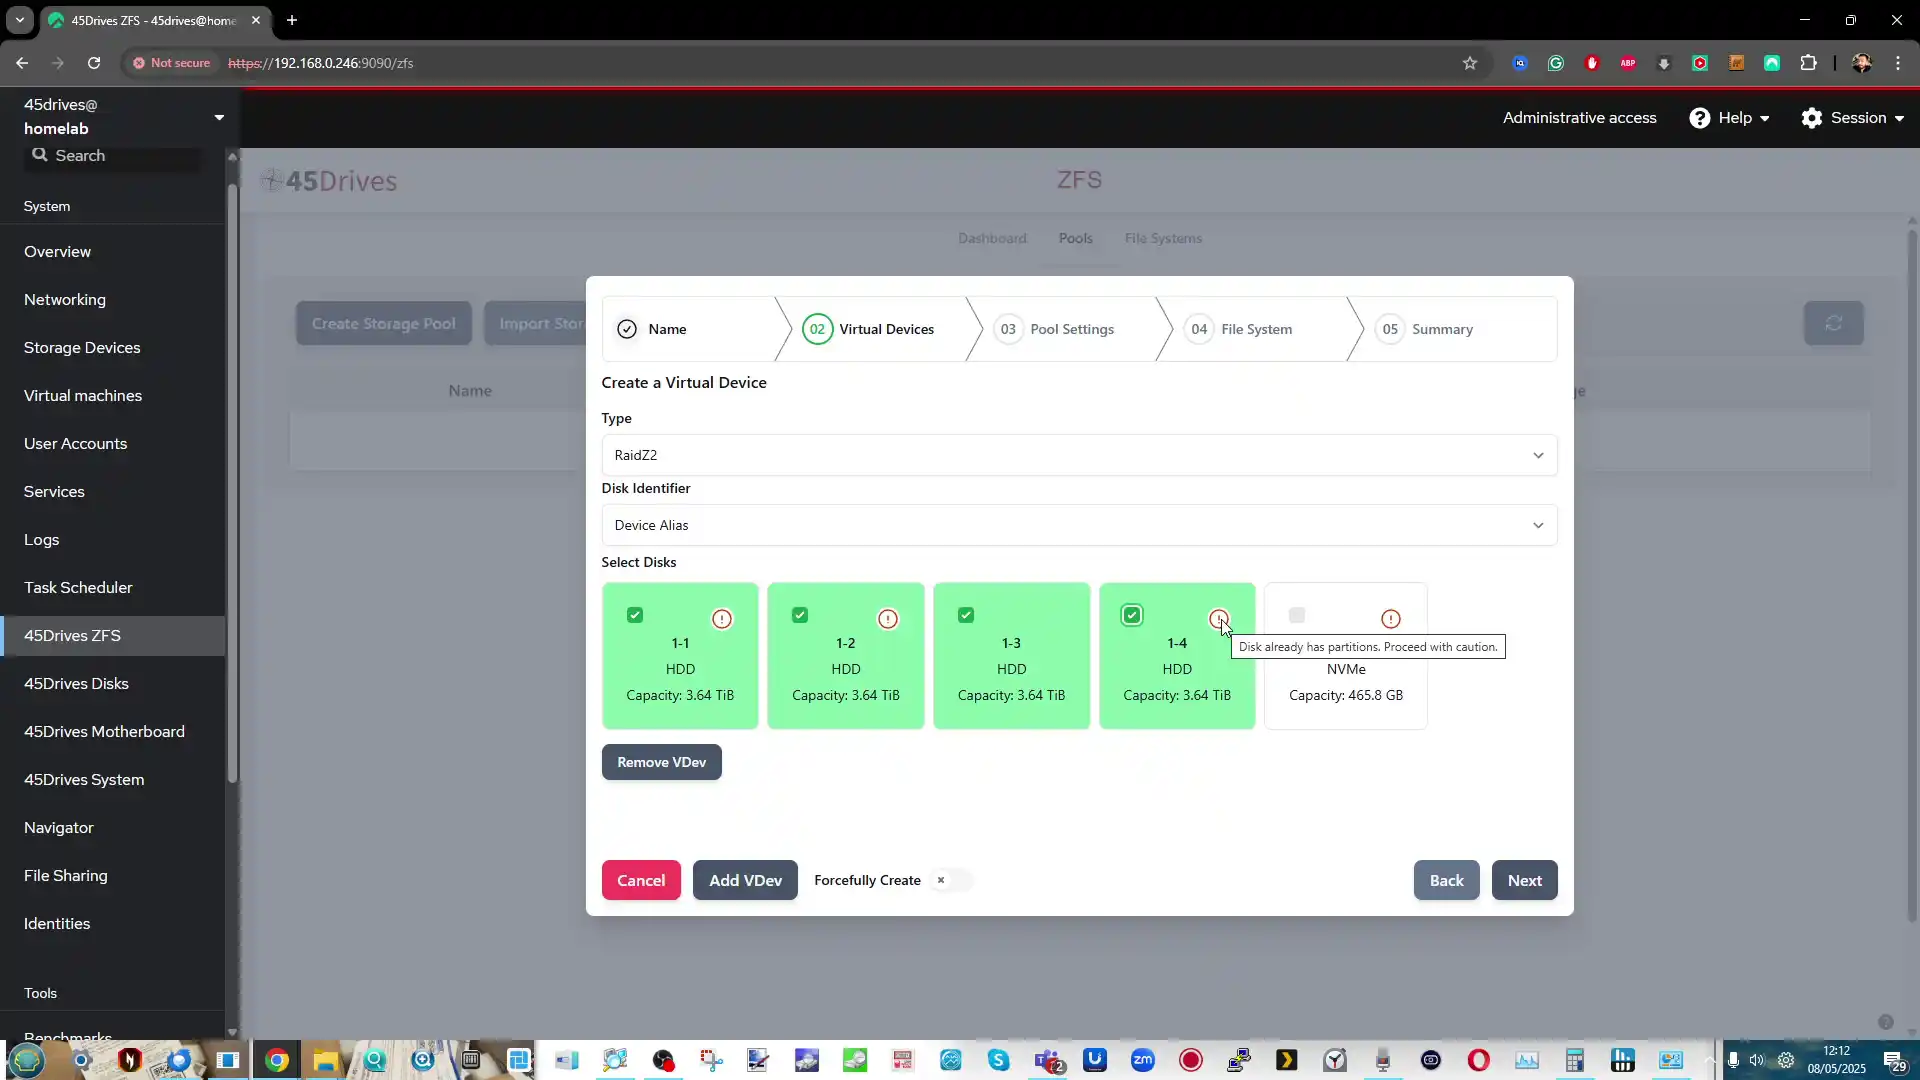 |
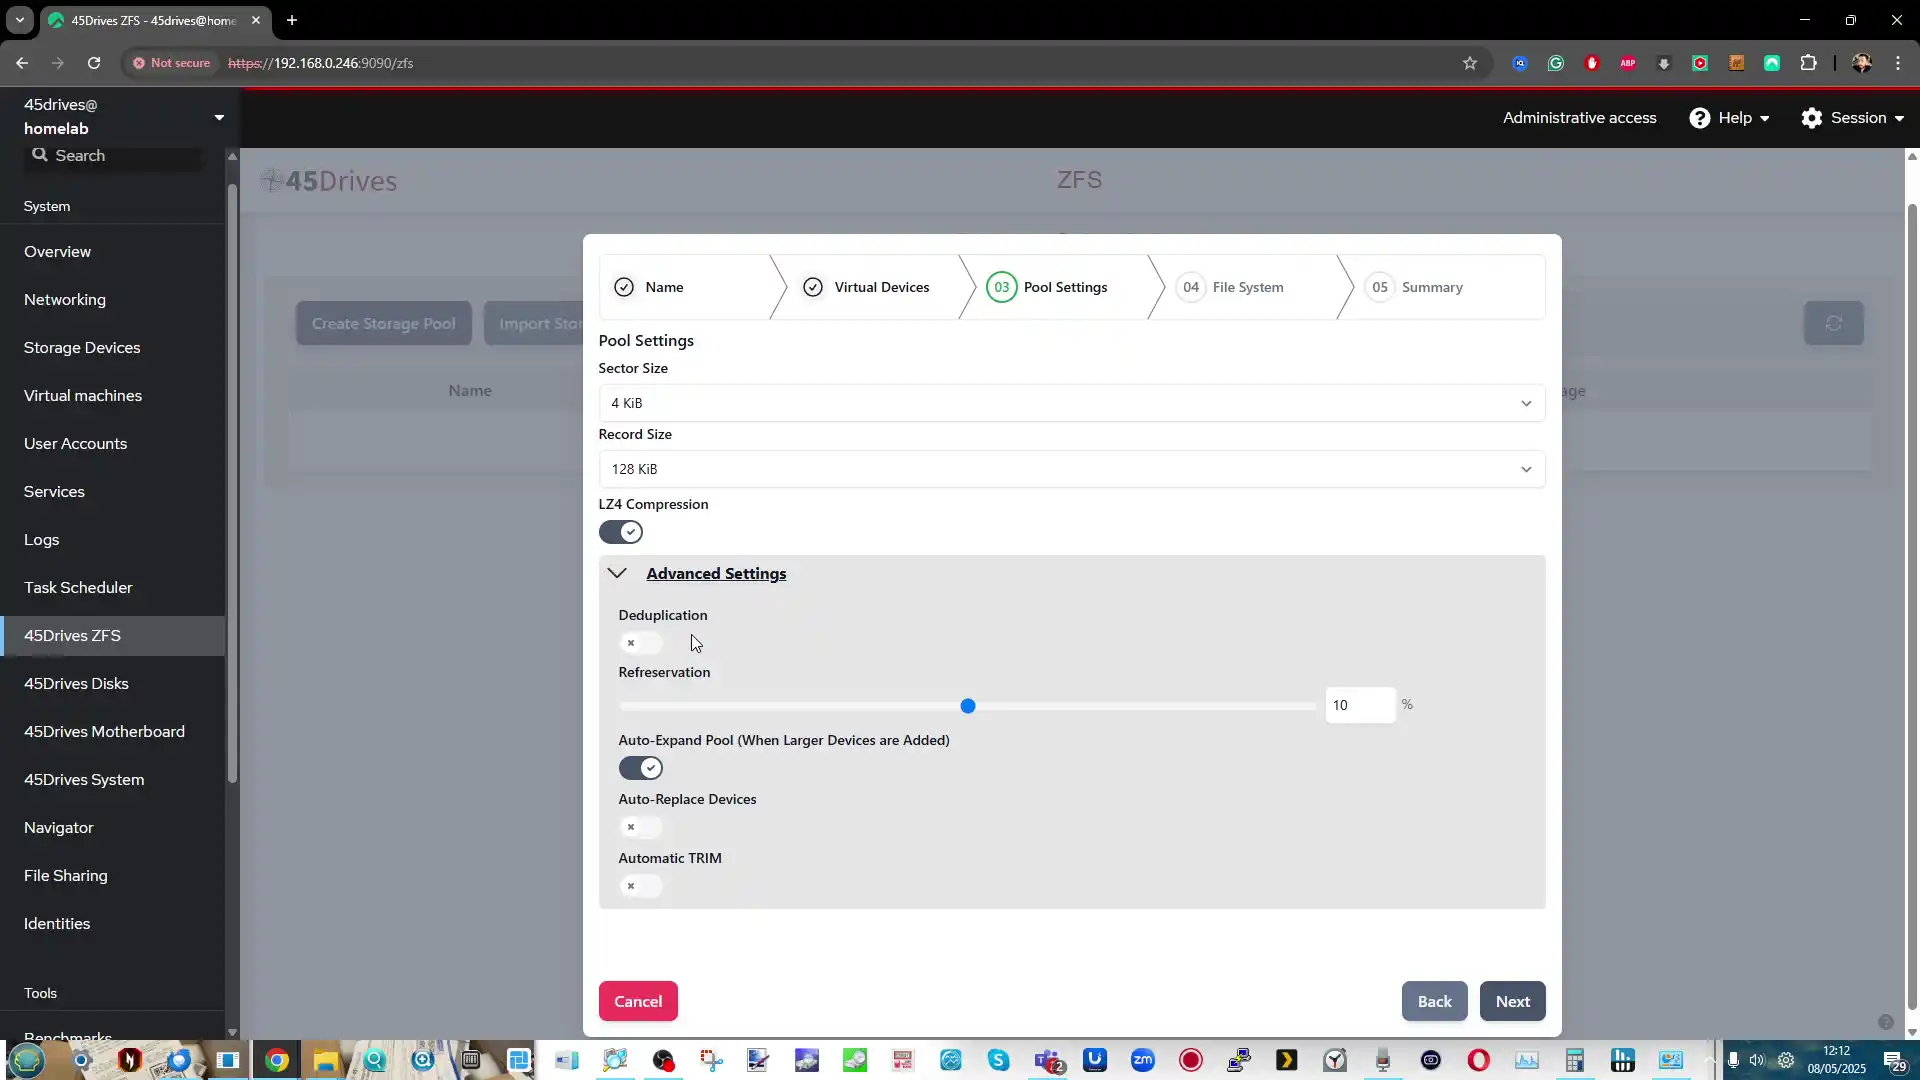 |
System monitoring is a central feature of Houston UI, with a real-time dashboard showing CPU, memory, network throughput, and active services. It includes disk status indicators, smart monitoring tools, and hardware detail pages.
Some of which include visual layouts depending on motherboard detection. While the graphical presentation is basic compared to Synology DSM, it does provide sufficient system insight for regular administration.
Houston UI also includes a modular service control center, where administrators can enable or disable a wide range of server services such as Samba (SMB), NFS, SSH, and rsync.
 Each module is toggleable, and users can configure individual services with editable configuration files directly from the browser. This brings flexibility, while still maintaining visual accessibility for basic tasks.
The task scheduler in Houston UI provides an easy way to set up automated jobs — including backups, updates, power cycling, and network interface toggling.
Unlike many systems that hide these functions under multiple wizards, Houston offers a unified “Tasks” area for managing all routine automations, including custom scripts and cron-based tasks.
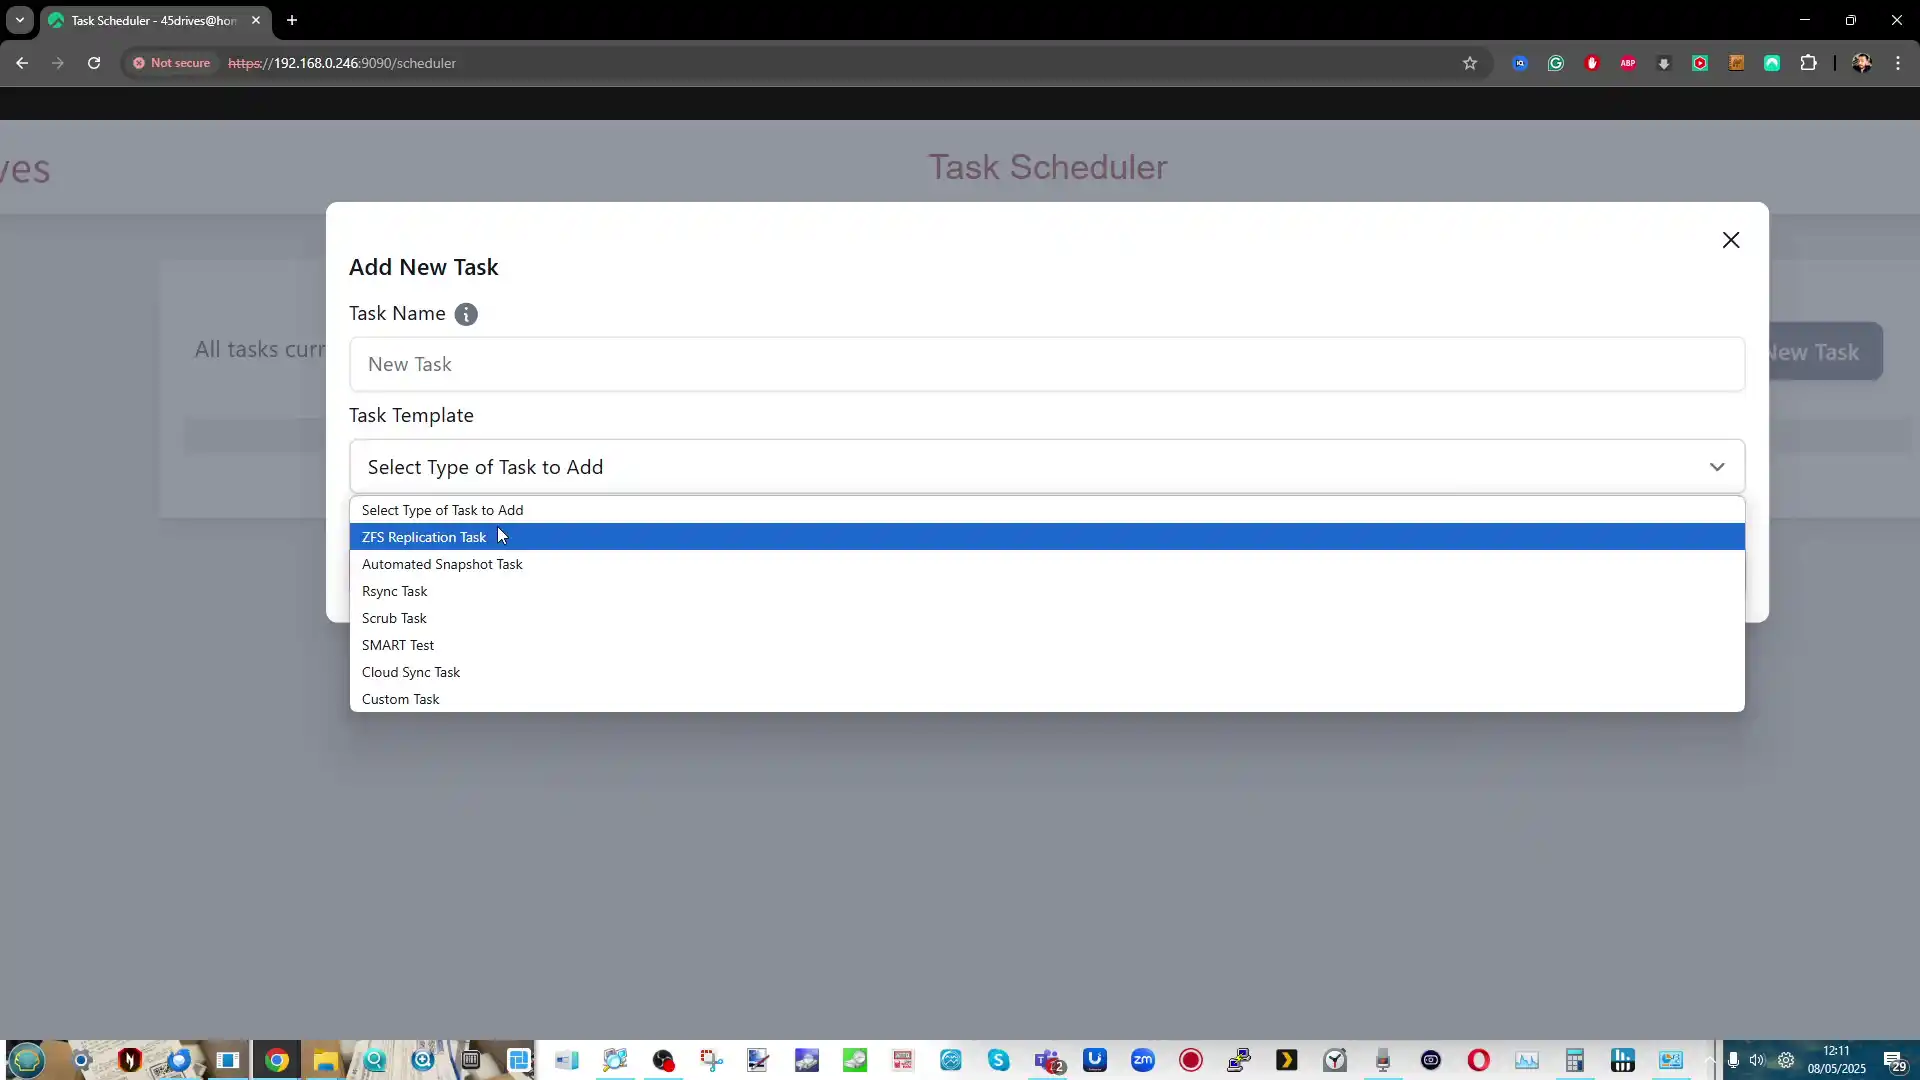
A standout feature is the cloud synchronization and backup module, which offers connectivity to cloud platforms such as Amazon S3 and Backblaze B2, as well as support for local-to-remote rsync and FTP targets. It allows users to control bandwidth, frequency, and folder mappings from a single-pane interface — something that’s typically fragmented in competing platforms.
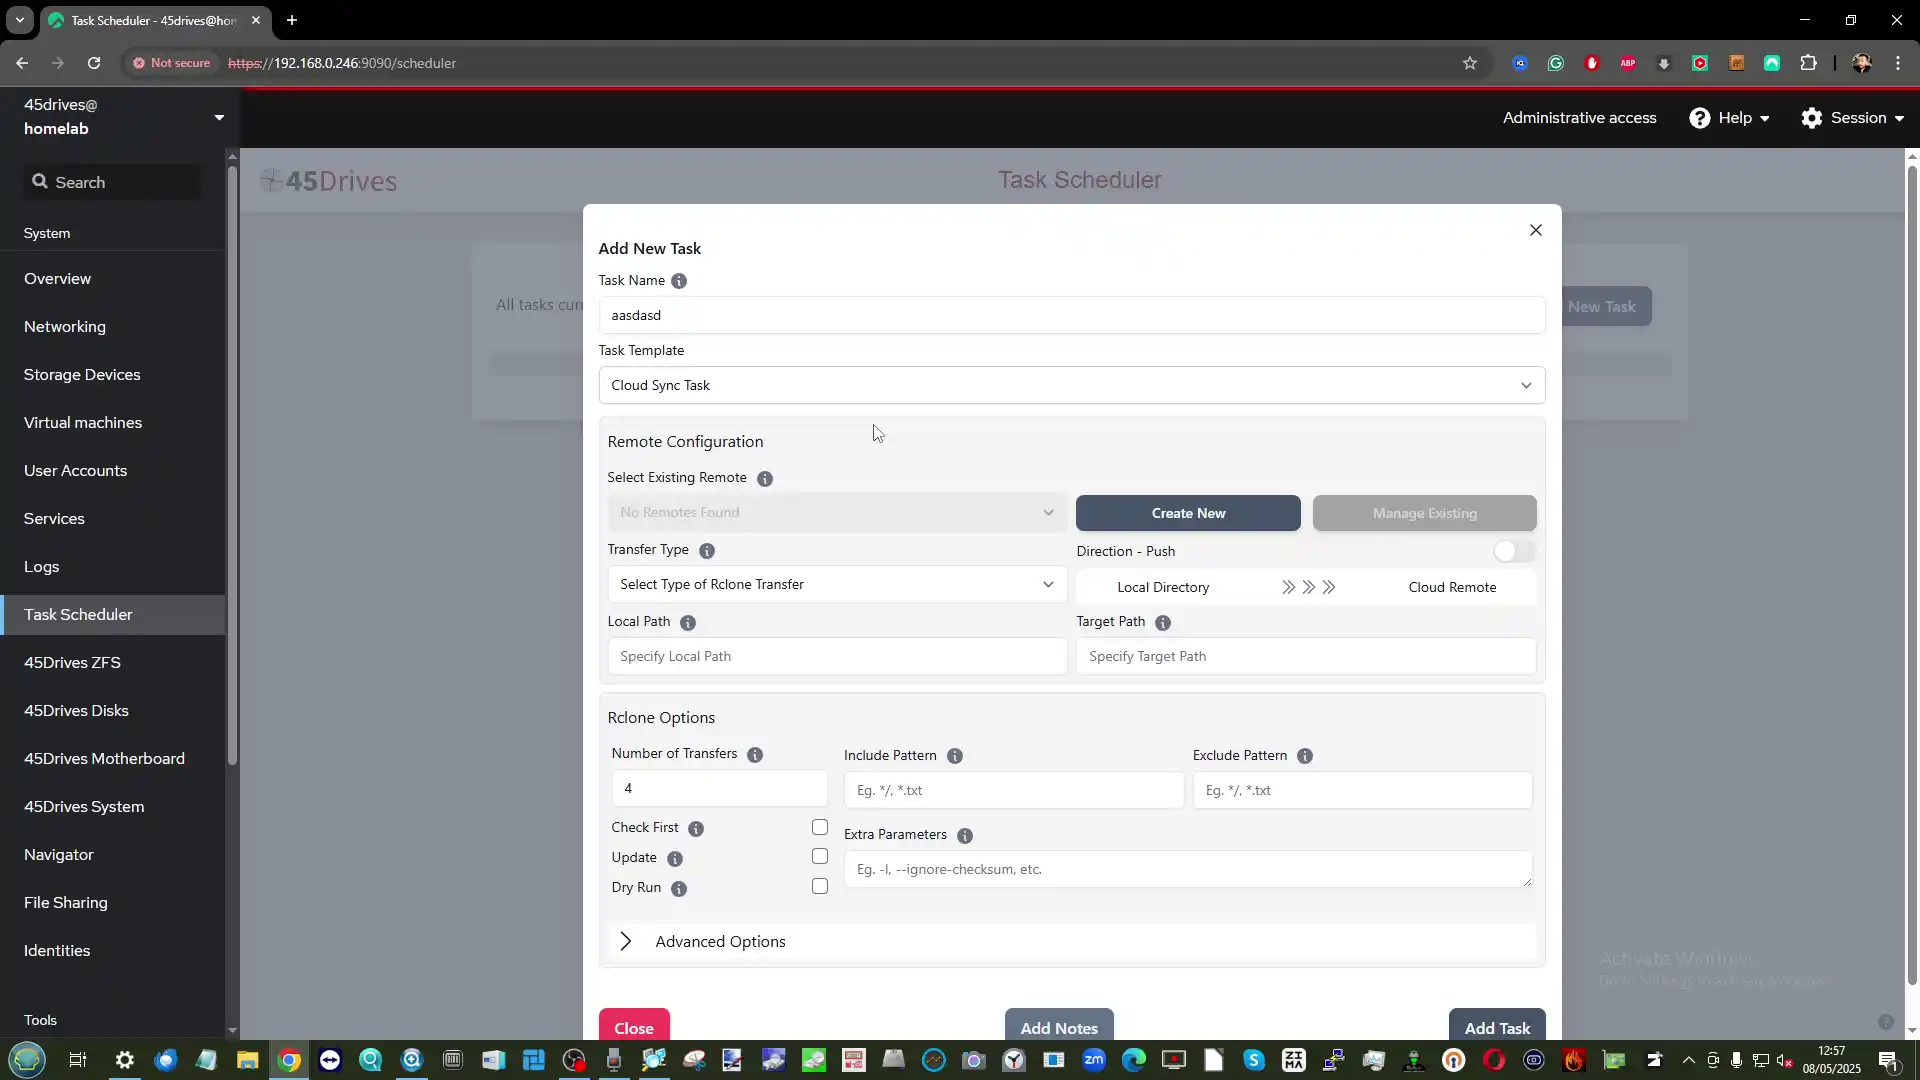
For users running virtual machines, Houston UI includes a KVM-based virtualization manager. This allows the creation and monitoring of guest VMs directly through the browser, including storage provisioning, image selection, CPU/memory configuration, and console access. While not as feature-rich as Proxmox, it’s suitable for lightweight VM workloads and container testing.
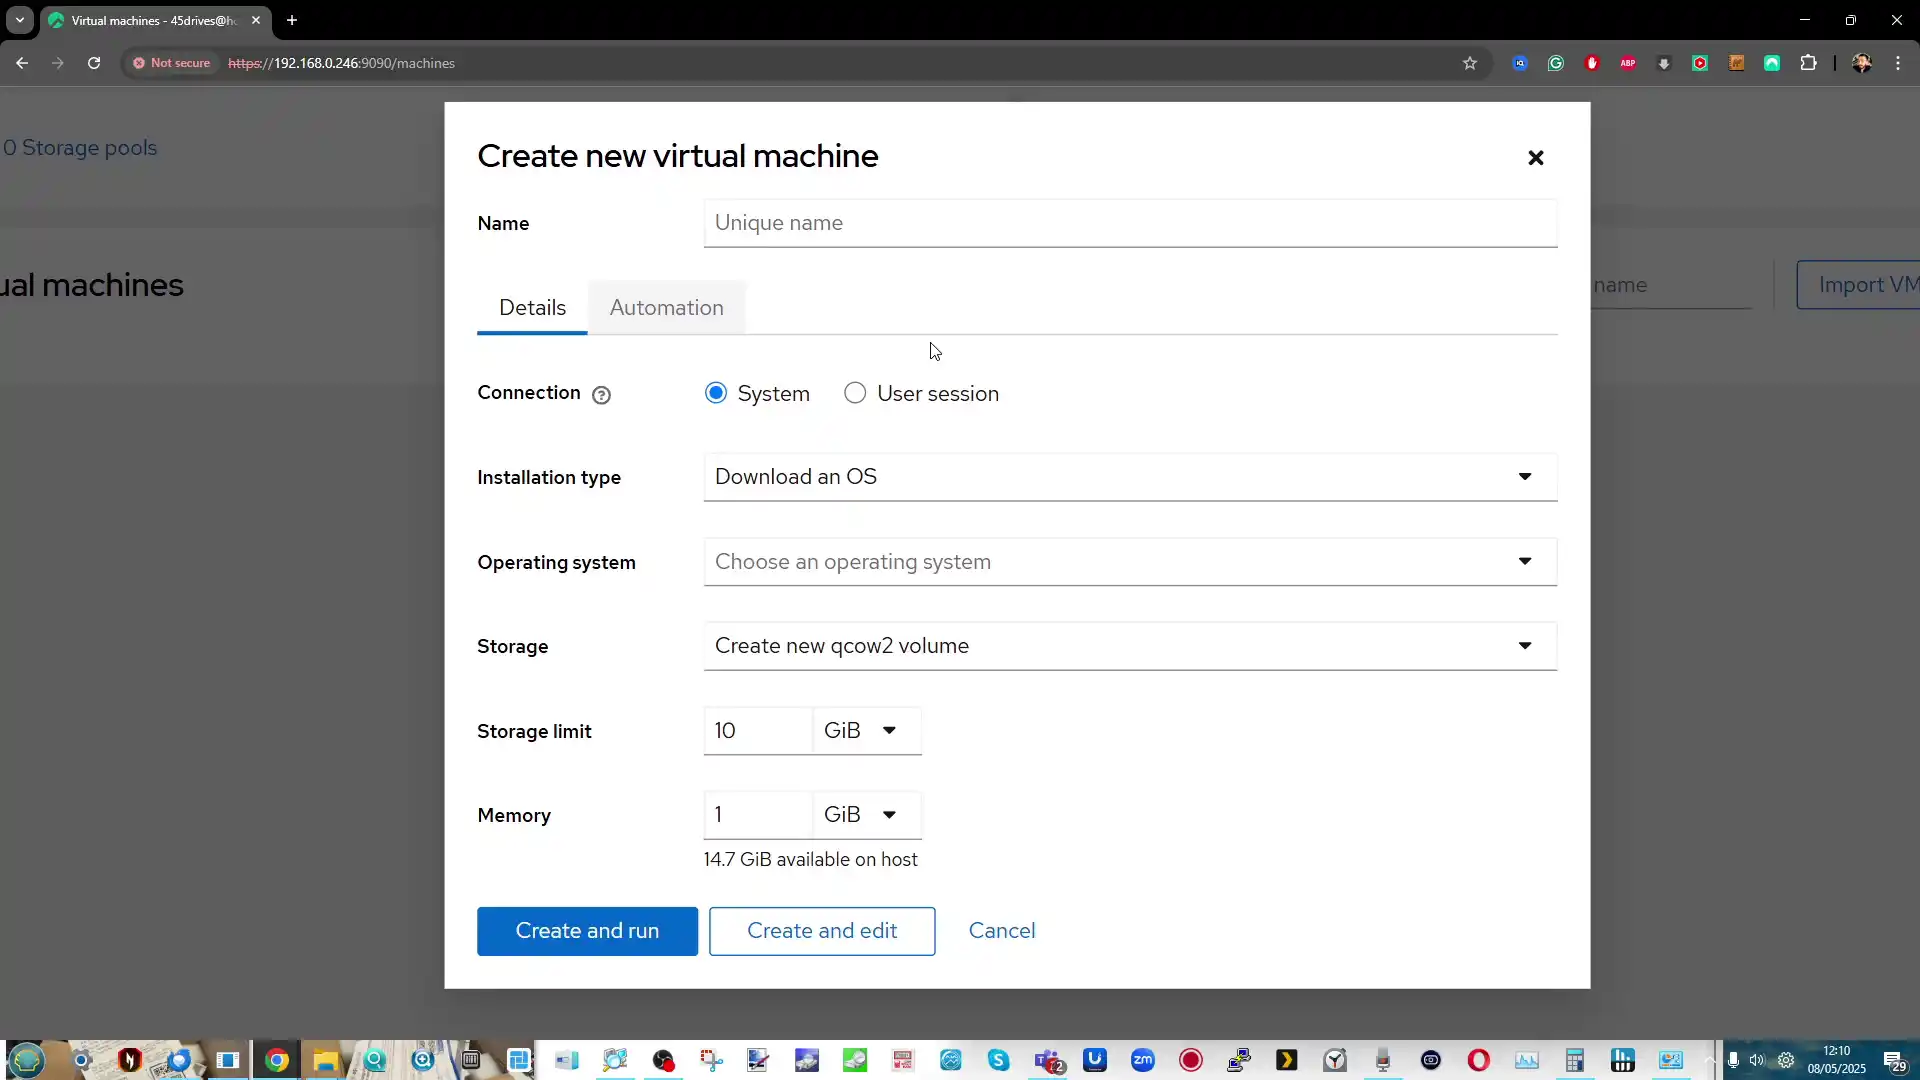
Finally, Houston supports module extensions, with 45Drives publishing their own file sharing and ZFS modules via GitHub. These can be installed on any compatible Linux system running Cockpit. This open approach allows users to build their own UI extensions or pull from the community, avoiding platform lock-in and enabling customization well beyond the factory defaults.
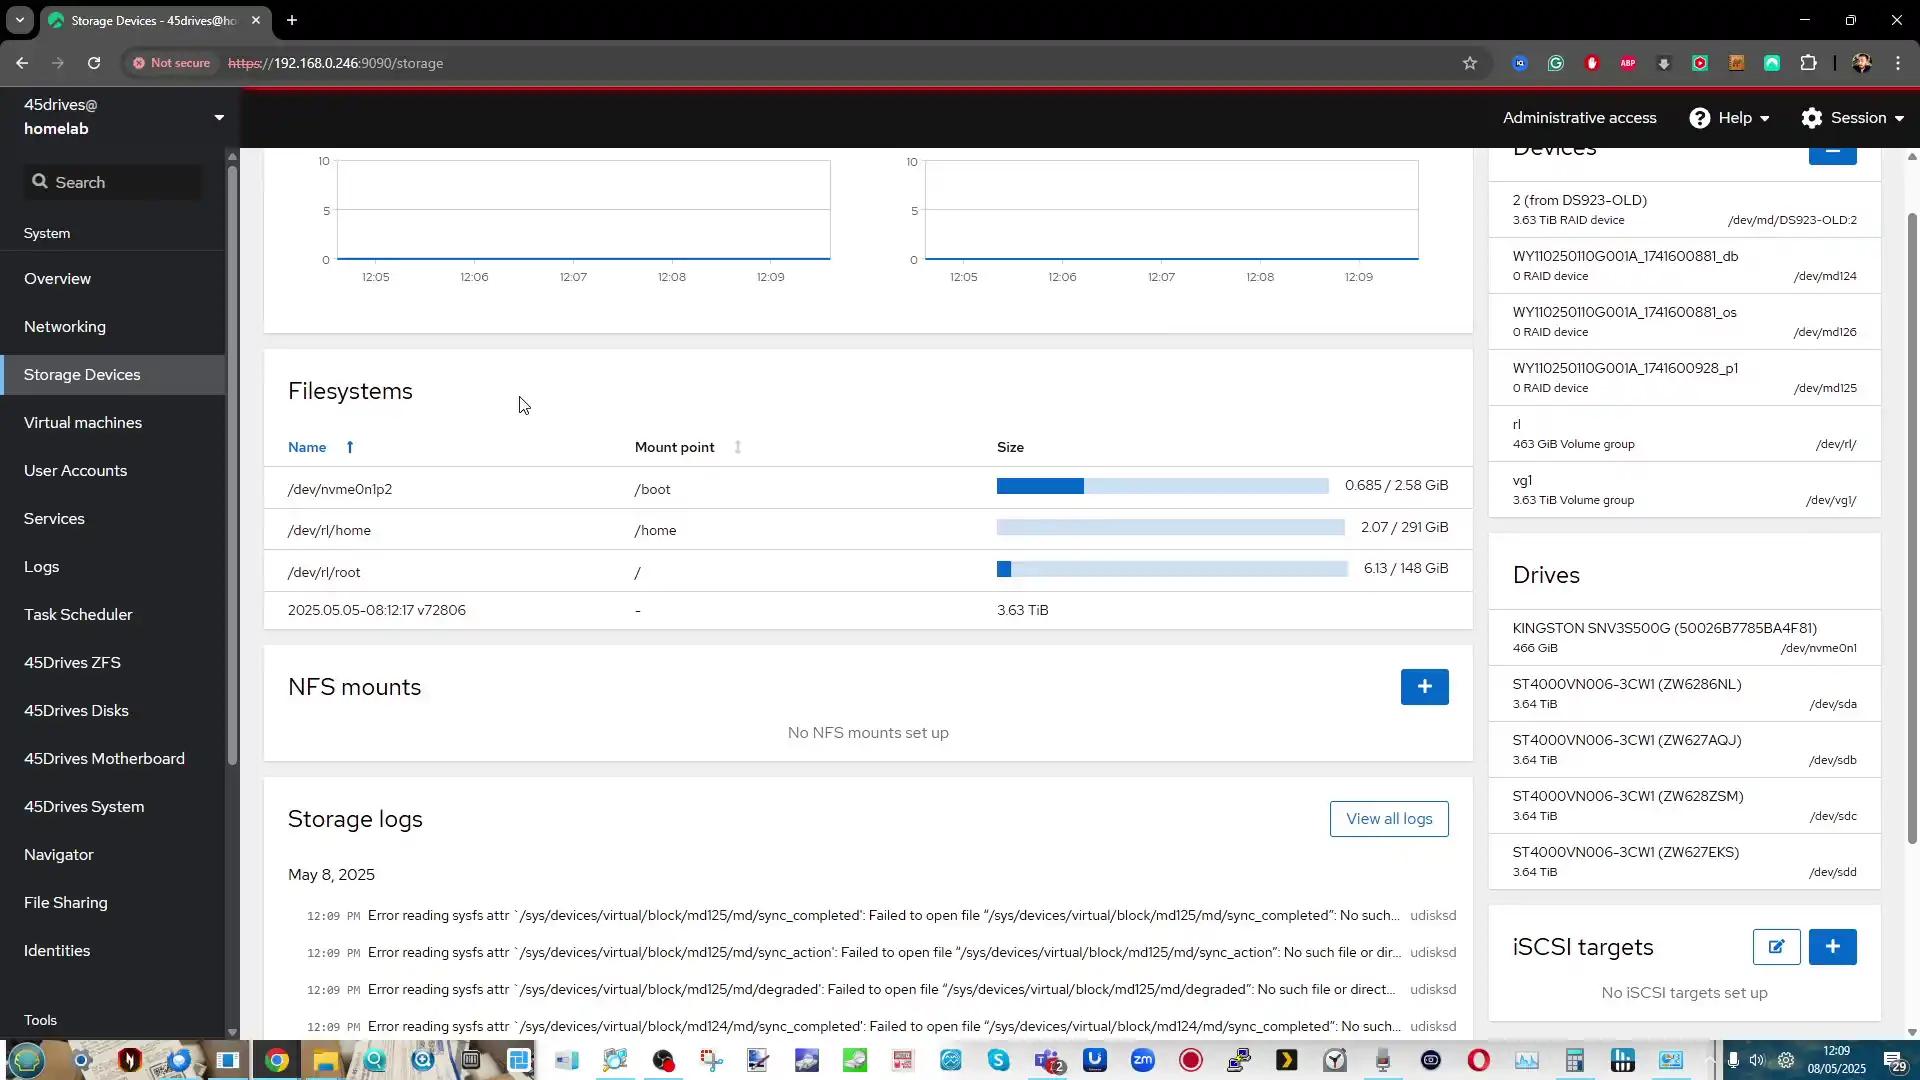
The 45Drives HL8, when configured as a chassis with backplane and PSU, represents a refined and deliberate approach to small-form NAS deployment. Priced around $880 USD, this configuration sits well above entry-level alternatives, but the investment is clearly reflected in its enterprise-grade construction, serviceable layout, and attention to detail. With a robust 16-gauge steel chassis, direct-wired SATA backplane, and a high-efficiency 500W Flex ATX PSU pre-installed, it offers an ideal base for users who plan to build a serious and scalable NAS solution without locking themselves into restrictive ecosystems.

The hinged body design, tool-free drive access, and Noctua fan integration show a strong understanding of real-world usability, especially for those who perform ongoing maintenance, upgrades, or hardware experimentation. In that sense, it’s less a typical “consumer NAS case” and more a modular platform intended for long-term infrastructure use in homelab and small business environments.
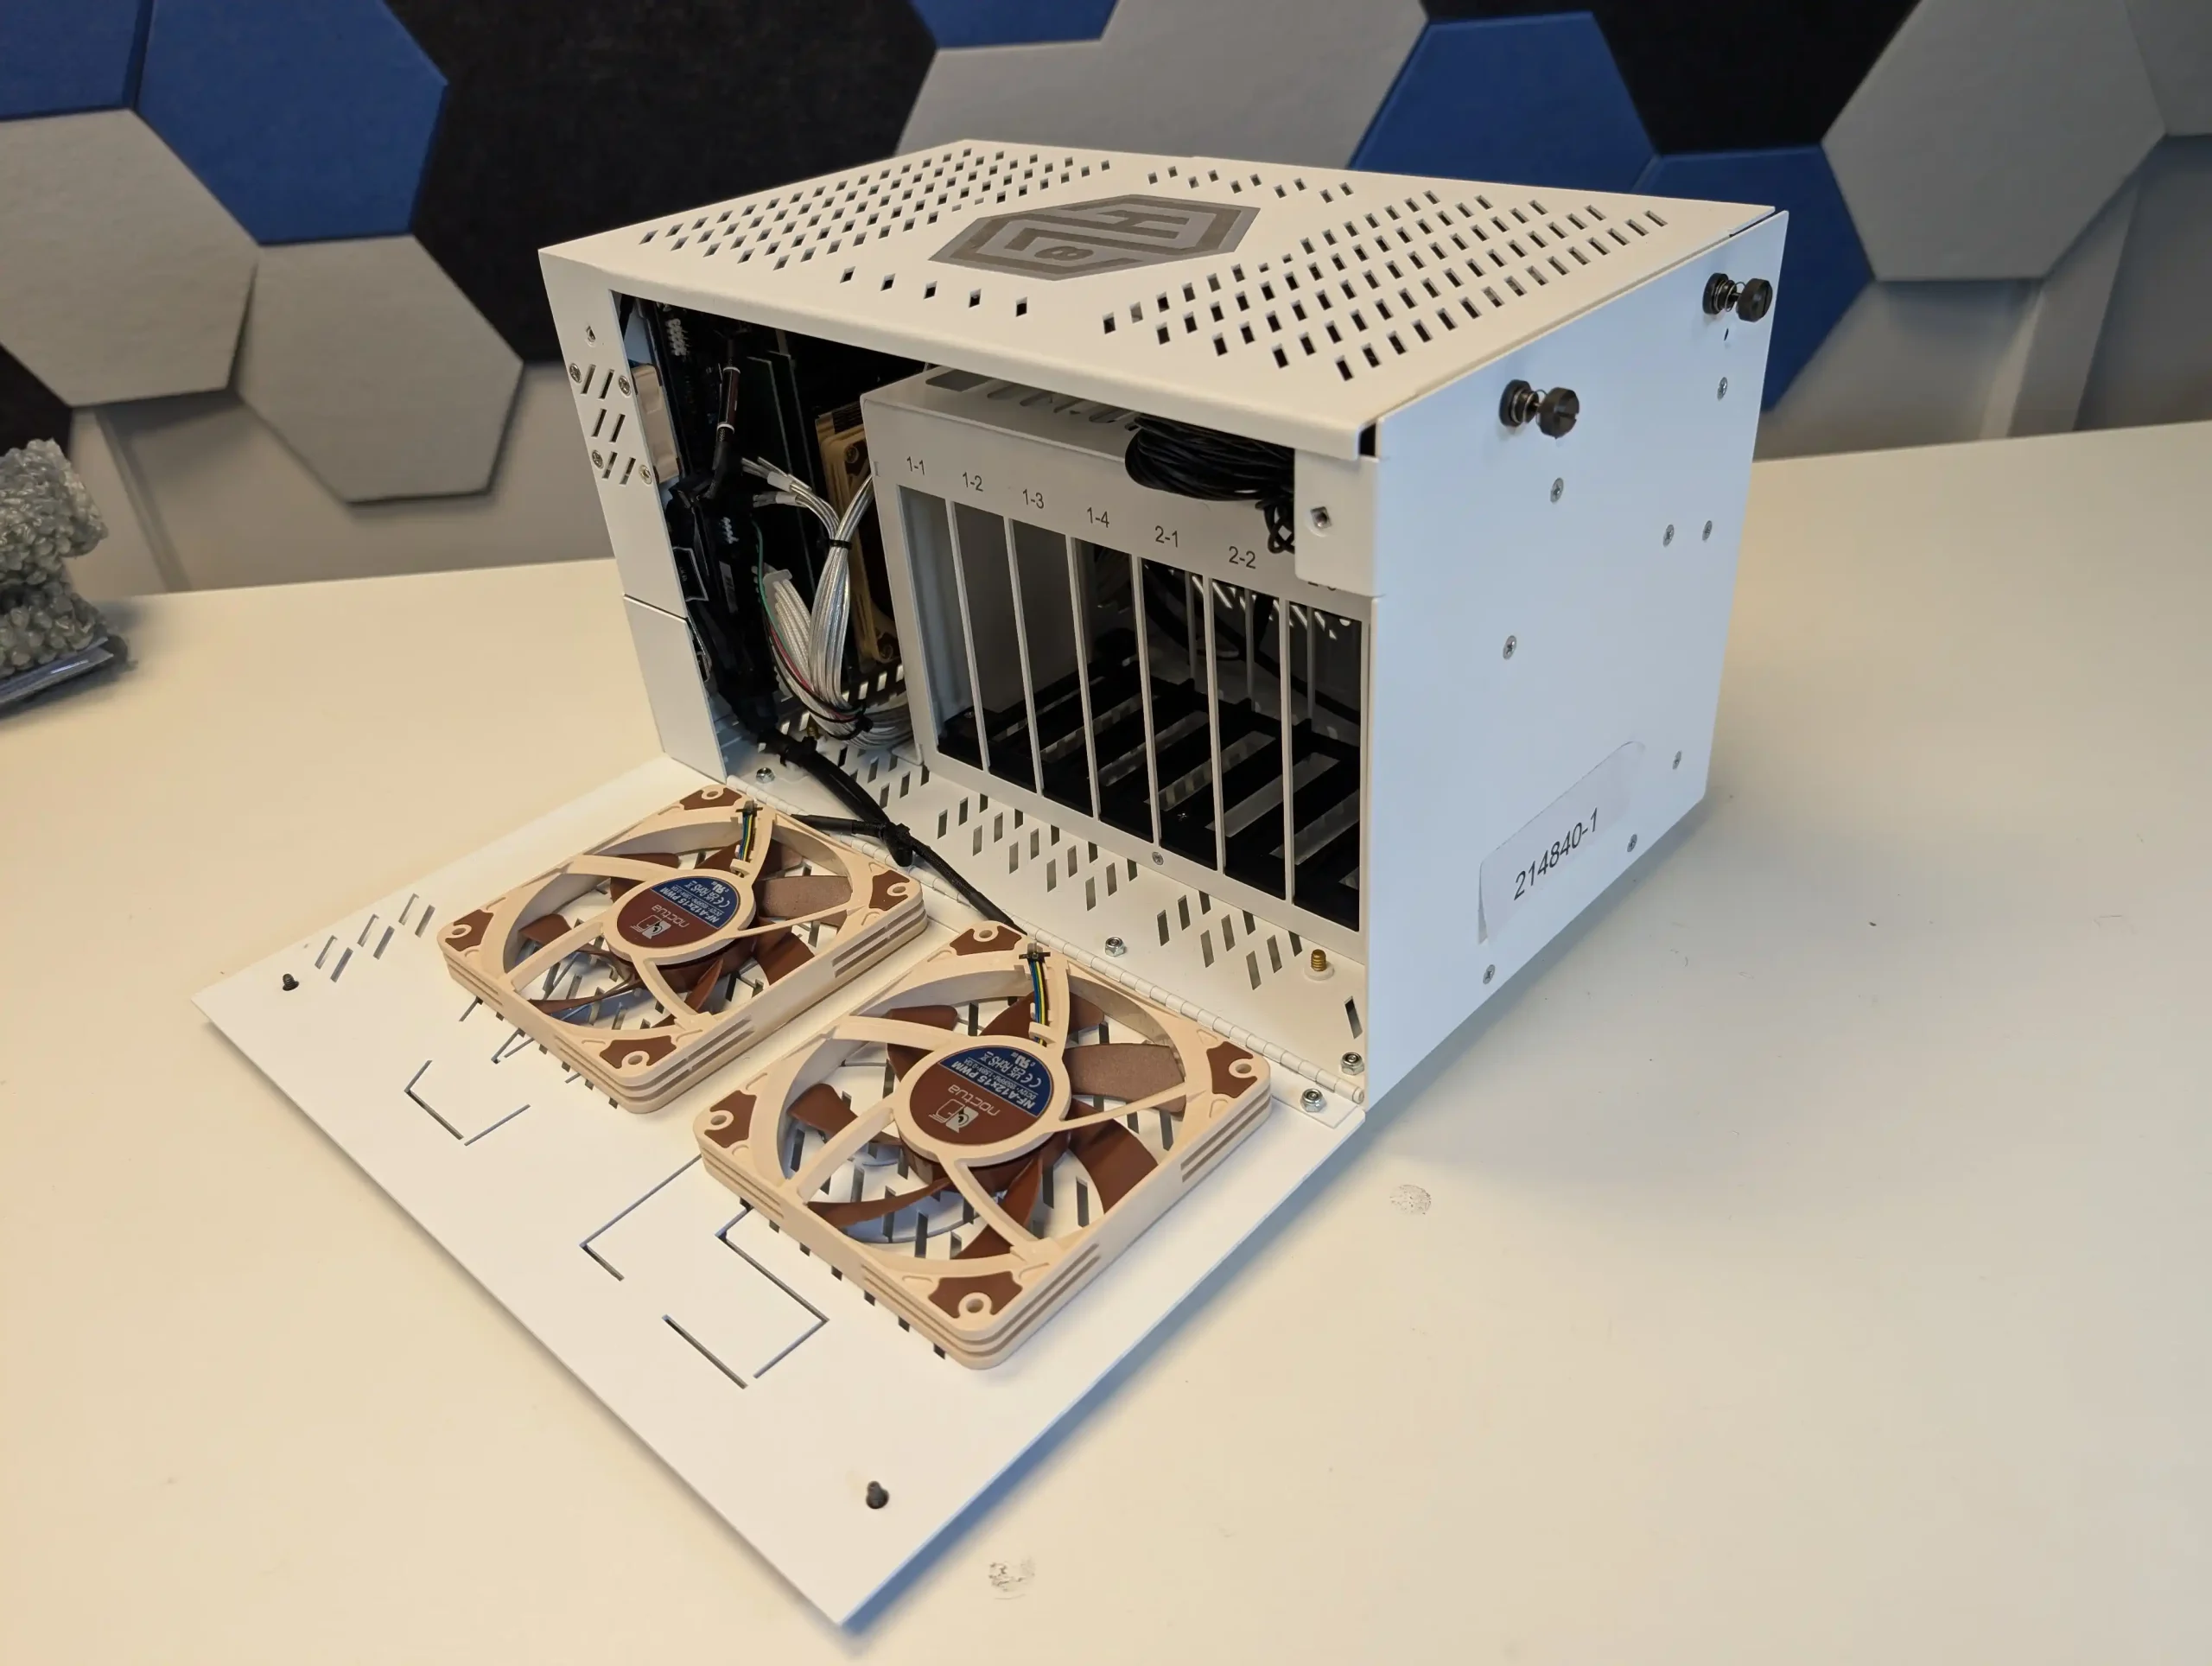
That said, this is not a universal fit for all users. The HL8’s exclusive support for mini-ITX motherboards imposes limitations on connectivity and expansion, especially for those needing multiple PCIe lanes or additional SATA ports without relying on adapters. And while the internal layout is clearly optimized, buyers still need to be comfortable sourcing and configuring their own motherboard, CPU, memory, and storage—something that could be daunting for beginners or those seeking simplicity over flexibility. In markets where similar 8-bay enclosures from lesser-known brands can be found for half the price, the HL8’s value lies more in its physical build quality, localized production, and long-term viability rather than raw cost efficiency. Users comparing it to entry-tier rackmount gear or compact server cases will need to weigh whether the HL8’s refinement and modularity justify the premium.
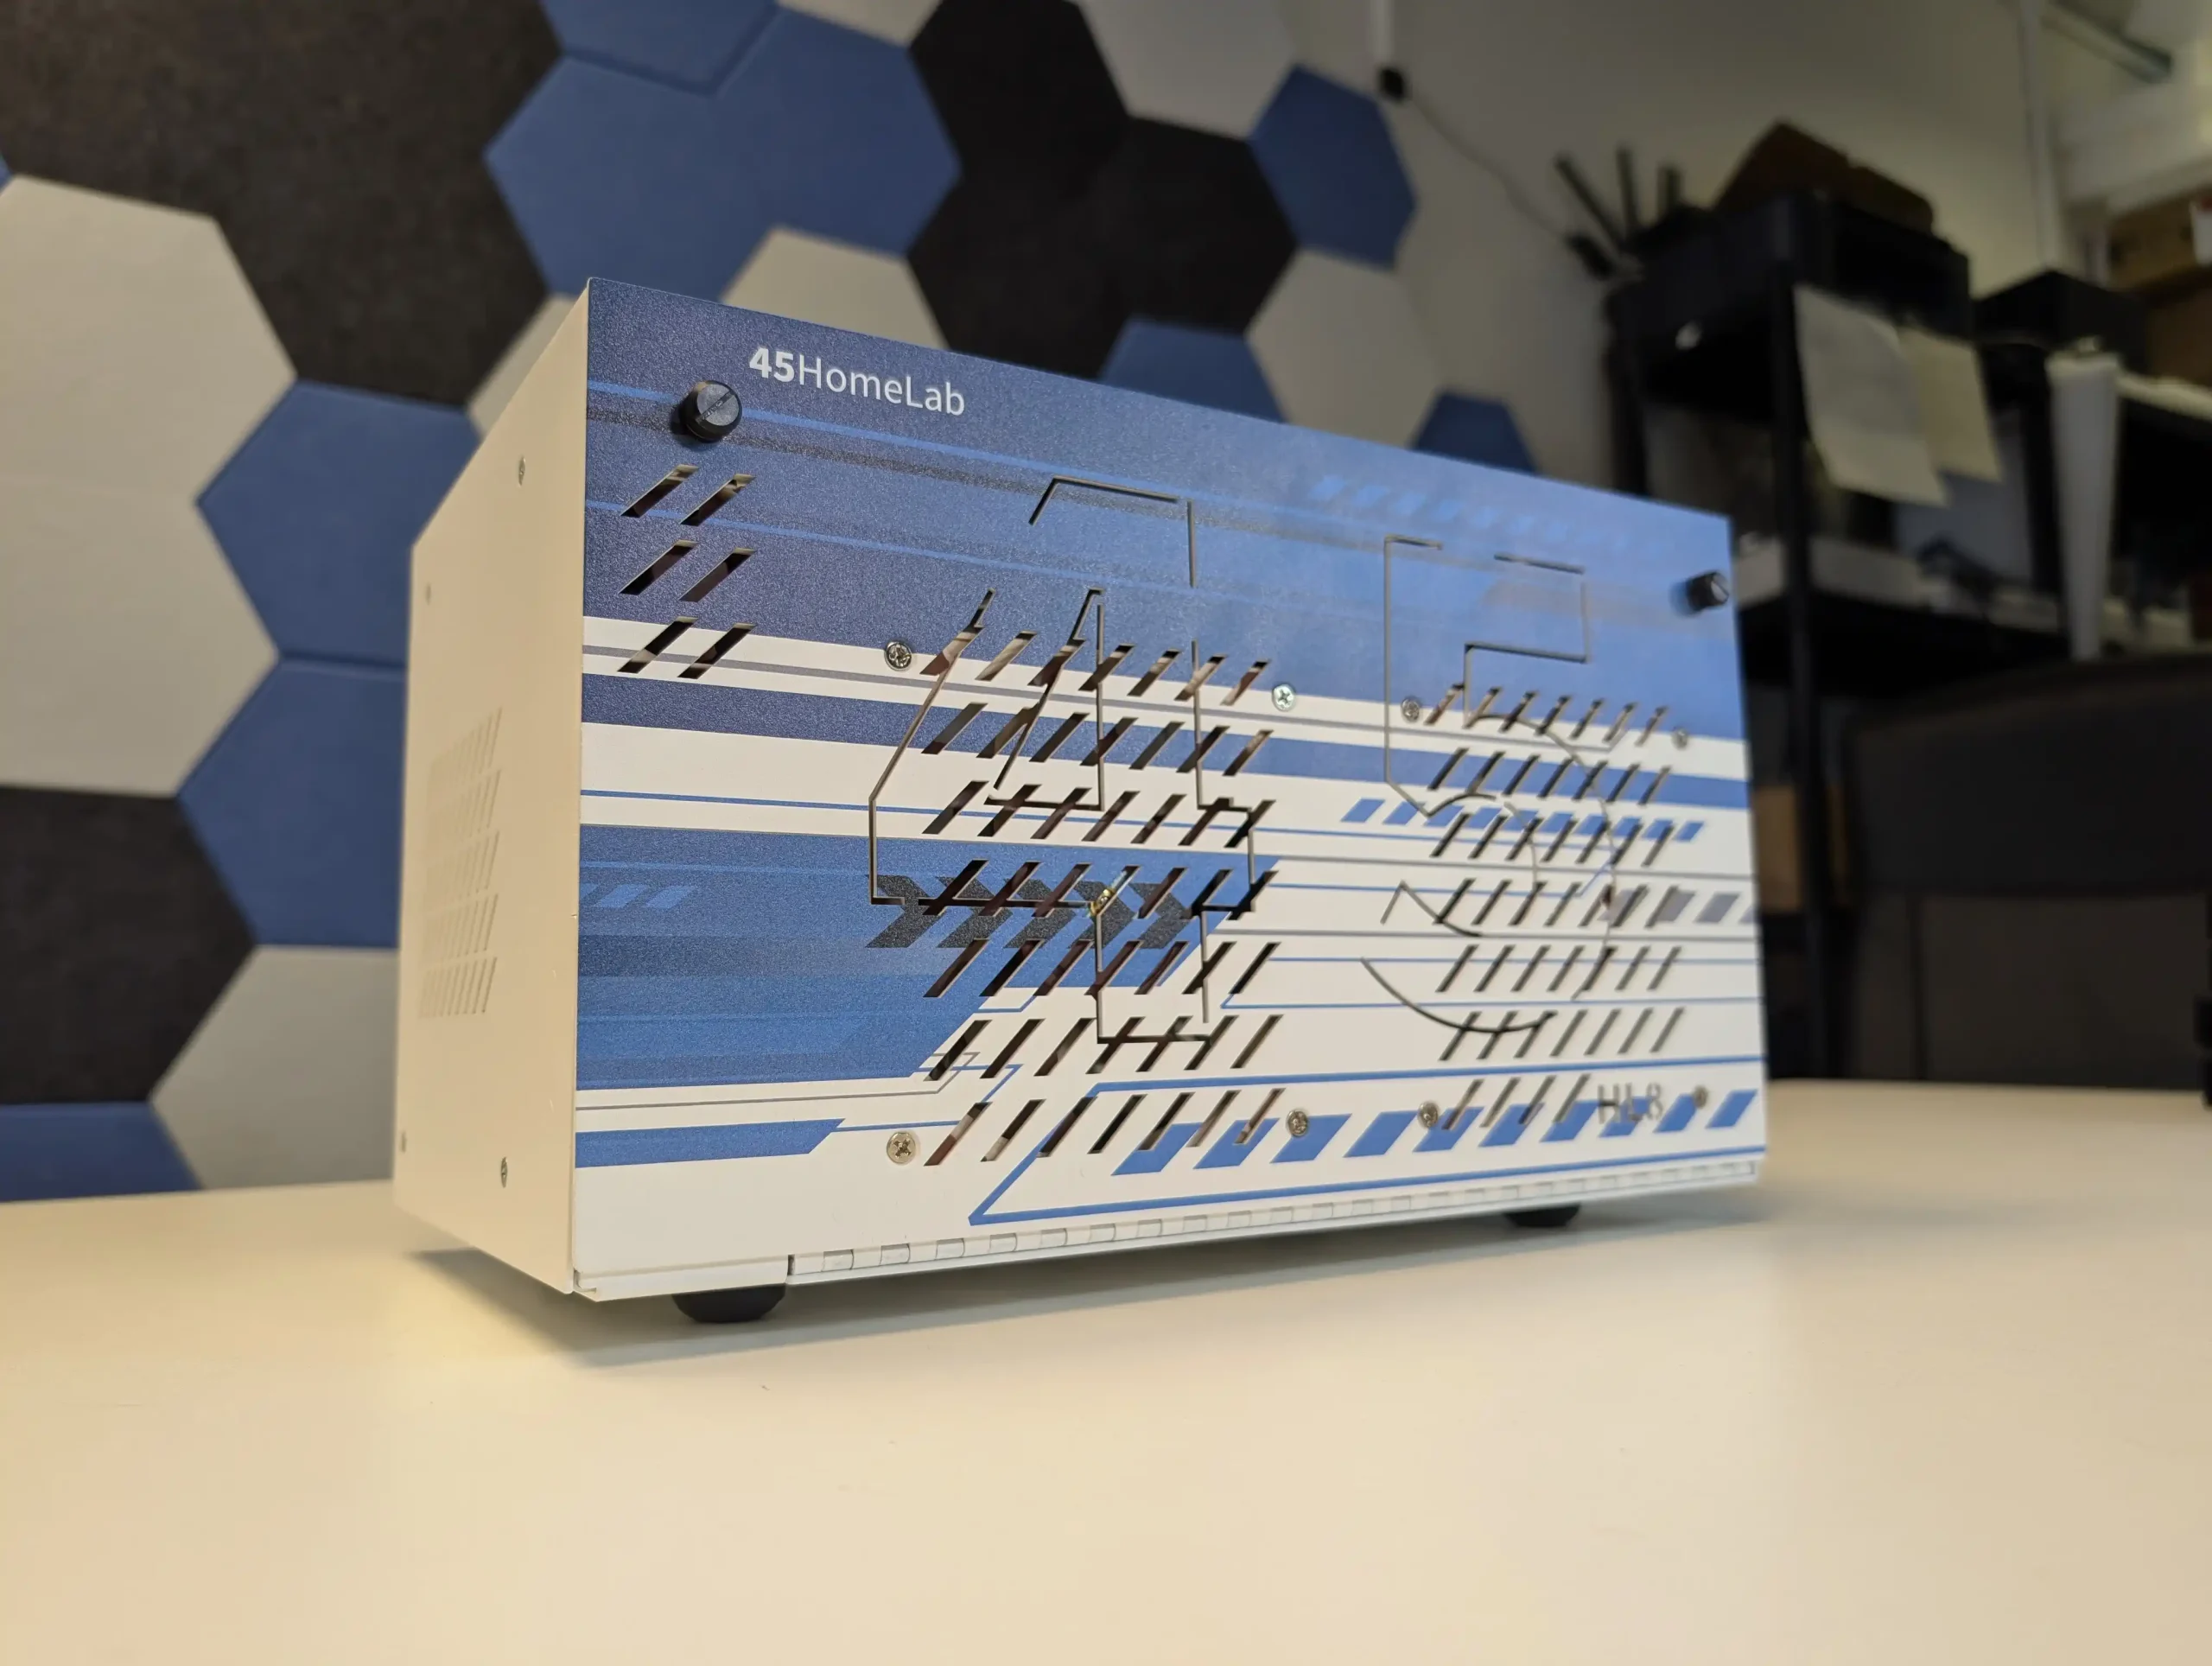
Ultimately, the HL8 is a product with a clearly defined audience: self-hosters, IT professionals, and technical users who understand the value of vendor-agnostic hardware and want to retain full control over their system’s lifecycle. It offers a rare middle ground between low-cost DIY setups that require piecemeal integration and fully locked turnkey NAS systems from mainstream brands. For those who are willing to invest not only financially but also in the time and knowledge needed to assemble and manage their NAS environment, the HL8 stands out as one of the most thoughtfully engineered and supportable 8-bay NAS chassis currently on the market.

| Pros | Cons |
|---|---|
| 1. Exceptional build quality using 2mm thick powder-coated steel | 1. Significantly more expensive than typical DIY NAS cases |
| 2. Unique hinged design allows full interior access without disassembly | 2. No native 2.5″ SSD bays included (requires 3D-printed or addon tray) |
| 3. Integrated 12Gb/s SATA/SAS-compatible hot-swap backplane | 3. Only compatible with Flex ATX PSUs, limiting choice and increasing cost |
| 4. Designed for Mini-ITX motherboards with full PCIe x16 slot support | |
| 5. Tool-less and tray-less drive bays improve maintenance and upgrades | |
| 6. Outstanding documentation and support from 45Drives | |
| 7. Fully open-source-friendly chassis with non-proprietary layout |
SUBSCRIBE TO OUR NEWSLETTER Join Inner Circle Subscribe
This description contains links to Amazon. These links will take you to some of the products mentioned in today's content. As an Amazon Associate, I earn from qualifying purchases. Visit the NASCompares Deal Finder to find the best place to buy this device in your region, based on Service, Support and Reputation - Just Search for your NAS Drive in the Box Below
Need Help?
Where possible (and where appropriate) please provide as much information about your requirements, as then I can arrange the best answer and solution to your needs. Do not worry about your e-mail address being required, it will NOT be used in a mailing list and will NOT be used in any way other than to respond to your enquiry.
[contact-form-7]
Ko-fi or old school Paypal. Thanks!To find out more about how to support this advice service check HEREIf you need to fix or configure a NAS, check Fiver
Have you thought about helping others with your knowledge? Find Instructions Here
|
|
|
Test du SwitchBot Hub 3 : ce hub Matter universel simplifie-t-il vraiment la gestion des objets connectés ? Découvrez notre avis complet.
The post Test SwitchBot Hub 3 : un hub universel compatible Matter et infrarouge pour piloter votre maison first appeared on IT-Connect.
Vous recherchez un vélo électrique élégant et léger ? Le modèle ENGWE MapFour N1 Air ST devrait vous plaire, car il est léger grâce à son cadre en carbone.
The post Test ENGWE MapFour N1 Air ST : un vélo électrique léger et endurant grâce au carbone first appeared on IT-Connect.
IMPORTANT – This is a review of two early prototypes of the Orico Cyberdata Vault NAS devices that will be launching on crowdfunding in July, and likely will see improvement and optimization as time and development continue. I provide this rolling/dynamic review as an indication of what the system is aiming fo ran a full and detailed review of the final product will arrive much closer to launch.
The Orico CyberData Vault CF56 and CF56 Pro NAS systems are part of a newly developed six-model lineup that will be launched via Kickstarter, aimed squarely at prosumers, media professionals, and small business environments in need of hybrid local storage with higher bandwidth connectivity and ZFS support. Both systems are built around the same chassis design but differ significantly in internal capabilities: the CF56 features an Intel Core i3-N305 processor (8-core, 8-thread), while the CF56 Pro steps up to an Intel Core i5-1240P (12-core, 16-thread). The units combine traditional 3.5-inch HDD storage (five bays) with six M.2 NVMe SSD slots for caching or tiered storage configurations, housed within a structure that offers magnetic access panels and multi-zone active cooling.

These models also introduce Orico’s new CyberData OS, a ZFS-based operating system featuring snapshots, real-time media indexing, and AI photo recognition—although in its current form it remains incomplete and in early development. With features such as dual 10GbE on the Pro model, USB4 connectivity, and flexible expansion via a GPU dock or RAID cabinet, these NAS systems reflect Orico’s shift from accessory brand to full-scale storage solution provider. While still prototype units, the CF56 and CF56 Pro demonstrate hardware ambition aligned with recent trends in semi-professional NAS design, echoing earlier moves from competitors like UGREEN, Aoostar, and Minisforum.

The Orico CF56 and CF56 Pro offer a promising blend of modern hardware, hybrid storage design, and ZFS-based data protection aimed at prosumers and small creative teams seeking high-speed, subscription-free private cloud solutions. With a total of five 3.5” HDD bays and six M.2 NVMe SSD slots, both units provide considerable flexibility for building tiered or cache-accelerated storage environments, while their use of efficient Intel processors—the N305 in the CF56 and the more powerful i5-1240P in the Pro—positions them for a wide range of workflows from basic file serving to heavier tasks like 8K transcoding, Docker hosting, and AI media indexing. The CF56 Pro, in particular, stands out with its dual 10GbE networking, USB4 ports, GPU dock support, and multi-zone cooling—placing it closer to workstation-class NAS territory. However, both models are currently limited by the early state of their CyberData OS software, which, while promising in features like snapshots, AI recognition, and mobile integration, suffers from missing essentials such as two-factor authentication, a complete app ecosystem, and consistent language localization. Performance results also reflect this unfinished software layer, with SMB transfer speeds and transcoding performance falling short of the hardware’s full potential. Concerns like elevated NVMe temperatures on the Pro model and the lack of ECC memory support—despite ZFS being the default file system—underscore the need for careful expectations among more advanced users. Nonetheless, as hardware platforms, the CF56 and CF56 Pro are well-designed and competitive, particularly if Orico can deliver on its planned optimizations and enhancements by the time of full release.
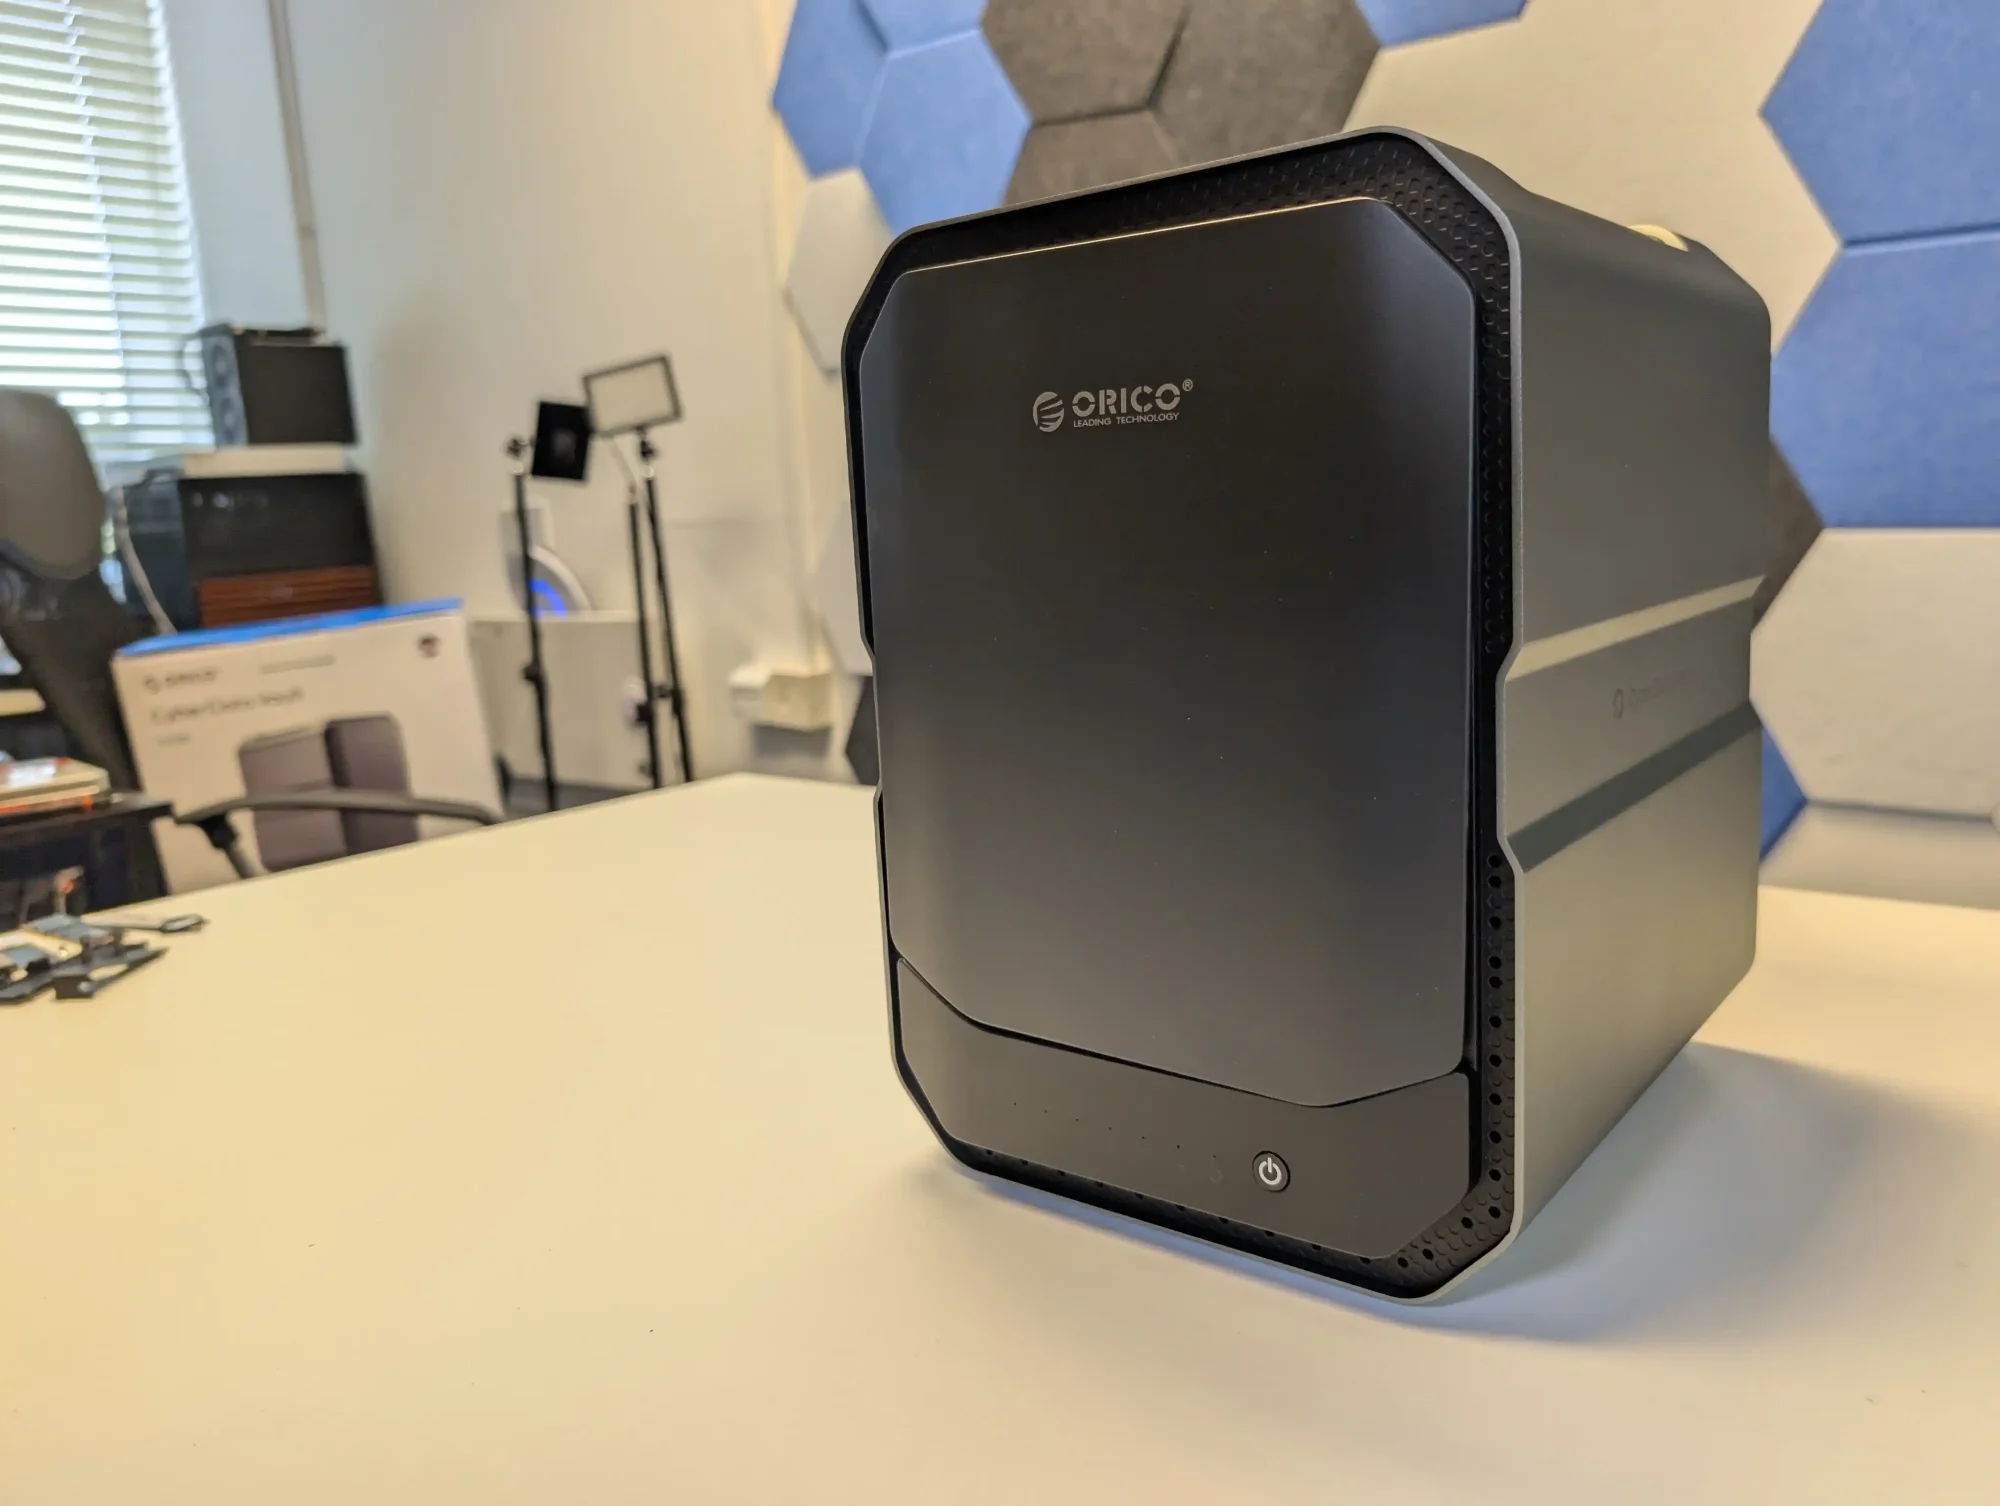 BUILD QUALITY - 8/10
HARDWARE - 8/10PERFORMANCE - 7/10PRICE - 8/10VALUE - 8/10
BUILD QUALITY - 8/10
HARDWARE - 8/10PERFORMANCE - 7/10PRICE - 8/10VALUE - 8/10
7.8
PROS
Hybrid storage: 5x HDD + 6x M.2 NVMe SSD (flexible ZFS configurations)Dual 10GbE on CF56 Pro for high-speed networkingModern CPUs: Efficient N305 and powerful i5-1240PExpandability via GPU dock (CF56 Pro only) and USB4 RAID cabinetUp to 64GB DDR5 RAM with dual-channel (CF56 Pro)Multi-zone active cooling and manual fan profilesHDMI + DisplayPort output with 4K/8K supportIntegrated AI media management and Docker support
CONS
No ECC memory supportUSB4 ports lack network-over-USB functionality (Coming Later Apparently)Early firmware lacks optimization (e.g. SMB transfer speeds)CyberData OS lacks two-factor authentication and app store currentlyTop NVMe region on CF56 Pro runs hot under load (80°C) on this protoypeLocalization/UI inconsistencies in current OS build (still pre-launch) and Software still in development; not final at time of reviewCrowdfunding is Not For Everyone
The exterior design of the CF56 and CF56 Pro is clearly built around practical serviceability and visual minimalism, with both devices using a shared chassis that prioritizes easy access to internal components. The most distinctive feature is the magnetic front panel, which is removable without tools and serves both an aesthetic and functional purpose. This panel provides ventilation along the sides and top edges, as well as system information through onboard LED indicators.
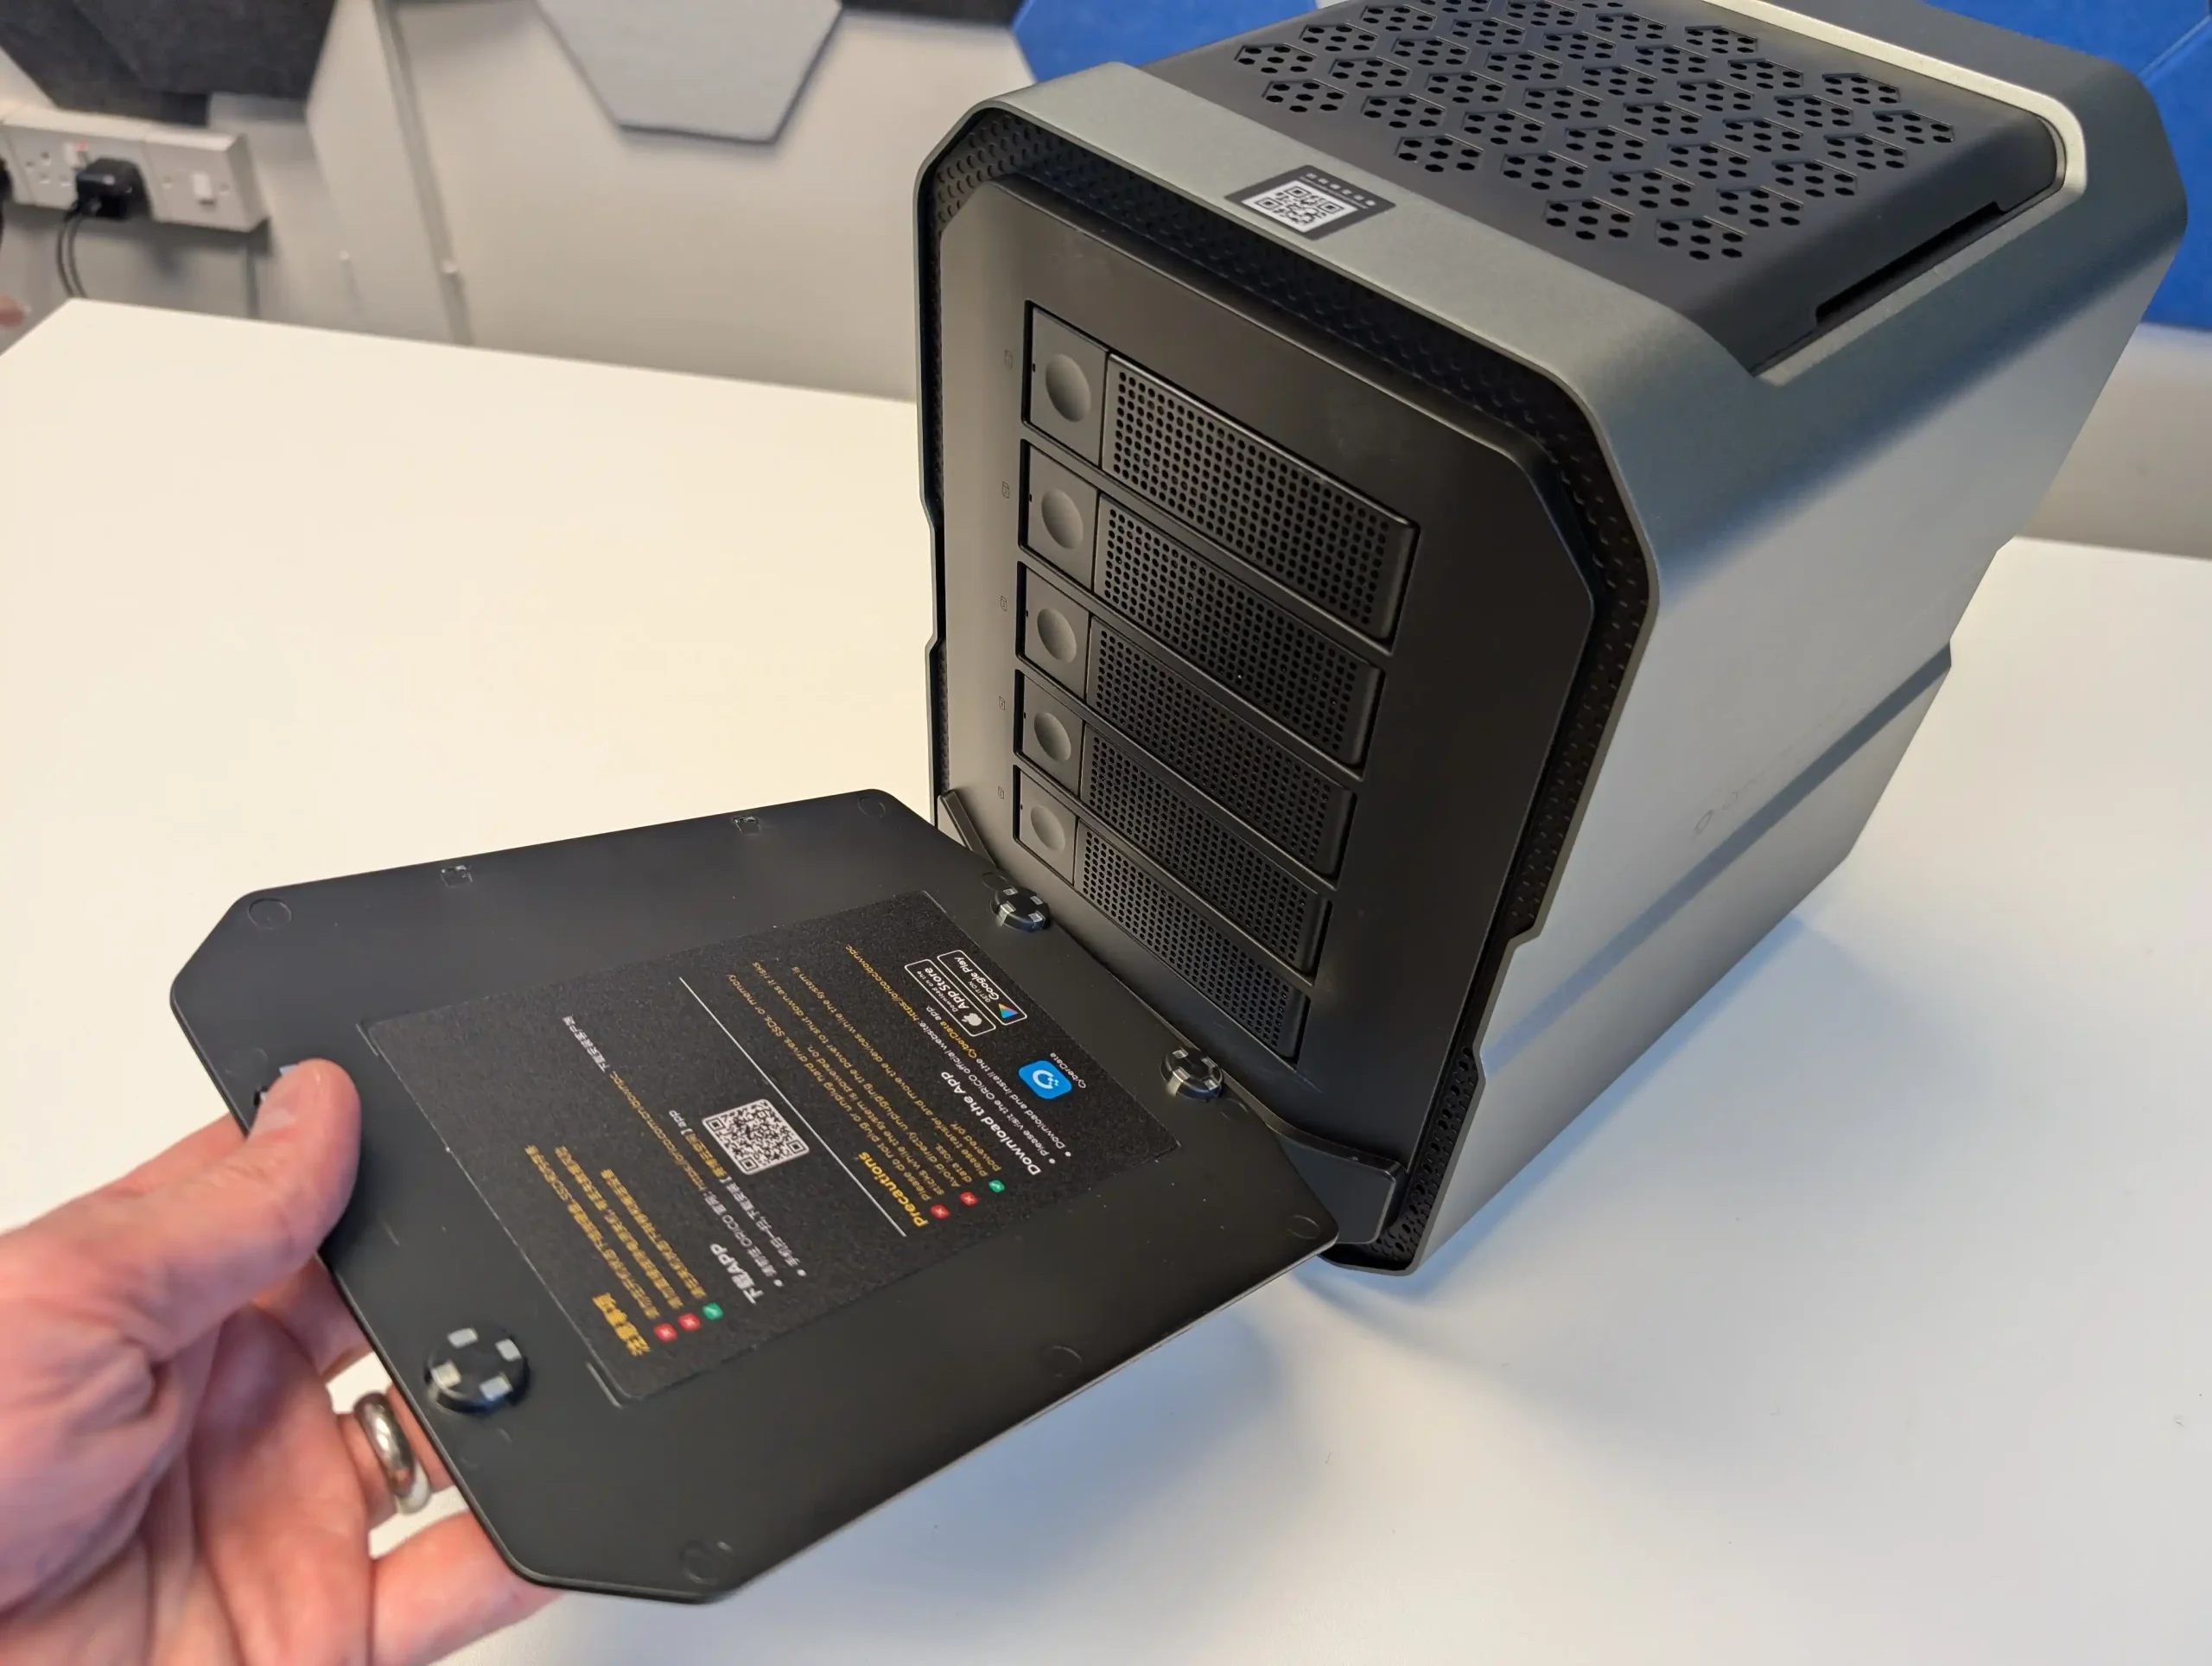
Behind it, the five 3.5-inch drive bays are arranged vertically on a dedicated SATA backplane, pre-wired for direct access to the internal storage controller. This layout streamlines maintenance and makes drive replacement relatively simple, although hot-swap capability has not been officially confirmed in the prototype documentation.
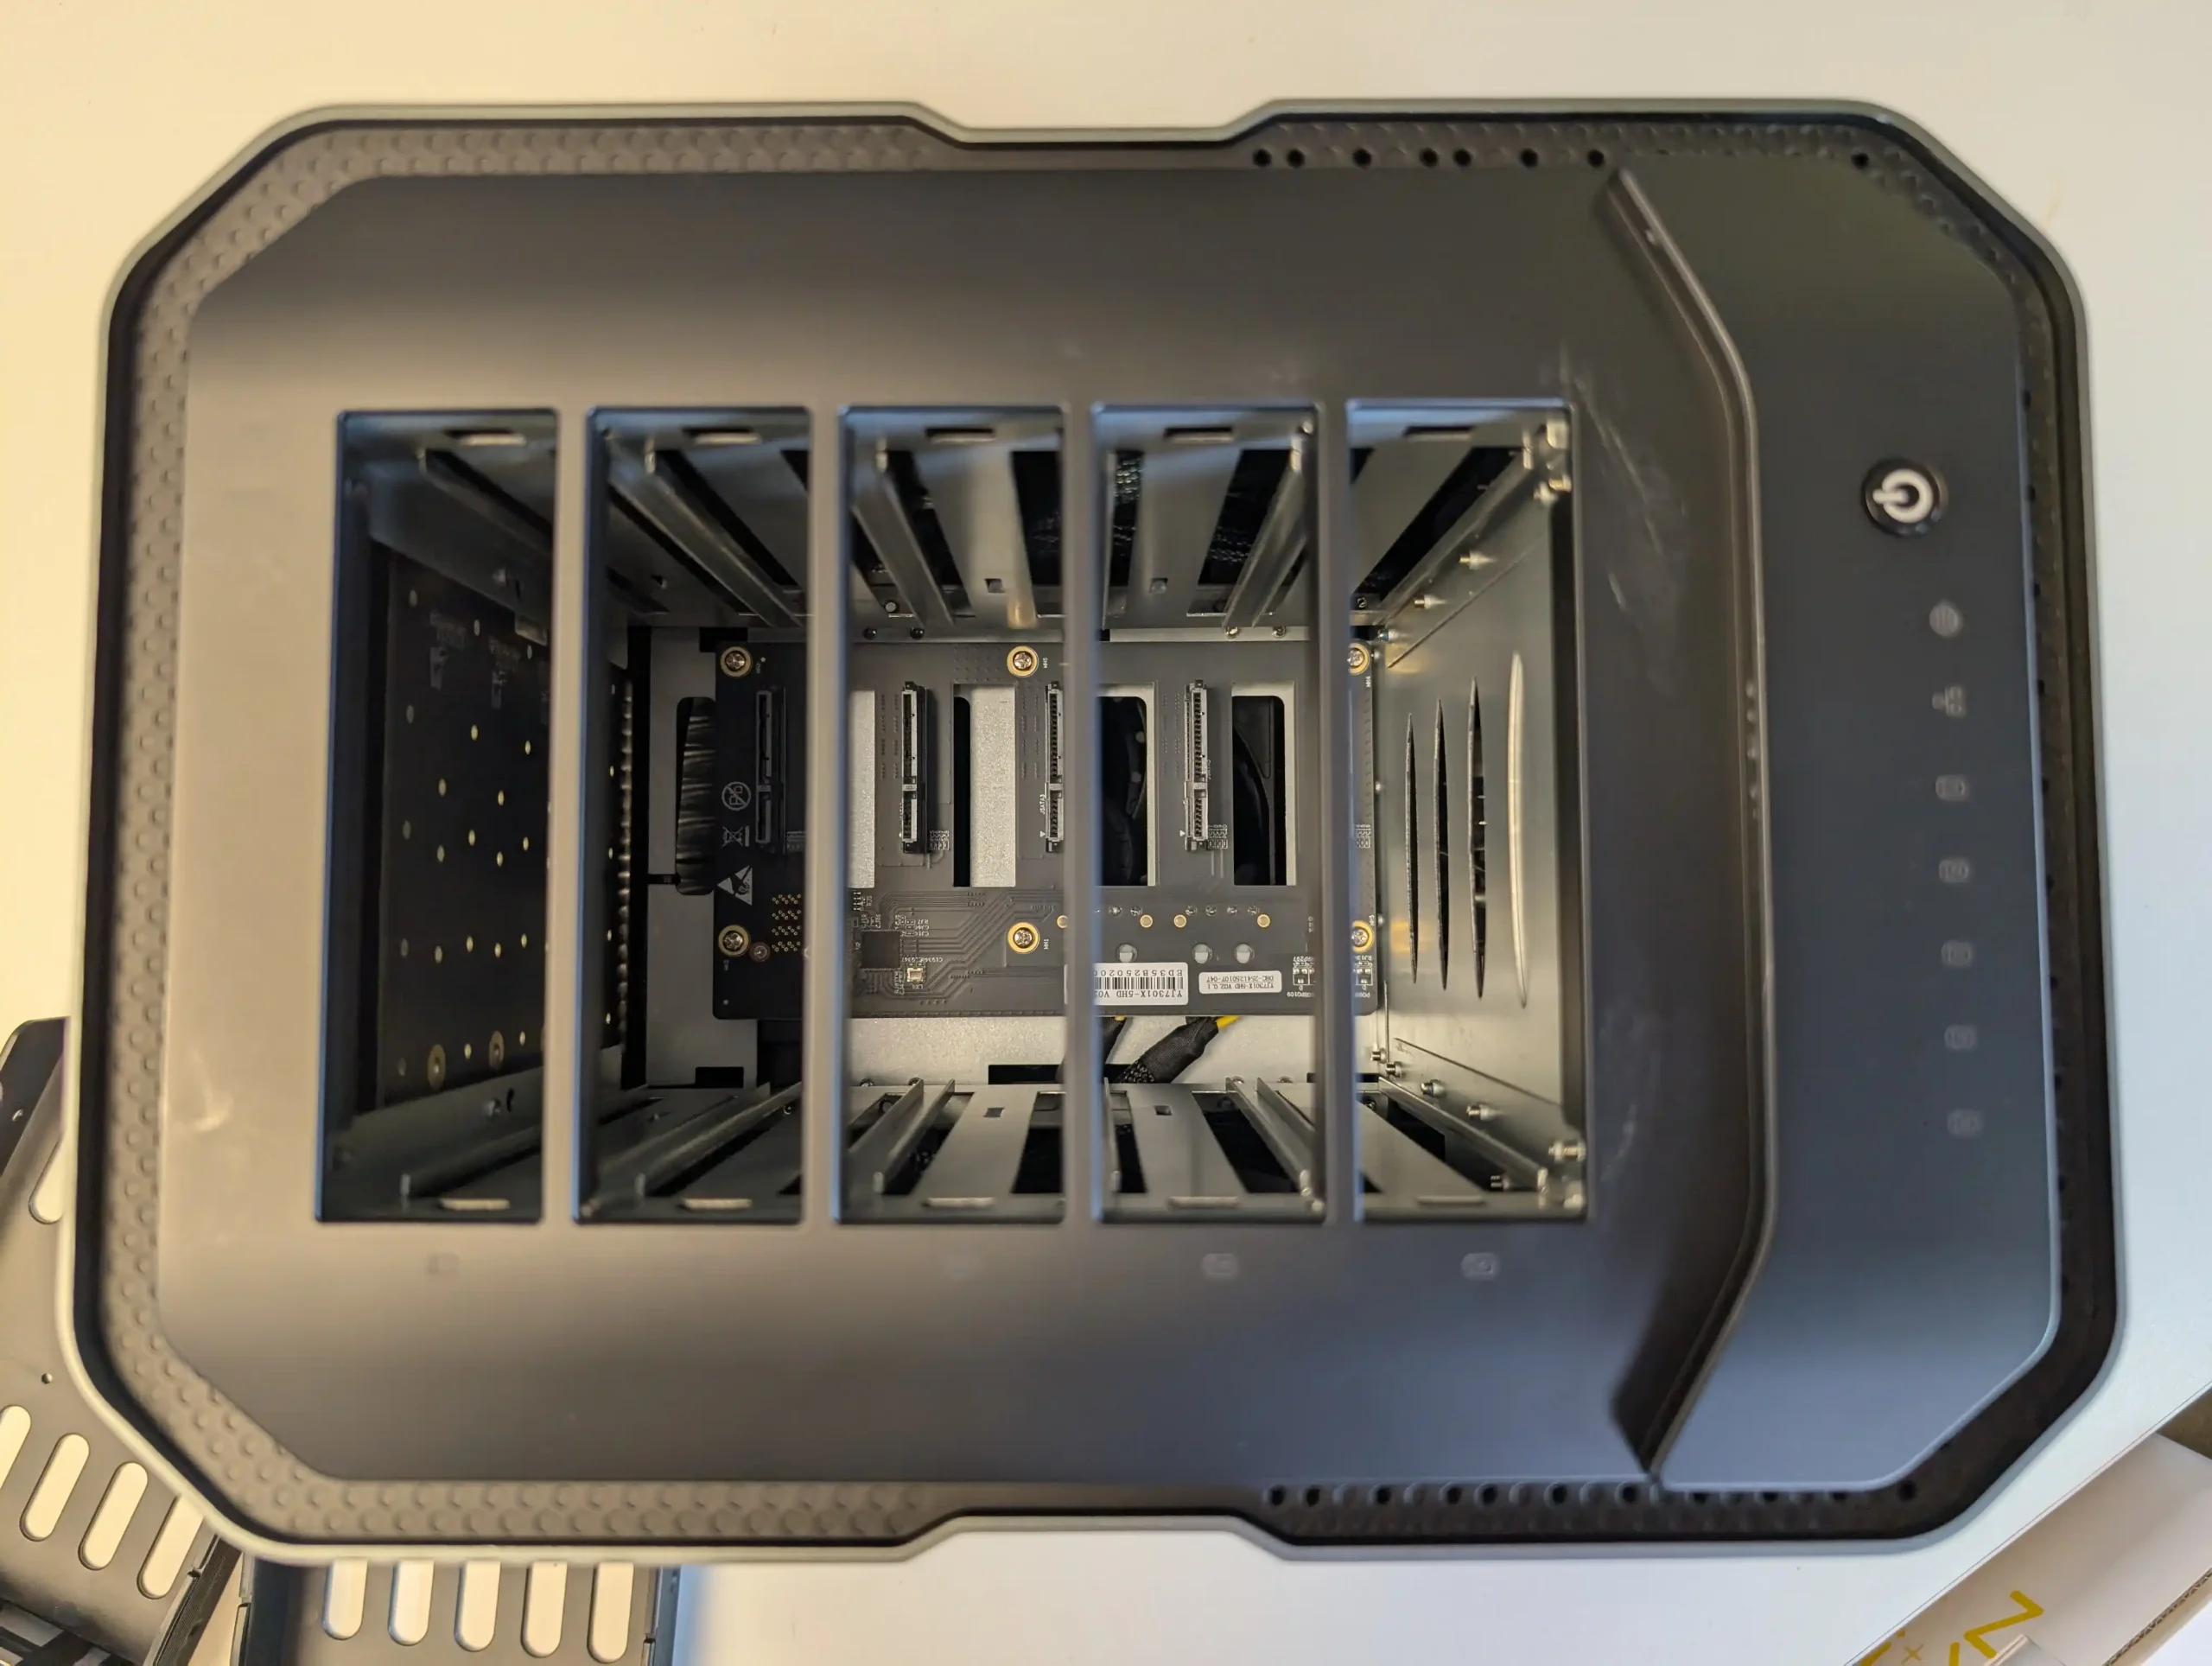
Above the HDD area, users will find four top-facing M.2 NVMe SSD slots located beneath a secondary magnetic lid, which includes a washable mesh dust filter. This dual-layered design gives quick tool-less access to the upper SSDs, and the system provides enough internal clearance to accommodate full-height heatsinks.
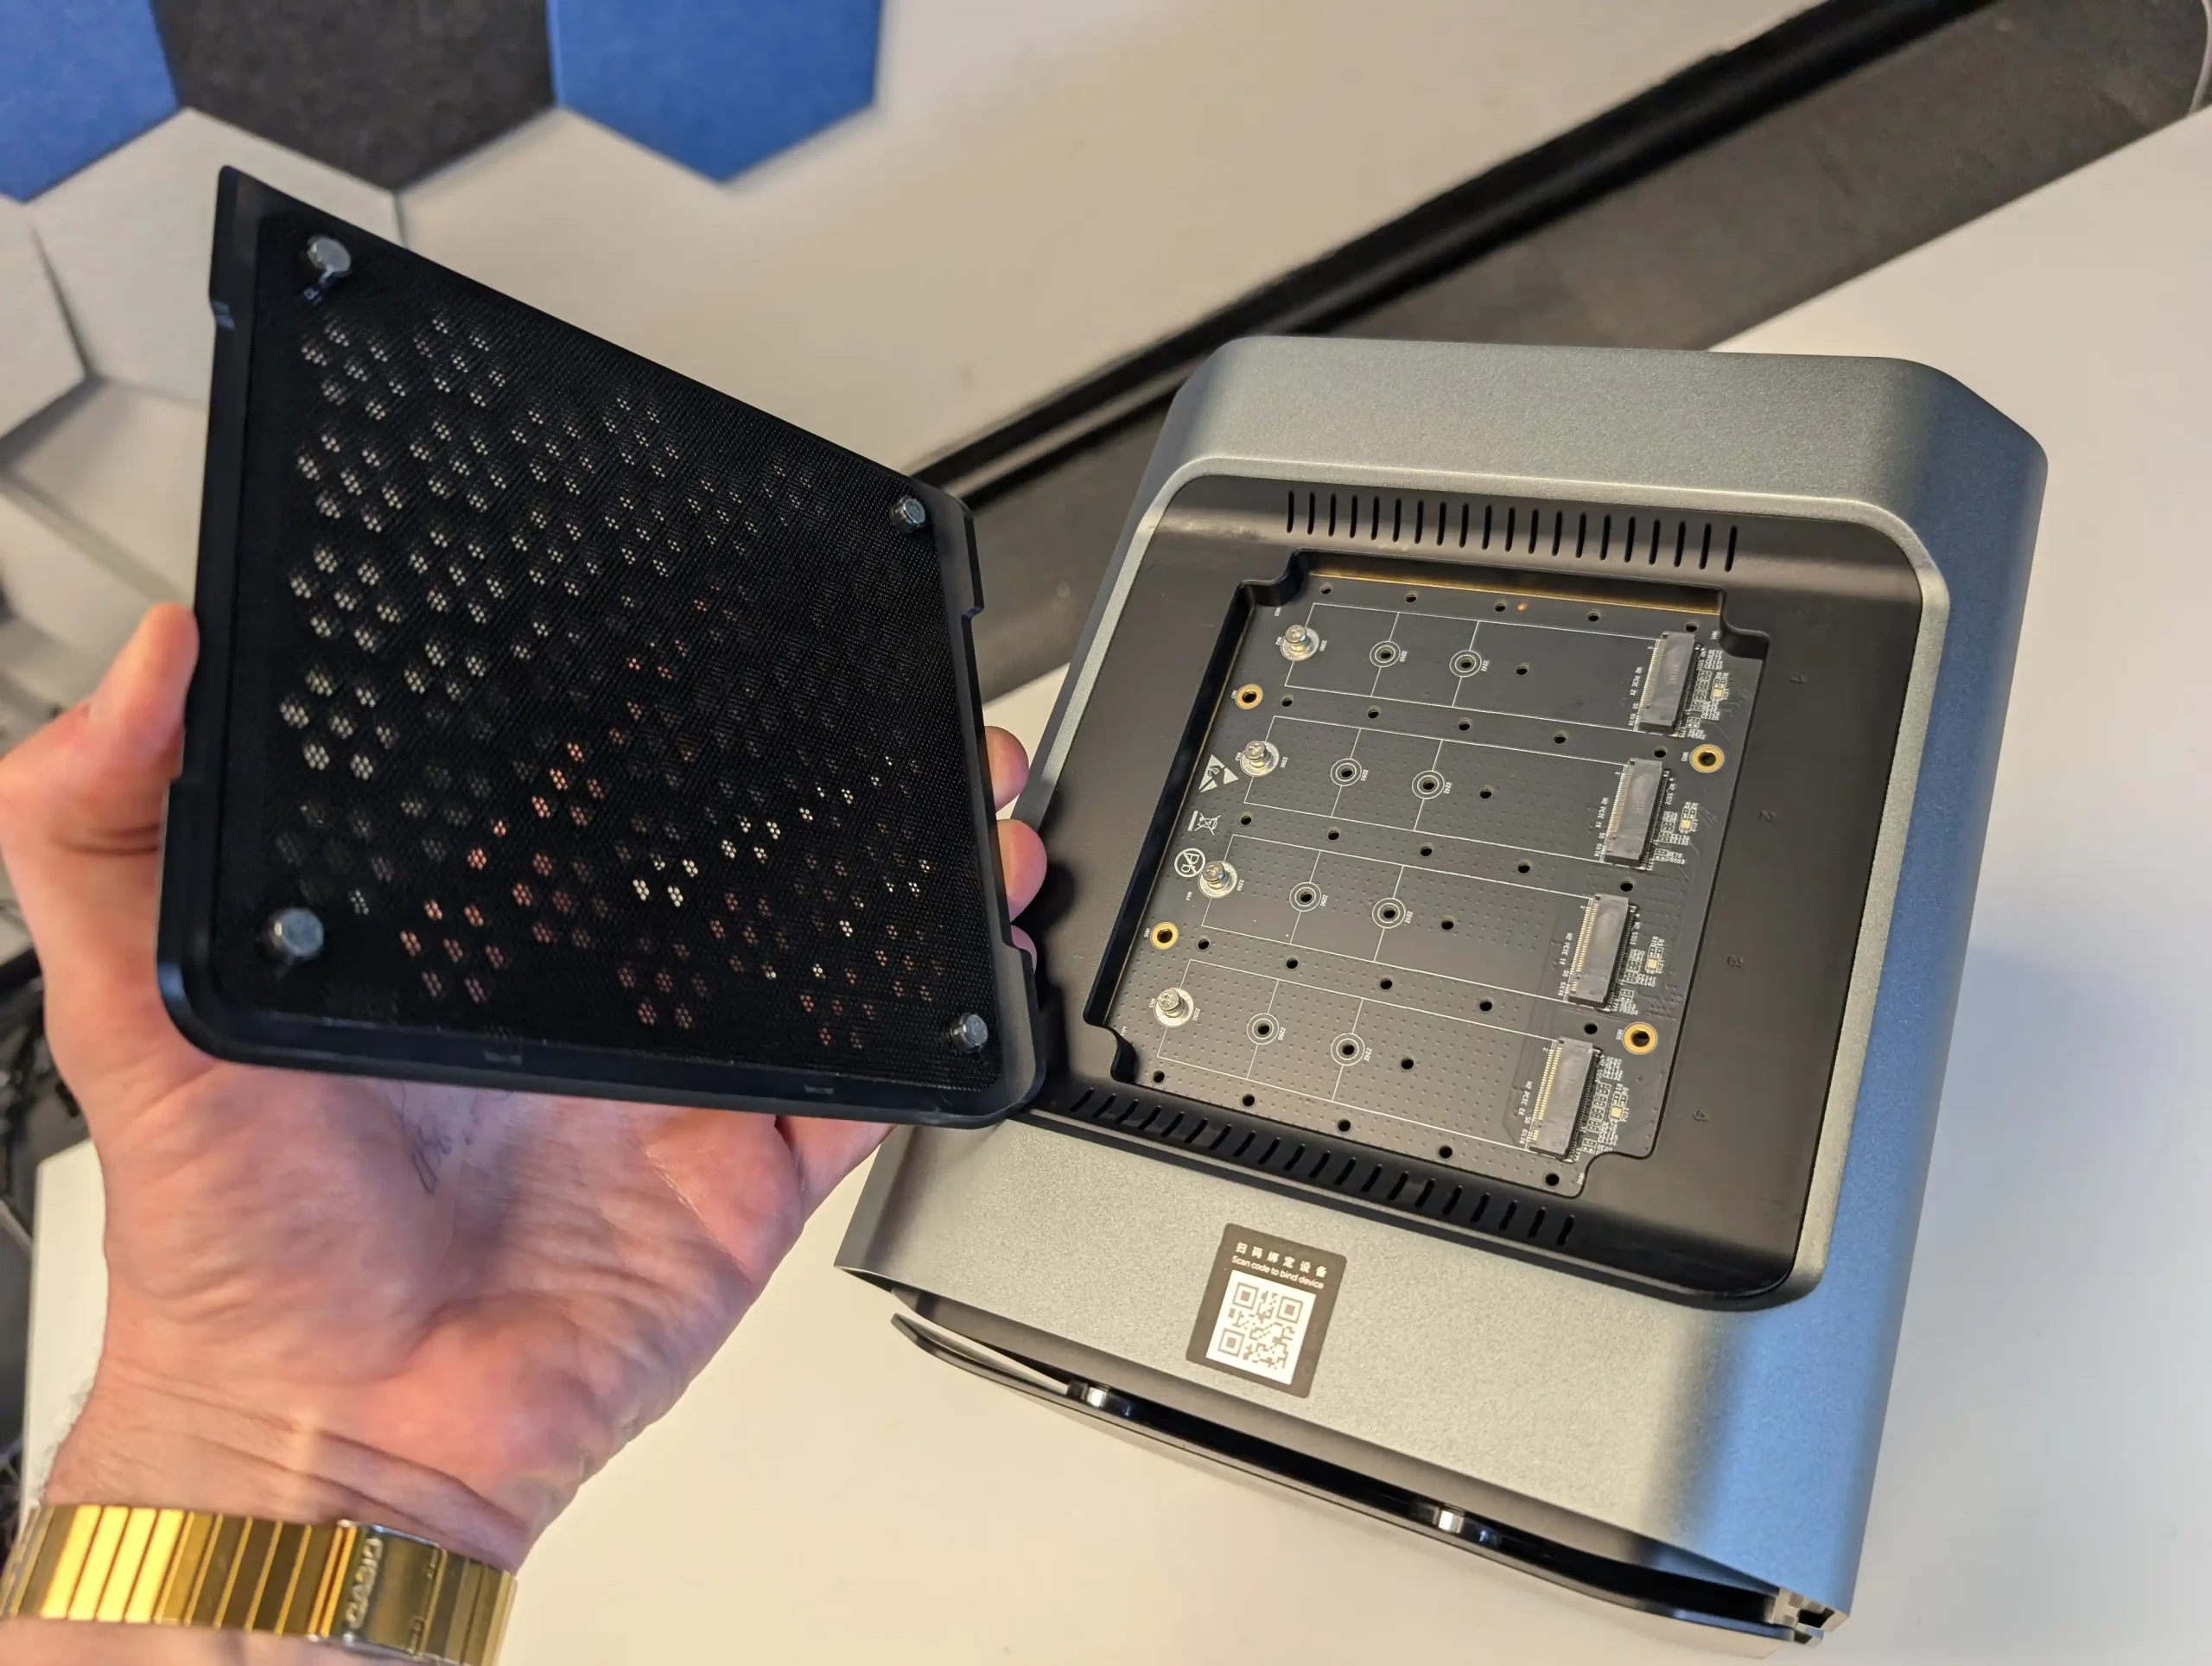
Underneath the chassis are two additional M.2 NVMe slots, accessed by removing the base plate, which is secured with standard screws. Combined, this provides a total of six M.2 bays, enabling hybrid storage setups where SSDs can be allocated for cache, metadata pools, or as part of a tiered ZFS configuration. While the layout appears consistent across both models, there are minor internal structural differences, especially in the power and thermals between the N305 and i5 variants.

Build quality varies slightly depending on perspective. The chassis exterior is predominantly plastic for reduced weight and cost, but the internal structure—such as drive cages, shielding, and board mounting points—is fully metal, contributing to better durability and heat dissipation.
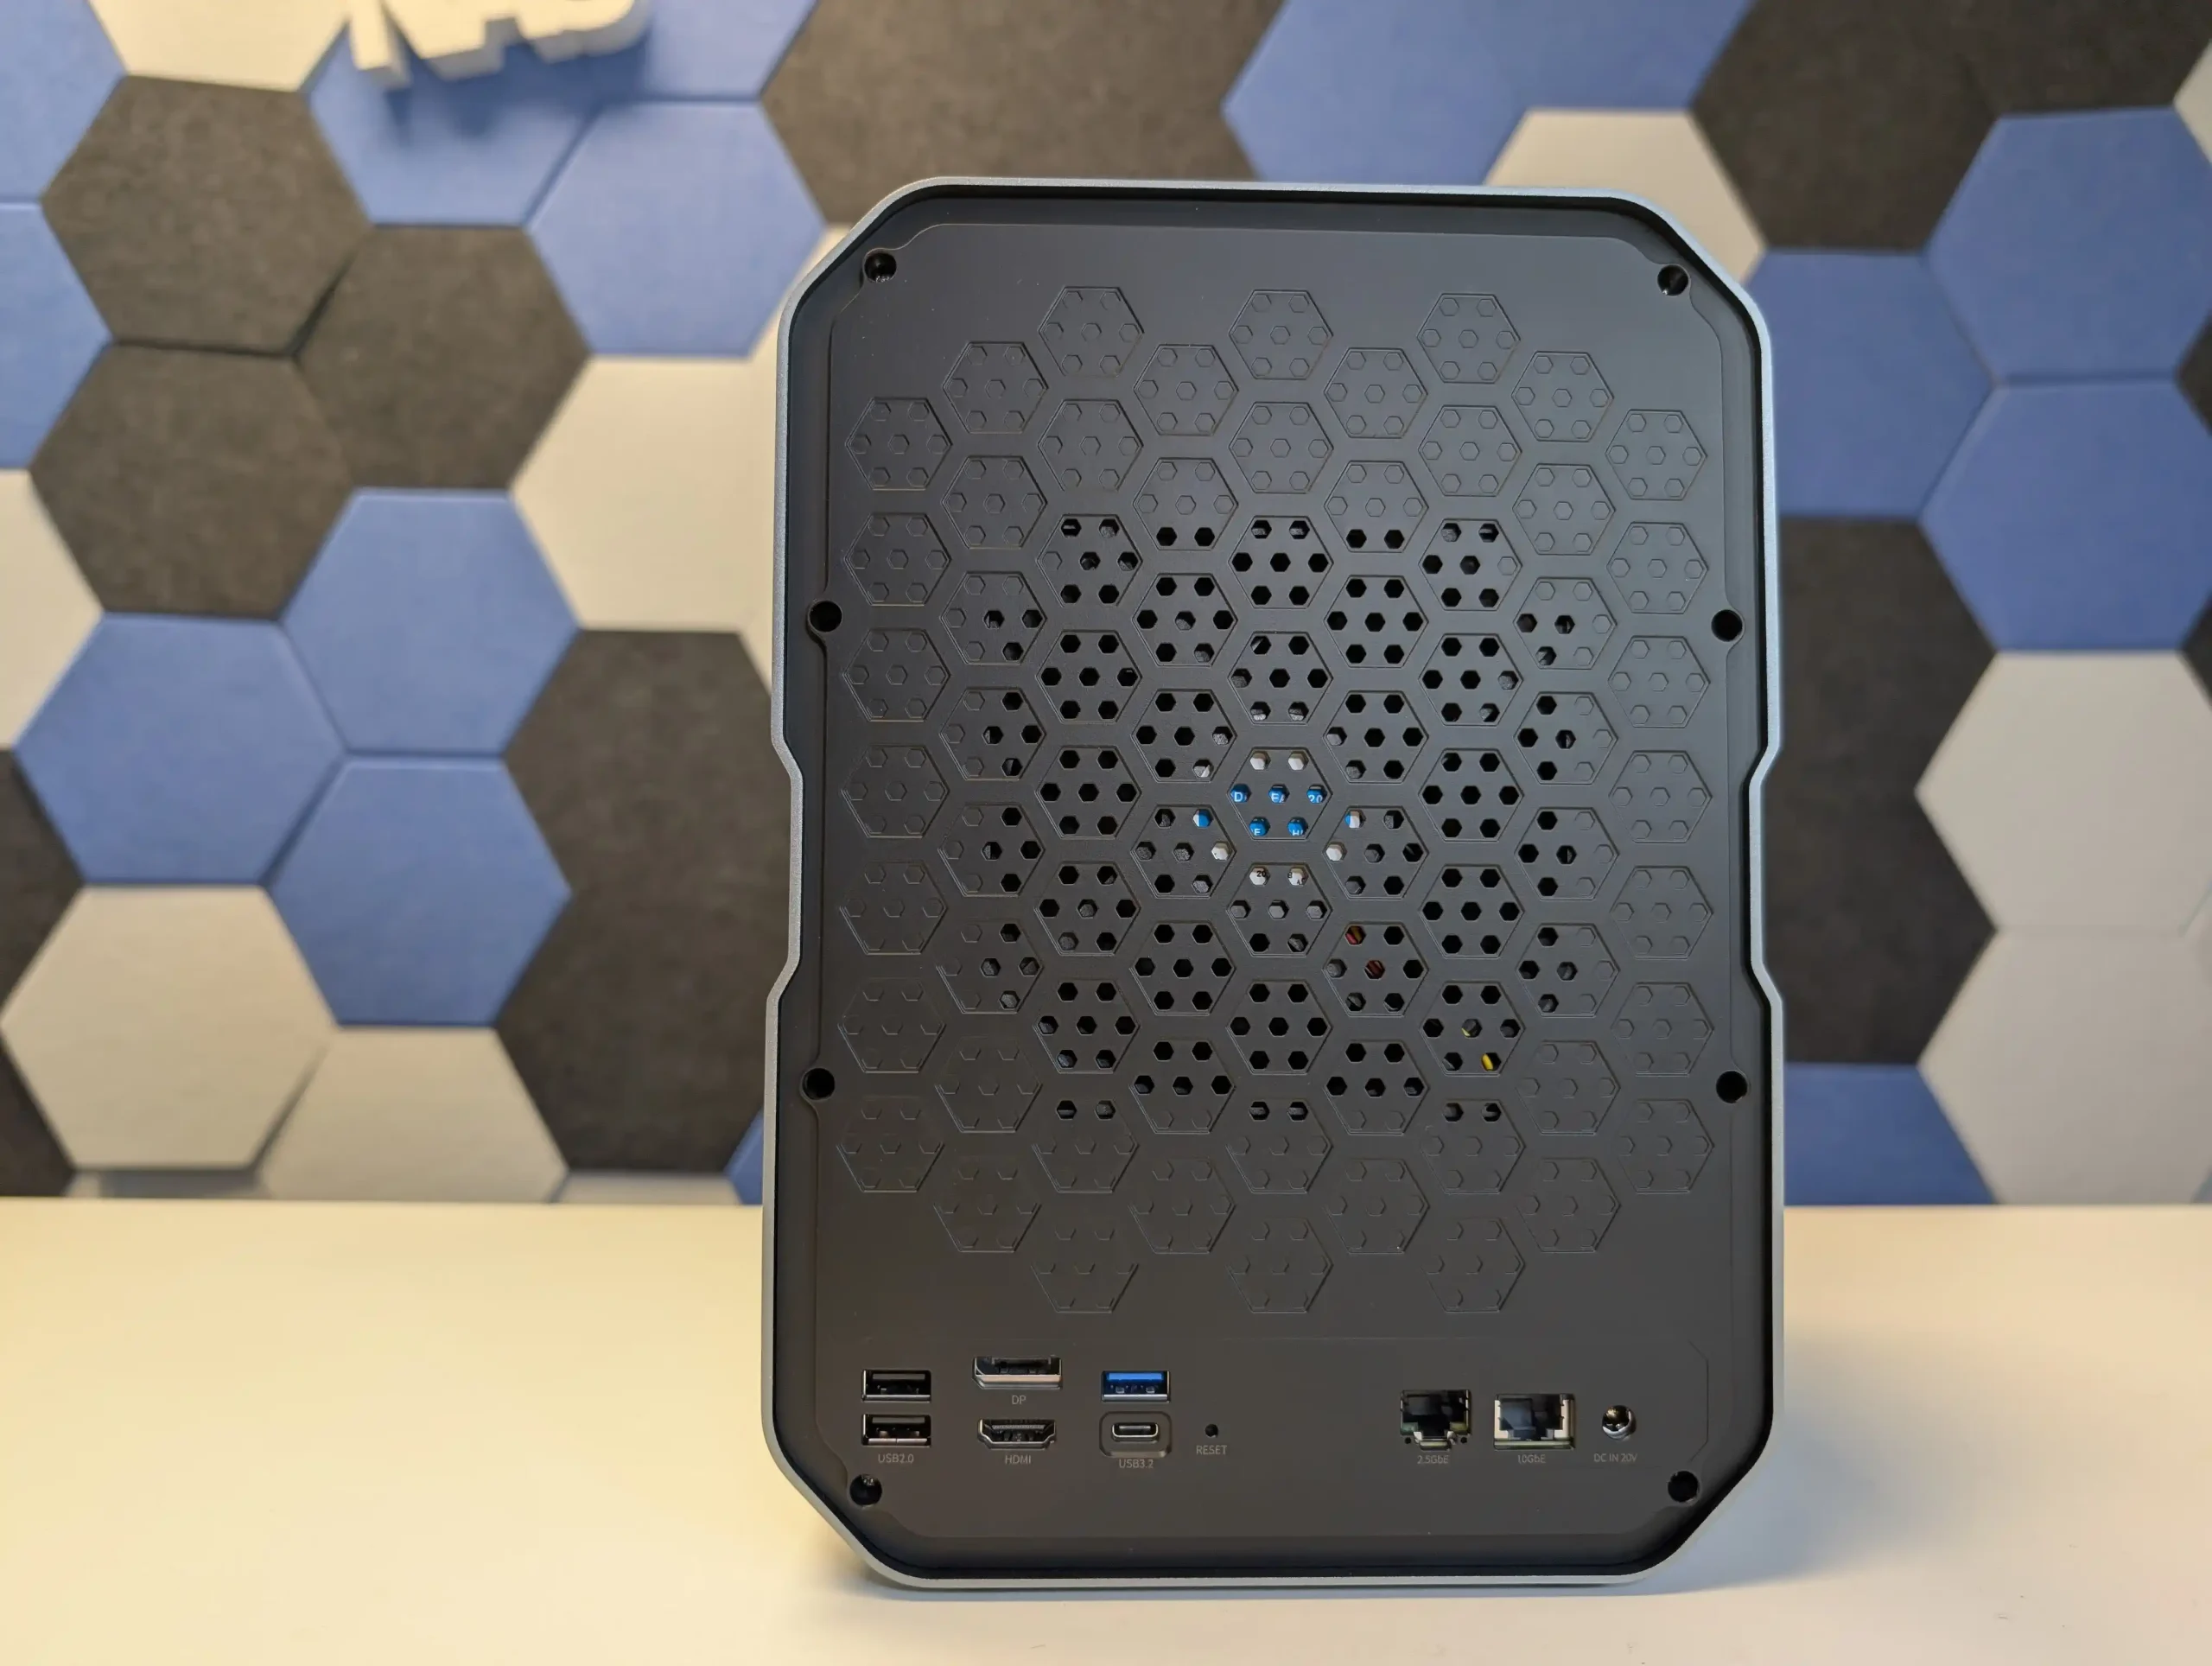
Ventilation is managed by a single large rear fan, with the Pro variant including additional improvements in thermal zoning. Noise levels remained within reasonable limits during testing, with the CF56 model averaging 29–31 dBA in quiet mode and the CF56 Pro rising to 46–47 dBA under full load. This suggests that although the design is visually consistent, thermal demands increase substantially with the i5-1240P model under sustained workloads or dense NVMe configurations.
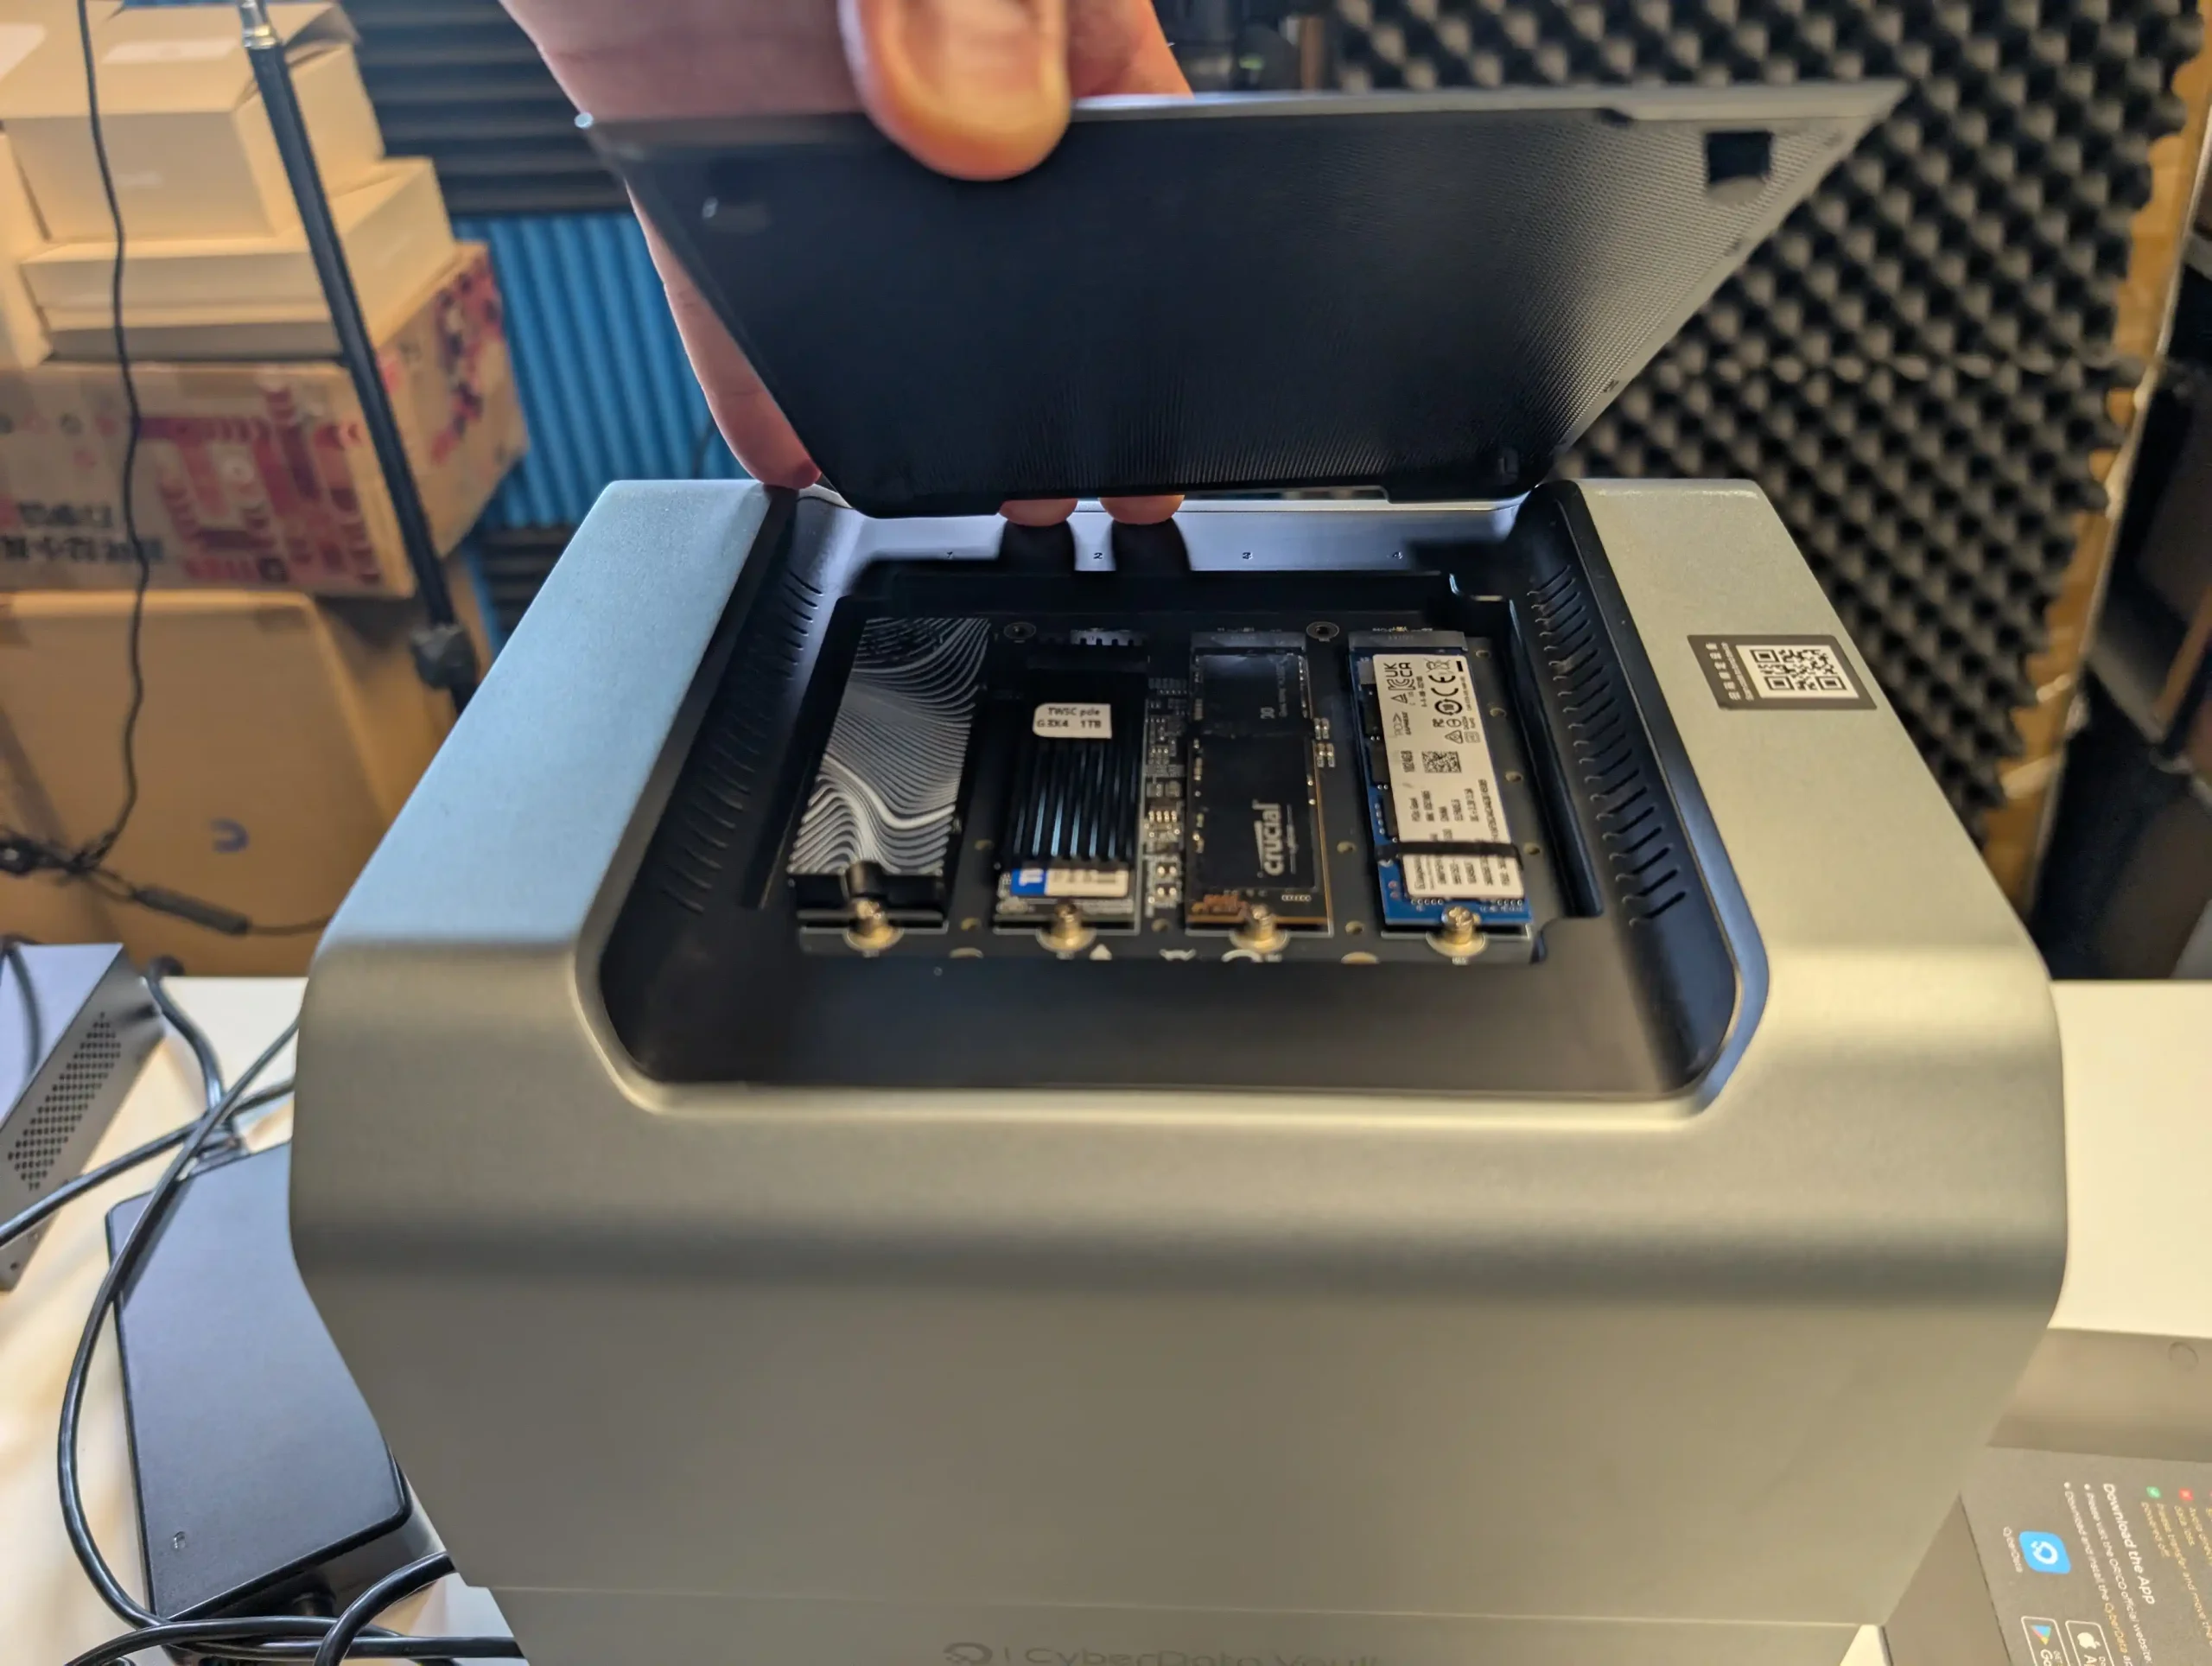
One notable design concern relates to the temperature observed in the upper M.2 bay region of the CF56 Pro. During extended stress testing, the top section of the chassis reached temperatures close to 80°C, prompting early correspondence with Orico about hardware revision plans. According to the brand, this issue has already led to a second- and third-generation PCB redesign, aiming to reduce thermal concentration around the CPU and top NVMe slots. It’s expected that the final retail revision of the CF56 Pro will include enhanced heat dissipation features in that area, potentially including better ventilation cutouts or redesigned passive cooling components on the board level.
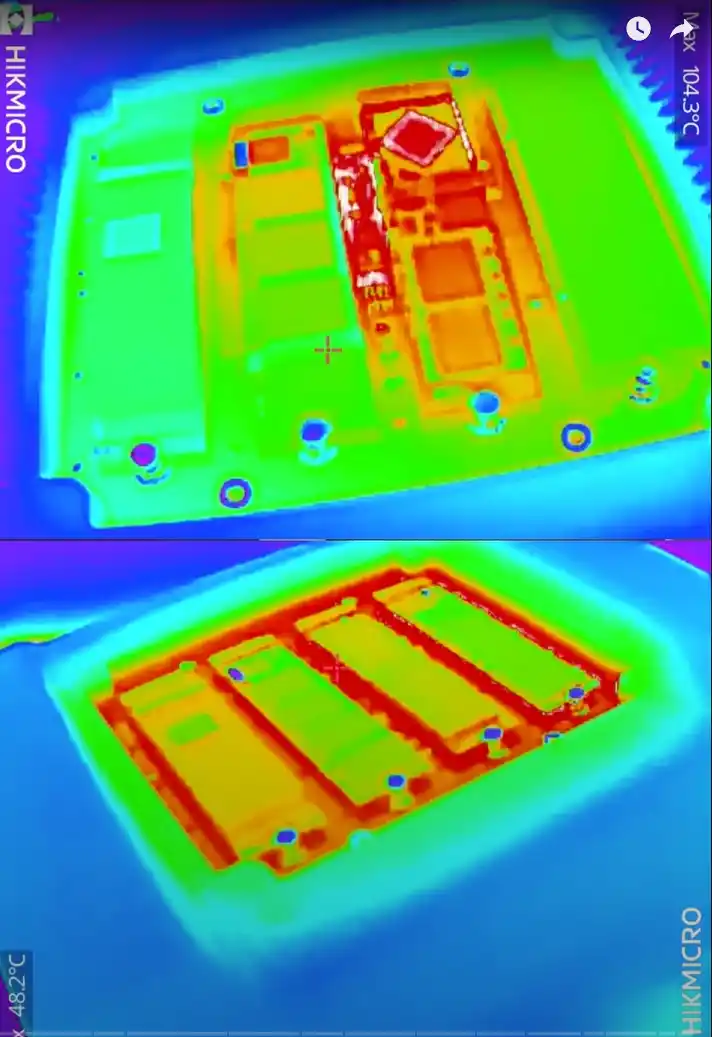
Lastly, the system’s approach to internal power delivery differs subtly between models. Both the CF56 and CF56 Pro use an external PSU that connects via a barrel plug, but the wattage and thermal ceiling requirements are significantly higher on the Pro due to its 12-core CPU and expanded 10GbE networking. These differences also manifest in fan curve behavior and system-wide power consumption. Under light but active load (including live network activity and idle CPU), the CF56 consumed around 45–46W. In contrast, the CF56 Pro peaked at 79–81W during 8K transcoding and full NVMe/HDD population. This further emphasizes how both models share a common enclosure but diverge internally to meet their respective performance tiers.
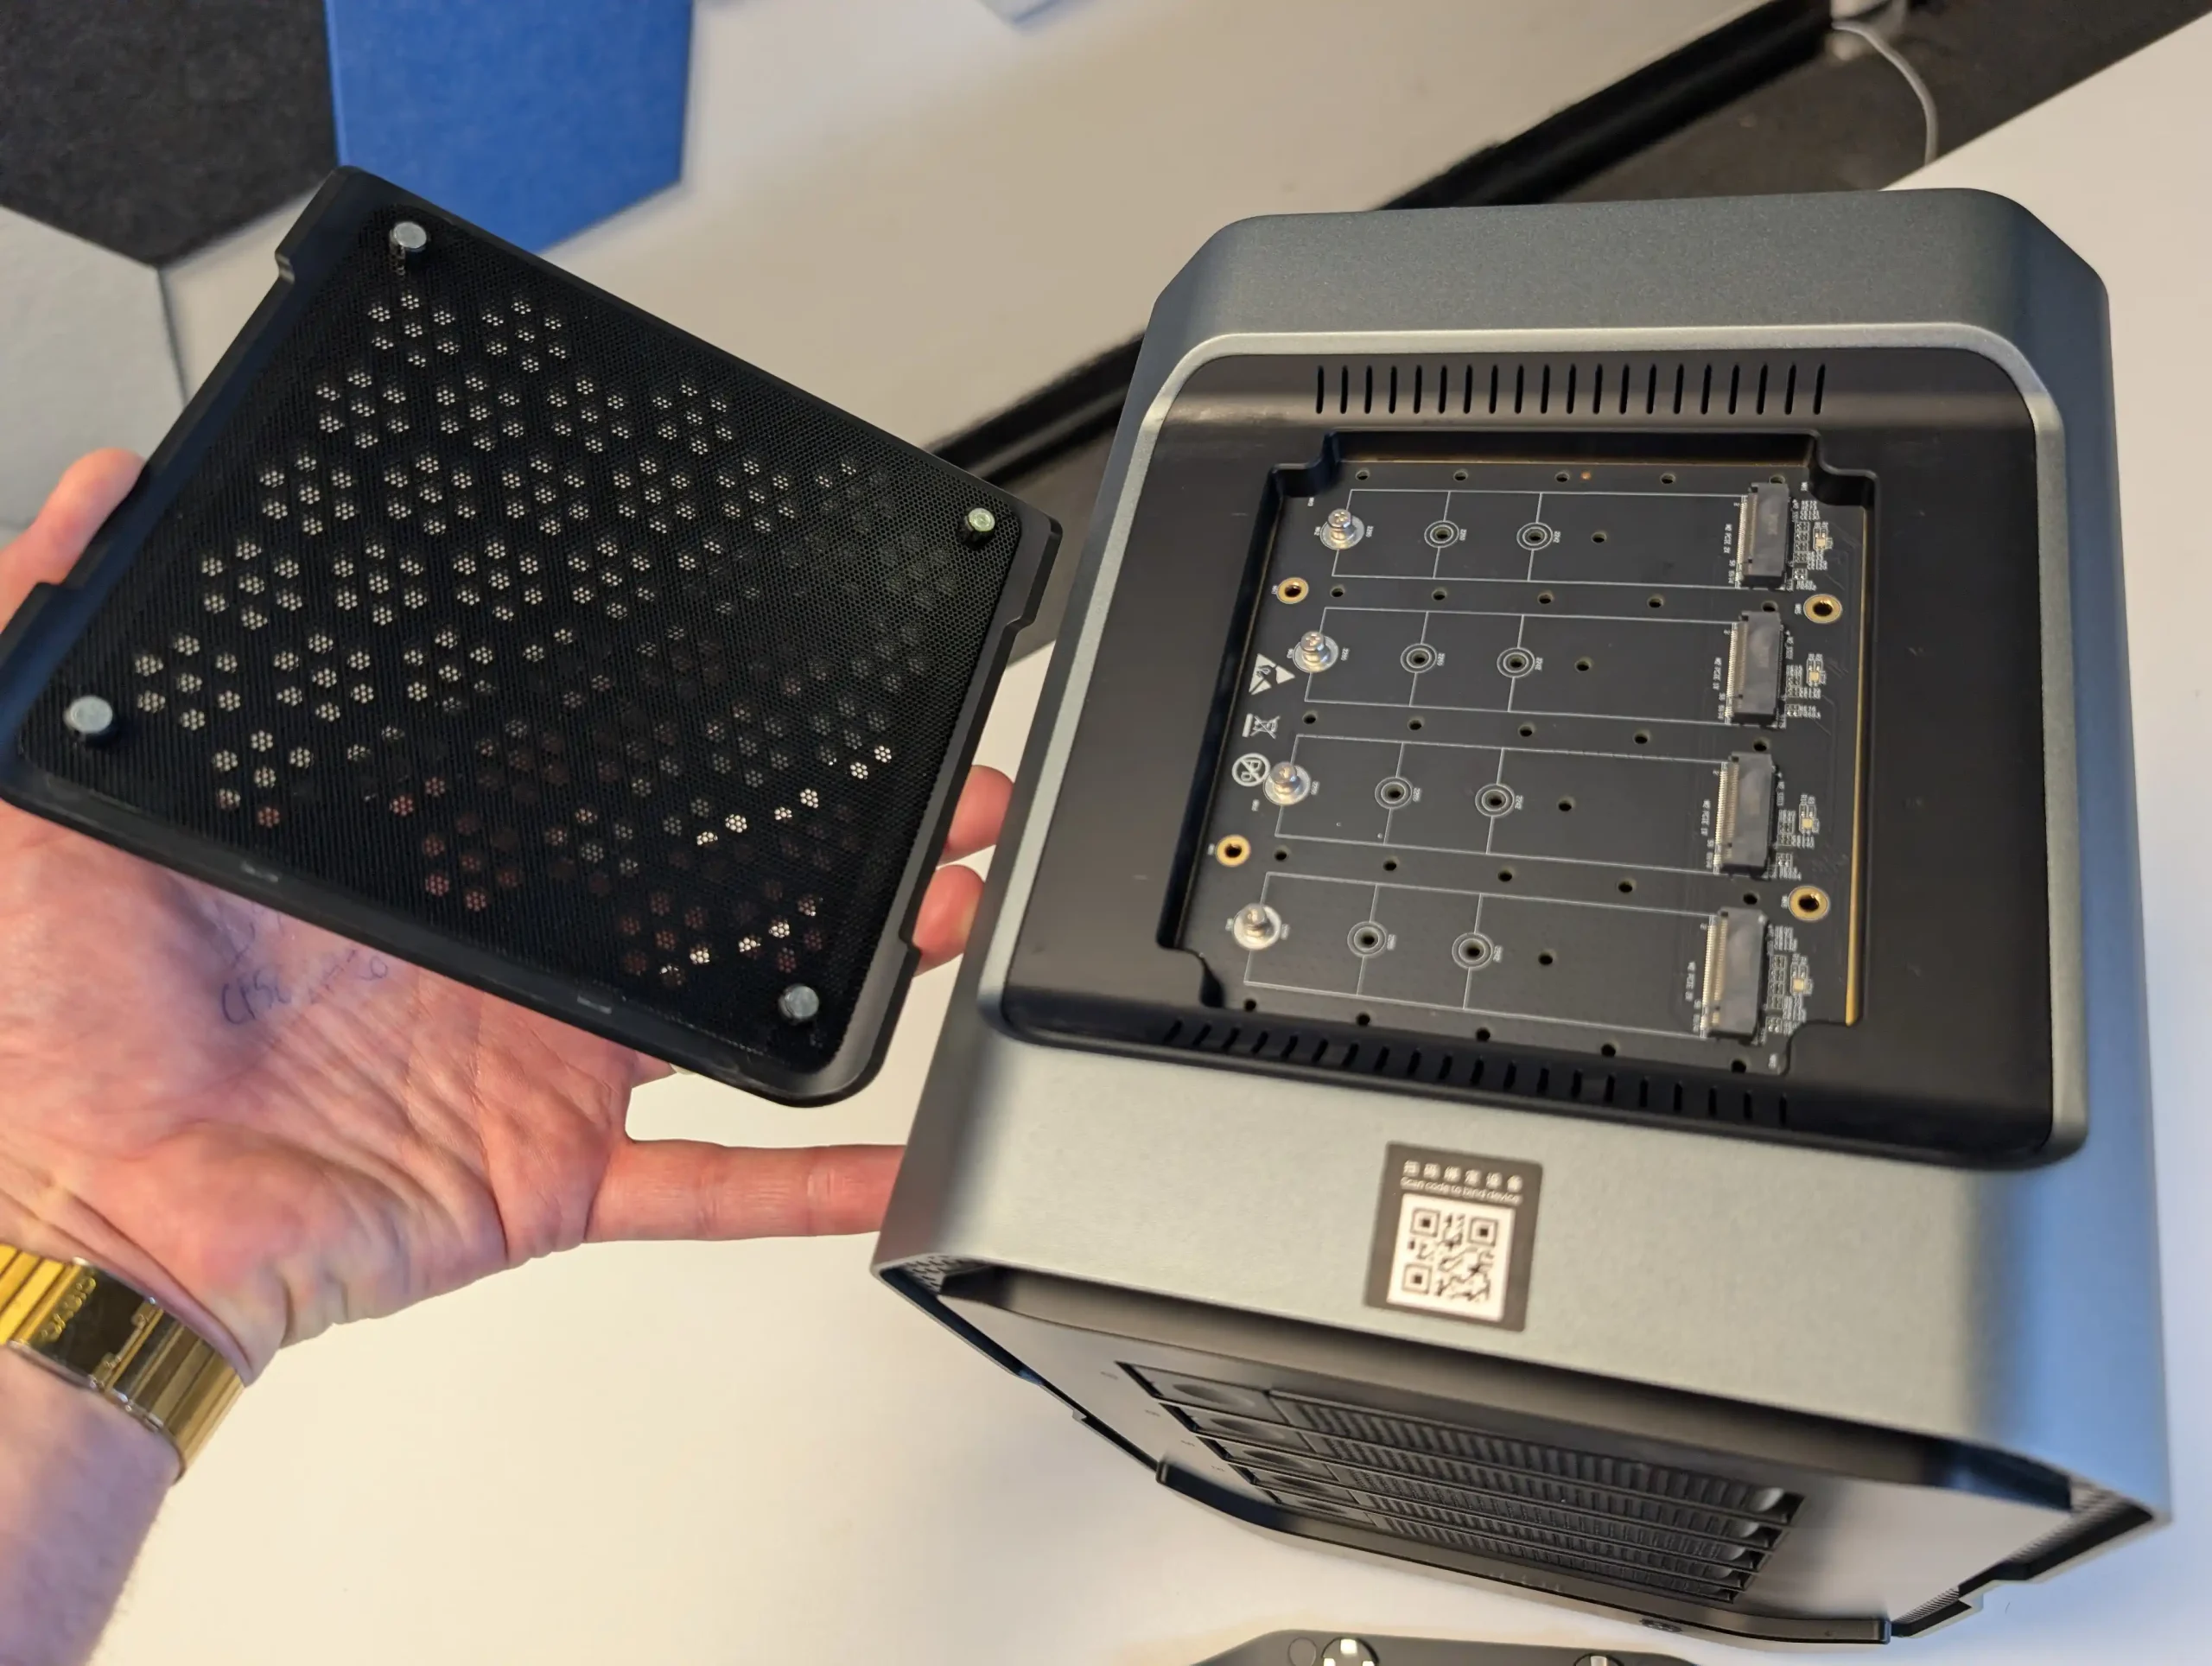
Internally, the CF56 and CF56 Pro share a similar board layout, but the differences in their processors define the target use case and overall capabilities of each unit. The CF56 is powered by the Intel Core i3-N305, an energy-efficient 8-core/8-thread processor based on the Gracemont architecture. This CPU is commonly used in fanless mini PCs and excels in multi-threaded workloads at low power consumption, making it suitable for light-to-moderate NAS tasks such as SMB file serving, local backups, Docker containers, and light Plex usage. Meanwhile, the CF56 Pro features the Intel Core i5-1240P, a significantly more powerful 12-core/16-thread processor with four performance cores and eight efficiency cores. This hybrid architecture provides greater burst throughput and a better foundation for AI-enhanced services, real-time media indexing, and virtualization tasks.
| Specification | i5-1240P | i3-N305 | N150 | N355 |
|---|---|---|---|---|
| Total Cores | 12 (4P + 8E) | 8 (Efficient only) | 4 | 8 |
| # of Performance-cores | 4 | – | – | – |
| # of Efficient-cores | 8 | 8 | 4 | 8 |
| Total Threads | 16 | 8 | 4 | 8 |
| Max Turbo Frequency | 4.40 GHz | 3.80 GHz | 3.6 GHz | 3.9 GHz |
| Performance-core Max Turbo Freq. | 4.40 GHz | – | – | – |
| Efficient-core Max Turbo Freq. | 3.30 GHz | – | – | – |
| Cache | 12 MB Intel® Smart Cache | 6 MB Intel® Smart Cache | 6 MB Intel® Smart Cache | 6 MB Intel® Smart Cache |
| Processor Base Power | 28 W | – | 6 W | 15 W |
| Maximum Turbo Power | 64 W | – | – | – |
| Minimum Assured Power | 20 W | – | – | 9 W |
| TDP | – | 15 W | – | – |
| Configurable TDP-down | – | 9 W | – | – |
| GPU Name | Intel® Iris® Xe Graphics eligible | Intel® UHD Graphics | Intel® Graphics | Intel® Graphics |
| Graphics Max Dynamic Frequency | 1.30 GHz | 1.25 GHz | 1 GHz | 1.35 GHz |
| Microprocessor PCIe Revision | Gen 4 | Gen 3 | Gen 3 | Gen 3 |
| Chipset / PCH PCIe Revision | Gen 3 | Gen 3 | Gen 3 | Gen 3 |
| Max # of PCI Express Lanes | 20 | 9 | 9 | 9 |
Both systems come with DDR5 memory pre-installed—16GB in the prototype units—but with different slot configurations. The CF56 includes a single DDR5 SO-DIMM slot, limiting it to a maximum of 32GB of memory and restricting dual-channel capability. In contrast, the CF56 Pro includes two SO-DIMM slots, supporting up to 64GB DDR5 and enabling dual-channel operation, which offers a notable performance uplift in workloads such as memory-intensive VMs or media databases. However, ECC memory is not supported on either model, due to both CPUs lacking ECC validation. This may concern users intending to rely on ZFS for mission-critical operations, as ECC is typically recommended in those scenarios to prevent silent data corruption.
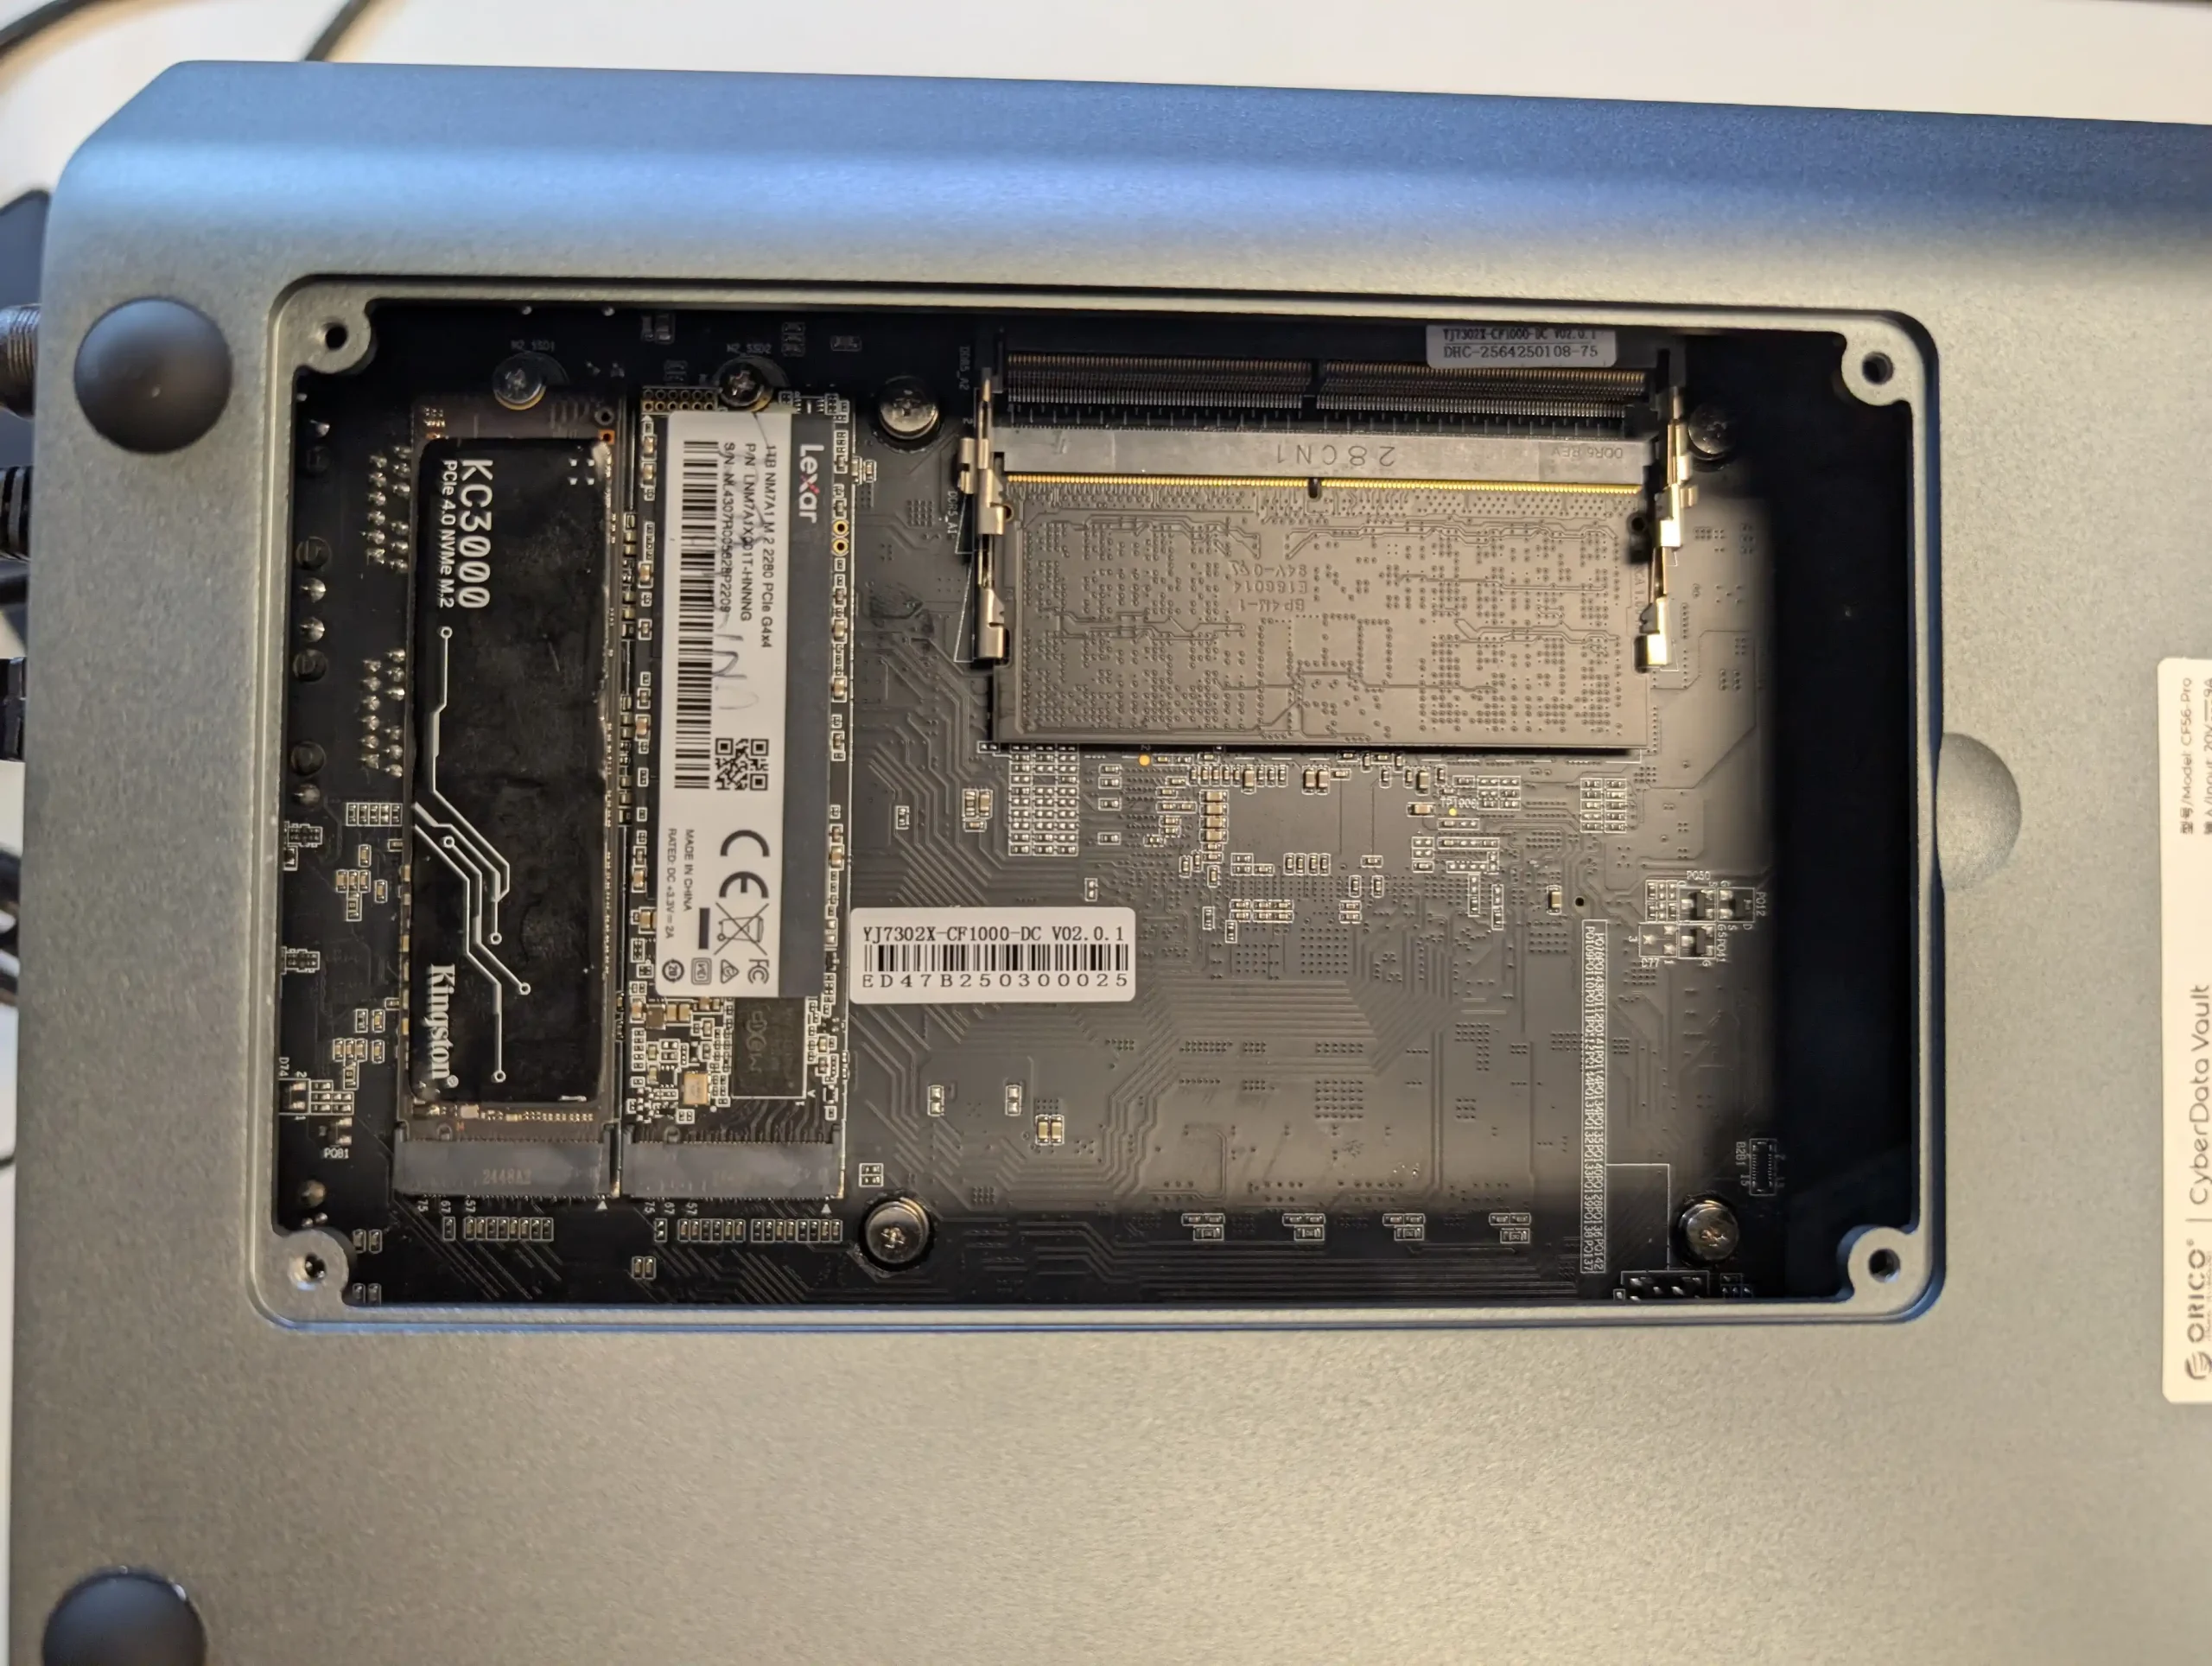 |
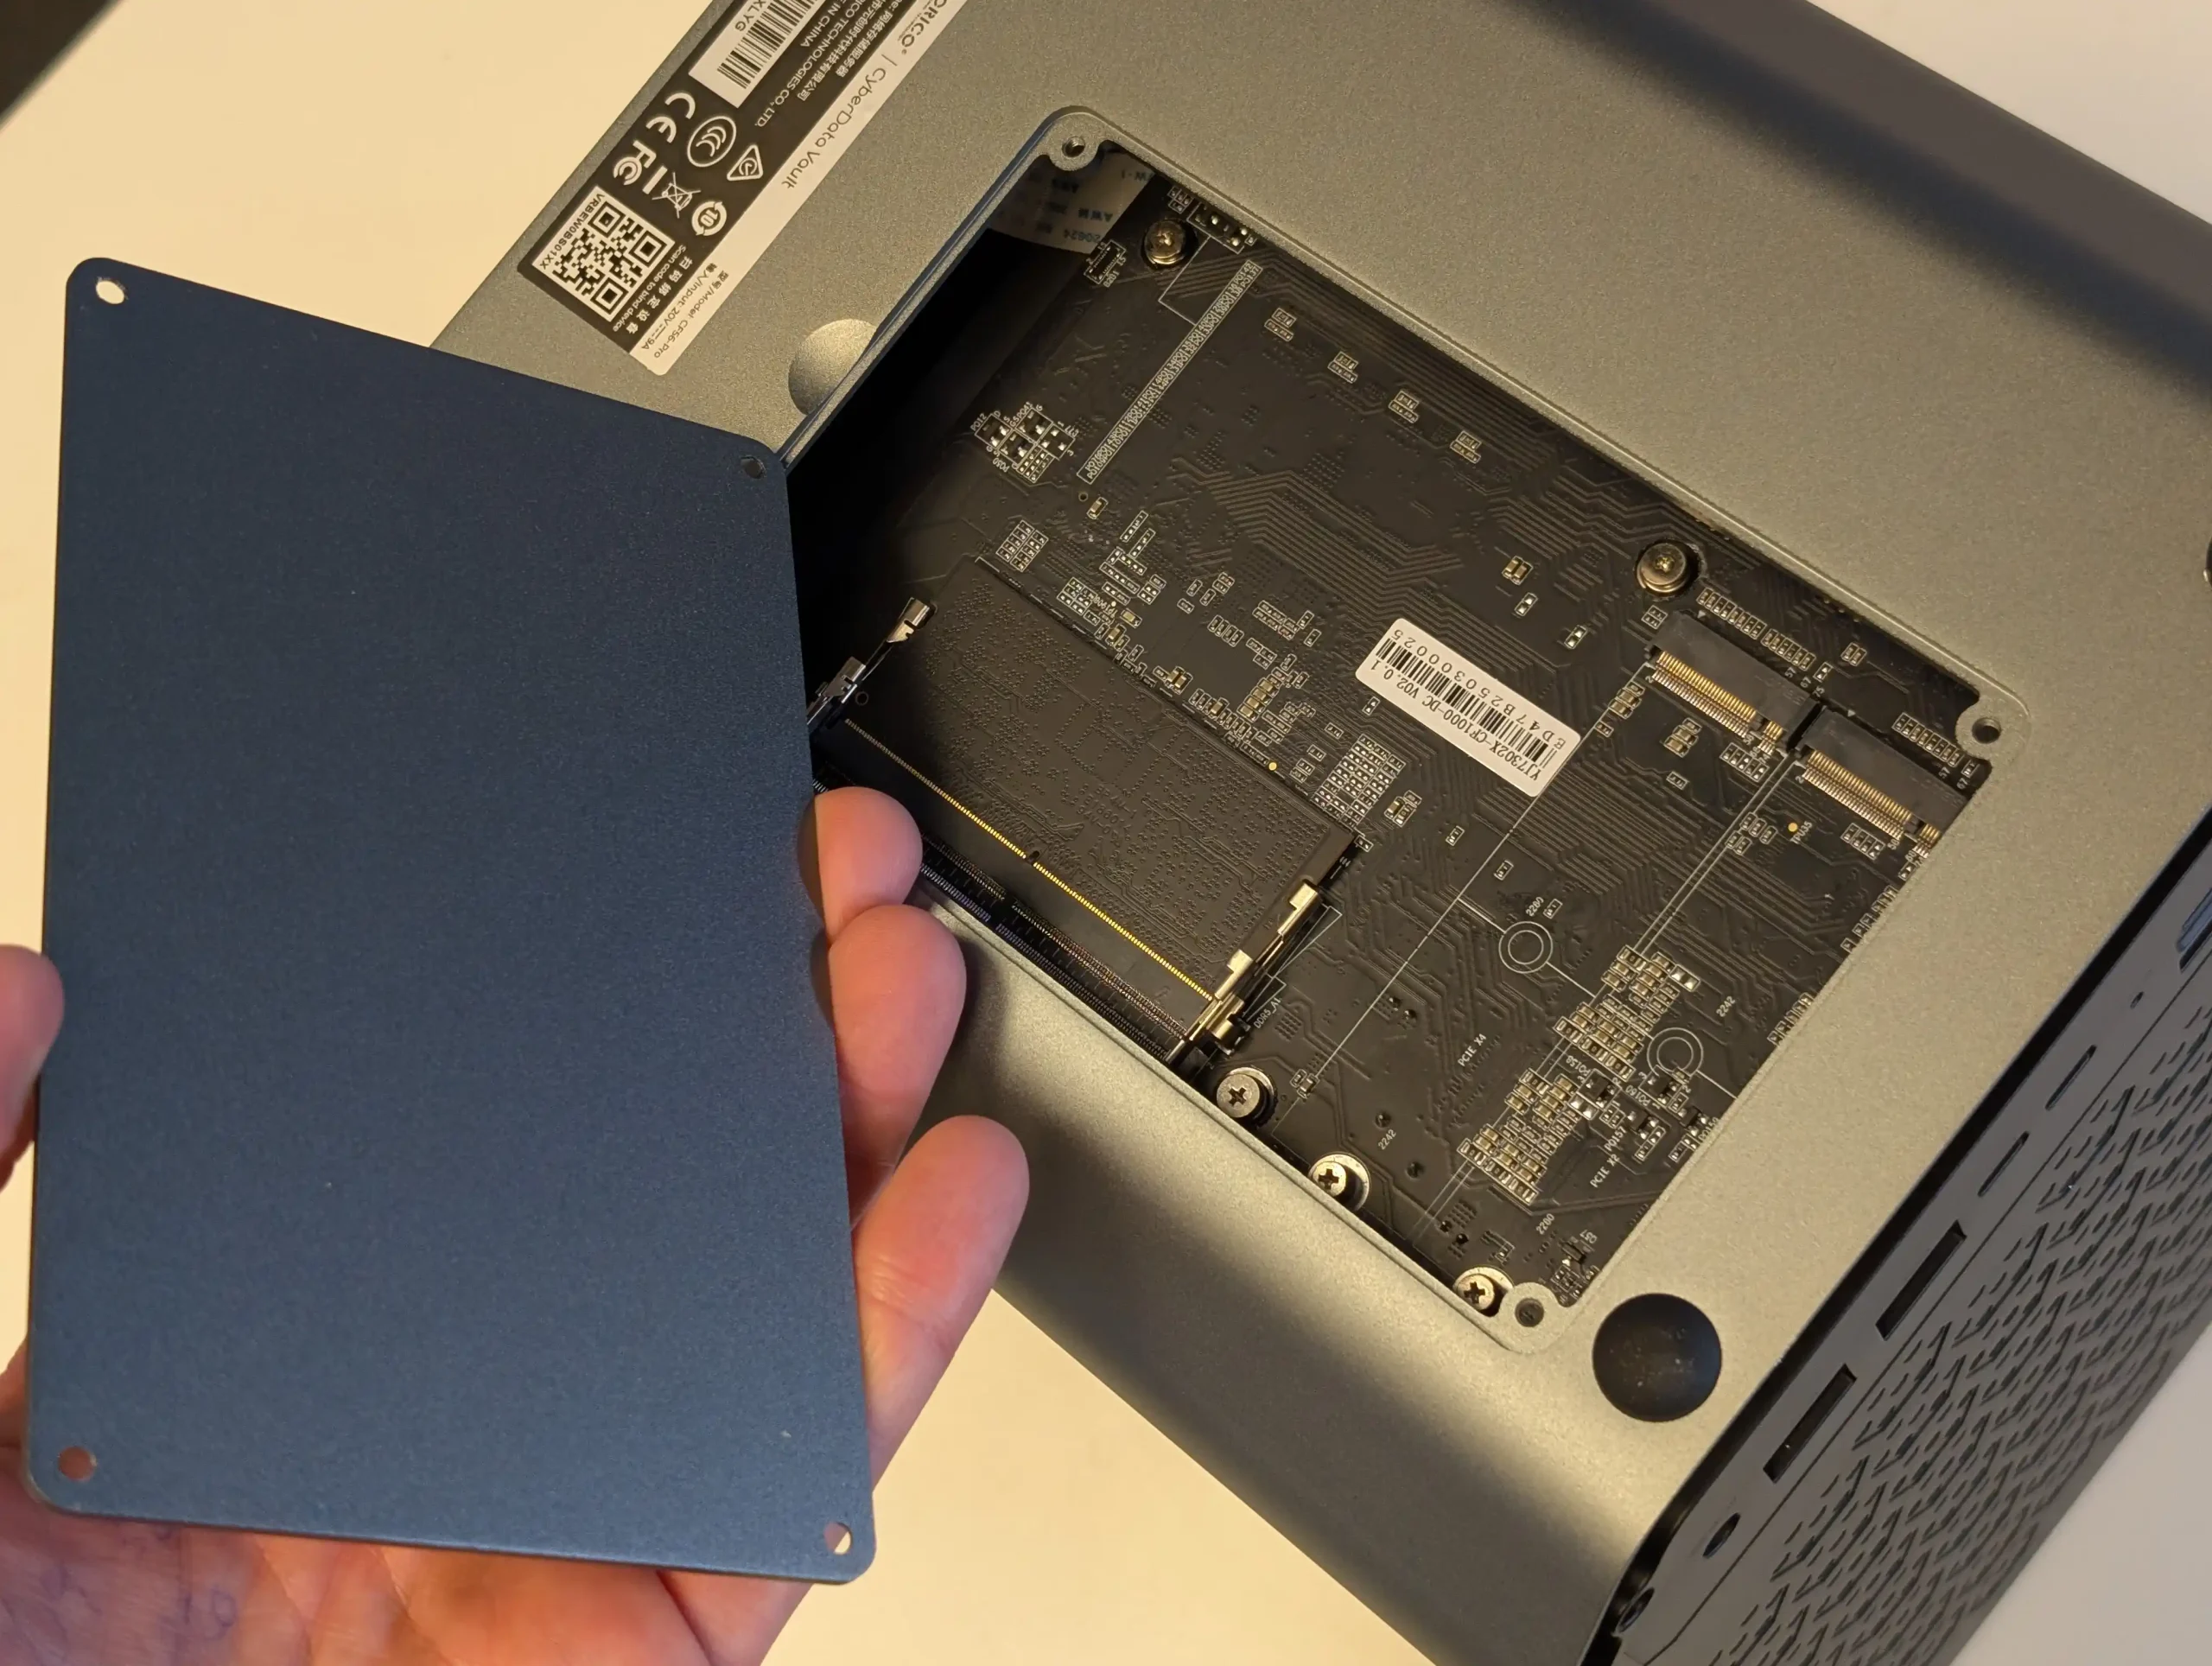 |
Storage throughput is also heavily influenced by the PCIe lane allocation on each model. In the CF56, all six M.2 NVMe SSD slots operate on Gen 3 lanes, with those on the top four slots running at PCIe 3.0 x1 speeds and the bottom two reaching PCIe 3.0 x4. While this limits maximum per-slot bandwidth to around 1 GB/s on the upper four, it allows for cost-effective use of Gen 3 drives, which remain widely available and affordable. The CF56 Pro offers higher total bandwidth, with its top four M.2 slots upgraded to PCIe 3.0 x2, and the bottom two retaining PCIe 3.0 x4. Despite the i5-1240P supporting Gen 4 PCIe, Orico appears to have intentionally limited all M.2 slots to Gen 3 to manage thermals and ensure system stability under prolonged load.
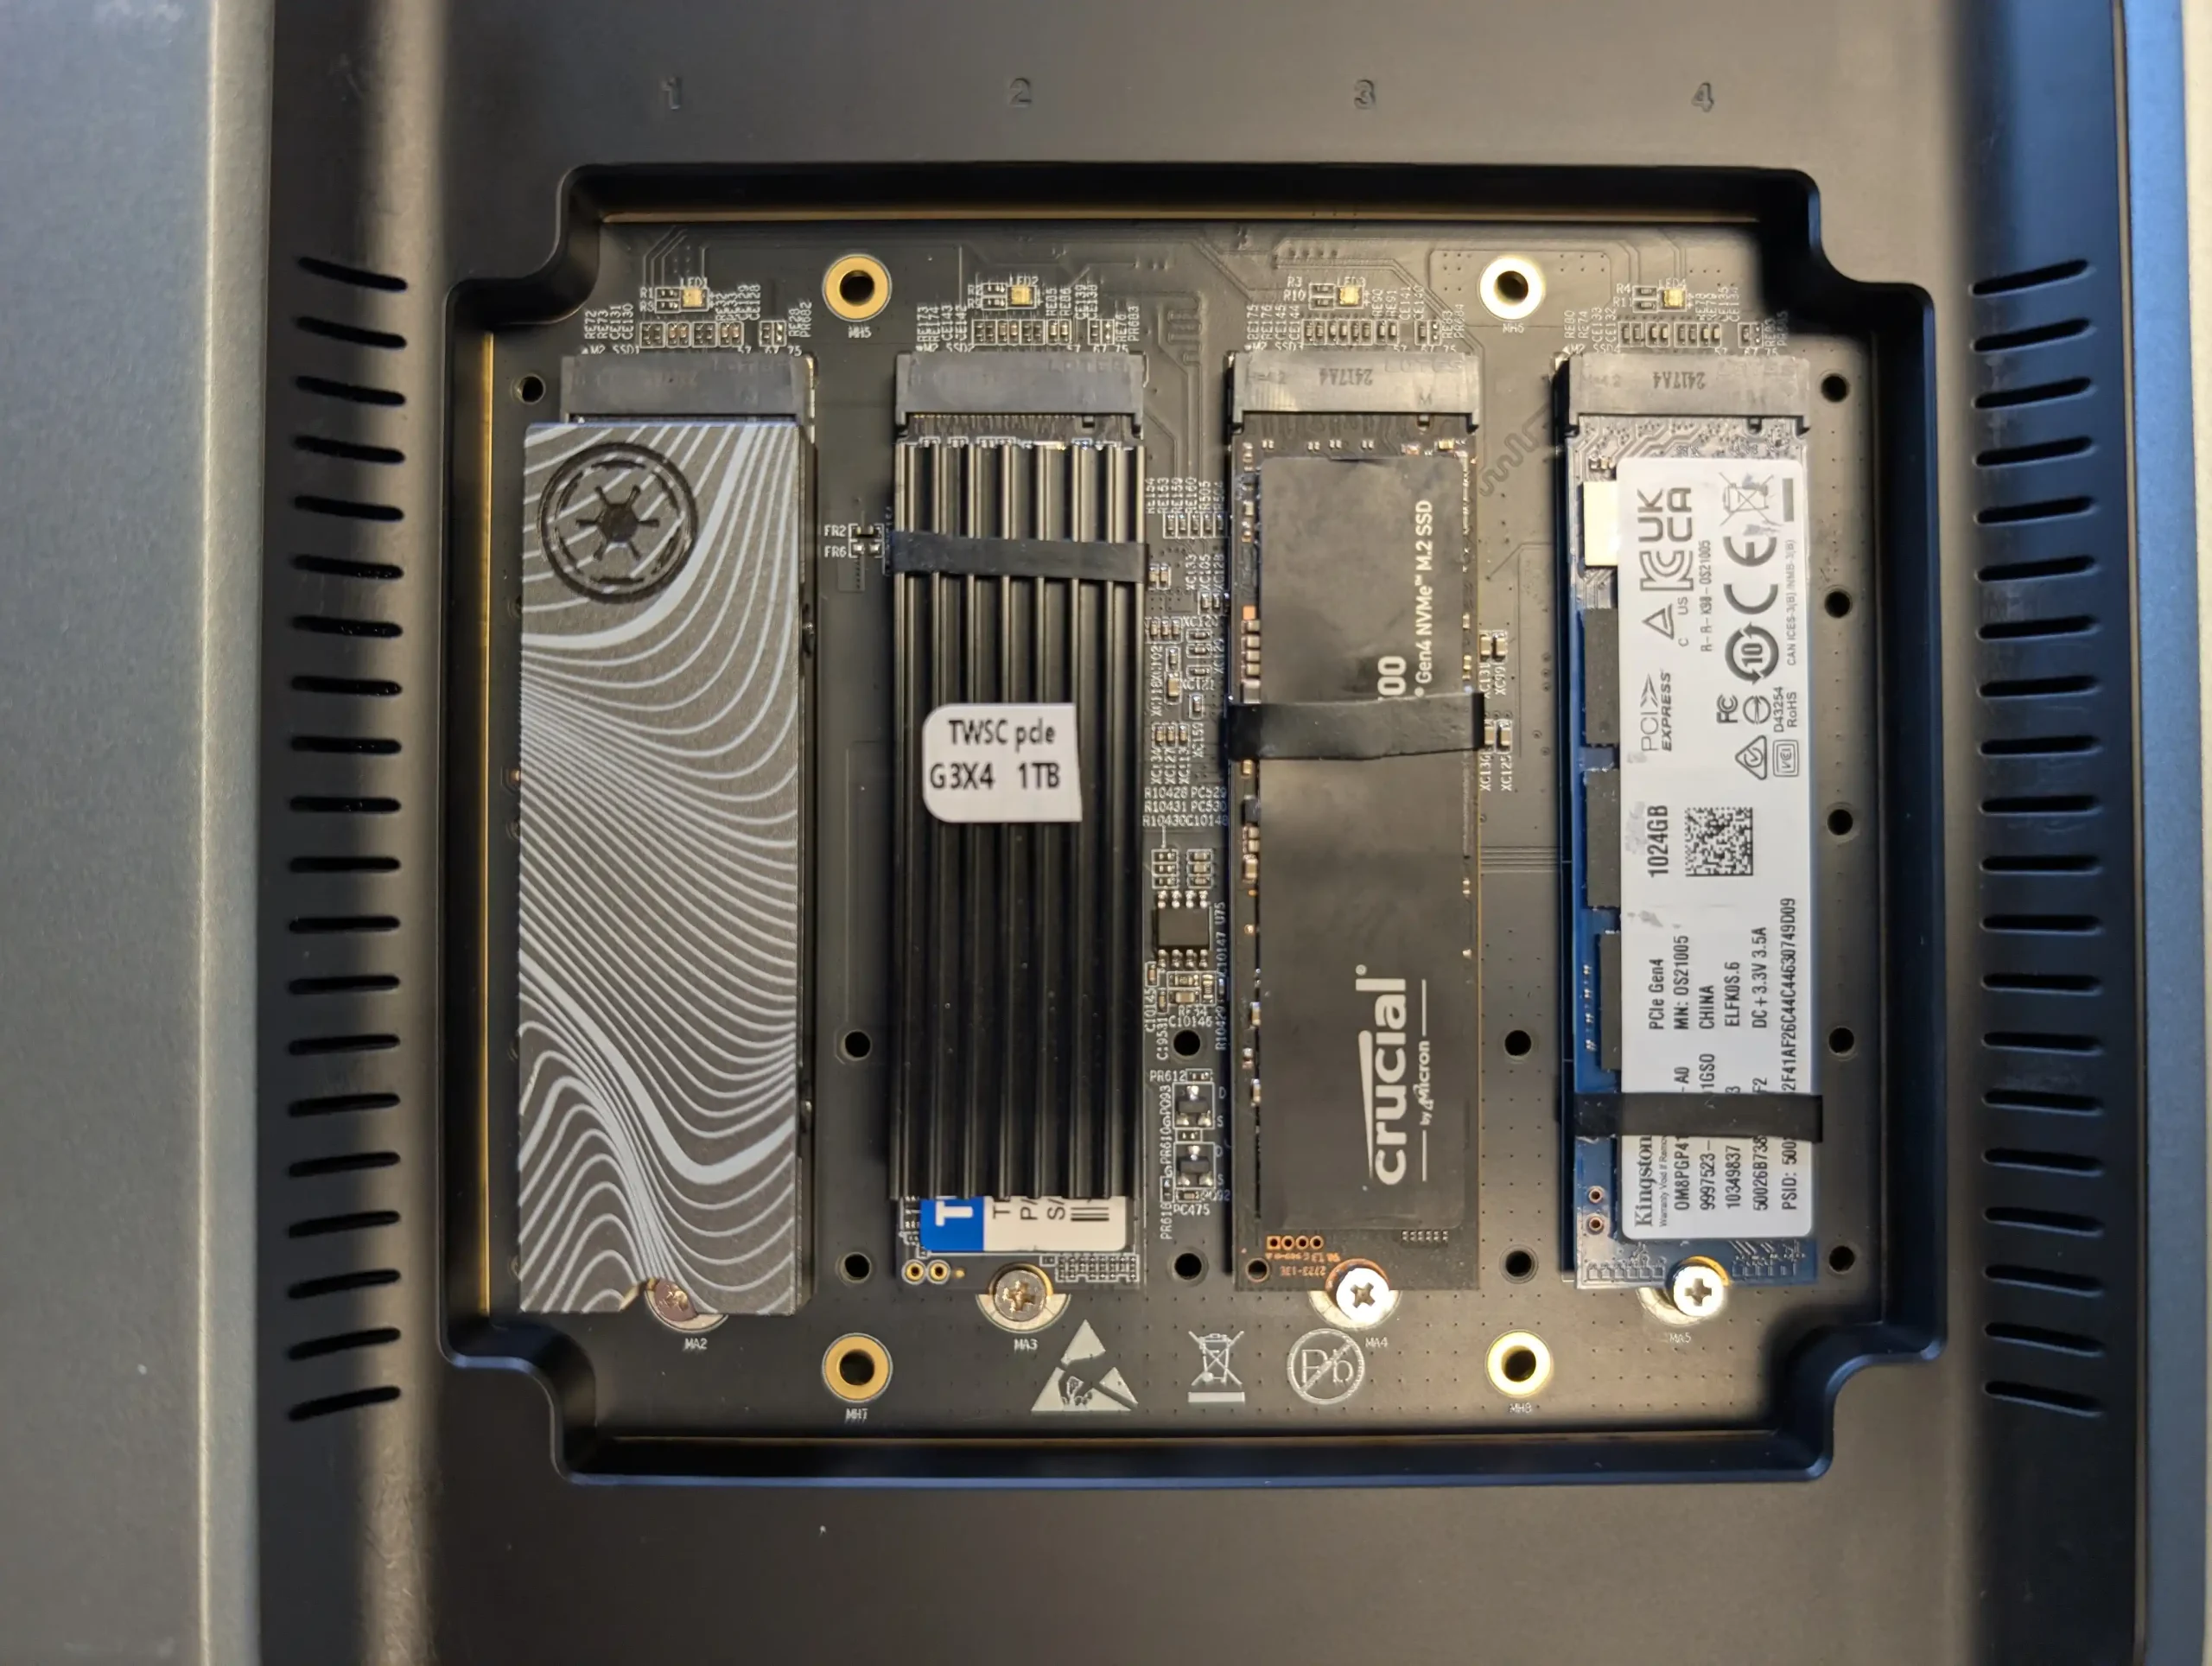 |
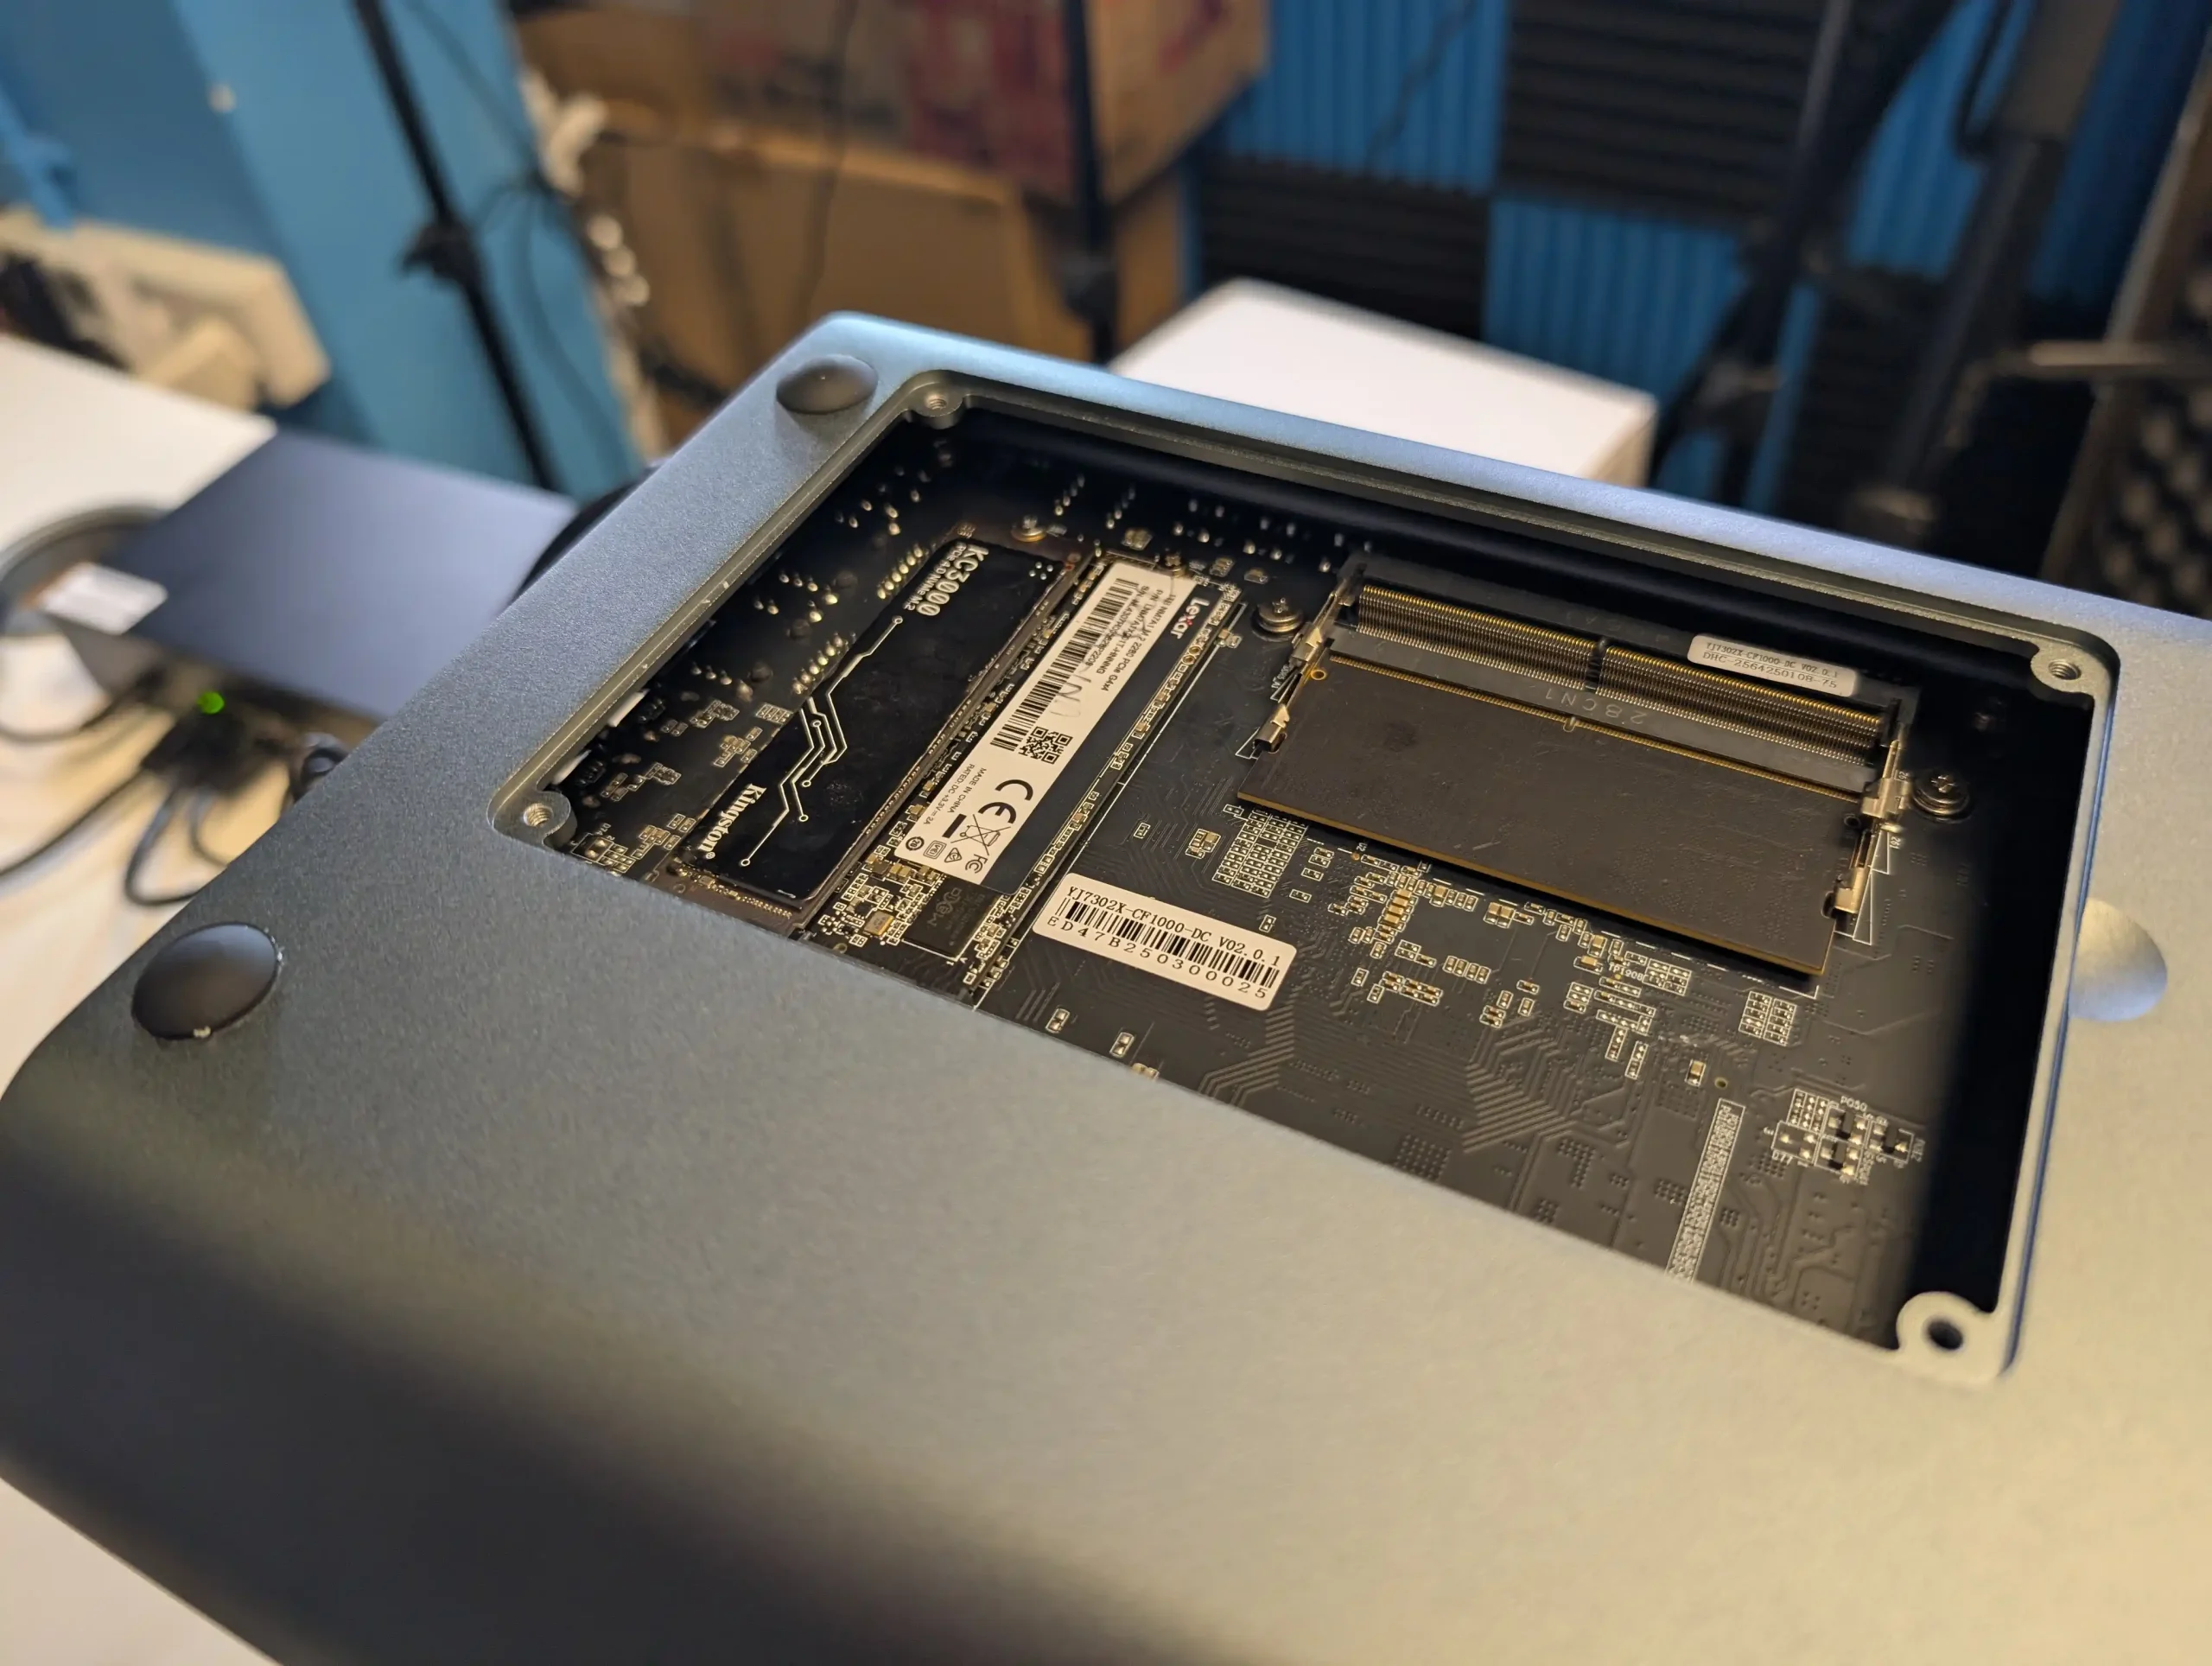 |
An unexpected discovery during prototype testing revealed a possible seventh internal M.2 slot in the CF56 Pro, presumed to host the system boot drive or be reserved for future expansion. However, due to the lack of SSH access in the prototype firmware, further validation was not possible at the time of recording.
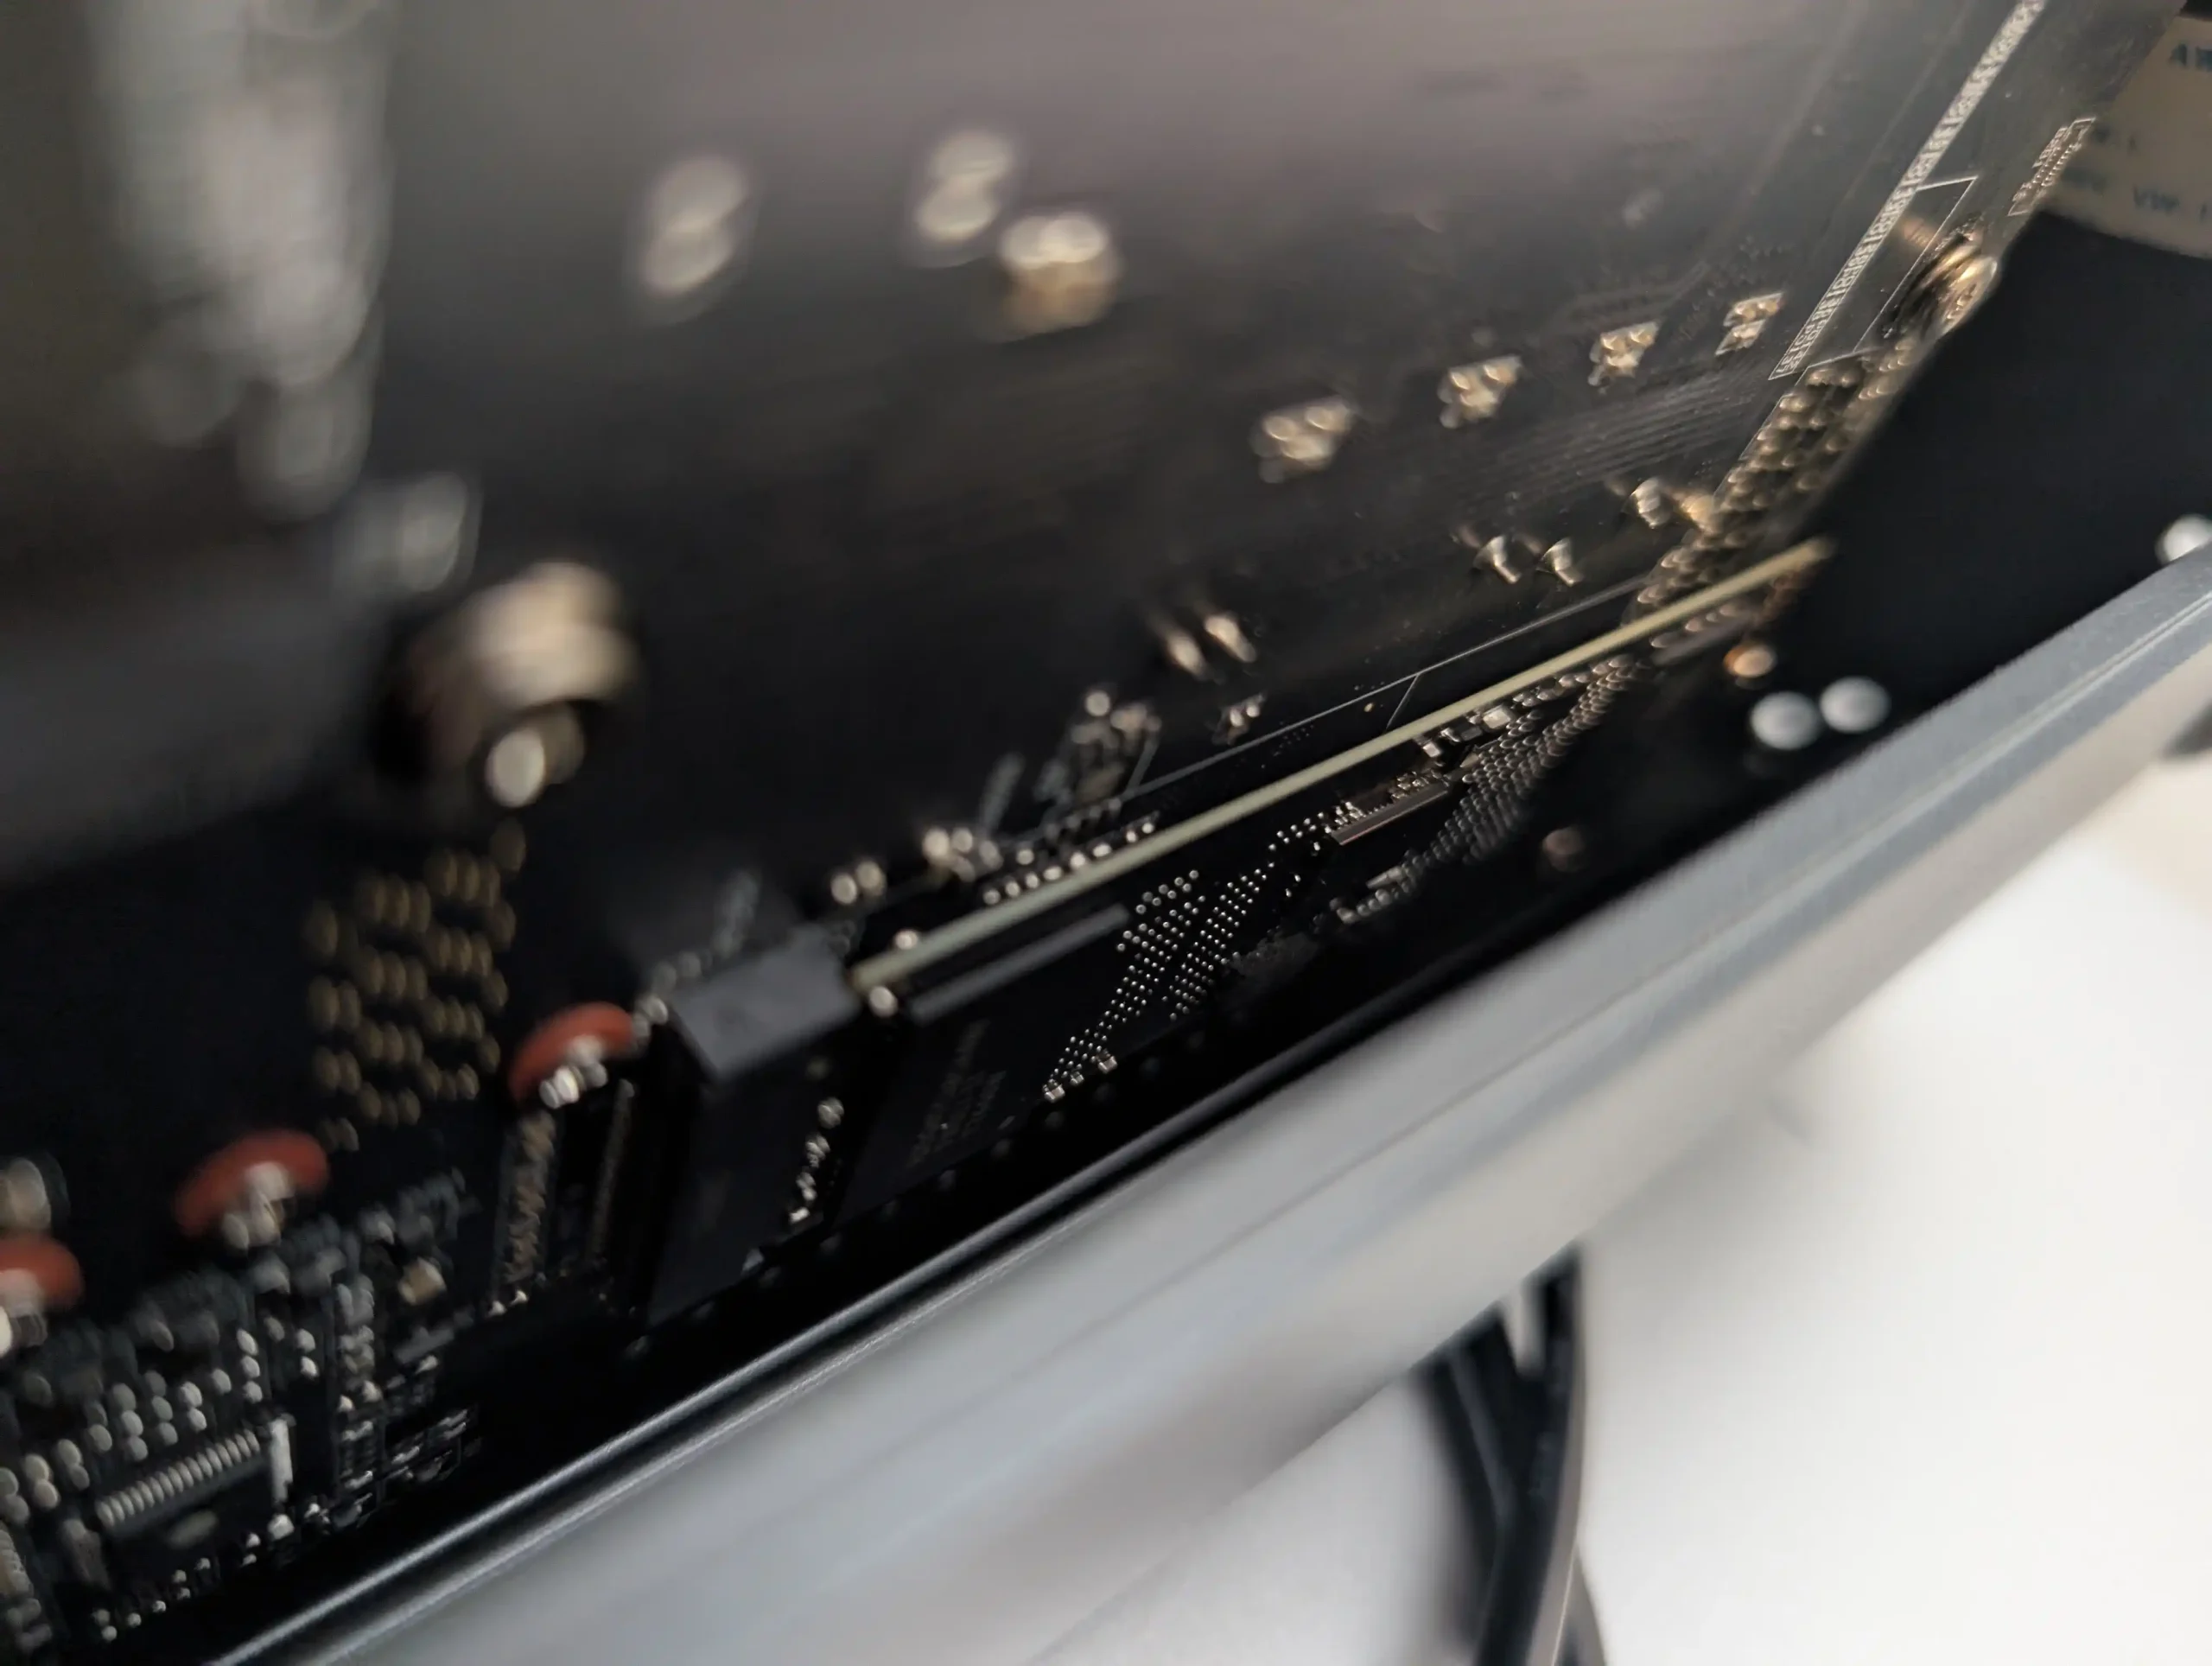
Regardless, the six main M.2 slots and five SATA drive bays offer ample storage configurability, especially when paired with the ZFS features of CyberData OS. System cooling, power delivery, and memory configuration all reflect Orico’s attempt to match their component selection with real-world use cases—balancing between hardware headroom, affordability, and the needs of semi-professional users handling mixed media workflows.
| Component | CF56 | CF56 Pro |
|---|---|---|
| CPU | Intel Core i3-N305 (8C/8T) | Intel Core i5-1240P (12C/16T) |
| CPU Base/Boost | 1.8 GHz / 3.8 GHz | 1.7 GHz / 4.4 GHz |
| Architecture | Gracemont (Intel 12th Gen E-cores) | Alder Lake (4P+8E Hybrid) |
| Memory Configuration | 1x DDR5 SO-DIMM (up to 32GB) | 2x DDR5 SO-DIMM (up to 64GB, dual-channel) |
| ECC Support | No | No |
| Boot Storage | 64GB eMMC | 128GB SATA SSD |
| M.2 NVMe Slots | 6x (Top: 4x PCIe 3.0 x1, Bottom: 2x PCIe 3.0 x4) | 6x (Top: 4x PCIe 3.0 x2, Bottom: 2x PCIe 3.0 x4) |
| 3.5″ HDD Bays | 5x SATA | 5x SATA |
| GPU Dock Support | Optional | Supported |
| Max Power Use (Observed) | ~46W (light load, populated) | ~81W (8K transcoding, fully populated) |
| Cooling System | Single-zone active cooling | Multi-zone advanced cooling |
The CF56 and CF56 Pro both offer a broad selection of ports, but the Pro model significantly extends external connectivity, particularly in terms of networking and high-speed data interfaces. On the CF56, the rear I/O includes a standard 2.5GbE LAN port alongside a single 10GbE RJ45 connection, suitable for most users looking to transfer large media files or operate light virtual environments. The CF56 Pro upgrades this to two dedicated 10GbE ports, allowing for simultaneous high-throughput tasks or link aggregation configurations. This networking setup makes the Pro variant especially attractive for multi-user environments, such as small studios, where heavy media file access and backups may occur concurrently across devices.
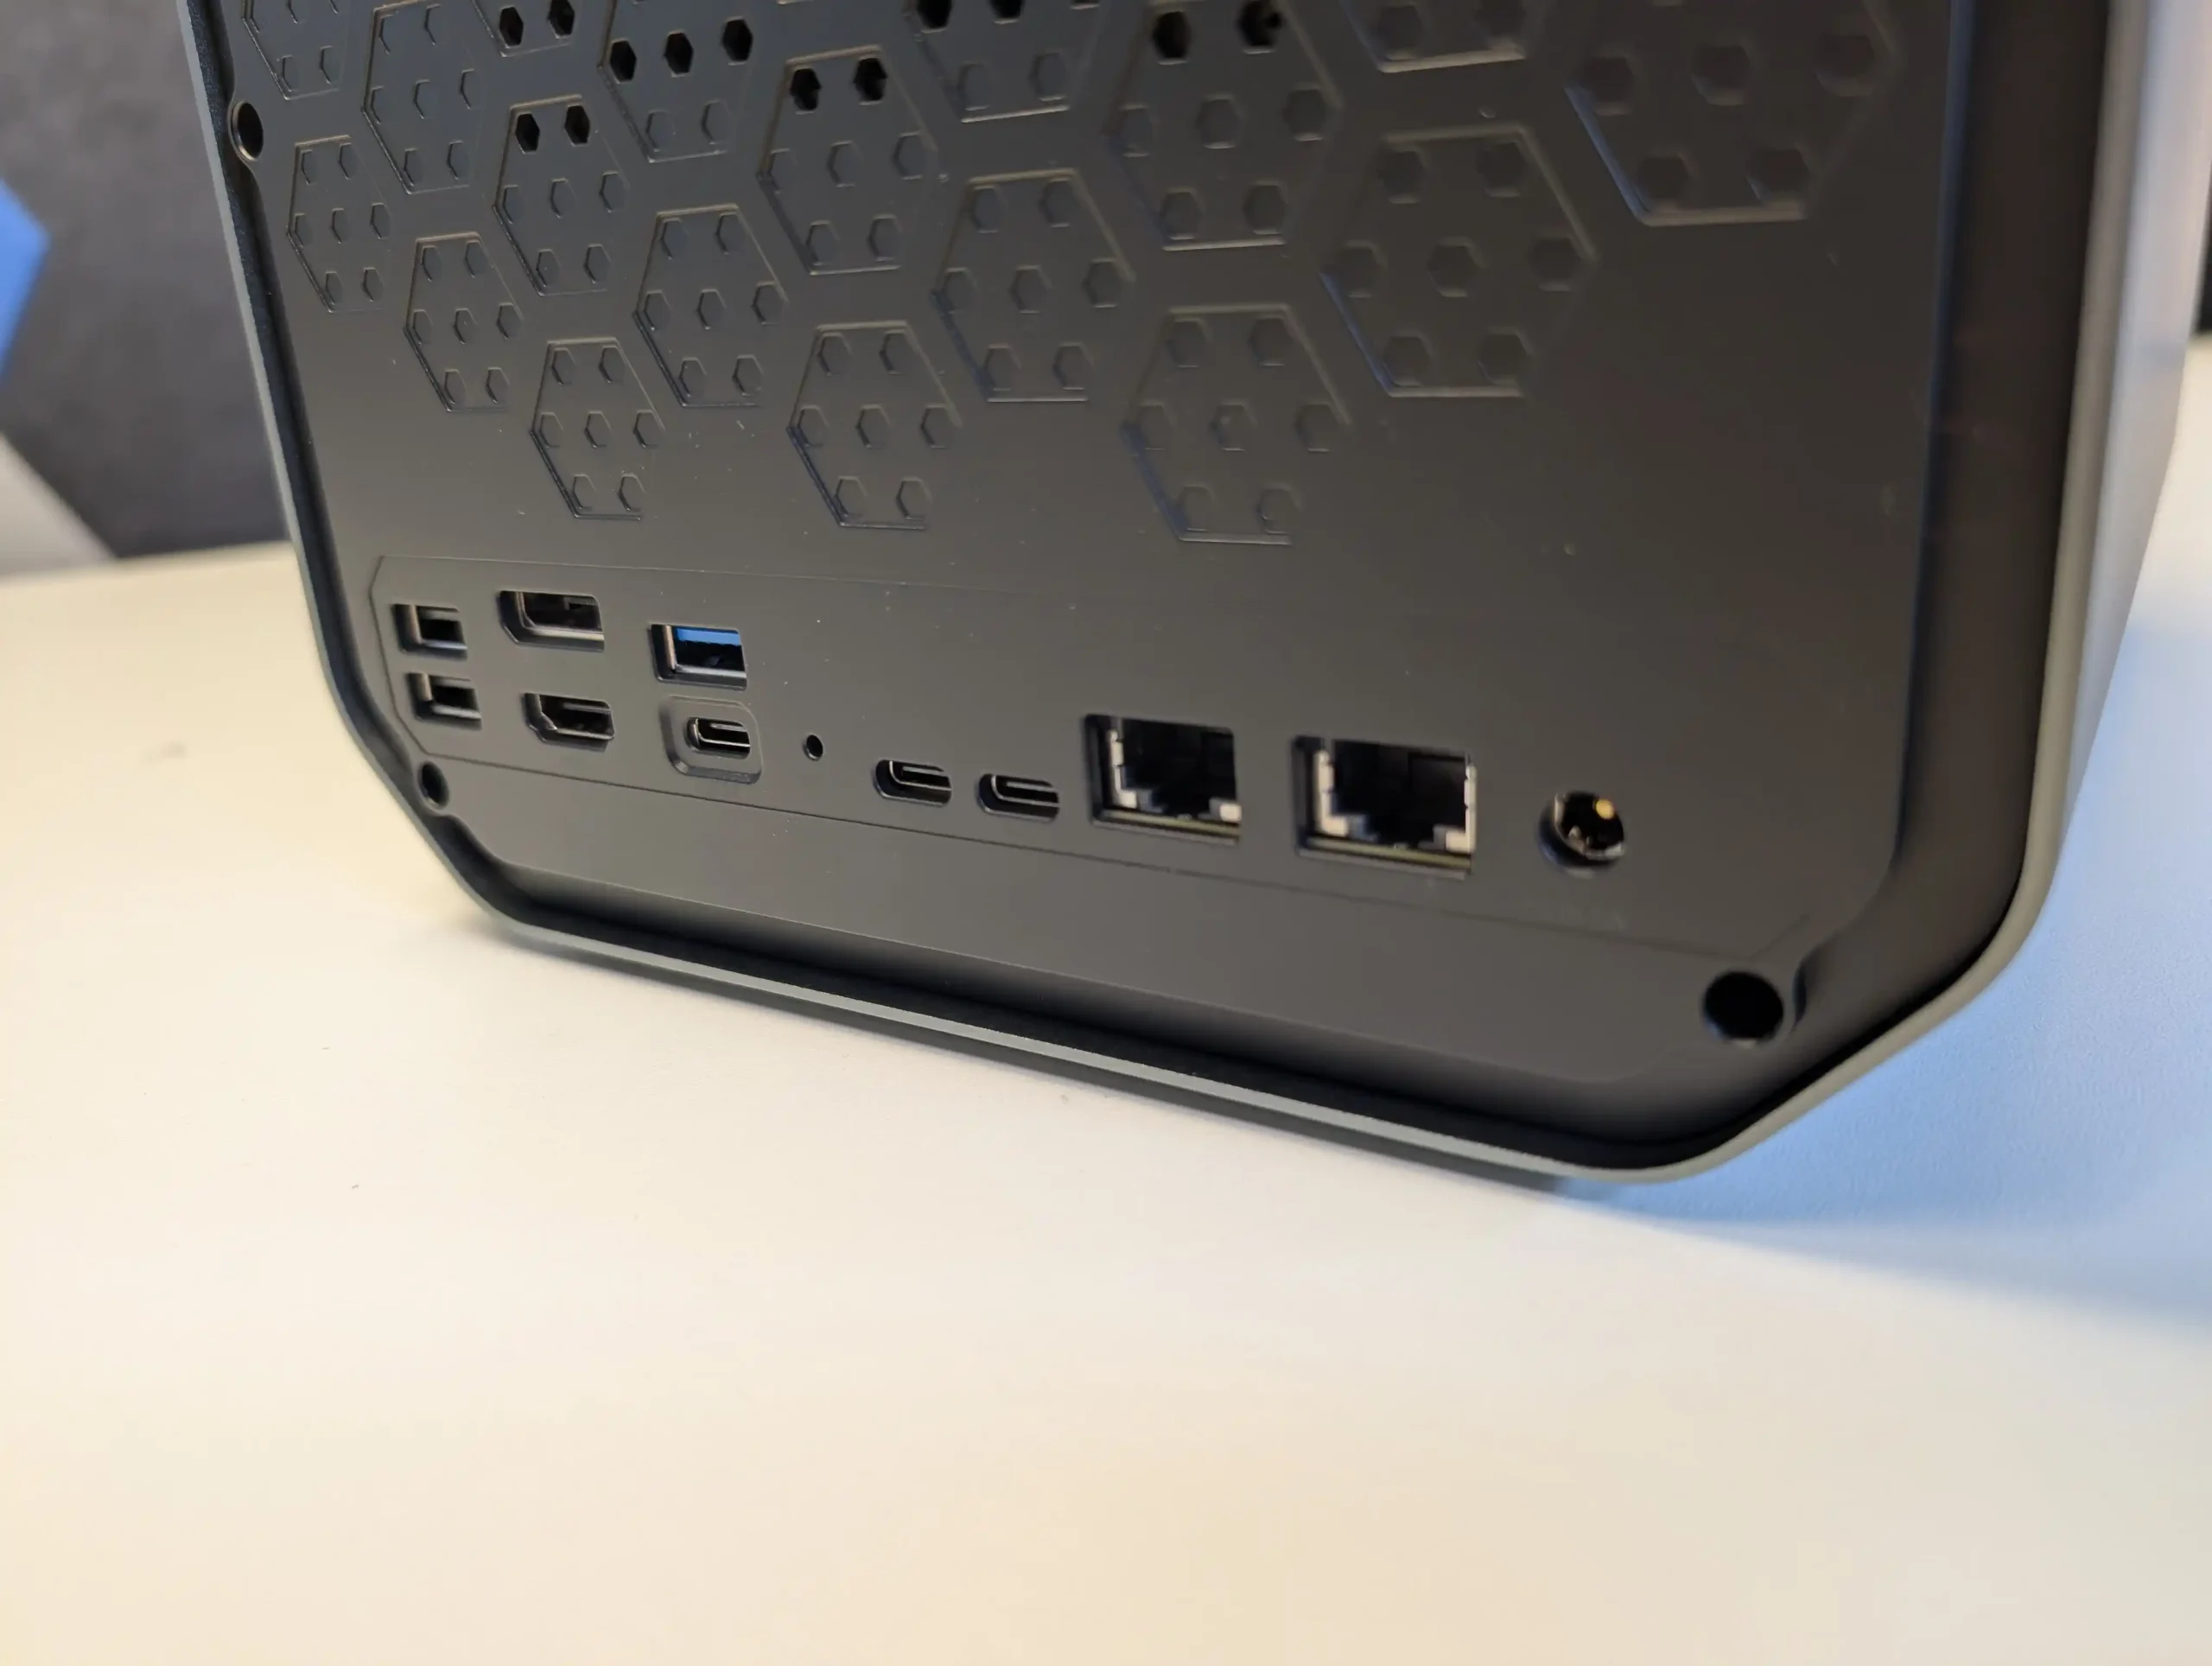 |
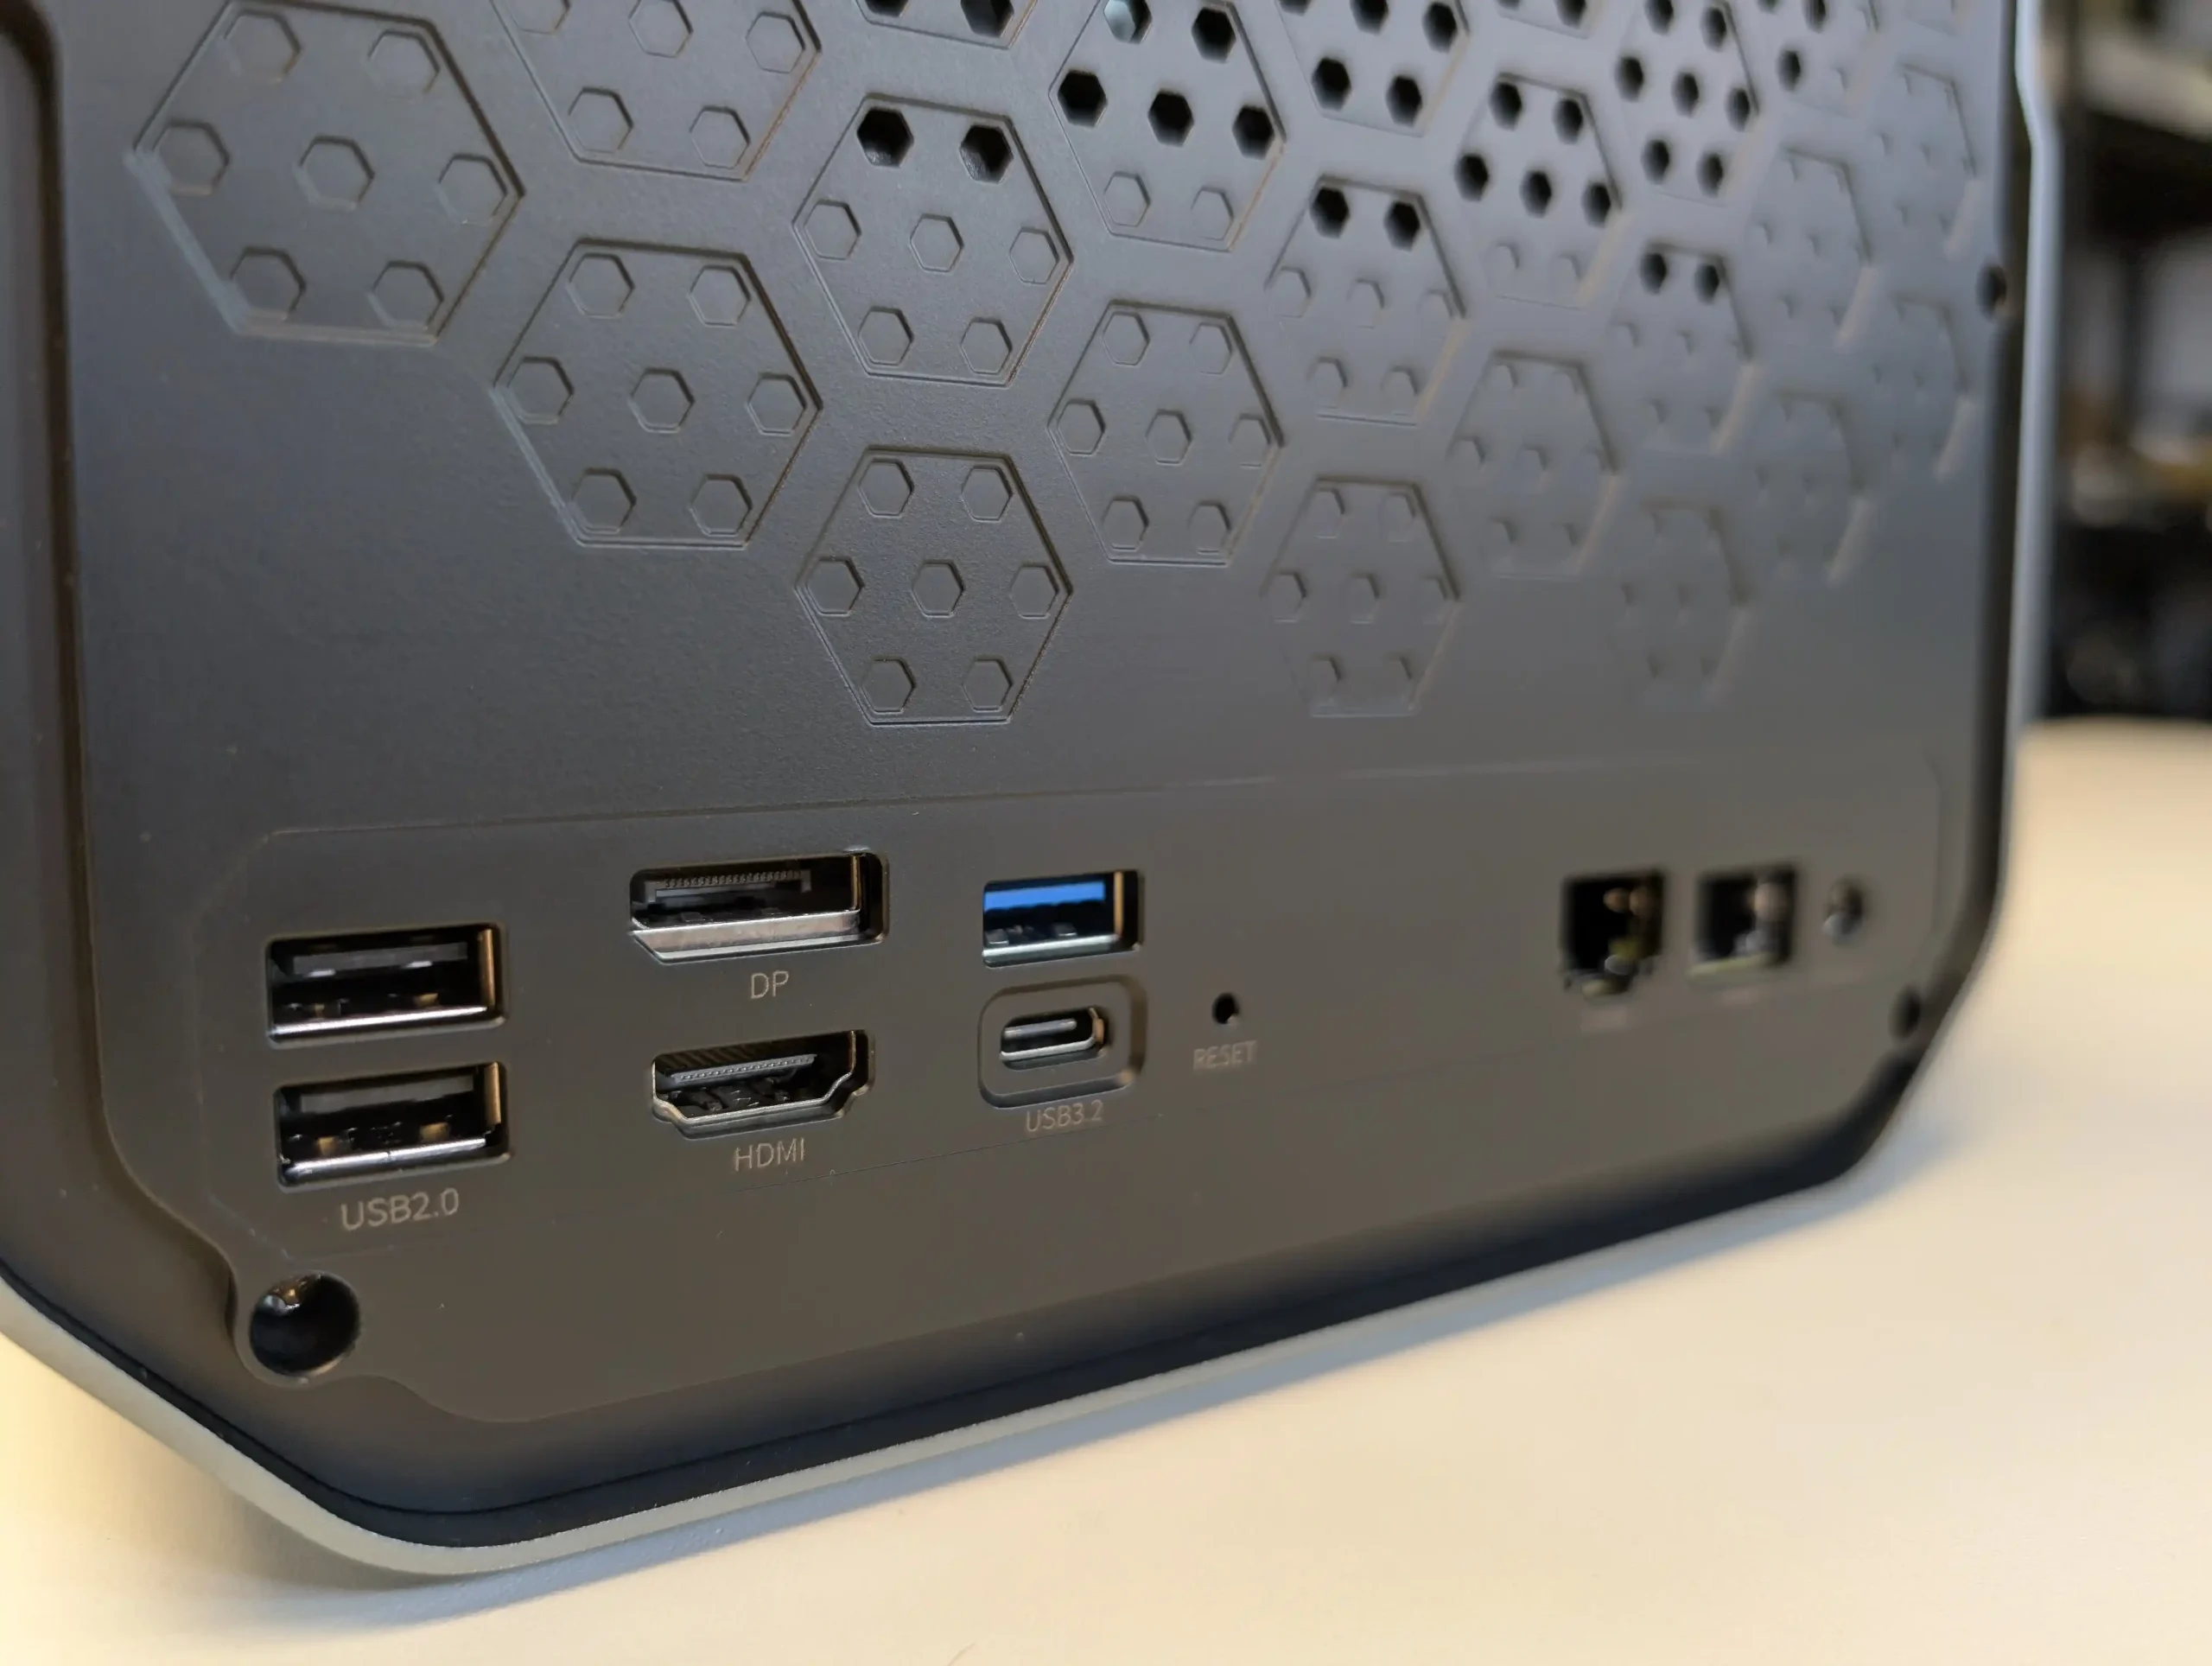 |
Both models include a similar array of USB ports on the rear and front panels. This consists of two USB 3.2 Gen 2 ports for high-speed peripheral or DAS connectivity, and two legacy USB 2.0 ports suitable for input devices or basic accessories. The CF56 Pro goes a step further by incorporating dual USB4 ports—though in testing, these were not available for direct network interface (as is possible on some modern NAS with Thunderbolt or USB-C network tunneling), but functioned as general-purpose USB interfaces. According to Orico, future firmware revisions may unlock additional functionality, but as of the current prototype, USB4 is primarily used for connecting high-speed external drives or expansion units.
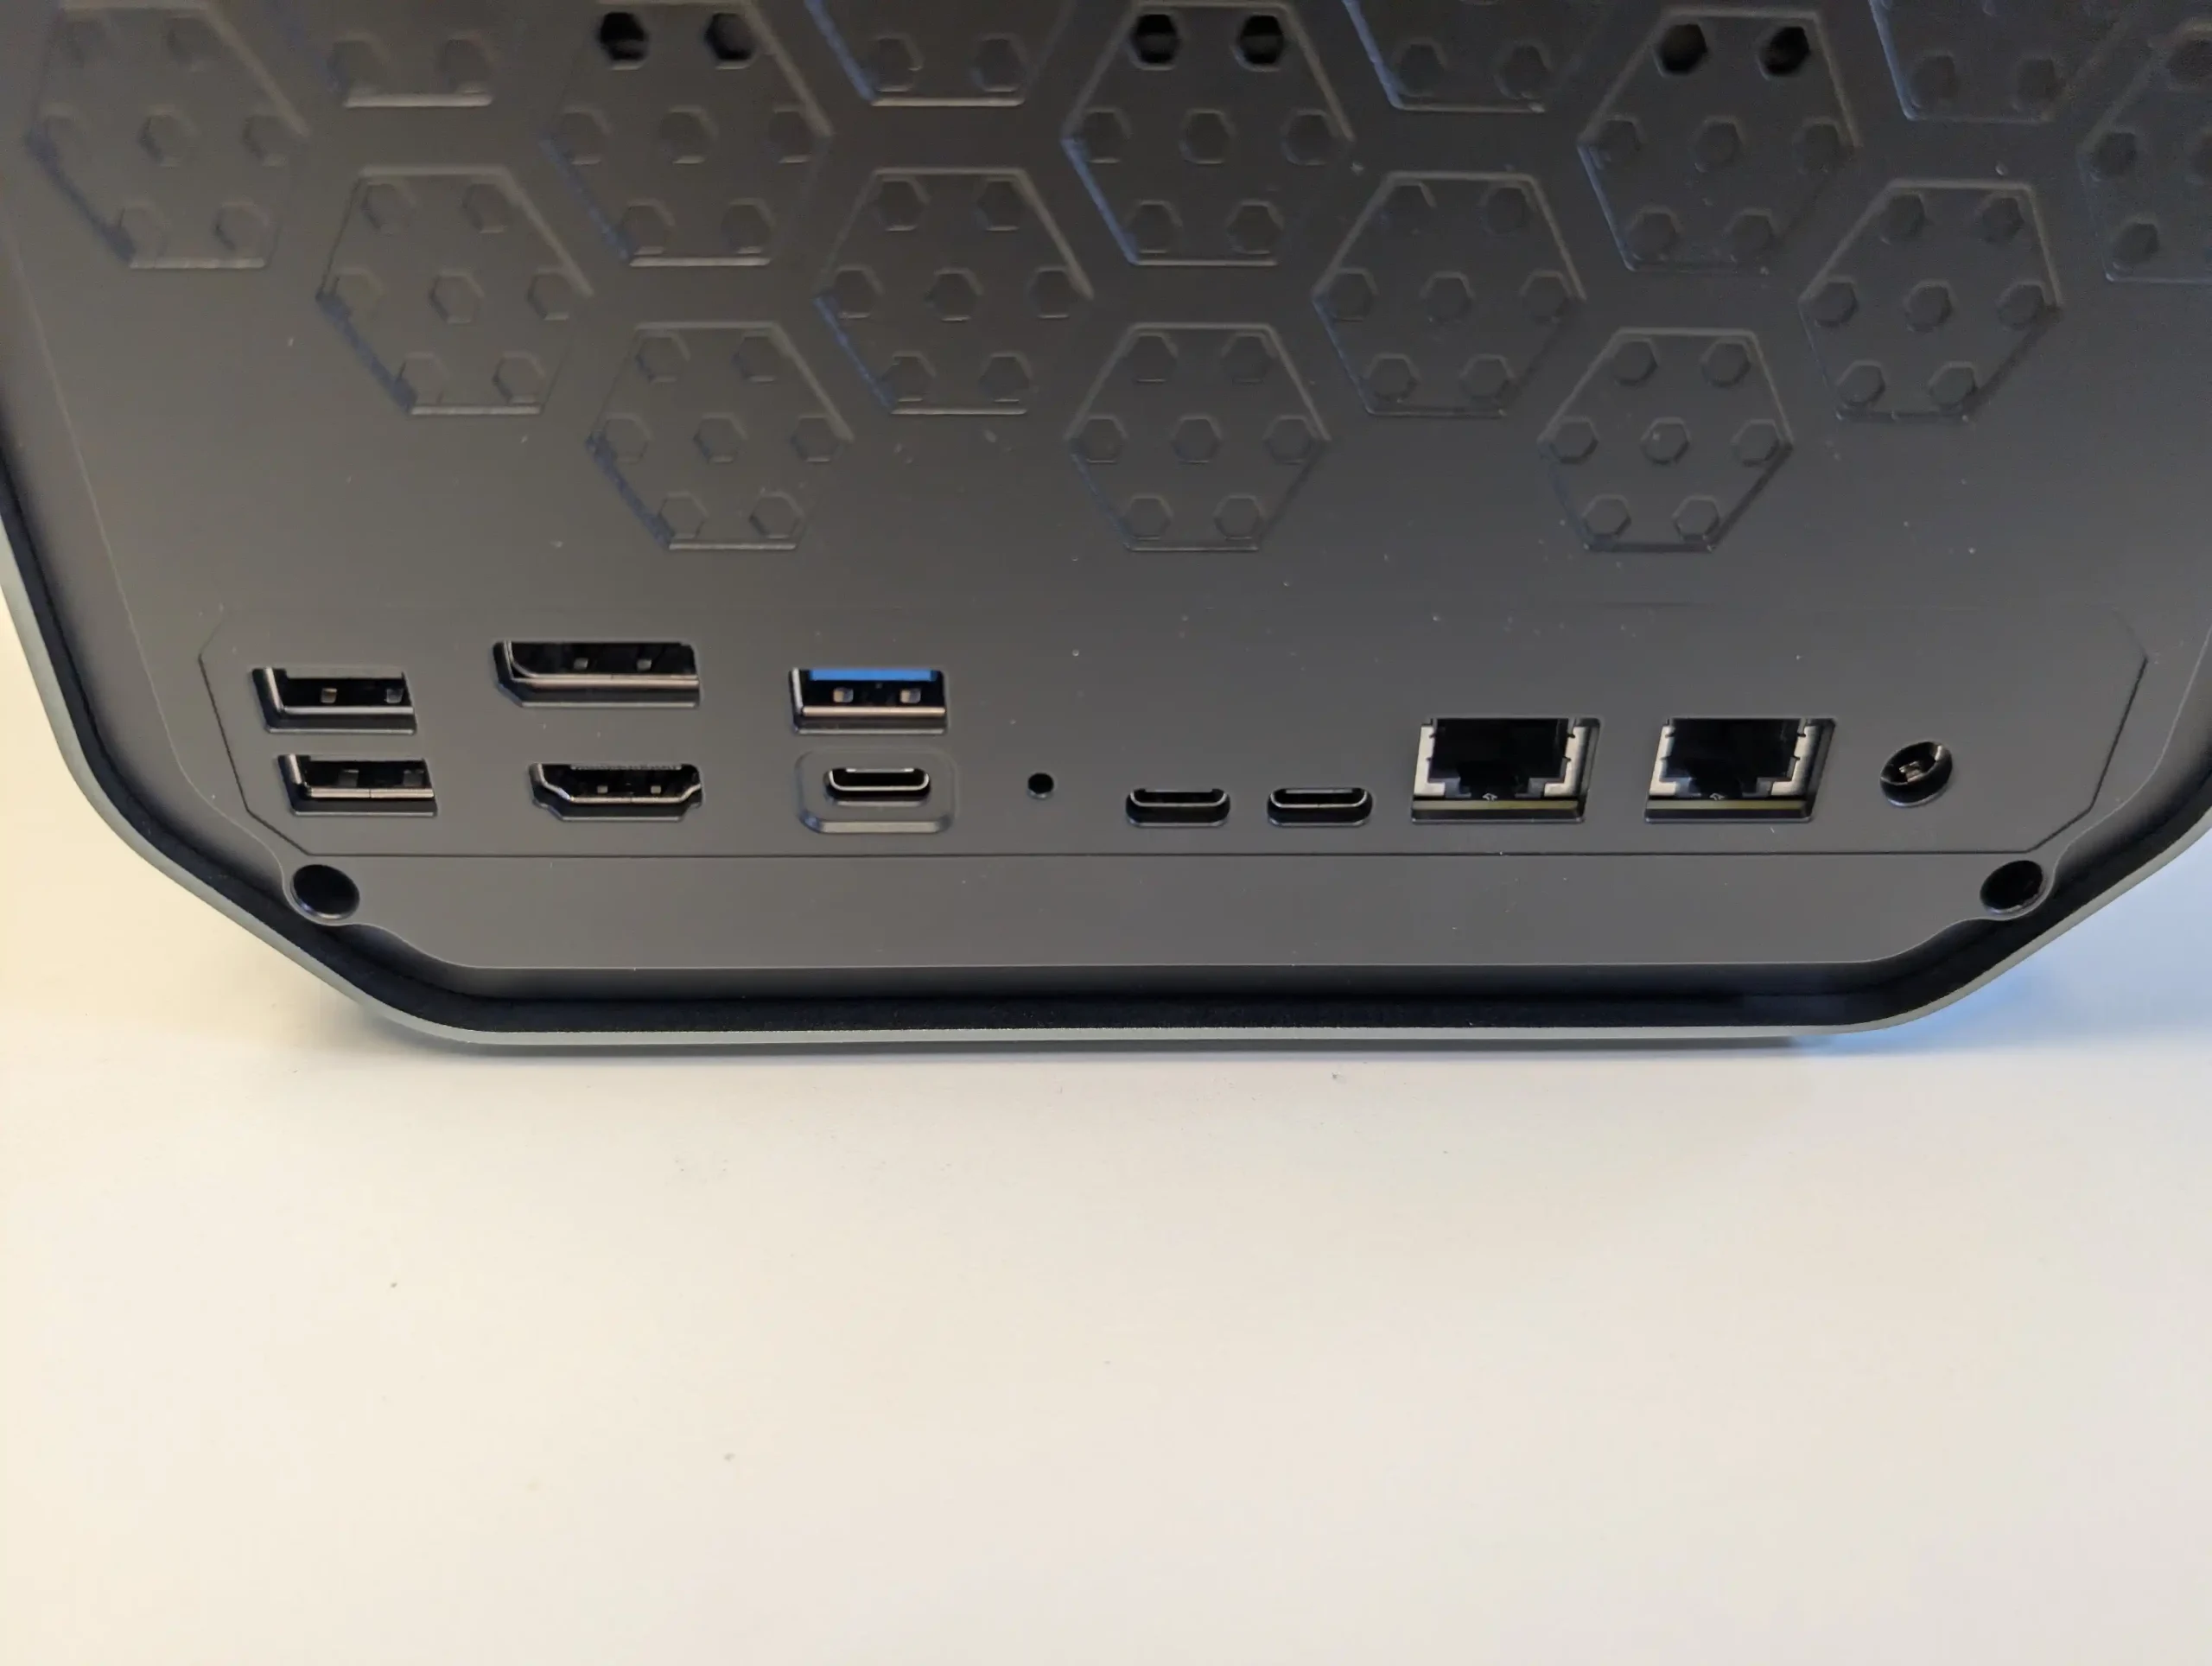
Video output is supported across both systems, which include an HDMI 2.0 port and a DisplayPort 1.4 connection on the CF56, and upgraded HDMI 2.1 and DisplayPort 1.4a outputs on the CF56 Pro. These allow users to output up to 8K display resolution, enabling the NAS to function as a lightweight desktop, digital signage server, or direct-play multimedia center. Integration with CyberData OS supports media playback and basic interface control over HDMI, though there are some limitations in UI optimization for direct screen navigation, especially in the current prototype firmware. Still, the availability of dual video outputs on both models reflects a growing trend in hybrid NAS/HTPC design.
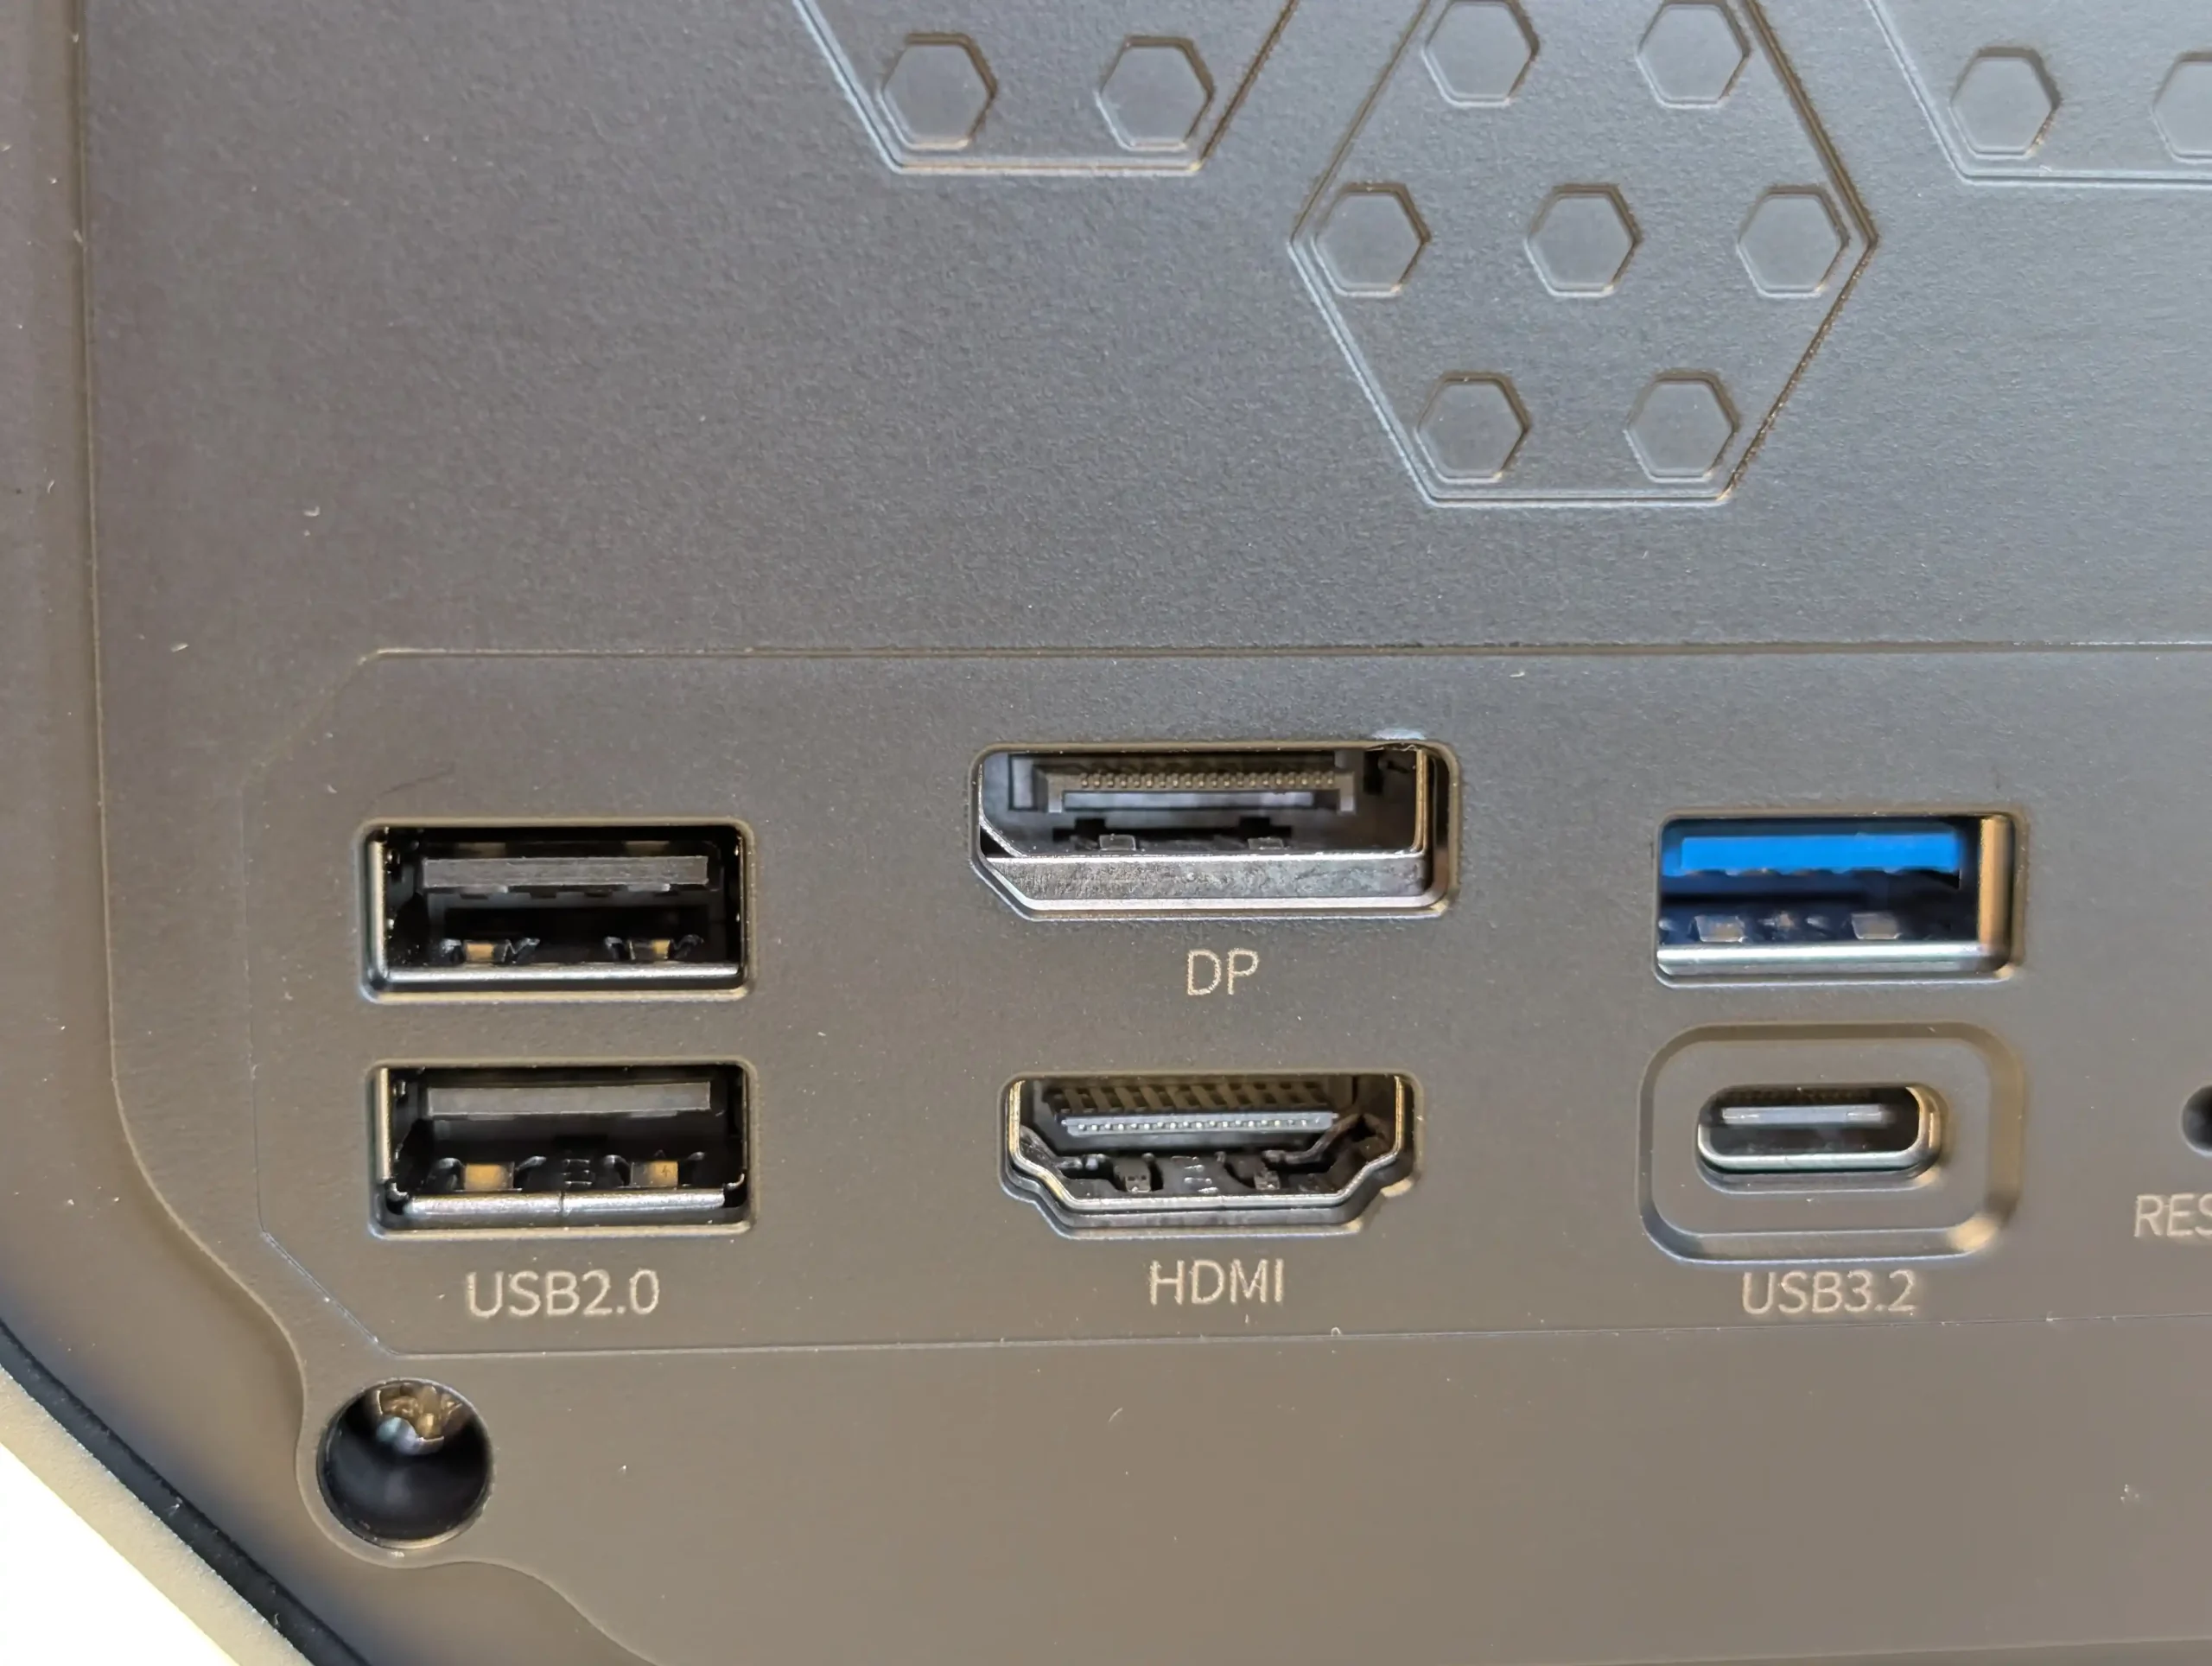
Power input is provided via a barrel connector on both models, though the CF56 Pro uses a higher-wattage external PSU due to the increased demands of its CPU and dual 10GbE networking. Internal power distribution appears to be cleanly handled, and the systems remained electrically stable during tests. One area of future interest will be how Orico handles expandability. While Thunderbolt or USB4-based RAID cabinets are planned for the series, support was not fully implemented in the prototype stage. GPU dock support is also present only on the larger devices in the product family, leveraging the i5’s PCIe expansion capability for dedicated GPU tasks such as video rendering, AI inference, or VM acceleration.
| Interface Type | CF56 | CF56 Pro |
|---|---|---|
| Ethernet | 1x 2.5GbE, 1x 10GbE | 2x 10GbE |
| USB 3.2 Gen2 | 2x | 2x |
| USB 2.0 | 2x | 2x |
| USB4 | None | 2x |
| HDMI Output | 1x HDMI 2.0 | 1x HDMI 2.1 |
| DisplayPort Output | 1x DP 1.4 | 1x DP 1.4a |
| Power Connector | Barrel plug (standard PSU) | Barrel plug (higher-watt PSU) |
| GPU Dock Support | Optional (undocumented) | Supported |
| Expansion Cabinet | Via USB4 or future RAID interface | Via USB4 or future RAID interface |

Initial performance evaluations of the CF56 and CF56 Pro revealed that while the underlying hardware is capable, real-world throughput is currently constrained by early-stage software optimization. During SMB file transfer testing over 10GbE, both models struggled to reach expected performance levels, with the CF56 averaging below 500 MB/s and the CF56 Pro rarely breaking 1 GB/s, even under favorable conditions. Orico acknowledged this limitation and confirmed that software-level optimization was ongoing. As such, these figures should be treated as provisional and not reflective of the final product performance. In both models, ZFS was used as the underlying file system, configured in a hybrid tiered setup with HDDs for capacity and NVMe for metadata and caching.
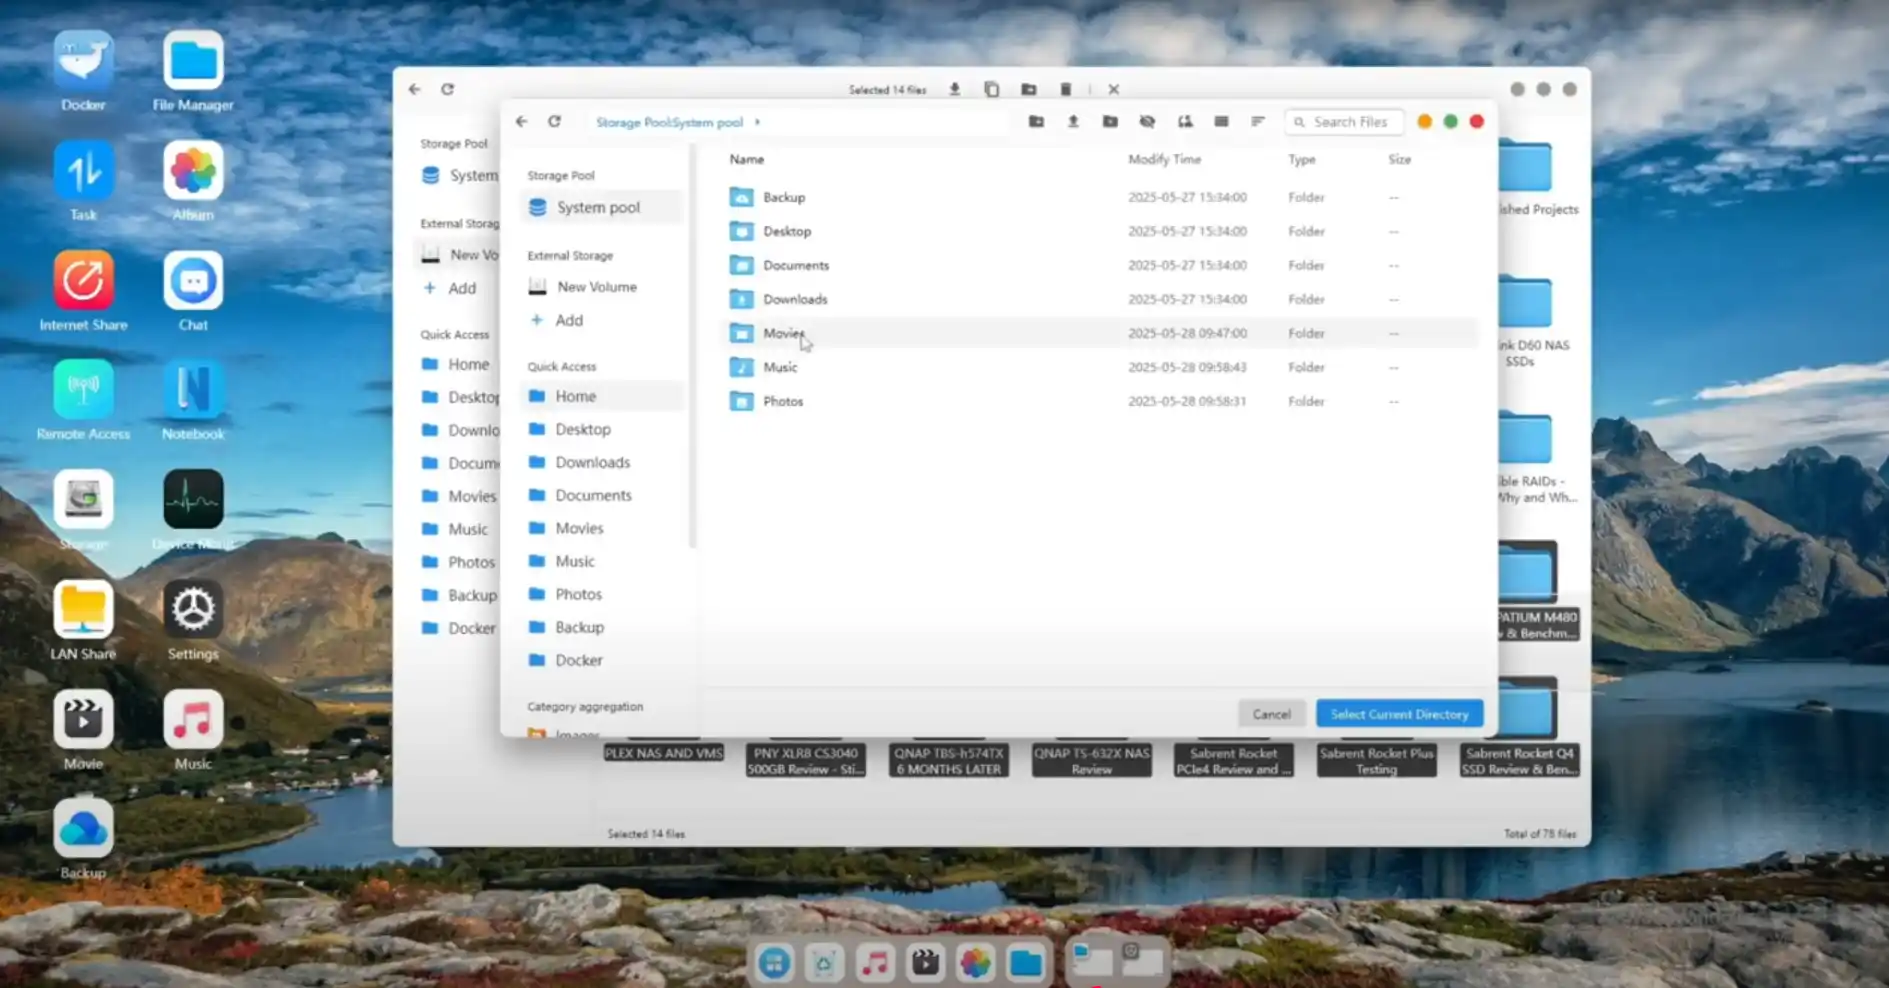
Transcoding tests were particularly revealing of the CPU differences between the models. The CF56 managed basic 1080p and some 4K H.265 transcodes via software decoding, but exhibited signs of strain under higher bitrates or simultaneous streams. In contrast, the CF56 Pro with its i5-1240P processor handled up to eight 8K transcodes concurrently during one benchmark, maintaining responsiveness while CPU usage hovered around 30%. Despite this impressive processing ability, peak system power draw climbed to 81W, highlighting the thermal and energy trade-offs required for sustained performance. Notably, neither system offers hardware transcoding via Intel Quick Sync, as support for it was not accessible in the current CyberData OS build.
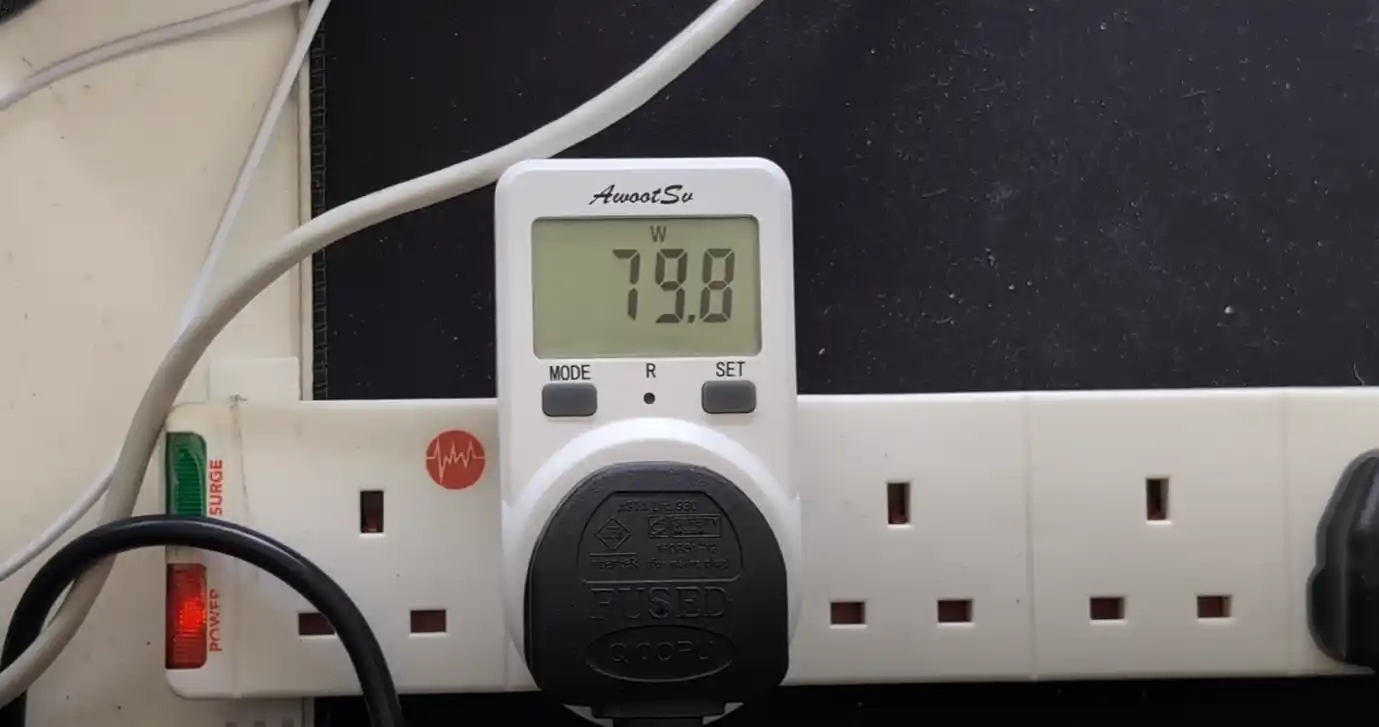 |
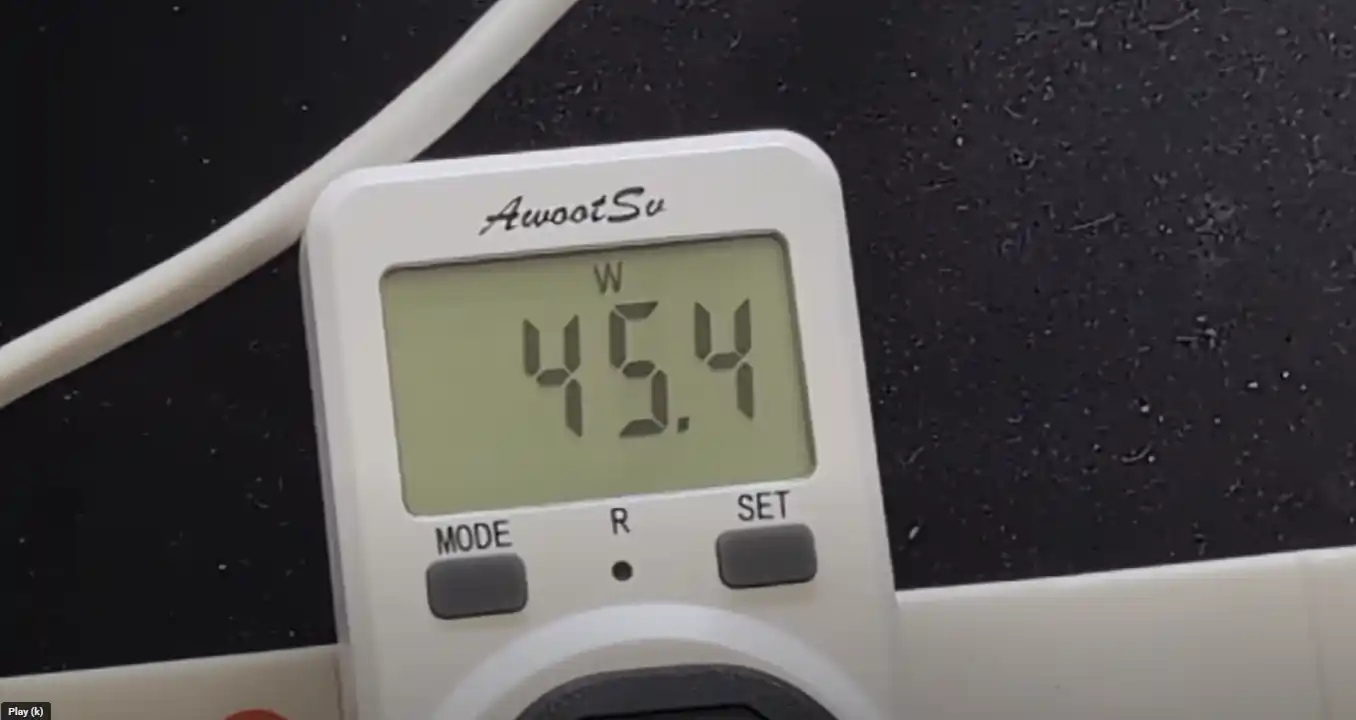 |
Thermal management remained mostly acceptable, though not without concern on the CF56 Pro. Under stress, the top M.2 bay area reached 80°C, and while no thermal throttling occurred, prolonged exposure could reduce SSD lifespan or stability. Orico responded that this issue was already being addressed through a revised internal board layout and enhanced venting. The CF56 maintained lower temperatures during the same tests, remaining between 38–46°C under average usage. The difference is largely attributable to the lower TDP of the N305 CPU and reduced overall system throughput, which in turn generated less heat throughout the chassis.
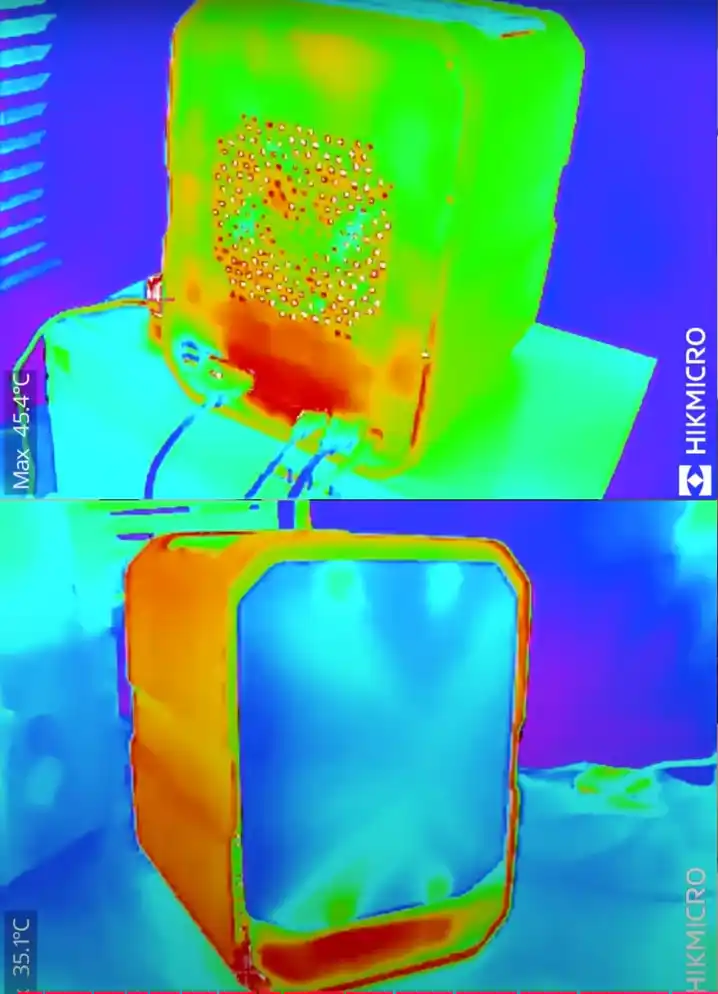
Noise levels were measured in all three fan modes (Quiet, Standard, and Turbo) to assess usability in home or small office settings. In Quiet mode, the CF56 registered 29–31 dBA, making it suitable for desktop deployment or living room environments. The CF56 Pro remained silent under light use, but escalated to 46–47 dBA under Turbo mode, with fan noise becoming noticeably audible. Most of the ambient sound during low to moderate use came from HDD activity, rather than the cooling fans. The OS includes manual fan control and profile scheduling, allowing users to balance performance and acoustics based on workload and time of day.
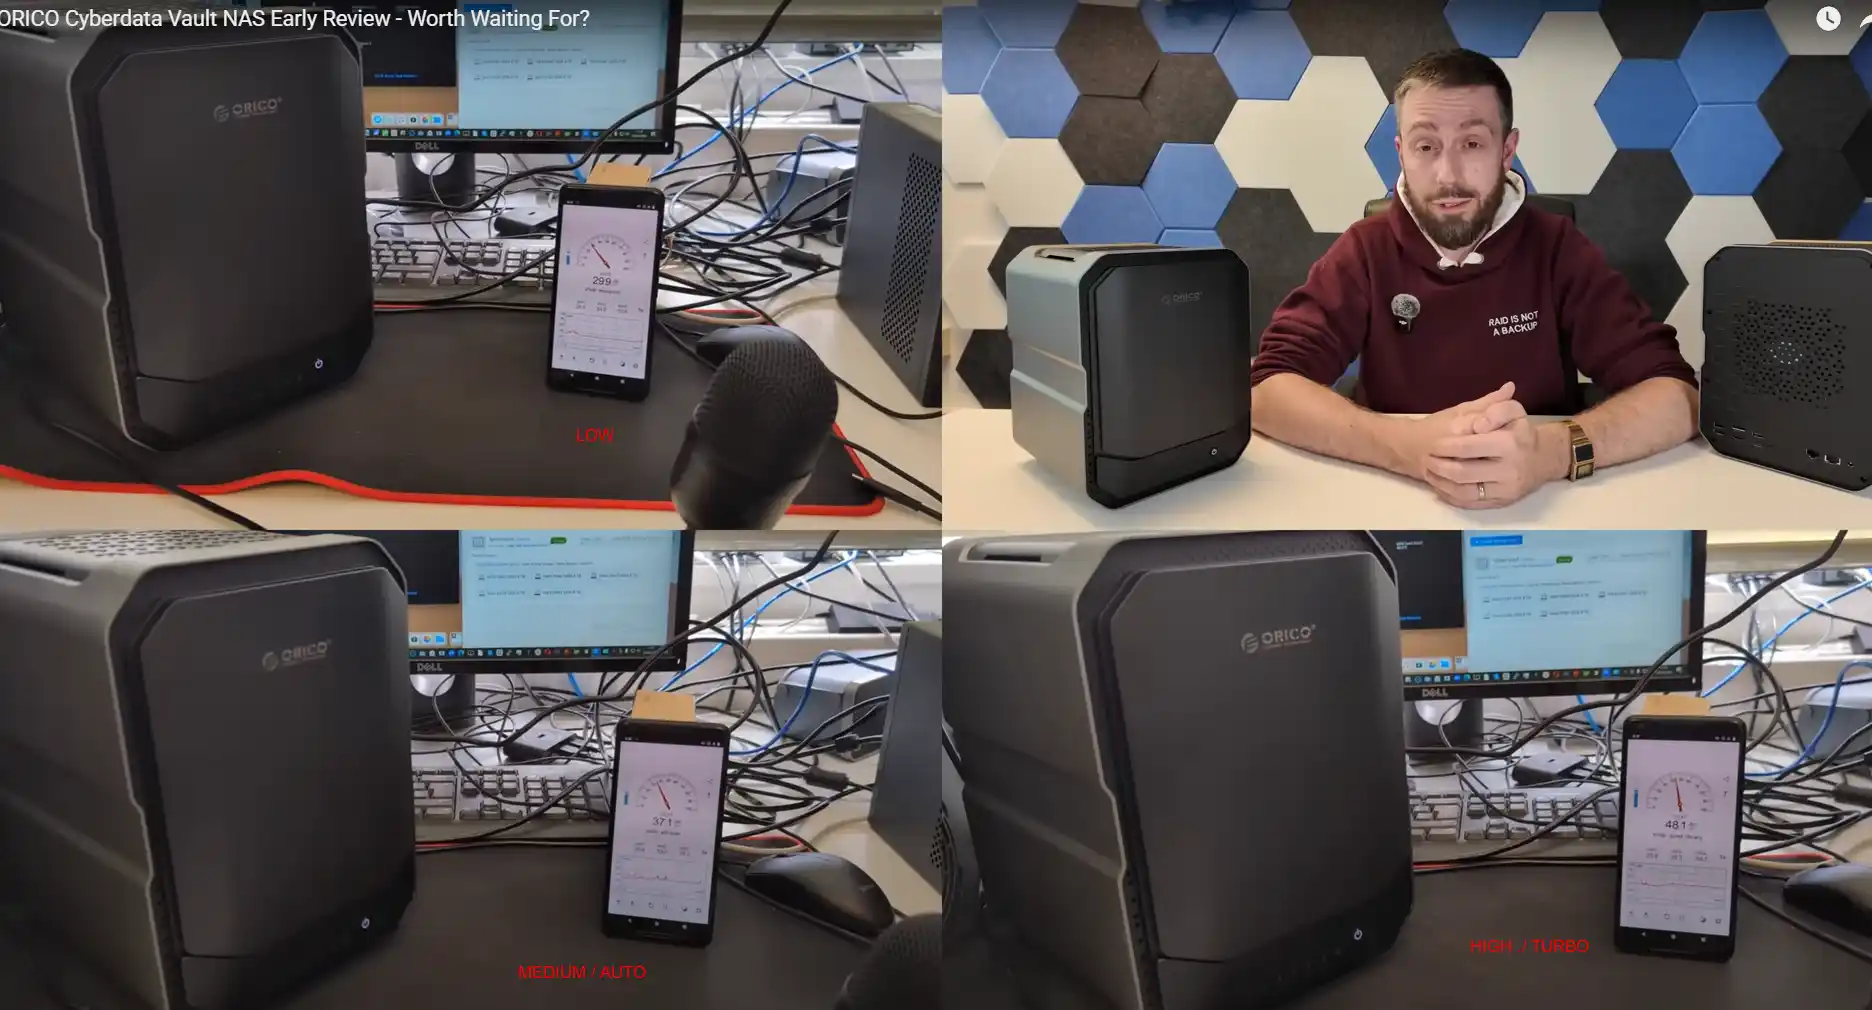
| Test Category | CF56 | CF56 Pro |
|---|---|---|
| SMB Transfer (10GbE) | ~400–500 MB/s (unoptimized) | ~800–950 MB/s (unoptimized) |
| Transcoding Capability | 1x 4K or 2x 1080p (software only) | Up to 8x 8K (software only) |
| CPU Load (During Test) | ~15% (light load) | ~30% (under 8K transcode load) |
| Max Power Draw (Observed) | ~46W (fully populated) | ~81W (fully populated) |
| Thermal Range | 38–46°C average | 70–80°C peak in top M.2 bay |
| Noise Level (Quiet Mode) | 29–31 dBA | 31–35 dBA |
| Noise Level (Turbo Mode) | 38–41 dBA | 46–47 dBA |
| Fan Control Options | Quiet, Standard, Turbo | Quiet, Standard, Turbo |
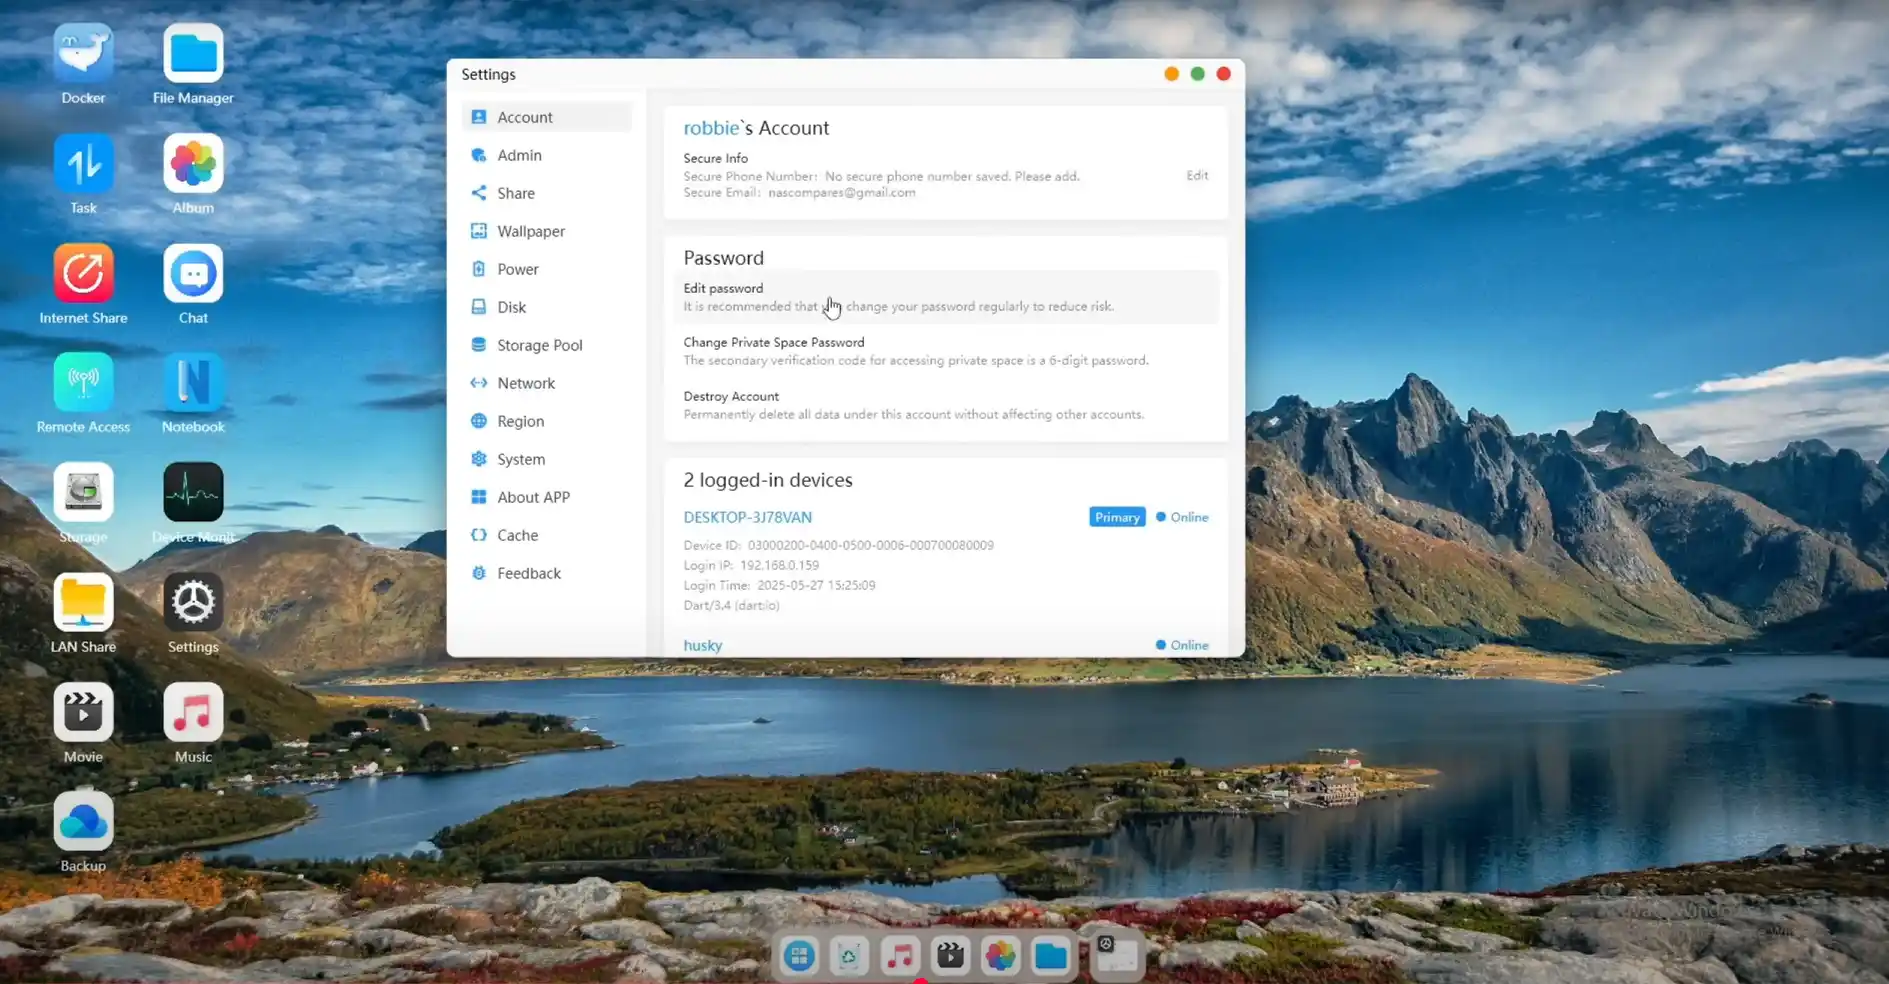
The desktop client software included with the Orico CF56 and CF56 Pro NAS systems is built on fnOS, a closed-source NAS operating system developed in China and increasingly licensed by various hardware brands. In its current state, the desktop interface provides access to all core storage functions, including RAID management, user permissions, snapshot control, and file operations, but it clearly reflects a system still undergoing development.
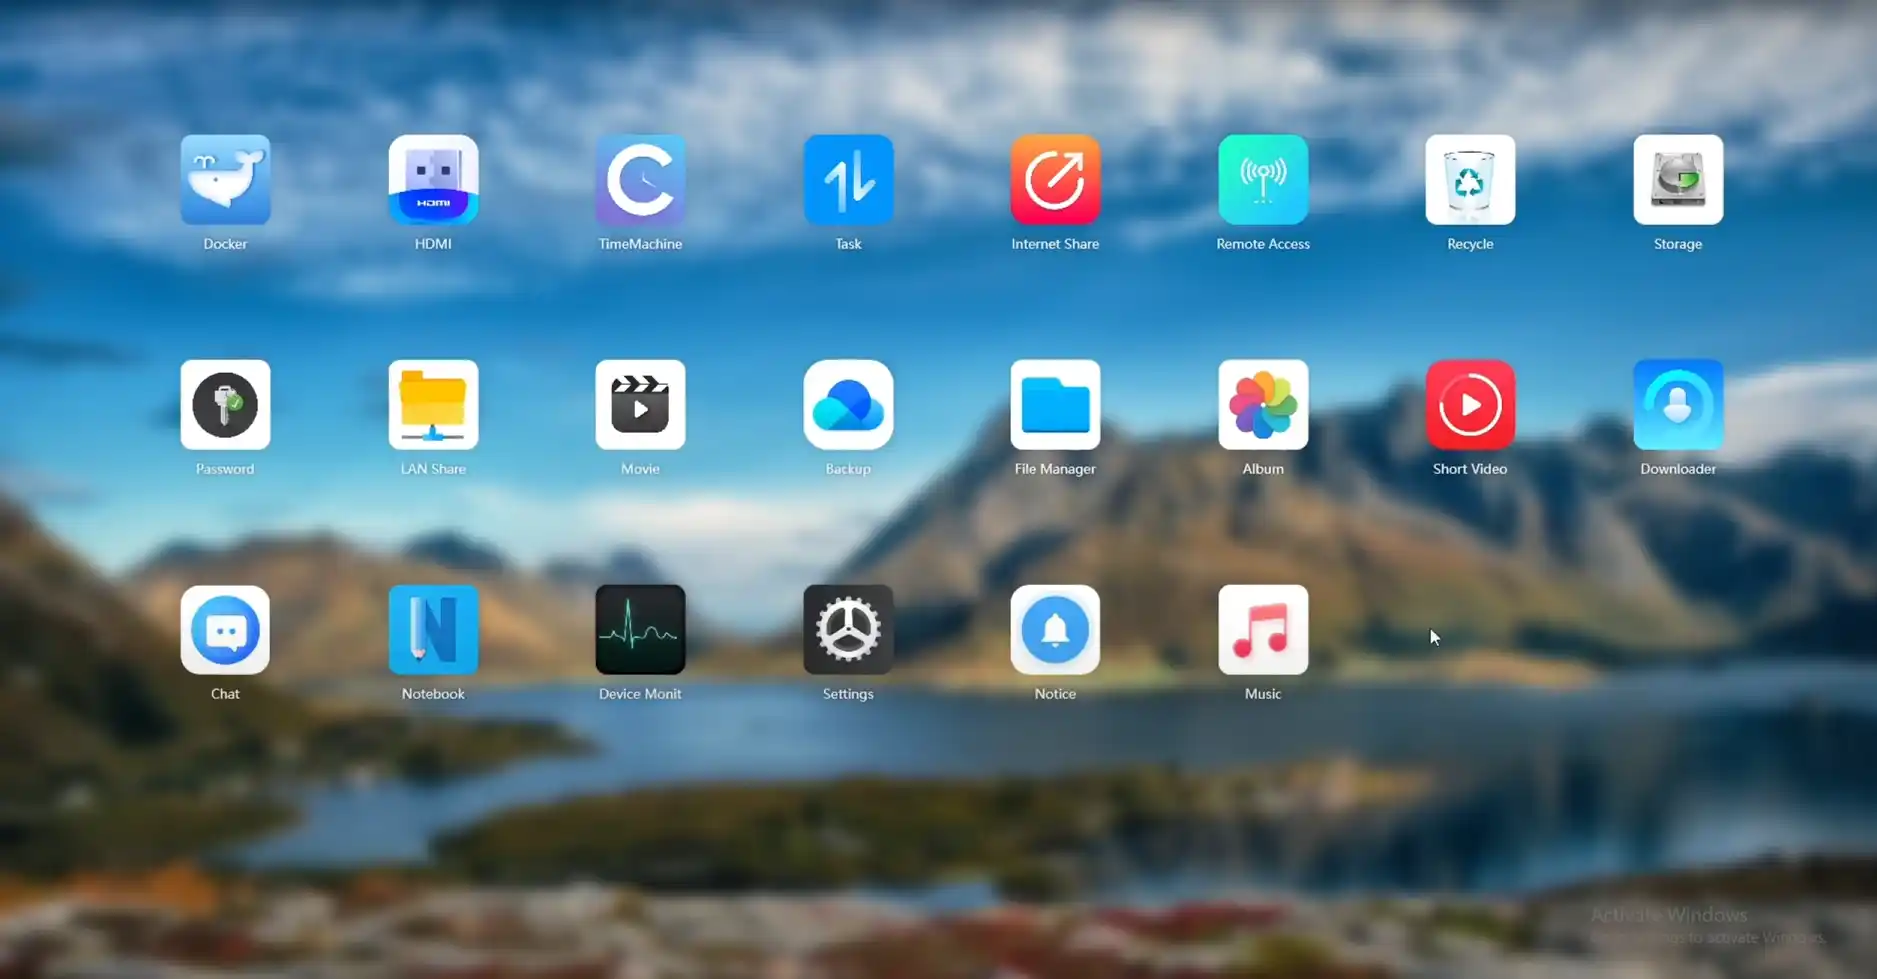
While the application is responsive and offers real-time monitoring of CPU, memory, and storage activity, it lacks polish in both design layout and localization. Several UI elements remain inconsistently translated, and some modules—such as the multimedia suite and AI functions—exhibit a mixture of English and untranslated Chinese text even when the system language is set to English.

Functionally, the OS supports the major protocols expected from a ZFS-based platform, including SMB, NFS, FTP, and Time Machine backup for macOS. File-level encryption, inline deduplication, and snapshot creation are all available within the storage management interface, with options for cache acceleration using the M.2 NVMe drives.
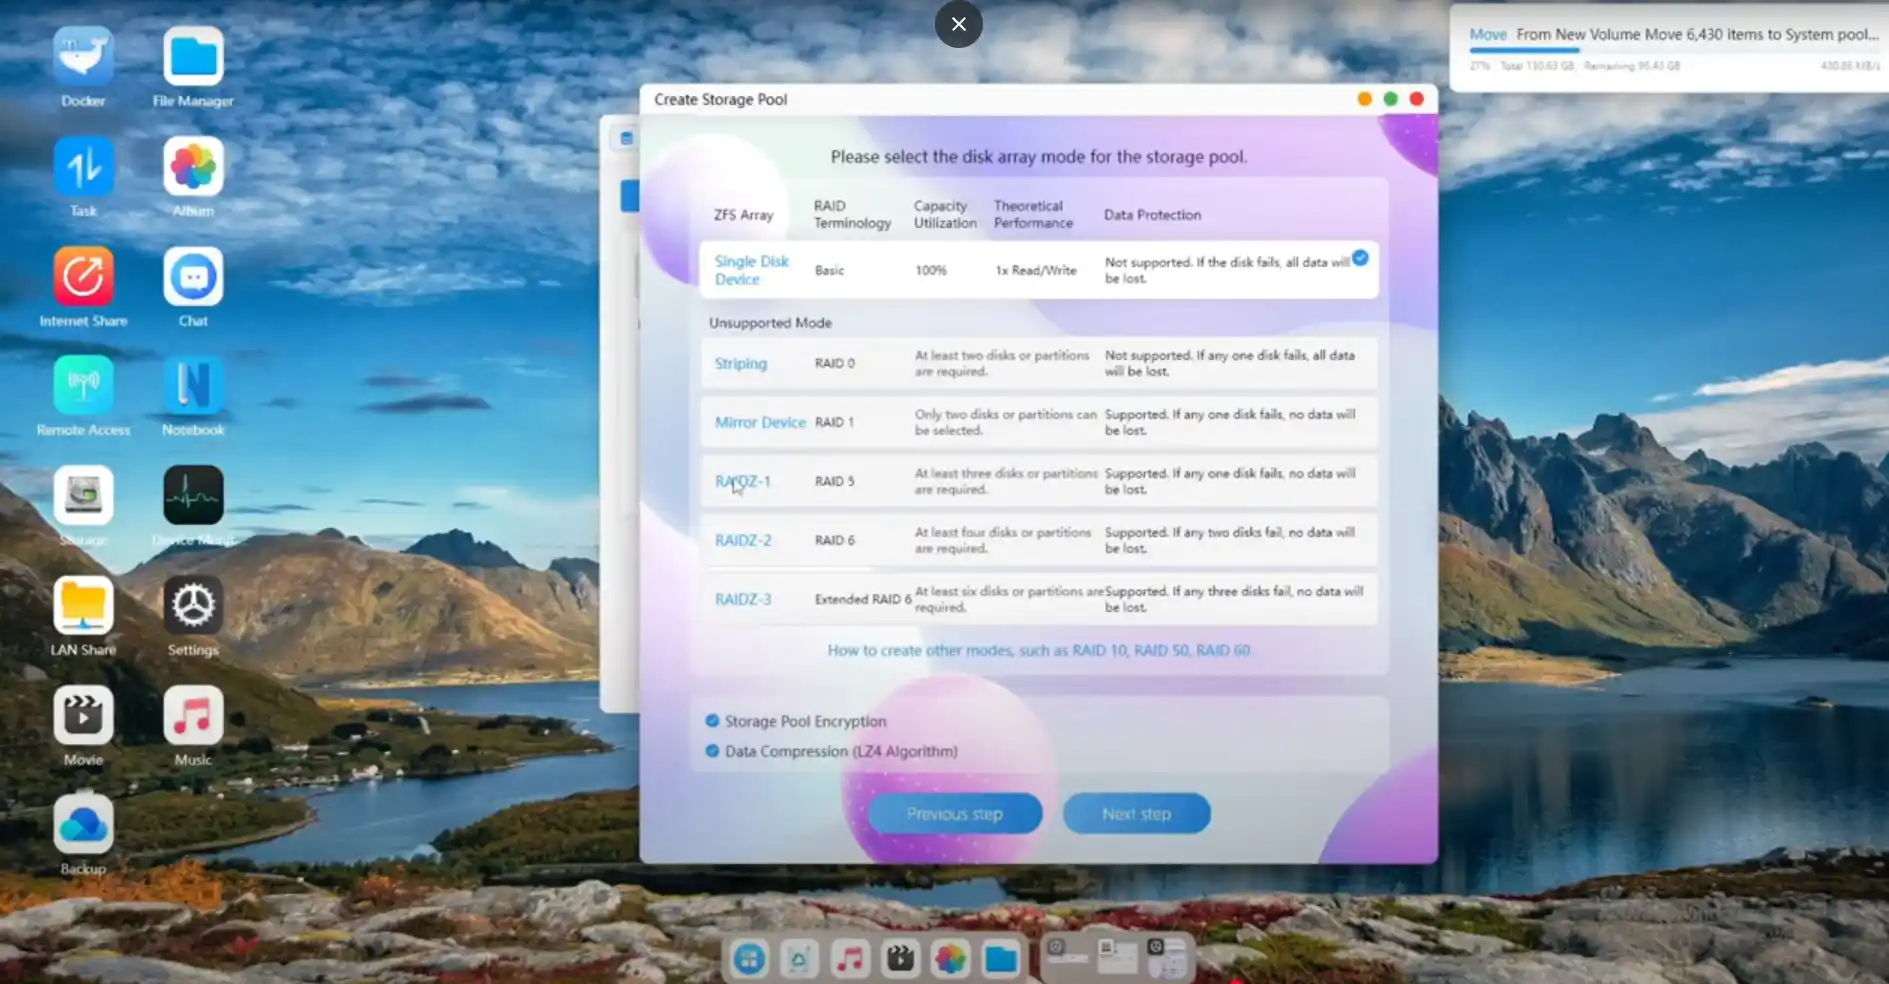
However, the absence of certain administrative features—most notably two-factor authentication, SSH access, and a dedicated app store—limits its appeal for security-conscious users or those looking to expand functionality via community-developed tools.
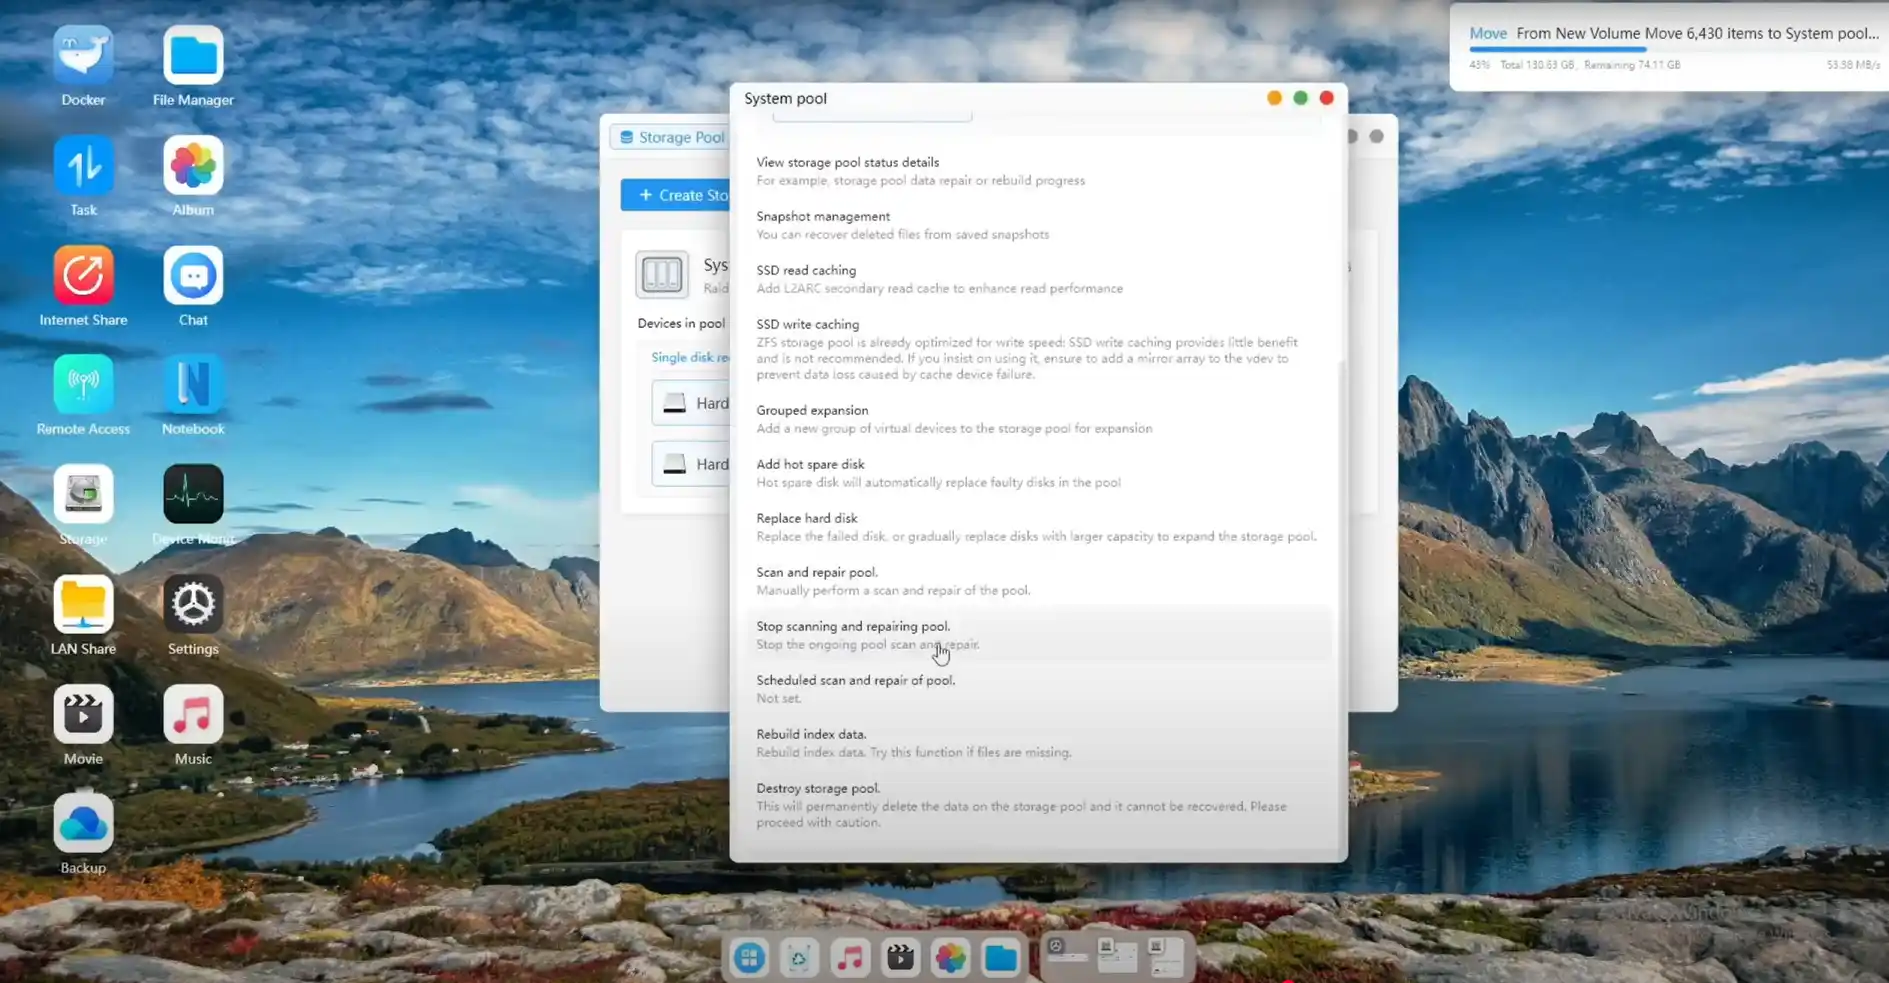
The system does include Docker support with a container manager interface, but VM deployment and third-party service integration (e.g., Plex, Jellyfin) are currently unavailable or not pre-installed.
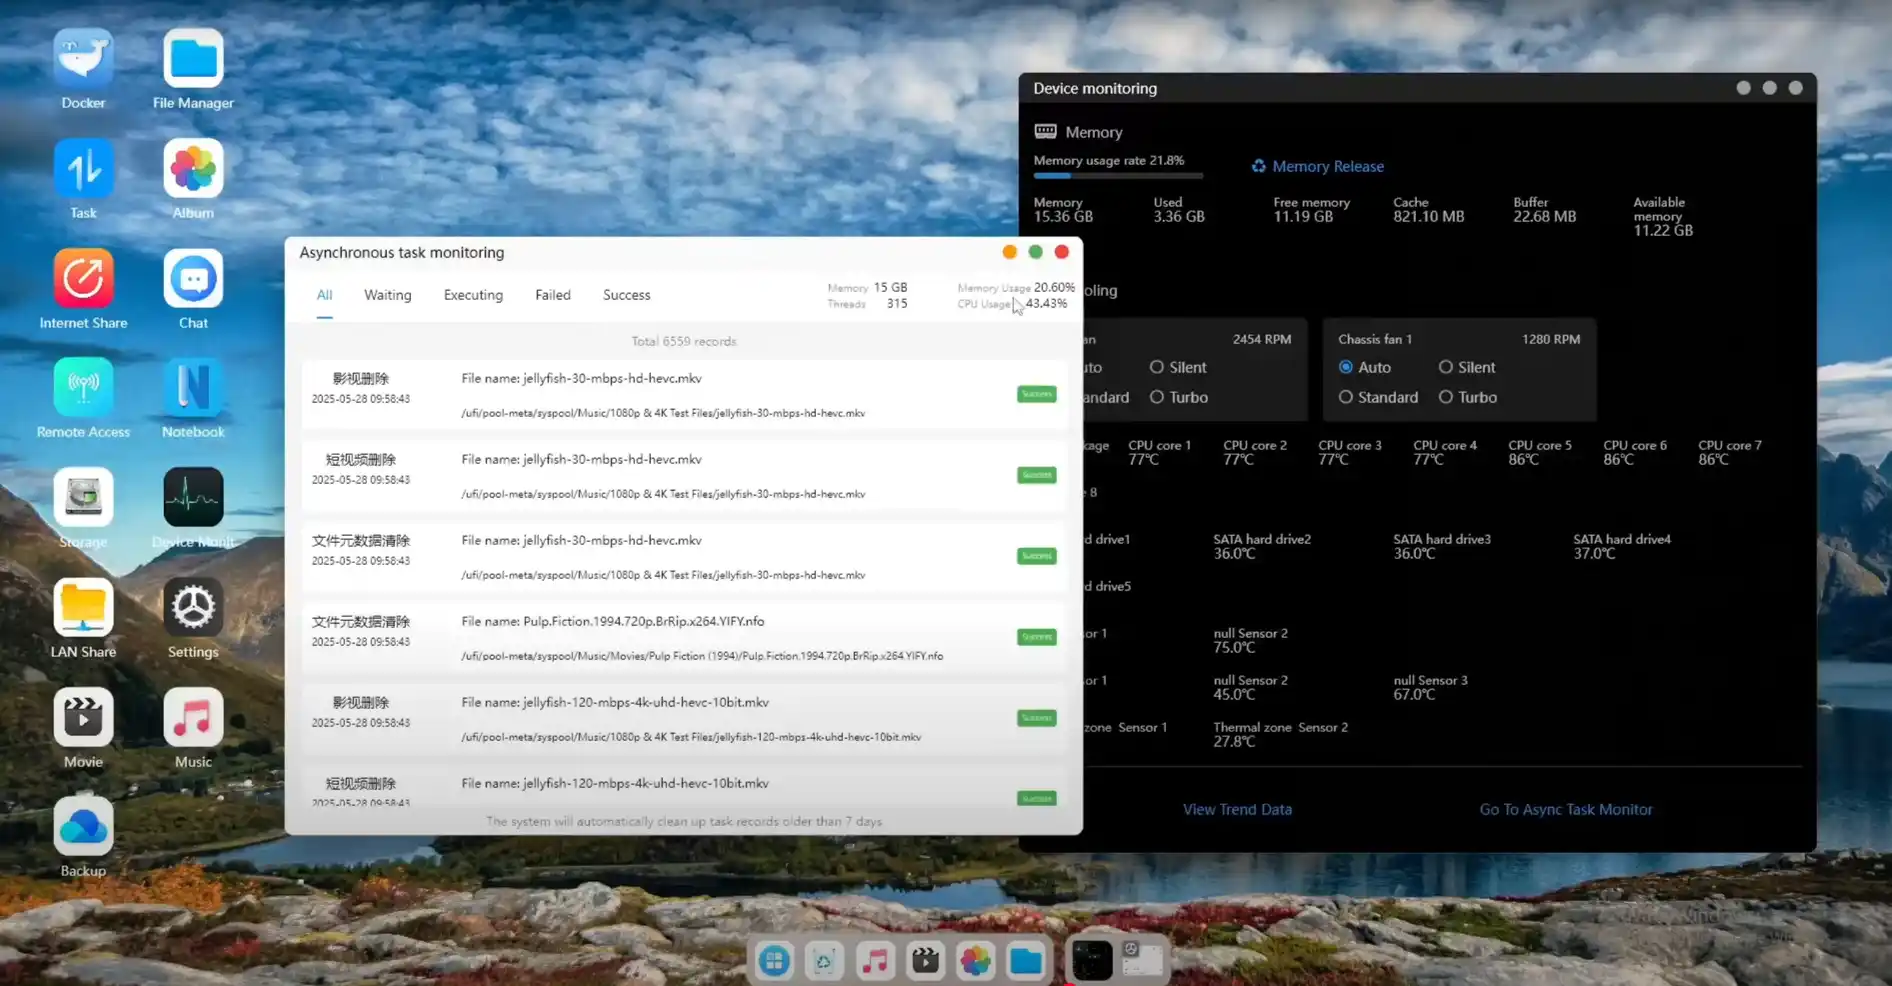
The file management system in the desktop client is functional but basic, offering drag-and-drop file operations, preview support for common file types, and options for setting sharing permissions. Remote access features rely on a relay service provided by Orico, and while this worked reliably during testing, there was no visible option for configuring custom domain access, HTTPS certificates, or firewall profiles—features typically expected in more mature NAS operating systems.

Some of the advanced AI features, such as facial recognition and semantic photo tagging, are accessible through this desktop interface, but their functionality is inconsistent due to metadata scraping issues and interface reliability.
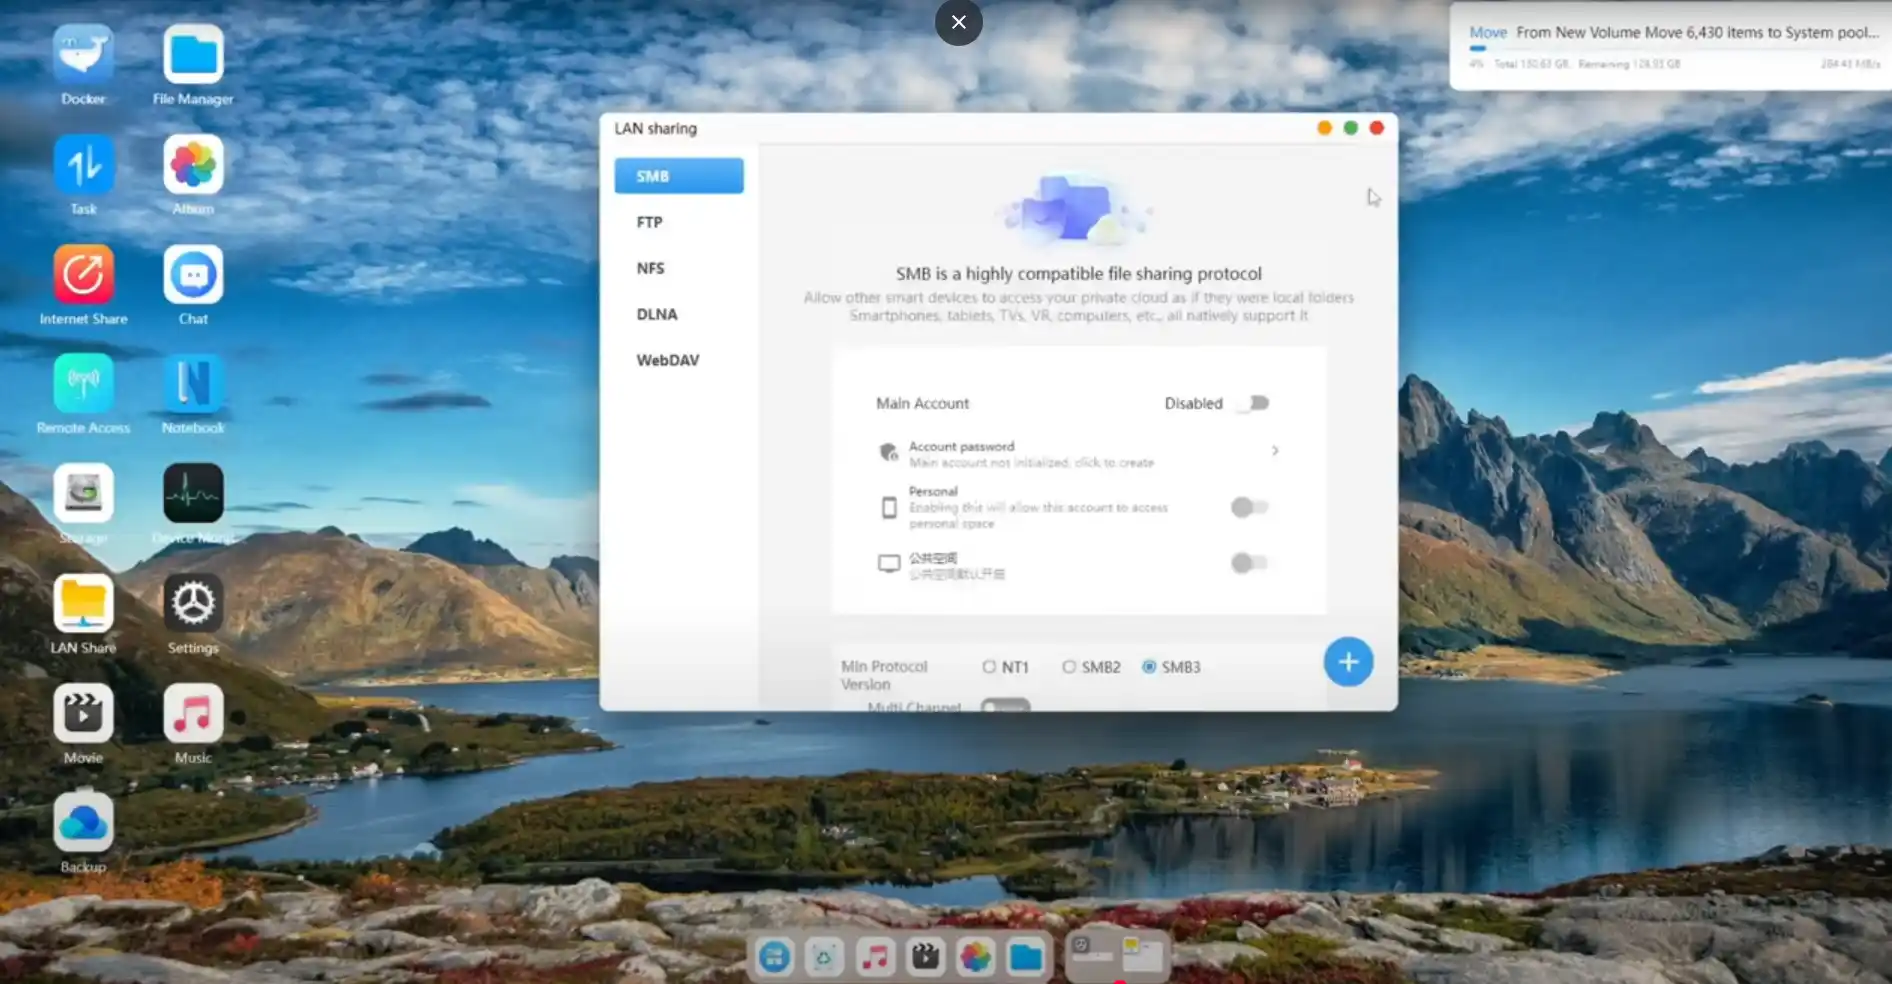
On the mobile side, the fnOS-derived application shows greater completeness. The Android client used during testing allowed for quick setup, user management, remote file access, and snapshot control. Photo and video libraries are indexed automatically and presented with timeline views, location tags, and album sorting. The app also supports real-time uploads, camera roll backups, and basic editing metadata tagging.
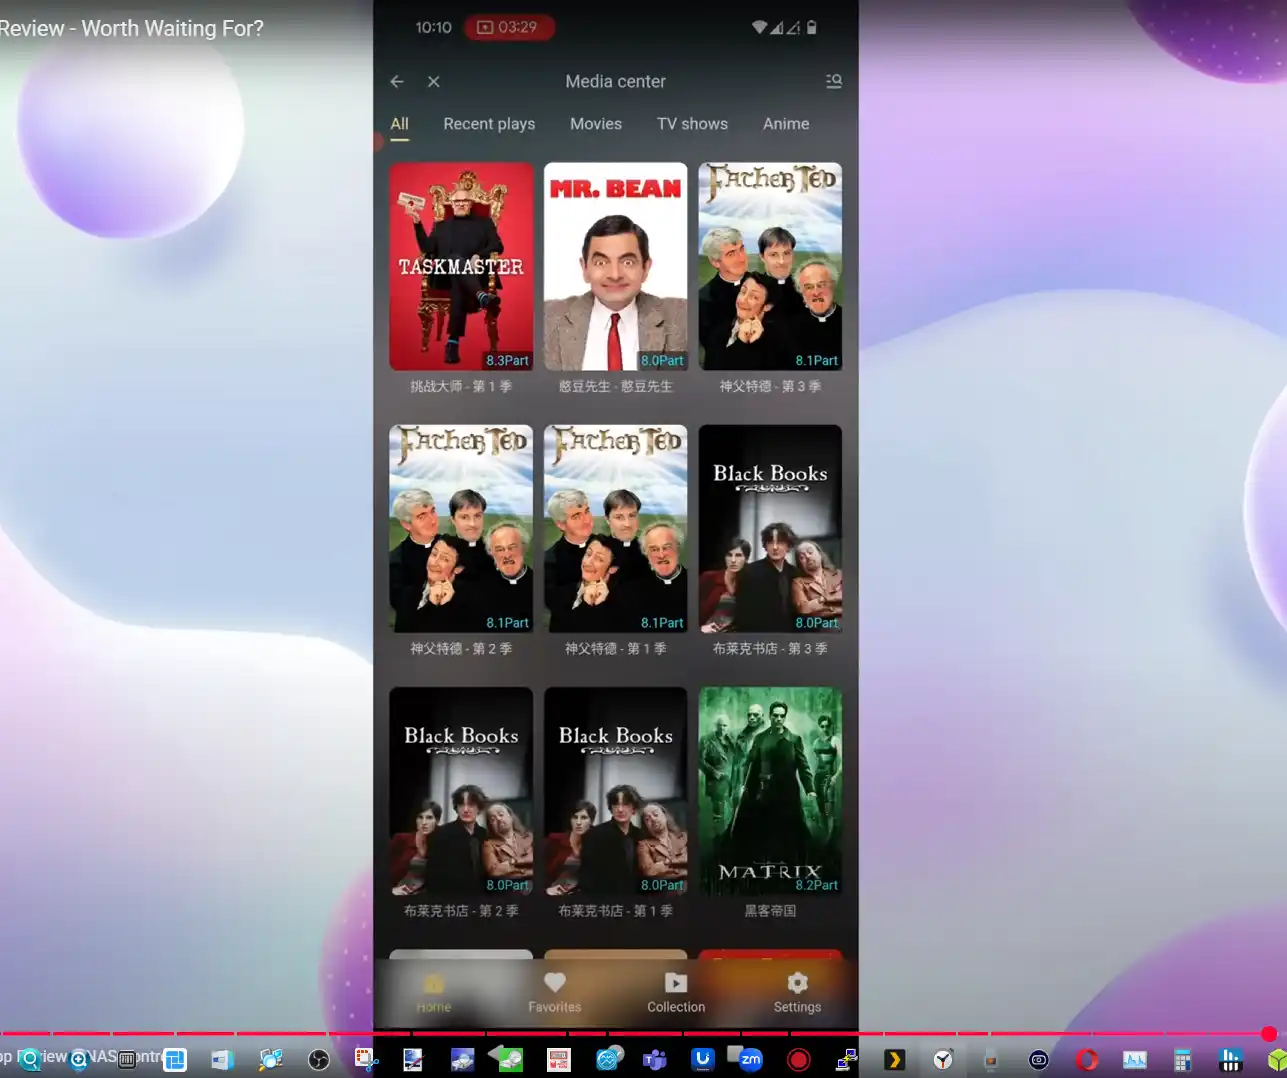
AI recognition features such as object detection and face grouping are available, although semantic search accuracy remains mixed.
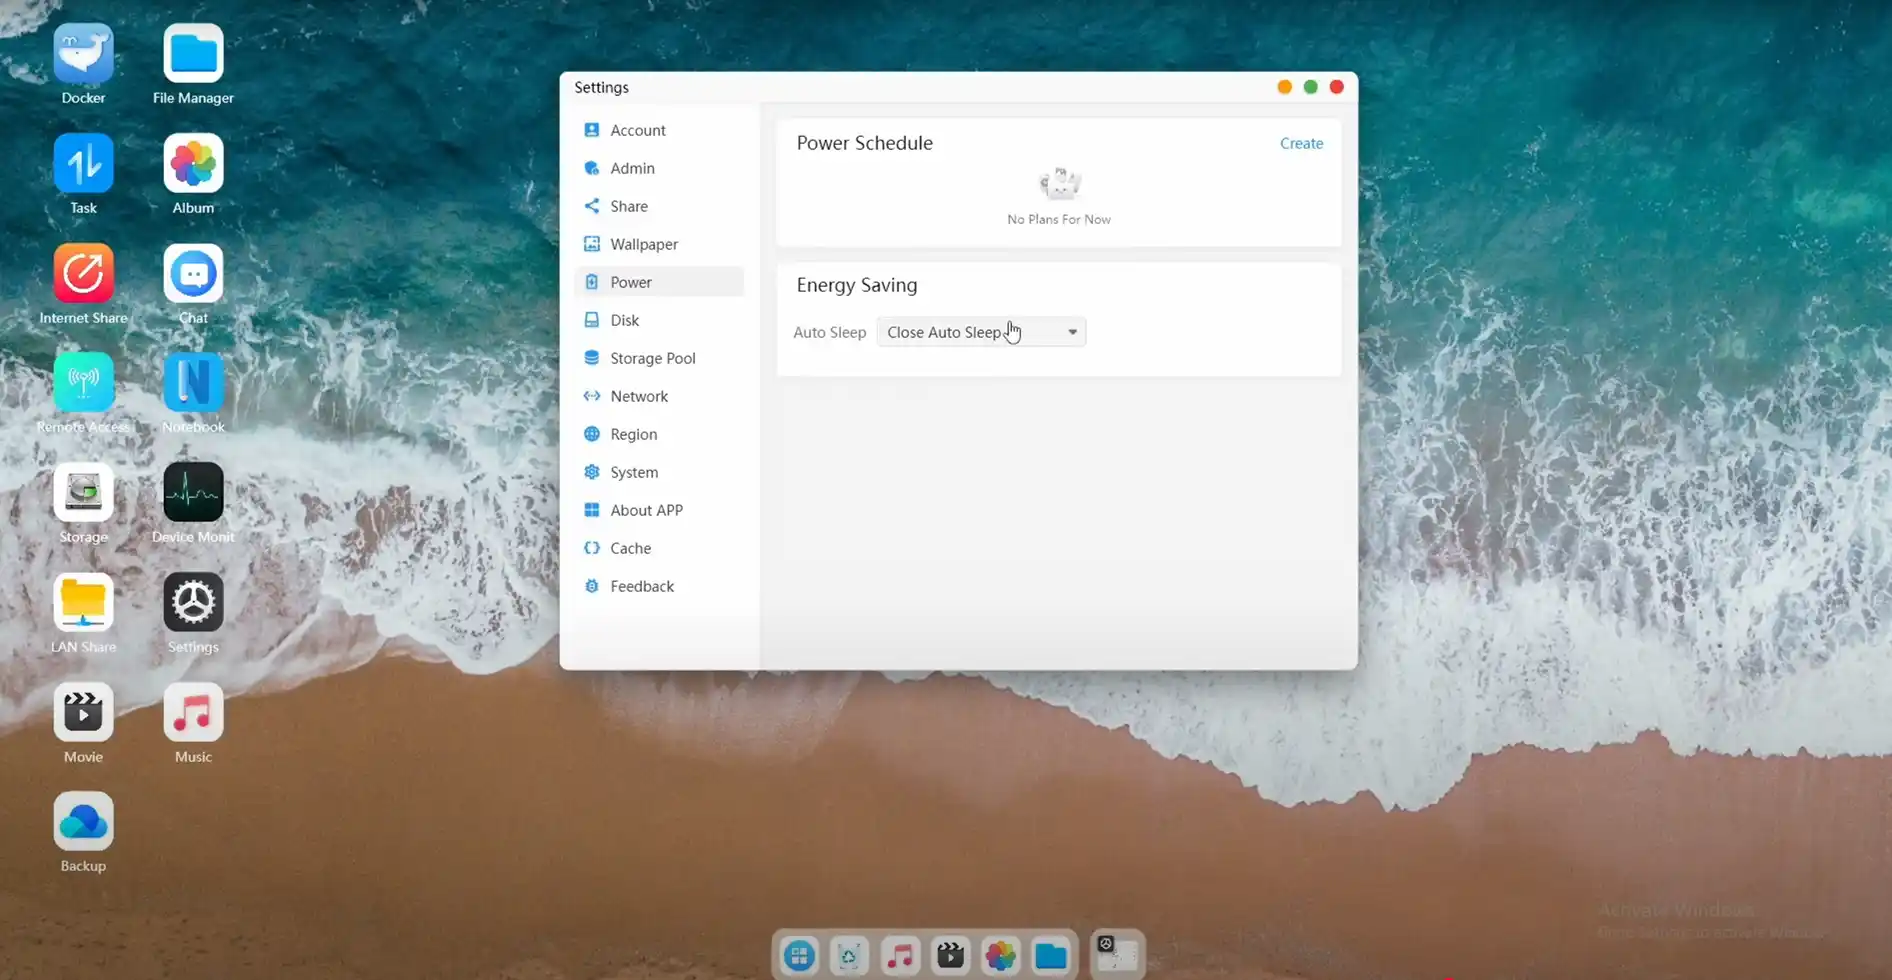
Remote control of HDMI playback from the phone is supported, allowing content streaming directly to a connected display, but the controls remain basic and lack the refinement of dedicated media remote interfaces.
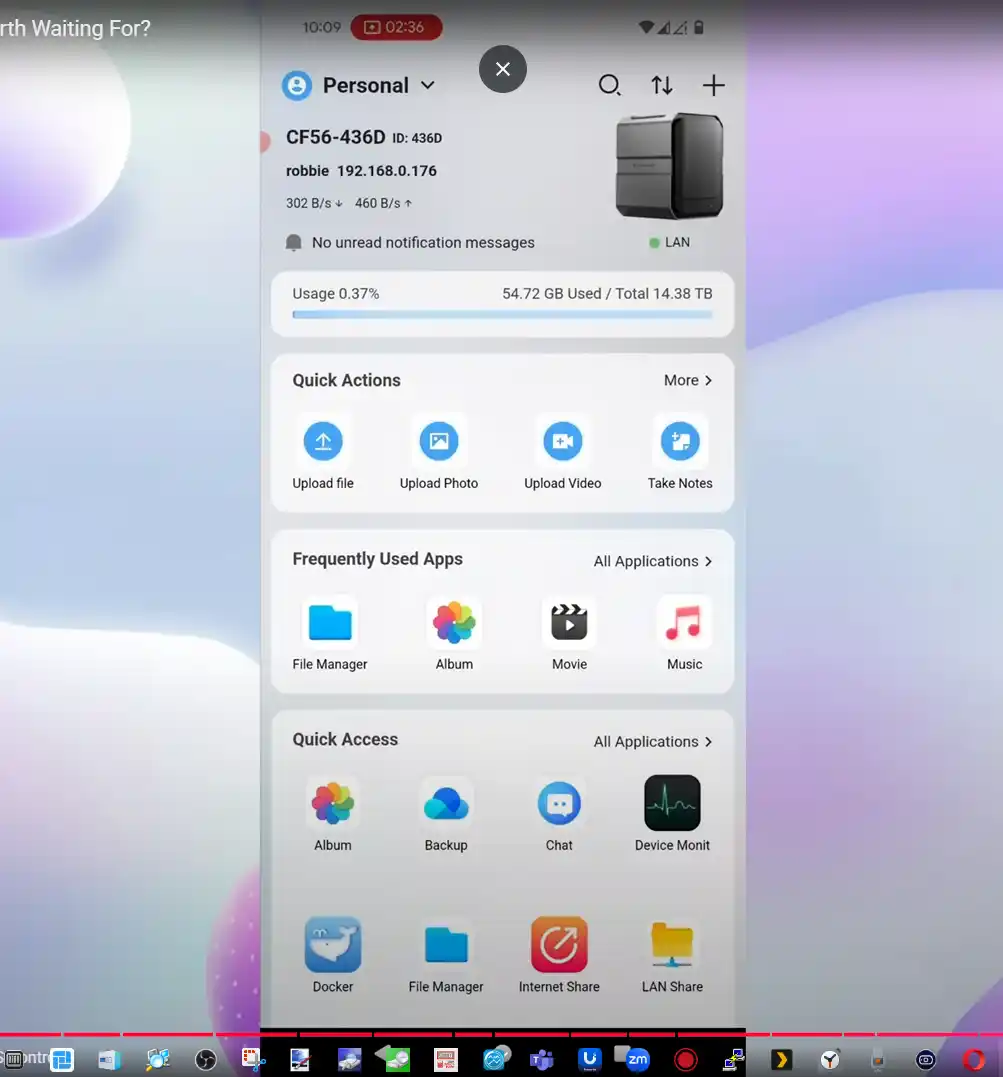
Overall, while the mobile app appears more polished and covers most core user needs, both desktop and mobile software clients reflect a platform that is not yet feature-complete. The reliance on fnOS gives Orico a functional foundation with native ZFS support and UI consistency across devices, but the closed nature of the system, combined with the lack of extensibility and incomplete localization, may limit its immediate appeal outside of its domestic market.

If Orico follows through on promised optimizations and expands the software stack with a proper app ecosystem and advanced security controls, the platform could become more viable in international NAS markets. Until then, the software should be considered a work-in-progress that supports basic NAS tasks but may fall short for more demanding or technical deployments.
The Orico CF56 and CF56 Pro represent a calculated step into the semi-professional NAS market by a brand historically known for accessories and external storage enclosures. By leveraging Intel’s N305 and i5-1240P processors, DDR5 memory, and a mix of HDD and NVMe storage options, Orico offers a compelling hardware platform on both models—especially in terms of expandability and bandwidth potential. The CF56 is well-suited for users who require reliable local storage with some containerization and light media usage, while the CF56 Pro pushes into territory typically occupied by entry-level rackmounts or high-end desktop NAS systems, thanks to its dual 10GbE ports, USB4 support, and improved thermal zoning. While the lack of ECC memory may deter more cautious enterprise buyers, most of the design trade-offs appear intentional and aligned with prosumer priorities.
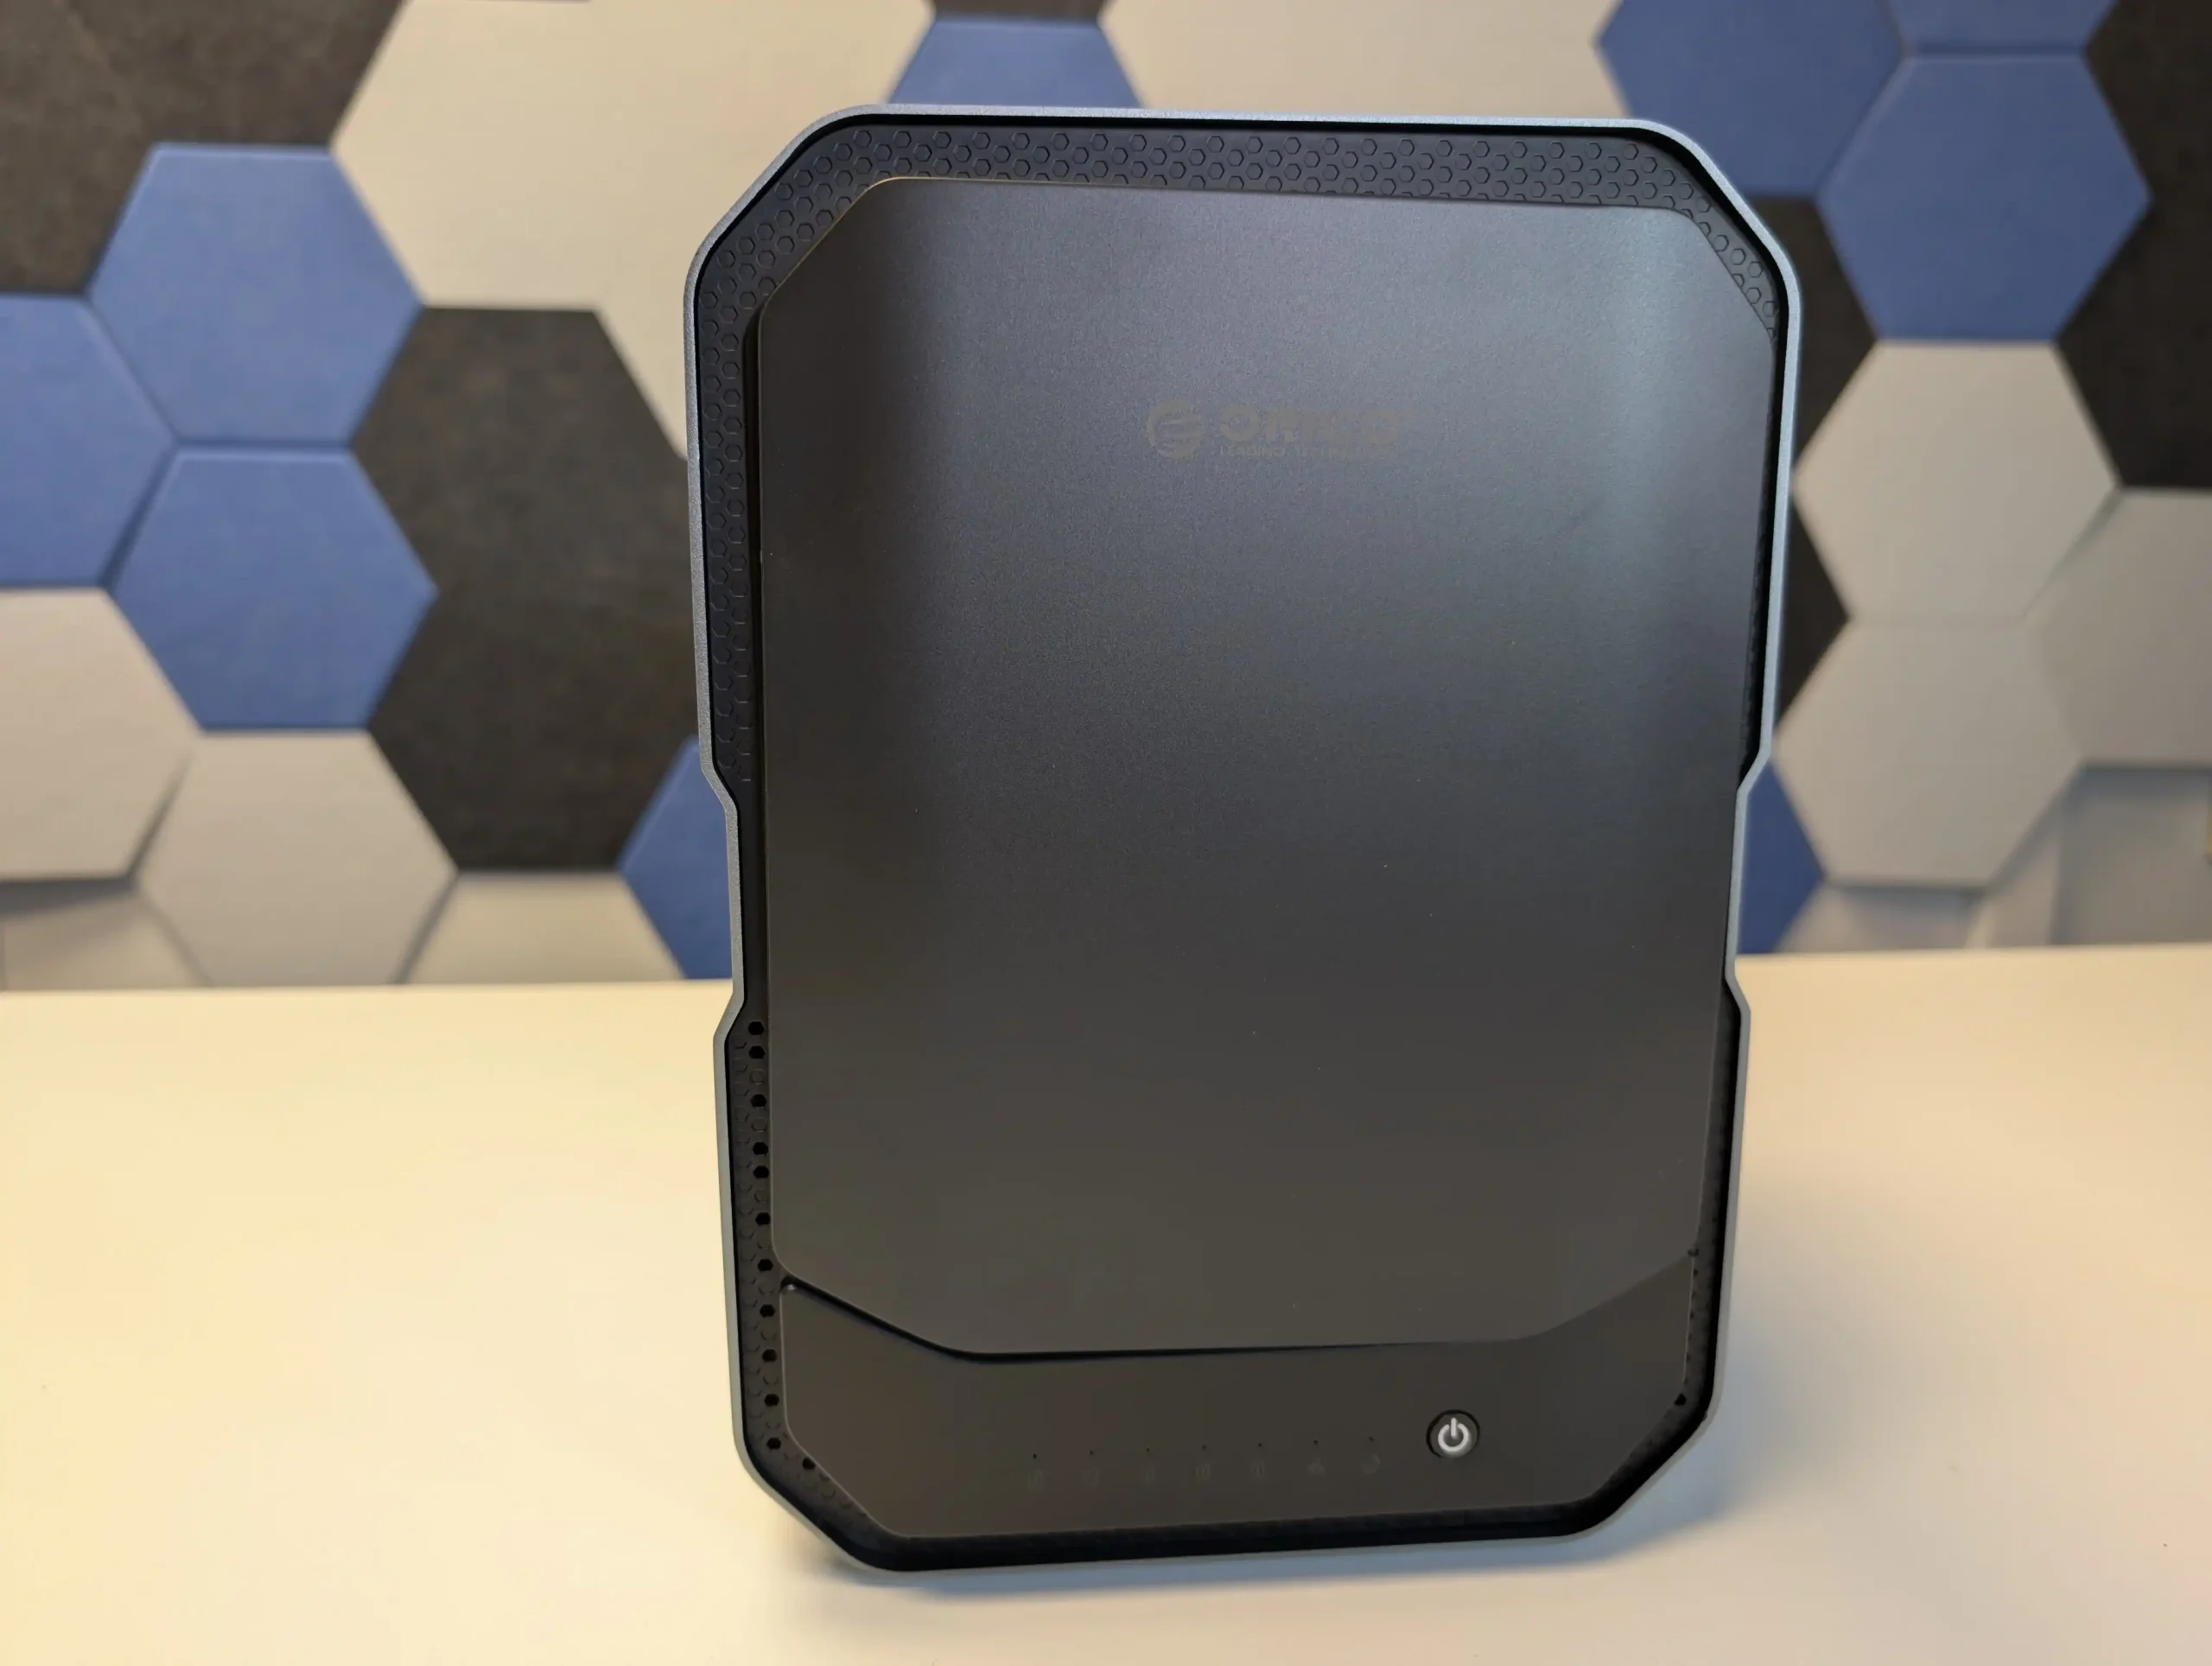
That said, both units remain in a pre-release state at the time of writing, and their software platform—CyberData OS—is clearly still under development. While the ZFS integration, AI media indexing, and snapshot management show promise, issues such as language inconsistencies, incomplete feature sets, and missing essentials like two-factor authentication may limit early adoption. File transfer and multimedia performance also require further optimization, with current speeds falling short of the hardware’s capabilities. As prototypes, the CF56 and CF56 Pro demonstrate strong hardware foundations, and if the OS matures as expected by launch, these units could become legitimate alternatives to mainstream NAS systems in the increasingly crowded hybrid storage space.
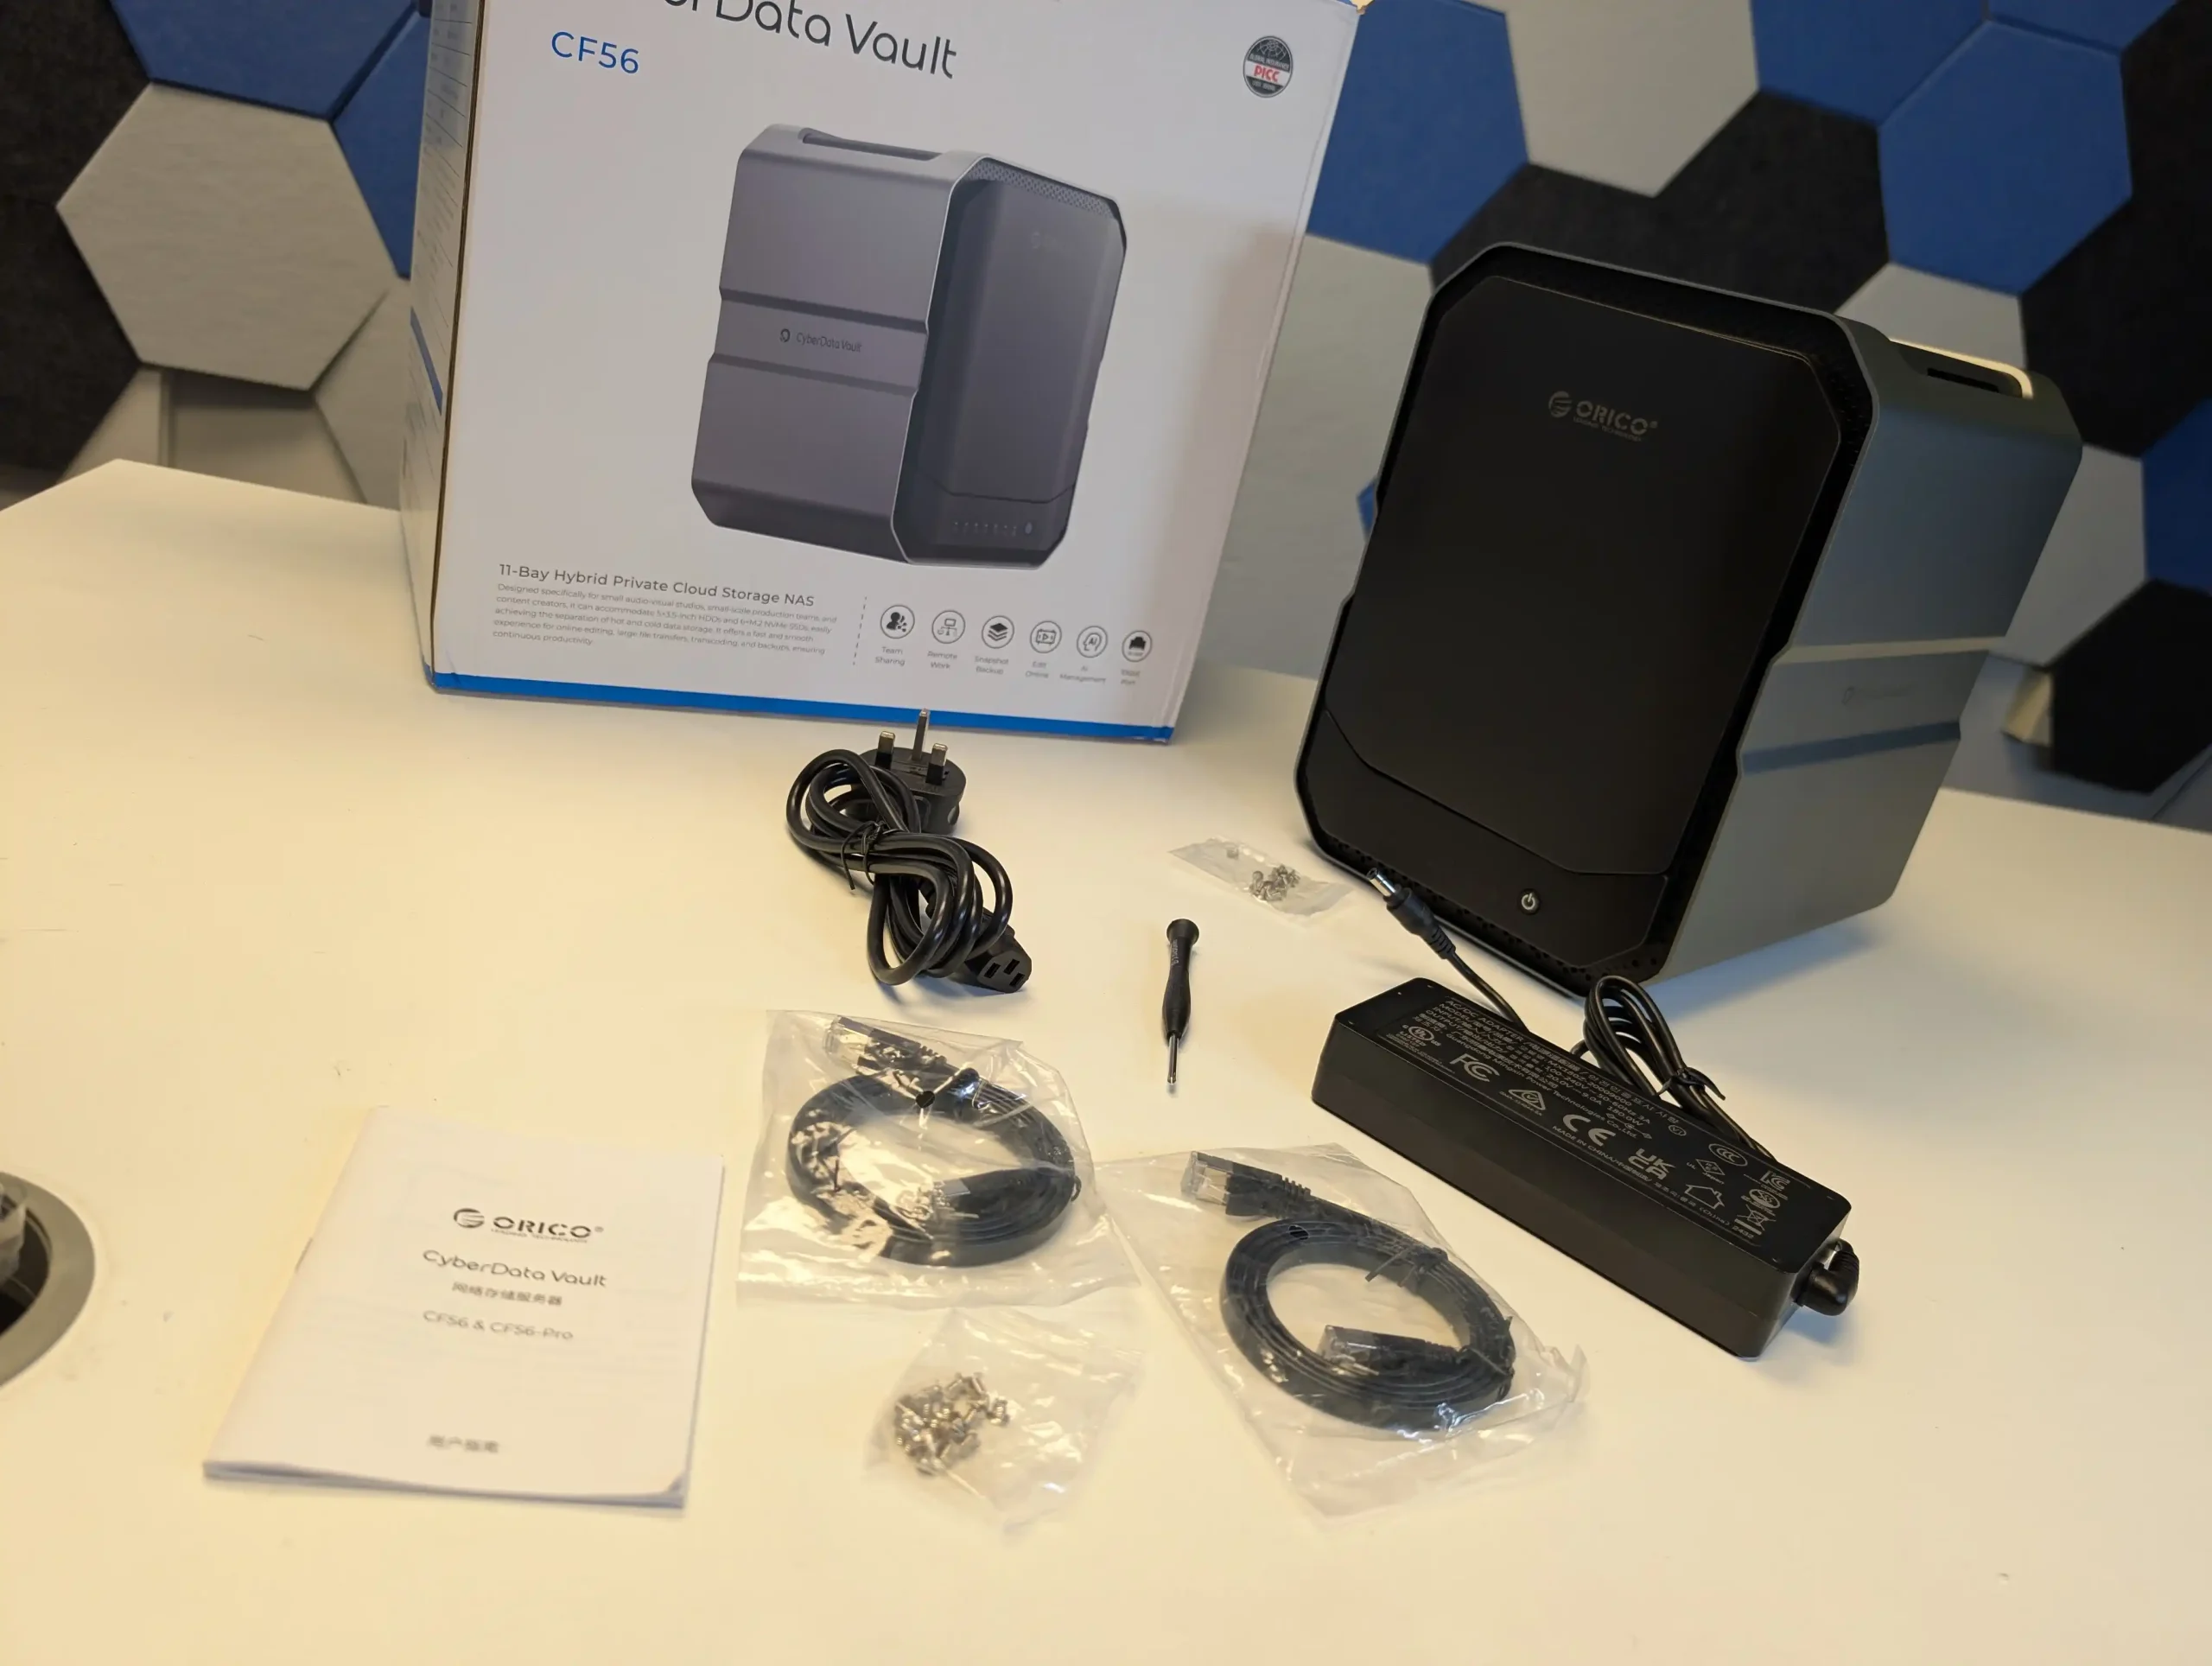
| Pros | Cons |
|---|---|
| Hybrid storage: 5x HDD + 6x M.2 NVMe SSD (flexible ZFS configurations) | No ECC memory support (despite using ZFS) |
| Dual 10GbE on CF56 Pro for high-speed networking | USB4 ports lack network-over-USB functionality |
| Modern CPUs: Efficient N305 and powerful i5-1240P | Early firmware lacks optimization (e.g. SMB transfer speeds) |
| Expandability via GPU dock (CF56 Pro only) and USB4 RAID cabinet | CyberData OS lacks two-factor authentication and app store |
| Up to 64GB DDR5 RAM with dual-channel (CF56 Pro) | Top NVMe region on CF56 Pro runs hot under load (80°C) |
| Multi-zone active cooling and manual fan profiles | Localization/UI inconsistencies in current OS build |
| HDMI + DisplayPort output with 4K/8K support | No official hot-swap confirmation for HDD bays |
| Integrated AI media management and Docker support | Software still in development; not final at time of review |
SUBSCRIBE TO OUR NEWSLETTER Join Inner Circle Subscribe
This description contains links to Amazon. These links will take you to some of the products mentioned in today's content. As an Amazon Associate, I earn from qualifying purchases. Visit the NASCompares Deal Finder to find the best place to buy this device in your region, based on Service, Support and Reputation - Just Search for your NAS Drive in the Box Below
Need Help?
Where possible (and where appropriate) please provide as much information about your requirements, as then I can arrange the best answer and solution to your needs. Do not worry about your e-mail address being required, it will NOT be used in a mailing list and will NOT be used in any way other than to respond to your enquiry.
[contact-form-7]
Ko-fi or old school Paypal. Thanks!To find out more about how to support this advice service check HEREIf you need to fix or configure a NAS, check Fiver
Have you thought about helping others with your knowledge? Find Instructions Here
|
|
|
The Beelink ME Mini NAS is a compact, six-slot network-attached storage solution aimed squarely at home users seeking a quiet, efficient, and flexible storage platform without the cost or complexity of traditional full-size NAS systems. Measuring just 99mm in each dimension and built with a minimalist cube design, the unit is designed to blend into home environments such as living rooms, bedrooms, or home offices. At its core is the Intel Twin Lake N150 processor, a 4-core, 4-thread CPU with a 6W TDP and a burst clock of up to 3.6GHz, paired with 12GB of soldered LPDDR5 4800MHz memory. This combination targets scenarios such as home media streaming, light file serving, or soft routing, rather than heavy enterprise workloads.
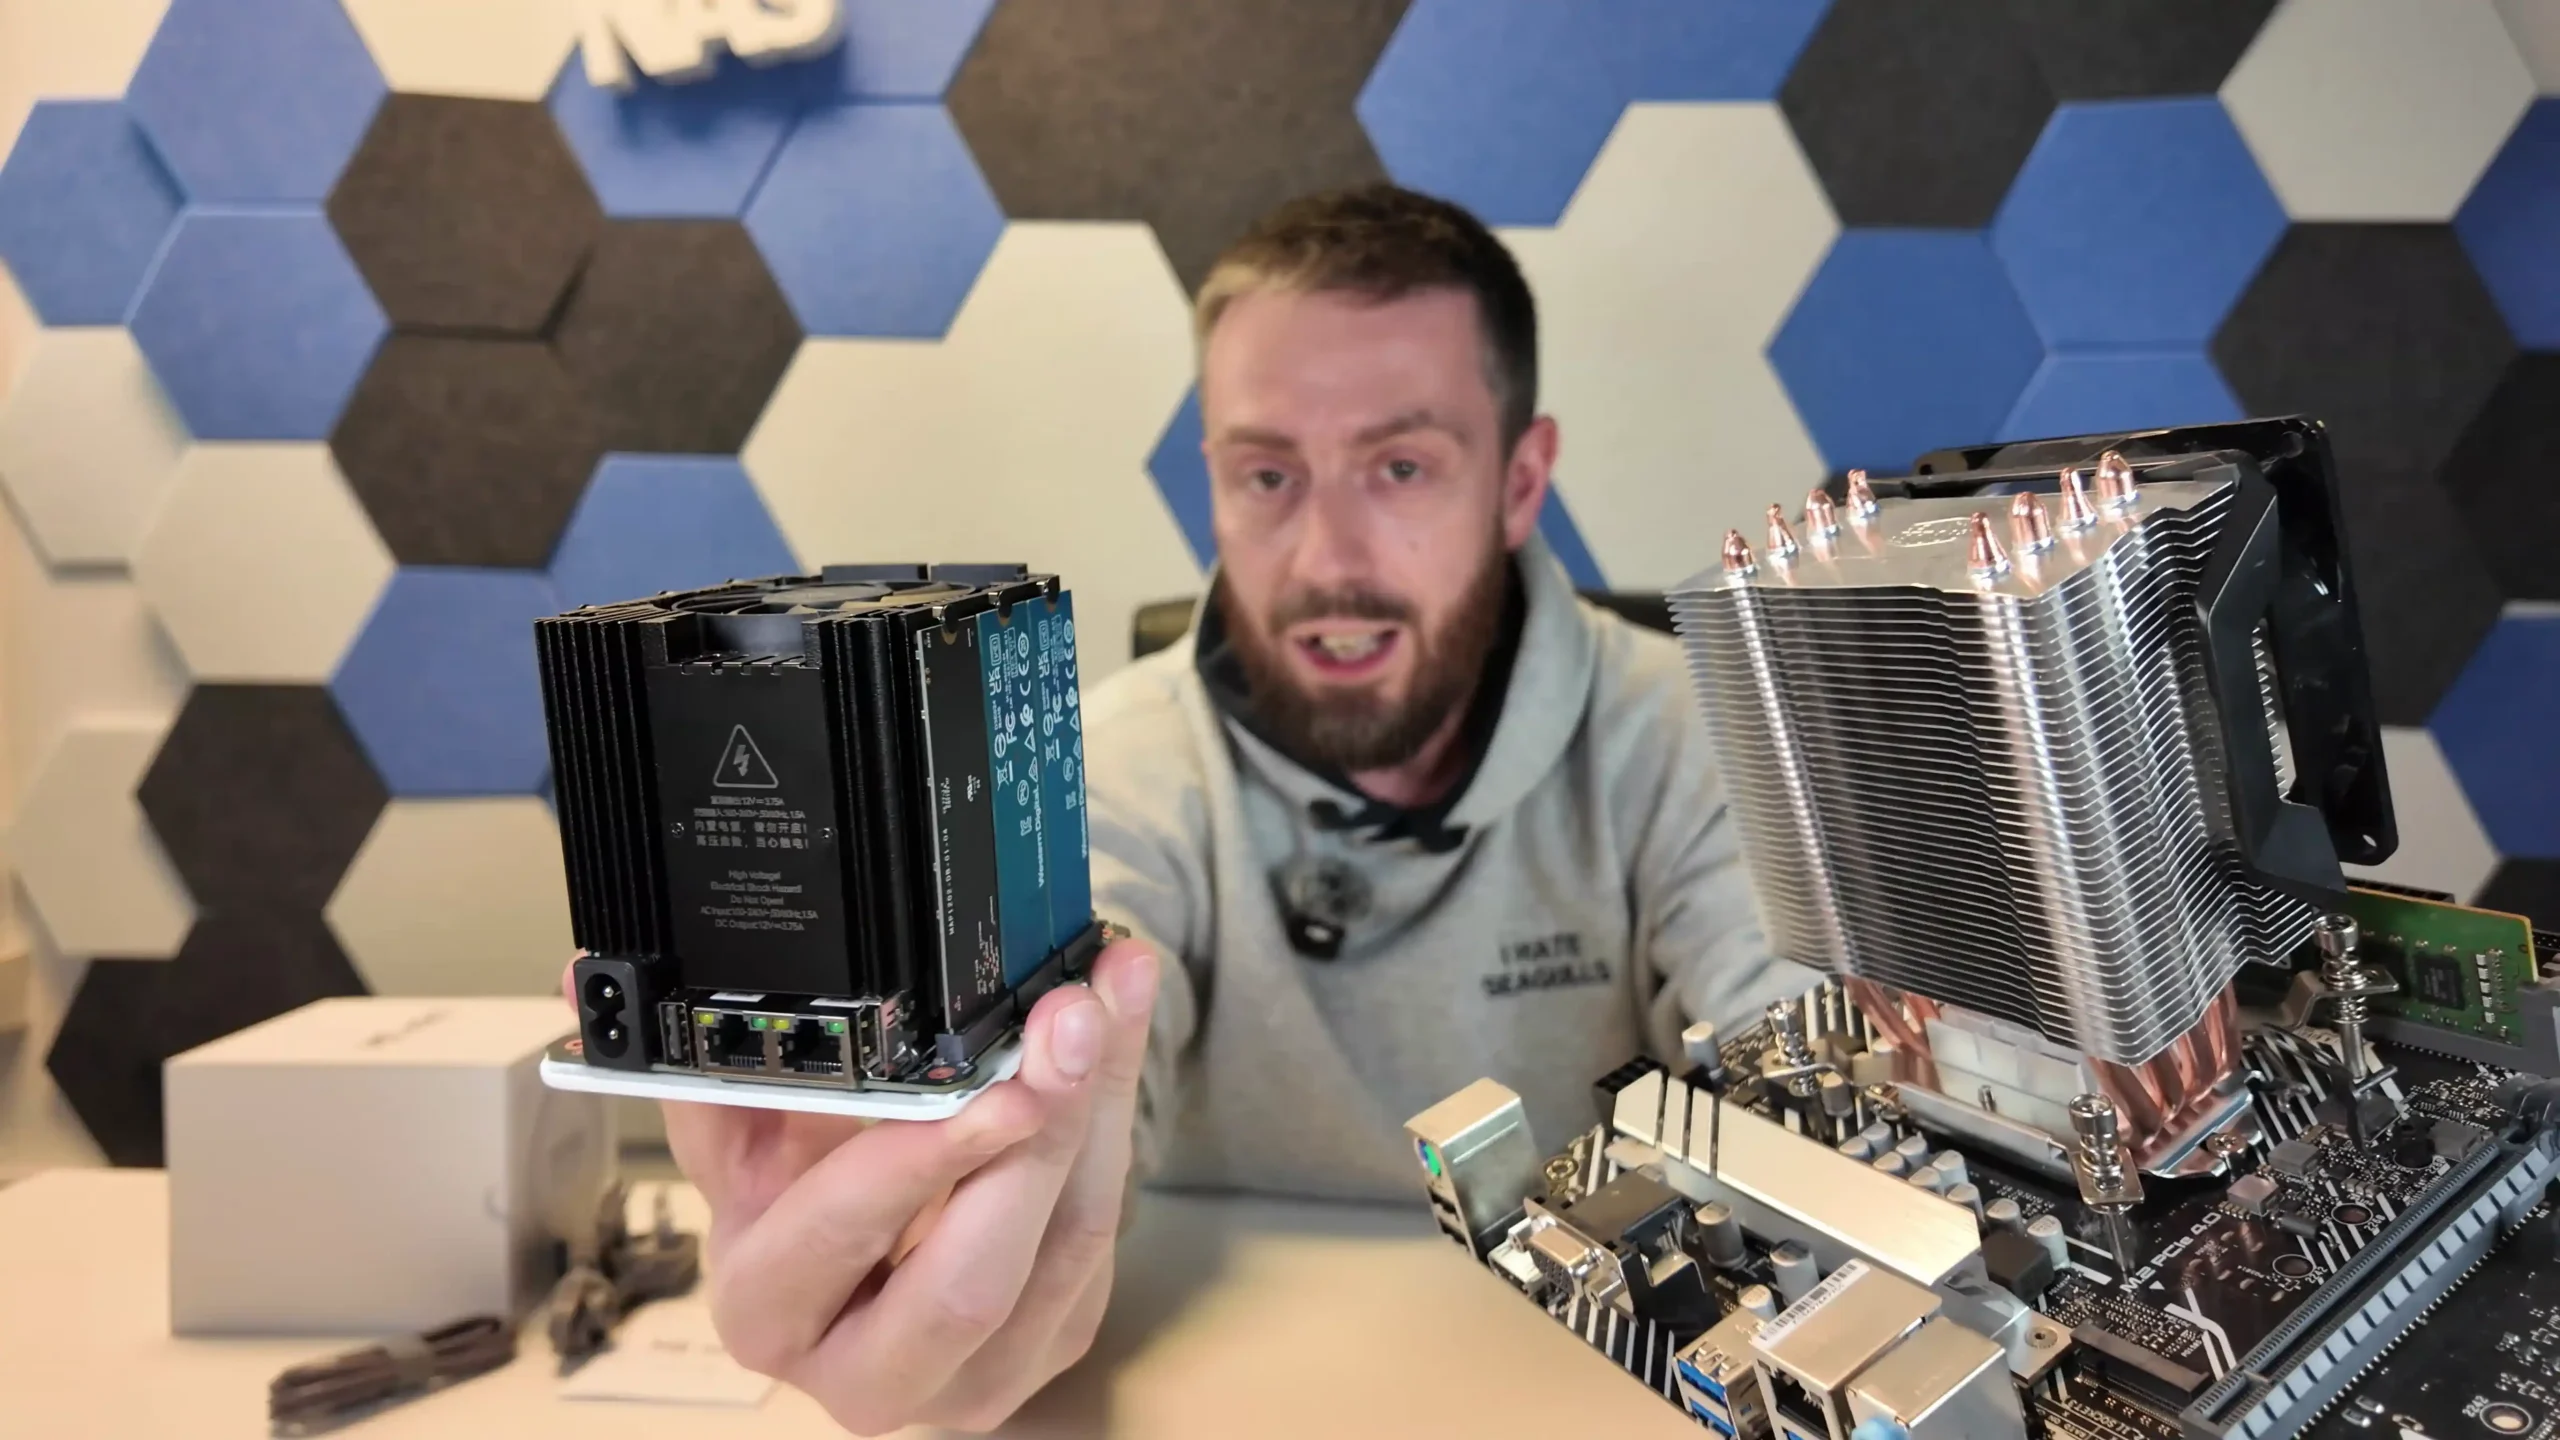
The ME Mini supports six M.2 2280 SSD slots, delivering a maximum theoretical storage capacity of 24TB. This includes one Gen 3 x2 slot (designed for the OS) and five Gen 3 x1 slots for storage expansion.
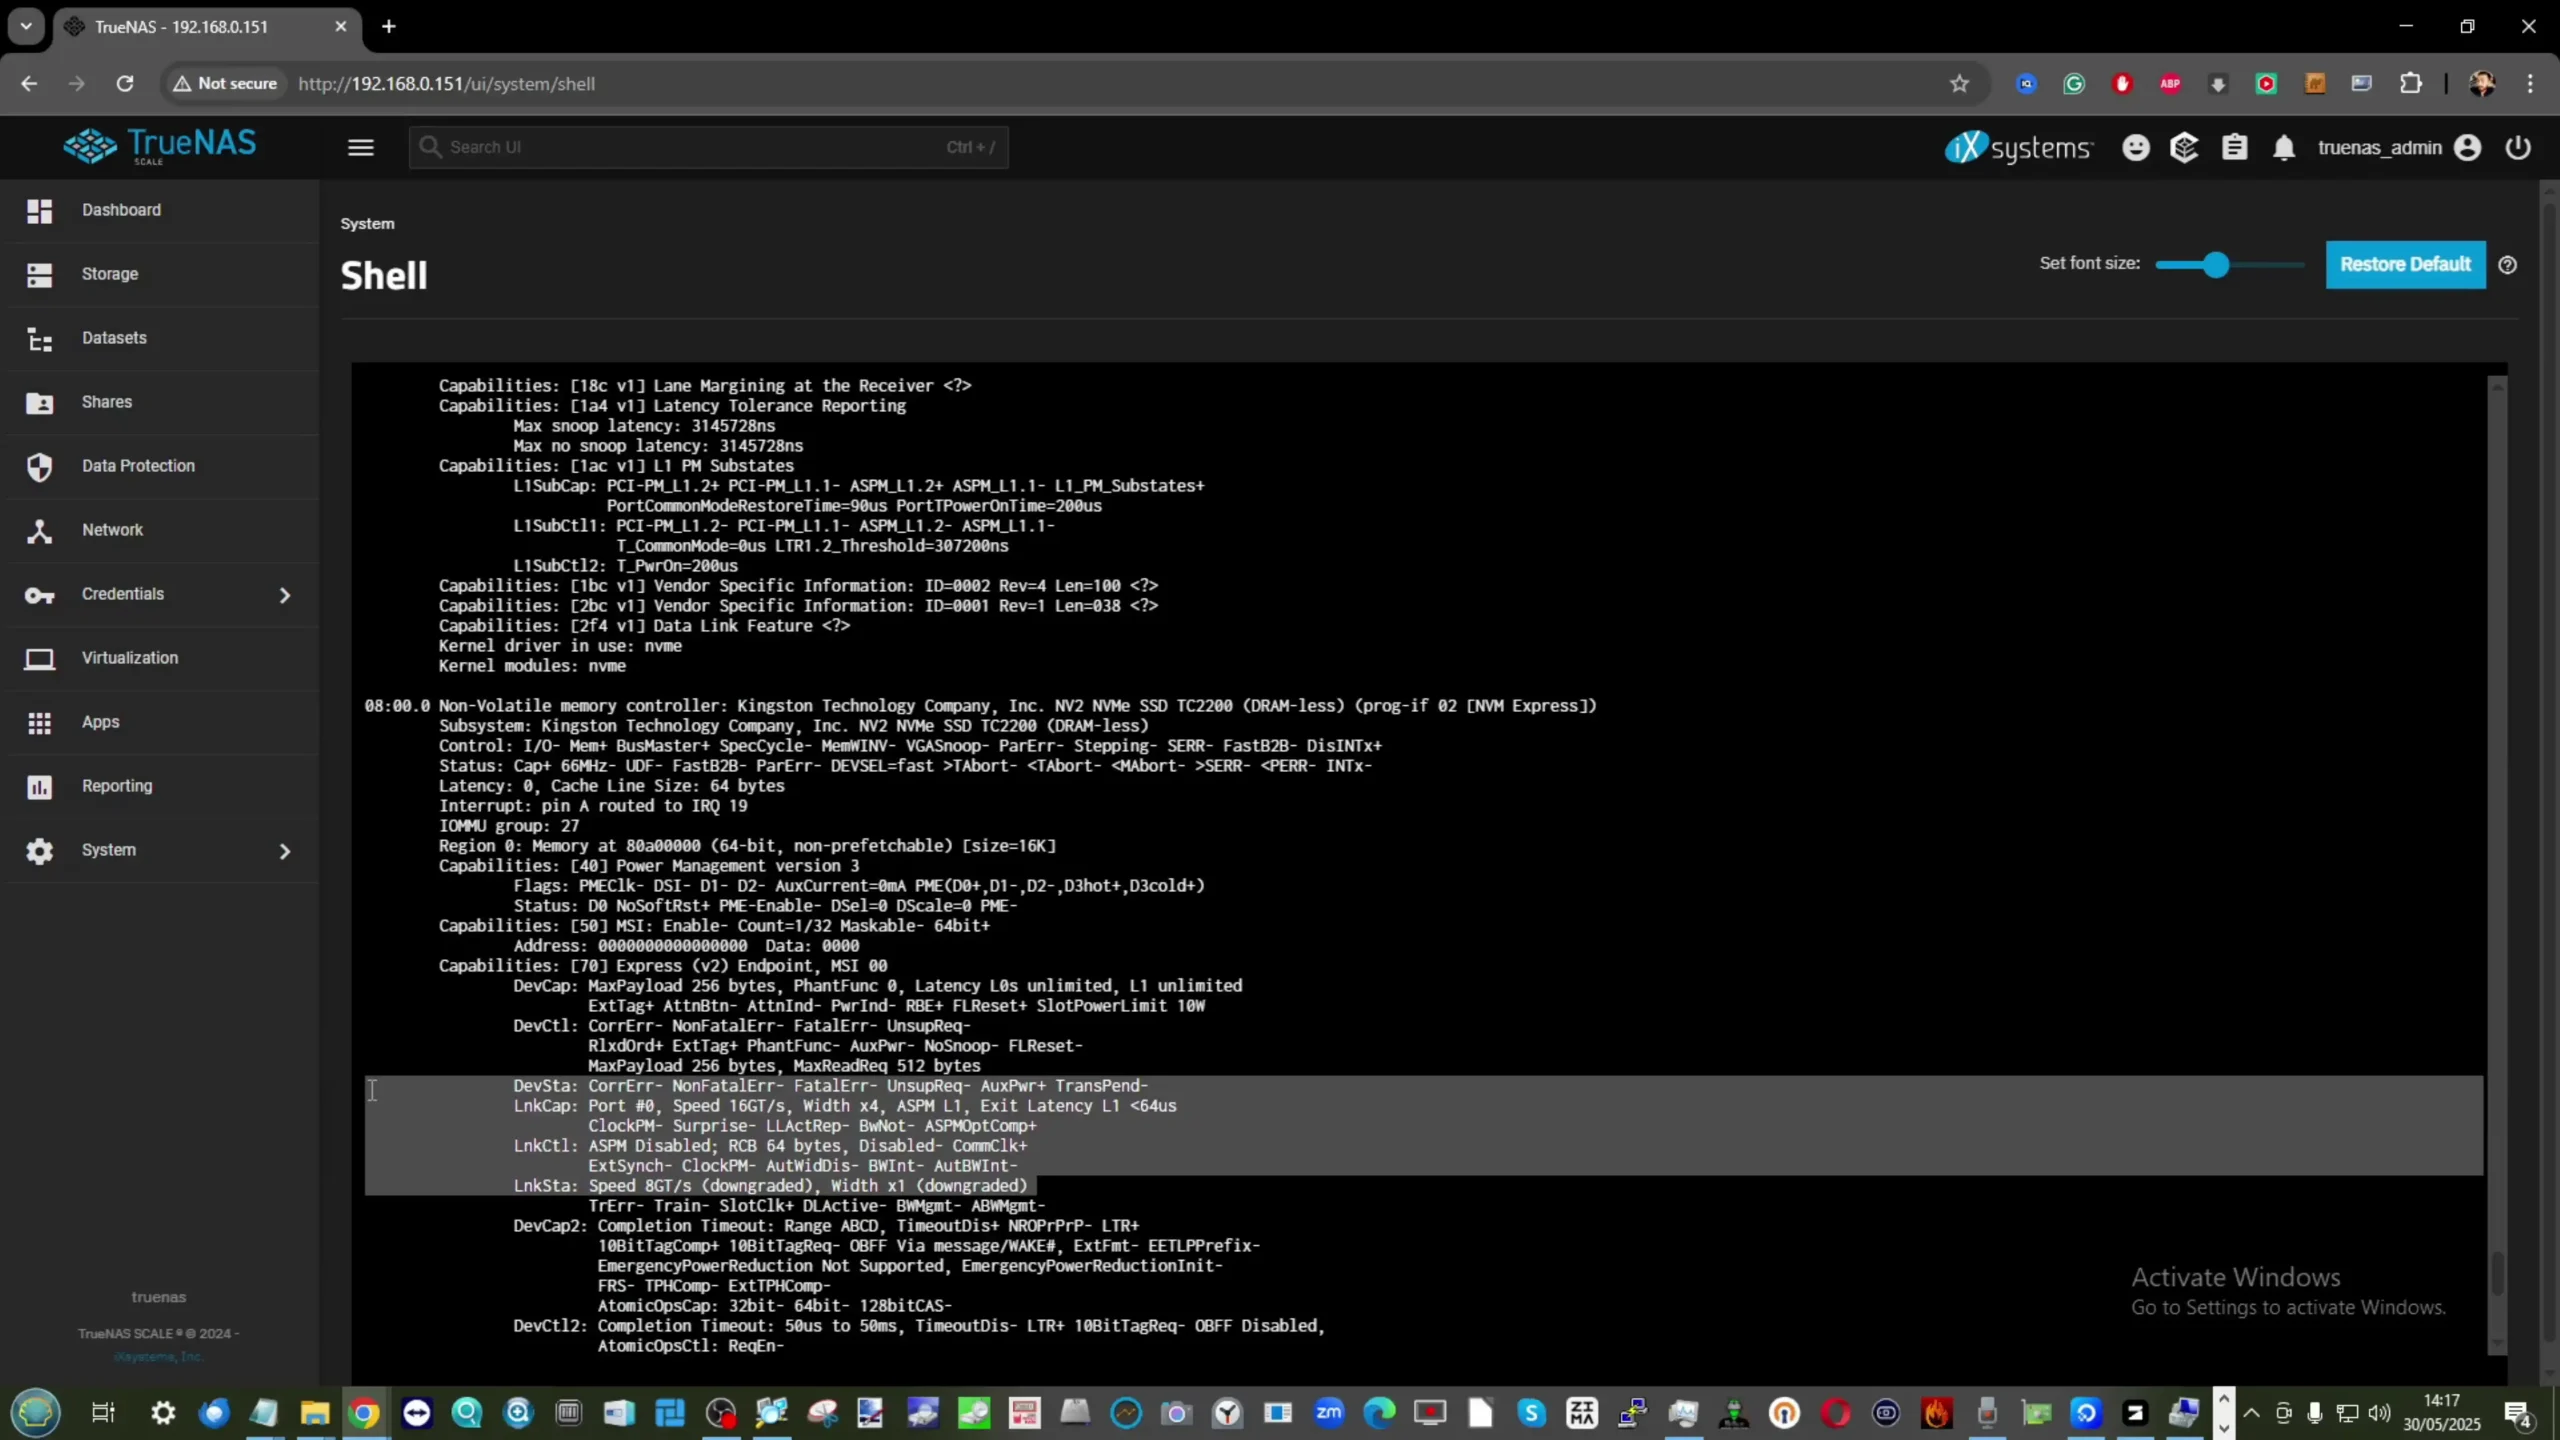 |
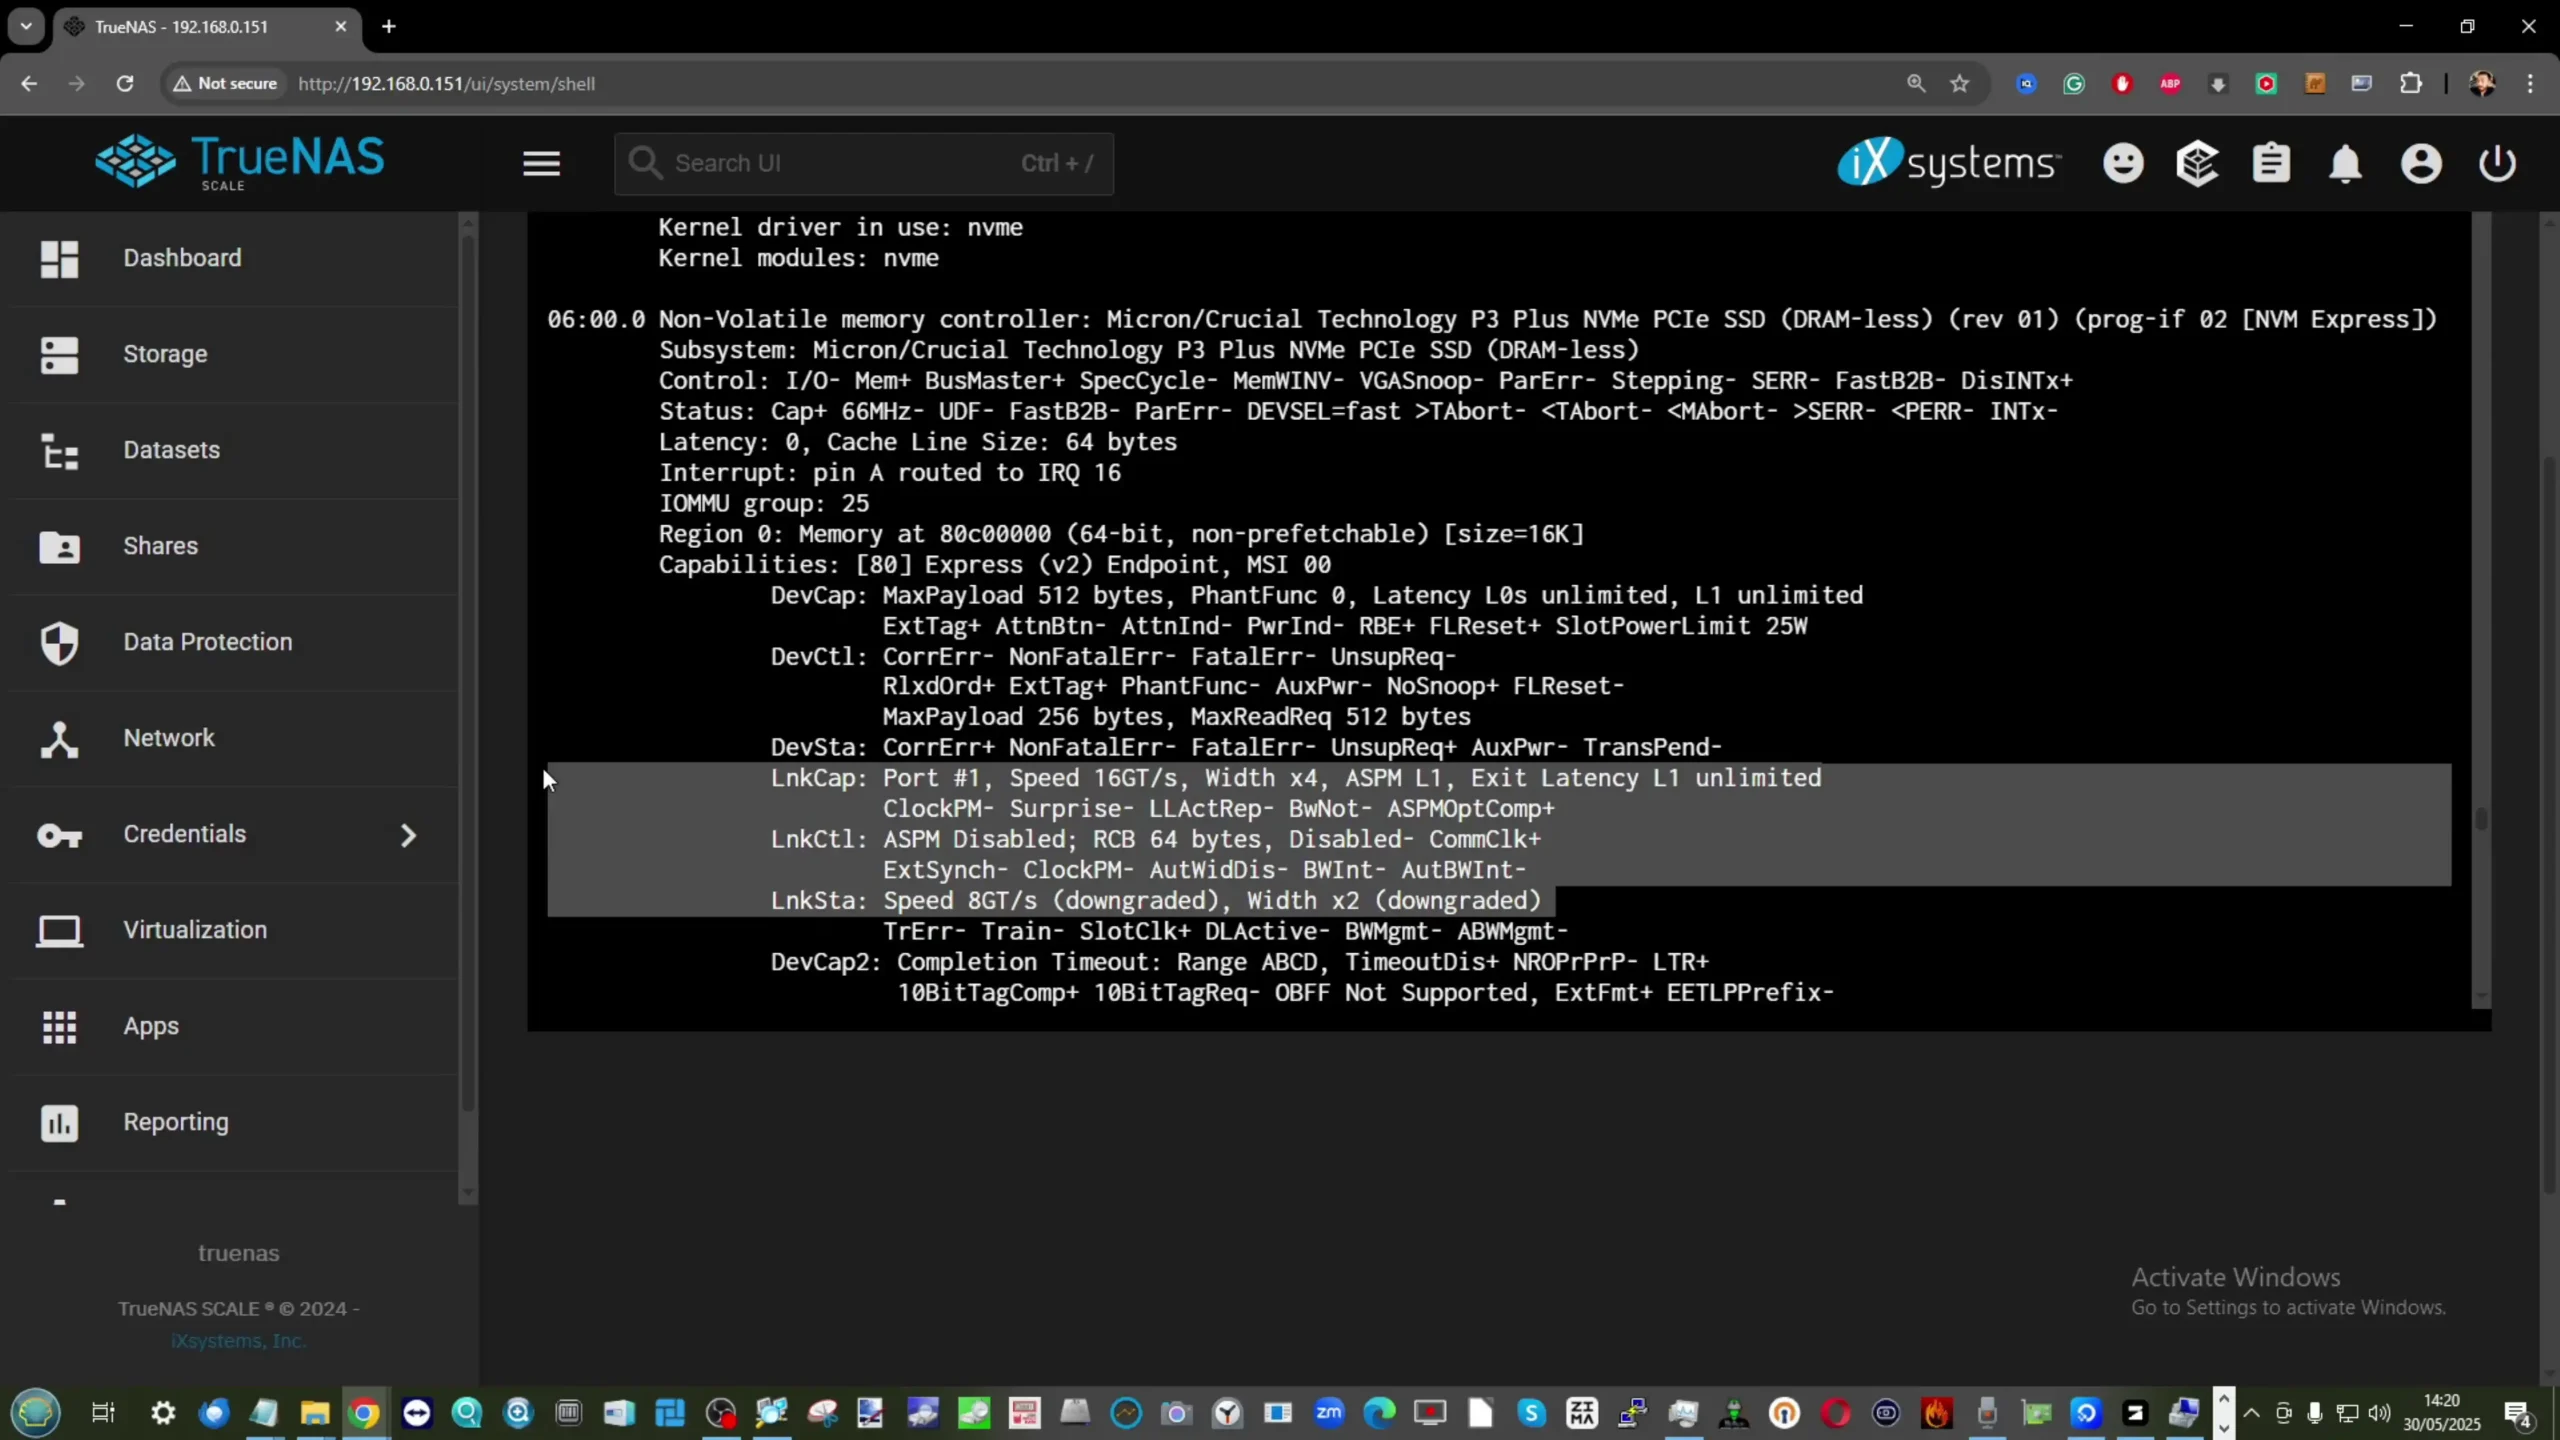 |
These SSD slots are actively cooled via an integrated heatsink and top-mounted silent fan, with thermal pads pre-attached for single-sided SSDs. Network connectivity includes dual Intel i226-V 2.5GbE ports and Wi-Fi 6 via an M.2 AX101 module, offering options for wired link aggregation or wireless deployment. Designed to support operating systems such as Unraid, OpenMediaVault, and TrueNAS, the ME Mini provides sufficient hardware for media servers like Plex or Jellyfin, personal backup, or even entry-level virtualization tasks. With a built-in power supply and no reliance on bulky external adapters, the device prioritizes simplicity and space efficiency.

The Beelink ME Mini NAS stands out as a compact, energy-efficient, and well-balanced storage solution tailored for home users seeking quiet and capable performance without the complexity of larger NAS systems. With support for six M.2 NVMe SSDs—one at Gen 3 x2 and five at Gen 3 x1—it offers up to 24TB of storage in a 99mm cube form factor, complete with an internal power supply and silent fan-assisted cooling. Its Intel Twin Lake N150 CPU and 12GB of LPDDR5 memory provide enough processing headroom for tasks like 4K media streaming, personal backups, and soft routing, while dual 2.5GbE LAN ports and Wi-Fi 6 expand its deployment options. Though the fixed memory and limited PCIe bandwidth on most slots constrain scalability, the thermal efficiency, low power draw (as low as 6.9W idle), and reliable Crucial SSD options make it a compelling value proposition. It’s not aimed at high-performance or prosumer use, but for users building a quiet, tidy, and effective DIY NAS at home, the ME Mini delivers far more than its size suggests.
 BUILD QUALITY - 9/10
HARDWARE - 8/10PERFORMANCE - 8/10PRICE - 9/10VALUE - 10/10
BUILD QUALITY - 9/10
HARDWARE - 8/10PERFORMANCE - 8/10PRICE - 9/10VALUE - 10/10
8.8
PROS
Compact cube design (99x99x99mm) ideal for discreet home deploymentSupports up to 6x M.2 NVMe SSDs with total capacity up to 24TBIntegrated PSU eliminates bulky external power adaptersDual 2.5GbE LAN ports with link aggregation supportWi-Fi 6 and UnRAID7 Support means not limited to 2x2.5GLow power consumption (as low as 6.9W idle, ~30W peak with full load)Silent fan and effective internal thermal management via large heatsinkIncludes Crucial-branded SSDs in pre-configured options for reliability
CONS
Five of the six SSD slots are limited to PCIe Gen 3 x1 bandwidthMemory is soldered and non-upgradableNot 10GbE Upgradable (maybe m.2 adapter - messy)Bottom panel retains heat due to lack of active ventilation
Where to Buy a Product
![]()
![]()
VISIT RETAILER ➤
![]()
![]()
VISIT RETAILER ➤
|
Check Amazon in Your Region for the Beelink ME Mini NAS ($329 4/6)
|
Check AliExpress for the Beelink ME Mini NAS ($344 4/6)
|
Check the Official Beelink Site for the ME Mini NAS ($209 4/6)
|
Visually, the Beelink ME Mini sets itself apart from other mini NAS systems with its symmetrical cube-shaped design, measuring 99x99x99mm. Available in three color variants—Pearl White, Midnight Grey, and Peacock Blue—the device adopts a subtle, neutral aesthetic intended to fit into typical home environments without drawing unnecessary attention. The enclosure features rubber feet for vertical stability and ventilation grilles located at both the top and bottom, supporting a passive vertical airflow design that assists with heat dissipation.
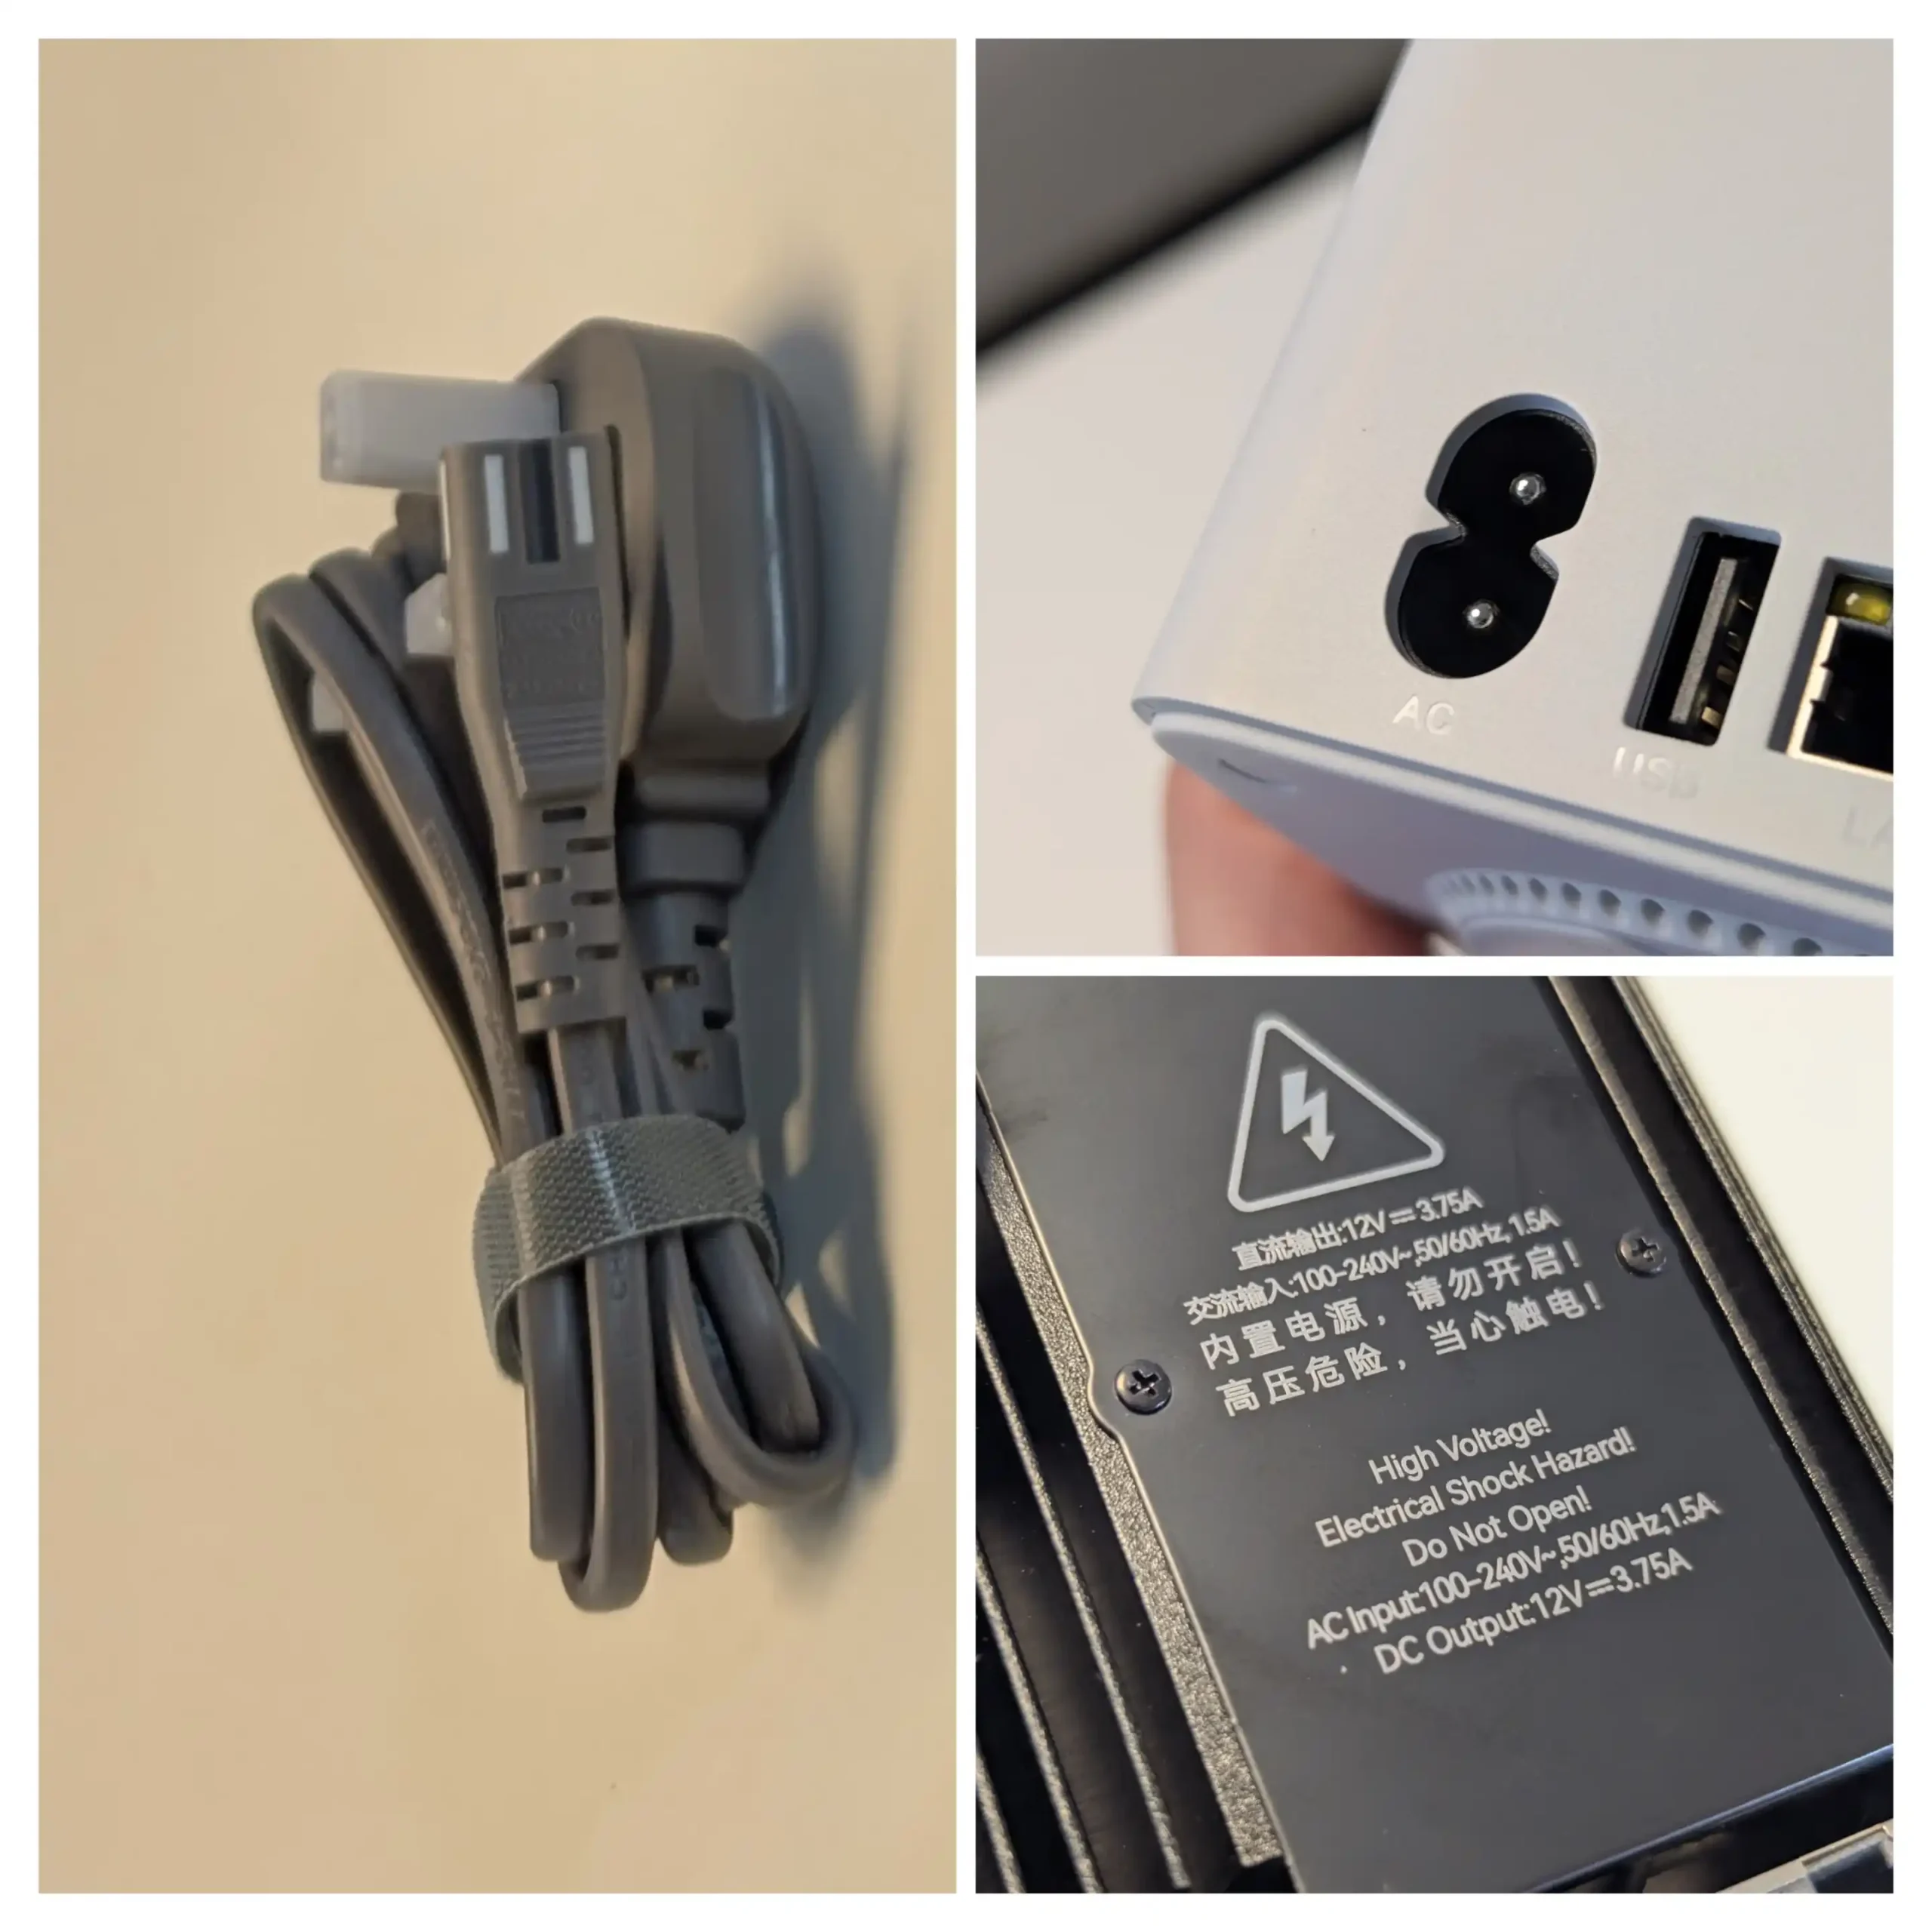
Despite its small footprint, the chassis houses an integrated power supply unit (PSU), which eliminates the need for bulky external power bricks and simplifies cable management—an uncommon but notable design feature in NAS devices of this size.
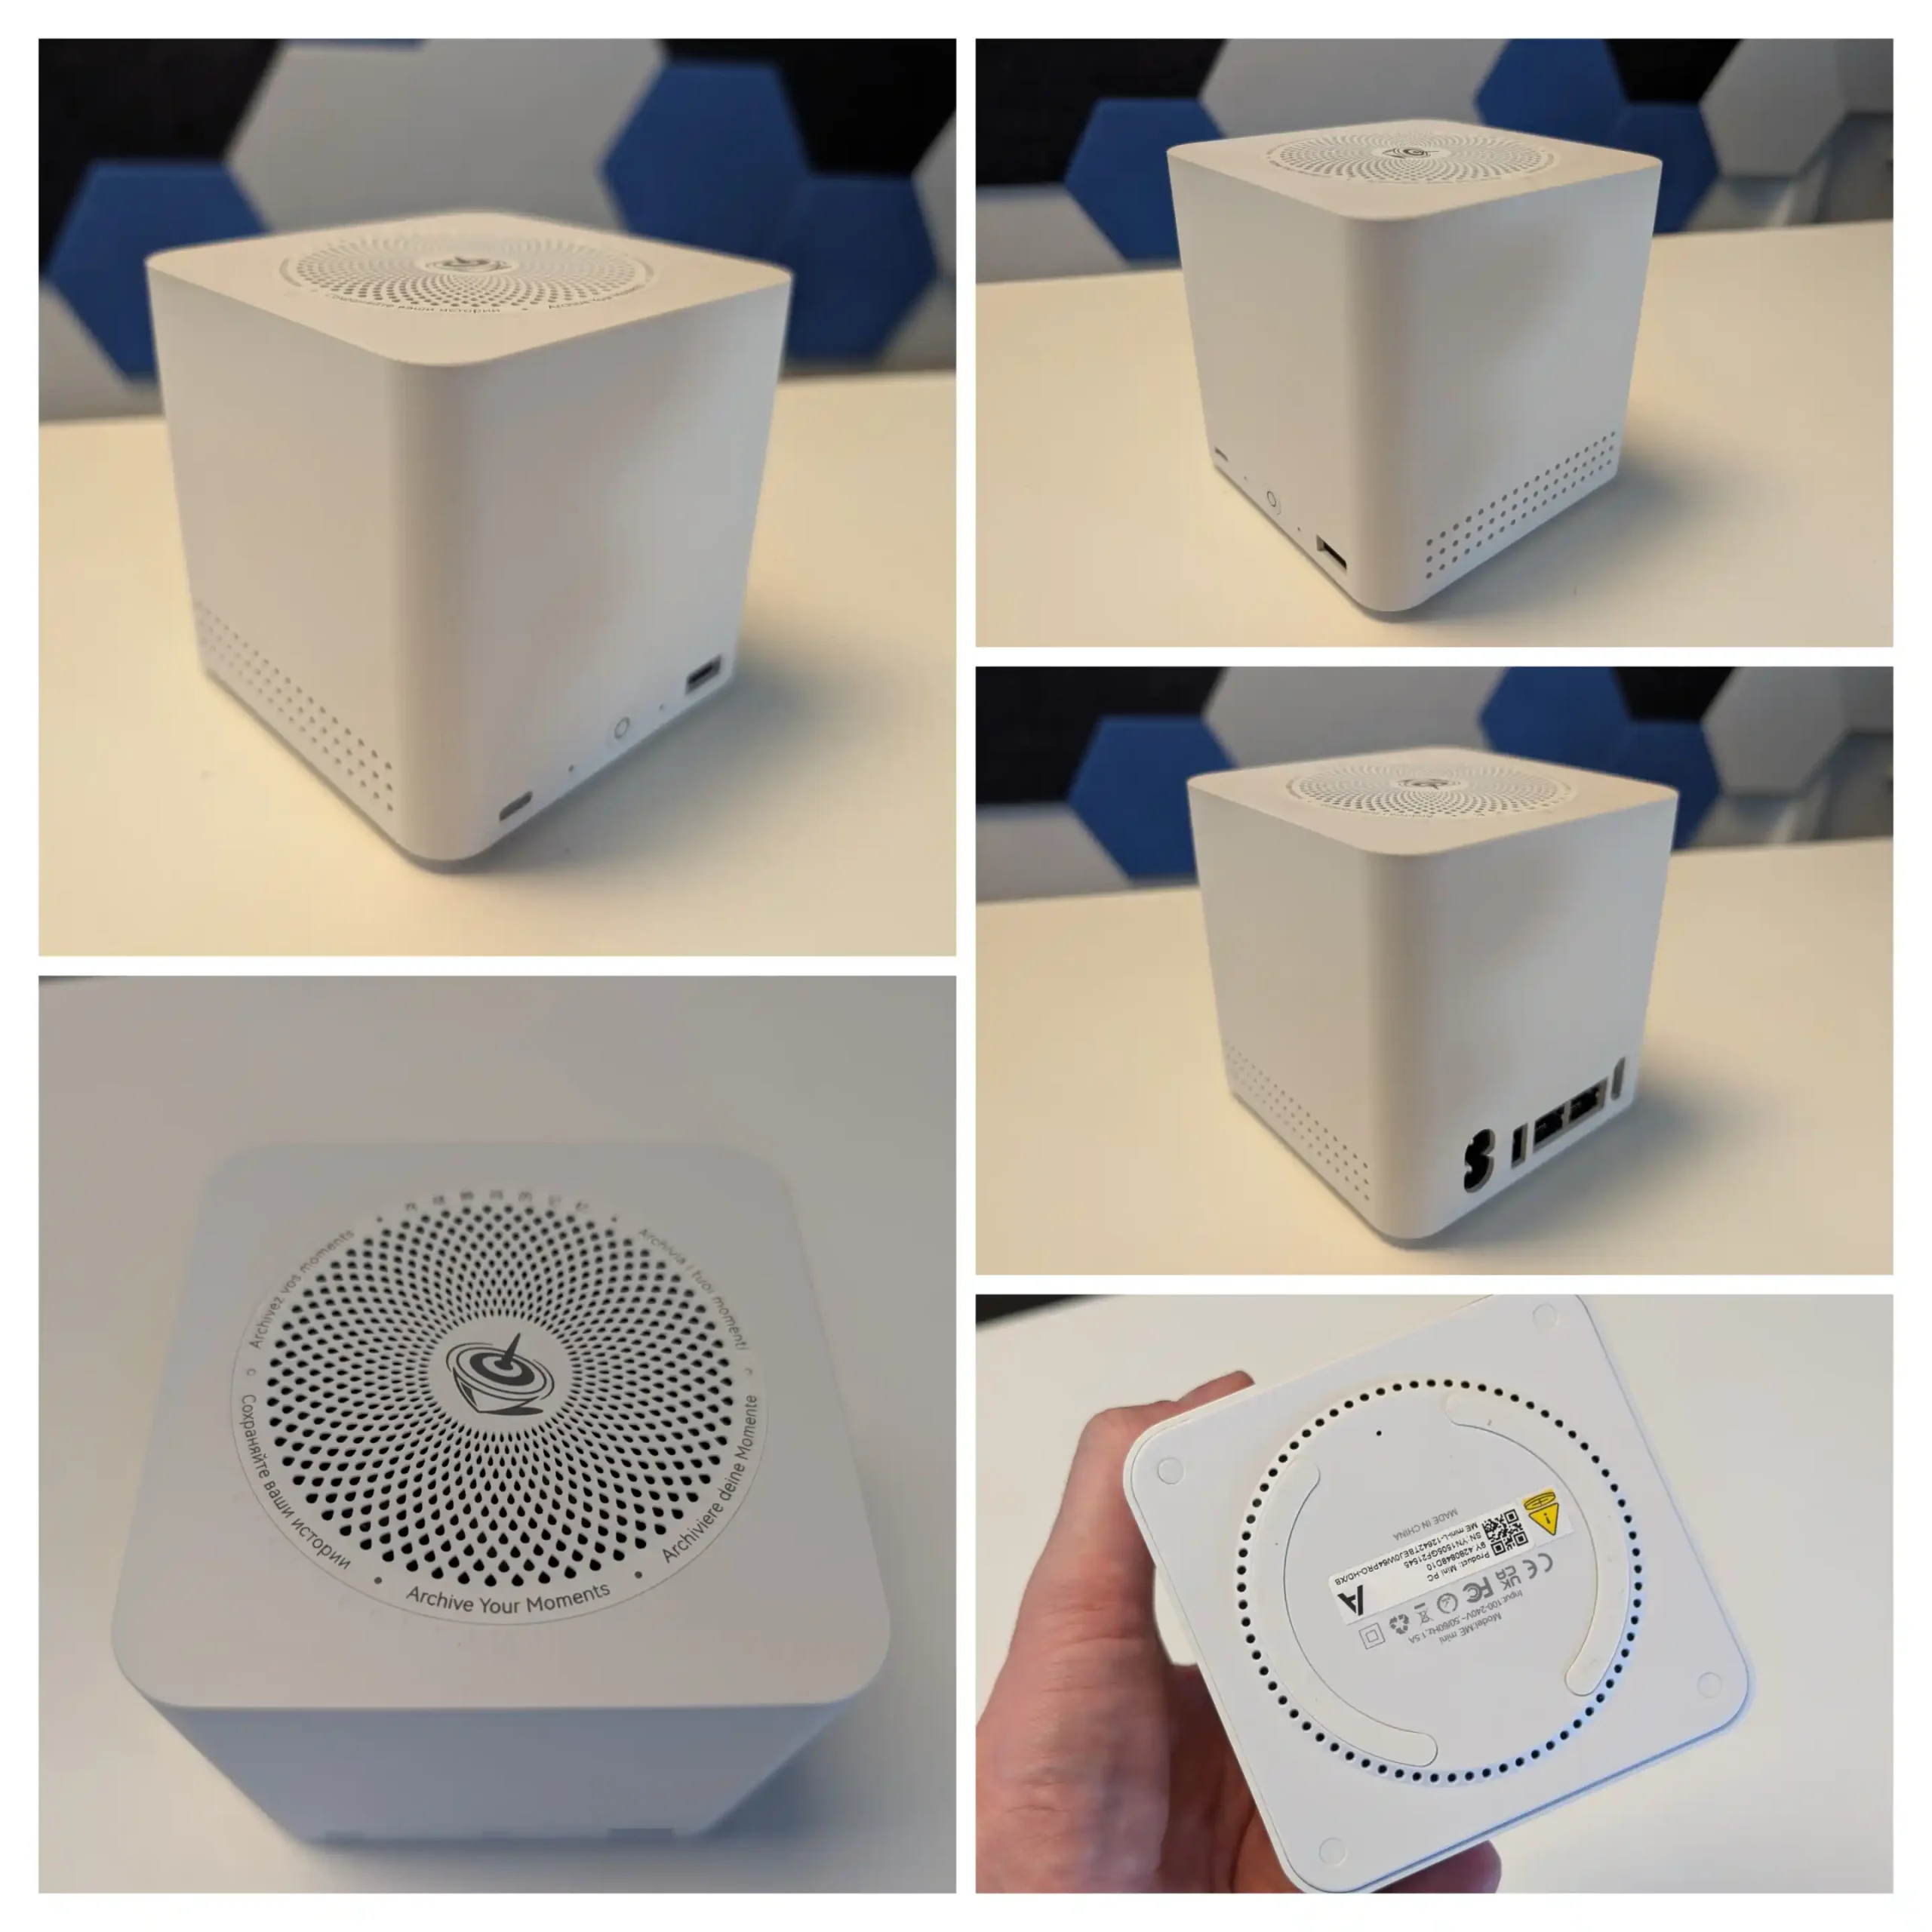
Storage capacity is a central feature of the ME Mini, with support for up to six M.2 SSDs in 2280 format, totaling a maximum of 24TB. These slots are all positioned internally in a dual-sided configuration—three on each internal face—and interface via PCIe Gen 3. Five of the slots operate at Gen 3 x1 bandwidth, while one (typically slot 4) operates at Gen 3 x2, recommended for installing the OS. The use of M.2 NVMe SSDs enables dense storage with minimal thermal output compared to 3.5” drives, which aligns with the ME Mini’s aim of delivering high-capacity, low-noise storage for homes. There is also a 64GB eMMC module included by default, recommended for lightweight OS installations or router-based platforms.
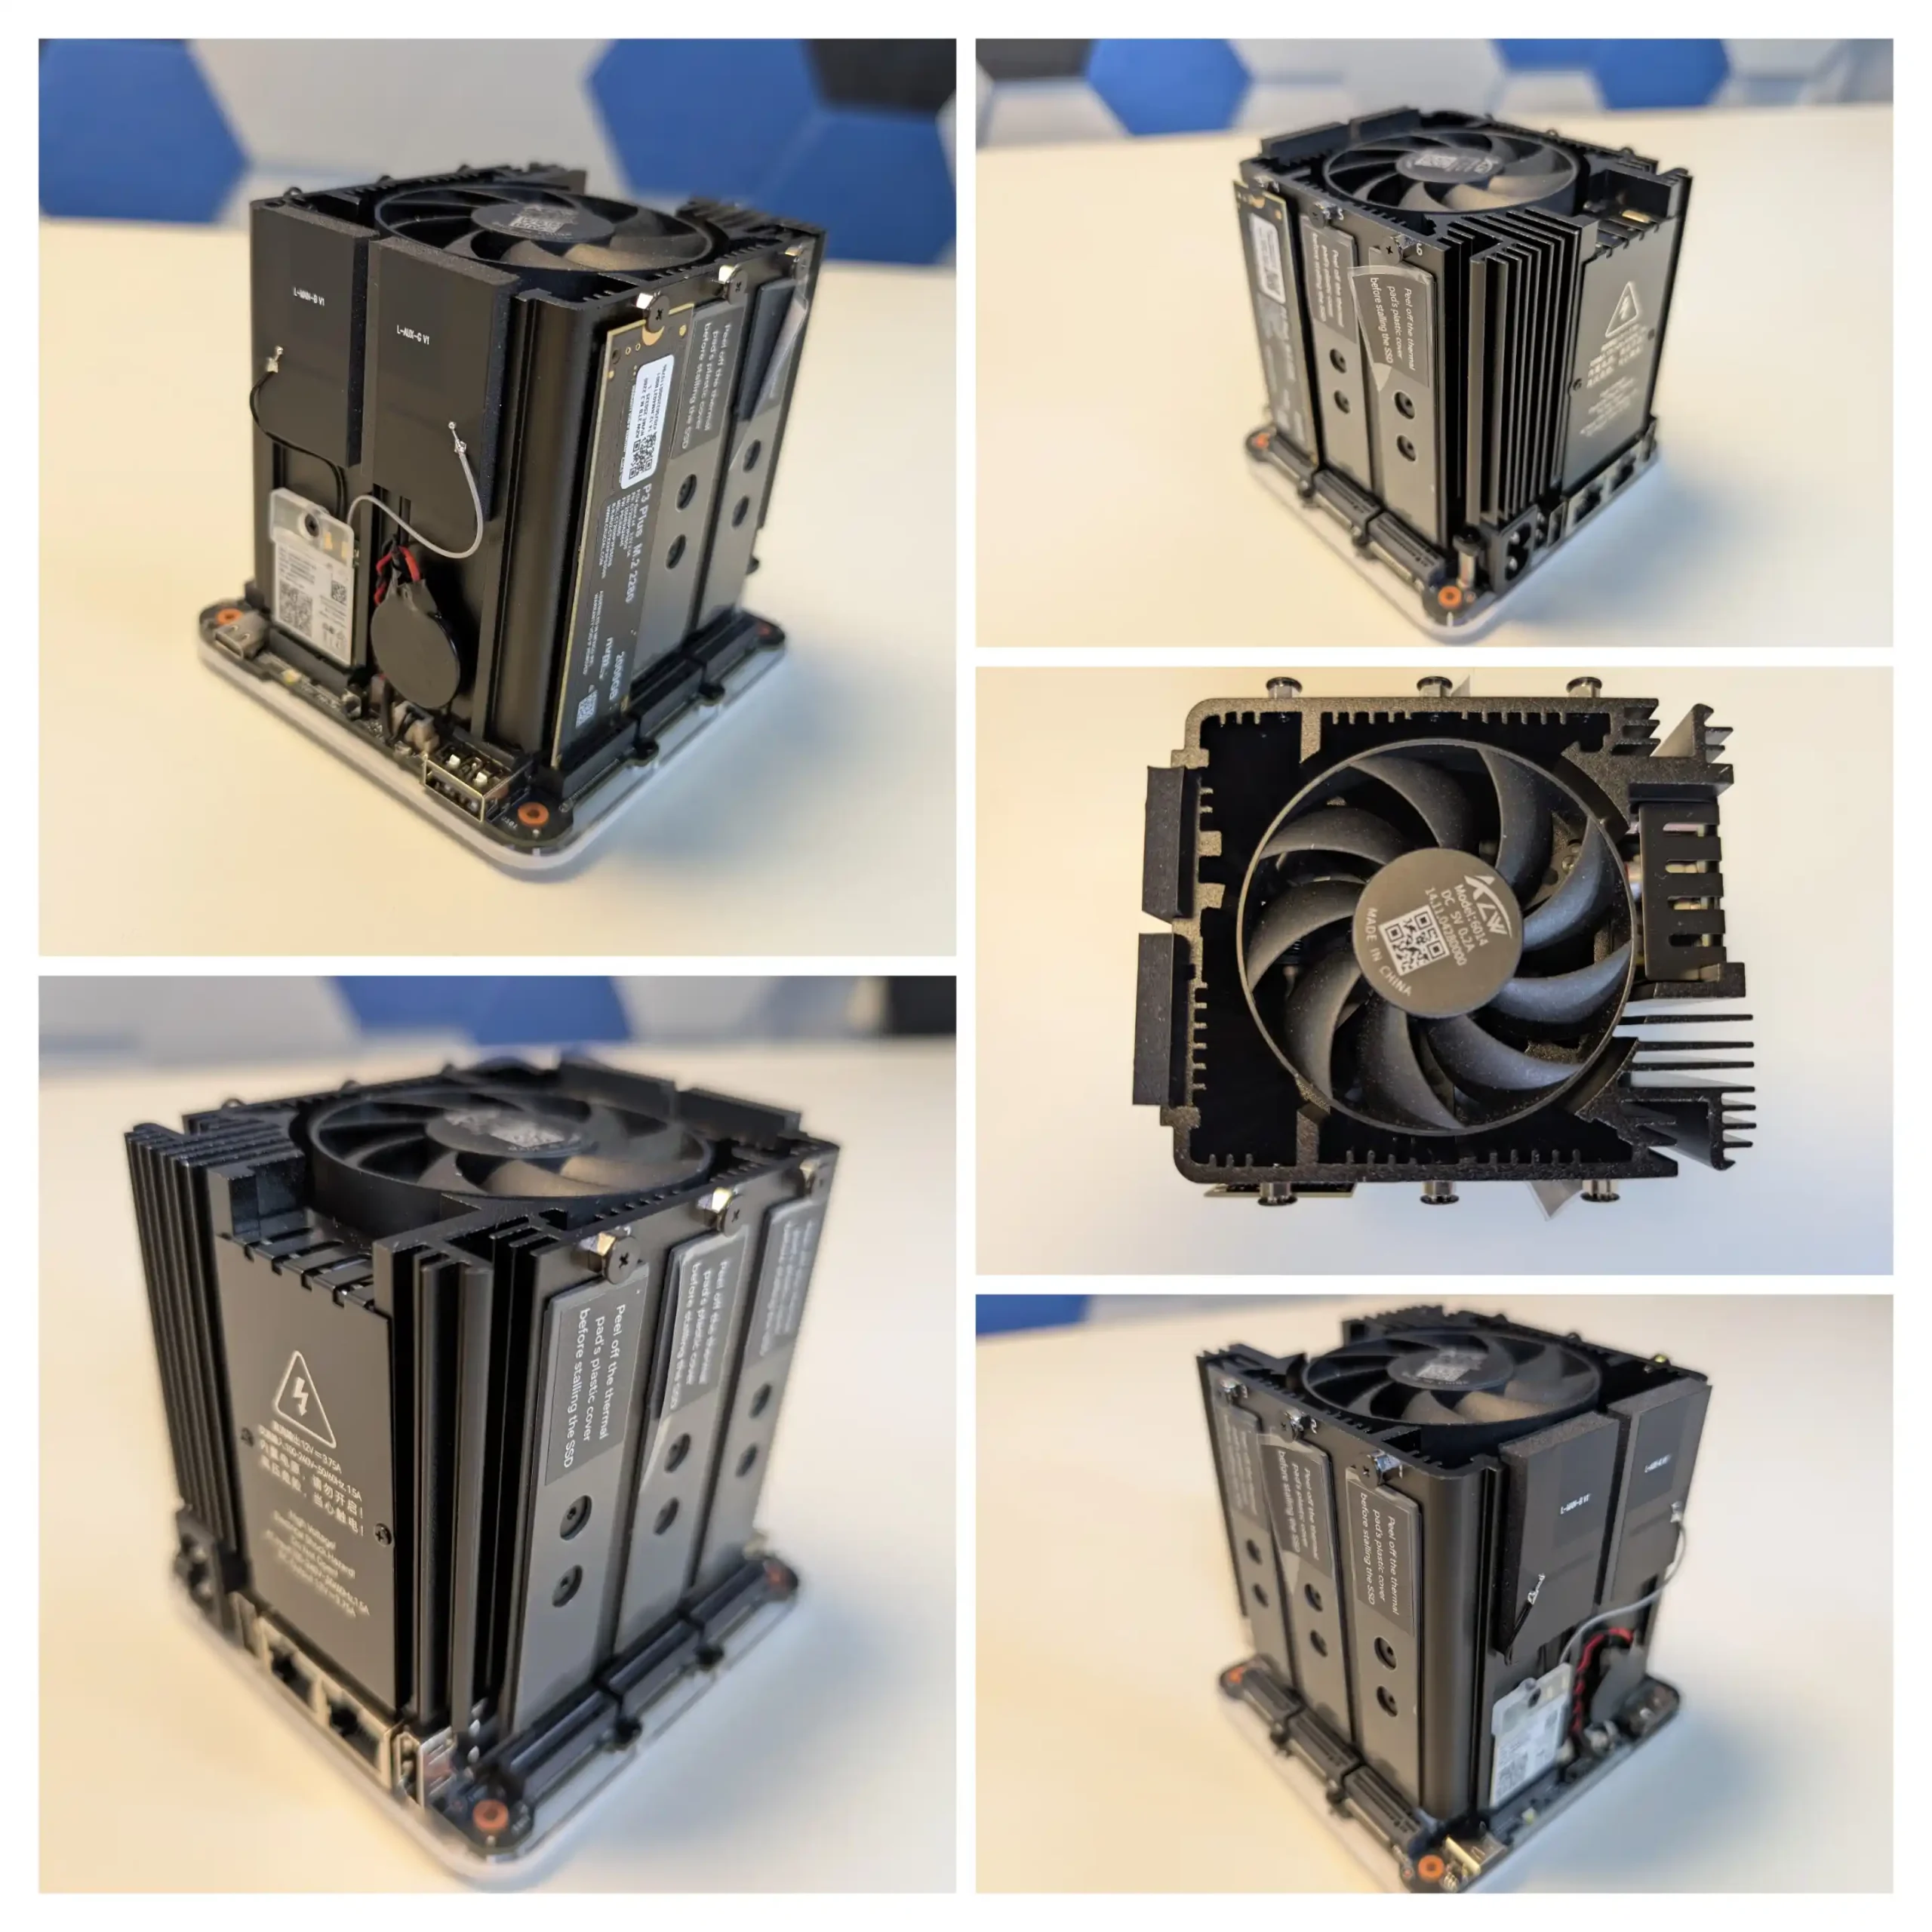
Internally, the layout is deliberately engineered to optimize thermal contact between the SSDs and the large aluminum heatsink at the center of the chassis. Each M.2 SSD slot is lined with a pre-applied thermal pad to ensure direct contact with the heatsink, enhancing passive cooling performance. This configuration is most effective with single-sided SSDs, though there is still clearance for some double-sided modules.
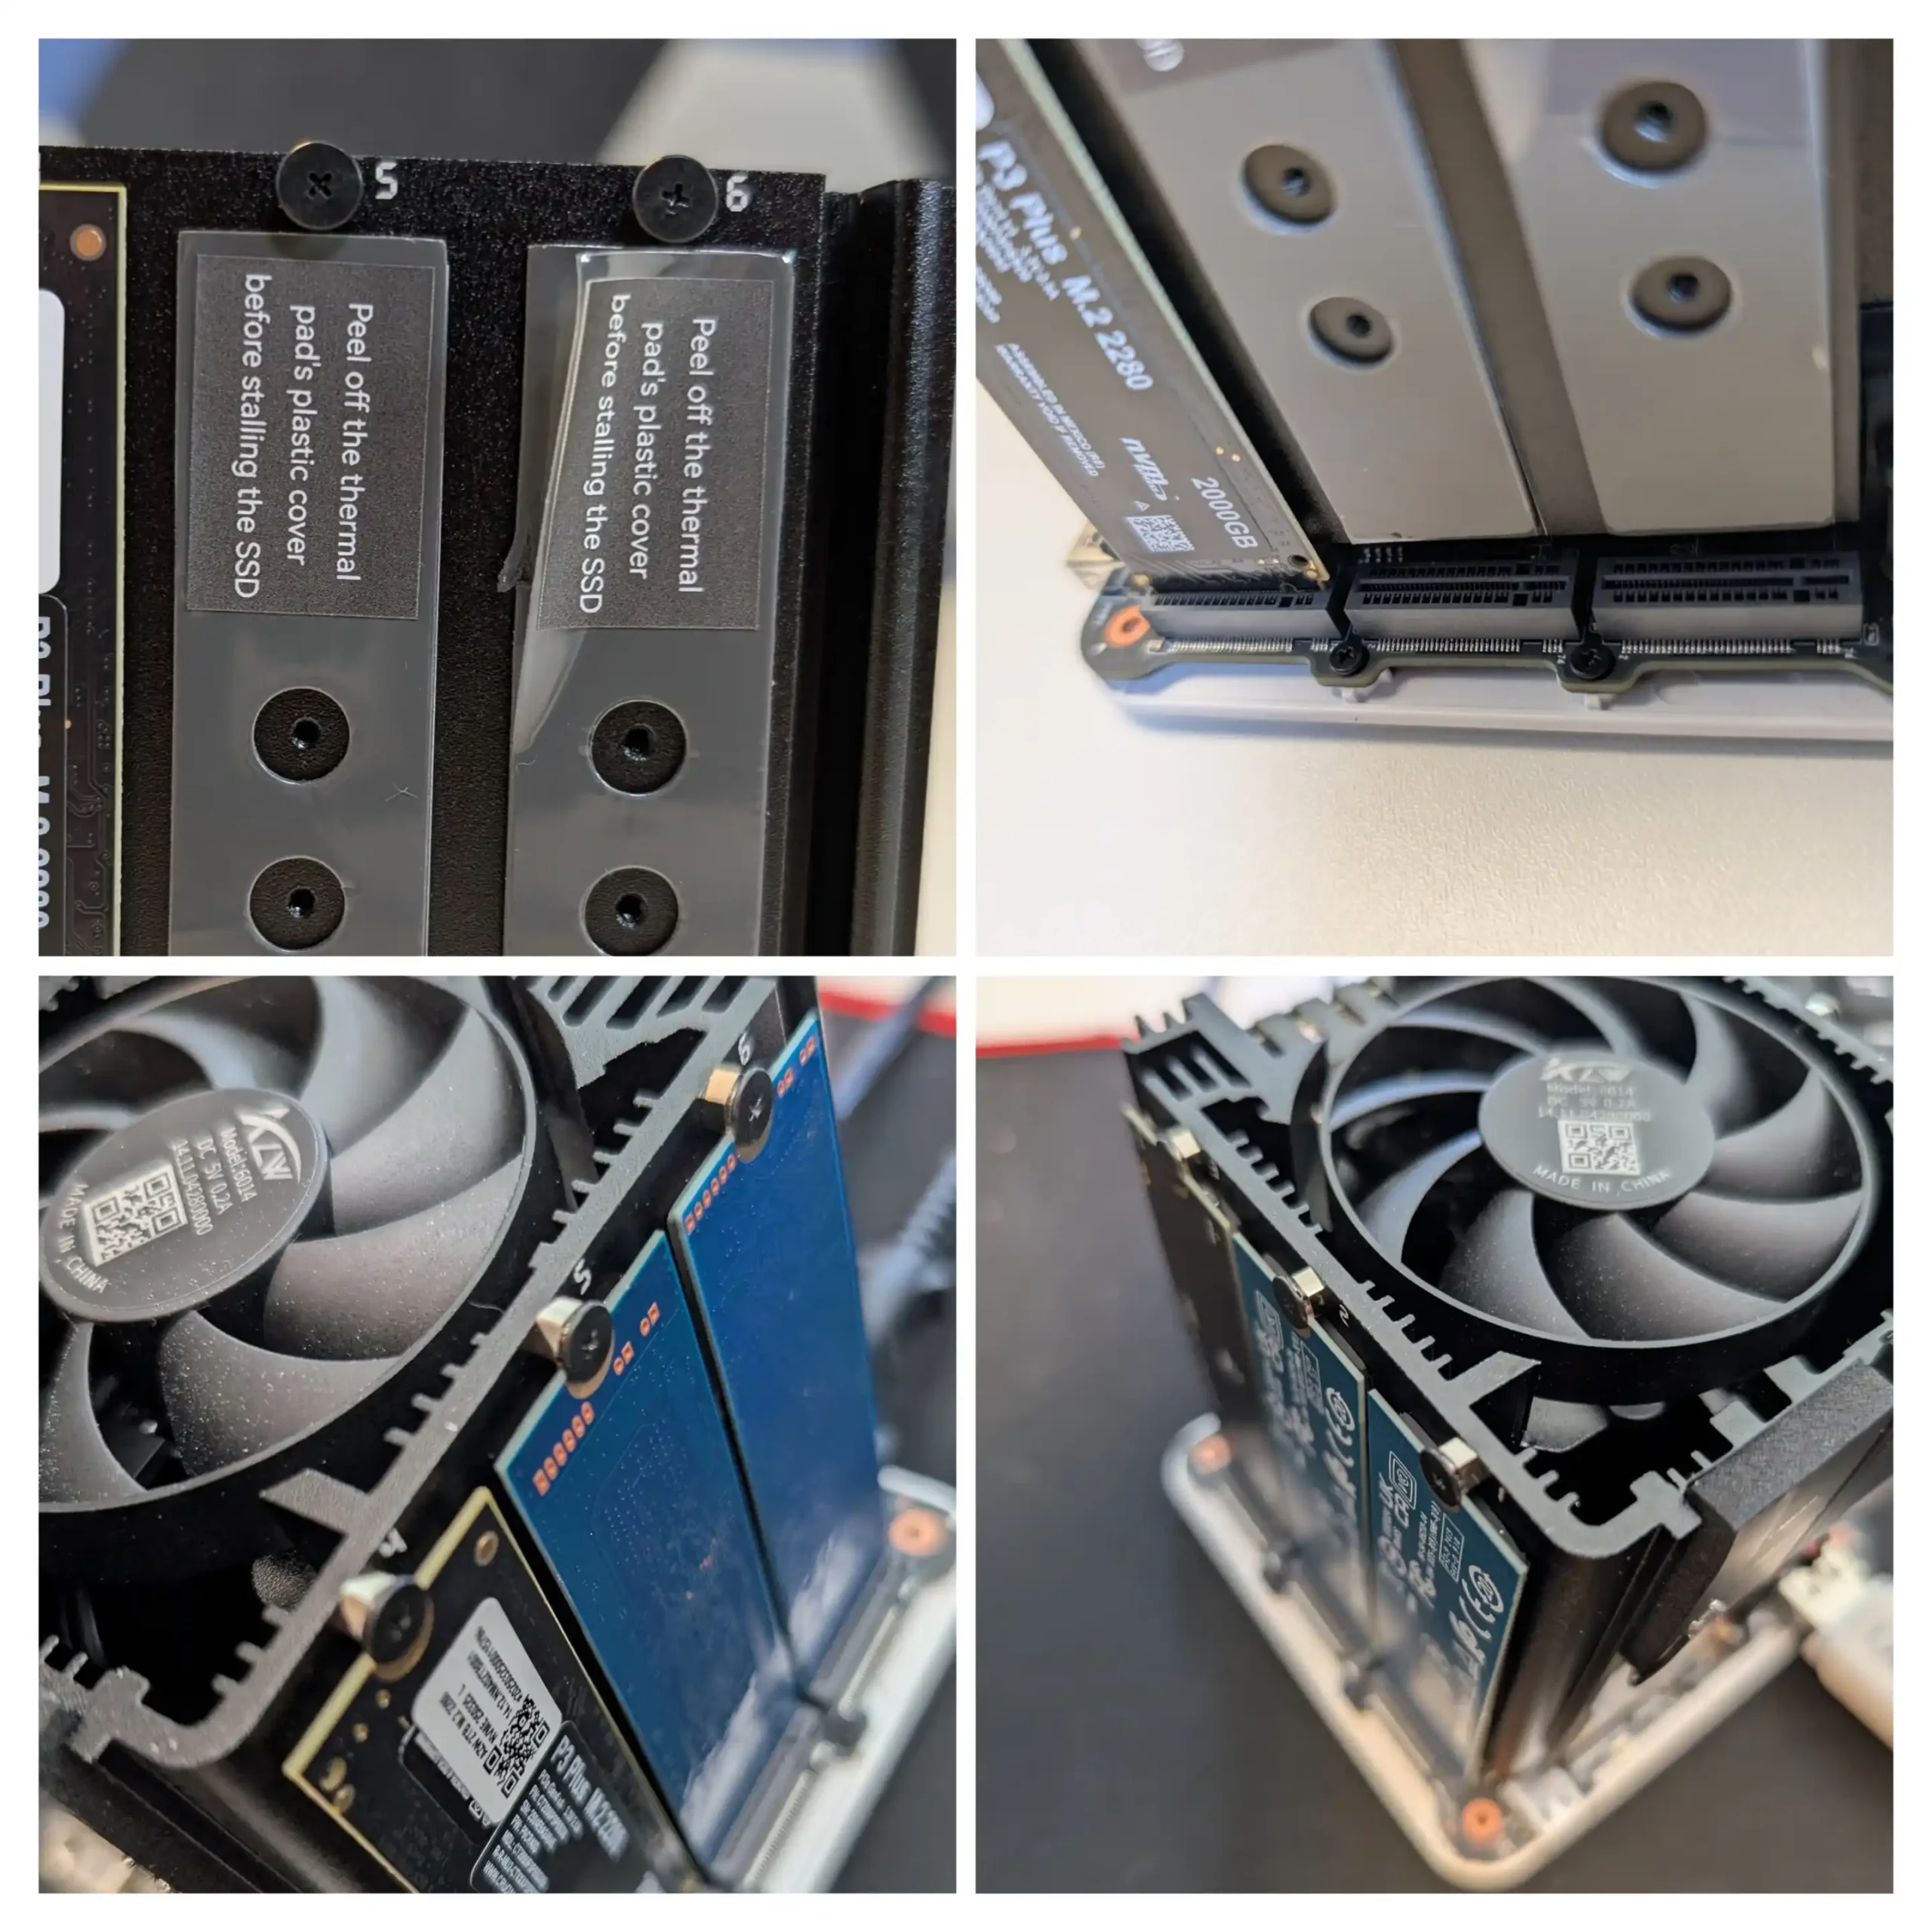
The passive heat management is further augmented by a silent fan located at the top, which provides active airflow without introducing noticeable noise—recorded at just 31–34 dBA during idle operation and up to 40 dBA under heavy load.
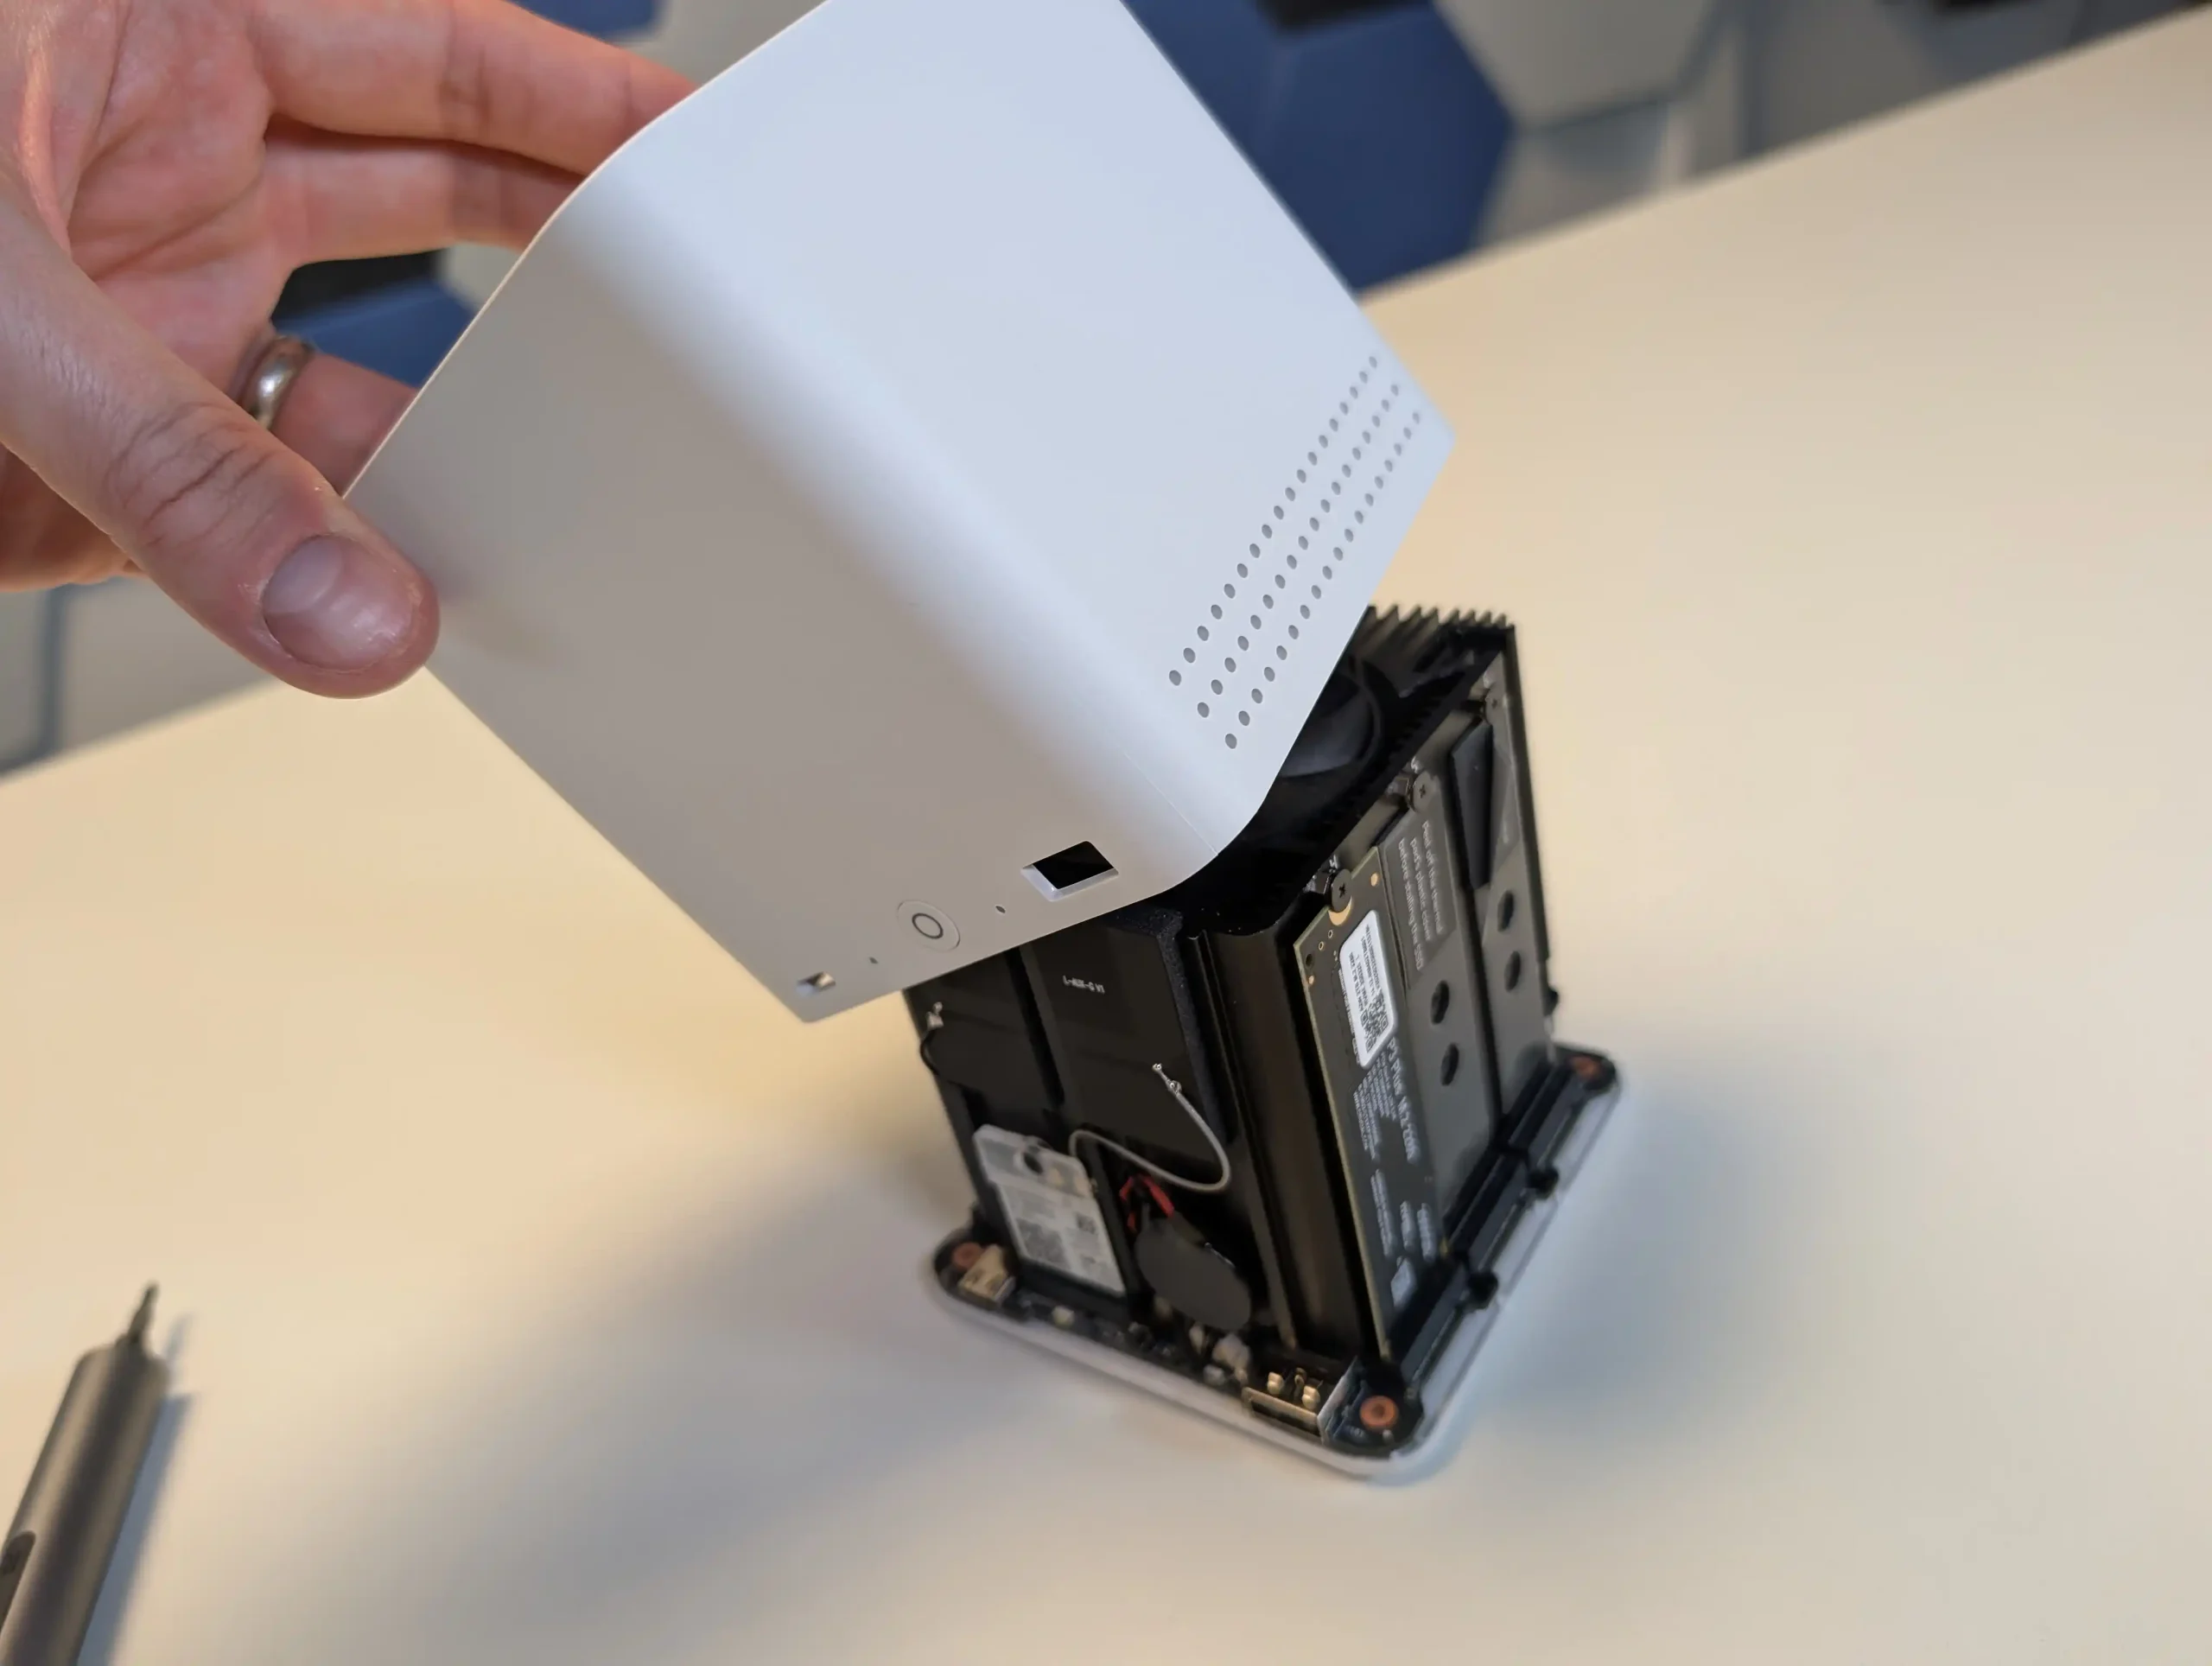
The ME Mini’s storage design is not intended for hot-swapping or tool-less drive changes, a reflection of its focus on home and small office environments where drives are installed once and left in place. While this may limit flexibility for enterprise workflows, it benefits reliability and aesthetics, especially considering the internal PSU, which would otherwise be challenged by fluctuating thermal loads from frequent disk changes.
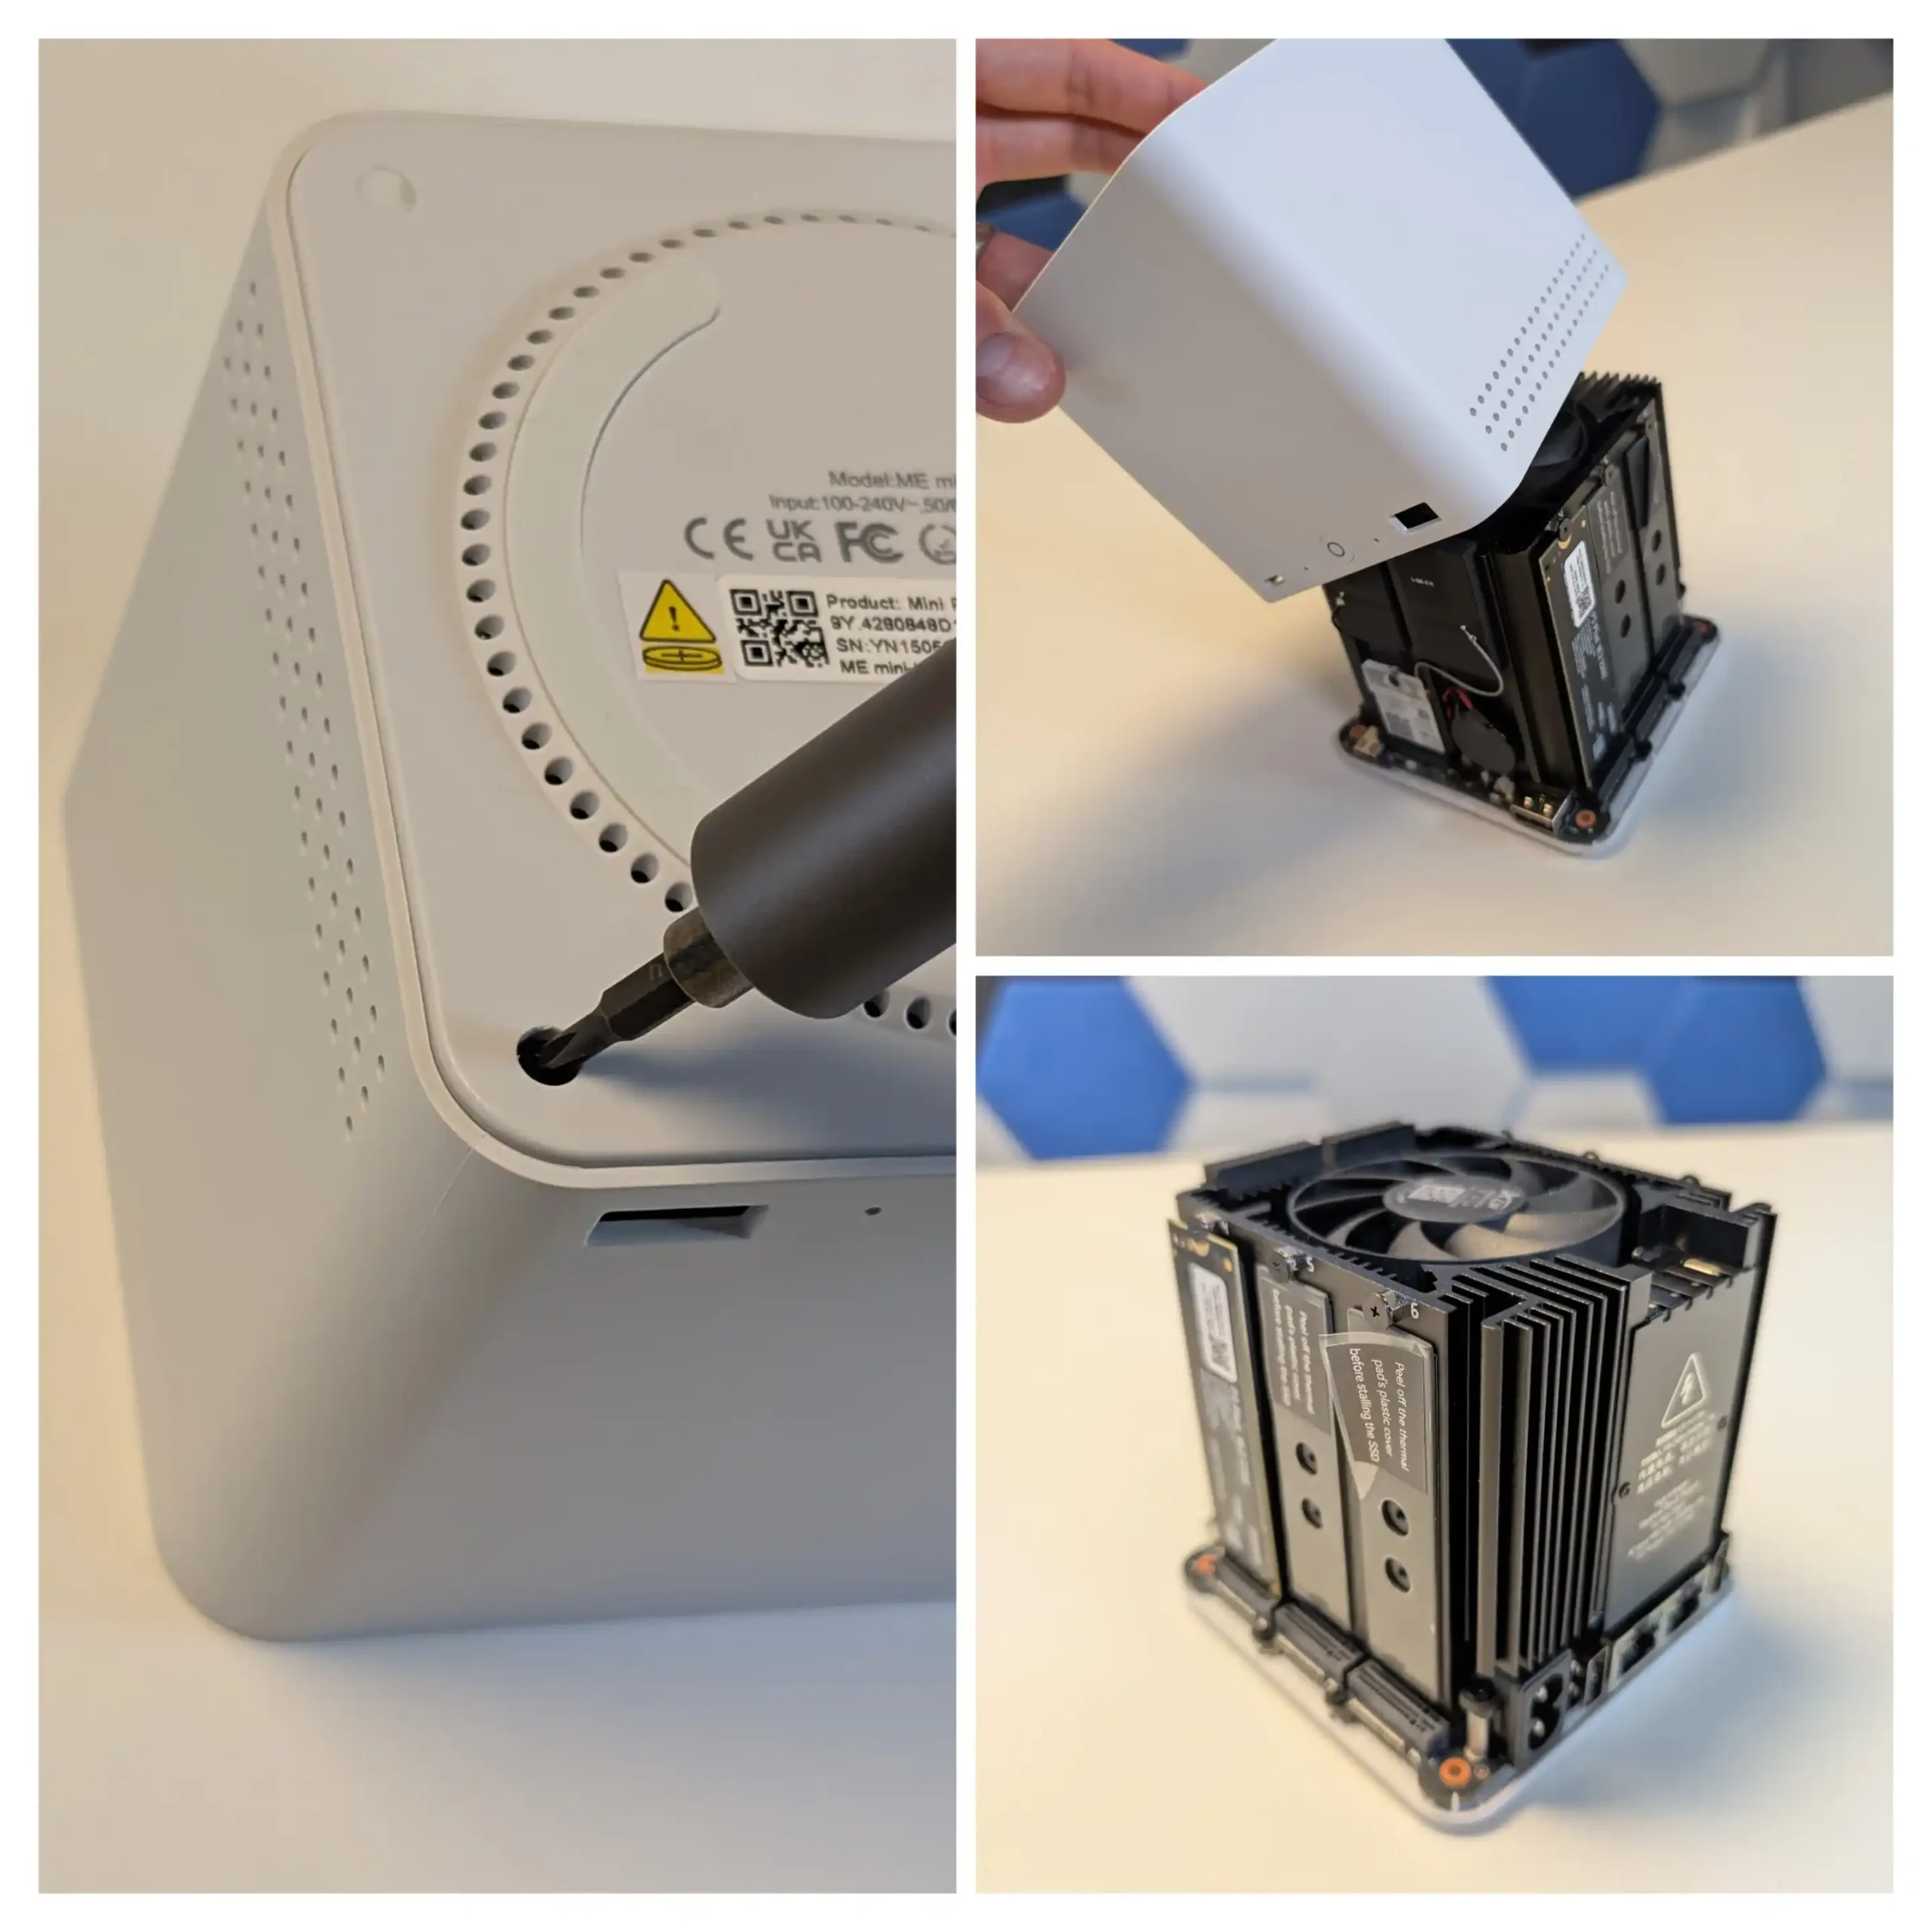
The result is a closed, compact system that maximizes storage density while maintaining a fanless aesthetic from the exterior.
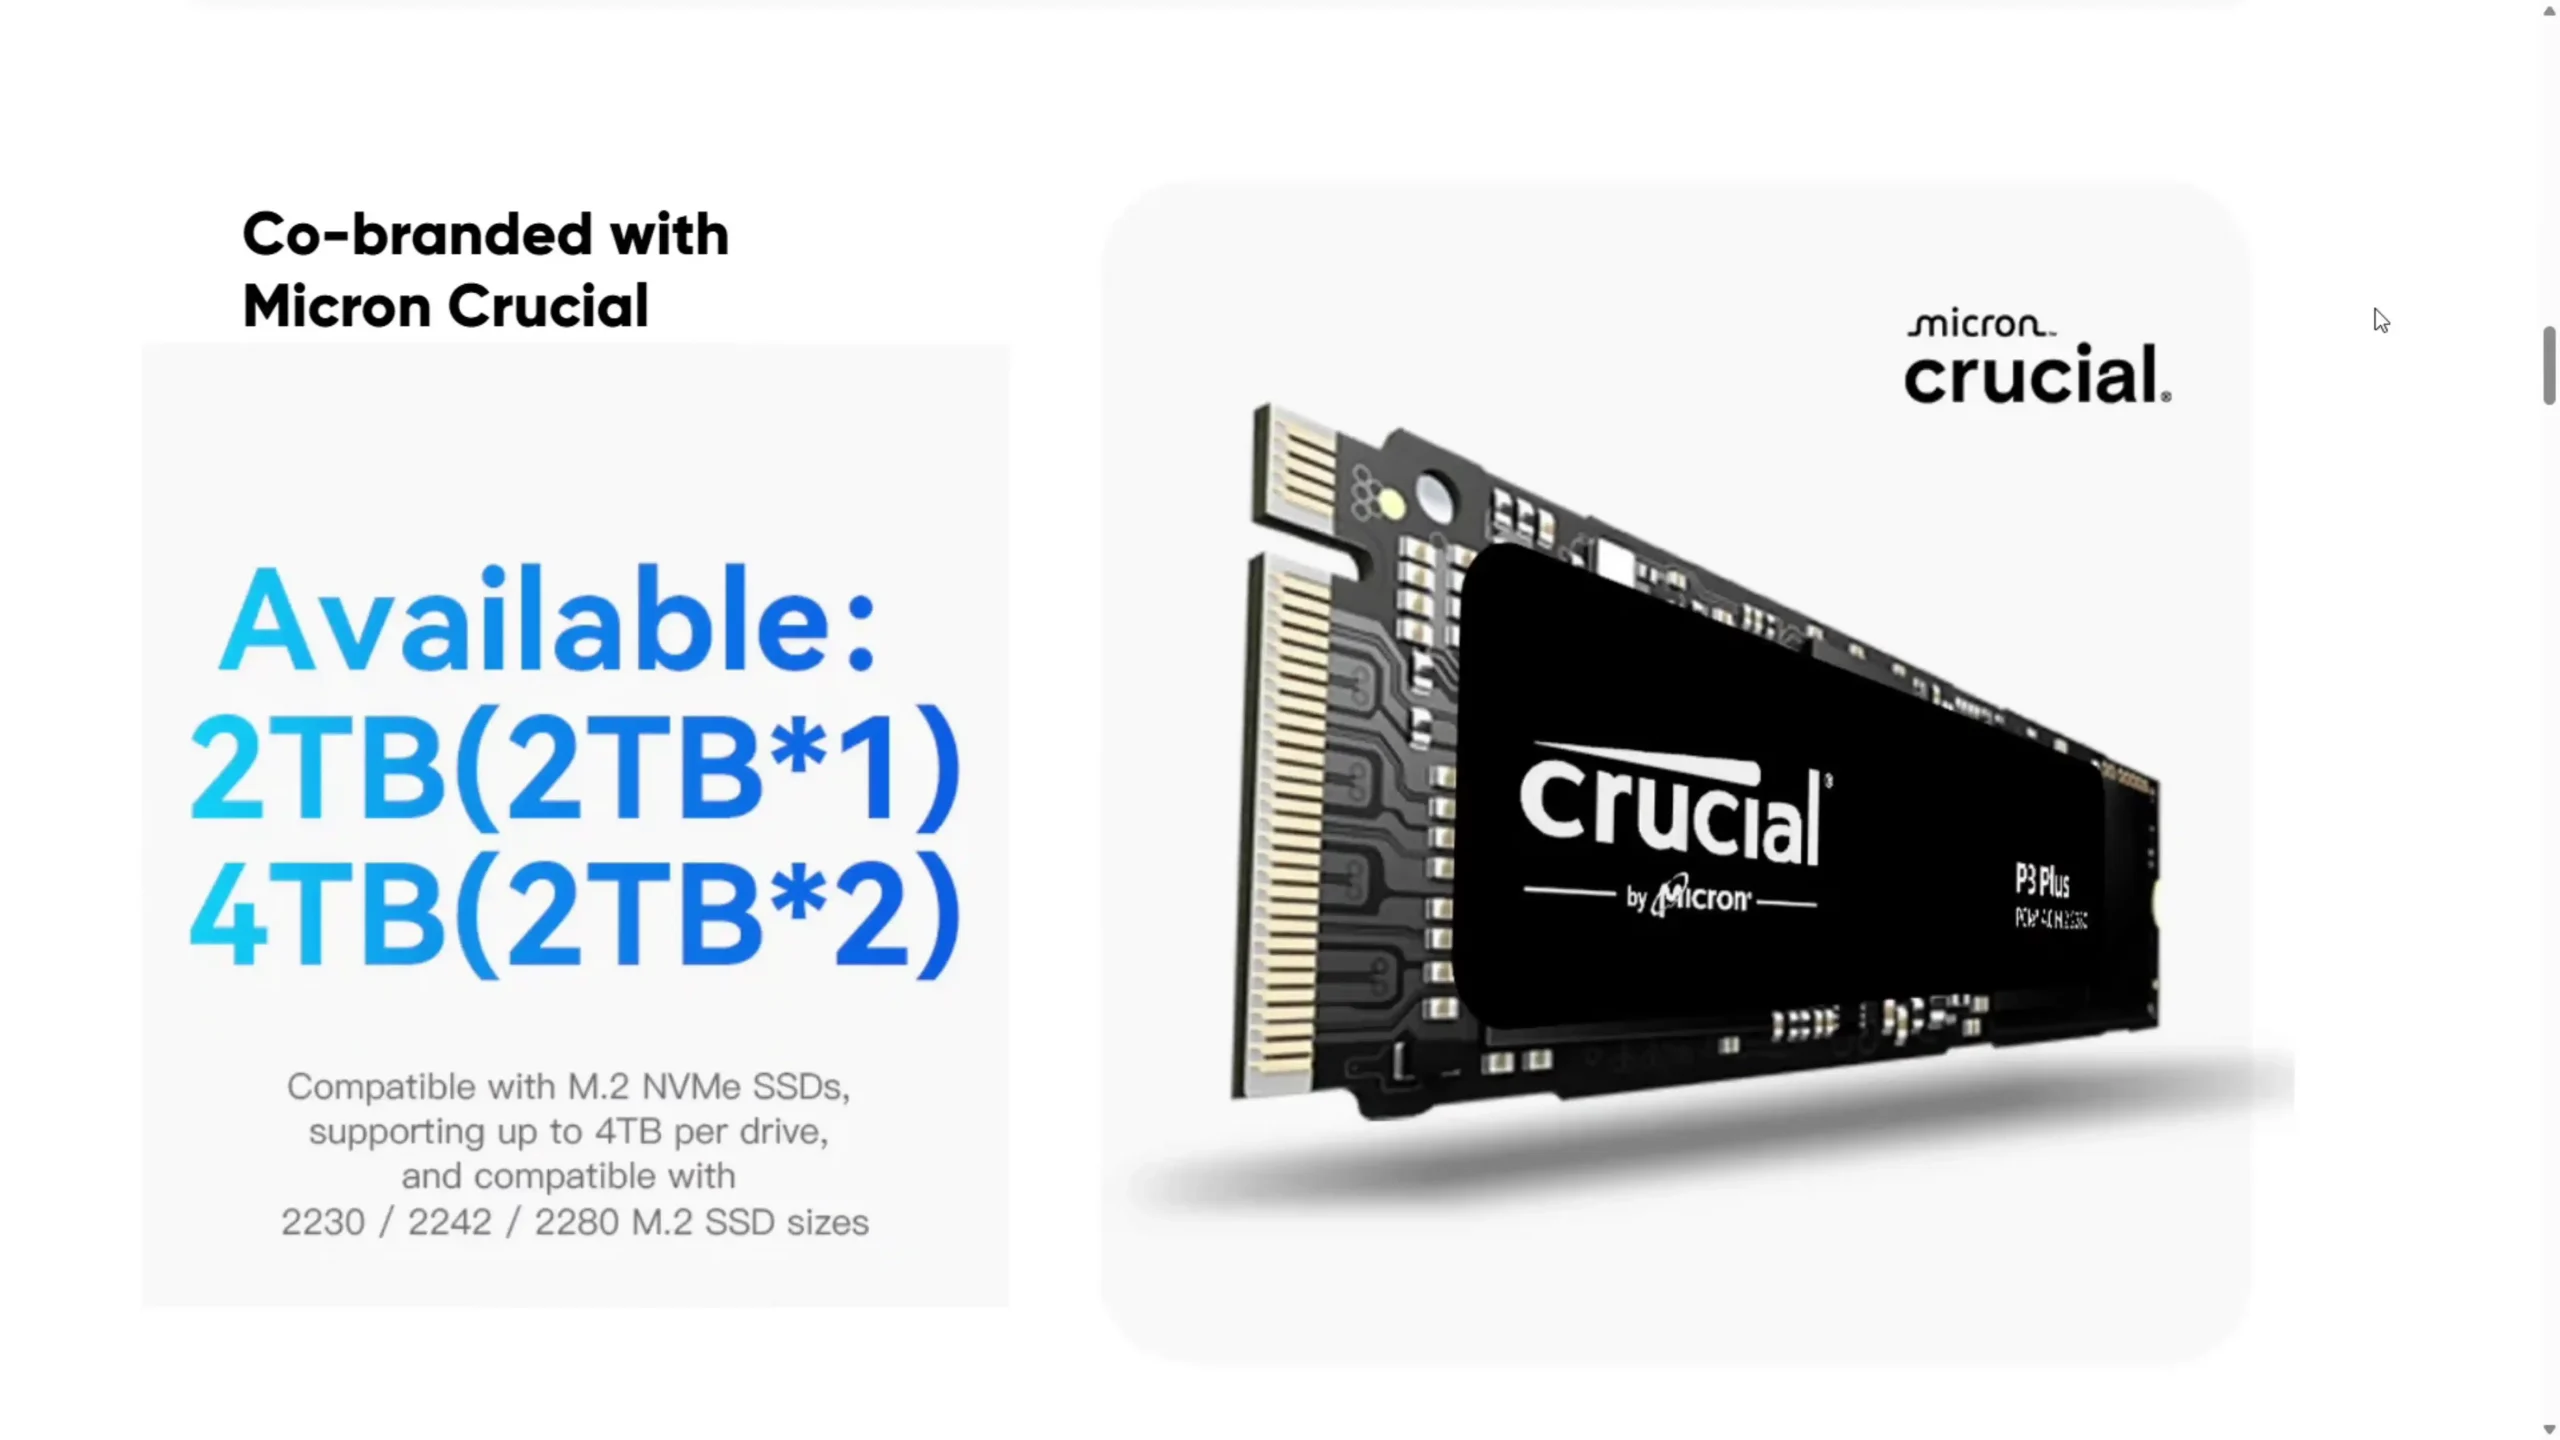
For users opting for pre-configured models, Beelink offers bundles that include Crucial P3 SSDs—either one 2TB unit or two 2TB units—depending on the chosen configuration. This co-branding with Crucial ensures a known level of SSD endurance and performance, contrasting favorably with many competing budget NAS options which often use generic or unverified storage media. The factory pairing also ensures that one of the SSDs is installed in the Gen 3 x2 slot, delivering better system responsiveness and transfer speeds for OS-hosted operations such as Plex metadata handling, RAID cache, or VM images.
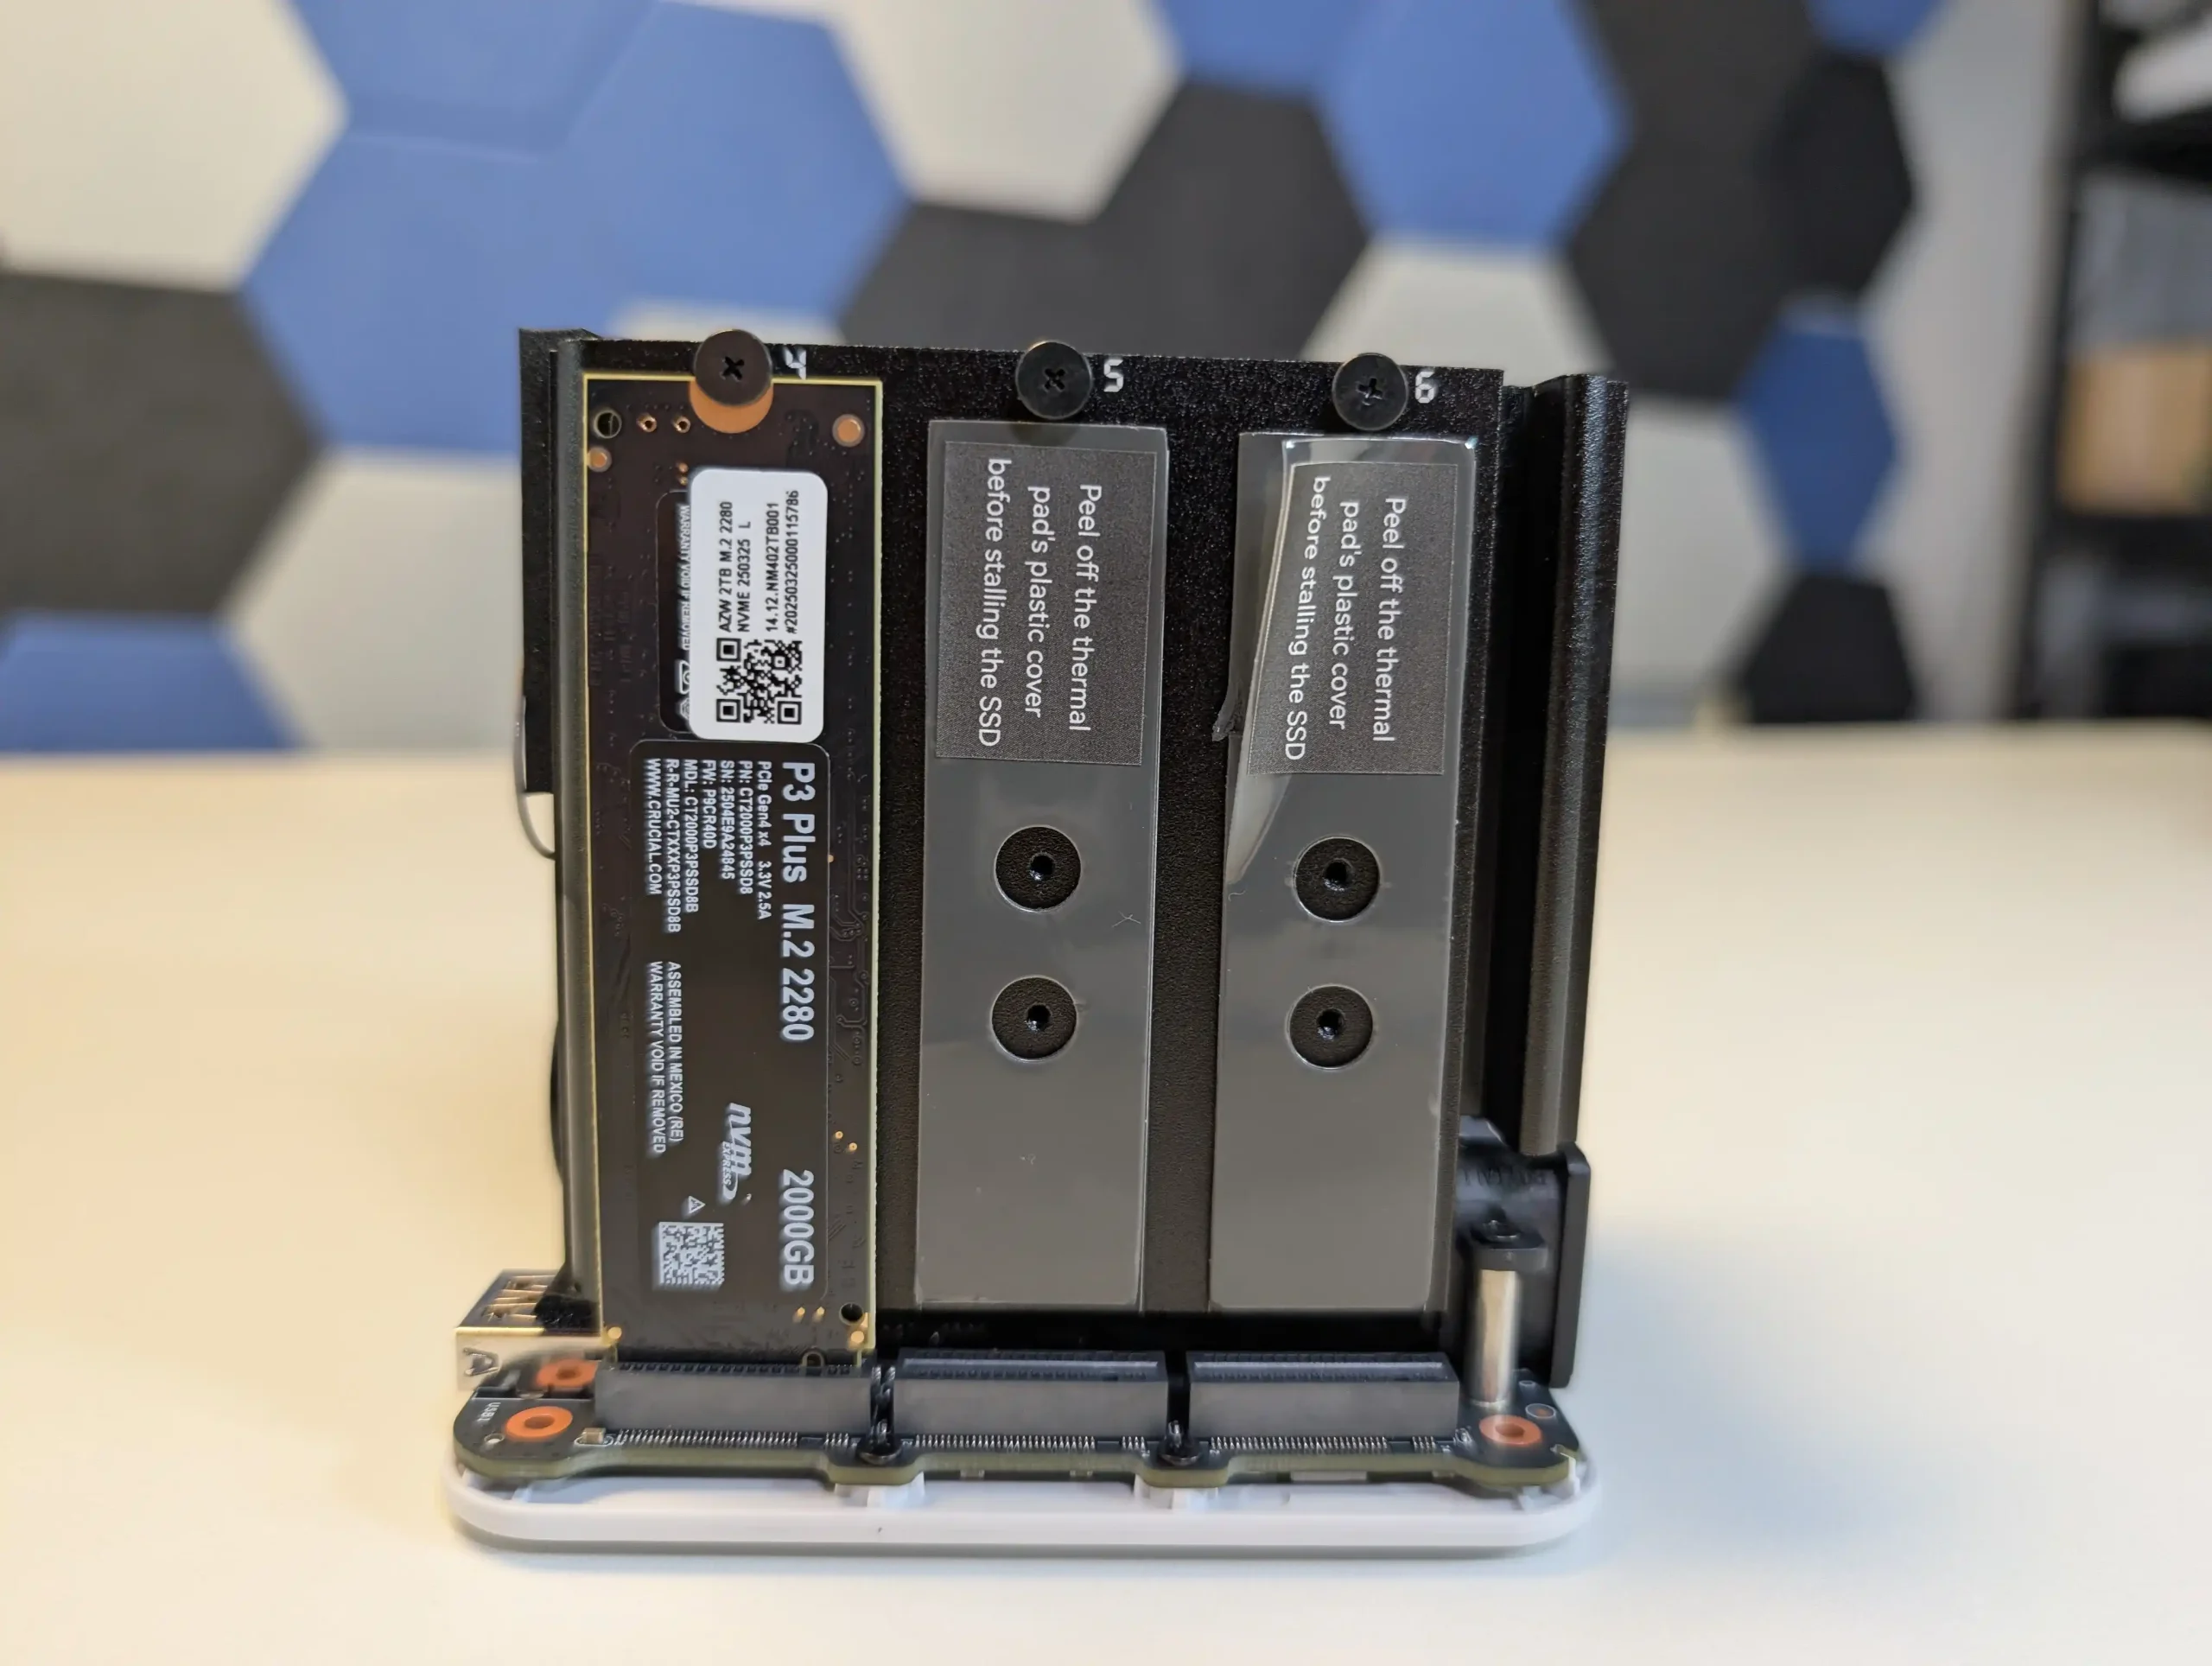
The internal hardware of the Beelink ME Mini centers around the Intel Twin Lake N150 processor, a 4-core, 4-thread chip based on Intel’s 10nm architecture. With a base TDP of 6W and burst frequency of up to 3.6GHz, it is positioned as a power-efficient solution for NAS tasks that include multimedia playback, basic file sharing, and light application hosting.
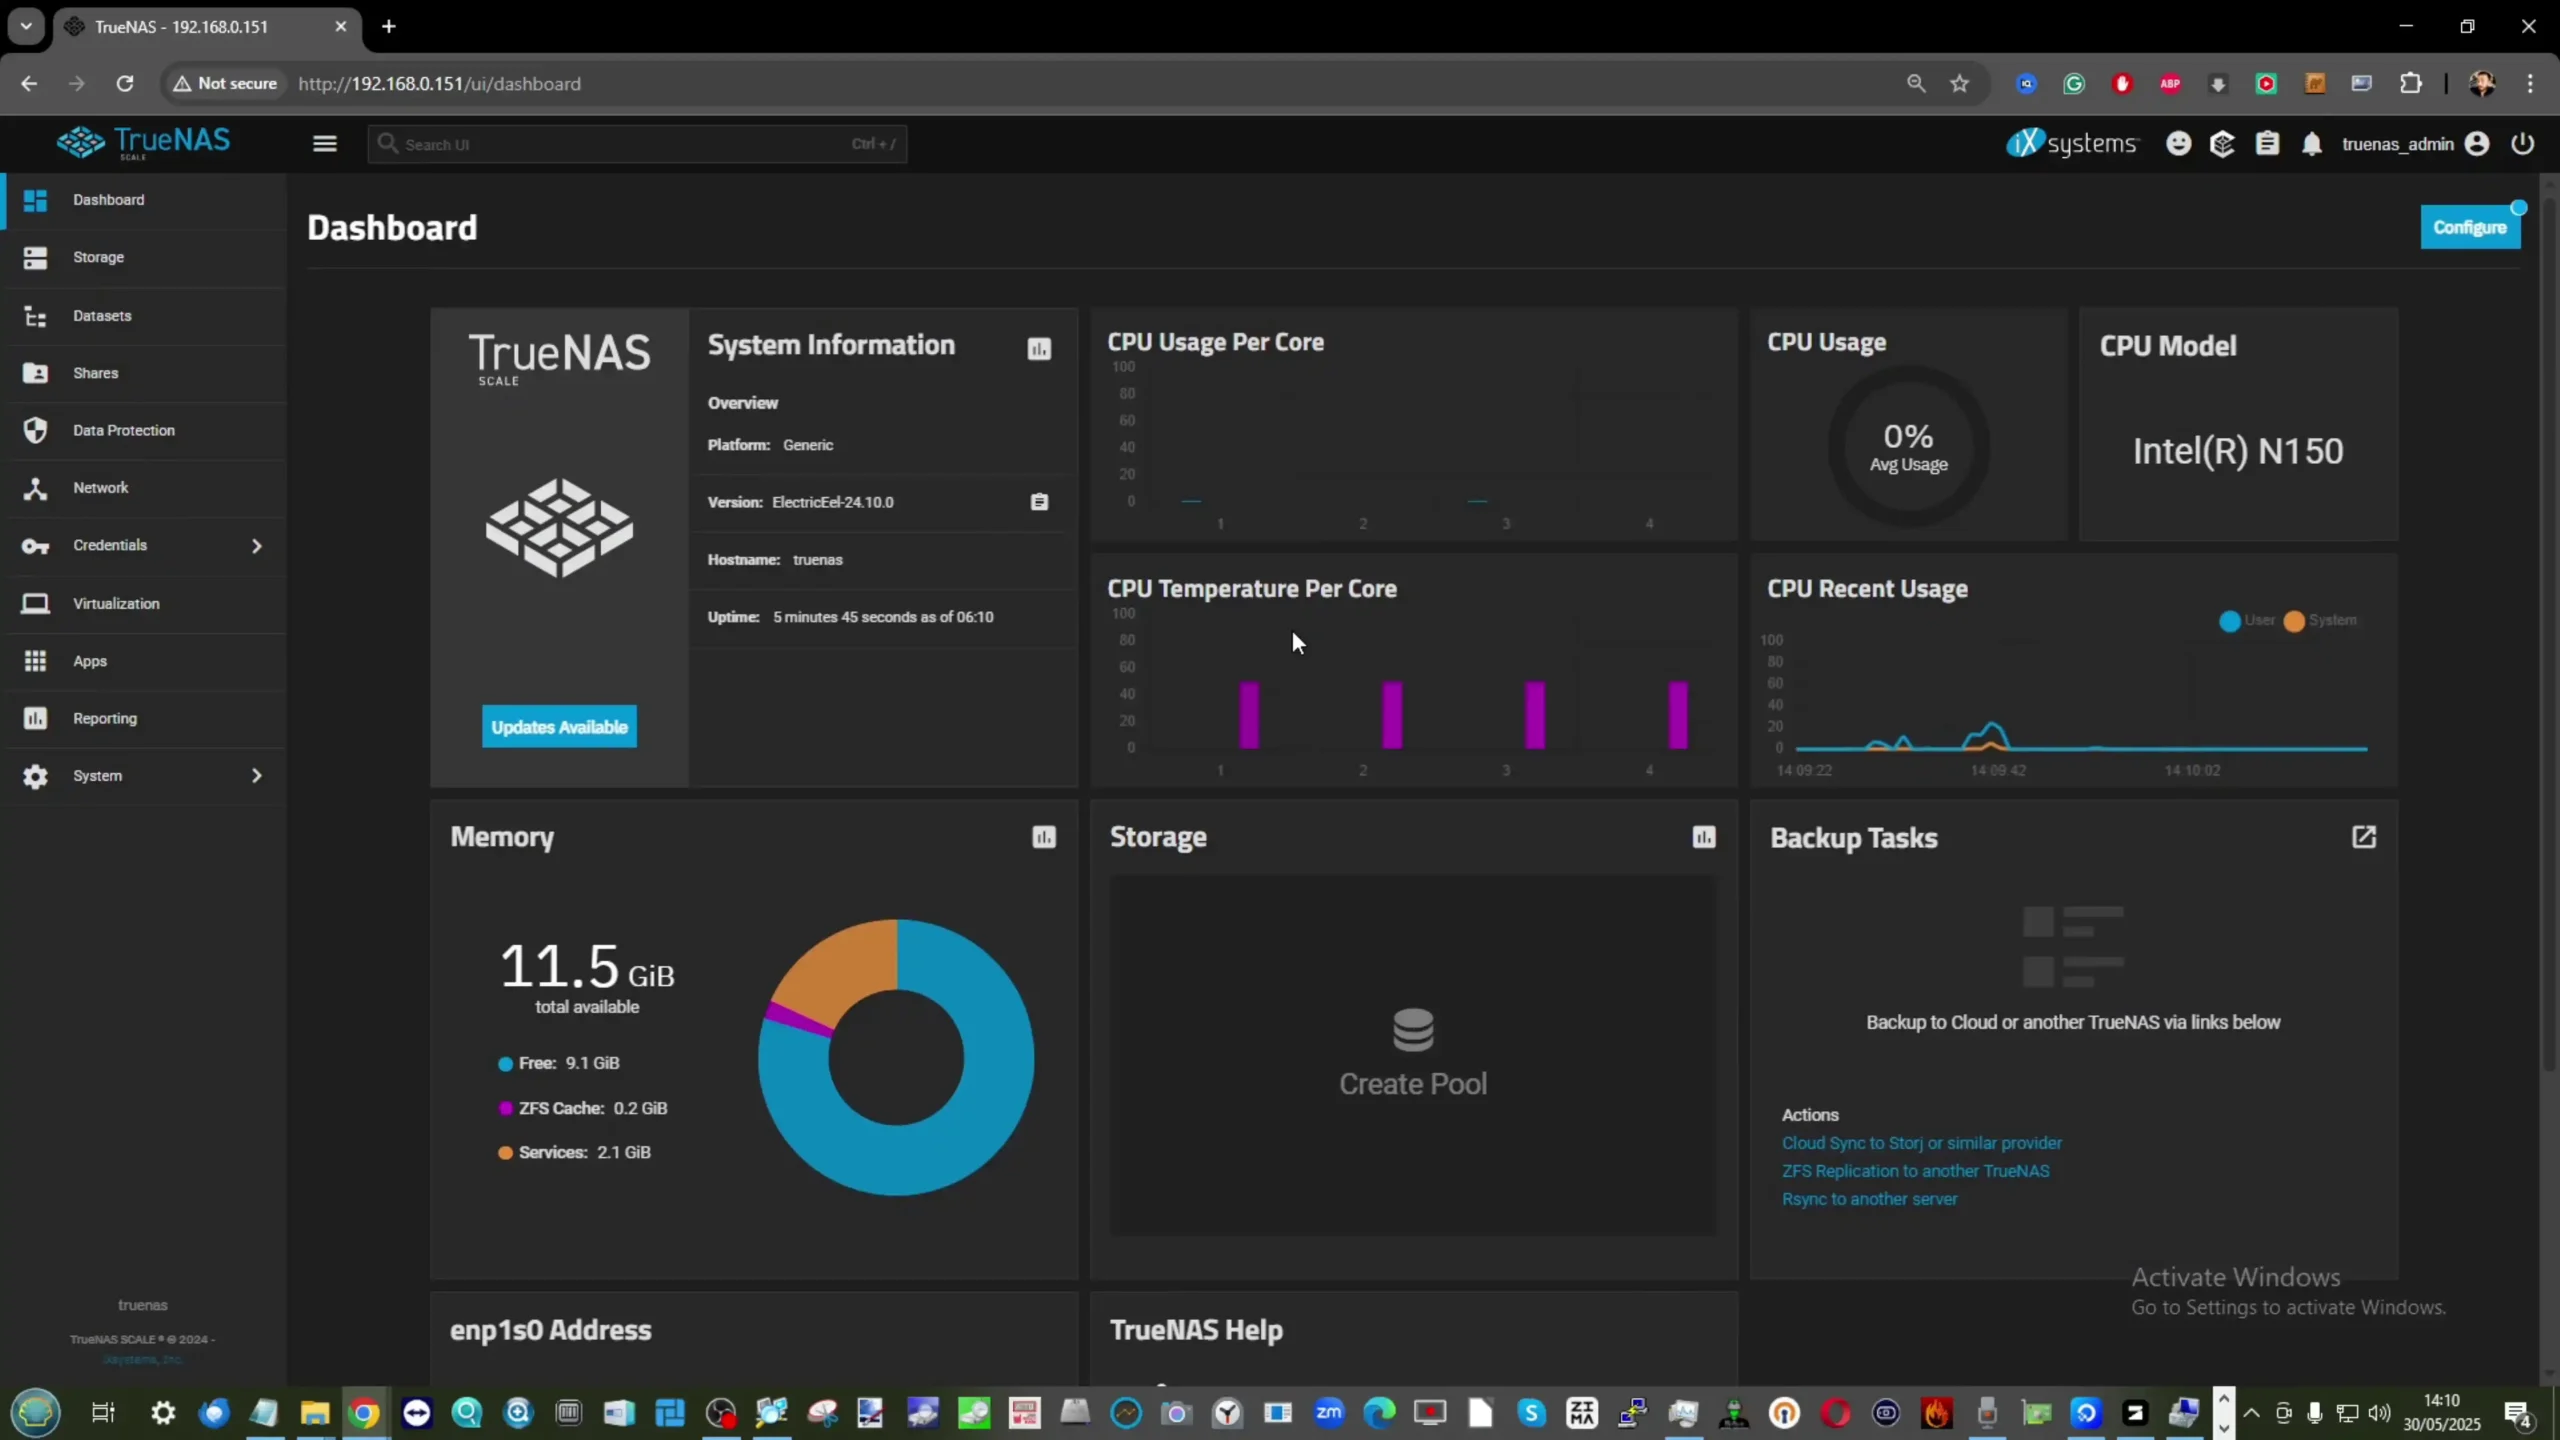
While it does not support hardware transcoding at the same level as higher-tier Intel core chips with Quick Sync, the N150 performs adequately for 4K playback in Plex and other media servers when transcoding is avoided. In real-world use, the CPU averaged 60–75% utilization during simultaneous dual 2.5GbE access and SSD activity, indicating a solid baseline for single-user or family scenarios.
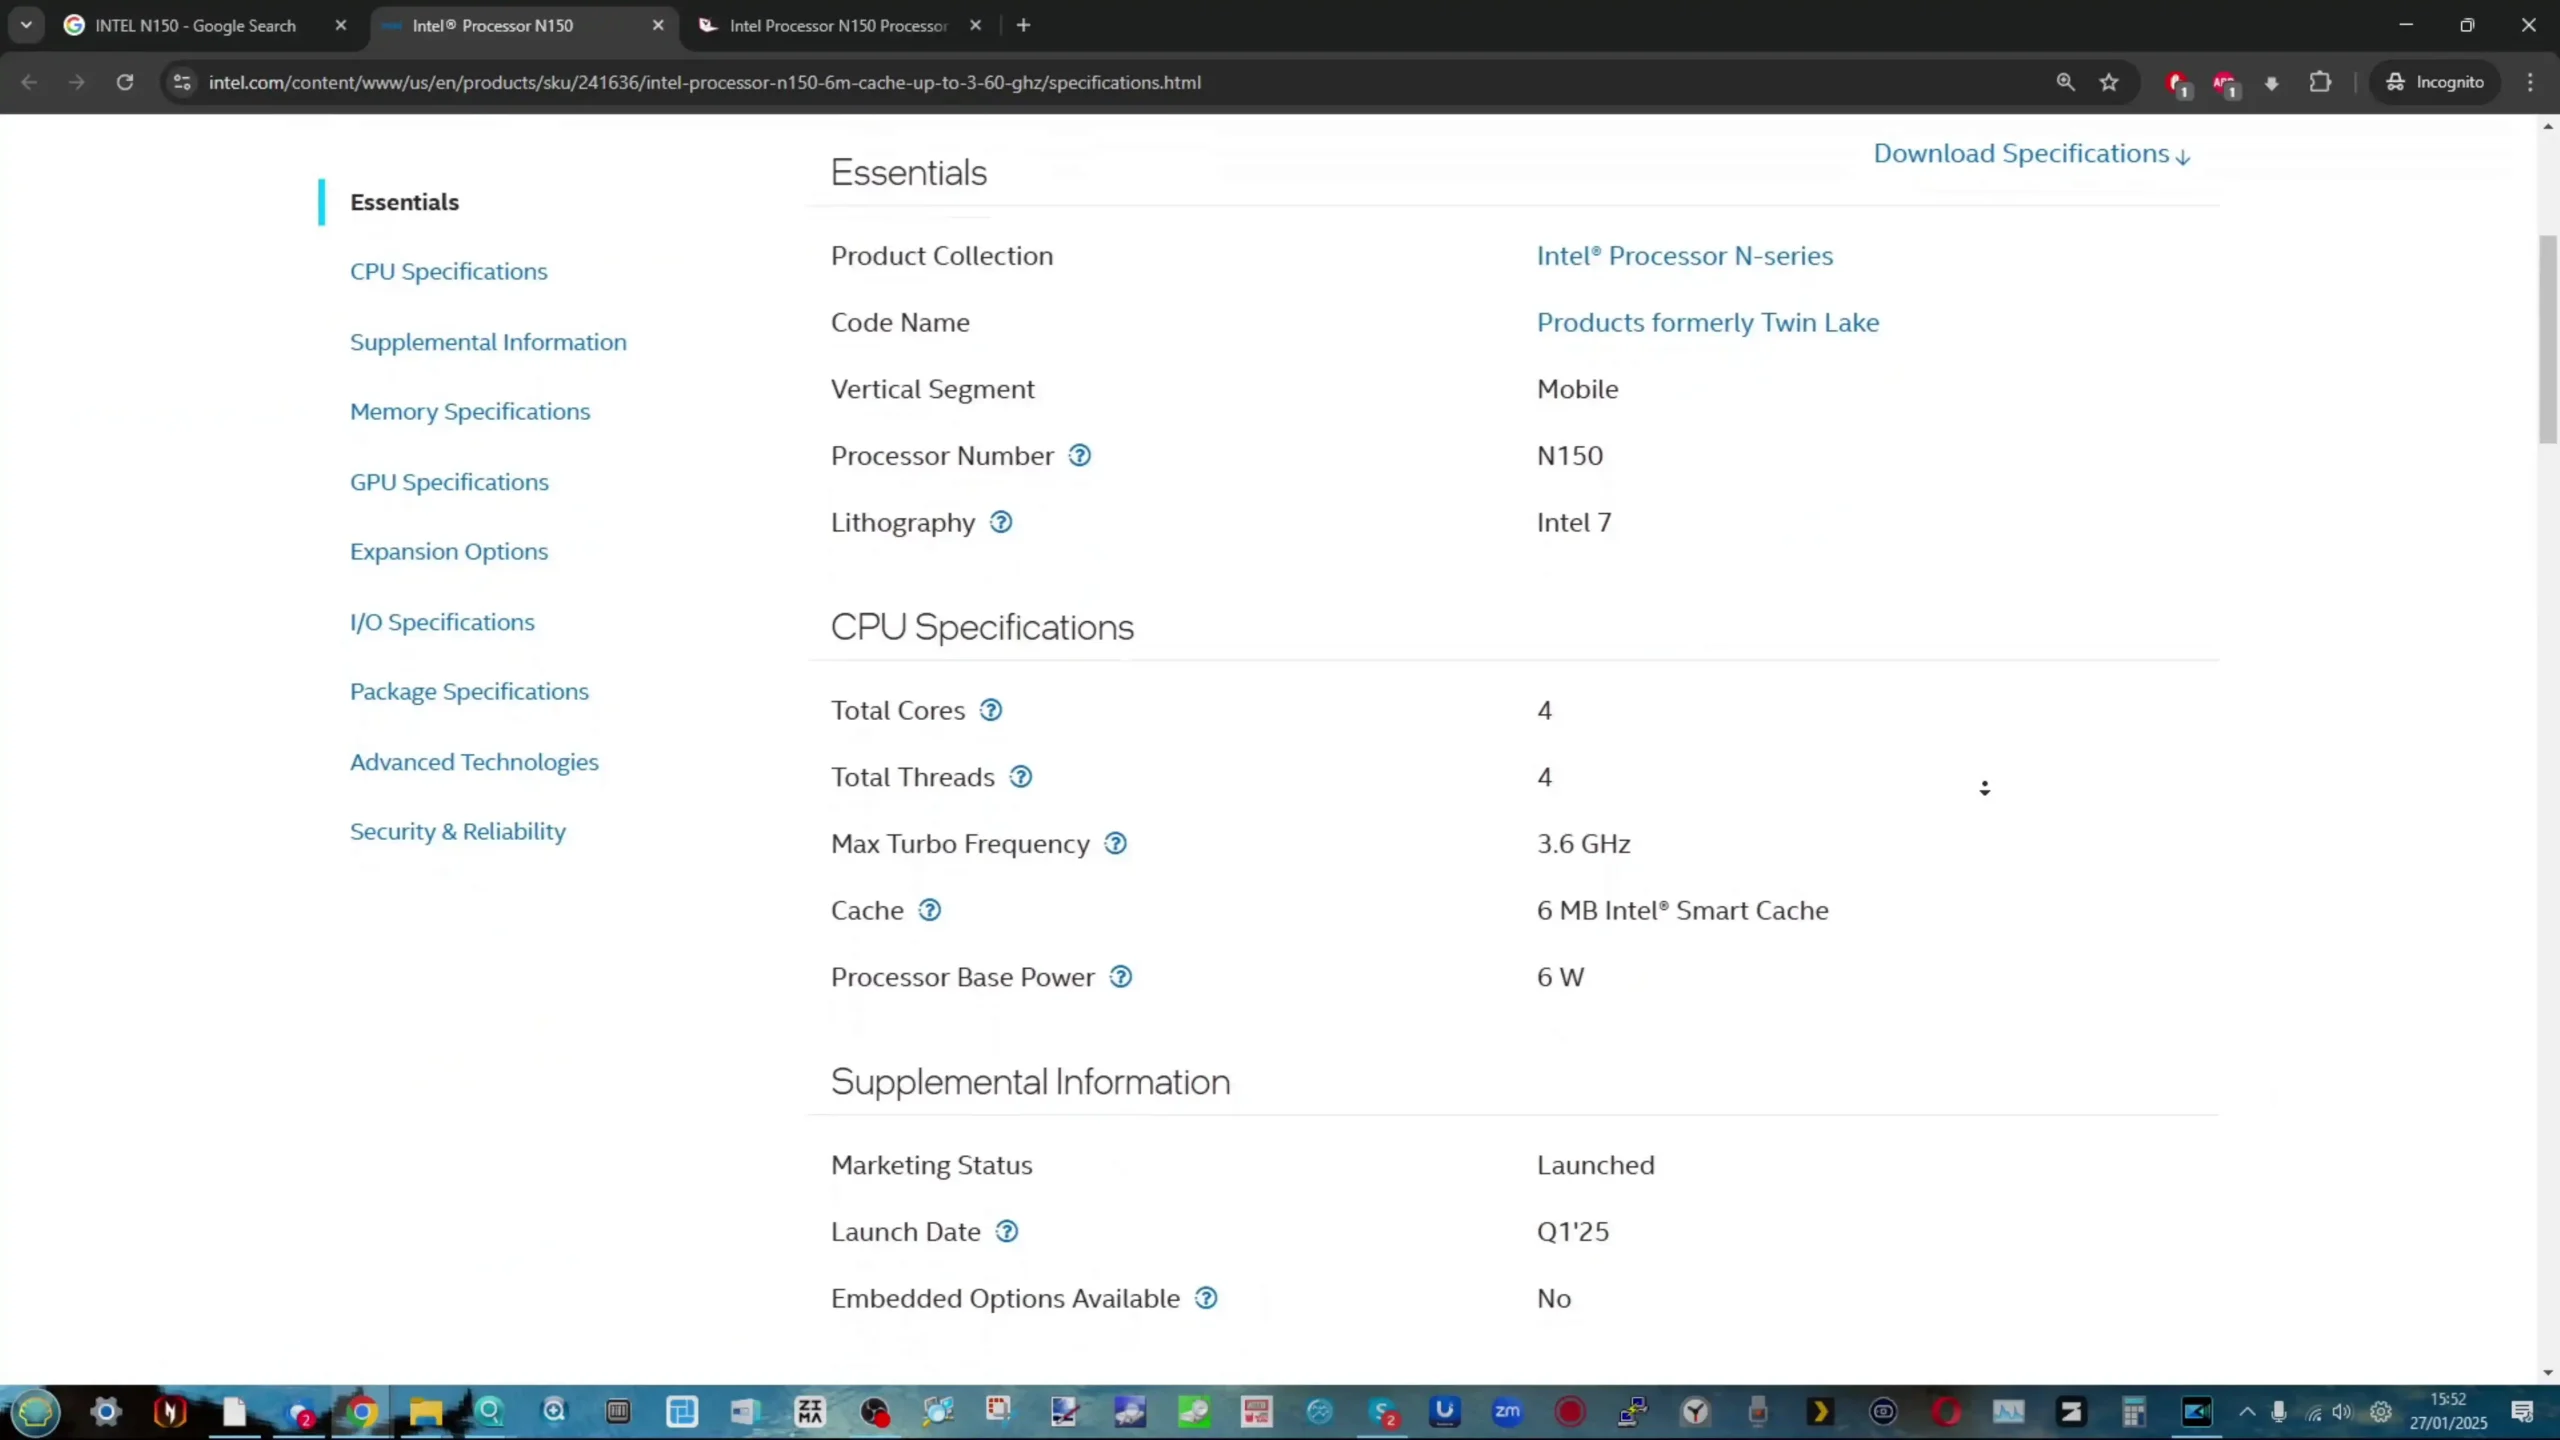
Complementing the CPU is 12GB of LPDDR5 memory, soldered directly to the board and clocked at 4800MHz. While the memory is non-upgradable, the capacity is sufficient for running lightweight NAS OS environments, containers, or even some virtual machines.
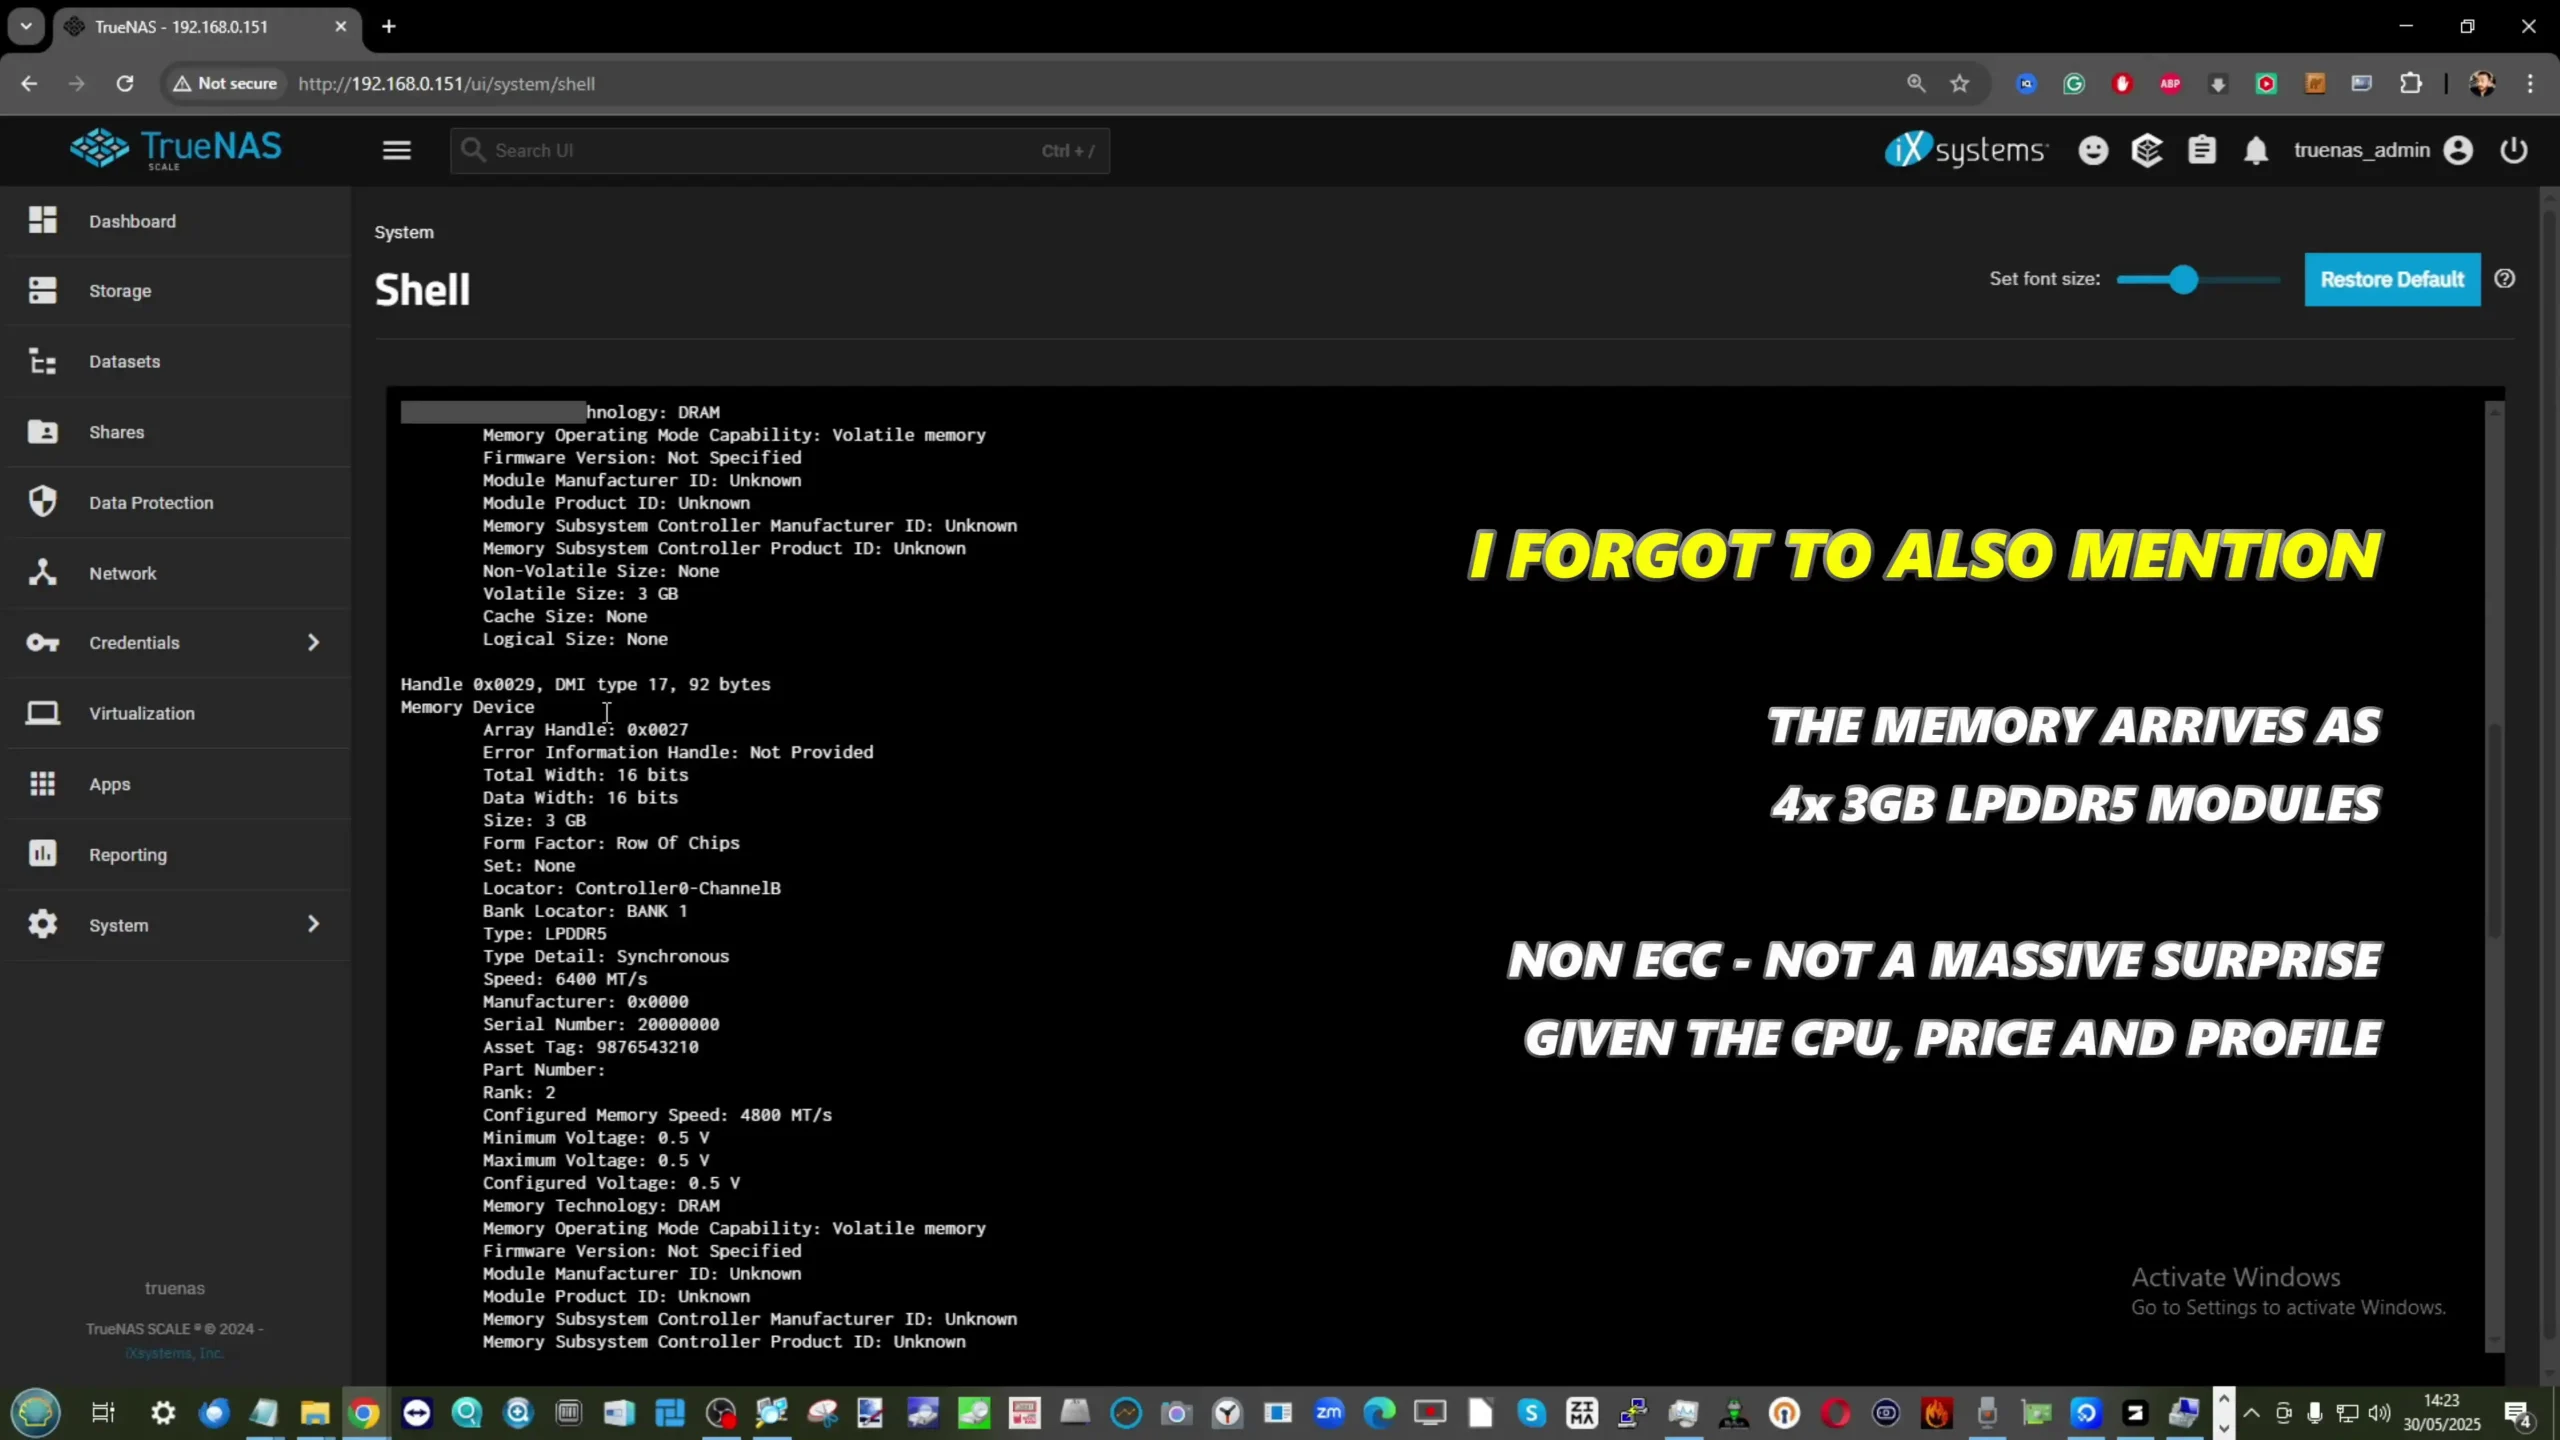
Unlike most mini PCs that cap out at 8GB in similar thermal envelopes, Beelink’s decision to include 12GB offers a practical boost for users running multiple services, such as a media server alongside a VPN container or light file indexing applications. The absence of SO-DIMM slots means this cannot be expanded further, which may deter power users seeking a more scalable system, but the default capacity fits the ME Mini’s home-use intentions well.
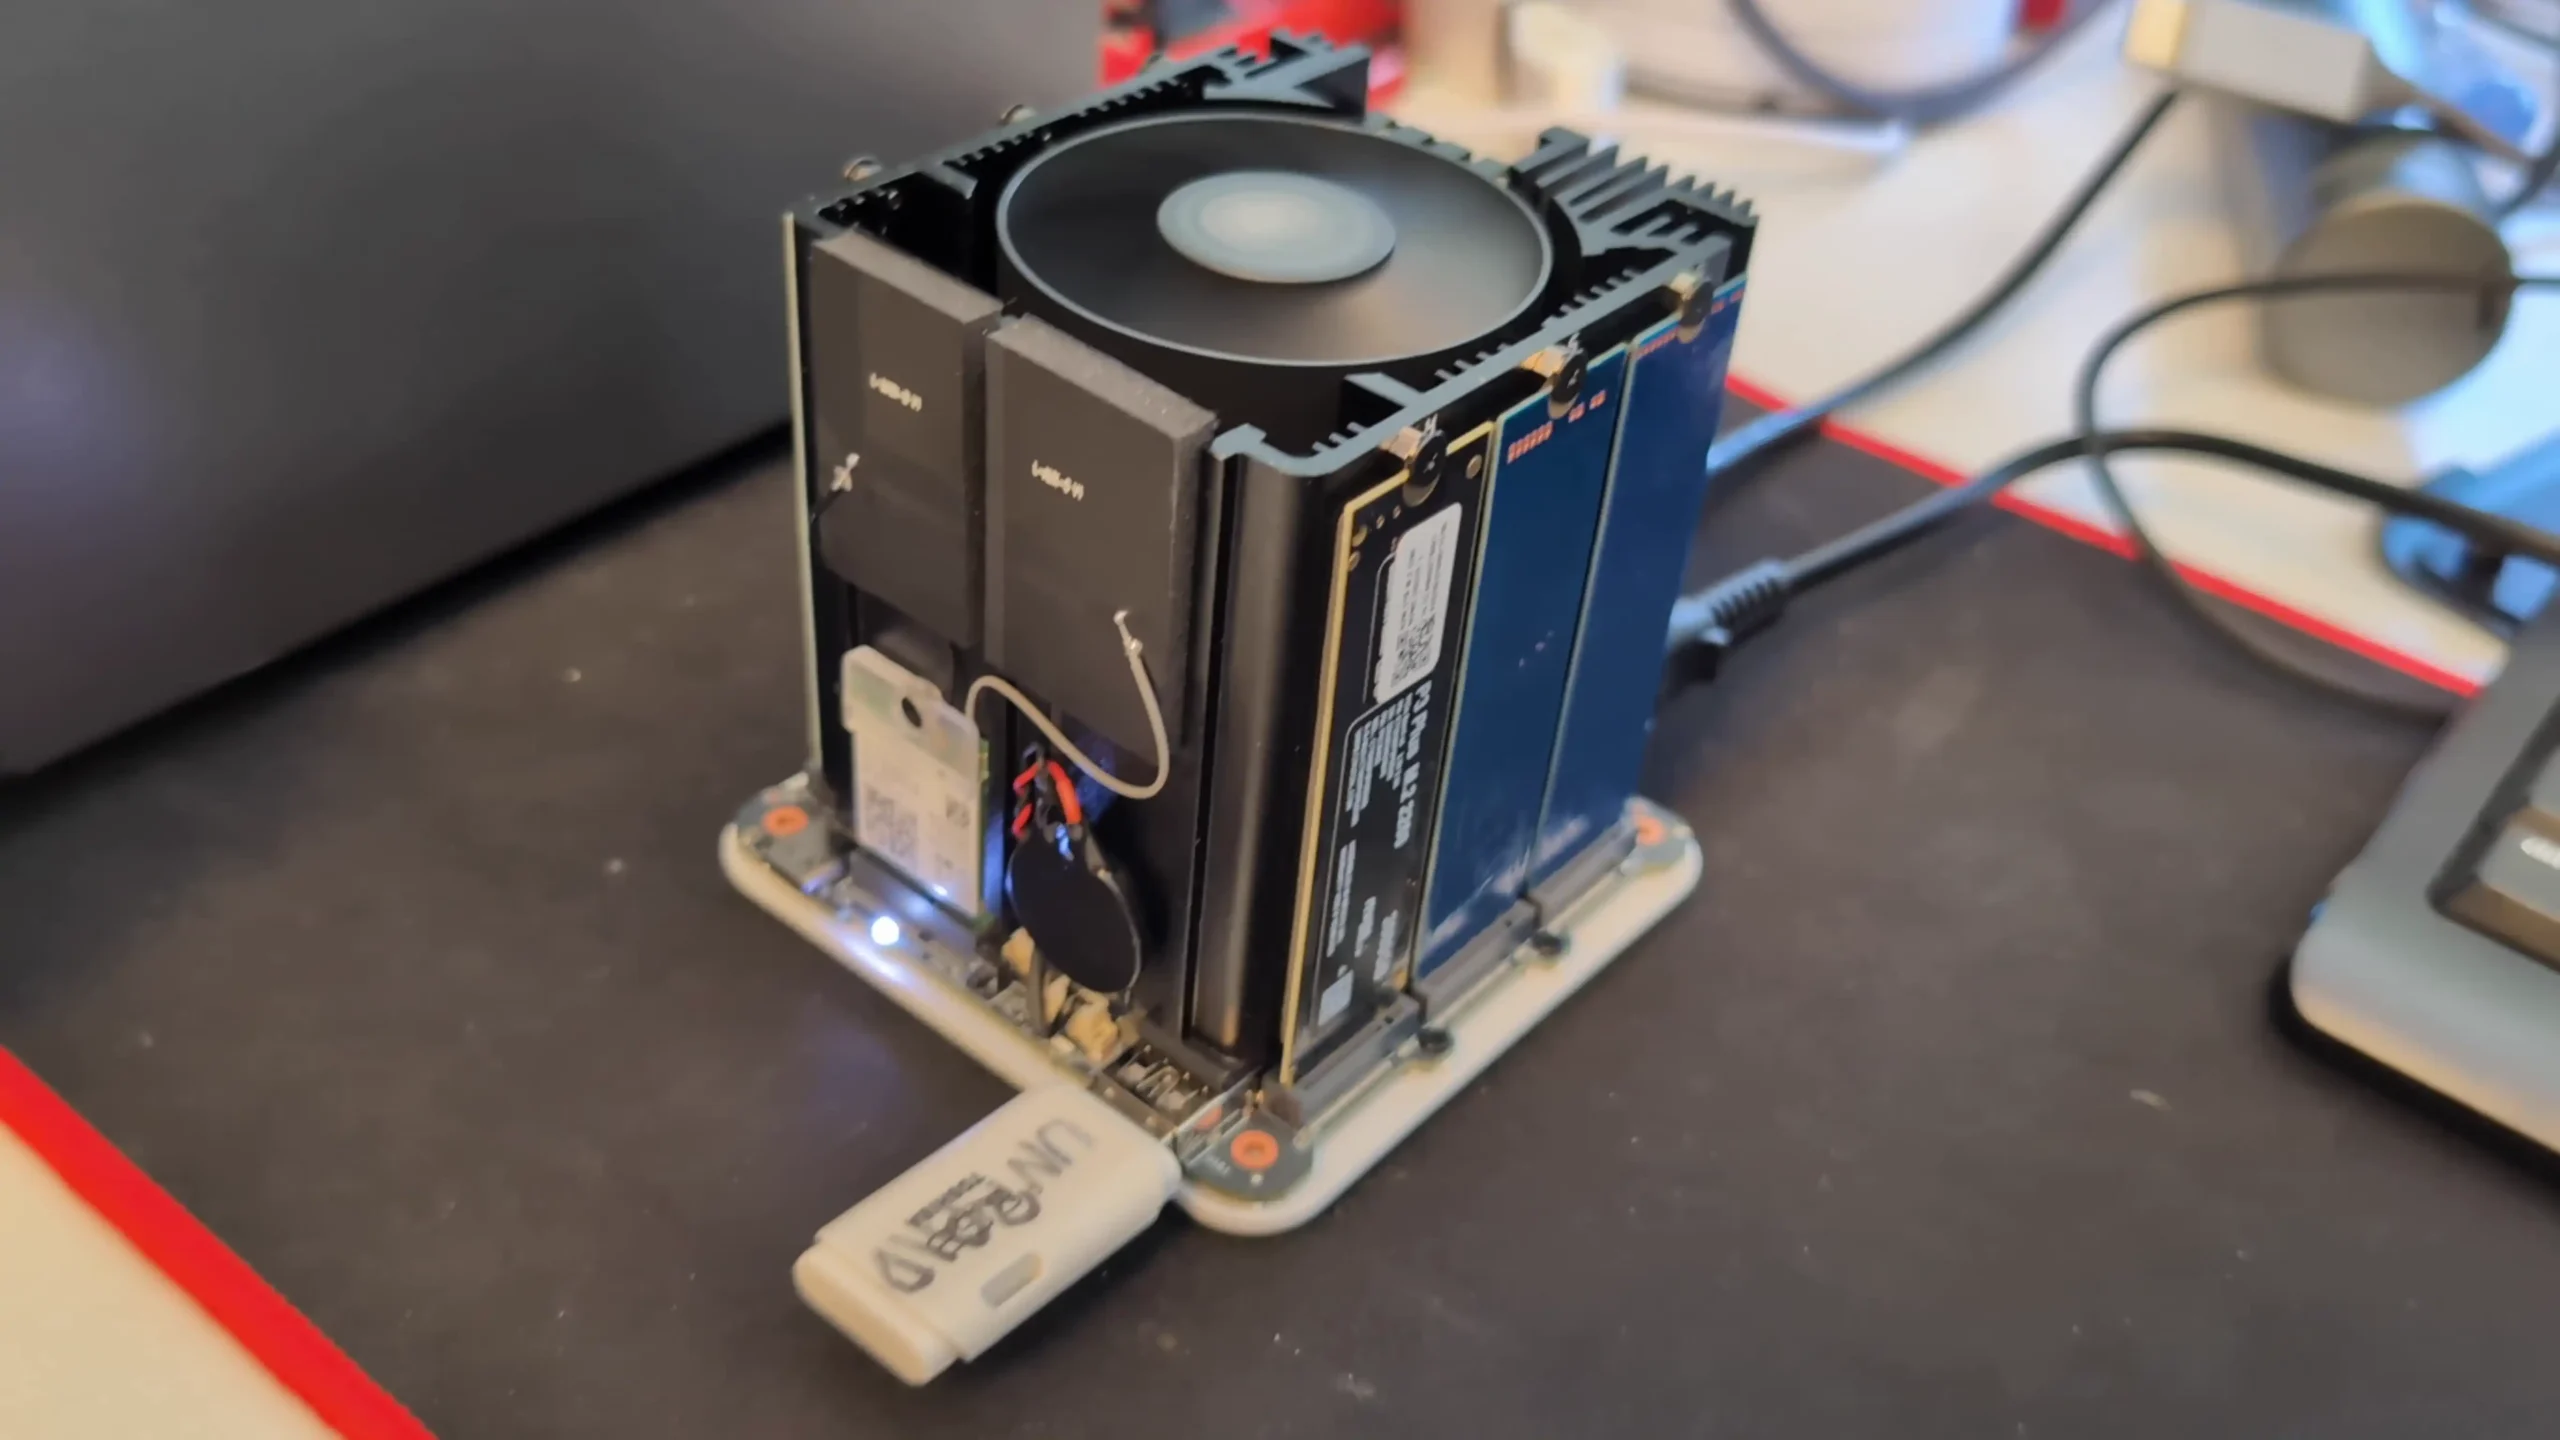
The overall thermal design pairs the CPU and SSDs with a centrally-mounted metal heatsink that acts as both a structural element and a cooling component. The silent fan located above the heatsink assists with vertical airflow, helping to maintain internal component temperatures during prolonged operation. During extended thermal tests—such as 24-hour idle and active file transfer sessions—surface temperatures peaked between 48°C and 60°C, particularly at the base where the PSU and networking ports reside.
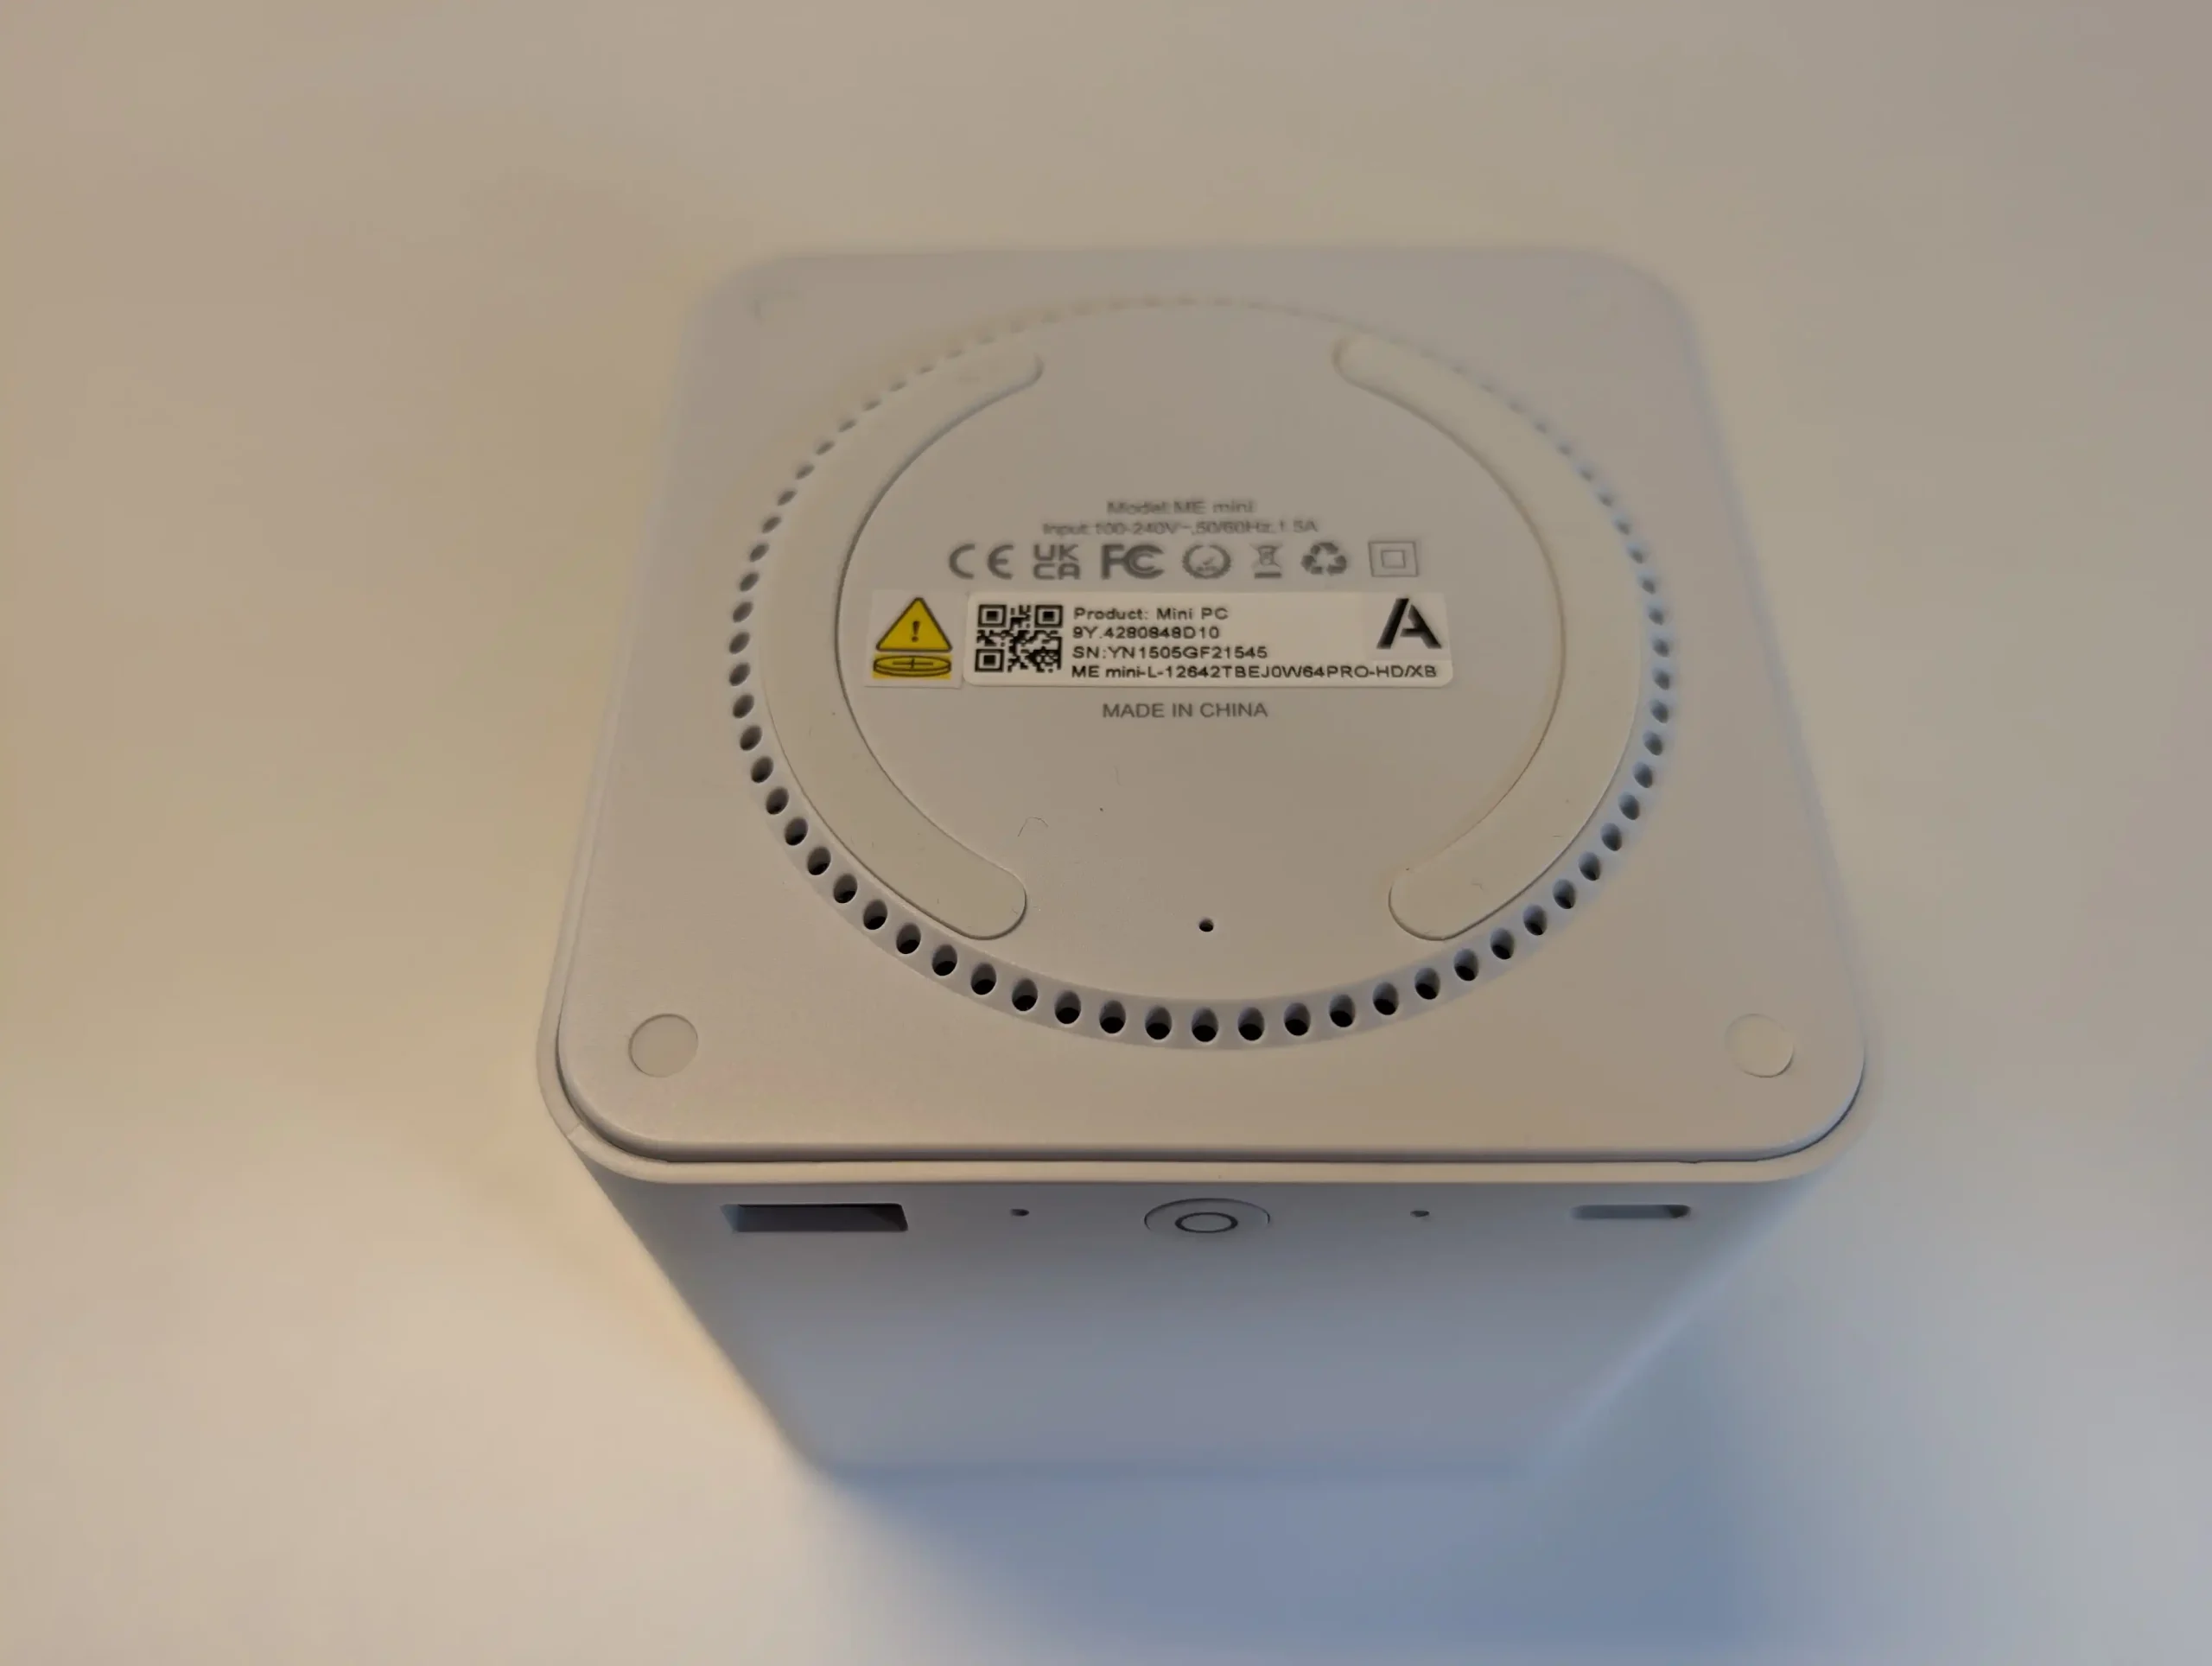
While the design keeps the main components within reasonable thermal ranges, there is a potential thermal buildup at the bottom under sustained load, suggesting an optional future design revision could include a base fan.
| Component | Specification |
|---|---|
| CPU | Intel Twin Lake N150, 4C/4T, 3.6GHz burst, 6W TDP |
| Memory | 12GB LPDDR5 (4800MHz, soldered, non-upgradable) |
| eMMC Storage | 64GB onboard |
| M.2 Storage | 6x M.2 2280 slots: 1x PCIe Gen 3 x2 (OS Recommended), 5x PCIe Gen 3 x1 |
| Cooling | Large internal heatsink + top-mounted silent fan |
| Thermals (avg) | 46–51°C top panel / 54–60°C bottom panel (under continuous load) |
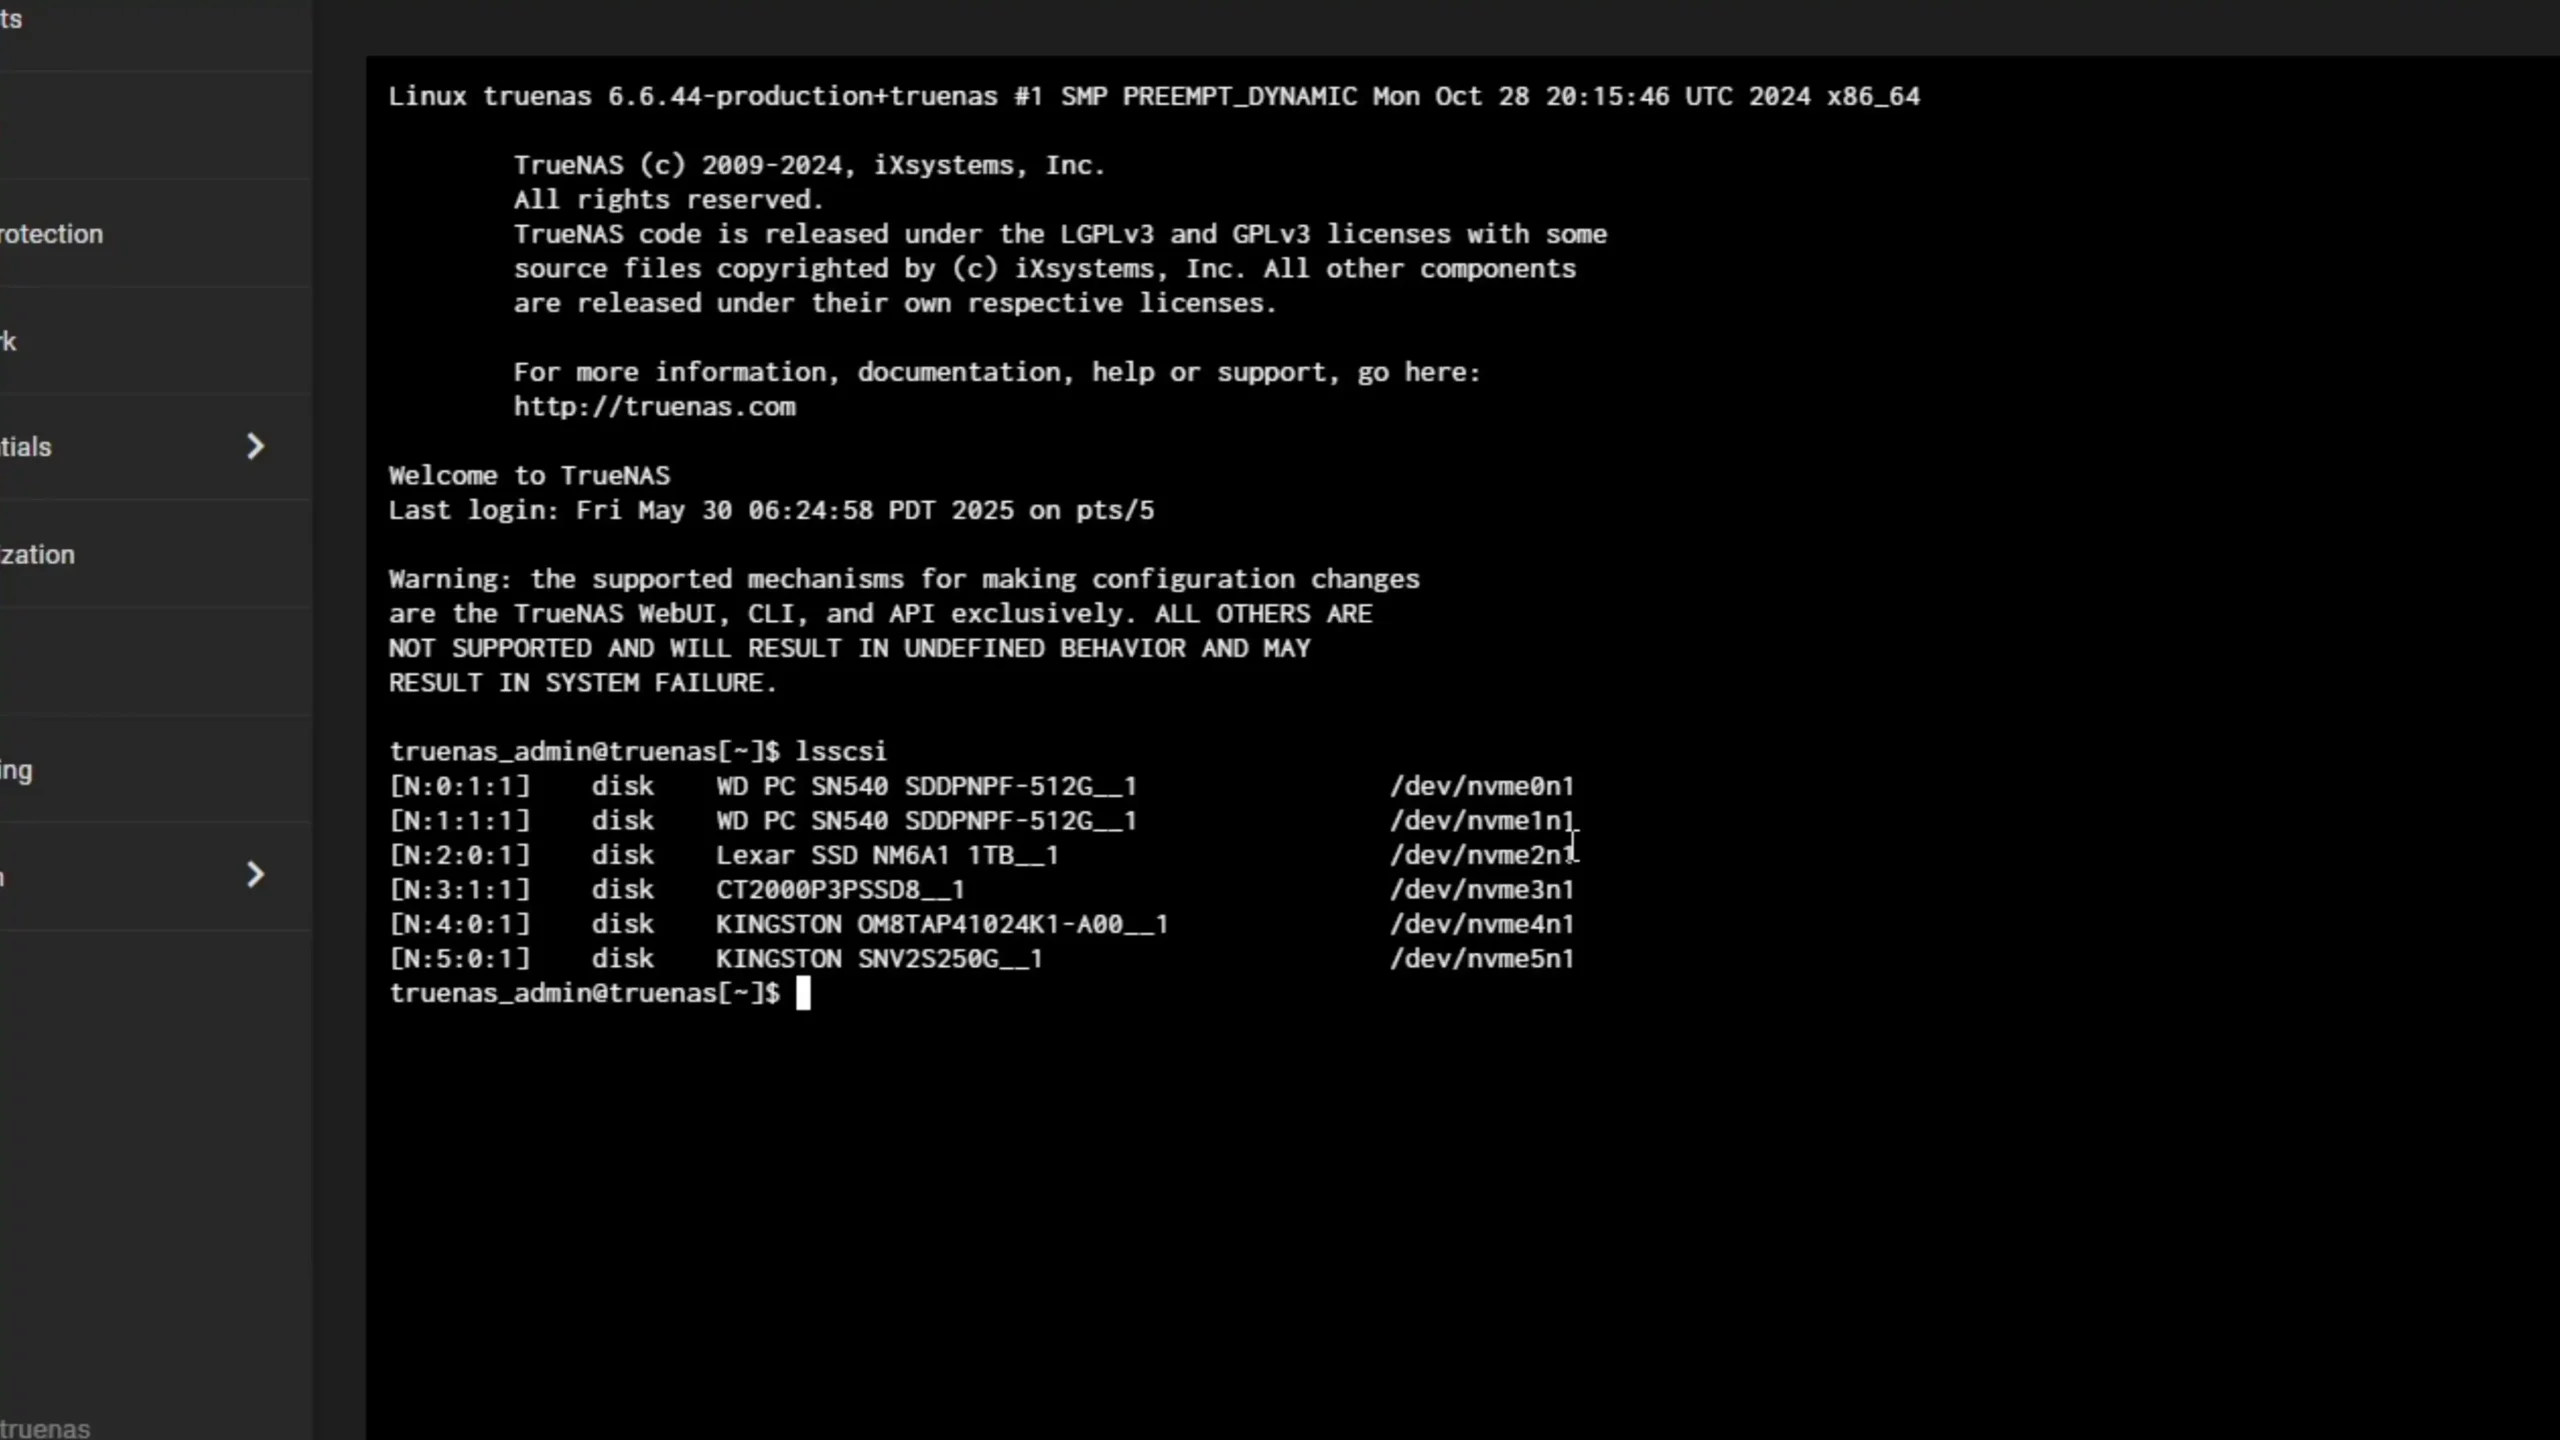
Despite its compact dimensions, the Beelink ME Mini includes a wide array of ports suited for both networking and peripheral connectivity. On the networking side, the unit features two 2.5GbE LAN ports (Intel i226-V), located at the rear, which support link aggregation or failover configurations. These enable transfer rates well above standard gigabit networking, although in practice, real-world throughput tends to be limited by SSD performance or PCIe lane constraints. During bandwidth testing, combined throughput between the LAN ports peaked around 580–600MB/s easily.
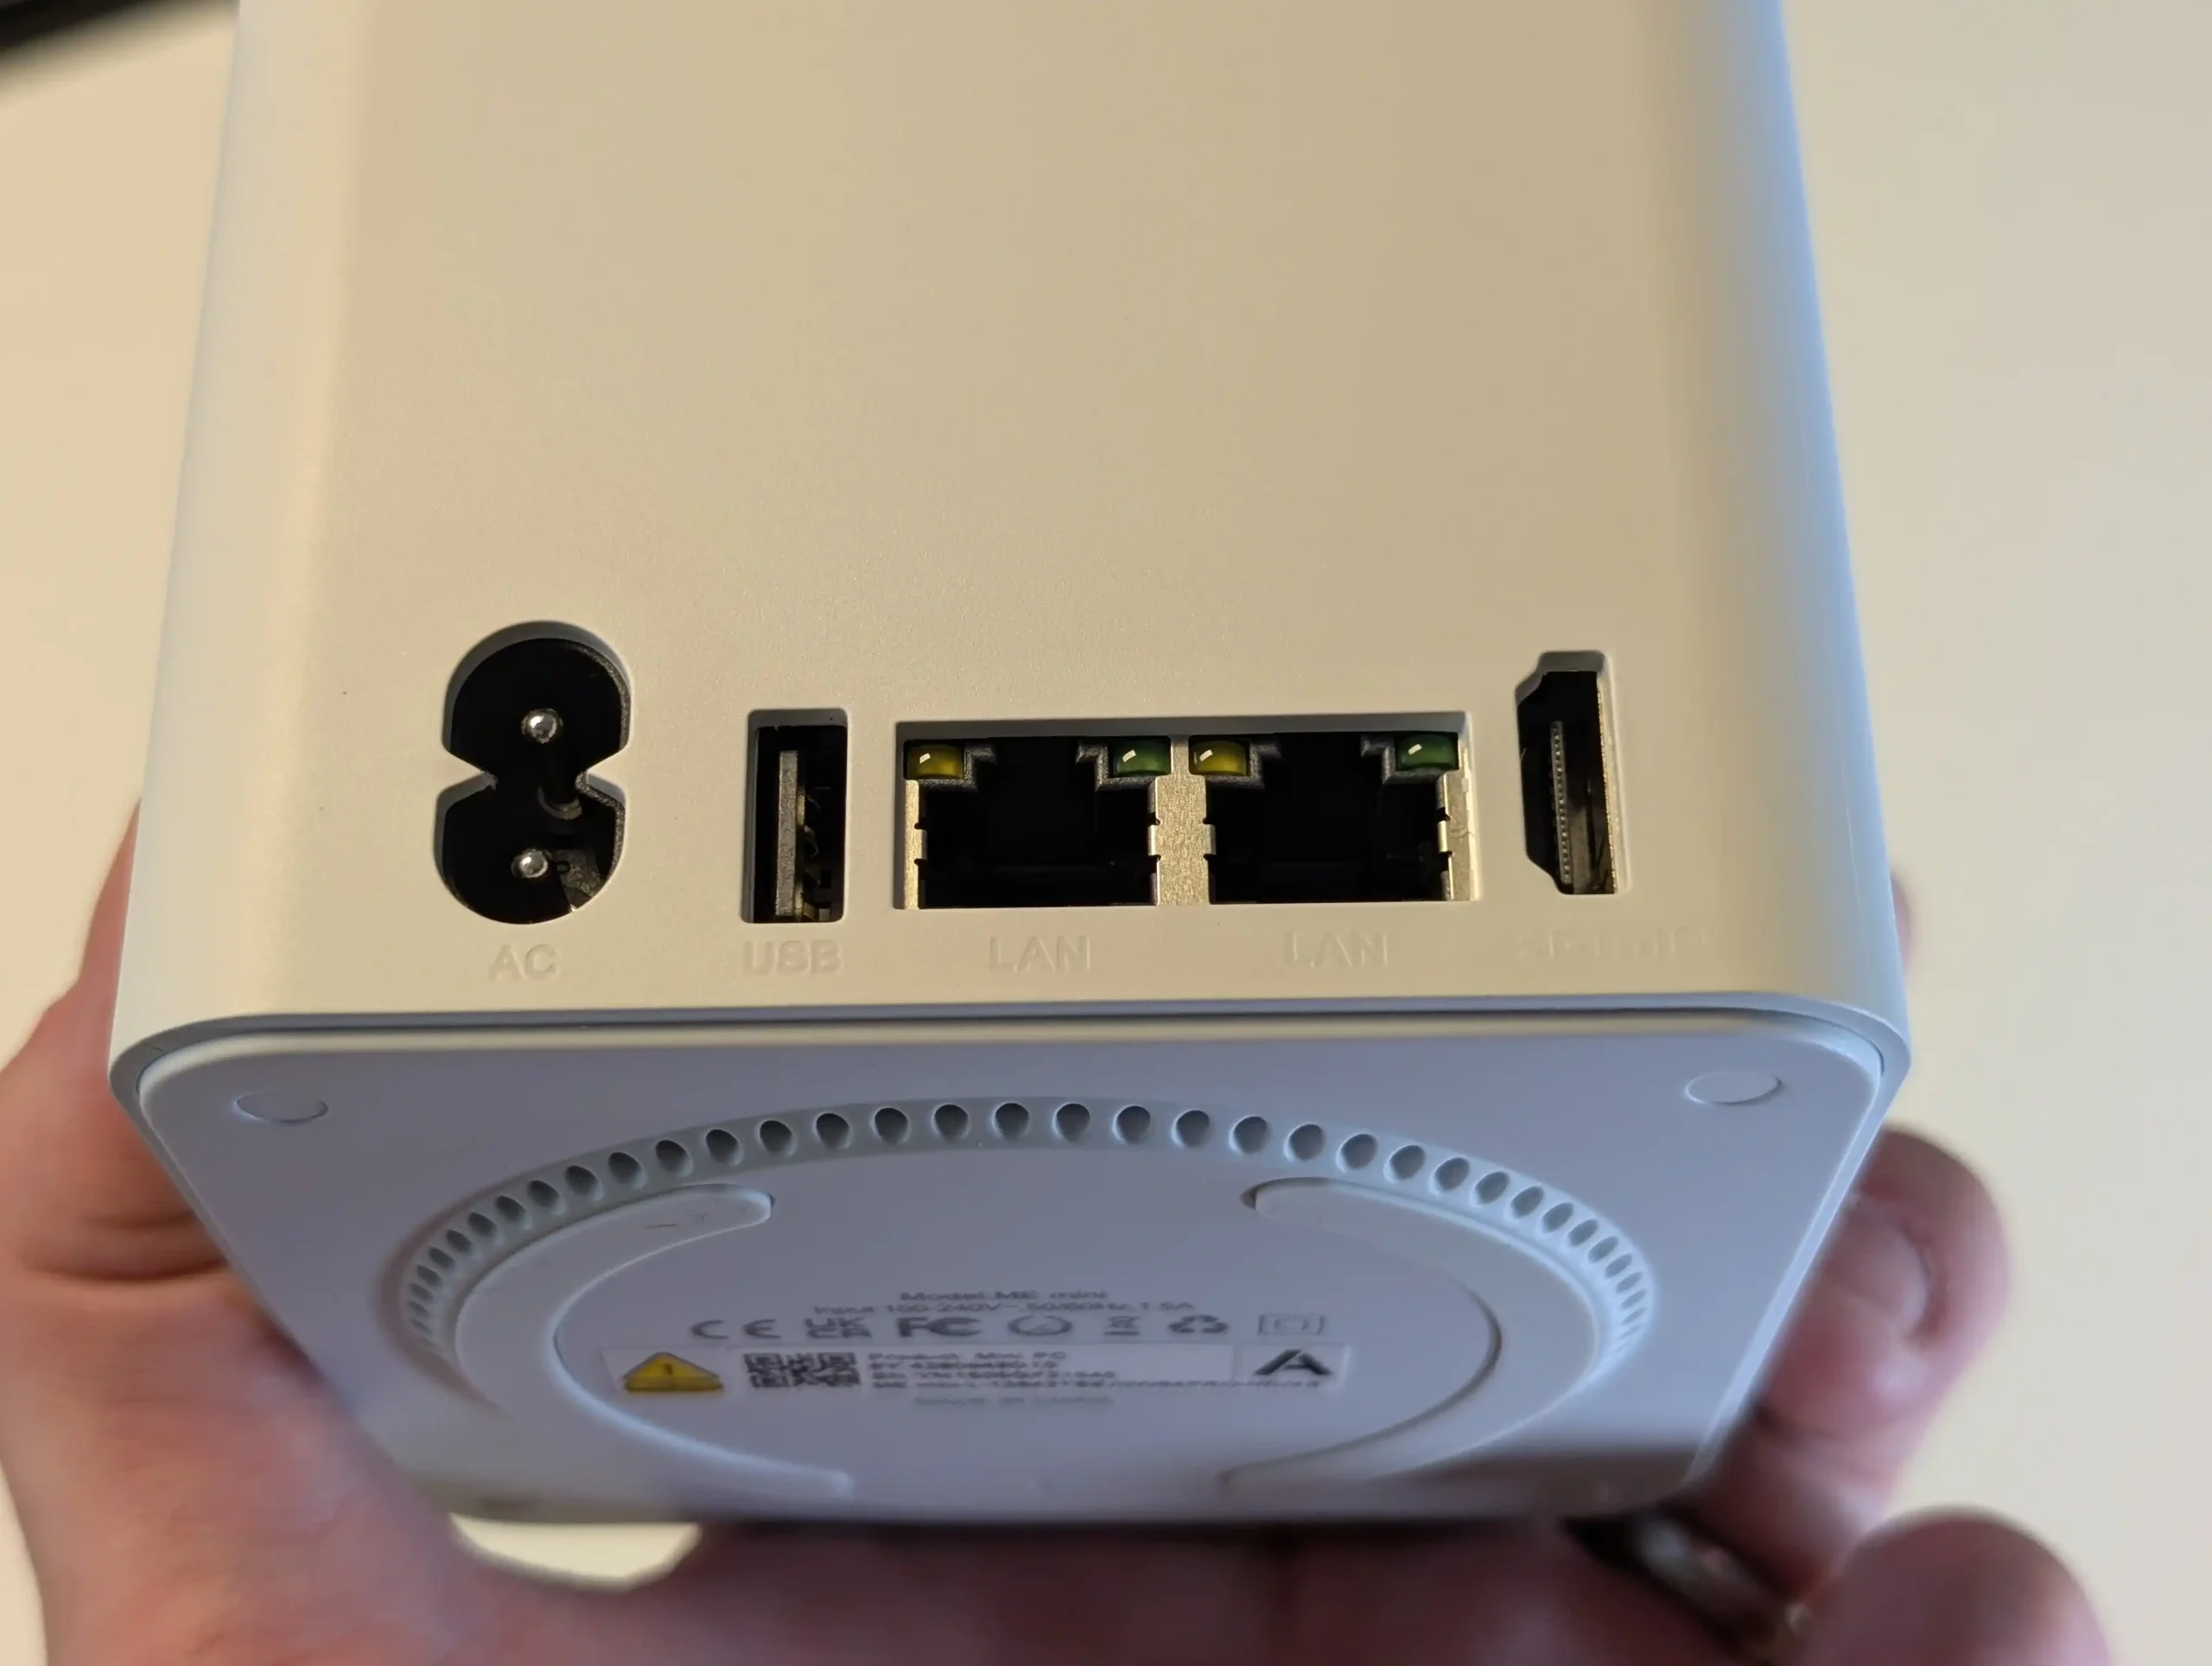
As much as many of us would want 10GbE – at this scale of CPU/Lanes, Price and just HEAT – I can understand why its absent here. That said, I do want to mention that the system includes onboard Wi-Fi 6 (via Intel AX101 module) and Bluetooth 5.2, expanding its use cases to wireless media streaming, mobile backups, and wireless NAS deployment without consuming physical LAN ports. More importantly though, UnRAID recently announced that in their latest update, you can now use wireless adapters (see below) – which, alongside UnRAID’s lightweight ‘on RAM’ deployment, makes it bloody IDEAL for using on the Beelink ME Mini

In terms of USB connectivity, the ME Mini provides a balanced selection across both older and high-speed standards. The rear I/O panel houses a USB 2.0 port (480 Mbps), while the front features one USB 3.2 Gen 2 port (10Gbps) and a USB Type-C port (also 10Gbps). This offers sufficient bandwidth for attaching external storage, keyboard/mouse input for system setup, or USB-based backup devices. While a higher count of USB 3.0+ ports might have benefitted users with multiple external drives, the available ports are positioned logically and suit the intended home-focused workflows.
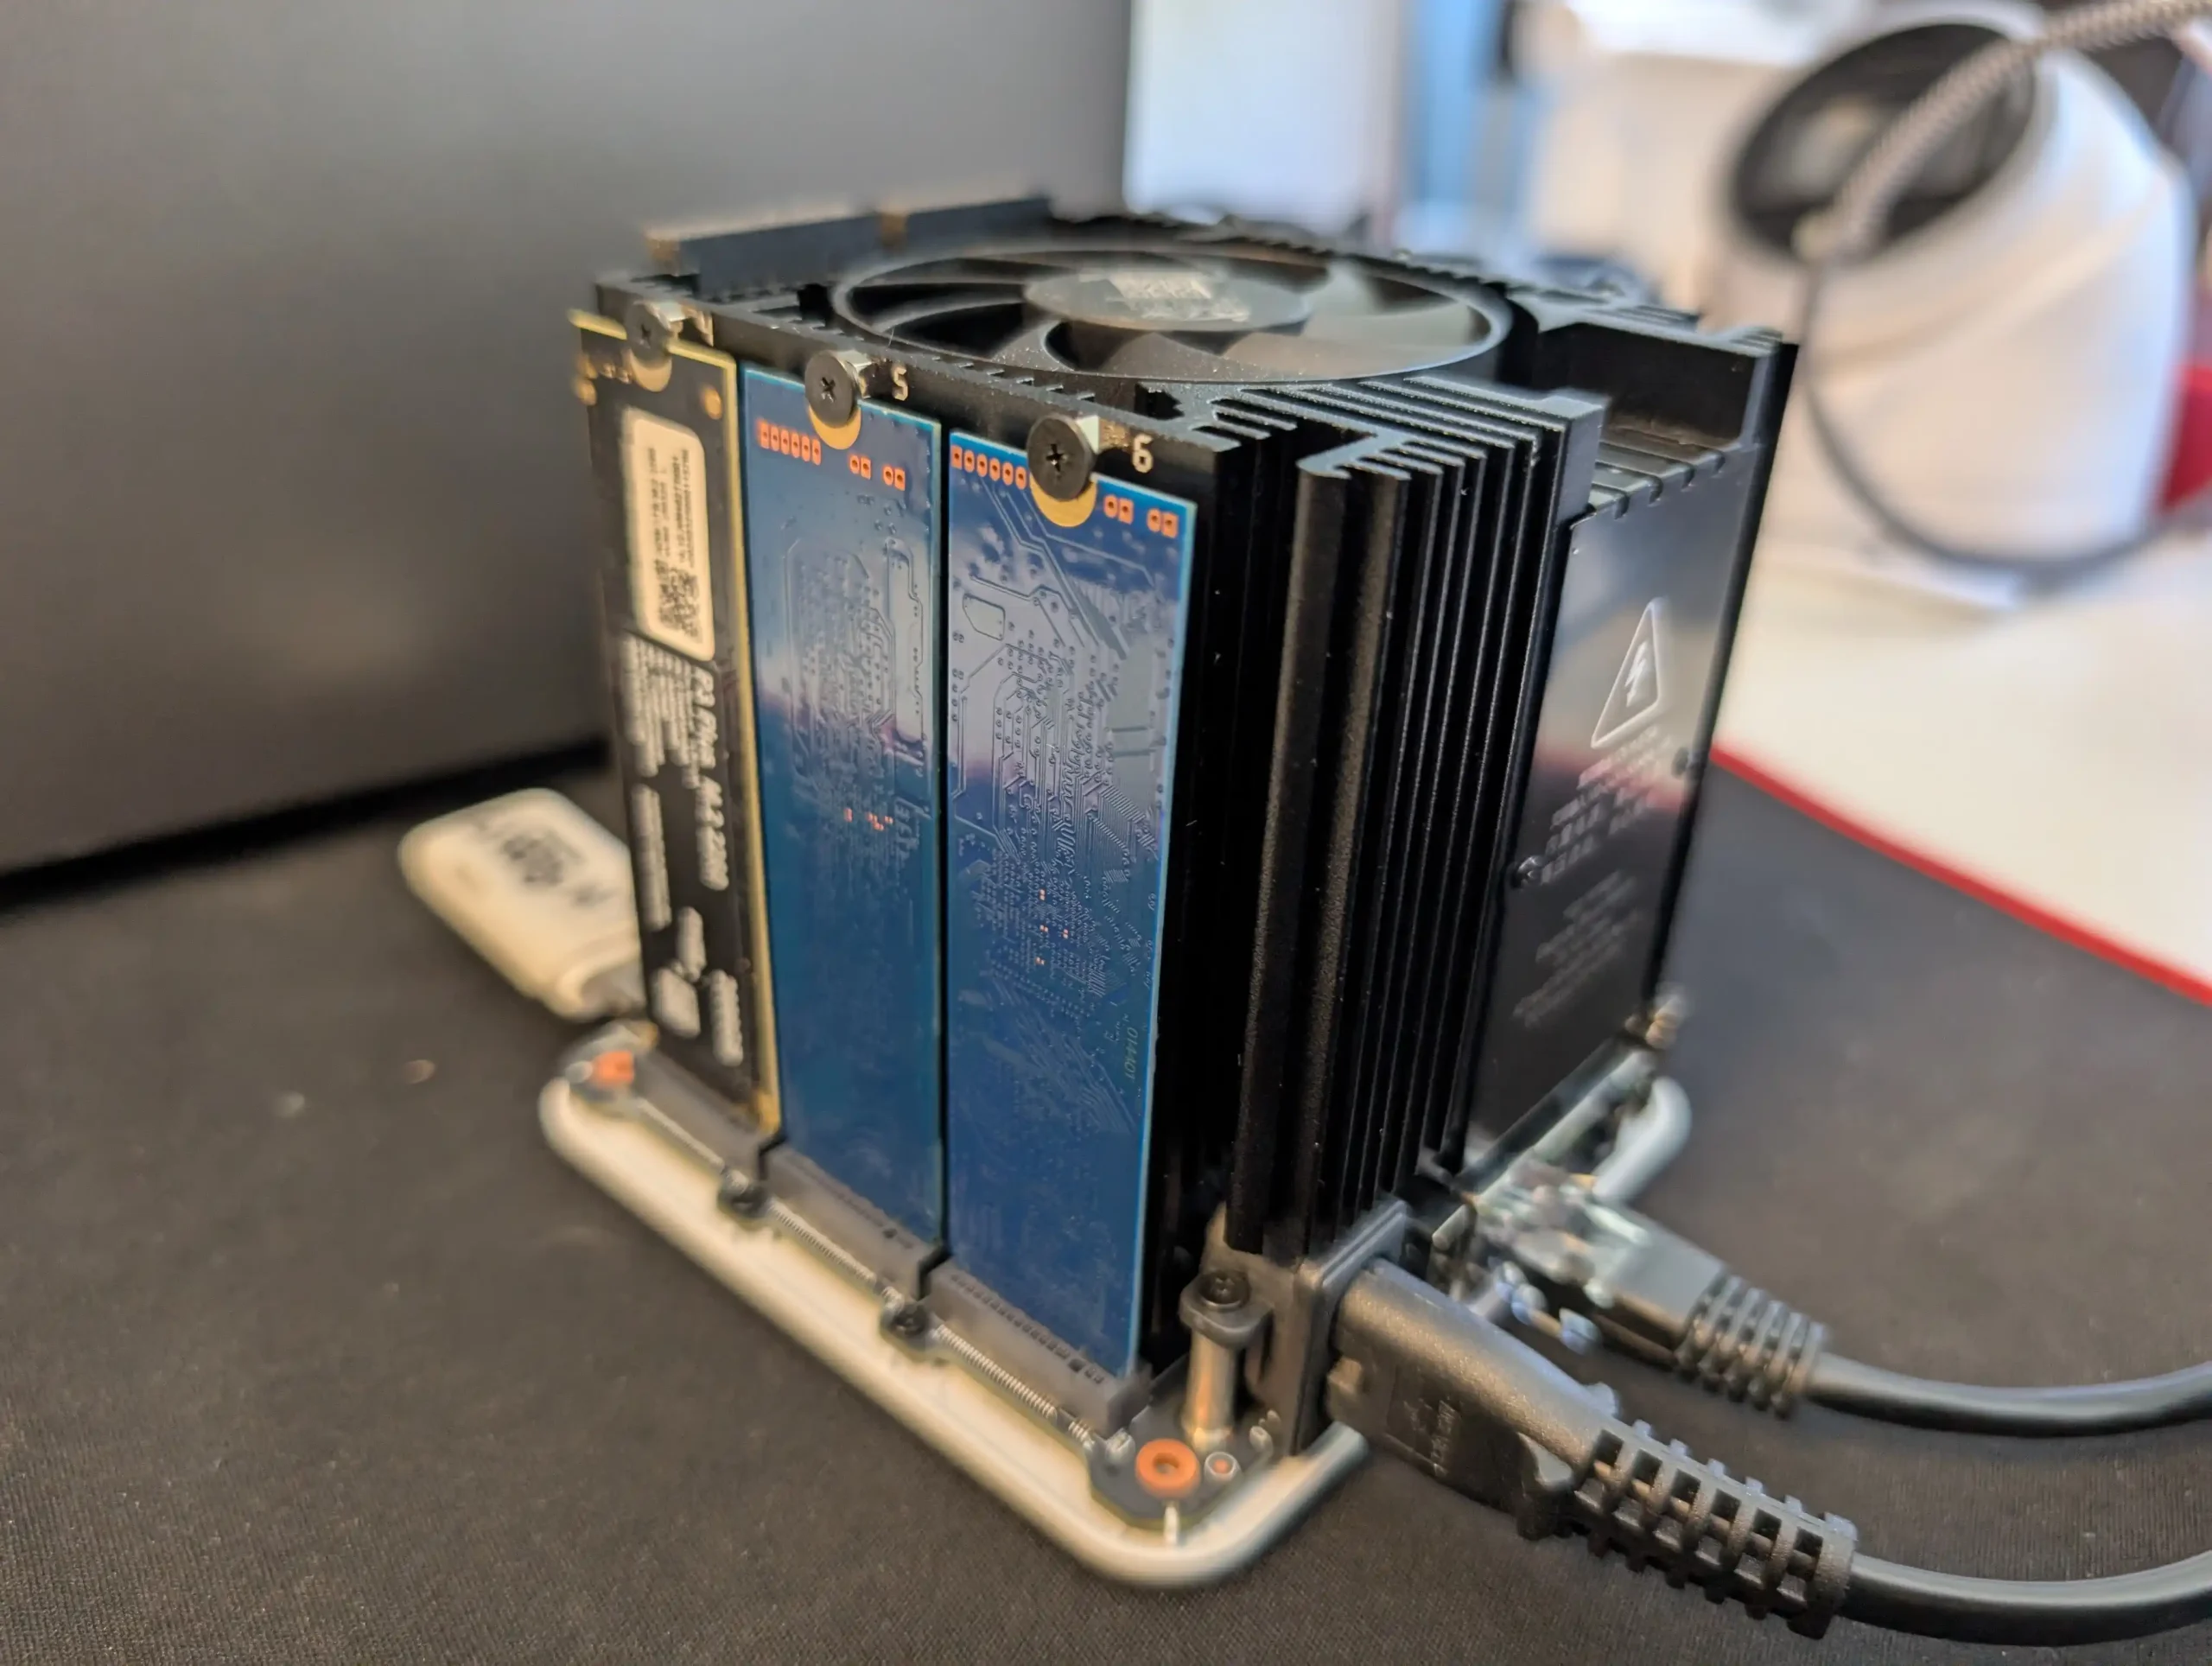
Display output is provided via a single HDMI port located on the rear, which supports resolutions up to 4K at 60Hz. Although display output isn’t central to most NAS workflows, this port enables users to connect the system to a monitor or TV for initial OS installation, dashboard display, or media playback when used with platforms like LibreELEC or Kodi.
However, as noted during hands-on testing, functionality via HDMI may vary depending on the operating system installed—some headless NAS platforms may not fully support graphical output. Nevertheless, for users experimenting with hybrid HTPC/NAS setups or running Linux-based OS variants with a GUI, the HDMI port remains a useful inclusion.
| Port Type | Specification |
|---|---|
| LAN Ports | 2 x 2.5GbE (Intel i226-V) |
| Wi-Fi | Wi-Fi 6 (Intel AX101, M.2 module) |
| Bluetooth | Bluetooth 5.2 |
| USB Ports | 1 x USB 2.0 (rear), 1 x USB 3.2 Gen 2 (front), 1 x USB Type-C 10Gbps (front) |
| HDMI | 1 x HDMI 2.0 (Max 4K @ 60Hz) |
| Power Supply | Internal PSU with 100–240V AC input |
In testing, the Beelink ME Mini demonstrated respectable throughput for a system of its class, especially when factoring in its compact size, low power draw, and passively biased thermal design. Using Unraid and TrueNAS Core for performance benchmarking, sequential read and write speeds from the five PCIe Gen 3 x1 slots averaged around 740MB/s read and 544MB/s write under repeated 1GB test files. These numbers are typical for Gen 3 x1 lanes and reflect near-maximum lane saturation, suggesting minimal internal throttling under standard conditions. The Gen 3 x2 slot, intended for the operating system, provided higher performance—averaging 1.1GB/s read and approximately 960MB/s write when paired with the bundled Crucial P3 SSD.

Transfer speeds between SSDs installed in Gen 3 x1 and Gen 3 x2 slots were tested in both directions and maintained averages of around 590–600MB/s. These figures reflect the limitations of internal bandwidth allocation rather than SSD performance. Even so, for most home NAS scenarios such as 4K media playback, multi-user access to stored documents, or photo libraries, the bandwidth is more than sufficient. It’s worth noting that SSD cooling remained effective during prolonged access, with only modest thermal variation even under full-speed transfers across all six drives.
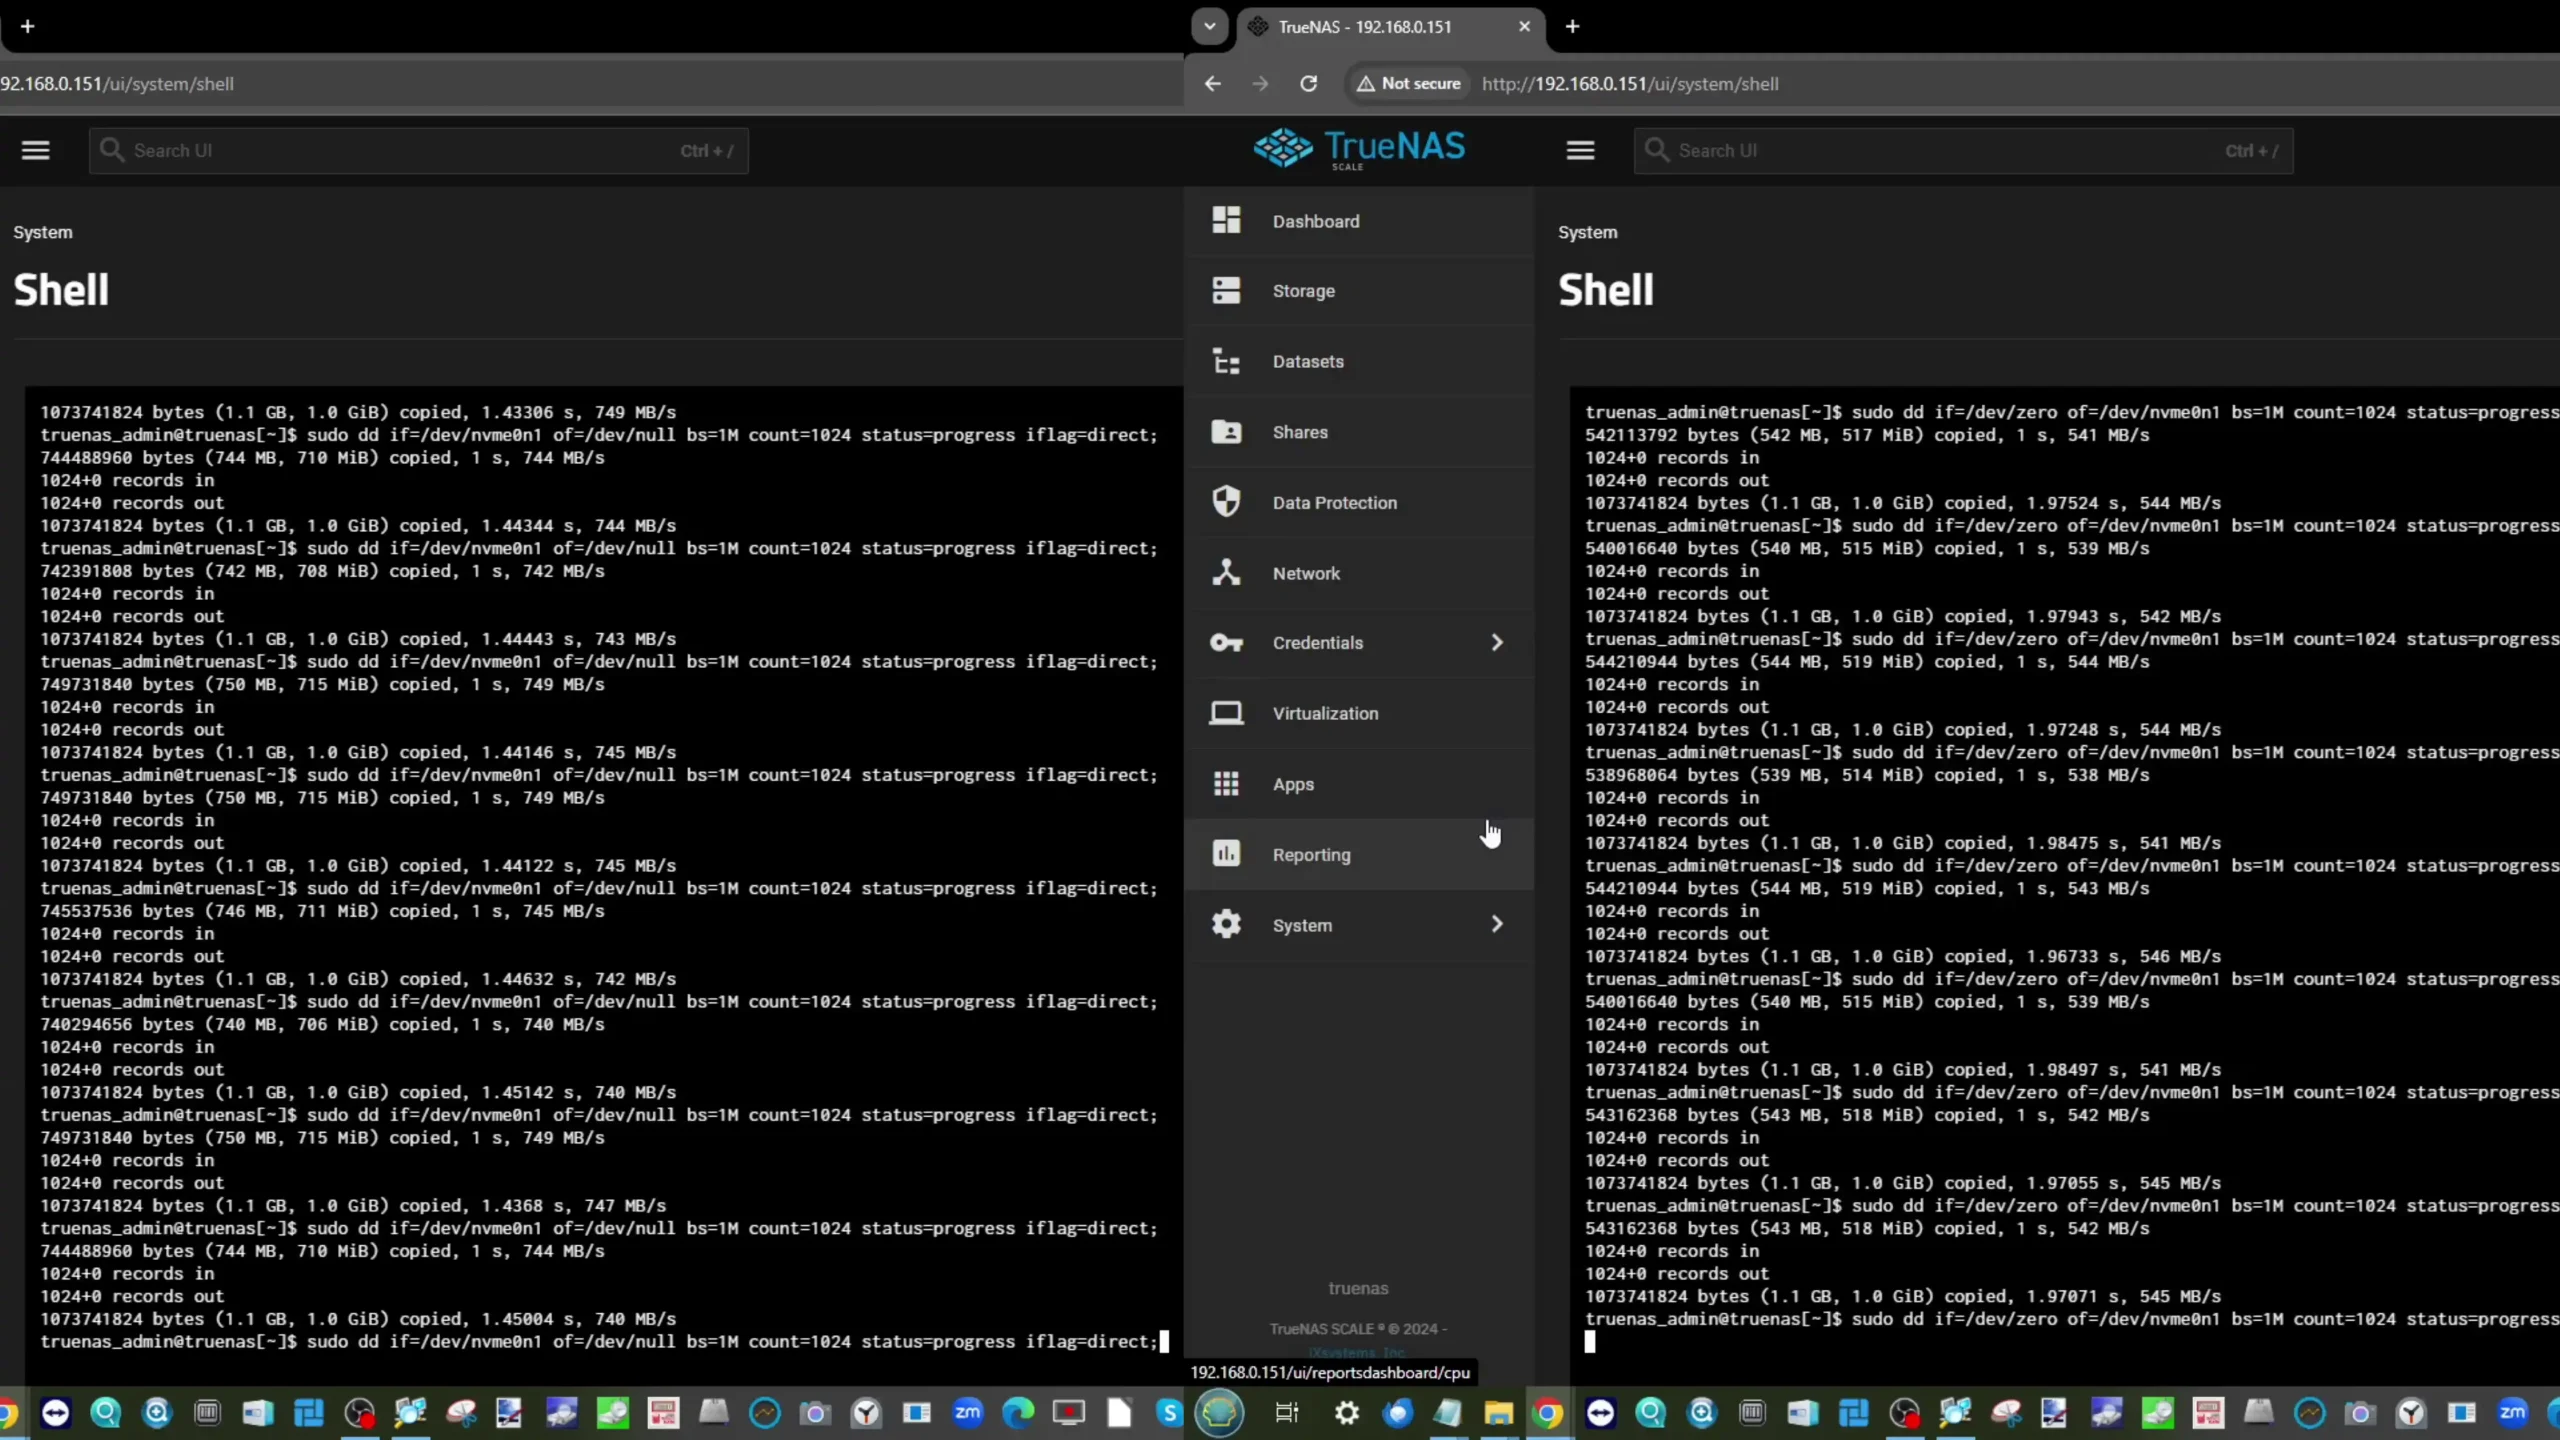
Thermal behavior during sustained load was closely monitored using a HIKMICRO thermal imaging camera. With all six SSDs installed and periodic access maintained over a 24-hour period, temperatures peaked at 48–51°C at the top panel and 58–60°C at the base, where most of the PSU and networking activity is concentrated. Running the same tests with the case removed saw temperatures settle slightly lower—around 49–51°C across the board—confirming the effectiveness of the internal heatsink and fan assembly. However, the bottom of the unit exhibited more thermal accumulation due to the lack of active ventilation underneath, pointing to an area for potential design refinement.
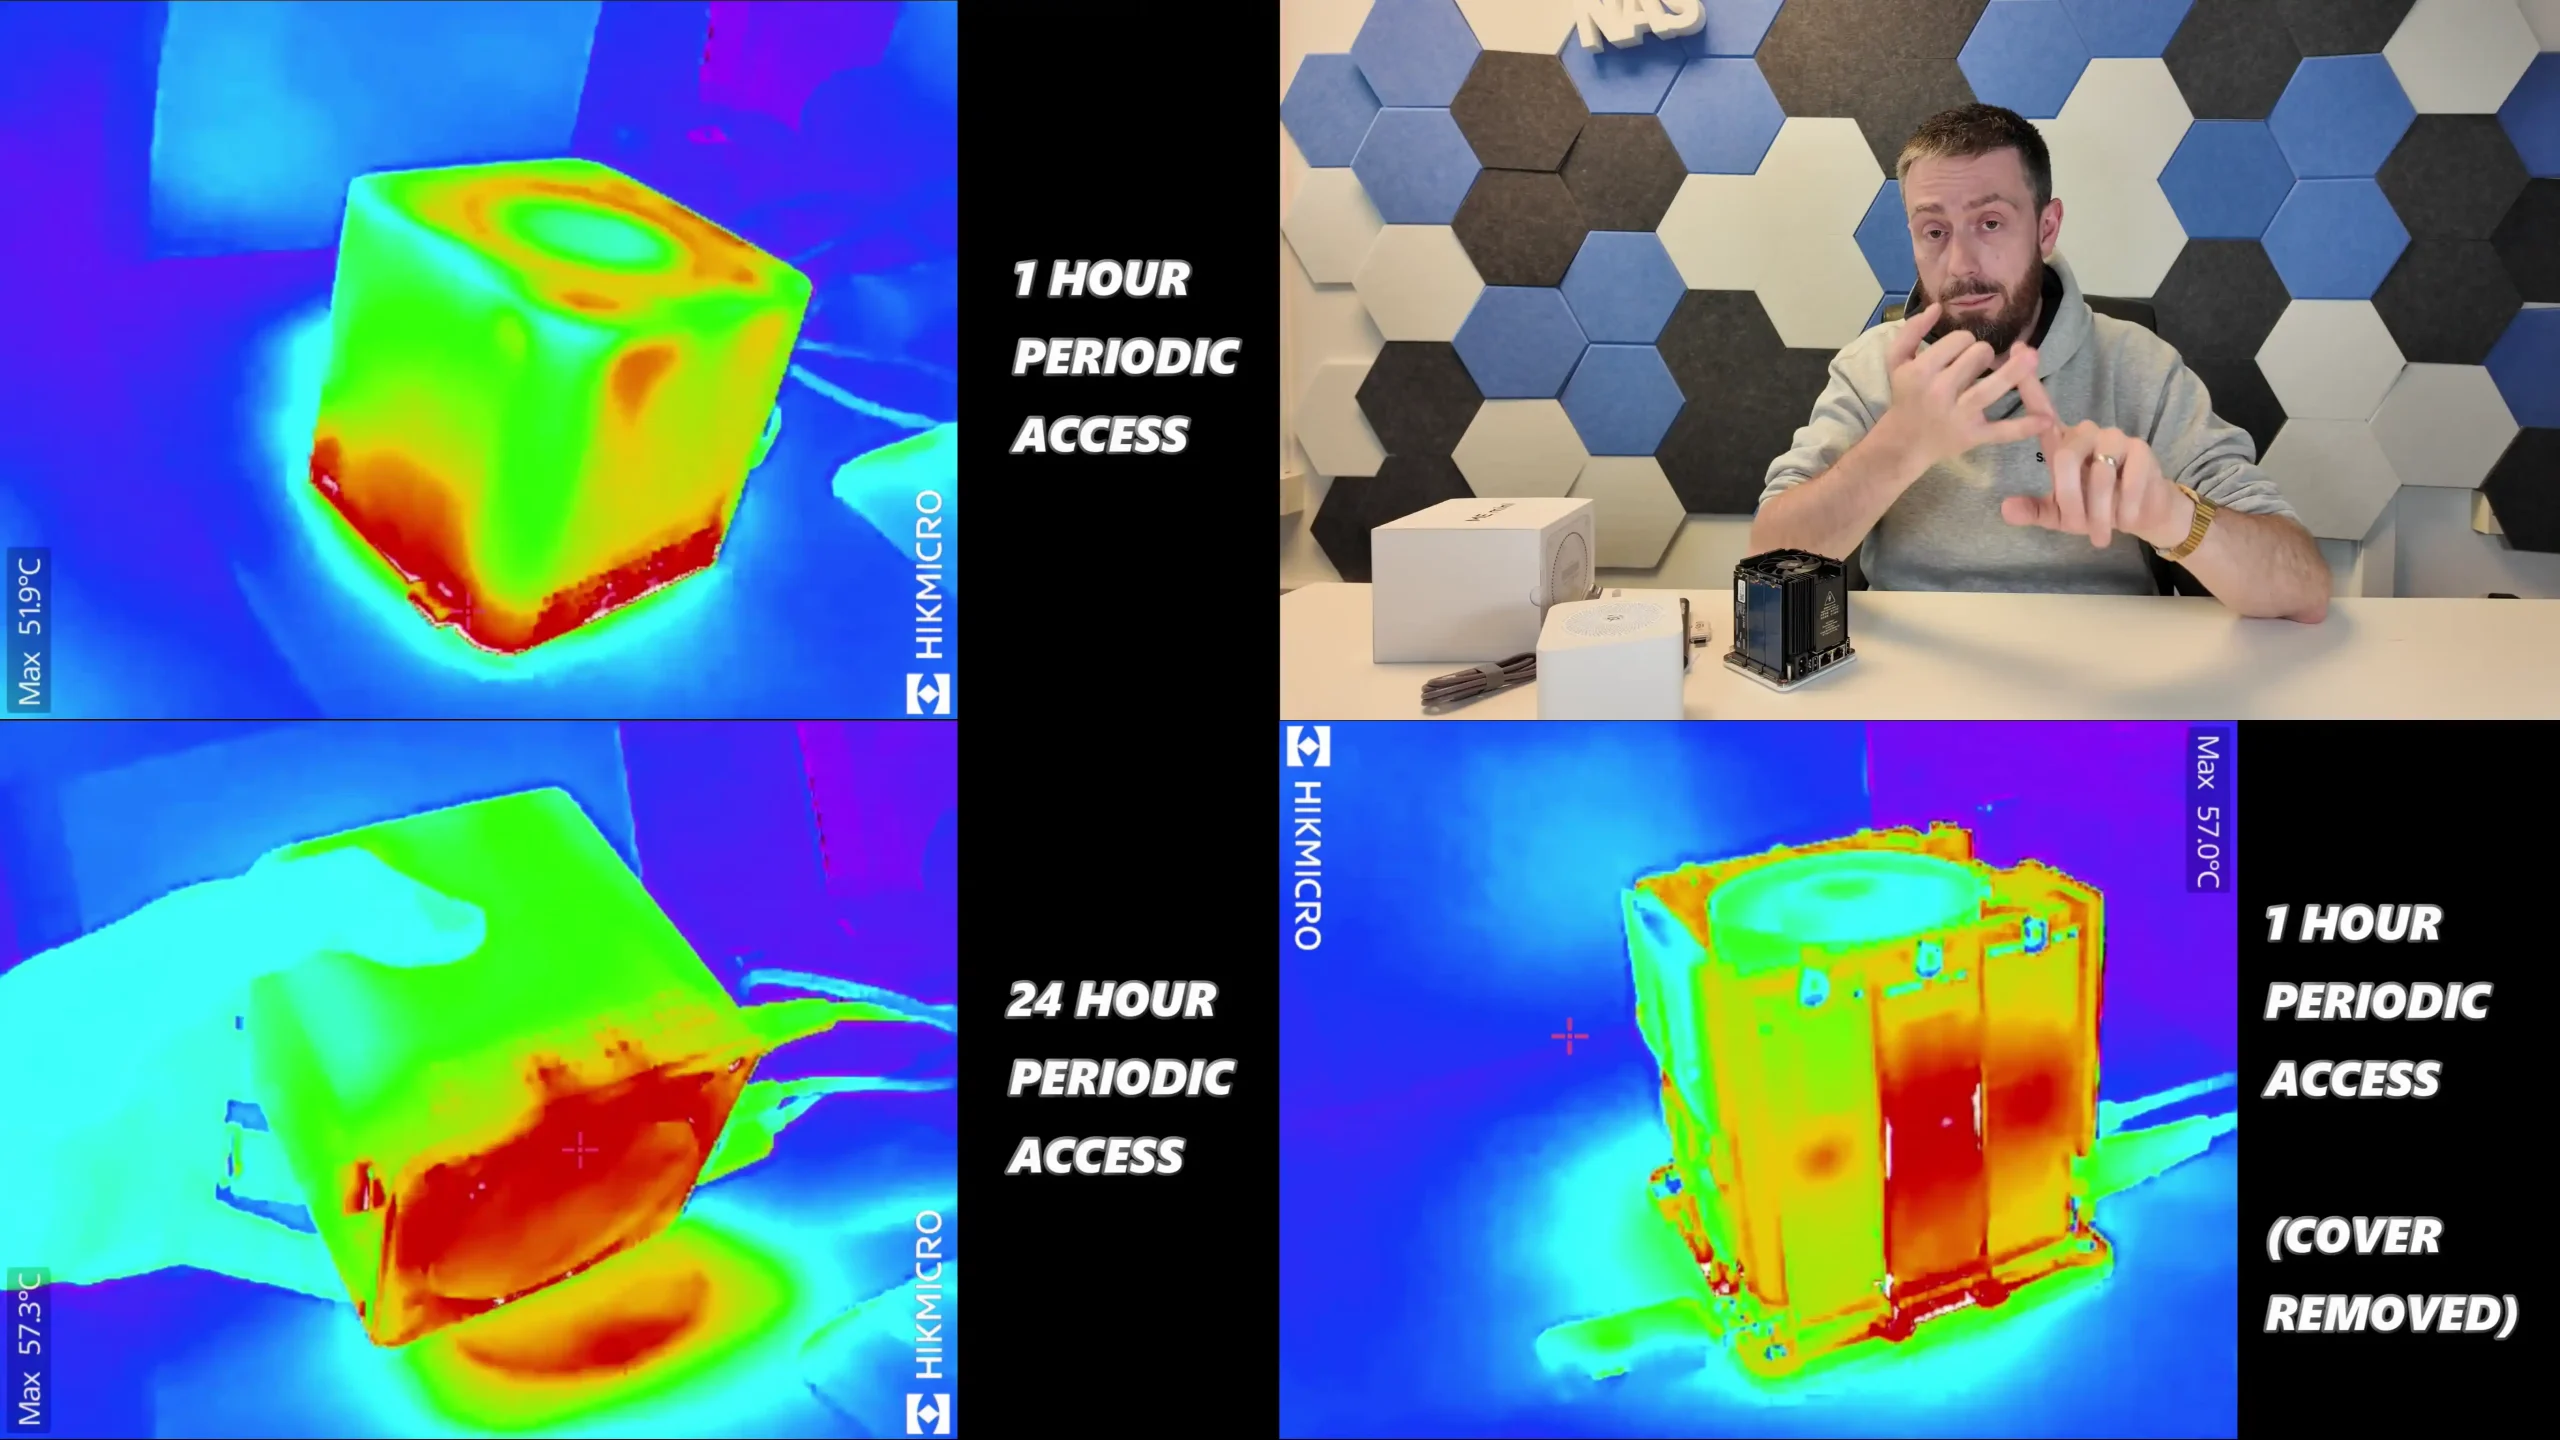
In terms of power consumption and noise, the ME Mini is especially frugal. With no SSDs installed, the device idled at 6.0–6.9W. When populated with six SSDs and left idle, it drew approximately 16.9W. During peak activity—dual LAN ports active, CPU load above 70%, and all drives in use—power draw peaked between 28W and 31W. These are competitive numbers even among ARM-based NAS devices, and particularly impressive for an x86-based solution with full M.2 NVMe storage.
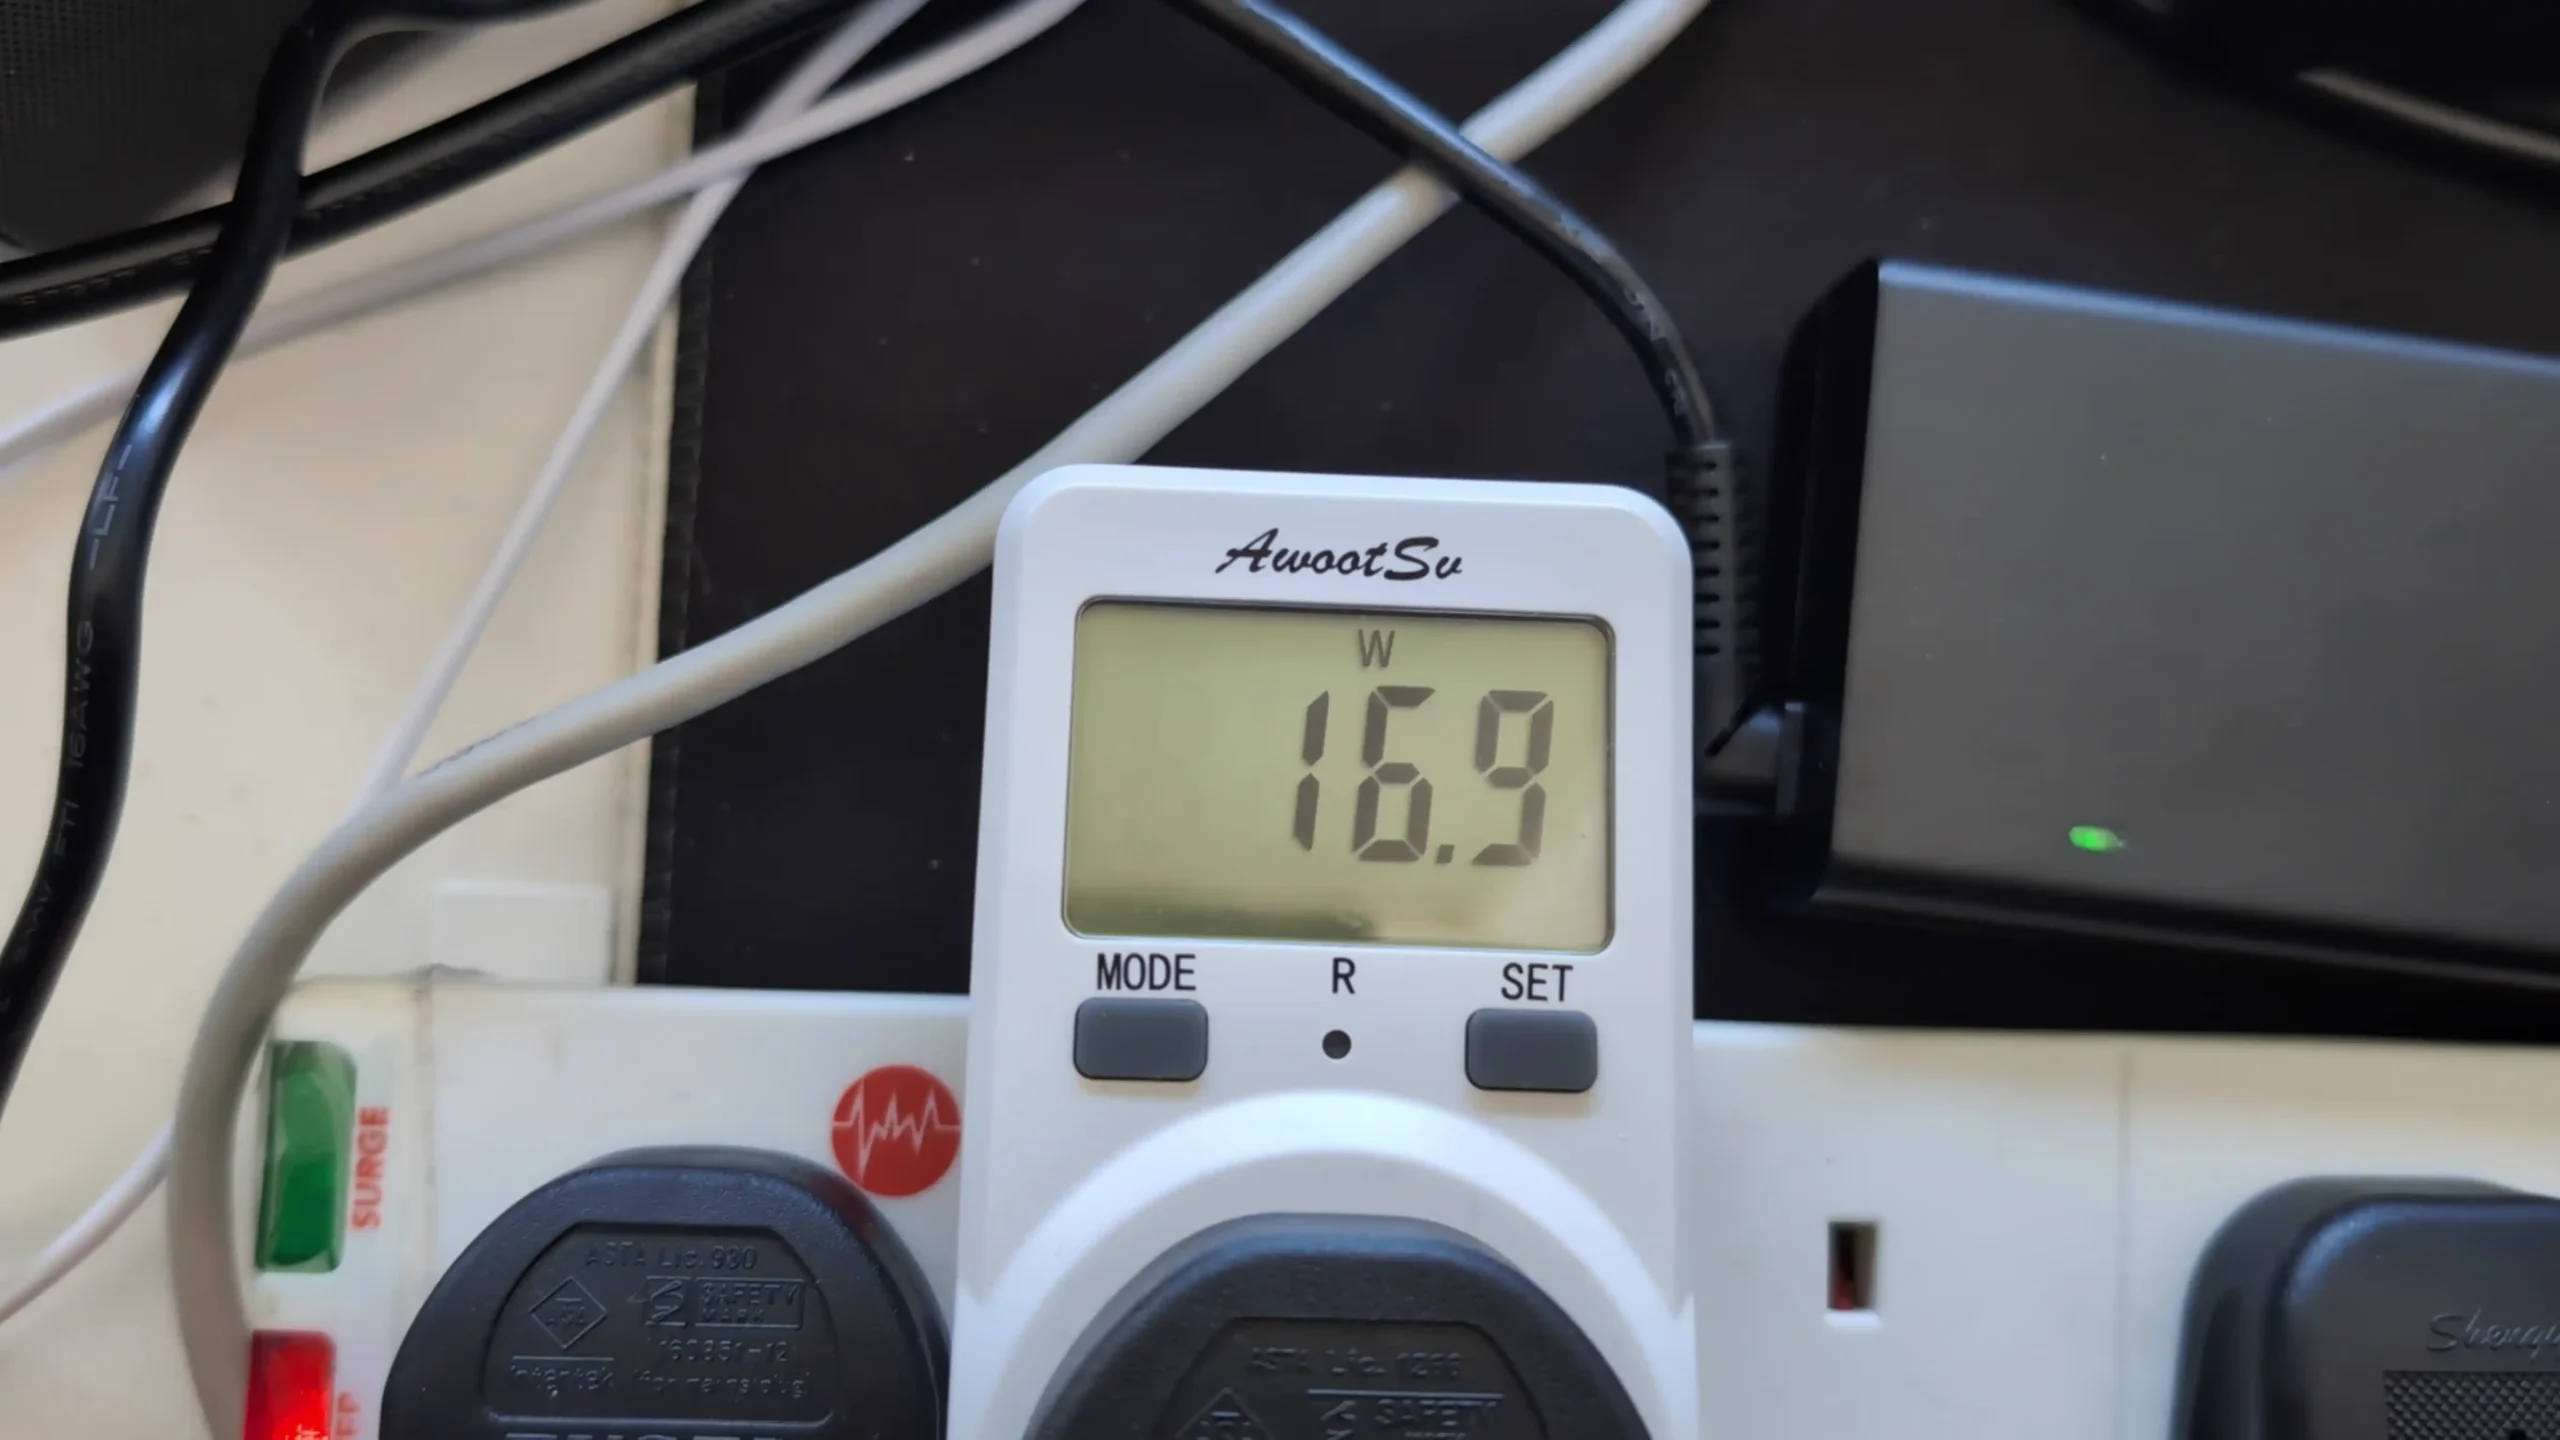 |
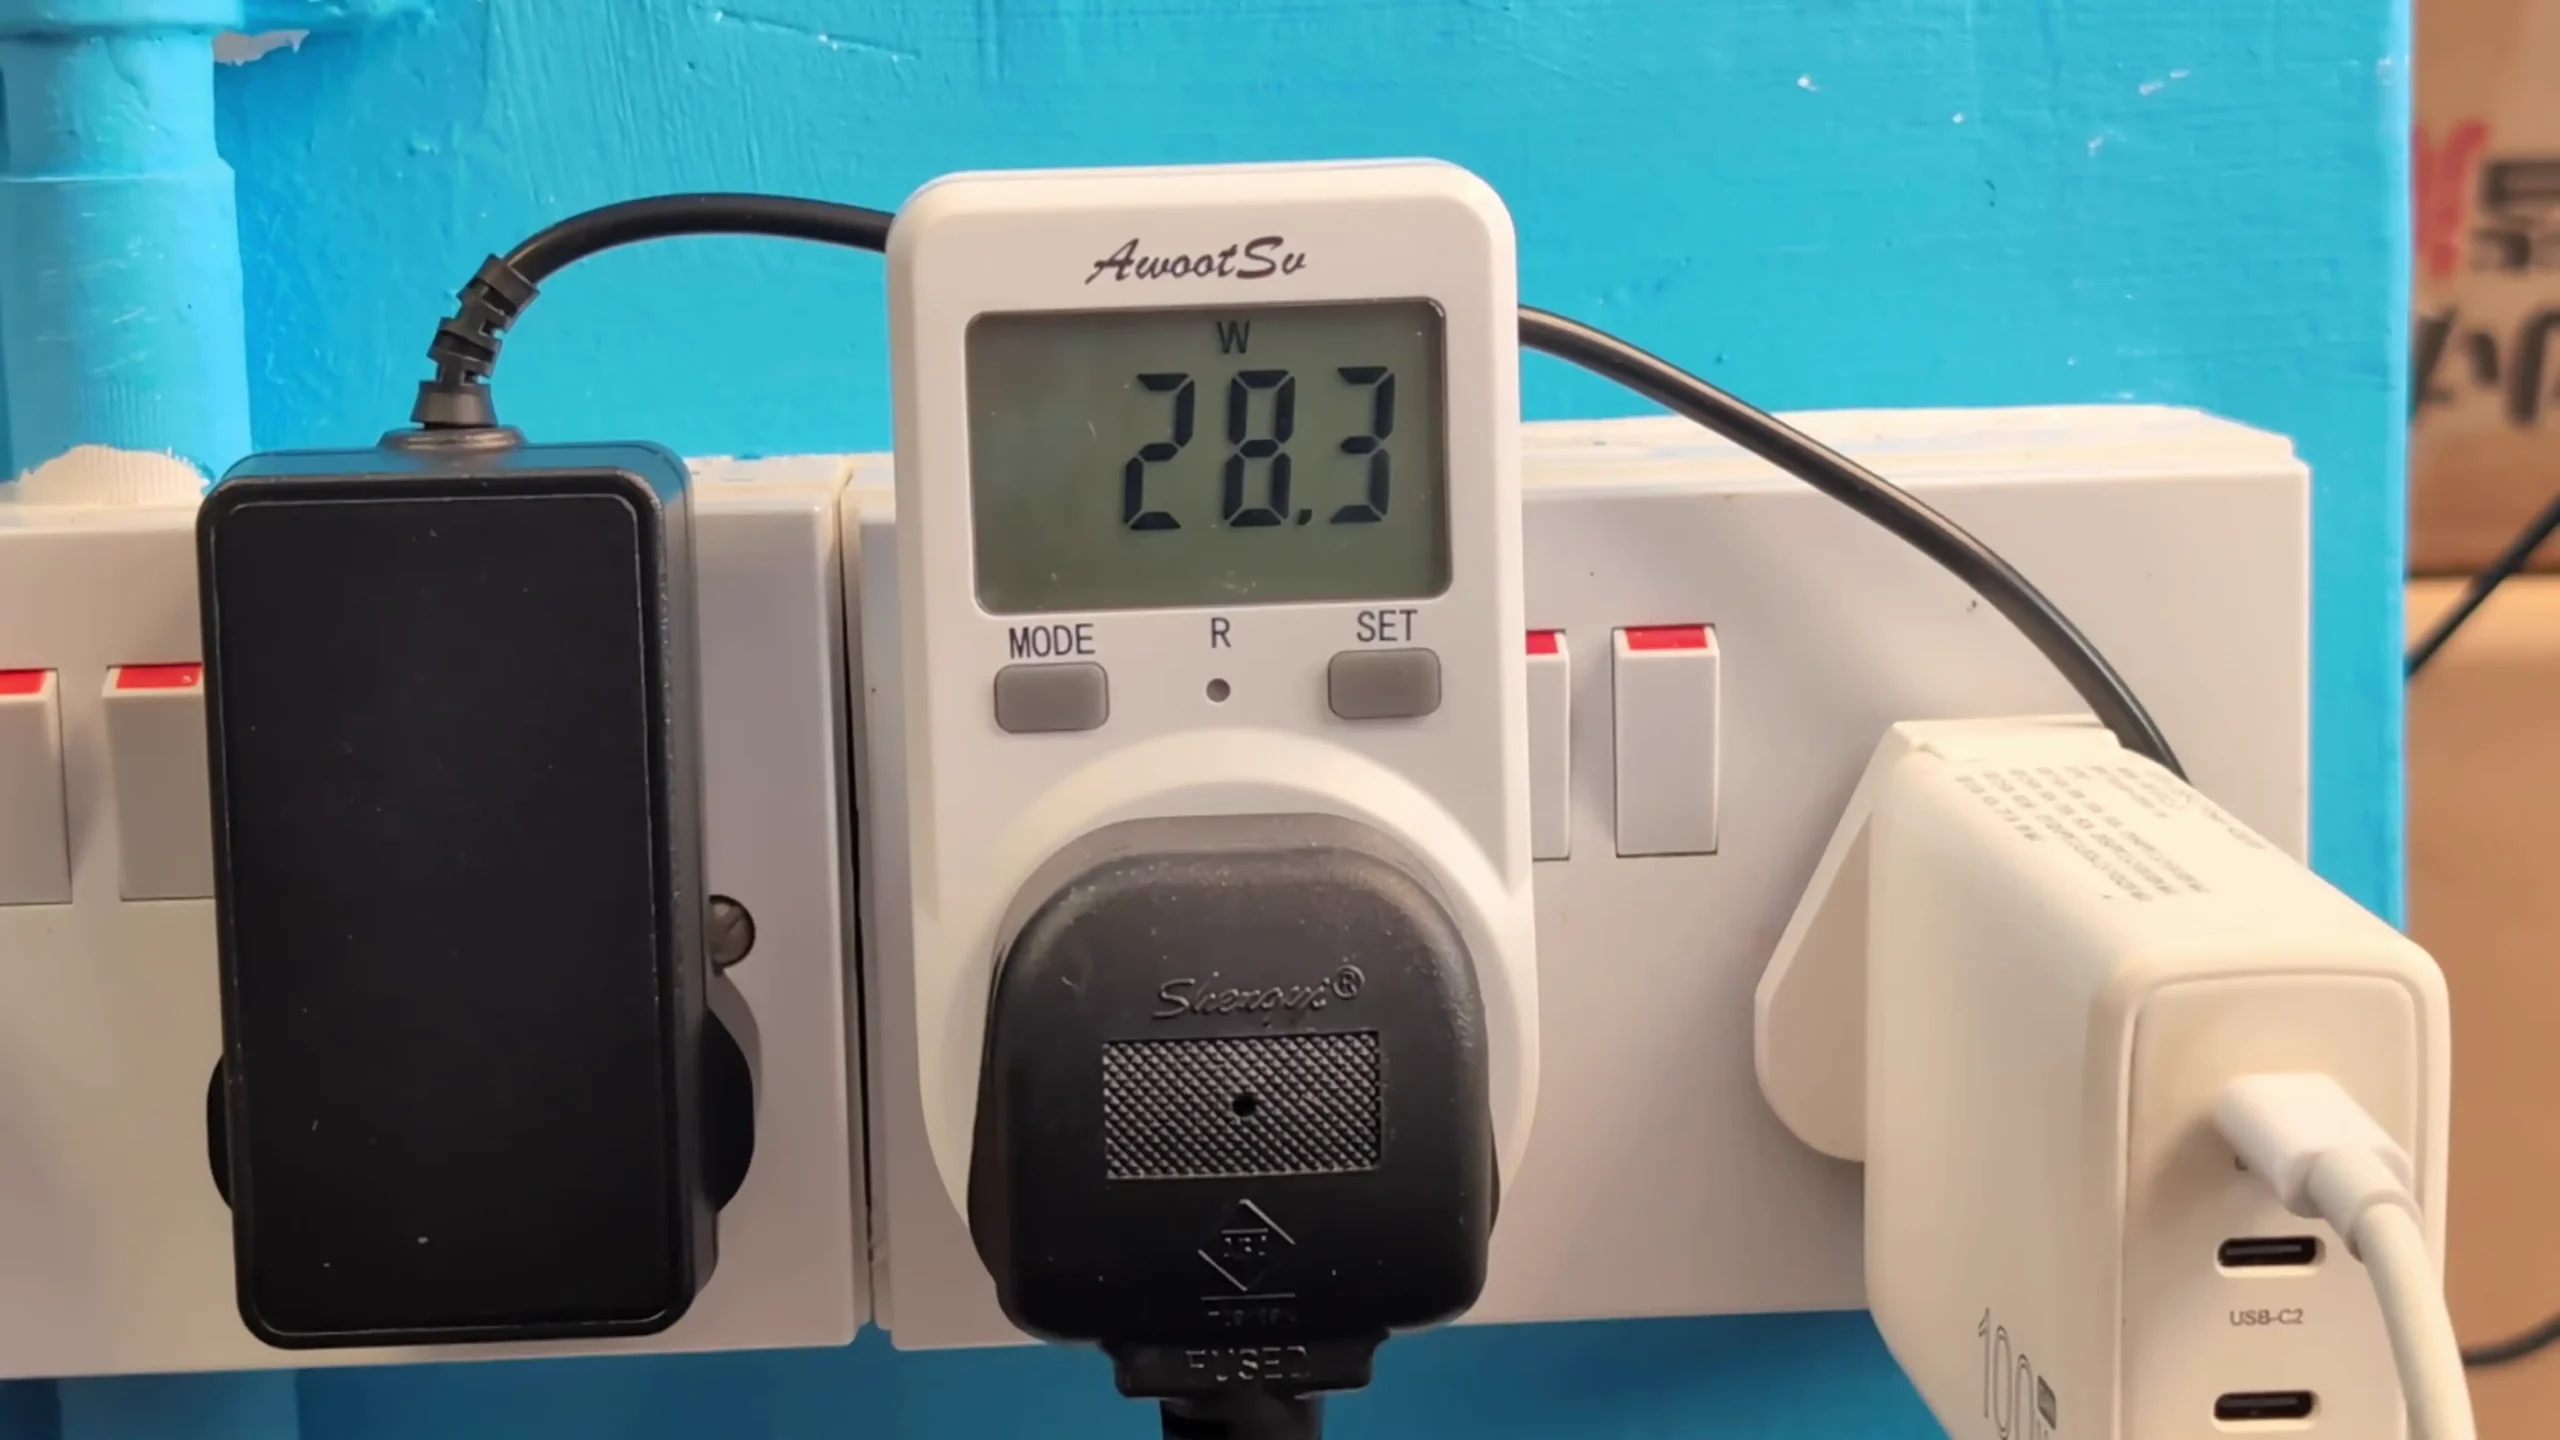 |
Acoustic output was also controlled, with idle operation measured at 31–34 dBA and full load peaking at just under 40 dBA—quiet enough for placement in shared living spaces without distraction.
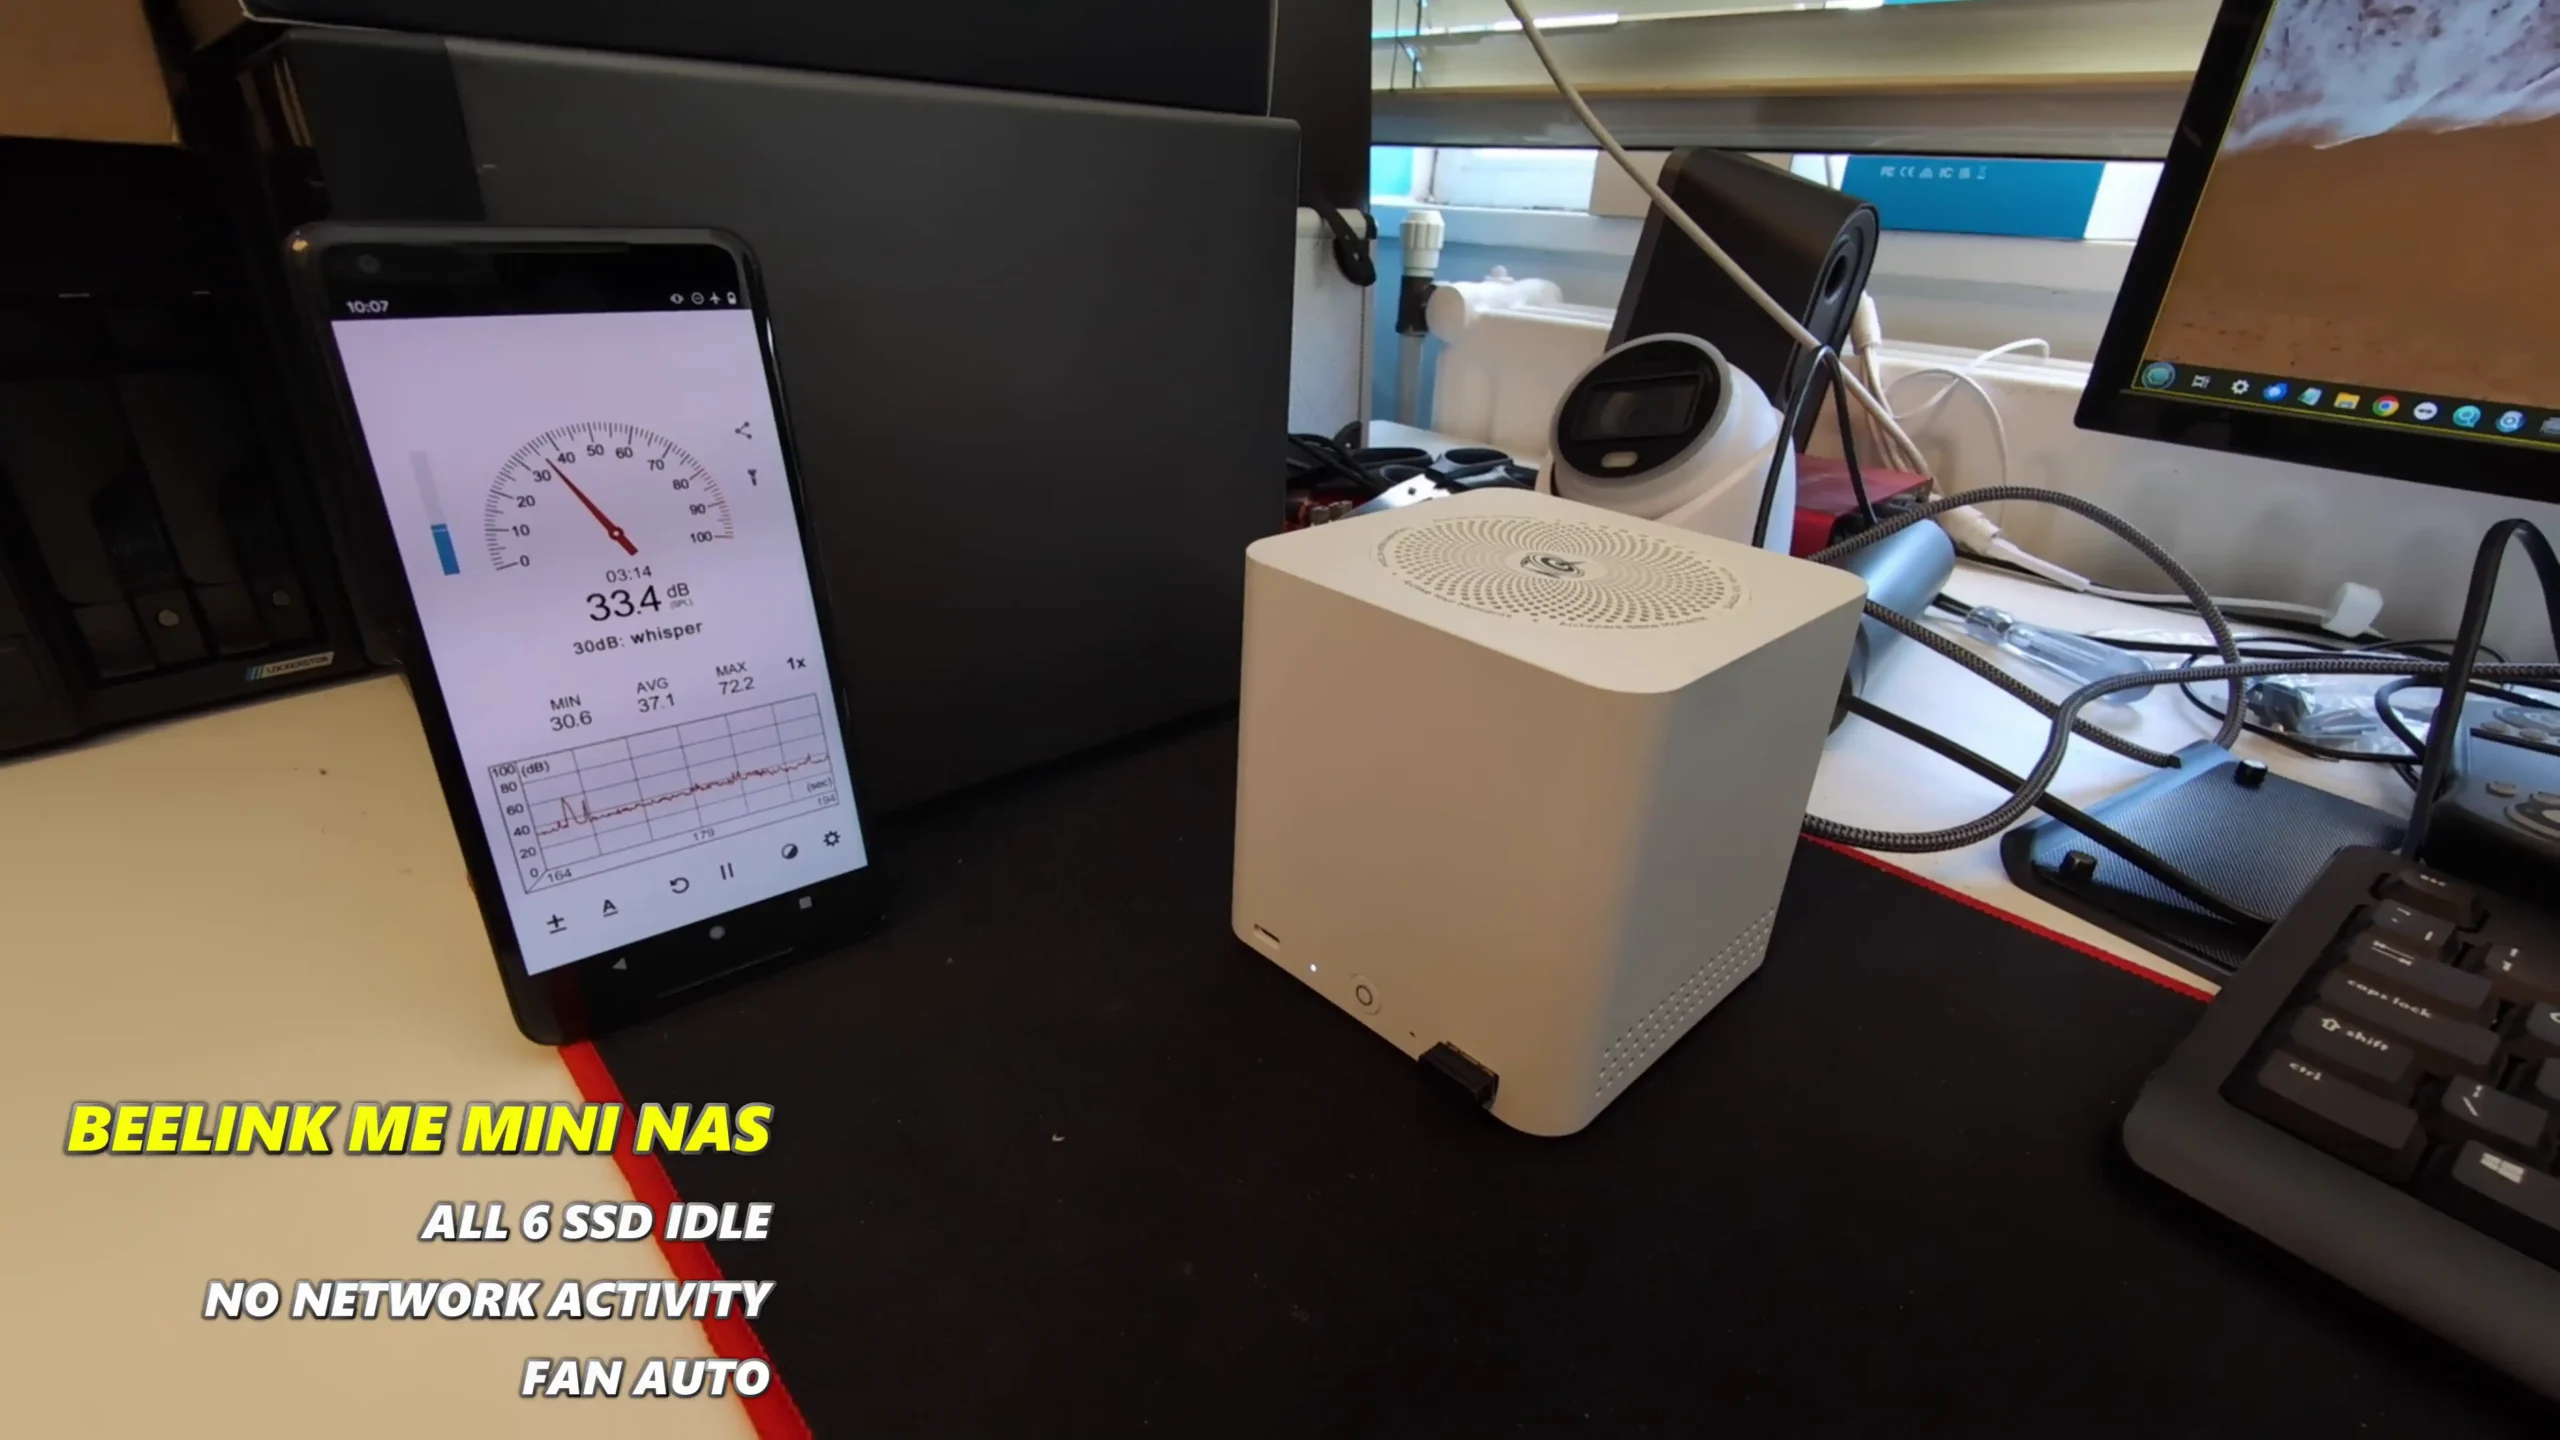 |
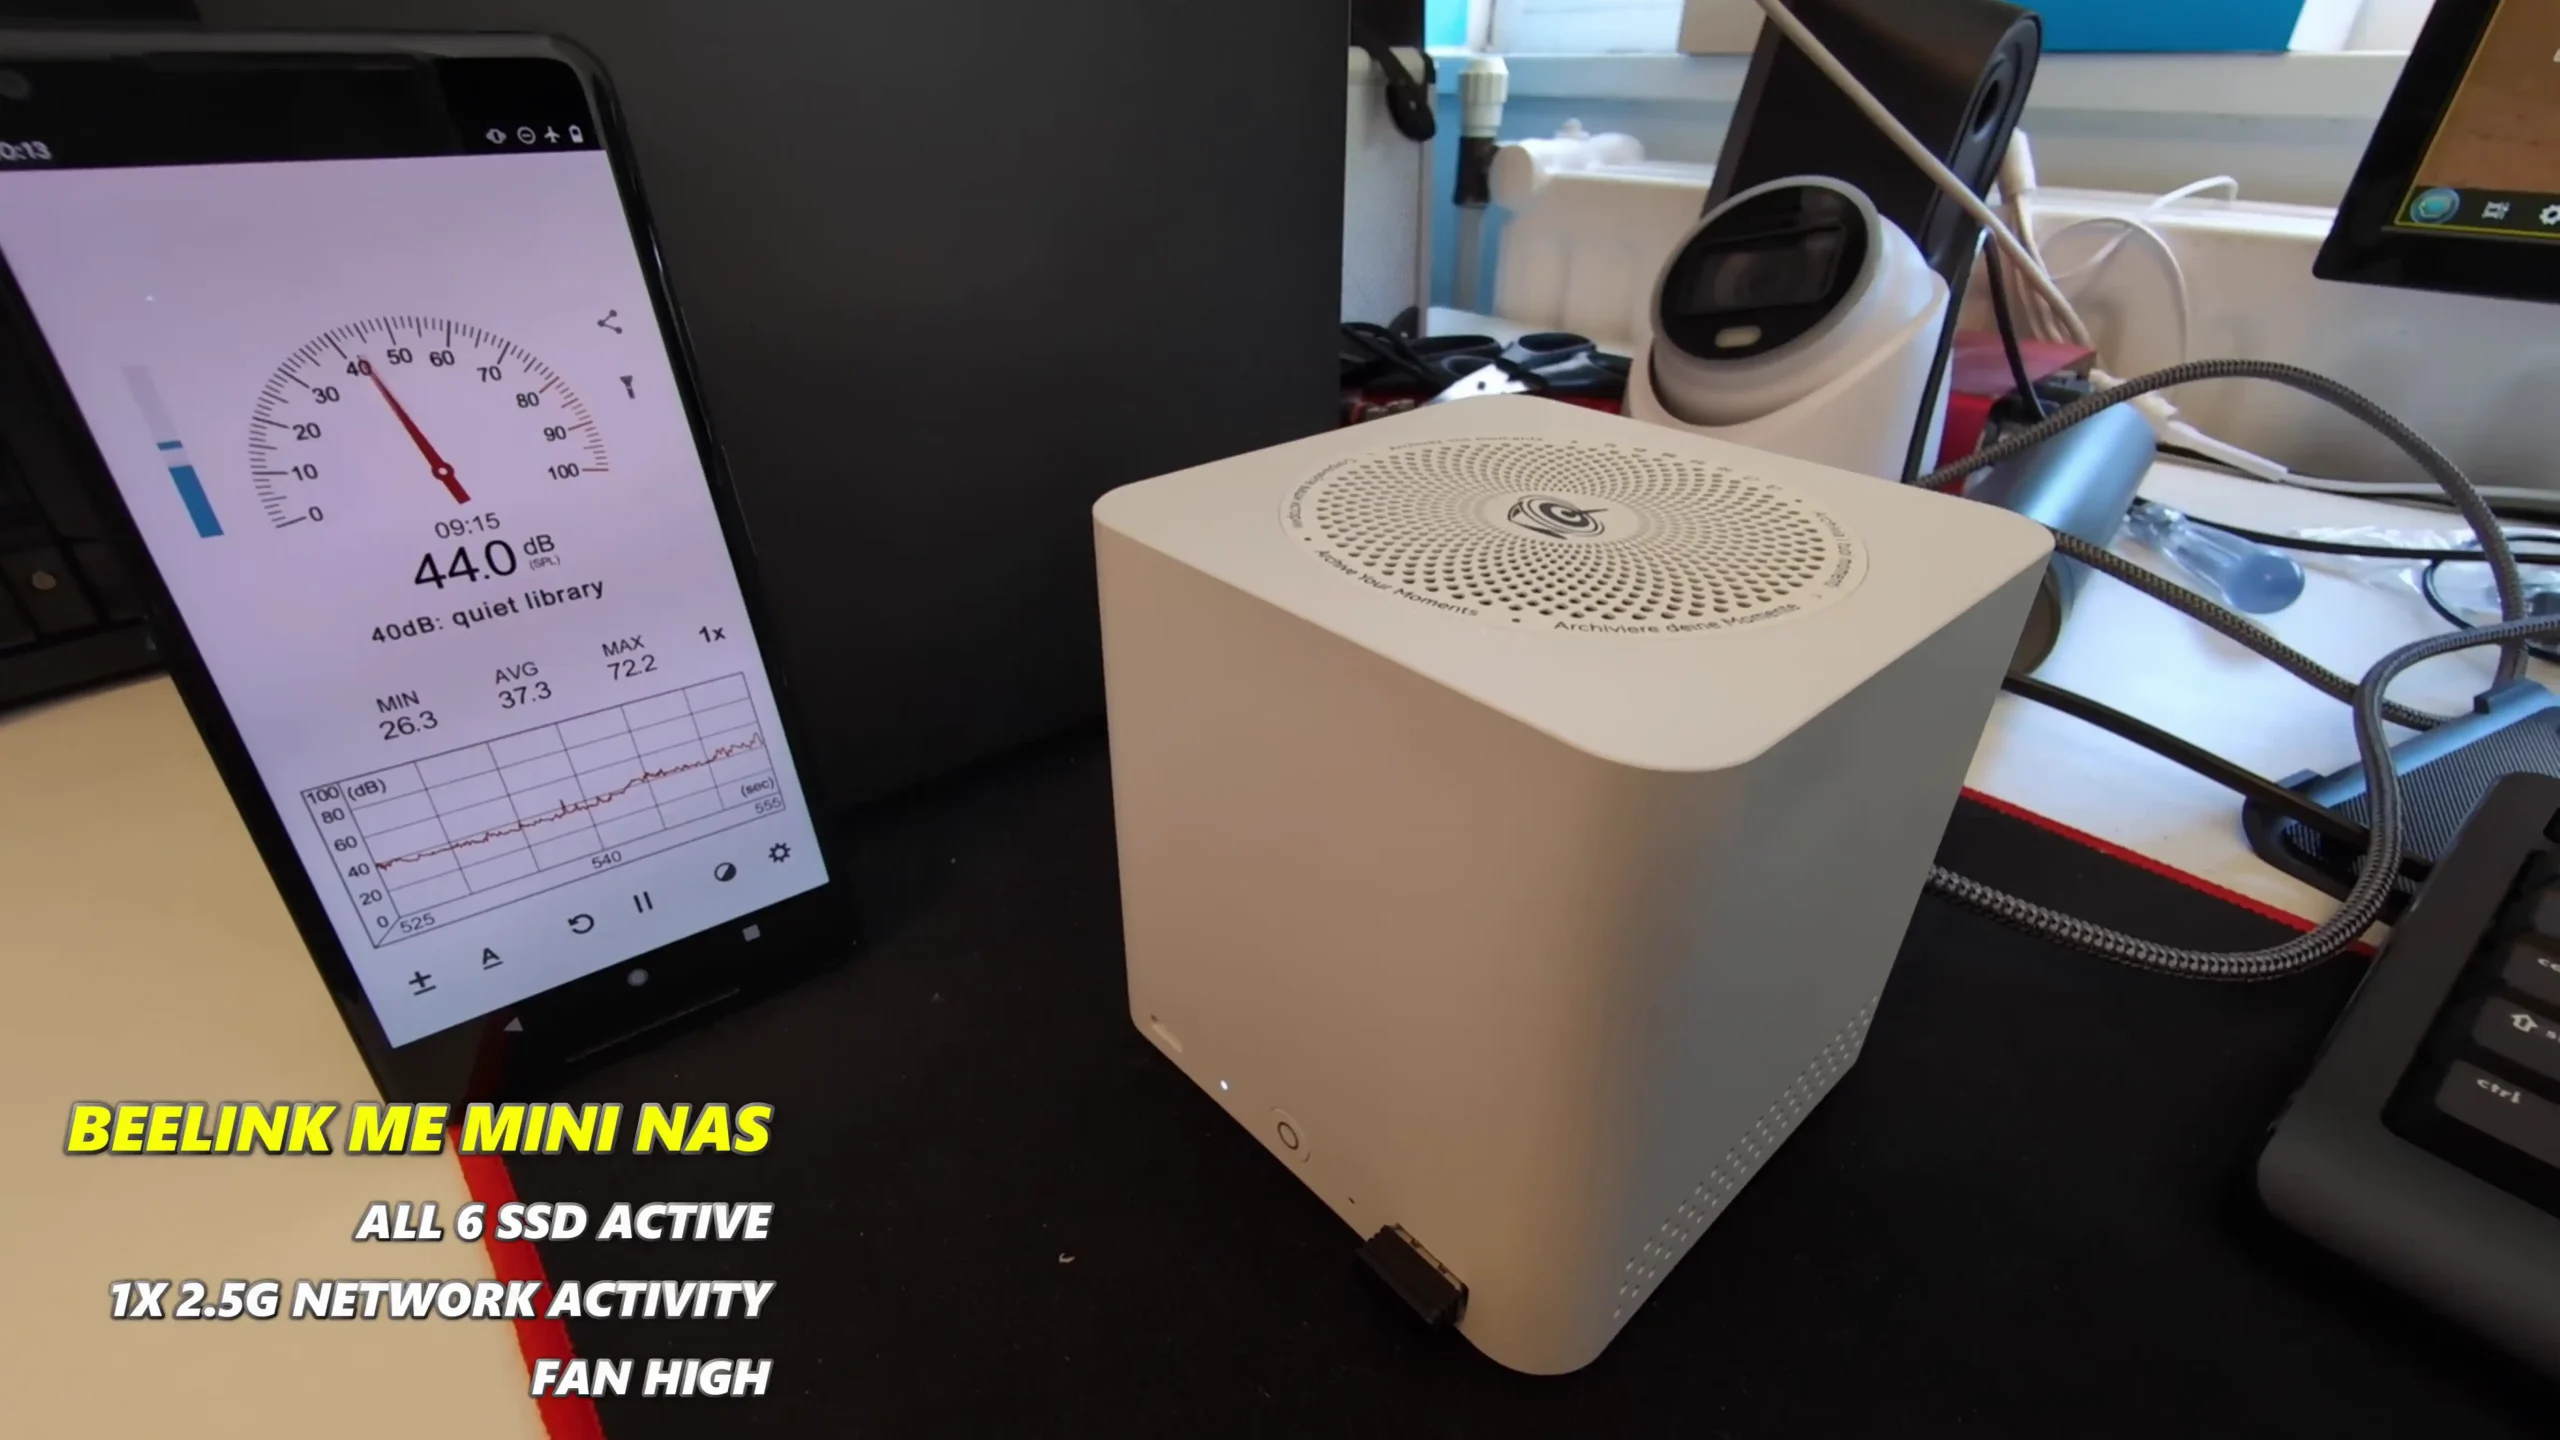 |
While performance is clearly limited by the Gen 3 x1 interface speeds on most slots, the device’s thermal and power efficiency arguably matter more for its intended audience. This NAS isn’t designed for high-throughput, multi-client virtualization tasks or heavy 10GbE video editing pipelines. Instead, it excels in delivering balanced, stable, and low-noise performance across general-purpose NAS workloads. For users building a Plex server, family backup archive, soft router, or even an experimental home lab appliance, the ME Mini offers just enough headroom to handle real-world demands without overwhelming complexity or cost.
| Test Scenario | Result/Reading |
|---|---|
| Read Speed (Gen 3 x1) | ~740MB/s |
| Write Speed (Gen 3 x1) | ~544MB/s |
| Read Speed (Gen 3 x2) | ~1.1GB/s |
| Write Speed (Gen 3 x2) | ~960MB/s |
| Inter-SSD Transfer | ~590–600MB/s |
| Idle Power Draw (No SSDs) | 6.0–6.9W |
| Idle Power Draw (6 SSDs) | 16.9W |
| Peak Load Power (Full Access) | 28–31W |
| Idle Noise Level | 31–34 dBA |
| Load Noise Level | 37–40 dBA |
| Avg. Top Panel Temp (Loaded) | 48–51°C |
| Avg. Bottom Panel Temp (Loaded) | 58–60°C |
The Beelink ME Mini NAS delivers an uncommon blend of size, functionality, and efficiency in a market segment often dominated by larger, louder, and less integrated alternatives. It is not designed to compete with traditional enterprise-grade NAS devices or modular, scalable solutions for prosumers. Instead, its strengths lie in targeting the needs of home users who want a quiet, energy-efficient storage solution that is easy to deploy, aesthetically unobtrusive, and capable of handling daily tasks such as media streaming, file backup, or soft routing. The inclusion of six M.2 NVMe SSD slots—paired with a Gen 3 x2 system slot—offers a rare level of expansion in such a small enclosure. The integration of an internal PSU, silent fan-assisted cooling, and a surprisingly effective thermal design are thoughtful touches that differentiate it from the majority of DIY NAS mini PCs.
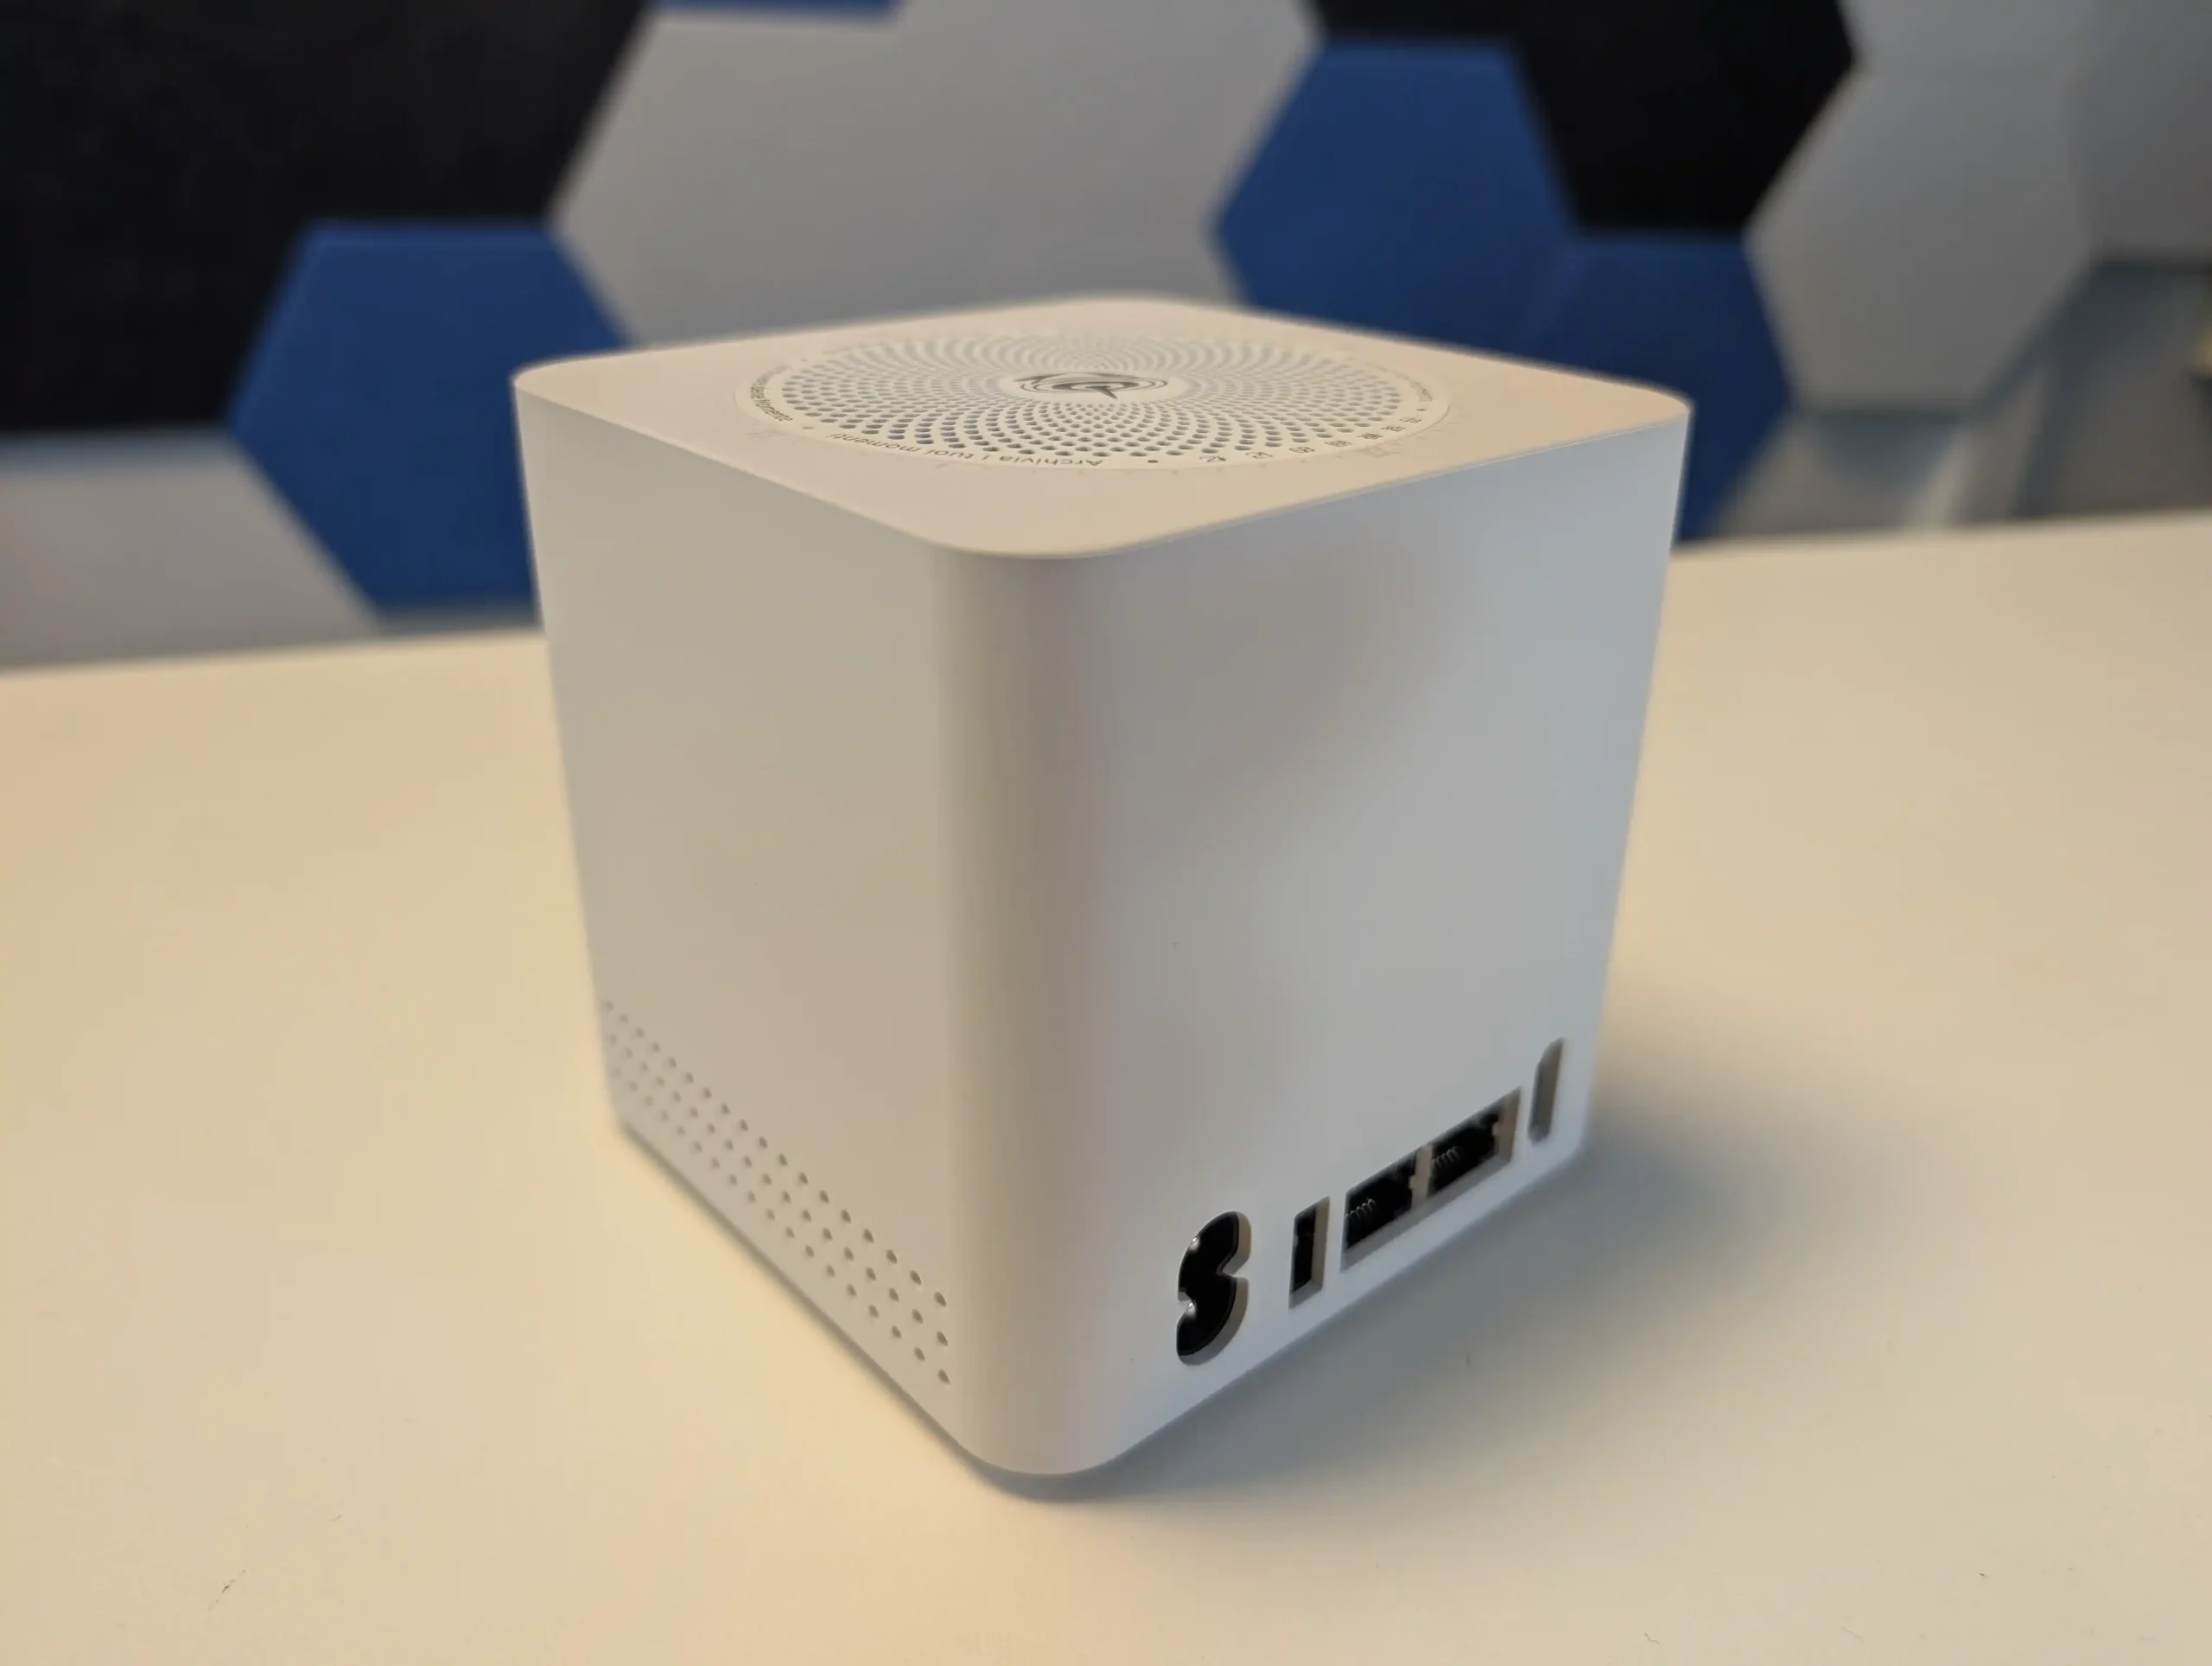 |
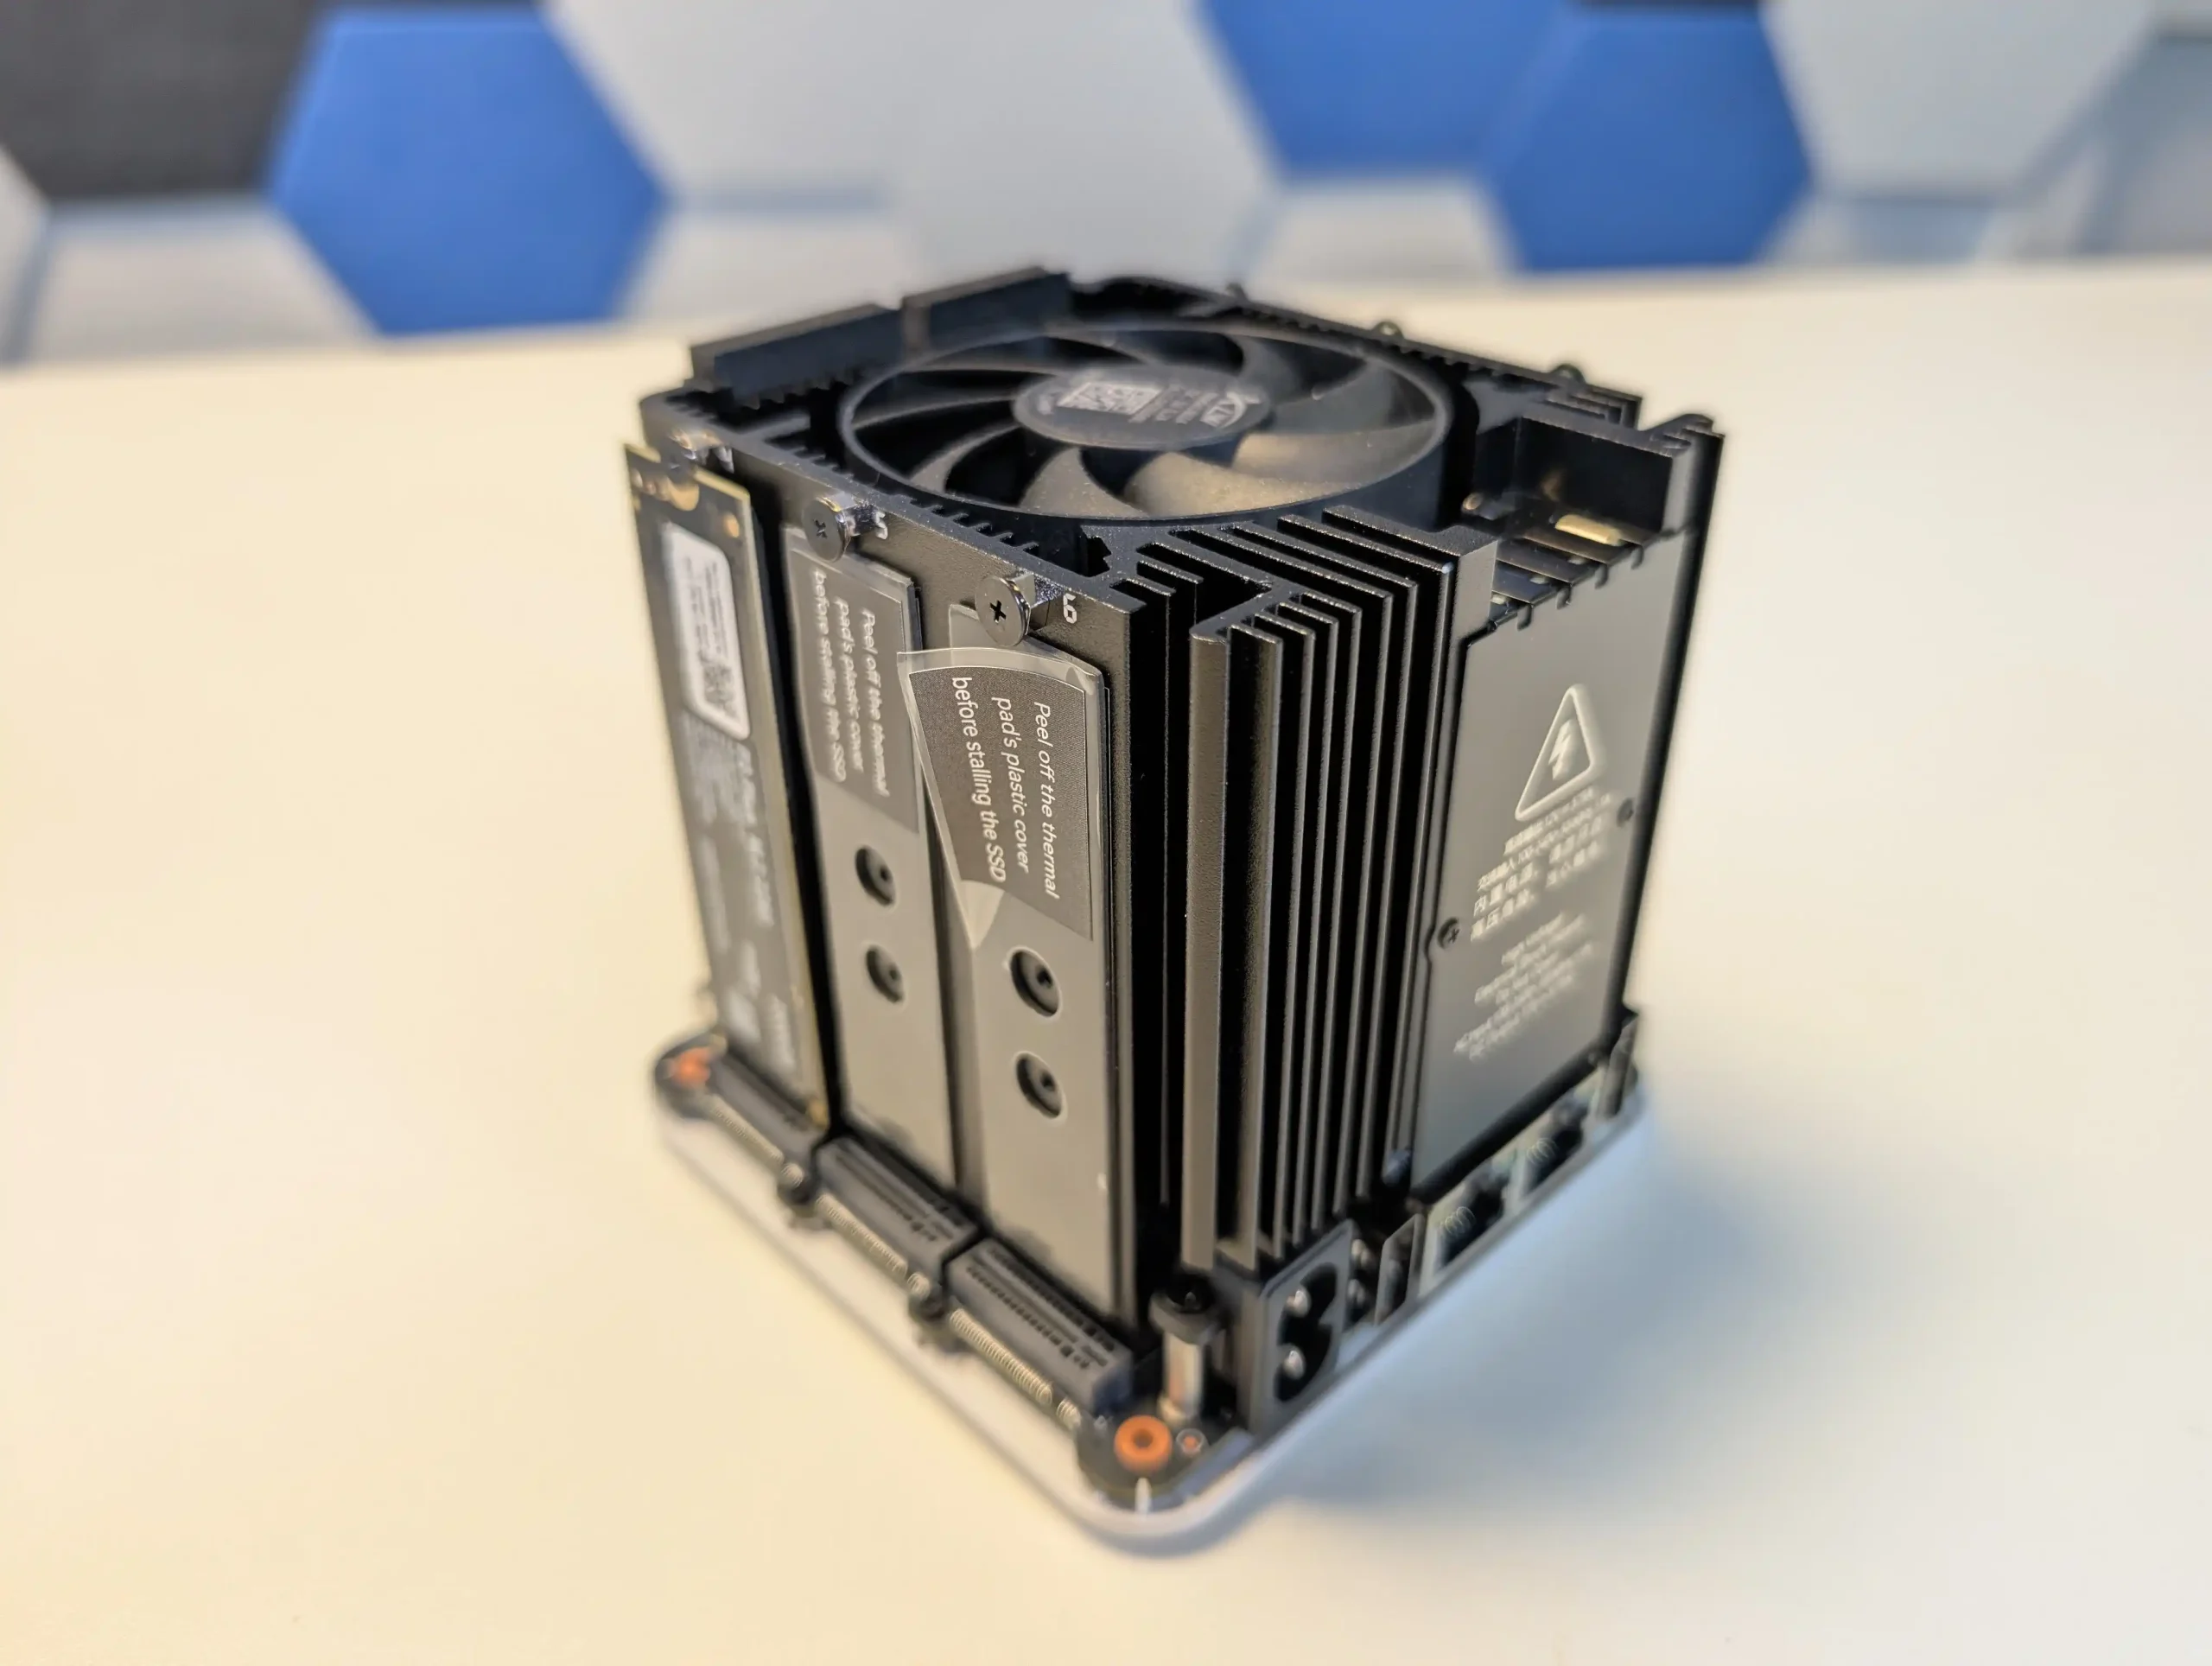 |
That said, it is not without limitations. The memory is non-upgradable, thermal accumulation at the base suggests room for improvement, and bandwidth ceilings imposed by Gen 3 x1 lanes will constrain users who demand high parallel throughput. Still, for its price point—particularly when pre-order discounts are applied—the ME Mini offers significant value, especially when compared to ARM-based NAS solutions with similar or lower specifications. With bundled Crucial SSD options and support for a wide range of NAS operating systems, it positions itself as a ready-to-go platform for tech-savvy users wanting to avoid the assembly of a fully DIY system. Overall, while not a product for every use case, the Beelink ME Mini succeeds in its aim to be a compact, stylish, and capable home NAS.
| Pros | Cons |
|---|---|
| Compact cube design (99x99x99mm) ideal for discreet home deployment | Memory is soldered and non-upgradable |
| Supports up to 6x M.2 NVMe SSDs with total capacity up to 24TB | Five of the six SSD slots are limited to PCIe Gen 3 x1 bandwidth |
| Integrated PSU eliminates bulky external power adapters | Bottom panel retains heat due to lack of active ventilation |
| Dual 2.5GbE LAN ports with link aggregation support | — |
| Wi-Fi 6 wireless access and flexibility in UnRAID7 | — |
| Low power consumption (as low as 6.9W idle, ~30W peak with full load) | — |
| Silent fan and effective internal thermal management via large heatsink | — |
| Includes Crucial-branded SSDs in pre-configured options for reliability | — |
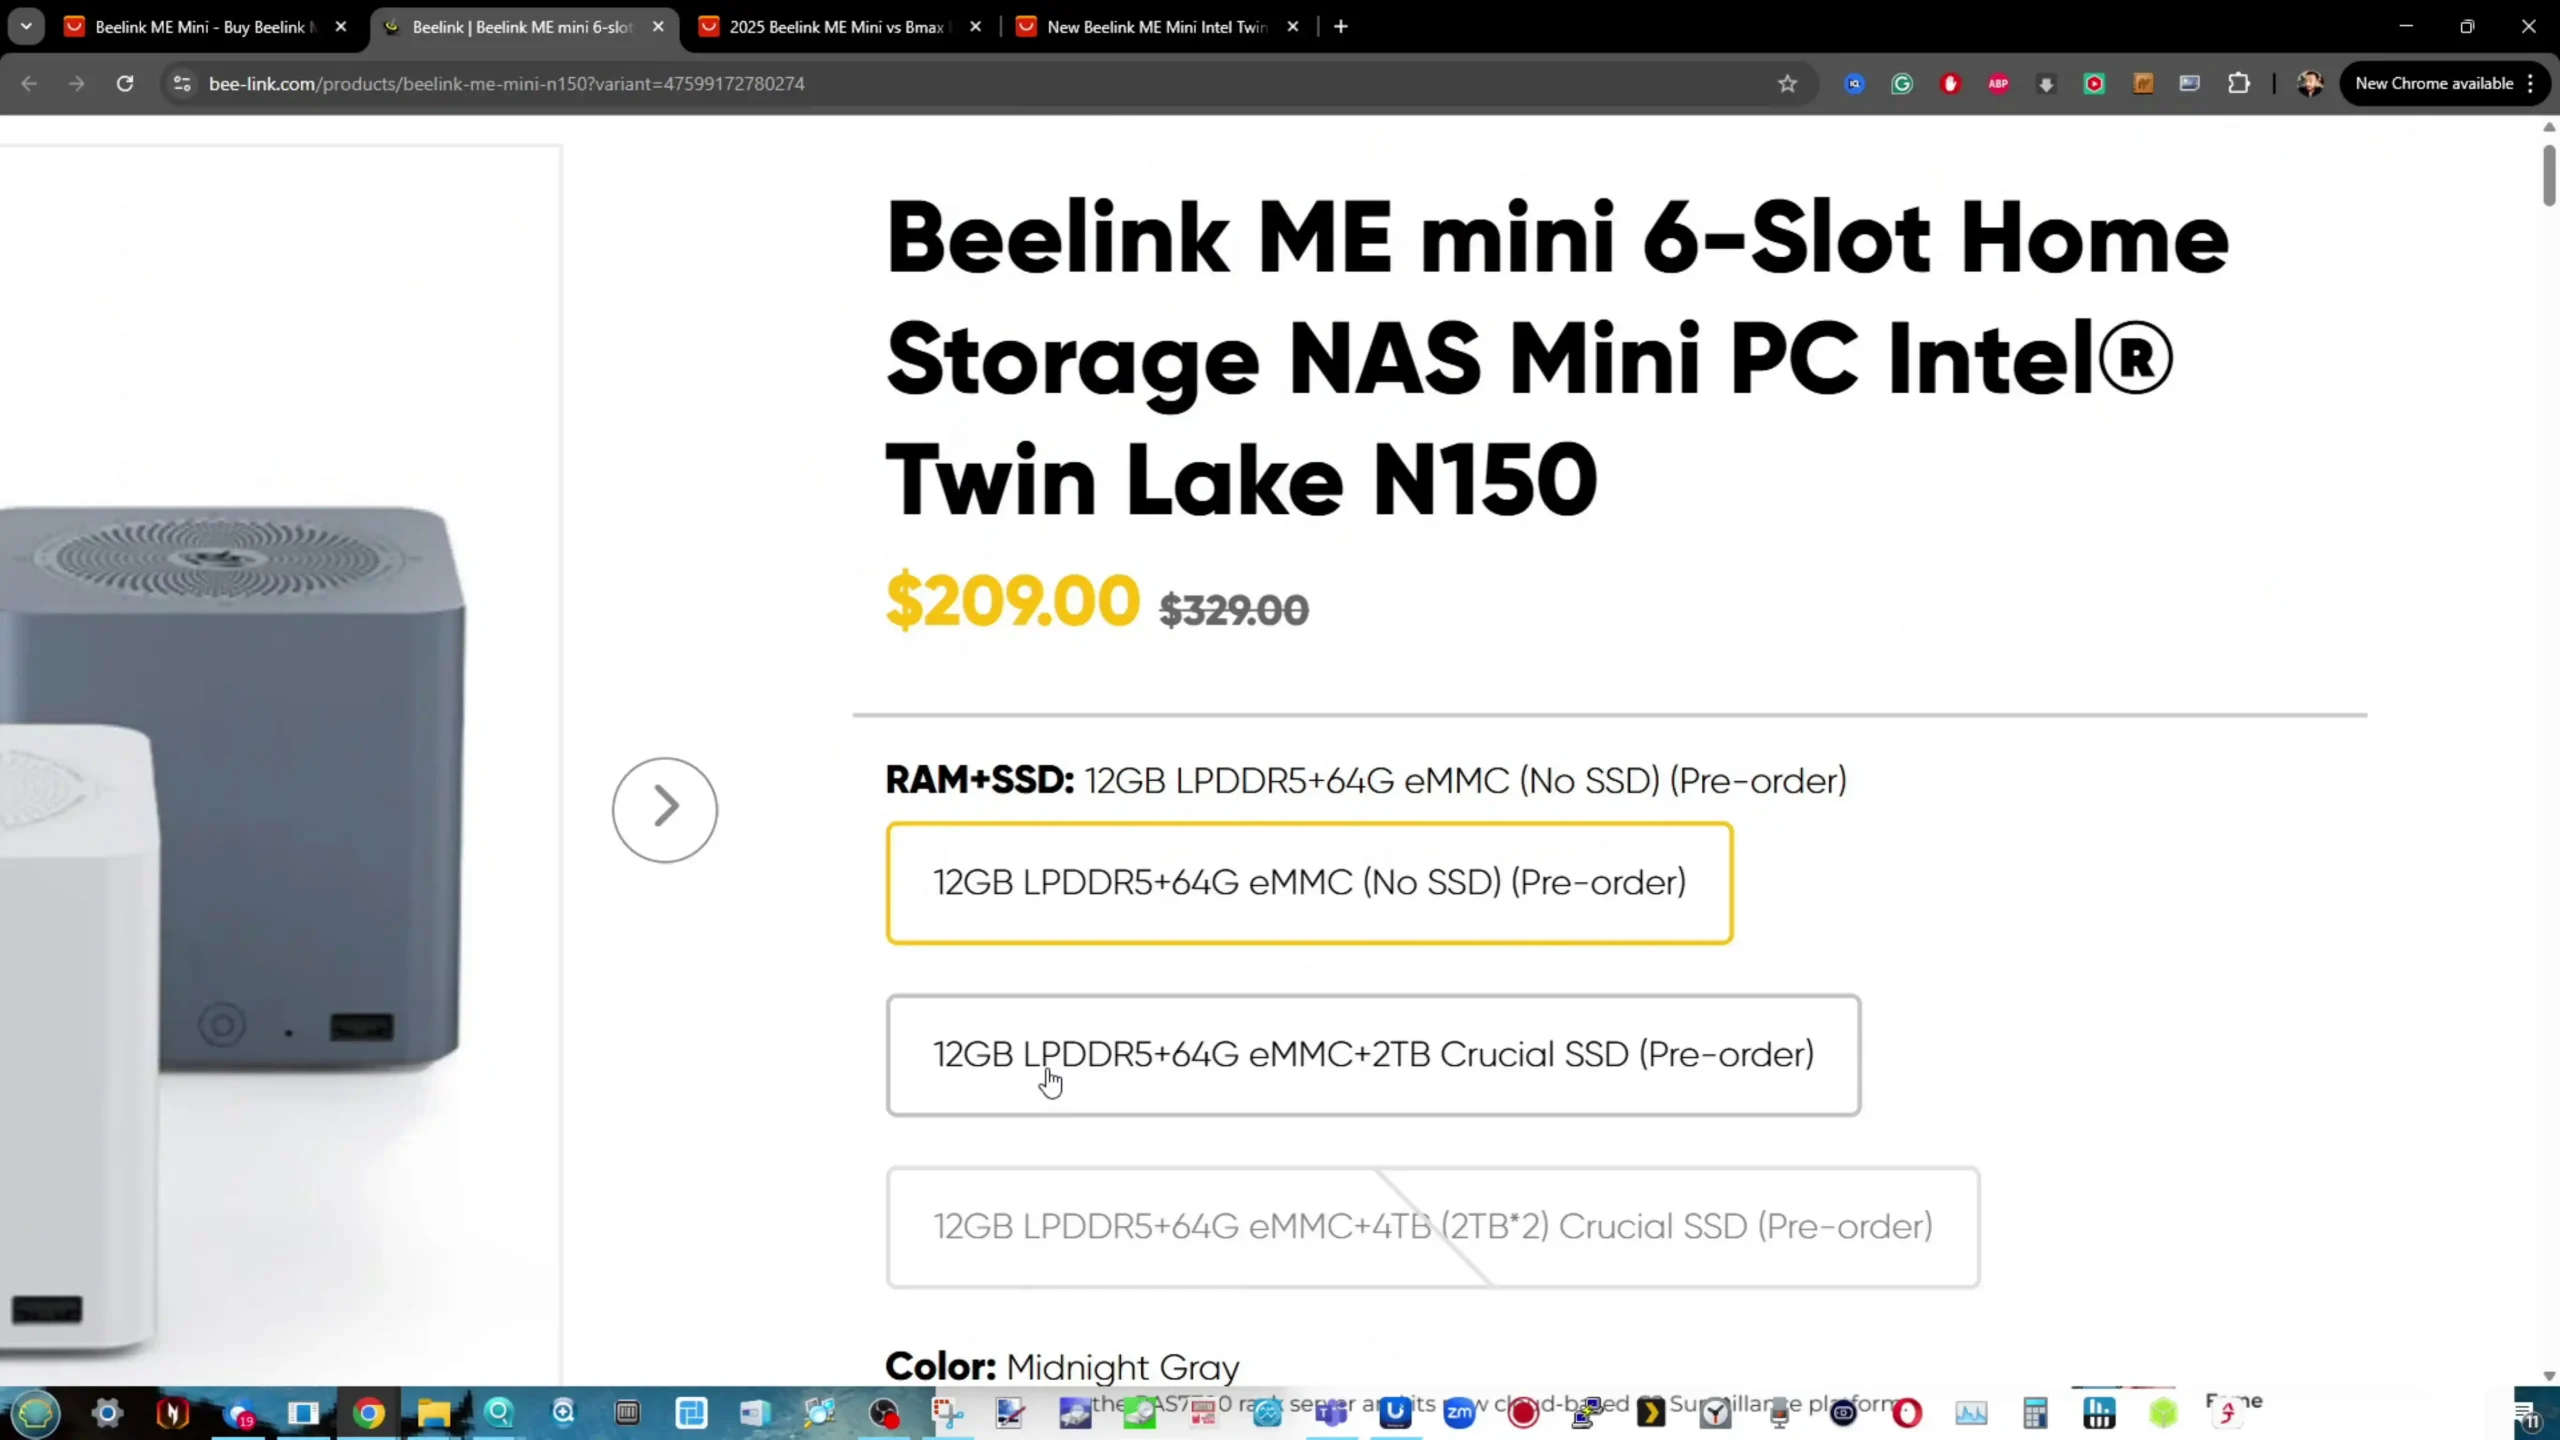
|
Check Amazon in Your Region for the Beelink ME Mini NAS ($329 4/6)
|
Check AliExpress for the Beelink ME Mini NAS ($344 4/6)
|
Check the Official Beelink Site for the ME Mini NAS ($209 4/6)
|
SUBSCRIBE TO OUR NEWSLETTER Join Inner Circle Subscribe
This description contains links to Amazon. These links will take you to some of the products mentioned in today's content. As an Amazon Associate, I earn from qualifying purchases. Visit the NASCompares Deal Finder to find the best place to buy this device in your region, based on Service, Support and Reputation - Just Search for your NAS Drive in the Box Below
Need Help?
Where possible (and where appropriate) please provide as much information about your requirements, as then I can arrange the best answer and solution to your needs. Do not worry about your e-mail address being required, it will NOT be used in a mailing list and will NOT be used in any way other than to respond to your enquiry.
[contact-form-7]
Ko-fi or old school Paypal. Thanks!To find out more about how to support this advice service check HEREIf you need to fix or configure a NAS, check Fiver
Have you thought about helping others with your knowledge? Find Instructions Here
|
|
|
 Test du ProArt LC 360, un Watercooling AIO de 360 visant les stations de travail et les utilisateurs exigeants. Est-il à la hauteur de ses promesses ?
Cet article Le ProArt LC 360 d’Asus face à un Core i9-13900K poussé à ses limites a été publié en premier par GinjFo.
 Test du ProArt LC 360 d’Asus, un Watercooling AIO de 360 équipé de ventilateur ayant un cadre métallique. Il vise les stations de travail.
Cet article Test ProArt LC 360 d’Asus a été publié en premier par GinjFo.
DIY router boxes have gained popularity in recent years, especially those coming out of China with various hardware configurations. The CWWK N355-powered firewall appliance is an intriguing option, not just as a high-performance router but also as a potential NAS device. Unlike many reviews that focus on its networking capabilities, this review explores its viability as a compact and efficient NAS solution.
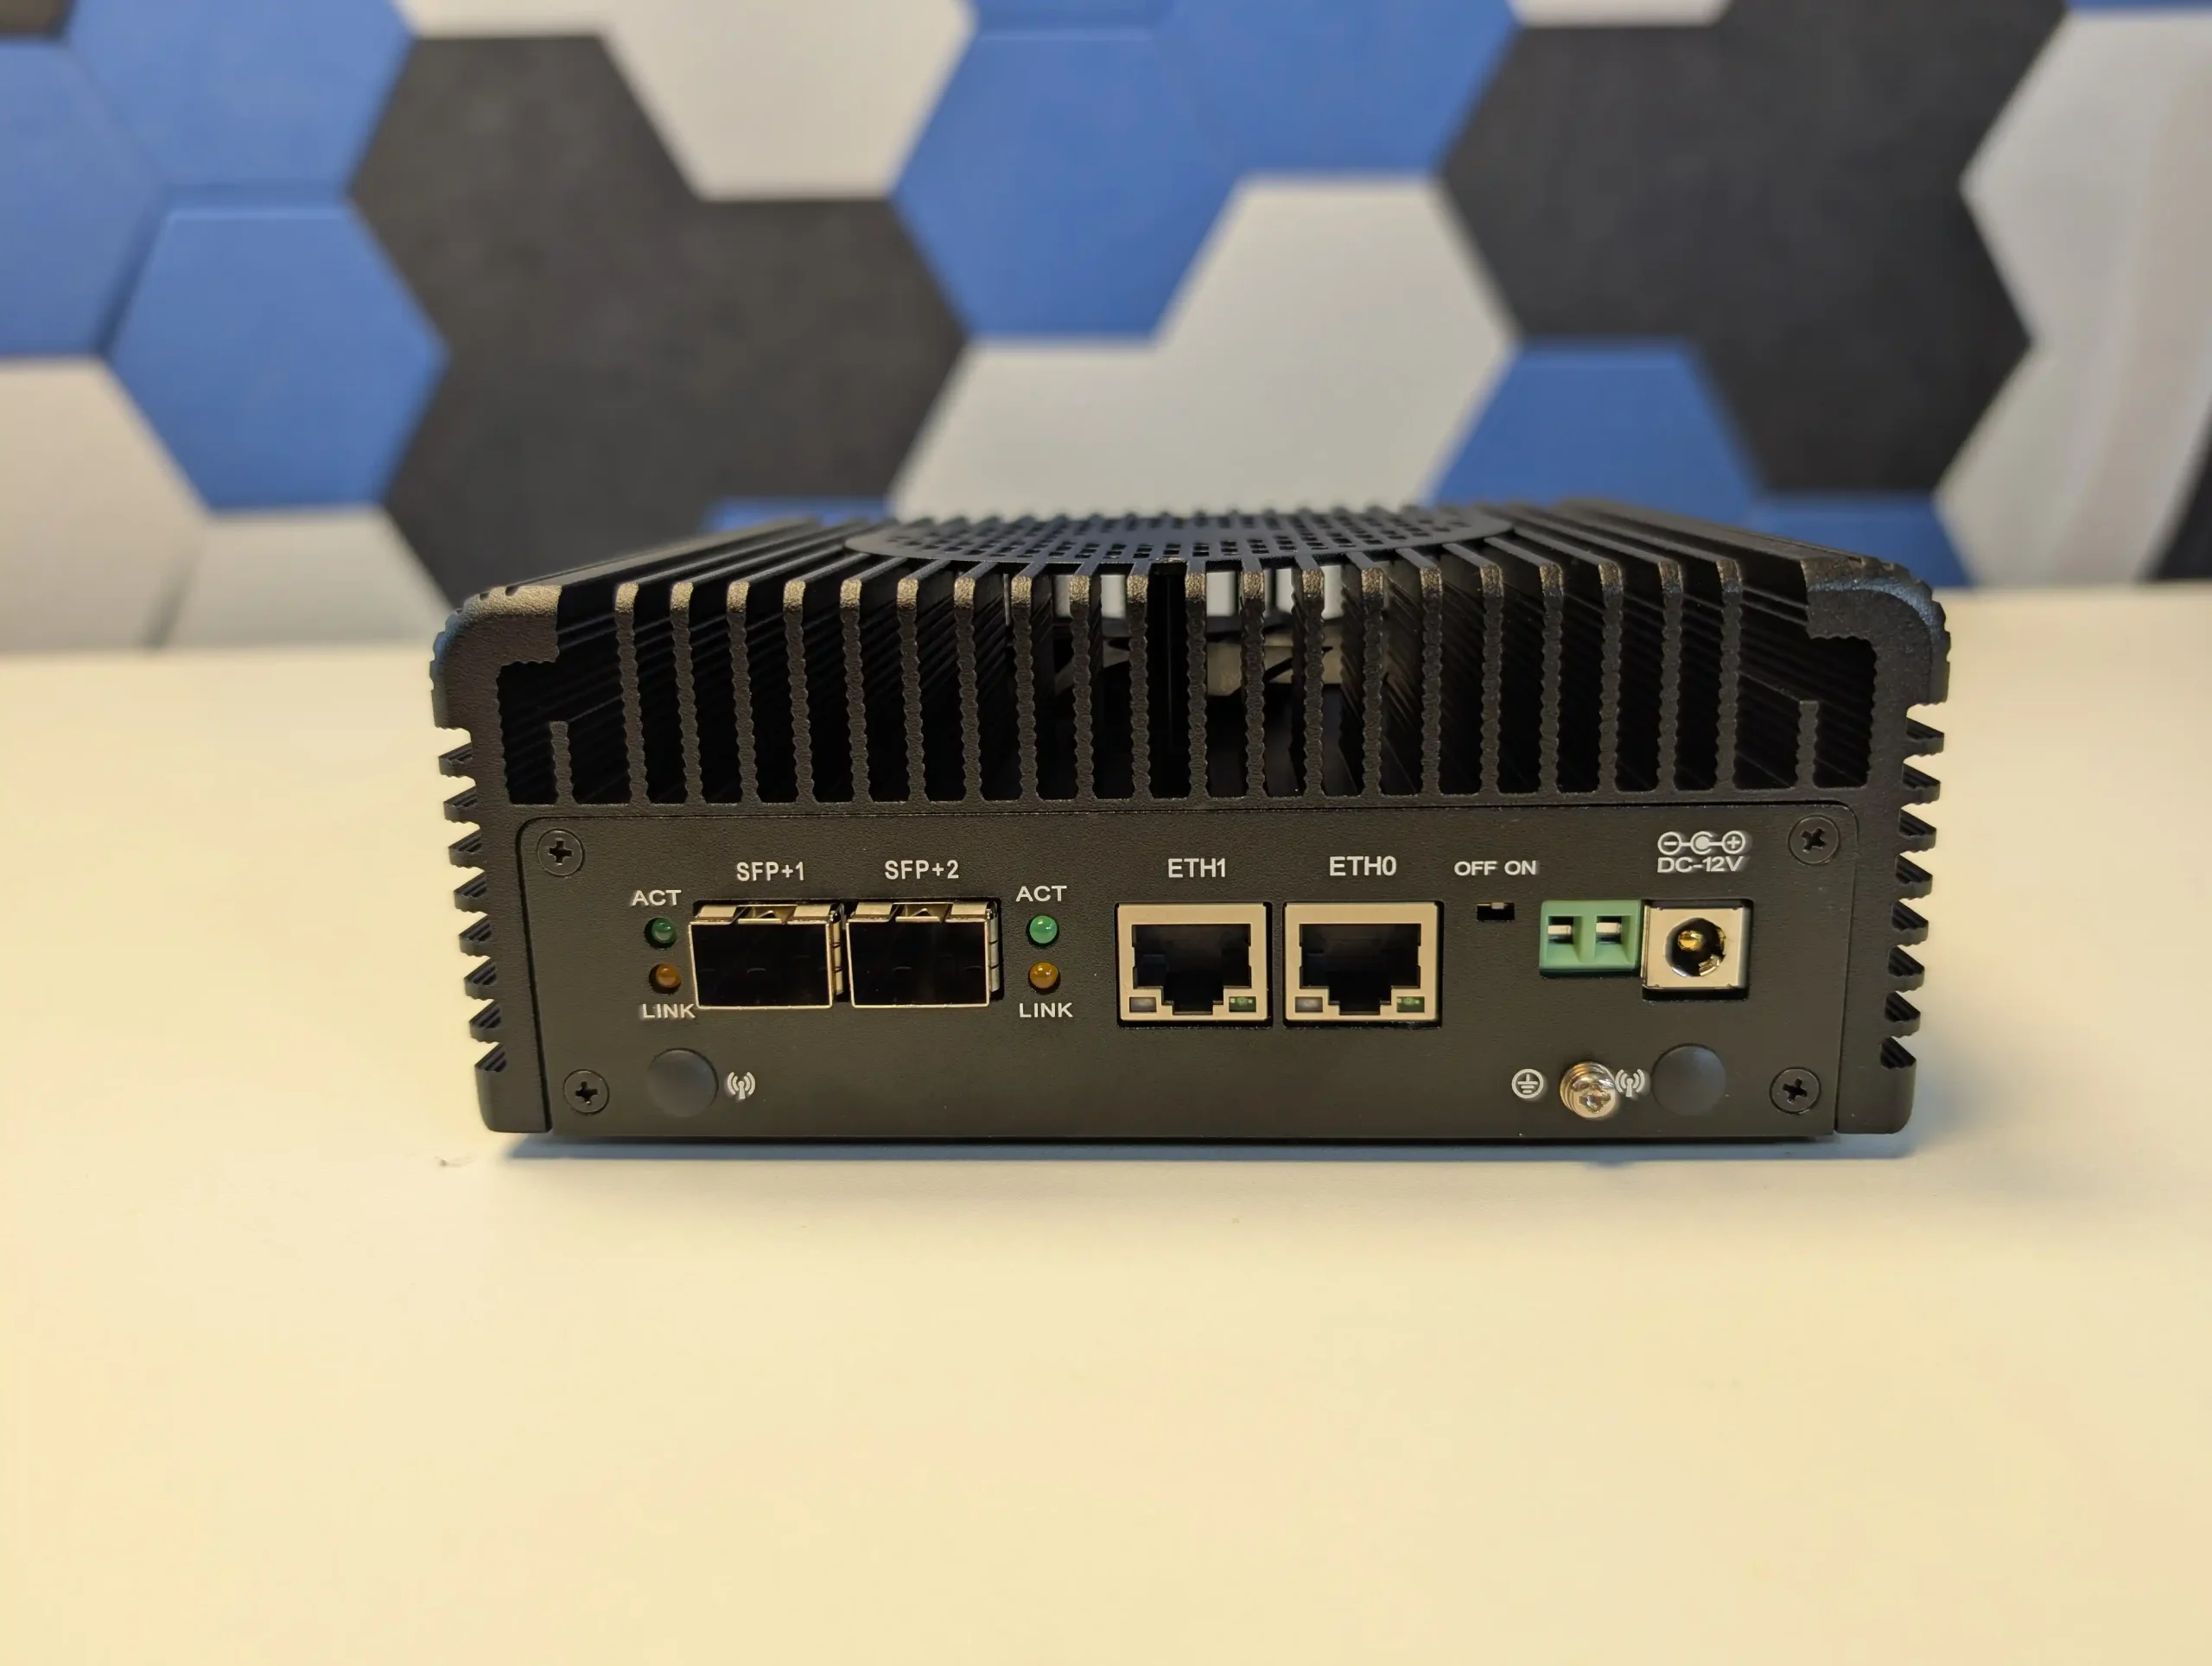
The CWWK N355 is a well-rounded and versatile device that excels in networking, virtualization, and compact NAS applications, thanks to its dual 10GbE SFP+ ports, 2.5GbE LAN, expandable DDR5 RAM, and M.2 NVMe storage support. It is a compelling choice for firewall applications, Proxmox virtualization, and even lightweight NAS or media server setups, offering a balance of performance and connectivity in a compact and durable metal chassis with active cooling. The Alder Lake-N N355 CPU delivers efficient multi-core performance, making it suitable for running multiple services, including Docker containers, VMs, and network security applications. Additionally, its expandable memory and storage options give users flexibility, though its storage implementation is somewhat restrictive due to only one native NVMe slot and a SATA port with no internal mounting space. However, its aging Intel 82599ES 10GbE controller, high idle power consumption of 21-22W, and lack of full-speed PCIe lanes limit its potential for high-performance NAS deployments. While it can handle moderate file-sharing and media streaming workloads, users who require full 10GbE speeds, extensive storage expansion, and power efficiency may find better options in dedicated NAS motherboards with PCIe slots or higher-efficiency processors. Still, for those looking for a compact, high-speed network appliance with strong customization potential, the CWWK N355 remains a solid choice for advanced home labs, small business networking, and hybrid router-NAS setups. As long as users are aware of its networking bottlenecks and storage limitations, it offers impressive versatility and performance at an attractive price point.
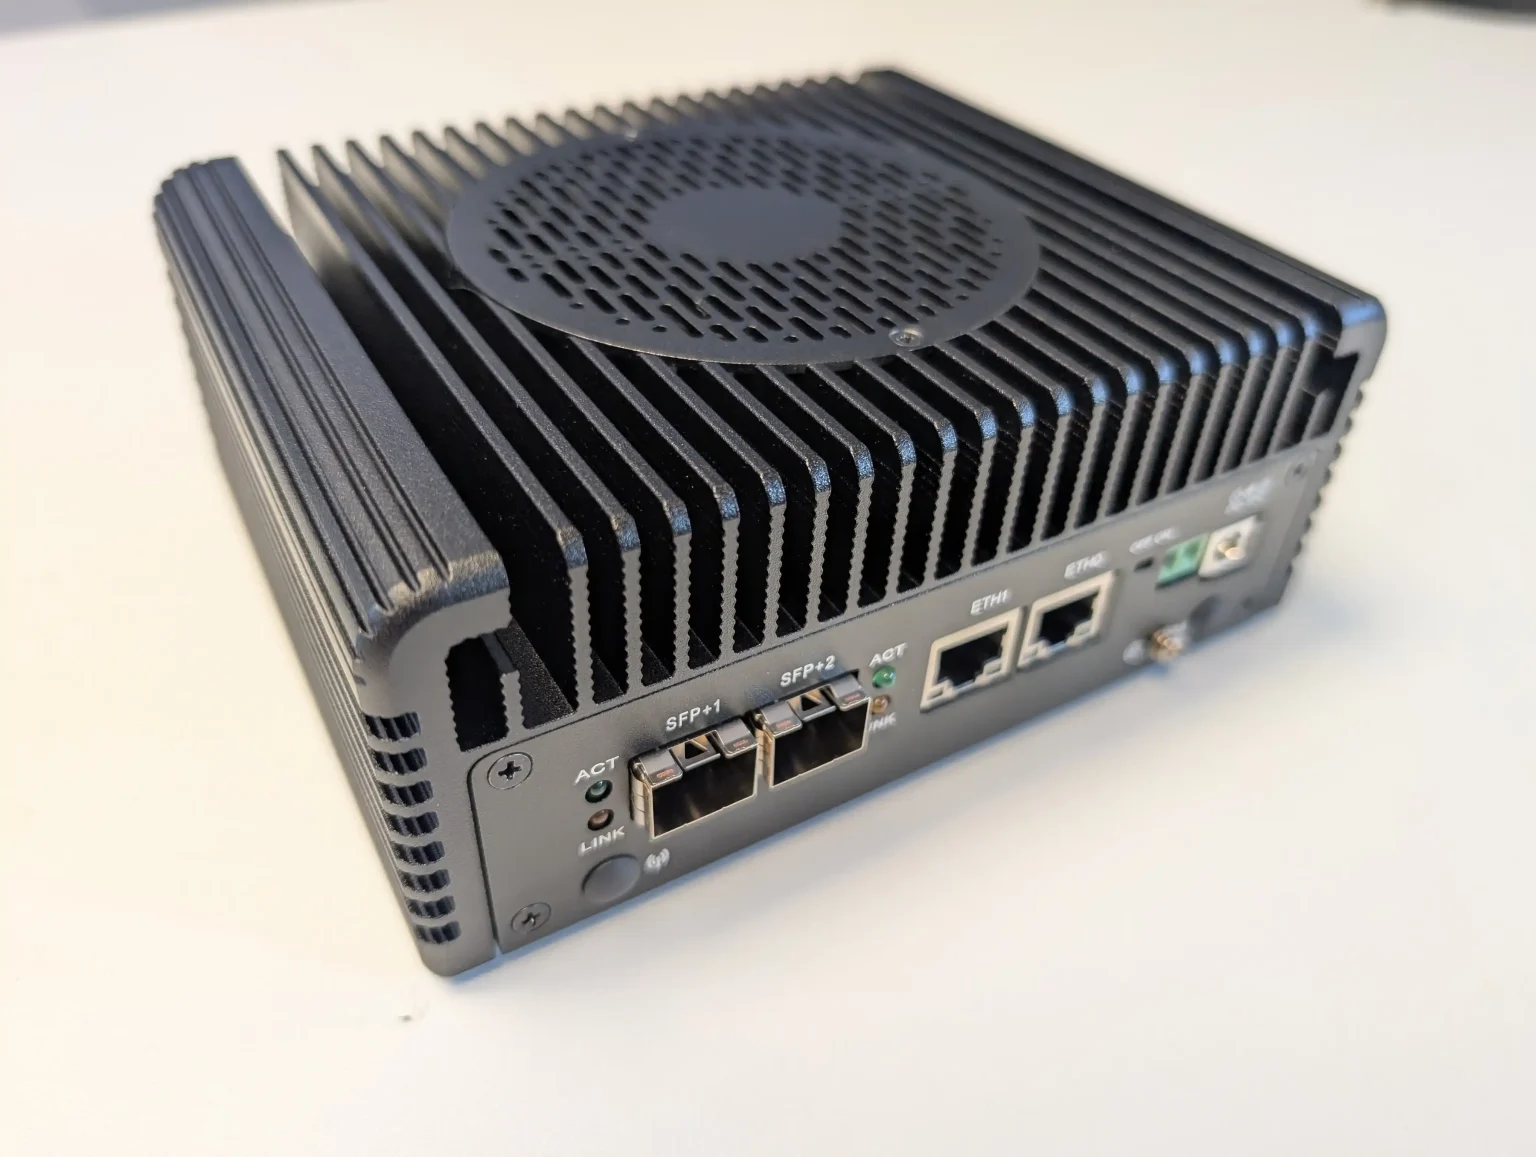 BUILD QUALITY - 8/10
HARDWARE - 8/10PERFORMANCE - 7/10PRICE - 10/10VALUE - 10/10
BUILD QUALITY - 8/10
HARDWARE - 8/10PERFORMANCE - 7/10PRICE - 10/10VALUE - 10/10
8.6
PROS
High-Speed Networking: Equipped with dual 10GbE SFP+ ports and two 2.5GbE LAN ports, providing excellent connectivity for advanced networking setups.Expandable Storage: Features two M.2 NVMe slots (one requiring an adapter) and a SATA 3.0 port, allowing for versatile storage configurations.Efficient Alder Lake-N CPU: The Intel N355 (8C/8T, up to 3.8GHz) offers efficient performance for firewall applications, Proxmox, lightweight NAS, and media servers.DDR5 Memory Support: Supports up to 48GB DDR5 RAM, enabling smooth multitasking, virtualization, and Docker/containerized environments.Robust Build and Cooling: Full aluminum chassis acts as a heat sink, with a top-mounted active cooling fan for effective thermal management.Wide OS Compatibility: Works with Windows 11 Pro, Linux distributions, ESXi, OPNsense, pfSense, OpenWrt, and TrueNAS, making it highly flexible.Compact and Power-Efficient: Small form factor and 15W TDP CPU make it space-saving and relatively low-power compared to traditional rack-mounted alternatives.
CONS
Aging 10GbE Controller: The Intel 82599ES 10GbE chipset is outdated, limiting maximum network speeds and performance efficiency in high-bandwidth workloads.Limited SATA Storage Options: While it includes a SATA 3.0 port, there is no internal mounting space for a 2.5-inch drive, requiring external solutions.Higher Idle Power Draw: Consumes 21-22W at idle, which is higher than dedicated NAS devices, potentially affecting long-term energy costs.
Where to Buy a Product
![]()
![]()
VISIT RETAILER ➤
![]()
![]()
VISIT RETAILER ➤
| Where to Buy? |
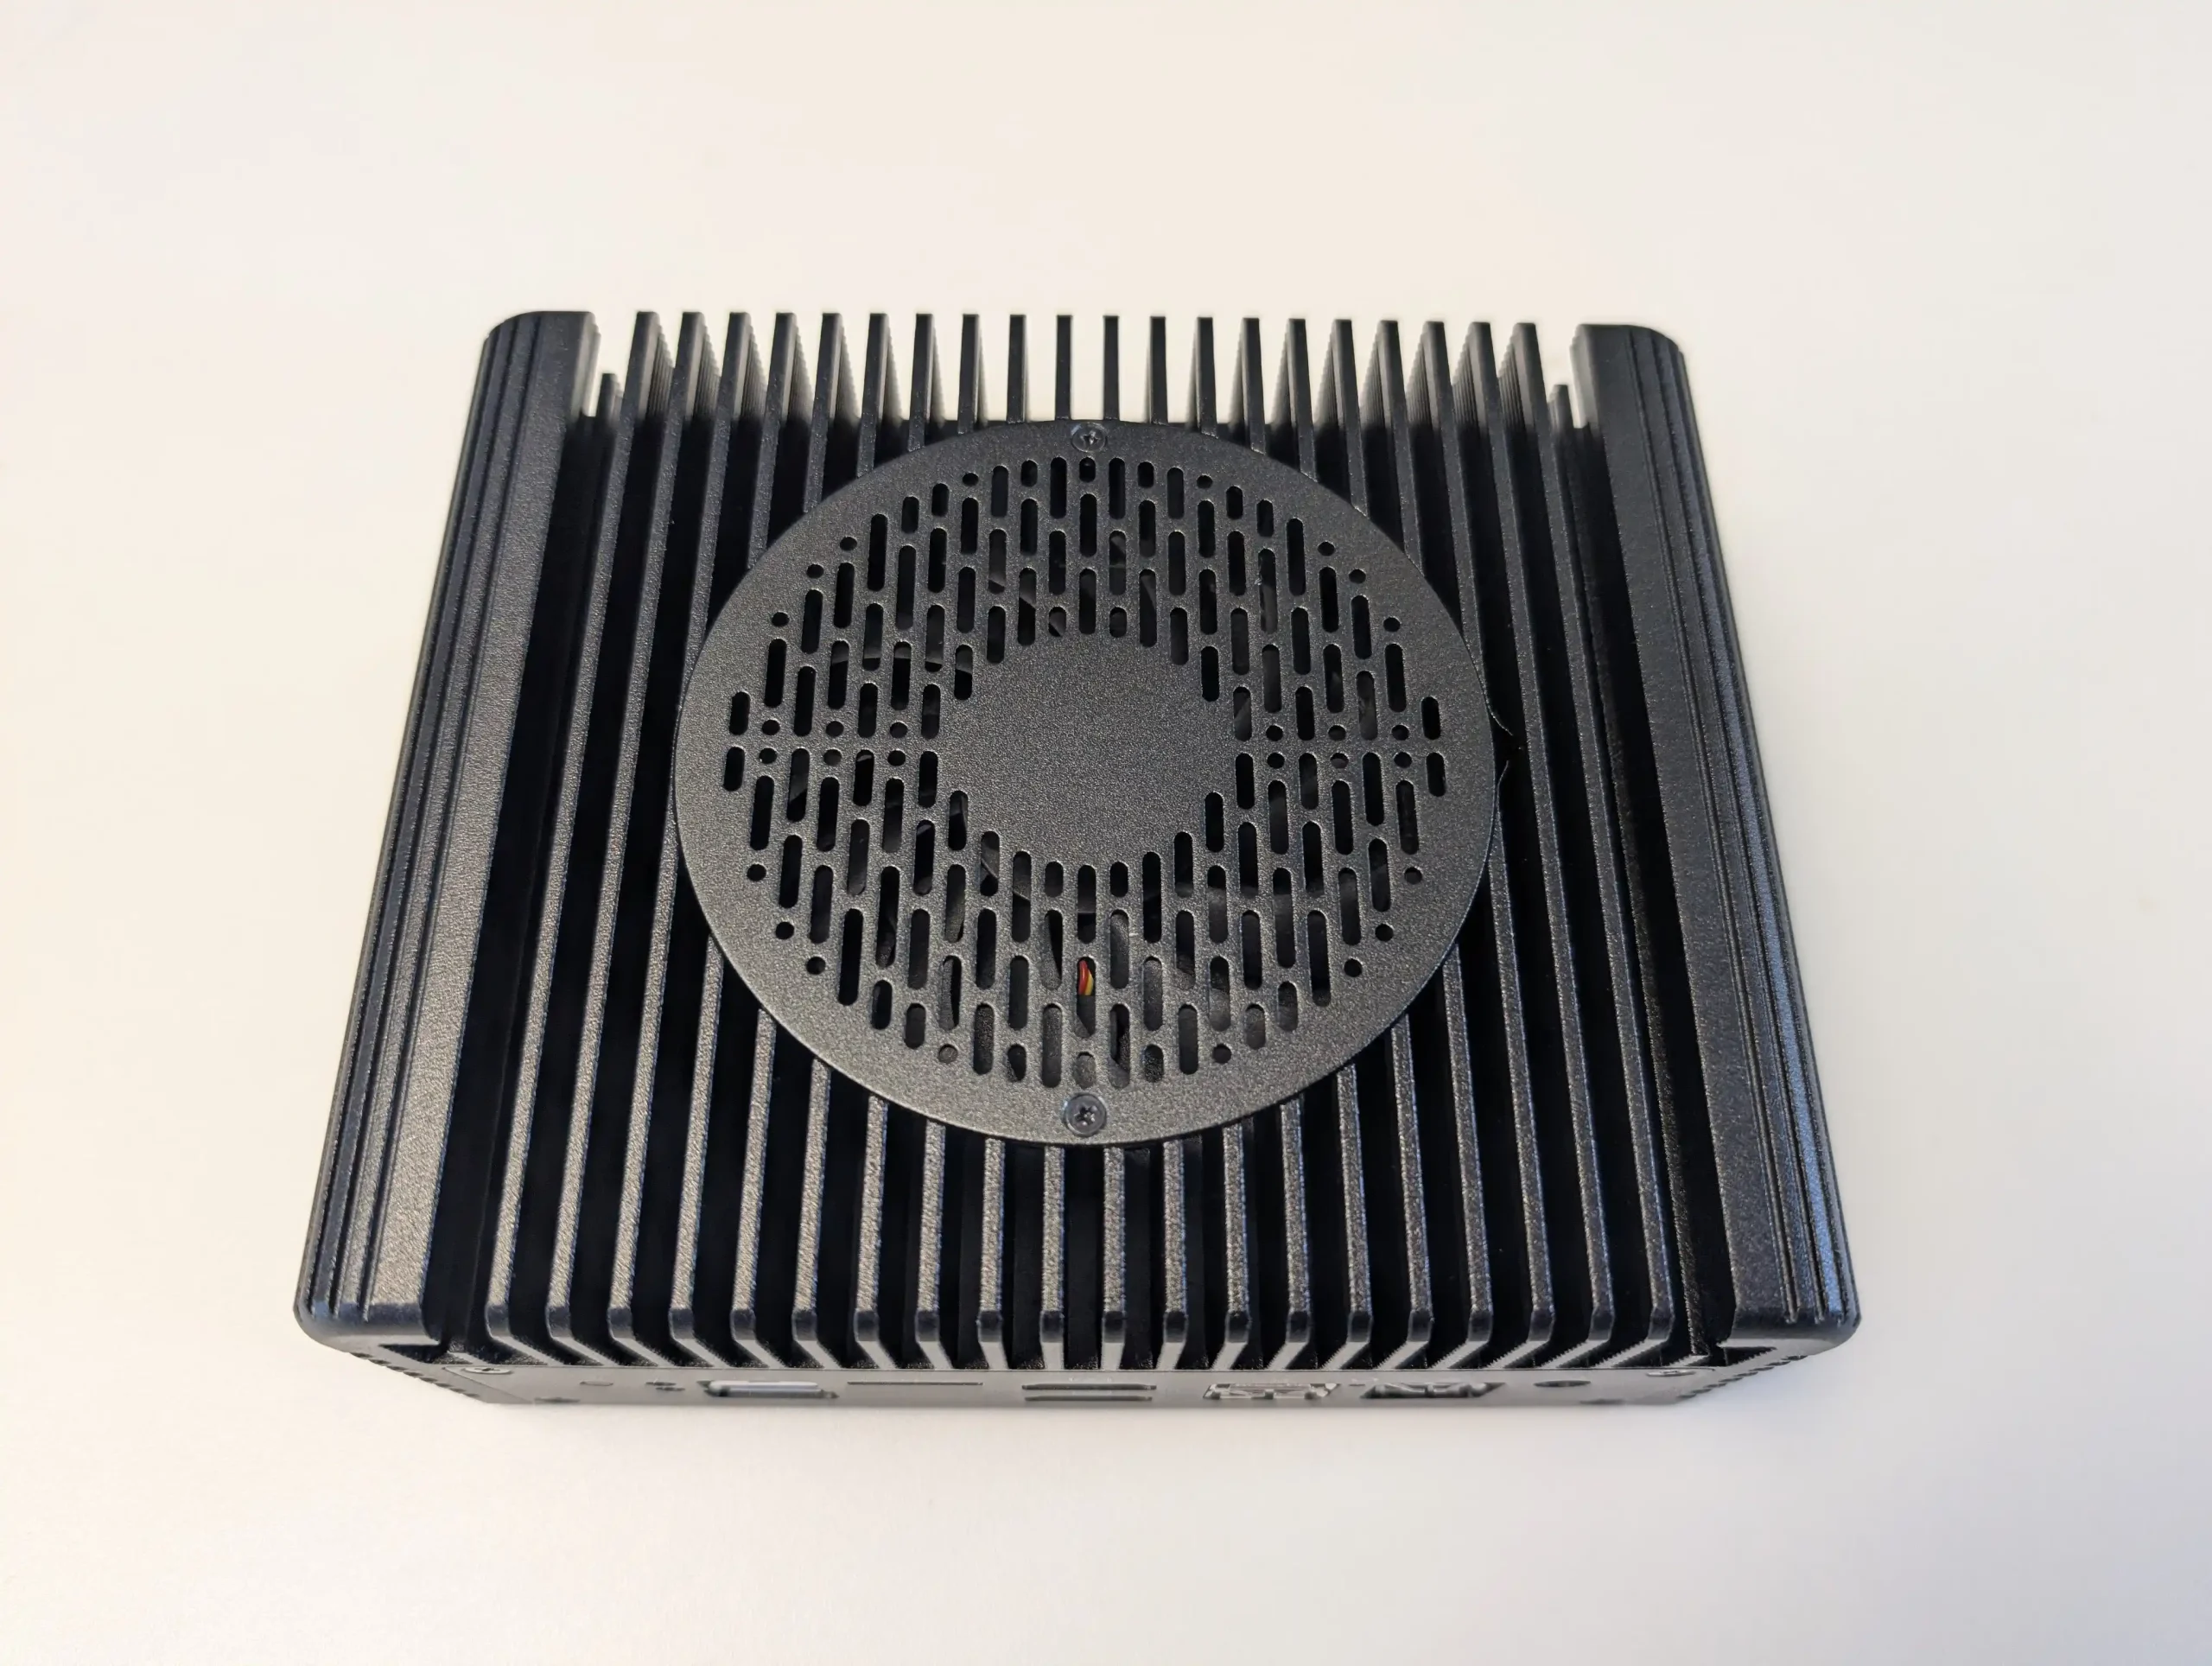
The CWWK N355 features a robust industrial design, with an all-metal chassis that acts as a heat sink, efficiently dissipating heat from critical components. The exterior is entirely metal, including the base panel, which features mesh ventilation to enhance airflow. A top-mounted active cooling fan ensures consistent airflow across the CPU and networking components, preventing thermal throttling under sustained workloads.
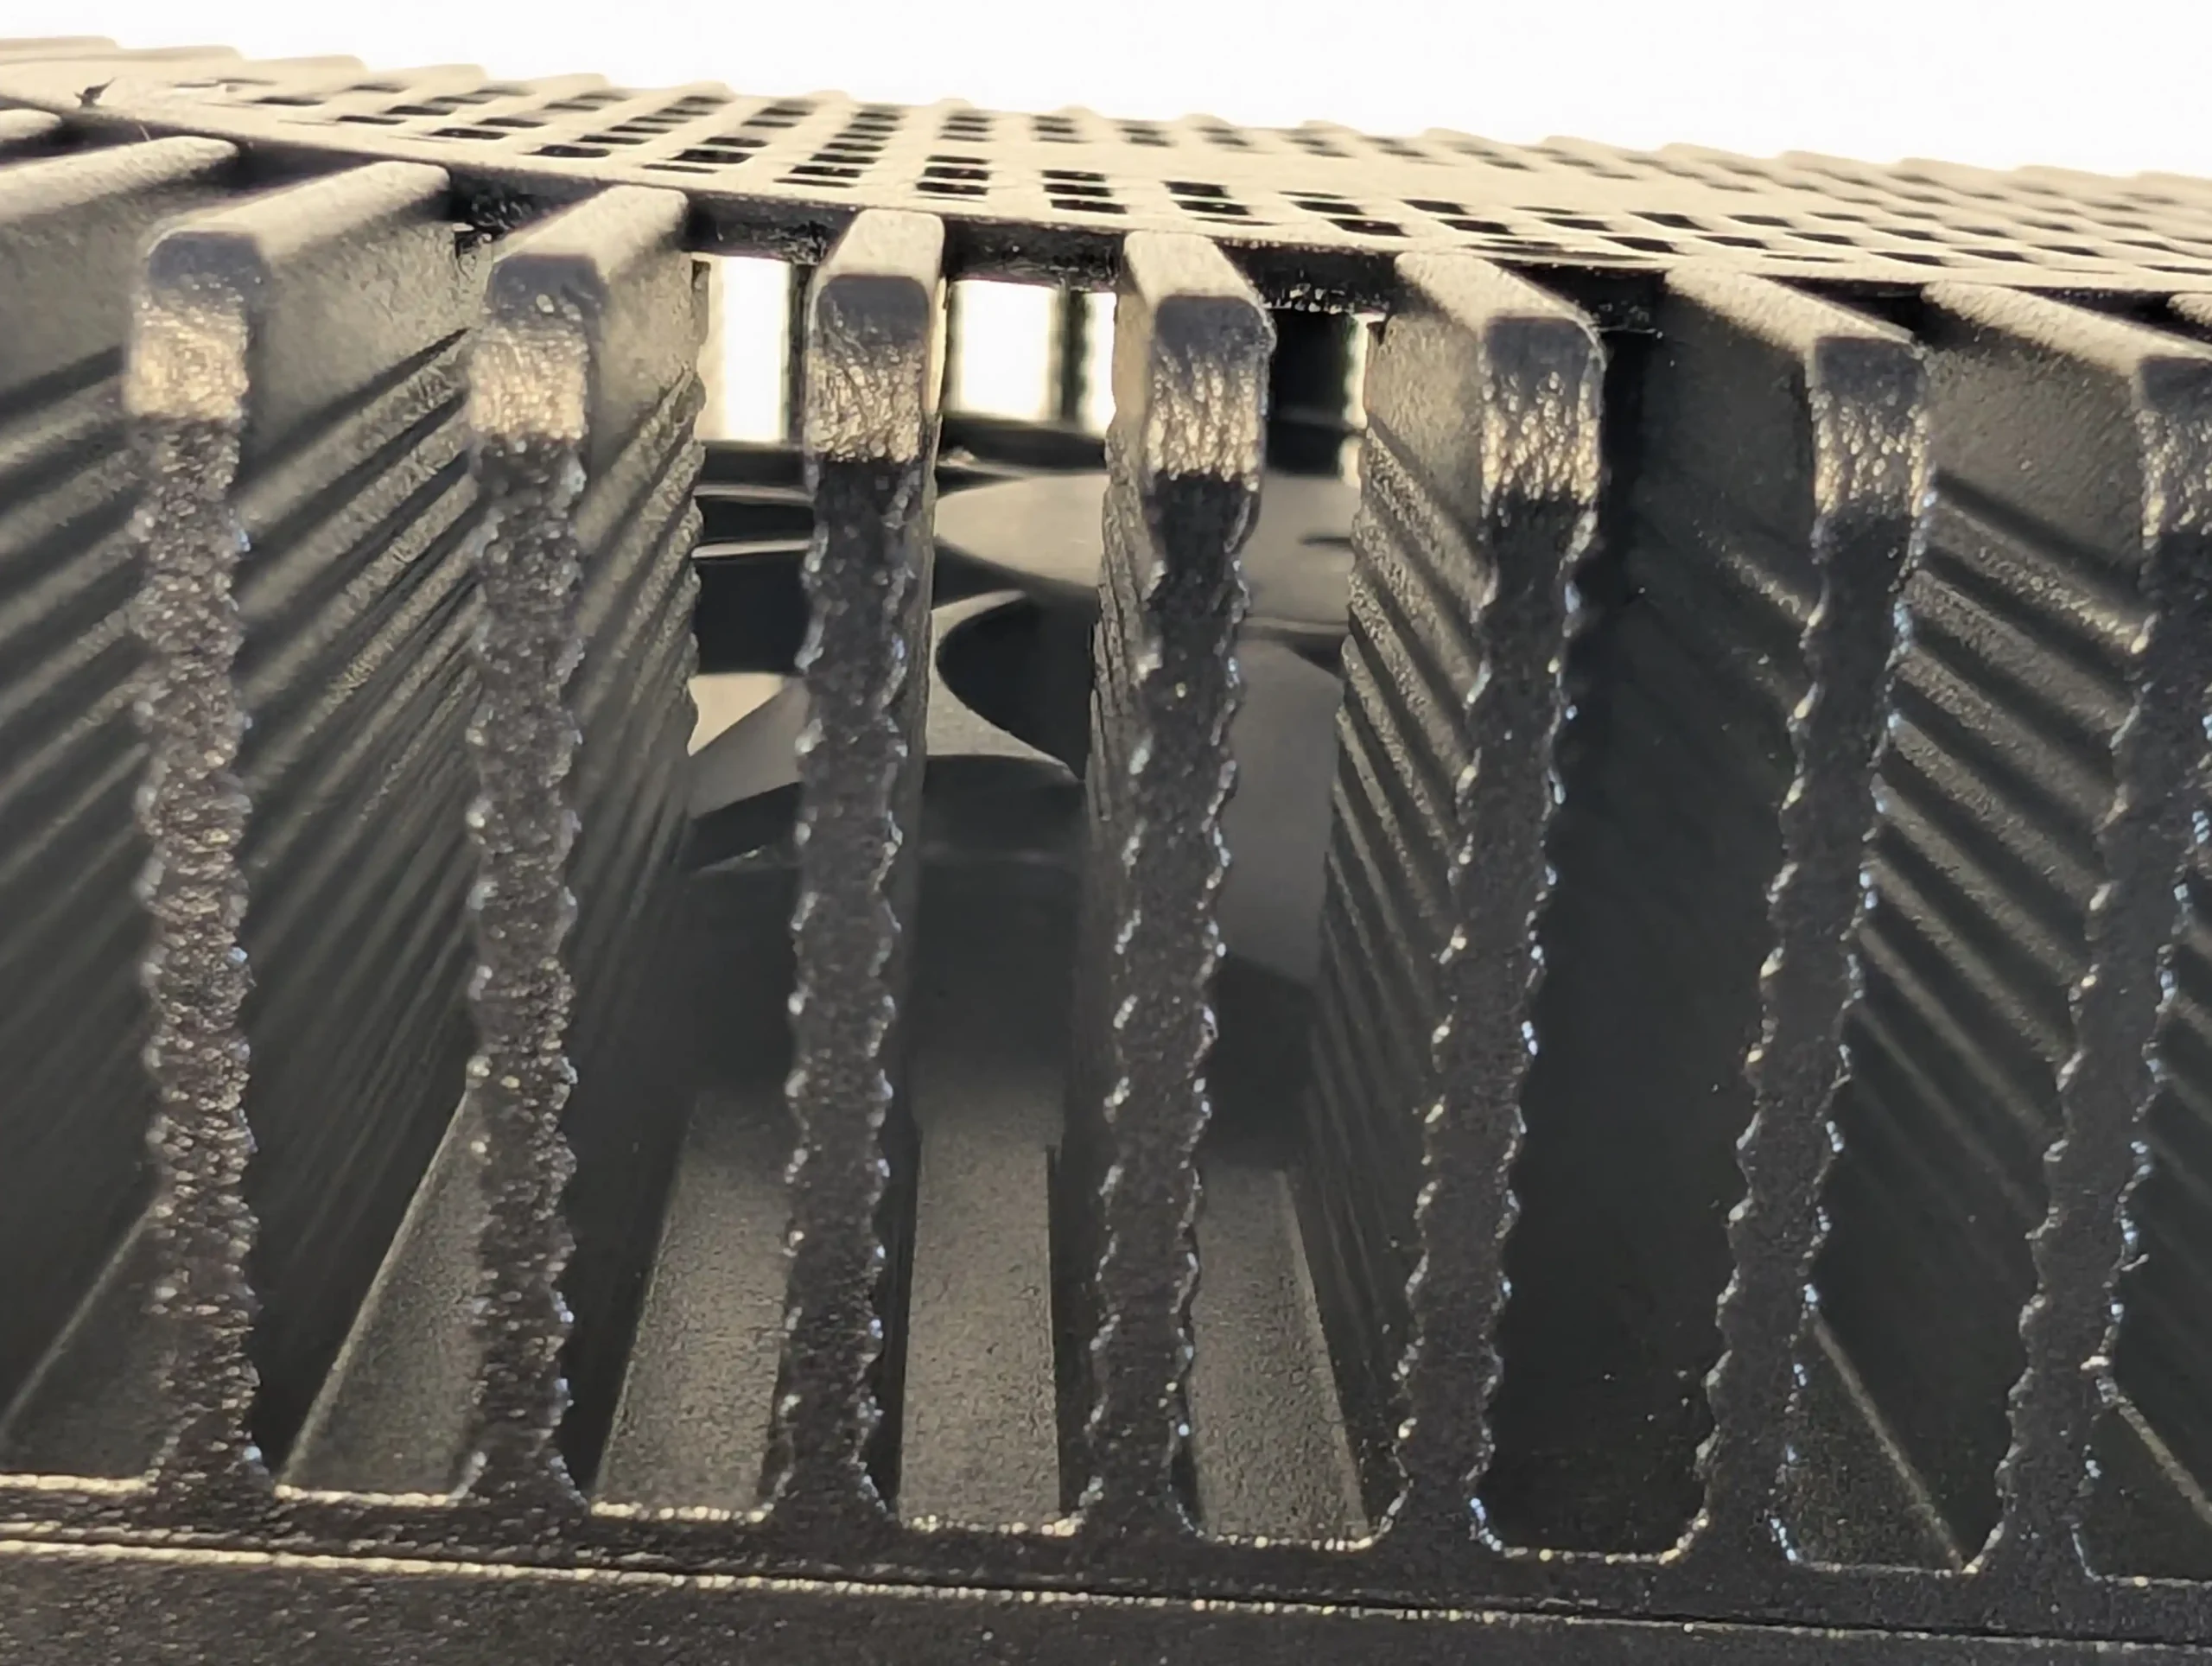
Internally, copper heat plates are placed over the CPU and 10GbE controllers, allowing for direct heat transfer to the chassis. This cooling system is highly effective, maintaining temperatures within safe limits even under heavy network and storage loads. During testing, the device remained at an average of 50-55°C under full load, with the fan producing minimal noise.
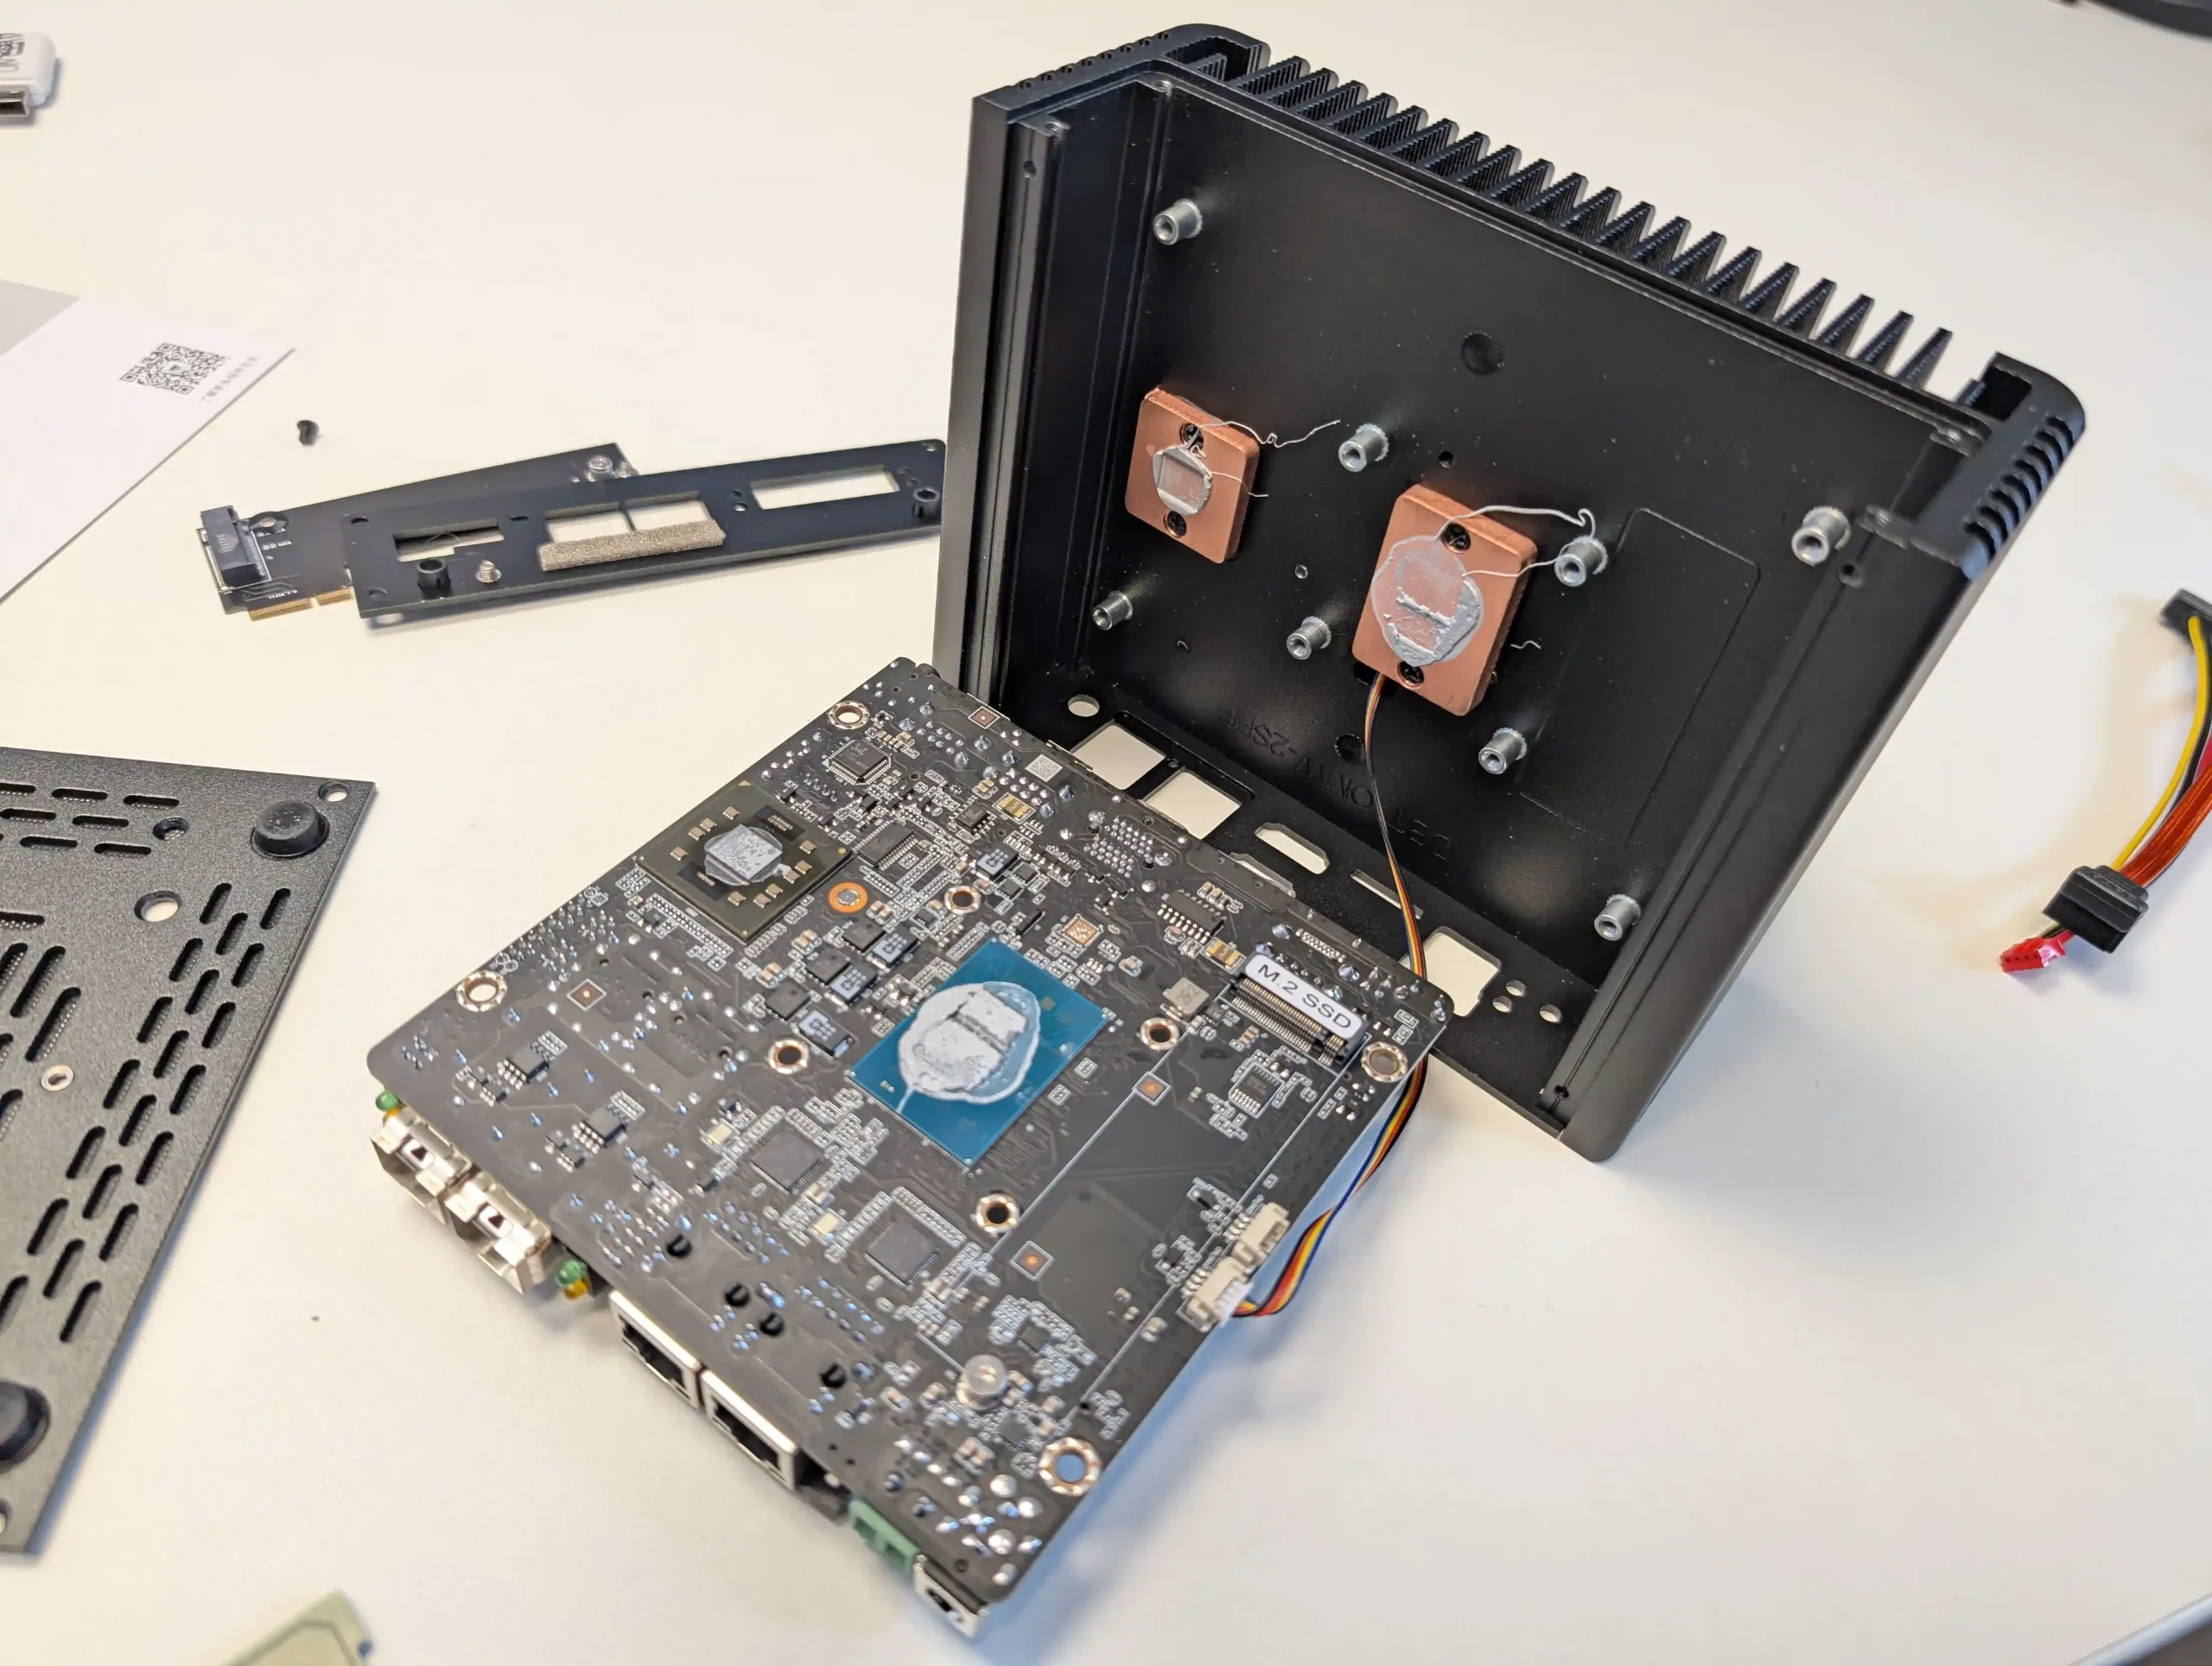
The cooling implementation makes the CWWK N355 a viable option for extended use in high-performance NAS, virtualization, or firewall applications where thermal efficiency is crucial. Given its mix of powerful networking features, ample connectivity, and storage options, this device has the potential to serve a broader range of applications than just routing. However, evaluating its strengths and weaknesses is crucial before repurposing it for a NAS setup.
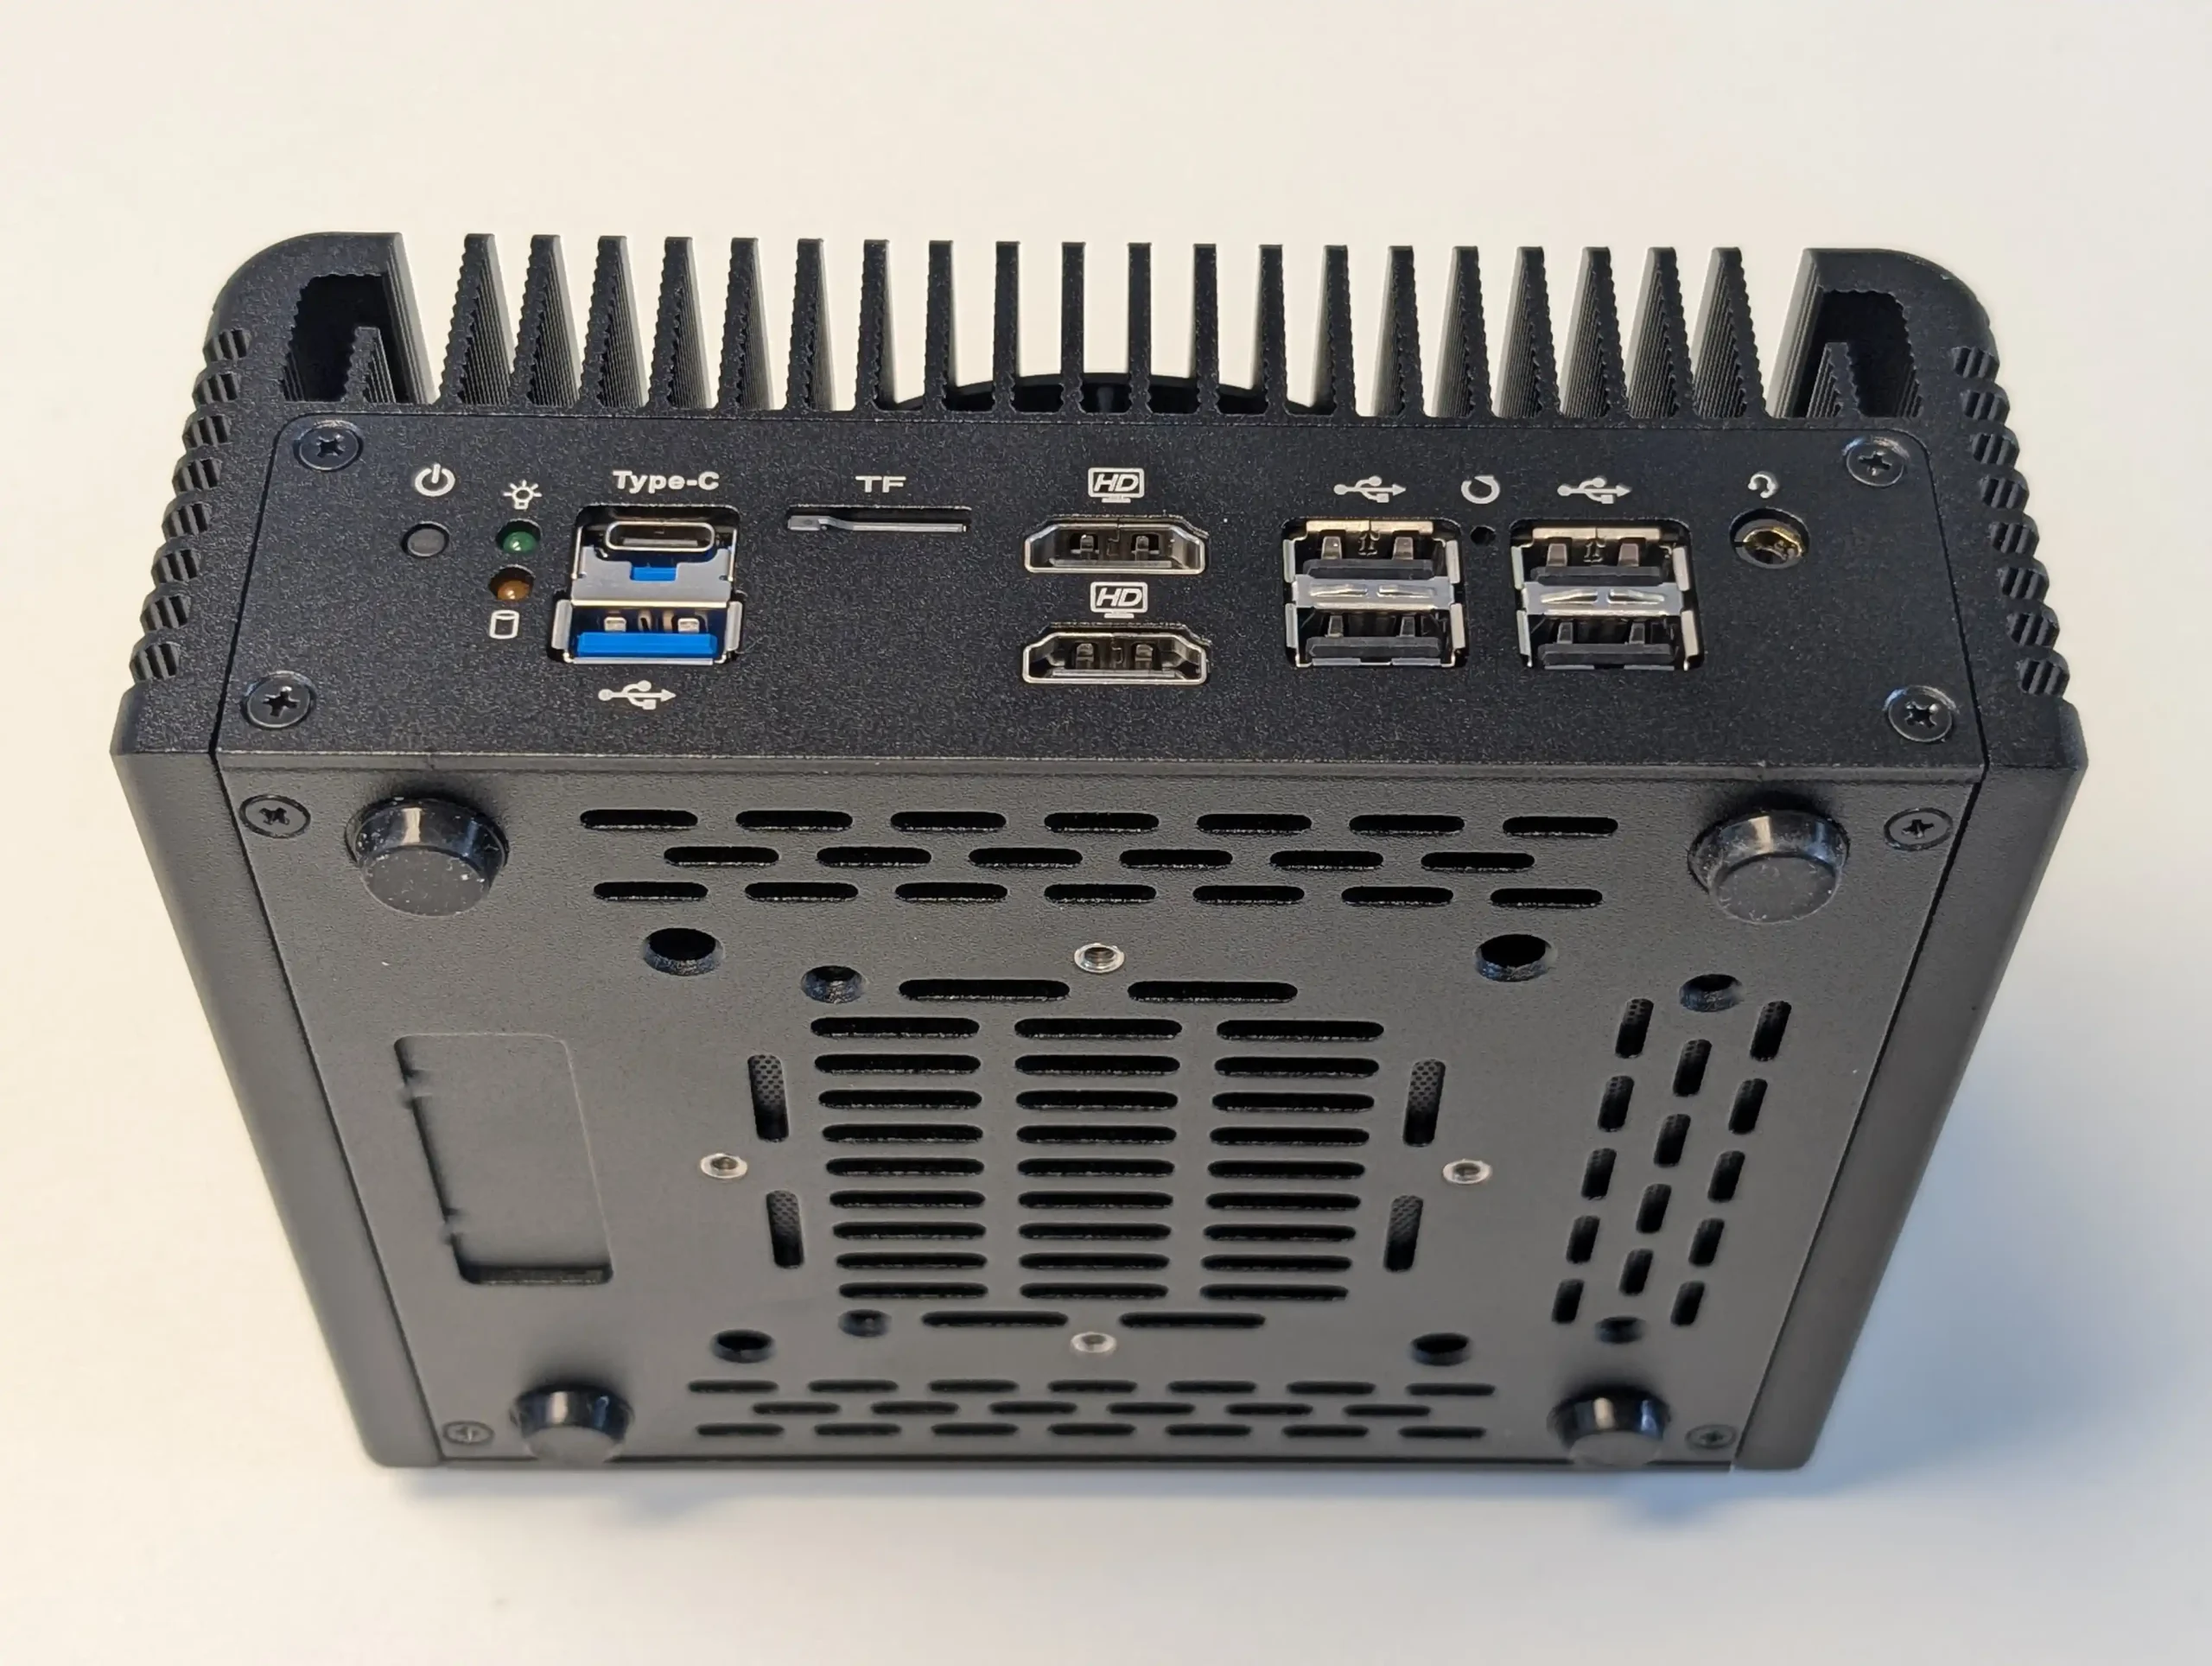
One of the standout features of the CWWK N355 is its impressive network connectivity. Equipped with dual 10GbE SFP+ ports and two 2.5GbE i226V LAN ports, it offers significantly more bandwidth than traditional consumer NAS devices.
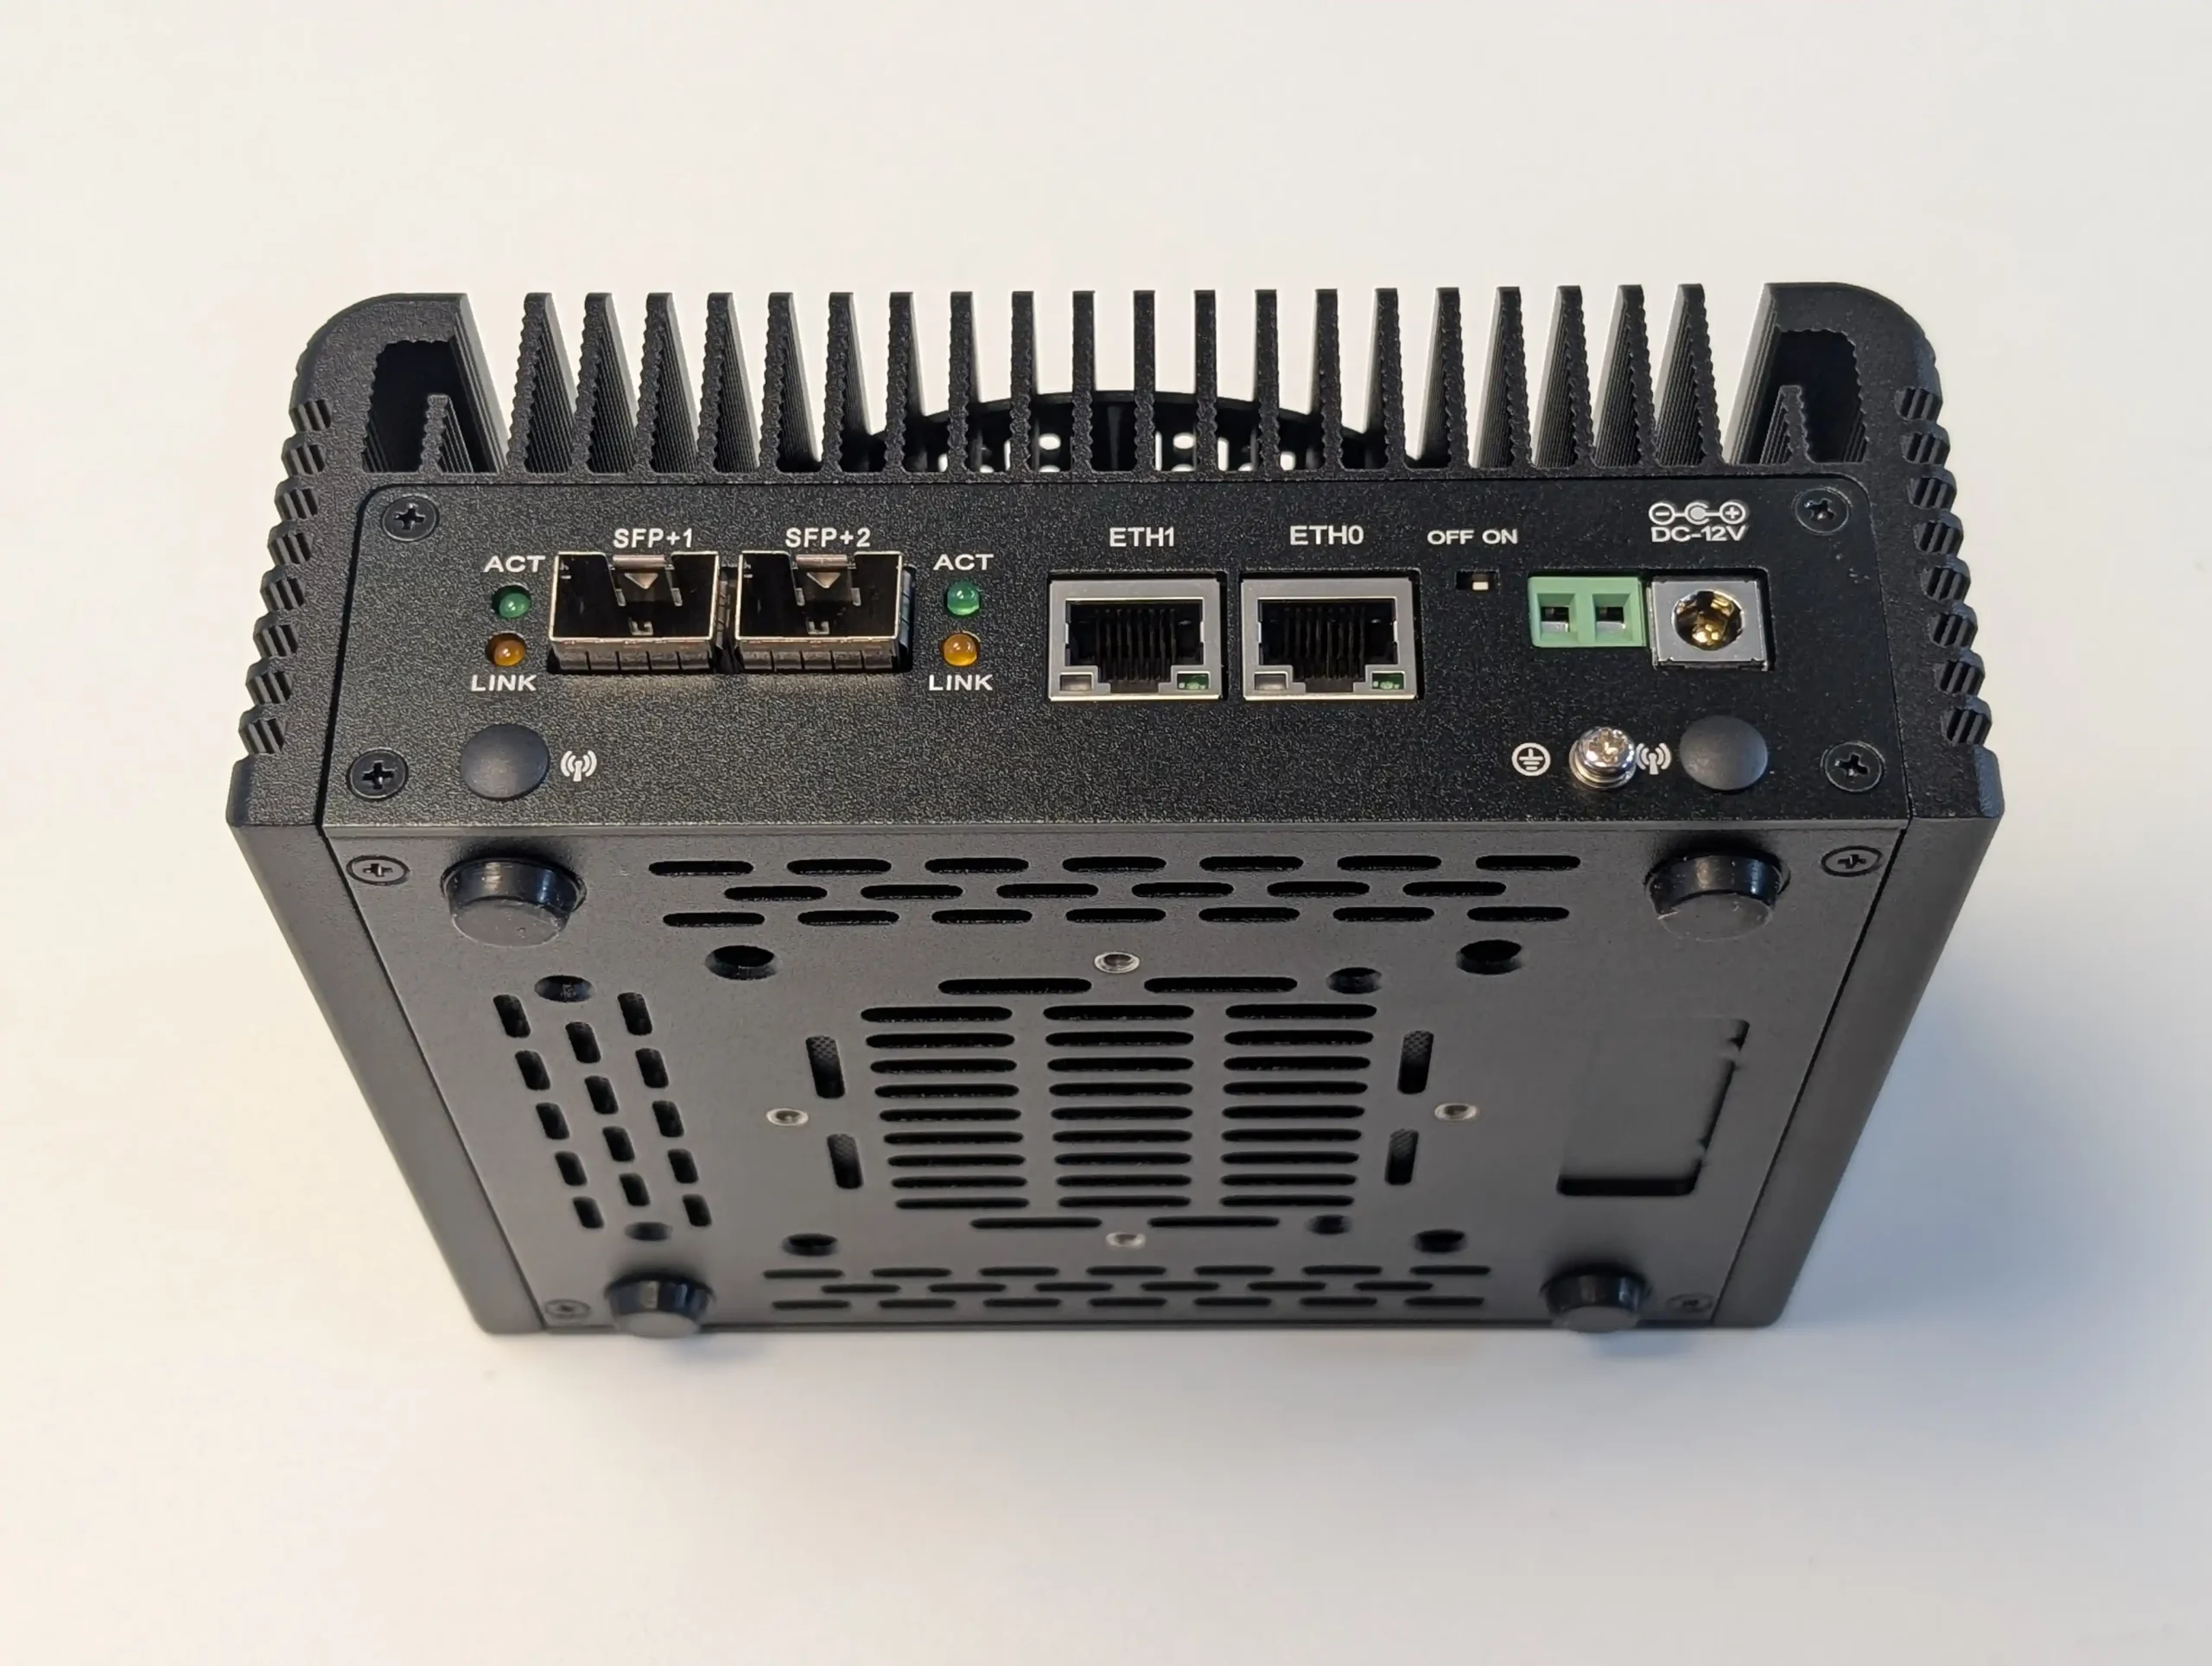
These high-speed connections enable rapid file transfers, efficient virtualization networking, and multi-user simultaneous access without bottlenecks.
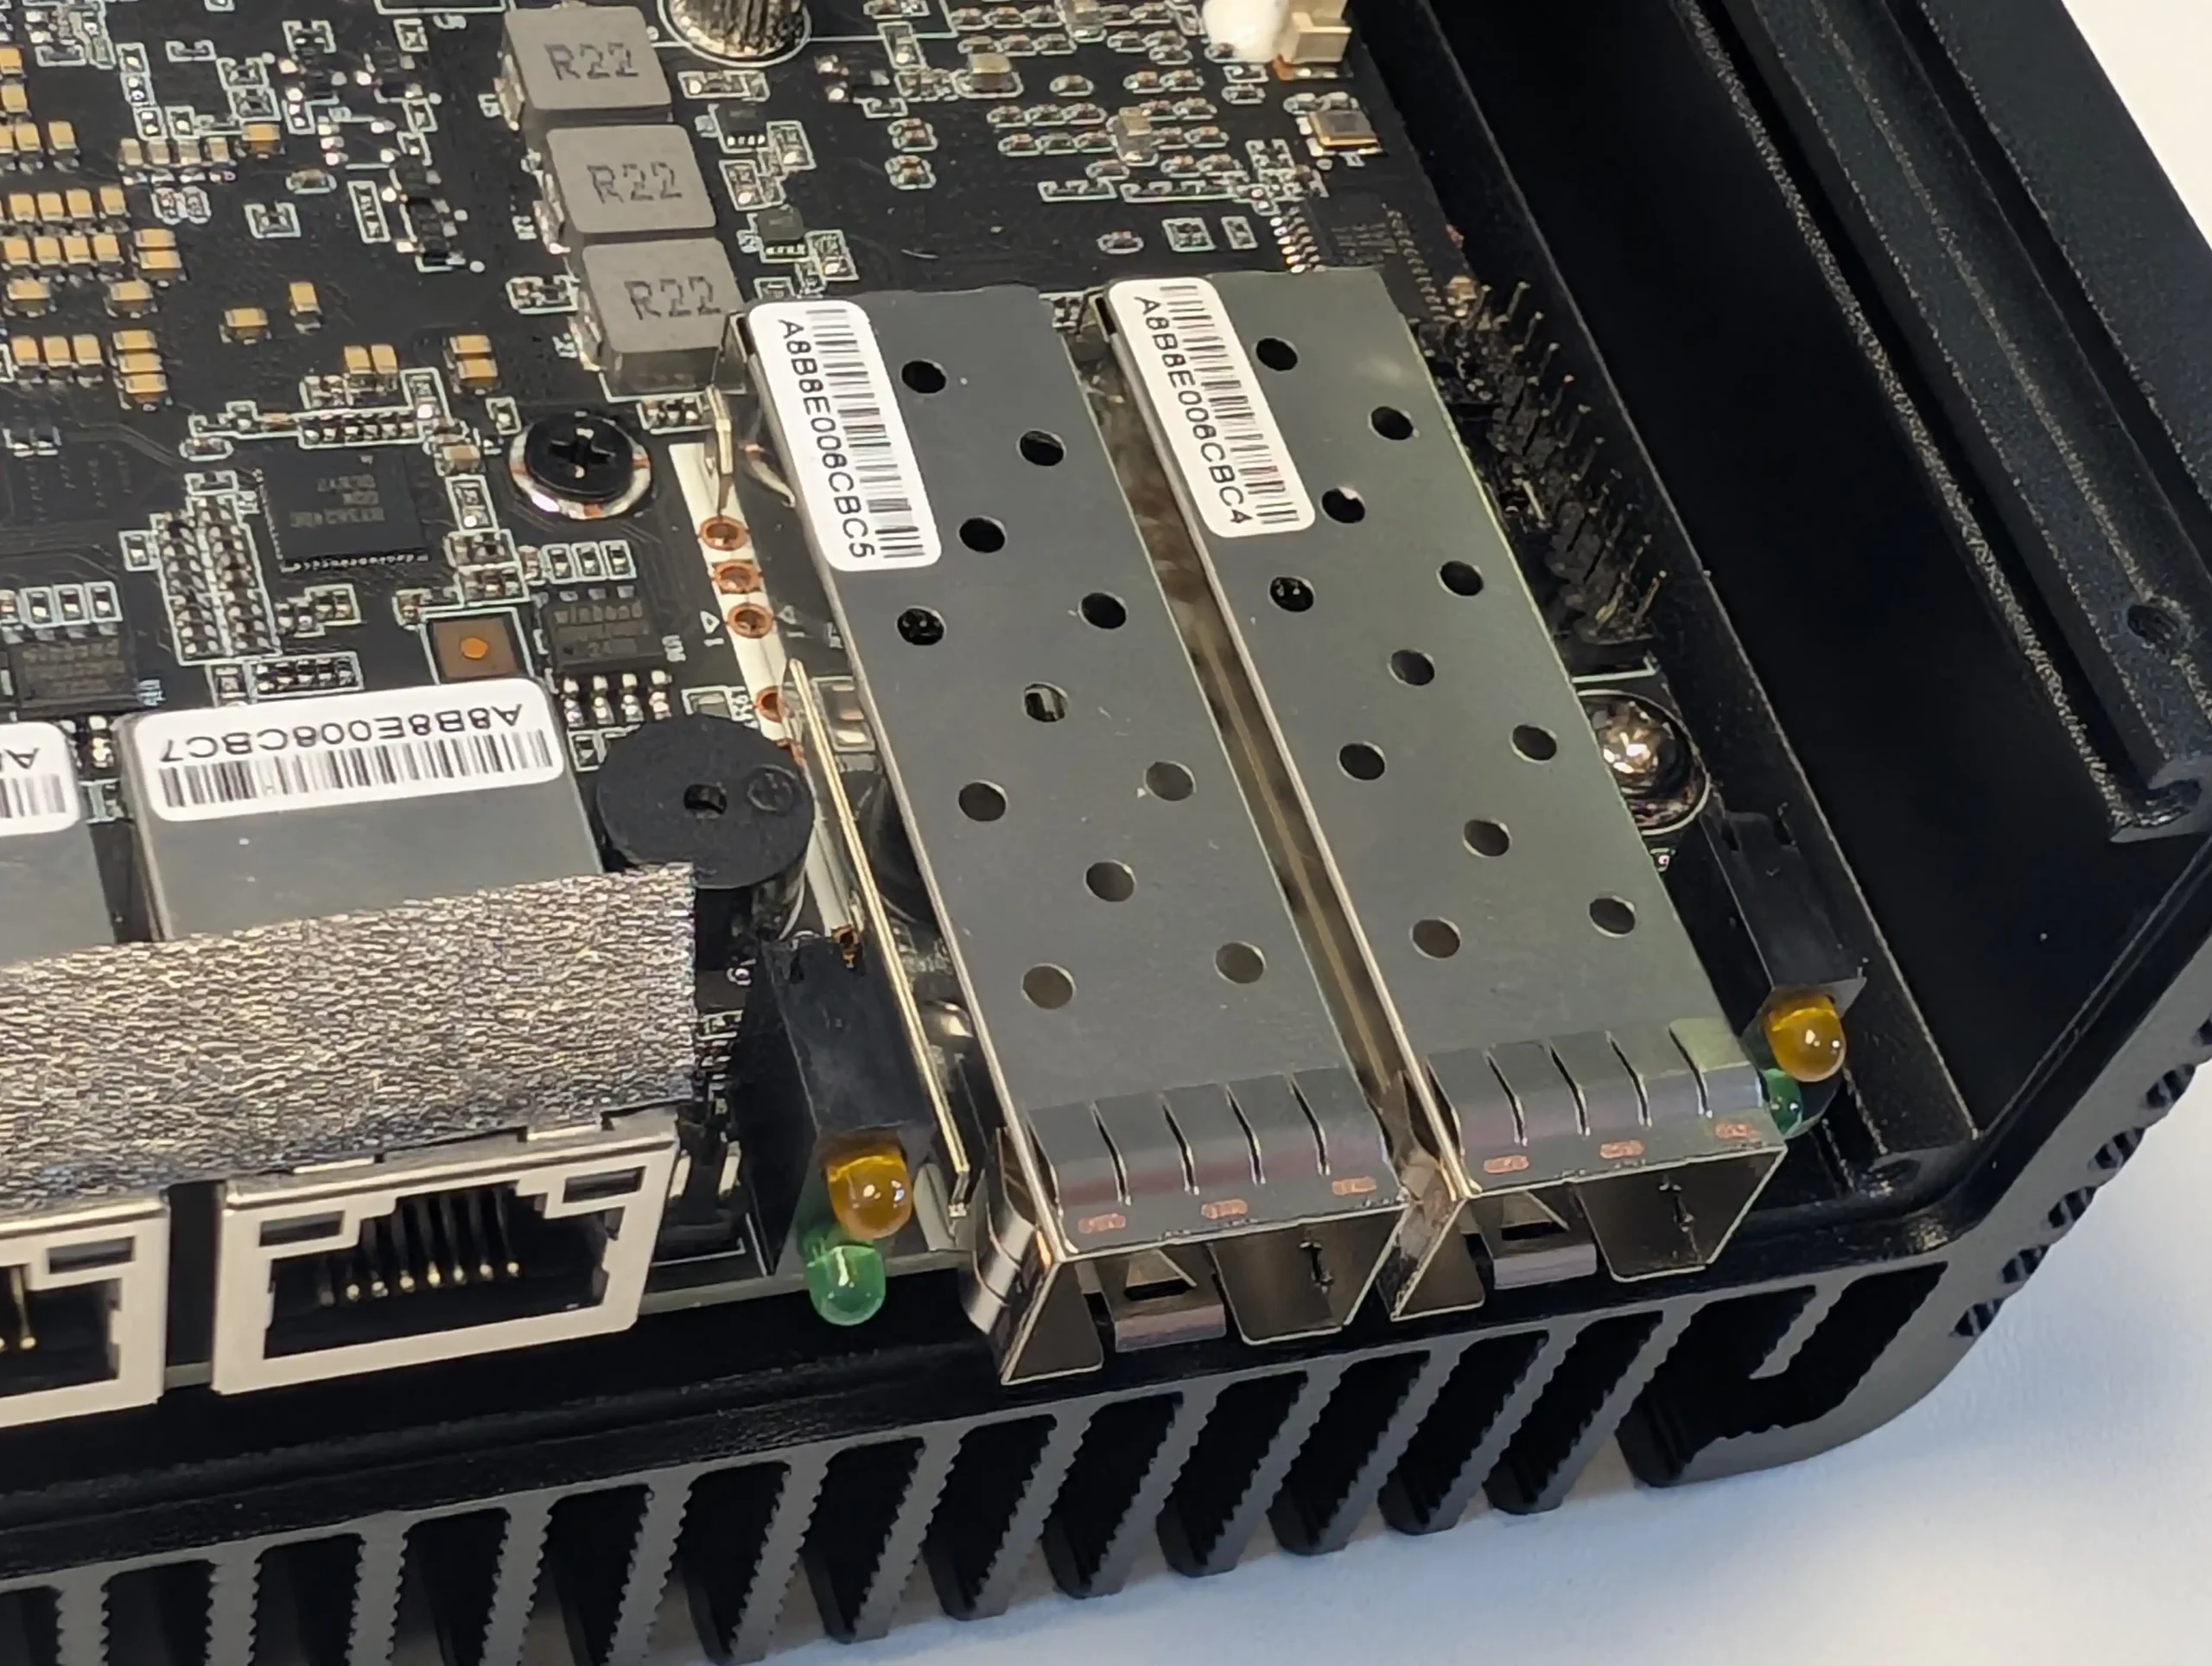
It also includes two M.2 NVMe slots and a SATA 3.0 port, making it highly flexible for storage configurations. This means users can integrate fast NVMe storage while still having the option to include traditional SATA drives for cost-effective capacity expansion.

The aluminum chassis with active cooling enhances its thermal efficiency, ensuring stable operation even under load, a crucial aspect for maintaining performance in continuous 24/7 operation.
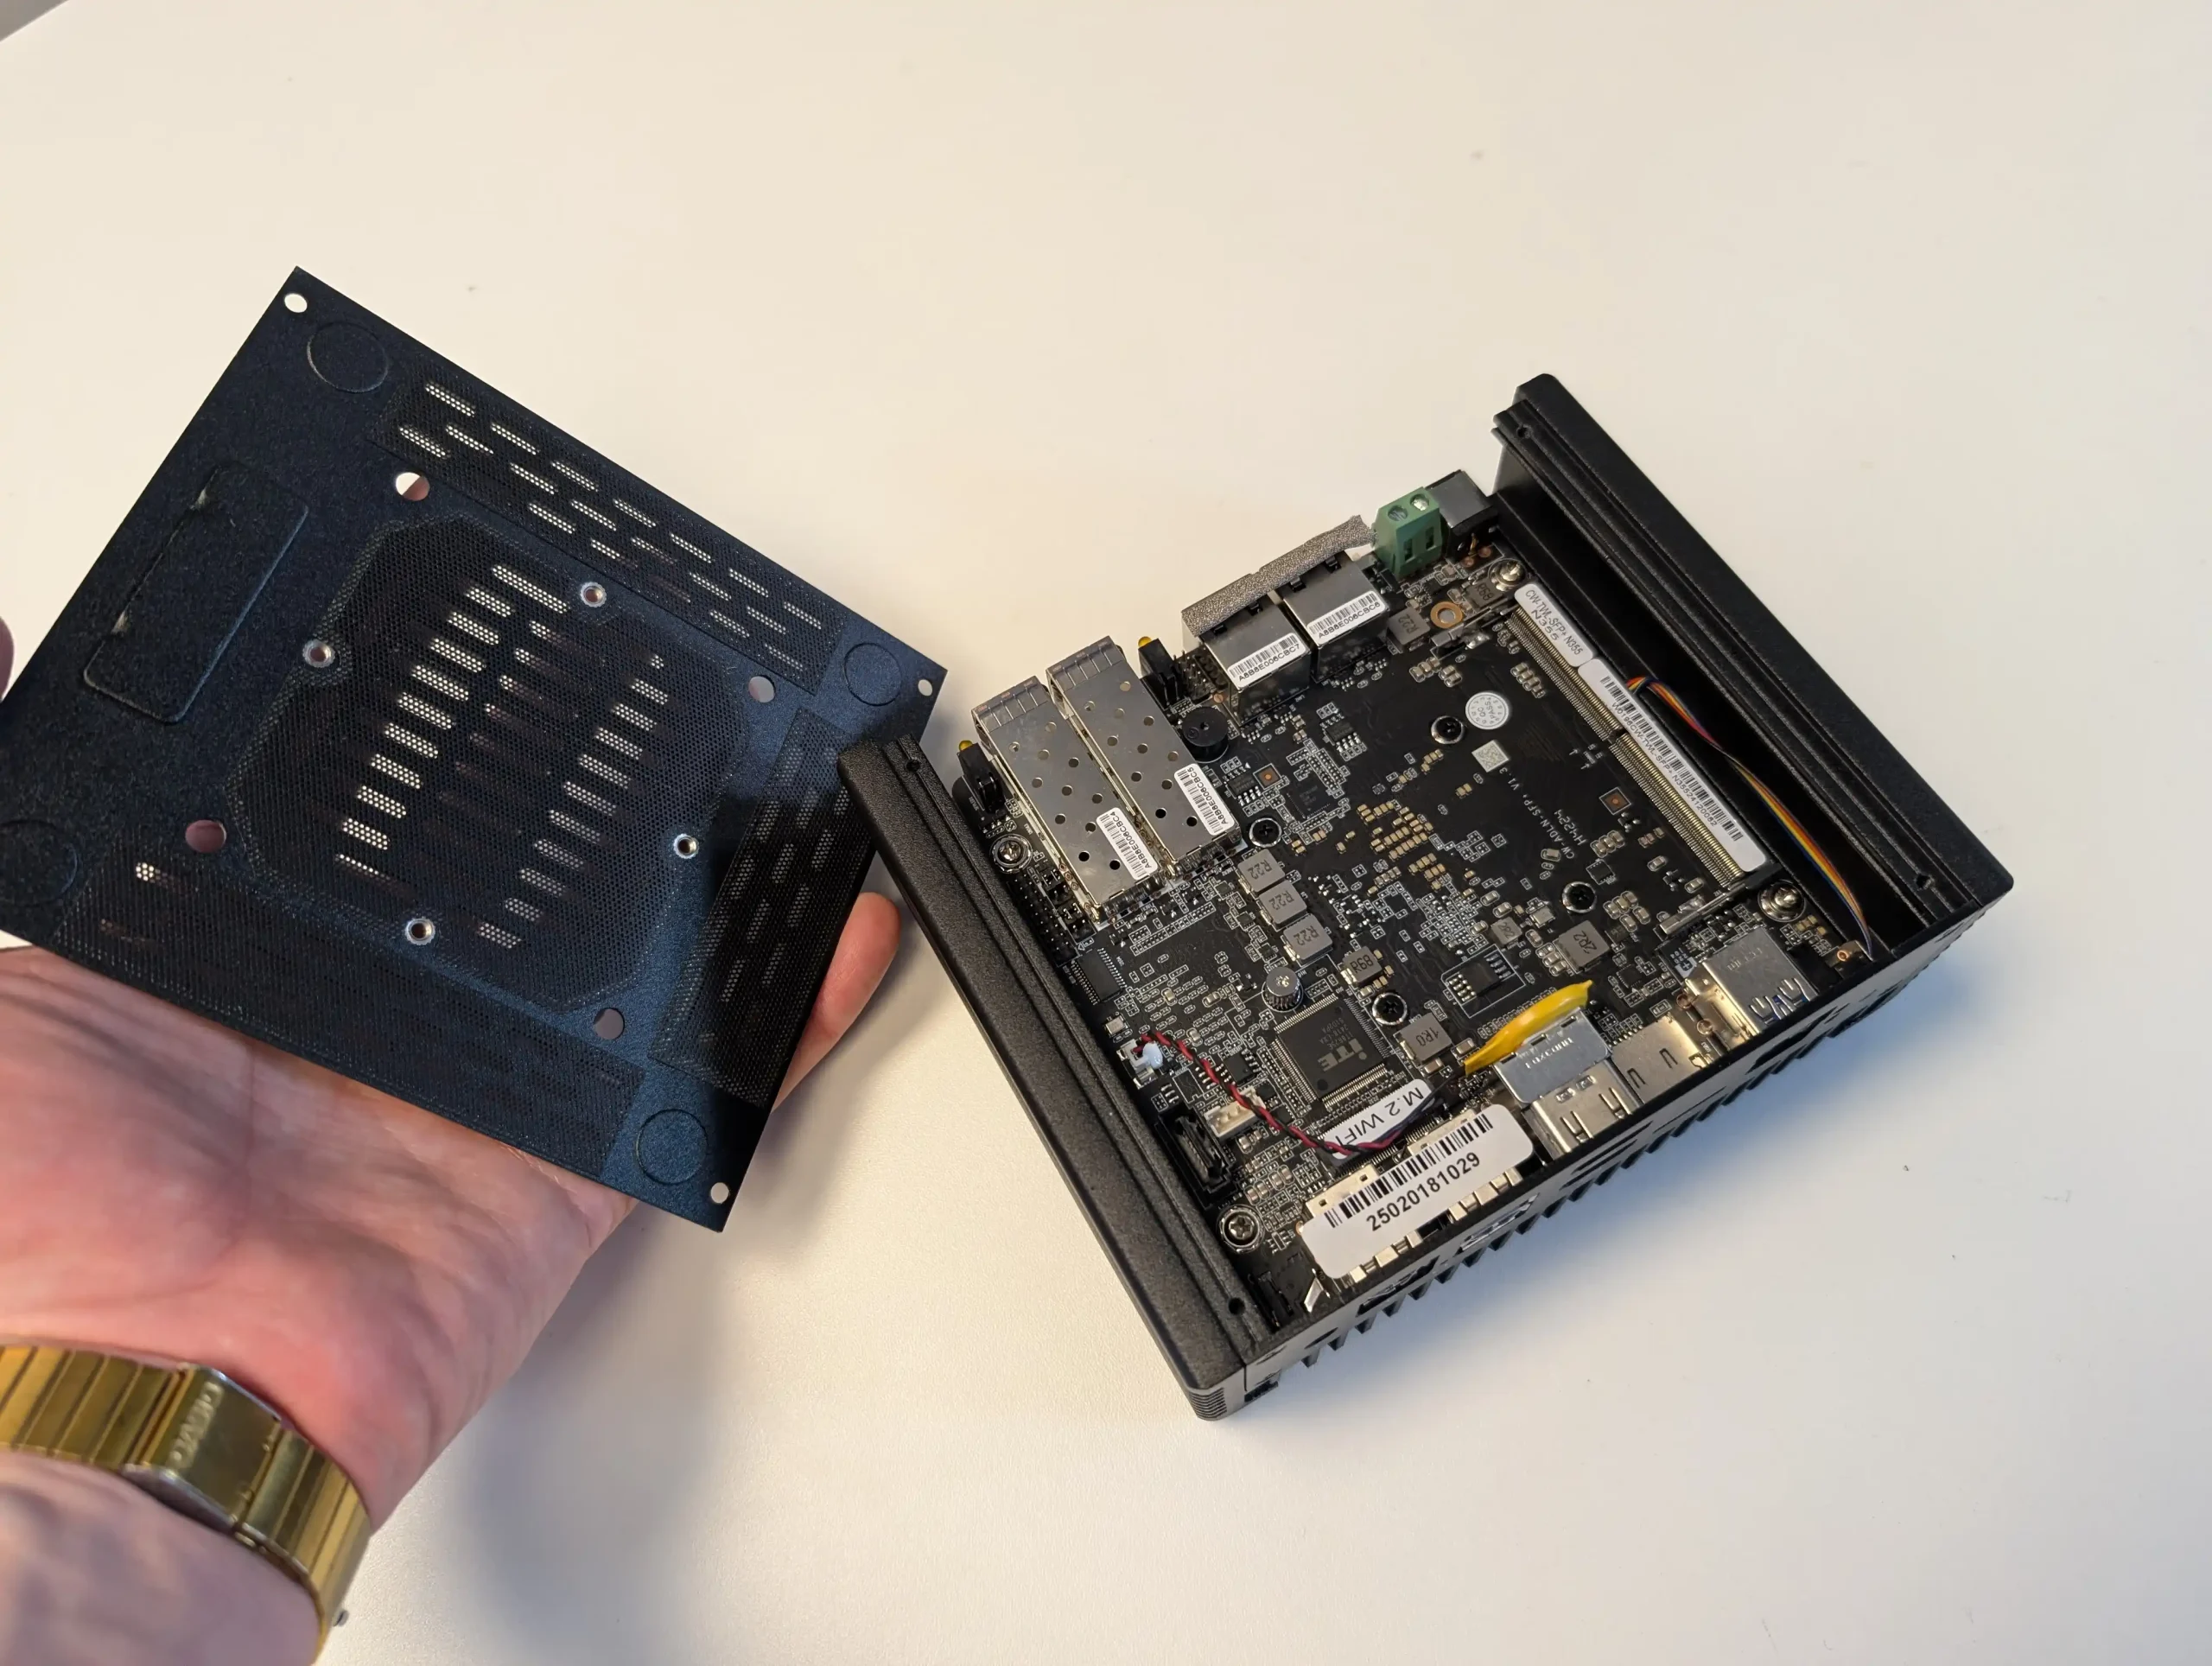
The N355 CPU, an Alder Lake-N processor, brings 8 cores and 8 threads, with a base clock of 1.8GHz and a boost up to 3.8GHz. This processor is designed for efficiency while maintaining a respectable level of performance for various workloads.
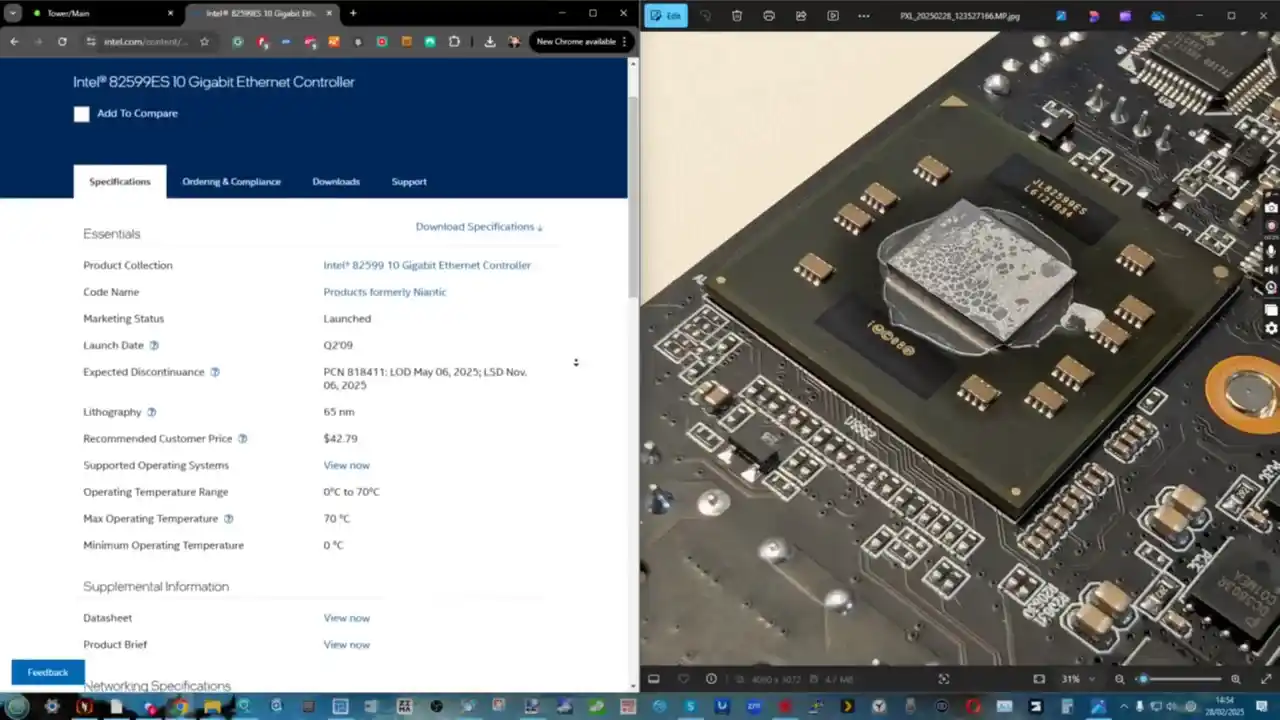
It also features integrated Intel UHD graphics, which allows it to handle lightweight GPU tasks such as video decoding, remote desktop applications, and low-power graphical processing.
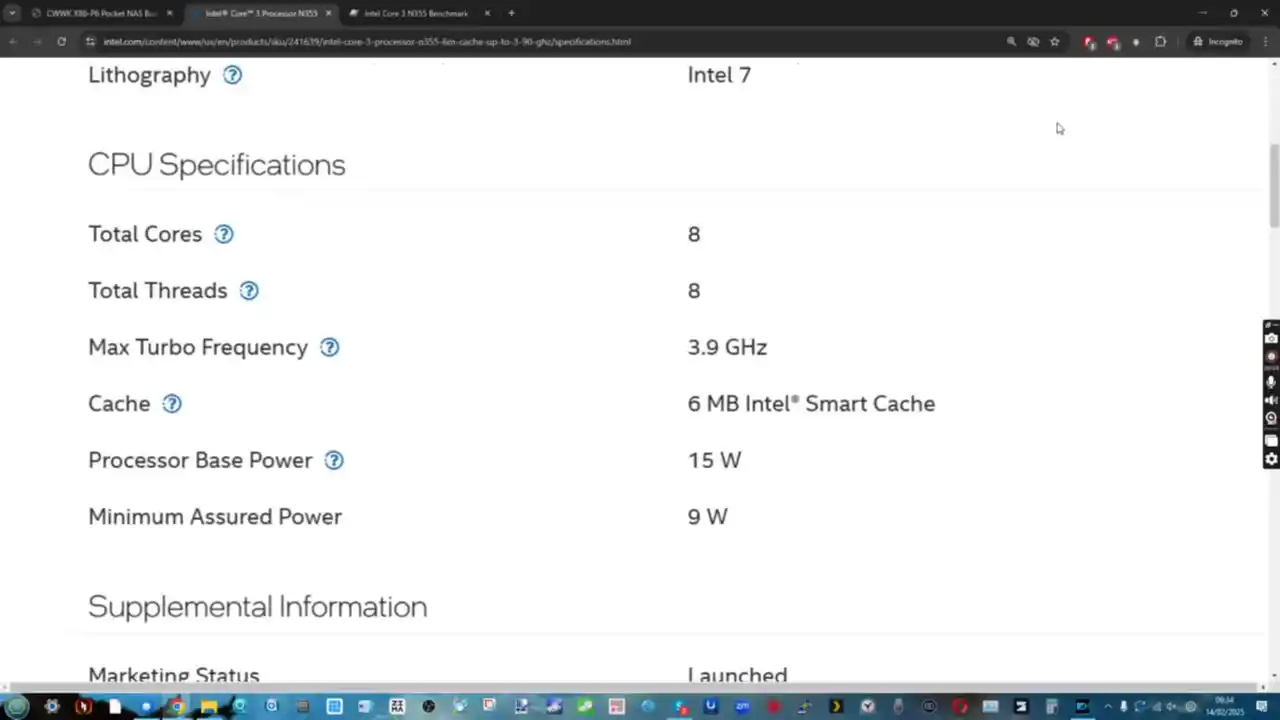
The DDR5 SO-DIMM slot supports up to 48GB RAM, although some listings mention 32GB as the maximum. This expanded memory capacity is particularly beneficial for virtualization, allowing users to run multiple lightweight VMs, containers, and even a Plex media server with modest hardware-accelerated transcoding capabilities.

| Component | Specification |
|---|---|
| Processor | Intel Alder Lake-N N355, 8 Cores / 8 Threads, 1.8GHz base, 3.8GHz boost |
| Graphics | Integrated Intel UHD Graphics |
| Memory | 1 x DDR5 SO-DIMM slot, up to 48GB (some listings state 32GB max) |
| Storage | 2 x M.2 NVMe (one requires adapter), 1 x SATA 3.0 (no internal mounting) |
| Networking | 2 x 10GbE SFP+, 2 x 2.5GbE i226V LAN |
| Power Consumption | 21-22W idle, up to 36W under load |
| Cooling | Aluminum chassis with active cooling fan |
| Ports | 1 x Type-C, 1 x USB 3.2, 4 x USB 2.0, 2 x HDMI 2.0, TF Card Slot |
| Operating System Support | Windows 11 Pro, OPNsense, Linux, ESXi, OpenWrt |
| Dimensions | 12.7 x 17.8 x 5.5 cm |
| Weight | 1.3 kg |
The combination of efficient CPU performance and expandable RAM makes it versatile, but users should be aware of its limitations when handling resource-intensive applications.
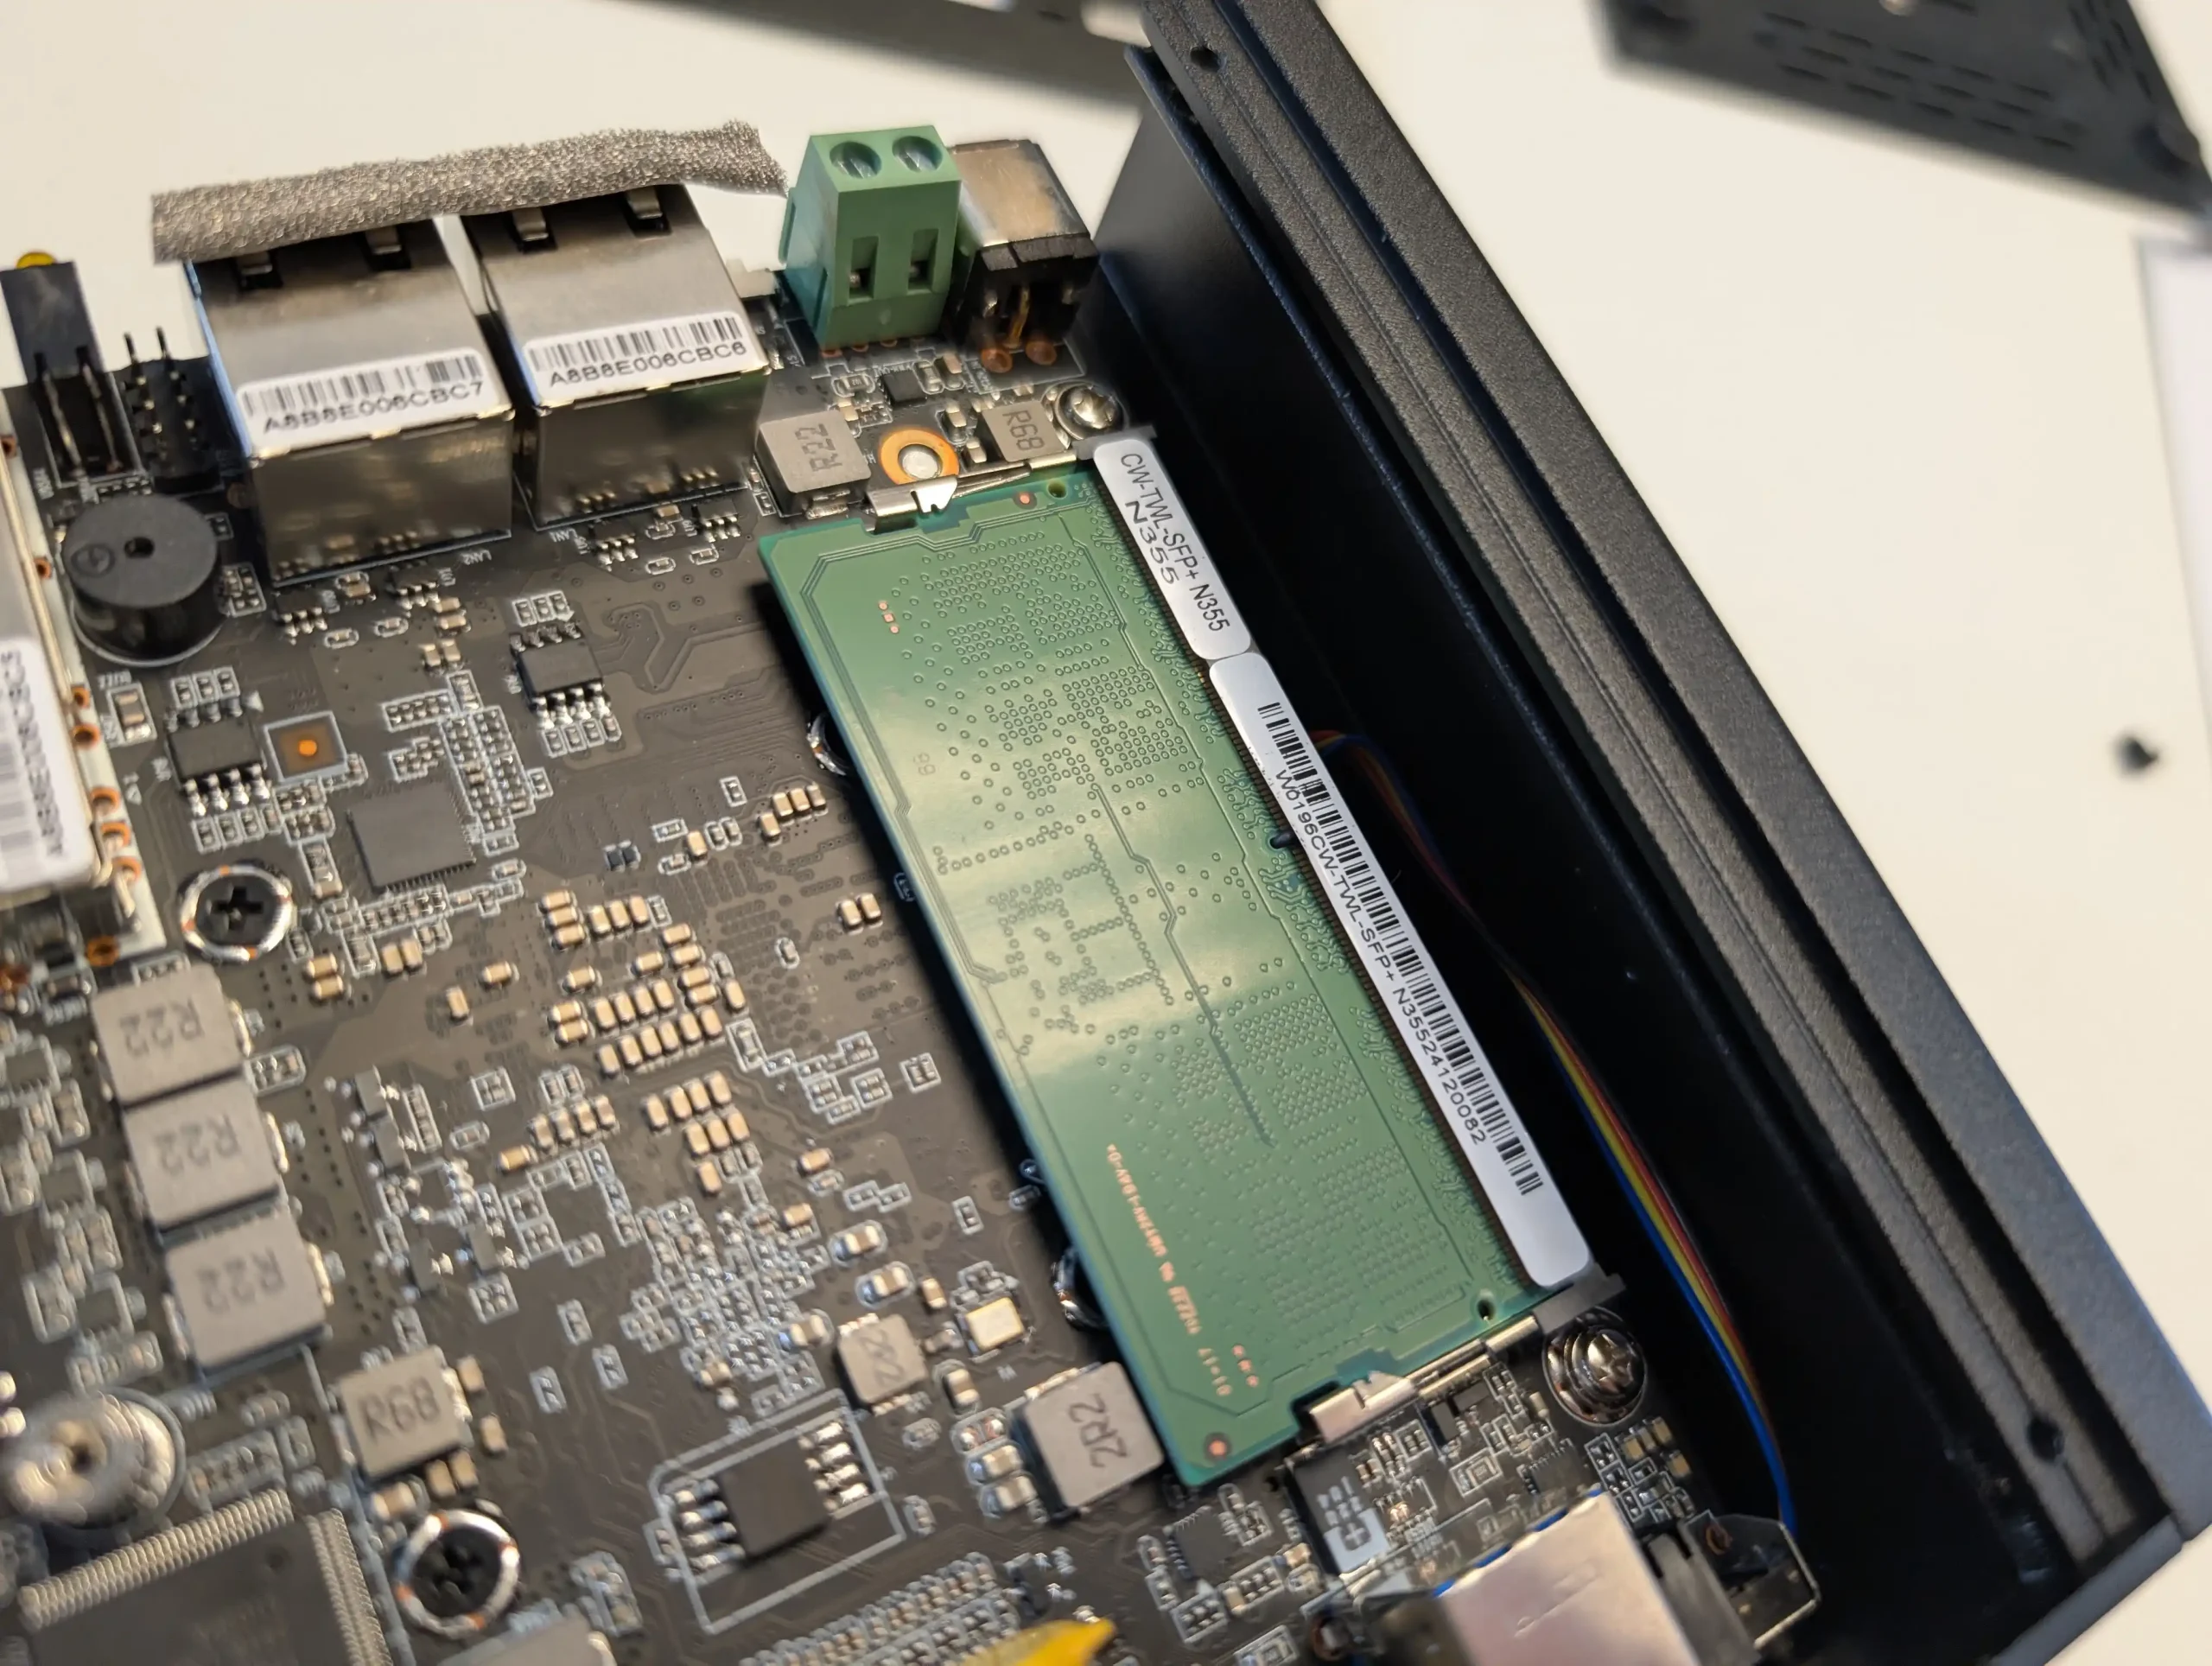
However, storage expansion comes with some challenges. While the device technically supports two M.2 NVMe drives, only one slot is a standard 2280 interface. The second slot requires an adapter, which is included, but adds complexity to installation. This additional requirement may be a concern for users who are less experienced with hardware modifications or prefer simpler plug-and-play configurations.
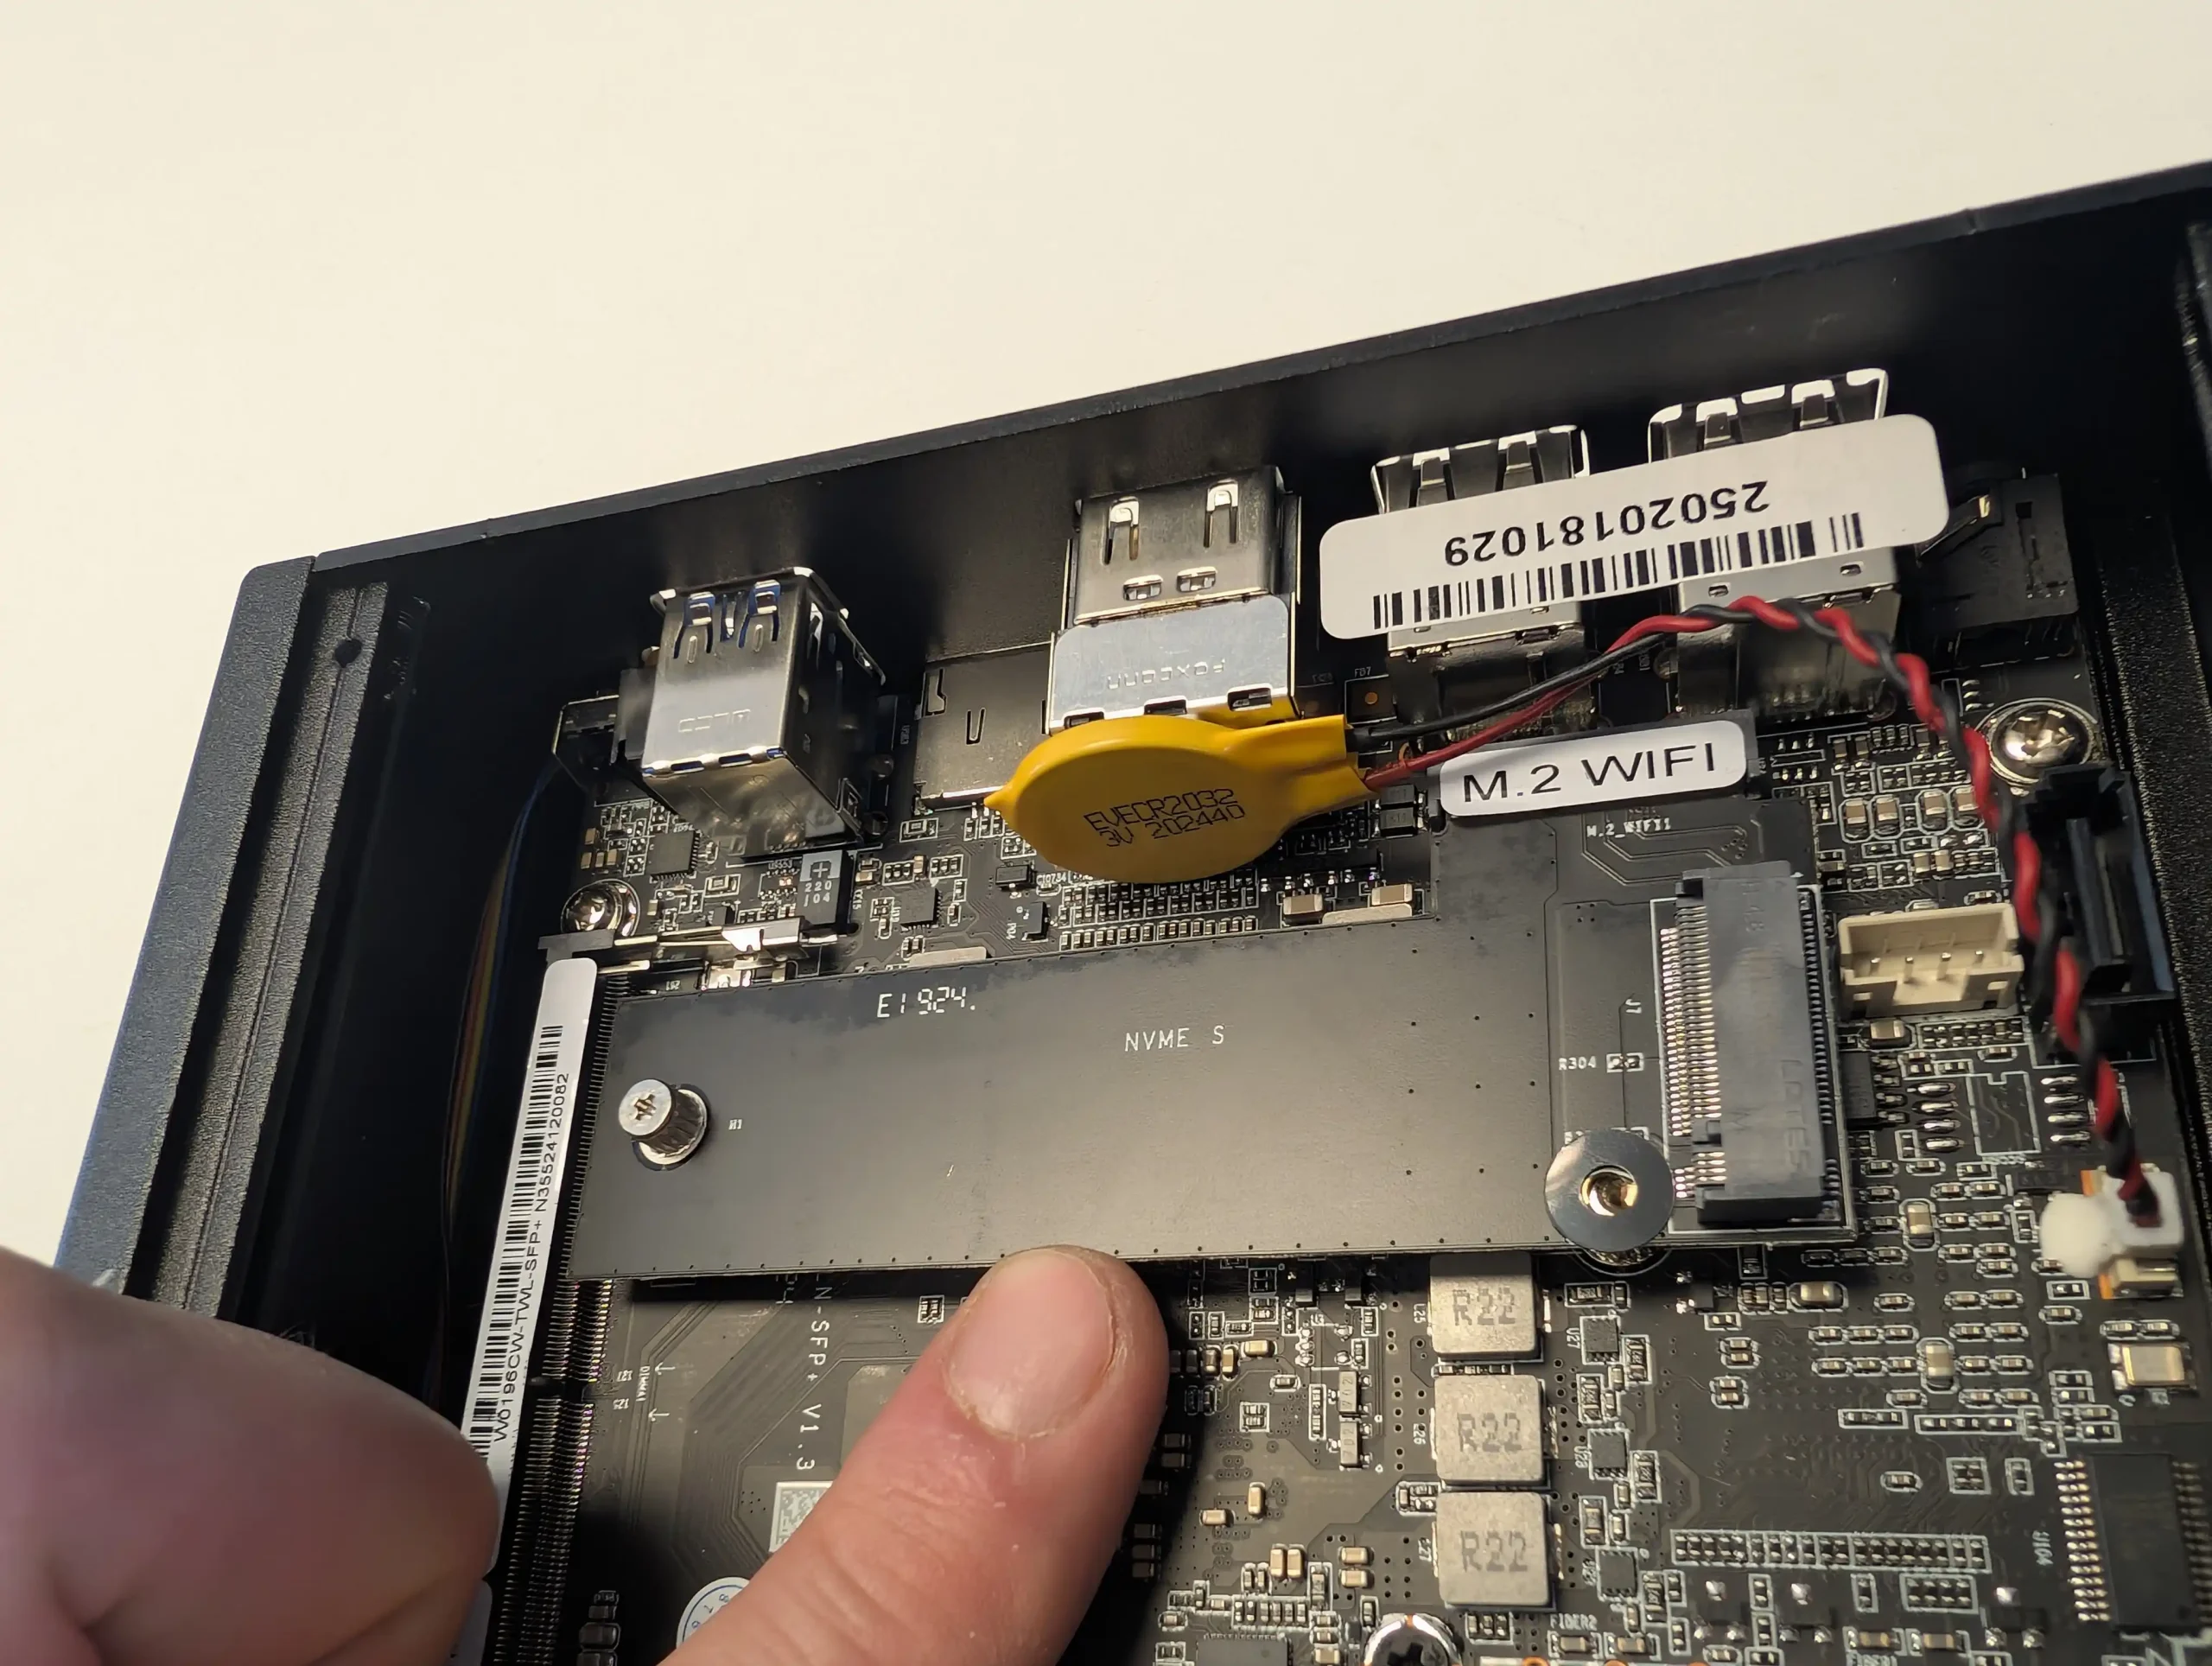
The SATA drive support is somewhat limited—while the port is available, there is no dedicated internal space for mounting a 2.5-inch drive inside the enclosure, meaning external mounting is necessary. This lack of internal SATA mounting may be a dealbreaker for those who prefer a more integrated and clutter-free build. While external enclosures or adapters could be used to house SATA drives, it introduces additional complexity and potential cable management issues.

Power consumption is another area of concern. Under idle conditions, the device draws 21-22W, which is quite high compared to traditional NAS appliances. Many consumer NAS systems are designed to run efficiently at around 10W to 15W when idle, making this unit significantly more power-hungry when not under load.
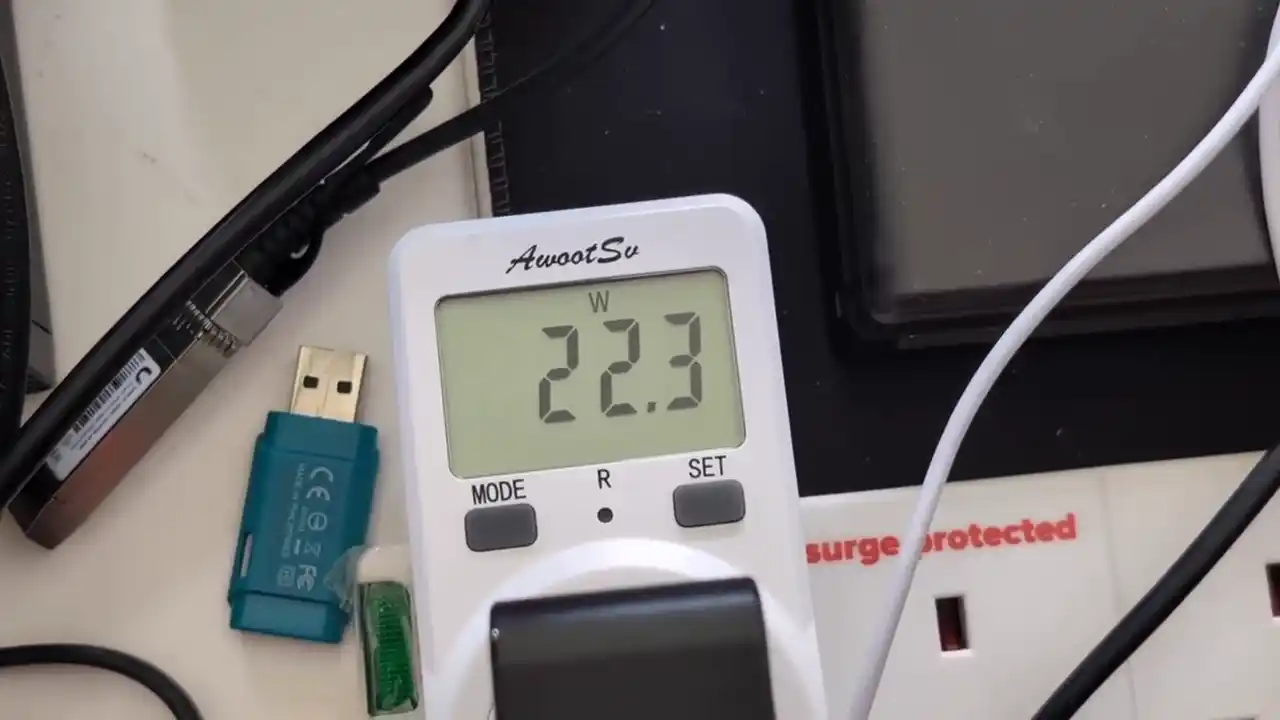
Under load, with 10GbE connections active, VMs running, and storage drives in use, power consumption reaches 36W. While this is still within reasonable limits for a device offering high-speed networking and multi-core processing, it is something to consider for users prioritizing energy efficiency. Over time, the additional power draw may add up, especially for those running multiple devices in a home or small business setup. If power efficiency is a critical factor, other lower-power options might be preferable.
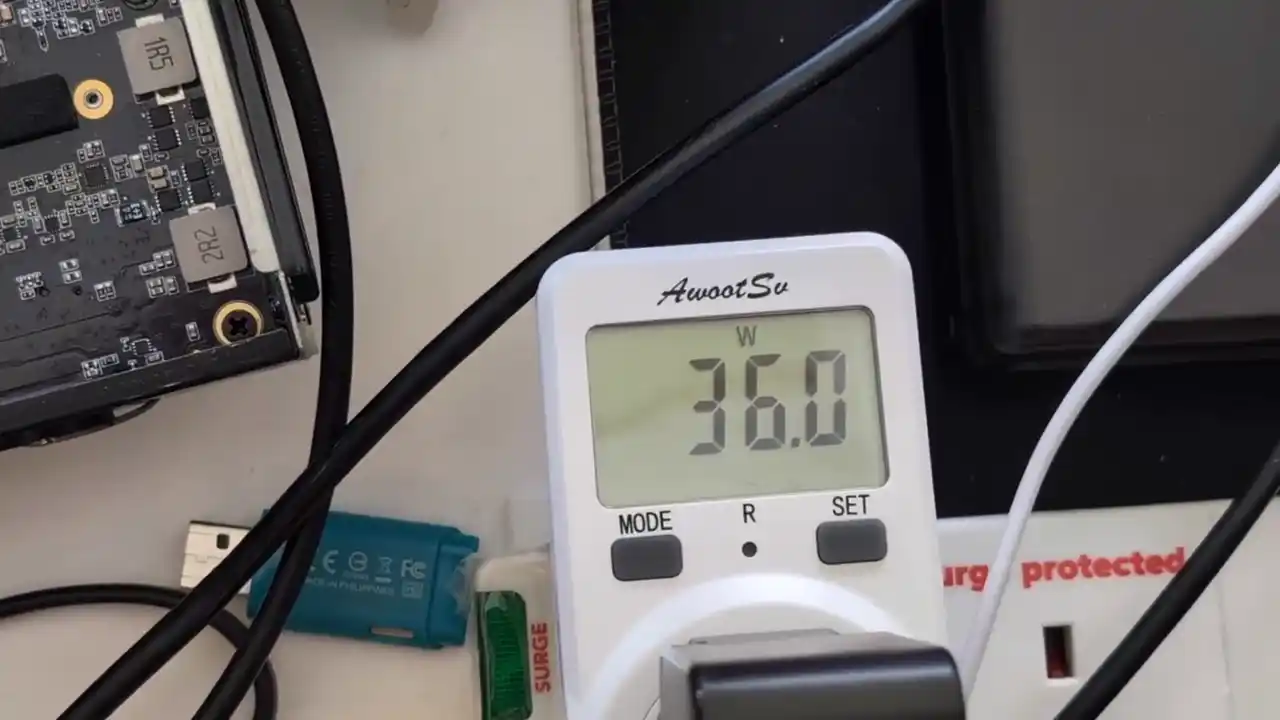
Performance-wise, the M.2 NVMe drives achieve read speeds of up to 720MB/s and write speeds of 690MB/s.
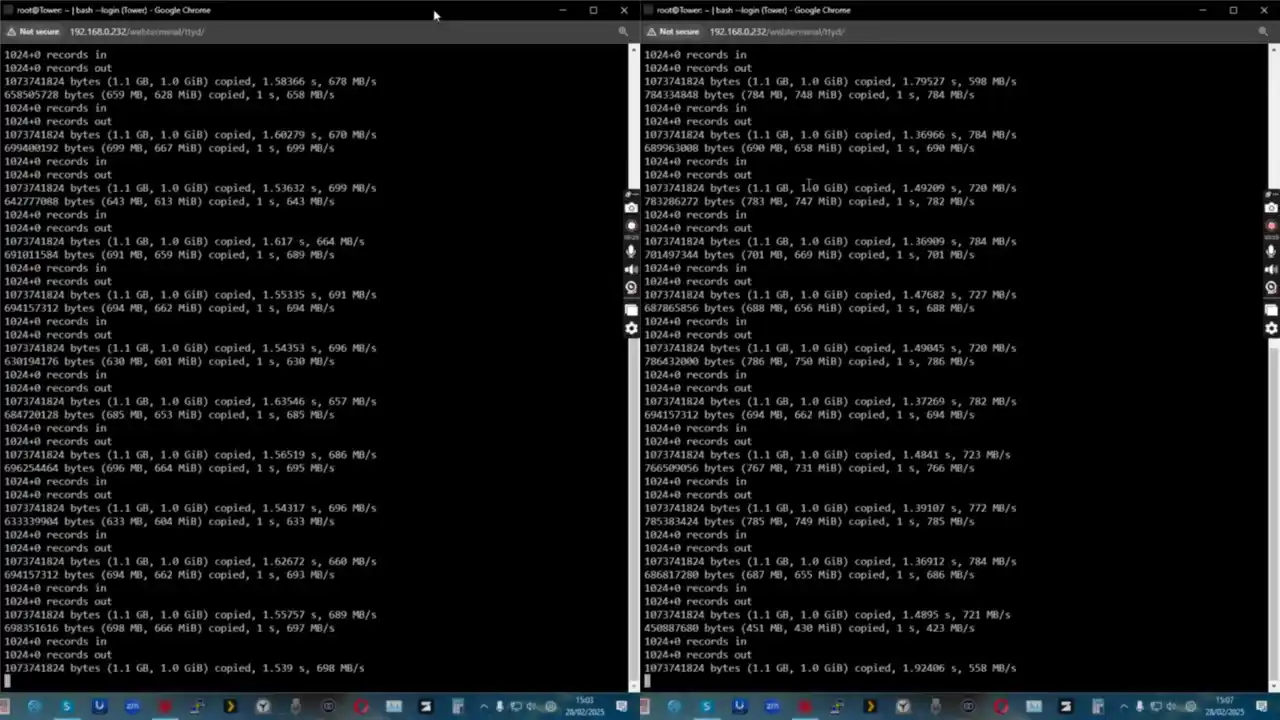
While SATA performance peaks at around 200MB/s with a standard HDD. These speeds are respectable but fall short of fully utilizing the available 10GbE networking potential.
While this is acceptable for most home NAS applications, the 82599ES 10GbE controller is a notable bottleneck. It is an older PCIe Gen2 x4-based controller (in this deployment at least), which limits full 10GbE speeds.
In testing, even with dual 10GbE connections active, network transfers maxed out at around 600-700Mbps per link, rather than saturating the full 10GbE bandwidth on each of them.

This suggests that while it is capable of handling high-speed transfers, it is not the ideal choice for users who need to maximize 10GbE connectivity for large-scale data transfers or enterprise workloads.
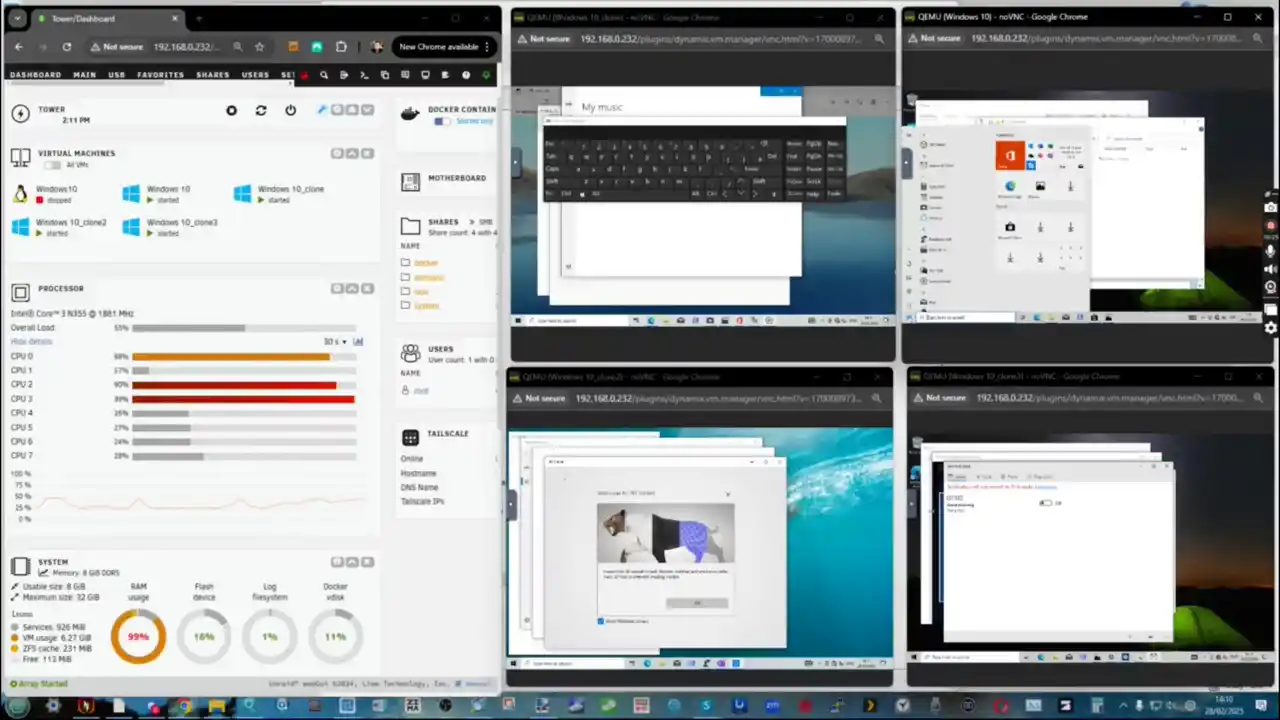
While the CWWK N355 offers excellent networking and processing power, its relatively aging 10GbE controller, high idle power consumption, and limited internal storage space make it less ideal for an all-purpose NAS. However, it excels as a high-performance firewall/router, Proxmox host, or Plex server for users who can work around these limitations.
Users interested in setting up an advanced home lab or small business server might find this device appealing due to its networking flexibility, processing capability, and virtualization potential. While it lacks native software optimization found in dedicated NAS brands, those comfortable with manual setup and open-source NAS software will find it a capable and adaptable device.
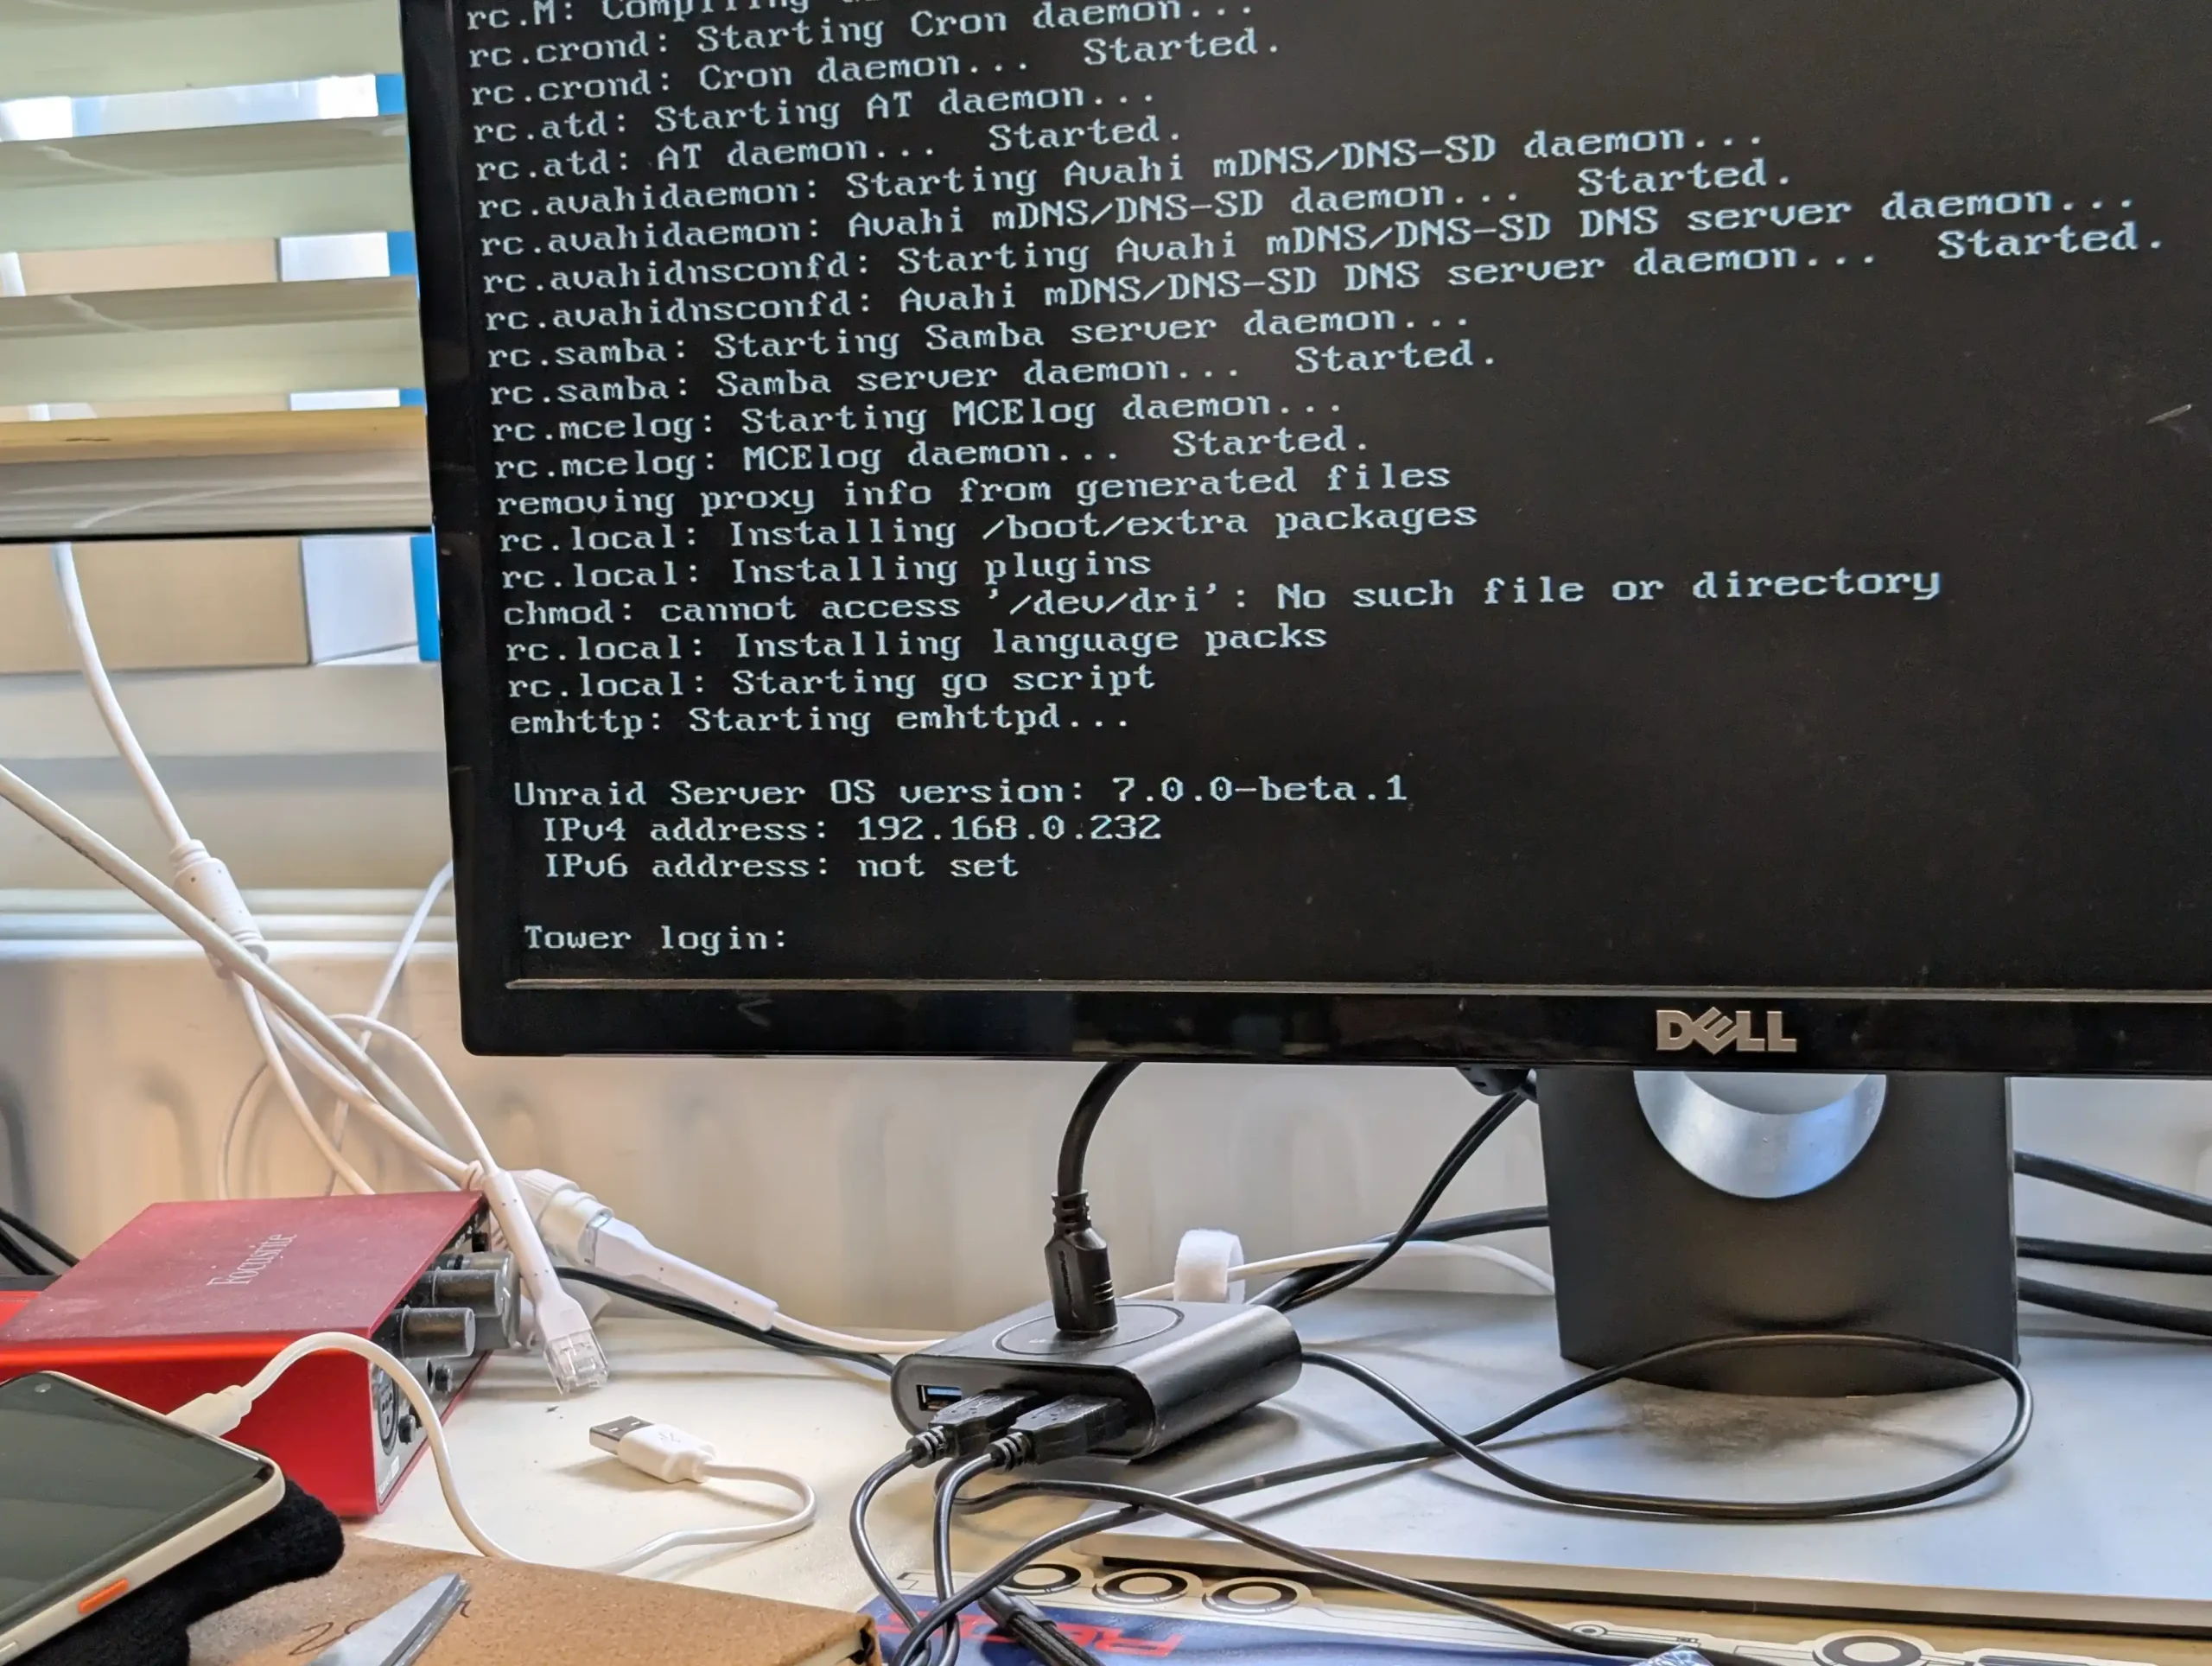
For those seeking a dedicated NAS solution with full 10GbE performance, an ITX motherboard with PCIe 3.0 slots and dedicated storage expansion might be a better alternative. Such options would provide greater flexibility for storage expansion, more efficient networking solutions, and overall better optimization for NAS workloads. But if you’re looking for a compact, all-in-one networking and storage device, the CWWK N355 is an impressive contender.

Just be mindful of the legacy components and potential bottlenecks before making your final decision. With the right configuration and expectations, it can serve as a cost-effective and powerful addition to a home lab or small business network setup.
| PROs of the CWWK N355 DIY 10GbE Box | CONs of the CWWK N355 DIY 10GbE Box |
|
|
| Where to Buy? |
SUBSCRIBE TO OUR NEWSLETTER Join Inner Circle Subscribe
This description contains links to Amazon. These links will take you to some of the products mentioned in today's content. As an Amazon Associate, I earn from qualifying purchases. Visit the NASCompares Deal Finder to find the best place to buy this device in your region, based on Service, Support and Reputation - Just Search for your NAS Drive in the Box Below
Need Help?
Where possible (and where appropriate) please provide as much information about your requirements, as then I can arrange the best answer and solution to your needs. Do not worry about your e-mail address being required, it will NOT be used in a mailing list and will NOT be used in any way other than to respond to your enquiry.
[contact-form-7]
Ko-fi or old school Paypal. Thanks!To find out more about how to support this advice service check HEREIf you need to fix or configure a NAS, check Fiver
Have you thought about helping others with your knowledge? Find Instructions Here
|
|
|