Depuis quelque temp, un mouvement de fond s’observe : un retour progressif vers les infrastructures locales. La raison ? Même s’il a de nombreux atouts, le Cloud ne coche plus toutes les cases dès que l’on parle de confidentialité des données, de latence ou simplement de coûts. C’est sur ce créneau que QNAP positionne son QAI-h1290FX. Un serveur de stockage pensé pour les charges de travail IA : LLM, architectures RAG, inférence en temps réel. Ici, il ne s’agit pas d’un simple NAS avec un logo IA collé dessus…
QNAP QAI-h1290FX
Le QAI-h1290FX est un boitier 12 baies SSD U.2 NVMe/SATA. Pas de disques rotatifs ici, on est clairement dans le registre des IOPS élevées, indispensables pour alimenter des pipelines de données intensifs ou soutenir l’inférence en temps réel sans créer de goulot d’étranglement côté stockage. Il est animé par un AMD EPYC 7302P (16 cœurs / 32 threads) pouvant atteindre 3,3 GHz. A noter que ce processeur a obtenu 32 114 points selon PassMark. Ce dernier est épaulé par 128 Go de RAM RDIMM DDR4 ECC extensible jusqu’à 1 To (8 × 128 Go)
Le QAI-h1290FX n’est pas un NAS comme les autres. Il est compatible avec les cartes NVIDIA RTX, notamment la RTX PRO 6000 Blackwell Max-Q, embarquant jusqu’à 96 Go de VRAM. Une capacité mémoire GPU qui change la donne pour quiconque veut faire tourner des LLM de taille respectable en local. La prise en charge de CUDA, TensorRT et du Transformer Engine vient confirmer l’orientation IA-first de la machine. On n’est pas sur un gadget, mais un outil capable d’accélérer des modèles de deep learning, de génération d’images ou de traitement du langage naturel.
Connectique
La connectivité est à la hauteur des ambitions du boîtier :
3 ports USB 3.0
2 ports réseau 2,5 Gb/s
2 ports réseau 25 Gb/s en SFP28
A noter la présence de 4 emplacements PCIe (3* Gen 4 x16 et 1* Gen 4 x8)
QuTS hero et l’écosystème logiciel
Côté système, on est sur du QuTS hero, basé sur ZFS. On retrouve les fonctionnalités attendues pour un usage professionnel : déduplication, snapshots, intégrité des données. Rien de révolutionnaire pour les habitués de la gamme… Container Station et Virtualization Station permettent de gérer des environnements bénéficiant d’un accès direct au GPU, ce qui permet aux équipes de déployer des modèles sans friction et sans reconfiguration complexe.
Plusieurs outils populaires dans l’écosystème IA open source sont préinstallés :
AnythingLLM, OpenWebUI, Ollama : pour monter rapidement un LLM privé ;
vLLM* : moteur d’inférence LLM ;
Stable Diffusion*, ComfyUI* : pour la génération d’images ;
n8n* : pour l’automatisation et les workflows sans code.
C’est une approche « prêt à l’emploi » qui tranche avec les serveurs IA nus que l’on retrouve chez certains concurrents.
En synthèse
Le QNAP QAI-h1290FX est un serveur de stockage conçu de bout en bout pour répondre aux besoins d’IA on-premise. L’alliance d’un stockage full-flash NVMe, d’un processeur EPYC et d’une compatibilité GPU NVIDIA en fait une plateforme intéressante pour les entreprises qui souhaitent reprendre la main sur leur stratégie IA (sans dépendre du cloud ou exposer leurs données).
Les logiciels faciles à installer (Ollama, OpenWebUI, n8n…) abaissent la barrière à l’entrée, ce qui est un point fort pour les équipes IT non spécialisées. Reste à connaître son prix et la date de disponibilité…
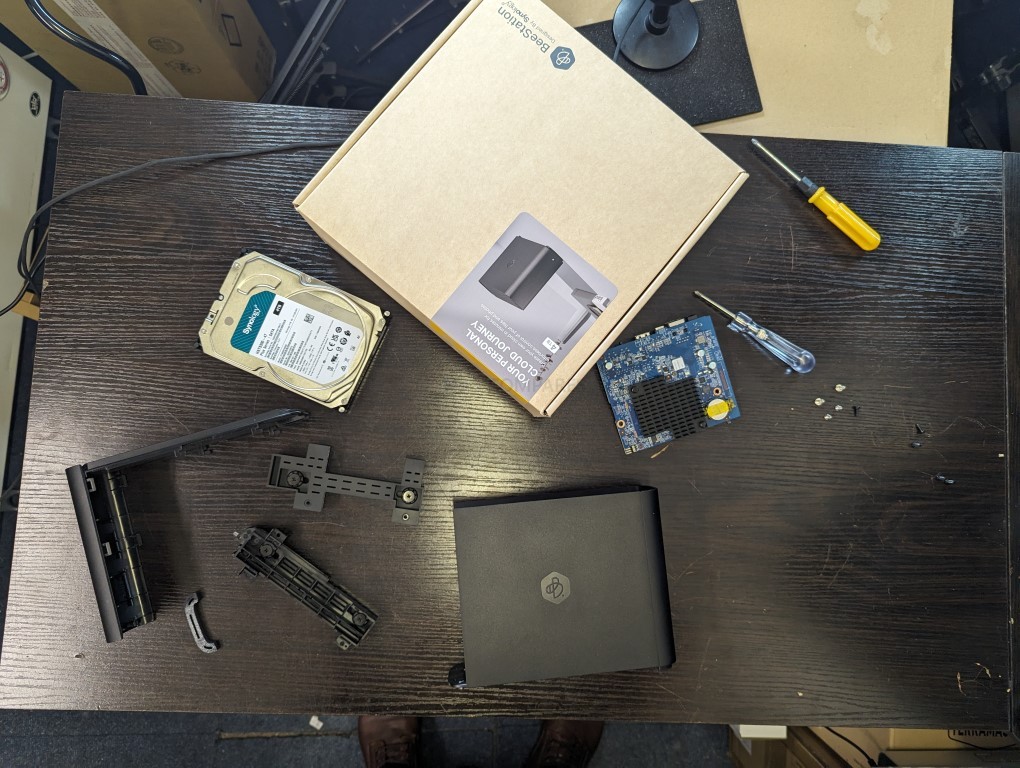
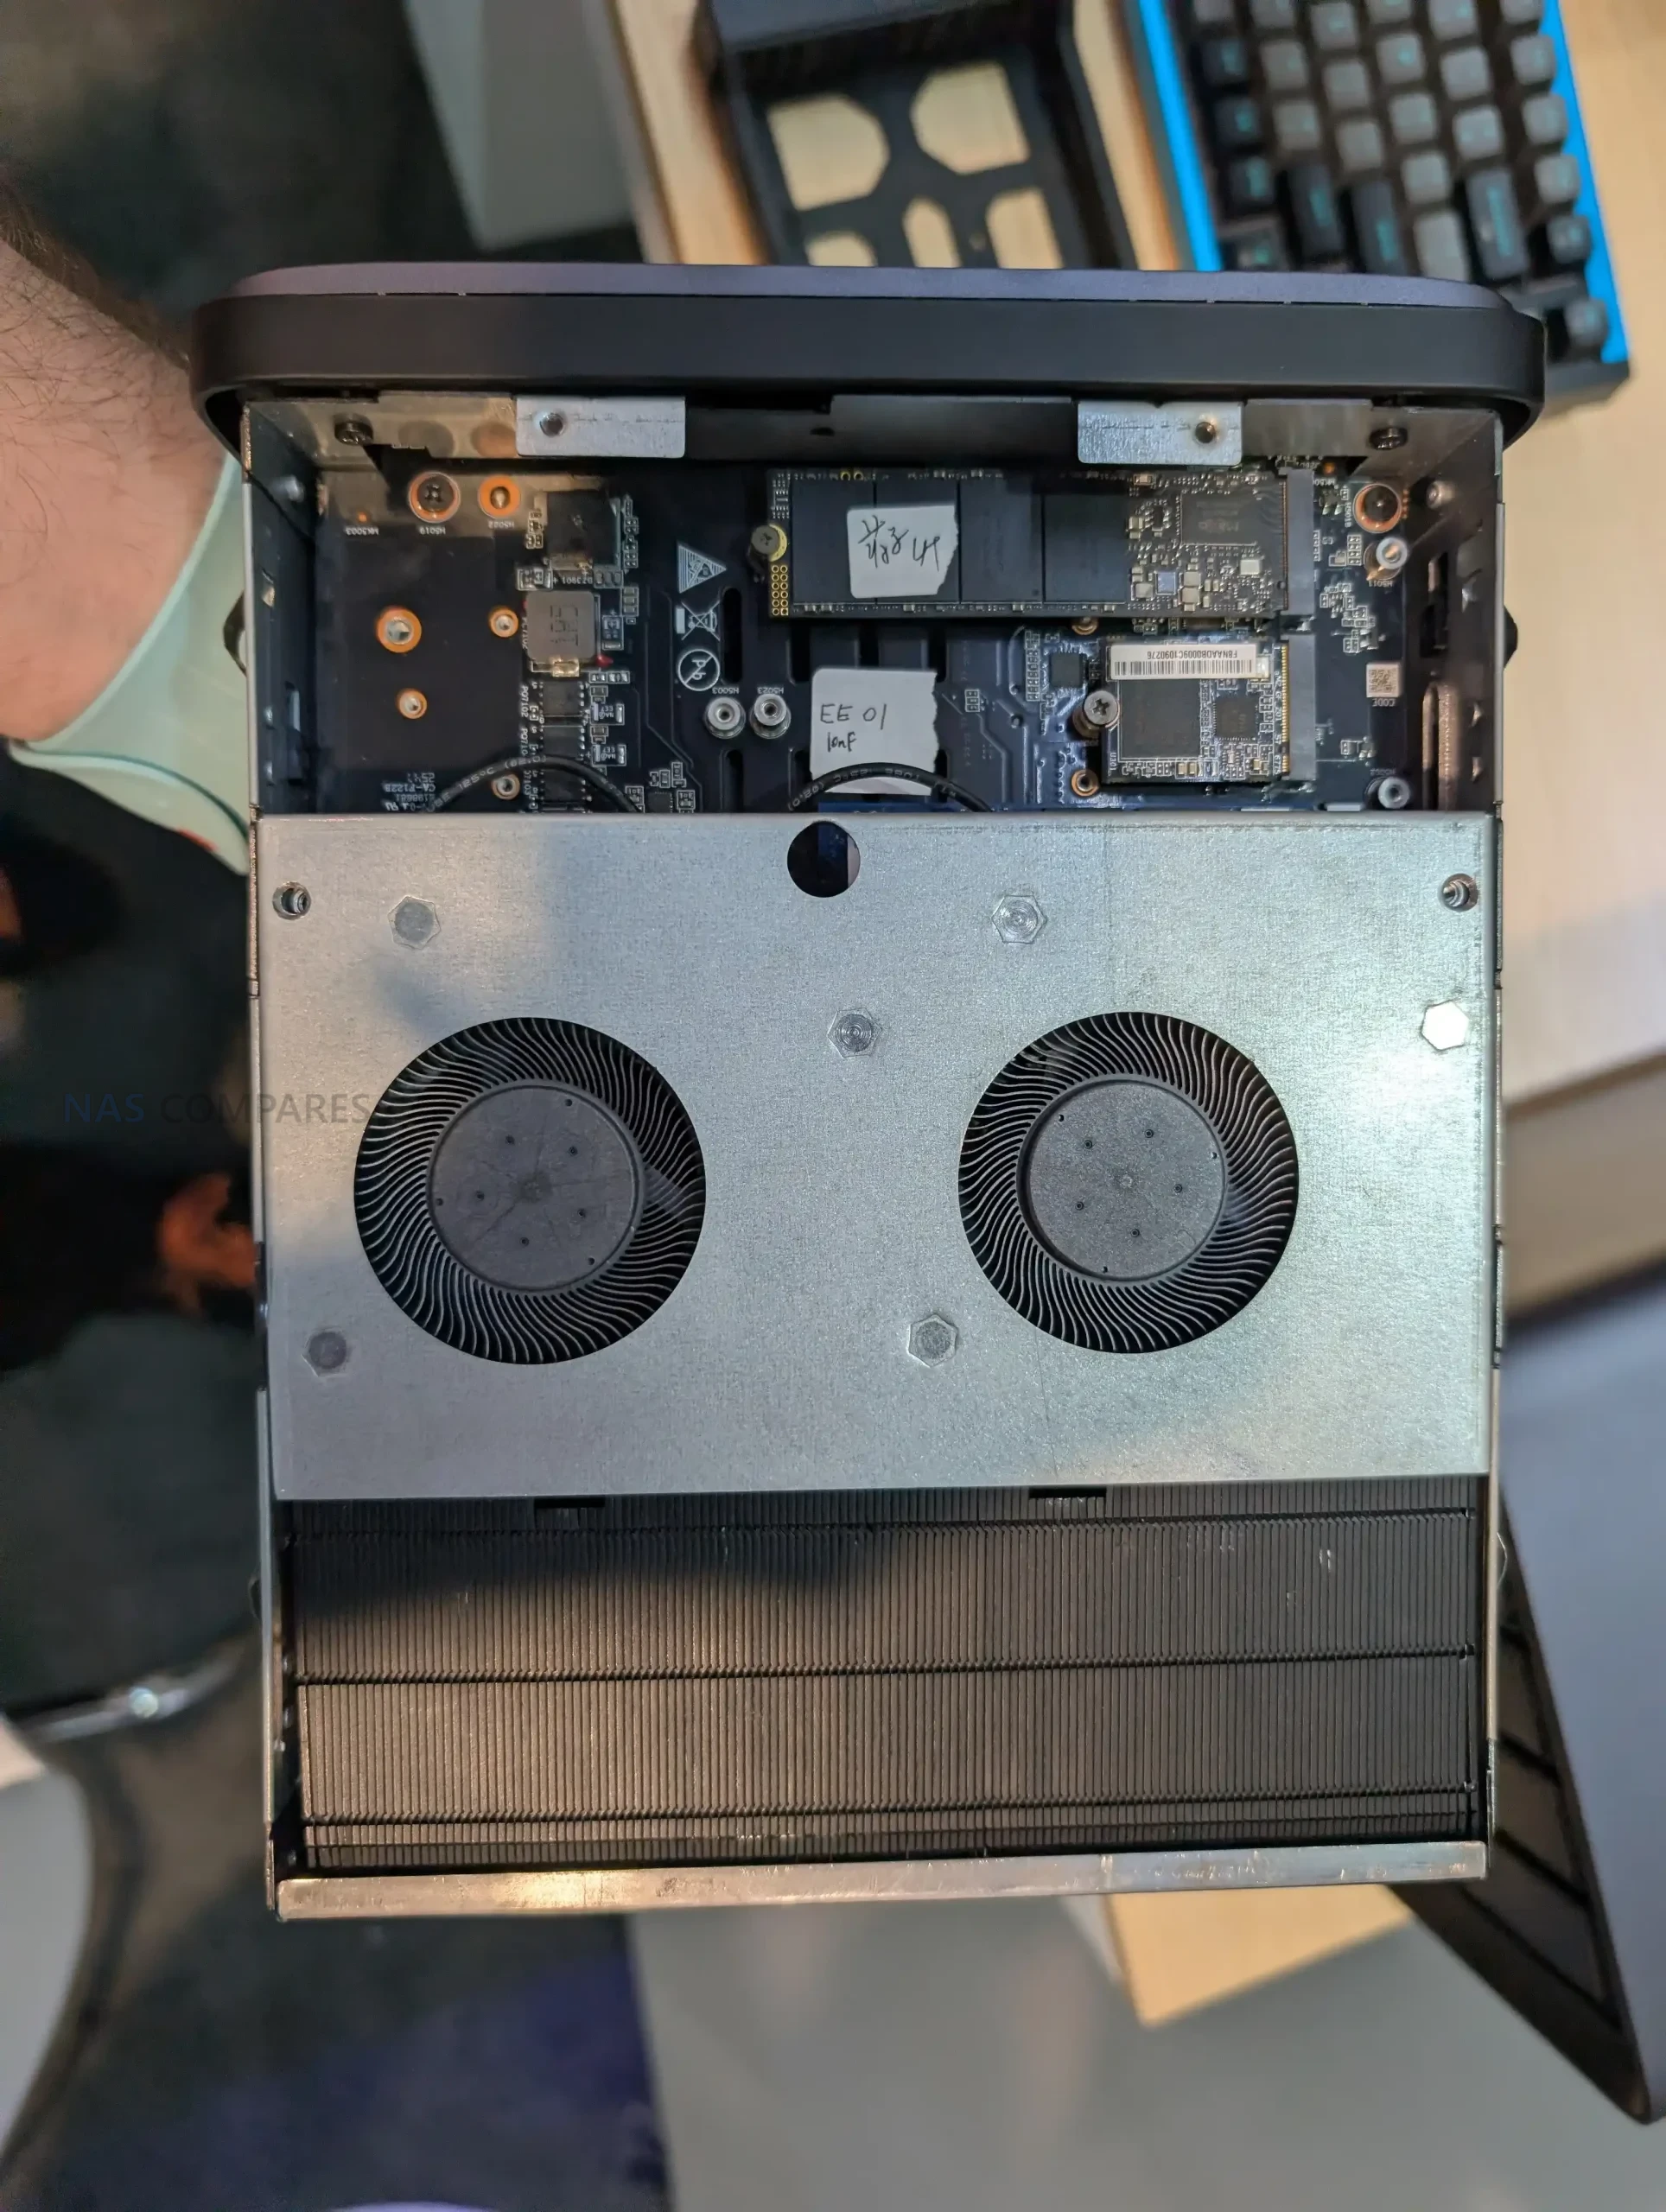
Avec le ZimaCube 2, IceWhale ambitionne de bousculer le marché des NAS. Fini le simple boîtier que l’on installe dans un coin pour stocker ses données. Le fabricant veut transformer le NAS en un véritable serveur domestique polyvalent, capable de gérer le stockage, la domotique, mais aussi des usages plus avancés comme l’IA en local…
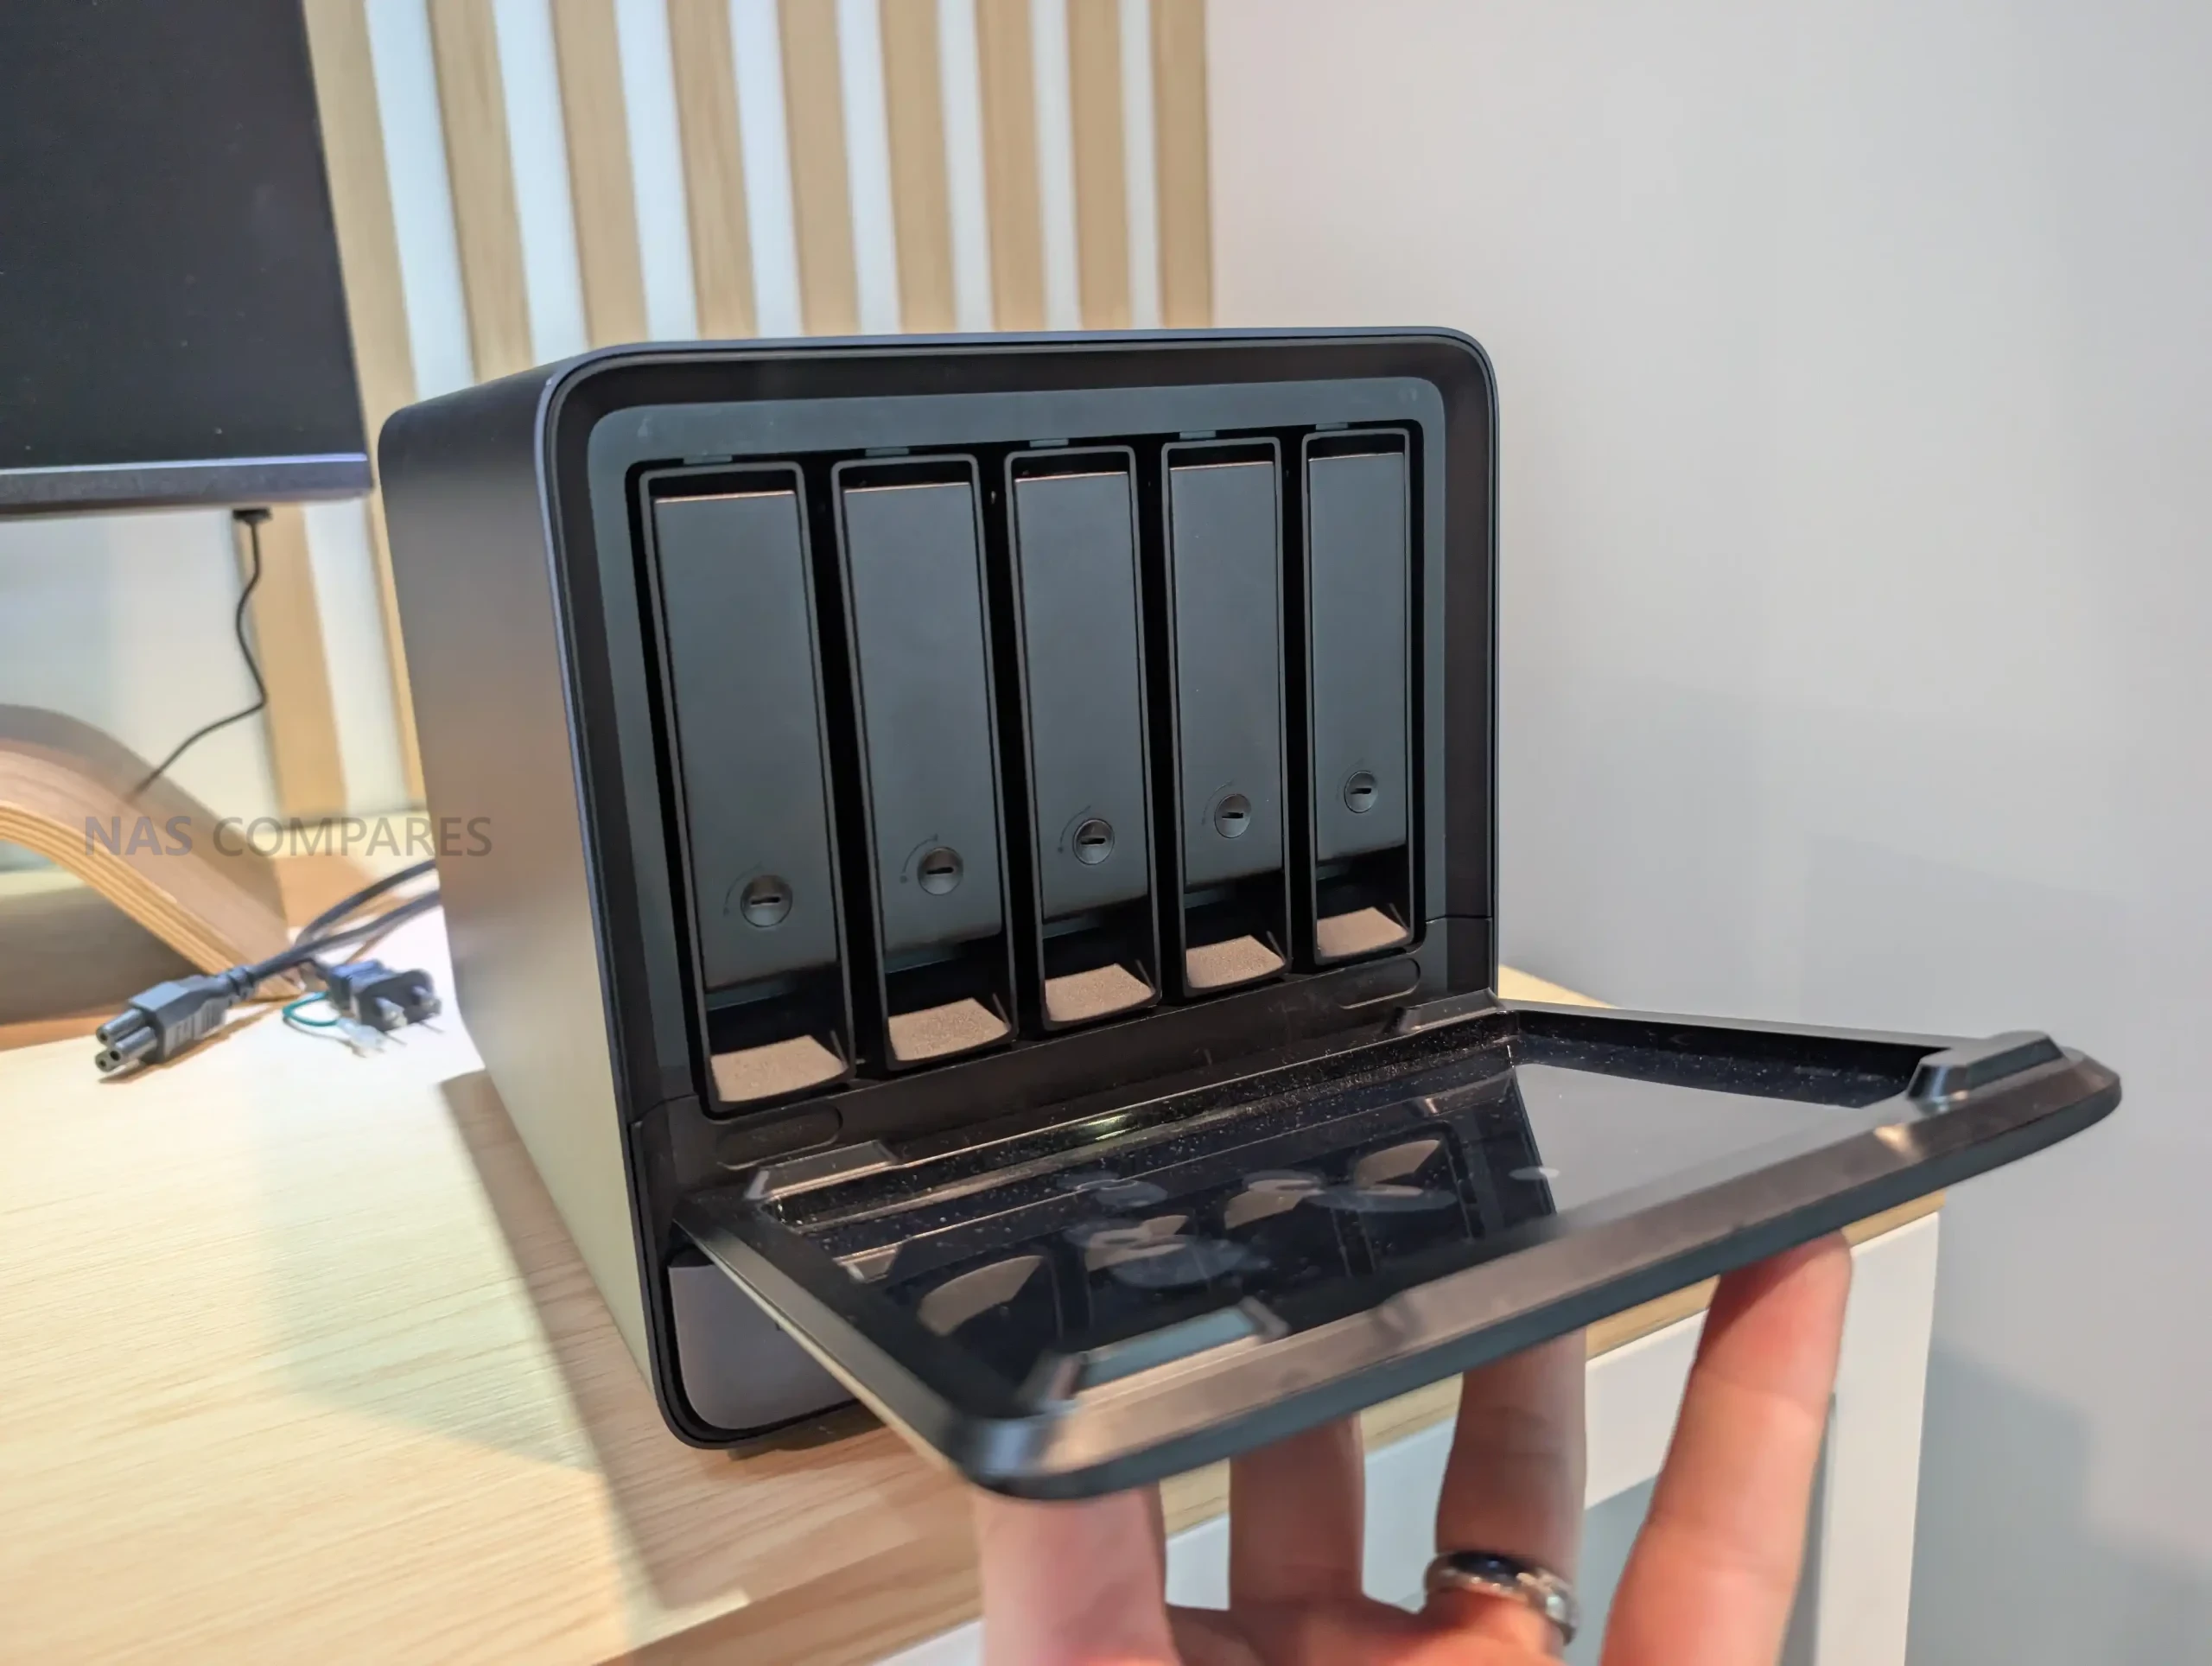
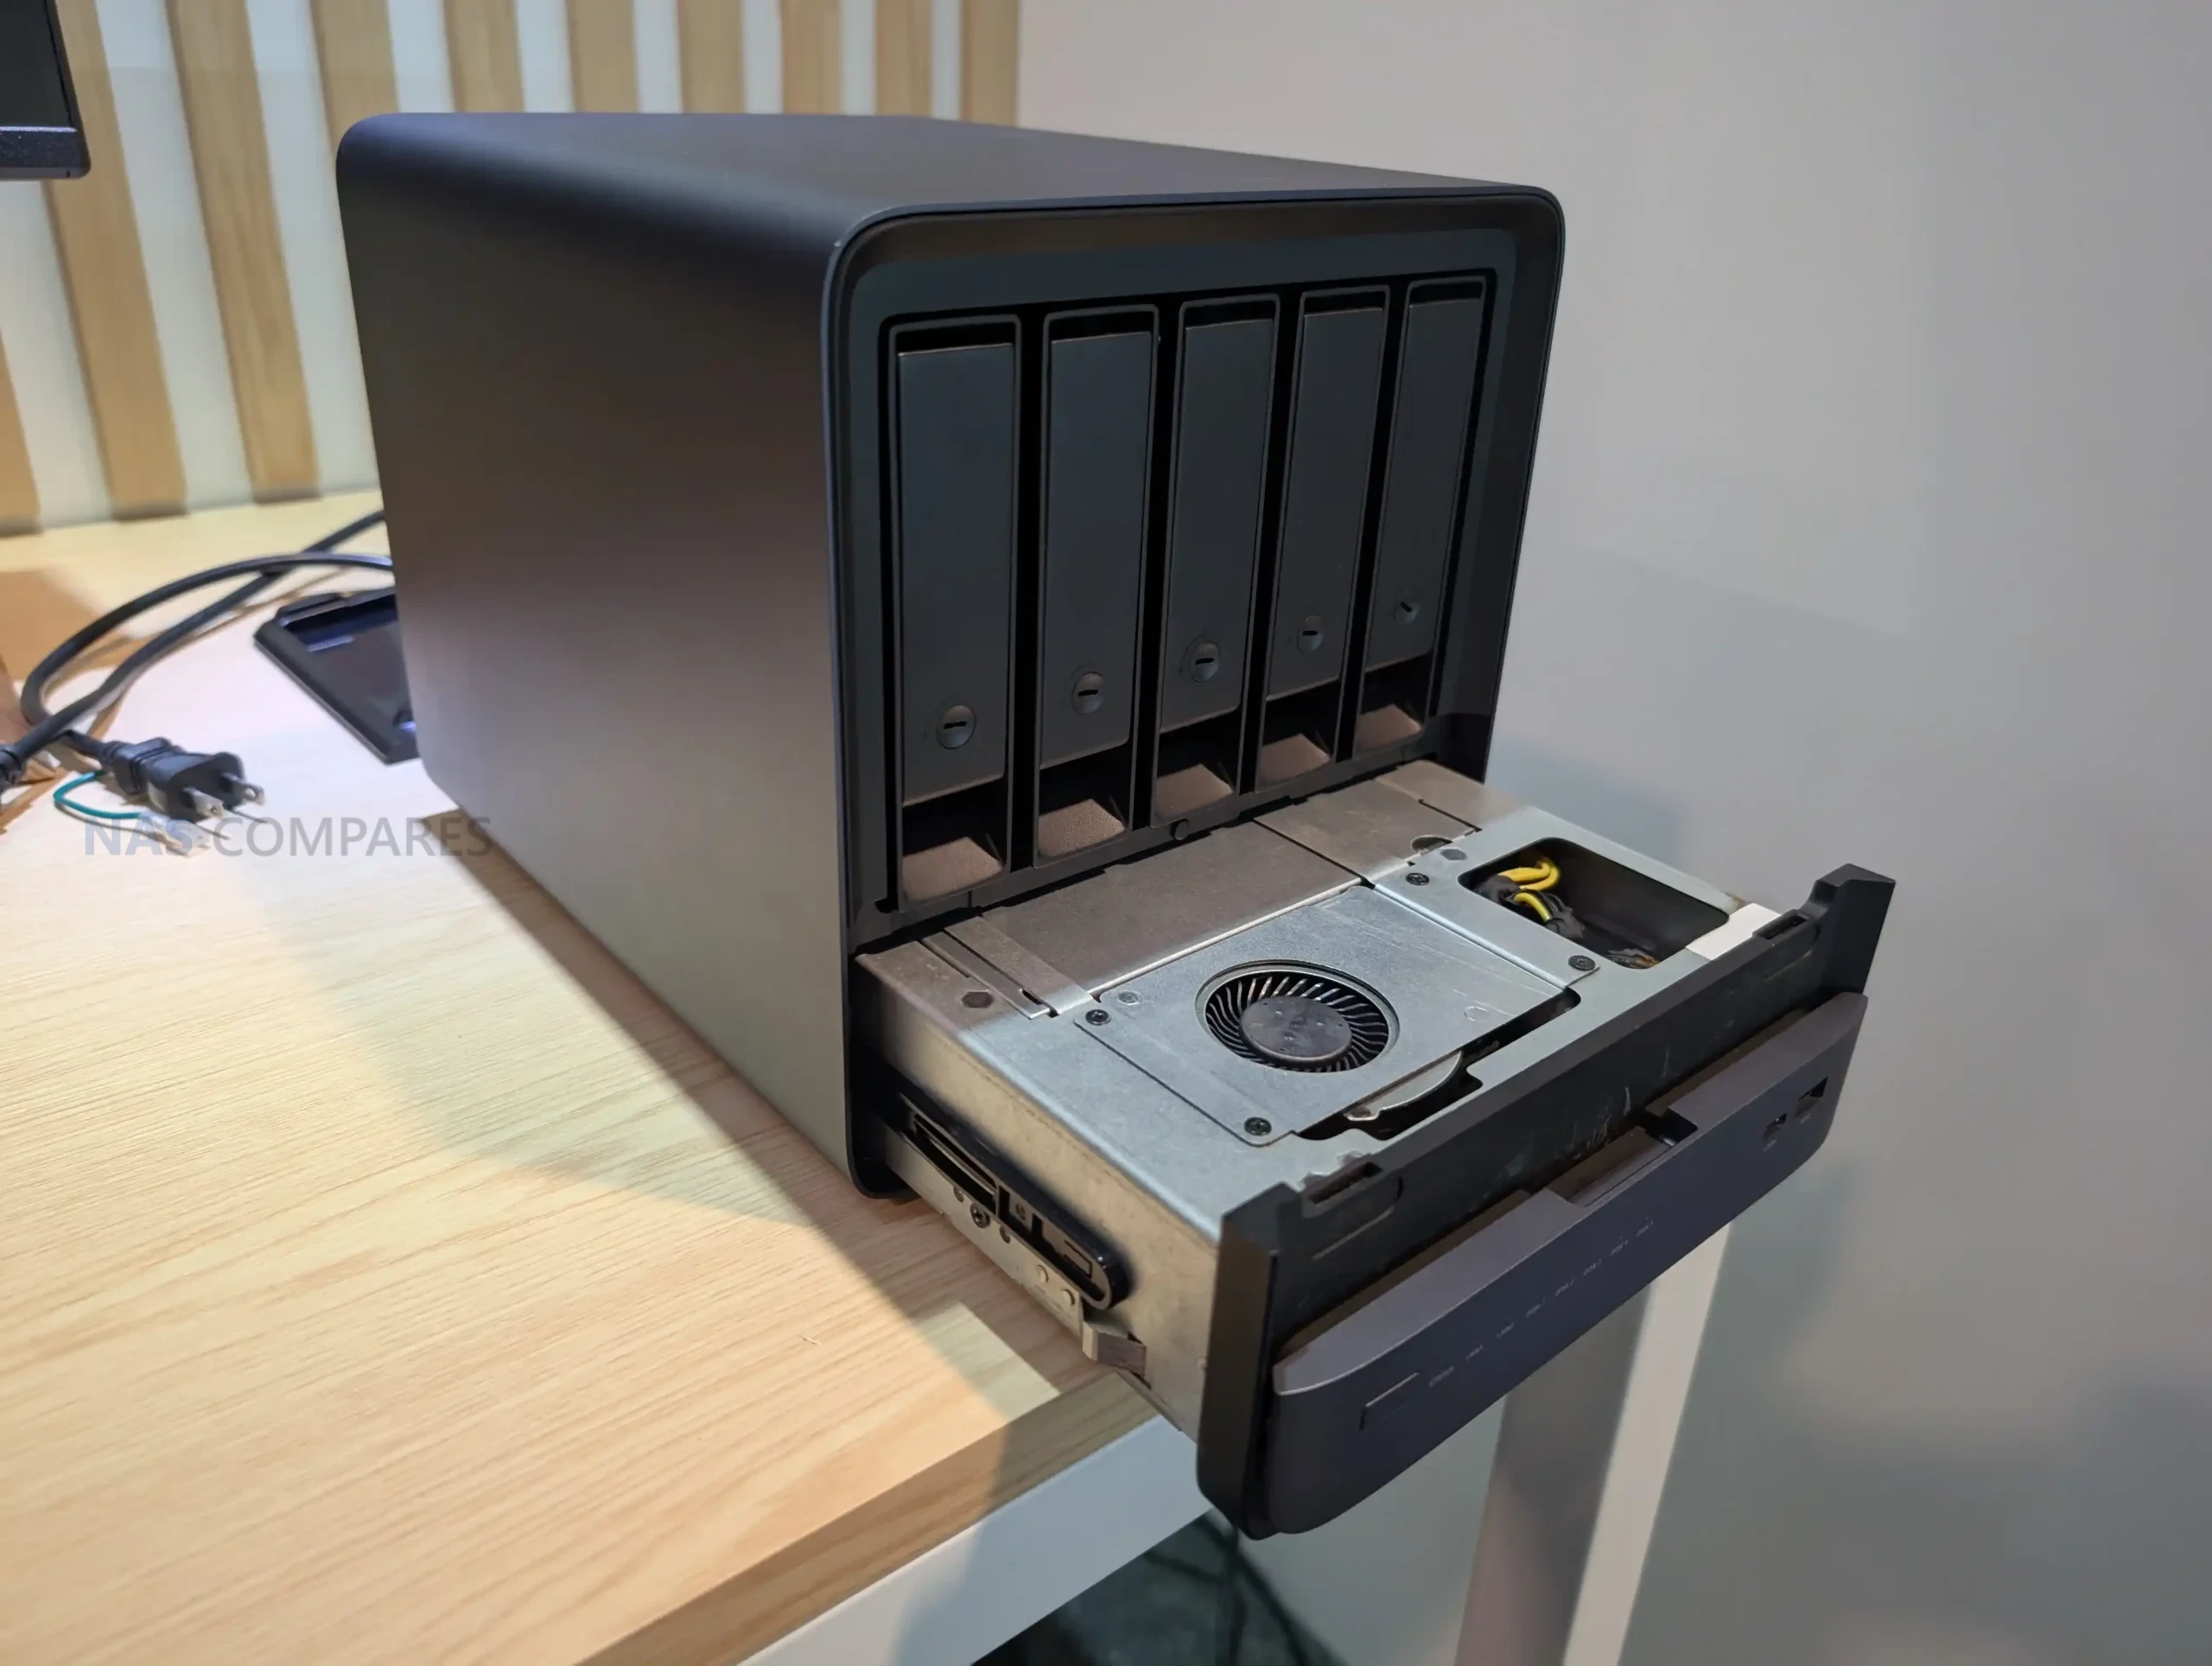
ZimaCube 2
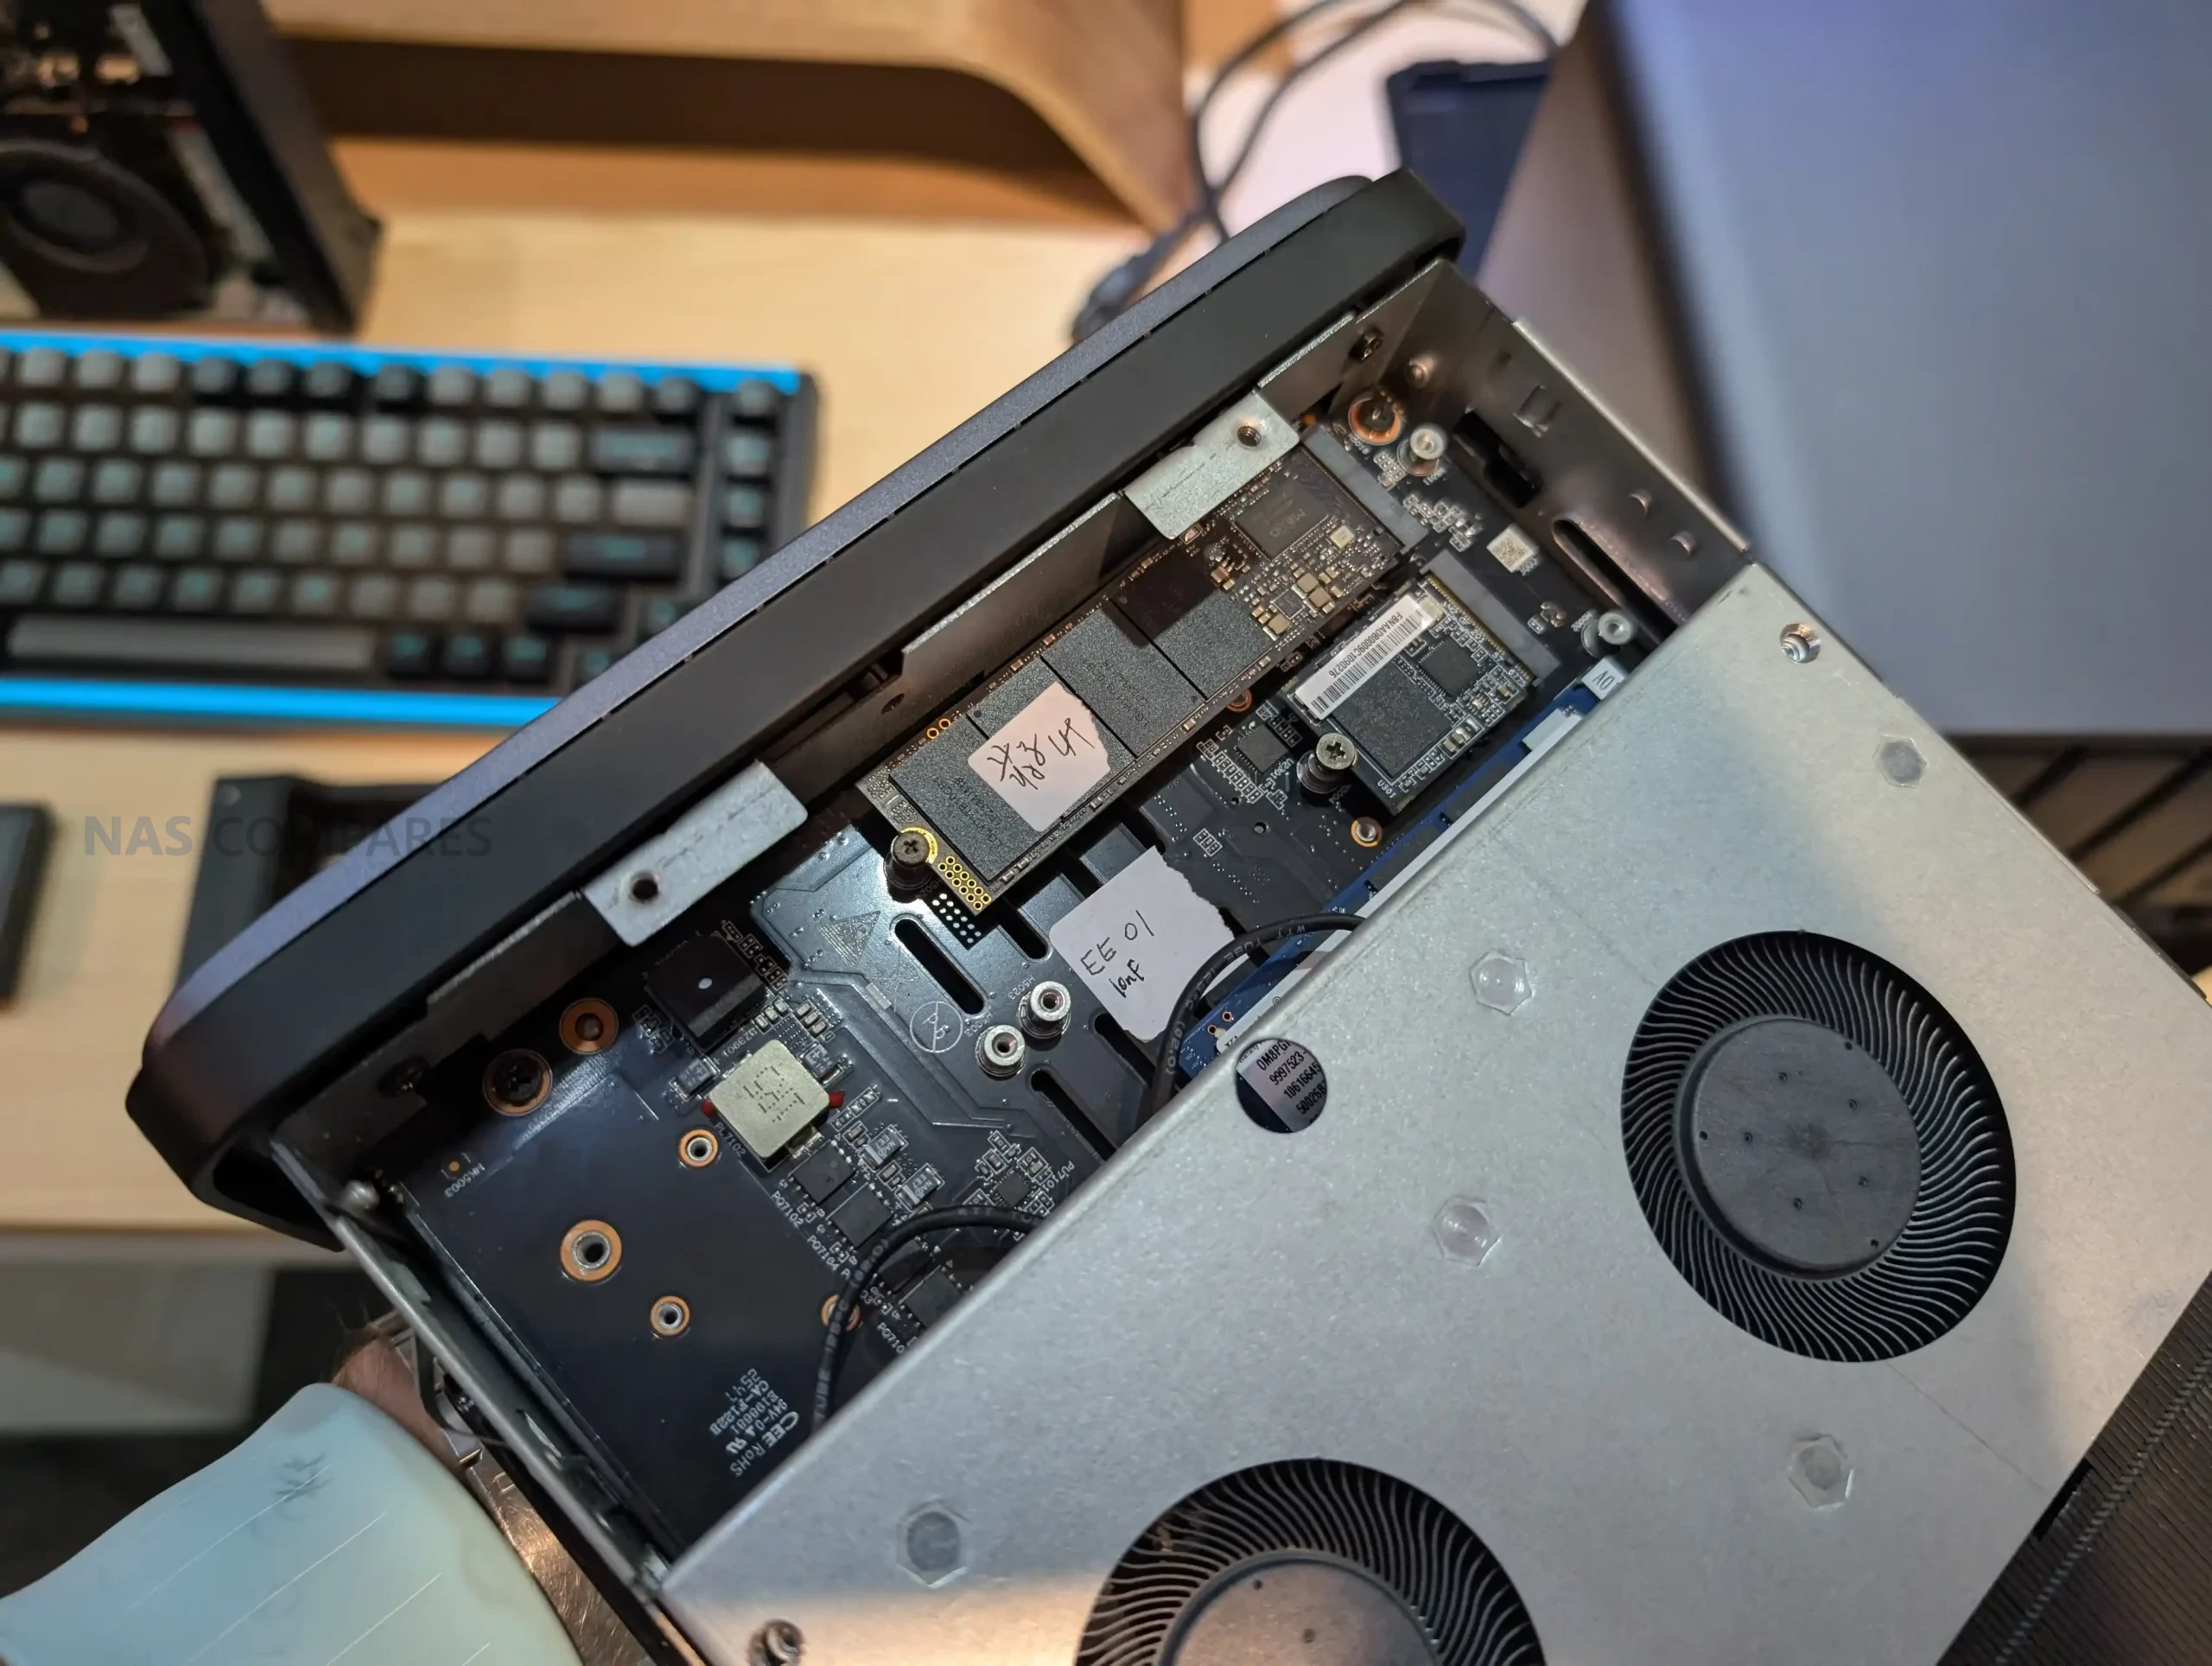
Le ZimaCube 2 est un boîtier avec 6 baies pouvant recevoir des SSD et disques durs 3,5 pouces. À cela s’ajoutent 4 emplacements M.2 NVMe. Le système (voir ci-dessous) est préinstallé sur un SSD interne de 256 Go et sur un autre emplacement dédié. Ce nouveau NAS est construit autour d’un processeur Intel Core de 12e génération (Core i3 ou Core i5) épaulé par de la mémoire DDR5.
3 configurations = 3 usages
La gamme se décline en 3 modèles :
ZimaCube 2 est un boitier gris avec un Core i3-1215U et 8 Go de DDR5
ZimaCube 2 Pro est un boitier noir avec un Core i5-1235U et 16 Go DDR5
Creator Pack identique au Pro avec 64 Go DDR5, 1 To de NVMe et une NVIDIA RTX PRO 2000
Pour rappel, l’Intel Core i3-1215U a obtenu un score Passmark de 10 196 points. De son côté, l’Intel Core i5-1235U a obtenu 12 595 points.
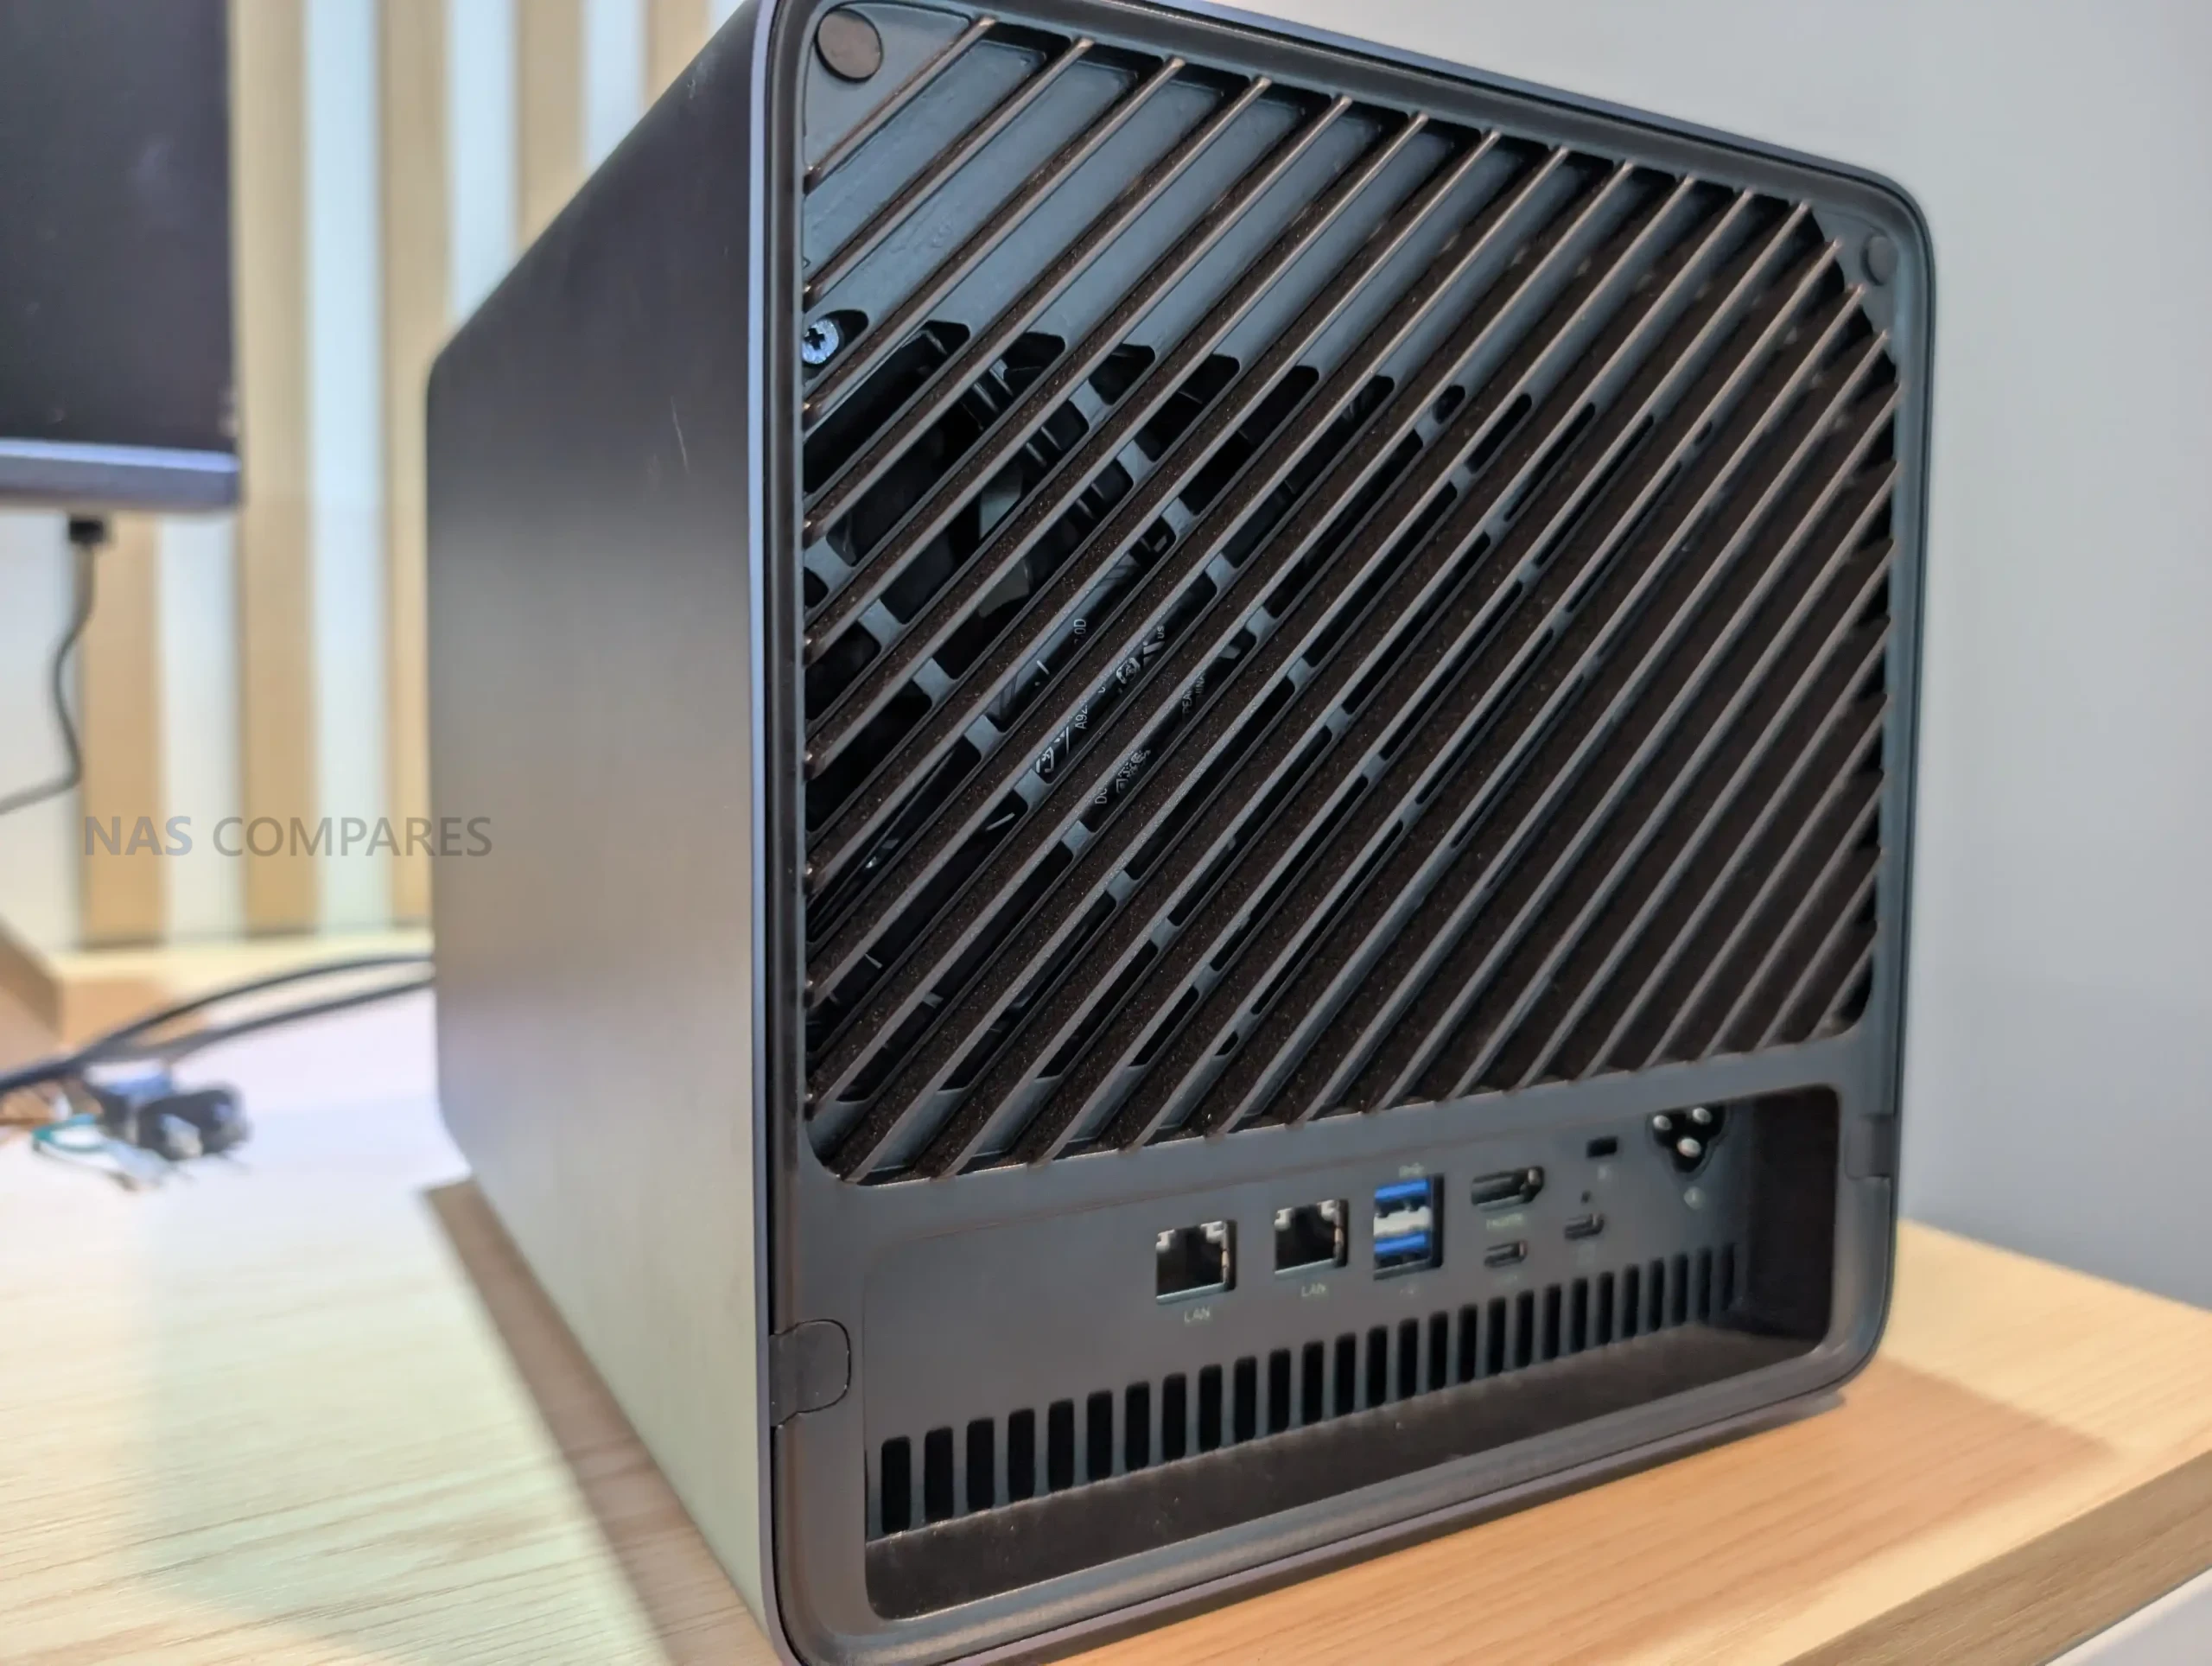
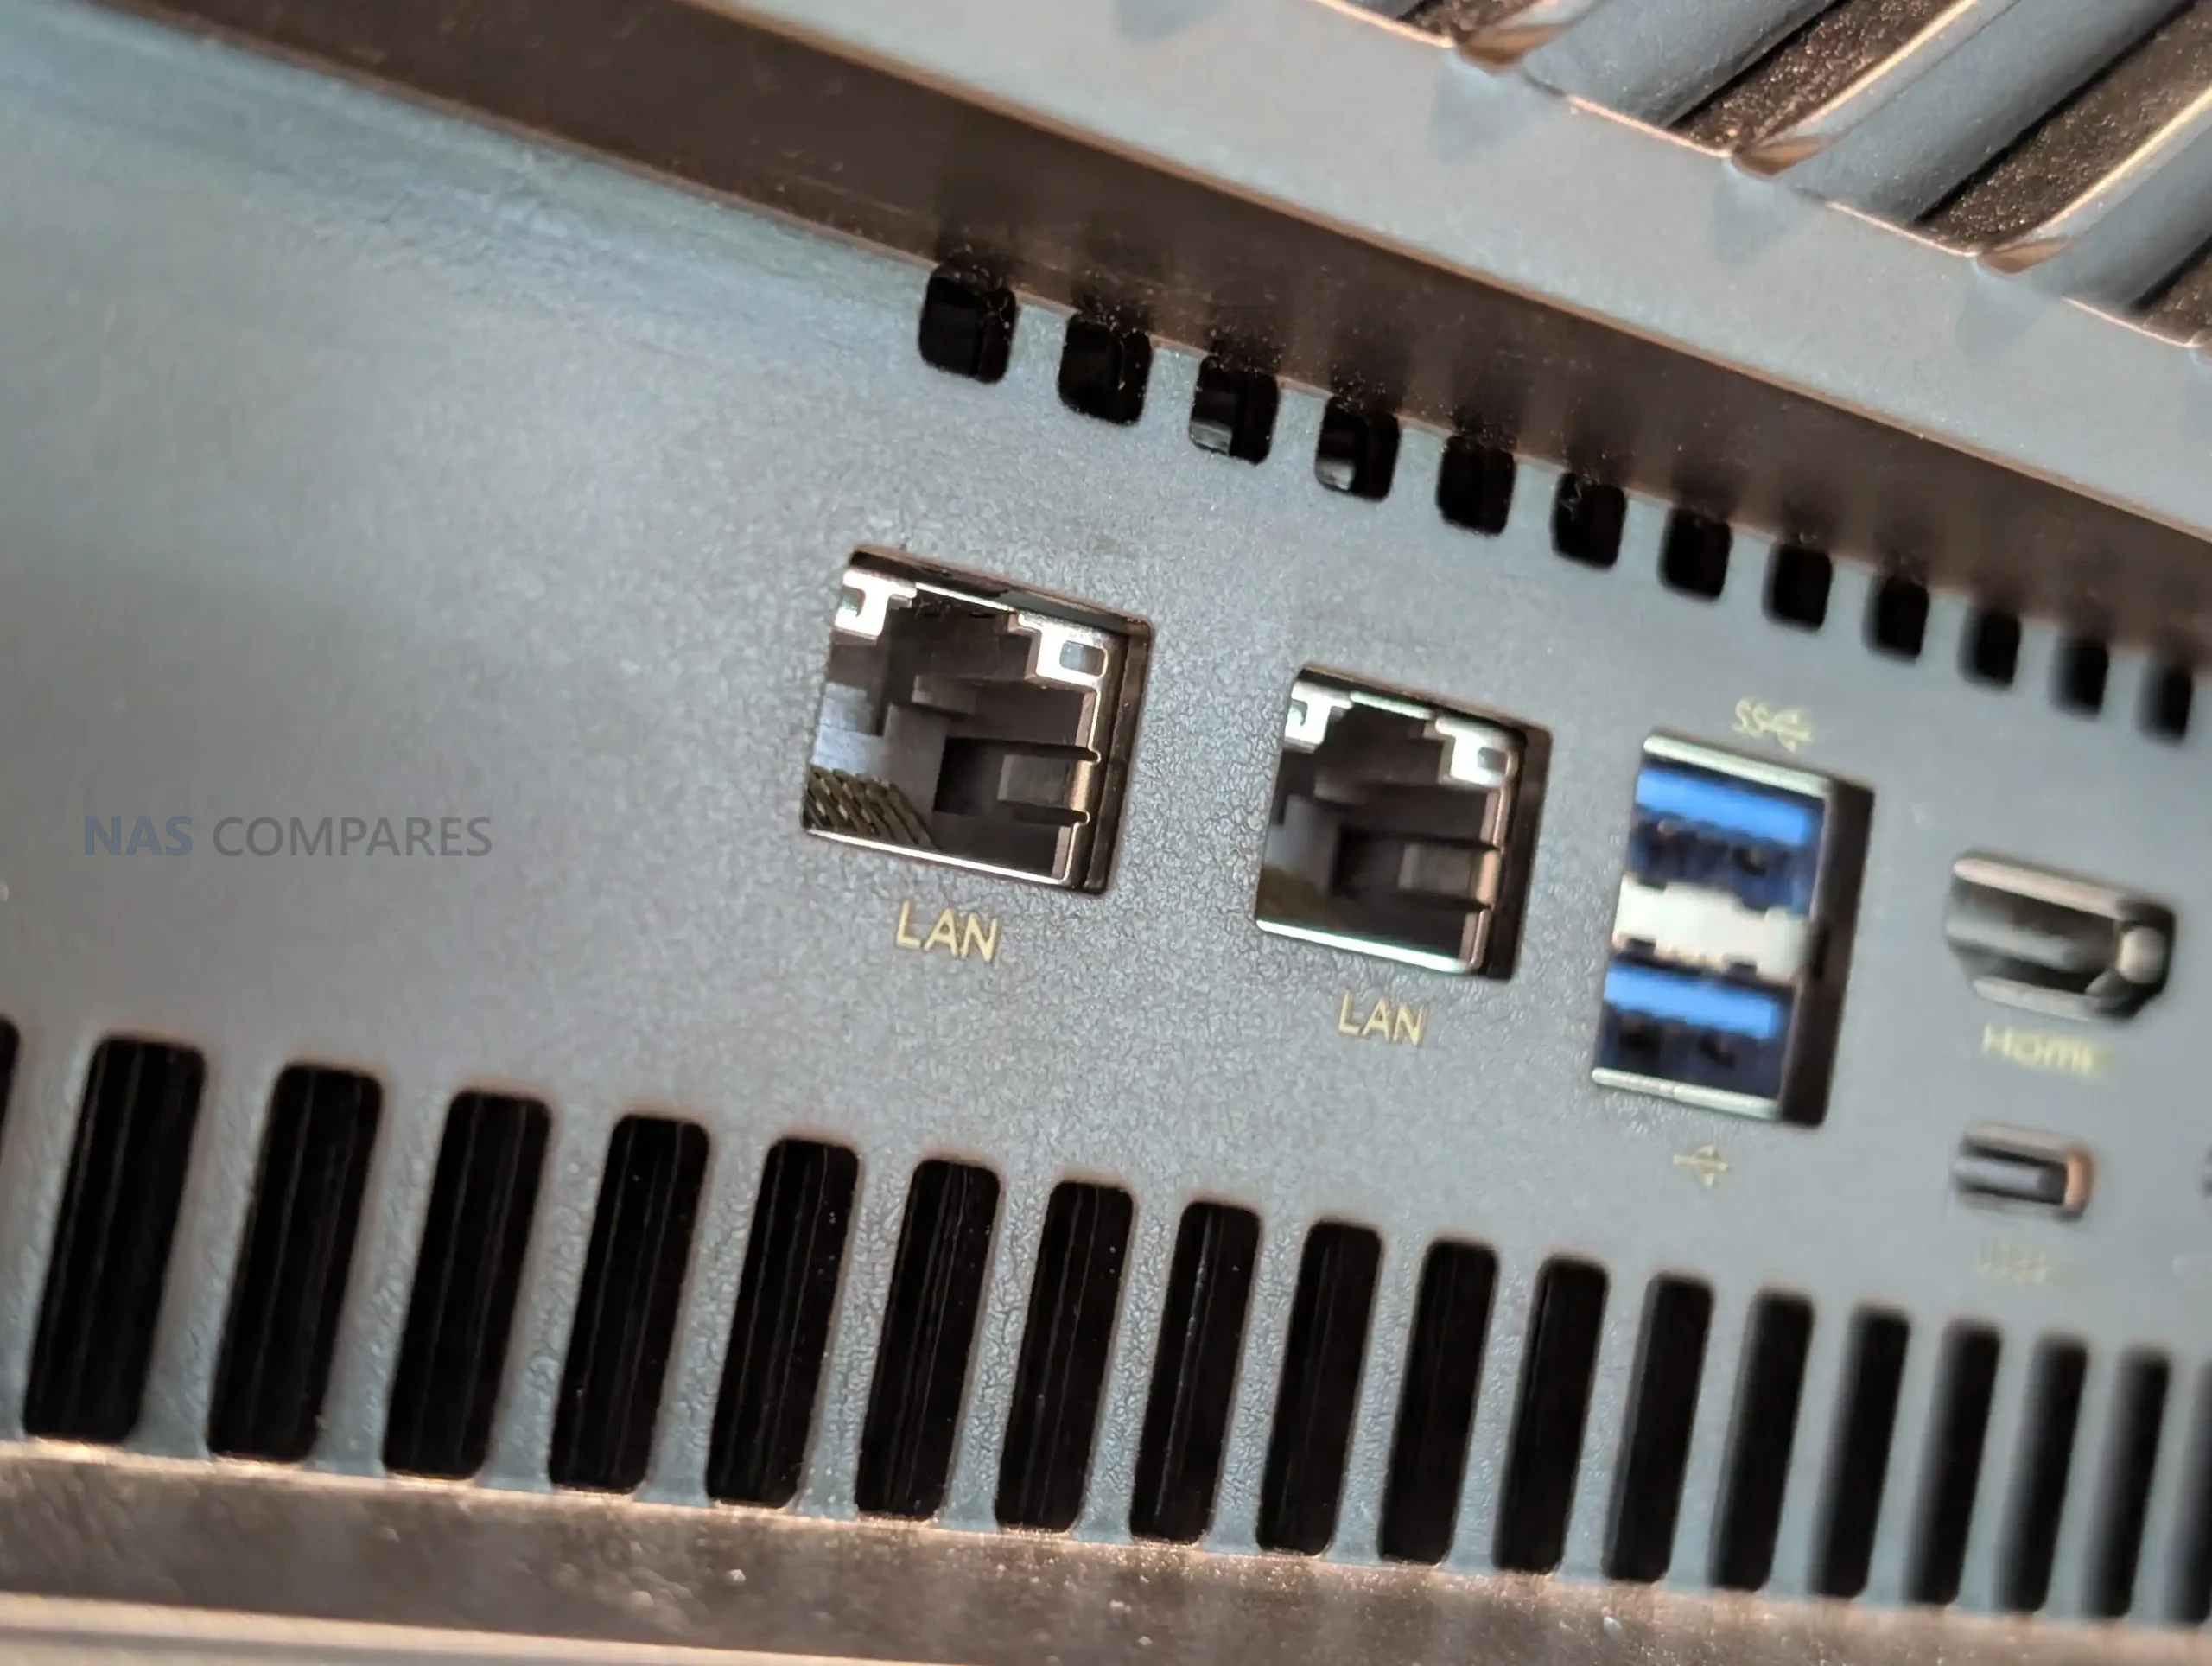
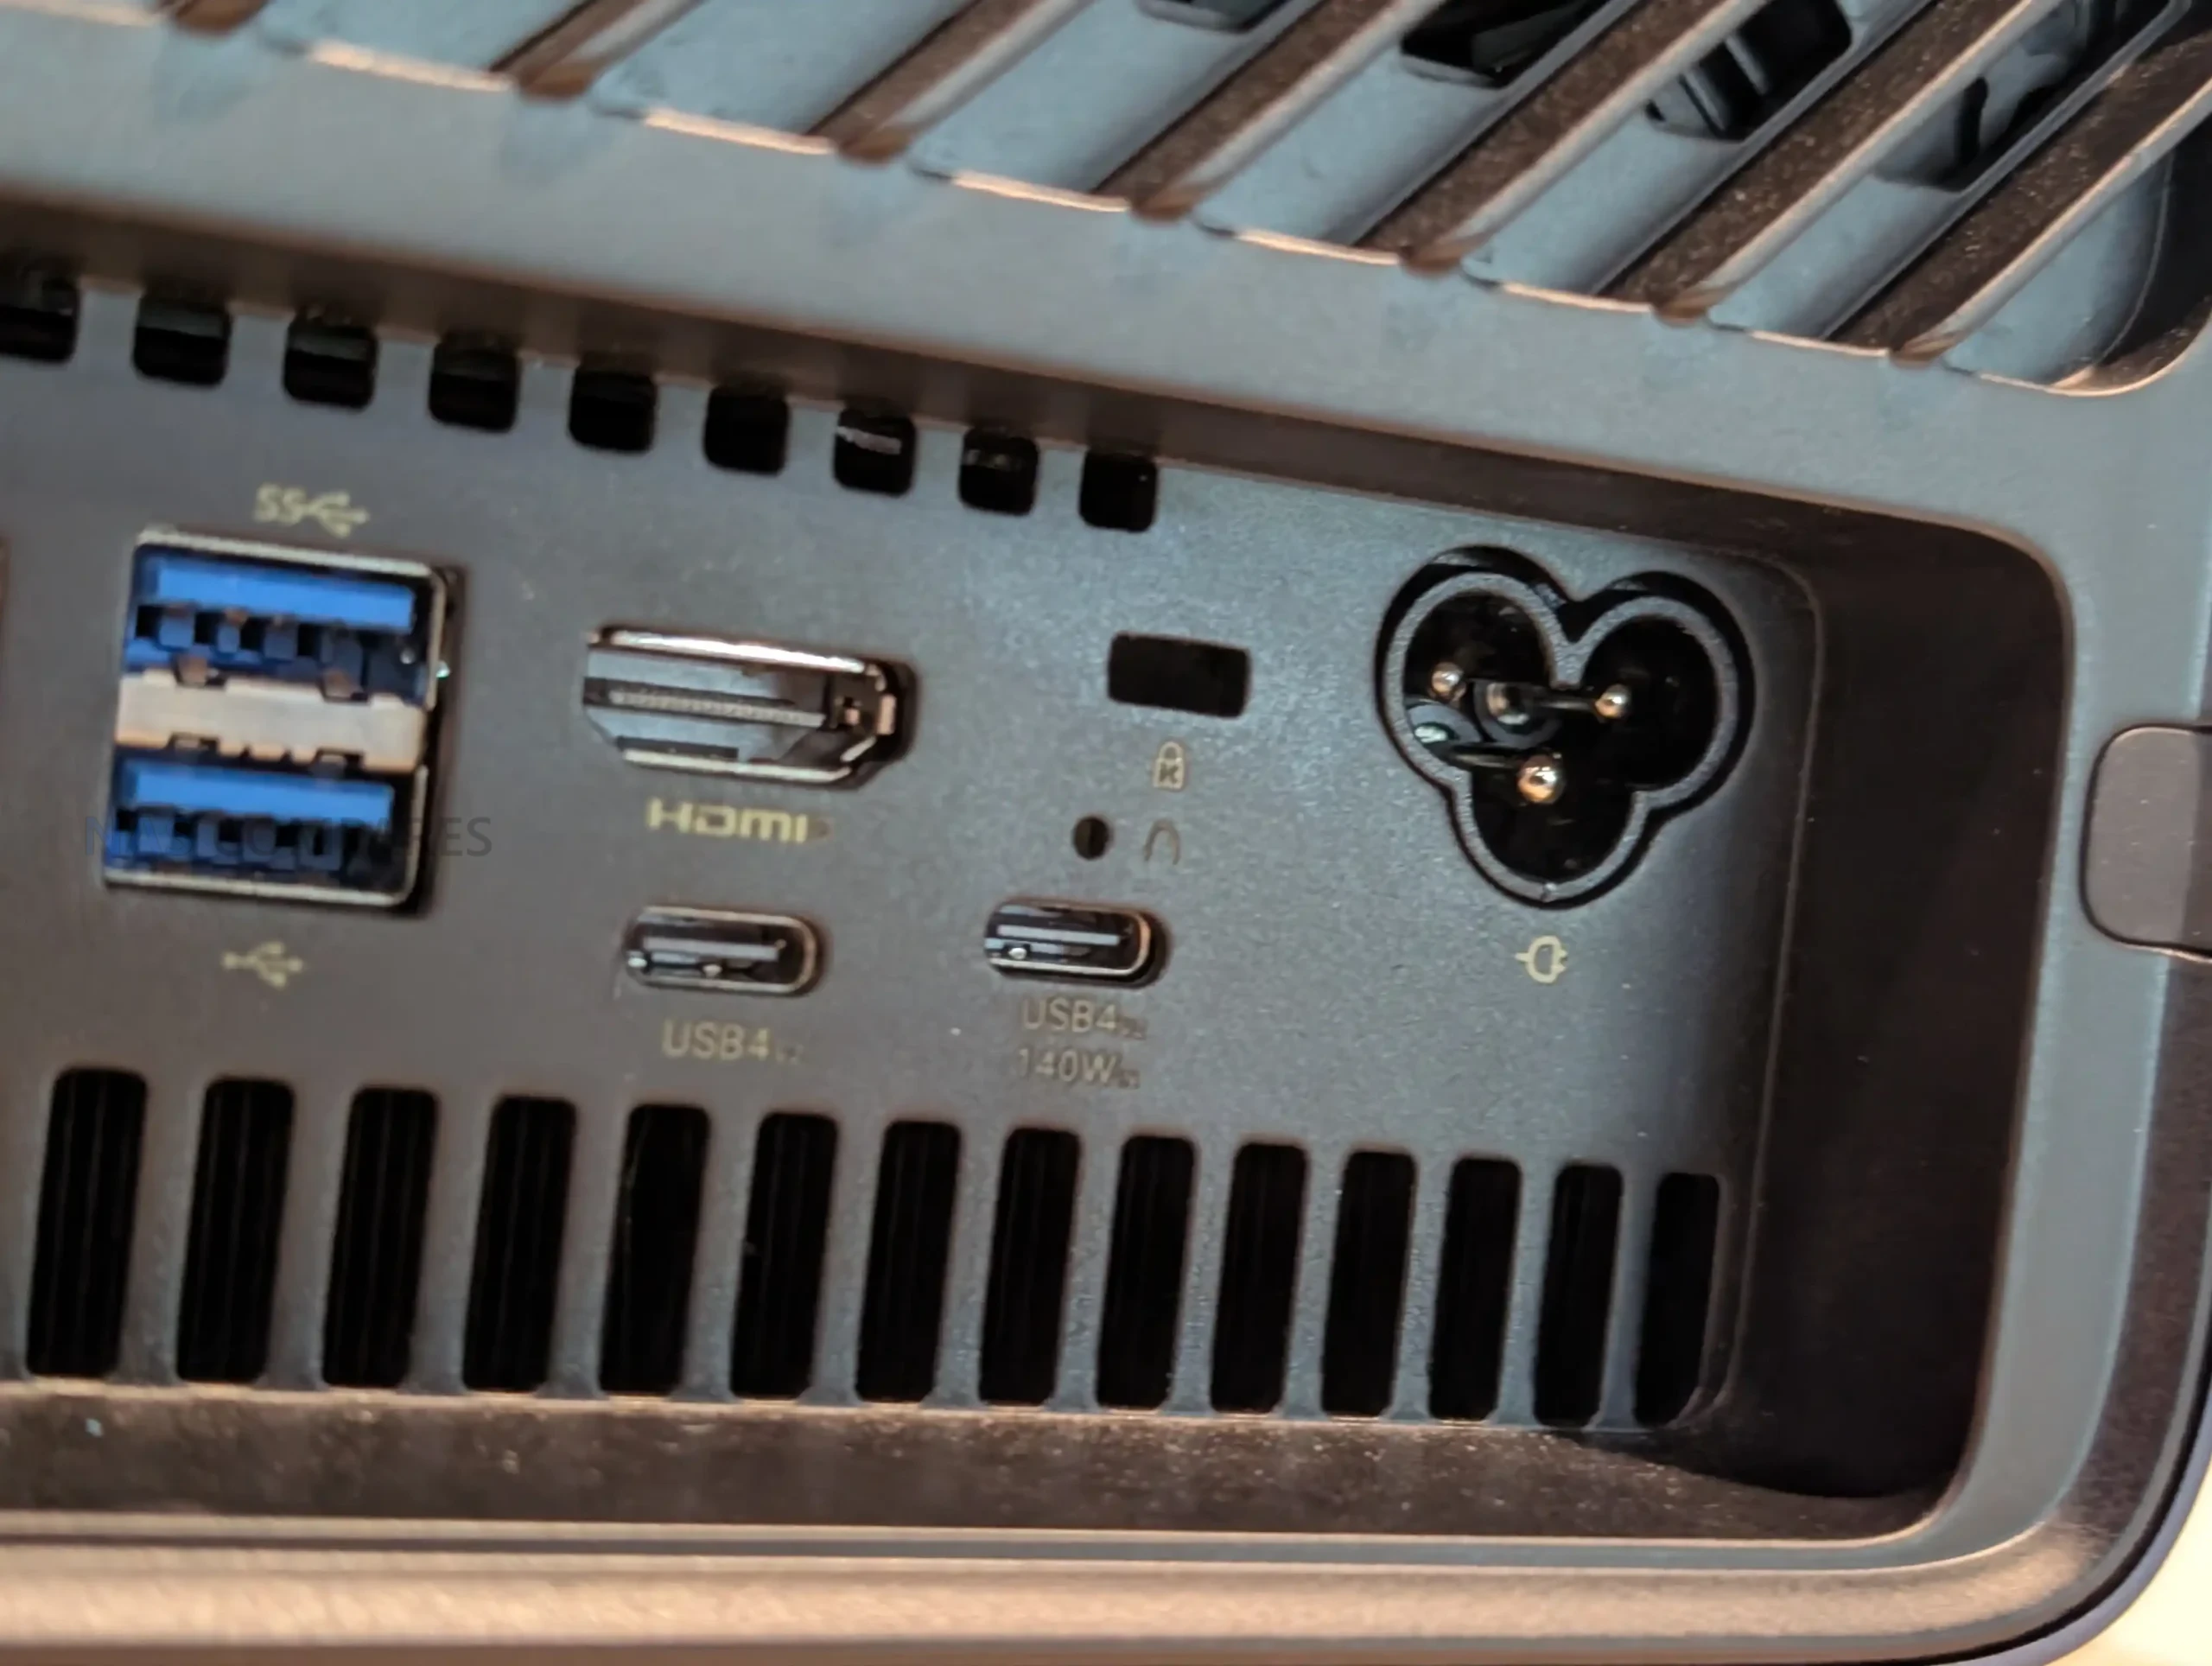
Connectique
Pour les interfaces de connexion, le ZimaCube 2 propose:
À l’avant : 3 ports USB 3.0 (dont 1 Type-C), 1 sortie audio 3,5 mm ;
Les modèles Pro et Creator Pack disposent également d’un port réseau 10 Gb/s.
Le NAS dispose également de 2 emplacements PCIe (PCIe 4.0 x16 et PCIe 3.0 x8), permettant d’installer une carte graphique, un accélérateur IA ou encore une carte réseau supplémentaire.
ZimaOS
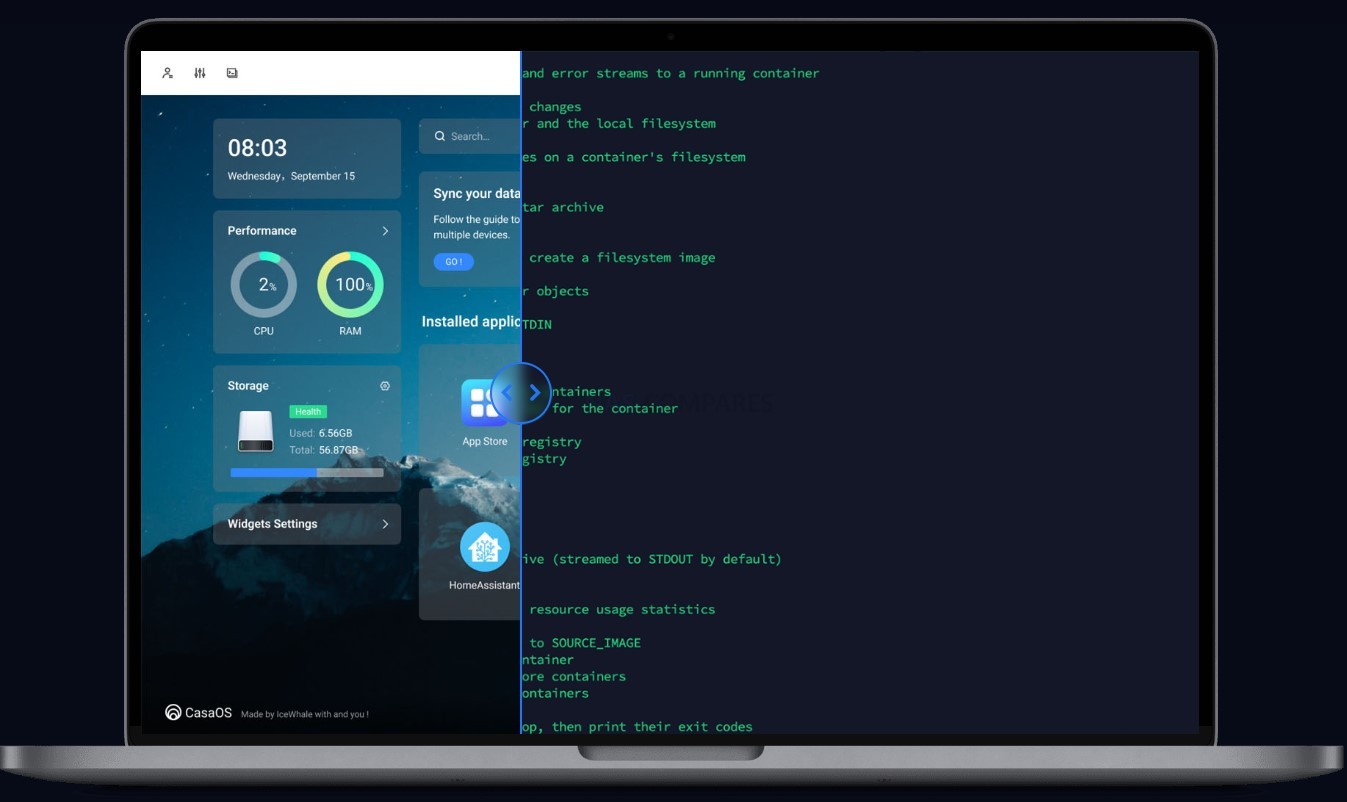
Le système maison se nomme ZimaOS (intégration native de CasaOS). Il est basé sur un Linux Debian et Docker. Il propose une boutique d’applications (800 différentes) permettant de déployer en un clic Plex, Jellyfin, Immich, Nextcloud, Home Assistant… Le gestionnaire de fichiers regroupe NAS local, stockage cloud et périphériques USB dans une même interface.
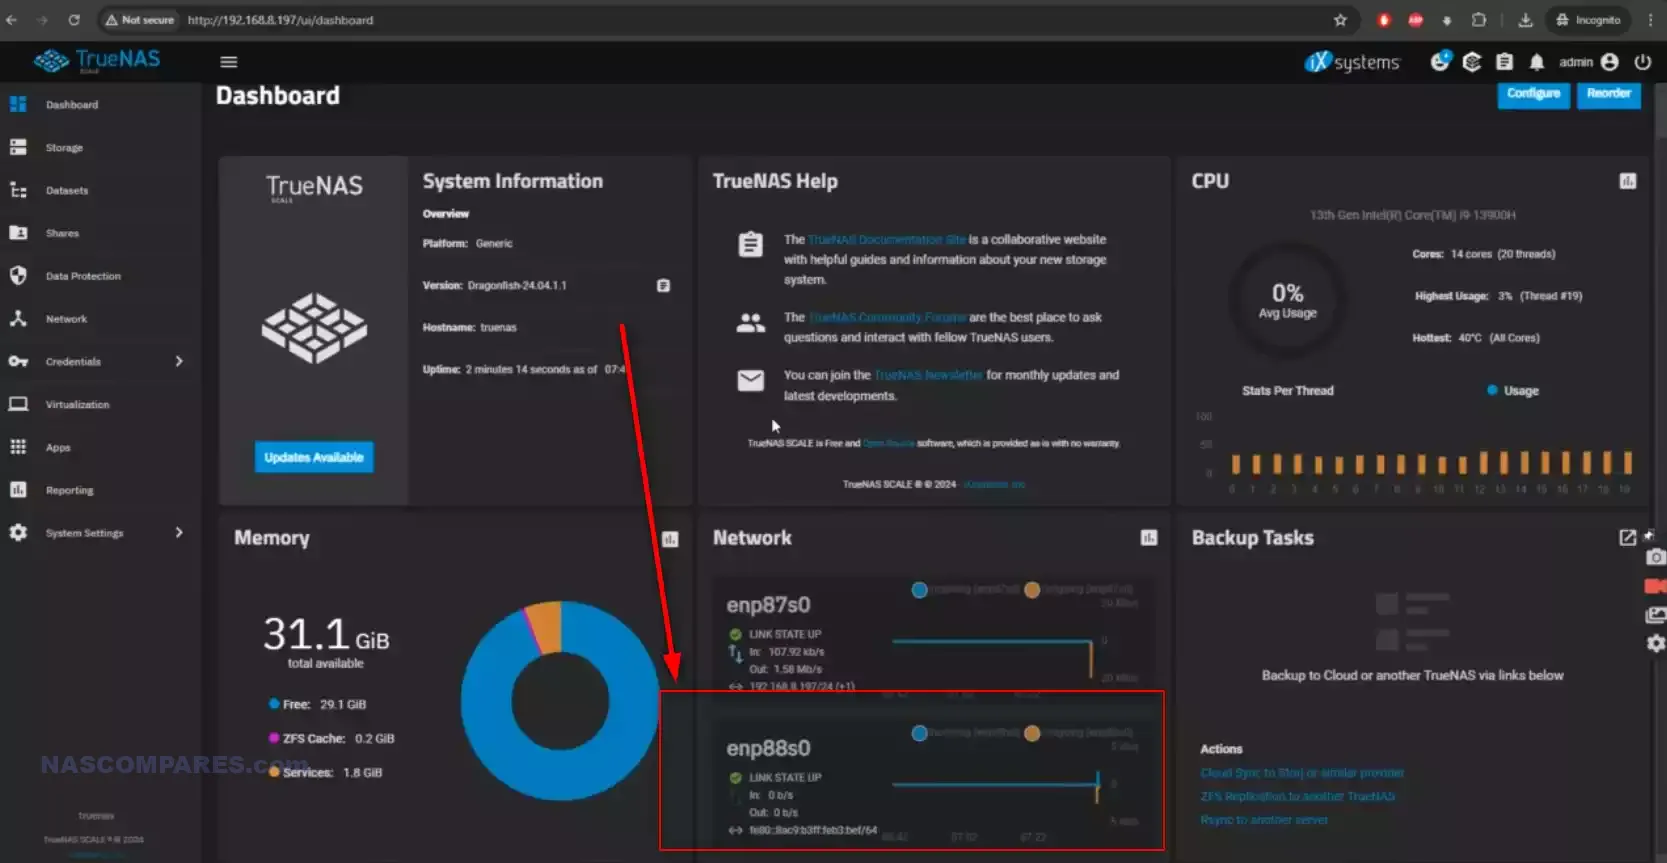
Pour les utilisateurs qui le souhaitent, TrueNAS, Proxmox, ou Unraid sont compatibles sur ce matériel.
New UniFi UDM Beast, Enterprise FG Core, Enterprise 100G and Enterprise S Revealed
At NAB 2026 in Las Vegas, Ubiquiti Inc. showcased a number of rackmount UniFi devices that have not yet been formally announced or released. These systems were presented alongside existing products, making it necessary to distinguish between current hardware and what appears to be forthcoming or experimental equipment. The devices observed represent a noticeable increase in port density, throughput capability, and overall positioning compared to the current UniFi lineup.
Four specific devices stand out from this showcase: the UniFi Dream Machine Beast, the Enterprise Fortress Gateway Core, the Enterprise 100G switch, and the Enterprise S PoE switch. Based on available observations and supporting information, these products appear to form a cohesive expansion of the UniFi ecosystem into higher-performance enterprise and datacenter environments. However, specifications remain unconfirmed and should be considered provisional until officially published.
UniFi Dream Machine BEAST – A 25GbE UDM!
The UniFi Dream Machine BEAST appears to be a significant evolution of the existing Dream Machine platform, extending beyond the capabilities of current models such as the UniFi Dream Machine Pro Max. Based on observed hardware, this device integrates substantially higher port density, particularly in 10G and 25G connectivity, while also introducing onboard storage via dual SATA bays. This suggests a continued emphasis on combining routing, switching, and application hosting within a single appliance, including UniFi OS services such as Protect and other controller-based functions.
Compared to previous Dream Machine models, the BEAST shifts closer toward an enterprise-focused deployment, particularly in environments requiring direct multi-gigabit connectivity without reliance on additional aggregation switches. However, key system details such as CPU architecture, memory capacity, and throughput performance remain unconfirmed. The absence of official documentation indicates that this device is still in a pre-release or prototype stage, and its final positioning within the UniFi portfolio is not yet defined.
The UniFi Enterprise Fortress Gateway Core appears to extend the capabilities of the existing UniFi Enterprise Fortress Gateway into a significantly higher performance tier. While the current Enterprise Fortress Gateway is already positioned as a high-end UniFi routing platform, the Core variant introduces substantially greater port density and bandwidth, including support for 100G connectivity. This suggests a shift from traditional edge gateway roles toward deployment in core or aggregation layers within larger enterprise or datacenter environments.
The observed hardware indicates a design focused on high-throughput routing and multi-layer network integration, with a combination of 10G copper, 25G SFP28, and 100G QSFP28 interfaces. This represents a notable departure from existing UniFi gateway designs, which typically rely on lower port counts and external switching for aggregation. As with the Dream Machine BEAST, critical specifications such as processing architecture, memory configuration, and pricing remain undisclosed, reinforcing the likelihood that this device is still in a pre-release stage.
Feature
Specification
2.5G RJ45 Ports
2
10G RJ45 Ports
8
25G SFP28 Ports
4
100G QSFP28 Ports
4
Power Supply
Dual redundant
Form Factor
Rackmount
CPU / RAM
Not confirmed
Release Status
Unreleased
UniFi Enterprise 100G – Next-Level Connections
The UniFi Enterprise 100G appears to be a high-density aggregation or spine switch designed for environments requiring large-scale bandwidth distribution. Its configuration, centered around 25G access ports and 100G uplinks, aligns with common leaf-spine architectures used in enterprise and datacenter networks. Within the current UniFi portfolio, the closest comparison would be aggregation-focused switches such as the UniFi Switch Enterprise Aggregation, although the observed specifications of this device significantly exceed existing models in both port count and total throughput capacity.
This device is likely intended for deployment deeper within network infrastructure rather than at the edge, acting as a central switching layer connecting multiple high-speed access or distribution switches. The combination of 48 × 25G and 6 × 100G ports suggests a focus on scalability and backbone connectivity rather than end-device access. As with the other devices observed, no official documentation, pricing, or detailed hardware specifications have been released, and its final role within the UniFi ecosystem remains unconfirmed.
Feature
Specification
25G SFP28 Ports
48
100G QSFP28 Ports
6
Form Factor
Rackmount
Switching Role
Aggregation / Spine
Cooling
Not confirmed
Power
Not confirmed
Release Status
Unreleased / Prototype
UniFi Enterprise S – PoE Powerhouse
The UniFi Enterprise S appears to be a high-density access switch focused on multi-gigabit connectivity and high-power PoE delivery. Its configuration combines a large number of 2.5G and 10G copper ports, all supporting PoE+++, alongside 25G uplinks for upstream connectivity. Within the current UniFi lineup, there is no direct equivalent, although products such as the UniFi Switch Pro XG 48 PoE operate in a similar space with lower overall port density and more limited PoE capability. The Enterprise S extends this concept by standardising high-power PoE across all access ports.
This design suggests deployment in environments with dense endpoint requirements, including wireless access points, cameras, and AV equipment, where both bandwidth and power delivery are critical. The combination of 2.5G and 10G ports allows for flexibility across different device classes, while the inclusion of 25G uplinks supports integration into higher-speed aggregation layers. As with the other devices observed, there is no confirmed information regarding total power budget, internal hardware, or release timeline, and the device should be considered pre-release.
Feature
Specification
2.5G RJ45 PoE+++ Ports
32
10G RJ45 PoE+++ Ports
16
25G SFP28 Ports
4
PoE Standard
PoE+++ (802.3bt)
Power Budget
Not confirmed
Form Factor
Rackmount
Cooling
Not confirmed
Release Status
Unreleased / Prototype
The four devices observed at NAB 2026 indicate a broader shift in the UniFi portfolio toward higher-performance networking tiers. Collectively, they introduce increased port density, support for 25G and 100G connectivity, and in some cases, significantly expanded power delivery capabilities. Compared to currently available products such as the UniFi Enterprise Fortress Gateway and UniFi Dream Machine Pro Max, these systems represent a move beyond traditional edge and SMB-focused deployments into roles typically associated with enterprise core, aggregation, and high-density access layers.
However, all four devices remain unannounced and lack confirmed specifications, pricing, and release timelines. As a result, their final positioning and availability cannot be determined with certainty. While the observed hardware suggests a structured expansion into a more complete end-to-end networking stack, any conclusions remain provisional until formal details are released by Ubiquiti Inc..
This description contains links to Amazon. These links will take you to some of the products mentioned in today's content. As an Amazon Associate, I earn from qualifying purchases. Visit the NASCompares Deal Finder to find the best place to buy this device in your region, based on Service, Support and Reputation - Just Search for your NAS Drive in the Box Below
Need Advice on Data Storage from an Expert?
Finally, for free advice about your setup, just leave a message in the comments below here at NASCompares.com and we will get back to you.Need Help?
Where possible (and where appropriate) please provide as much information about your requirements, as then I can arrange the best answer and solution to your needs. Do not worry about your e-mail address being required, it will NOT be used in a mailing list and will NOT be used in any way other than to respond to your enquiry.
[contact-form-7]
TRY CHAT Terms and Conditions
If you like this service, please consider supporting us.
We use affiliate links on the blog allowing NAScompares information and advice service to be free of charge to you.Anything you purchase on the day you click on our links will generate a small commission which isused to run the website. Here is a link for Amazon and B&H.You can also get me a Ko-fi or old school Paypal. Thanks!To find out more about how to support this advice service checkHEREIf you need to fix or configure a NAS, check FiverHave you thought about helping others with your knowledge? Find Instructions Here
Or support us by using our affiliate links on Amazon UK and Amazon US
Alternatively, why not ask me on the ASK NASCompares forum, by clicking the button below. This is a community hub that serves as a place that I can answer your question, chew the fat, share new release information and even get corrections posted. I will always get around to answering ALL queries, but as a one-man operation, I cannot promise speed! So by sharing your query in the ASK NASCompares section below, you can get a better range of solutions and suggestions, alongside my own.
New QNAP TS-xh66TX SERIES – Intel i3, USB4, 2x 10GbE, M.2/E1.S, SATA, U.2, PCIe and MORE
QNAP’s TS h666TX, TS h866TX and TS h966TX arrive at a point where the company’s tower portfolio has had a fairly visible split between mainstream QTS systems such as the TS 464 and TS 664, and higher tier QuTS hero models such as the TVS h674. The older TS x64 family remains relevant, but those systems are built around the Intel Celeron N5095 with DDR4 memory and a lower ceiling for memory expansion, while the TVS h674 moves into a more performance led and more expensive part of the range with desktop class Intel Core processors and QuTS hero support. Against that backdrop, a new ZFS focused series with Intel Core i3 1215U, DDR5 memory, integrated 10GbE and USB4 has a clear role in the lineup, at least on paper.
That is also why these systems are likely to attract attention from buyers who want more than the current TS 464 or TS 664 can offer, but who may not need, or want to pay for, a TVS h674 class solution. The i3 1215U itself is a 6 core, 8 thread mobile processor with 2 Performance cores, 4 Efficient cores and boost speeds up to 4.40 GHz, which places it well above the older Celeron class hardware used in the TS x64 generation. Combined with QuTS hero’s ZFS platform and the broader move toward hybrid HDD and SSD storage layouts, these new TS h66xTX models appear designed to address demand for a more modern mid range NAS that balances file services, high speed networking and SSD aware storage without immediately stepping into QNAP’s more workstation style hero systems.
Specification
TS-h666TX
TS-h866TX
TS-h966TX
CPU
Intel Core i3-1215U
Intel Core i3-1215U
Intel Core i3-1215U
Memory
8GB DDR5, up to 64GB
8GB DDR5, up to 64GB
8GB DDR5, up to 64GB
SATA Bays
4 x 3.5-inch
6 x 3.5-inch
5 x 3.5-inch
SSD Bays
2 x E1.S / M.2 NVMe 2280
2 x E1.S / M.2 NVMe 2280
4 x U.2 / SATA 2.5-inch
Network
2 x 10GbE
2 x 10GbE
1 x 10GbE, 1 x 2.5GbE
USB
2 x USB 10Gb/s, 2 x USB4
2 x USB 10Gb/s, 2 x USB4
2 x USB 10Gb/s, 2 x USB4
PCIe Expansion
1 x PCIe Gen 3 x4
1 x PCIe Gen 3 x4
None listed
QNAP TS-h666TX, TS-h866TX and TS-h966TX – Design & Storage
The clearest design distinction in this series is that QNAP is not treating all 3 models as simple capacity variants of the same enclosure. The TS h666TX and TS h866TX appear to share the same newer tower styling, with the standard 3.5 inch bays on the front and a separate area for the solid state media, while the TS h966TX moves into the denser mixed media format that QNAP has used before on some of its hybrid hero systems. That already places the range closer to a purpose built QuTS hero family than a straightforward update of the older TS 464 and TS 664, which used a more conventional compact tower layout with 4 or 6 HDD bays and 2 internal M.2 slots rather than externally accessible SSD facing bays.
From a storage layout perspective, the TS h666TX and TS h866TX are the more direct and easier models to position. They combine either 4 or 6 SATA HDD bays with 2 additional E1.S or M.2 NVMe capable bays, effectively giving each system a built in hybrid structure for HDD capacity and SSD tiering or fast pool allocation. That is a notable step away from the TS 464 and TS 664 approach, where the SSD element is present but still secondary, with 2 x M.2 2280 PCIe Gen 3 x1 slots intended mainly for caching or separate SSD storage rather than being presented as a more central part of the overall bay count.
The TS h966TX is the more unusual model in the group because it uses a 5 plus 4 arrangement, with 5 SATA HDD bays and 4 U.2 or SATA 2.5 inch bays. In practical terms, that design is less about scaling raw HDD capacity and more about offering a denser mixed media platform for users who want heavier SSD integration without moving into a full flash chassis. That layout is more in line with some of QNAP’s existing hybrid hero systems, where ZFS storage is paired with a more deliberate split between bulk HDD storage and higher speed SSD media, rather than the simpler HDD plus cache model seen in entry and lower mid range systems.
This is also where the new series starts to sit in a more defined position between the TS x64 range and the TVS h674 class. The TS 464 and TS 664 are still marketed as compact and affordable towers with M.2 support, but their storage design remains closer to mainstream SMB and prosumer use. The TVS h674, by comparison, is a 6 bay QuTS hero platform with 2 x M.2 NVMe slots and a much more traditional premium desktop NAS structure, focused on higher end ZFS deployment and PCIe expansion. The TS h666TX and TS h866TX seem to introduce a middle route, where the chassis and bay layout are more SSD aware and more explicitly hybrid than the TS x64 generation, but without fully mirroring the larger TVS hero desktop approach.
Overall, the design language here suggests that QNAP is targeting users who want direct access to both hard drive and flash storage in a tower form factor without relying entirely on internal motherboard mounted SSD slots. For QuTS hero in particular, that matters because ZFS benefits from clearer separation of storage roles, whether for high speed pools, application storage, read intensive workloads or automated tiering as QNAP continues to develop Qtier support in its ZFS platform. As a result, the storage design of the TS h666TX, TS h866TX and TS h966TX is not just a matter of adding more bays, but of shifting the product family toward more structured hybrid storage deployment than the older TS 464 and TS 664 offered.
QNAP TS-h666TX, TS-h866TX and TS-h966TX – Internal Hardware
Internally, the most important shift in this series is the move to Intel Core i3 1215U. This is a 6 core, 8 thread processor with a hybrid layout of 2 Performance cores and 4 Efficient cores, up to 4.40 GHz boost, and a 15 W base power profile. In broad terms, that puts it above the Intel Celeron N5095 used in the TS 464 and TS 664 generation, which is a 4 core, 4 thread chip with a lower performance ceiling and no hybrid core structure. For a QuTS hero platform, that matters because ZFS services, snapshots, background data operations, deduplication related overhead where applicable, and multi user file handling all benefit from having more CPU headroom than the older Celeron class systems can typically provide.
Memory is the other clear upgrade point. According to the revealed specification, all 3 systems arrive with 8GB DDR5 and support expansion up to 64GB. That is a substantial change in class compared with the TS 464, which uses DDR4 and officially tops out at 16GB, and it aligns more closely with the expectations of a ZFS based system where memory capacity can have a direct effect on caching behaviour, data services and overall responsiveness under heavier workloads. It does not place these models at the same level as QNAP’s higher end QuTS hero hardware with larger default memory pools or ECC focused enterprise positioning, but it does move them noticeably beyond the entry and lower mid range segment.
That leaves these systems in an interesting middle position when compared with the TVS h674. The TVS h674 is still the more powerful desktop hero system overall, with Intel Core desktop CPUs such as the Core i5 12400 or Core i3 12100 depending on configuration, higher default memory allocations, and a more overtly performance focused design. At the same time, the new TS h666TX, TS h866TX and TS h966TX seem to be aiming for a more efficient balance of modern CPU architecture, ZFS support and hybrid storage flexibility without moving fully into that higher cost workstation style category. In other words, the internal hardware does not suggest a direct replacement for the TVS h674, but it does suggest a clear move away from the older TS x64 class and toward a more serious mid tier hero platform.
QNAP TS-h666TX, TS-h866TX and TS-h966TX – Ports and Connectivity
Connectivity is one of the areas where this series separates itself most clearly from the older TS x64 generation. The TS h666TX and TS h866TX both combine 2 x 10GbE with 2 x USB 10Gb/s and 2 x USB4, alongside a PCIe Gen 3 x4 expansion slot. That is a substantial step forward from systems such as the TS 464, which provides 2 x 2.5GbE as standard and relies on PCIe expansion if higher bandwidth networking is needed. In practical terms, that means the new h66xTX models are being positioned for multi user editing, faster backup windows and direct attached workflows in a way that the mainstream TS line was not originally built around.
The inclusion of USB4 is particularly relevant here because QNAP has already used this kind of connectivity in creator focused products such as the TVS h674T, where Thunderbolt 4 is presented as a direct host connection option for Mac and Windows systems. While QNAP will still need to confirm the exact implementation and host workflow support on these new NAB 2026 systems, the presence of 2 x USB4 on all 3 models suggests that direct high bandwidth connection is a deliberate part of their design, rather than a secondary feature. That places these units closer to QNAP’s media and production focused hardware than to the more general office and home NAS segment.
The TS h966TX is slightly different, and arguably less aggressive, in its network configuration. Instead of the dual 10GbE arrangement of the h666TX and h866TX, the h966TX is listed with 1 x 10GbE and 1 x 2.5GbE, while still retaining 2 x USB 10Gb/s and 2 x USB4. That means the 9 bay model has the most storage flexibility in the family, but not the strongest network specification on paper. If that specification is accurate at launch, it makes the h966TX a more storage led hybrid platform rather than the highest bandwidth model in the group, which is not the usual assumption buyers would make when looking at the largest chassis first.
Specification: TS h666TX: 2 x 10GbE, 2 x USB 10Gb/s, 2 x USB4, 1 x PCIe Gen 3 x4 TS h866TX: 2 x 10GbE, 2 x USB 10Gb/s, 2 x USB4, 1 x PCIe Gen 3 x4 TS h966TX: 1 x 10GbE, 1 x 2.5GbE, 2 x USB 10Gb/s, 2 x USB4
QNAP TS-h666TX, TS-h866TX and TS-h966TX – Price and Release Date
At the time of writing, QNAP does not appear to have published final retail pricing or a formal product page for the TS h666TX, TS h866TX or TS h966TX on its main product catalogue or 2026 newsroom pages, so both availability and price should still be treated as unconfirmed. Based on the information shared at NAB 2026, the current indication is a target launch window around Q2 to Q3 2026, but that remains provisional until QNAP publishes official listings, regional store pages or a formal press release. QNAP’s own 2026 newsroom and product comparison pages currently show no live retail entry for these 3 systems, which supports the view that the series is still in the pre release stage rather than being commercially available now. In pricing terms, the most reasonable expectation is that this range will sit above the TS x64 family and below the TVS h74 class, assuming QNAP keeps the rest of its tower lineup structured in the same way. The TS 464 is still positioned by QNAP as a mainstream high performance tower option in its 2026 buying guide, while the current TVS h674 remains a more premium QuTS hero desktop platform with stronger CPU options and a generally higher specification tier. Given that the new TS h666TX and TS h866TX introduce QuTS hero, DDR5, Intel Core i3 1215U, integrated 10GbE and USB4, they would logically land between those 2 product families rather than alongside either one directly.
That said, the TS h966TX may prove harder to price neatly because its storage configuration is more specialised than the other 2 models. Its 5 plus 4 hybrid layout, mixed 10GbE and 2.5GbE networking, and heavier SSD oriented design could place it closer to existing hybrid hero systems in value, even if its processor remains the same. Until QNAP confirms MSRPs, any exact figure would be speculative, but the broader market position appears to be that these are intended as a mid tier QuTS hero tower family, not a direct budget replacement for the TS 464 and TS 664, and not a full substitute for the TVS h674 or TVS h674T either.
This description contains links to Amazon. These links will take you to some of the products mentioned in today's content. As an Amazon Associate, I earn from qualifying purchases. Visit the NASCompares Deal Finder to find the best place to buy this device in your region, based on Service, Support and Reputation - Just Search for your NAS Drive in the Box Below
Need Advice on Data Storage from an Expert?
Finally, for free advice about your setup, just leave a message in the comments below here at NASCompares.com and we will get back to you.Need Help?
Where possible (and where appropriate) please provide as much information about your requirements, as then I can arrange the best answer and solution to your needs. Do not worry about your e-mail address being required, it will NOT be used in a mailing list and will NOT be used in any way other than to respond to your enquiry.
[contact-form-7]
TRY CHAT Terms and Conditions
If you like this service, please consider supporting us.
We use affiliate links on the blog allowing NAScompares information and advice service to be free of charge to you.Anything you purchase on the day you click on our links will generate a small commission which isused to run the website. Here is a link for Amazon and B&H.You can also get me a Ko-fi or old school Paypal. Thanks!To find out more about how to support this advice service checkHEREIf you need to fix or configure a NAS, check FiverHave you thought about helping others with your knowledge? Find Instructions Here
Or support us by using our affiliate links on Amazon UK and Amazon US
Alternatively, why not ask me on the ASK NASCompares forum, by clicking the button below. This is a community hub that serves as a place that I can answer your question, chew the fat, share new release information and even get corrections posted. I will always get around to answering ALL queries, but as a one-man operation, I cannot promise speed! So by sharing your query in the ASK NASCompares section below, you can get a better range of solutions and suggestions, alongside my own.
UGREEN DH4300 PLUS vs UniFi UNAS 4 – Which Should You Buy?
The UniFi UNAS 4 and the UGREEN DH4300 Plus are being compared because they currently occupy a very similar part of the 4-bay NAS market, with both systems targeting buyers who want a relatively affordable turnkey storage solution with 2.5GbE connectivity, modern desktop design, and a lower entry price than many traditional NAS brands. On paper, they are close enough in price to be direct alternatives, but in practice they approach NAS deployment very differently. The UniFi UNAS 4 is built around tight integration with the wider UniFi ecosystem and focuses primarily on straightforward storage, backup, and remote file access, whereas the UGREEN DH4300 Plus is designed as a broader standalone NAS platform with more memory, a more powerful ARM processor, HDMI output, and a wider range of applications and services. That makes this comparison relevant not just because of the hardware and price overlap, but because each system reflects a different idea of what an entry to mid-range 4-bay NAS should be in 2026.
UniFi vs UGREEN NAS – Brand vs Brand
Before I dig into which of the DH4300 or UNAS 4 is best for you, it is worth highlighting again that these are two comparatively new players in the NAS scene (compared with long time multi-decade vetrans such as Synology, QNAP, Asustor and Terramaster), so let’s talk about their priorities and focus at a brand level. Both UGREEN and UniFi have entered the NAS sector from distinct starting points and continue to move in different directions, each targeting a particular type of user. UniFi’s UNAS series delivers consistency, predictable performance, and dependable integration with the broader UniFi ecosystem. Its software is stable, lightweight, and well-suited to users who prioritize straightforward storage management, reliable data handling, and unified control across routers, switches, and surveillance systems. While the hardware is limited to fixed ARM configurations and non-expandable memory, it is efficient, quiet, and designed for continuous operation with minimal maintenance. For organizations already invested in UniFi infrastructure, the UNAS systems provide a logical expansion that keeps management centralized and operational risk low. However, their value depends heavily on ecosystem synergy; outside of that environment, the systems remain competent but relatively inflexible standalone NAS options.
UGREEN’s NASync platform, on the other hand, appeals to users seeking broader performance capability and independence. Its x86-based models, upgradable memory, and open software environment allow it to serve as a hybrid between NAS and compact server, capable of running applications, containers, and virtual machines alongside storage tasks. The design language is more suited to individual or small business use than datacenter deployment, but the hardware range—from ARM to Core i5—covers a far wider performance spectrum than UniFi’s. Software maturity continues to evolve quickly, with new features added frequently, and the systems provide extensive compatibility with third-party clients and backup services. The trade-off is that long-term reliability and enterprise-level security validation are still developing.
Ultimately, UniFi NAS suits users who already rely on UniFi’s networking ecosystem and value simplicity, predictability, and centralized management, while UGREEN NAS caters to those prioritizing flexibility, compute power, and open software capability. Both brands have lowered the entry barrier into reliable NAS ownership, but they embody opposing philosophies: UniFi focuses on integration and control, whereas UGREEN emphasizes capability and independence.
Why Buy UniFi NAS?
Why Buy UGREEN NAS?
Ecosystem Integration: Seamlessly integrates with UniFi Network, Protect, and Access systems, allowing unified management through a single controller interface.
Centralized Management: Designed for administrators managing multiple UniFi sites or devices, providing consistent firmware, remote access, and monitoring from one dashboard.
Reliable, Efficient Design: ARM-based architecture ensures low power draw, cool operation, and stable long-term performance with minimal maintenance.
Enterprise-Grade Networking: Equipped with up to dual 10G SFP+ and 10GBase-T ports, plus USP-RPS redundancy for professional deployments.
Proven Security Framework: Benefits from Ubiquiti’s mature network security infrastructure, signed firmware updates, and NDAA-compliant hardware.
Superior Hardware Performance: Offers a full range from ARM to Intel Core i5 CPUs, with upgradable RAM, NVMe storage pools, and optional PCIe expansion.
Versatile Software (UGOS Pro): Supports Docker, virtual machines, AI photo indexing, and multi-platform backups out of the box.
All-in-One Standalone System: Functions independently without relying on an external ecosystem, ideal for users wanting a complete server in one unit.
Advanced Connectivity: Includes 2.5 GbE and 10 GbE networking, USB 4/Thunderbolt 4, and support for direct-attached workflows like video editing or large-file transfer.
Rapid Development and Updates: Frequent firmware releases continually add new features, broader hardware support, and improved backup and security options.
Want to support us NASCompares? Use the links/buttons below, and anything you purchase results in a small commission coming to me and Eddie @NASCompares. It really is just the two of us doing everything, and purchasing things via these links will allow you to passively support creators like us (as well as allow us to keep making videos, providing support, running the forum, making tutorials and more) at no extra cost to yourself!
UGREEN DH4300 vs UniFi UNAS 4 – Design and Storage
From a physical design perspective, these 2 NAS systems take very different approaches. The UniFi UNAS 4 has a taller, narrower chassis with a more vertical layout, while the UGREEN DH4300 Plus uses a more cubic desktop design that will look more familiar to buyers coming from Synology, QNAP, or Asustor hardware. The UniFi system is also available in black or white, which gives it a more deliberate visual identity within the wider UniFi product range, whereas the UGREEN keeps to a more conventional single-finish enclosure. In both cases, the chassis material is primarily plastic, so neither is especially premium in material terms, but each is clearly trying to prioritize compactness and low manufacturing cost rather than metal construction.
The drive arrangement is also notably different. The UniFi UNAS 4 places its 4 SATA bays in the base of the chassis, with the drives inserted from underneath, while the UGREEN DH4300 Plus uses a top-loaded vertical bay arrangement hidden under a removable outer shell. Neither system uses a particularly enterprise-focused tray design, and neither is really built around frequent hot-swap use in the same way as more expensive rackmount or prosumer NAS systems. That said, the UniFi trays are easier to describe as straightforward click-in drive carriers, while the UGREEN trays feel more budget-oriented in construction and do not leave the same impression of robustness as more established NAS brands.
In storage flexibility, the UniFi has the more ambitious configuration. Alongside its 4 SATA bays, it also includes 2 dedicated M.2 NVMe slots for SSD cache. That gives it an advantage in hybrid storage architecture, since the hard drives can be used for capacity while the NVMe media handles read and write cache duties. The UGREEN DH4300 Plus does not include M.2 storage slots, so any SSD deployment has to consume one or more of the main SATA bays, which reduces total storage capacity. At the same time, UniFi currently limits those NVMe bays to cache use rather than general storage pools, so the practical advantage is still narrower than the raw hardware layout suggests.
The 2 brands also differ in RAID and storage management philosophy. The UGREEN supports a broader list of RAID modes, including JBOD, Basic, RAID 0, RAID 1, RAID 5, RAID 6, and RAID 10, which gives it more deployment flexibility for different user priorities around performance, redundancy, or simple linear storage. The UniFi platform supports RAID 5, RAID 6, and RAID 10, but its overall storage structure is more controlled and less flexible, with a stronger focus on a simplified single storage pool approach. For buyers who want fewer decisions and a cleaner setup process, that may be acceptable, but for users who want more granular control over how storage is arranged, the UGREEN is less restrictive.
In pure storage potential, the UGREEN is also easier to quantify because it officially supports up to 128TB across 4 bays using 32TB drives, whereas UniFi focuses more on supported drive compatibility and cache pairing than on headline raw capacity figures. The UniFi does have the practical advantage of SSD caching built in, which can improve responsiveness in repeated access and write-heavy workloads, but the UGREEN has the simpler storage proposition overall and does not tie part of its internal design to optional accessories such as UniFi’s separate M.2 tray approach. As a result, the UniFi has the more distinctive and technically layered storage design, while the UGREEN has the more conventional and broadly flexible one.
Internally, the UGREEN DH4300 Plus has the stronger hardware specification. It uses an 8-core Rockchip ARM processor based on Cortex-A76 and Cortex-A55 cores running at up to 2.0GHz, alongside 8GB of LPDDR4X memory and 32GB of eMMC for the system. By comparison, the UniFi UNAS 4 uses a quad-core ARM Cortex-A55 processor at 1.7GHz with 4GB of memory. Both systems are clearly built around low-power ARM architecture rather than x86 processing, but the UGREEN has the more capable platform on paper and offers more headroom for multitasking, background services, and broader software functionality.
The UniFi system does, however, counter with a more unusual internal layout. In addition to its 4 SATA bays, it includes 2 M.2 NVMe slots dedicated to SSD cache, which gives it a storage acceleration feature that the UGREEN does not match natively. For users dealing with repeated file access, background synchronization, or burst-heavy write activity, that cache support has practical value. The UGREEN relies entirely on its 4 SATA bays for storage media, so although its CPU and memory are stronger, its internal storage architecture is less advanced in terms of tiered storage.
External connectivity is broader on the UGREEN. It includes 1x 2.5GbE LAN port, HDMI output at up to 4K 60Hz, 1x front USB 3.2 Gen 1 port at 5Gb/s, and 2 additional USB-A 5Gb/s ports. The UniFi UNAS 4 is much more limited, offering 1x 2.5GbE RJ45 port and 1x 5Gb/s USB-C port. This narrower I/O profile reflects the fact that UniFi has positioned the UNAS 4 as a focused network storage appliance rather than a multi-role NAS for media output, peripheral attachment, or application expansion. In direct hardware terms, the UGREEN is better equipped for users who expect more than basic file serving.
Power and deployment also separate these 2 systems. The UniFi UNAS 4 supports PoE+++ and includes a 90W PoE adapter, which allows both power and network connectivity over a single cable in supported environments. That is unusual in this part of the NAS market and makes it particularly relevant for users already invested in UniFi switching infrastructure or those deploying hardware in locations where simplified cabling matters. The UGREEN uses a more conventional external power arrangement, which is less distinctive but also less dependent on network infrastructure choices. Therefore, the UGREEN has the stronger internal compute hardware and broader physical connectivity, while the UniFi has the more specialized deployment advantage.
UGREEN DH4300 vs UniFi UNAS 4 – Software & Services
The biggest difference between these 2 NAS systems is not the chassis or the processor, but the software scope. The UniFi UNAS 4 runs UniFi Drive and is clearly built around a narrower storage-first brief, with support for SMB, NFS, snapshots, file encryption, Time Machine, share links, user groups, remote backup, cloud backup targets, and client apps. It covers the main NAS fundamentals expected by home users and small offices, but it does so within a more controlled environment that places simplicity and consistency ahead of feature breadth. The UGREEN DH4300 Plus, running UGOS Pro, aims much wider and includes not only file serving and backup tools, but also multimedia applications, container support, HDMI-based media playback, AI-assisted photo features, and broader service depth overall.
For pure storage management, UniFi Drive is cleaner and more focused, particularly for users who want the NAS to act primarily as private cloud storage, backup target, and centralized file repository. Its interface is built to align with the broader UniFi platform, and that gives it an advantage for users already running UniFi networking equipment and remote management tools. However, that same focus also means the UNAS 4 is less flexible as a general-purpose NAS. The UGREEN platform does not have the same ecosystem tie-in, but it operates more independently and gives the user more scope to use the system for different workloads beyond file storage.
Application support is where the gap becomes more obvious. The UGREEN DH4300 Plus supports Docker and has a noticeably broader service layer for media, backup, and user applications. That creates options for running third-party software, home media tools, and more customized services that simply are not part of the UniFi approach. The UniFi UNAS 4 does not currently try to compete in that area and instead presents itself as a dedicated NAS platform rather than an application host. For some users that will be a limitation, while for others it will be a benefit, because it reduces complexity and keeps the system centered on storage tasks rather than mixed workload experimentation.
In practical terms, the software decision comes down to whether the buyer values depth or focus. The UGREEN DH4300 Plus offers the broader NAS software experience and is better suited to users who want more features, more applications, and more ways to extend the system over time. The UniFi UNAS 4 offers the more controlled and storage-specific platform, with the clearest advantage appearing when it is deployed inside an existing UniFi environment. As a result, the UGREEN software stack is more versatile, while the UniFi software stack is more specialized.
UniFi UNAS 4 vs UGREEN DH4300 NAS – Conclusion & Verdict
Taken as a whole, these 2 systems are aimed at a similar buyer in price terms, but they are not trying to solve the same problem in the same way. The UniFi UNAS 4 is a more specialized NAS that focuses on storage, backup, remote access, and integration within the UniFi ecosystem. The UGREEN DH4300 Plus is a broader standalone NAS that gives the user more hardware resources, more software flexibility, and a wider overall role in the network. That difference matters more than the relatively small gap in price, because in day to day use they will appeal to different priorities. The UniFi UNAS 4 makes more sense for buyers who already use UniFi switches, gateways, and management tools, or for those who specifically want a NAS that stays focused on file storage instead of trying to become a media server or container host. Its built in NVMe cache support and PoE+++ deployment give it some useful differentiators, and its simpler software scope will suit users who want a more controlled experience. However, outside of the UniFi ecosystem, some of its strengths become less important, while its limitations in application support, connectivity, and hardware power become harder to ignore.
The UGREEN DH4300 Plus is the better fit for users who want a more traditional all-round NAS. It has the stronger CPU, more memory, broader external connectivity, more RAID options, HDMI output, Docker support, and a software platform with more room to scale into multimedia, backup variety, and third party services. It is the more capable choice for mixed home and small business use, particularly for buyers who are not tied to any specific network brand and want their NAS to handle more than just centralized storage. It is also the easier system to recommend to users comparing it against other established 4-bay NAS platforms in the same price bracket. So, in direct usage terms, the UniFi UNAS 4 is better for UniFi-centric deployments, cleaner storage-first use, and buyers who value NVMe caching and PoE-based installation. The UGREEN DH4300 Plus is better for users who want stronger hardware, more software features, better connectivity, and a wider long term usage profile. If the question is which is the better pure value NAS for the largest number of users, the UGREEN DH4300 Plus is the stronger overall option. If the question is which fits better into a UniFi-led network and a simpler storage-focused role, the UniFi UNAS 4 is the more appropriate choice.
This description contains links to Amazon. These links will take you to some of the products mentioned in today's content. As an Amazon Associate, I earn from qualifying purchases. Visit the NASCompares Deal Finder to find the best place to buy this device in your region, based on Service, Support and Reputation - Just Search for your NAS Drive in the Box Below
Need Advice on Data Storage from an Expert?
Finally, for free advice about your setup, just leave a message in the comments below here at NASCompares.com and we will get back to you.Need Help?
Where possible (and where appropriate) please provide as much information about your requirements, as then I can arrange the best answer and solution to your needs. Do not worry about your e-mail address being required, it will NOT be used in a mailing list and will NOT be used in any way other than to respond to your enquiry.
[contact-form-7]
TRY CHAT Terms and Conditions
If you like this service, please consider supporting us.
We use affiliate links on the blog allowing NAScompares information and advice service to be free of charge to you.Anything you purchase on the day you click on our links will generate a small commission which isused to run the website. Here is a link for Amazon and B&H.You can also get me a Ko-fi or old school Paypal. Thanks!To find out more about how to support this advice service checkHEREIf you need to fix or configure a NAS, check FiverHave you thought about helping others with your knowledge? Find Instructions Here
Or support us by using our affiliate links on Amazon UK and Amazon US
Alternatively, why not ask me on the ASK NASCompares forum, by clicking the button below. This is a community hub that serves as a place that I can answer your question, chew the fat, share new release information and even get corrections posted. I will always get around to answering ALL queries, but as a one-man operation, I cannot promise speed! So by sharing your query in the ASK NASCompares section below, you can get a better range of solutions and suggestions, alongside my own.
Choisir un NAS peut vite devenir un casse-tête. Entre les marques, les modèles, le nombre de baies, les performances, le RAID ou encore les usages possibles, il est facile de s’y perdre… et de faire un mauvais choix. Et pourtant, dans de nombreux cas, quelques critères suffisent pour trouver le modèle adapté à ses besoins.
Les erreurs les plus fréquentes
Avec le recul, on observe souvent les mêmes erreurs :
Choisir un NAS trop puissant (et donc trop cher) par rapport à son usage ;
Sous-estimer ses besoins en stockage ;
Ne pas vérifier les fonctionnalités disponibles ;
Négliger la sécurité ou la sauvegarde.
Résultat : un équipement mal exploité… ou qu’il faut remplacer plus tôt que prévu.
Les critères essentiels pour choisir un NAS
Plutôt que de se focaliser sur les fiches techniques, mieux vaut commencer par l’essentiel.
L’usage principal :
Sauvegarde de fichiers
Stockage de photos et vidéos
Serveur multimédia (Plex, streaming)
Usage avancé (Docker, virtualisation)
Pour moi, c’est LE critère le plus important.
Le nombre d’utilisateurs :
1 à 2 utilisateurs → NAS 2 baies
Famille ou équipe → NAS 4 baies recommandé
Plus il y a d’utilisateurs, plus les besoins en performances et en stockage augmentent. Cela peut sembler évident, mais c’est souvent sous-estimé…
L’évolutivité
Un NAS est un investissement sur plusieurs années. Il est donc préférable de prévoir :
un peu plus de capacité que nécessaire ;
une solution évolutive (RAM, disques, extensions).
Anticiper permet d’éviter un remplacement prématuré !
En pratique
Dans la majorité des cas :
Un NAS 2 baies suffit pour débuter ;
Un NAS 4 baies apporte plus de confort et de sécurité ;
Les fabricant comme Synology, QNAP, Asustor ou TerraMaster couvrent la plupart des besoins…
Il est inutile de viser trop haut dès le départ, mais de nombreux utilisateurs commencent avec un NAS 2 baies et un an après… passent sur le modèle 4 baies.
Vous cherchez un NAS ? Téléchargez le guide gratuit pour faire le bon choix en quelques minutes
Vérifiez votre boite de réception ou votre dossier d’indésirables pour confirmer votre abonnement.
Après confirmation, vous recevrez le guide sous 10 minutes...
Un guide pour aller plus loin
Pour vous aider à faire le bon choix rapidement, j’ai créé un guide complet complet : Choisir son NAS en 10 minutes. Ce guide reprend les bases, explique simplement les notions importantes et propose des recommandations concrètes selon votre profil.
J’en profite également pour lancer une newsletter Cachem. Une fois par mois, vous recevrez :
Les actualités importantes autour des NAS ;
Des conseils pratiques ;
Du contenu exclusif réservé aux abonnés ;
Une sélection de ressources utiles.
L’objectif reste le même : vous faire gagner du temps et éviter les erreurs.
Recevoir le guide gratuitement
Le guide est accessible gratuitement en vous inscrivant à la newsletter
Vérifiez votre boite de réception ou votre dossier d’indésirables pour confirmer votre abonnement.
Après confirmation, vous recevrez le guide sous 10 minutes...
Pour aller plus loin
Vous pouvez également consulter les guides déjà disponibles sur le site :
Guide d’achat NAS
Conseils pour bien choisir son NAS
Comment choisir un NAS
Meilleurs NAS : le comparatif complet
Comme toujours sur Cachem, l’objectif est de proposer des contenus simples, utiles et directement exploitables. Si ce guide peut vous éviter une erreur ou vous faire gagner du temps, alors il aura rempli son rôle.
The Synology BeeStation BST151-4T is a 4 TB single drive personal cloud device that sits somewhere between an external hard drive and a traditional NAS, targeting users who want centralized storage, photo backup, file syncing, and remote access without dealing with a conventional multi bay server setup. It follows the original BST150-4T BeeStation, first released in February 2024, and appears to be a light refresh of that earlier model rather than a full redesign. As with the first version, the focus is on quick deployment, simple management, and a more consumer friendly software experience, using Synology’s BeeStation platform instead of the broader and more configurable DSM system found on the company’s standard NAS lineup.
At a hardware level, the BST151-4T remains a very compact single bay network storage appliance with a fixed 4 TB hard drive, built around the Realtek RTD1619B platform and a 1GbE network connection. Physical connectivity is unchanged from the earlier BeeStation, with 1 x USB-A 3.2 Gen 1 port, 1 x USB-C 3.2 Gen 1 port, and 1 x RJ-45 LAN port, all housed in the same 148.0 x 62.6 x 196.3 mm enclosure weighing 820 g.
That hardware profile makes clear where the BeeStation sits in Synology’s lineup. This is not a flexible NAS chassis with room for drive upgrades, SSD cache, multi bay expansion, or faster networking. The internal disk is part of the appliance design, so there is no meaningful path to RAID redundancy, easier drive level recovery, or long term capacity scaling in the way there is on a conventional 2 bay or 4 bay NAS.
Power and thermals are also modest, which is consistent with a low power, always on personal cloud device. Synology lists power consumption at about 7.85 W during access and 1.65 W in HDD hibernation, with a 36 W external power adapter. The system continues to use a single HAT3300-4T drive, and Synology’s current 4 TB HAT3300 model is a 5400 RPM class disk rather than a faster 7200 RPM unit.
The one specification that requires care is memory. Synology’s March 30, 2026 product specification PDF and the current BeeStation comparison page both list the BST151-4T with 1 GB DDR4, but Synology’s newer BST151-4T datasheet, published later in March 2026 and mirrored across multiple regional versions, lists 2 GB DDR4 instead. On balance, the later datasheet appears to reflect the intended refresh specification, but Synology’s own published material is not yet fully consistent. (UPDATE – RAM on the BST151-4T is CONFIRMED as 2GB)
Assuming the 2 GB figure in the later datasheet is the correct final spec, the BST151-4T is best understood as a minimal revision of the BST150-4T rather than a new hardware generation. The enclosure, CPU, ports, networking, and drive class are effectively the same, while the main change is the move from the predecessor’s 1 GB memory configuration to 2 GB. That could simply reflect practical component economics as much as performance tuning, since lower density memory packages can become less cost effective over time as supply shifts. In either case, this still appears to be fixed onboard memory, not a user upgradeable SO-DIMM arrangement, so the platform remains closed in the same way as the original model.
Specification
Synology BeeStation BST151-4T
Capacity
4 TB
Drive type
Synology HAT3300-4T
Processor
Realtek RTD1619B
Memory
2 GB DDR4 listed in the newer datasheet; 1 GB DDR4 still appears on some Synology product spec pages
LAN
1 x 1GbE RJ-45
USB
1 x USB-A 3.2 Gen 1, 1 x USB-C 3.2 Gen 1
Dimensions
148.0 x 62.6 x 196.3 mm
Weight
820 g
Power adapter
36 W
Power consumption
7.85 W access, 1.65 W HDD hibernation
Operating temperature
0°C to 35°C
Warranty
3 years
Synology BeeStation in 2026 – What can it do?
In 2026, the BeeStation platform is no longer limited to basic remote file access. Synology positions it as a consumer focused private cloud for storing, syncing, and sharing files and photos, with web, desktop, and mobile access, support for sign in via Google Account, Apple ID, or Synology Account, and shared access for up to 8 users on a single device. It is designed to pull together data from phones, computers, external drives, and selected cloud services into one managed location rather than acting only as a simple networked hard drive.
Photo handling is one of the more developed parts of the platform. Synology states that BeeStation can back up mobile photos, import content from sources such as Google Photos and iCloud Photos, and organize images with local AI based recognition for people, subjects, and places. The software also supports timeline and map based browsing, album creation, and controlled photo sharing, which places the BST151-4T closer to a private cloud photo hub than to a basic USB backup box.
Its data protection features have also expanded since launch. BeeStation now supports internal restore points based on snapshots, backups to BeeProtect, Synology NAS, and external drives, plus a 3 year Acronis True Image Essentials license for 1 computer. BeeStation OS 1.5 also added BeeCamera support, but Synology limits that feature to BeeStation Plus models rather than the standard 4 TB unit, so the BST151-4T does not currently gain the surveillance role that the higher tier model has started to take on.
Where the BeeStation still differs from a DSM based NAS such as the DS124 or DS223 is in breadth and flexibility. Synology’s DS124 and DS223 product pages explicitly advertise broader DSM functions including Synology Drive based private cloud workflows, Btrfs snapshot features, ShareSync between Synology systems, full Surveillance Station support, and the wider DSM application platform. By contrast, BeeStation remains a curated appliance with a narrower software stack, no general DSM Package Center environment, no broad package driven expansion path, and on the standard 4 TB model no BeeCamera surveillance support either. In other words, it can cover the main personal cloud tasks, but it still does not replace the wider role of even Synology’s entry level DSM NAS systems.
The BST151-4T looks like a modest revision of the original BeeStation rather than a substantially new product. Its appeal remains the same: a preconfigured, low friction private cloud for users who want basic file storage, photo backup, syncing, sharing, and remote access without moving into a full DSM based NAS environment. The hardware envelope is still narrow, with a fixed internal 4 TB drive, 1GbE networking, and no real upgrade path for storage expansion or RAID style redundancy, but that is consistent with its role as an entry level turnkey appliance rather than a general purpose NAS. Synology’s own later datasheet points to 2 GB of RAM on the new model, which would make the BST151-4T a small but practical refresh of the BST150-4T rather than a platform shift. Pricing is the main unknown at the time of writing. Synology’s support status page already lists the BST151-4T as generally available, but public retail pricing is still not clearly established. On that basis, the safest expectation is that it will land close to the earlier 4 TB BeeStation, which launched around $199 in the US and about £209 in the UK, while more recent BST150-4T retail listings have also appeared higher depending on seller and region, sat around $309 without TAX. That likely places the BST151-4T will land in excess of $300 and maybe closer to $350 when factoring the RAM increase.
This description contains links to Amazon. These links will take you to some of the products mentioned in today's content. As an Amazon Associate, I earn from qualifying purchases. Visit the NASCompares Deal Finder to find the best place to buy this device in your region, based on Service, Support and Reputation - Just Search for your NAS Drive in the Box Below
Need Advice on Data Storage from an Expert?
Finally, for free advice about your setup, just leave a message in the comments below here at NASCompares.com and we will get back to you.Need Help?
Where possible (and where appropriate) please provide as much information about your requirements, as then I can arrange the best answer and solution to your needs. Do not worry about your e-mail address being required, it will NOT be used in a mailing list and will NOT be used in any way other than to respond to your enquiry.
[contact-form-7]
TRY CHAT Terms and Conditions
If you like this service, please consider supporting us.
We use affiliate links on the blog allowing NAScompares information and advice service to be free of charge to you.Anything you purchase on the day you click on our links will generate a small commission which isused to run the website. Here is a link for Amazon and B&H.You can also get me a Ko-fi or old school Paypal. Thanks!To find out more about how to support this advice service checkHEREIf you need to fix or configure a NAS, check FiverHave you thought about helping others with your knowledge? Find Instructions Here
Or support us by using our affiliate links on Amazon UK and Amazon US
Alternatively, why not ask me on the ASK NASCompares forum, by clicking the button below. This is a community hub that serves as a place that I can answer your question, chew the fat, share new release information and even get corrections posted. I will always get around to answering ALL queries, but as a one-man operation, I cannot promise speed! So by sharing your query in the ASK NASCompares section below, you can get a better range of solutions and suggestions, alongside my own.
Le marché du stockage professionnel continue de monter en puissance. ASUSTOR annonce un nouveau NAS rackable : Lockerstor 24R Pro Gen2. Ce modèle vise les entreprises exigeantes, avec une capacité de stockage importante, des performances élevées et une sécurité avancée… regardons de plus près ce nouveau boitier.
Lockerstor 24R Pro Gen2 (AS7224RDX)
Le Lockerstor 24R Pro Gen2 est un NAS rackable équipé de 24 baies pouvant acceuillir des disques durs ou SSD. Il dispose également de 4 emplacements pour des SSD NVMe (PCIe Gen 5) pour accélérer les performances via du cache ou pour du stockage rapide. Dans sa configuration maximale, il peut atteindre 768 To et même dépasser le pétaoctet avec une extension Xpanstor
Sous le capot, ce NAS embarque un processeur octo-core AMD Ryzen 7 Pro 7745, capable d’atteindre 5,3 GHz. Il est accompagné de 16 Go de RAM DDR5 ECC, extensible jusqu’à 192 Go. Cette configuration assure à la fois puissance de calcul, stabilité et évolutivité pour les charges de travail intensives.
Connectique et performance
Côté connectique, le Lockerstor 24R Pro Gen2 est orienté performance réseau. Il embarque 2 ports 10 Gb/s et 2 ports 1 Gb/s pour de la redondance par exemple. Selon le fabricant, les débits pourrait atteindre 2300 Mo/s en lecture et 1900 Mo/s en écriture séquentielles.
Le NAS propose également 4 ports USB 3.0, 1 sortie HDMI (service uniqueemnt). À cela s’ajoutent 2 emplacements PCIe (Gen5 x8 et Gen5 x4), offrant des possibilités d’extension supplémentaires selon les besoins.
Il est important de noter que ce boitier dispose de 2 alimentations certifiées 80 PLUS Platinum pour la redondance.
En synthèse
Avec ce modèle 24 baies, ASUSTOR complète sa gamme Lockerstor Pro Gen2… Le positionnement est clair : répondre aux besoins des entreprises manipulant des volumes de données importants. La capacité d’évolution, notamment au-delà du pétaoctet, en fait une solution pérenne.
Les performances réseau annoncées et l’intégration d’un processeur Ryzen renforcent sa légitimité sur les charges intensives. L’évolutivité matérielle via PCIe est également un point intéressant pour les infrastructures spécifiques. Enfin, l’ensemble des caractéristiques en fait un NAS rackable solide et adapté aux environnements modernes.
Immich a beaucoup évolué depuis mon premier tutoriel publié avec la version Bêta… L’application a énormément évolué et elle est aujourd’hui nettement plus mature, stable et complète. Si vous installez Immich pour la première fois sur votre NAS Synology, suivez ce guide étape par étape…
En revanche, si votre installation actuelle fonctionne correctement, ne changez rien. Les mises à jour majeures peuvent nécessiter des ajustements techniques.
Qu’est-ce que Immich ?
Immich est un logiciel de gestion et sauvegarde de photos et vidéos lancé en 2022. L’interface est fluide, les fonctionnalités sont riches et l’expérience utilisateur est clairement au niveau des solutions cloud grand public, sans dépendre d’un GAFAM.
Alternative à Google Photos, Immich offre une approche axée sur la confidentialité et l’auto-hébergement.
Pourquoi choisir Immich plutôt que Google Photos ?
Contrairement à Google Photos :
Vos données restent chez vous, sur votre NAS
Aucun accès par un tiers
Traitement local des données (IA incluse)
Aucune compression forcée
Clairement, Immich est aujourd’hui une solution plus avancée pour un usage personnel maîtrisé.
Fonctionnalités principales d’Immich (2026)
La liste des fonctionnalités est très longue, mais voici les principales :
Gestion photo et vidéo :
Support des formats classiques et RAW
Live Photos / Motion Photos
Zoom vidéo
Prise en charge des panoramas 360°
Sauvegarde automatique :
Synchronisation en arrière-plan
Détection des doublons
Sauvegarde en Wi-Fi, 4G/5G ou uniquement pendant la charge
Libération d’espace :
Suppression automatique des fichiers déjà sauvegardés
Nettoyage manuel par lots
Recherche avancée :
Tags, EXIF, lieux, objets
Reconnaissance faciale locale
Vue carte :
Intégration OpenStreetMap
Géolocalisation automatique
Édition non destructive : le fichier original reste intact
Partage simplifié : Liens personnalisés, même depuis un téléphone
Sécurité et confidentialité :
Dossier verrouillé (code PIN)
Corbeille avec suppression différée
Authentification OAuth2 / OIDC
Support certificats auto-signés
À cela s’ajoutent : mode hors ligne, Chromecast, multi-utilisateurs, Memories, etc.
Combien coûte Immich ?
Immich est open source et 100% gratuit si vous l’installer sur votre NAS (ou sur un ordinateur). Les applications Android et iOS sont également gratuites. Les développeurs proposent un système de licence payante, elles n’offrent aucun fonctionnalité ou service complémentaire.
Installer Immich sur un NAS Synology
L’installation repose sur 4 conteneurs Docker :
immich_server : cœur de l’application ;
immich_machine_learning : IA (visages, objets) ;
immich_postgres : base de données ;
immich_redis : cache et performance.
Ce guide est basé sur la documentation officielle, adaptée aux NAS Synology.
Préparation des dossiers
Ouvrez File Station
Allez dans le dossier docker
Créez un sous-dossier nommé Immich
Dans ce nouveau dossier, créez 3 sous-dossier : library, model-cache et postgres
Création du conteneur Docker
Ouvrez Container Manager
Allez dans Projet → Créer
Renseignez :
Nom du projet : immich
Chemin : docker/Immich
Source : Créer un fichier docker-compose.yml
Collez ensuite le contenu suivant :
services:
  # Immich : https://immich.app/
  immich-server:
    container_name: immich_server
    image: ghcr.io/immich-app/immich-server:v2
    # Si votre NAS a un processeur Intel, décommentez les 2 lignes ci-dessous "# "
    # devices:
    #  - /dev/dri:/dev/dri
    environment:
      TZ: Europe/Paris
      DB_HOSTNAME: database
      DB_PORT: 5432
      DB_USERNAME: postgres
      DB_PASSWORD: PasswordCachem123$  # A changer par un mot de passe fort
      DB_DATABASE_NAME: immich
      REDIS_HOSTNAME: redis
      REDIS_PORT: 6379
    volumes:
      # Stockage des fichiers (adaptez le chemin à votre NAS)
      - ./library:/usr/src/app/upload
      # - "/volume1/Mes Archives/:/mnt/media/MesArchives"  # Exemple d'ajout d'un dossier de votre NAS
      - /etc/localtime:/etc/localtime:ro
    ports:
      - "2283:2283"
    depends_on:
      - database
      - redis
    restart: always
    healthcheck:
      disable: false

  # Immich Machine Learning
  immich-machine-learning:
    container_name: immich_machine_learning
    image: ghcr.io/immich-app/immich-machine-learning:v2
    environment:
      TZ: Europe/Paris
      DB_HOSTNAME: database
      DB_PORT: 5432
      DB_USERNAME: postgres
      DB_PASSWORD: PasswordCachem123$  # A changer par un mot de passe fort
      DB_DATABASE_NAME: immich
      REDIS_HOSTNAME: redis
      REDIS_PORT: 6379
    volumes:
      - ./model-cache:/cache
    restart: always
    healthcheck:
      disable: false

  # Immich Redis
  redis:
    container_name: immich_redis
    image: docker.io/valkey/valkey:9
    healthcheck:
      test: redis-cli ping || exit 1
    restart: always

  # Immich PostgreSQL
  database:
    container_name: immich_postgres
    image: ghcr.io/immich-app/postgres:14-vectorchord0.4.3-pgvectors0.2.0
    environment:
      TZ: Europe/Paris
      POSTGRES_PASSWORD: PasswordCachem123$  # A changer par un mot de passe fort
      POSTGRES_USER: postgres
      POSTGRES_DB: immich
      POSTGRES_INITDB_ARGS: "--data-checksums"
      # Décommentez la ligne suivante si la base est sur un disque dur (HDD)
      # DB_STORAGE_TYPE: "HDD"
    volumes:
      - ./postgres:/var/lib/postgresql/data
    shm_size: 128mb
    restart: always
    healthcheck:
      test: ["CMD-SHELL", "pg_isready -U postgres -d immich"]
      interval: 10s
      timeout: 5s
      retries: 3
      start_period: 30s
N’hésitez pas à utiliser un éditeur de texte pour changer les paramètres si besoin. Pensez à changer les mots de passe.
Appuyez sur le bouton Suivant (2 fois), puis le bouton Effectué. Container Station va télécharger les images (cela peut prendre quelques minutes selon votre connexion Internet) puis démarrer les conteneurs…
Attendez encore une à deux minutes le temps que tout démarre correctement.
Appuyez sur le bouton Commencer et laissez-vous guider par les premières étapes :
Créez votre compte administrateur (adresse email, mot de passe et nom d’utilisateur)
Configurez :
Thème (mode sombre / mode clair)
Langue (par défaut en Français)
Confidentialité serveur (faites vos choix)
Paramètres utilisateur
Modèle de stockage (recommandé : activé et laissé par défaut)
Sauvegarde (rappel de la stratégie 3-2-1)
Installez l’application mobile et lancez vos premières sauvegardes !
Optimisations et paramètres avancés
Modifier le dossier par défaut
Par défaut, Immich utilise : docker/Immich/library
Ce n’est pas idéal si vous souhaitez une organisation propre et j’avoue que j’utilise un dossier à la racine de mon NAS. Je préfère que les bibliothèques photos et vidéos ne soient dans le dossier docker.
Ajouter une bibliothèque externe
Un exemple a été donné ci-dessus. Vous aurez remarqué que le fichier compose.yaml a été créé automatiquement dans le dossier docker/Immich. Arrêter votre projet immich puis vous ajoutez le/les dossiers contenant vos photos et vidéos. C’est la ligne :
Vous pouvez bloquer la possibilité de modifier ou supprimer les fichiers du dossier en ajoutant :ro à la fin (pour notre exemple : - "/volume1/Vacances 2024/:/mnt/media/Archives2024:ro". Par défaut, c’est en lecture et écriture (:rw).
Si vous avez déjà installé Immich et que vous modifiez le fichier compose.yaml, pour prendre en compte les modifications, il faut recréer le projet (sans perte d’information). Voici ce que vous devez faire :
Ouvrez Container Manager
Allez dans Projet et faites un clic droit sur immich et choisissez Nettoyer
Le Terminal s’affiche et attendez de voir Exit Code: 0 puis appuyez sur le bouton Fermer
Toujours dans Projet et faites un clic droit sur immich et choisissez Créer
Ensuite, depuis l’interface d’administration d’Immich (pensez à relancer votre projet), allez dans Administration > Bibliothèque externe pour ajouter le dossier à un utilisateur.
Synology Container Manager n’interroge que Docker Hub pour vérifier les mises à jour et ignore les autres registres comme ghcr.io. Voici comment mettre à jour facilement Immich :
Ouvrez Container Manager
Allez dans Projet et faites un clic droit sur immich et choisissez Nettoyer
Le Terminal s’affiche et attendez de voir Exit Code: 0 puis appuyez sur le bouton Fermer
Allez dans Images, chercher les images commençant par ghcr.io/immich-app faites clic droit dessus et choisissez Supprimer
Retourner dans Projet et faites un clic droit sur immich et choisissez Créer
Par défaut, j’ai bloqué la configuration sur la dernière version de la branche 2.x uniquement. Si vous souhaitez la dernière version publiée, alors vous mettrez :release à la place de :2 dans le fichier compose.yaml.
FAQ – Immich sur NAS Synology
Immich est-il stable ?
Oui. Immich a bien évolué depuis ses débuts. L’application est stable pour un usage quotidien, y compris avec de grandes bibliothèques photo. Des mises à jour fréquentes continuent d’améliorer les performances et les fonctionnalités.
Peut-on remplacer Google Photos par Immich ?
Oui, dans la majorité des cas. Immich propose :
Sauvegarde automatique
Reconnaissance faciale
Recherche avancée
Partage de fichiers
La principale différence : vos données restent sur votre NAS, sans dépendre d’un service Cloud.
Peut-on importer ses photos depuis Google Photos ?
Oui, il est possible d’importer vos données via Google Takeout, puis de les intégrer dans Immich. Selon la taille de votre bibliothèque, l’indexation (visages, objets) peut prendre du temps.
Quelle configuration minimale pour faire tourner Immich ?
NAS avec Docker (paquet Container Manager)
6 Go de RAM minimum (8 Go recommandés)
CPU x86 recommandé pour de meilleures performances
On connaissait Acemagic pour ses Mini PC accessibles… Le fabricant chinois confirme son ambition d’entrer sur le marché des NAS, à l’instar de Beelink. Pour cela, il lance un modèle hybride animé par un Ryzen Embedded R2544. Un choix qui peut surprendre sur le papier, mais qui s’avère finalement plutôt cohérent…
Acemagic N3A
Avec le N3A, Acemagic fait un pari simple : ne pas trancher entre mini PC et NAS. Le constructeur propose ici une solution tout-en-un capable de répondre à ces deux usages.
Il s’agit d’un boîtier intégrant 4 baies pour disques durs (ou SSD) ainsi que 2 emplacements M.2 NVMe en PCIe 3.0. Il est construit autour d’un processeur Quad Core AMD Ryzen Embedded R2544, avec iGPU intégré. Selon CPU Passmark, ce dernier obtiendrait 8 459 points.
Le produit est livré en version barebone, c’est à dire sans mémoire ni stockage. Il prend en charge jusqu’à 64 Go de DDR4, avec compatibilité ECC. C’est plutôt un avantage pour les usages orientés serveur et stockage.
Côté logiciel, il semble tourner sous la dernière version de Windows.
Un vrai hybride
Le N3A ne se limite pas à un simple rôle de NAS. Sa connectique complète lui permet aussi de fonctionner comme un mini PC classique.
On retrouve :
2 ports réseau : 2.5 GbE et 1 GbE
1 sortie HDMI 2.0
1 DisplayPort 1.4
1 port USB Type-C compatible vidéo
2 ports USB 2.0
2 ports USB 3.0 Type-A
Cette configuration permet de gérer plusieurs écrans ( y compris en 4K) et d’envisager des usages variés.
Prix et disponibilité
Le boîtier est d’ores et déjà disponible à la commande sur lesite officiel pour 300€. À ce tarif, le N3A se positionne comme une alternative compétitive face aux NAS x86 traditionnels.
Sur le papier, le rapport capacité/prix est intéressant. Comme souvent avec ce type de produit, tout se jouera sur des éléments moins visibles : qualité du firmware, gestion thermique et niveau sonore.
La fiche technique semble solide et cohérente, mais c’est un produit qui devra faire ses preuves…
The Minisforum N5 Max was originally shown in January 2026 during CES 2026 as the next step in the company’s 5 bay NAS series, following the N5 Pro that arrived in summer 2025 and later sitting above the N5 Air that was introduced in February 2026. At that stage, most of the information around the system came from early hands on coverage, reveal material, and first wave specification details, which meant some elements were still provisional or inconsistent depending on source. Now, in April 2026, the picture around the N5 Max is much clearer. Minisforum has provided a more defined specification set, a clearer description of the hardware layout, and a much stronger explanation of how the system is intended to be positioned, not just as another compact 5 bay NAS, but as a higher tier platform that combines local AI capability, multi tier storage, and more advanced infrastructure features. This update is therefore intended to bring the original January reveal into line with what is currently known, clarify where earlier CES details have since been refined, and set out the N5 Max as it stands now based on the latest available information.
The N5 Max keeps the same broad chassis direction first seen in the earlier N5 systems, using a compact 5 bay enclosure that supports both 3.5 inch and 2.5 inch SATA drives. Physically, it remains very close to the N5 Pro and N5 Air in footprint, with the April 2026 dimensions now listed at 199 × 202.4 × 252.3 mm and a base unit weight of 5 kg. That means Minisforum has not redesigned the platform into a larger desktop tower, but instead chosen to scale capability within the same general enclosure class that defined the rest of the series.
One of the more visible design changes carried over from the original January reveal is the inclusion of lockable drive trays. That may seem like a small revision, but it directly addresses one of the practical complaints raised around the earlier N5 generation. Minisforum is also still using the pull out internal layout, where the main board and flash storage area can be accessed through a more service friendly internal assembly rather than a completely fixed internal frame.
In structural terms, the N5 Max remains very much part of the same family, but it has been revised in several small ways that make it look more mature than the first N5 design.
On the hard drive side, the N5 Max is now specified with 5 SATA 3.0 bays supporting up to 30 TB per bay, giving the system a stated raw HDD ceiling of 150 TB before any NVMe storage is counted. Minisforum also lists the platform as supporting up to 190 TB total storage overall. Compared with the 22 TB per drive guidance attached to earlier N5 series documentation, this higher ceiling does not change the number of bays, but it does position the Max for a higher total capacity target within the same physical format. As with most NAS vendors, real world drive compatibility will still depend on validation over time, but the intent is clearly to place the N5 Max above the earlier models in maximum raw storage potential.
Flash storage is where the N5 Max diverges most clearly from the N5 Pro and N5 Air. Instead of the mixed M.2 and U.2 style arrangement used on those systems, the N5 Max is now described as having 5 M.2 NVMe positions in total. The current April 2026 specification lists 1 × M.2 2280 NVMe slot running at PCIe 4.0 x4 with support up to 8 TB, plus 4 × M.2 2280 NVMe slots running at PCIe 4.0 x1 with support up to 8 TB each. Minisforum also states that the system disk is a preinstalled 64 GB module occupying 1 of those SSD positions, which is relevant because it affects how many slots are immediately free to the user out of the box.
That layout gives the N5 Max a storage structure that is more layered than the earlier N5 models, with large capacity HDDs handling primary bulk storage while multiple NVMe slots can be used for cache, active project data, containers, VM storage, model files, or application workloads. It also fits the broader April 2026 positioning of the unit as a system meant to keep more data in an active state rather than simply acting as a passive archive box. The tradeoff is that the Max no longer appears to prioritize the same U.2 flexibility seen on the N5 Pro and N5 Air, instead leaning harder into a denser onboard M.2 arrangement within the same 5 bay chassis.
Minisforum N5 Max NAS Internal Hardware
The N5 Max is built around the AMD Ryzen AI Max+ 395, a 16 core, 32 thread processor with a 3 GHz base frequency and boost up to 5.1 GHz. Minisforum lists the chip with Radeon 8060S integrated graphics featuring 40 graphics cores, alongside AMD Ryzen AI support rated at up to 126 TOPS overall and up to 50 TOPS on the NPU. In simple terms, this places the N5 Max in a very different compute class to the original N5 and above the N5 Pro as well, making it much closer to a compact workstation platform than a conventional 5 bay NAS in processor terms.
Memory is also handled very differently from the rest of the series. Rather than using upgradeable SO-DIMM slots, the N5 Max is listed with 128 GB of LPDDR5x memory on a 256 bit interface, with support references of 7500 to 8000 MT/s depending on source. That fixed memory design should provide substantially more bandwidth than the socketed DDR5 approach in the N5 Pro and N5 Air, which matters for integrated graphics and local AI workloads, but it also removes user upgrade flexibility. This is one of the clearest examples of Minisforum prioritizing performance density over long term modularity in the Max model.
Cooling and power delivery have also been scaled up to match that higher tier hardware. Minisforum lists a cooling system built around 5 heat pipes with PCM, dual 80 × 15 mm turbo fans for the CPU area, dual 92 × 25 mm axial fans for the HDD section, and a separate 60 × 12 mm turbo fan for the SSD and PSU area. Power is now handled by an internal 250 W supply with AC input built directly into the chassis, replacing the external brick used on the earlier N5 systems. Taken together, these changes suggest that the N5 Max is not simply using a faster CPU in the same shell, but has been reworked internally to support higher sustained load, denser flash storage, and a more integrated overall design.
Minisforum N5 Max NAS Connectivity
The N5 Max keeps the same broad I/O philosophy as the rest of the N5 family, but with a more aggressive top end specification. On the front, Minisforum lists 1 × USB4 port with DisplayPort Alt Mode 2.0 support and 1 × USB 3.2 Gen 2 port. On the rear, the system is listed with 2 × USB4 v2, 1 × USB 3.2 Gen 2, 1 × USB 2.0, 1 × HDMI 2.1 FRL, and 1 × AC input. There is also still an internal PCIe x16 slot operating at PCIe 4.0 x4, which means the N5 Max continues to support internal expansion in the same general way as the earlier N5 systems.
Networking is one of the areas where the April 2026 information has become more specific, but it is also where earlier coverage created some confusion. The latest specification material lists 2 × 10GbE LAN ports using Realtek RTL8127 controllers. That differs from some earlier CES era references that described 1 × 10GbE plus 1 × 5GbE, and it also differs from the N5 Pro and N5 Air, which were generally presented as 10GbE plus 5GbE systems. Based on the most recent material now available, the safest reading is that the N5 Max is currently positioned as a dual 10GbE model, though that was not consistently communicated in the earliest reveal phase.
Display and high speed external bandwidth are also stronger on the N5 Max than on the other N5 variants. Minisforum lists video output support through HDMI and USB4, with the current specification stating up to 8K at 60 Hz or 4K at 144 Hz. More notably, the USB configuration now includes 2 × USB4 v2 connections, which is a substantial increase in external bandwidth compared with standard USB4 implementations. In practical terms, that gives the N5 Max a better fit for high speed external storage, direct attach workflows, fast ingest tasks, and display connectivity, while reinforcing that this system is being pitched as more than just a standard network storage appliance.
What Can You Do with the Minisforum N5 Max NAS
At the most basic level, the N5 Max can still be understood as a compact 5 bay NAS for centralised storage, backup, and multi user file access. With support for up to 150 TB of raw HDD capacity across its SATA bays, plus additional NVMe storage for faster tiers, it can be used for the same core roles as more traditional NAS systems, including shared folders, media libraries, workstation backups, and project archives. The difference is that Minisforum is not presenting it as a storage box first and everything else second. Instead, the current messaging places storage alongside compute and local services as equal parts of the platform.
The second role is as a higher performance working data system for users who need more than simple network storage. The combination of 5 HDD bays, multiple NVMe slots, dual 10GbE, PCIe expansion, and high speed USB4 v2 means the N5 Max is better suited to active workloads than a typical 5 bay desktop NAS. That can include media production, large photo libraries, virtual machine storage, container workloads, active project caching, and heavier multi user access. In that sense, the N5 Max sits closer to a compact storage server or workstation adjacent appliance than to an entry level NAS.
The third and most distinctive role is local AI processing. Minisforum’s March 2026 positioning pushes the N5 Max as a platform for private AI workloads running directly on the device rather than through cloud services. The company has specifically highlighted OpenClaw deployment on local LLMs, semantic photo search, voice to text, summarisation, smart organisation, and a more unified AI assistant style interface inside its software environment. Whether all of those functions arrive in the same form and at the same maturity level at launch remains something that still needs real world validation, but the intended direction is clearly toward keeping both data and AI interactions local.
For more advanced users, the N5 Max is also being framed as a private infrastructure platform rather than only an appliance. Minisforum has attached features such as ZFS, snapshots, virtualization, Docker, UPS support, and stronger permission control to the product direction, which broadens its appeal beyond simple home storage. That means the N5 Max could be used not just for storing files or running AI assisted search, but also for self hosting services, managing recoverable local data pools, running isolated applications, or building a more controlled homelab environment around the same hardware.
Minisforum N5 Max Price & Release Date
As of April 6, 2026, Minisforum still does not appear to have published an official retail price or a confirmed shipping date for the N5 Max. The company’s March 11 announcement described the system as “to-be-launched,” and contemporaneous reporting also noted that pricing and release timing had not yet been announced. That means the N5 Max remains in a pre-release stage from a commercial point of view, even though the hardware platform, software direction, and much of the specification set are now clearer than they were during the original January CES reveal.
What can be said with more confidence is where the N5 Max is likely to sit within the existing Minisforum NAS range. On Minisforum’s current store listings, the N5 Air is shown at $519 sale price on the official store home page, the base N5 is shown at $599, and the N5 Pro is shown at $959, while no live product listing or price is currently visible there for the N5 Max. Given the Ryzen AI Max+ 395 platform, fixed 128 GB LPDDR5x memory, internal 250 W PSU, and broader AI focused positioning, it is reasonable to expect the N5 Max to land above the N5 Pro rather than alongside it, but until Minisforum formally opens orders or publishes a listing, that remains an informed expectation rather than a confirmed launch price.
This description contains links to Amazon. These links will take you to some of the products mentioned in today's content. As an Amazon Associate, I earn from qualifying purchases. Visit the NASCompares Deal Finder to find the best place to buy this device in your region, based on Service, Support and Reputation - Just Search for your NAS Drive in the Box Below
Need Advice on Data Storage from an Expert?
Finally, for free advice about your setup, just leave a message in the comments below here at NASCompares.com and we will get back to you.Need Help?
Where possible (and where appropriate) please provide as much information about your requirements, as then I can arrange the best answer and solution to your needs. Do not worry about your e-mail address being required, it will NOT be used in a mailing list and will NOT be used in any way other than to respond to your enquiry.
[contact-form-7]
TRY CHAT Terms and Conditions
If you like this service, please consider supporting us.
We use affiliate links on the blog allowing NAScompares information and advice service to be free of charge to you.Anything you purchase on the day you click on our links will generate a small commission which isused to run the website. Here is a link for Amazon and B&H.You can also get me a Ko-fi or old school Paypal. Thanks!To find out more about how to support this advice service checkHEREIf you need to fix or configure a NAS, check FiverHave you thought about helping others with your knowledge? Find Instructions Here
Or support us by using our affiliate links on Amazon UK and Amazon US
Alternatively, why not ask me on the ASK NASCompares forum, by clicking the button below. This is a community hub that serves as a place that I can answer your question, chew the fat, share new release information and even get corrections posted. I will always get around to answering ALL queries, but as a one-man operation, I cannot promise speed! So by sharing your query in the ASK NASCompares section below, you can get a better range of solutions and suggestions, alongside my own.
Update on the ZimaCube 2 NAS + Your Questions Answered
Following the original ZimaCube and ZimaCube Pro, IceWhale is now preparing the ZimaCube 2 range as a more mature follow-up to its first desktop NAS platform, combining the same broad idea of a compact, open, software-defined personal cloud with clearer attention paid to refinement, validation, and retail readiness. Based on the specifications revealed so far, the standard $799 ZimaCube 2, the $1,299 ZimaCube 2 Pro, and the $2,499 Creator Pack continue to target users who want a turnkey system that still leaves room for alternative operating systems, PCIe expansion, direct Thunderbolt 4 or USB4 connectivity, and mixed storage workloads, but the second generation also arrives in the shadow of the first model’s early issues around cooling, power handling, and hardware compatibility, all of which IceWhale now says informed the redesign. Rather than presenting the ZimaCube 2 as a radically different product category, the company appears to be positioning it as a more stable and better validated version of the same formula, with a stronger base model, revised cooling, closer hardware and software integration, and a retail launch path instead of another crowdfunding campaign.
Remember to use the NASCompares Channel Discount Code: ‘NASCOMPARES50’
Zimacube 2 First Look at the Design
In physical terms, the ZimaCube 2 remains very close to the original system. The listed chassis dimensions are still 240 x 221 x 220 mm, and the overall layout continues to center on a compact desktop enclosure with 6 front-facing drive bays, a removable front panel, and a secondary internal sled for the 7th-bay M.2 storage section. That means this is not a major departure in footprint or format, but rather a continuation of the same small-tower NAS concept that IceWhale introduced with the first ZimaCube generation.
The external build also keeps the same broad industrial approach, with an all-metal enclosure and a design that is intended to be visible on a desk rather than hidden away. Based on the Shenzhen hands-on material, the finish has been revised to a silver tone rather than the darker look associated with earlier models, and there are still decorative touches such as copper-coloured screws and RGB lighting. The magnetic front cover also remains part of the design language, although the hands-on notes suggest that removability is still not especially refined, with no obvious front handle to make access easier.
Internally, the most significant design revision appears to be in thermals rather than structure. The original ZimaCube family drew recurring criticism over cooling behaviour and fan noise, and IceWhale itself later issued optimisation guidance and revised cooling components for early units. On the ZimaCube 2, the cooling assembly appears to have been reworked substantially, with a much larger vapor-chamber style module, extended heatpipe routing, and a direct airflow path toward a rear-mounted fan. In practical terms, this is one of the clearest visible signs that the company is treating thermal control as a first-order design issue rather than a secondary adjustment.
The storage layout remains one of the most recognisable elements of the platform. At the front are 6 SATA bays for 3.5-inch and 2.5-inch drives, while the separate 7th-bay board carries 4 M.2 slots. What has changed is the clarification around performance tiers. Following the post-video corrections, both the standard and Pro use PCIe Gen 4 for the 7th-bay architecture, but the actual throughput differs because of the ASMedia bridge hardware: the standard model is rated for 800MB/s R/W, while the Pro and Creator Pack are rated for 3200MB/s R/W. So although the physical design remains familiar, the storage subsystem is now segmented more clearly by model.
Taken together, the ZimaCube 2’s design changes are best understood as a revision rather than a clean-sheet rethink. The enclosure, bay structure, general scale, and visual concept are all recognisably derived from the earlier ZimaCube, but the thermal hardware, finish, and some of the internal implementation details suggest a product that has been adjusted in response to first-generation feedback. From a design perspective, the main story is not reinvention. It is that IceWhale appears to have revisited the same chassis idea with greater emphasis on cooling headroom, validation, and long-term use as a retail product rather than a first-wave crowdfunded device.
Zimacube 2 Internal Hardware Confirmation
The internal hardware changes are more substantial than the exterior suggests, particularly at the lower end of the range. The standard ZimaCube 2 now moves from the original ZimaCube’s Intel N100 to a 12th Gen Intel Core i3-1215U, giving the base model 6 cores, 8 threads, and a much stronger starting point for mixed storage and application workloads.
The ZimaCube 2 Pro and Creator Pack both use the 12th Gen Intel Core i5-1235U with 10 cores and 12 threads, which keeps the Pro class in the same broad processor tier as the earlier ZimaCube Pro, but still gives the second-generation lineup a more balanced split between entry and higher-tier models. Memory has also shifted upward in platform terms, with DDR5 SODIMM support and upgradeable slots rather than fixed memory, allowing the standard model to start at 8GB, the Pro at 16GB, and the Creator Pack at 64GB.
One of the more important details here is that IceWhale is not presenting the hardware purely as a NAS board with attached storage, but as a compact compute platform that also happens to handle large-scale local storage. The system still uses an internal NVMe SSD for the operating system, with 256GB on the standard and Pro and 1TB on the Creator Pack, while retaining dual PCIe slots on a Mini-ITX based custom board. That means the core platform is still built around expandability, and not just in a theoretical sense. IceWhale continues to point toward GPU cards, AI accelerators, network cards, and SSD-focused upgrades as intended use cases, which places the ZimaCube 2 somewhere between a traditional NAS, a compact home server, and a turnkey prosumer workstation-style storage appliance.
At the same time, the scale of the internal upgrade depends on which earlier model is being used as the reference point. Against the original non-Pro ZimaCube, the jump is obvious: newer CPU class, higher memory ceiling, improved internal segmentation, and a platform that appears better prepared for virtualization, media handling, and direct-attached workloads. Against the original ZimaCube Pro, however, the advance is more limited, because the Pro remains on the same Core i5-1235U family and much of the underlying capability was already present in some form. So while the internal hardware is clearly stronger overall, especially in the standard model, this still reads more as a focused revision of the existing architecture than a complete hardware reset.
Zimacube 2 Final Ports and Connectivity
Externally, the ZimaCube 2 continues to position itself as something broader than a conventional NAS, and the port layout reflects that. On the rear, the standard model includes 2 x 2.5GbE network ports alongside 2 x Thunderbolt 4 or USB4-capable USB-C connections, which gives it both networked and direct-attached workflow options. That matters because IceWhale is still treating direct host connection as one of the platform’s defining features, particularly for users who want local high-speed access without routing everything through standard Ethernet alone. It also keeps the ZimaCube 2 distinct from many turnkey NAS systems that rely almost entirely on network connectivity as the primary access path.
The separation between the standard and Pro models is more visible in networking than in external appearance. The standard ZimaCube 2 is limited to 2 x 2.5GbE, while the ZimaCube 2 Pro adds an additional 10GbE port. That makes the Pro the more complete option for users intending to deploy the system as shared high-speed network storage, while the standard model leans more heavily on its direct-connect Thunderbolt 4 or USB4 story to offset the absence of 10GbE. In practical terms, this is an important distinction, because although both systems look closely related on paper, the network capabilities create a clear difference in how they are likely to be used in creative or multi-user environments.
The rest of the I/O remains relatively conventional but still useful for a system of this class. IceWhale lists 4 x USB-A 3.0 ports, 1 x USB-C 3.0 port, DisplayPort 1.4, HDMI 2.0, and a 3.5mm audio jack, while the internal platform also keeps 2 PCIe expansion slots available for broader configuration. None of these ports alone are unusual, but taken together they reinforce the same point as the rest of the hardware: this is not being framed as a sealed appliance. It is being framed as a turnkey system with room for local expansion, direct attachment, and mixed workload deployment, even if the actual value of that depends on whether the buyer is choosing the standard model’s lower-cost balance or the Pro model’s more complete network specification.
Next, I spent some time with the founder of Icewhale (the company behind the Zimacube and ZimaOS, as well as the popular Zimaboard and Zimablade) and put forward a few questions about the current development of Zimacube 2 and their recent pricing changes to ZimaOS.
What is the ZimaCube 2 bringing to the market that your previous ZimaCube/ZimaCube Pro does not?
Based on the hands-on session and Lauren Pan’s comments, IceWhale is not presenting the ZimaCube 2 as a completely new product category, but rather as a more refined and better balanced version of the same idea. The biggest practical difference is that the standard model is no longer a clearly compromised entry point in the way the original N100-based ZimaCube often appeared next to the first Pro. The move to a Core i3-1215U, DDR5 memory, dual Thunderbolt 4 or USB4, 6 SATA bays, 4 M.2 slots, 2 PCIe slots, and upgradeable SODIMM memory means the base model now looks much closer to the wider prosumer NAS and compact server market, instead of acting mainly as the cheaper route into the ecosystem. That gives the range a stronger starting point and makes the standard unit a more serious option in its own right.
The second major difference is maturity rather than raw specification. IceWhale is tying the ZimaCube 2 more directly to the lessons learned from the first generation, especially around cooling, stability, hardware validation, and closer coordination between hardware and software development. The revised thermal module, the stronger emphasis on compatibility testing, the claim of more OS-level control over system parameters such as fans, and the move away from crowdfunding toward direct retail all suggest that the ZimaCube 2 is intended to arrive as a more settled product. So while the overall concept remains familiar, what IceWhale appears to be bringing to market this time is a more fully developed turnkey platform, not just in hardware terms, but in how the product is being prepared, sold, and supported.
What lessons were learnt in the development of the original ZimaCube that are going to be applied in the development of ZimaCube 2?
The clearest lesson appears to have been that the original ZimaCube needed tighter coordination between hardware and software from the outset. According to Lauren Pan, one of the main internal changes for the second generation is that both teams now work far more closely together, discussing hardware and software details in the same development cycle rather than treating them as separate tracks. In practical terms, that matters because the first-generation platform showed that a NAS or personal cloud product is not defined by hardware alone. It also depends heavily on how well thermals, fan control, storage behaviour, connectivity, and OS-level management are integrated into a single system.
A second lesson concerns validation and first-batch readiness. The original ZimaCube attracted feedback around cooling, fan behaviour, drive compatibility, and power-related issues, and IceWhale now appears to be treating those areas much more seriously in the ZimaCube 2. Pan specifically pointed to a redesigned thermal module, more extensive compatibility testing, and additional work with drive manufacturers such as Seagate and Western Digital after earlier issues emerged. The broader implication is that ZimaCube 2 is being developed less like an experimental first-generation product and more like a revision intended to reduce the kind of early hardware and integration problems that affected the first release.
What was the biggest challenge that you have faced in the development of ZimaCube 2?
According to Lauren Pan, the biggest challenge in developing the ZimaCube 2 was production cost. That answer fits the wider context of the current hardware market, where CPU, memory, SSD, and other component pricing has remained a significant pressure on system builders. In the case of the ZimaCube 2, IceWhale appears to have been trying to hold onto several features that are often reduced or removed in competing products at this price level, including upgradeable SODIMM memory, bundled system storage, dual Thunderbolt 4 or USB4 connectivity, PCIe expansion, and a more substantial cooling solution. So the challenge was not simply making a new box, but doing so while keeping the product within a price band that still looked competitive against other turnkey and semi-DIY NAS systems in 2026.
That issue appears especially relevant to the standard model. IceWhale is trying to position the $799 ZimaCube 2 as a stronger base platform than the original non-Pro unit, while still including a Core i3-1215U, 8GB of DDR5, 256GB of NVMe storage, 6 SATA bays, 4 M.2 slots, and full ZimaOS licensing as part of the package. In that respect, the development challenge seems to have been balancing specification, manufacturability, and margin without moving the product out of reach of the same buyers it is trying to attract. The result is that cost control appears to have shaped not just pricing, but also the way IceWhale talks about the ZimaCube 2 as a price versus performance compromise rather than an attempt to maximise specifications at any cost.
What has the user response been to your switch towards a free/paid $29 model of your ZimaOS software since the announcement?
According to Lauren Pan, the response to the move from a fully free model to the current free tier plus $29 lifetime ZimaOS+ model has been mixed, but not unexpected. Some community members were confused by the change or felt the software should have remained fully free, while others accepted that the platform needed a sustainable business model if development was going to continue over the long term.
That split is fairly typical for software that begins as a no-cost offering and later introduces paid licensing, particularly when it has built much of its reputation through community use, testing, and feedback. In IceWhale’s case, the company’s position is that the low-cost lifetime fee is intended to make the software commercially sustainable without undermining its accessibility.
IceWhale has also tried to frame the pricing change as part of a broader community model rather than just a revenue switch. Pan said the company had explained the reasoning publicly in late 2025 and described a plan under which 33% of license revenue would be directed back toward community contributors, including moderators, app maintainers, and users helping support the wider ZimaOS and CasaOS ecosystem.
Whether that model proves sustainable over time remains to be seen, but the immediate point is that IceWhale does not appear to be treating the $29 fee as a traditional software upsell. Instead, it is presenting it as a low-cost, lifetime contribution intended to keep development active while maintaining a relatively low barrier to entry compared with other paid NAS software platforms.
Will ZimaCube 2 be headed for crowdfunding, or direct to traditional retail?
IceWhale says the ZimaCube 2 is going direct to traditional retail rather than returning to crowdfunding. In Lauren Pan’s explanation, Kickstarter is something the company now sees as useful in 2 specific cases: either when a product concept still needs market validation, or when production costs are high enough that outside funding is needed to get the first batch built. IceWhale’s position is that the original ZimaCube fit that earlier stage of the company, when the product was more expensive to bring to market and the business itself was still proving demand for this kind of home server and personal cloud hardware. With the ZimaCube 2, the company appears to believe it no longer needs crowdfunding for either of those reasons.
That change is also part of the wider message around the second generation. Moving straight to store-based pre-orders gives the impression that IceWhale wants the ZimaCube 2 to be seen less as an experimental or community-funded device and more as a normal retail product. Pan also described the early response as active, with roughly 200 to 300 community applications tied to testing and usage scenarios, suggesting that demand discovery is now happening around a product that already exists, rather than one still needing crowdfunding to justify its creation. In practical terms, the retail-first approach supports IceWhale’s broader attempt to position the ZimaCube 2 as a more mature follow-up to the first generation.
The NASCompares Conclusion and Verdict so Far on ZimaCube 2
Taken as a whole, the ZimaCube 2 looks less like a dramatic reinvention of the original platform and more like a deliberate correction and refinement of it. The overall chassis concept, storage layout, and broader product identity remain familiar, but IceWhale appears to have focused this second generation on the areas that mattered most after the first release: a stronger base model, revised thermals, closer hardware and software coordination, more validation around compatibility, and a direct retail launch rather than another crowdfunding cycle. That means the scale of change is uneven depending on which earlier model it is compared against, but the direction is clear enough. The ZimaCube 2 does not appear to be trying to replace the original with a wholly different vision. Instead, it looks like IceWhale is trying to turn the ZimaCube formula into a more complete and commercially mature turnkey platform, with ZimaOS, direct Thunderbolt 4 or USB4 connectivity, PCIe expansion, and hybrid storage still forming the core of its appeal.
Remember to use the NASCompares Channel Discount Code: ‘NASCOMPARES50’
This description contains links to Amazon. These links will take you to some of the products mentioned in today's content. As an Amazon Associate, I earn from qualifying purchases. Visit the NASCompares Deal Finder to find the best place to buy this device in your region, based on Service, Support and Reputation - Just Search for your NAS Drive in the Box Below
Need Advice on Data Storage from an Expert?
Finally, for free advice about your setup, just leave a message in the comments below here at NASCompares.com and we will get back to you.Need Help?
Where possible (and where appropriate) please provide as much information about your requirements, as then I can arrange the best answer and solution to your needs. Do not worry about your e-mail address being required, it will NOT be used in a mailing list and will NOT be used in any way other than to respond to your enquiry.
[contact-form-7]
TRY CHAT Terms and Conditions
If you like this service, please consider supporting us.
We use affiliate links on the blog allowing NAScompares information and advice service to be free of charge to you.Anything you purchase on the day you click on our links will generate a small commission which isused to run the website. Here is a link for Amazon and B&H.You can also get me a Ko-fi or old school Paypal. Thanks!To find out more about how to support this advice service checkHEREIf you need to fix or configure a NAS, check FiverHave you thought about helping others with your knowledge? Find Instructions Here
Or support us by using our affiliate links on Amazon UK and Amazon US
Alternatively, why not ask me on the ASK NASCompares forum, by clicking the button below. This is a community hub that serves as a place that I can answer your question, chew the fat, share new release information and even get corrections posted. I will always get around to answering ALL queries, but as a one-man operation, I cannot promise speed! So by sharing your query in the ASK NASCompares section below, you can get a better range of solutions and suggestions, alongside my own.
Aujourd’hui, je vous propose un guide complet pour installer Karakeep sur votre NAS Synology. Karakeep est un gestionnaire de signets open source qui va bien plus loin que vos favoris de navigateur : il sauvegarde le contenu complet des pages web, prend des captures d’écran, extrait le texte intégral et l’indexe dans un moteur de recherche interne. En clair, même si une page disparaît ou change du tout au tout, vous pouvez toujours retrouver l’information. Entrons directement dans le vif du sujet…
Synology et Karakeep
Karakeep (anciennement Hoarder) est un projet open source qui a rapidement gagné en popularité depuis son lancement en 2024. L’interface est moderne, il dispose d’une extension navigateur pour Chrome et Firefox, d’une application mobile iOS et Android, et d’une recherche full-text sur tout le contenu archivé.
Voici ce qu’il sait faire :
Sauvegarde de liens, notes et images ;
Archivage complet des pages via Monolith (page sauvegardée dans un fichier HTML autonome) ;
Archivage automatique des vidéos via yt-dlp (YouTube, Vimeo, etc.) ;
OCR sur les images pour en extraire le texte ;
Surligner et annoter des passages de vos pages archivées ;
Tag automatique par IA (local via Ollama ou une API externe) ;
Ingestion RSS automatiquement ;
Moteur de règles pour automatiser la gestion de vos signets ;
Importation depuis Chrome, Pocket, Linkwarden, Omnivore, Tab Session Manager ;
Synchronisation avec les favoris navigateur via Floccus ;
SSO, mode sombre…
L’installation repose sur 3 conteneurs qui travaillent ensemble :
karakeep : l’application principale (interface web + API)
chrome : un navigateur headless qui capture les pages
meilisearch : le moteur de recherche qui indexe tout le texte
Installer sur un NAS Synology
Pour cette installation, j’ai simplement suivi le tuto officiel et opéré à quelques adaptations simple.
Préparation des dossiers
Ouvrez File Station
Allez dans le dossier docker
Créez un sous-dossier nommé Karakeep
Dans ce dernier, créez 2 sous-dossiers : data et meilisearch
Création du conteneur Docker
Ouvrez Container Manager
Allez dans Projet → Créer
Renseignez les informations suivantes :
Nom du projet : karakeep
Chemin : docker/Karakeep
Source : Créer un fichier docker-compose.yml
Collez ensuite le contenu suivant :
services:
  web:
        image: ghcr.io/karakeep-app/karakeep:release
        restart: unless-stopped
        volumes:
            - ./data:/data
        ports:
            - 3008:3000
        environment:
            NEXTAUTH_SECRET: dCACHEMP9qL4nR8wZ1yA5bC3eF6hJ0tU # A modifier
            MEILI_MASTER_KEY: sYnOlogy5aS8dF3gH7jK1lZ4xC6vB0nM # A modifier
            NEXTAUTH_URL: http://192.168.1.100:3008
            MEILI_ADDR: http://meilisearch:7700
            BROWSER_WEB_URL: http://chrome:9222
            DATA_DIR: /data
            CRAWLER_STORE_PDF: "true" # A retirer si vous ne souhaitez pas de PDF
        depends_on:
            - chrome
            - meilisearch
  chrome:
      image: gcr.io/zenika-hub/alpine-chrome:124
      restart: unless-stopped
      command:
          - --no-sandbox
          - --disable-gpu
          - --disable-dev-shm-usage
          - --remote-debugging-address=0.0.0.0
          - --remote-debugging-port=9222
          - --hide-scrollbars
  meilisearch:
      image: getmeili/meilisearch:v1.37.0
      restart: unless-stopped
      volumes:
          - ./meilisearch:/meili_data
      environment:
          MEILI_MASTER_KEY: sYnOlogy5aS8dF3gH7jK1lZ4xC6vB0nM # A modifier
          MEILI_NO_ANALYTICS: "true"
Avant de cliquer sur Suivant, prenez quelques instant pour personnaliser :
NEXTAUTH_URL : http://192.168.1.100:3008 (adresse IP de votre NAS)
NEXTAUTH_SECRET (en rouge) : chaîne de caractères aléatoires pour sécuriser votre installation
MEILI_MASTER_KEY (en bleu) : chaîne de caractères aléatoires identique dans les services web et meilisearch
Une fois les valeurs ajustées, cliquez sur Suivant puis sur Effectué. Container Station va télécharger les 3 images (cela peut prendre quelques minutes selon votre connexion) puis démarrer les conteneurs…
Première connexion
Ouvrez un onglet dans votre navigateur et rendez-vous sur : http://AdresseIPduNAS:3008
Cliquez sur le Sign up pour créer votre premier compte. Renseignez une adresse e-mail et un mot de passe, puis connectez-vous. Vous pourrez changer pour avoir une interface en français
Bloquer les inscriptions
Une fois votre compte créé, il est vivement conseillé de désactiver la création de nouveaux comptes. Pour cela, ajoutez simplement la ligne suivante dans la section environment du service web : DISABLE_SIGNUPS: "true"
Redémarrez le projet depuis Container Station pour appliquer le changement.
Installer l’extension navigateur
Pour sauvegarder une page en un clic depuis Chrome ou Firefox, installez l’extension officielle Karakeep :
Lors de la première utilisation, l’extension vous demande l’adresse de votre instance (http://AdresseIPduNAS:3008) ainsi que vos identifiants. Après ça, il suffit de cliquer sur l’icône dans la barre pour archiver n’importe quelle page.
En synthèse
Karakeep est une solution intéressante et activement développée pour ne plus jamais perdre une information glanée sur le Web. L’installation sur un NAS Synology ne prend que quelques minutes avec Container Station… Le résultat est une application fluide, interrogeable avec son moteur de recherche, accessible depuis n’importe quel navigateur ou téléphone. Si vous avez un NAS QNAP, Asustor, TerraMaster ou Ugreen, sachez que la configuration présentée ci-dessus fonctionnera également sans modification
The Synology RS1626xs+ is a 1U 4 bay rackmount NAS aimed at business and enterprise environments that need high performance in a short-depth footprint. It succeeds the RS1619xs+ after a notably long refresh gap and introduces a more modern hardware platform, including a newer Intel Xeon D processor, 16 GB of ECC memory as standard, dual 10GbE networking, integrated M.2 NVMe slots, and PCIe Gen4 expansion. On paper, this is a more substantial update than some recent Synology refreshes, particularly in areas that affect throughput, caching, and expansion flexibility. At the same time, the RS1626xs+ arrives within the current Synology enterprise strategy, which places tighter control around validated components and supported media. That means the hardware changes need to be considered alongside platform restrictions, expected pricing movement, and the wider value proposition of DSM in the business rackmount market. As a result, the RS1626xs+ looks positioned as a compact but capable SMB and enterprise rack NAS, though its appeal will likely depend as much on Synology’s ecosystem policies as on the hardware itself.
Synology RS1626xs+ Hardware Specifications
At the core of the RS1626xs+ is an Intel Xeon D-1726 processor, a 6-core, 12-thread CPU with a 2.9 GHz base clock and up to 3.5 GHz turbo. This is a clear step up from the previous generation Xeon D-1527 found in the RS1619xs+, increasing both core count and clock speed. Although it is not the newest server CPU architecture available in 2026, it is a more current platform than its predecessor and brings PCIe Gen4 support, which has a direct effect on overall system bandwidth for expansions and attached components.
Memory has also been increased, with the RS1626xs+ arriving with 16 GB of DDR4 ECC RDIMM as standard across 4 memory slots, with support for up to 64 GB total. That doubles the default memory provision of the older model and should better align with virtualization, backup indexing, active collaboration workloads, and larger multi-service deployments in DSM. Synology continues to recommend its own validated memory for upgrades, and as with other current business systems in its portfolio, warranty and support are tied closely to approved components.
In terms of storage, the system retains a 4 bay SATA drive architecture and supports expansion up to 16 total bays through the RX1225RP expansion unit. Alongside the main bays, Synology has included 2 internal M.2 2280 NVMe slots for SSD caching without consuming the PCIe expansion slot or front storage bays. This allows the RS1626xs+ to support flash-assisted performance acceleration out of the box, while preserving the rear PCIe slot for network or storage upgrades. Official support covers 3.5-inch SATA HDDs, 2.5-inch SATA SSDs, and M.2 NVMe SSDs, though deployment flexibility will still depend on Synology’s compatibility policies.
Networking is one of the more significant changes in this generation. The RS1626xs+ includes 2 built-in 10GbE RJ-45 ports, compared with the 4 x 1GbE arrangement of the RS1619xs+. There is also a dedicated out-of-band management port, 2 USB 3.2 Gen 1 ports, and a Mini-SAS HD expansion connector for the external shelf. For additional connectivity, the system includes 1 PCIe Gen4 x8 slot that can be used for 10GbE, 25GbE, or Fibre Channel upgrades, giving it more flexibility for storage networks and higher-bandwidth business environments than the previous model’s Gen3 slot.
Physically, the RS1626xs+ remains a 1U rack system but is notably deeper and heavier than the older unit, measuring 44 x 481.9 x 668.5 mm and weighing 9.5 kg. It also moves to a 250 W redundant power design, compared with the earlier 150 W arrangement, which reflects the higher performance profile and expanded integrated feature set. Synology rates the unit at 97.59 W during access and 56.19 W during HDD hibernation, with a quoted noise level of 52.6 dB(A). Cooling is handled by 4 x 40 mm fans, and the system includes standard enterprise features such as dual hot-swappable PSUs, scheduled power controls, auto-restart after power loss, and a 5-year warranty.
Synology RS1626xs+ Software Specifications
On the software side, the RS1626xs+ is positioned as a full DSM business platform rather than a storage-only rackmount. It supports up to 32 storage pools, a maximum single volume size of 108 TB by default, 200 TB with at least 32 GB of memory, and up to 1 PB in specific RAID 6 configurations with 64 GB of memory. Supported RAID modes include Basic, JBOD, RAID 0, RAID 1, RAID 5, RAID 6, RAID 10, and RAID F1, with SSD read/write cache and SSD TRIM also supported. File system support includes Btrfs internally, with a broad range of external file systems and network protocols including SMB, NFS, FTP, WebDAV, Rsync, iSCSI, and Fibre Channel.
DSM on this platform is also designed to support heavier service consolidation. Synology rates the RS1626xs+ for up to 1,900 SMB connections, 2,048 local user accounts, 512 shared folders, and 12 shared folder sync tasks. In application terms, the system is listed with support for up to 3,100 Synology Drive users, 3,000 Synology Office users, 3,600 MailPlus users, and 400 Synology Chat users, depending on memory configuration and workload type. Virtualization support includes VMware vSphere, Microsoft Hyper-V, Citrix XenServer, and OpenStack, while Virtual Machine Manager is rated for 12 virtual machines and 12 Virtual DSM instances.
Beyond file serving, the RS1626xs+ includes Synology’s wider business software stack for backup, surveillance, synchronization, and centralized administration. It supports Synology High Availability, Hyper Backup, Active Backup workloads, Snapshot Replication with up to 4,096 system snapshots, SAN Manager with up to 256 iSCSI targets and 512 LUNs, and Surveillance Station with 2 camera licenses included and support for up to 75 IP cameras at 1080p. Synology also positions the platform for hybrid cloud workflows, centralized fleet management through CMS and Active Insight, and newer AI-assisted functions within its collaboration suite, making the RS1626xs+ a software-heavy platform where DSM remains a major part of the system’s overall value.
Category
Specification
OS
DSM
Max Volume Size
108 TB, 200 TB with 32 GB RAM, up to 1 PB with 64 GB RAM and RAID 6
Max Storage Pools / Volumes
32
RAID Support
Basic, JBOD, RAID 0, 1, 5, 6, 10, F1
SSD Features
Read/write cache, TRIM
Internal File System
Btrfs
External File Systems
Btrfs, ext4, ext3, FAT32, NTFS, HFS+, exFAT
File Protocols
SMB, AFP, NFS, FTP, WebDAV, Rsync
Max SMB Connections
1,900
User / Folder Limits
2,048 users, 512 groups, 512 shared folders
Shared Folder Sync Tasks
12
Hybrid Share Folder Limit
15
High Availability
Yes
Hyper Backup
Yes
Snapshot Replication
256 snapshots per shared folder, 64 per LUN, 4,096 per system
Third-party AI model integration, de-identification up to 1,700 words
Synology RS1626xs+ vs RS1619xs+ NAS
Compared with the RS1619xs+, the RS1626xs+ is a more substantial hardware refresh than the model gap alone might suggest. The older system used an Intel Xeon D-1527, a 4-core, 8-thread processor running at 2.2 GHz base and 2.7 GHz turbo, whereas the RS1626xs+ moves to a Xeon D-1726 with 6 cores, 12 threads, 2.9 GHz base, and 3.5 GHz turbo. The newer model also doubles the default memory from 8 GB DDR4 ECC UDIMM to 16 GB DDR4 ECC RDIMM, while retaining the same 64 GB maximum ceiling across 4 slots. At the platform level, the move from PCIe Gen3 x8 to PCIe Gen4 x8 is also relevant, as it increases available expansion bandwidth for modern network or storage upgrades.
The networking and storage configuration also show a clearer shift in priorities. The RS1619xs+ arrived with 4 x 1GbE ports and required expansion for faster networking, whereas the RS1626xs+ includes 2 x 10GbE RJ-45 ports as standard, alongside a dedicated management port. Both systems support expansion to 16 bays with a 1 unit expansion shelf and both include 2 M.2 slots, but the RS1626xs+ is more focused on NVMe caching with integrated flash support alongside newer expansion options such as 10GbE, 25GbE, and Fibre Channel via the Gen4 slot. In practical terms, the newer system is much better aligned with modern high-throughput business environments straight out of the box.
That said, the RS1626xs+ is not an across-the-board improvement in every operational metric. It is larger, deeper, heavier, and significantly noisier on paper, moving from 518.6 mm depth and 39.3 dB(A) on the RS1619xs+ to 668.5 mm depth and 52.6 dB(A) on the newer model. Power consumption is also higher, rising from 68.68 W active usage on the older unit to 97.59 W on the newer platform. So while the RS1626xs+ is clearly the more capable and modern system in CPU, networking, memory, and expansion, it also reflects a more demanding enterprise profile in acoustics, power draw, and likely total deployment cost.
Category
Synology RS1626xs+
Synology RS1619xs+
CPU
Intel Xeon D-1726
Intel Xeon D-1527
CPU Cores / Threads
6 cores / 12 threads
4 cores / 8 threads
CPU Clock Speed
2.9 GHz base / 3.5 GHz turbo
2.2 GHz base / 2.7 GHz turbo
Architecture
64-bit
64-bit
Hardware Encryption
Yes
Yes
Default Memory
16 GB DDR4 ECC RDIMM
8 GB DDR4 ECC UDIMM
Memory Slots
4
4
Maximum Memory
64 GB
64 GB
Drive Bays
4
4
Maximum Bays with Expansion
16
16
Expansion Unit
RX1225RP
RX1217 / RX1217RP
M.2 Slots
2 x NVMe
2 x NVMe / SATA
Supported Drives
3.5″ SATA HDD, 2.5″ SATA SSD, M.2 NVMe SSD
3.5″ SATA HDD, 2.5″ SATA HDD, 2.5″ SATA SSD, M.2 NVMe / SATA SSD
Hot Swap Support
Yes
Yes
Built-in Network Ports
2 x 10GbE RJ-45
4 x 1GbE RJ-45
Management Port
1 x out-of-band management port
No dedicated management port listed
USB Ports
2 x USB 3.2 Gen 1
2 x USB 3.2 Gen 1
Expansion Port
1 x Mini-SAS HD
1 x Infiniband
PCIe Slot
1 x PCIe Gen4 x8
1 x PCIe Gen3 x8
Form Factor
1U rackmount
1U rackmount
Dimensions
44 x 481.9 x 668.5 mm
44 x 480 x 518.6 mm
Weight
9.5 kg
8.16 kg
System Fans
4 x 40 mm
2 x 40 mm
Fan Modes
Full speed, low temperature, silent
Full-speed, cool, quiet
Noise Level
52.6 dB(A)
39.3 dB(A)
Power Supply
250 W
150 W
Redundant PSU
Yes
Yes
Power Consumption
97.59 W access / 56.19 W hibernation
68.68 W access / 34.78 W hibernation
Operating Temperature
5°C to 35°C
5°C to 35°C
Warranty
5 years
5 years
Synology RS1626xs+ Price and Release
At the time of writing, Synology has revealed the RS1626xs+ on regional product pages, but wider global availability still appears to be pending. The system has already appeared in official marketing materials and product specification pages, indicating that the hardware and software position are now largely defined, even if retail rollout is not yet universal across all regions. Based on that, the RS1626xs+ should be treated as officially revealed, but not yet fully launched in every market. Release timing is notable because the RS1626xs+ arrives after a long gap following the RS1619xs+, which was introduced in the 2018 to 2019 period. That makes this a delayed but more meaningful refresh than some of Synology’s shorter product cycles, particularly given the changes to CPU generation, default memory, built-in networking, PCIe bandwidth, and integrated NVMe support. It is therefore not simply a minor refresh of the previous 1U 4 bay platform, even if the overall product class remains the same.
Pricing has not yet been formally confirmed in the materials provided, so any figure at this stage remains estimate rather than specification. The earlier RS1619xs+ was commonly seen around the $2,400 range earlier in its lifecycle, but later pricing in some regions moved closer to or above $3,000. Given the RS1626xs+ includes 16 GB ECC memory as standard, dual 10GbE onboard, a newer Xeon D platform, PCIe Gen4, and redundant 250 W power supplies, it would be reasonable to expect a higher launch price than its predecessor rather than price parity. The main issue for buyers will likely be total platform cost rather than base chassis cost alone. This system is aimed at business and enterprise deployment, and that means the final spend may also include validated Synology drives, NVMe media, memory upgrades, rail kits, network cards, and the RX1225RP expansion shelf where needed. Until Synology confirms full regional rollout and channel pricing, the RS1626xs+ should be viewed as a higher-tier compact rackmount NAS with an expected premium position in the current RackStation portfolio.
This description contains links to Amazon. These links will take you to some of the products mentioned in today's content. As an Amazon Associate, I earn from qualifying purchases. Visit the NASCompares Deal Finder to find the best place to buy this device in your region, based on Service, Support and Reputation - Just Search for your NAS Drive in the Box Below
Need Advice on Data Storage from an Expert?
Finally, for free advice about your setup, just leave a message in the comments below here at NASCompares.com and we will get back to you.Need Help?
Where possible (and where appropriate) please provide as much information about your requirements, as then I can arrange the best answer and solution to your needs. Do not worry about your e-mail address being required, it will NOT be used in a mailing list and will NOT be used in any way other than to respond to your enquiry.
[contact-form-7]
TRY CHAT Terms and Conditions
If you like this service, please consider supporting us.
We use affiliate links on the blog allowing NAScompares information and advice service to be free of charge to you.Anything you purchase on the day you click on our links will generate a small commission which isused to run the website. Here is a link for Amazon and B&H.You can also get me a Ko-fi or old school Paypal. Thanks!To find out more about how to support this advice service checkHEREIf you need to fix or configure a NAS, check FiverHave you thought about helping others with your knowledge? Find Instructions Here
Or support us by using our affiliate links on Amazon UK and Amazon US
Alternatively, why not ask me on the ASK NASCompares forum, by clicking the button below. This is a community hub that serves as a place that I can answer your question, chew the fat, share new release information and even get corrections posted. I will always get around to answering ALL queries, but as a one-man operation, I cannot promise speed! So by sharing your query in the ASK NASCompares section below, you can get a better range of solutions and suggestions, alongside my own.
Chaque année, le 31 mars marque le World Backup Day. Et comme souvent, le message reste le même mais toujours trop peu suivi. Car oui, même en 2026, la majorité des utilisateurs continue de sous-estimer le risque de perte de données. Pourtant la question est simple : que se passerait-il si vous perdiez tout demain matin ?
Une menace bien réelle (et souvent ignorée)
Panne matérielle, vol, ransomware, erreur humaine ou même indisponibilité d’un service cloud : les scénarios ne manquent pas. Vos photos, documents professionnels, fichiers personnels… tout peut disparaître en quelques secondes.
Les chiffres parlent d’eux-mêmes :
30 % des utilisateurs n’ont jamais réalisé de sauvegarde ;
70 % des pannes de disque dur surviennent sans prévenir ;
60 % des entreprises victimes d’une perte majeure ferment dans les 6 mois.
Malgré cela, beaucoup continuent de repousser l’échéance.
Le piège du “tout Cloud”
Le Cloud est aujourd’hui omniprésent. Pratique, automatique, accessible partout… mais loin d’être infaillible. Sans connexion Internet, vos données deviennent inaccessibles. Et en cas de problème côté fournisseur (panne, restriction, suppression de compte), vous perdez également le contrôle. Une stratégie de sauvegarde ne doit jamais dépendre d’un seul support.
Le retour du stockage local
Face à ces limites, le stockage local retrouve tout son sens. Disque dur externe, NAS… ces solutions offrent plusieurs avantages concrets :
accès immédiat, sans Internet ;
contrôle total des données ;
vitesses de transfert élevées ;
coût maîtrisé (pas d’abonnement).
Mais attention : un disque dur seul ne suffit pas. Lui aussi peut tomber en panne ou disparaître.
La seule méthode fiable : la règle du 3-2-1
La meilleure protection reste une stratégie structurée. La règle du 3-2-1 est aujourd’hui la référence :
3 copies de vos données ;
2 supports différents (ex : disque dur + Cloud) ;
1 sauvegarde hors site.
C’est simple, efficace, et surtout indispensable.
Sauvegarder, c’est bien. Vérifier, c’est mieux
Une erreur fréquente consiste à penser qu’une sauvegarde fonctionne… sans jamais la tester. Or, une sauvegarde corrompue ou incomplète ne sert à rien. Prenez le temps de vérifier régulièrement vos fichiers. Ouvrez-les, restaurez-les, assurez-vous qu’ils sont exploitables.
Le bon moment, c’est maintenant
Le World Backup Day 2026 n’est pas qu’un rappel symbolique. C’est une opportunité concrète de mettre en place (ou corriger) votre stratégie de sauvegarde. Car dans ce domaine, il n’y a qu’une certitude : ceux qui pensent être à l’abri… sont souvent ceux qui n’ont rien prévu.
Ne laissez pas le hasard décider pour vous : sauvegardez, testez… et dormez tranquille.
Synology continue de faire évoluer son positionnement avec son BeeStation Plus. Initialement pensée comme une solution de stockage ultra simplifiée, elle se rapproche désormais clairement des NAS traditionnels de la marque avec l’arrivée de BeeCamera. Une évolution stratégique qui réduit progressivement la frontière entre les deux gammes.
BeeStation adopte les codes des NAS Synology
Historiquement, la vidéosurveillance chez Synology reposait sur Surveillance Station, une plateforme reconnue pour sa robustesse et ses fonctionnalités avancées. Avec l’application BeeCamera, Synology transpose une partie de cette expertise vers un public plus large. Le positionnement change, BeeStation n’est plus seulement un « Cloud personnel », elle devient une solution polyvalente intégrant stockage, gestion de fichiers, photos et désormais surveillance vidéo. En clair, il emprunte de plus en plus aux capacités des NAS historiques…
Surveillance locale accessible sans complexité
BeeCamera permet de gérer jusqu’à 4 caméras avec des fonctionnalités essentielles :
Les flux vidéos sont stockés localement sur la BeeStation Plus (animé par un processeur Intel J4125 et épaulé par 4 Go de RAM), sans dépendance au Cloud. Cette approche garantit un meilleur contrôle des données, un point fort déjà central chez Synology avec ses NAS traditionnels. L’application propose une timeline d’événements facile pour naviguer rapidement dans les enregistrements, avec la possibilité de verrouiller certaines séquences importantes.
Expérience simplifiée, mais moins limitée
Synology conserve ici son approche plug-and-play, avec une installation rapide et une interface accessible. La compatibilité avec les caméras CC400W, BC500 et TC500 permet de construire un système cohérent sans configuration complexe.
Le partage des flux avec jusqu’à 8 utilisateurs confirme également une orientation vers des usages familiaux ou pour les petites entreprises.
Une convergence assumée
L’arrivée de BeeCamera marque une étape importante : la distinction entre BeeStation et les NAS Synology devient de plus en plus floue. Là où la gamme Bee visait la simplicité au détriment des fonctionnalités avancées, elle intègre désormais des briques historiquement réservées aux NAS. Cette convergence reste toutefois partielle. BeeCamera est limité à la BeeStation Plus, la version la plus puissante avec ses 8 To de stockage, laissant de côté le modèle standard et ses 4 To.
À terme, Synology semble tester une nouvelle approche : démocratiser ses technologies clés dans des produits accessibles, tout en conservant ses NAS traditionnels pour les usages avancés. Une stratégie qui pourrait redéfinir l’entrée de gamme du stockage et de la surveillance personnelle.
100 Reasons DIY NAS (TrueNAS, UnRAID, Proxmox) are BETTER than Turnkey (Synology/QNAP/etc)
Plenty of people who start with Synology, QNAP or other turnkey NAS boxes will quietly admit that they keep hearing the siren call of DIY platforms like TrueNAS, Unraid, Proxmox, OpenMediaVault and ZimaOS. They see the videos, the benchmarks and the insane builds that squeeze every last drop out of consumer and ex-enterprise hardware. No one is pretending that turnkey systems are not convenient or polished, but more and more users are realising that the raw control, scalability and flexibility you get from rolling your own NAS can be worth the extra effort. In 2025 it is easier than ever to grab a used server, a pile of drives and a USB stick and end up with something that outperforms many branded appliances, both in speed and long term value. So, below are 100 reasons why users decide to jump ship from the safe, curated and sometimes expensive world of turnkey NAS, and instead join the more open, powerful and endlessly customisable world of DIY storage. Some points are very homelab focused, others are about cost and longevity, and some are specific to individual platforms such as TrueNAS ZFS, Unraid parity arrays or Proxmox clustering.
IMPORTANT DISCLAIMER – Different tools suit different tasks! I use both DIY and Turnkey Solutions in my own personal/work data storage environments (as well as a little bit of DAS and even some off site cloud!),. This article is not designed to ‘attack’ or ‘slag off’ one side of the home server market over another! It is to help understand why users might choose one over the other. Not disimilar in some ways to how some people prefer PC gaming vs Console gaming (or even exclusively mobile, though even struggle to wrap my head around that one!).
1. Full control over your hardware
With TrueNAS, Unraid, ZimaOS, Proxmox or OMV you choose everything yourself, from CPU and RAM to motherboard, HBA, NIC, case and power supply. You are not restricted to a small list of approved chassis and expansion units, so you can build around quiet small form factor systems, big tower rigs, or used rack servers depending on your needs and budget.
2. No vendor lock on drives
DIY NAS platforms let you use almost any SATA or SAS drive you like, including shucked external drives and mixed brands. There are no vendor media lists, no compatibility warnings that nag you for using third party disks, and no artificial limits that push you toward expensive branded drives.
3. Advanced file system features
TrueNAS and some other DIY platforms give you direct access to ZFS features such as copy on write integrity, end to end checksums, compression, snapshots, clones and send or receive replication. You can design datasets and snapshot schedules exactly as you want rather than relying on simplified abstractions.
4. Flexible storage layouts and mixed disk sizes
Unraid and ZFS based DIY stacks allow non traditional layouts, with mixed disk sizes, parity only arrays, mirror vdevs, striped vdevs and multiple pools. You can start small and grow over time without following the fixed bay patterns or limited RAID options of many turnkey systems.
5. Deep performance tuning
DIY NAS operating systems usually expose more dials for memory usage, cache behaviour, record sizes, sync policy, queue depths and network stack tuning. Power users can squeeze more throughput or lower latency from the same hardware by testing and adjusting these settings, something appliance firmware often hides.
6. Multi role server in one box
A DIY NAS can be more than just storage. With Proxmox, Unraid, ZimaOS or OMV plus a hypervisor you can run VMs, containers, network services and lab workloads on the same system. This suits homelab users who want their storage server to double as a general purpose compute node.
7. Better use of high end or unusual components
If you invest in many core CPUs, large amounts of RAM, enterprise NVMe or special purpose HBAs, DIY platforms can take full advantage of them. You are not limited by a turnkey vendor firmware that assumes mid range hardware and sometimes underuses powerful components.
8. Lower cost at large scale
Once you move beyond a handful of bays, appliance NAS pricing climbs quickly. Building a DIY NAS with commodity parts or refurbished enterprise gear often gives you a much lower cost per bay and a cheaper upgrade path over five to ten years, especially for media servers and backup targets.
9. Reuse of existing hardware
Many people already have a spare gaming PC, workstation or decommissioned server. DIY NAS software lets you repurpose that hardware rather than buying a completely new appliance. You can then gradually replace parts over time without throwing the whole system away.
10. Independence from vendor roadmaps
With TrueNAS, Unraid, Proxmox or OMV you are not tied to one company product line or release schedule. If a vendor drops a feature, changes licensing, or stops making a class of device, your DIY stack keeps going and you can add or swap components as you see fit.
11. Open source transparency and auditability
Many DIY NAS platforms are open source or based on open distributions. You can inspect the code, follow public issue trackers, and see exactly how data path and management components behave. For organisations with strong security requirements this transparency can be more attractive than opaque appliance firmware.
12. Rich community plugin and container ecosystem
TrueNAS, Unraid, Proxmox and OMV all have active communities that publish templates, stacks and guides for a huge range of self hosted services. New applications usually appear first as containers or community charts, so you can experiment with cutting edge projects long before they arrive in any vendor app store.
13. Clean integration with existing homelab tools
If you already use tools such as Ansible, Terraform, Salt, Proxmox clusters, or Kubernetes, a DIY NAS fits into that world more naturally. It behaves like another Linux or BSD server, so you can reuse automation, monitoring, and configuration patterns that you already trust.
14. Freedom from feature based licensing
DIY platforms generally do not charge extra for adding more cameras, shares, users or applications. If your hardware can handle twenty containers or twenty camera streams, you can run them without buying more licences. That is very different from some turnkey systems where extra features are tightly controlled.
15. Strong privacy control and no enforced cloud accounts
TrueNAS, Unraid, ZimaOS, Proxmox and OMV can all run fully local with no requirement to create cloud accounts or sign in to a vendor portal. You choose if you want remote access and which VPN or reverse proxy you trust, so it is easier to keep storage isolated from external services.
16. Powerful scripting and automation options
Because DIY NAS software sits on standard Linux or BSD layers, you can use cron, systemd timers, full shell scripting and language runtimes such as Python or Go. Backup pipelines, integrity checks, archiving rules and housekeeping tasks can be scripted exactly as you need them.
17. Better fit for larger and denser builds
If you want twenty four, thirty six or more bays, DIY approaches scale more smoothly. You can use dedicated JBOD shelves, fibre or SAS expanders, and multiple HBAs, with TrueNAS or Proxmox managing pools across them. Many consumer appliances run out of official options long before that point.
18. Easier experimentation with new technologies
DIY platforms are ideal for lab work with new storage ideas, for example experimental ZFS features, new compression algorithms, alternative filesystems or clustered storage layers such as Ceph and Gluster. You can try these on real hardware without waiting for a turnkey vendor to embrace them.
19. Ability to virtualise the NAS itself
A DIY NAS stack can sit inside a virtual machine on top of Proxmox, VMware or another hypervisor. That makes it easier to move the entire storage system between hosts, snapshot the system disk, test upgrades in clones, or run multiple separate NAS instances on the same physical hardware.
21. Alignment with strict open source or compliance policies
Some companies and institutions prefer or require that core infrastructure runs on software with open licensing and source availability. DIY NAS stacks based on standard Linux or BSD distributions make it easier to satisfy those policies than closed vendor operating systems.
22. Efficient use of decommissioned enterprise hardware
The secondary market is full of cheap rack servers, HBAs and SAS shelves that are no longer wanted in data centres but are perfect for home or small business storage. TrueNAS, Proxmox and OMV can run happily on this hardware and give you enterprise level resilience for a fraction of the original cost.
23. Custom network roles on the same machine
A DIY NAS can also act as router, firewall, VPN concentrator or reverse proxy if you want to consolidate equipment. Proxmox or Unraid can host a firewall VM, DNS resolver and other network tools right next to your storage, which is not how most turnkey NAS devices are designed to be used.
24. Fine grained control of encryption and keys
DIY platforms usually let you decide exactly how encryption is applied, how keys are stored, how passphrases are entered and how this interacts with snapshots and replication. You can integrate with external key managers or strict manual processes rather than using a one size fits all wizard.
25. Easier avoidance of telemetry and phone home behaviour
If you want a storage stack that never connects to any remote service unless you deliberately configure it, DIY software is easier to keep quiet. You can review services, outgoing connections and packages yourself, instead of relying on a vendor to document what their appliance firmware does.
26. Flexible data retention and tiering schemes
Because you control the hierarchy of datasets, shares and pools, you can implement very detailed retention rules and archiving flows. Cold data can move to slower and cheaper disks, hot data can live on SSD pools, and you can enforce lifecycles with your own scripts instead of fixed vendor policies.
27. Shared skillset across storage and compute
When your storage servers and application servers all run similar bases, for example Debian or FreeBSD, the same administration knowledge applies everywhere. Teams do not need to learn a unique vendor interface for one box and a completely different approach for the rest of the estate.
28. Support for niche and emerging services
DIY NAS ecosystems often adopt new projects quickly, whether that is a young media server, a fresh photo tool, or an unusual database. Community templates for Unraid or Proxmox arrive much faster than official packages on proprietary platforms, so you can explore niche services early.
29. Long term reuse of hardware for other roles
If your storage needs change, a DIY NAS box can become a general server, a lab hypervisor or a test bench machine simply by reinstalling or repurposing the disks. You are not stuck with a chassis that only really makes sense as a proprietary NAS.
30. Lean installations without extra bloat
DIY stacks can be installed in a minimal way with only the services you actually need. There is no requirement to run vendor photo portals, cloud connectors or bundled office tools if you do not want them, which keeps resource use low and reduces the attack surface.
31. Granular control over updates and versions
DIY NAS platforms usually let you decide exactly when to update the core system, plugins and containers. You can hold a known good version for months, run a newer kernel only on a test VM, or pin specific containers while the rest of the stack moves forward, instead of accepting a single vendor update cadence across everything.
32. Ability to run several NAS platforms on one machine
With Proxmox or similar hypervisors you can run TrueNAS in one VM, Unraid in another and maybe a plain Linux storage stack beside them, all on the same hardware. This lets you compare platforms, migrate gradually or dedicate different virtual NAS instances to different clients without buying multiple appliances.
33. Deep visibility for troubleshooting and performance analysis
DIY systems expose full system logs, kernel messages, packet captures and low level profiling tools. When you hit a strange performance issue or network glitch you can drill right down into iostat, tcpdump or perf, rather than relying only on a high level vendor dashboard that may not reveal the root cause.
34. Configuration managed like code in Git
Because most DIY NAS configurations live in text or structured files, you can store them in Git, review changes, roll back to older commits and clone the same setup onto another node. This aligns your storage servers with modern configuration management practices instead of keeping all changes on a single vendor GUI.
35. Option to extend or maintain abandoned components
If a plugin, driver or feature you rely on is dropped by its original maintainer, an open DIY stack at least gives you the option to fork and maintain it or hire someone to do so. With a closed appliance firmware, once the vendor removes or changes a feature you generally have no way to bring it back.
36. Freedom to fully rebrand or white label
Service providers that build solutions for clients can install TrueNAS, Proxmox or OMV on standard hardware and theme the interfaces, hostnames and portals to match their own brand. There is no prominent third party logo on the front of the GUI, which is often preferable when you are selling a complete solution.
37. Direct choice of monitoring and alerting stack
DIY NAS servers can run native agents for Prometheus, Zabbix, Checkmk, commercial monitoring suites and whatever log pipeline you already use. You do not have to rely on a vendor specific cloud portal or proprietary alert format, so storage monitoring fits seamlessly into the rest of your infrastructure.
38. Support for unusual hardware form factors
Because you can install DIY NAS software on almost anything that runs a suitable kernel, it is easier to use very compact systems, blade servers, dense JBOD trays or custom builds that no turnkey NAS vendor offers. This flexibility is valuable when you have physical constraints or leftover hardware that does not match appliance shapes.
39. Full control over repositories and software sources
On a DIY stack you decide which package repositories are trusted, whether you mirror them locally and which versions are allowed. This is useful in secure environments that need all software to come from internal mirrors and want to block any unapproved external package feeds.
40. Faster access to new kernel and protocol features
New SMB or NFS versions, fresh filesystems, driver updates and network features typically land on general purpose Linux or BSD first. DIY platforms that stay close to upstream can adopt these improvements long before a NAS vendor ships them in a future firmware for a specific appliance.
41. Stronger learning value and career skills
Running TrueNAS, Unraid, Proxmox or OMV teaches real storage, networking and operating system concepts. Many homelab users treat their DIY NAS as a training ground, and the knowledge they gain with ZFS, KVM, Docker and Linux often translates directly into professional roles in IT and DevOps.
42. Better use of GPUs and accelerators
DIY NAS systems can use almost any supported GPU or accelerator card for tasks such as Plex transcoding, AI workloads, video processing or scientific computing. You can pass devices through to VMs or containers and tune them as you like, instead of being restricted to a short list of vendor approved cards.
43. True multi tenant storage on a single chassis
With Proxmox or other hypervisors you can run several separate NAS VMs for different customers or departments on one physical box, each with its own web UI, users and policies. This multi tenant approach is attractive for managed service providers and is harder to implement cleanly on a single turnkey NAS.
44. Custom identity and multifactor authentication integration
DIY NAS environments can tie directly into whatever identity stack you prefer, from simple LDAP through to complex single sign on with custom multifactor rules. You can adopt advanced access controls or experiment with new identity providers without waiting for a NAS vendor to support them.
45. Alignment with strict internal security tooling
Organisations that already use SELinux, AppArmor, central audit frameworks or host based intrusion detection can apply the same policies to DIY storage nodes. A TrueNAS or Proxmox box that runs on a standard distribution can join existing security baselines, which is much harder with proprietary NAS firmware.
46. Support for exotic and high performance networking
DIY NAS stacks can use specialist network cards such as Infiniband, RoCE capable adapters or unusual fibre interfaces as long as the drivers exist. This allows you to experiment with very high throughput or low latency technologies that are rarely supported on commodity appliance NAS hardware.
47. Custom backup and replication pipelines
With tools like ZFS send and receive, rclone, Restic or Borg you can build very specific backup and replication flows. You can script encryption, throttling, snapshot selection and multiple targets in a way that fits your environment instead of being limited to the fixed policies of one vendor backup tool.
48. Colocation friendly and data center ready
DIY NAS builds can follow data center norms such as using standard rack servers, redundant power supplies, remote management controllers and IPv6 heavy networks. Colocation providers expect this type of hardware, and DIY software lets your storage blend into a standard server fleet rather than being an odd office appliance.
49. Fine grained admin delegation at operating system level
On a DIY NAS you can use normal user, group and sudo rules with SSH keys to control who can run which commands. One person can manage pools, another can manage virtual machines, another can handle monitoring agents, all with precise restrictions that go beyond the coarse admin or user split of many appliances.
50. Integration with dynamic energy and solar setups
Because DIY NAS software can talk to external APIs and home automation systems, you can schedule heavy tasks such as scrubs, backups or transcoding to run when solar output is high or electricity tariffs are low. This kind of energy aware behaviour is difficult to achieve with fixed vendor power schedules.
51. Deep home automation and MQTT integration
DIY storage nodes can publish events into MQTT, Node Red or Home Assistant whenever backups finish, disks fail or space runs low, and can also respond to automation signals from the rest of the house. This lets your NAS participate in a wider automation fabric rather than living as an isolated appliance.
52. Use of enterprise secrets management for keys and passwords
DIY NAS servers can fetch encryption keys, passwords and API tokens from systems such as HashiCorp Vault or other corporate secret stores. That allows central management and rotation of sensitive data instead of keeping secrets inside a proprietary NAS configuration database.
53. Network boot and golden image strategies
You can build a standard disk image or network boot environment for your DIY NAS with all tooling and configuration baked in. If the system disk fails or you want to spin up a second node, you simply redeploy the image and reattach the existing storage pools, which is a very different model from appliance firmware.
54. Validation of changes through continuous integration
When configuration lives in files managed in Git, you can run linting and simulation jobs in a CI pipeline before applying changes to your DIY NAS servers. This allows you to catch syntax errors or bad parameters automatically, which is impossible when all edits happen only through a click driven vendor interface.
55. Custom user interfaces and portals on top of APIs
DIY stacks expose command line tools and often REST APIs that allow you to build your own lightweight dashboards for particular users or teams. You can present a simplified view for media editors, a different one for backup operators, and keep the full complexity of the base system hidden in the background.
56. Tailored localisation and language choices
If the default language or terminology of the platform does not suit your users, you can adjust translation files or web templates on a DIY system. Community contributions in minority languages are also easier to ship and maintain than on a closed vendor NAS where only official translations exist.
57. Customised drive qualification and burn in workflows
You can design a strict process for testing new disks, for example running multi day read and write passes, specific SMART tests and temperature checks before a drive ever joins a pool. Scripts and reports can enforce this burn in policy across all your DIY NAS nodes, something turnkey platforms rarely expose in detail.
58. Robust behaviour in extreme or niche environments
In vehicles, ships, remote cabins or unstable power conditions you may need unusual behaviours such as aggressive throttling at certain temperatures, logging to serial consoles or special shutdown routines. DIY software gives you the hooks to script and tune these reactions in ways that appliance firmware does not anticipate.
59. Clean integration with formal change management processes
Organisations with strict change control can insist that all NAS configuration changes arrive through reviewed pull requests and automated deployment tools. A DIY NAS whose configuration is driven by code fits smoothly into this world, whereas an appliance managed only through a browser is harder to audit and control.
60. Easy experimentation with clustered storage technologies
If you want to explore scale out storage such as Ceph, Gluster or other distributed systems, DIY hardware and open platforms are the most practical route. You can repurpose existing nodes into a cluster, test resilience and performance characteristics, and later reuse those machines for other lab work if requirements change.
61. Easier long term data salvage and portability
With DIY platforms such as TrueNAS, Unraid, ZimaOS, Proxmox and OMV, the on disk formats and pool layouts are widely documented and used in many contexts. If a motherboard dies in several years, you can move the disks to new hardware, reinstall the same software and import the pools, instead of hunting for an identical appliance or vendor recovery tool.
62. Broader protocol support and deeper tuning
DIY NAS software lets you expose storage over SMB, NFS, iSCSI, rsync modules, sometimes NVMe over TCP and more, with detailed control of versions, encryption, timeouts and caching. You can tune each protocol for a specific workload instead of accepting whatever subset and presets a turnkey vendor offers.
63. Custom hooks on file and dataset operations
Because you control the base system, you can attach your own scripts when files are written, moved or deleted in particular locations. That allows automatic virus scanning, metadata extraction, indexing, transcoding or business workflows that trigger whenever content changes, rather than relying only on built in features.
64. Comfortable operation with serial console and no local screen
DIY NAS platforms are happy on machines that have only serial console or out of band management with no HDMI or local keyboard. This matches how many server rooms and colocation racks actually work and lets you manage storage over low bandwidth links without any graphical tools if needed.
65. More compression and deduplication options per dataset
ZFS based DIY systems allow you to choose different compression algorithms and record sizes per dataset and to enable or disable deduplication only where it makes sense. You can optimise for databases, media archives or virtual machines individually rather than living with a single vendor setting for an entire volume.
66. Clear separation of storage and management planes
On a DIY NAS you can keep the storage node lean and run most of the management logic on other servers through SSH, APIs or orchestration tools. The storage device can behave as a focused data plane while the control plane lives elsewhere, which is attractive in environments that want very thin appliances.
67. Community culture that embraces experimentation
The forums and communities around TrueNAS, Unraid, Proxmox and OMV are full of people who enjoy deep technical dives, benchmarks and off label use cases. For homelab users and engineers that culture can feel more welcoming than vendor moderated communities that discourage unsupported combinations.
68. Reuse of one reference design across home, lab and office
Once you settle on a particular DIY stack and layout, you can repeat the same design at home, at work and in test environments with only minor changes. Automation scripts, monitoring templates and backup strategies can be shared almost unchanged between all these machines.
69. Neutral target for testing third party backup strategies
A DIY NAS can act as a neutral storage target for many different backup products and appliances from other vendors. You can point various commercial systems at the same TrueNAS or Proxmox storage, then compare how they behave for restore, versioning and verification, something that is harder when your main storage is itself a fixed vendor appliance.
70. No hard limits on shares, datasets or exports
DIY platforms rarely impose artificial limits on the number of datasets, snapshots, exports or shares you can create. As long as the underlying system can handle it, you can build very granular layouts for different teams, applications and projects without hitting a model based cap.
71. Better fit for reproducible research environments
In academic or scientific work, it is often important that another team can rebuild the same stack years later. A DIY NAS with configuration stored in code and based on standard distributions can be recreated on any suitable hardware, which supports reproducible experiments and shared lab setups.
72. Combination of storage and high performance computing
In some labs and studios the same physical machines are used both for heavy compute work and for fast local storage. DIY NAS software can happily coexist with HPC toolchains and schedulers on the same hardware, allowing you to run compute workloads close to the data without separate appliances.
73. Precise control of time and clock integration
DIY platforms give full access to NTP, Precision Time Protocol and kernel timing controls. For environments where consistent timing is critical, such as finance, measurement systems or some industrial setups, the storage node can participate in the same strict time hierarchy as the rest of the infrastructure.
74. Better support for unusual backup and archival devices
If you need to attach tape libraries, optical jukeboxes or rare archival devices, a DIY NAS running a general purpose operating system is more likely to support them. You can install the required drivers and tools for these devices rather than waiting for a turnkey vendor to recognise them.
75. Ideal for storage that is a pure backend service
Some administrators want their storage nodes to be invisible to end users and to present only block or file protocols to other systems. DIY NAS installations can be trimmed down to offer only SMB, NFS, iSCSI or object storage with no media portals or user apps, which suits this backend only role very well.
76. Flexible data transformation and ingestion pipelines
Because you can run whatever tools and containers you like, a DIY NAS can also host data transformation jobs. For example, you can receive raw data, clean it, compress it, encrypt it and then push it to cloud storage or another site, all driven by your own scripts and schedules.
77. Reduced reliance on any single vendor decision
With DIY platforms you are not waiting for one company to decide which media codecs, hardware accelerators or remote access features are allowed. If a particular vendor chooses a direction you dislike, you can still adopt the tools and configurations that suit you within your own stack.
78. No forced hardware replacement at support end dates
When a commercial NAS model reaches the vendor end of support, users are often encouraged to buy a new box even if the hardware is still reliable. With DIY storage you can keep updating the operating system on the same machine for as long as the components remain healthy, decoupling software support from hardware marketing cycles.
79. Good fit for very lean remote management
In remote or bandwidth constrained locations, being able to manage the NAS entirely with text tools and small configuration files is valuable. DIY platforms let you perform upgrades, configuration changes and even troubleshooting over slow links without relying on heavy web interfaces.
80. Custom quality of service tied to processes and containers
On DIY systems you can use native resource controllers to limit bandwidth, CPU time or IOPS per container, process group or user. This makes it possible to enforce complex quality of service rules that prioritise critical workloads while still allowing experimental services to run in the background.
81. Strong separation between data layout and hardware chassis
With pools and datasets defined at the software level, you can move storage from one chassis to another or rebalance between servers without changing how applications see their paths. This separation makes it easier to evolve the physical layer over time while keeping logical layout stable.
82. Use as a standard test bench for vendor devices
A DIY NAS environment can act as a standard reference platform when you test routers, backup appliances or other network gear. Because it is not tied to one brand, it is easier to observe how third party devices behave when they read and write to a known stable storage backend.
83. Ability to layer multiple security models
DIY stacks allow you to combine filesystem permissions, network firewalls, container isolation, mandatory access control frameworks and external identity providers in creative ways. You are not limited to the single security model that a turnkey NAS interface exposes, which allows more nuanced defence in depth.
84. Fine control over logging and audit detail
You can configure exactly what is logged, where logs are stored and how long they are kept, from kernel messages to application events. Logs can be shipped to central collectors in formats that match your existing observability stack, making compliance and forensic analysis simpler.
85. Tailored behaviour for backup and disaster drills
DIY platforms can be wired into automated disaster simulations, where systems are repeatedly torn down and rebuilt to prove that recovery works. Storage configurations can be recreated from code, pools imported and test data restored on a schedule, instead of relying on manual wizard driven tests.
86. Ability to swap out components in the software stack over time
Over the lifetime of a DIY NAS, you can replace almost every layer: change the init system, switch to a different web interface, adopt a new container engine or even move from one DIY distribution to another while keeping the same pools. This modularity keeps the platform adaptable as tastes and technology change.
87. Better fit for organisations that avoid proprietary formats
Some organisations have policies against storing important data in formats that depend on closed code or single vendor tools. DIY NAS solutions using standard filesystems and open source utilities are easier to justify under these rules than appliances that use proprietary volume managers and configuration stores.
88. Helpful for education and training labs
Training providers and universities can deploy DIY NAS stacks inside virtual environments so that students can break, repair and rebuild storage systems without touching production gear. The same images can be reset between classes, giving learners realistic hands on experience at low cost.
89. Capacity to follow very specific legal or regulatory rules
In some jurisdictions or industries, unusual requirements appear, such as special retention schedules, local encryption standards or niche logging rules. DIY NAS environments can be scripted to satisfy these specific requirements even when no turnkey NAS vendor has considered them.
90. Natural choice when mixing many self hosted applications
If you already run a wide range of self hosted tools in containers or VMs, adding storage duties to that world with DIY software keeps everything consistent. The NAS simply becomes another service in the same orchestration fabric rather than a separate product with its own way of doing things.
91. Easier experimentation with new network filesystems
When new network filesystem projects appear, such as experimental user space protocols or research systems, they nearly always target Linux and BSD first. A DIY NAS gives you a platform to test these technologies for specific problems, long before any commercial vendor would consider supporting them.
92. Ability to enforce very conservative update policies
Some organisations prefer to update only once or twice a year after extensive internal testing. DIY NAS stacks allow you to freeze versions and postpone upgrades until you have validated them, instead of accepting automatic firmware updates that may change behaviour on the vendor schedule.
93. Better suitability for mixed licence environments
If you already pay for certain commercial tools but want the storage layer to stay licence free, DIY approaches give you that mix. You can run proprietary database or backup software while keeping the underlying storage platform open and under your control.
94. Simple way to expose standard development environments next to data
With Proxmox or similar platforms you can spin up development VMs or containers right next to the storage that holds source code and artefacts. Developers can work close to large repositories and test data without hauling everything over the network, using the NAS as both storage and dev host.
95. Easier to integrate with custom dashboards and reporting systems
Because DIY NAS boxes export metrics in standard ways or can run your own collectors, it is straightforward to feed storage statistics into company specific dashboards and reports. You can show exactly the charts and summaries that matter for your audience instead of relying on whatever reporting screens a vendor includes.
96. Straightforward reuse of disks in other systems if needed
If your plans change, you can remove disks from a DIY NAS, wipe or repurpose them in other servers without dealing with vendor specific metadata or compatibility warnings. The drives are just drives, not part of an opaque appliance ecosystem that expects to keep them forever.
97. Good platform for testing security tools and hardening guides
A DIY NAS can serve as a lab for experimenting with new security scanners, vulnerability assessment tools and hardening recommendations before you roll them out to production servers. You can observe how these changes affect a real storage workload and adjust accordingly.
98. Realistic environment for practising incident response
Because you control every part of the stack, you can simulate failures, intrusions or misconfigurations on a DIY NAS and then practise your incident response procedure. This kind of training is harder with commercial appliances where you cannot fully control or inspect all layers.
99. Freedom to keep legacy protocols alive while you migrate
In some environments you still need to support older protocols for a while, for example legacy SMB dialects or older NFS versions. DIY NAS systems let you keep these services available during migration while still offering modern protocols to new clients, with careful isolation where needed.
100. Serves as a long lived foundation independent of brand trends
Vendors come and go, change direction or pivot to new markets, but the core technologies behind DIY NAS platforms have existed for decades and are used in many places beyond home storage. Building on that foundation means your data and workflows are less tied to the fashion of any particular hardware brand.
This description contains links to Amazon. These links will take you to some of the products mentioned in today's content. As an Amazon Associate, I earn from qualifying purchases. Visit the NASCompares Deal Finder to find the best place to buy this device in your region, based on Service, Support and Reputation - Just Search for your NAS Drive in the Box Below
Need Advice on Data Storage from an Expert?
Finally, for free advice about your setup, just leave a message in the comments below here at NASCompares.com and we will get back to you.Need Help?
Where possible (and where appropriate) please provide as much information about your requirements, as then I can arrange the best answer and solution to your needs. Do not worry about your e-mail address being required, it will NOT be used in a mailing list and will NOT be used in any way other than to respond to your enquiry.
[contact-form-7]
TRY CHAT Terms and Conditions
If you like this service, please consider supporting us.
We use affiliate links on the blog allowing NAScompares information and advice service to be free of charge to you.Anything you purchase on the day you click on our links will generate a small commission which isused to run the website. Here is a link for Amazon and B&H.You can also get me a Ko-fi or old school Paypal. Thanks!To find out more about how to support this advice service checkHEREIf you need to fix or configure a NAS, check FiverHave you thought about helping others with your knowledge? Find Instructions Here
Or support us by using our affiliate links on Amazon UK and Amazon US
Alternatively, why not ask me on the ASK NASCompares forum, by clicking the button below. This is a community hub that serves as a place that I can answer your question, chew the fat, share new release information and even get corrections posted. I will always get around to answering ALL queries, but as a one-man operation, I cannot promise speed! So by sharing your query in the ASK NASCompares section below, you can get a better range of solutions and suggestions, alongside my own.
Unraid and 45HomeLab have entered into a partnership focused on delivering prebuilt systems designed around Unraid, with 45HomeLab drawing on the wider hardware background connected to 45Drives and Protocase. Based on the public announcement and the clarification provided by Unraid, the collaboration is being framed as a home lab and prosumer focused offering rather than an enterprise initiative, with the emphasis placed on validated hardware, upgradeable designs, local data ownership, and a simpler route for users who want a ready made Unraid system without having to source and test each part on their own.
Who Are 45Drives?
45Drives is a North American storage hardware company best known for building large capacity data storage and compute systems, with much of its reputation coming from deployments aimed at organizations rather than casual consumer buyers. The company is closely associated with Protocase, which provides the manufacturing base behind its hardware, and over time it has become known for emphasizing practical, serviceable system design instead of tightly closed appliance style products. Its broader identity has generally been tied to storage infrastructure for research environments, institutional buyers, enterprise deployments, and government related use cases, particularly where buyers value high drive density, open platform thinking, and hardware that can be maintained over a long service life rather than treated as disposable.
That background matters here because 45HomeLab does not appear in isolation, but instead comes from the same wider engineering and manufacturing ecosystem that established the 45Drives name. In practical terms, that gives context to why the partnership materials place such a strong focus on chassis construction, replaceable components, repairability, and long term upgrade paths. At the same time, the distinction between 45Drives and 45HomeLab remains important. 45Drives is the more established name connected with professional and organizational hardware, while 45HomeLab is the consumer oriented brand being used for this partnership with Unraid. That separation helps explain why the collaboration is being presented as a home lab and prosumer solution, rather than as a move by Unraid into enterprise infrastructure.
Who are UnRAID?
Unraid is a server operating system developed by Lime Technology, with its origins going back to 2005. It initially gained attention for a storage model that allowed users to combine drives of different sizes more flexibly than many traditional RAID based systems, while also reducing the need to keep every disk active at all times. Over the years, the platform has developed beyond file storage into a broader self hosting environment that supports containers, virtual machines, application hosting, and centralized management from a single interface. That combination has made it particularly relevant to home lab users, media server owners, and small operators who want a single machine to handle several different roles without the complexity often associated with enterprise storage platforms.
Its position in the market is shaped less by raw hardware manufacturing and more by software flexibility and community adoption. Unraid is generally associated with users who want direct control over their own data and services, but who also want a system that is more accessible than building and maintaining everything from scratch. In practice, that has placed it in a middle ground between consumer NAS products on one side and fully custom Linux based server setups on the other. Within this partnership, Unraid brings the software environment, workload focus, and user base, while 45HomeLab brings the physical system design and hardware validation. That division of roles is central to understanding why the partnership is being presented as a practical product collaboration rather than simply a branding exercise.
Why is this a good idea?
The main case for this partnership is that it addresses a common weak point in the self hosting market: software and hardware are often chosen separately, leaving the buyer to work through compatibility, firmware behavior, thermal limits, expansion planning, and general stability on their own. For experienced users, that process can be manageable, but it still takes time and usually involves trial and error. For less experienced buyers, it can be a barrier that keeps them from adopting a self hosted setup at all. A partnership between a software platform like Unraid and a hardware focused company like 45HomeLab makes sense because it reduces that gap. Instead of the customer having to guess which platform combinations will work well together, the expectation is that the testing and validation have already been done before the system reaches the buyer.
It also makes sense because the strengths of the 2 sides are complementary rather than overlapping. Unraid already has an established base of users who want flexible storage and application hosting in a single system, while 45HomeLab comes from a hardware background that places importance on build quality, serviceability, and long term component replacement. When those priorities are combined, the result is easier to position as a durable self hosting solution rather than as a short lifecycle appliance. That is especially relevant in a market where many buyers want something simpler than a fully custom build, but still want to avoid proprietary consumer NAS limitations. In that context, a jointly validated system with standard parts, upgrade paths, and bundled software licensing can be seen as a logical middle ground.
What Do We Know About How this Partnership will be presented as a solution?
Based on the announcement, the partnership is being presented as a ready made answer for people who want the flexibility of a self hosted server without having to design the hardware platform themselves. The emphasis is on systems that arrive prebuilt, tested, and validated for the kinds of workloads Unraid users commonly run, rather than on users assembling parts independently and then solving compatibility issues afterward. In practical terms, that means the offer is not being framed as just hardware on one side and software on the other, but as a combined product where both have been selected with the same use cases in mind. The message is that buyers should be able to start with a system that works as delivered, while still retaining the freedom to expand or modify it later.
The use cases being highlighted are broad enough to make the solution look adaptable rather than narrow. The announcement refers to media storage, file serving, containers, virtual machines, home automation, game servers, security camera management, and local AI workloads. That is important because it suggests the systems are meant to be positioned as consolidated household or small office servers rather than single purpose NAS appliances. At the same time, the hardware side is being described in a way that supports that message, with attention given to replaceable parts, upgradeability, standard tools, and chassis design. The intended impression is that the buyer is getting something easier to adopt than a custom build, but not something locked down in the way many consumer appliances are.
There is also a commercial and positioning element to how the partnership is being presented. The clarification from Unraid makes clear that this should be understood as a partnership with 45HomeLab, not 45Drives, which helps keep the focus on home lab and prosumer users instead of enterprise infrastructure. Another notable detail is that the systems are expected to ship with Lifetime Unraid licenses, which strengthens the idea that this is a complete solution rather than a partially assembled starting point. Taken together, the public messaging suggests that the partnership will be presented as a middle option in the market: more polished and pre validated than building a server from scratch, but more open, serviceable, and ownership focused than a typical closed consumer NAS product.
Taken at face value, the partnership between Unraid and 45HomeLab appears to be aimed at a specific gap in the market: users who want the flexibility and control of self hosting, but do not want the added work of sourcing, validating, and maintaining a hardware platform entirely on their own. The combination of Unraid’s software environment with 45HomeLab’s hardware design approach gives the partnership a clear logic, particularly when it is framed around upgradeability, standard components, and long term ownership rather than closed appliance style convenience. The distinction between 45HomeLab and 45Drives is also important to how the arrangement is being presented, because it keeps the focus on home lab and prosumer buyers. Overall, the partnership is best understood as a practical attempt to package self hosting in a more accessible form without removing the flexibility that makes it appealing in the first place.
This description contains links to Amazon. These links will take you to some of the products mentioned in today's content. As an Amazon Associate, I earn from qualifying purchases. Visit the NASCompares Deal Finder to find the best place to buy this device in your region, based on Service, Support and Reputation - Just Search for your NAS Drive in the Box Below
Need Advice on Data Storage from an Expert?
Finally, for free advice about your setup, just leave a message in the comments below here at NASCompares.com and we will get back to you.Need Help?
Where possible (and where appropriate) please provide as much information about your requirements, as then I can arrange the best answer and solution to your needs. Do not worry about your e-mail address being required, it will NOT be used in a mailing list and will NOT be used in any way other than to respond to your enquiry.
[contact-form-7]
TRY CHAT Terms and Conditions
If you like this service, please consider supporting us.
We use affiliate links on the blog allowing NAScompares information and advice service to be free of charge to you.Anything you purchase on the day you click on our links will generate a small commission which isused to run the website. Here is a link for Amazon and B&H.You can also get me a Ko-fi or old school Paypal. Thanks!To find out more about how to support this advice service checkHEREIf you need to fix or configure a NAS, check FiverHave you thought about helping others with your knowledge? Find Instructions Here
Or support us by using our affiliate links on Amazon UK and Amazon US
Alternatively, why not ask me on the ASK NASCompares forum, by clicking the button below. This is a community hub that serves as a place that I can answer your question, chew the fat, share new release information and even get corrections posted. I will always get around to answering ALL queries, but as a one-man operation, I cannot promise speed! So by sharing your query in the ASK NASCompares section below, you can get a better range of solutions and suggestions, alongside my own.
If you like this service, please consider supporting us. We use affiliate links on the blog allowing NAScompares information and advice service to be free of charge to you.Anything you purchase on the day you click on our links will generate a small commission which isused to run the website. Here is a link for Amazon and B&H.You can also get me a Ko-fi or old school Paypal. Thanks!To find out more about how to support this advice service checkHERE
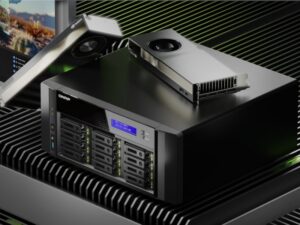
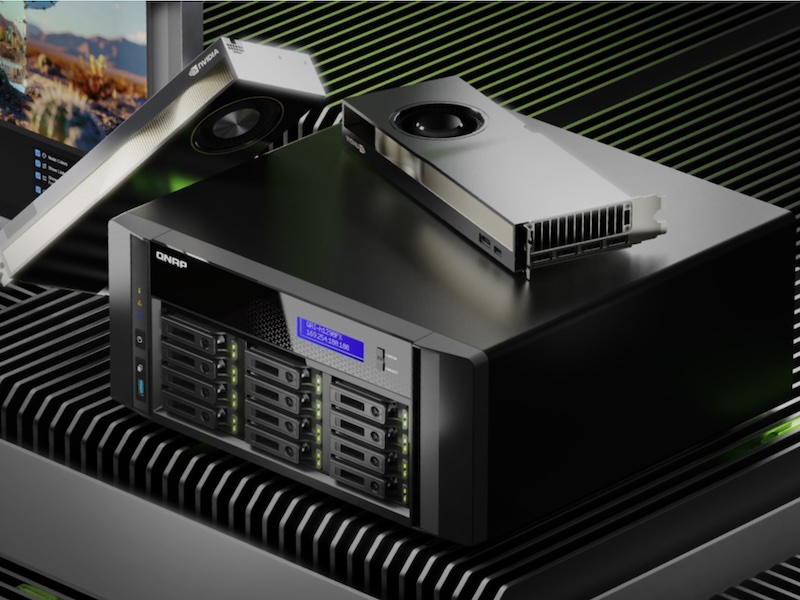
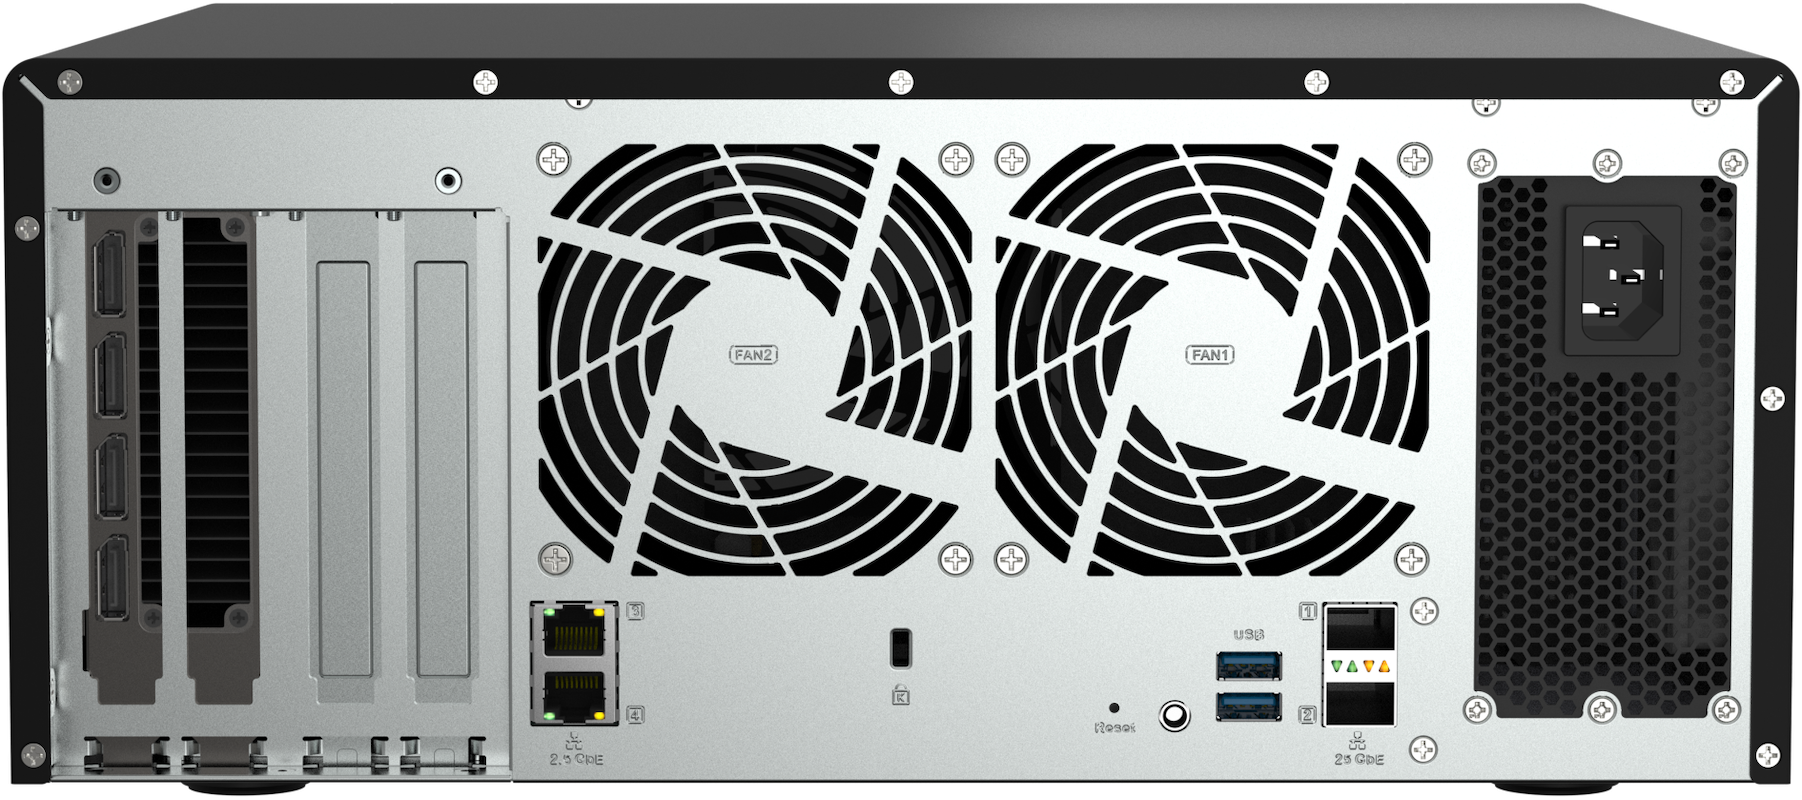

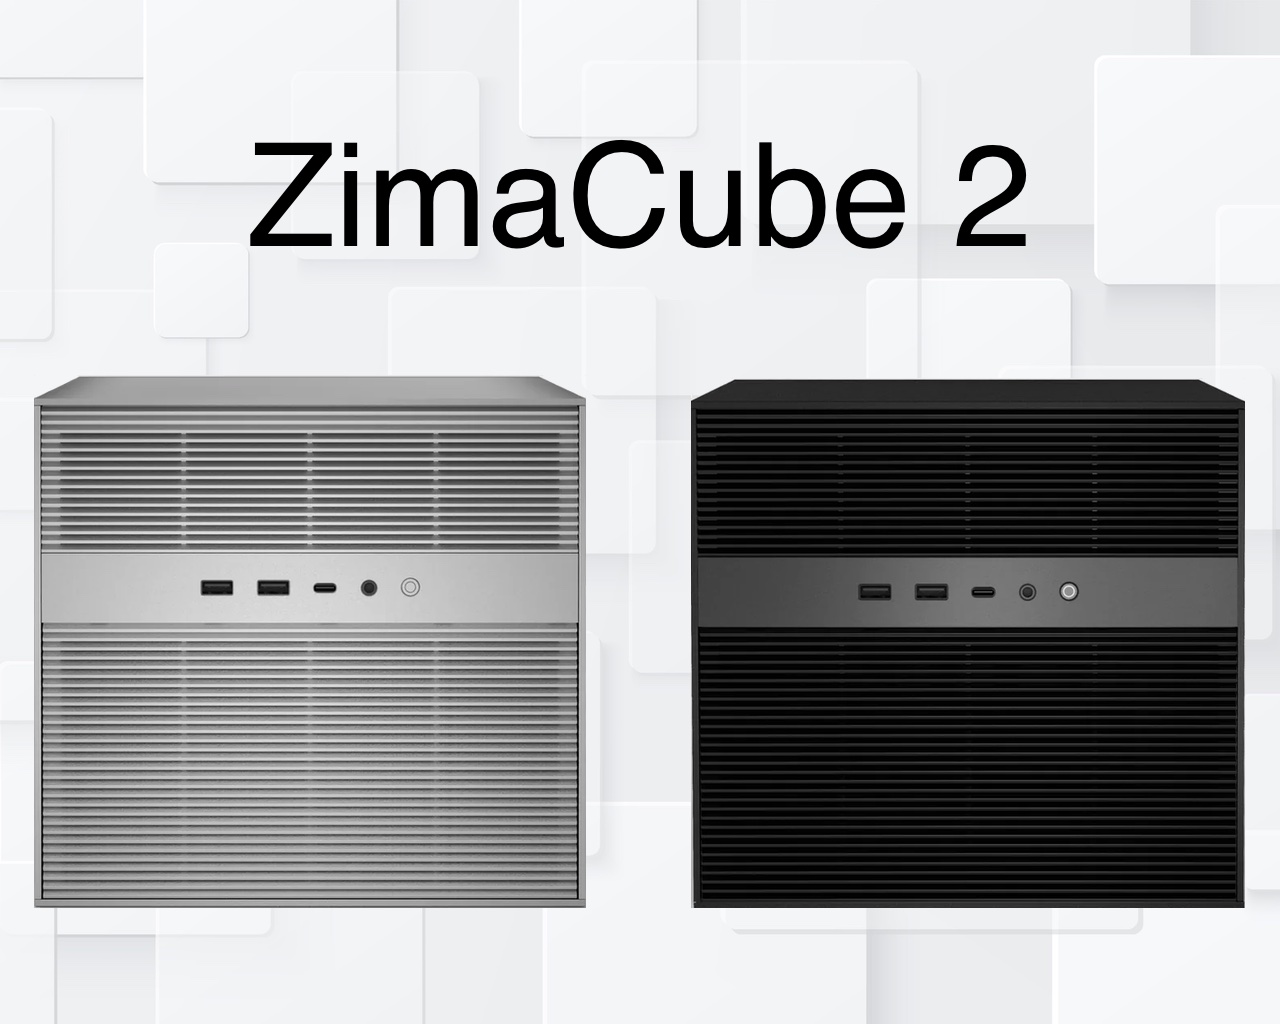
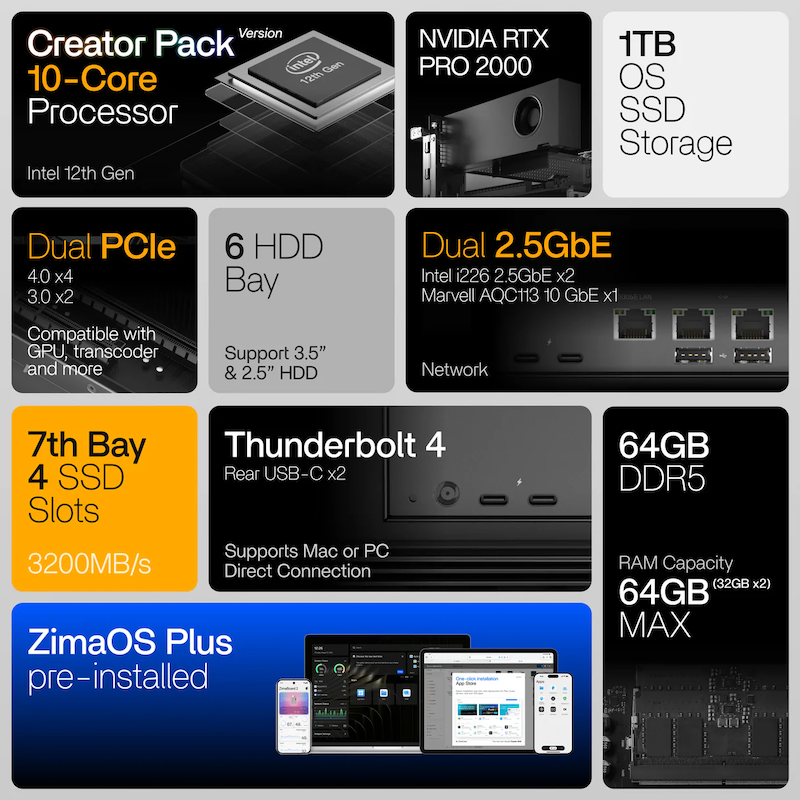


 SUBSCRIBE TO OUR NEWSLETTER


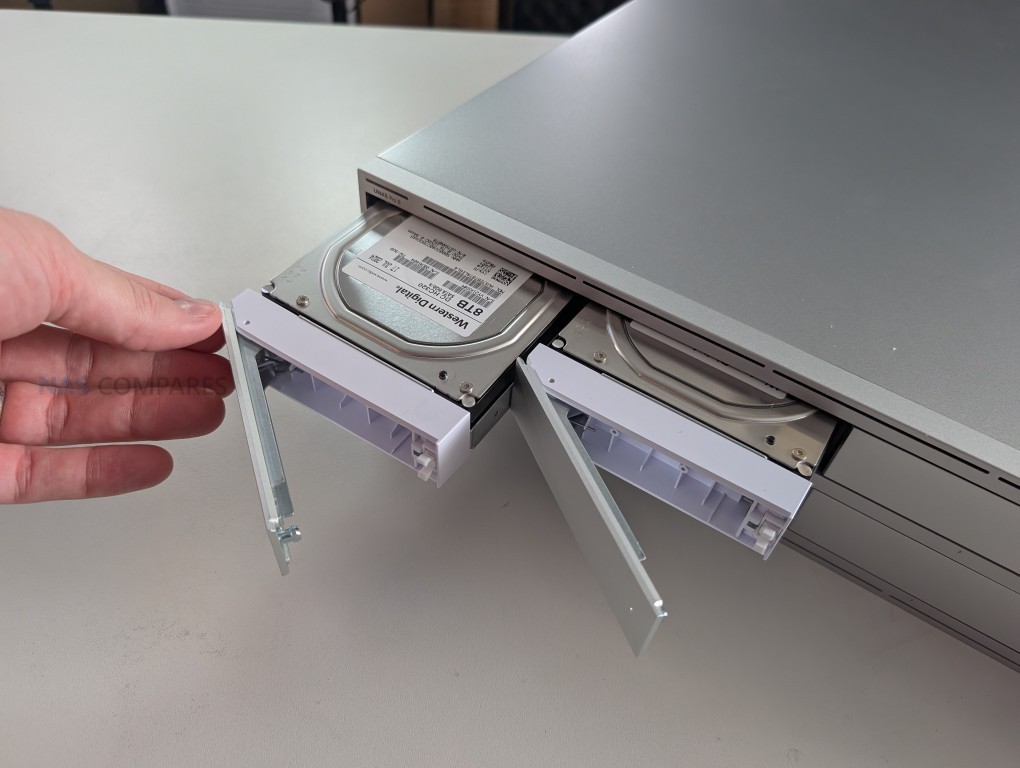
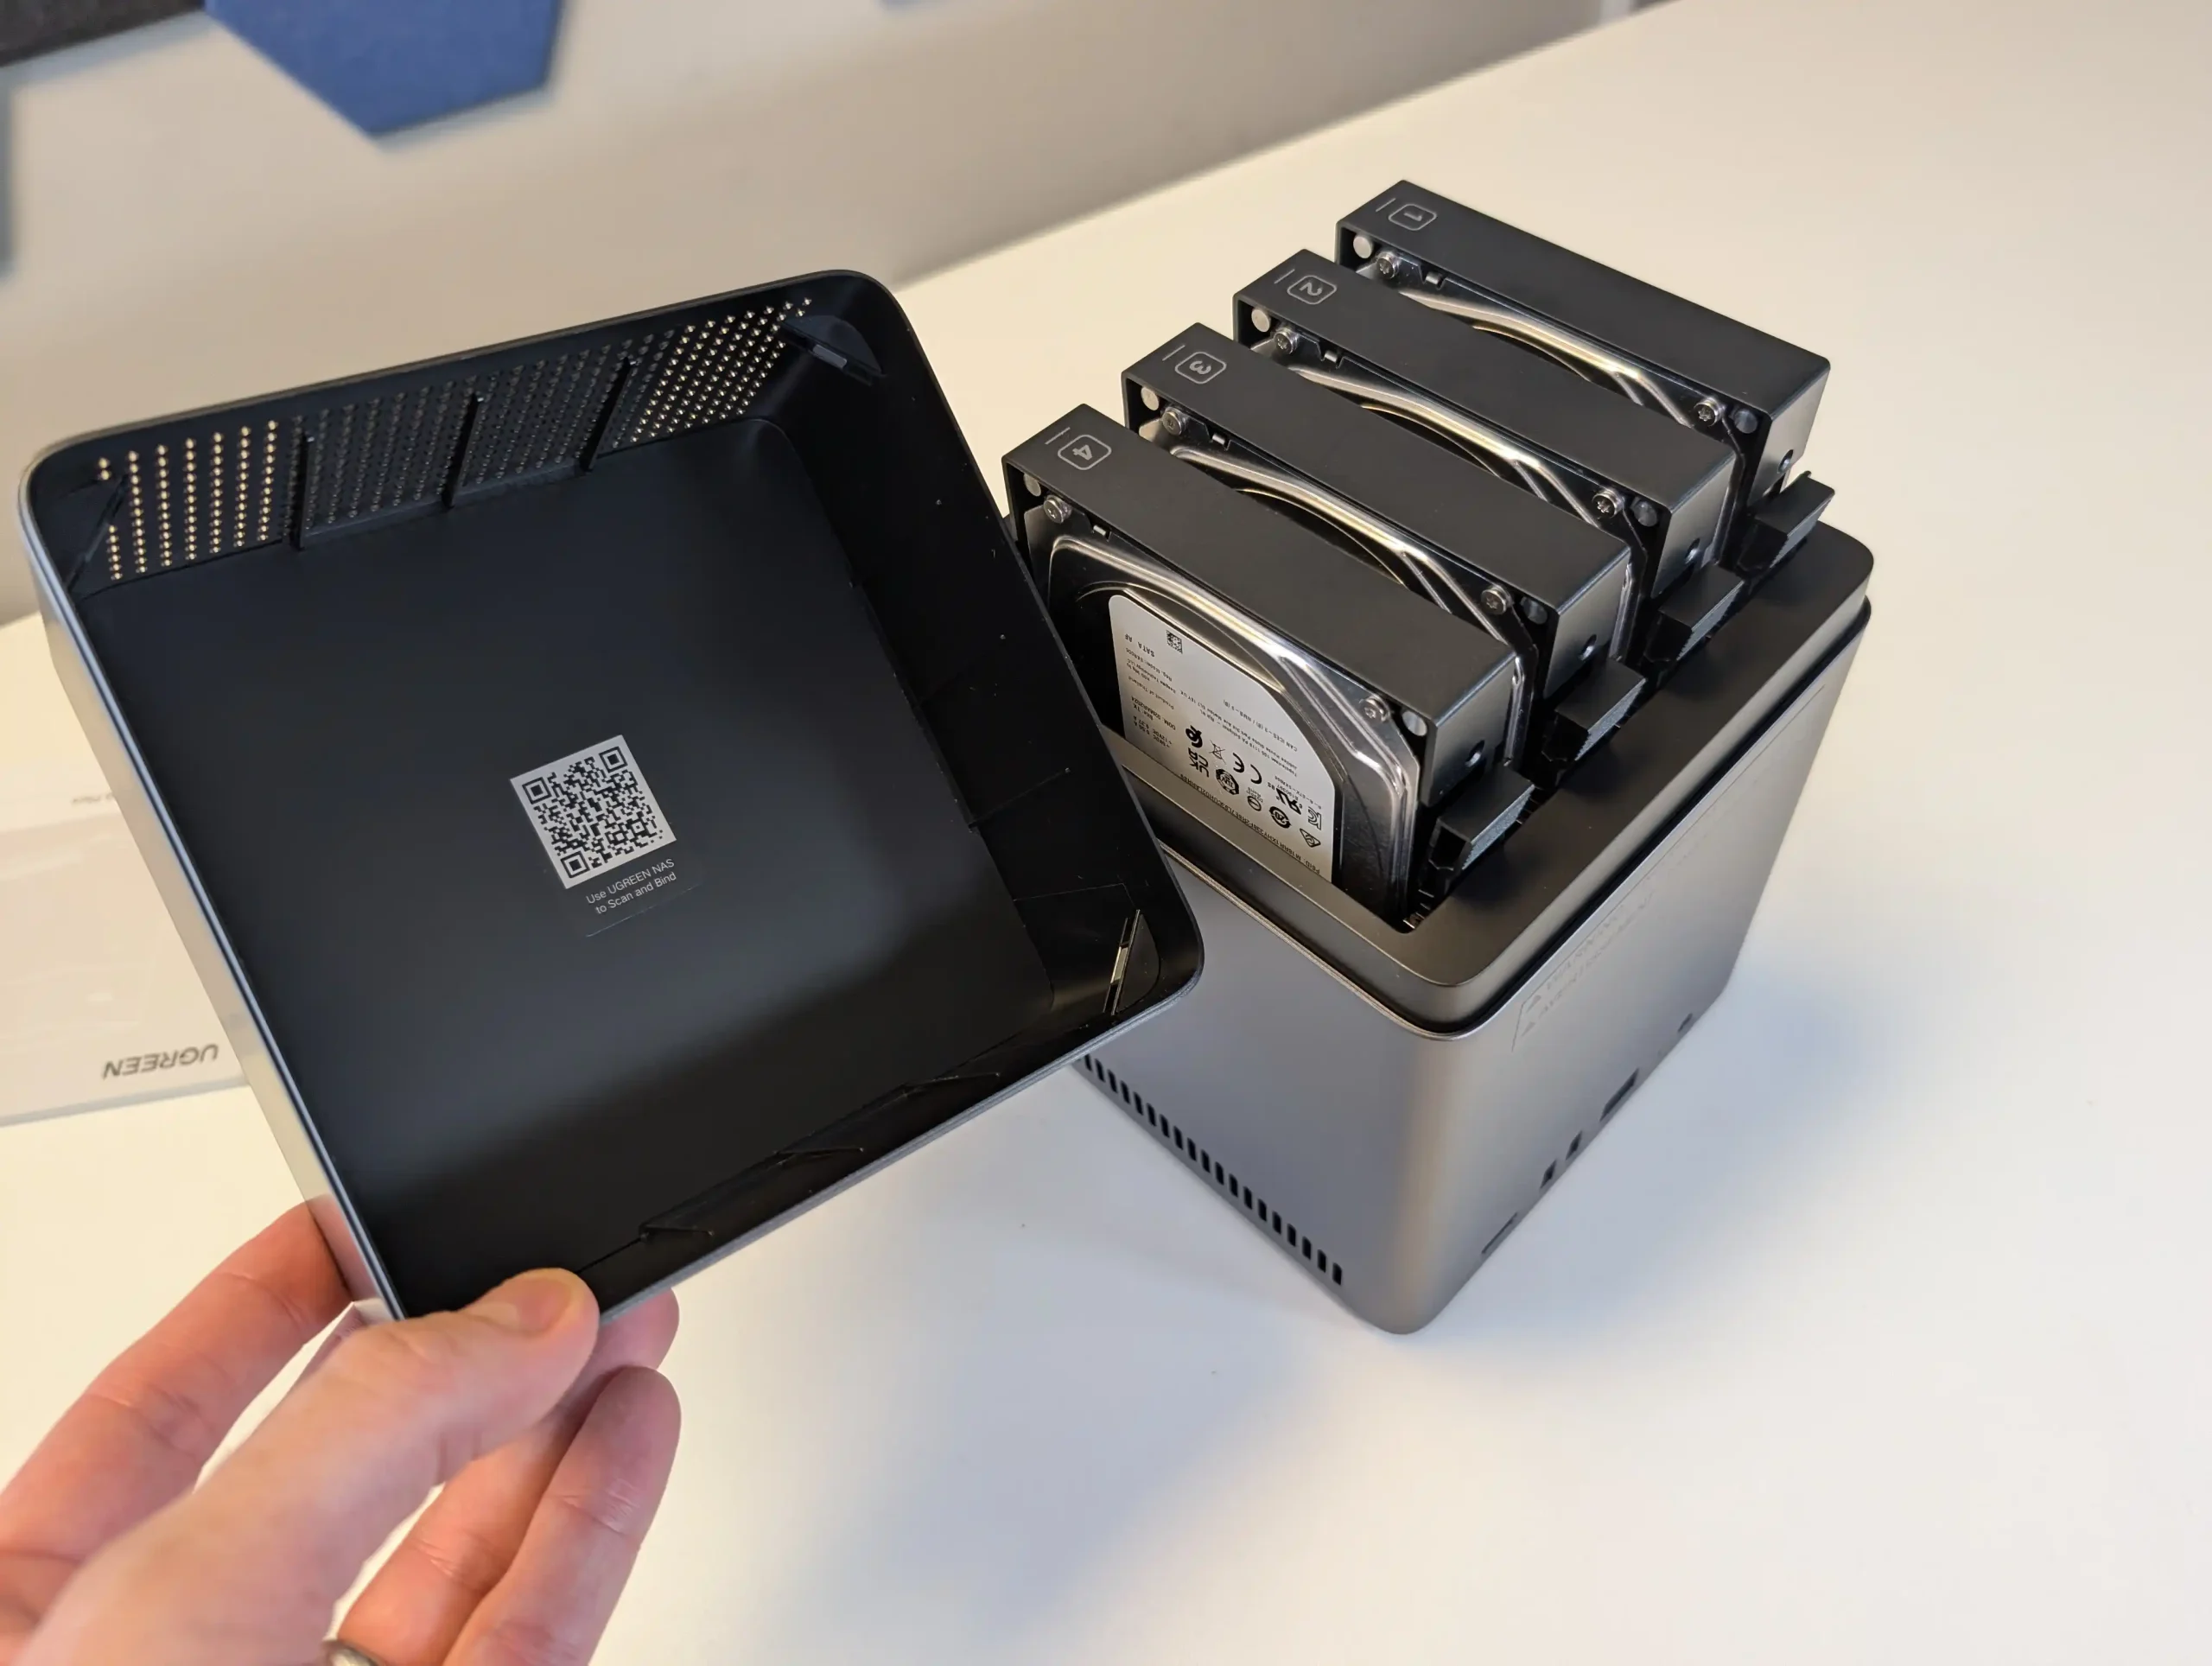
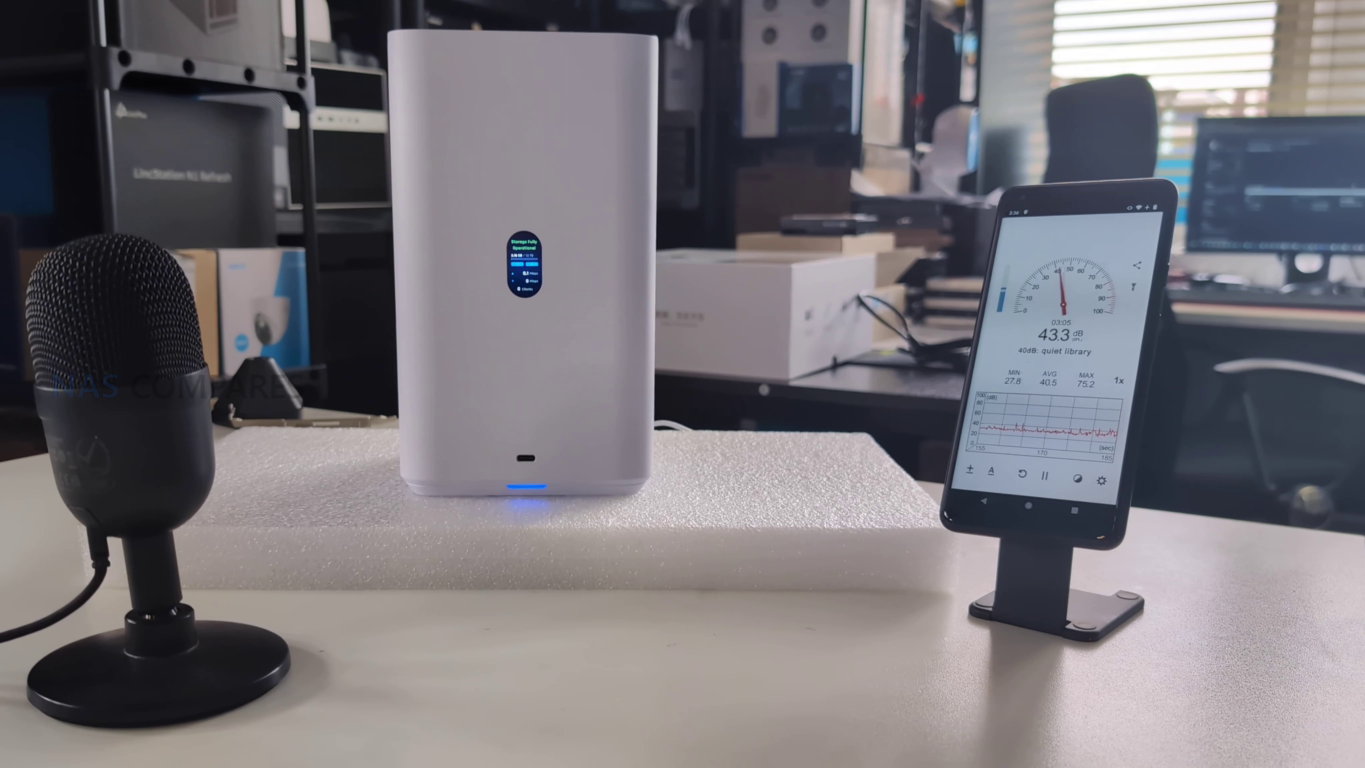
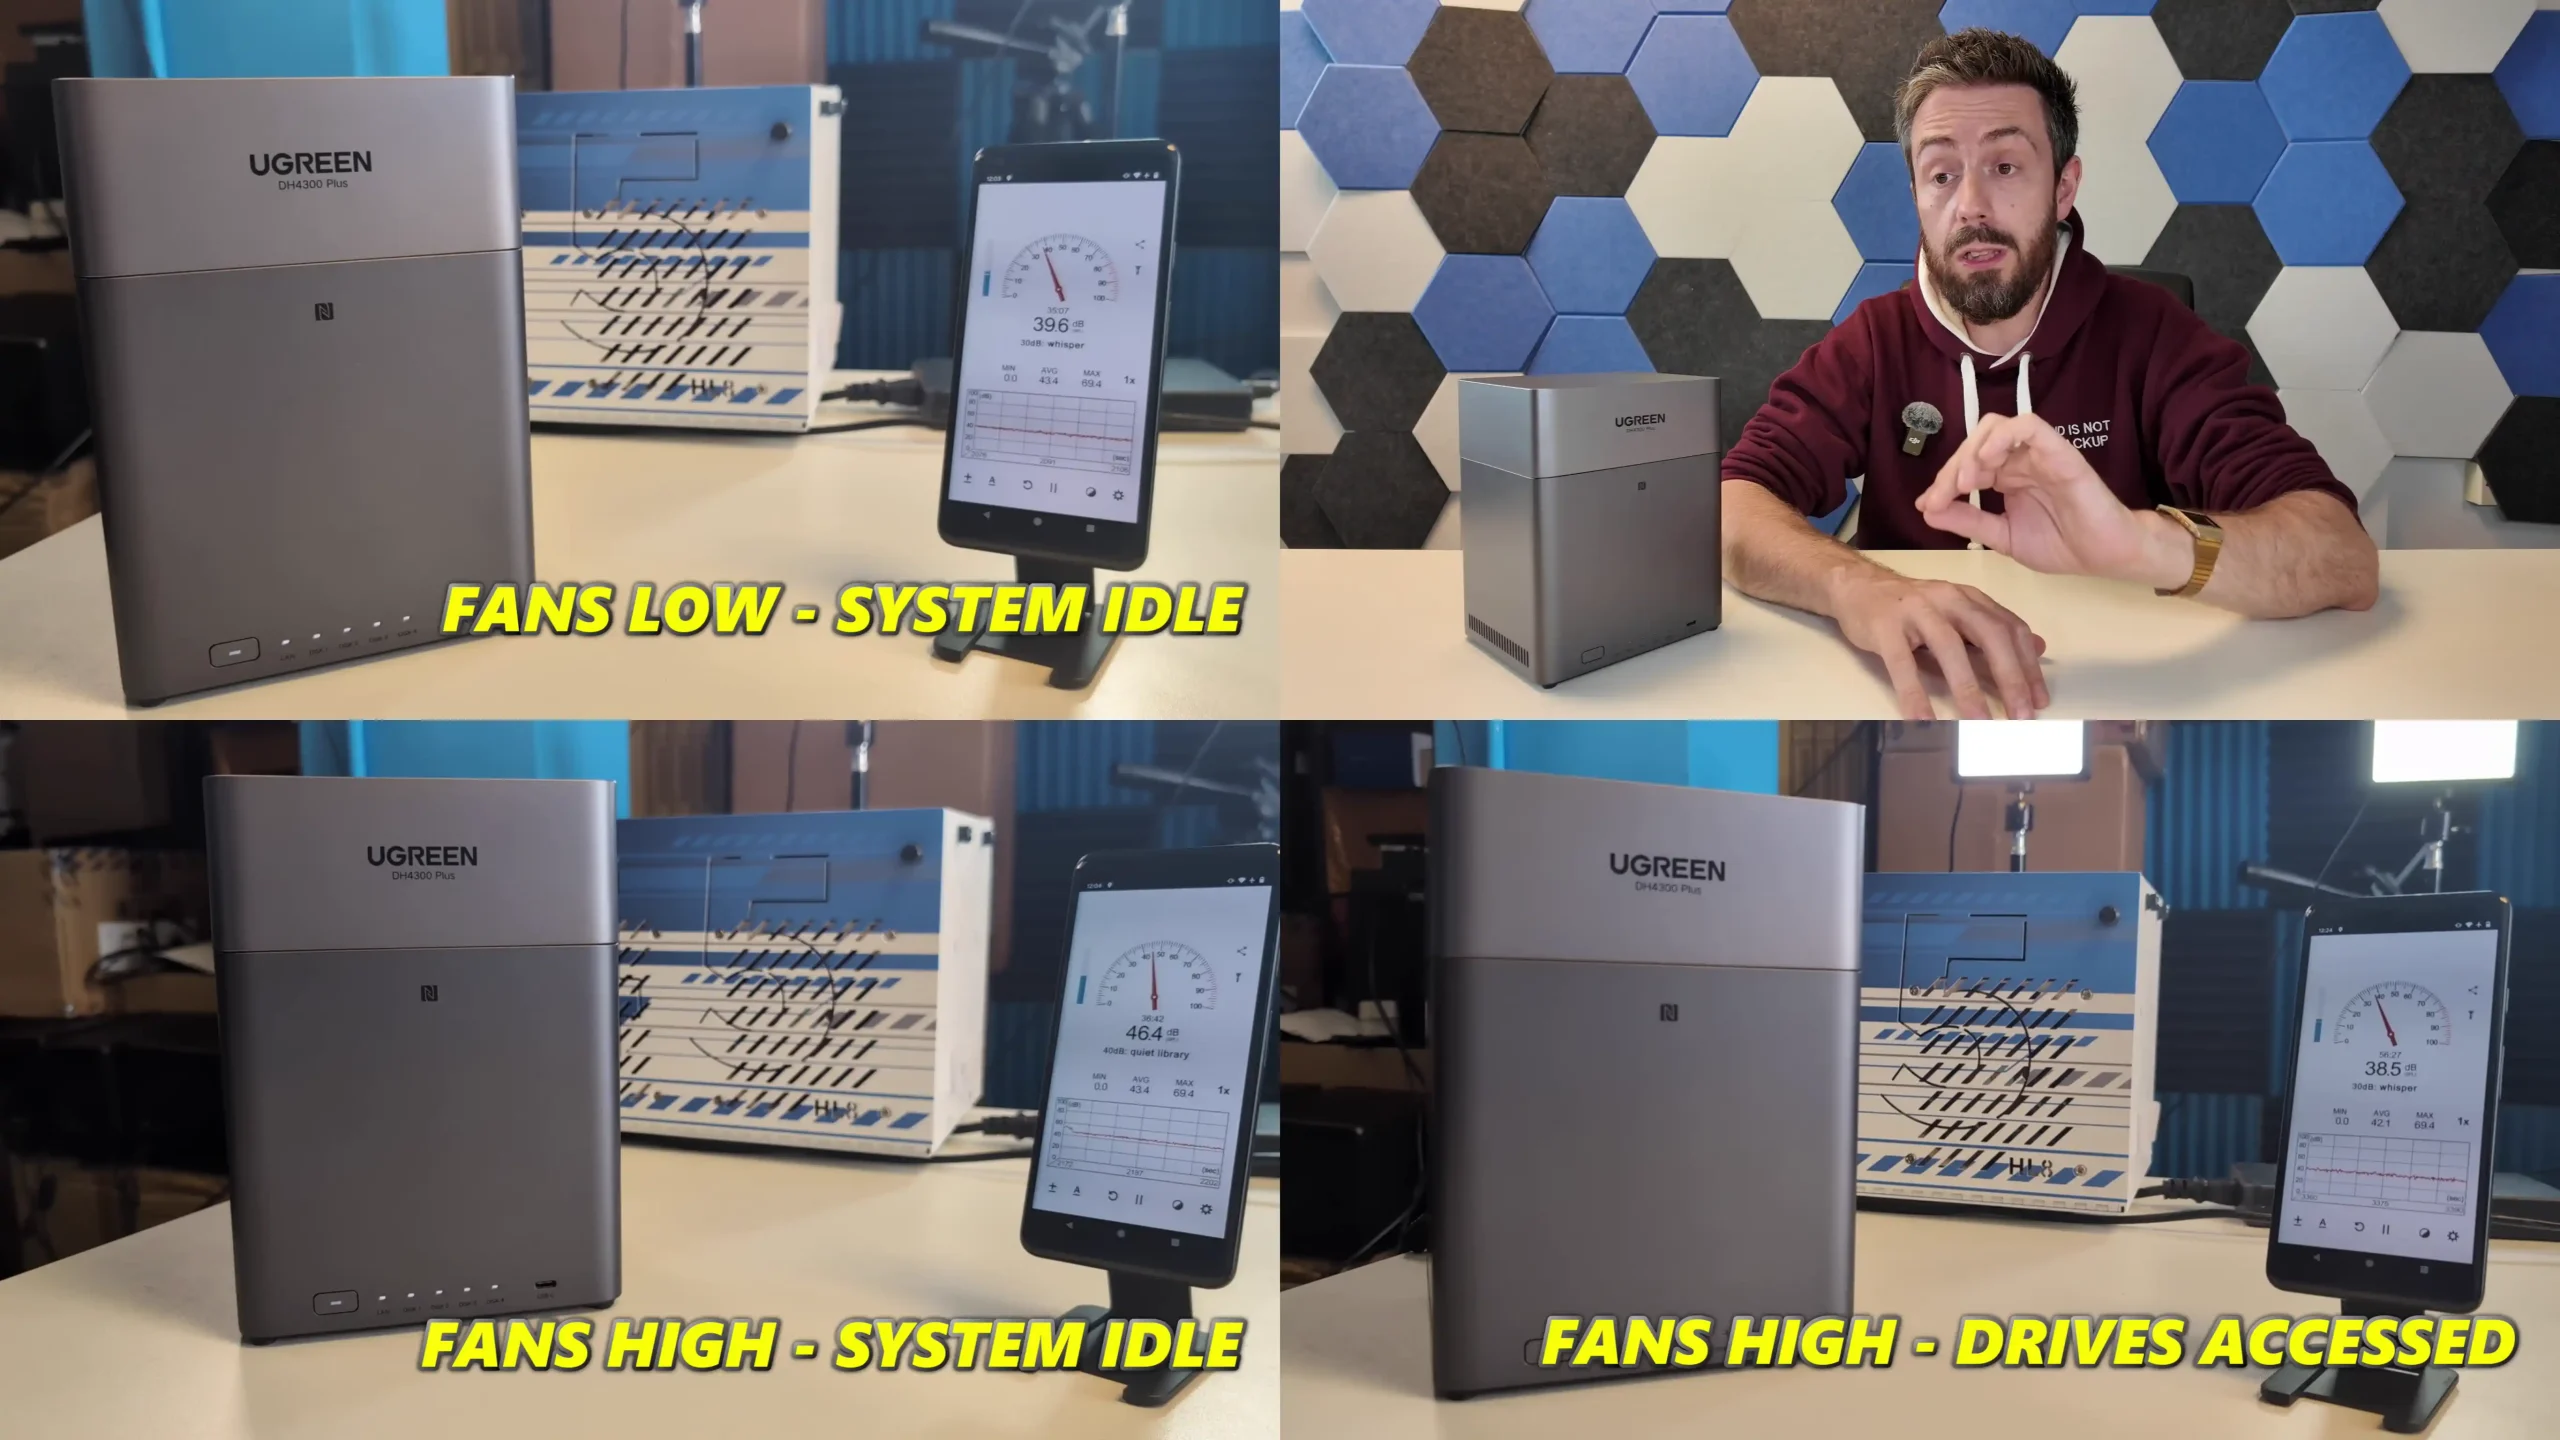
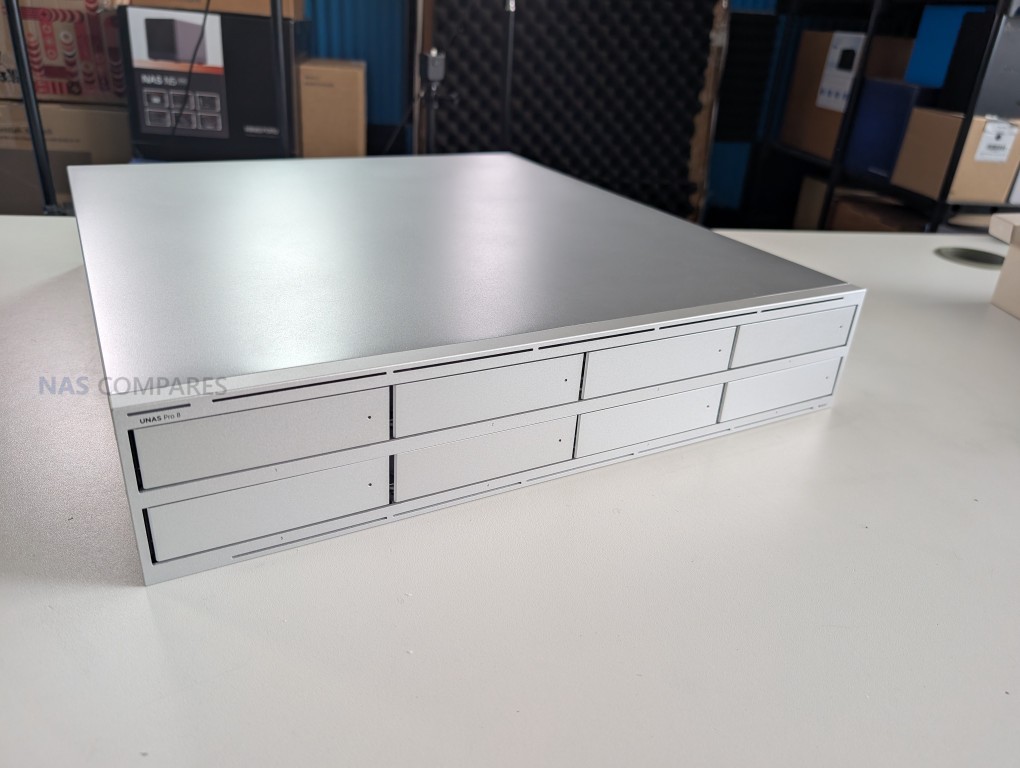
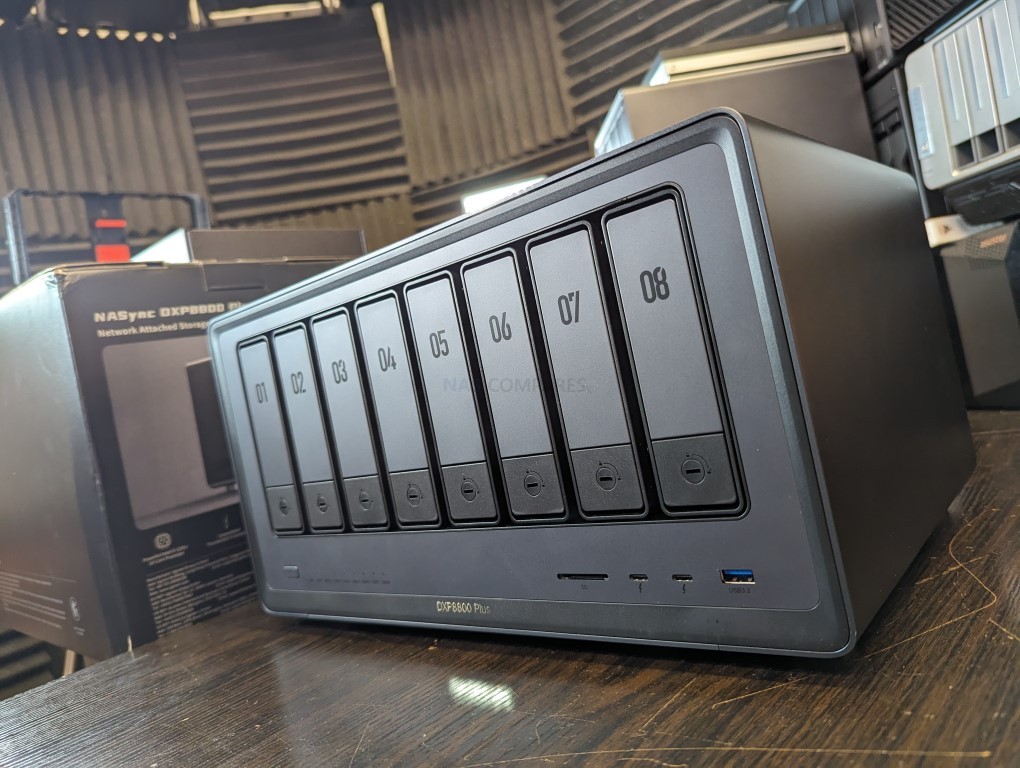


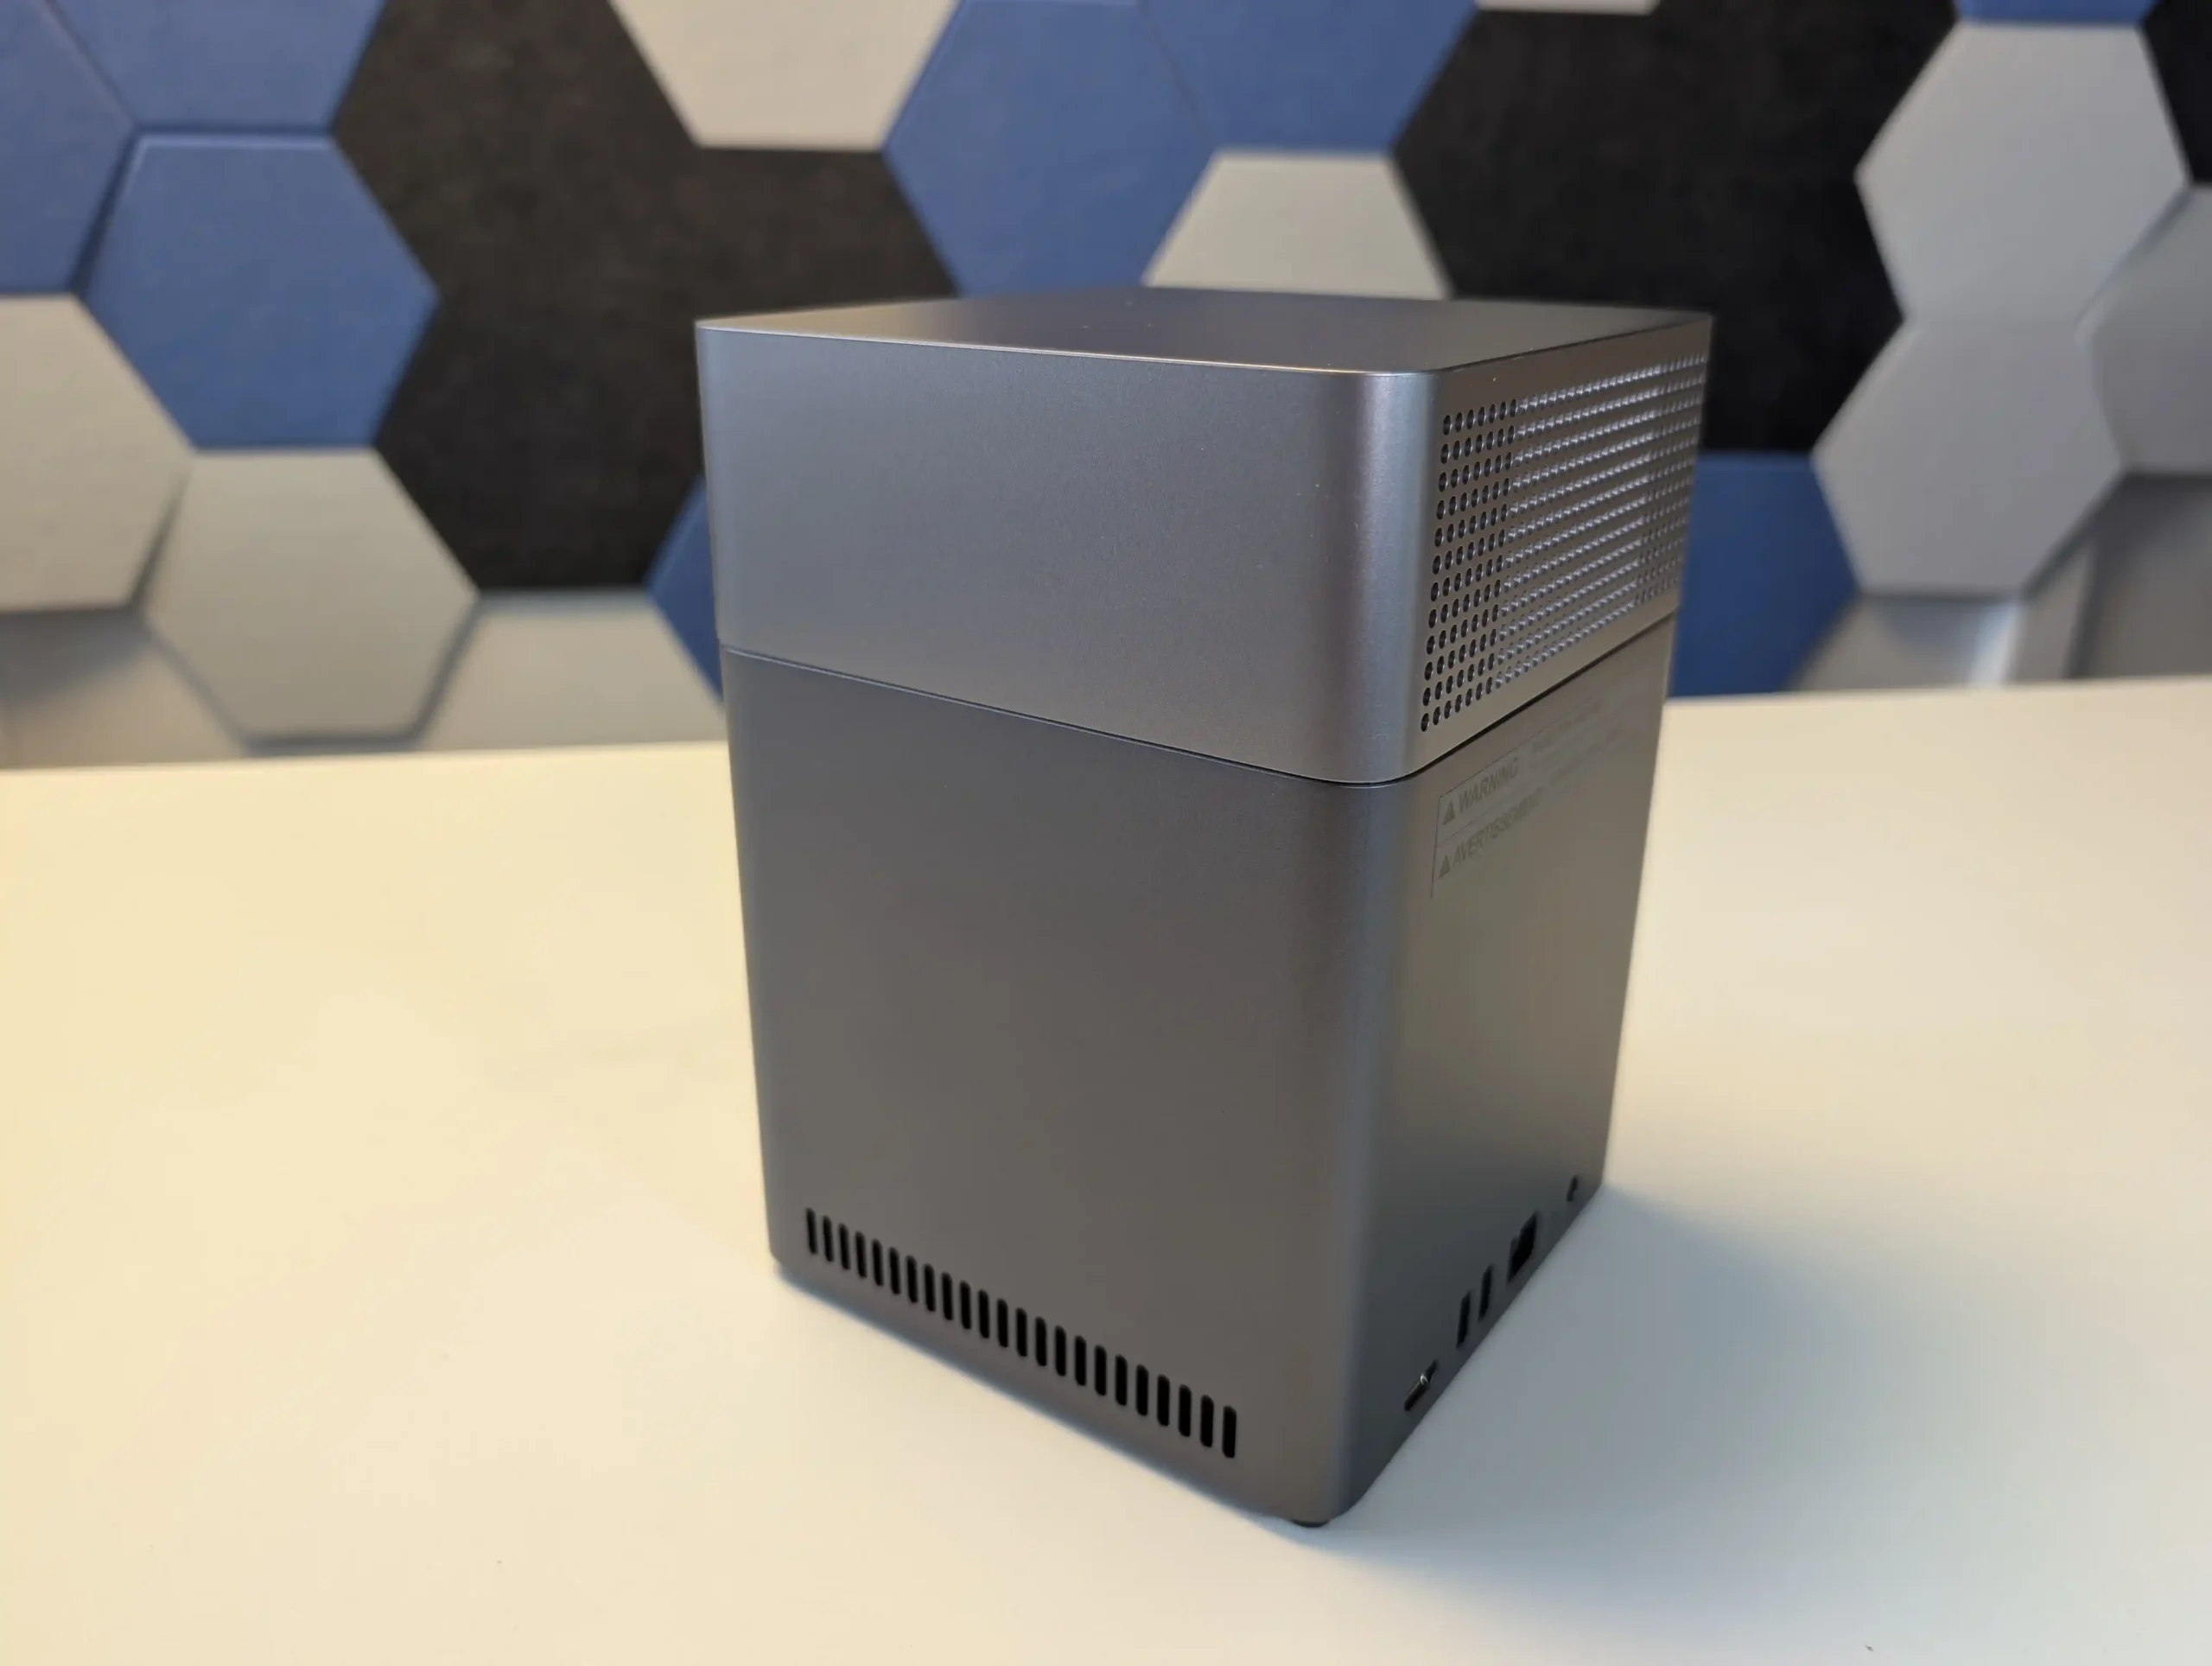

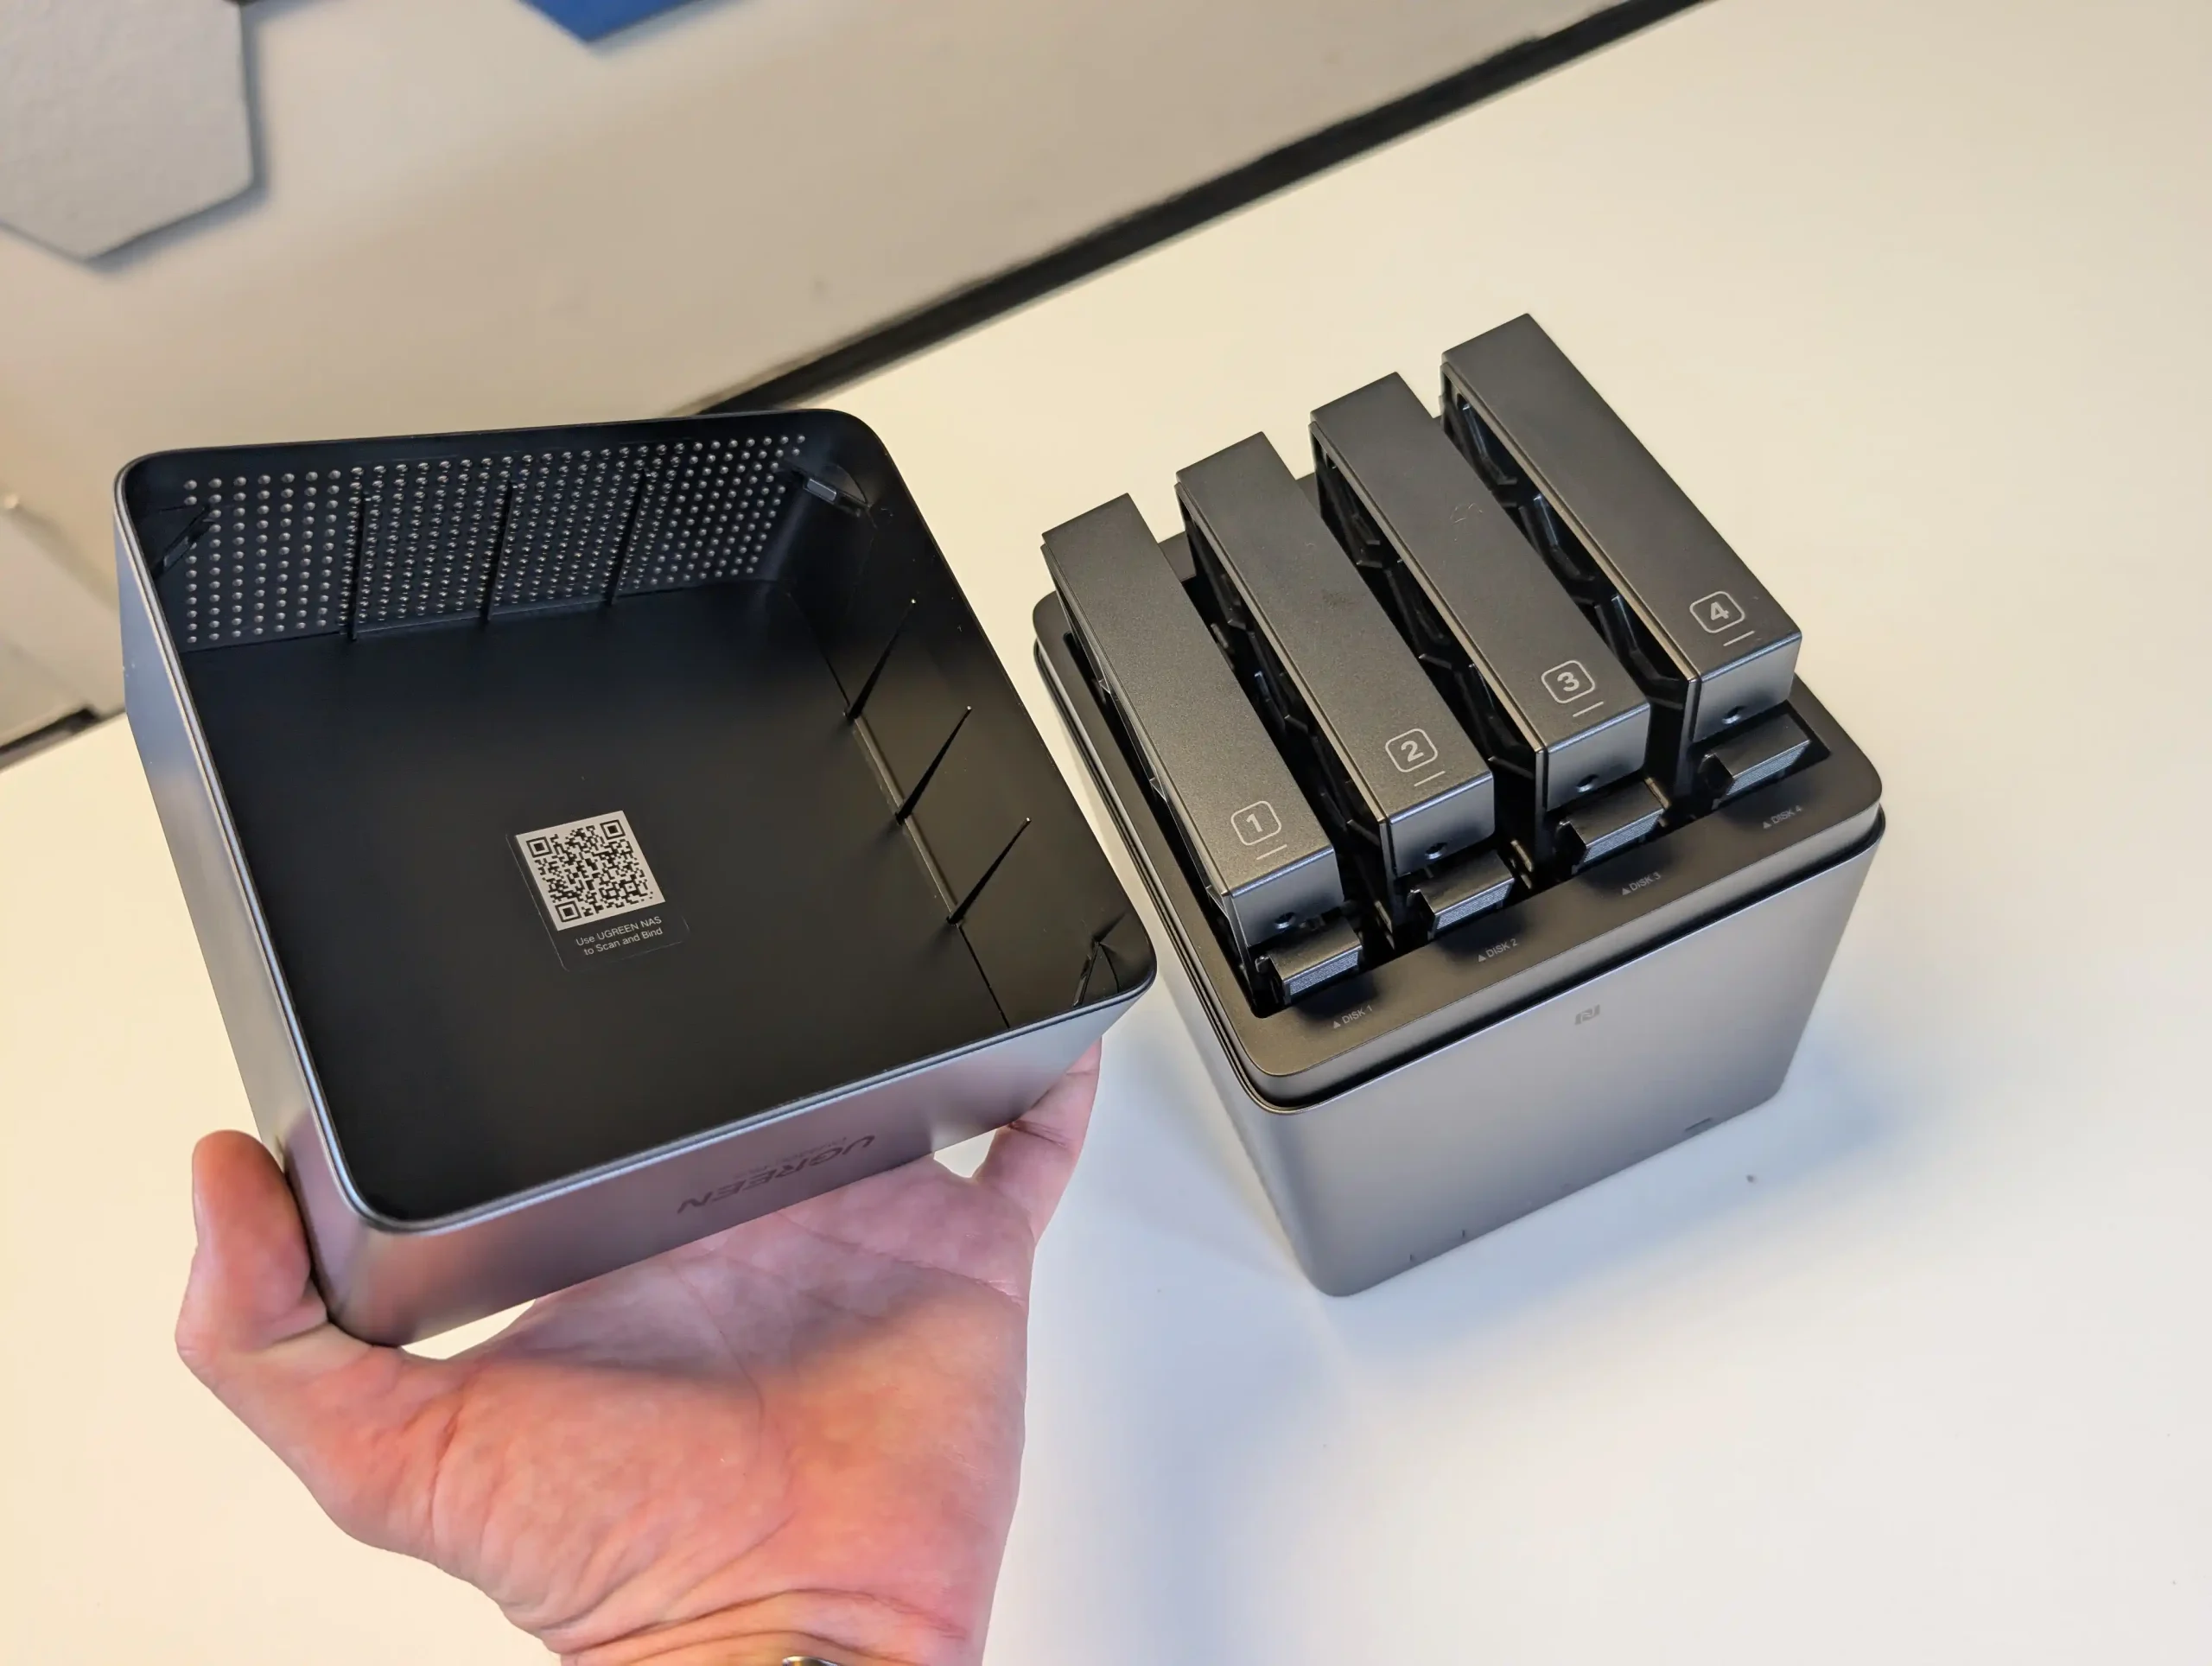


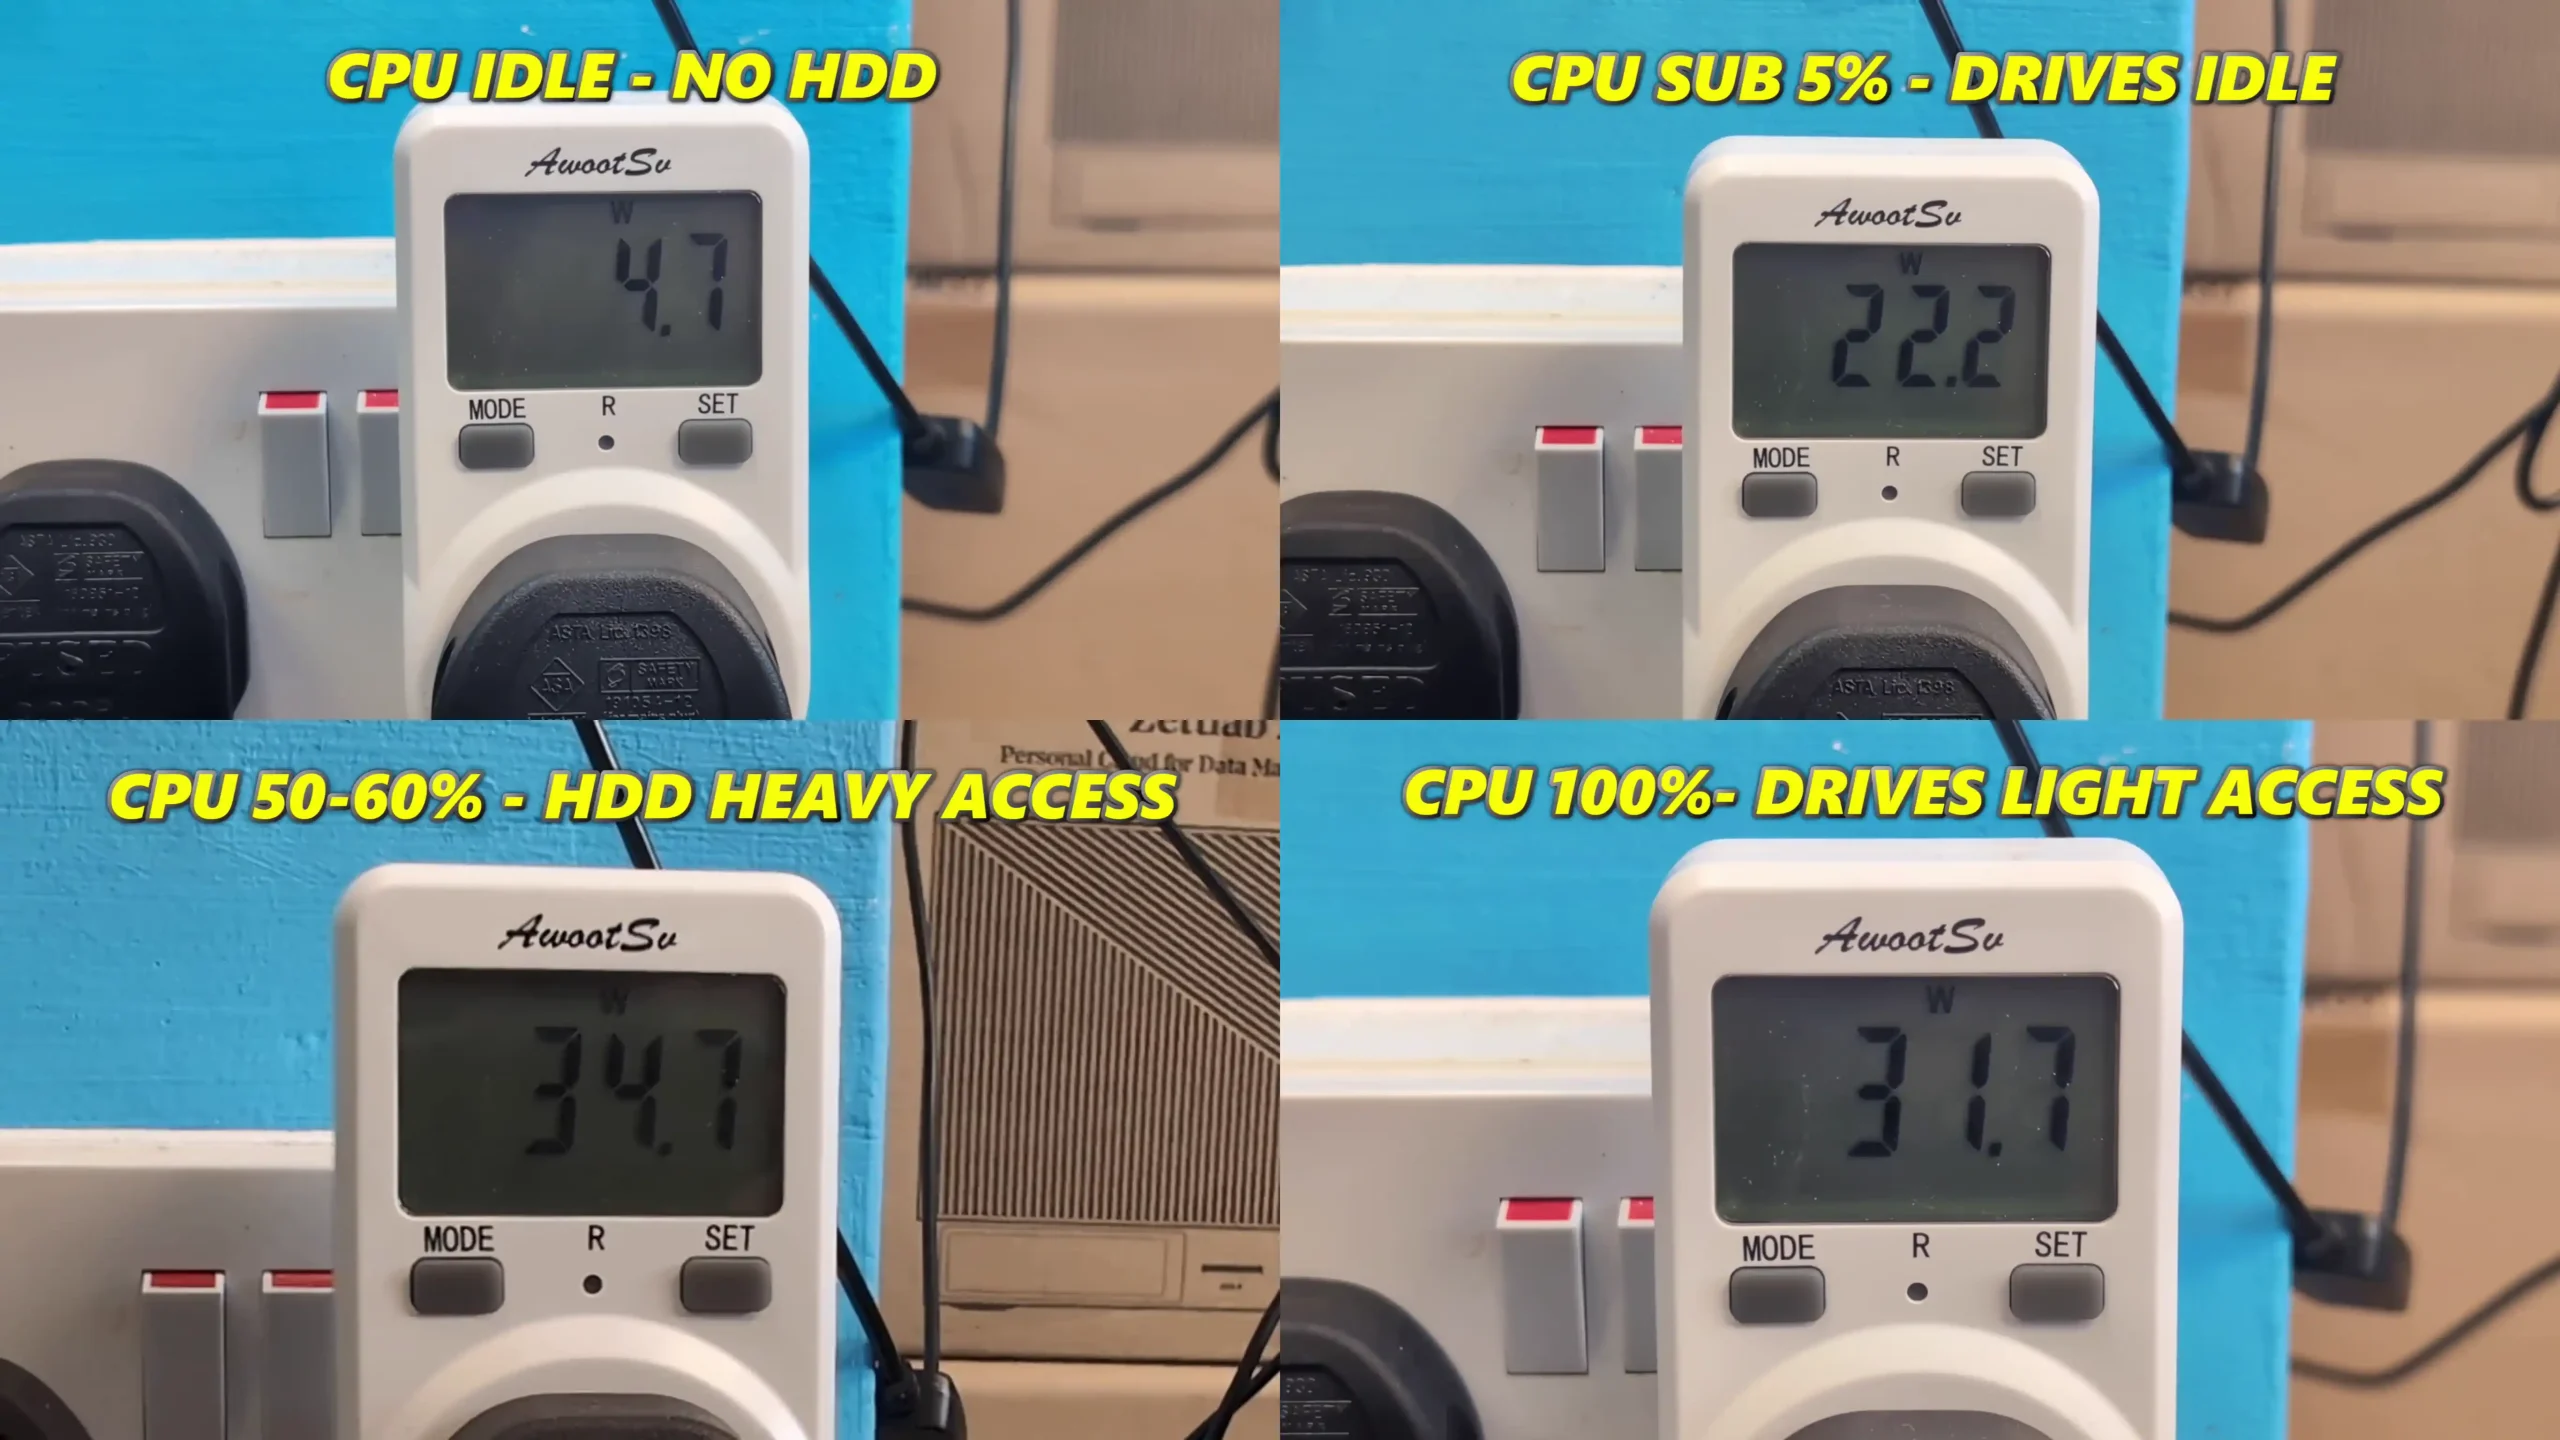


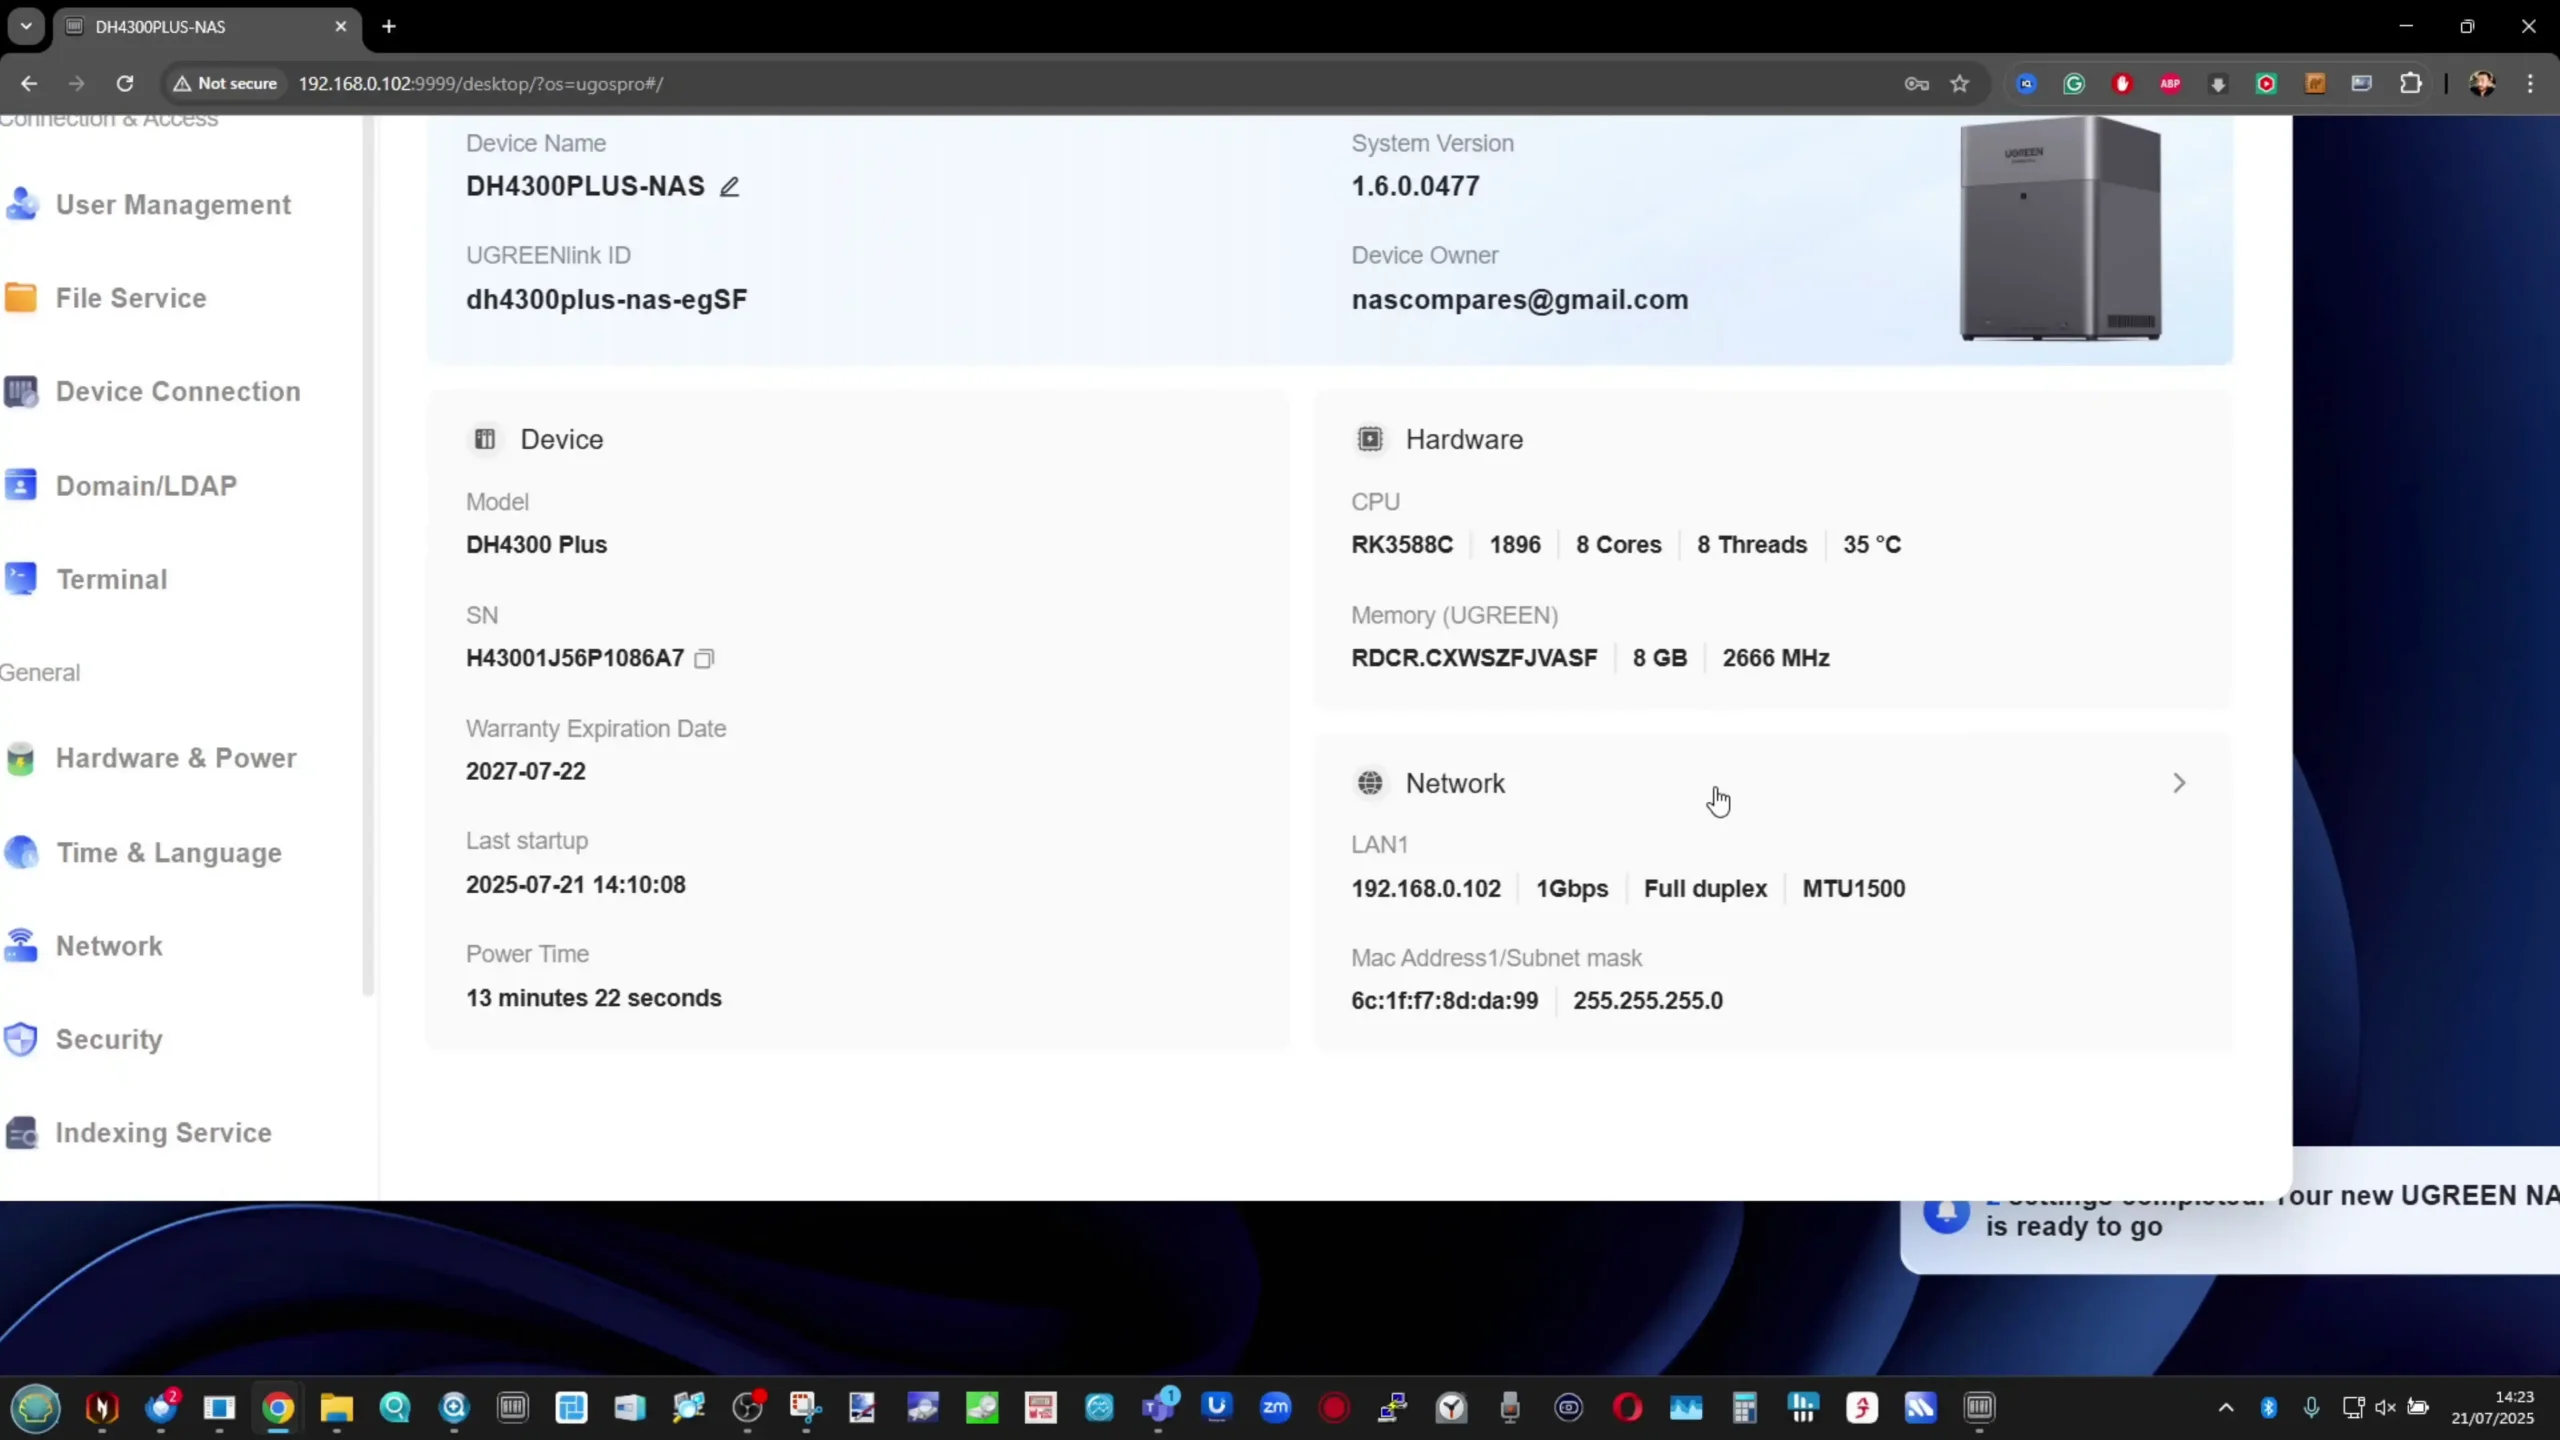

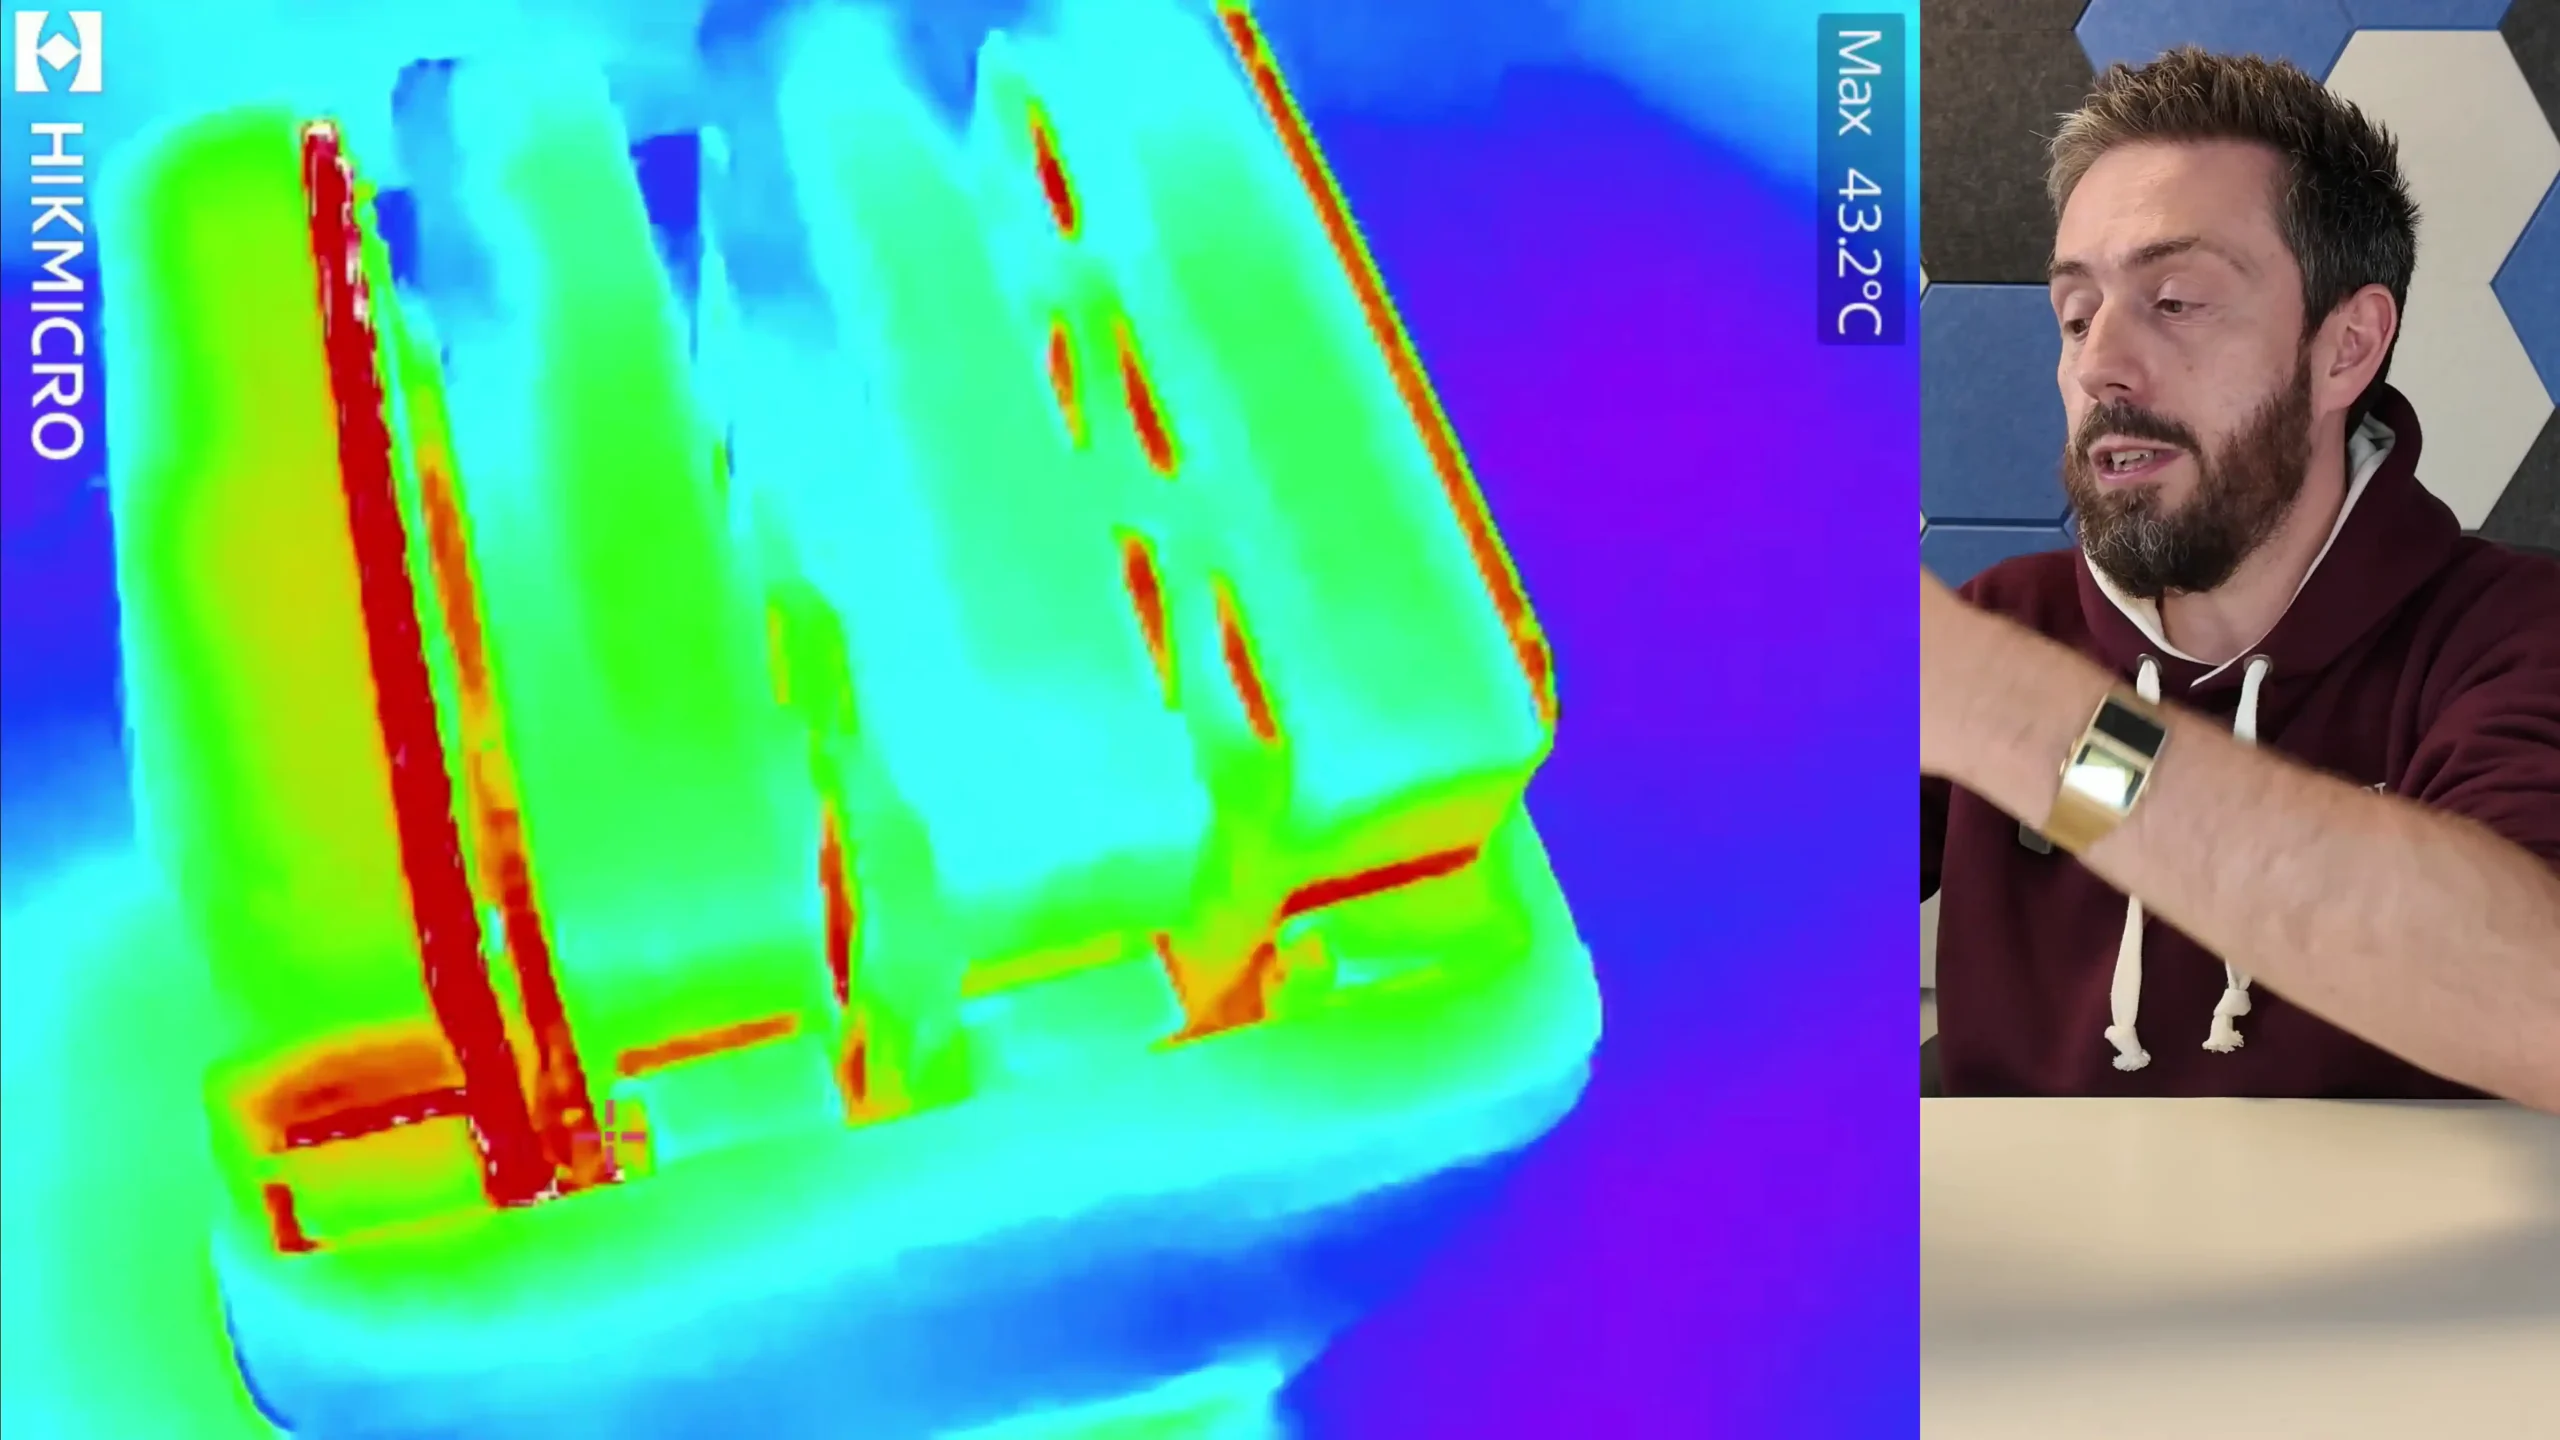


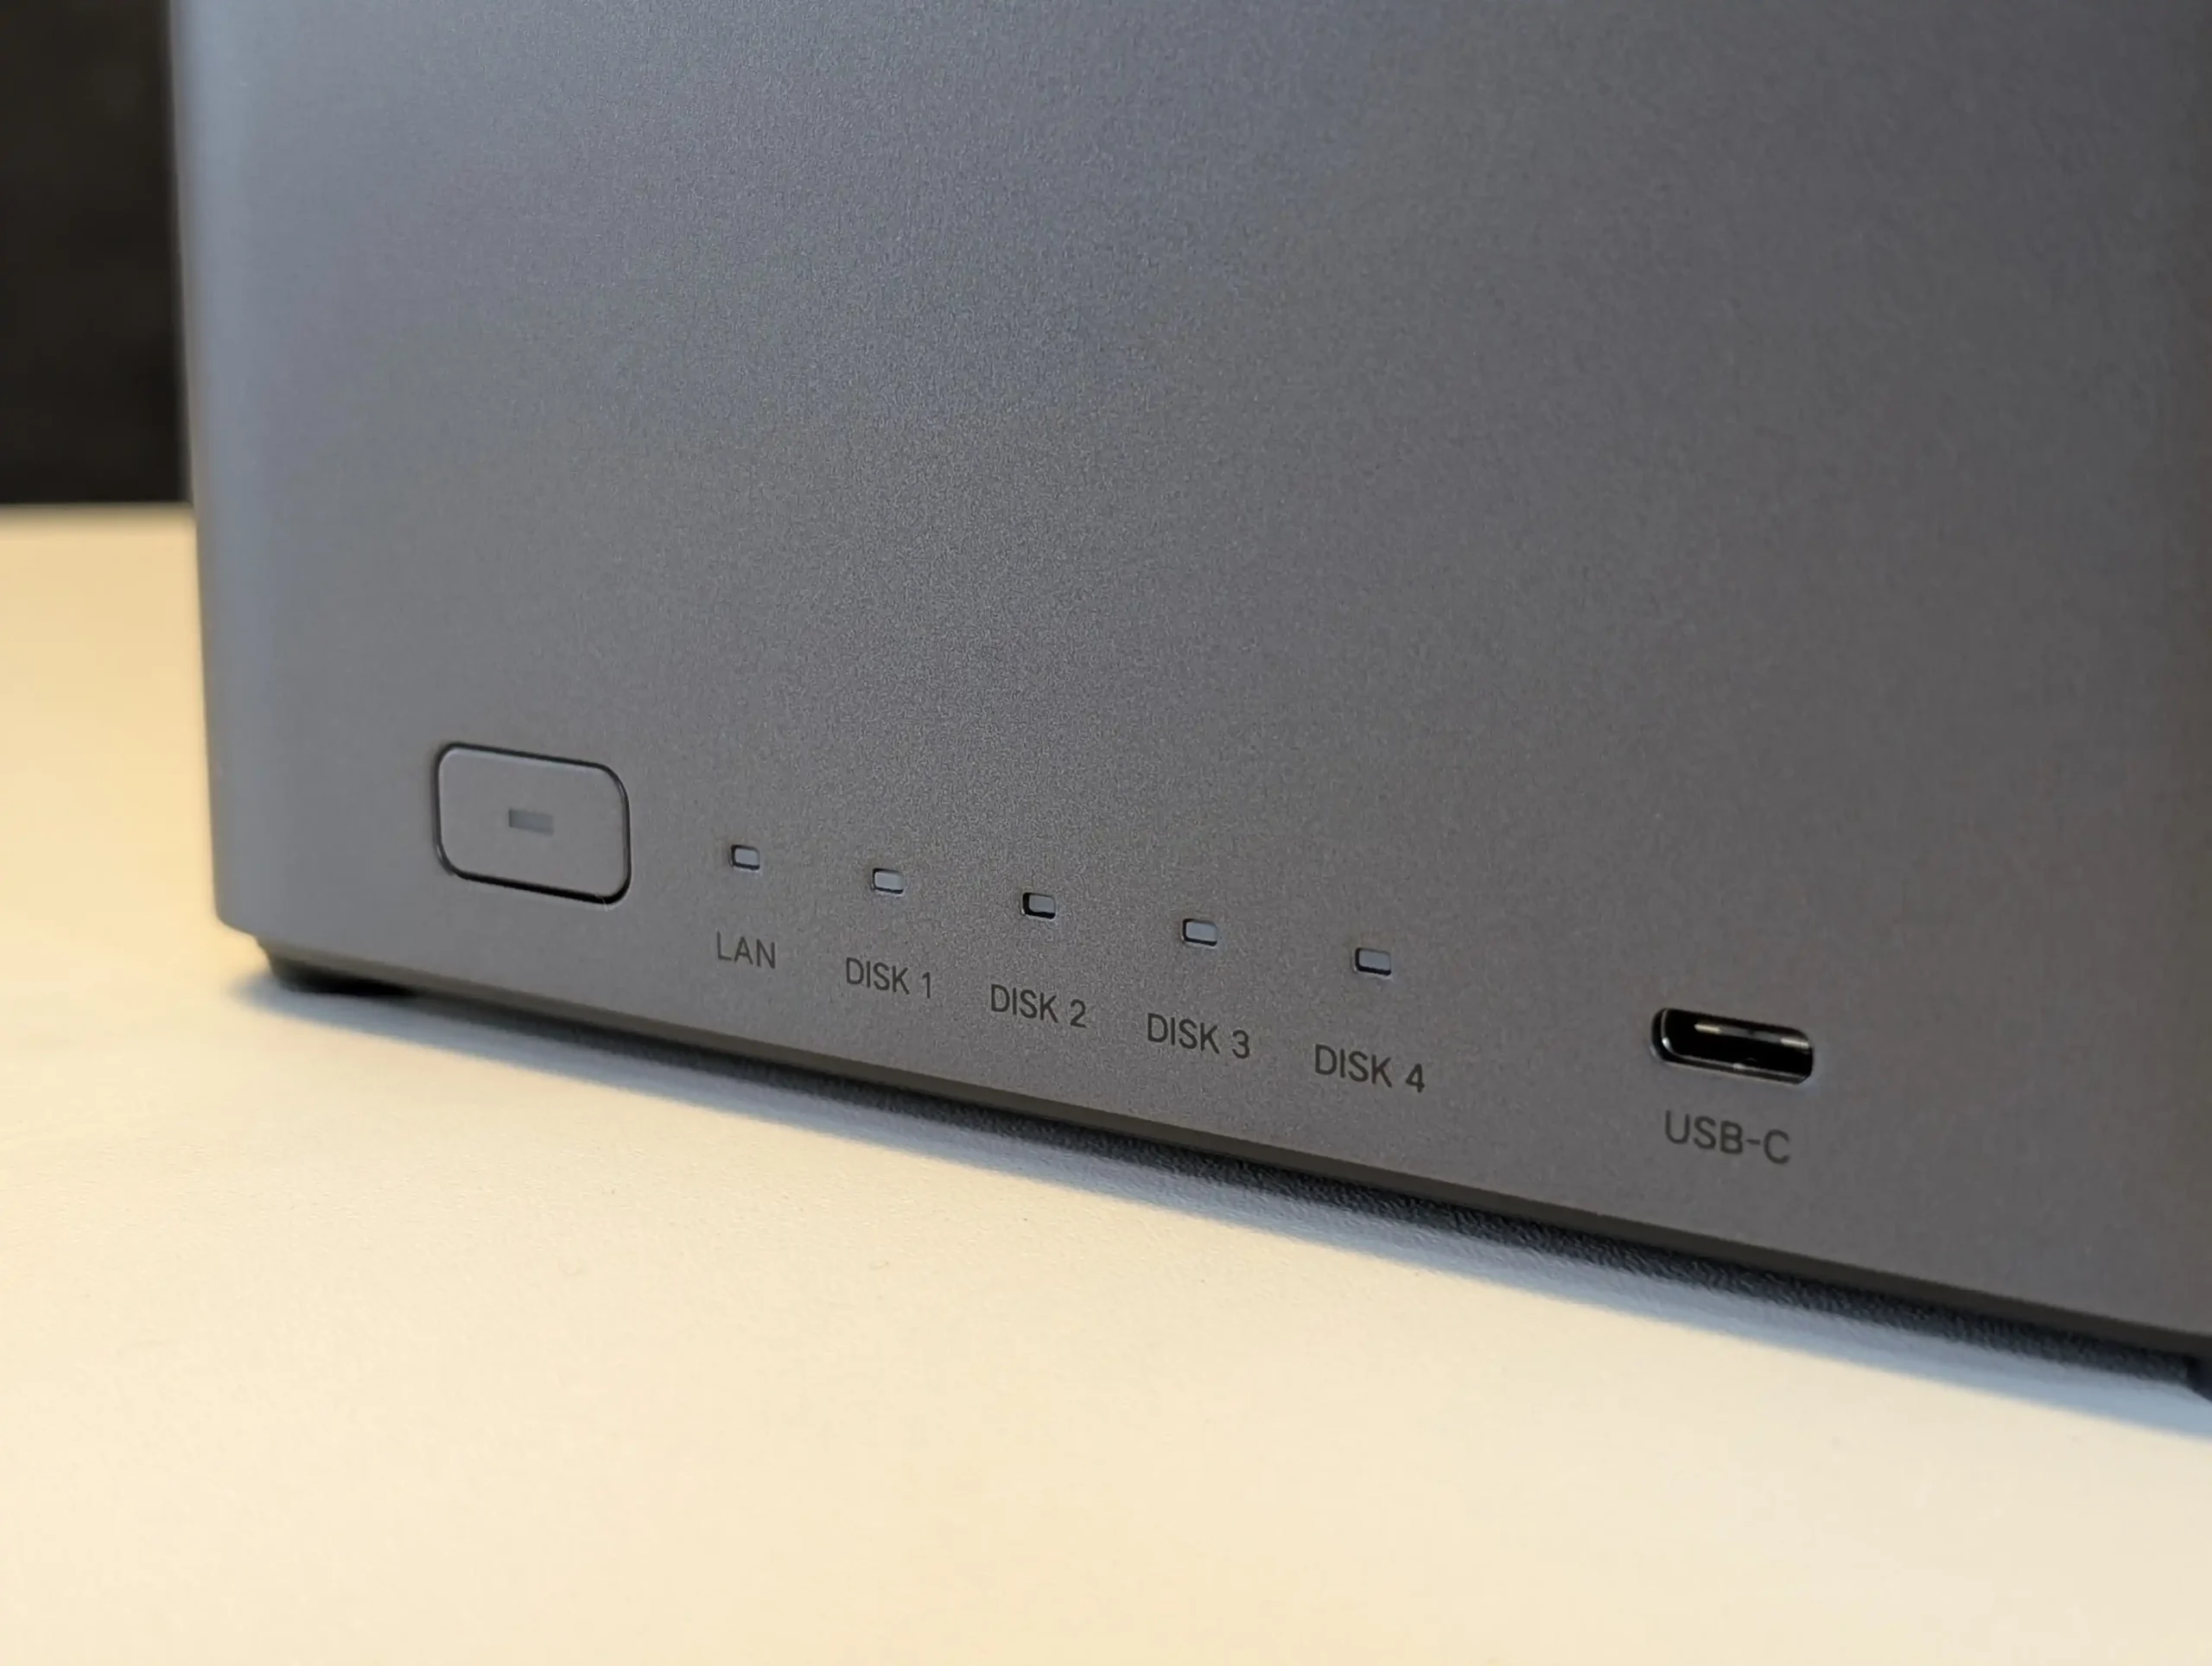

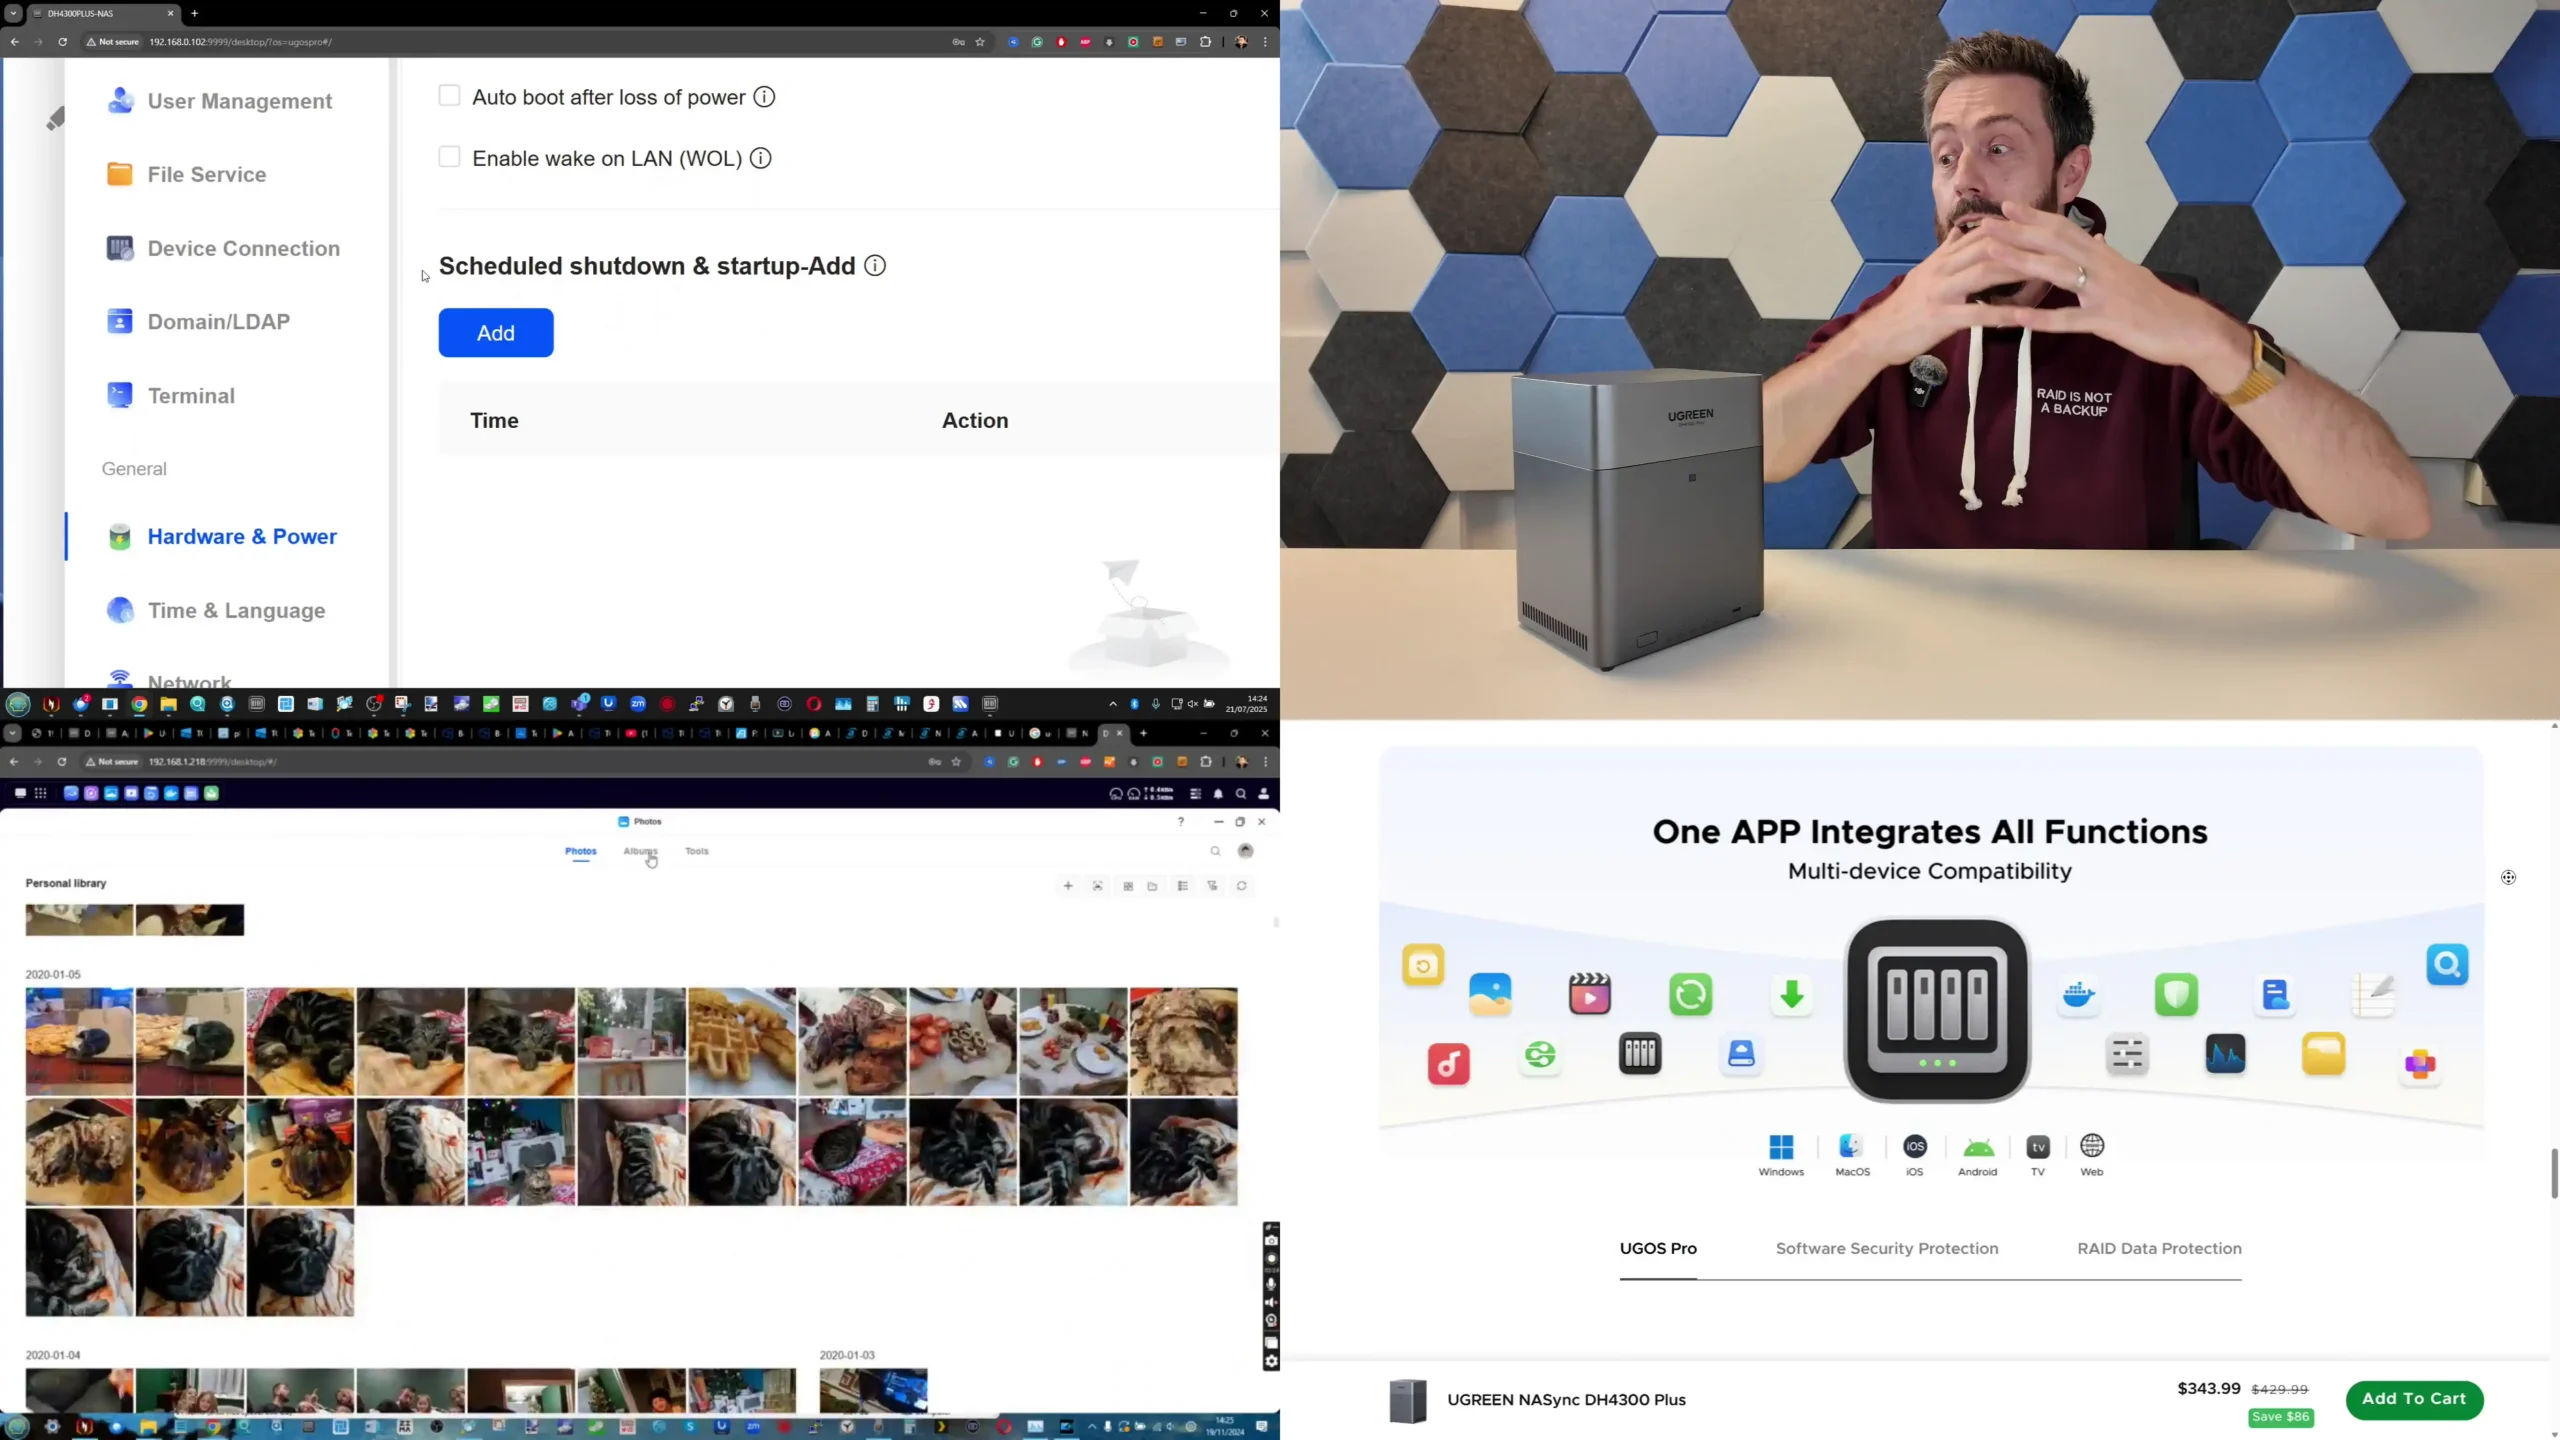

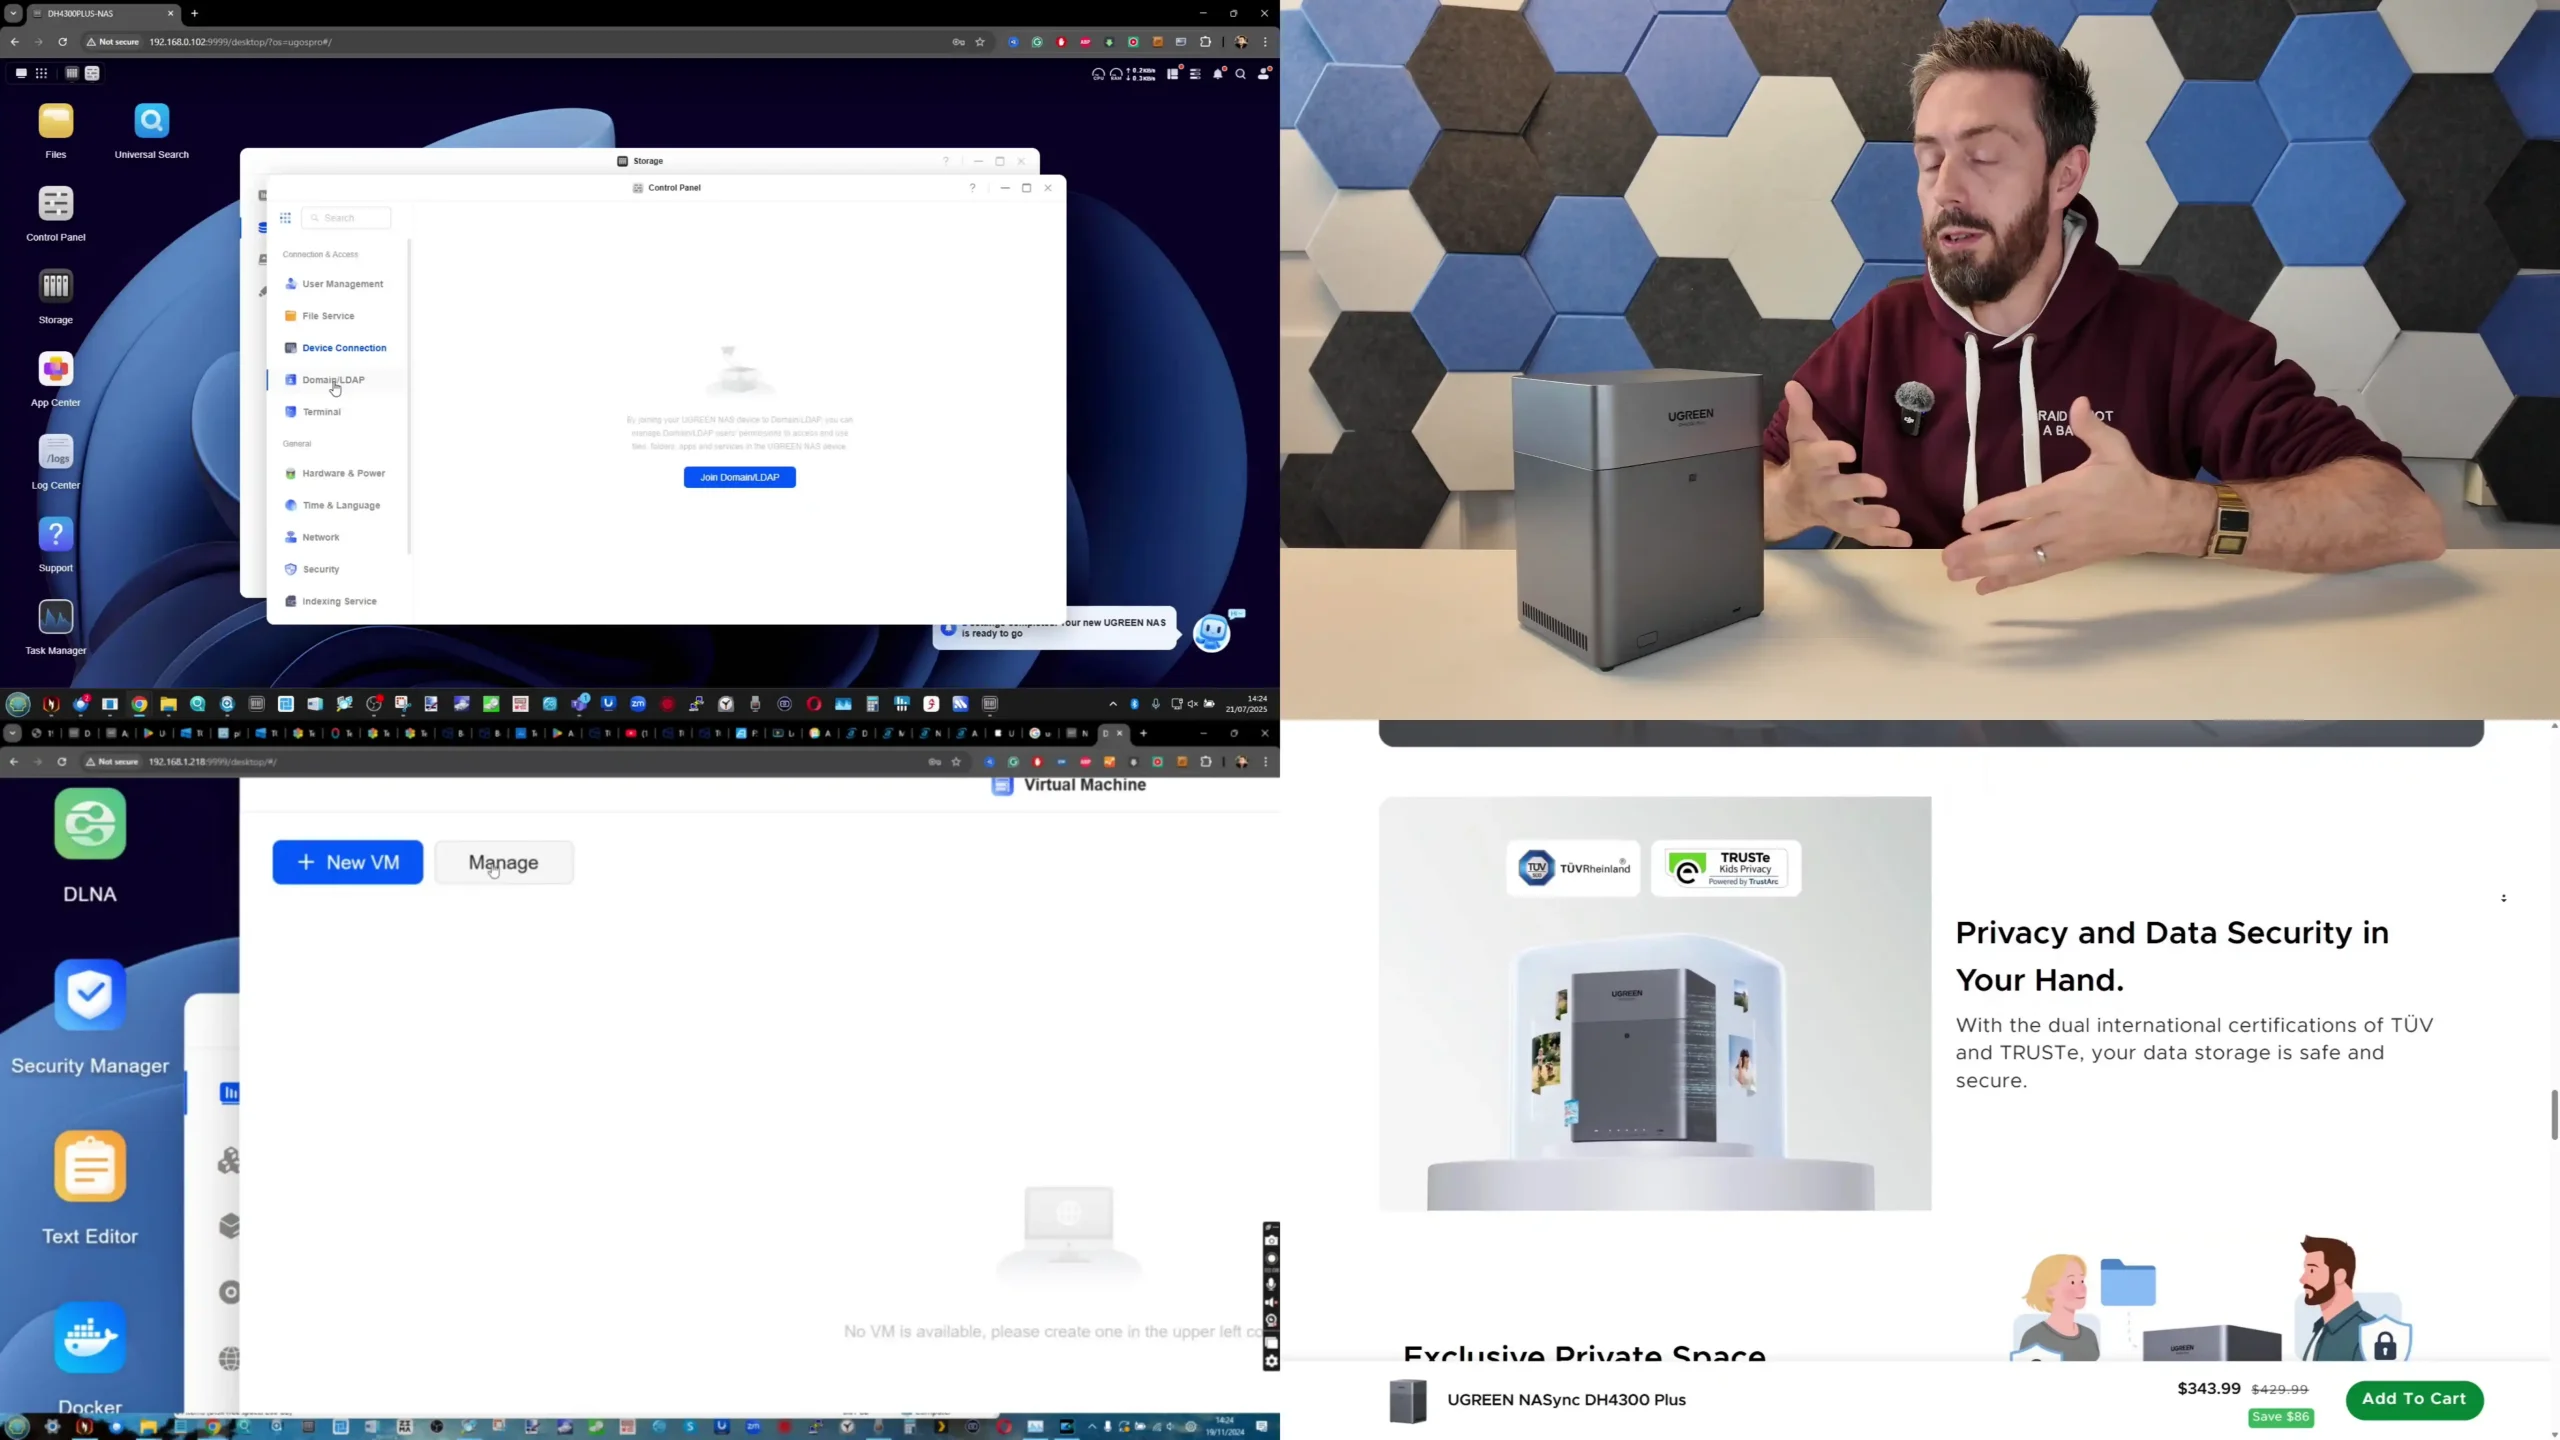

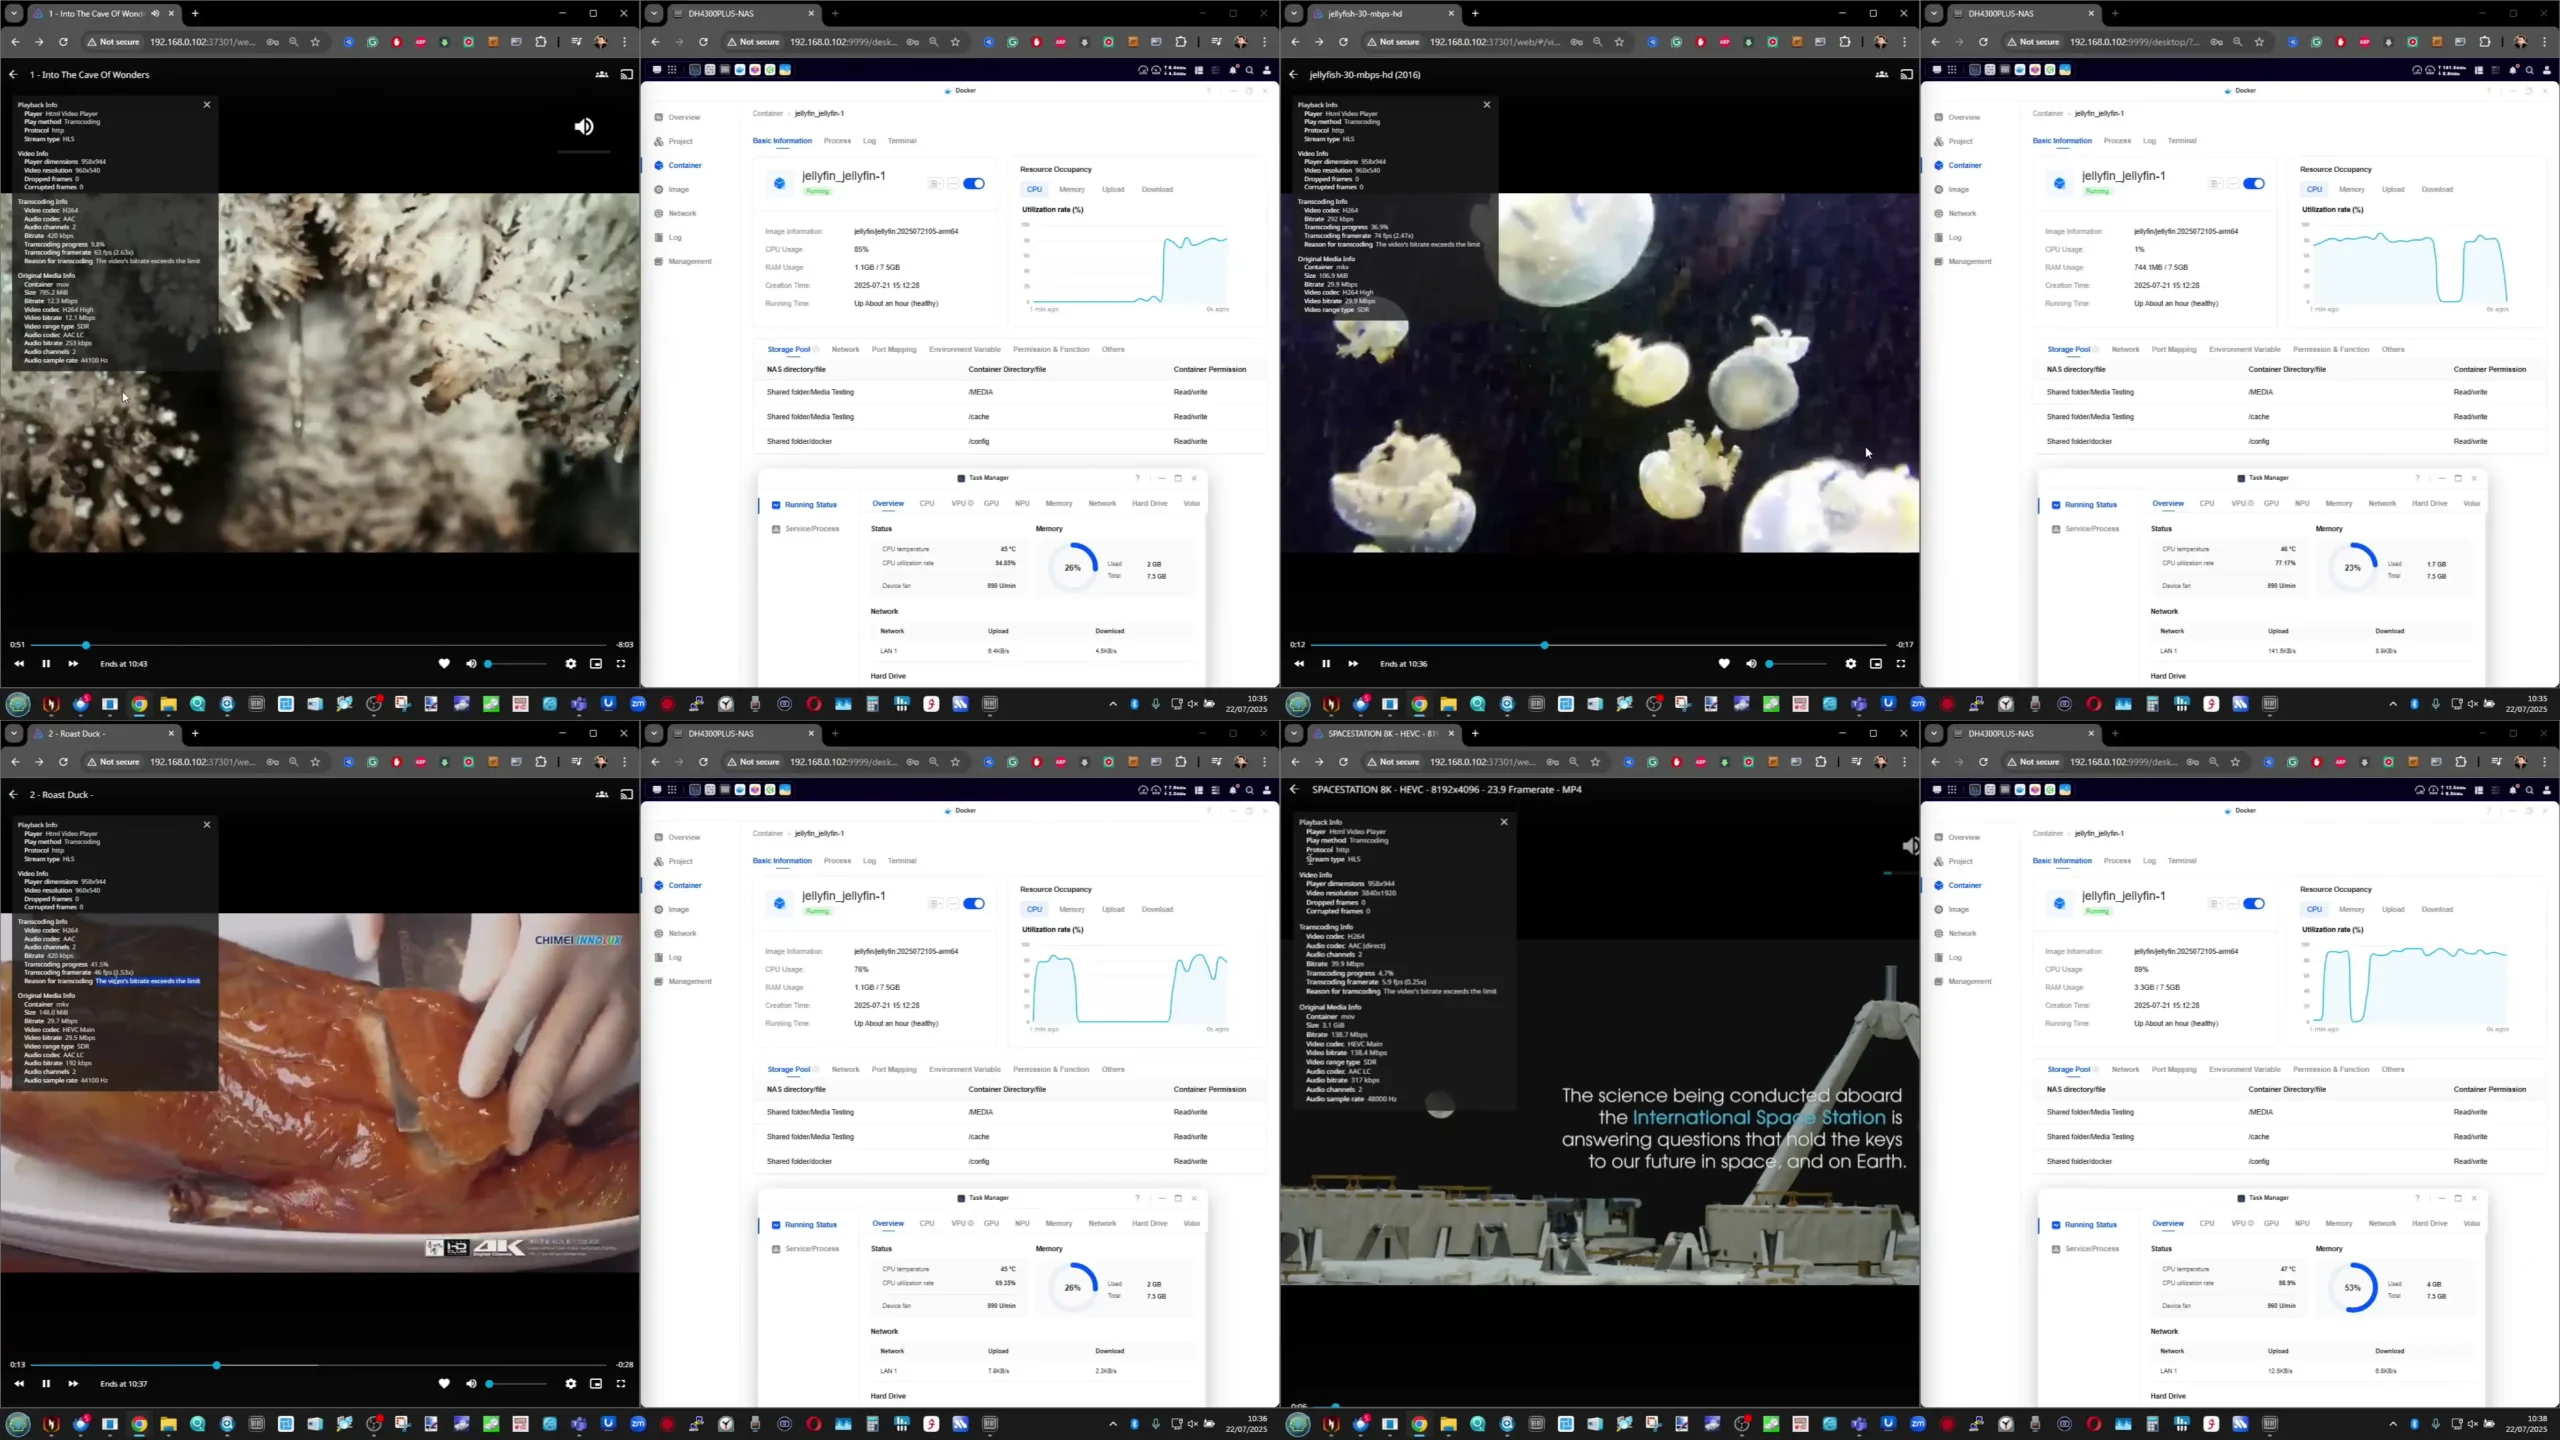

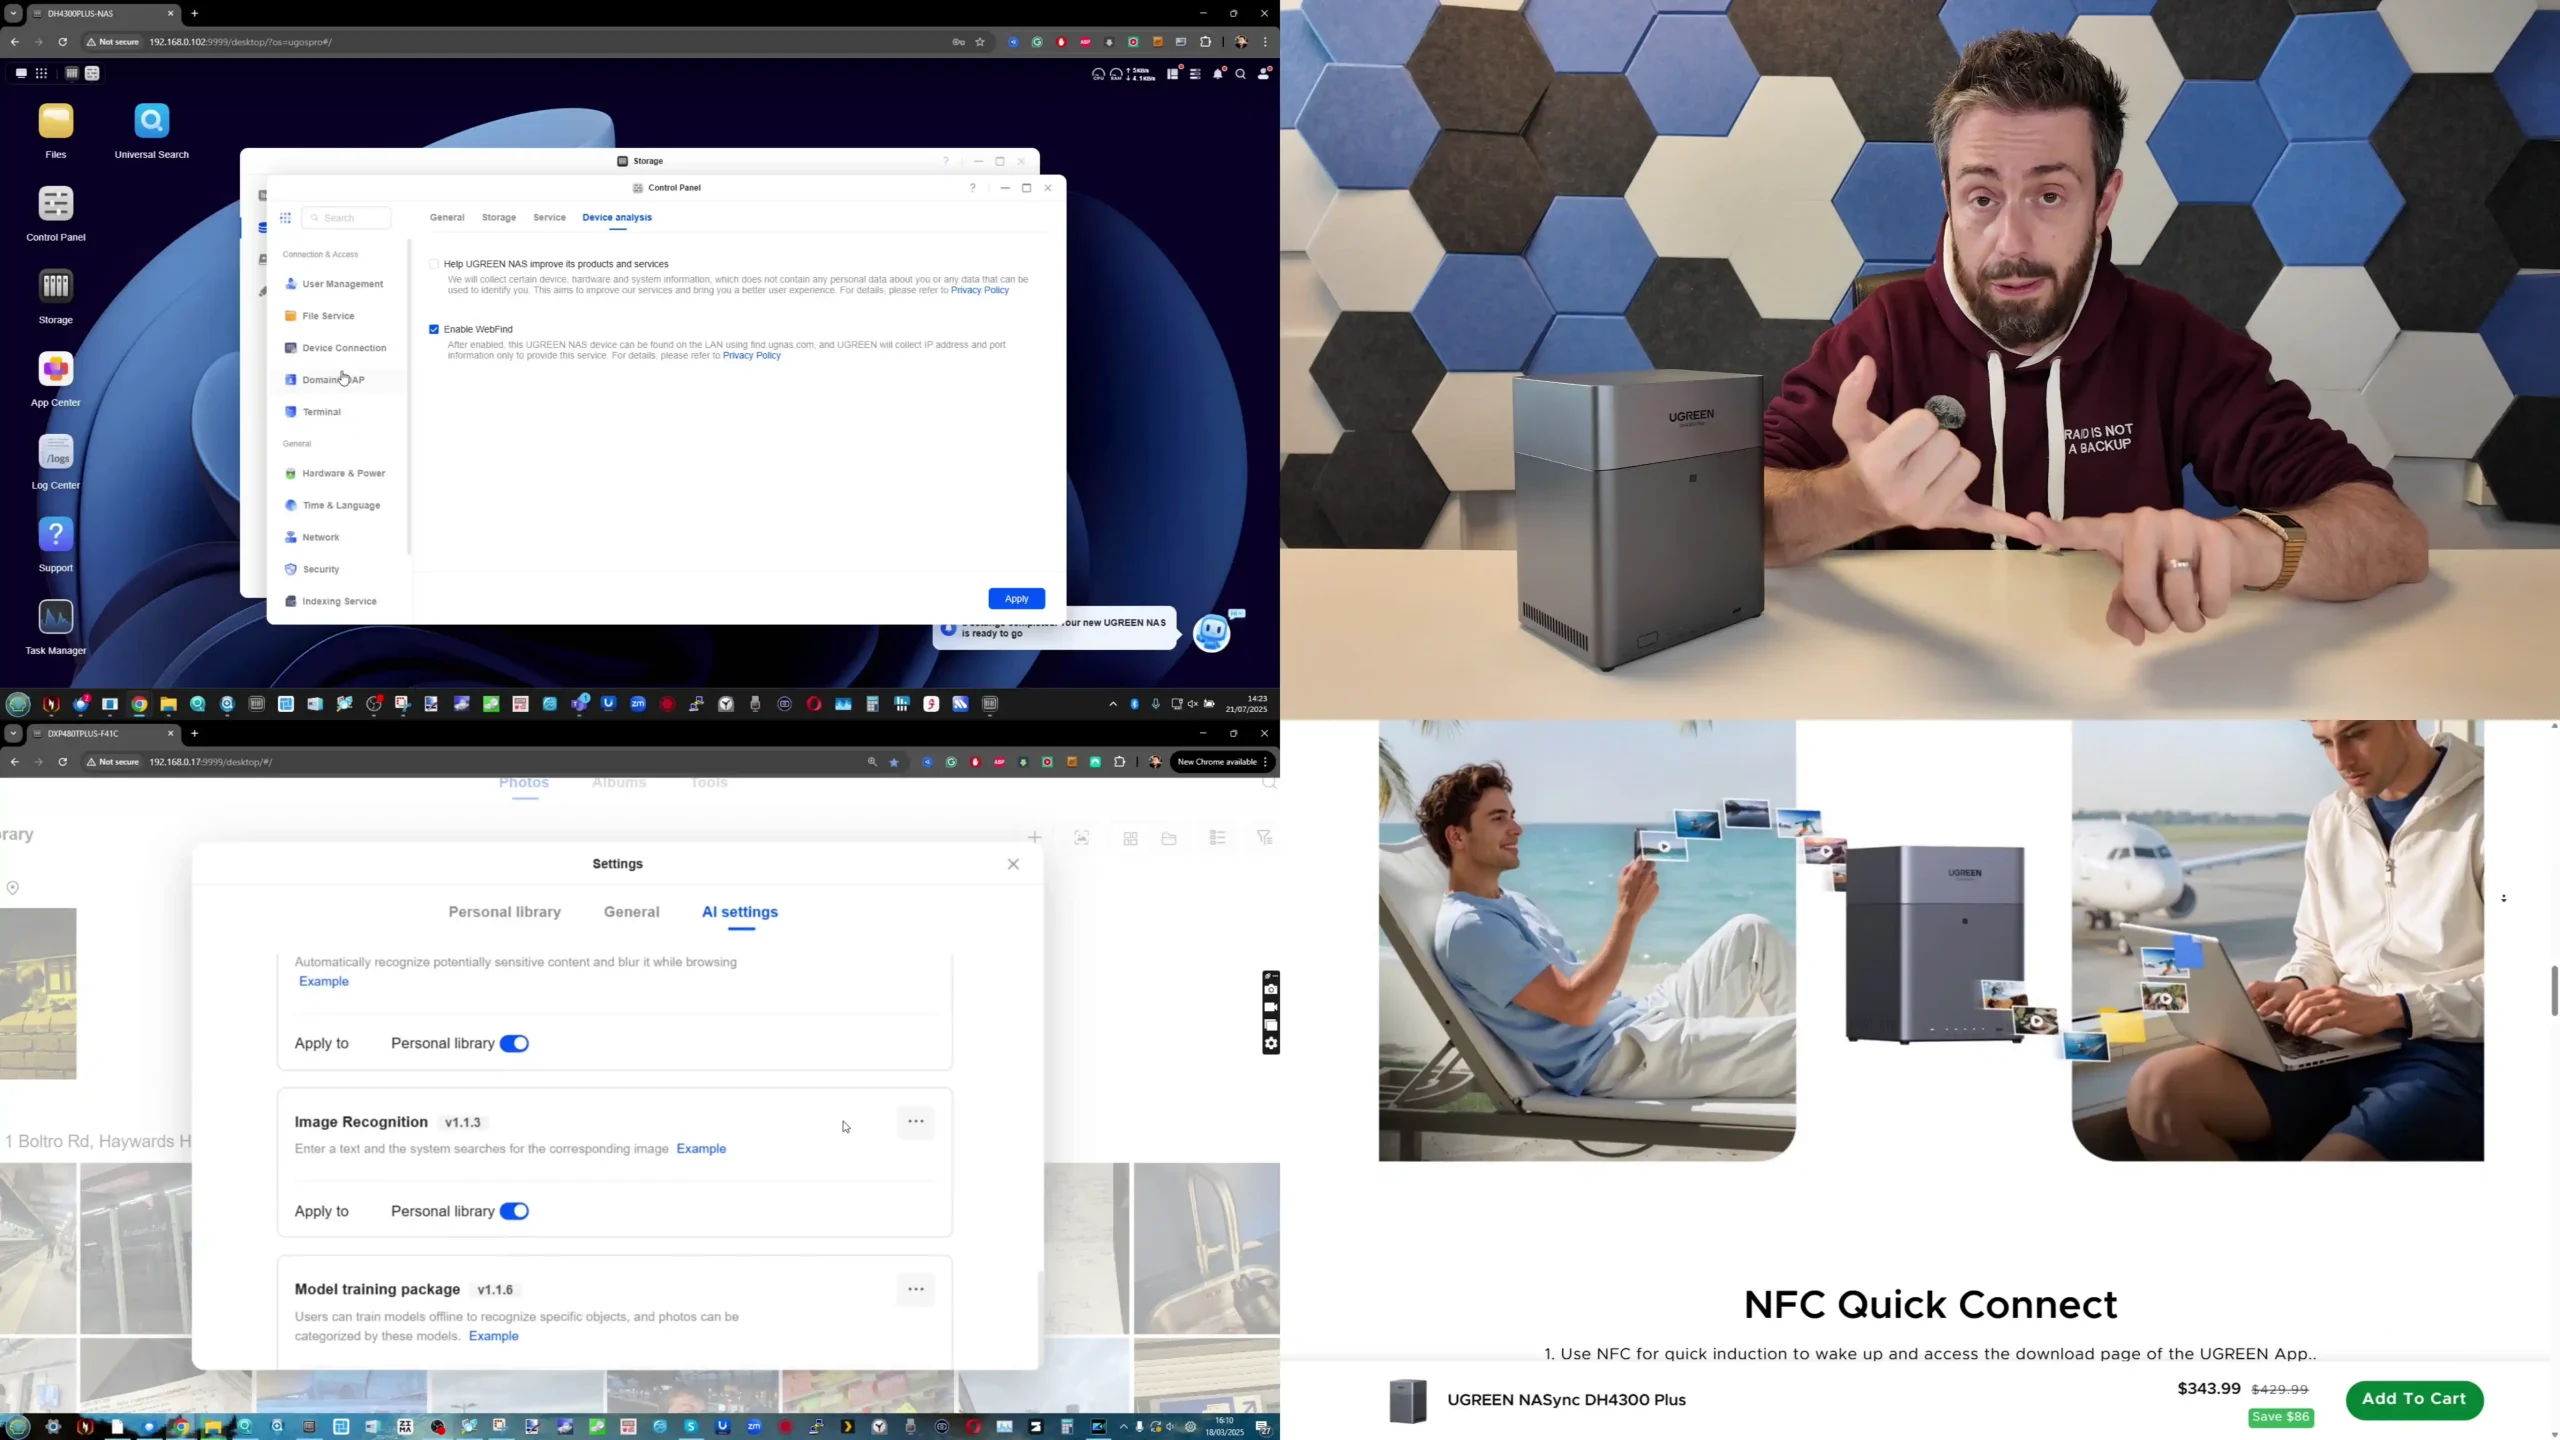

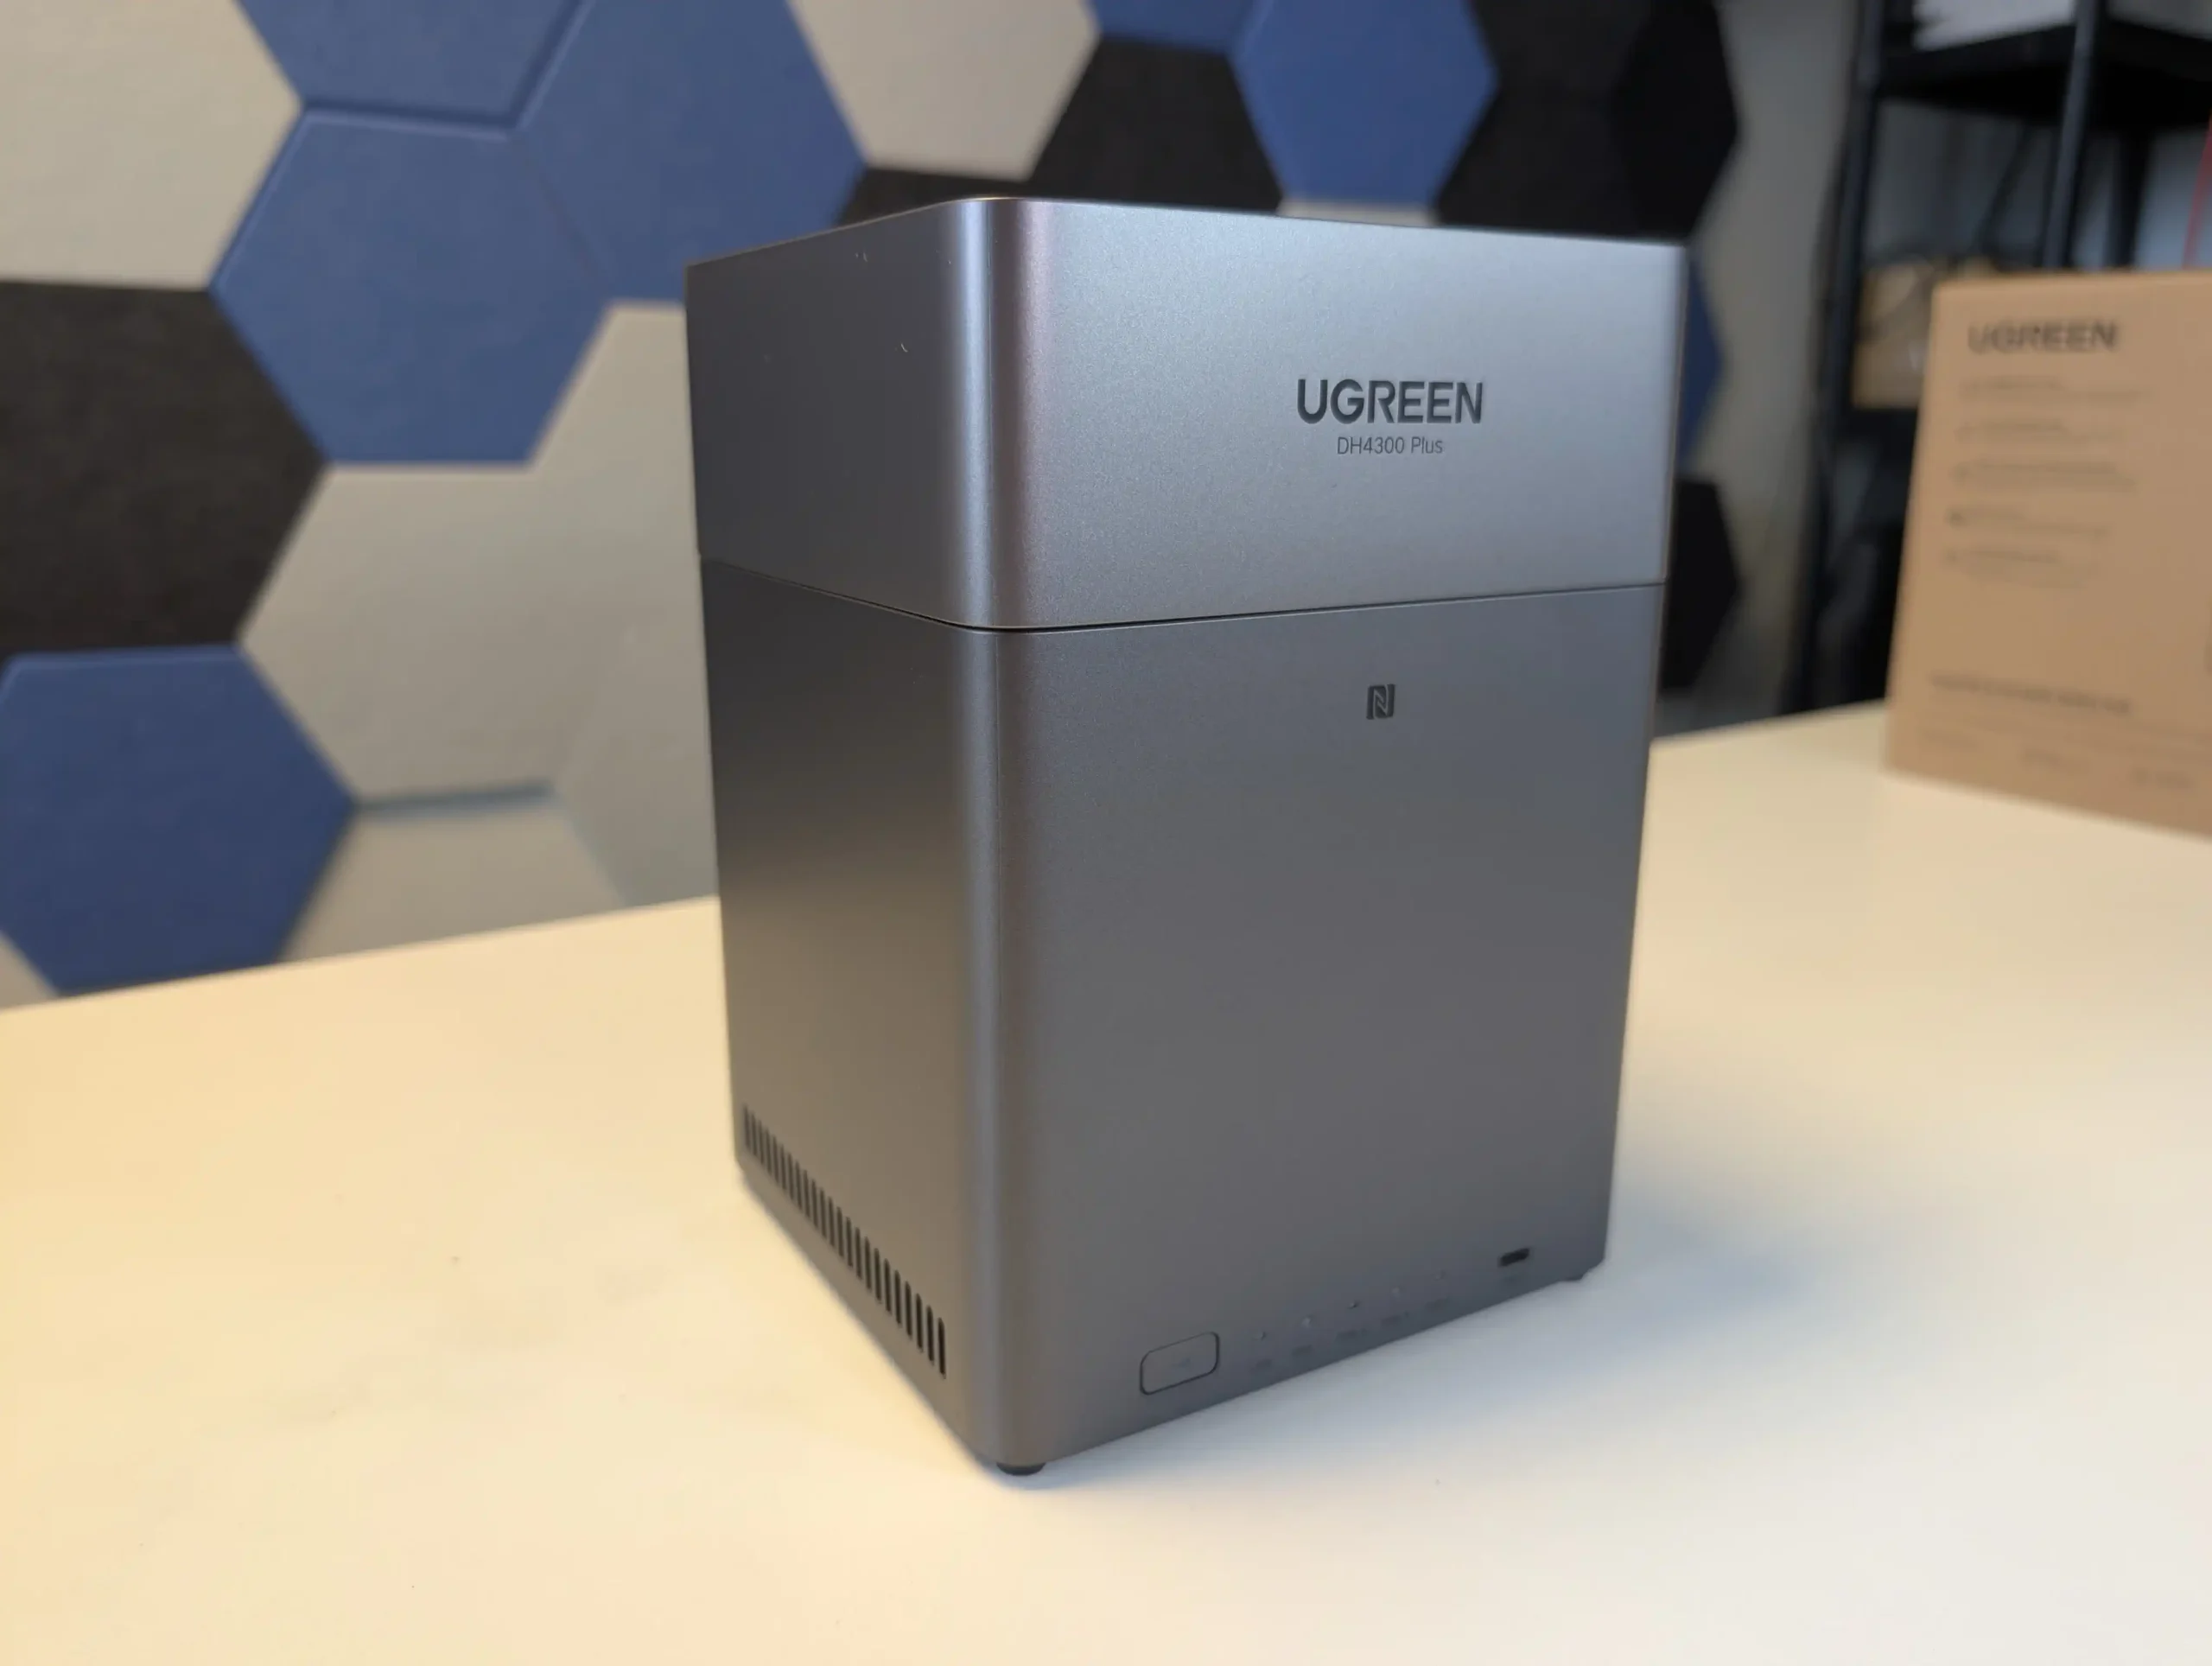
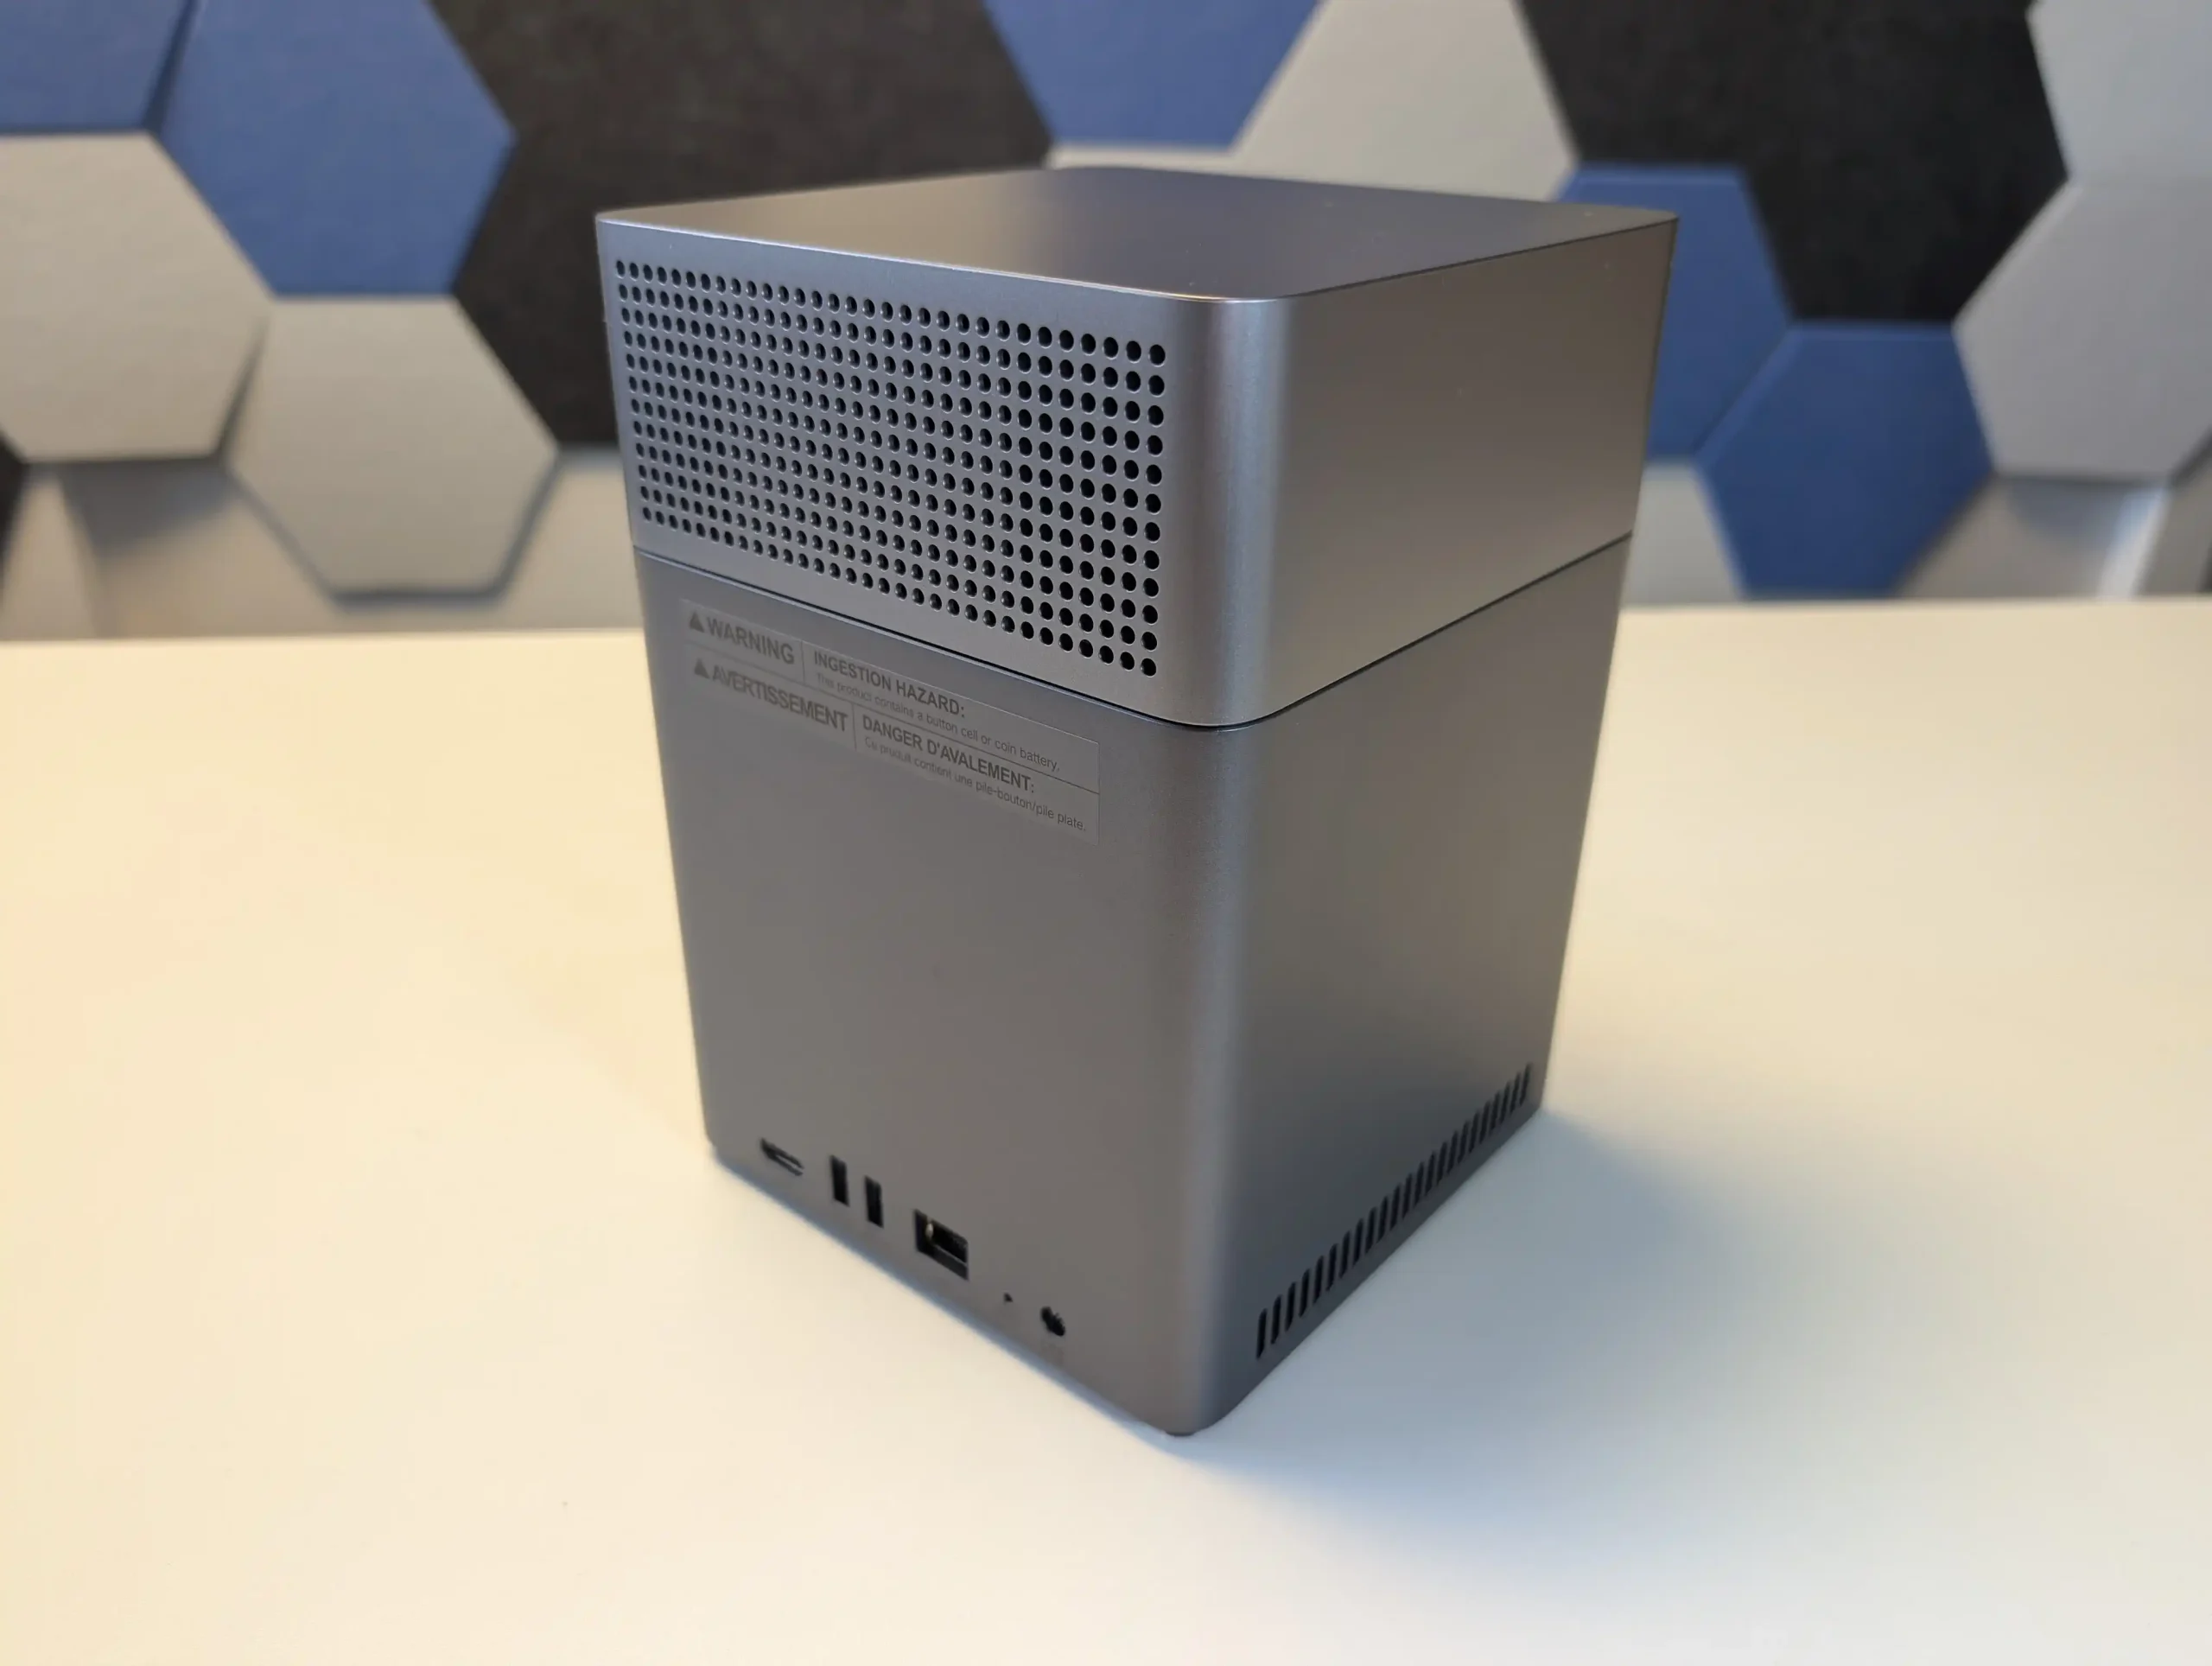

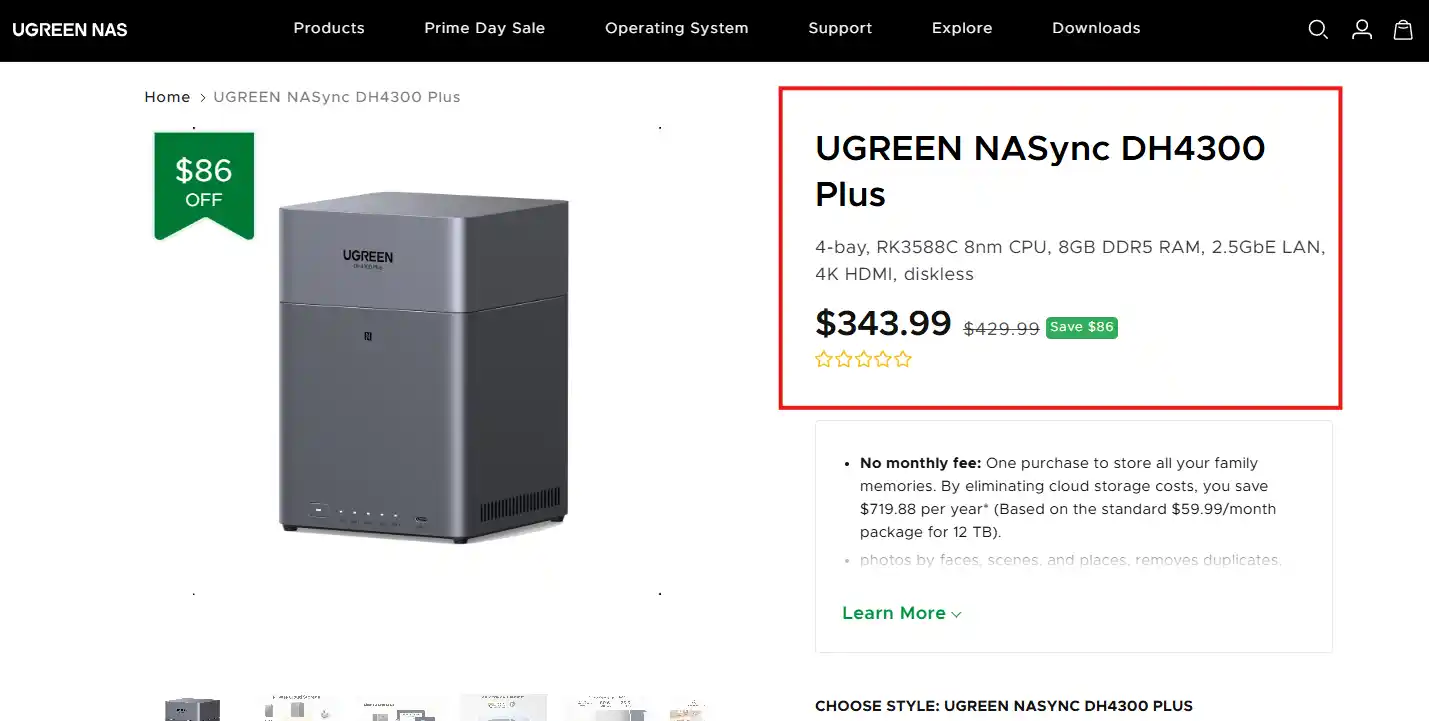


 Vous cherchez un NAS ? Téléchargez le guide gratuit pour faire le bon choix en quelques minutes

 TÉLÉCHARGER LE GUIDE