Top Fixes When Windows 11 Teams Is Not Working
With Microsoft Teams, you can collaborate and enjoy features such as chatting with colleagues, file and document sharing, meetings, and project work. In this article, we will show you the best solutions if Teams does not work in Windows 11.
Fix 1: Basic Solutions and Checks
Before going into anything complex, try these basic fixes.
- Ensure your computer meets the minimum requirements to run Teams.
- You can run Teams as an administrator by searching for Teams and clicking the Run as Administrator option.
- Restart your computer to fix minor glitches that prevent Teams from working.
If none of the above fixes the problem with Teams, you may proceed to the fixes below.
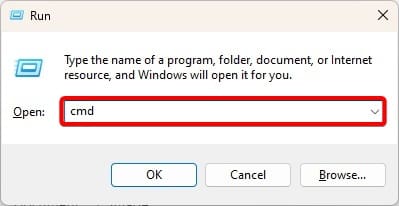
Fix 2: Clear your Teams cache
Clearing the cache is an important fix when Microsoft Teams refuses to start. If the cache is old or corrupted, this solution should work. If you have the new Teams built into Windows 11, this solution will not work, as there is no separate app data file. However, for the stand-alone Teams installation, you may follow the steps below.
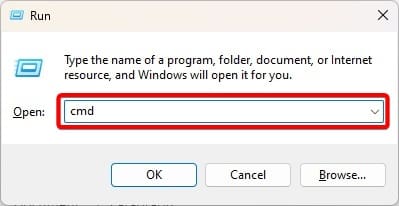
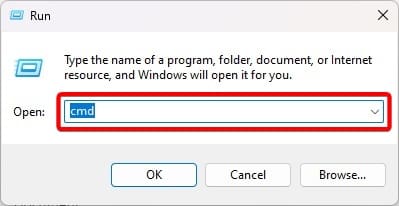
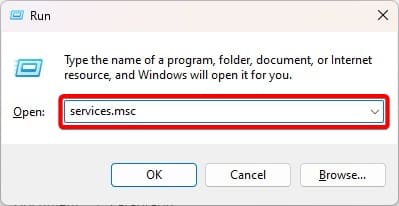
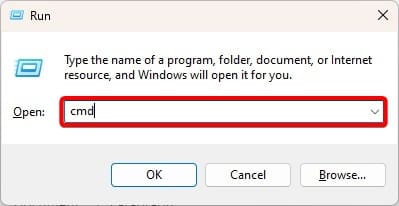
1. Press Windows + R to launch the Run dialog.
2. Type the command below and hit Enter.
%appdata%\Microsoft\Teams
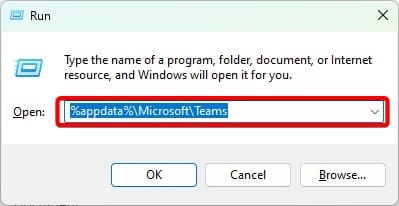
3. Delete the folder’s content and try to start Teams to see if the problem is fixed.
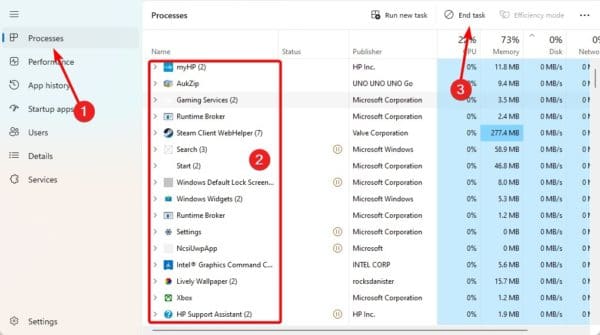
Fix 3: Force Close Microsoft teams in the Task Manager
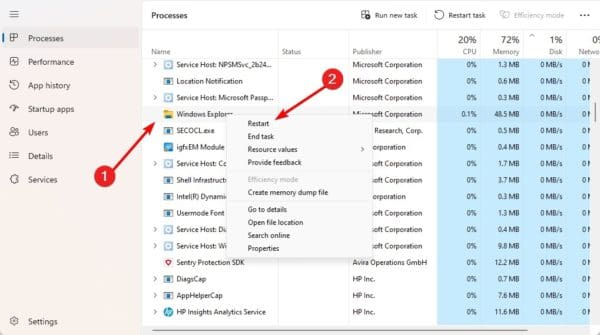
If you are having problems opening Teams, there is a chance that a Teams process is already running. To fix the problem, you will have to close this in the Task Manager. You may have to pause Task Manager updates to complete this process.
1. Press Ctrl + Shift + Esc to open the Task Manager.
2. Search for Microsoft Teams, right-click it, and click End task.

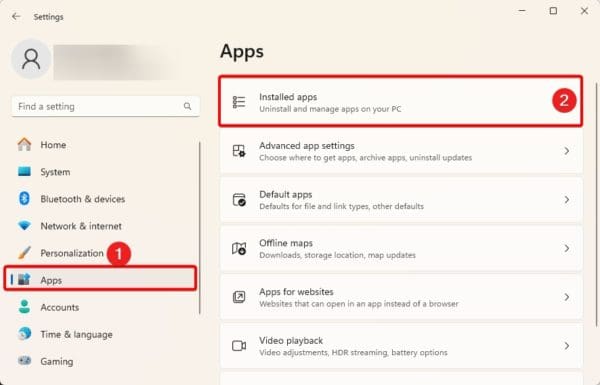
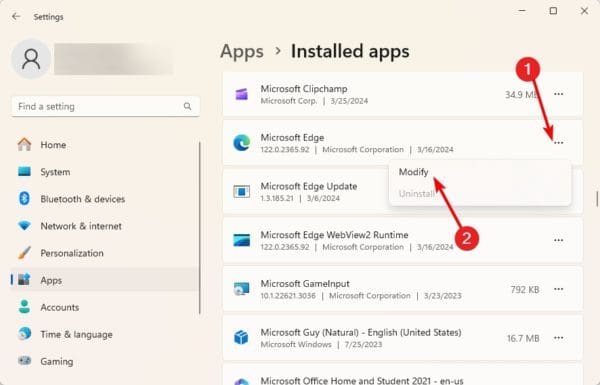
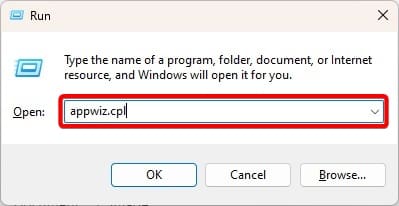
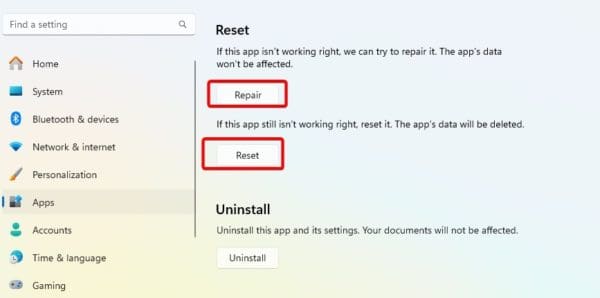
Fix 4: Repair and Reset Microsoft Teams
many native Windows 11 applications come with built-in Repair and Reset features. These features will scan for problems within the app and also take the app to its default settings. Follow the steps below to repair and reset Teams when it is not working.
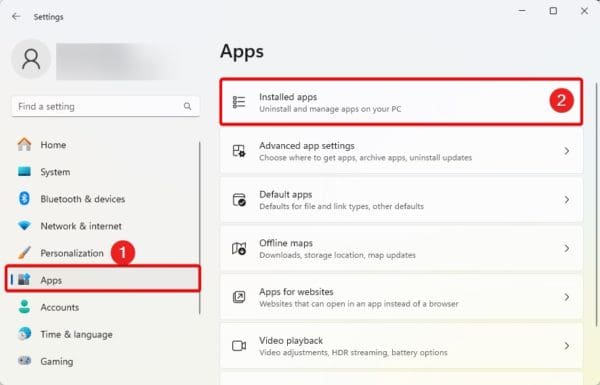
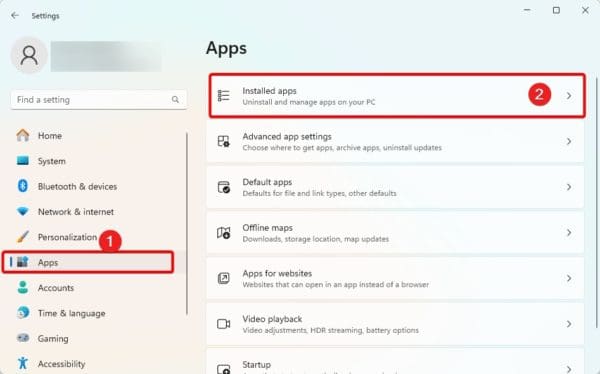
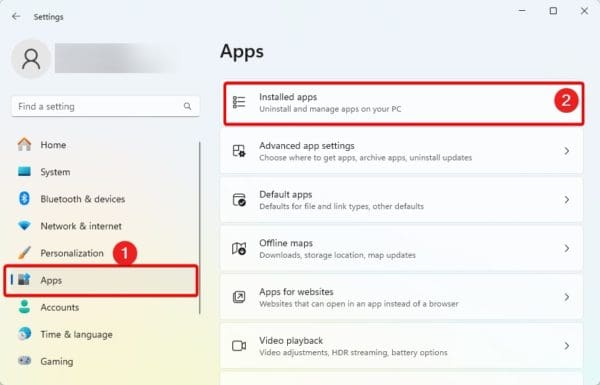
1. Press Windows + I to open the Windows 11 Settings app.
2. Click Apps on the left pane, then click Installed Apps on the right.
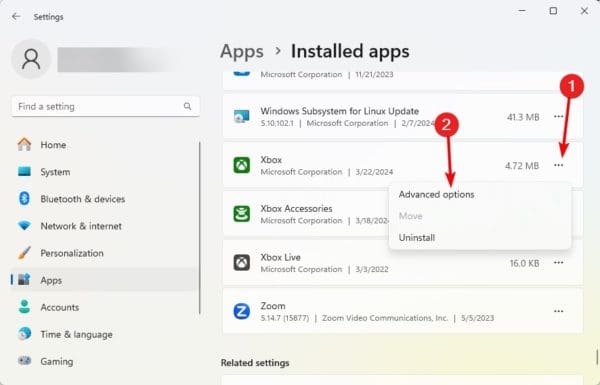
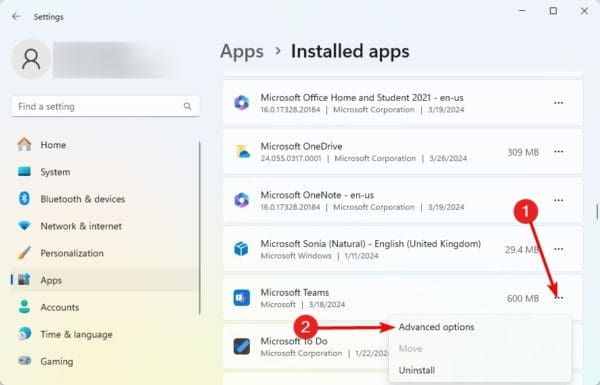
3. Click the 3 dots for Microsoft Teams, then click Advanced options.
4. Click the Repair button, then the Reset button, and verify the problem is fixed.
That is as much as we share. These solutions should help you if Teams is not starting, if it is stuck, or if it is not working properly on Windows 11.
What solution did you find most effective? Please tell us in the comment section.
The post Top Fixes When Windows 11 Teams Is Not Working appeared first on Next of Windows.