Comme vous le savez, j’aime beaucoup voyager… même si les finances ne le permettent pas toujours autant que je le souhaiterais. S’il m’arrive de partir pour le plaisir avec la famille ou les amis, je me déplace aussi régulièrement pour le travail. Justement, je suis actuellement en déplacement pour quelques jours. Je me suis dit que c’était l’occasion de partager quelques astuces et accessoires que j’utilise depuis des années et qui me facilitent vraiment la vie en voyage : sac à dos, pochettes, chargeurs, etc.
Accessoires indispensables pour voyager
Sac à dos valise
Commençons par le sac à dos valise. Mon premier date de 2018. Je l’ai toujours, même s’il commence à accuser le coup. Il faut dire qu’il a pas mal voyagé avec moi… mais aussi avec des potes et des collègues à qui je l’ai prêté. La marque existe toujours (Cabin Max) et elle a complètement revu sa gamme depuis. Le principe reste le même : c’est un sac à dos assez large (pas forcément très élégant), suffisamment pour emporter l’essentiel lors d’un déplacement de deux nuits. Chaque membre de la famille a le sien, c’est très pratique.
On peut facilement y glisser quelques vêtements de rechange (t-shirts, pantalon, sous-vêtements…), une trousse de toilette, mon ordinateur portable, chargeur, batterie externe… Le gros avantage, c’est qu’il est facilement accepté en cabine comme bagage à main dans les avions. Résultat : pas de bagage en soute.
Sac à dos
Autre accessoire indispensable : le sac à dos. C’est clairement votre meilleur allié en déplacement. J’en emmène toujours un, que ce soit pour un court séjour ou un voyage plus long. Rien de très original de mon côté, j’utilise un Eastpak Wyoming avec un renfort sur la partie basse. Pourquoi celui-là ? D’abord pour le style : j’aime bien son aspect bicolore. Mais aussi parce qu’il garde mieux sa forme dans le temps. Il est parfait pour une balade, une journée à la plage, etc. Il m’est arrivé d’utiliser mon sac à dos valise (mentionné ci-dessus) comme sac à dos classique, mais il est assez encombrant.
Sac sous vide manuel
On les appelle souvent sacs compactor : ce sont des sacs de rangement sous vide. J’en emmène généralement un ou deux avec moi. Ils sont parfaits pour ranger les sous-vêtements, les chaussettes, t-shirts… En revanche, je déconseille de les utiliser pour les chemises, qui risquent de se froisser. Ils peuvent aussi servir au retour pour isoler les vêtements sales. Le gain de place dans un sac est réel. Le vide d’air se fait simplement en roulant le sac ou en appuyant dessus doucement pour expulser l’air. Il existe plusieurs tailles et les prix sont très accessibles. Et bien sûr, ils sont réutilisables
Pochette à rabat
Lorsque je pars en déplacement professionnel et que je dois emporter une chemise (ou plusieurs), je la glisse dans une pochette à rabat. Je replie légèrement les bords de la pochette pour créer un peu d’épaisseur pour protéger la chemise et limite les plis pendant le transport. Ce n’est évidemment pas une solution miracle, mais ça fonctionne plutôt bien.
Une fois arrivé à destination (généralement à l’hôtel), je passe simplement à la réception pour demander un fer à repasser. En quelques minutes, la chemise retrouve une allure correcte. C’est une petite astuce simple qui évite de transporter une housse à vêtements beaucoup plus encombrante.
Chargeurs
Je mentionnais les chargeurs plus haut : j’en ai plusieurs, mais j’ai récemment investi dans un adaptateur de voyage Belkin de 100 W GaN et il est super pratique. Il permet de choisir entre trois fiches : US, UK et EU. Il dispose aussi de deux ports USB-C et d’un port USB-A. On peut donc charger simultanément un ordinateur portable, une tablette et un téléphone. Il est compact, discret… et franchement très pratique. En revanche, il assez cher, comptez environ 40 €.
Quand on voyage avec Madame, j’ajoute ce petit Anker 67 W GaN pliable. En effet, la fiche secteur peut se replier sur le chargeur. Il ne prend pas beaucoup de place. Il peut recharger sans souci un ordinateur portable et un téléphone simultanément.
Batterie externe
Je n’utilise qu’une à deux batteries externes. J’avoue que j’ai une préférence pour la marque Anker… je n’ai jamais eu de problème (même avec d’autres produits de la marque). La version MagSafe de 5000 mAhme suit partout. Elle offre un bon compromis entre capacité, rapidité de charge, finesse, légèreté… idéale pour les randonnées ou les longues journées sur les salons.
Écouteurs
Depuis plus de 15 ans, j’utilise des écouteurs (ou un casque) avec réduction de bruit. Les premiers étaient des Sennheiser assez encombrants (2010), qui fonctionnaient avec 2 piles, un micro déporté et un DSP plutôt efficace pour l’époque. Depuis, la miniaturisation est passée par là… On trouve aujourd’hui des écouteurs qui tiennent dans la paume de la main et qui sont extrêmement performants. De mon côté, j’utilise des AirPods Pro 3 au quotidien (lire mon article).
Traqueur
J’ai aussi un AirTag que je place dans ma valise ou dans mon sac. Je ne vais pas raconter toute l’histoire (ce serait trop long), mais cet AirTag m’a sauvé deux fois : une fois dans un train dans un sac et une autre fois dans un aéroport avec une valise égarée. J’ai dû en racheter un récemment, mais vu le prix, j’ai testé une alternative : le UGREEN Smart Finder Tag. Il coûte environ deux fois moins cher et fonctionne tout aussi bien.
Gourde
J’ai une petite gourde de 500 ml qui me suit depuis des années. C’est extrêmement pratique, surtout lors de longs trajets. On peut tout à fait voyager avec une gourde en avion, mais il faudra la vider avant de passer les contrôles de sécurité. Dans la plupart des aéroports, vous trouverez ensuite des fontaines à eau (souvent près des toilettes) pour la remplir.
Couteau suisse
Voyager avec un couteau en avion est interdit… enfin, pas totalement. Si la lame fait moins de 6 cm : aucun souci en Europe (il faut faire attention aux règles locales). Cela dit, je n’ai jamais vraiment tenté. En revanche, il est tout à fait possible de le mettre dans un bagage en soute. Si vous voyagez en train, aucun souci… personnellement, j’aime bien avoir avec moi un couteau Suisse.
En synthèse
Voilà, vous en savez maintenant un peu plus sur ce qui m’accompagne lors de mes déplacements personnels et professionnels. Rien de révolutionnaire dans cette liste, mais ce sont des accessoires que j’utilise depuis des années et qui m’ont souvent simplifié la vie en voyage.
Et vous, avez-vous des astuces ou des produits qui vous suivent systématiquement lors de vos déplacements ? N’hésitez pas à laisser un commentaire pour partager vos recommandations. C’est toujours intéressant de découvrir les habitudes des autres voyageurs
The TerraMaster F2-425 takes the same underlying hardware platform as the F4-425 and adapts it to a smaller 2 bay format aimed at simpler home and small office environments. With the same Intel Celeron N5095 processor, 4GB of upgradeable DDR4 memory, and single 2.5GbE connection, it delivers comparable compute capability in a more compact enclosure that prioritizes quiet operation and minimal physical footprint. The appeal of the F2-425 is less about expansion and more about practicality, targeting users who want centralized storage, backups, and media services without managing a larger multi drive system. It fits particularly well in scenarios where space, noise, and cost matter more than raw throughput or long term capacity growth. Rather than competing with higher end 2 bay NAS units that include NVMe caching or faster networking, the F2-425 focuses on providing a straightforward Intel based NAS experience that covers common use cases while leaving room for memory upgrades or alternative operating systems if requirements change later.
SOFTWARE - 8/10
HARDWARE - 6/10
PERFORMANCE - 6/10
PRICE - 10/10
VALUE - 9/10
7.8
PROS
Accessible Entry Into Intel NAS for Smaller Setups in the F2-425 Simplified Capacity Planning for Home Users on the F2-425 Quiet, Consistent Performance in a Compact Chassis of the F2-425 Straightforward Management for Individual and Family Use with the F2-425 Long Term Flexibility Beyond the Default Software of the F2-425
CONS
Network Bandwidth Ceiling Reached Quickly in the F2-425 No SSD Cache or High Speed Tier Options on the F2-425 Limited Headroom for Future Software Demands of the F2-425 Hardware Feature That Adds Little Day to Day Value in the F2-425 Narrow Upgrade Path Compared to Nearby Alternatives of the F2-425
Accessible Entry Into Intel NAS for Smaller Setups in the F2-425
The F2-425 stands out by bringing an Intel x86 platform into the more compact and cost sensitive 2 bay NAS category. Many 2 bay systems at this size and price rely on ARM processors, which can limit software compatibility and long term flexibility. By contrast, the F2-425 provides an Intel based environment that supports a broader range of applications, containers, and services, while remaining relatively affordable for home and small office users. Its value is less about raw performance and more about flexibility, giving users access to an x86 ecosystem without stepping up to more expensive 2 bay models that add NVMe caching or higher speed networking. For buyers who want a simple, compact NAS that can comfortably handle file sharing, backups, and media services, but who also want the option to expand functionality through third party applications or alternative operating systems, the F2-425 offers a balanced and practical entry point.
Simplified Capacity Planning for Home Users on the F2-425
On the F2-425, TRAID plays a slightly different role and aligns more closely with simplicity than scale. In a 2 bay NAS, users are often limited to RAID 1 or single disk configurations, which can make capacity upgrades feel restrictive. TRAID allows the F2-425 to handle mismatched drive sizes more gracefully, reducing the penalty of upgrading one drive at a time. This is particularly useful for home users who may start with smaller disks and later replace them individually rather than investing in a matched pair upfront.
The system abstracts much of the complexity away from the user, making storage expansion more approachable for those who do not want to manually manage RAID levels or rebuild arrays. While the absolute capacity ceiling is lower than on the 4 bay model, the F2-425 benefits from a storage system that prioritizes ease of use and gradual growth rather than strict optimization.
Quiet, Consistent Performance in a Compact Chassis of the F2-425
The F2-425 emphasizes steady and predictable performance rather than raw throughput, which aligns well with its smaller enclosure and typical use cases. With fewer drive bays and a lower likelihood of simultaneous high demand from multiple users, the Intel Celeron N5095 is generally sufficient for file serving, media playback, and routine background tasks. Hardware assisted video decoding allows the system to handle 4K media streaming with reduced CPU load, helping maintain responsiveness even during playback. The smaller chassis and lower overall thermal output also contribute to consistent behavior under everyday workloads, without aggressive fan ramping in most scenarios. For users placing the NAS in a living space or home office, this balance between performance and noise control can be more relevant than peak throughput figures.
Straightforward Management for Individual and Family Use with the F2-425
On the F2-425, the same TOS 6 platform is presented in a context that favors simplicity and accessibility. The interface is largely self contained and can be managed through a browser or the TNAS mobile application, which is useful for users who want basic control without learning advanced system administration. Features such as automated photo backups, shared folders, and user account isolation are easy to configure and align well with typical home usage.
In a smaller NAS, the emphasis is less on complex workflows and more on reliability and ease of access, and TOS 6 supports this by consolidating most tasks into a single interface. For users moving from external drives or cloud storage, the software environment on the F2-425 provides a relatively gentle transition into centralized network storage.
Long Term Flexibility Beyond the Default Software of the F2-425
The F2-425 also benefits from its openness as an x86 based system, which can be especially relevant in a smaller NAS that may change roles over time. While many users will initially deploy it as a simple file server or media box using TOS 6, the ability to switch to a different operating system later allows the hardware to be repurposed rather than replaced. This could include running a lightweight home server, experimenting with container workloads, or using it as a learning platform for NAS and Linux based systems. In a compact 2 bay device, this flexibility helps offset the more limited expansion options by giving the hardware multiple potential use cases across its lifespan. For users who want a small NAS that is not locked into a single software path, the F2-425 offers a degree of freedom that is less common in this size and price range.
Network Bandwidth Ceiling Reached Quickly in the F2-425
On the F2-425, the same single 2.5GbE port presents a different but still relevant constraint. Although a 2 bay NAS is less likely to push extreme throughput compared to a 4 bay system, even a pair of modern hard drives in RAID 0 or during parallel access can approach the limits of a 2.5GbE connection. This reduces the benefit of faster drives and makes performance gains from certain configurations less noticeable in real world use.
For users who plan to use SSDs or who already have a multi gigabit home network, the absence of faster native networking may feel restrictive. As with the F4-425, expansion via USB adapters is possible, but it adds another dependency rather than providing a clean, integrated solution. For a device positioned as an Intel based NAS, the networking capabilities may feel conservative relative to current expectations.
No SSD Cache or High Speed Tier Options on the F2-425
On the F2-425, the lack of NVMe support affects usability in a more subtle but still meaningful way. A 2 bay NAS often benefits from SSD caching to compensate for limited drive count, improving responsiveness during file browsing, small file access, and application use. Without NVMe slots, users are restricted to SATA based storage, and dedicating a drive bay to an SSD for caching or fast storage comes at the cost of usable capacity or redundancy. This reduces flexibility, especially for users who want to mix performance and safety in a compact system. While the F2-425 can still perform well for basic file serving and media playback, it does not offer a clear upgrade path for users who later want faster storage tiers without replacing the system entirely. In this size class, the absence of NVMe support reinforces its role as a straightforward storage appliance rather than a performance tunable platform.
Limited Headroom for Future Software Demands of the F2-425
In the F2-425, the same N5095 processor is generally adequate for its intended use cases, but it still represents a compromise when viewed against newer entry level Intel CPUs. For a compact NAS, the processor is sufficient for file sharing, backups, and media playback, but it offers less margin for expanding into additional services or more demanding applications. As operating systems and third party tools evolve, performance expectations tend to rise, and the older architecture may reach its limits sooner than more recent alternatives. This does not prevent the F2-425 from performing its current role effectively, but it does mean that users planning to grow their usage beyond basic tasks may encounter constraints earlier in the system’s lifespan. The CPU choice reinforces the device’s position as an entry level Intel NAS rather than a long term performance platform.
Hardware Feature That Adds Little Day to Day Value in the F2-425
On the F2-425, the HDMI port has even less practical relevance for most users. Given the device’s smaller size and typical placement in home environments, it is unlikely to be connected directly to a display for regular interaction. As with the larger model, the HDMI output does not provide access to a graphical interface or media center functionality under the default operating system. This limits its usefulness to diagnostics or alternative OS installation scenarios.
For users expecting local playback or direct control via a monitor and keyboard, the presence of HDMI may create expectations that are not met in practice. In everyday use, the port remains largely unused, making it more of a technical inclusion than a functional feature for the target audience.
Narrow Upgrade Path Compared to Nearby Alternatives of the F2-425
The F2-425 faces a similar issue within TerraMaster’s broader range, particularly when compared to other compact Intel based NAS models that include NVMe slots or more efficient processors. While the initial cost is lower, the lack of internal expansion options means users are largely locked into the performance profile they purchase on day 1. For buyers who later decide they want faster storage tiers, improved networking, or more responsive application performance, there is limited scope to evolve the system without replacing it entirely. In this context, the F2-425 works best for clearly defined and stable use cases, but it is less forgiving if requirements change. The presence of more flexible alternatives nearby in the lineup makes this limitation more noticeable when evaluating long term ownership.
Conclusion and Verdict of the F2-425 Review – Should You Buy?
The TerraMaster F2-425 offers a compact and accessible route into Intel based NAS ownership, focusing on everyday storage, backups, and media services rather than advanced performance tuning. Its smaller form factor, quieter operation, and simpler capacity planning align well with home and small office environments where space and ease of use matter more than throughput. The inclusion of TOS 6 and support for alternative operating systems provides flexibility at the software level, helping extend the usefulness of the hardware across different roles over time. However, like its 4 bay counterpart, the F2-425 has clearly defined limits. The lack of NVMe support and faster native networking means there is little room to grow into more demanding workloads, and the aging processor reinforces its position as an entry level Intel NAS. For users with modest, stable requirements, it can serve reliably as a central data hub. For those who anticipate expanding performance needs or experimenting with higher speed storage and networking, nearby alternatives may offer better long term value, even if they come at a higher initial cost.
This description contains links to Amazon. These links will take you to some of the products mentioned in today's content. As an Amazon Associate, I earn from qualifying purchases. Visit the NASCompares Deal Finder to find the best place to buy this device in your region, based on Service, Support and Reputation - Just Search for your NAS Drive in the Box Below
Need Advice on Data Storage from an Expert?
Finally, for free advice about your setup, just leave a message in the comments below here at NASCompares.com and we will get back to you.Need Help?
Where possible (and where appropriate) please provide as much information about your requirements, as then I can arrange the best answer and solution to your needs. Do not worry about your e-mail address being required, it will NOT be used in a mailing list and will NOT be used in any way other than to respond to your enquiry.
[contact-form-7]
TRY CHAT Terms and Conditions
If you like this service, please consider supporting us.
We use affiliate links on the blog allowing NAScompares information and advice service to be free of charge to you.Anything you purchase on the day you click on our links will generate a small commission which isused to run the website. Here is a link for Amazon and B&H.You can also get me a Ko-fi or old school Paypal. Thanks!To find out more about how to support this advice service checkHEREIf you need to fix or configure a NAS, check FiverHave you thought about helping others with your knowledge? Find Instructions Here
Or support us by using our affiliate links on Amazon UK and Amazon US
Alternatively, why not ask me on the ASK NASCompares forum, by clicking the button below. This is a community hub that serves as a place that I can answer your question, chew the fat, share new release information and even get corrections posted. I will always get around to answering ALL queries, but as a one-man operation, I cannot promise speed! So by sharing your query in the ASK NASCompares section below, you can get a better range of solutions and suggestions, alongside my own.
L’ASUSTOR AS6704T v2 (nom complet Lockerstor 4 Gen2+) constitue une évolution discrète du Lockerstor 4 Gen2. La dénomination peut prêter à confusion : les différences entre les références sont très ténues, le modèle intégrant simplement un « v2 » tandis que le nom commercial ajoute un « + ».
Du point de vue matériel, les changements restent très limités :
le v2 intègre deux ports réseau 5 Gb/s, au lieu de deux ports 2,5 Gb/s sur la version précédente ;
il dispose d’un port USB 2.0 supplémentaire à l’arrière.
Pour le reste, les spécifications demeurent identiques :
processeur Intel Celeron N5105 Quad Core ;
4 Go de mémoire vive ;
4 emplacements NVMe ;
la possibilité d’installer une carte réseau 10 Gb/s à la place de la carte d’extension NVMe.
Vous trouverez un tableau comparatif complet entre les deux modèles sur le site d’Asustor.
Le prix, en revanche, a évolué. La première génération était proposée autour de 700 € lors de notre test d’octobre 2022, tandis que la v2 est affichée à 833 € en mars 2026 ( probablement sous l’effet de l’inflation).
La question reste donc ouverte : cette évolution vaut-elle réellement la peine ?
Conditions des tests
Pour réaliser ces tests, je me suis équipé d’un switch UGREEN 2,5 Gb/s, ainsi que d’un adaptateur USB-C vers réseau 2,5 Gb/s de la même marque. Je ne suis malheureusement pas équipé de SSD NVMe et leur prix actuel ne m’a pas permis de tester cette partie du NAS. Cependant, les performances en NVMe ne devraient pas avoir significativement changés depuis notre test d’octobre 2022. J’ai donc configuré le NAS avec : deux SSD SATA de 2 To en RAID 1 et deux SSD SATA de 240 Go en RAID 0. J’ai créé des partages chiffrés et non chiffrés sur les deux grappes.
Contenu de la boite
Le NAS AS6704T v2 ;
2 câbles réseau RJ45 Cat.5e ;
Les vis de fixation pour disques durs 2,5 et 3,5 pouces ;
L’alimentation externe et son câble ;
Un passe-câble à fixer à l’arrière afin de sécuriser le branchement au NAS et éviter que le câble ne se débranche en cas de manipulations ou d’un passage de votre chat ;
Le guide de démarrage rapide.
À noter : aucun dissipateur thermique n’est fourni pour les éventuels SSD NVMe.
Point négatif, les plateaux pour les disques durs ne sont pas en montage sans outil pour les disques de 3,5 pouces contrairement à la plupart des concurrents. C’est dommage, d’autant plus qu’Asustor propose depuis des années une fonctionnalité assez intéressante, avec MyArchive. Il aurait été pratique d’avoir un montage sans outil pour faciliter le changement de disque d’archivage (par exemple, pour externaliser une sauvegarde), sans devoir acheter des plateaux supplémentaires ou utiliser un tournevis.
Le Lockerstor 4 Gen2+ est équipé d’une barrette de 4go de DDR4. Il y a deux emplacements sur la carte mère, dont un accessible en retirant juste le capot.
Le second se trouve de l’autre coté de la carte mère, et nécessite un démontage complet pour l’atteindre, cela peut se réaliser en une quarantaine de minutes en suivant cette vidéo du support officiel Asustor.
Le logiciel
Au moment d’écrire ces lignes, le Lockerstor 4 Gen2+ tourne sous ADM version 5.1.2.RE51 . L’interface a bien évolué ces dernières années, et même si Asustor n’a pas atteint Synology au niveau de l’ergonomie, on ne peut que les féliciter pour les progrès accomplis. Le magasin d’application est très complet, même si certaines applications sont quelque peu obsolètes, comme par exemple aMule qui n’a plus été mis à jour depuis plus de 4 ans.
Bien que l’application semble abandonnée par son développeur, ce n’est pas la dernière version qui est proposée dans le magasin Asustor. Cela pose la question de la pertinence de maintenir ce type d’applications dans un catalogue qui se veut sécurisé (un argument pourtant central de la marque).
Un autre point perfectible concerne l’intégration des machines virtuelles. Là où QNAP et Synology proposent des solutions maison bien intégrées, Asustor s’appuie sur VirtualBox, dont l’intégration au système reste plus limitée. Certes, le constructeur semble aujourd’hui privilégier les conteneurs Docker, mais il est dommage que les machines virtuelles soient relativement délaissées.
À l’inverse, l’intégration des conteneurs est particulièrement réussie. J’ai par exemple pu installer VaultWarden en deux clics depuis le magasin d’applications, et gratuitement. À titre de comparaison, la version équivalente sur QNAP nécessite de passer par le dépôt alternatif MyQNAP… et elle est payante.
Les performances
Avertissement : Pour ces tests, j’ai utilisé un MacBook Pro M1 avec un adaptateur USB-C Ugreen. J’ai obtenu des résultats surprenants : des vitesses d’écriture parfois supérieures à celles observées en lecture dans les configurations en RAID sans chiffrement. J’ai validé les résultats d’écriture en copiant des fichiers entre deux NAS (mon QNAP TS453D et le Lockerstor), connectés en 2,5 Gb/s. Les vitesses de lecture, en revanche, devraient être supérieures à celles relevées… je mets donc un gros avertissement sur ces dernières.
Des tests iperf ont confirmé que le réseau atteignait des performances proches de la limite théorique du 2,5 GbE, sans toutefois la dépasser.
Lors des transferts entre les deux NAS, les débits observés se situaient entre 2,45 et 2,47 Gb/s.
Résultats en RAID 0
Cette configuration est déconseillée sur un NAS, mais elle a été utilisée ici afin d’extraire les performances maximales :
Ici sans chiffrement
Ici, avec le chiffrement activé
Résultats en RAID 1
En RAID 1 sans chiffrement, les performances ne chutent pas significativement par rapport au RAID 0.
Même constat avec chiffrement activé : les performances restent comparables à celles du RAID 0 chiffré.
Bruit et consommation
L’un des points les plus impressionnants de ce NAS reste son silence de fonctionnement. L’absence de disques mécaniques y contribue évidemment beaucoup, mais même sous charge élevée, le NAS demeure remarquablement discret.
Côté consommation électrique :
20 W en utilisation normale avec 4 SSD SATA
29 à 30 W au démarrage
Des valeurs très raisonnables pour un NAS de cette catégorie.
CONCLUSION
Pour répondre à la question posée en introduction (cette évolution en vaut-elle la peine ?) : la réponse est plutôt non.
Si l’on s’en tient strictement au terme « évolution », les changements restent très limités. À l’exception de l’ajout de deux ports réseau 5 Gb/s et d’un port USB supplémentaire, il s’agit globalement du même NAS que le Lockerstor 4 Gen2 (sans le « + »).
En revanche, pour quelqu’un qui souhaite s’équiper d’un premier NAS ou remplacer un modèle vieillissant, le Lockerstor 4 Gen2+ reste, à mes yeux, un excellent choix.
Entre un magasin d’applications bien fourni, de bonnes performances, un prix compétitif face à la concurrence et une qualité matérielle solide, il dispose d’arguments sérieux. À cela s’ajoute une garantie constructeur de 3 ans, toujours appréciable sur ce type d’équipement.
Les deux ports réseau 5 Gb/s constituent également un choix tourné vers l’avenir. Les débits réseau progressent rapidement, y compris dans les environnements domestiques. Il n’est plus rare aujourd’hui de voir apparaître des switchs 10 Gb/s dans les installations personnelles. Même si le 2,5 Gb/s reste largement suffisant pour la majorité des usages, comme le dit l’adage : « qui peut le plus peut le moins ».
Enfin, si vous souhaitez échanger autour de ce modèle, un sujet dédié au NAS testé est déjà disponible sur le forum-nas.
The Aoostar WTR Max Intel version is best understood, at least at this stage, as an early preview of a known NAS design rather than a finished retail product. The unit sent to me appears to retain the same general WTR Max concept as the earlier 2025 model, built around a compact 6-bay SATA layout plus 5 M.2 NVMe slots, while replacing the Ryzen 7 8845HS used in the current WTR Max 8845 with Intel’s Core i5-1235U. That CPU change is significant because these 2 processors target different kinds of systems: the Ryzen 7 8845HS is an 8-core, 16-thread chip with a 45W default TDP and boost speeds up to 5.1GHz, whereas the Core i5-1235U is a 10-core, 12-thread Alder Lake-U part with 2 performance cores, 8 efficiency cores, a 15W processor base power, and a launch date going back to Q1 2022. On paper, that makes the Intel version a potentially more efficiency-focused or cost-focused variation of the same platform, rather than a direct step up from the AMD model. That distinction matters, because this is not yet a product with confirmed pricing, confirmed availability, or a final release timetable, so the more useful question at this stage is not whether it definitively replaces the existing WTR Max 8845, but whether Aoostar is preparing to turn this chassis into a broader platform with multiple hardware tiers built around different CPUs and buyer priorities.
If this version works as intended, its appeal is fairly easy to understand even before full launch details are known. The original WTR Max formula already stands out because it combines high drive density, modern external connectivity, and small-footprint DIY NAS flexibility in a way that relatively few systems currently do, and an Intel alternative could broaden that appeal for buyers who prefer Intel media features, lower-power mobile silicon, or simply a lower entry point than the Ryzen-based model if Aoostar prices it accordingly. At the same time, this remains a first look at hardware provided by the brand, not a final buying recommendation. Until Aoostar confirms retail positioning, regional availability, and exact specifications for this Intel edition, it makes more sense to treat the device as an interesting platform variation with clear practical potential, rather than a confirmed replacement for the existing AMD version already listed by Aoostar at $669 in its current storefront
The Aoostar WTR MAX Nas is available from the following places:
The storage layout appears to be unchanged from the earlier WTR Max 8845 design. Physically, this platform combines 6 SATA drive bays with 5 M.2 2280 NVMe slots, giving it a mixed storage approach that is more flexible than most compact DIY NAS systems in the same size class. Aoostar’s official specification for the current WTR Max 8845 lists support for up to 6 x 24TB SATA HDDs and 5 NVMe SSDs, with the M.2 allocation split across PCIe 4.0 x2 and PCIe 4.0 x1 links rather than giving every slot the same bandwidth. In practical terms, that matters less for bulk storage and more for how the system is likely to be used: large-capacity SATA bays can be assigned to primary data, backup, or archive duties, while the NVMe slots are better suited to cache, application storage, containers, VMs, or high-speed working data. For a NAS aimed at users choosing their own OS and storage strategy, that mixed topology is one of the main reasons the WTR Max platform is notable in the first place.
The Intel Core i5-1235U is also a sensible fit for this kind of storage-heavy design because, like the Ryzen 7 8845HS used in the existing AMD version, it supports up to 20 PCIe lanes and PCIe 4.0 connectivity. That does not automatically mean the Intel model will perform identically in every storage scenario, because lane routing, controller choice, and motherboard implementation still determine how those lanes are divided between SATA, NVMe, USB4, OCuLink, and networking. Even so, on an early preview basis, the key point is that Aoostar does not appear to have changed the overall storage proposition of the WTR Max by moving to Intel. The appeal here remains the same: this is a compact chassis that can hold a large amount of slower capacity storage alongside a meaningful amount of flash storage, which makes it suitable for users who want both traditional NAS volume space and a faster SSD tier in the same enclosure.
Aoostar WTR Max Intel Version – Ports and Connections
The Aoostar WTR Max platform is already unusually well equipped on connectivity, and the Intel preview unit appears to preserve that same approach. On the currently listed WTR Max 8845 model, Aoostar specifies 2 x 10GbE SFP+ ports based on the Intel X710 controller, alongside 2 x 2.5GbE LAN ports, 1 x USB4 port, 1 x OCuLink port, 2 x USB 3.2 Gen 2 ports, 1 x USB 3.2 Gen 1 port, 1 x Type C port, 1 x HDMI output, a 3.5mm audio jack, a microSD card slot, and DC input. In practical terms, that gives the system a broader mix of storage, networking, and external expansion connectivity than most compact DIY NAS solutions, especially once the dual 10GbE and OCuLink are factored in. For an early preview, that matters because the appeal of the Intel version is not just the CPU change itself, but the fact that Aoostar seems to be pairing that CPU with the same high-connectivity platform rather than trimming the I/O to create a lower-tier model.
From the CPU side, the Core i5-1235U also makes sense in a system that leans heavily on external I/O. Intel’s official specifications list support for Thunderbolt 4 and PCIe 4.0, which aligns well with the inclusion of USB4 and helps explain why this processor can still fit into a NAS design with multiple high-bandwidth ports despite being a lower-power mobile chip. By comparison, the Ryzen 7 8845HS used in the current AMD version is the stronger processor in raw core configuration and sustained power class, but the Intel option may still hold practical appeal for buyers who place more value on Intel platform familiarity, media handling, or a potentially lower-cost entry point into the same chassis.
At this stage, though, the key observation is simply that Aoostar does not appear to have repositioned the WTR Max Intel model as a cut-down connectivity variant. Based on the preview hardware and the existing WTR Max specification, this still looks like a NAS platform built around unusually broad networking and expansion options first, with the CPU choice acting as the variable element.
Aoostar WTR Max Intel Version – Internal Hardware
Internally, the previewed WTR Max Intel unit appears to follow the same motherboard and chassis logic as the existing AMD-based design, with the main change being the move to Intel’s Core i5-1235U. That processor combines 10 cores and 12 threads in a hybrid layout made up of 2 performance cores and 8 efficiency cores, supports PCIe 4.0, and provides up to 20 PCIe lanes to distribute across storage, networking, and external expansion.
It also supports up to 64GB of memory officially on Intel’s own specification pages, across 2 channels, and does not list ECC memory support. By comparison, the Ryzen 7 8845HS commonly associated with this class of WTR Max hardware is an 8-core, 16-thread processor with PCIe 4.0, 20 usable PCIe lanes, support for DDR5-5600, and a much higher maximum supported memory capacity on AMD’s specification sheet. In simple terms, the Intel version looks less like a redesign of the platform and more like a rebalancing of it, using a lower-power mobile CPU that still has enough I/O resources to support the dense hardware layout that defines the WTR Max.
That internal trade-off is likely where the Intel model will either make sense or not, depending on the intended workload. The Ryzen 7 8845HS remains the stronger chip on paper for sustained multi-threaded tasks, heavier virtualization, and broader memory headroom, while the Core i5-1235U shifts the system toward a more efficiency-oriented profile and brings Intel’s integrated graphics stack into the equation. For a NAS like this, that could matter for media-focused deployments, lighter VM use, or users who simply prefer Intel’s platform characteristics, but it also means the Intel version should not automatically be viewed as equivalent to the AMD model in raw processing terms.
It is also worth noting that Aoostar’s current public WTR Max 8845 materials refer to the retail model as using a Ryzen 7 PRO 8845HS rather than the standard Ryzen 7 8845HS, which suggests the final retail naming and CPU positioning around this series may still vary depending on region or configuration. As an early preview, the most accurate conclusion is that the internal hardware remains recognisably WTR Max in structure, but the CPU choice changes the expected character of the system more than the exterior suggests.
Aoostar WTR Max Intel Version – Price, Launch Date, More?
At the time of writing, Aoostar has not publicly listed this Intel Core i5-1235U version of the WTR Max on its storefront, so price, release date, and regional availability remain unconfirmed. By contrast, the currently listed WTR Max 8845 is shown on Aoostar’s site at $669, reduced from $699, and the product naming has shifted to specifically identify that model as the WTR Max 8845 rather than simply the WTR Max. That naming detail is relevant because it suggests Aoostar may be preparing the chassis for more than 1 CPU configuration, even if the Intel variant has not yet been formally announced. The Core i5-1235U itself is not a new processor, having launched in Q1 2022 with a 15W processor base power, while the Ryzen 7 8845HS used in the 2025 WTR Max model is a newer and higher-power chip with an 8-core, 16-thread design and a 45W default TDP. Taken together, that makes the Intel preview unit look less like a replacement for the existing AMD version and more like a possible alternative tier within the same product family.
The more important question is what Aoostar intends to do with this platform next. If the company keeps the same chassis, storage layout, and broad I/O design while offering multiple CPU variants, the WTR Max could become a more flexible series rather than a single fixed model. In that context, an Intel version would make sense as a lower-cost or differently positioned option for buyers who do not need the stronger processing profile of the Ryzen 7 8845HS, or who specifically want an Intel-based media and virtualization platform. At this stage, though, that remains an informed reading of the hardware direction rather than a confirmed launch plan. Since this unit was sent as an early preview sample and Aoostar has not yet published a retail page for the Intel edition, the most accurate conclusion is that the WTR Max Intel version is promising as a product idea, but still undefined in the areas that matter most for a final purchasing decision: official pricing, shipping regions, final specification sheet, and release timing.
The Aoostar WTR MAX Nas is available from the following places:
This description contains links to Amazon. These links will take you to some of the products mentioned in today's content. As an Amazon Associate, I earn from qualifying purchases. Visit the NASCompares Deal Finder to find the best place to buy this device in your region, based on Service, Support and Reputation - Just Search for your NAS Drive in the Box Below
Need Advice on Data Storage from an Expert?
Finally, for free advice about your setup, just leave a message in the comments below here at NASCompares.com and we will get back to you.Need Help?
Where possible (and where appropriate) please provide as much information about your requirements, as then I can arrange the best answer and solution to your needs. Do not worry about your e-mail address being required, it will NOT be used in a mailing list and will NOT be used in any way other than to respond to your enquiry.
[contact-form-7]
TRY CHAT Terms and Conditions
If you like this service, please consider supporting us.
We use affiliate links on the blog allowing NAScompares information and advice service to be free of charge to you.Anything you purchase on the day you click on our links will generate a small commission which isused to run the website. Here is a link for Amazon and B&H.You can also get me a Ko-fi or old school Paypal. Thanks!To find out more about how to support this advice service checkHEREIf you need to fix or configure a NAS, check FiverHave you thought about helping others with your knowledge? Find Instructions Here
Or support us by using our affiliate links on Amazon UK and Amazon US
Alternatively, why not ask me on the ASK NASCompares forum, by clicking the button below. This is a community hub that serves as a place that I can answer your question, chew the fat, share new release information and even get corrections posted. I will always get around to answering ALL queries, but as a one-man operation, I cannot promise speed! So by sharing your query in the ASK NASCompares section below, you can get a better range of solutions and suggestions, alongside my own.
The LincStation E1 is a compact 2-bay NAS from LincPlus aimed at users who want a simple way to move file storage, backups, and basic media access off third-party cloud services and onto local hardware. It is built around an ARM platform and combines 2 x SATA drive bays with 2 x NVMe slots, which gives it a433 storage layout that is more flexible than many entry-level NAS units in this price class. Rather than targeting enthusiasts who want extensive customization from day 1, the E1 is positioned as a ready-to-use system with LincPlus’s own LincOS software, desktop and mobile apps, and a feature set focused on everyday tasks such as file sharing, photo backup, remote access, and media browsing. From a review perspective, the main appeal of the E1 is not that it competes directly with higher-end NAS systems on raw performance or software maturity, but that it tries to offer a broad hardware and feature package at a very low entry cost. The combination of 1GbE networking, dual NVMe support, and a compact chassis makes it an interesting option for first-time NAS buyers, light home users, or anyone looking for a secondary backup device with low power usage. At the same time, its value depends heavily on expectations, especially around software polish and the realities of buying storage media separately, so it is best evaluated as a budget-oriented turnkey NAS with clear strengths and equally clear limitations.
Want to Learn More about Lincplus Lincsation NAS Solutions? The N1, N2 and S1 all include an UnRAID Software License included:
Kickstarter Disclaimer!!! This is NOT traditional retail
At the time of review, the LincStation E1 is positioned as a crowdfunding product rather than a standard retail NAS, which means buyers should treat it differently from an item sold through normal retail channels with established return policies and support expectations. LincPlus is not an unknown brand and has released other NAS and computing products, but crowdfunding still carries delivery, software maturity, and post-launch support risks, so any purchase decision should factor in the reduced consumer protections compared with conventional retail.
Lincstation E1 NAS Review – Quick Conclusion
The LincStation E1 is a low-cost, compact 2-bay NAS that stands out mainly because it combines 2 x SATA bays and 2 x NVMe slots in a small ARM-based enclosure while still aiming to be a turnkey product rather than a DIY project, which makes it an appealing option for first-time NAS buyers or users who want a simple local backup/file server with low power draw and basic private cloud-style features; the hardware package is strong for the price category, the included accessories are unusually complete, and the overall design is practical for light home storage, media access, and phone backup use, but the key caveat is that the software experience (LincOS) is still developing, with the mobile app appearing more mature than the desktop and web interfaces and some expected security and usability features not yet fully in place in the reviewed build, so the E1 makes the most sense if it is judged as a budget-oriented NAS with good hardware value and a work-in-progress software platform rather than a polished replacement for established NAS ecosystems.
SOFTWARE - 5/10
HARDWARE - 7/10
PERFORMANCE - 7/10
PRICE - 10/10
VALUE - 9/10
7.6
PROS
Very low entry price (crowdfunding positioning) for a turnkey NAS-class device Compact chassis with a small desktop footprint and low overall weight Flexible storage layout with 2 x SATA bays + 2 x M.2 NVMe slots Low-power ARM platform that supports relatively modest power consumption in real use 2.5GbE-class networking referenced in review testing (strong value if confirmed in final retail spec) Front USB 3.2 Gen 2 Type-A port for faster external drive imports/backups Good in-box accessory bundle (cables, screwdriver, screws, thermal pads, PSU) LincOS includes a broad feature set for entry users (SMB sharing, backups, remote access, media features, mobile app control)
CONS
Software maturity is still a concern, especially desktop and web UI polish Crowdfunding purchase model adds risk compared with normal retail buying Single LAN port only, so no link aggregation or failover Some expected NAS security/admin features were missing or underdeveloped in the reviewed build (for example, 2FA)
The LincStation E1 uses a compact vertical desktop chassis with a plastic outer shell and a front panel that keeps visible hardware elements to a minimum. At 218.5 x 88 x 140 mm and 907 g, it is physically smaller and lighter than many conventional 2-bay NAS systems, which affects both placement and cooling design. The front panel includes status LEDs for the 2 SATA bays (S1, S2), 2 NVMe slots (M1, M2), network activity/status, and the power button LED, so users can check basic drive and network state at a glance without opening the software interface. There is no front display panel, and the clean exterior design is clearly focused on compactness and low manufacturing complexity rather than service indicators or advanced controls.
The primary storage section is built around 2 top-loading drive trays that support both 3.5-inch and 2.5-inch SATA HDD/SSD media. These trays are accessed from the top of the chassis and use integrated pull handles that sit relatively flush when closed, which helps reduce accidental snagging and keeps the top surface visually tidy. The supplied accessory pack includes mounting screws and a screwdriver, which is relevant here because 2.5-inch drives require screw mounting rather than tool-less insertion. The tray design is simple and functional, but there is no locking mechanism, no front latch key, and no hot-swap enterprise-style caddy system, so the emphasis is clearly on basic home use rather than secure or high-frequency drive replacement.
A secondary storage layer is provided by 2 underside M.2 ports, both supporting M.2 2280 NVMe SSDs. These slots are located under the bottom panel rather than on an internal motherboard tray accessed from the side, which means initial installation is straightforward but drive swaps are less convenient than the top SATA bays. The box contents include 2 thermal pads for SSDs of different thicknesses, which is a notable detail at this price point because it indicates the NVMe area was designed with at least basic thermal contact in mind rather than treating the slots as purely optional expansion. Functionally, these NVMe slots can be used for cache or as storage pools, which gives the system more deployment flexibility than a standard 2-bay HDD-only NAS.
The storage layout is technically more ambitious than many entry-level NAS devices because it combines 2 x SATA bays for bulk capacity with 2 x NVMe slots for faster storage tiers in a very small chassis. Based on the provided CPU/PCIe layout, the system is built around the RK3568 platform with PCIe and SATA resources split across NVMe and SATA connectivity, with the SATA side also involving a JMB575 SATA controller path for the drive bay implementation. In practical terms, this means the E1 is designed to support mixed workloads such as HDD-based backups plus SSD cache, or separate SSD-backed application/media indexing storage alongside larger mechanical drives. This is still a consumer NAS layout, but from a hardware planning perspective it gives more options than a basic ARM 2-bay design that only exposes SATA.
From a mechanical and thermal design perspective, the main compromise is internal space density, especially around the underside NVMe area and the airflow path shared across the enclosure. The chassis uses a single base-mounted fan and passive ventilation openings around multiple sides, with the SATA bays above and the NVMe slots below, so the internal airflow strategy is relatively simple and constrained by the compact dimensions. This approach is consistent with the low-power RK3568 platform and the intended use of 2 local drives plus optional NVMe, but it also means there is limited room for large heatsinks, cable routing, or internal upgrades beyond the defined storage slots. As a result, the E1 offers a technically flexible storage layout for its class, but it remains a tightly integrated, compact NAS design rather than a modular enclosure built for extensive hardware modification.
Lincstation E1 NAS Review – Internal Hardware
The LincStation E1 is built around the Rockchip RK3568, a quad-core ARM SoC (Cortex-A55 class) running at up to 2.0 GHz. This is a low-power embedded platform commonly used in compact network and edge devices, and it is a practical fit for a NAS that prioritizes basic file services, light media tasks, and low idle power over high parallel compute performance. In this system, the RK3568 is paired with 4 GB of embedded DDR4 memory, with no indication of user-upgradeable RAM, which places the E1 firmly in the entry-level category for multitasking and container-heavy workloads.
From an architecture standpoint, the E1’s hardware is more interesting than a typical low-cost 2-bay ARM NAS because it exposes both SATA and NVMe storage within a single compact design. The provided block layout shows the RK3568 distributing PCIe lanes across NVMe connectivity and additional controller paths, while the SATA bays are implemented through a JMB575 SATA controller stage. This matters because the system is not simply attaching 2 SATA drives directly to a minimal embedded board, but instead using a more layered I/O design to support 2 x SATA bays plus 2 x NVMe slots within the limits of the SoC’s available interfaces.
The hardware platform also includes a 1GbE network interface, HDMI 2.1 (TMDS) output, and a mix of USB connectivity, which indicates that the E1 is designed as more than a headless file box even if its primary role is NAS storage. The CPU/PHY layout also reflects the shared nature of resources in compact ARM systems, where PCIe, USB, and SATA connectivity are allocated carefully to balance cost and capability. In practical terms, the hardware specification is broad for the class, but users should still view it as a constrained embedded platform, not as a substitute for x86 NAS hardware with higher throughput ceilings or large virtualization headroom.
At a system design level, the internal hardware choices are clearly optimized around low power draw, compact thermals, and cost efficiency. The RK3568 platform, embedded memory, and compact board-level integration reduce complexity and help keep the device small, while the storage expansion is pushed into the defined SATA and M.2 bays rather than broader internal upgrade options. This makes the E1 a purpose-built appliance with a relatively fixed hardware profile: flexible in storage configuration, but limited in CPU and memory scalability once deployed.
Lincstation E1 NAS Review – Ports and Connections
The LincStation E1 provides a basic but functional I/O layout split across the front and rear panels. On the front, there is 1 x USB 3.2 Gen 2 Type-A port, which is the highest-speed external USB connection on the unit and the most practical port for temporary storage imports, external backup drives, or direct file transfers. The front panel also includes the status LEDs for both SATA bays, both NVMe slots, network activity, and the power button with integrated LED, so operational state is visible from the main user-facing side of the device.
On the rear panel, the E1 includes 1 x RJ-45 LAN port, 2 x USB 2.0 Type-A ports, 1 x HDMI 2.1 (TMDS) port, a reset button, and a 12V/5A DC power input jack. The rear USB ports are limited to USB 2.0, which is sufficient for low-speed peripherals or occasional backup devices, but they are not ideal for sustained high-speed external storage workflows. The HDMI output is an important inclusion in specification terms because it expands potential use cases beyond standard NAS access, although the practical value of that port depends on software support and feature maturity.
In networking terms, the hardware specification lists 1 x Gigabit RJ-45, while the review transcript references 1GbE operation during testing and performance discussion, so this is an area where buyers should verify the final shipping specification and campaign listing before purchase. Regardless of the final Ethernet speed, the E1 only provides a single wired LAN port, which means no link aggregation, no failover path, and no dual-NIC network segmentation. The system does, however, also support Wi-Fi connectivity according to the review material, which may help with placement flexibility or initial setup, but wired Ethernet remains the primary connection for NAS use.
Lincstation E1 NAS Review – Software and Services
The LincStation E1 runs LincOS, which is positioned as an integrated NAS platform for file access, backup, remote connectivity, and media services rather than a bare system that requires users to install a third-party OS. Based on the provided feature overview, the core service set includes LincAccess for remote access without manual port forwarding, System Upgrade for background firmware updates, Secure Space for encrypted storage, Local Share over SMB, Backup Disk and Sync Disk for scheduled backup/sync tasks, Remote Download, Smart Album for local photo analysis/tagging, and Video Center for media browsing and playback. On paper, this gives the E1 a broad set of consumer NAS functions, especially for users who want a single interface for files, phone backups, and basic media management.
In practical use, the software experience appears to vary significantly depending on whether the system is accessed via desktop client, web browser, or mobile app. The review transcript describes the desktop client as functional but visually and structurally closer to a mobile-first interface, with some sections feeling sparse or less optimized for larger screens. The mobile application is described as the more mature experience, with better flow for common tasks such as file access, photo backup, service control, and SMB management. By contrast, the browser-based interface is described as much more limited, which is relevant because web UI access remains a standard workflow for many NAS users.
The main issue at the time of review is software maturity rather than feature absence alone. The transcript indicates that newer builds added functions that were missing in earlier testing, which suggests active development, but also confirms that the platform is still evolving and not yet fully polished. Specific concerns raised include weak desktop/web UX consistency, limited clarity in some backup/sync terminology for less experienced users, and missing or underdeveloped areas in security and administration workflows (for example, the absence of 2FA and other standard NAS security tooling in the tested build). As a result, the E1 software stack is best understood as a usable but still developing platform that may improve over time, but should not be evaluated as equivalent in maturity to long-established NAS operating systems.
Lincstation E1 NAS Review – Noise, Temp and Power Performance Tests
Testing in the review focused on real-world NAS usage with 2 x 4TB Seagate IronWolf HDDs installed in the SATA bays and 2 x 1TB NVMe SSDs in the M.2 slots. In this configuration, the unit was used for file transfers, mobile backups, and sustained read/write activity to observe behavior under load rather than synthetic benchmark-only results. The review also notes that the NVMe slots were constrained in practical throughput relative to full higher-lane NVMe operation, with observed expectations around a capped transfer range consistent with the platform and lane allocation.
Acoustically, the measured noise level was reported at around 41 to 43 dB at idle, and remained in a similar 42 to 43 dB range under heavier activity. That indicates a relatively stable acoustic profile during testing, likely due in part to the inability (at the time of recording) to directly tune fan behavior in the software build initially tested. The result is not silent, and the plastic chassis plus compact internal layout may contribute to audible drive and airflow presence, but the unit also did not show a major noise spike during CPU and storage activity in the tested setup.
Thermally, the system was run for about 4 hours under sustained read/write activity, including transfers involving attached USB storage and mobile device backup traffic. Reported external surface temperatures were around 38 to 41°C on the chassis sides, with perforated ventilation areas reaching about 43 to 44°C. The hottest areas were around the underside NVMe region and between the installed drives, which is consistent with the compact internal layout and base-mounted cooling approach. With the 4TB HDDs used in testing, the reported drive temperature was around 51°C during this sustained activity period, while other external port-side areas remained around the low-to-mid 40°C range.
Power consumption results were in line with a low-power ARM NAS platform. With low CPU utilization (below roughly 15%) and drives/SSDs in idle or light activity states, the measured draw was around 12 to 12.2 W. Under heavier use, with CPU utilization above roughly 75% and simultaneous HDD/NVMe read/write activity, reported power draw increased to about 19.4 to 19.7 W. SMB transfer performance over the network was reported at roughly 180 to 200 MB/s on HDD-based access, while NVMe-backed activity was described as saturating the available network path in testing, which is broadly consistent with the stated Ethernet and storage configuration constraints.
Lincstation E1 NAS Review – Conclusion & Verdict
The LincStation E1 presents a clear budget-focused NAS proposition: compact hardware, flexible storage options for its class, low-power ARM design, and a turnkey software stack that covers the main functions many entry-level users look for, including local sharing, backup, remote access, and media features. Its main hardware appeal is the combination of 2-bay SATA storage and 2 x NVMe support in a small enclosure, which is uncommon at this level. As a hardware platform for basic home storage and backup use, it is a practical design with a broader feature set than many similarly positioned entry NAS devices.
The main limitation is software maturity rather than core hardware capability. Based on the review material, LincOS is usable and actively improving, but the desktop and web experience still need refinement, and some security and usability expectations common in more established NAS ecosystems are not yet fully met. For that reason, the E1 is best evaluated as a low-cost NAS with strong hardware value and a developing software platform, rather than a fully polished alternative to long-established NAS brands at the time of review.
Want to Learn More about Lincplus Lincsation NAS Solutions? The N1, N2 and S1 all include an UnRAID Software License included:
This description contains links to Amazon. These links will take you to some of the products mentioned in today's content. As an Amazon Associate, I earn from qualifying purchases. Visit the NASCompares Deal Finder to find the best place to buy this device in your region, based on Service, Support and Reputation - Just Search for your NAS Drive in the Box Below
Need Advice on Data Storage from an Expert?
Finally, for free advice about your setup, just leave a message in the comments below here at NASCompares.com and we will get back to you.Need Help?
Where possible (and where appropriate) please provide as much information about your requirements, as then I can arrange the best answer and solution to your needs. Do not worry about your e-mail address being required, it will NOT be used in a mailing list and will NOT be used in any way other than to respond to your enquiry.
[contact-form-7]
TRY CHAT Terms and Conditions
If you like this service, please consider supporting us.
We use affiliate links on the blog allowing NAScompares information and advice service to be free of charge to you.Anything you purchase on the day you click on our links will generate a small commission which isused to run the website. Here is a link for Amazon and B&H.You can also get me a Ko-fi or old school Paypal. Thanks!To find out more about how to support this advice service checkHEREIf you need to fix or configure a NAS, check FiverHave you thought about helping others with your knowledge? Find Instructions Here
Or support us by using our affiliate links on Amazon UK and Amazon US
Alternatively, why not ask me on the ASK NASCompares forum, by clicking the button below. This is a community hub that serves as a place that I can answer your question, chew the fat, share new release information and even get corrections posted. I will always get around to answering ALL queries, but as a one-man operation, I cannot promise speed! So by sharing your query in the ASK NASCompares section below, you can get a better range of solutions and suggestions, alongside my own.
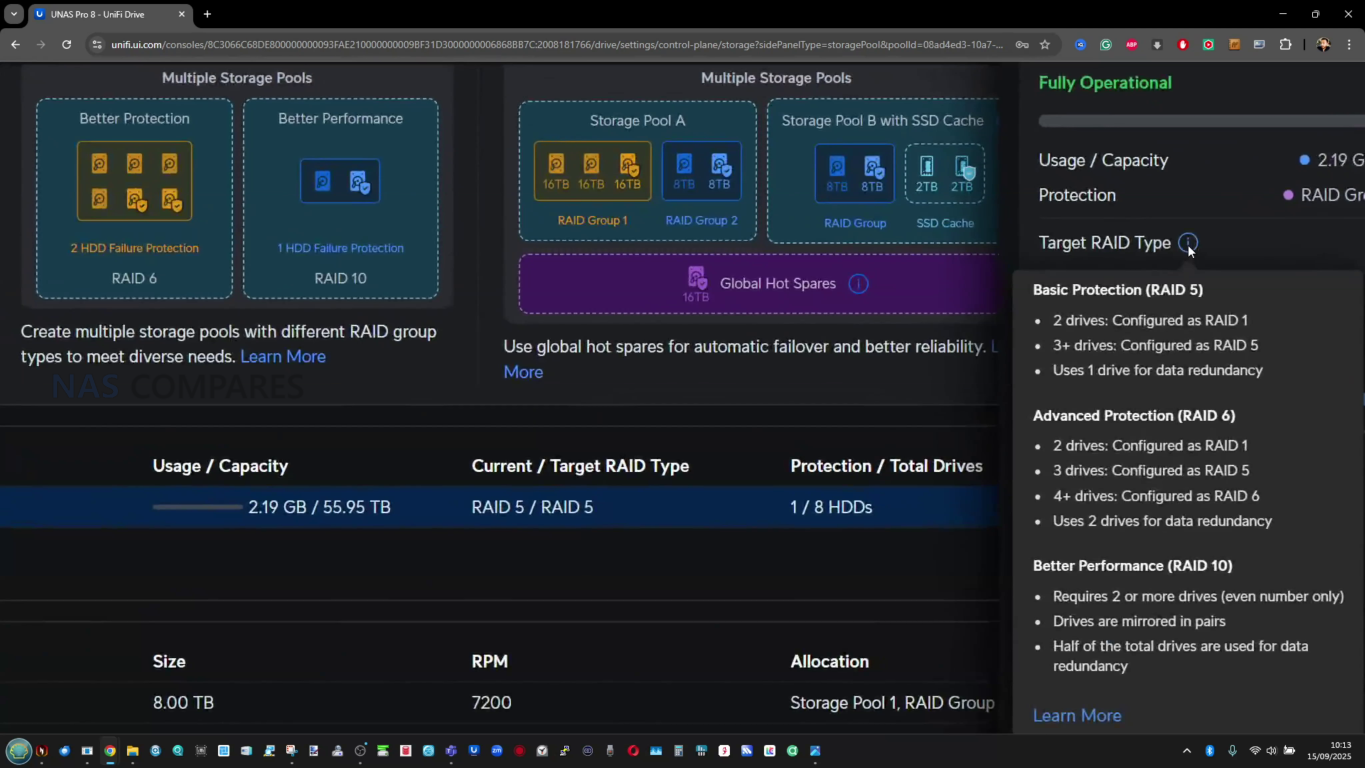
The UniFi UNAS 4 is Ubiquiti’s desktop 4 bay NAS and part of the company’s growing UniFi storage portfolio. Positioned as a compact network storage appliance, it is designed to provide centralized file storage, backups, and shared access within a local network, while also integrating with the wider UniFi management platform. The 4 bay form factor is widely considered a practical starting point for NAS deployments, offering enough capacity for RAID redundancy while maintaining a relatively small physical footprint suitable for offices, home labs, and small business environments. At $379, the UNAS 4 enters the market as a relatively affordable turnkey NAS that includes both hardware and the UniFi Drive software platform. The system combines traditional SATA storage bays with NVMe SSD caching support and 2.5GbE networking, while also introducing PoE+++ power as a deployment option. On paper, the device aims to deliver a straightforward storage solution that focuses on core NAS functionality rather than attempting to compete directly with more feature heavy platforms.
UniFi UNAS 4 Review – Quick Conclusion
TLDR: The UniFi UNAS 4 is a compact $379 4 bay NAS aimed at straightforward file storage and backups, with a clean UniFi oriented deployment that includes PoE+++ power plus data over a single cable and a bundled 90W adapter for non PoE setups. It combines 4 SATA bays with 2 M.2 NVMe slots for SSD caching, simple click and load drive trays, and a small front status display, while UniFi Drive provides the expected NAS services such as SMB and NFS access, RAID options, snapshots, encryption, share links, and multi user management, plus backup support that can include other UNAS targets, SMB destinations, and several cloud providers. The main compromises are the single 2.5GbE port that caps throughput and offers no redundancy, NVMe trays not being included despite the slots being present, and a USB C port that currently functions mostly for basic external storage rather than broader expansion, so it fits best when the goal is uncomplicated storage within a UniFi managed environment rather than a more flexible, performance oriented NAS platform.
BUILD QUALITY - 9/10
HARDWARE - 7/10
PERFORMANCE - 7/10
PRICE - 9/10
VALUE - 9/10
8.2
PROS
$379 pricing is competitive for a turnkey 4 bay NAS with UniFi Drive included 4 bay 2.5 inch and 3.5 inch SATA support for flexible capacity planning 2 x M.2 NVMe slots for read and write SSD caching PoE+++ support enables single cable power plus data deployment 90W PoE+++ mains adapter included, so PoE infrastructure is optional Simple click and load HDD trays with straightforward access for drive installs and swaps Front 1.47 inch color LCM display provides basic status and activity visibility UniFi Drive software includes RAID options, snapshots, encryption, share links, and user management
CONS
Single 2.5GbE port limits throughput and provides no network redundancy or aggregation M.2 NVMe trays not included, adding cost to use SSD caching USB C port is currently limited in utility beyond basic external storage attachment
Here are all the current UniFi NAS Solutions & Prices:
You can buy the UniFi UNAS 4 NAS via the link below – doing so will result in a small commission coming to me and Eddie at NASCompares, and allows us to keep doing what we do!
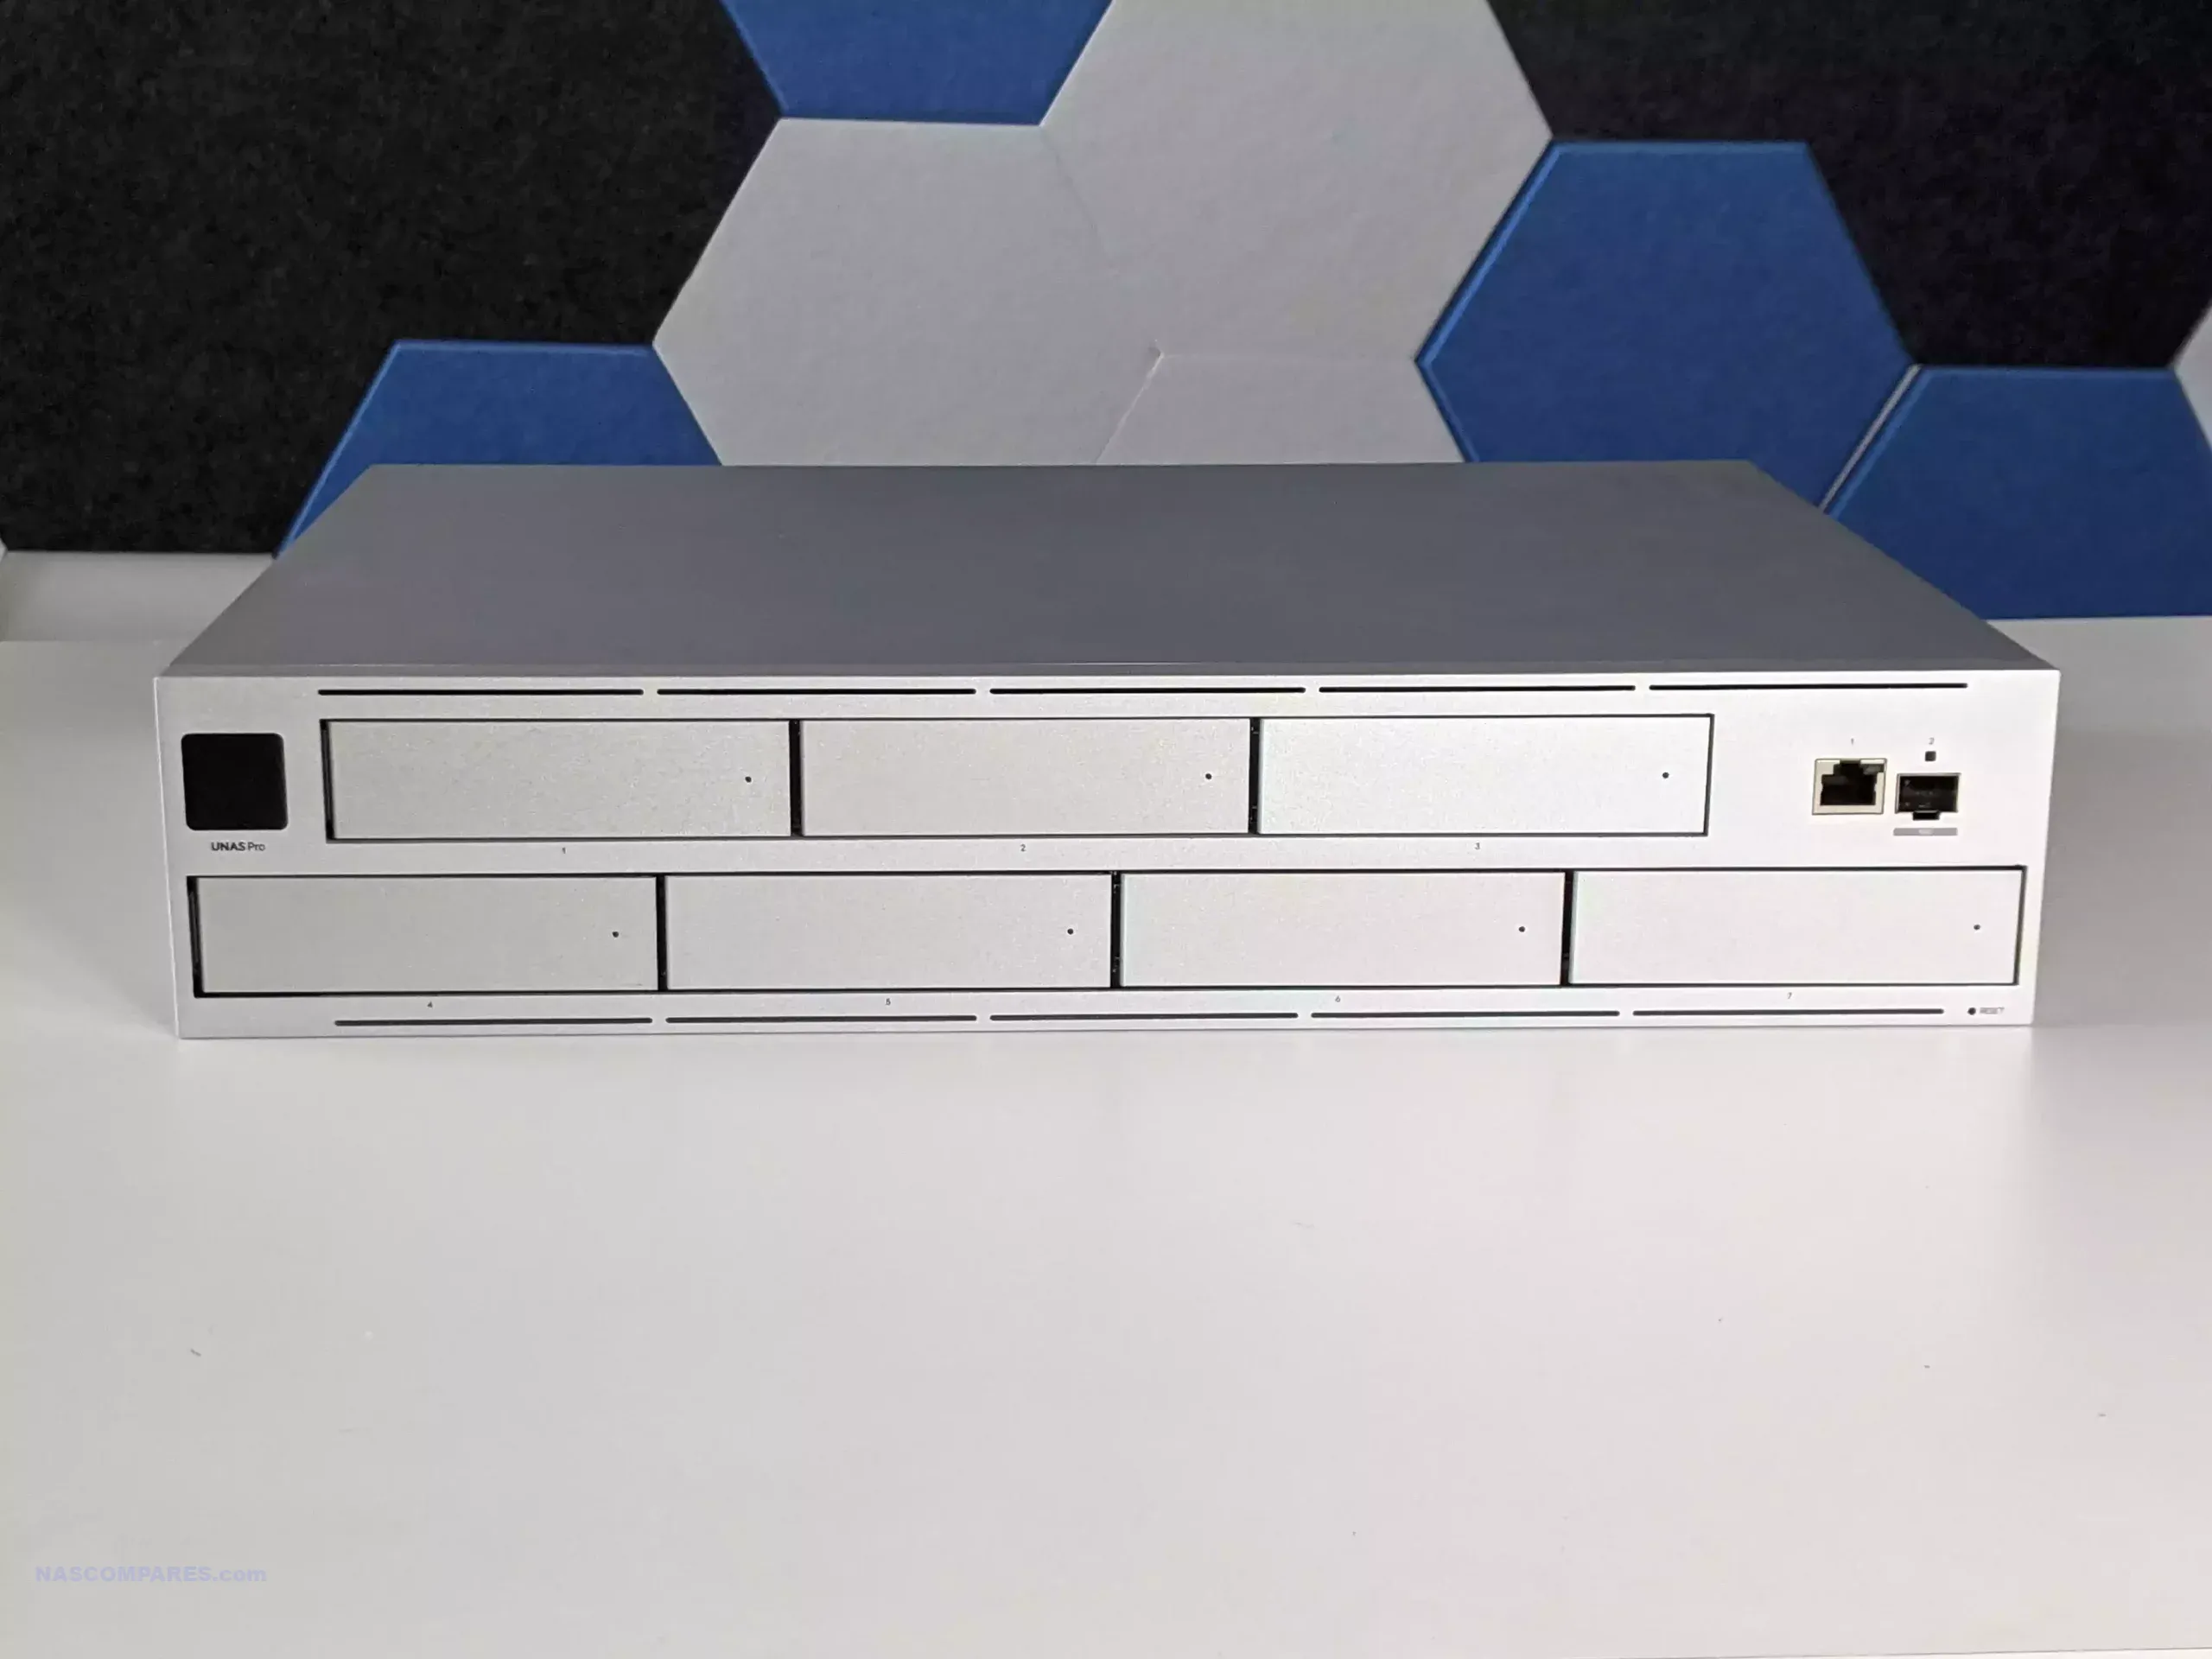
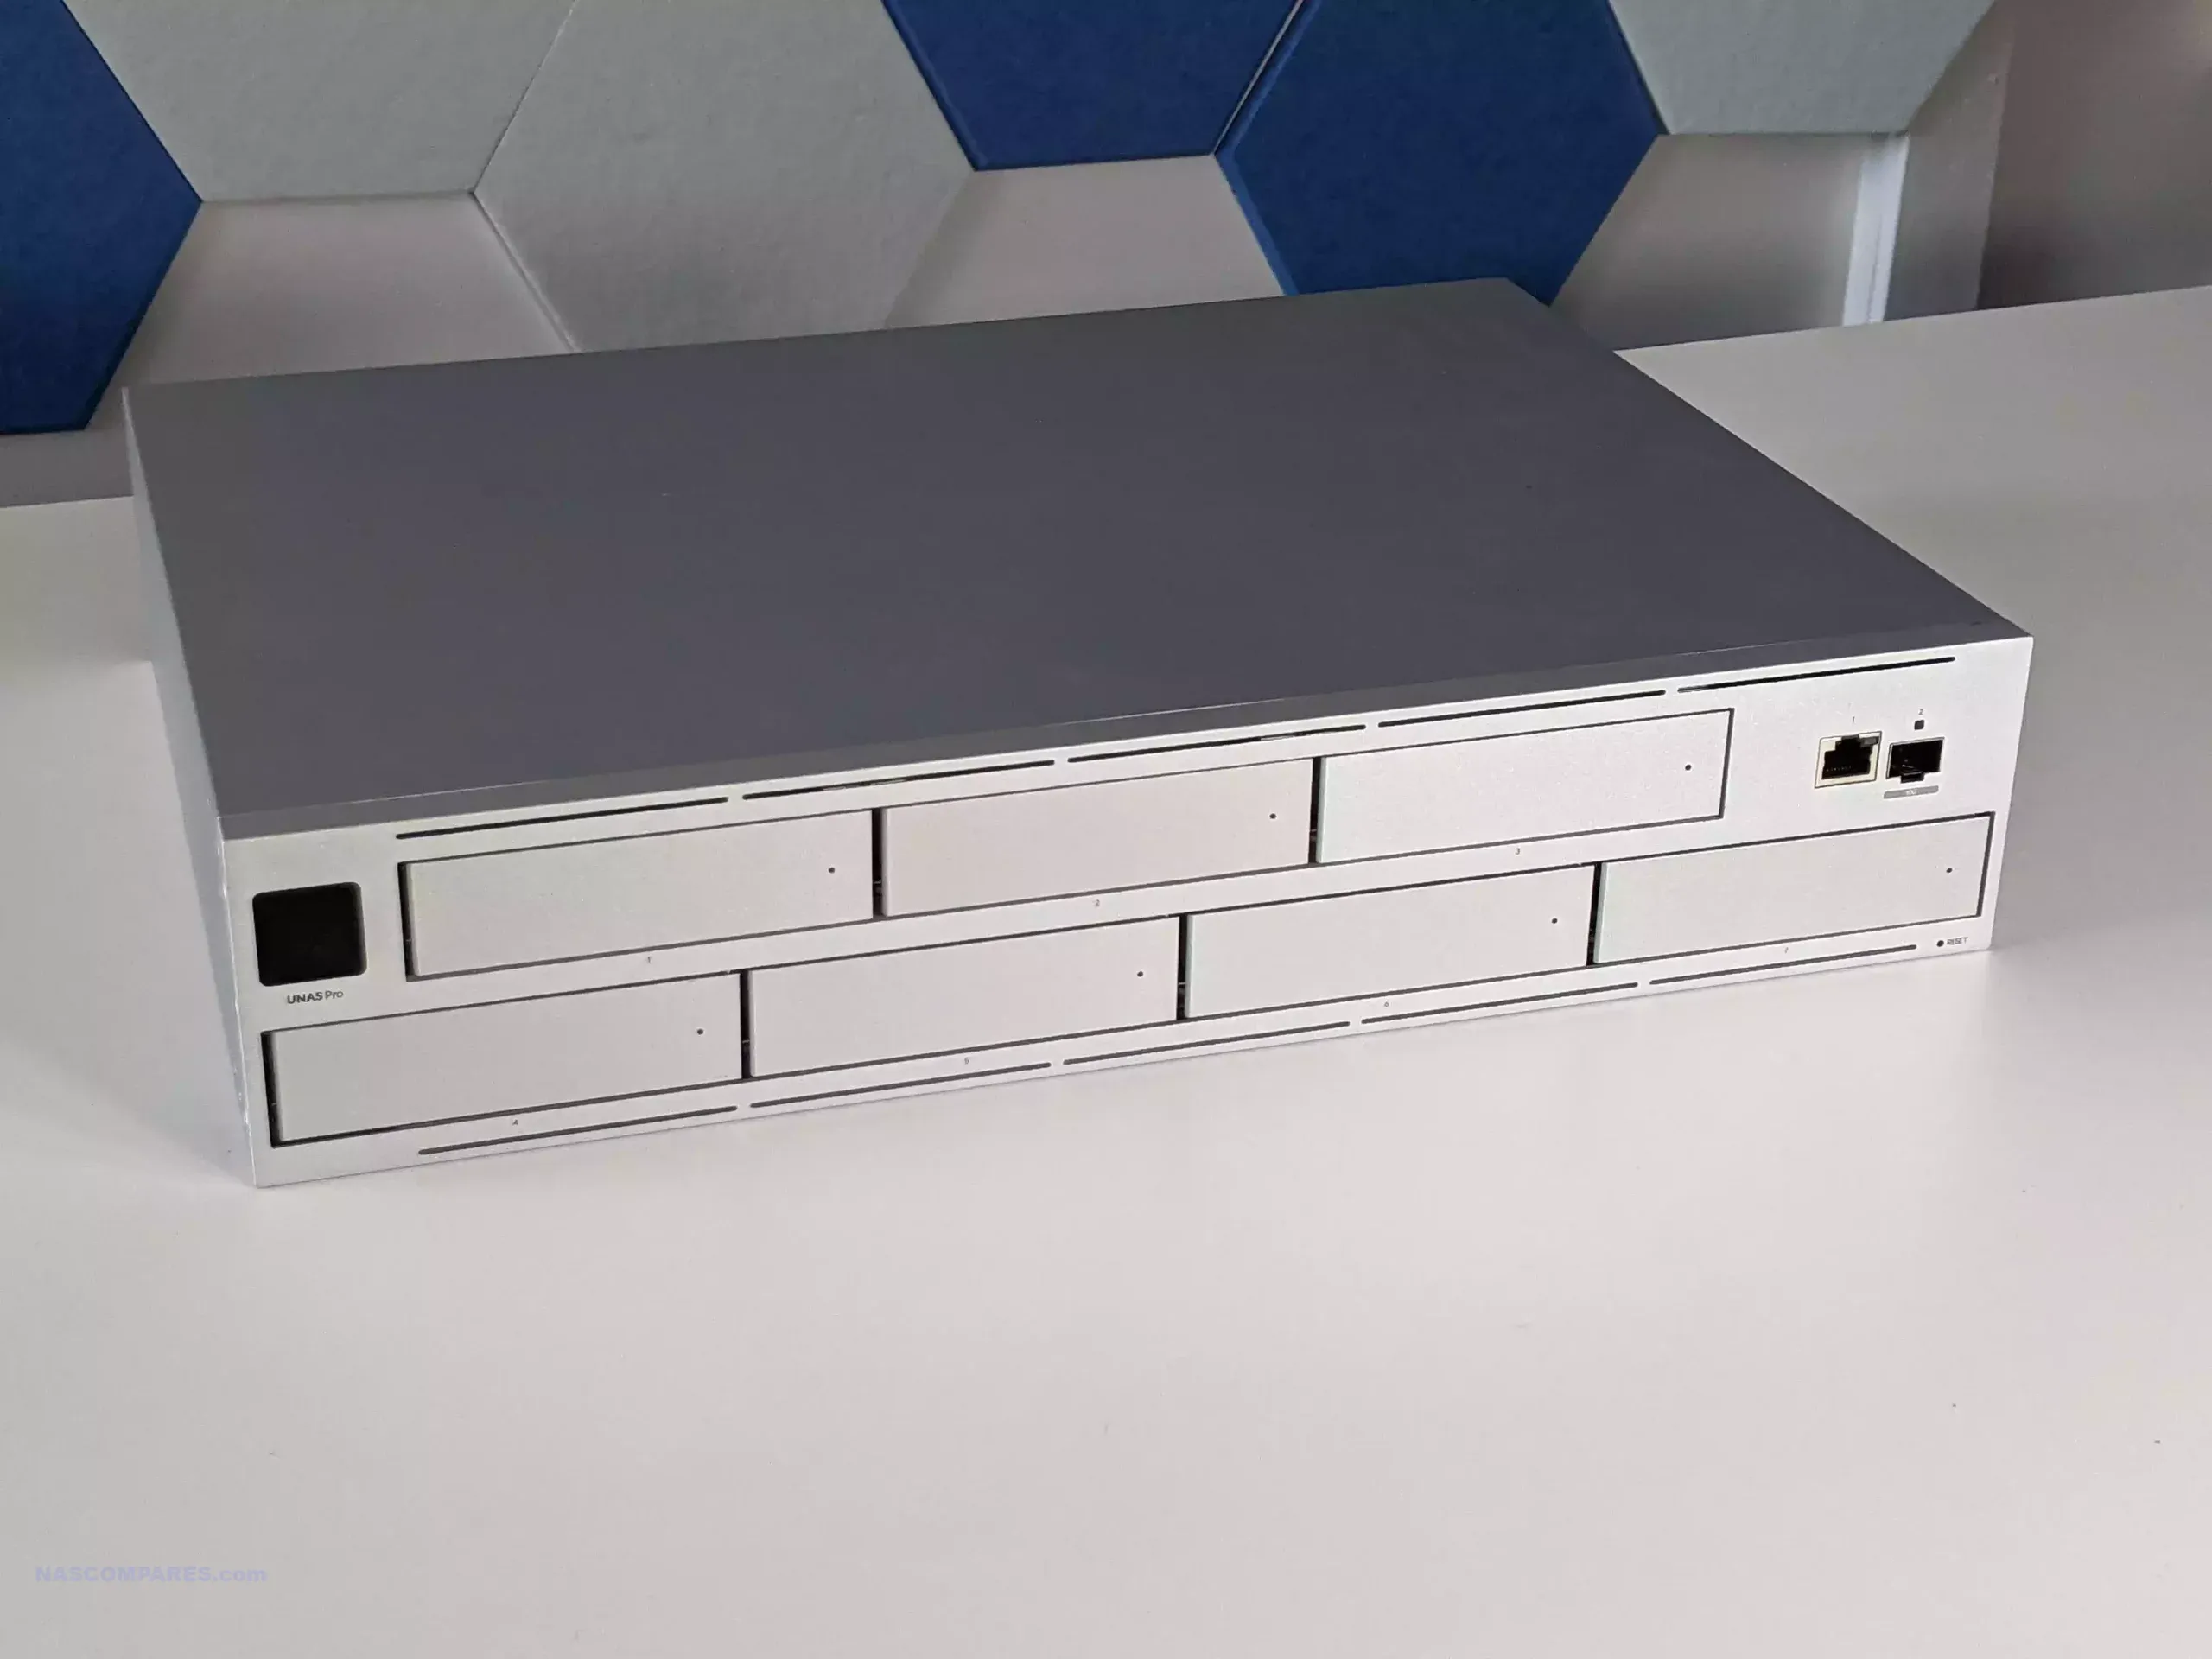
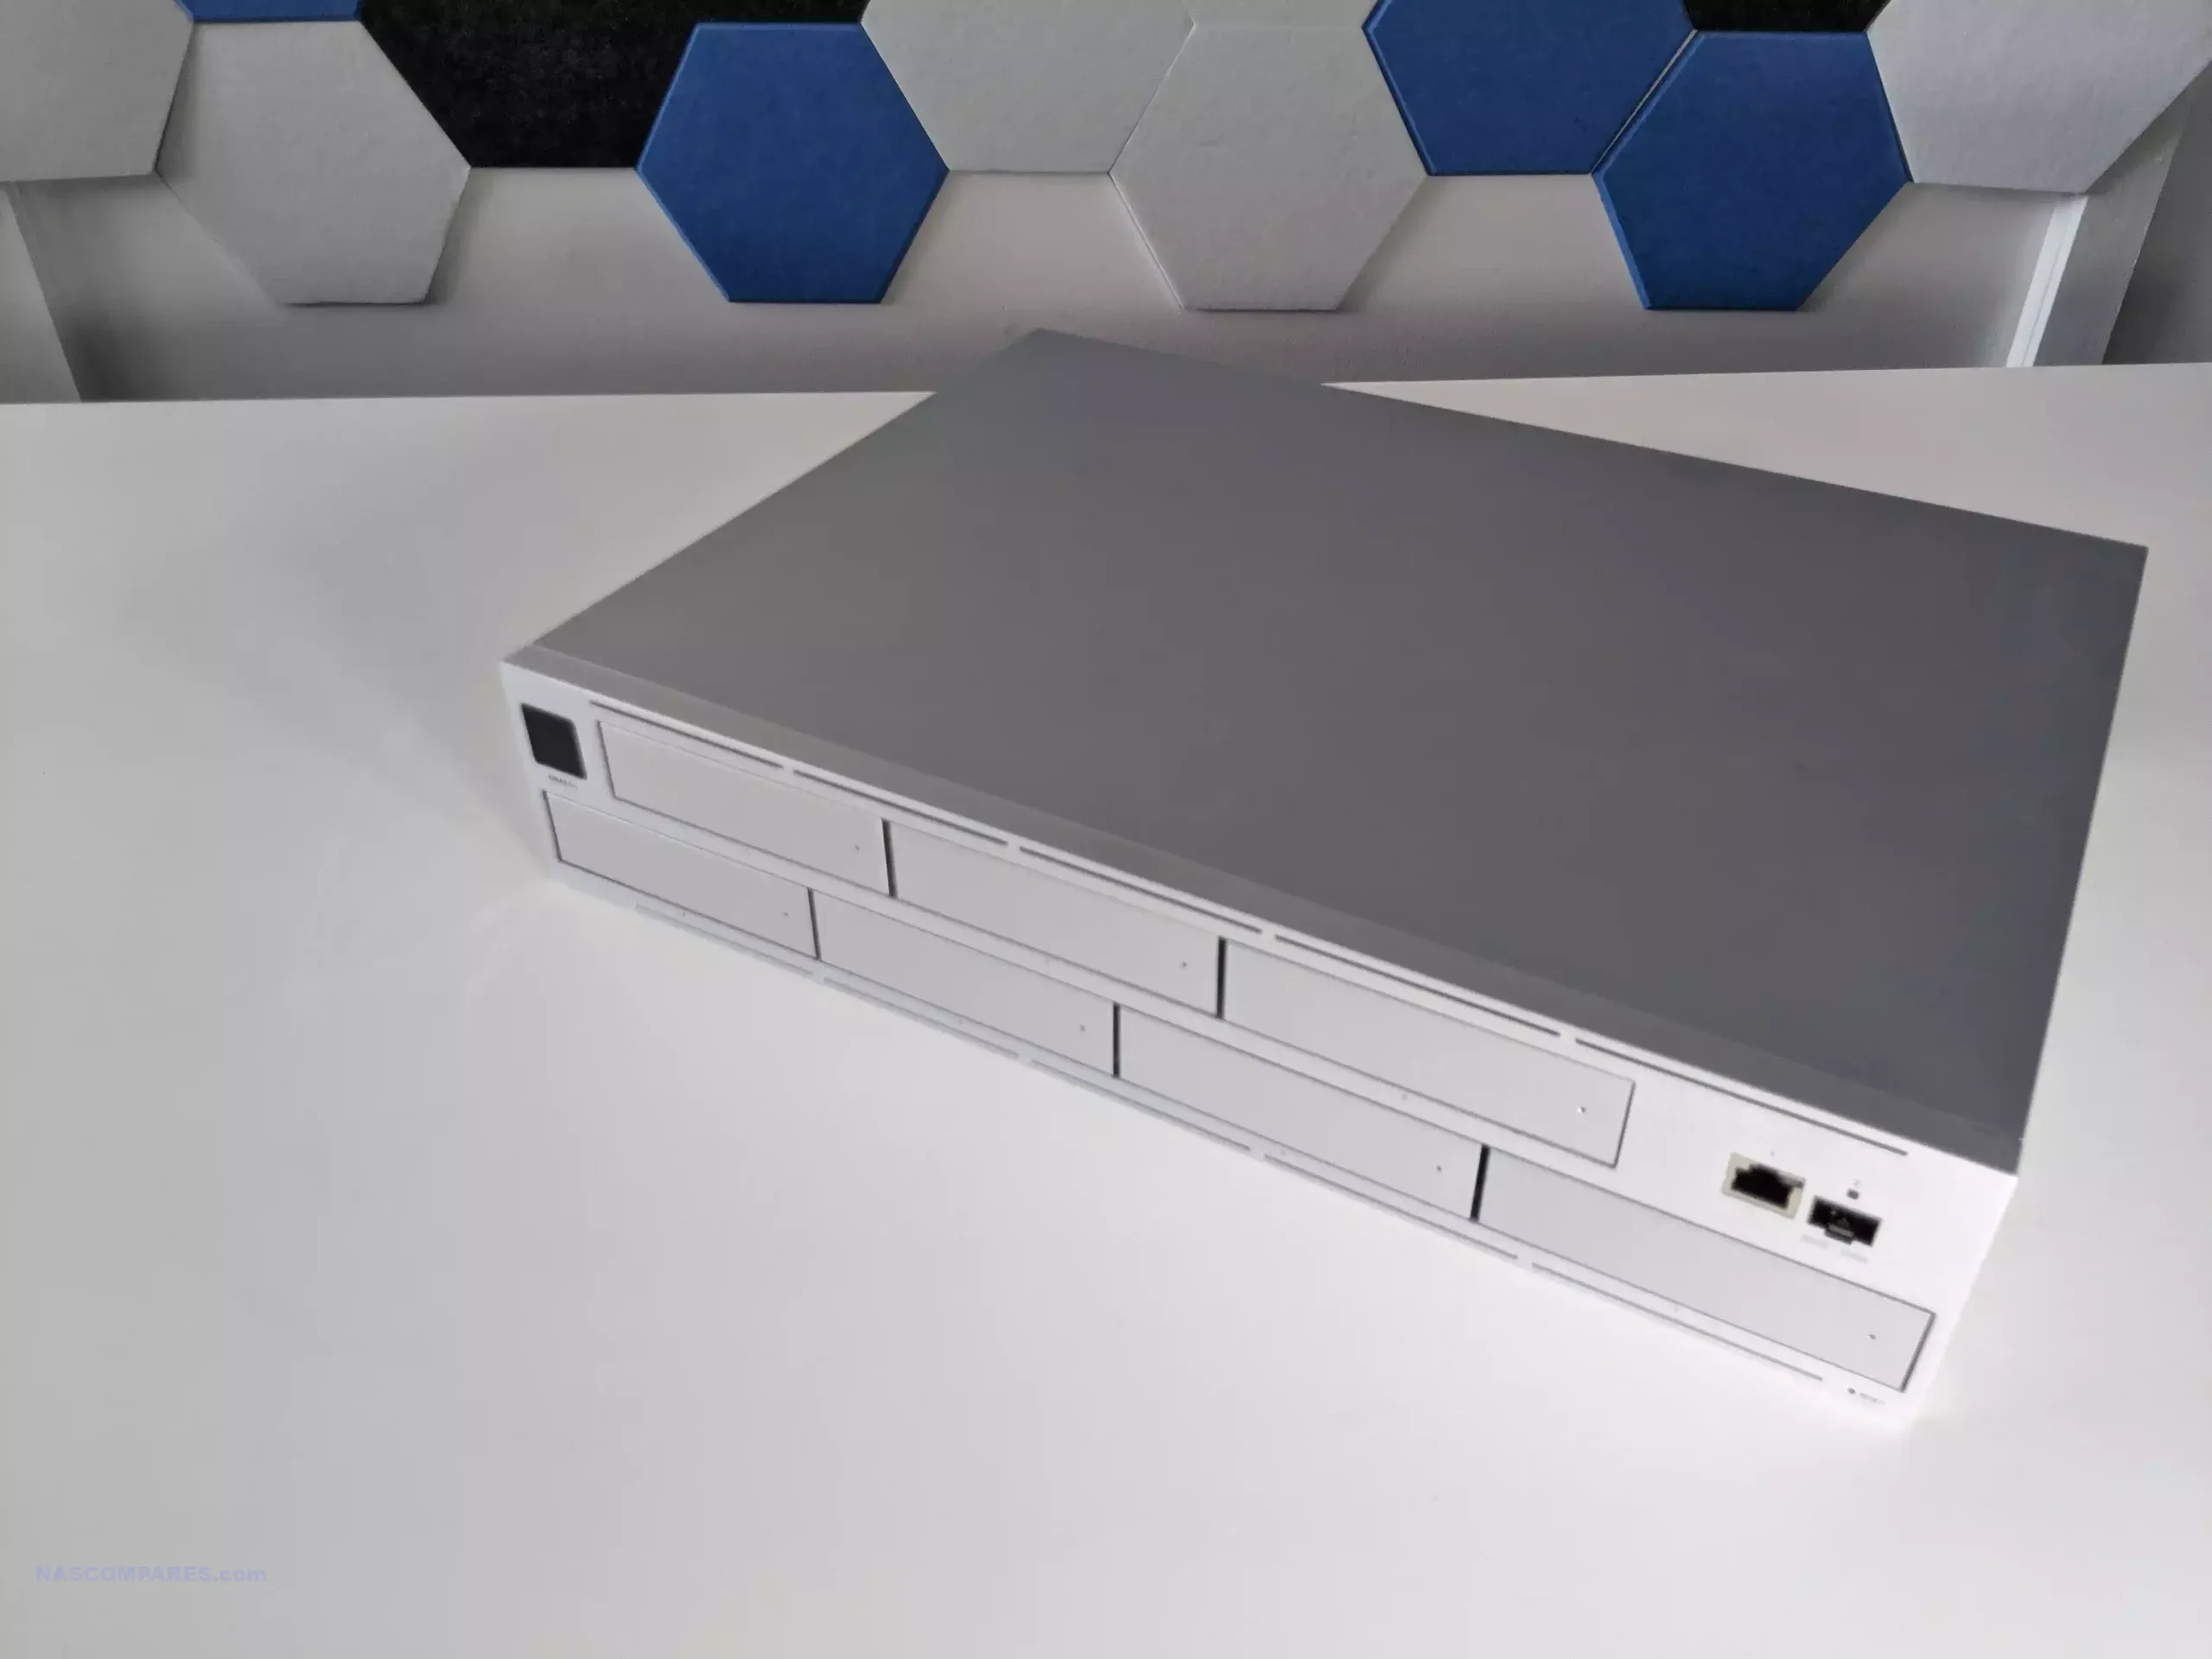
UniFi UNAS 4 Review – Design & Storage
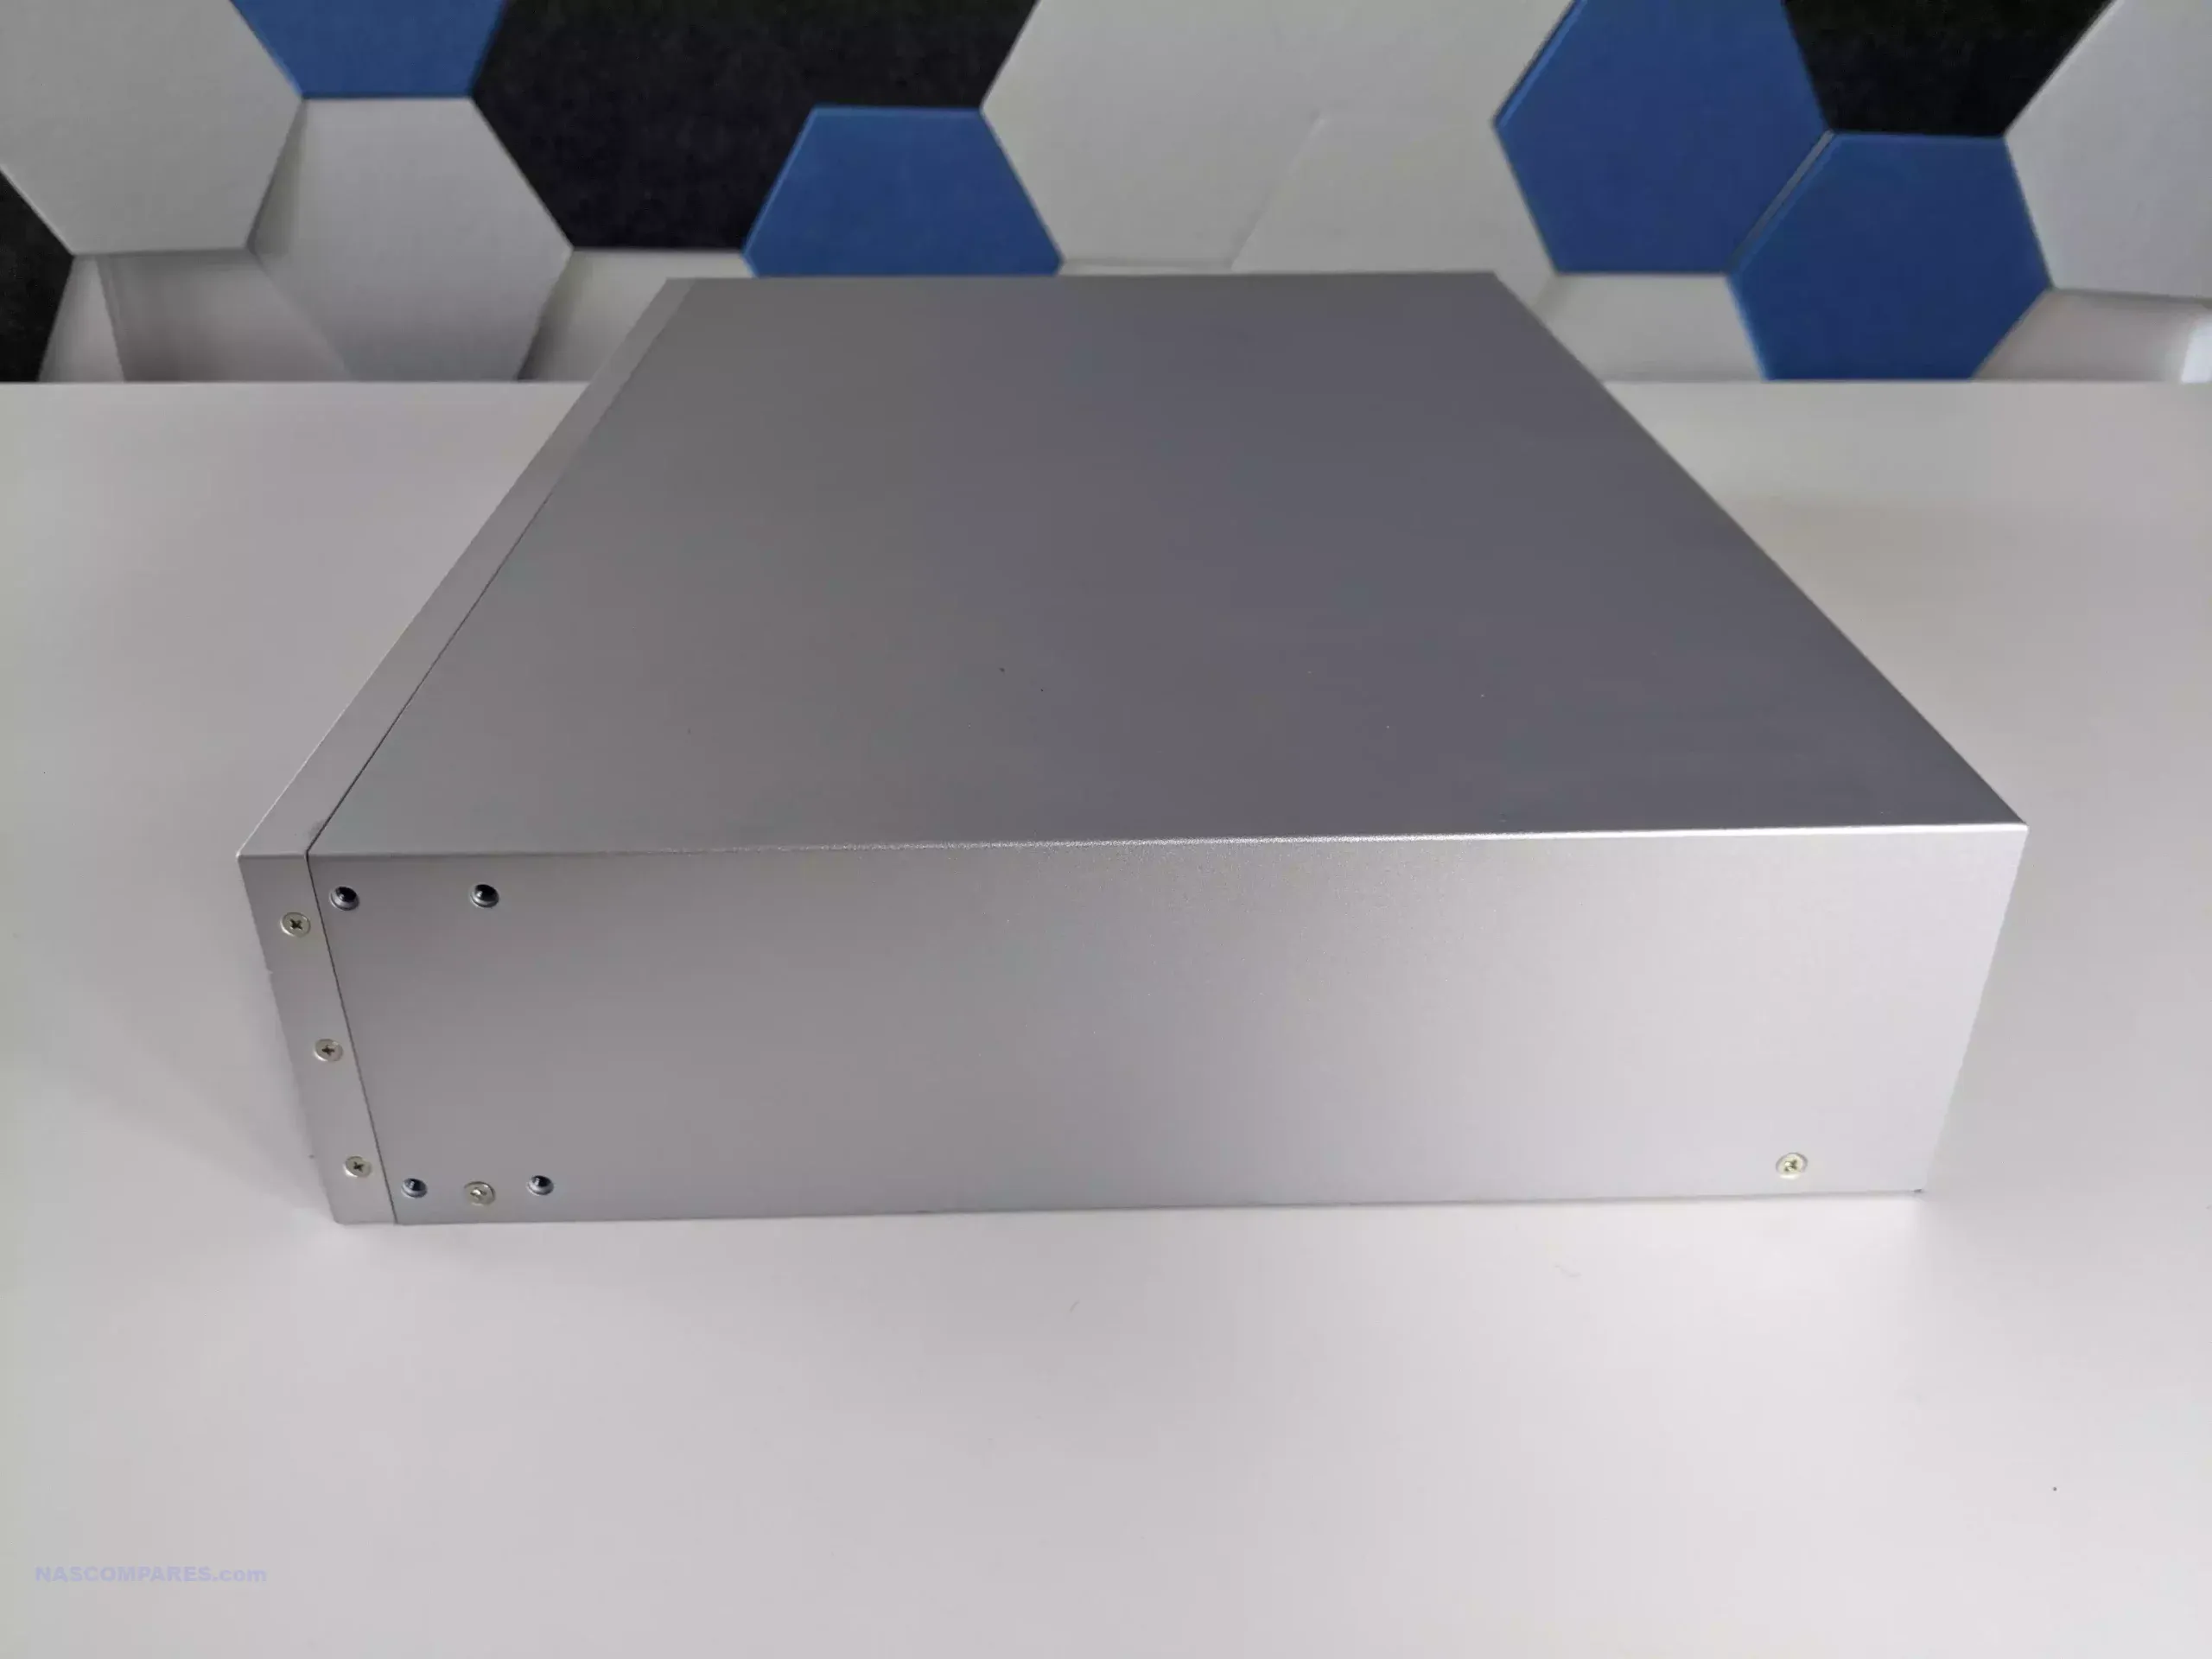
The UniFi UNAS 4 uses a compact desktop chassis that differs from the more traditional box shaped NAS designs seen from many competing brands. The enclosure is relatively narrow and deep, giving it a vertical appearance that resembles some earlier consumer NAS designs. The casing itself is constructed from polycarbonate rather than metal, which keeps overall weight down to around 2.6 kg without drives installed. Ventilation is primarily handled through openings along the upper portion of the chassis, with airflow directed toward a rear mounted cooling fan.
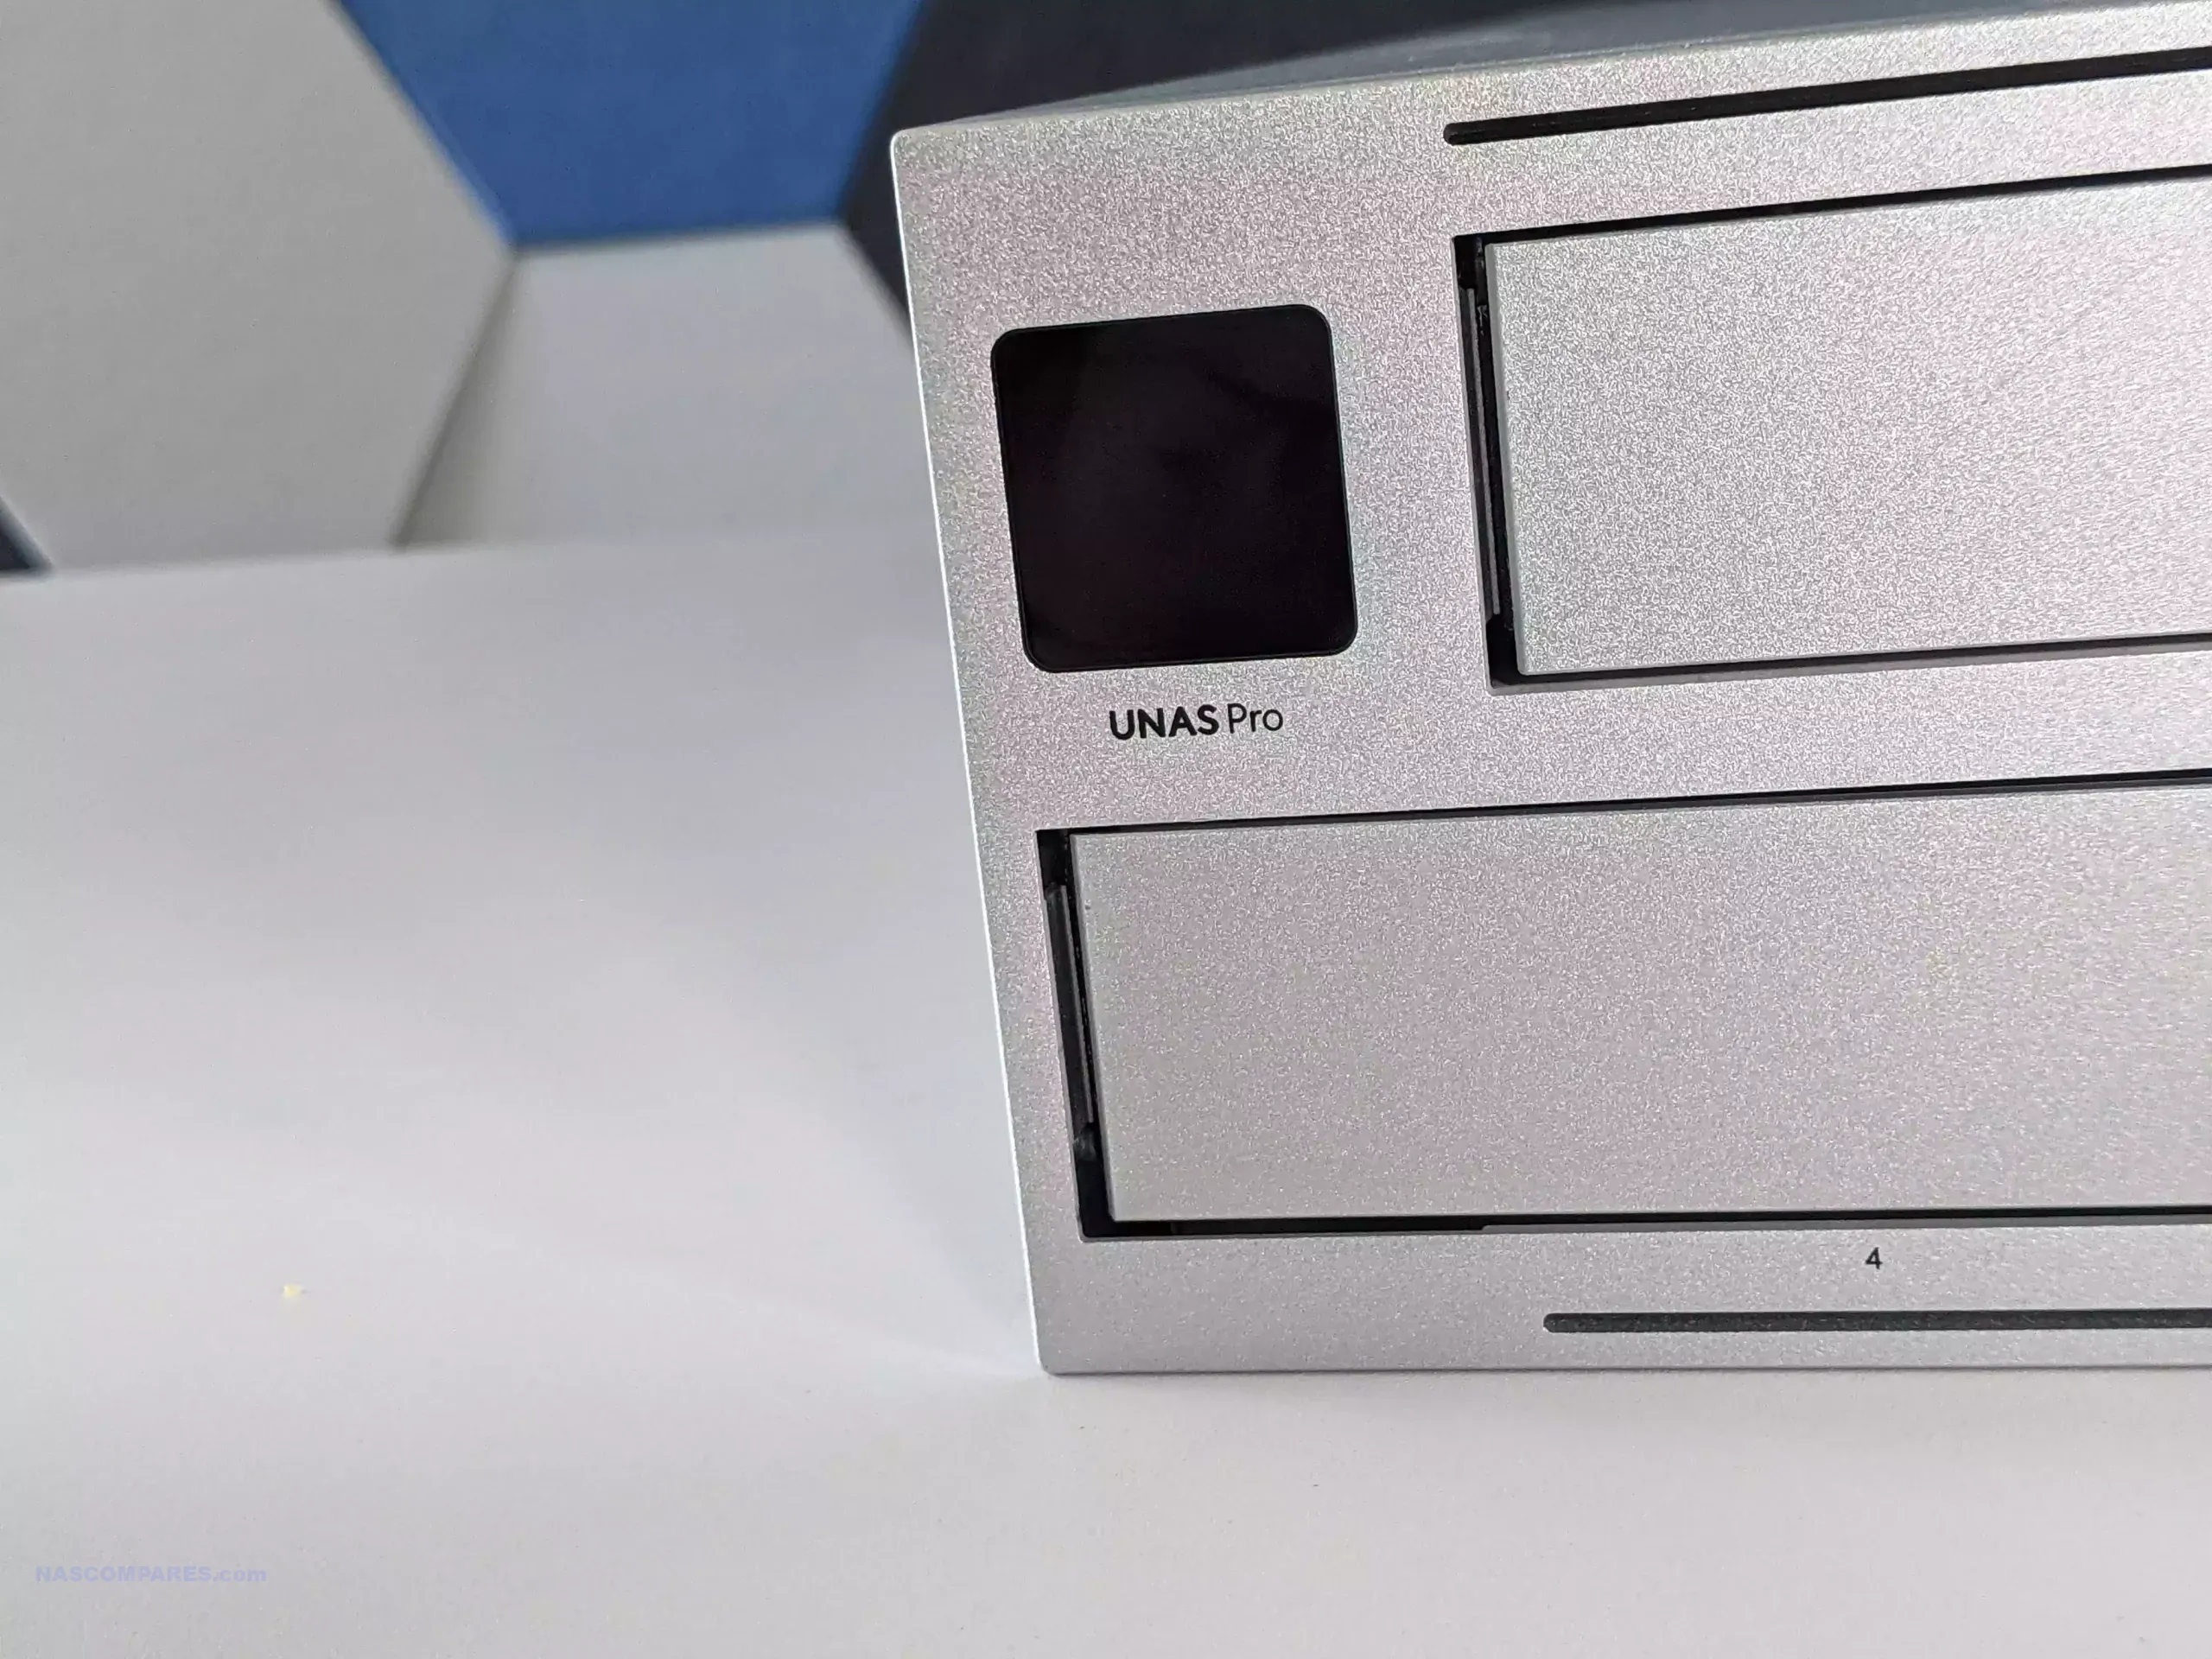
At the front of the unit is a small 1.47 inch color LCM display that provides basic system information. This panel is not touch enabled but can show details such as drive activity, network activity, and general system status. It acts primarily as a quick visual reference rather than a full control interface. For most configuration and monitoring tasks, the system is intended to be managed through the UniFi Drive interface via a web browser or mobile application.
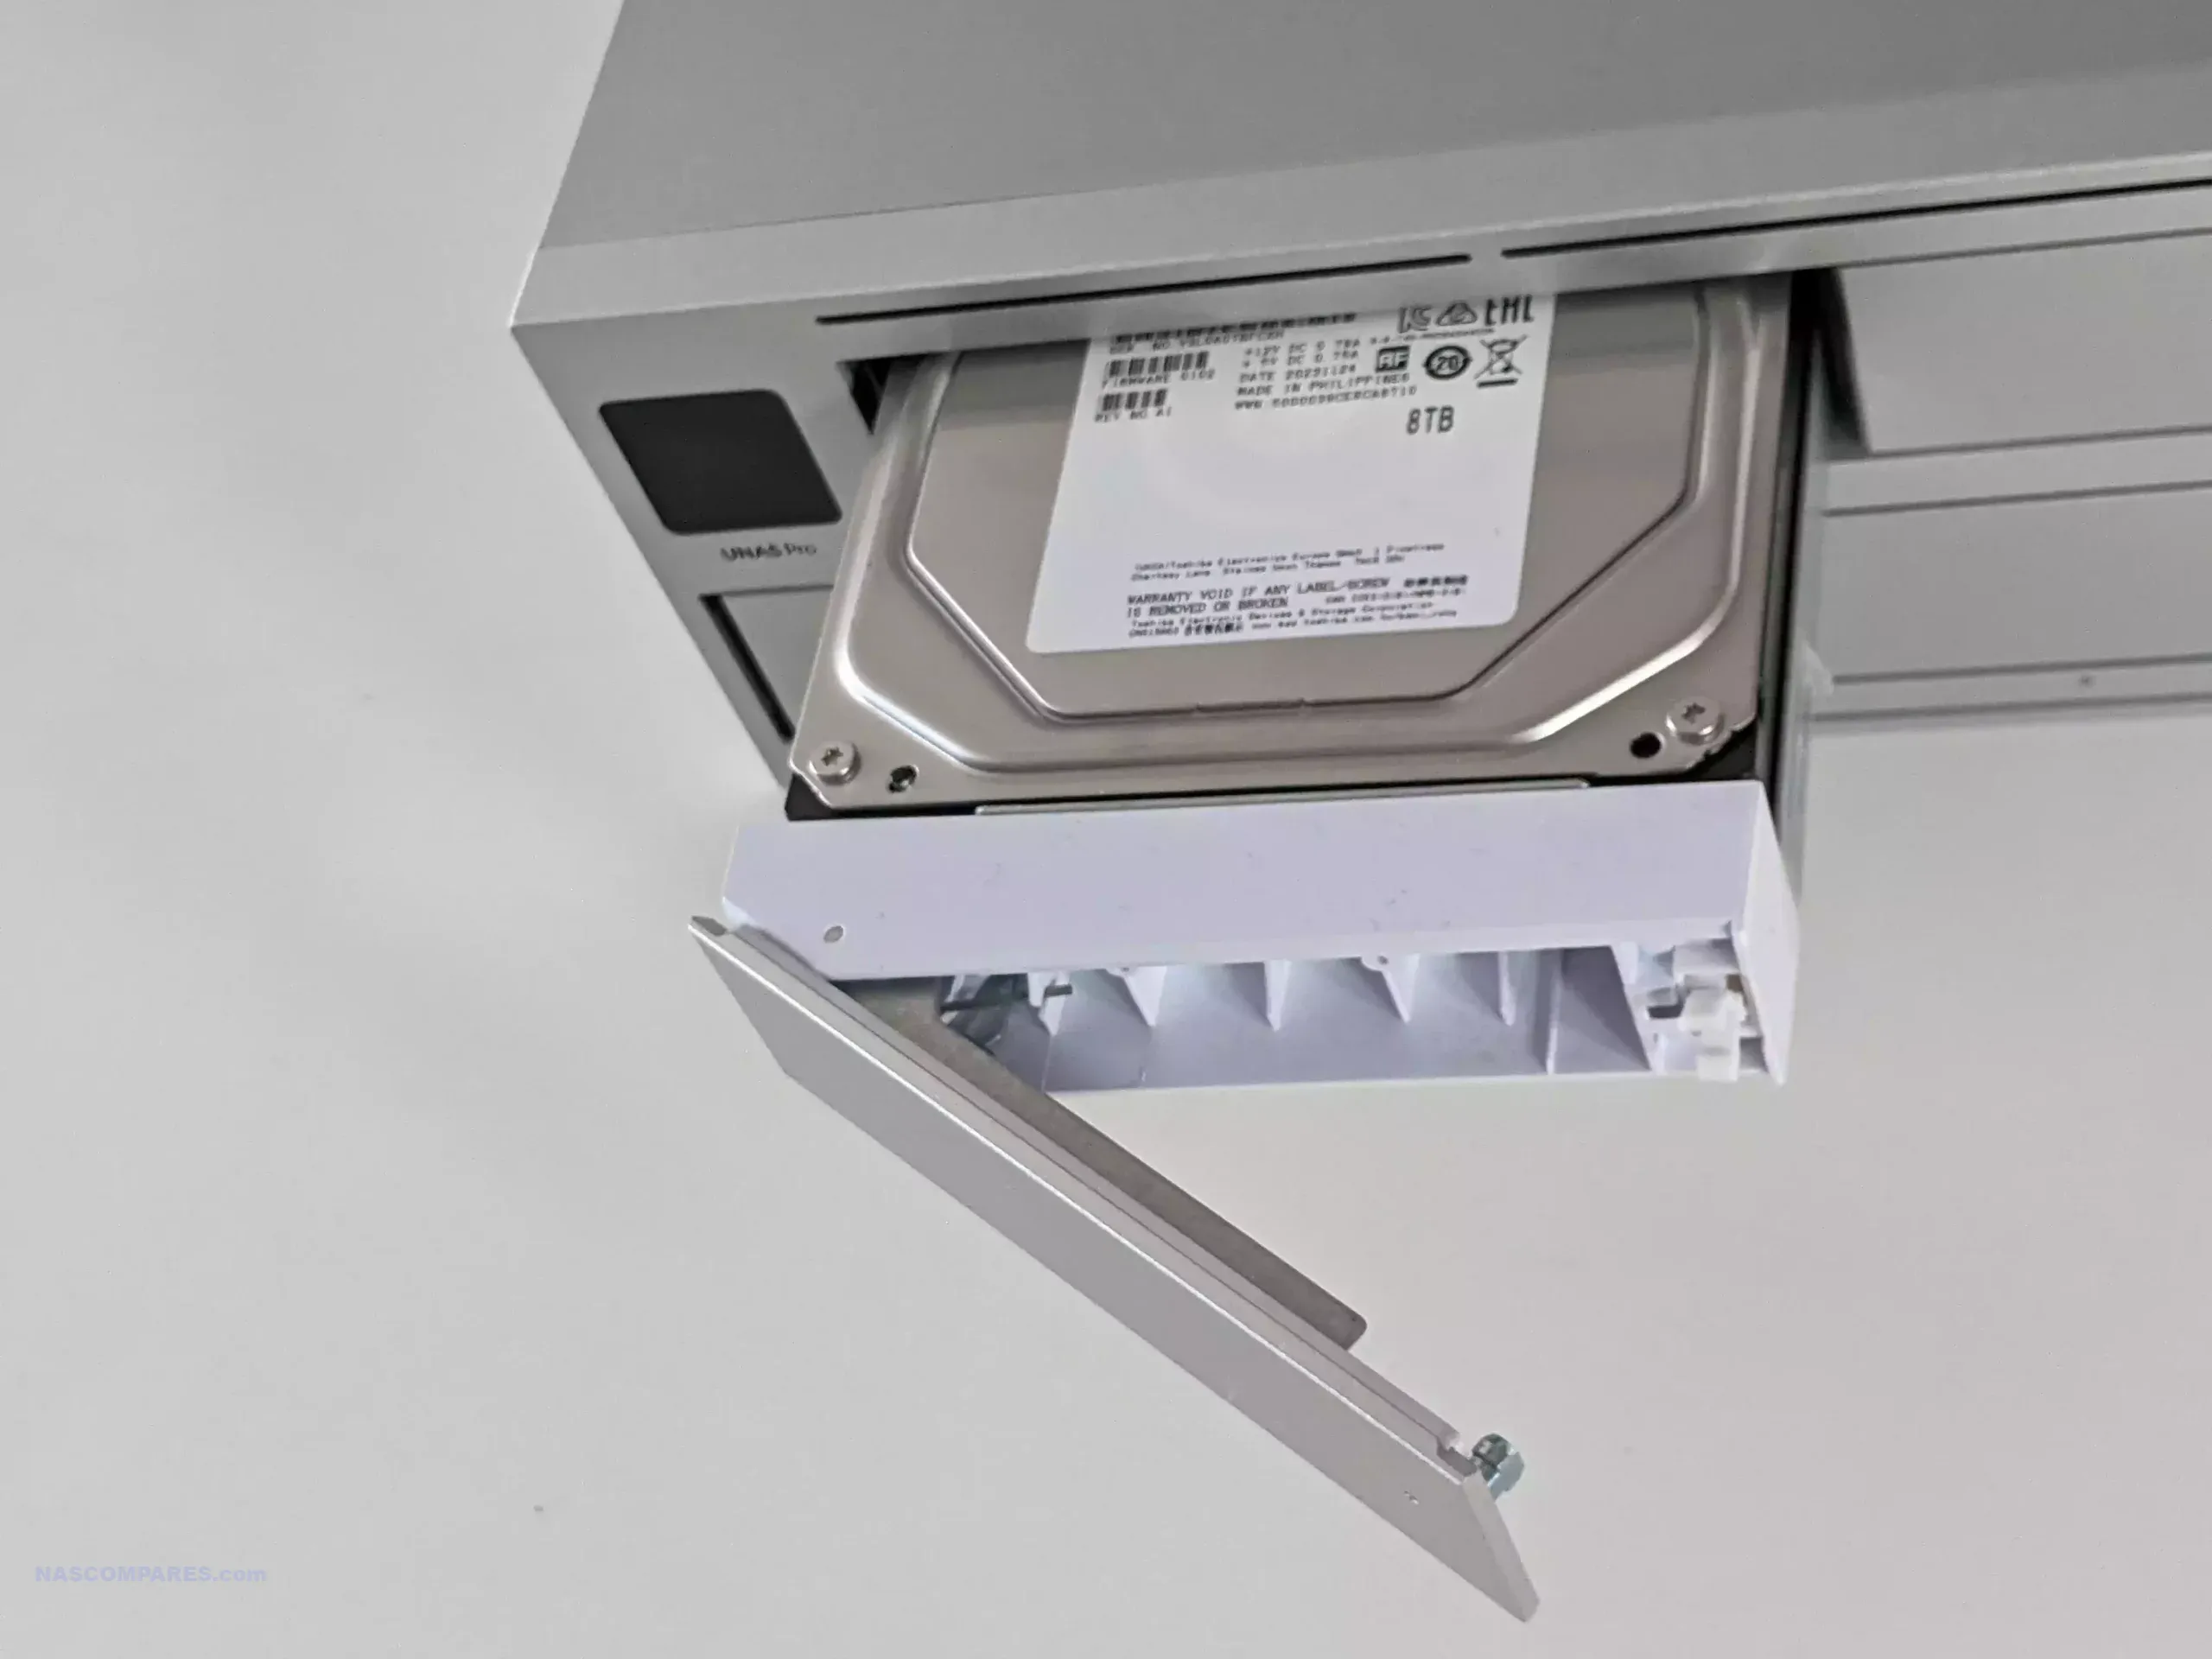
The primary storage configuration consists of 4 drive bays supporting either 3.5 inch or 2.5 inch SATA drives. Each drive uses an individual tray that slides into the chassis and clicks into place without requiring screws for 3.5 inch drives. The trays are ventilated and designed for relatively straightforward installation or replacement, although they are not lockable. Compared with earlier UniFi NAS designs that grouped multiple drives into a single tray, the use of separate trays simplifies drive access and improves hot swap usability.
In addition to the main hard drive bays, the system includes 2 M.2 NVMe slots intended for SSD caching. These slots are located in a separate compartment on the base of the device and can be accessed by removing a small cover using the included key. Once installed, these SSDs can be used to provide read and write caching to improve responsiveness when working with frequently accessed data. At the time of writing, these NVMe drives cannot be used as independent storage pools and are limited to caching roles.
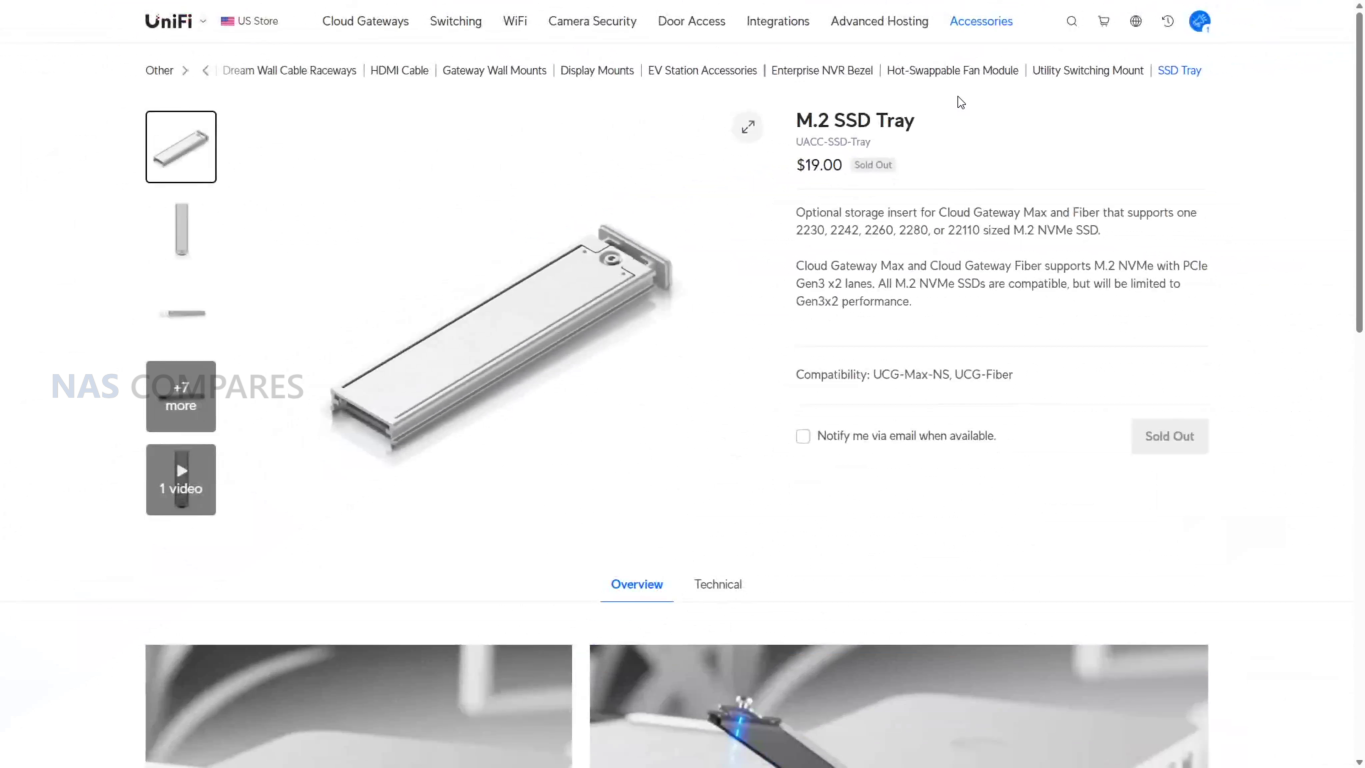
One design choice that may affect installation is that the trays required to hold the NVMe SSDs are not included in the retail package. Instead, they must be purchased separately or obtained as part of pre populated SSD modules from Ubiquiti. While the M.2 slots themselves are built into the device, the lack of included trays adds an additional step and cost for users who intend to make use of SSD caching alongside the main hard drive storage.
UniFi UNAS 4 Review – Internal Hardware
Internally, the UniFi UNAS 4 is built around a quad core ARM Cortex A55 processor running at 1.7 GHz. This type of processor is commonly used in embedded networking hardware and lower power storage appliances, where efficiency and reliability are prioritized over raw processing performance. Ubiquiti has extensive experience deploying ARM architectures across its networking and infrastructure products, and the choice here aligns with the system’s intended role as a dedicated storage appliance rather than a general purpose server platform.
The system includes 4 GB of LPDDR4 memory, which is fixed and not user upgradeable. For the core functions the device is designed to handle, such as file transfers, backups, and storage management, this amount of memory is generally sufficient. However, the fixed memory configuration does place a ceiling on how much additional functionality the hardware could realistically support in the future, particularly if the software platform expands with additional services or heavier workloads.
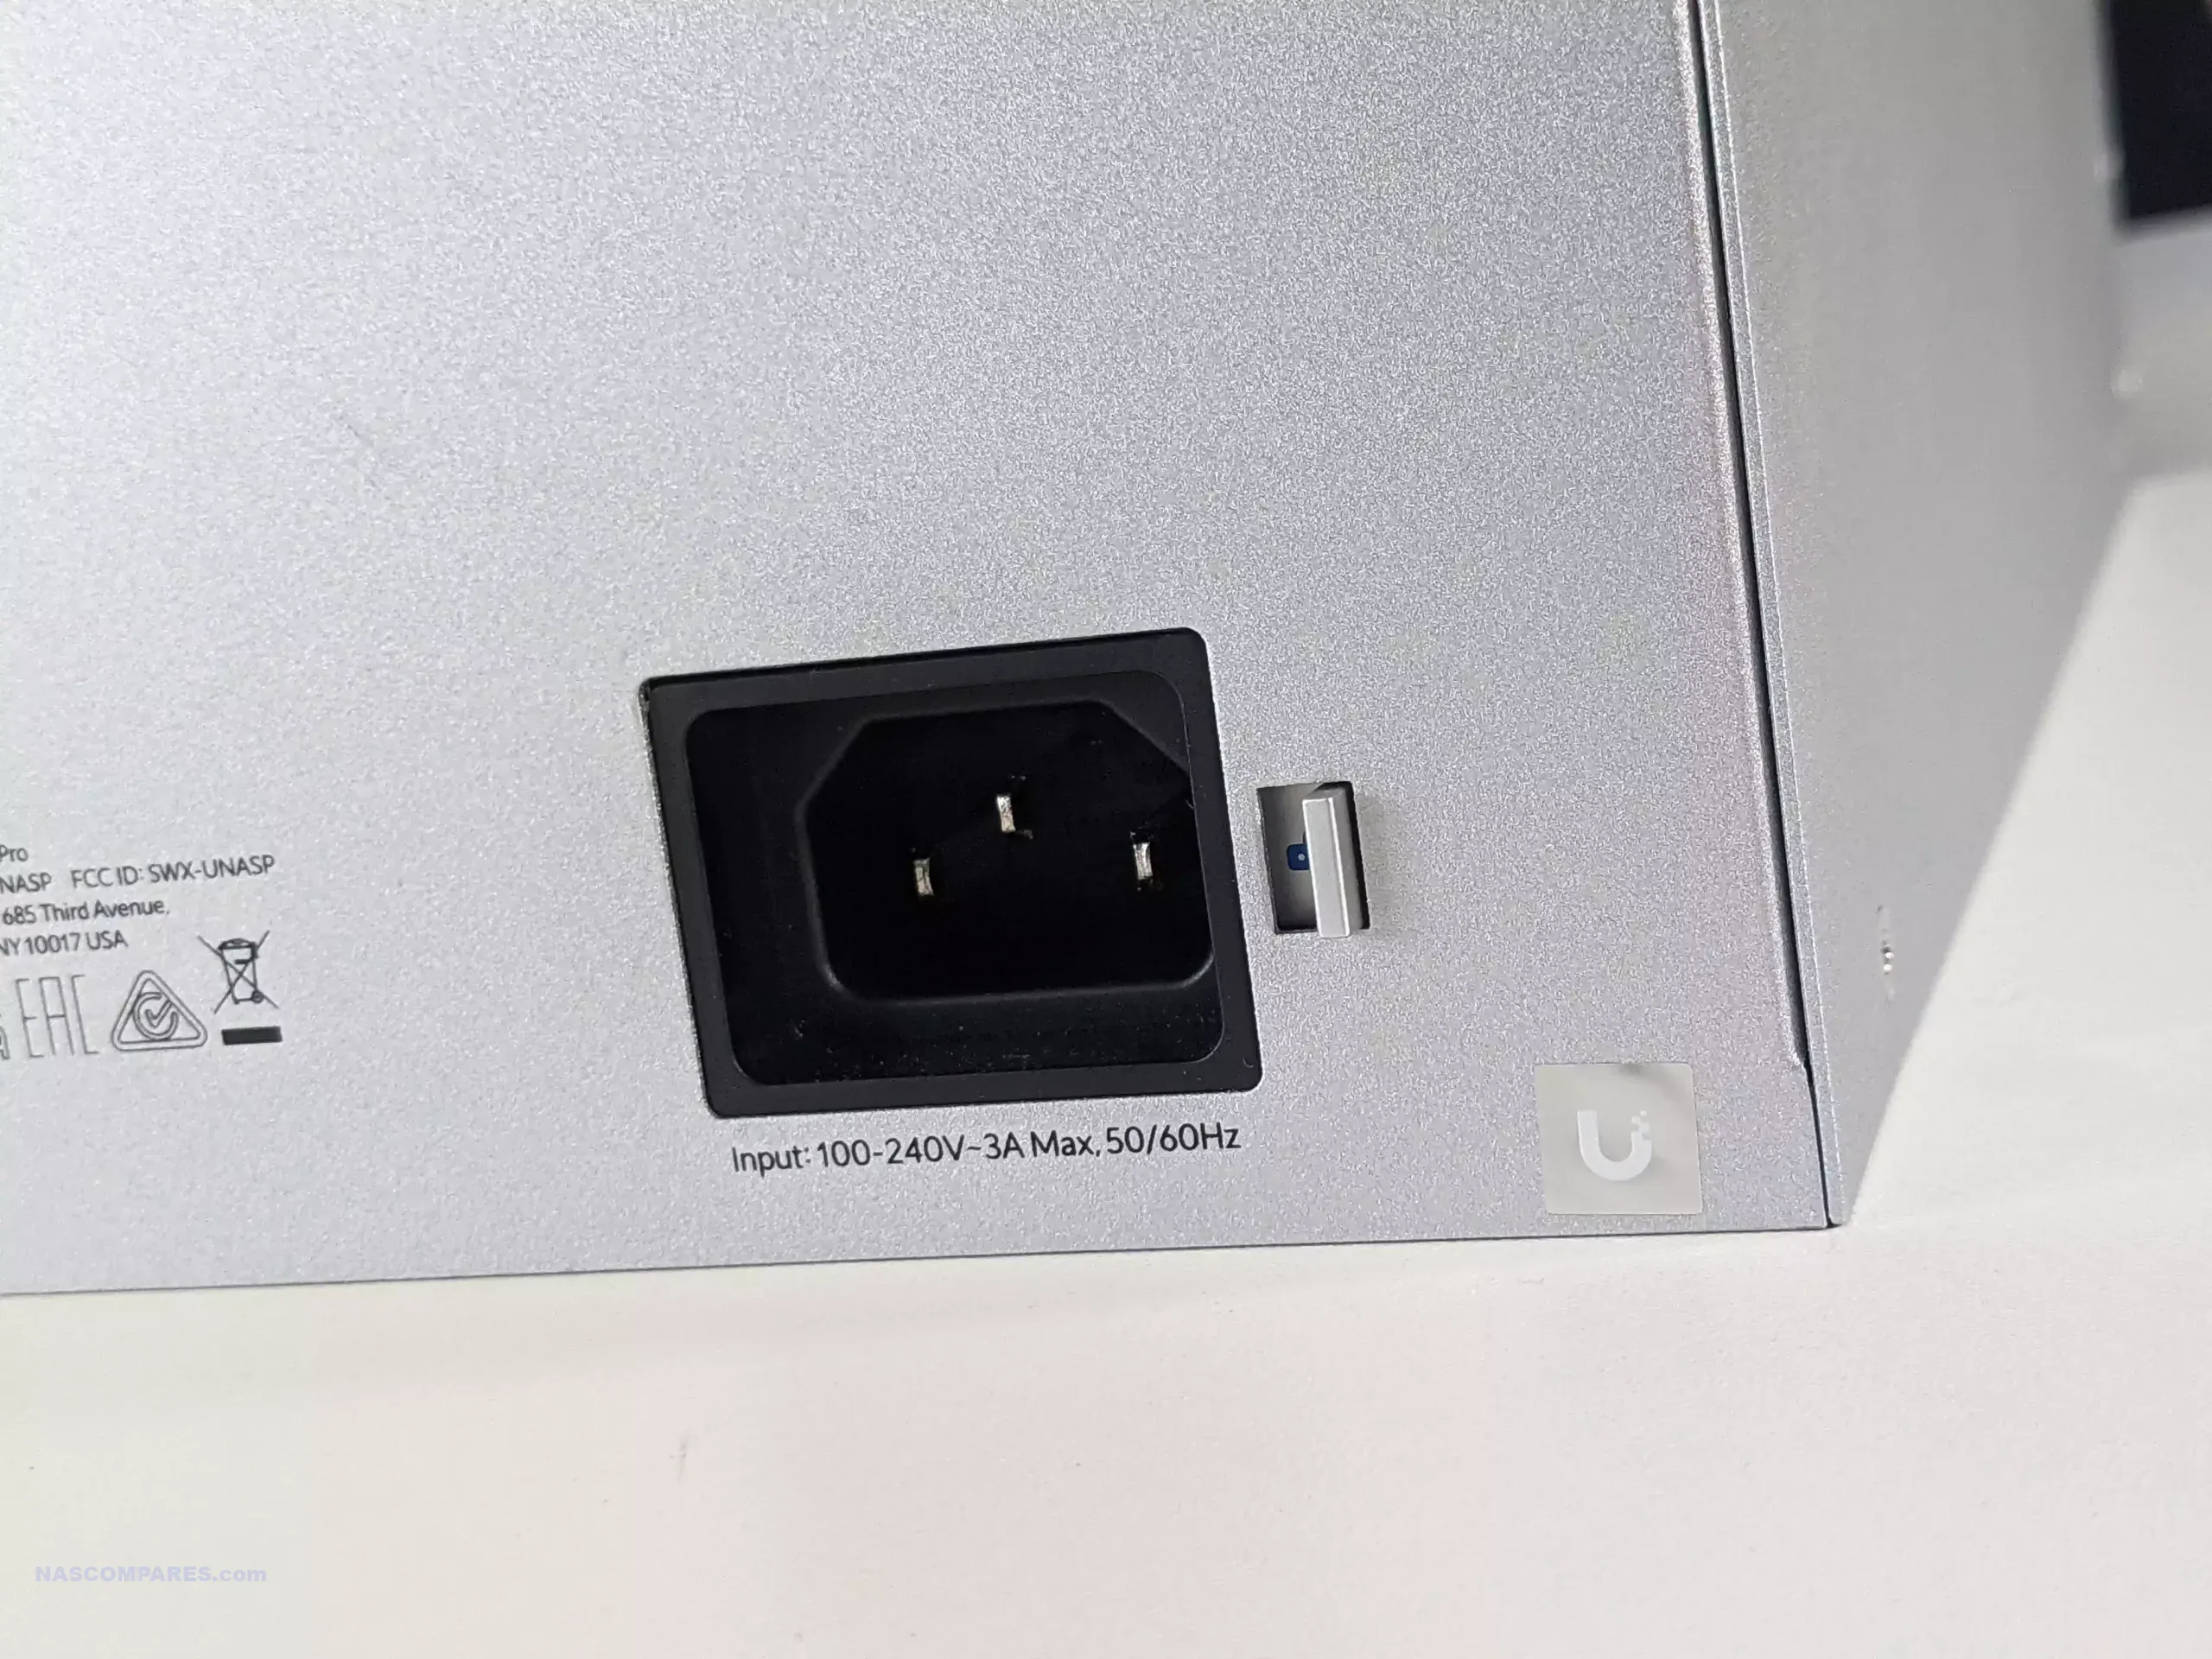
From a power perspective, the system is designed to operate within a relatively modest power envelope. The maximum system power consumption is rated at 90 W, with a maximum drive power budget of 80 W. Power delivery is handled through PoE+++, allowing both data and power to be carried through the same Ethernet connection when used with compatible infrastructure. For deployments without PoE support, the device ships with a 90 W PoE+++ adapter, allowing it to be powered from a standard mains outlet while still maintaining the same connection layout.
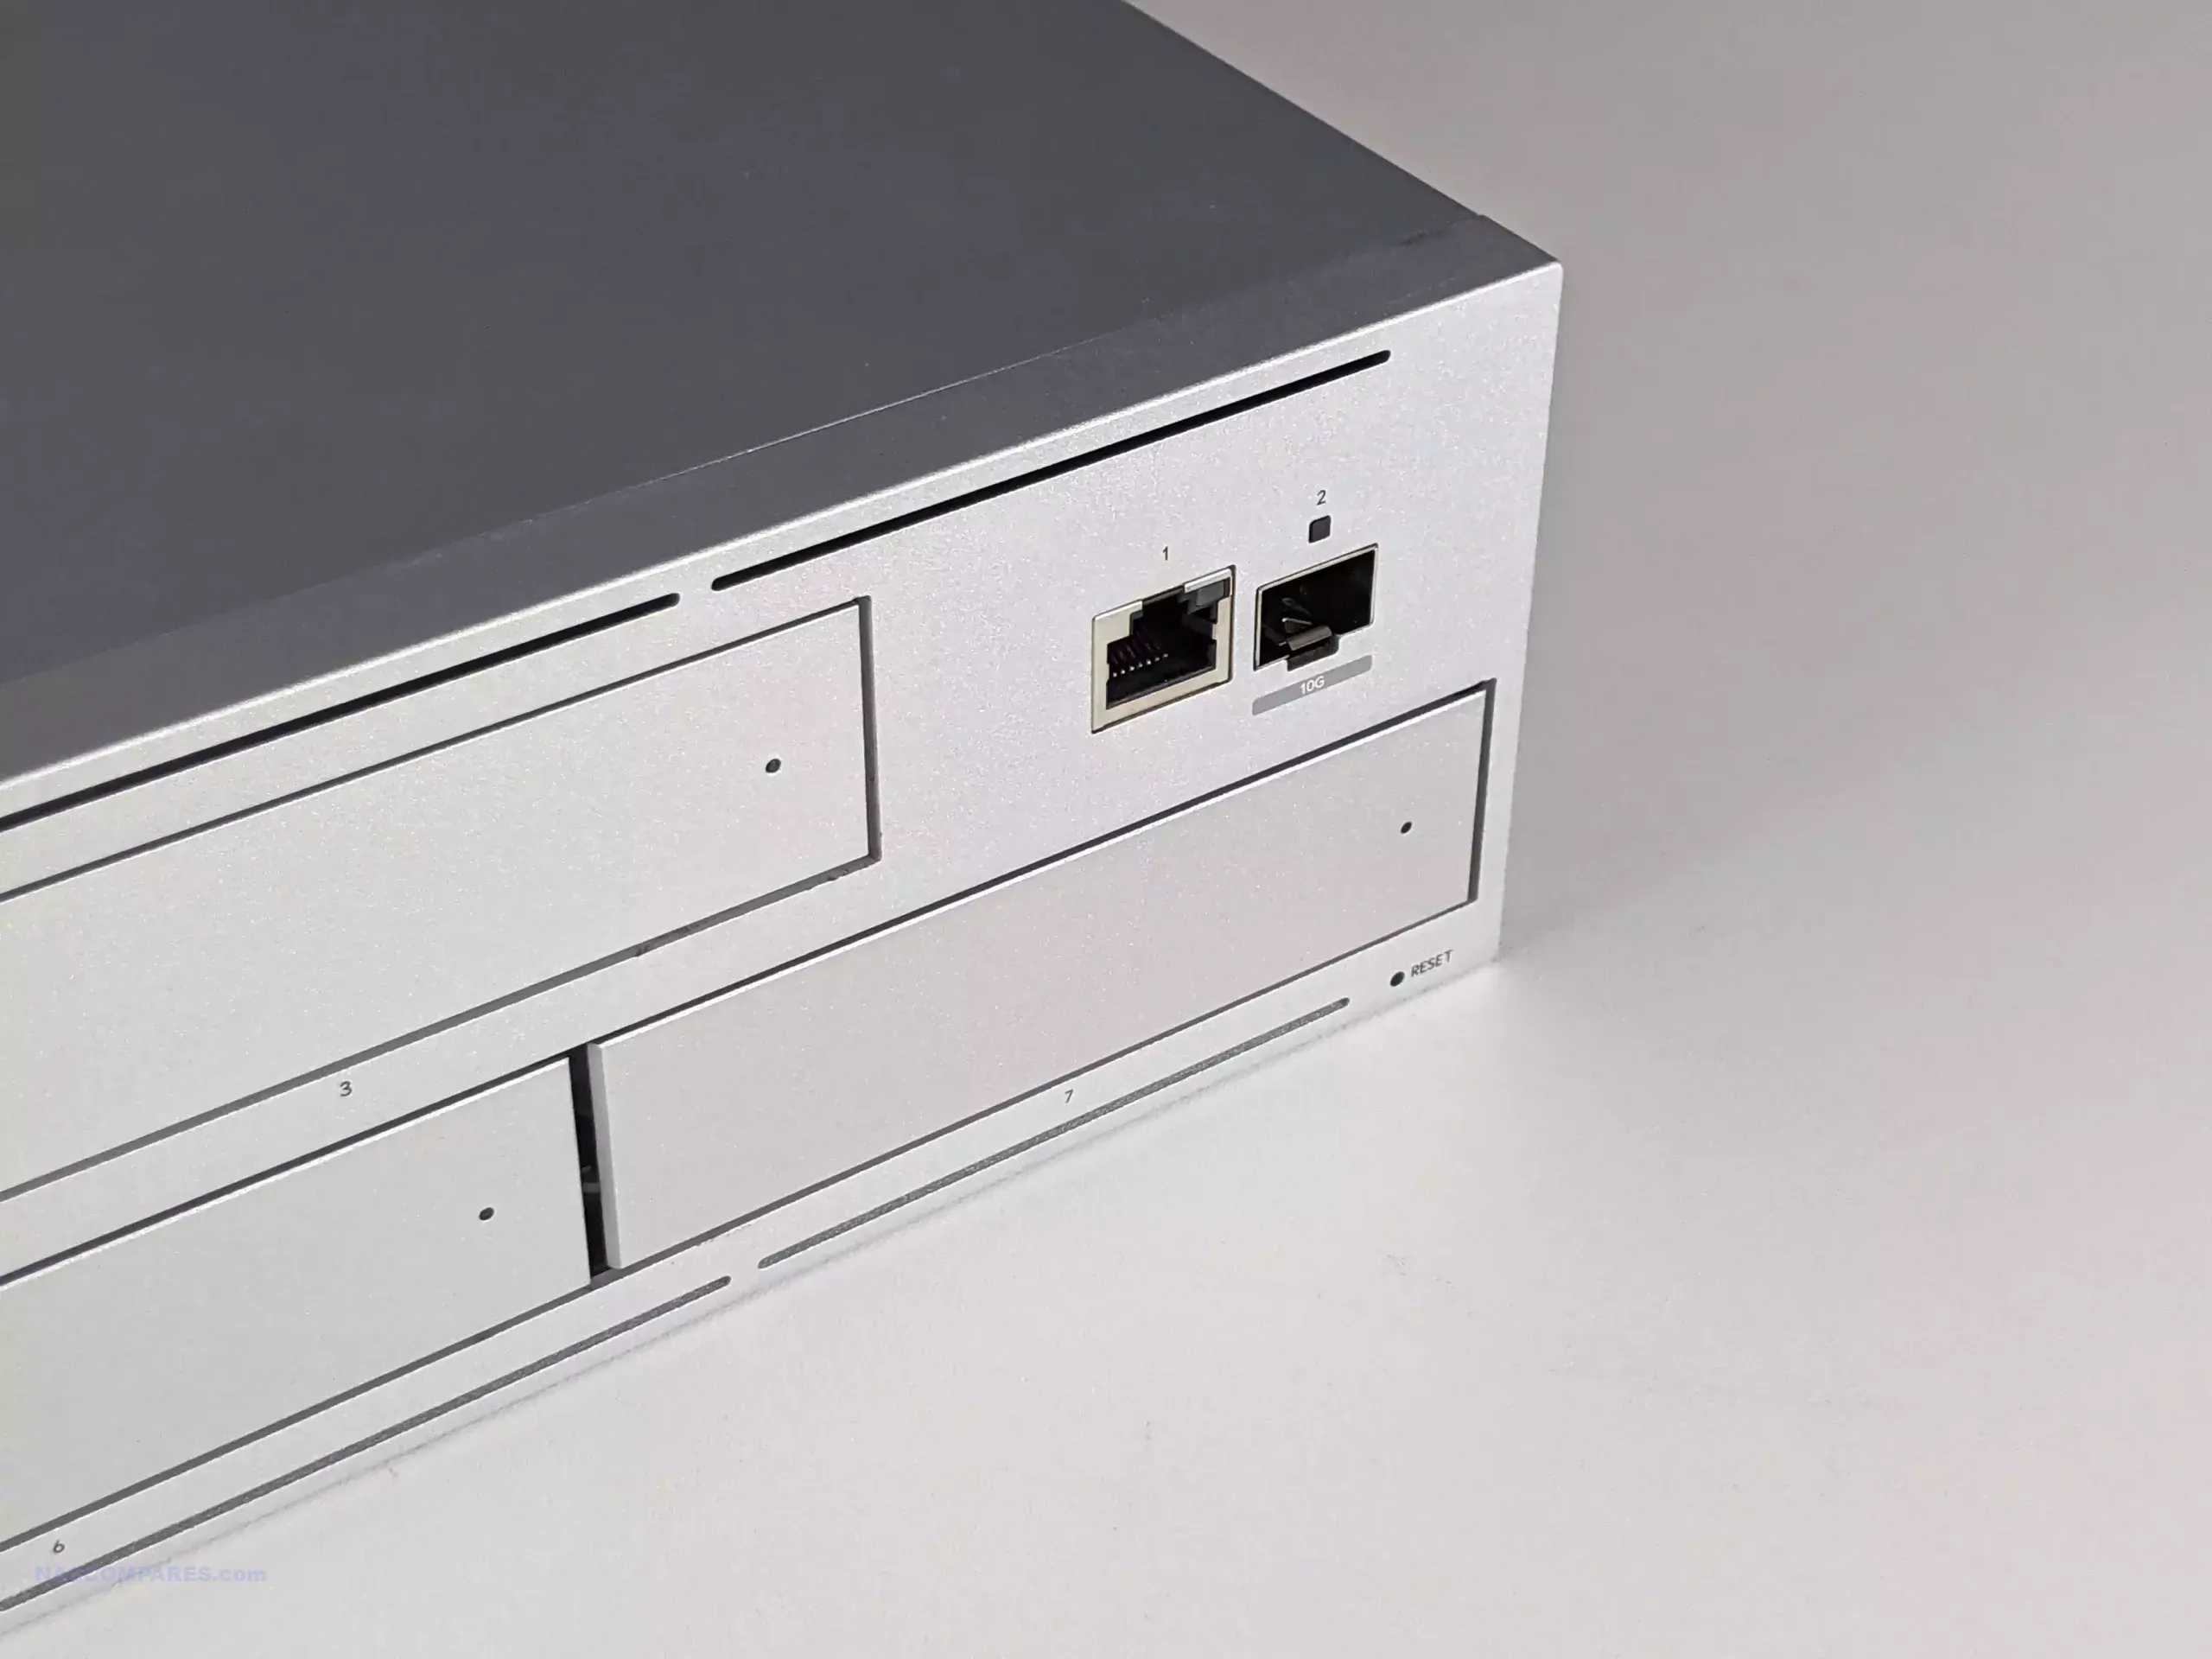
UniFi UNAS 4 Review – Ports and Connections
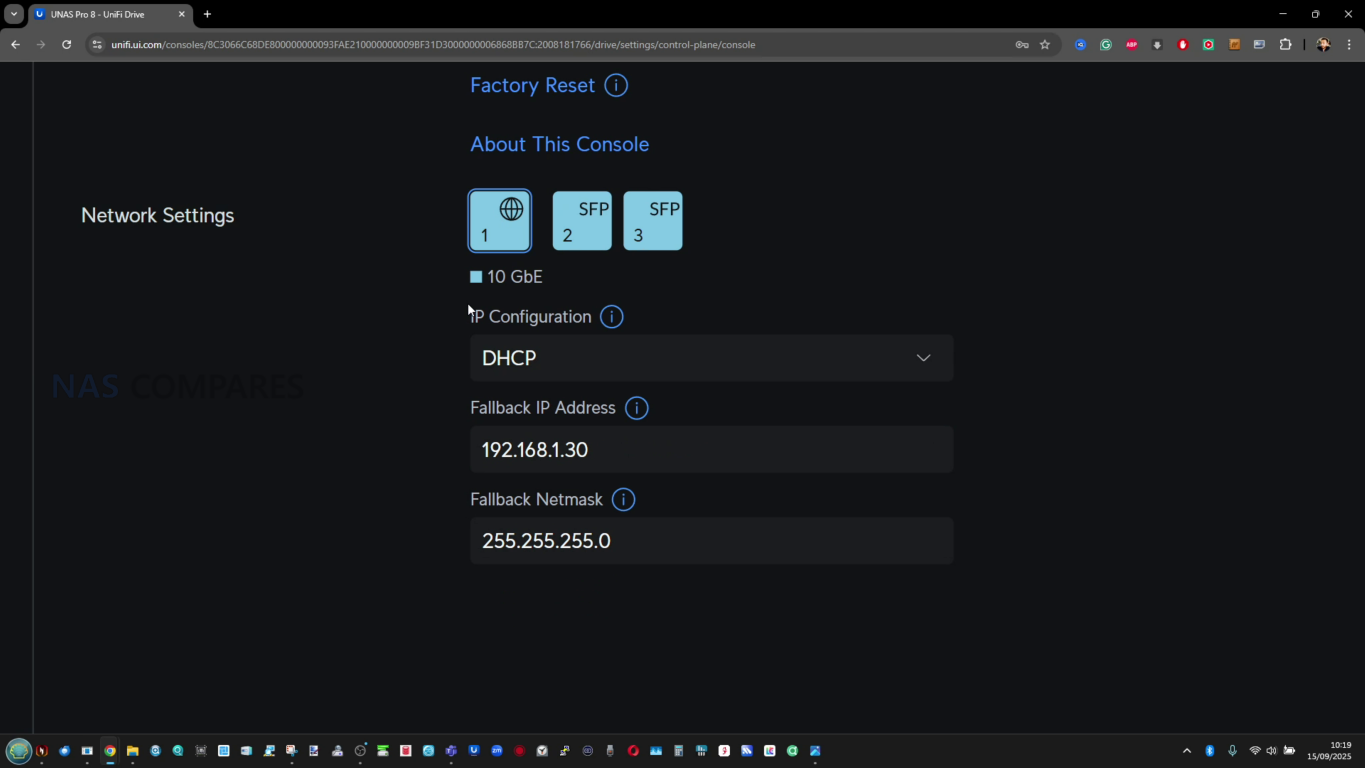
The UniFi UNAS 4 keeps connectivity simple, with a single 2.5GbE RJ45 port handling both network data and PoE+++ power delivery. This allows the unit to be deployed with a single cable when used with compatible switches or injectors, which can reduce cable clutter and simplify placement compared with NAS systems that require separate power and network connections. The port supports 2.5G, 1G, 100M, and 10M link speeds, so it can operate in mixed networks even if 2.5GbE infrastructure is not available.
The main limitation is that there is only 1 network interface, with no secondary port for link aggregation, redundancy, or dedicated management traffic. In practical terms, this reduces options for failover and makes the network connection a single point of dependency. It also places a hard ceiling on throughput, which is relevant on a 4 bay system where aggregate drive performance can exceed what a single 2.5GbE link can sustain in some workloads.
For external expansion, the device includes a 5 Gbps USB C port intended for attaching external storage. In its current form, it functions primarily as a straightforward way to connect a USB drive for basic transfers rather than as a broader expansion interface. The hardware capability suggests potential for wider use cases, but the available functionality is mainly determined by what UniFi Drive supports at the software level.
UniFi UNAS 4 Review – Software and Services
The UNAS 4 runs UniFi Drive and is managed through the same UniFi style web interface used across the wider portfolio, with system status, storage, backups, and user access presented through a single dashboard. For typical NAS use, the core functions are in place: initializing drives, building RAID storage, creating shared and personal drives, enabling file services, and checking drive health information. The interface is mostly structured around completing common tasks quickly and keeping administration consistent with other UniFi products, rather than exposing a long list of granular configuration controls. That approach makes initial setup and day to day management relatively straightforward, but it also means experienced NAS users may notice limits in how far the system can be tuned.
File access is centered on SMB and NFS, with browser based file management available for basic upload, download, and folder navigation. The web file manager covers essential functions and includes share link creation plus thumbnail and preview handling, but it is not designed as a full productivity layer with collaborative editing or advanced file workflow tools. Client access is largely built around standard network shares and UniFi’s account-driven identity layer, and while the system can be deployed locally without relying on a UniFi account, the most integrated remote workflow is clearly designed around UniFi’s own UI and identity services rather than third party remote networking options.
Data protection features cover most of what is expected for a general purpose file NAS. UniFi Drive supports snapshots, encrypted storage, and configurable retention policies, which covers common rollback needs and basic ransomware recovery strategy when paired with sensible scheduling. Backup tooling is one of the stronger areas in terms of scope, supporting tasks to another UniFi NAS, to SMB targets, and to cloud services such as Google Drive, OneDrive, Dropbox, Amazon S3, Backblaze B2, and Wasabi. Time Machine support is also present for macOS environments, and Microsoft 365 backup is part of the broader UniFi Drive direction, even if the overall feature set remains more storage and protection focused than application focused.
The limitations are consistent with the UNAS 4’s role and its hardware profile. There is no iSCSI target support, which restricts certain virtualization, hypervisor, and block storage workflows, and there is no container or VM layer intended for running third party services directly on the device. NVMe support remains limited to SSD caching rather than separate pools, and on the UNAS 4 that caching is also constrained by the single 2.5GbE connection, which can cap how much of the cache benefit is visible over the network in sustained sequential transfers. More broadly, system level configuration remains relatively contained, with fewer advanced networking and scheduling controls than many established NAS platforms provide.
Client side tooling is also still relatively limited compared with ecosystems that offer a more developed sync, selective download, and offline pinning experience across desktop and mobile. UniFi Drive does provide client app support and identity driven access, but the overall workflow remains closer to traditional network share usage than to a full cloud drive style experience. As it stands, the software aligns with the UNAS 4’s positioning as a storage and backup appliance with a clean management layer, rather than a platform intended to replace a more feature dense NAS operating system.
In practical use, performance on the UNAS 4 is largely shaped by its single 2.5GbE connection. With mechanical drives, the system can deliver consistent transfer rates that sit within the expected ceiling of a 2.5GbE link, but it does not have the networking headroom to take full advantage of what a 4 drive array can potentially deliver under sustained sequential workloads. This is most noticeable when using higher capacity 7200 RPM drives, where the combined throughput of multiple disks can exceed the network limit even before SSD caching is factored in.
Testing with mixed file transfers showed typical throughput in the range of roughly 180 to 250 MB/s depending on file type and workload, with higher results generally observed once NVMe caching was enabled. A 50 GB Windows transfer completed at a pace that aligned with these figures, with sustained rates remaining stable rather than spiking briefly and then dropping sharply. The overall behaviour suggests that the device can maintain steady network limited transfers, but it is not designed to chase peak throughput beyond what 2.5GbE allows.
NVMe caching improved responsiveness and helped maintain higher sustained transfer speeds, particularly during repeated reads and writes where the cache could play an active role. However, the caching implementation is limited to acceleration rather than acting as a separate storage tier, and the benefit is workload dependent. Large sequential transfers still remain constrained by the network port, while smaller or more frequently accessed data sees more practical gains from the cache layer.
From an operational standpoint, power draw remained relatively modest for a 4 bay system. A baseline measurement with no drives installed was around 14.1 W. With 4 HDDs and 2 NVMe SSDs installed, idle power use was observed at around 46 W, rising to roughly 50 to 51 W under active read and write workloads with moderate CPU and memory utilization. The relatively small gap between idle and active indicates that drive idle draw forms a significant portion of the total consumption in typical day to day use.
UniFi UNAS 4 Review – Conclusion & Verdict
The UniFi UNAS 4 is a compact 4 bay NAS that prioritizes straightforward storage deployment, particularly for users already running UniFi hardware and UniFi management. Its pricing, PoE+++ support with an included adapter, NVMe caching capability, and generally simple physical drive access make it a practical option for core NAS tasks such as shared folders, backups, and centralized file storage. The hardware choices are consistent with that goal, and the platform is best assessed as a storage appliance rather than a general purpose server. On the software side, UniFi Drive provides the expected baseline services for this category, including SMB and NFS file access, RAID options, snapshots, encrypted storage, share links, and multi user management. Backup support is broader than the basics, with options that can include remote UNAS targets, SMB destinations, and several mainstream cloud services, along with Time Machine support for macOS. Management is clearly aimed at keeping configuration simple through a unified interface, but it also remains more limited than mature NAS platforms in areas such as deeper system tuning, third party remote access alternatives, and broader application style features.
The trade offs are easy to identify. A single 2.5GbE port limits peak throughput and removes options such as link aggregation or network failover, which matters more on a 4 bay system than it would on a smaller unit. The NVMe slots are limited to caching rather than independent pools, and using them adds cost due to trays not being included. Cooling behaviour can become more noticeable if fan speed increases, and the USB C port currently operates mainly as an external drive attachment point rather than a broader expansion interface. Overall, the UNAS 4 makes the most sense when its role is kept narrow, and when UniFi Drive’s storage and backup feature set, alongside UniFi ecosystem integration, is a meaningful part of the purchase decision.
You can buy the UniFi UNAS 4 NAS via the link below – doing so will result in a small commission coming to me and Eddie at NASCompares, and allows us to keep doing what we do!
PROs of the UniFi UNAS 4
CONs of the UniFi UNAS 4
$379 pricing is competitive for a turnkey 4 bay NAS with UniFi Drive included
4 bay 2.5 inch and 3.5 inch SATA support for flexible capacity planning
2 x M.2 NVMe slots for read and write SSD caching
PoE+++ support enables single cable power plus data deployment
90W PoE+++ mains adapter included, so PoE infrastructure is optional
Simple click and load HDD trays with straightforward access for drive installs and swaps
Front 1.47 inch color LCM display provides basic status and activity visibility
UniFi Drive software includes RAID options, snapshots, encryption, share links, and user management
Single 2.5GbE port limits throughput and provides no network redundancy or aggregation
M.2 NVMe trays not included, adding cost to use SSD caching
USB C port is currently limited in utility beyond basic external storage attachment
Here are all the current UniFi NAS Solutions & Prices:
This description contains links to Amazon. These links will take you to some of the products mentioned in today's content. As an Amazon Associate, I earn from qualifying purchases. Visit the NASCompares Deal Finder to find the best place to buy this device in your region, based on Service, Support and Reputation - Just Search for your NAS Drive in the Box Below
Need Advice on Data Storage from an Expert?
Finally, for free advice about your setup, just leave a message in the comments below here at NASCompares.com and we will get back to you.Need Help?
Where possible (and where appropriate) please provide as much information about your requirements, as then I can arrange the best answer and solution to your needs. Do not worry about your e-mail address being required, it will NOT be used in a mailing list and will NOT be used in any way other than to respond to your enquiry.
[contact-form-7]
TRY CHAT Terms and Conditions
If you like this service, please consider supporting us.
We use affiliate links on the blog allowing NAScompares information and advice service to be free of charge to you.Anything you purchase on the day you click on our links will generate a small commission which isused to run the website. Here is a link for Amazon and B&H.You can also get me a Ko-fi or old school Paypal. Thanks!To find out more about how to support this advice service checkHEREIf you need to fix or configure a NAS, check FiverHave you thought about helping others with your knowledge? Find Instructions Here
Or support us by using our affiliate links on Amazon UK and Amazon US
Alternatively, why not ask me on the ASK NASCompares forum, by clicking the button below. This is a community hub that serves as a place that I can answer your question, chew the fat, share new release information and even get corrections posted. I will always get around to answering ALL queries, but as a one-man operation, I cannot promise speed! So by sharing your query in the ASK NASCompares section below, you can get a better range of solutions and suggestions, alongside my own.
Aujourd’hui, je vous propose un guide rapide pour installer et utiliser Dockhand sur votre NAS Synology. Dockhand est une alternative à Container Manager de Synology. Il propose une interface légère et directe, pensée pour ceux qui veulent garder la main sans se noyer dans une multitude d’options. Entrons immédiatement dans le vif du sujet…
Synology et Dockhand
Suite à mon article « Dockhand, Arcane ou Portainer : quelle interface Docker en 2026 ?« , je vous propose de découvrir comment installer facilement et rapidement Dockhand. Inutile de désactiver Container Station, vous pourrez parfaitement profiter de Dockhand en parallèle. Mieux encore, tous vos conteneurs existants seront automatiquement visibles.
Dockhand s’adresse aux utilisateurs déjà à l’aise avec Docker et qui recherchent une interface rapide et efficace. Si la ligne de commande ne vous fait pas peur, mais que vous appréciez d’avoir une vue d’ensemble claire de ce qui tourne sur votre serveur, Dockhand coche beaucoup de cases. L’approche est volontairement minimaliste, il n’y a pas de menus interminables, pas de concepts propriétaires obscurs. Vous gérez les containers, vous regardez les logs, vous redémarrez un service si besoin. L’outil est plus complet que Container Manager par défaut, tout en restant simple à prendre en main.
Installer sur un NAS Synology
Pour cette installation, j’ai simplement suivi le tuto officiel de Dockhand.
Le port 3000 sur mon NAS est déjà utilisé. J’ai donc fait le choix du 3075…
Voici ce que vous devriez avoir :
Cliquez sur Suivant, puis sur Effectué… et patientez quelques minutes le temps que le conteneur démarre. C’est terminé !
Pour y accéder, tapez dans l’adresse suivante dans un nouvel onglet de votre navigateur : http://AdresseIPduNAS:3075
Première connexion
Lors de la première connexion, un message d’accueil s’affiche. Cliquez sur Got it. Dockhand vous demandera ensuite de créer un environnement…
Créer votre environnement
Appuyez sur le bouton Go to Settings puis…
le bouton bleu + Add environment Dans mon cas, je l’ai nommé Production Synology, mais vous pouvez évidemment choisir le nom que vous souhaitez.
Profitez en pour aller sur l’onglet Updates pour gérer la vérification des mises à jour (Enable scheduled update check) et changer la Timezone pour mettre Europe/Paris. Je vous déconseille d’activer l’option de mise à jour automatique des conteneurs (trop risqué).
Scan des vulnérabilités
Dans l’onglet Security (toujours lors de la création de l’environnement), vous pouvez activer le scan automatique des vulnérabilités. À chaque installation ou mise à jour d’un conteneur, Dockhand analysera l’image afin de détecter d’éventuelles failles de sécurité.
Authentification
Par défaut, l’interface ne propose pas d’identification, mais il est possible de mettre en place un authentification facilement (identifiant + mot de passe, SSO, LDAP…).
Allez dans le menu de gauche Settings puis sur l’onglet Authentication. Vous cliquerez sur le bouton off en face de Authentication pour activer l’authentification (voir capture ci-dessus). A noter qu’il faut d’abord créer un utilisateur (Users) avant d’activer l’authentification.
En synthèse
Dockhand propose une interface plus complète que Container Manager sur un NAS Synology, tout en étant plus simple à prendre en main que Portainer. L’installation ne prend que quelques minutes et permet de gérer facilement ses conteneurs Docker. Si vous possédez un NAS QNAP, Asustor, TerraMaster ou Ugreen, sachez que la configuration présentée ci-dessus fonctionnera également
Gl.iNet Slate 7 vs Beryl 7 Travel Router – Which Should You Buy?
At first glance, the GL.iNet Beryl 7 (GL-MT3600BE) and the GL.iNet Slate 7 (GL-BE3600) appear very closely matched. Both are compact dual band WiFi 7 travel routers, both include dual 2.5GbE ports, USB 3.0 expansion, OpenWrt based firmware, and support for VPN client and server deployment. They are designed for similar use cases such as securing public WiFi in hotels and airports, creating a private subnet for multiple personal devices, or acting as a portable gateway for temporary work setups. On paper, their wireless speed ratings are identical, and their overall feature sets overlap significantly. However, there is a clear price separation, with the Beryl 7 typically retailing at $139.99 and the Slate 7 positioned higher at $169.99. Given how similar they appear in specification tables, this comparison focuses on what justifies that difference, looking beyond headline WiFi 7 support and examining hardware platform choices, memory configuration, interface design, performance ceilings, and overall positioning within the travel router lineup.
If you are in a hurry – here is the TL;DR – the Slate 7 is $30-40 more, and for that you get a touchscreen LCD panel to allow for client-less configuration on the fly, it arrives with double the base memory (1GB, as opposed to 512MB) and a much more performance focused processor (a Qualcomm, rather than a Mediatek, which is much more widely supported and used in router applications and services). If you can spare the $30-40, get the Slate 7!
Gl.iNet Beryl 7 Travel Router
Gl.iNet Slate 7 Travel Router
Buy From Gl.iNet
Buy From Amazon
Buy From Gl.iNet
Buy From Amazon
Gl.iNet Beryl 7 vs Slate 7 – Wireless Connectivity
Both the GL.iNet Beryl 7 (GL-MT3600BE) and the GL.iNet Slate 7 (GL-BE3600) are dual band WiFi 7 routers operating across 2.4GHz and 5GHz, with identical rated wireless speeds of 688Mbps on 2.4GHz and 2882Mbps on 5GHz, for a combined 3600Mbps class rating. Neither device includes 6GHz support, which means both are technically WiFi 7 implementations without access to the expanded 6GHz spectrum or 320MHz channel widths. Instead, they focus on delivering WiFi 7 features such as improved OFDMA efficiency, 4K QAM, preamble puncturing, and Multi Link Operation within the existing 2 band framework.
In practical use, this means the wireless experience between the two routers is very similar when connecting modern WiFi 7 client devices. Multi Link Operation allows compatible devices to aggregate traffic across 2.4GHz and 5GHz simultaneously rather than choosing a single band. This can improve stability and reduce latency under load, particularly when multiple devices are active. However, because neither router supports 6GHz, both are limited to 160MHz channels, which caps the theoretical advantage compared to tri band WiFi 7 platforms. For most travel environments where surrounding networks are congested and spectrum is shared, the absence of 6GHz may not be the primary limiting factor.
It is also relevant that WiFi 7 client adoption is still developing, and many connected devices will continue to operate using WiFi 6 or earlier standards. In those cases, both routers fall back to backward compatible modes with similar performance characteristics. Since their radio specifications are aligned and both omit 6GHz, there is no material wireless generation advantage of one over the other. The distinction between these two models therefore lies less in raw WiFi 7 capability and more in the hardware platform and resource allocation that supports that wireless layer.
Gl.iNet Beryl 7 vs Slate 7 – Wired Connectivity
From a wired networking perspective, both the GL.iNet Beryl 7 (GL-MT3600BE) and the GL.iNet Slate 7 (GL-BE3600) are equipped with dual 2.5GbE ports. Each device includes 1 port typically designated as WAN and 1 as LAN, but both allow role reassignment within the software. This means either router can be configured to accept a multi gigabit internet uplink while simultaneously providing a 2.5G wired connection to a local client such as a workstation, NAS, or switch. In contrast to earlier travel routers limited to 1G LAN outputs, both of these models are capable of sustaining multi gigabit throughput on both ingress and egress.
In practical deployment, this gives both devices flexibility in scenarios where internet speeds exceed 1Gbps or where high speed local transfers are required. For example, a user connecting to a fiber service above 1G can feed that into the WAN port and still provide full 2.5G bandwidth to a wired LAN device. This configuration also supports load balancing or failover setups when combined with USB tethering or repeater modes. Since both routers share this dual 2.5G configuration, there is no structural limitation on either side in terms of raw Ethernet throughput.
The differences in wired behavior emerge more subtly in how the internal hardware handles sustained traffic across those ports, rather than in port specification alone. On paper, the Ethernet configuration is effectively matched between the two models. Both remove the earlier compromise seen in WiFi 6 travel routers where users had to choose between multi gigabit WAN or LAN, and both provide the same baseline flexibility for wired high speed connectivity in a compact travel format.
Gl.iNet Beryl 7 vs Slate 7 – Internal Hardware
Although their wireless ratings and Ethernet layouts are nearly identical, the internal hardware platforms of the GL.iNet Beryl 7 (GL-MT3600BE) and the GL.iNet Slate 7 (GL-BE3600) are based on different SoCs with distinct design goals. The Beryl 7 uses a MediaTek quad core processor operating at 2.0 GHz per core, paired with 512 MB of DDR4 memory and 512 MB of NAND flash. The Slate 7 instead uses the Qualcomm IPQ5018 platform, which integrates a quad-core ARM Cortex-A53 CPU running at about 1.0 GHz with additional packet processing and network subsystem features, and pairs that with 1 GB of DDR4 memory and 512 MB of NAND flash.
In real-world router workloads, CPU architecture and memory allocation each play a role. A higher clock speed like that in the Beryl 7 tends to benefit single threaded tasks such as some encryption operations and packet inspection. The Qualcomm IPQ5018’s emphasis on networking, hardware acceleration, and integrated network subsystem may offset its lower clock speed, particularly in tasks like NAT, traffic classification, or other system-level switching operations, and the doubled memory of the Slate 7 provides more space for concurrent services, queuing, and package expansions without immediate memory contention. In practice, the two platforms reflect different design priorities rather than a simple faster/ slower division.
Both devices provide a single USB 3.0 port for data expansion alongside a USB Type-C port for power input, meaning external storage, USB tethering, or a cellular dongle must share the same data port; using one function prevents the simultaneous use of the others. The Slate 7 also includes an integrated touchscreen display that provides real-time status information and direct toggling of features such as VPN or network mode, while the Beryl 7 relies solely on web and mobile app based controls. Internally, the distinction therefore is not just MediaTek versus Qualcomm, but a trade-off between frequency-focused CPU design, expanded system memory, and user interface enhancements.
Gl.iNet Beryl 7 vs Slate 7 – Deployment
When translating specifications into practical deployment behavior, the most measurable difference between the GL.iNet Beryl 7 (GL-MT3600BE) and the GL.iNet Slate 7 (GL-BE3600) appears in VPN throughput. The Beryl 7 is rated at up to 1100Mbps with WireGuard and up to 1000Mbps with OpenVPN DCO in client mode. The Slate 7, powered by the Qualcomm IPQ5018 platform, is rated at up to 490Mbps with WireGuard and up to 385Mbps with OpenVPN DCO. Although the Qualcomm platform is well optimized for routing and packet handling, the higher clock speed MediaTek processor in the Beryl 7 provides substantially more headroom for encrypted throughput. In scenarios where the internet connection exceeds 500Mbps and VPN encryption is permanently enabled, the Beryl 7 is less likely to become the limiting factor.
In raw LAN and WiFi performance, both devices operate within a similar ceiling due to identical wireless radios and dual 2.5GbE ports. Real world file transfers over 2.5GbE typically settle below theoretical maximums, often in the 230MB/s to 240MB/s range depending on workload and protocol overhead. Neither device consistently saturates the full 2.5GbE line rate under mixed routing and wireless conditions, which reflects internal processing overhead rather than port limitation. From a pure switching and routing standpoint without heavy encryption, both platforms are capable of sustaining high multi gigabit traffic within expected travel router boundaries.
Both units are rated to support up to 120 concurrent devices, which exceeds typical travel usage but provides insight into scheduler and resource allocation capacity. The Slate 7’s 1GB memory pool may provide additional stability when multiple OpenWrt services, monitoring tools, DNS filtering, and USB storage sharing are active simultaneously. The Beryl 7, meanwhile, demonstrates a clear advantage when encrypted traffic volume is high relative to available WAN bandwidth. As a result, the performance distinction depends less on wireless speed and more on whether the primary workload is VPN intensive broadband use or service heavy multi feature deployment.
Gl.iNet Beryl 7 vs Slate 7 – Which One Should You Buy?
The GL.iNet Beryl 7 (GL-MT3600BE) and the GL.iNet Slate 7 (GL-BE3600) are closer in capability than their price difference might initially suggest. Both deliver dual band WiFi 7 across 2.4GHz and 5GHz, both provide dual 2.5GbE ports, both support OpenWrt with extensive plugin flexibility, and both are designed for securing public internet connections while travelling.
From a purely wireless and Ethernet standpoint, they are effectively matched. The practical separation appears in internal resource allocation and user interface design. The Beryl 7, priced at $139.99, offers significantly higher rated VPN throughput and a faster clocked processor, making it better suited to users with high speed broadband connections who intend to run persistent encrypted tunnels. The Slate 7, priced at $169.99, provides double the system memory and integrates a touchscreen interface that allows direct device control without relying entirely on a browser or mobile app.
The decision therefore depends on workload priorities rather than headline WiFi generation. If the primary requirement is maximizing encrypted throughput over fast WAN connections, the Beryl 7 presents stronger performance value at a lower price. If the focus is on memory headroom for multiple services, a more integrated on device interface, and a Qualcomm based networking platform, the Slate 7 may justify its higher cost. Neither device includes 6GHz support, meaning both are dual band WiFi 7 implementations rather than full tri band models.
For users specifically seeking 6GHz spectrum and 320MHz channel capability, a different tier of hardware would be required. Within the compact dual band travel router segment, the distinction between these two models is defined less by WiFi 7 itself and more by how each device balances CPU performance, memory allocation, and interface design within a portable form factor.
This description contains links to Amazon. These links will take you to some of the products mentioned in today's content. As an Amazon Associate, I earn from qualifying purchases. Visit the NASCompares Deal Finder to find the best place to buy this device in your region, based on Service, Support and Reputation - Just Search for your NAS Drive in the Box Below
Need Advice on Data Storage from an Expert?
Finally, for free advice about your setup, just leave a message in the comments below here at NASCompares.com and we will get back to you.Need Help?
Where possible (and where appropriate) please provide as much information about your requirements, as then I can arrange the best answer and solution to your needs. Do not worry about your e-mail address being required, it will NOT be used in a mailing list and will NOT be used in any way other than to respond to your enquiry.
[contact-form-7]
TRY CHAT Terms and Conditions
If you like this service, please consider supporting us.
We use affiliate links on the blog allowing NAScompares information and advice service to be free of charge to you.Anything you purchase on the day you click on our links will generate a small commission which isused to run the website. Here is a link for Amazon and B&H.You can also get me a Ko-fi or old school Paypal. Thanks!To find out more about how to support this advice service checkHEREIf you need to fix or configure a NAS, check FiverHave you thought about helping others with your knowledge? Find Instructions Here
Or support us by using our affiliate links on Amazon UK and Amazon US
Alternatively, why not ask me on the ASK NASCompares forum, by clicking the button below. This is a community hub that serves as a place that I can answer your question, chew the fat, share new release information and even get corrections posted. I will always get around to answering ALL queries, but as a one-man operation, I cannot promise speed! So by sharing your query in the ASK NASCompares section below, you can get a better range of solutions and suggestions, alongside my own.
Cachem existe depuis plus de 16 ans. Seize années rendues possibles par une seule chose : la passion… et vous. Si vous lisez ces lignes, vous faites déjà partie de l’aventure.
Suite à mon précédent article « Cachem.fr : pourquoi je continue (et pourquoi parfois je doute)« , vos nombreux commentaires m’ont touché, encouragé et surtout fait réfléchir. Plusieurs idées sont revenues : comment aider ? Comment participer davantage ? Comment soutenir ?
Pour celles et ceux qui souhaitent aller un peu plus loin, il existe deux façons simples de contribuer.
Soutenir Cachem
Cachem est un blog totalement indépendant. Il n’y a pas de rédaction, pas de structure derrière… seulement du temps, de l’énergie et beaucoup de passion.
Les dons permettent concrètement de :
Acheter du matériel pour réaliser des tests complets et objectifs
Financer l’hébergement et l’infrastructure du site
Maintenir l’indépendance éditoriale
Continuer à produire des guides, tutoriels et retours d’expérience
Si Cachem vous apporte des informations utiles, des idées pour vos projets NAS ou des solutions à vos problèmes techniques, vous pouvez le soutenir ponctuellement via Buy me a coffee. Chaque contribution, petite ou grande, fait réellement la différence. Et elle envoie surtout un message fort : ce travail a de la valeur.
Contribuer en tant qu’auteur bénévole
Cachem est né d’une passion pour le NAS et la tech. Cette passion, beaucoup d’entre vous la partagent. Vous aimez partager votre passion pour le NAS ou la tech ? Cachem accueille des contributeurs pour publier des articles ou des tests. Ce n’est pas rémunéré, mais c’est l’occasion de :
Partager vos connaissances avec une communauté passionnée
Développer vos compétences rédactionnelles ou techniques
Participer à un projet indépendant qui dure
Si cela vous intéresse, envoyez-moi un message via l’adresse e-mail ci-dessous. On pourra discuter de vos idées et trouver la meilleure manière de les partager.
Cachem reste avant tout un blog passion et toute participation est volontaire. Merci à tous ceux qui lisent, commentent et partagent : vous faites vivre cette aventure chaque jour.
A lot can change in 12 months with a router, especially one that launched with strong hardware and a lot of software ambition behind it. The UniFi Dream Router 7 (UDR7) arrived in February 2025 at $279 and immediately stood out on paper, but a year later the more useful question is not what it promised at launch, it is what it actually delivers now: is it better, worse, or largely the same after a full year of real-world use and updates? In this 1 year later review, I am looking at that from 3 angles: my own experience of using the UDR7 in a live home setup over the last 12 months, the wider experience of other users in home and business environments, and how Ubiquiti has supported the platform through UniFi OS and router software updates since release. The goal is to move beyond launch-day specs and first impressions and answer the more practical question for anyone considering an upgrade today: in early 2026, is the UniFi Dream Router 7 still worth $279?
My Own 12 Month Experience of the UniFi Dream Router 7
My own experience with the UDR7 over 12 months is slightly different from a short test bench review because this unit stayed deployed in my home for most of that time. After the original review, I kept it and ran it in a real environment rather than treating it as a temporary test device.
It was not my only wireless setup, so there was some unavoidable radio overlap in the house, and I was also running the UDR7 with 4 additional access points placed across different rooms. It was positioned behind a TV rather than in an ideal open location, which is worth stating because that kind of placement can affect both wireless behavior and thermals.
In terms of reliability, my own results were stable across the year. The UDR7 was set to install updates automatically, so it received every update as it arrived, and outside of planned interruptions for filming, firmware reboots, and a reprofile/reset around October for remote access preparation, it remained in service continuously.
Across that period it handled a regular set of around 12 active devices, while interacting with roughly 20 to 25 devices over time.
I did not run UniFi Protect on this unit in my own setup, so my long-term comments are focused on routing, wireless management, and day to day network operation rather than surveillance recording. In that role, it was dependable and I did not encounter recurring crashes or operational failures.
Resource use and thermals were also within a reasonable range for the way I deployed it. Internally, the system generally sat around 61 to 67°C depending on load, with CPU utilization commonly around 20 to 25% and RAM usage often around 40 to 50% when more security features and logging were enabled.
External temperatures were warmer than ambient but not excessive for a compact desktop gateway placed in a less than ideal location: roughly 48 to 49°C on the outer body, around 51°C near the top ventilation strip at peak use, and around 43 to 45°C at the base.
The copper ports remained cooler, while the SFP side ran hotter when used. None of this pointed to a thermal problem in my deployment, but it does reinforce that placement and ventilation still matter.
Traffic volume across the test period also helps frame the result. I put roughly 1.25TB of internet traffic through the unit, with just over 1TB downloaded and around 204GB uploaded, while also testing PoE output with a few APs.
The only PoE limitation I ran into was with a higher draw AP that exceeded what the port is designed to provide, which matched the published power limits rather than indicating a fault.
Taken strictly from my own 1 year usage, the UDR7 did what it was supposed to do at $279 in a mixed home environment with multiple APs, automatic updates, and steady day to day load. My experience was not a stress test of every feature, but as a long-running gateway deployment it remained reliable.
The Community Feedback on the UniFi Dream Router 7 in 1 Year
Looking at wider user feedback over the last 12 months, the most consistent pattern is that early criticism focused less on the hardware itself and more on launch readiness. Across UniFi Community threads, Reddit posts, and ISP forum discussions, many users described the UDR7 as capable hardware paired with software that felt immature in the first weeks and months after release. The phrase “unfinished at launch” appears repeatedly in community discussions, particularly from users who deployed it as a primary gateway rather than a simple single room router.
The most widely reported issue was selective connectivity behavior, especially on PPPoE connections using the RJ45 WAN port. Users reported situations where speed tests looked normal but specific services failed or behaved unreliably, including video calls, social media video loading, live camera feeds, and some VPN apps. Multiple threads also repeated the same temporary workarounds: moving WAN to the SFP+ port or enabling Smart Queues, with users noting the tradeoff in cost, added hardware, or reduced throughput. This issue appears frequently enough across separate threads and forums to be treated as a recurring launch-period problem rather than isolated misconfiguration.
A second recurring theme was inconsistent WiFi behavior in more demanding or more complex deployments. Community reports described unstable wireless performance, intermittent disconnects, poor range relative to expectations, and in some cases daily reboots or loss of connectivity requiring a full restart. Not every report points to the same root cause, and some users specifically tied their issues to WAN mode, AP combinations, or feature settings, but the overall pattern is clear: setups with heavier tuning, multiple APs, or more demanding coverage expectations were more likely to expose weaknesses during the early firmware cycle. Also, there was the expensive testing of ‘REAL’ MLO support by RTINGS last month, where the marketing materials around WiFi 7 routers and the level of currently MLO abilities vs the reality of client and router support.
By early 2026, community sentiment appears more mixed than uniformly negative. The strongest complaints are still easy to find, but there are also repeated updates from users saying behavior improved after firmware updates, manual upgrades, or configuration changes, especially in threads that started during the launch period. The broad shift is not that all criticism disappeared, but that the conversation moved from “basic reliability concerns” toward “specific deployment and tuning limitations,” which is a materially different position for a product that had a rougher first impression for many early adopters.
Changes, Fixes, Improvements on the UDR7 over 1 Year
The clearest difference between the UDR7 at launch and the UDR7 after 12 months is software maturity. Over the March 2025 to February 2026 period, UniFi OS and the router platform received a substantial number of additions, improvements, and fixes that changed the practical experience of using the device. This was not just a case of minor UI clean-up. The update history shows ongoing work across setup flow, backup and restore behavior, WAN resiliency, WiFi stability, VPN reliability, logging, storage handling, and administrative tooling. In simple terms, the software stack was actively developed throughout the year, which supports the wider view that the product improved materially after release.
The additions also indicate that Ubiquiti treated the platform as something to expand, not only stabilize. Over that period, support was added for features such as custom certificates, custom SMTP, packet captures, Hotspot 2.0/PassPoint, IPv6 traffic identification and DNS Shield support, SIEM integration, advanced mDNS options, Alarm Manager, CNAME DNS records, and additional identity and directory integration options. Some of these are more relevant to business or managed environments than typical home users, but they still matter in the context of value because the UDR7 is sold as a UniFi cloud gateway, not just a domestic WiFi router. The result is that 1 year later, the software feature set is broader and more aligned with the hardware’s original positioning.
Just as important are the fixes that directly overlap with common launch-era complaints. These include a specific fix for wireless throughput issues when using PPPoE on the RJ45 WAN port, fixes for MLO and guest portal interaction, WiFi and RF scanning related issues, stability improvements when using MLO, improved 2.4GHz client resiliency, improved minimum RSSI stability, and a long list of VPN, routing, and policy-based routing fixes. There were also repeated improvements to backup/restore resiliency, web UI stability, speed test stability, and hardware offloading. Taken together, this update history does not prove every user issue is resolved in every deployment, but it does show a sustained effort to address exactly the types of faults and inconsistencies that shaped the early reputation of the UDR7.
Is the UniFi Dream Router Better, Worse or the Same Value at $279 1 Year Later? (Verdict)
1 year on, the UniFi Dream Router 7 is easier to recommend than it was at launch, but for a different reason than the original review. The core hardware value proposition remains largely the same: at $279, it still offers an unusual combination of WiFi 7, multi-gig copper, 10G SFP+, 1 PoE output, UniFi application support, and a compact all-in-1 gateway design that many competing devices at this price either do not match or only match in narrower areas. What changed over the last 12 months is the software side. Early concerns around stability, selective connectivity, and inconsistent behavior in more demanding deployments were significant enough to affect the product’s reputation, and that criticism was not unreasonable. However, the volume and direction of updates over the year indicate that Ubiquiti has spent that time closing the gap between what the hardware promised and what the software delivered in practice.
The most accurate verdict in early 2026 is that the UDR7 is not a fundamentally different product than it was in February 2025, but it is a more complete one. In straightforward home and small business use, especially where the buyer wants a UniFi-managed gateway with room to scale, it now presents a stronger case than it did for early adopters. At the same time, buyers with more complex AP layouts, aggressive tuning requirements, or very specific expectations around WiFi 7 MLO behavior should still approach it with realistic expectations and pay attention to current firmware state and client compatibility. On balance, based on the hardware, the year of software support, my own long-term deployment experience, and the broader community trajectory, the UDR7 remains a valid purchase at $279 in 2026.
What I originally said about the UniFi Dream Router 7 in my Feb 2025 Review:
As appealing as the UniFi router and network software that this system is bundled with are, the main praise I have to give the UDR 7 is that everyone is going to feel the benefits of this router in their network at this price point. The small compromises it has compared to the previous UDR system (such as fewer PoE ports) are immediately outweighed by its versatility, which would be hard to find at a better price elsewhere. The fact that all LAN ports are 2.5G and that the two WAN/LAN ports are 2.5G and 10G SFP+ respectively puts this router massively ahead of most competitors in the sub-$300 market. Equally, support for the UniFi Protect surveillance software and the included WD Purple SD card storage are nice extras that you don’t commonly find elsewhere—let alone the inclusion of a PoE 2.5G port. The router and network management software is, of course, quintessentially UniFi in its presentation. Striking a balance between usability and information is a tough challenge, and the UniFi software almost succeeds. It excels in its presentation and management via the mobile app, though the desktop UI could be a touch more intuitive. How could you make wireless and wired network management truly user-friendly?
That said, the UDR 7 is a genuinely WiFi 7-ready router, offering 2×2 6GHz coverage and taking advantage of all the frequency and bandwidth benefits afforded to true WiFi 7 6GHz clients. Add a simple $20 USB WiFi 7 adapter to your system, and you can immediately enjoy base-level 2.8Gbps wireless connectivity, scaling this up substantially with the right WiFi 7 wireless NICs. Even if you’re not in love with the UniFi software platform or handing management of your services over to Ubiquiti’s remote services, you can still set up the device without a UI.com account. You do not need to deploy it with UniFi Network equipment, and VPN and encrypted protocol services can still be managed via popular third-party options if preferred. Buying a router for your home or business instead of relying on the one supplied by your ISP can often feel like an unnecessary expense. However, considering the price point and the network advantages the UDR 7 provides, I believe this system is worth it. Some of its services might require additional polish over time, and greater network capabilities on this router will be realized as technology progresses, but I wholeheartedly recommend the UDR 7 for the majority of setups.
BUILD QUALITY - 10/10
HARDWARE - 9/10
PERFORMANCE - 9/10
PRICE - 8/10
VALUE - 9/10
9.0
PROS
WiFi 7 Support – Offers Genuine 6GHz connectivity with 320MHz channels, enabling faster speeds and lower latency. Multi-Gig Networking – Includes three 2.5GbE LAN ports and a 10GbE SFP+ WAN/LAN port, making it highly future-proof. Comprehensive UniFi Software – Provides robust network management features, including VLANs, QoS, IDS/IPS security, and VPN support. Integrated UniFi Protect Support – Comes with a pre-installed 64GB WD Purple SD card, allowing local video storage for security cameras. Flexible WAN/LAN Configurations – Supports dual WAN for failover or load balancing, or repurposing the 10GbE SFP+ port as LAN. High Customization & Security – Offers advanced firewall controls, application-aware filtering, and in-depth traffic analytics. User-Friendly Mobile App – Easy setup and management via the UniFi mobile app, with intuitive controls and real-time monitoring. No UI.com Account Required – Can be set up locally without requiring an online UniFi account, providing more control over network privacy.
CONS
Limited PoE Support – Only includes one PoE-enabled 2.5GbE port, which may be a drawback for users looking to power multiple UniFi cameras or access points. 6GHz Band Availability Varies by Region – While WiFi 7 delivers significant improvements, the 6GHz spectrum and 320MHz channels may not be fully available in all areas, limiting real-world performance. Not the Most Budget-Friendly Option – Although competitively priced for a WiFi 7 router, there are still more cost-effective alternatives on the market, especially for users who don’t need UniFi’s ecosystem. The MLO architecture is currently E-MLSR MLO (Enhanced Multi-Link Single Radio Operation Mode), which lacks the true aggregation of Sync MLMR (Synchronous Multi-Link Multi-Radio) MLO
This description contains links to Amazon. These links will take you to some of the products mentioned in today's content. As an Amazon Associate, I earn from qualifying purchases. Visit the NASCompares Deal Finder to find the best place to buy this device in your region, based on Service, Support and Reputation - Just Search for your NAS Drive in the Box Below
Need Advice on Data Storage from an Expert?
Finally, for free advice about your setup, just leave a message in the comments below here at NASCompares.com and we will get back to you.Need Help?
Where possible (and where appropriate) please provide as much information about your requirements, as then I can arrange the best answer and solution to your needs. Do not worry about your e-mail address being required, it will NOT be used in a mailing list and will NOT be used in any way other than to respond to your enquiry.
[contact-form-7]
TRY CHAT Terms and Conditions
If you like this service, please consider supporting us.
We use affiliate links on the blog allowing NAScompares information and advice service to be free of charge to you.Anything you purchase on the day you click on our links will generate a small commission which isused to run the website. Here is a link for Amazon and B&H.You can also get me a Ko-fi or old school Paypal. Thanks!To find out more about how to support this advice service checkHEREIf you need to fix or configure a NAS, check FiverHave you thought about helping others with your knowledge? Find Instructions Here
Or support us by using our affiliate links on Amazon UK and Amazon US
Alternatively, why not ask me on the ASK NASCompares forum, by clicking the button below. This is a community hub that serves as a place that I can answer your question, chew the fat, share new release information and even get corrections posted. I will always get around to answering ALL queries, but as a one-man operation, I cannot promise speed! So by sharing your query in the ASK NASCompares section below, you can get a better range of solutions and suggestions, alongside my own.
Asustor AS6704T v2 Lockerstor 4 Gen2+ NAS Hardware Review, Worth Your Data?
Asustor has always sat slightly off to one side of the mainstream NAS conversation. It does not chase the same marketing angles as the bigger names, but it has consistently tried to combine features that other brands often keep separated by model tier. The Lockerstor series is a good example of that approach, mixing prosumer hardware touches such as a metal chassis, HDMI output and multiple SSD bays with a fairly traditional four bay NAS layout. The Lockerstor 4 Gen2+ is not a clean-slate redesign. Instead, it is a mid-range refresh of the existing Lockerstor 4 Gen2, built on the same underlying platform. The CPU remains the Intel Celeron N5095, memory starts at 4 GB of DDR4, the four internal M.2 NVMe slots are unchanged, and the chassis and physical layout are effectively identical. The meaningful update in this revision is networking, with the Gen2+ moving from dual 2.5GbE ports to dual 5GbE. That change is intended to raise the usable network headroom for single users and small teams, particularly where SSD caching or multiple clients are involved, without forcing buyers straight into 10GbE. At the same time, the broader market has moved on since the original Gen2 launched. 2.5GbE is now common at this price point, and the N5095, while still stable and capable, is no longer the standout CPU it was in 2022 and 2023, with newer low power Intel platforms offering better efficiency and raw performance. Taken as a whole, the Lockerstor 4 Gen2+ is best viewed as a targeted update designed to keep the existing Lockerstor platform relevant for longer. It does not attempt to redefine what a mid-range four bay NAS should be, but instead focuses on addressing network performance as storage media and workflows continue to push beyond the limits of 2.5GbE.
Asustor AS6704T v2 Lockerstor 4 Gen2+ NAS Review, Quick Conclusion
The Lockerstor 4 Gen2+ is a competent and largely familiar system. From a hardware perspective, it remains solid, well built and flexible, with few outright weaknesses in isolation. The metal chassis, internal expandability and feature set still compare well against many competing four bay NAS systems. However, this revision does not materially change the overall character or capability of the platform beyond networking. The move from dual 2.5GbE to dual 5GbE is the defining update. For users who already have compatible network infrastructure, or who are working close to the limits of 2.5GbE with multiple clients, SSD caching or larger hard drives, this upgrade does provide tangible benefits. For others, particularly those still on gigabit or mixed networks, the improvement may be largely theoretical in day to day use. At the same time, the unchanged use of the Intel Celeron N5095 is more noticeable now than it was at the original Gen2 launch. While it remains stable and well supported, it no longer stands out in a market where newer low power Intel CPUs offer better efficiency and performance at similar price points. Combined with pricing that now faces stronger competition, the Gen2+ feels more like a stopgap refresh than a forward looking update. Overall, the Lockerstor 4 Gen2+ is a capable NAS that makes sense primarily for users who value its physical design, internal expandability and Asustor’s flexible hardware policy, and who can take advantage of 5GbE networking today. It is less compelling as a general upgrade for existing Gen2 owners, or as a default recommendation in a crowded mid-range market.
SOFTWARE - 6/10
HARDWARE - 7/10
PERFORMANCE - 7/10
PRICE - 6/10
VALUE - 7/10
6.6
PROS
Dual 5GbE networking provides higher aggregate and single client throughput than 2.5GbE when supported by the surrounding network Four internal M.2 NVMe slots allow SSD caching, SSD storage pools, or mixed configurations without sacrificing SATA bays Solid metal chassis and metal drive trays provide durability and assist passive heat dissipation HDMI output with Asustor Portal enables direct media playback, VM interaction and local management without a client PC Supports both EXT4 and Btrfs, including snapshot functionality for basic data protection and recovery PCIe expansion slot allows future upgrade to 10GbE, extending the usable lifespan of the system Flexible storage configuration, including use of NVMe drives as independent storage pools rather than cache only Hardware warranty remains valid when installing third party NAS operating systems, supporting advanced and DIY users
CONS
Intel Celeron N5095 is now dated relative to newer low power CPUs available at similar price points (eg N100, N150, N355, etc) right now ADM software is stable but lacks the depth, automation and flagship features found on some competing platforms PCIe slot is shared between NVMe carrier and expansion cards, forcing a choice without a compatible combo card Pricing faces stronger competition in 2026, reducing its appeal as a default mid range NAS option
Asustor AS6704T v2 Lockerstor 4 Gen2+ NAS Review, Design
The physical design of the Lockerstor 4 Gen2+ is effectively unchanged from the earlier Gen2 model. Asustor has retained the same chassis, dimensions and layout, making this revision visually indistinguishable from its predecessor. This is a deliberate choice rather than an oversight, and it reflects Asustor’s preference for continuity in this product line.
The enclosure is almost entirely metal, including the outer shell and the individual drive trays. This gives the unit a robust, industrial feel and contributes to passive heat dissipation. It also differentiates the Lockerstor from many competing four bay NAS systems that rely more heavily on plastic for cost and noise reduction. The trade-off remains increased vibration and audible resonance when using higher capacity, faster spinning hard drives.
On the front of the unit, the Lockerstor retains its LCD display, a feature that has largely disappeared from this segment. The display provides system status information such as IP addresses, temperature readings and alert notifications. Beyond basic monitoring, it can also be used for initial system setup, allowing the NAS to be configured without a connected computer. While this will not replace web based administration for ongoing management, it remains useful for rapid deployment and troubleshooting, particularly when network access is limited.
Status LEDs are present alongside the display and drive bays, offering basic activity indicators. These are functional but secondary to the information provided by the LCD panel. A front mounted USB port with a dedicated copy button is also retained. This supports both manual and automatic backup tasks and has been upgraded in earlier Gen2 models to USB 3.2 Gen 2, allowing higher speed transfers to and from external storage devices.
The drive trays themselves are metal, ventilated and feature a locking mechanism. They support both 3.5 inch and 2.5 inch SATA drives and allow hot swapping where the configuration permits. The tray design prioritizes rigidity and airflow over acoustic dampening, which again reinforces the Lockerstor’s server-like character rather than a living room friendly one.
Ventilation is handled through a combination of tray perforation, side vents and a large rear mounted cooling fan. There have been minor adjustments over successive revisions to improve airflow around the M.2 area, but the overall cooling approach remains conservative and tuned for reliability rather than silence.
In summary, the design of the Lockerstor 4 Gen2+ will appeal to users who value durability, serviceability and physical controls. It does not attempt to modernize its appearance or reduce its footprint, and buyers sensitive to noise or aesthetics should be aware of the compromises that come with this design philosophy.
Asustor AS6704T v2 Lockerstor 4 Gen2+ NAS Review, Ports and Connections
The rear connectivity of the Lockerstor 4 Gen2+ closely resembles that of the earlier Gen2 model, with one important exception. The dual 2.5GbE ports have been replaced with dual 5GbE Ethernet, which represents the core purpose of this refresh. Everything else in the port layout remains largely the same, reinforcing that this is a targeted update rather than a rework of the platform.
The two 5GbE ports support standard Ethernet features including link aggregation and SMB Multichannel. In practical terms, this allows higher aggregate throughput when multiple clients are accessing the NAS simultaneously, or improved single client performance in supported environments. Asustor positions this as offering near 10GbE class performance without the cost or infrastructure demands of full 10GbE. In reality, the benefits depend heavily on the surrounding network hardware, client support and workload type. Users without compatible switches or clients will see little immediate advantage over 2.5GbE.
Alongside the Ethernet ports, the Lockerstor 4 Gen2+ retains its HDMI output. This is used with Asustor Portal, a parallel interface that allows direct interaction with media playback, virtual machines and containerized applications when the NAS is connected to a display. Unlike some competing implementations, this HDMI output is actively supported, though it remains a secondary interface compared to the browser based ADM environment. Two rear USB ports provide USB 3.2 Gen 2 connectivity for high speed external storage, adapters and peripherals.
A PCIe expansion slot is also present and remains an important part of the Lockerstor design. In the Gen2+ series, this slot is described as no longer proprietary, allowing broader compatibility with third party 10GbE network cards. This adds flexibility for users who expect to outgrow 5GbE in the future, although it still requires choosing between PCIe expansion and the preinstalled M.2 carrier board.
The combination of four SATA bays, four internal NVMe slots and dual 5GbE networking provides sufficient internal and external bandwidth for many small office and creative workloads. However, it is worth noting that modern hard drives and NVMe SSDs can quickly approach or exceed the limits of a single 5GbE connection. In environments where sustained maximum throughput is a priority, the optional move to 10GbE may still be the more appropriate long term choice.
Overall, the port selection on the Lockerstor 4 Gen2+ is well rounded and flexible. The addition of dual 5GbE meaningfully updates the networking capability of the system, but it does not fundamentally change how the device integrates into a network compared to the earlier Gen2.
Asustor AS6704T v2 Lockerstor 4 Gen2+ NAS Review, Internal Hardware
Internally, the Lockerstor 4 Gen2+ is almost identical to the earlier Gen2 model. Asustor has not revised the core platform, and the internal layout, controller architecture and expansion approach remain the same. This consistency simplifies evaluation, but it also makes the age of some components more apparent in the current market.
The system is powered by the Intel Celeron N5095, a quad core processor based on Intel’s Jasper Lake architecture. At launch, this CPU was widely adopted in mid range NAS systems due to its balance of power consumption, integrated graphics and general purpose performance. It operates at a 2.0 GHz base frequency with burst speeds up to 2.9 GHz. In 2026 terms, the N5095 is no longer a standout choice. Newer low power Intel CPUs offer improved efficiency and stronger CPU side performance at similar price points, particularly for non media workloads.
The presence of integrated graphics remains relevant for hardware assisted video transcoding and HDMI based output, and the N5095 continues to handle typical NAS tasks, light virtualization and container workloads without issue. However, users planning heavier multi VM deployments or CPU intensive services may find the platform limiting compared to more recent alternatives.
Memory configuration starts at 4 GB of DDR4 2933 MHz SODIMM memory and can be expanded up to 16 GB. This is sufficient for most file serving, backup and multimedia tasks, and provides some headroom for virtualization and containers. ECC memory is not supported, which is worth noting given the pricing and the comparison to some competing systems in this segment.
One of the defining features of the Lockerstor platform remains the inclusion of four M.2 NVMe SSD slots. These support 2280 form factor drives and operate over PCIe Gen3. The slots can be used for SSD caching, dedicated storage pools, or a mixture of both, offering flexibility that is not universally available in this class. The practical throughput per slot is lower than modern x4 NVMe drives can deliver, but still significantly higher than SATA SSDs and more than sufficient for caching and high IOPS workloads. The NVMe slots are mounted on a dedicated PCIe carrier board that occupies the system’s expansion slot. This design choice means users must choose between using the four M.2 slots and installing a PCIe network card, unless a compatible combination card is used. While workable, it remains a compromise that should be considered when planning long term upgrades.
Overall, the internal hardware of the Lockerstor 4 Gen2+ remains capable and flexible, but it is clearly rooted in an earlier generation of mid range NAS design. The networking upgrade extends its usefulness, but it does not address the broader shifts in CPU and platform expectations that have emerged since the original Gen2 release.
Asustor AS6704T v2 Lockerstor 4 Gen2+ NAS Review, Software
The Lockerstor 4 Gen2+ ships with the latest version of Asustor Data Master, commonly referred to as ADM. Functionally, the software experience is the same as on the earlier Gen2 models, with no Gen2+ specific changes or features introduced as part of this refresh. Any improvements are the result of ongoing platform updates rather than hardware driven differentiation.
ADM presents a desktop style interface accessed through a web browser, with windowed applications, user accounts and a traditional file manager. It is straightforward to navigate and generally stable in operation. Performance on the N5095 platform is consistent and predictable, with no major responsiveness issues during typical file serving, backup or media management tasks.
Asustor continues to support both EXT4 and Btrfs file systems. Btrfs brings snapshot support and data versioning for shared folders and iSCSI volumes, while EXT4 remains available for users who prefer a simpler, lower overhead file system. Snapshot Center integrates with Btrfs to provide scheduled and manual snapshots, offering basic protection against accidental deletion or ransomware scenarios.
The application ecosystem in ADM remains broad but uneven. Core first party applications for storage management, backups, media indexing and basic virtualization are present and generally reliable. However, a number of advanced functions rely heavily on third party software. Virtualization, for example, is still built around VirtualBox rather than a native hypervisor. Container support is provided through Docker and Portainer, which is flexible but assumes a degree of user familiarity.
Multimedia support is one of ADM’s stronger areas. Applications such as LooksGood, Photo Gallery and SoundsGood provide local media management and streaming, and hardware assisted video transcoding is available through the Intel integrated graphics. HDMI output via Asustor Portal runs in parallel to ADM and allows direct playback and interaction with selected applications. While this remains more fully featured than some competing HDMI implementations, it is clearly secondary to the browser based interface and receives fewer updates.
Backup and synchronization tools are comprehensive in scope. ADM supports local and remote backups via rsync, USB devices, NAS to NAS replication and a wide range of public cloud services. DataSync Center and Cloud Backup Center consolidate many of these functions into centralized tools, though configuration can feel fragmented compared to more tightly integrated platforms.
Security features have expanded steadily since earlier releases. ADM includes a firewall, automatic IP blocking, antivirus scanning through ClamAV, two step verification and encryption options for shared folders and MyArchive volumes. These features provide a reasonable baseline for small business and advanced home users, though they rely on manual configuration rather than automated policy driven protection.
Overall, the ADM software platform is stable, functional and capable of supporting a wide range of use cases. It does not stand out for innovation or advanced automation, and it lacks some of the higher level, tightly integrated services offered by competitors. For users seeking a dependable and flexible NAS operating system that prioritizes core functionality over novelty, ADM remains adequate. For those placing heavy emphasis on software features and ecosystem depth, it may feel comparatively restrained.
Asustor AS6704T v2 Lockerstor 4 Gen2+ NAS Review, Conclusion
The Lockerstor 4 Gen2+ is best understood as a maintenance refresh rather than a new generation. Asustor has taken an existing and well established platform and updated it in one specific area, network connectivity, to better align with how storage performance and workloads have evolved since the original Gen2 launch. Outside of that change, the system remains fundamentally the same device. The move to dual 5GbE does meaningfully extend the usable lifespan of the Lockerstor 4 design for users who are already constrained by 2.5GbE, particularly in multi user environments or setups that make effective use of SSD caching and faster hard drives. For those users, the Gen2+ offers a tangible improvement without the immediate cost or complexity of moving to 10GbE. For others, especially those still on gigabit or mixed networks, the practical benefit may be limited.
At the same time, the unchanged internal platform is harder to ignore in 2026. The Intel Celeron N5095 remains stable and compatible with a wide range of workloads, but it no longer compares as favourably against newer low power CPUs now appearing in similarly priced systems. Combined with increased competition across this segment, the value proposition of the Gen2+ is narrower than it was when the original Gen2 launched. The Lockerstor 4 Gen2+ will appeal most to buyers who value its physical build quality, internal expandability, flexible storage configuration and Asustor’s relatively open hardware stance, including third party OS support. It is less compelling as an upgrade for existing Gen2 owners, and it is not a clear default choice in the current mid range NAS market unless its specific strengths align with the intended use case. In short, the Gen2+ succeeds in keeping the Lockerstor platform relevant for longer, but it does not redefine it.
PROs of the Lockerstor 4 Gen 2+ NAS
CONs of the Lockerstor 4 Gen 2+ NAS
Dual 5GbE networking provides higher aggregate and single client throughput than 2.5GbE when supported by the surrounding network
Four internal M.2 NVMe slots allow SSD caching, SSD storage pools, or mixed configurations without sacrificing SATA bays
Solid metal chassis and metal drive trays provide durability and assist passive heat dissipation
HDMI output with Asustor Portal enables direct media playback, VM interaction and local management without a client PC
Supports both EXT4 and Btrfs, including snapshot functionality for basic data protection and recovery
PCIe expansion slot allows future upgrade to 10GbE, extending the usable lifespan of the system
Flexible storage configuration, including use of NVMe drives as independent storage pools rather than cache only
Hardware warranty remains valid when installing third party NAS operating systems, supporting advanced and DIY users
Intel Celeron N5095 is now dated relative to newer low power CPUs available at similar price points (eg N100, N150, N355, etc) right now
ADM software is stable but lacks the depth, automation and flagship features found on some competing platforms
PCIe slot is shared between NVMe carrier and expansion cards, forcing a choice without a compatible combo card
Pricing faces stronger competition in 2026, reducing its appeal as a default mid range NAS option
Need More Help Choosing the right NAS?
Choosing the right data storage solution for your needs can be very intimidating and it’s never too late to ask for help. With options ranging from NAS to DAS, Thunderbolt to SAS and connecting everything up so you can access all your lovely data at the touch of a button can be a lot simpler than you think. If you want some tips, guidance or help with everything from compatibility to suitability of a solution for you, why not drop me a message below and I will get back to you as soon as possible with what you should go for, its suitability and the best place to get it. This service is designed without profit in mind and in order to help you with your data storage needs, so I will try to answer your questions as soon as possible.
This description contains links to Amazon. These links will take you to some of the products mentioned in today's content. As an Amazon Associate, I earn from qualifying purchases. Visit the NASCompares Deal Finder to find the best place to buy this device in your region, based on Service, Support and Reputation - Just Search for your NAS Drive in the Box Below
Need Advice on Data Storage from an Expert?
Finally, for free advice about your setup, just leave a message in the comments below here at NASCompares.com and we will get back to you.Need Help?
Where possible (and where appropriate) please provide as much information about your requirements, as then I can arrange the best answer and solution to your needs. Do not worry about your e-mail address being required, it will NOT be used in a mailing list and will NOT be used in any way other than to respond to your enquiry.
[contact-form-7]
TRY CHAT Terms and Conditions
If you like this service, please consider supporting us.
We use affiliate links on the blog allowing NAScompares information and advice service to be free of charge to you.Anything you purchase on the day you click on our links will generate a small commission which isused to run the website. Here is a link for Amazon and B&H.You can also get me a Ko-fi or old school Paypal. Thanks!To find out more about how to support this advice service checkHEREIf you need to fix or configure a NAS, check FiverHave you thought about helping others with your knowledge? Find Instructions Here
Or support us by using our affiliate links on Amazon UK and Amazon US
Alternatively, why not ask me on the ASK NASCompares forum, by clicking the button below. This is a community hub that serves as a place that I can answer your question, chew the fat, share new release information and even get corrections posted. I will always get around to answering ALL queries, but as a one-man operation, I cannot promise speed! So by sharing your query in the ASK NASCompares section below, you can get a better range of solutions and suggestions, alongside my own.
Ugreen continue son offensive sur le marché des NAS avec un nouveau 4 baies ambitieux : UGREEN NASync DXP4800 Pro. Après le DXP4800 Plus de l’an dernier, nous avons pu passer plusieurs jours avec le modèle Pro, une version musclée pensée pour les usages avancés, le multitâches intensif et les environnements exigeants sans compromis sur la simplicité d’utilisation. Sur le papier, la promesse est solide. En pratique, tout n’est cependant pas parfait…
UGREEN NASync DXP4800 Pro
Là où le DXP4800 Plus s’appuie sur un Intel Pentium Gold 8505, le DXP4800 Pro passe sur un processeur Intel Core i3-1315U, offrant plus de puissance brute et une meilleure capacité de traitement pour des charges lourdes : virtualisation, transcodage multimédia, IA, Docker…
Contenu de la boîte
À l’ouverture, on retrouve :
Le DXP4800 Pro en lui-même ;
2 câble réseau RJ45 Cat. 7 ;
L’alimentation externe et son câble ;
Des vis pour les SSD avec un tournevis ;
2 blocs de pâte thermique pour les SSD NVMe ;
Un guide de démarrage rapide en anglais, allemand et chinois ;
Une feuille sur la garantie de 2 ans.
Comme pour son grand frère, l’emballage reste soigné, avec plusieurs niveaux de protection. On note les efforts du fabricant…
Design et connectivité
Extérieurement, il ressemble comme 2 gouttes d »eau aux DXP4800 Plus. Nous avons un NAS bien lourd avec un boîtier en aluminium bleu-gris. Son poids sur la balance affiche 4,1 kg. À l’arrière, nous avons toujours un ventilateur de 140 mm. Seul le nom en façade (en bas) diffère…
Du côté de la connectique, ce NAS dispose de :
2 ports USB 3.2 Gen 2 (dont 1 Type-C) ;
1 port USB 3.0 Type-A ;
2 ports USB 2.0 Type-A ;
1 lecteur de carte SD ;
1 sortie HDMI 2.1 ;
1 port RJ45 2,5 Gb/s ;
1 port RJ45 10 Gb/s.
Une connectivité bien pensée et complète.
Intérieur du DXP4800 Pro
C’est là que les choses changent ! Le DXP4800 Pro est animé par un processeur Intel Core i3-1315U capable d’atteindre 4,50 GHz (6 cœurs, 8 threads) avec iGPU intégré. Il est épaulé par 8 Go de RAM DDR5 (extensibles à 96 Go). On aurait préféré voir 16 Go pour ce modèle Pro. Le score PassMark est de 11 183 points ! Pour ce tarif, il largue tous les concurrents…
Installation des disques et SSD
Les disques durs 3,5 pouces s’installent assez facilement, sans outils. Les chariots sont différents de ceux de Synology ou QNAP, mais ils sont fonctionnels.
Pour installer un SSD SATA, il faut retirer une fixation en plastique (en bas à droite sur la photo ci-dessus) via un outil fourni. Attention à ne pas forcer trop fort au risque d’abimer la pièce. Le NAS dispose de 2 emplacements pour SSD NVMe, accessibles via une trappe sous l’appareil. C’est également ici que vous pourrez augmenter la RAM. L’ajout de pâte thermique (fournie) et le rôle de dissipateur thermique du capot en aluminium sont des points positifs.
De notre point de vue, le NAS n’est pas suffisamment surélevé. Les patins sous l’appareil ne sont peu assez haut, ce qui limite la circulation de l’air et favorise les vibrations. De nombreux utilisateurs recommandent l’ajout de petits amortisseurs en élastomère pour corriger ce léger défaut. Nous validons ce choix.
UGOS
Nous vous avons déjà présenté le système embarqué UGOS précédemment. Nous avons bien conscience que Ugreen est encore jeune sur le marché et il faut savoir être indulgent. Le système évolue régulièrement sans rivaliser pour le moment avec les ténors du marché. Cependant, il n’a pas à rougir, car il sait déjà répondre à de nombreux usages.
Installation d’UGOS
L’utilisateur doit taper dans son navigateur find.ugnas.com pour trouver son NAS sur le réseau. L’installation se fait en 4 étapes (voire ci-dessous) :
Par rapport à notre précédent test, l’interface est désormais bien en français.
Une fois l’installation terminée, le NAS redémarre… il ne reste plus qu’à se connecter avec l’identifiant et le mot de passe saisis précédemment. Un nouveau guide se lance pour accompagner l’utilisateur dans les premières étapes :
Découverte de l’interface ;
Création d’un volume de stockage ;
Premier dossier partagé ;
Découverte d’UGREENlink pour l’accès à distance.
Note importante : lors du test précédent, nous pensions avoir commis une erreur, mais non… le service SMB (partage réseau) est désactivé par défaut. Cela veut dire que si vous ne faites rien, le NAS n’est pas accessible par le réseau (Windows, macOS ou Linux).
Usage au quotidien
UGOS est un système Linux optimisé pour le stockage en réseau. Il propose un ensemble de paramètres, auquel on peut ajouter des fonctionnalités via le Centre d’applications : Antivirus, Download Center, Text Edit, etc. Ugreen a fait le choix de privilégier Docker pour compléter son environnement applicatif.
Le fabricant propose une application mobile tout-en-un qui permet de profiter de son NAS à distance ou sur son réseau local. Il faut avouer qu’elle est complète et bien pensée. Ugreen propose également une application de bureau (Windows et macOS), ainsi qu’une adapté à Apple TV et Android TV. Elles permettent d’accéder aux fichiers, au statut du NAS, aux notifications… mais aussi au visionnage de vidéo, etc. Tout y est, un véritable couteau suisse !
Ugreen déploie fréquemment des mises à jour pour corriger des bugs et soucis de traductions, mais aussi pour améliorer les performances et ajouter des fonctionnalités. Un NAS, c’est un investissement sur le long terme. Aujourd’hui, les NAS sont régulièrement mis à jour… et surtout pendant de nombreuses années.
Nouvel entrant et tolérance
Ugreen est nouveau sur le marché des NAS, mais ce n’est pas un novice. L’entreprise possède une solide expérience industrielle et maîtrise déjà la conception matérielle et logicielle. Le fabricant connait également très bien ce secteur exigeant, dominé par des acteurs comme Synology et QNAP. Côté matériel, le produit tient la route…
Sur la partie logicielle, UGOS reste limité pour un usage avancé. S’il répond à 90% des particuliers, certains pourraient être déçus. La majorité des utilisateurs parient sur des mises à jour futures pour corriger le tir dans les prochains mois. Ugreen en a bien conscience… À noter qu’il propose également la possibilité d’installer de systèmes alternatifs comme OMV, TrueNAS, Unraid, etc. Une approche ouverte, que beaucoup apprécient.
L’essentiel est là : une base matérielle fiable et une volonté claire d’évoluer.
Performances du DXP4800 Pro
Dans la première partie des tests, nous allons évaluer les performances des transferts à travers un réseau 10 Gb/s (entre le NAS et des ordinateurs). Ensuite, nous regarderons les capacités du processeur, en analysant ses performances globales…
Vitesses dans les transferts
Depuis plusieurs années, nous avons mis en place un protocole de tests rigoureux fournissant des données fiables et comparables avec les performances des autres NAS. Pour cela, nous utilisons 4 applications de mesure différentes (2 sous macOS et 2 sous Windows) et réalisons en plus des transferts de fichiers de tailles variées dans les deux sens (NAS -> Ordinateur puis Ordinateur -> NAS) :
Petites tailles : 100 fichiers de 500 Ko à 12 Mo (MP3, photos, documents Office)
Tailles moyennes : 30 fichiers de 12 à 350 Mo (DivX, images RAW, archives ZIP)
Fichiers volumineux : 10 fichiers avec une taille comprise entre 4 et 10 Go (MKV, ISO)
À la suite des tests, une moyenne des transferts est calculée et nous la représentons sous forme de graphiques exprimée en mégaoctets par seconde (Mo/s). Plus le nombre est élevé, plus le NAS est rapide. Pour notre évaluation du DXP4800 Plus, nous avons configuré un premier volume avec 2 SSD NVMe en RAID 0, puis un second volume avec 3 SSD SATA en RAID 5.
RAID 0
Le NAS propose d’excellentes performances en lecture. Le système est réactif et les transferts solides. On voit tout de suite le gain offert par le nouveau processeur. Si les performances en écriture progressent (par rapport au DXP 4800 Plus), nous restons un peu sur notre faim.
RAID 5
Les débits vous surprennent… nous aussi. En lecture, le RAID 5 SATA assure et nous sommes sur des performances proches du RAID 0 NVMe. En écriture, les SSD SATA font même mieux sur les petits fichiers et ceux de taille moyenne. Par contre, sur les gros fichiers, les choses sont différentes.
Performances générales
Avec son nouveau processeur, Ugreen propose un NAS offrant des capacités bien plus étendues. Comparons rapidement celui-ci
UGREEN
DXP4800 Pro
UGREEN DXP4800 Plus
ASUSTOR FS6806X
Synology DS925+
Processeur
Intel Core
i3-1315U
Intel Pentium
Gold
AMD Ryzen Embedded V3C14
AMD Ryzen Embedded V1500B
iGPU intégré
Intel UHD Graphics
(13th Gen)
Intel UHD Graphics
(12th Gen)
Aucun
Aucun
Score Passmark
(CPU)
11 182
9 080
11 882
4 513
Score Single Thread
3 315
3 226
2 800
1 136
TDP
15 W
(55 W burst)
15 W
15 W
16 W
RAM max supportée
96 Go DDR5
64 Go DDR5
64 Go DDR5
32 Go DDR4 ECC
Vous l’aurez compris, le changement opéré par Ugreen n’est pas anodin. On se retrouve avec un processeur taillé pour les tâches complexes ou il n’aura pas de difficulté : chiffrement des données, virtualisation, conteneurisation ou encore le transcodage vidéo. Il sera difficile de le mettre en difficulté. Seul regret, la présence de seulement 8 Go de RAM par défaut. On ne va pas se mentir, c’est un peu juste pour exploiter pleinement le potentiel de ce NAS : 16 Go auraient été préférables.
IA & DXP 4800 Pro
Ugreen a été intégré ici et là quelques touches d’IA dans ses applications maisons (notamment dans son application pour les photos). Mais nous avons voulu aller plus loin et tenté l’expérience des modèles Qwen2.5:3B et Gemma2:2B avec Ollama. Ils fonctionnent très bien avec ce NAS et répondent en quelques secondes. Attention, l’IA consomme beaucoup de ressources : processeur et RAM. Aussi, nous avons constaté une certaine limitation dans la gestion des ressources avec Docker, certainement pour protéger les fonctions de base du NAS.
Consommation électrique et nuisance sonore
Le ventilateur arrière est relativement discret. Côté consommation électrique, le NAS affiche environ 27 W en usage normal (avec 2 SSD NVMe et 3 SSD SATA) et jusqu’à 45 W en charge plus soutenue.
CONCLUSION
Le UGREEN NASync DXP4800 Pro marque un vrai tournant pour la marque avec une base matérielle puissante et cohérente. Son Intel Core i3 et le 10 GbE natif en font un NAS taillé pour les usages avancés. Les performances sont au rendez-vous !!! En revanche, les 8 Go de RAM par défaut et un UGOS encore en maturation tempèrent légèrement l’ensemble.
Ugreen propose ici une alternative crédible face aux leaders, à condition d’accepter sa jeunesse logicielle.
UniFi Cloud Gateway Industrial – Did Ubiquiti Go Too Hard Here?
The UniFi Cloud Gateway Industrial and UniFi Cloud Gateway Fiber are positioned as high throughput UniFi gateways that also act as the controller for UniFi Network and other UniFi applications, so the buying decision is less about basic compatibility and more about which hardware package better fits the environment and the deployment style. The Fiber model is typically the lower cost entry point and focuses on compact desktop placement, multiple high speed WAN options, and optional local storage via an NVMe SSD for UniFi Protect. The Industrial model costs more and its appeal is tied to practical deployment factors rather than raw routing numbers: a heavier, ruggedized, fanless chassis intended to tolerate harsher placement, integrated WiFi 7 for situations where local wireless is useful at the gateway, built in microSD storage for NVR use out of the box, and a much higher PoE output budget that can power downstream devices directly. Both are rated for similar IDS/IPS throughput and similar scale on paper, so the price gap tends to come down to whether you actually need the Industrial model’s power delivery, integrated wireless, and physical design features, or whether you would get more value by choosing the Fiber model and putting the savings into switches, access points, cameras, storage, or redundancy elsewhere in the network.
UniFi Cloud Gateway Industrial – Quick Conclusion
The UniFi Cloud Gateway Industrial only makes sense at $579 if you will actually use what drives that price. That primarily means the 270W PoE budget with multiple PoE+++ 90W ports, the integrated WiFi 7 radio, the included 128 GB microSD for immediate Protect recording, and the tougher deployment profile. That deployment profile includes a fanless design, heavier build, higher operating temperature rating, and more mounting options. Those features can replace a separate PoE switch, a basic access point, and some setup time. They are most relevant in locations that are not ideal for a small desktop gateway. If your network already has a PoE switch and dedicated access points, the value shifts quickly. The same is true if you mainly want a fast UniFi controller and gateway with flexible uplinks, or if you would rather put $300 into more switching, an AP, cameras, or more storage capacity.
In that case, the UniFi Cloud Gateway Fiber is generally the more rational buy. Both units share the same core platform traits that matter for routing and security workloads, including the 5 Gbps IDS/IPS rating. The Fiber’s higher WAN port count and 2x 10G SFP+ layout also fits conventional designs where WiFi and PoE are handled elsewhere. Put simply, the Industrial is a justified premium when it simplifies the overall bill of materials or solves placement constraints. It is hard to justify as an upgrade on performance alone. For typical indoor deployments, it usually makes more sense to buy the Fiber and allocate the difference to parts that materially expand the network.
Here are all the latest UniFi Gateway, Routing and PoE+++ Solutions & Prices:
You can buy the UniFi UNAS Pro 4 NAS via the link below – doing so will result in a small commission coming to me and Eddie at NASCompares, and allows us to keep doing what we do!
Physically, the UniFi Cloud Gateway Industrial is built around a larger, heavier enclosure that is meant to stay in place rather than sit lightly on a shelf. In informal handling, it feels closer to a small piece of infrastructure gear than a typical compact gateway, which is consistent with its stated intent for rugged or semi permanent installs. By contrast, the Cloud Gateway Fiber is a low profile compact desktop unit, and its design reads more like a traditional small office gateway that can be placed near an ISP handoff or a small network stack.
The materials reflect that difference in intent. The Industrial uses a polycarbonate and aluminium alloy enclosure, while the Fiber uses polycarbonate. In practical terms, the Industrial’s metal content is more aligned with durability and heat management expectations in a fanless box that may be mounted in less forgiving places, whereas the Fiber’s lighter build aligns with a device expected to live in normal indoor environments.
Mounting flexibility is also not equal. The Industrial is listed as supporting wall mounting, compact desktop placement, and rack mounting via an accessory sold separately. The hardware design includes elements intended to support reconfiguration and installation style changes without changing the device itself.
The Fiber is primarily framed as a compact desktop form factor, which is typically fine for small racks or structured cabling areas only if you are comfortable improvising placement, rather than using a purpose built mounting approach.
Environmental tolerances are one of the clearest design separators. The Industrial is rated for an ambient operating range of -30 to 50 C, with 5 to 95 percent noncondensing humidity. The Fiber is rated for 0 to 40 C, also with 5 to 95 percent noncondensing humidity. If the gateway will be placed in a garage, loft, workshop, cabinet with poor airflow, or any space that regularly drifts outside typical indoor office temperatures, the Industrial’s ratings are the more relevant detail than most headline performance numbers.
Storage is where the devices take opposite approaches. The Industrial includes pre installed storage for NVR use, listed as a 128 GB microSD, and also supports microSD expansion. The Fiber does not ship with built in NVR storage, but supports selectable NVMe SSD storage up to 2 TB. In practice, the Industrial’s included microSD makes Protect usable immediately for light camera retention without additional parts, while the Fiber’s NVMe approach is better aligned with longer retention targets and scaling camera storage without relying on removable flash media
At the core, both gateways sit on a very similar compute platform: a quad core ARM Cortex A73 CPU clocked at 2.2 GHz with 3 GB of system memory. In practical terms, that means neither device has an inherent advantage in baseline controller duties like running UniFi Network alongside other UniFi applications, or handling typical gateway services such as stateful firewalling, VPN termination, and traffic analysis.
The key performance headline for security enabled routing is also aligned. The Cloud Gateway Fiber is rated at 5 Gbps IDS/IPS throughput, and the Industrial model is positioned at the same 5 Gbps figure in the specifications you provided. That sets a realistic expectation that the price difference is not being driven by faster IDS/IPS, and that either unit can be the bottleneck if the goal is to inspect traffic at speeds above that rating.
Where the internal design diverges is less about raw compute and more about what each device integrates around that shared platform. The Industrial model bundles additional subsystems into the chassis, including a built in WiFi 7 radio, PoE switching hardware with much higher total PoE delivery, and cellular related features such as SIM slots intended for use with UniFi cellular hardware. Those additions change the role of the device from a gateway plus controller into something closer to a gateway, small switch, and basic wireless node combined, which can simplify certain installations where power and connectivity need to be consolidated.
The Fiber model stays more focused on being a high speed gateway with multiple WAN options and scalable local storage via NVMe for Protect, rather than integrating WiFi and high power PoE into the same chassis. In a typical structured network design, that aligns with the approach of keeping wireless and switching as separate components. In a more compact or power constrained install, the Industrial’s integrated approach can reduce the number of separate devices, but it also means you are paying for features you might not use if you already have dedicated switches and access points.
UniFi Cloud Gateway Industrial (vs Fiber) – Ports and Connections
Both gateways are built around multi WAN capability and a mix of 10 GbE and 2.5 GbE connectivity, but they prioritize different things. The Fiber model pushes WAN flexibility and high speed uplinks, listing a max WAN port count of 6. The Industrial model lists a max WAN port count of 5 and instead leans into powering downstream equipment directly through multiple high wattage PoE ports.
On the Cloud Gateway Fiber, the physical layout is centered on high speed copper and fiber. It includes (2) 10G SFP+ ports, (1) 10 GbE RJ45 port, and (4) 2.5 GbE RJ45 ports. Its default WAN configuration is shown as (1) 10G SFP+ and (1) 10 GbE RJ45, which makes it straightforward to mix fiber and copper upstream, or to reserve additional ports for LAN and internal switching depending on how you assign roles inside UniFi.
On the Cloud Gateway Industrial, the port layout is more explicit about power delivery. It has (4) 2.5 GbE RJ45 ports split as (2) PoE+++ and (2) PoE+, plus (1) 10 GbE RJ45 port that is PoE+++, and (1) 10G SFP+ port. The default WAN ports are listed as (1) 10 GbE RJ45 and (1) 2.5 GbE RJ45. In other words, it gives up some of the Fiber model’s extra high speed uplink optionality in exchange for multiple powered Ethernet outputs, including 90W class ports intended for higher draw devices.
Power input design also differs because it sets limits on what the PoE side can realistically do. The Industrial lists a PoE budget of up to 270W on DC input, with a 54V 350W adapter included, and it also supports an ATX power input (48V) with a lower PoE budget listed at 75W. The Fiber lists a much smaller PoE budget of 30W and is powered via a 54V DC jack with a 1.1A adapter. Excluding PoE output, both are in the same general range for the gateway itself, listed at 28W max for the Industrial and 29.4W max for the Fiber, but the Industrial’s power system is sized for PoE heavy deployments.
The Industrial also adds non Ethernet connectivity that the Fiber does not include. It has integrated WiFi 7 on 2.4 GHz and 5 GHz with external antenna support, and it includes 2 SIM slots intended for use with UniFi cellular hardware. The Fiber does not integrate WiFi or SIM slots, so wireless and cellular failover are typically handled by separate UniFi devices rather than being built into the gateway.
UniFi Cloud Gateway Industrial vs Cloud Gateway Fiber – Where Has $300 Been Spent?
At $579 versus $279, the Industrial is asking you to pay about $300 extra for a different kind of gateway bundle rather than a higher routing ceiling. Both platforms align on the core controller and gateway capability, including the same general IDS/IPS rating, so the decision largely comes down to whether you will use the Industrial model’s integrated features and physical design enough to offset the price difference. The biggest measurable value add is PoE output. The Fiber’s PoE budget is 30W total, which covers a single low to moderate power device, but it does not change how you design a network. The Industrial can deliver up to 270W of PoE output on DC input, with multiple ports supporting PoE+++ up to 90W per port. If your plan includes powering higher draw devices directly from the gateway, or you want to avoid adding a separate PoE switch in a small installation, that difference can replace other hardware and simplify cabling.
The next set of value drivers are convenience and deployment constraints. The Industrial includes integrated WiFi 7 (2.4 GHz and 5 GHz) with external antennas, plus dual SIM slots intended for cellular related UniFi use, and it is built for harsher placement with a higher listed operating temperature range. Those are specific benefits when the gateway needs to live in less controlled spaces, when a basic local wireless link at the gateway is useful, or when you want those functions inside a single enclosure. If you already plan to deploy dedicated access points, dedicated switching, and a separate failover device, these integrated features are less likely to change the design. Storage is a smaller part of the $300, but it affects out of box readiness. The Industrial includes 128 GB microSD intended for NVR use, so Protect storage exists immediately with no additional parts. The Fiber can scale higher with an NVMe SSD up to 2 TB, but that storage is optional and adds cost. If Protect is a core requirement and you want higher retention, the Fiber can still end up costing more once storage is added, while the Industrial starts with basic capacity included.
The UniFi Cloud Gateway Industrial is primarily justified by what it combines into a single chassis, and by where it is intended to live. The unit pairs a fanless, ruggedized enclosure and higher temperature tolerance with integrated WiFi 7 (2.4 GHz and 5 GHz) using external antennas, multi port PoE output that includes PoE+++ at up to 90W per port, and a high total PoE budget when powered from its included 54V adapter. It also includes pre installed microSD storage aimed at NVR duties, plus SIM slots that are designed around supported UniFi cellular integrations. None of these features change the stated IDS/IPS ceiling compared with other similar gateways, but they do change what additional equipment is required in smaller or more constrained deployments.
The value case depends on whether those integrated functions replace other purchases. If you would otherwise buy a separate network gateway, a WiFi access point or router, and a PoE+++ capable switch to power downstream devices, the combined cost and installation complexity can narrow the apparent price gap and in some cases make the Industrial model the simpler, potentially cheaper route overall. If your design already assumes dedicated switching, dedicated wireless, and storage sized beyond what a microSD setup can reasonably provide, the Industrial model’s premium is more likely to be paying for capabilities you do not use. In that situation, the practical advantage of the Industrial is mainly its physical build and power delivery, not a different performance class for routing and security inspection.
Here are all the latest UniFi Gateway Network PoE Solutions & Prices:
You can buy the UniFi UNAS Pro 4 NAS via the link below – doing so will result in a small commission coming to me and Eddie at NASCompares, and allows us to keep doing what we do!
PROs of the UniFi Cloud Gateway Industrial
PROs of the UniFi Cloud Gateway Industrial
High PoE capacity: up to 270W total PoE budget on DC input, with PoE+++ up to 90W per port AND Multiple powered ports: 3 PoE+++ ports and 2 PoE+ ports across the 2.5 GbE and 10 GbE RJ45 interfaces
Integrated WiFi 7 on 2.4 GHz and 5 GHz with external antennas, useful when wireless at the gateway is needed
Included Protect ready storage: 128 GB microSD pre installed for NVR use
Rugged, fanless build with a higher listed operating range (-30 to 50 C) than typical desktop gateways
Flexible deployment options: wall mount, compact desktop, rack mount via accessory
Multi WAN support up to 5 WAN ports for failover and load balancing designs
Full UniFi feature set without additional licensing: firewalling, IDS/IPS, SD WAN, and VPN options like WireGuard, OpenVPN, and IPsec
Works out cheaper than buying a separate business WiFi 7 Router and a higher-end PoE+++ Switch
$579 pricing, roughly $300 more than the Cloud Gateway Fiber, so the premium only pays off if you use the extra features
Less high speed uplink flexibility than the Fiber due to 1x 10G SFP+ versus the Fiber’s 2x 10G SFP+
microSD based storage model is less ideal than NVMe for higher retention Protect use cases or heavier write workloads
This description contains links to Amazon. These links will take you to some of the products mentioned in today's content. As an Amazon Associate, I earn from qualifying purchases. Visit the NASCompares Deal Finder to find the best place to buy this device in your region, based on Service, Support and Reputation - Just Search for your NAS Drive in the Box Below
Need Advice on Data Storage from an Expert?
Finally, for free advice about your setup, just leave a message in the comments below here at NASCompares.com and we will get back to you.Need Help?
Where possible (and where appropriate) please provide as much information about your requirements, as then I can arrange the best answer and solution to your needs. Do not worry about your e-mail address being required, it will NOT be used in a mailing list and will NOT be used in any way other than to respond to your enquiry.
[contact-form-7]
TRY CHAT Terms and Conditions
If you like this service, please consider supporting us.
We use affiliate links on the blog allowing NAScompares information and advice service to be free of charge to you.Anything you purchase on the day you click on our links will generate a small commission which isused to run the website. Here is a link for Amazon and B&H.You can also get me a Ko-fi or old school Paypal. Thanks!To find out more about how to support this advice service checkHEREIf you need to fix or configure a NAS, check FiverHave you thought about helping others with your knowledge? Find Instructions Here
Or support us by using our affiliate links on Amazon UK and Amazon US
Alternatively, why not ask me on the ASK NASCompares forum, by clicking the button below. This is a community hub that serves as a place that I can answer your question, chew the fat, share new release information and even get corrections posted. I will always get around to answering ALL queries, but as a one-man operation, I cannot promise speed! So by sharing your query in the ASK NASCompares section below, you can get a better range of solutions and suggestions, alongside my own.
Aujourd’hui, c’est un article pas comme les autres. Je vous partage un peu en vrac mes idées et mes doutes. J’ai lancé Cachem.fr en 2009. À l’époque, je rédigeais des tutoriels sous Word pour des amis. Je partageais mes découvertes, mes tests, mes bidouilles. Personne ou presque ne parlait des NAS. Alors j’ai mis tout ça en ligne… Il n’y avait pas de stratégie, pas de business plan. Juste l’envie de partager une passion.
Cela fait plus de 16 ans, Cachem est toujours là. Sur le Web, on peut dire que c’est un dinosaure. Et moi aussi…
Une passion… mais pas mon métier
Dans la vie, j’ai un “vrai” métier. Je travaille dans une grande entreprise française dans un environnement structuré, exigeant, très éloigné du monde des NAS et des tests hardware. Au travail, je suis concentré à 100 % dans mes fonctions : Cachem n’interfère jamais.
Mais le soir, le week-end… entre deux moments en famille, Cachem reprend sa place.
Je passe en moyenne 12 heures par semaine dessus. Rédaction, tests, mises à jour, veille, échanges… Ça prend une place importante (trop ?) dans mon quotidien. C’est toujours une passion. Mais parfois, elle se transforme en contrainte.
Il m’arrive d’écrire “par devoir”, de me sentir obligé de publier. Comme si laisser le site au repos était une forme d’abandon.
Ce que Cachem m’apporte vraiment
Si je continue, ce n’est pas pour l’argent. La monétisation est anecdotique. Elle finance l’achat de matériel pour les tests, un restaurant avec madame de temps en temps, rien de plus. Je continue parce que Cachem m’apporte énormément :
Le site m’oblige à rester curieux ;
À comprendre les technologies en profondeur ;
À tester des produits innovants ;
À garder un équilibre intellectuel…
Et surtout, il y a le partage. Les commentaires et les échanges par mail. La reconnaissance d’une communauté passionnée. Cachem est un blog passion. Il l’a toujours été.
Les doutes sont réels
Je ne vais pas faire semblant : j’ai pensé arrêter. Régulièrement. Par manque de temps, par fatigue, par impression de ne plus rien avoir d’intéressant à raconter. Le paysage du web a changé. Les blogs ne sont plus à la mode. L’attention est ailleurs : TikTok, Instagram, YouTube…
Beaucoup de sites tech ferment, d’autres se regroupent sous de grands ensembles, les indépendants deviennent rares.
Parfois, je me demande si écrire a encore du sens. Et puis, je reviens toujours au même point. Le NAS revient toujours. Le NAS ne brille pas à la hauteur qu’il devrait, à mon goût. Il connaît des cycles, des périodes creuses, des vagues d’intérêt. Mais on y revient toujours :
Face au cloud ;
Face aux questions de souveraineté ;
Face au besoin de disponibilité locale ;
Face à la sécurisation des données personnelles…
Le NAS, c’est l’autonomie numérique à la maison. Et je crois que tant que ce sujet existera, j’aurai envie d’en parler. Parce que derrière la boîte noire posée sur l’étagère, il y a une philosophie : reprendre (ou garder) un peu le contrôle.
Pourquoi le rythme peut ralentir
Si le rythme évolue, ce n’est pas un abandon. C’est un équilibre à trouver. Ma vision : c’est que Cachem ne doit pas devenir une obligation pesante pour moi ou mon entourage. Il doit rester un espace de liberté.
Il y aura peut-être moins d’articles, peut-être plus de recul, peut-être plus de sélection, mais toujours la même sincérité.
Merci
Désolé si c’est un peu en vrac, je ne me suis pas relu, car je souhaite partager avec vous mon état d’esprit, ce qui se passe dans ma tête… un peu brut.
Merci à ceux qui lisent depuis des années, à ceux qui commentent, à ceux qui partagent un article, à ceux qui envoient un message pour dire simplement “merci”. Un blog indépendant vit par sa communauté. Alors si Cachem vous apporte quelque chose (une information, une solution, une réflexion) continuez à le faire vivre. Par un commentaire. Un partage. Un mot.
Cachem n’a jamais été un projet opportuniste. C’est un blog passion. Et tant que la passion sera plus forte que le doute, il continuera d’exister.
Gl.iNet Comet 5G Review – The ULTIMATE ALL-ACCESS KVM?
The GL.iNet Comet 5G is a remote KVM built to provide keyboard, video, and mouse control of a connected computer from power on through BIOS, rather than relying on a working operating system like traditional remote desktop tools. It accepts HDMI input from the host and offers HDMI passthrough so a local display can remain connected, with support up to 4K at 30 fps or 1080p at 60 fps, plus 2 way audio. Connectivity is where the Comet 5G differentiates itself most clearly in this product line: it can be managed over Gigabit Ethernet and Wi-Fi 6, but it also includes a nano SIM slot for 5G RedCap with 4G LTE fallback, intended for out of band access when the site network is down, segmented, or simply not trusted. It also supports a local AP mode that broadcasts its own wireless network for nearby management sessions without joining the surrounding LAN. In day to day use, the device is mainly aimed at remote maintenance tasks such as OS installs, recovery and imaging, BIOS changes, and support work on machines that lack built in management like iDRAC or iLO. Compared with the Comet Pro, it keeps the same general platform and interface approach, but adds the cellular path, the AP mode, a larger 3.69 in touchscreen, and 64 GB of eMMC storage for ISO and file staging. The key questions for a review are less about raw compute, since the core platform is similar to the Comet Pro, and more about whether the extra connectivity options, storage capacity, and on device usability justify its higher price for the way it will actually be deployed.
Gli.Net Comet 5G KVM Review – Quick Conclusion
The GL.iNet Comet 5G is essentially the Comet Pro style KVM experience with a stronger connectivity toolkit rather than a major jump in raw performance: you still get reliable BIOS level access, HDMI passthrough so a local screen can stay connected, and flexible access from a browser across different operating systems, but the main reason to choose it is the extra ways it can be reached when the local network is unavailable or not trusted. The nano SIM support (5G RedCap with 4G LTE fallback) gives an out of band route that can keep access available even when Ethernet or Wi-Fi are misconfigured, and the AP mode adds a direct nearby connection for quick point to point management without joining the site LAN, which can be genuinely useful in field work, segmented networks, or recovery situations. It also doubles the internal storage to 64 GB, which makes it easier to keep several ISO images and tools ready to mount remotely, and the larger 3.69 in touchscreen makes local setup and status checks less cramped. The trade offs are mostly about expectations: storage speeds remain modest, so uploading and copying large files is not fast; USB based storage expansion exists but is limited by USB 2.0, can require reboots, and drive compatibility is not always consistent; and while the device supports multiple paths and is marketed around failover, the current interface does not expose deep, router style controls for tuning how those paths behave. If you mostly run KVM over a stable wired or Wi-Fi network, the Comet Pro will usually cover the same core tasks for less money, but if you want a small KVM that gives you more options to regain access when networks are awkward or failing, the Comet 5G is the more complete tool as long as you accept the storage and configuration limitations.
SOFTWARE - 9/10
HARDWARE - 9/10
PERFORMANCE - 8/10
PRICE - 8/10
VALUE - 8/10
8.4
PROS
Cellular out of band access via nano SIM (5G RedCap with 4G LTE fallback) adds a separate path when the site LAN is down or misconfigured Nearby Control via AP mode enables direct point to point access without joining the surrounding network, useful for local BIOS work and isolated environments HDMI passthrough plus capture keeps a local monitor active while still providing remote KVM access (up to 4K 30 fps, 1080p 60 fps) Browser based management and access works across Windows, macOS, and Linux without requiring a dedicated client 64 GB eMMC provides more room for ISO images and utility files than the 32 GB model, reducing how often media needs to be rotated 3.69 in touchscreen makes on device setup and status checks less cramped than smaller panel implementations Multiple remote access approaches are available (LAN, relay, and VPN style options like Tailscale and ZeroTier), allowing different trust and routing models Low complexity deployment with passive cooling and a small footprint makes it viable as a 24/7 appliance when powered independently
CONS
Storage performance is modest, and remains closer to mid range eMMC speeds than fast removable storage External storage expansion has caveats, including USB 2.0 limits, possible reboots, and inconsistent compatibility depending on the USB drive and power draw Failover and cellular controls are not deeply tunable in the current UI, so users expecting router grade policy controls may find configuration limited
Buy the Gl.iNet KVM 5G from Amazon Below:
Buy the Gl.iNet Comet KVM ($219) from the Official Store Below:
Gli.Net Comet 5G KVM Review – Design & Storage
The Comet 5G follows the same general design language as the Comet Pro, but it is physically larger and more deployment focused. It measures 128 × 93 × 33 mm and weighs 285 g, which makes it more of a bag sized tool than something that disappears behind a monitor without planning. The casing relies on passive ventilation rather than active cooling, and in normal use it is intended to be left running continuously, provided it is powered independently rather than from the host machine.
A practical difference in the Comet 5G design is the addition of external antennas to support its wireless roles.
This includes cellular and Wi-Fi antennas, and the unit is clearly built around the expectation that it may be used away from a stable wired network, whether that is via the SIM slot or via a direct nearby wireless connection. In a fixed desk setup the antennas can feel like overkill, but for temporary installs and field support they suit the intended use case.
On the front, the Comet 5G uses a 3.69 in touchscreen, which is notably larger than the Comet Pro’s 2.22 in panel. In practice, that extra size does not materially change the experience of mirroring the host display on the device itself, since you remain limited by the source resolution and scaling.
Where it does help is in the local management interface, where menus and status screens have more room and are less cramped, particularly during setup or when checking network state and service toggles directly on the unit.
Storage is expanded to 64 GB eMMC, and the main advantage is capacity rather than speed. In use, the internal storage is primarily for keeping ISO images, recovery media, and utility files that can be mounted remotely as virtual media or exposed to the host as a remote drive.
File transfers to and from the internal storage typically sit in the same general performance range as the Comet Pro, which means it is functional for staging installers and smaller toolsets, but slow for moving large data sets.
A newer software feature available across the platform also allows external storage via a USB drive, but it comes with constraints that affect how usable it is in practice. Adding a drive can require a reboot, compatibility varies between drives, and the management interface tends to treat partitions individually rather than offering straightforward full disk handling.
Because the port involved is USB 2.0, external storage is more about adding space for additional ISOs than achieving a meaningful improvement in transfer speeds.
Gli.Net Comet 5G KVM Review – Connectivity
The Comet 5G keeps its I/O layout simple, with the core KVM connections built around full sized HDMI input and HDMI output for passthrough. This avoids adapter reliance and makes it easier to drop into existing setups where monitors and capture paths already use standard HDMI cabling. In a permanent install, passthrough is the more important part of that arrangement, since it allows a local user to keep working on the attached screen while remote access remains available in the background.
For host control, the unit presents USB based keyboard and mouse emulation over its USB-C connection, while power is also supplied via USB-C at 5V/3A with PD compatibility.
In practical terms, powering it from an independent adapter is the safer approach, because drawing power from the host machine can remove KVM access when the host is powered off, rebooting, or in a state where USB power is unstable.
Wired networking is provided by a 1 GbE RJ45 port, which is the most consistent option for image quality and responsiveness when the site network is stable. Alongside this, the Comet 5G supports Wi-Fi 6 on both 2.4 GHz and 5 GHz, and it also includes an AP mode that allows a direct nearby wireless connection without joining the surrounding LAN.
That AP mode is best understood as a local management path rather than a general purpose hotspot, and it is primarily useful when you want a quick point to point session for BIOS work or initial configuration.
The main connectivity addition over the Comet Pro is the nano SIM slot for cellular access, supporting 5G RedCap with 4G LTE fallback. This is positioned as an out of band route that can keep the management channel available when Ethernet and Wi-Fi are unavailable or misconfigured, and it also reduces dependence on VLAN routing rules and other site side constraints.
In the current software experience, the cellular side is exposed through its own configuration section, but it does not offer the same depth of policy and failover tuning found on GL.iNet’s router products.
Gli.Net Comet 5G KVM Review – Internal Hardware
Internally, the Comet 5G is built around a quad core ARM Cortex-A53 SoC paired with 1 GB of DDR3L memory, which is broadly the same class of platform used by the Comet Pro. In review terms, this means the Comet 5G is not trying to win on raw compute, but on connectivity and deployment options, because the core processing headroom is similar. The A53 class CPU is adequate for running the management services, handling multiple control sessions, and keeping the on device UI responsive, but it is not aimed at heavier workloads outside the core KVM functions. The OS is Linux 6.1, and the device behaves like a small embedded appliance rather than a general purpose system you would extend with additional packages and services.
The video path is designed around HDMI ingest and H.264 hardware encoding, with the remote stream adapting to available bandwidth and quality settings in the client interface. Support is listed up to 4K at 30 fps and 1080p at 60 fps, with HDMI passthrough keeping a local monitor active while the unit captures the same signal for remote viewing.
Audio is supported in 2 directions, but the device itself is not treated as a standalone audio endpoint, so the practical experience depends on how the host exposes audio over HDMI or USB and how the client session is configured. Input is handled via USB based HID emulation, which is why copy and paste and keystroke injection can sometimes behave differently between applications depending on how they interpret simulated typing versus clipboard shortcuts.
The storage subsystem uses 64 GB eMMC soldered to the board, and in practice it is tuned for predictable, mid range throughput rather than high performance. Real world transfer rates observed during ISO uploads and mounted storage tests typically sit around the mid 20s to mid 30s MB/s range, which aligns with the Comet Pro experience and reflects the limits of the flash and controller rather than a network bottleneck.
That makes it usable for staging installers, recovery media, and driver packs, but not ideal for repeated large image transfers or heavy file shuttling. Expansion is possible via a USB drive using the USB 2.0 Type-A port, but that is primarily a capacity extension, because USB 2.0 limits both bandwidth and available bus power, and drive compatibility can vary depending on the enclosure controller and power draw.
The Comet 5G uses the same GLKVM software family as the earlier Comet devices, with access provided through a browser interface, a desktop client, and a mobile app. In testing, the browser UI is the most straightforward for configuration and for working across different operating systems, and it also exposes most of the device settings without needing to install anything locally.
Firmware maturity differed slightly between units during side by side use, with the Comet Pro running a stable 1.8 release build while the Comet 5G was still presented as beta, though the overall layout and feature set were close enough that the differences felt tied to hardware options rather than a separate software branch.
#
Account and session security options are built into the platform, including 2 factor authentication and passkey support at the account level, plus the ability to apply an additional password gate per device before entering a remote session. Remote access can be handled locally over LAN, through GL.iNet’s relay service, or through peer to peer options. Tailscale support is part of the platform, and newer software revisions have also introduced ZeroTier support, which addresses earlier feedback around relying on a single remote access option.
For users who prefer not to use relay services, these VPN style paths can provide remote reachability without opening ports or depending on the vendor’s cloud beyond account management.
Where the Comet 5G differs in day to day software behavior is how cellular and nearby access are exposed. Cellular configuration appears as a dedicated section for SIM based connectivity, while the Wi-Fi settings include an AP mode that allows direct nearby connections without joining the site WLAN. In practice, these features improve the chances of reaching the device when the surrounding network is misconfigured or inaccessible, but the management interface does not currently provide the same depth of routing, policy control, or visible failover logic that GL.iNet includes in its router products. Multi path behavior is present at a feature level, but there is limited opportunity to tune it beyond selecting the available connection modes.
Performance during remote control sessions depends mainly on the network path and the host workload rather than differences between the Comet 5G and Comet Pro hardware. Video quality controls and stream settings allow the session to be made more stable on weaker links, and the general desktop experience remains usable for BIOS work, OS installs, and troubleshooting.
A copy and paste stress test with a large block of text showed both devices could transfer long input sequences, but the Comet 5G produced fewer odd spacing issues in the final pasted document during that run. On mobile, both devices provide touch mode and cursor mode plus access to a software keyboard, and external Bluetooth keyboards and mice can be used, but fluidity and compression artifacts were more noticeable when the phone was on cellular data compared with a local Wi-Fi or wired path.
The Comet 5G works as a continuation of the Comet Pro platform rather than a clean break. The remote session experience, general interface layout, and core feature set remain familiar, because the underlying compute and encoding approach is broadly the same, and both devices are aimed at the same type of work: BIOS access, OS installs, recovery tasks, and remote troubleshooting where standard remote desktop tools are not enough. The areas that do change the day to day ownership experience are mostly around how you can reach the device when things go wrong. The SIM based 5G RedCap and 4G LTE fallback adds a separate management path, and the AP mode provides a direct nearby connection that avoids relying on the site LAN. The larger 3.69 in screen also makes the on device menus easier to use, even if it does not transform the usefulness of live video mirroring on the panel itself.
On the positive side, the Comet 5G is more adaptable in awkward environments, such as networks with strict VLAN boundaries, unreliable Wi-Fi, or unknown cabling, and it gives you more ways to regain access without a site visit. The 64 GB eMMC storage is also easier to live with if you keep multiple ISO images or toolkits available, although transfer speed remains limited and does not materially improve over the 32 GB model. On the less positive side, the cellular and multi path story is currently presented more as a capability than as a deeply configurable system, so users expecting router style failover policies and detailed controls may find the options relatively basic. The external storage expansion feature helps with capacity, but it is constrained by USB 2.0, requires reboots in some situations, and drive compatibility can be inconsistent, which limits how predictable it is as a long term workflow.
Overall, the Comet 5G is easier to justify when you expect to use the cellular connection or the nearby AP mode regularly, because those are the main reasons it exists and the main differences you will notice. If the device will live on a stable wired network most of the time and you only need a straightforward remote KVM for routine maintenance, the Comet Pro will usually cover the same core tasks for less money. If your priority is having multiple ways to reach the box when the local network is down or not trusted, the Comet 5G is the more complete tool, but its value depends on those deployment realities rather than any large jump in raw performance.
Buy the Gl.iNet KVM 5G from Amazon Below:
Buy the Gl.iNet Comet KVM ($219) from the Official Store Below:
Gl.iNet Comet 5G KVM Pros
Gl.iNet Comet 5G KVM CONs
Cellular out of band access via nano SIM (5G RedCap with 4G LTE fallback) adds a separate path when the site LAN is down or misconfigured
Nearby Control via AP mode enables direct point to point access without joining the surrounding network, useful for local BIOS work and isolated environments
HDMI passthrough plus capture keeps a local monitor active while still providing remote KVM access (up to 4K 30 fps, 1080p 60 fps)
Browser based management and access works across Windows, macOS, and Linux without requiring a dedicated client
64 GB eMMC provides more room for ISO images and utility files than the 32 GB model, reducing how often media needs to be rotated
3.69 in touchscreen makes on device setup and status checks less cramped than smaller panel implementations
Multiple remote access approaches are available (LAN, relay, and VPN style options like Tailscale and ZeroTier), allowing different trust and routing models
Low complexity deployment with passive cooling and a small footprint makes it viable as a 24/7 appliance when powered independently
Storage performance is modest, and remains closer to mid range eMMC speeds than fast removable storage
External storage expansion has caveats, including USB 2.0 limits, possible reboots, and inconsistent compatibility depending on the USB drive and power draw
Failover and cellular controls are not deeply tunable in the current UI, so users expecting router grade policy controls may find configuration limited
This description contains links to Amazon. These links will take you to some of the products mentioned in today's content. As an Amazon Associate, I earn from qualifying purchases. Visit the NASCompares Deal Finder to find the best place to buy this device in your region, based on Service, Support and Reputation - Just Search for your NAS Drive in the Box Below
Need Advice on Data Storage from an Expert?
Finally, for free advice about your setup, just leave a message in the comments below here at NASCompares.com and we will get back to you.Need Help?
Where possible (and where appropriate) please provide as much information about your requirements, as then I can arrange the best answer and solution to your needs. Do not worry about your e-mail address being required, it will NOT be used in a mailing list and will NOT be used in any way other than to respond to your enquiry.
[contact-form-7]
TRY CHAT Terms and Conditions
If you like this service, please consider supporting us.
We use affiliate links on the blog allowing NAScompares information and advice service to be free of charge to you.Anything you purchase on the day you click on our links will generate a small commission which isused to run the website. Here is a link for Amazon and B&H.You can also get me a Ko-fi or old school Paypal. Thanks!To find out more about how to support this advice service checkHEREIf you need to fix or configure a NAS, check FiverHave you thought about helping others with your knowledge? Find Instructions Here
Or support us by using our affiliate links on Amazon UK and Amazon US
Alternatively, why not ask me on the ASK NASCompares forum, by clicking the button below. This is a community hub that serves as a place that I can answer your question, chew the fat, share new release information and even get corrections posted. I will always get around to answering ALL queries, but as a one-man operation, I cannot promise speed! So by sharing your query in the ASK NASCompares section below, you can get a better range of solutions and suggestions, alongside my own.
L’IT Partner est un événement high-tech que j’apprécie particulièrement. Pour cette 20e édition, le salon se tenait une nouvelle fois à l’Arena de La Défense. C’est un rendez-vous unique qui permet de rencontrer, sur un même site, plusieurs fabricants de NAS… mais pas seulement. En effet, au-delà du stockage, l’événement couvre l’ensemble de l’écosystème IT : infrastructures, cybersécurité, réseaux, cloud, services managés, distribution et intégration. Un concentré du marché en deux jours.
Un passage express, mais ciblé
Pendant ces 2 jours, pas moins de 230 exposants étaient présents. Cette année, mon agenda était particulièrement contraint. Malheureusement, je n’ai pu passer qu’un peu moins de deux heures sur le salon, et uniquement le second jour.
J’avais donc préparé en amont la liste des acteurs que je souhaitais absolument rencontrer. Résultat : un parcours optimisé, au pas de course, mais efficace.
Synology, Asustor et Ugreen : focus NAS
Ugreen : une première remarquée
Ugreen participait pour la première fois au salon avec son propre stand (et il ne désemplissait pas). La marque attire clairement la curiosité sur le marché du NAS. J’ai pu échanger longuement avec Gaëlle, France Business Development Manager, au sujet de l’arrivée d’Ugreen sur ce segment et des opportunités à venir pour le fabricant. La stratégie est ambitieuse et le positionnement mérite d’être suivi de près.
Asustor : montée en puissance en France
Asustor participait à son premier salon en France. Le constructeur était présent sur le stand du grossiste ALSO. La France (et plus largement l’Europe) représente un marché stratégique pour la marque. La présence de Mehdi, Sales Manager, a permis un échange constructif sur la situation actuelle du secteur et sur la stratégie de développement d’Asustor. Petite déception toutefois : Damien, bien connu de la communauté, n’était pas présent cette année. Ce sera pour une prochaine édition.
Synology : présence solide, peu de nouveautés
Comme toujours, Synology était au rendez-vous, avec une présence sur deux corners distincts via deux grossistes. Beaucoup de monde sur les espaces dédiés, preuve de l’intérêt constant pour la marque. En revanche, peu de nouveautés majeures à découvrir sur place cette année.
QNAP : une absence remarquée
On notera l’absence de stand pour QNAP. Même si j’ai croisé deux membres de l’équipe, le constructeur ne disposait ni de stand dédié ni de corner partagé. Un choix compréhensible au regard de leur actualité chargée (déménagement, nouveaux produits, roadshow…), mais une présence officielle aurait été appréciée.
Un événement incontournable pour les professionnels IT
L’IT Partners reste un rendez-vous clé pour les professionnels du secteur. Le salon offre un cadre efficace pour échanger avec les fabricants et les distributeurs, découvrir de nouvelles solutions et renforcer son réseau.
Même en passage rapide, la valeur ajoutée est bien réelle. Pour tous les acteurs de l’écosystème IT (intégrateurs, revendeurs, MSP ou éditeurs) c’est un événement à inscrire dans l’agenda.
UniFi UNAS Pro 4 vs Pro vs Pro 8 NAS – WHICH ONE SHOULD YOU BUY?
Within UniFi, the UNAS line is positioned as a straightforward, storage focused, turnkey NAS platform that fits into the same single pane management style as the rest of the ecosystem, prioritizing file storage, sharing, snapshots, and backup workflows over broader server style expandability. In this 3 way comparison, the UNAS Pro (7 bay, Nov 2024), UNAS Pro 8 (8 bay, Nov 2025), and UNAS Pro 4 (4 bay, Feb 2026) look similar on the surface, but they target different deployment constraints and ceiling limits in rack depth, storage scalability, cache options, memory headroom, network redundancy, and power design. Two of the units (Pro 4 and Pro 8) add M.2 NVMe cache support and higher availability 10GbE networking than the original Pro, while the Pro 8 also pushes furthest on RAM capacity and physical redundancy expectations for a rack install.
More 3.5 inch bays than UNAS Pro 4 at the same $499 price (7 vs 4)
1U chassis (smallest height)
Most total bays (8) plus 2x NVMe cache slots
Shallower chassis depth than both (325 mm), easier fit in short depth racks
2x 10G SFP+ instead of 1x 10G SFP+ on UNAS Pro
16 GB memory (double UNAS Pro and UNAS Pro 4)
Front 10G SFP+ and 1G RJ45 placement can suit front of rack cabling
NVMe cache support (absent on UNAS Pro)
3 total 10 GbE ports (2x 10G SFP+ plus 10 GbE RJ45), most flexible networking
1.3 inch touchscreen (absent on UNAS Pro 4 and UNAS Pro 8)
Longer CPU clock than UNAS Pro (2.0 GHz vs 1.7 GHz)
Hot swappable power modules (only model with this design)
Con
No NVMe cache support (both UNAS Pro 4 and UNAS Pro 8 have it)
Lowest bay ceiling and no official expansion path, so it fills up fastest
Highest price up front ($799)
Only 1x 10G SFP+ (UNAS Pro 4 has 2x, UNAS Pro 8 has 2x plus 10 GbE RJ45)
Deeper chassis than UNAS Pro (400 mm vs 325 mm)
Deepest chassis (480 mm), most demanding fit in shallow racks
Lower CPU clock than UNAS Pro 4 and UNAS Pro 8 (1.7 GHz vs 2.0 GHz)
No hot swap PSU design (UNAS Pro 8 is the only one with hot swappable power modules)
No touchscreen (UNAS Pro includes a front touchscreen)
Same 8 GB memory as UNAS Pro 4 and less than UNAS Pro 8 (16 GB)
Same 8 GB memory as UNAS Pro and less than UNAS Pro 8 (16 GB)
Higher power ceiling and max power consumption than the other 2 (250 W max)
At the same time, the lineup is notable for pricing that stays lower than many established rackmount NAS competitors at comparable connectivity, with both the UNAS Pro and UNAS Pro 4 landing at $499, and the UNAS Pro 8 stepping up to $799 for more bays, more memory, and more network paths. The practical decision usually comes down to whether the priority is maximum bays at the lowest buy in, a tighter 1U footprint with newer cache and dual 10GbE links, or a higher ceiling platform with the strongest long term headroom in bays, RAM, and connectivity for users who expect growth rather than a fixed storage target.
IMPORTANT – It is worth highlighting that all three UNAS solutions include the same software and updates in the UniFi Drive and NAS OS services. Alongside the client tools (eg Identity Endpoint and File/Folder services remotely) and can be easily integrated into an existing Ubiquiti/UniFi network landscape. HOWEVER crucially, it is not ‘mandotory’ – you can run any of the UNAS Pro systems completely ‘offline’ (i.e LAN only) and there is no need to already have an existing UniFi network (existing 3rd party network landscapes work perfectly fine) and you also do not need to use/register any kind of UI.com/Ubiquiti account to setup the device.
UniFi UNAS Pro 4 vs Pro vs Pro 8 NAS – Design
At a chassis level, the lineup splits into 2U and 1U designs, and that difference shapes how each unit fits into smaller racks and shallow cabinets.
The UNAS Pro is the shortest depth of the 3, while the UNAS Pro 4 and UNAS Pro 8 extend further back, which matters once you account for cable bend radius and rear clearance.
For compact wall racks and shorter cabinets, the older UNAS Pro tends to be easier to accommodate purely on physical depth, even before you consider anything about performance or features.
UNAS PRO 8 480MM DEPTH
UNAS PRO 325MM DEPTH
UNAS PRO 4 400MM DEPTH
DON’T FORGET RAILS!!!
The UNAS Pro also stands apart on the front panel experience, because it includes a 1.3″ touchscreen that can surface live status information without needing to log into the UI. That is not present on the UNAS Pro 4 or UNAS Pro 8, which lean into a more conventional rack appliance faceplate focused on bay access and basic indicators. In day to day use, the screen is mainly a convenience feature for quick checks and basic local interaction, rather than something that changes how the system is deployed.
Another practical design difference is port placement philosophy. The UNAS Pro places its primary network connectivity on the front, while the UNAS Pro 4 and UNAS Pro 8 move connectivity to the rear, matching the typical layout most rackmount NAS systems follow. Front facing ports can reduce visible cabling in front of a rack and shorten patch runs in some UniFi heavy layouts, but rear mounted ports are generally easier to route cleanly in deeper cabinets with rear cable management.
Power implementation also affects the physical serviceability profile of each unit. The UNAS Pro 8 uses hot swappable power modules, which changes how you handle failure or planned maintenance compared with the fixed internal power approach used by the UNAS Pro and UNAS Pro 4.
All 3 use a steel enclosure and ship as purpose built rack devices rather than desktop conversions, but the UNAS Pro 8 is the one that most closely matches what many buyers expect from a higher end rack appliance in terms of field replacement for key physical components.
UniFi UNAS Pro vs Pro 4 vs Pro 8 NAS – Storage
The most obvious storage difference is the bay count and what that does to capacity planning. The UNAS Pro provides 7 front accessible 2.5 inch or 3.5 inch bays in a 2U chassis, the UNAS Pro 4 offers 4 bays in a 1U chassis, and the UNAS Pro 8 increases that to 8 bays in 2U. If you expect to grow into larger pools over time, the 7 bay and 8 bay models give more headroom before you are forced into drive replacements, a second NAS, or a new storage tier. With no official expansion chassis support referenced here, the physical bay count is effectively the ceiling for each system.
The UNAS Pro 4 and UNAS Pro 8 add 2 M.2 NVMe slots intended for SSD caching, while the UNAS Pro does not include NVMe slots. This changes how you can approach mixed workloads, because cache can reduce latency for repeated small file access and help smooth bursts of writes, depending on how the platform applies caching. It does not change the underlying reality that the main capacity tier is still the SATA bay set, but it gives the Pro 4 and Pro 8 a path to improve responsiveness for specific access patterns without committing to full SSD storage across all bays.
RAID flexibility also varies, not in the list of RAID levels available, but in how storage can be organized. All 3 units support RAID 5, RAID 6, and RAID 10, but the UNAS Pro 4 is listed as supporting a single RAID group, while the UNAS Pro and UNAS Pro 8 are listed with multiple RAID groups. In practice, the single group limitation matters if you prefer separating workloads or isolating different retention policies into distinct pools, rather than placing everything into 1 volume. On the larger models, multiple groups give more options for structuring storage around different priorities, such as performance versus redundancy, or shared storage versus dedicated project space.
Operational features tied to storage protection are also not identical across the range. Hot spare support is listed on the UNAS Pro and UNAS Pro 8, but not on the UNAS Pro 4, which affects how you plan for unattended recovery after a drive failure. All 3 support snapshots, file encryption, share links, Time Machine backup, and cloud and network backup targets, which makes baseline data protection and recovery workflows broadly consistent regardless of bay count.
The larger differentiation is therefore less about whether core protection features exist and more about how much flexibility you have in pool layout and drive management within the limits of each chassis.
Storage Feature
UNAS Pro
UNAS Pro 4
UNAS Pro 8
Form factor
2U rack
1U rack
2U rack
SATA bays
7x 2.5/3.5 inch
4x 2.5/3.5 inch
8x 2.5/3.5 inch
M.2 NVMe slots
0
2
2
SSD cache support
No
Yes
Yes
Max NVMe capacity supported
N/A
4 TiB
4 TiB
RAID types listed
RAID 5, RAID 6, RAID 10
RAID 5, RAID 6, RAID 10
RAID 5, RAID 6, RAID 10
RAID group support
Multiple
Single
Multiple
Hot spare support
Yes
No (not listed)
Yes
Snapshots
Yes
Yes
Yes
File encryption
Yes
Yes
Yes
UniFi UNAS Pro 8 vs Pro vs Pro 4 NAS – Internal Hardware
All 3 systems are built around a quad core ARM Cortex A57 platform, but they are not configured identically. The UNAS Pro runs the Cortex A57 at 1.7 GHz, while the UNAS Pro 4 and UNAS Pro 8 are listed at 2.0 GHz. In day to day use, this tends to show up less as a dramatic jump in peak throughput and more as extra headroom when the system is handling several background jobs at once, such as indexing, snapshots, and multi user access, while still servicing file activity. The architecture choice is aligned with lower draw compared with typical x86 NAS hardware, but it also sets a ceiling on heavier compute workloads that some buyers associate with higher end NAS platforms.Memory is where the split is clearer. The UNAS Pro and UNAS Pro 4 ship with 8 GB, while the UNAS Pro 8 steps up to 16 GB. The practical impact is less about basic file sharing and more about how much concurrent activity the system can absorb before responsiveness drops, particularly when you add more users, larger file operations, more snapshot activity, and cache related behavior on models that support it. None of these systems are positioned as memory expandable platforms in the provided specifications, so the installed capacity is effectively the long term limit.
Power delivery and serviceability differ meaningfully between the range. The UNAS Pro and UNAS Pro 4 use internal AC to DC power supplies with an additional USP RPS DC input for redundancy, and their overall platform power limits are lower, matching their smaller scale.
The UNAS Pro 8 uses hot swappable power modules and is designed to support more demanding configurations, reflected in the higher maximum power consumption and the larger drive power budget. This does not automatically translate into higher idle power, but it does indicate how much overhead the chassis is designed to tolerate when fully populated and under sustained activity.
Internal Hardware Detail
UNAS Pro
UNAS Pro 4
UNAS Pro 8
Processor
Quad Core ARM Cortex A57
Quad Core ARM Cortex A57
Quad Core ARM Cortex A57
CPU clock
1.7 GHz
2.0 GHz
2.0 GHz
Memory
8 GB
8 GB
16 GB
Power supply design
Internal AC DC, 200W
Internal AC DC, 150W
2x hot swappable AC DC modules, 550W
Power inputs
1x AC, 1x USP RPS DC input
1x AC, 1x USP RPS DC input
2x AC inputs via hot swap modules
Max power consumption
160W
150W
250W
Max drive power budget
135W
125W
225W
Management and setup radios
Bluetooth 4.1
Bluetooth 4.1
Bluetooth 4.1
Display
1.3 inch touchscreen
None listed
None listed
Operating environment
-5 to 40 C, 5 to 95 percent noncondensing
-5 to 40 C, 5 to 95 percent noncondensing
-5 to 40 C, 5 to 95 percent noncondensing
Weight
9.2 kg without brackets, 9.5 kg with brackets
6.7 kg
11.5 kg
UniFi UNAS Pro 4 vs Pro vs Pro 8 NAS – Ports and Connections
Across the 3 systems, the shared theme is 10 GbE as the primary path for file access, but the implementation differs. The UNAS Pro provides a single 10G SFP+ port plus a 1 GbE RJ45 port, which typically ends up used either for management traffic or as a slower access fallback. The UNAS Pro 4 shifts to a dual 10G SFP+ layout, giving more flexibility for link aggregation or failover planning, even if the practical benefit depends on the storage configuration and client support. The UNAS Pro 8 goes further with 2x 10G SFP+ and adds a 10 GbE RJ45 port that supports multi speed negotiation, which makes it easier to drop into networks that are already built around copper 10 GbE.
Port placement is also part of the decision, because the UNAS Pro uses front mounted networking, while the UNAS Pro 4 and UNAS Pro 8 keep network connections on the rear. Front mounted ports can simplify short patch runs in racks that are set up around front facing switching, while rear mounted ports follow the more common rack NAS convention and can be cleaner in racks that route cabling at the back. None of the 3 is positioned as a platform for network expansion cards, so what you buy is the long term connectivity ceiling.
In day to day operation, the multi port models are mainly about resiliency and network design options rather than guaranteeing linear scaling for a single user. You can plan for redundancy across switches, use bonding where your environment supports it, or segment traffic patterns in a more controlled way.
The UNAS Pro 8 is also the only model here with 10 GbE available on both SFP+ and RJ45 in the base hardware, which reduces the need for media converters or additional transceiver planning if your network is not SFP+ centric.
Connectivity
UNAS Pro
UNAS Pro 4
UNAS Pro 8
10 GbE SFP+
1 (10G/1G)
2 (10G only)
2 (10G only)
10 GbE RJ45
0
0
1 (10G/5G/2.5G/1G/100M)
1 GbE RJ45
1 (1G/100M/10M)
1 (1G/100M/10M)
0
Total high speed 10G ports
1
2
3
Network port location
Front
Rear
Rear
UniFi UNAS Pro 4 vs Pro 8 vs Pro NAS – Price and Value
At list pricing, the UNAS Pro and UNAS Pro 4 sit at the same $499, but they are selling different priorities. The UNAS Pro concentrates its value in raw bay count and a shorter 2U chassis, trading away NVMe cache support and additional 10 GbE links to keep the platform simple. The UNAS Pro 4 is priced the same while reducing the HDD bay count and moving to a 1U chassis, but it adds 2x NVMe cache slots and a second 10G SFP+ port, positioning it more as a “small but fast access” rack NAS rather than a capacity first box.
The UNAS Pro 8 steps up to $799and is priced like a higher tier option, but the spec sheet shows where that uplift is meant to land: more drive bays than either $499 model, NVMe cache capability like the Pro 4, more total 10 GbE ports, and a jump to 16 GB memory. It is also the only one of the 3 with a 10 GbE RJ45 port alongside SFP+, which can reduce friction in mixed copper and fiber environments. If the goal is to keep the same platform longer term, the Pro 8 is the only one here with both the capacity headroom and the memory ceiling to match it.
Using the simplified “price per bay” and “price per element” approach, the headline result is that the Pro 8 looks strongest once you count all the included hardware features rather than only the number of drive bays. The UNAS Pro has the lowest cost per bay because it is a 7 bay system at the same price as the 4 bay model, but the Pro 4 catches up when the NVMe slots and dual 10 GbE are treated as part of the value calculation. The Pro 8 is not the cheapest upfront, but it ends up close to the Pro 4 on cost per bay and is the lowest on cost per element because it stacks more of the “platform” features in one chassis.
The UNAS Pro 4, UNAS Pro, and UNAS Pro 8 are close enough in naming to look like simple capacity steps, but they are positioned more like 3 different takes on the same UniFi Drive appliance idea. The UNAS Pro is the most capacity oriented at $499, giving 7 bays in a shorter depth 2U chassis with a built in 1.3 inch touchscreen and a straightforward port layout that suits some front of rack workflows. The UNAS Pro 4 shifts the emphasis away from bay count and toward “newer platform features” at the same $499 price, combining a 1U form factor with 2x 10G SFP+ and 2x NVMe cache slots, at the cost of a deeper chassis and fewer total drive bays. The UNAS Pro 8 is the most complete hardware package in the lineup, adding more bays, NVMe cache, more total 10 GbE connectivity including 10 GbE RJ45, and 16 GB memory, while also being the only one of the 3 to use hot swappable power modules. None of the 3 supports an official expansion shelf approach, so the bay count you buy on day 1 is effectively the long term ceiling unless you plan a separate NAS later.
Choosing between them mostly comes down to which ceiling matters first in your deployment: total bays, total network options, or overall platform headroom. If you want the most bays at $499 and the chassis depth is a priority, the UNAS Pro remains the obvious pick, with the tradeoffs being no NVMe cache path and a simpler network layout than the newer units. If you want the $499 option that aligns most with modern expectations for a small rack NAS, the UNAS Pro 4 has the cleanest argument, because dual 10G and NVMe cache can matter more than extra bays in smaller, faster working sets, even if those cache slots are not usable as standalone storage pools. If you are planning for longer retention cycles, heavier multi user access, or you simply want the most complete feature set in a single chassis, the UNAS Pro 8 is the one that most clearly justifies its higher price, particularly once memory, network flexibility, and the power module design are considered together. The main limitation across the lineup is that the ARM platform and fixed memory approach sets expectations about the long term performance ceiling, but within that constraint, the decision is primarily about how you want the hardware budget divided between capacity, connectivity, and overall platform resources.
This description contains links to Amazon. These links will take you to some of the products mentioned in today's content. As an Amazon Associate, I earn from qualifying purchases. Visit the NASCompares Deal Finder to find the best place to buy this device in your region, based on Service, Support and Reputation - Just Search for your NAS Drive in the Box Below
Need Advice on Data Storage from an Expert?
Finally, for free advice about your setup, just leave a message in the comments below here at NASCompares.com and we will get back to you.Need Help?
Where possible (and where appropriate) please provide as much information about your requirements, as then I can arrange the best answer and solution to your needs. Do not worry about your e-mail address being required, it will NOT be used in a mailing list and will NOT be used in any way other than to respond to your enquiry.
[contact-form-7]
TRY CHAT Terms and Conditions
If you like this service, please consider supporting us.
We use affiliate links on the blog allowing NAScompares information and advice service to be free of charge to you.Anything you purchase on the day you click on our links will generate a small commission which isused to run the website. Here is a link for Amazon and B&H.You can also get me a Ko-fi or old school Paypal. Thanks!To find out more about how to support this advice service checkHEREIf you need to fix or configure a NAS, check FiverHave you thought about helping others with your knowledge? Find Instructions Here
Or support us by using our affiliate links on Amazon UK and Amazon US
Alternatively, why not ask me on the ASK NASCompares forum, by clicking the button below. This is a community hub that serves as a place that I can answer your question, chew the fat, share new release information and even get corrections posted. I will always get around to answering ALL queries, but as a one-man operation, I cannot promise speed! So by sharing your query in the ASK NASCompares section below, you can get a better range of solutions and suggestions, alongside my own.
Review of the UniFi UNAS Pro 4 NAS – Possibly the Best Value 1U Rack Ever?
Over the last 18-24 months, Ubiquiti has shifted the ‘UniFi’ label from being a networking and bridging ecosystem into a wider storage hardware and software platform that now includes a steadily expanding NAS line under UniFi Drive. Early UniFi UNAS storage products leaned heavily on simple file sharing and basic backup, but the pace of updates and the broader product rollout in 2025/2026 pushed the range closer to what small business buyers expect from an entry level NAS platform: clearer storage management, stronger snapshot and backup tooling, and tighter integration with the UniFi account and identity layer for remote access and user control (with the recent Drive 4.0 Update really uping their game considerably). The UniFi UNAS Pro 4 sits within that context as a compact 1U, 4 bay rack mount system designed mainly for file storage and sharing over SMB and NFS, rather than running third party applications, containers, or virtual machines. At $499, it is priced noticeably lower than many competing 1U rack NAS products at broadly comparable “headline” hardware, particularly where dual 10Gb networking and NVMe caching are concerned, which makes it hard to ignore if the goal is simple, high bandwidth storage in a rack footprint without moving into significantly higher spend.
UniFi UNAS Pro 4 Review – Quick Conclusion
The UniFi UNAS Pro 4 is a 1U, 4 bay rack mount NAS aimed at straightforward SMB and NFS file storage, and its main differentiator is value: at $499 it undercuts many comparable 1U rack units while still offering 2x 10Gb SFP+ plus a separate 1GbE management port, 4 hot swap bays for 3.5 inch or 2.5 inch drives, and 2 M.2 NVMe slots for read and write caching. In testing with 4 HDDs in RAID 5 over 10GbE, it delivered strong real-world file transfer results for a small SATA array, with synthetic benchmarks showing high peak throughput but some variability depending on the tool used, and the platform’s power draw and noise profile were heavily influenced by drive choice and fan mode, including very loud output if maximum cooling is forced. UniFi Drive covers the core fundamentals expected at this level, including snapshots, encrypted volumes, and a wide range of backup targets (NAS, SMB, and multiple cloud services, with Microsoft 365 direction evident in recent updates), but the interface still limits deeper tuning in places and the feature set remains focused on storage rather than apps. The main downsides are structural and easy to identify up front: NVMe can only be used for cache rather than storage pools, the NVMe carriers are an extra purchase, there are no USB ports for local copy tasks, the PSU is internal and not a hot swap module, and missing features like iSCSI, ECC, and RAM upgradability place a clear ceiling on more advanced workloads, though those trade-offs are broadly consistent with a $499 ‘turnkey’ NAS appliance in 2026 though and hard to criticise!
BUILD QUALITY - 9/10
HARDWARE - 7/10
PERFORMANCE - 7/10
PRICE - 9/10
VALUE - 10/10
8.4
PROS
Dual 10Gb SFP+ networking is unusual in a 1U 4 bay NAS at this price point + failover will not result in bandwidth throttle A separate 1GbE port is useful for management or fallback connectivity 1U chassis with relatively short depth is easier to fit in smaller racks and cabinets Rails and rack hardware included, reducing extra setup cost and friction Ubiquiti and UniFi online/brand services are optional (i.e pure offline/LAN is possible)+ no need for a Ubiquiti/UniFi network setup to use NVMe read and write caching support can improve responsiveness in mixed workloads UniFi Drive provides snapshots, encryption, and a broad set of backup targets (NAS, SMB, and multiple cloud providers) Setup and management are streamlined, especially for users already running UniFi infrastructure Drive 4.0 Update scales up the Business Utilities notably
CONS
NVMe is cache only, with no option to use M.2 drives as primary storage pools NVMe trays or carriers are not included, adding extra cost and an extra purchase step Single PSU (no redundency) and non-slide removable SFX/ATX PSU (relies on propriatary UniFi Battery Backup rack module or external UPS) No NAS Expansion Support, so 4 HDDs are your limit
Here are all the current UniFi NAS Solutions & Prices:
You can buy the UniFi UNAS Pro 4 NAS via the link below – doing so will result in a small commission coming to me and Eddie at NASCompares, and allows us to keep doing what we do!
UniFi UNAS Pro 4 Review – Design & Storage
The UNAS Pro 4 uses a conventional 1U rack mount layout, with a plain, functional front panel and an all metal enclosure intended for permanent installation rather than desktop use. It ships with rails and rack handles, which removes the usual extra step of sourcing mounting hardware separately. The chassis depth is about 400 mm, so it is not in the “full depth server” category, and that helps in smaller cabinets where rear clearance and cable management space can be limited.
Across the front are 4 hot swap bays supporting both 3.5 inch and 2.5 inch SATA drives. The trays are set up for tool-less 3.5 inch HDD installation with a click-in fit, while 2.5 inch SSDs still require screws to secure them properly. Each bay has status lighting, and the front panel also provides system level indicators so you can identify basic state and drive activity at a glance without logging into the interface. The trays feel rigid and spring-loaded, but they are not lockable, which is a practical consideration if the unit is placed in a shared rack or anywhere physical access is not strictly controlled.
From a capacity and planning perspective, this system is defined by its fixed 4 bay layout. You can configure a conventional RAID group within those bays, but there is no built-in path to scale beyond the internal slots, and there is no supported external expansion shelf option to push the same chassis further later on. That means the decision on drive sizes and redundancy level matters upfront, because the ceiling is reached quickly compared with higher bay count rack units. In a small rack deployment, it also means the unit is either a compact standalone store or part of a broader multi-NAS approach rather than a single box that grows over time.
In addition to the SATA bays, the chassis supports 2 M.2 NVMe slots intended specifically for SSD caching. The caching model is designed to accelerate HDD-based storage by using SSDs as a performance layer, rather than allowing NVMe drives to become their own primary pool for general file storage. Practically, that positions the NVMe feature as a supplement for mixed workloads, such as improving responsiveness for frequently accessed data and smoothing write behavior, rather than a route to running the system as a small all flash NAS.
A design detail that affects the storage experience is the physical NVMe mounting method. Instead of a simple screw-down slot on a board, the NVMe drives are installed via a tray or carrier mechanism, and that carrier is not included with the base unit. The carrier itself is neatly engineered with a clip-in style insertion and thermal padding, and it supports common M.2 lengths including 2280 and 22110, but requiring an additional part adds friction if caching is part of the plan from day 1. It is a small issue, but it is the kind of detail that can slow down an otherwise straightforward deployment.
UniFi UNAS Pro 4 Review – Internal Hardware
The UNAS Pro 4 is built around a quad core ARM Cortex-A57 CPU clocked at 2.0 GHz and paired with 8 GB of memory, which sets expectations for the type of workloads it is designed to handle. This is not a platform aimed at heavyweight compute tasks, but for file services and scheduled backup activity it has enough headroom to keep the system responsive, particularly when multiple users are accessing shared folders and snapshots are being taken in the background.
The CPU choice also reflects a focus on predictable appliance behavior and lower overall platform complexity rather than maximum expandable performance.
Internally, the power system is a single 150 W unit mounted inside the chassis rather than a hot swap module, which influences servicing and downtime planning. If the PSU fails, replacement is more involved than swapping an external canister, and that is a meaningful difference compared with rack systems that use easily replaceable redundant modules.
The unit does, however, support UniFi’s USP-RPS DC input as an alternative redundancy method, which changes the redundancy approach from “dual PSU in the chassis” to “centralized redundant supply for multiple devices,” with different trade-offs in cost, cabling, and rack layout.
A further internal design choice is how the system treats its software environment as a dedicated appliance rather than an OS sharing space with user storage. The system software runs on its own internal storage rather than living on the same disks that hold your data. In practical terms, that reduces the chance of the OS being affected by changes to the main array, and it can make maintenance tasks like drive replacement or pool rebuilds feel more self-contained, because the unit remains manageable even while the primary storage is under stress.
ARM-based NAS platforms typically bring some efficiency advantages, and this model follows that general pattern. The CPU class and memory configuration are aligned with lower baseline overhead than many x86 NAS designs, which can help keep idle draw and sustained power use in check relative to equivalent rack hardware, though drive choice still dominates the total. The trade-off is a lower performance ceiling compared with modern x86 systems for certain workloads, plus the usual limitations seen in this category: no practical RAM upgrade path, no ECC support, and fewer options for buyers who want to push beyond file services into heavier compute. At $499, those omissions are consistent with the target price bracket in 2026 rather than being unexpected corner cutting.
UniFi UNAS Pro 4 Review – Ports and Connections
The rear connectivity is centered on 2x 10Gb SFP+ ports, and that is the defining hardware choice for this NAS in a 1U, 4 bay format. It allows the unit to be placed into a 10Gb environment without adapters, and it also opens up practical options beyond raw throughput, such as separating traffic types, connecting into different switches, or keeping a second path available for failover. The choice of SFP+ over 10GBase-T will suit users already running fiber or DAC links in a rack, but it can be less convenient for small setups built around copper RJ45.
Alongside the 10Gb ports is a separate 1GbE RJ45 port that can be used for management or for general connectivity in networks where 10Gb is not available everywhere. In a mixed UniFi environment, this is useful because it avoids tying basic onboarding and administration to a 10Gb port that might be better reserved for file traffic. It also gives a simple fallback path for access and troubleshooting if the 10Gb side is being reconfigured, moved between switches, or temporarily taken offline.
What is missing is just as relevant as what is included. There are no USB ports for quick ingest, offline copy tasks, or attaching temporary media, which some rack NAS platforms still provide for convenience even in 1U designs. Wireless is not a focus here, though Bluetooth is present for initial setup workflows, which fits the product’s “appliance onboarding” approach more than it does ongoing connectivity. The result is a port layout that prioritizes network-first storage and rack integration, while leaving out local expansion and quick-access I/O features that some users expect on a NAS.
However, (and I am sounding like a broken record at this point) at $499, these ports and connections are a notable degree more than most other turn-key NAS solutions from Synology, QNAP and even Terramaster (the more budget end of the NAS market already) are offering at under 500! So, what is presented here is a great value Day 1 solution in terms of base connectivity, but there is no denying that it might well feel the pinch in 5 years down the road when your storage is filling and your storage speeds begin to bottleneck vs your other equipment bandwidth.
UniFi UNAS Pro 4 Review – Testing Noise, Temps, Power Consumption & Speed
Performance here needs to be framed around the physical limits of 4 SATA bays and the role of SSD caching. Even with dual 10Gb networking available, a 4 drive HDD array has a throughput ceiling that will be reached long before the network becomes the bottleneck in most single-client scenarios. The value of 10Gb in this context is less about hitting theoretical maximums and more about maintaining higher transfer rates consistently, handling multiple simultaneous users, and keeping latency lower when lots of smaller operations are happening alongside big file moves.
In testing with 4 HDDs in a RAID 5 configuration over a 10Gb link to a Windows 11 client, measured throughput landed in the range expected of a well-tuned 4 disk array. Using AJA with a repeated 1 GB test file, results sat around 680 to 730 MB/s for download and 520 to 600 MB/s for upload. A real-world Windows file transfer of 101 GB made up of 1,231 mixed files completed in 3 minutes and 57 seconds, which works out at an average of about 426 MB/s across the transfer, reflecting the usual drop from synthetic peak results when file variety and filesystem overhead are introduced.
Synthetic benchmarking results varied depending on the tool used, which is not unusual when caching behavior and test patterns differ. CrystalDiskMark with a 1 GB test file reported 353 MB/s read and 429 MB/s write in this run, with write coming out higher than read, which is atypical enough to treat as an outlier pending further retesting. ATTO produced stronger peak figures of 860 MB/s read and 570 MB/s write at the top end, which aligns more closely with the best-case behavior seen in sequential-focused tests on multi-drive arrays.
Noise, power draw, and thermal behavior were also measured because they affect rack placement and operating cost. With the fan profile set to auto and drives idle, noise sat around 42 to 44 dBA, dropping to roughly 38 to 40 dBA in the lowest RPM mode. Manually forcing maximum cooling pushed noise to around 56 to 57 dBA, and that level remained dominant even when drive activity increased, suggesting the cooling system prioritizes aggressive airflow when pushed. Power consumption with 4 enterprise HDDs measured roughly 49 to 50 W at idle and 60 to 62 W under activity, while swapping to 4 SATA SSDs reduced that to around 32 W during synchronization, underlining how drive choice can change the overall profile as much as the base platform.
UniFi UNAS Pro 4 Review – Software and Services
The UNAS Pro 4 runs UniFi Drive and is managed through the same style of web interface used across the broader UniFi portfolio, with system status, storage, backups, and user access presented in a single dashboard. For basic NAS use, the core functions are in place: creating storage pools, managing shares, enabling file services, and monitoring drive health. The interface is generally structured around doing common tasks quickly rather than exposing every possible tuning option, which keeps setup approachable but also limits deeper control in areas that some experienced NAS users look for.
File access is centered on SMB and NFS, with browser-based file management available for basic upload, download, and folder navigation. The browser file manager covers the essentials and includes sharing link creation, but it is not positioned as a full productivity layer with advanced file handling or rich collaboration features. Remote access and identity-based access tools are tied into UniFi’s account and identity layer, and while local-only deployment is possible, the most integrated remote workflow is clearly designed around UniFi’s own services rather than third party remote networking tools.
Storage protection features include snapshot support, encrypted volumes, and configurable retention policies, which addresses most common rollback and recovery needs for file storage. Backup tooling covers several targets, including backing up to another UniFi NAS, to SMB targets, and to cloud services such as Google Drive, OneDrive, Dropbox, Amazon S3, Backblaze B2, and Wasabi, with Microsoft 365 backup support also part of the broader UniFi Drive direction. These features reflect the brand’s recent focus on strengthening data protection rather than expanding into application hosting or media server style functionality.
The gaps are consistent with the product’s current scope. There is no iSCSI target support, which limits certain virtualization and block-storage workflows, and there is no container or VM layer for running third party services directly on the NAS. NVMe usage remains limited to caching rather than becoming its own storage pool, which narrows the performance paths available if the goal is to build a small all-flash volume.
Client-side tooling is also still limited compared with platforms that provide a dedicated sync-and-pin application, with access leaning on standard network shares and UniFi’s identity-driven access methods rather than a full drive-style client experience.
UniFi UNAS Pro 4 Review – Conclusion & Verdict
The UNAS Pro 4 is a focused 1U, 4 bay NAS that prioritizes networked file storage and straightforward deployment over broader application support. The hardware choices align with that goal: dual 10Gb SFP+ connectivity, 4 hot swap bays, and optional NVMe caching provide a platform that can deliver strong file transfer rates for a small array, while the ARM-based design keeps the system positioned as an appliance rather than a general-purpose server. Its main compromises are largely structural rather than hidden: fixed bay count with no expansion path, NVMe limited to cache, no USB I/O for local tasks, and a single internal PSU rather than a hot swap redundant design.
At $499, the value case is driven by how much rack-oriented networking is included at a price that undercuts many comparable 1U NAS systems, especially those offering 10Gb as standard. The software is usable for core storage tasks and has clearly improved over the last year in areas like snapshots and backup targets, but it still leaves out features that matter to some buyers, including iSCSI and a fuller client sync experience. For users who want a compact rack NAS primarily for SMB or NFS file storage with modern backup and snapshot features, it fits its role well; for users expecting a broader NAS app ecosystem or more hardware serviceability, the limitations are likely to be decisive. But, as Delboy once said, at this price, “what do you want? Jam on it?”. This system is giving more at this price than anyone else right now and for its limitations, for many these will be paletable in the grand scheme of things. 1U 4Bay rackmounts has always been something that most turnkey NAS brands treat poorly, due to the low saturation point of four SATA drives and why waste more capable hardware on that? In that sense, Ubiquiti is really piling on the hardware here at this price – and I for one applaud this.
Here are all the current UniFi NAS Solutions & Prices:
You can buy the UniFi UNAS Pro 4 NAS via the link below – doing so will result in a small commission coming to me and Eddie at NASCompares, and allows us to keep doing what we do!
PROs of the UniFi UNAS Pro 4 NAS
PROs of the UniFi UNAS Pro 4 NAS
Dual 10Gb SFP+ networking is unusual in a 1U 4 bay NAS at this price point + failover will not result in bandwidth throttle
A separate 1GbE port is useful for management or fallback connectivity
1U chassis with relatively short depth is easier to fit in smaller racks and cabinets
Rails and rack hardware included, reducing extra setup cost and friction
Ubiquiti and UniFi online/brand services are optional (i.e pure offline/LAN is possible)+ no need for a Ubiquiti/UniFi network setup to use
NVMe read and write caching support can improve responsiveness in mixed workloads
UniFi Drive provides snapshots, encryption, and a broad set of backup targets (NAS, SMB, and multiple cloud providers)
Setup and management are streamlined, especially for users already running UniFi infrastructure
Drive 4.0 Update scales up the Business Utilities notably
NVMe is cache only, with no option to use M.2 drives as primary storage pools
NVMe trays or carriers are not included, adding extra cost and an extra purchase step
Single PSU (no redundency) and non-slide removable SFX/ATX PSU (relies on propriatary UniFi Battery Backup rack module or external UPS)
No NAS Expansion Support, so 4 HDDs are your limit
This description contains links to Amazon. These links will take you to some of the products mentioned in today's content. As an Amazon Associate, I earn from qualifying purchases. Visit the NASCompares Deal Finder to find the best place to buy this device in your region, based on Service, Support and Reputation - Just Search for your NAS Drive in the Box Below
Need Advice on Data Storage from an Expert?
Finally, for free advice about your setup, just leave a message in the comments below here at NASCompares.com and we will get back to you.Need Help?
Where possible (and where appropriate) please provide as much information about your requirements, as then I can arrange the best answer and solution to your needs. Do not worry about your e-mail address being required, it will NOT be used in a mailing list and will NOT be used in any way other than to respond to your enquiry.
[contact-form-7]
TRY CHAT Terms and Conditions
If you like this service, please consider supporting us.
We use affiliate links on the blog allowing NAScompares information and advice service to be free of charge to you.Anything you purchase on the day you click on our links will generate a small commission which isused to run the website. Here is a link for Amazon and B&H.You can also get me a Ko-fi or old school Paypal. Thanks!To find out more about how to support this advice service checkHEREIf you need to fix or configure a NAS, check FiverHave you thought about helping others with your knowledge? Find Instructions Here
Or support us by using our affiliate links on Amazon UK and Amazon US
Alternatively, why not ask me on the ASK NASCompares forum, by clicking the button below. This is a community hub that serves as a place that I can answer your question, chew the fat, share new release information and even get corrections posted. I will always get around to answering ALL queries, but as a one-man operation, I cannot promise speed! So by sharing your query in the ASK NASCompares section below, you can get a better range of solutions and suggestions, alongside my own.
The Terramaster F4-425 Value Intel 4-Bay – Does It Deserve your Data?
The TerraMaster F4-425 is positioned as a lower cost entry point into the company’s Intel based NAS lineup for the 2025 to 2026 generation, sitting below the Plus, Pro, and Max series models. It combines a 4 bay desktop chassis with the Intel Celeron N5095, 4GB of DDR4 memory with upgrade support up to 16GB, and a single 2.5GbE network interface. This places it squarely in the middle ground between basic ARM powered NAS systems and more fully featured x86 solutions with higher network bandwidth and NVMe expansion. The appeal of the F4-425 lies in its balance rather than specialization, offering enough CPU performance for multi user file access, media streaming, and general application use, while keeping cost, noise, and power consumption relatively controlled. It is clearly designed for users who want an Intel based NAS for everyday storage and media tasks, but who do not necessarily need the higher throughput, expansion options, or future scalability found in TerraMaster’s more expensive models.
SOFTWARE - 8/10
HARDWARE - 7/10
PERFORMANCE - 6/10
PRICE - 9/10
VALUE - 8/10
7.6
PROS
Competitive Intel-Based Value in a 4 Bay Format with the F4-425 vs other Intel Entry Systems Flexible Storage Management With TRAID and TRAID Plus in the F4-425 Balanced Performance for Media and Multi-User Access of the F4-425 system Practical Software Feature Set With TOS 6 of the F4-425 Flexible Platform for Turnkey or DIY NAS Use with the F4-425
CONS
Single 2.5GbE Network Port Limits Throughput of the F4-425 1.7 Lack of NVMe Expansion Limits Internal Performance in the F4-425 Aging CPU Platform for a New Generation NAS of the F4-425 HDMI Output With No Practical Software Use on the F4-425 Overlap With Better Equipped Models in the Same Lineup of the F4-425
Competitive Intel-Based Value in a 4 Bay Format with the F4-425 vs other Intel Entry Systems
One of the key advantages of the F4-425 is how it positions itself within the x86 turnkey NAS market, particularly in the 4 bay segment. Systems that combine an Intel processor, upgradeable memory, and faster than gigabit networking are typically aimed at prosumer or small business buyers and often carry a noticeably higher price. The F4-425 offers a complete, ready to use solution that includes TerraMaster’s TOS 6 operating system, allowing users to deploy storage, backups, and shared services without needing to install or license additional software.
This lowers the overall barrier to entry for buyers who want an Intel based NAS primarily for general purpose storage, media streaming, or light application hosting. While it does not compete directly with higher end 4 bay systems that include multi LAN configurations or NVMe expansion, it delivers a core x86 experience at a price level that is more approachable, especially for users who do not plan to saturate network bandwidth or push heavy virtualization workloads.
Flexible Storage Management With TRAID and TRAID Plus in the F4-425
A notable strength of the F4-425 is its support for TerraMaster’s TRAID and TRAID Plus storage systems, which are particularly relevant in a 4 bay enclosure. Traditional RAID configurations often require matched drive sizes to avoid wasted capacity, and expanding an array later can involve rebuilding or replacing multiple disks at once. TRAID reduces this rigidity by allowing mixed capacity drives to be used more efficiently over time, automatically organizing available space while maintaining redundancy.
In a 4 bay system, this becomes more practical, as users are more likely to add drives gradually or replace older disks with higher capacity models as prices fall. The result is a storage setup that is easier to grow incrementally without complex planning. For users managing a family media library, backups from multiple devices, or shared data across several users, this flexibility can simplify long term storage expansion while reducing the need for disruptive migrations.
Balanced Performance for Media and Multi-User Access of the F4-425 system
The F4-425 offers a level of performance that is generally well suited to shared home or small office environments, particularly where multiple users are accessing data simultaneously. The Intel Celeron N5095 provides enough processing headroom to handle file transfers, background services, and media applications without the system feeling unresponsive under light to moderate load. In a 4 bay configuration, this performance profile pairs well with mixed workloads, such as ongoing backups, media indexing, and concurrent playback through applications like Plex, Emby, or Jellyfin using hardware assisted 4K decoding. While it is not intended for heavy virtualization or sustained high throughput tasks, the F4-425 can comfortably support several users accessing files or streaming content at the same time. This makes it suitable for households or teams where shared access and consistency are more important than peak benchmark performance.
Practical Software Feature Set With TOS 6 of the F4-425
The F4-425 benefits from TerraMaster’s TOS 6 operating system, which provides a broad and functional software environment without requiring additional licenses or complex setup. The platform includes native tools for file sharing, snapshots, cloud synchronization, and multi device backups, allowing the NAS to act as a central data hub for several users. In a 4 bay system, these features become more relevant as storage is often shared across multiple PCs, mobile devices, and services.
TOS 6 also supports container based applications and virtualization features that, while limited by the underlying hardware, can still be useful for light workloads such as small services or test environments. The software is not as polished as some higher profile NAS platforms, but it offers a level of depth that covers most common use cases and reduces the need to rely on third party tools for everyday management.
Flexible Platform for Turnkey or DIY NAS Use with the F4-425
An often overlooked advantage of the F4-425 is how accommodating it is for users who may want to move beyond the included operating system in the future. While it is sold and marketed as a complete turnkey NAS with TOS 6, the underlying x86 architecture allows relatively straightforward installation of alternative NAS operating systems such as TrueNAS, Unraid, or other Linux based platforms. TerraMaster does not restrict this process at the firmware level, and using third party software does not invalidate the hardware warranty. In a 4 bay system, this flexibility can extend the useful lifespan of the device, particularly for users whose storage needs or technical confidence evolve over time. The presence of HDMI output and KVM support simplifies local setup when experimenting with other operating systems, even if that HDMI port is not fully utilized by TOS itself. This dual role as both a turnkey appliance and a potential DIY platform adds practical long term value for more technically inclined users.
Single 2.5GbE Network Port Limits Throughput of the F4-425
A clear limitation of the F4-425 is its networking configuration, which consists of a single 2.5GbE port with no additional LAN interfaces or internal upgrade options. In a 4 bay NAS, this can quickly become a bottleneck once multiple drives are active, particularly in RAID configurations that are capable of delivering higher aggregate read and write performance than the network interface can carry. Even with mechanical hard drives, it is possible to saturate a 2.5GbE connection under sequential workloads, and this leaves little headroom for multiple users or concurrent tasks.
The lack of link aggregation, 5GbE, or 10GbE options also limits the system’s suitability for users with faster network infrastructure or plans to upgrade in the future. While USB based network adapters can be added, this introduces extra cost and complexity, and it does not fully compensate for the absence of native multi port or higher speed networking in a 4 bay chassis.
Lack of NVMe Expansion Limits Internal Performance in the F4-425
The absence of any M.2 NVMe slots on the F4-425 places a clear ceiling on its internal performance and storage flexibility. In a 4 bay Intel based NAS released into the 2025 to 2026 market, NVMe support is commonly expected, either for SSD caching or for high speed storage pools that can absorb bursts of activity and improve responsiveness under mixed workloads. Without NVMe, all storage activity is constrained to SATA drives, which limits the benefits of the x86 platform when running applications, containers, or multiple background services. This is particularly relevant in scenarios where the system is handling indexing, backups, and media access at the same time. While TerraMaster offers other models in its lineup with extensive NVMe support, the omission here means the F4-425 cannot be easily optimized for latency sensitive tasks, regardless of how much memory is added or how the drives are configured.
Aging CPU Platform for a New Generation NAS of the F4-425
The F4-425 relies on the Intel Celeron N5095, a processor that has been widely used across multiple NAS generations and is now showing its age in the context of newer Intel platforms. While it remains capable of handling file services, media transcoding, and light application workloads, it lacks the efficiency and performance improvements found in more recent Intel N series processors. In a 4 bay system, this matters because the hardware is more likely to be tasked with simultaneous operations such as multi user access, background maintenance, and application services. The N5095 can manage these workloads, but it does so with less headroom than newer alternatives, which can impact long term relevance. As software platforms continue to add features and increase baseline requirements, the CPU choice places a practical limit on how far the system can scale over time.
HDMI Output With No Practical Software Use on the F4-425
The inclusion of an HDMI port on the F4-425 may appear useful on paper, but in practice it offers limited functionality within TerraMaster’s software environment. The HDMI output is primarily used for basic system information and troubleshooting during boot, rather than providing a usable local interface or media output experience. There is no native desktop mode, multimedia interface, or direct playback environment available through TOS that would allow the NAS to function as a locally controlled media device. In a 4 bay system with an Intel CPU capable of hardware video decoding, this unused output can feel like missed potential, especially when other NAS vendors and newer platforms have begun to implement functional HDMI driven interfaces. While the port can be helpful when installing third party operating systems, its role within the default configuration remains minimal.
Overlap With Better Equipped Models in the Same Lineup of the F4-425
A practical concern with the F4-425 is how closely it sits to other TerraMaster models that offer substantially more capability for a relatively modest increase in cost. Within the same product family, there are options that add faster networking, NVMe expansion, additional LAN ports, or more modern Intel processors, sometimes at a price difference that may be difficult to justify ignoring. For buyers who already anticipate growing storage needs, higher throughput, or heavier application use, the F4-425 can feel constrained when compared directly against these alternatives. This internal competition weakens its long term value proposition, as users may find that spending slightly more upfront would avoid the limitations around bandwidth and expansion that cannot be addressed later through upgrades.
Conclusion and Verdict of the F4-425 Review – Should You Buy?
The TerraMaster F4-425 is best understood as a deliberately constrained Intel based NAS that prioritizes affordability and simplicity over expandability and peak performance. It delivers competent multi user storage, media streaming, and general NAS functionality in a 4 bay format, supported by a software platform that covers most common requirements without forcing reliance on third party tools. Its strengths lie in predictable behavior, flexible RAID options, and openness to alternative operating systems, rather than cutting edge hardware features. For users with clearly defined needs who value an x86 platform but do not expect to push high bandwidth workflows or advanced storage tiers, the F4-425 can meet expectations without unnecessary complexity. At the same time, its limitations are structural rather than temporary. The single 2.5GbE port, absence of NVMe expansion, and older CPU architecture set firm boundaries on future growth. These constraints become more apparent when viewed alongside other models in TerraMaster’s own lineup that address these gaps at a higher but not disproportionate cost. As a result, the F4-425 makes the most sense for buyers who want a straightforward Intel NAS for shared storage and media use today, and who are comfortable accepting that it is not designed to scale significantly beyond that role.
This description contains links to Amazon. These links will take you to some of the products mentioned in today's content. As an Amazon Associate, I earn from qualifying purchases. Visit the NASCompares Deal Finder to find the best place to buy this device in your region, based on Service, Support and Reputation - Just Search for your NAS Drive in the Box Below
Need Advice on Data Storage from an Expert?
Finally, for free advice about your setup, just leave a message in the comments below here at NASCompares.com and we will get back to you.Need Help?
Where possible (and where appropriate) please provide as much information about your requirements, as then I can arrange the best answer and solution to your needs. Do not worry about your e-mail address being required, it will NOT be used in a mailing list and will NOT be used in any way other than to respond to your enquiry.
[contact-form-7]
TRY CHAT Terms and Conditions
If you like this service, please consider supporting us.
We use affiliate links on the blog allowing NAScompares information and advice service to be free of charge to you.Anything you purchase on the day you click on our links will generate a small commission which isused to run the website. Here is a link for Amazon and B&H.You can also get me a Ko-fi or old school Paypal. Thanks!To find out more about how to support this advice service checkHEREIf you need to fix or configure a NAS, check FiverHave you thought about helping others with your knowledge? Find Instructions Here
Or support us by using our affiliate links on Amazon UK and Amazon US
Alternatively, why not ask me on the ASK NASCompares forum, by clicking the button below. This is a community hub that serves as a place that I can answer your question, chew the fat, share new release information and even get corrections posted. I will always get around to answering ALL queries, but as a one-man operation, I cannot promise speed! So by sharing your query in the ASK NASCompares section below, you can get a better range of solutions and suggestions, alongside my own.


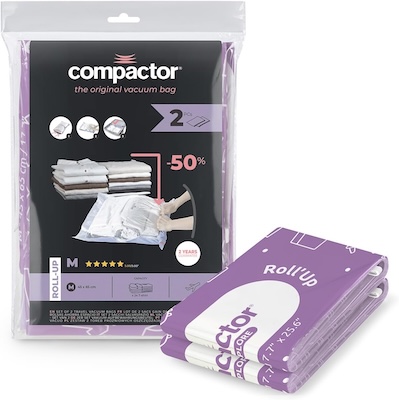


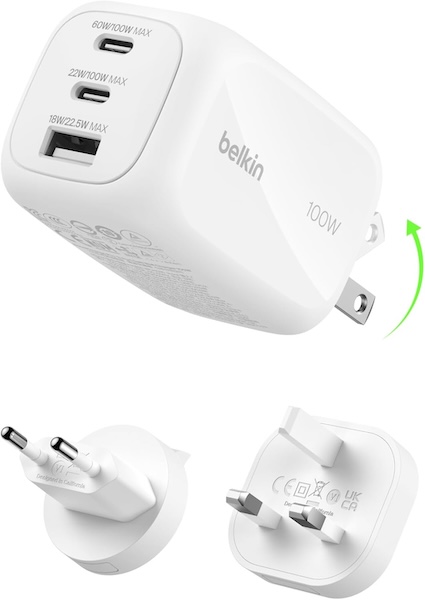
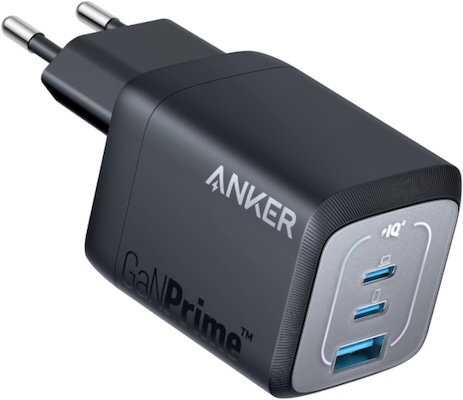


 Accessible Entry Into Intel NAS for Smaller Setups in the F2-425
 Network Bandwidth Ceiling Reached Quickly in the F2-425


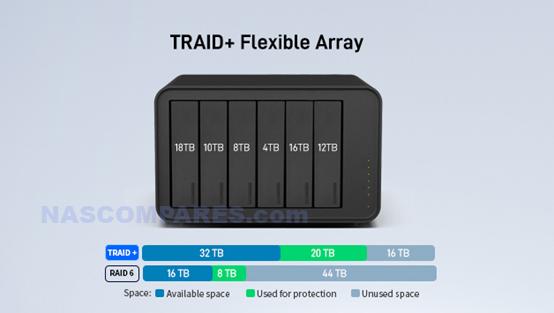


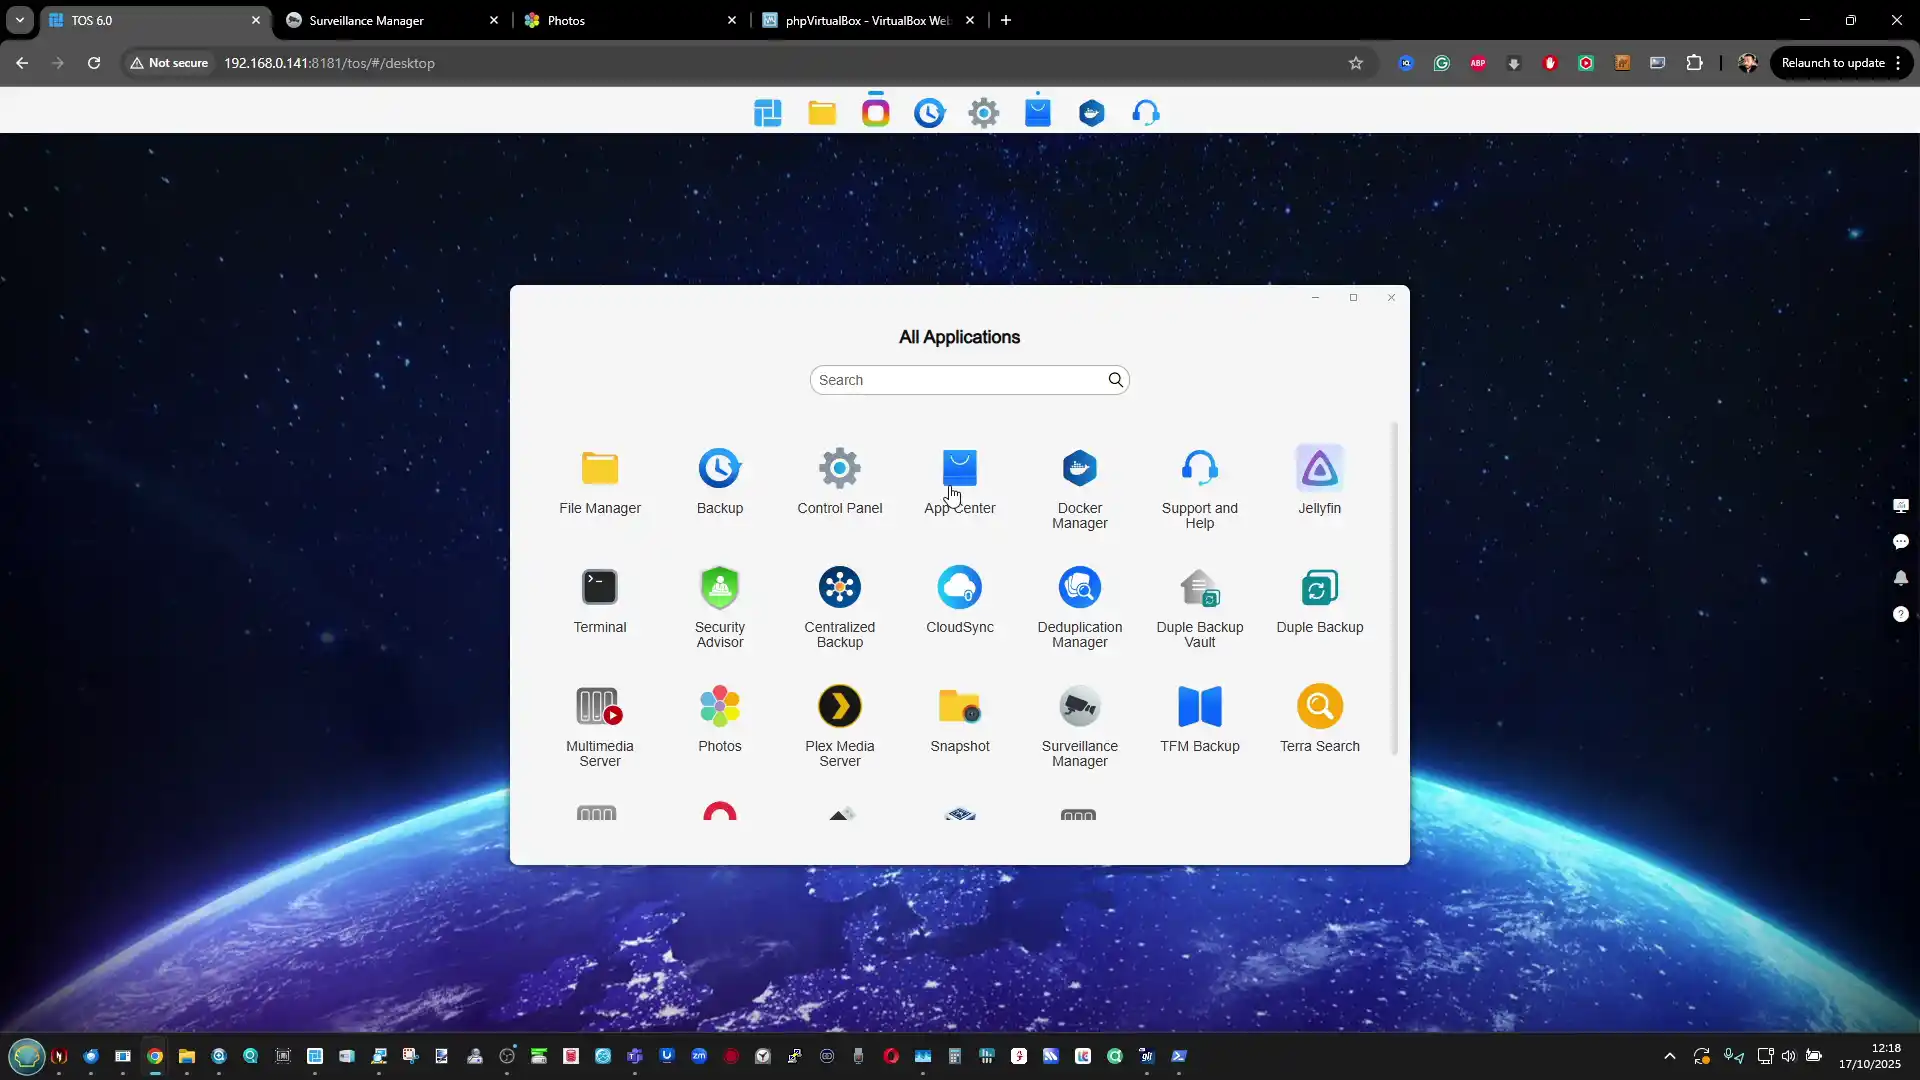
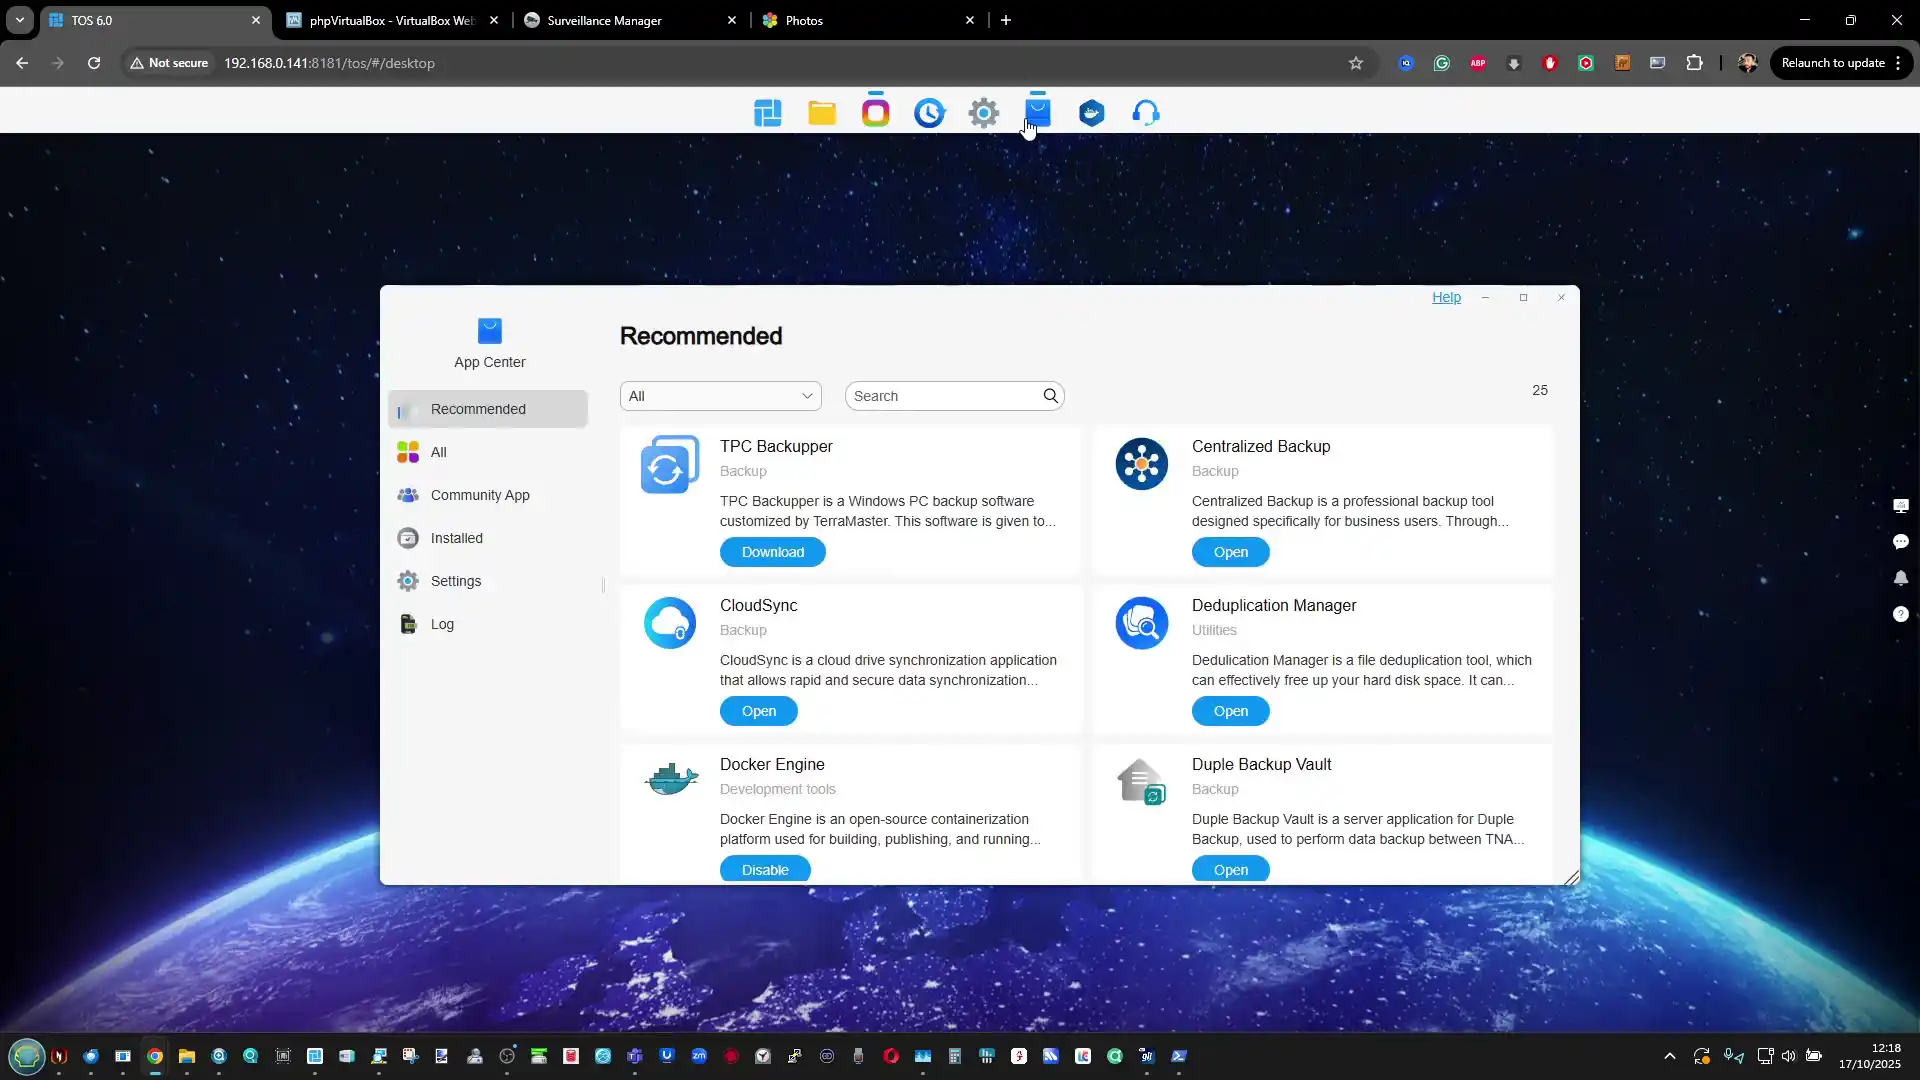
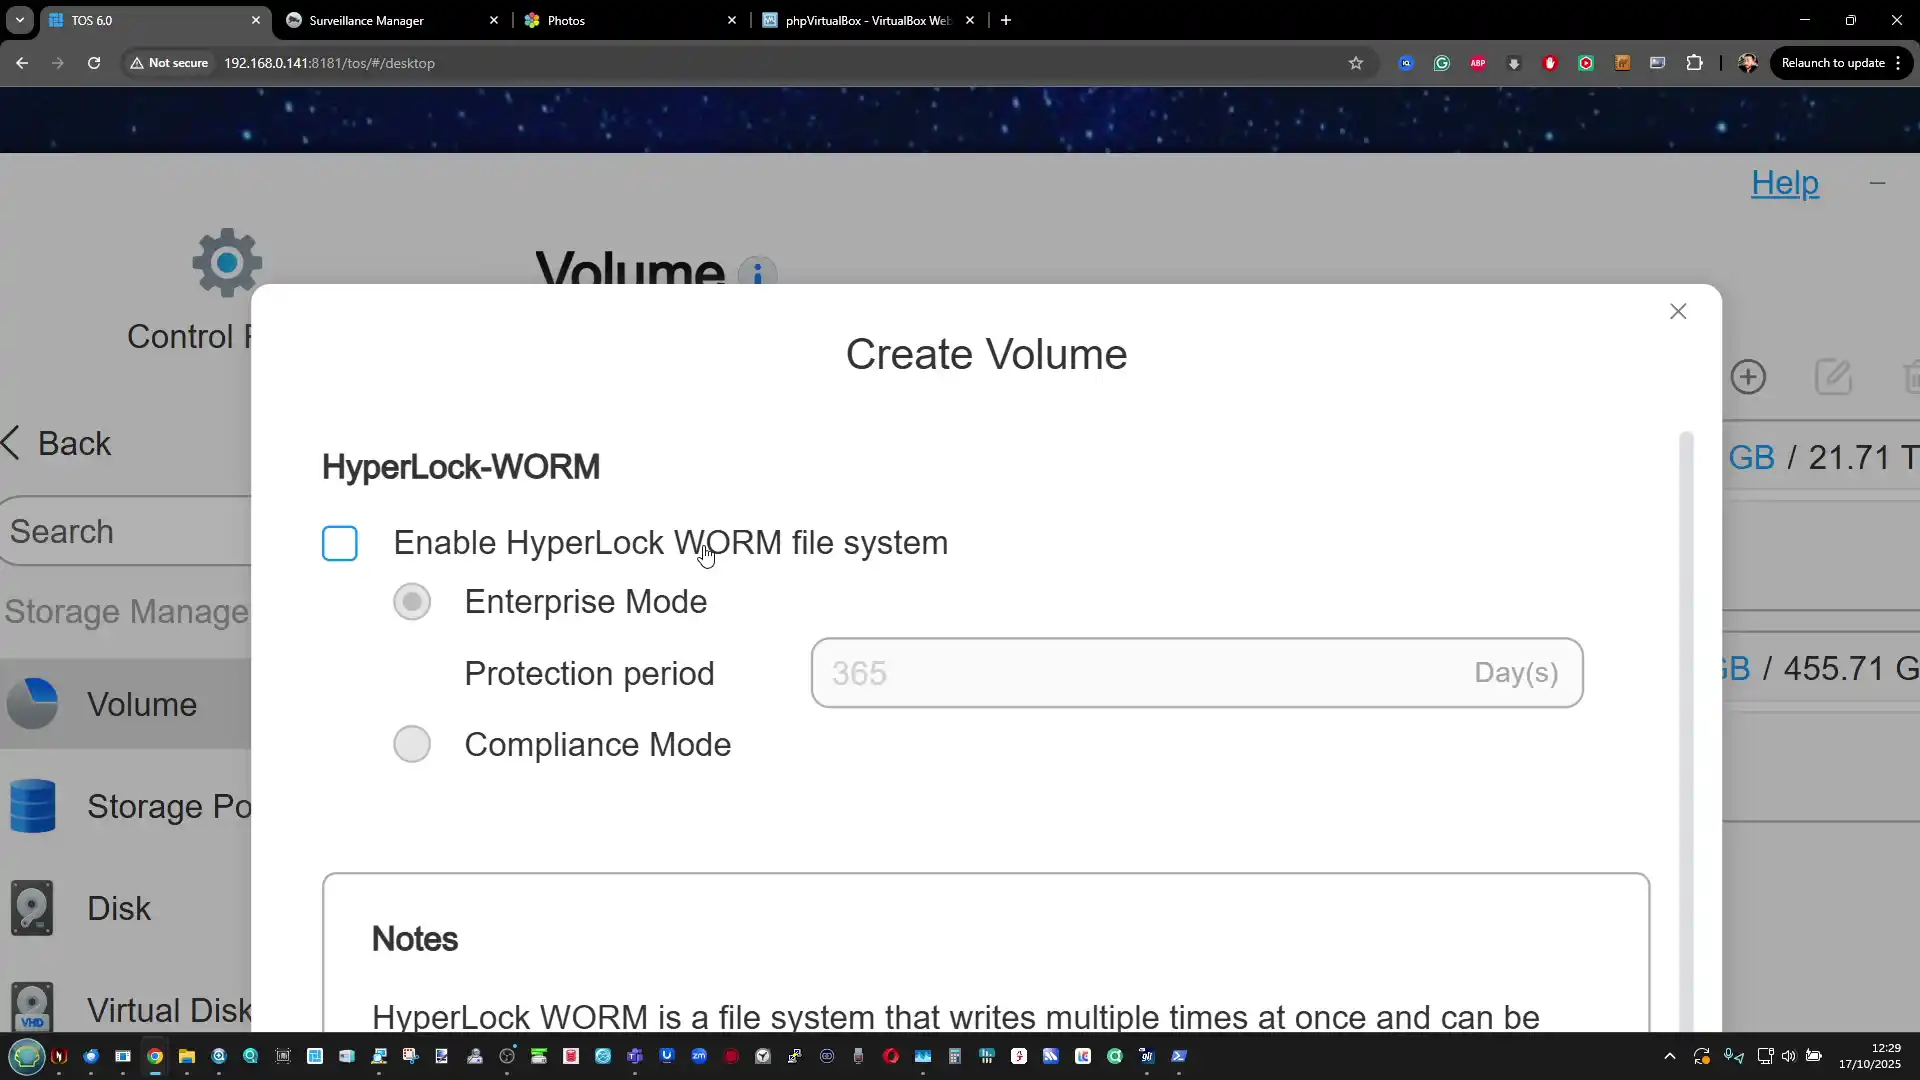
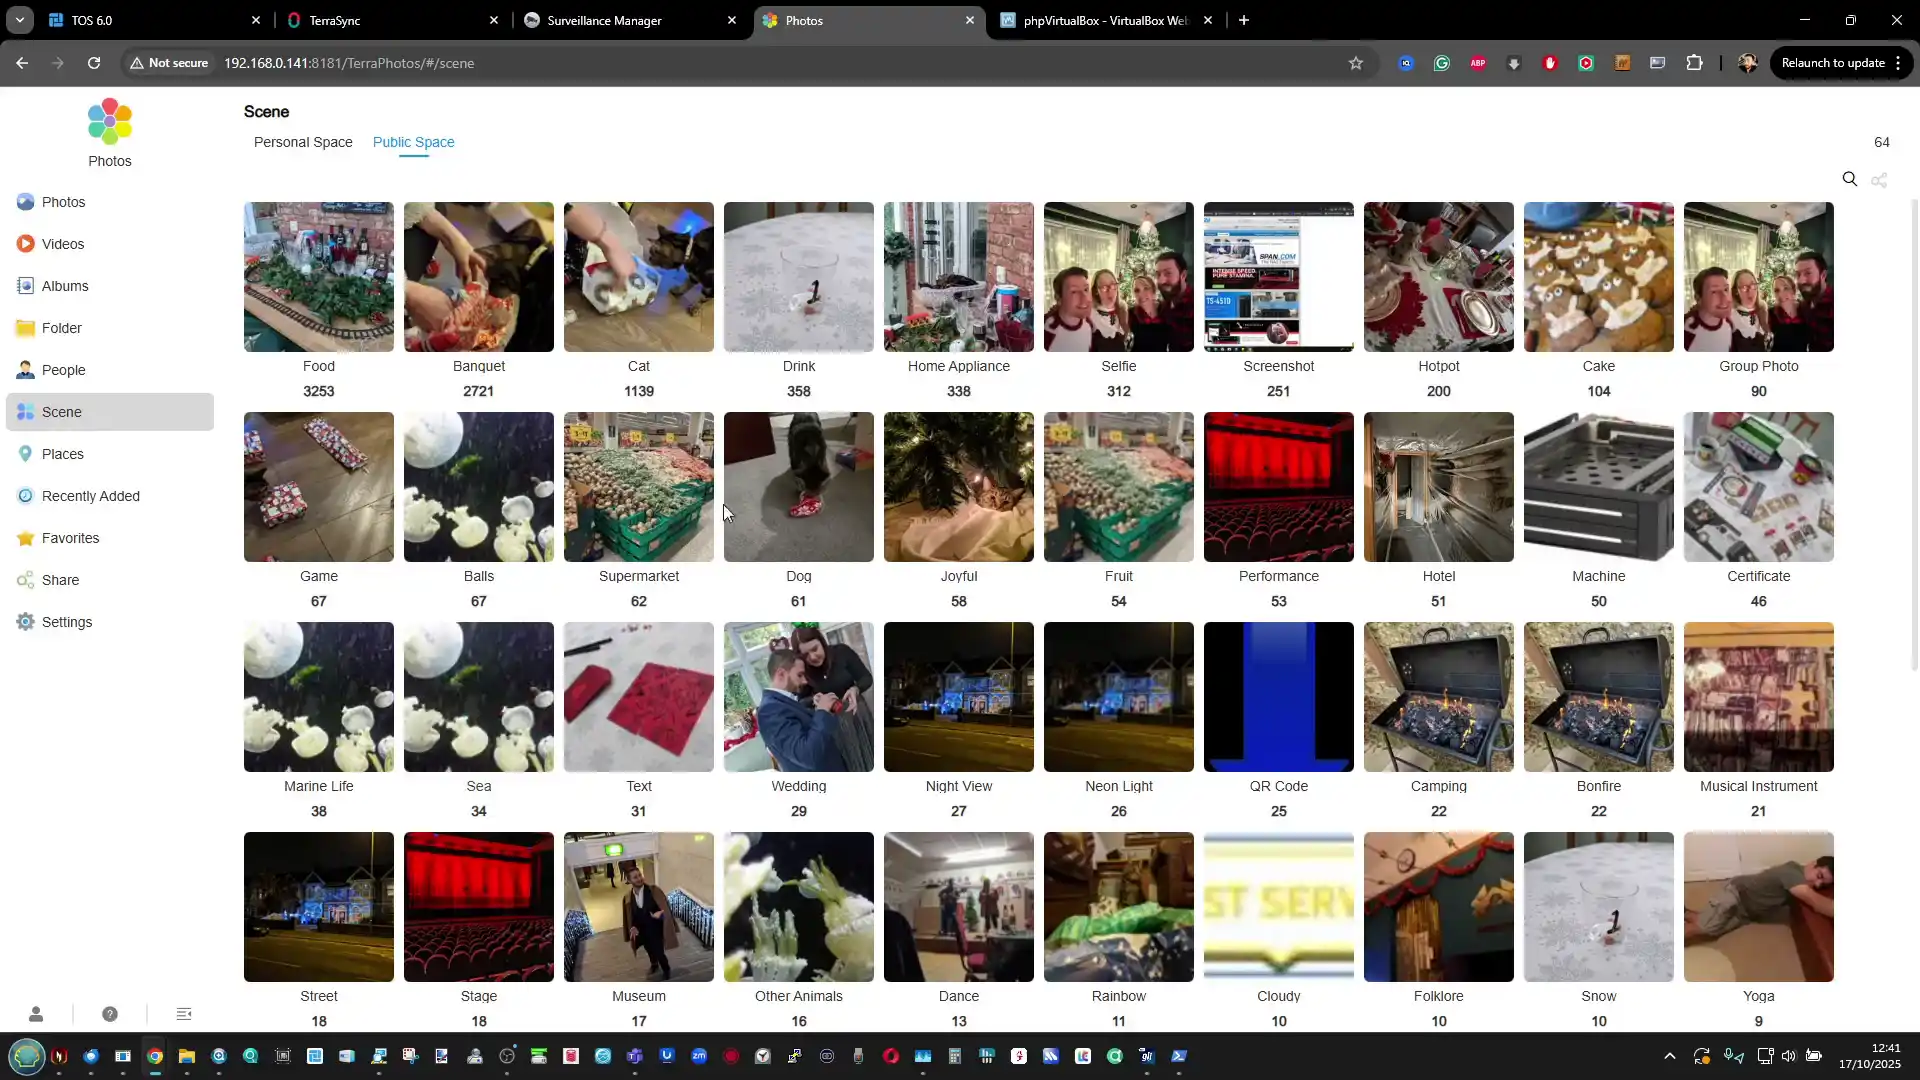


 SUBSCRIBE TO OUR NEWSLETTER


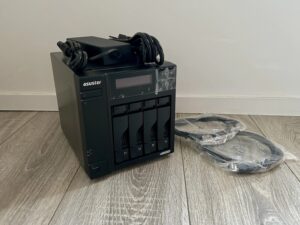
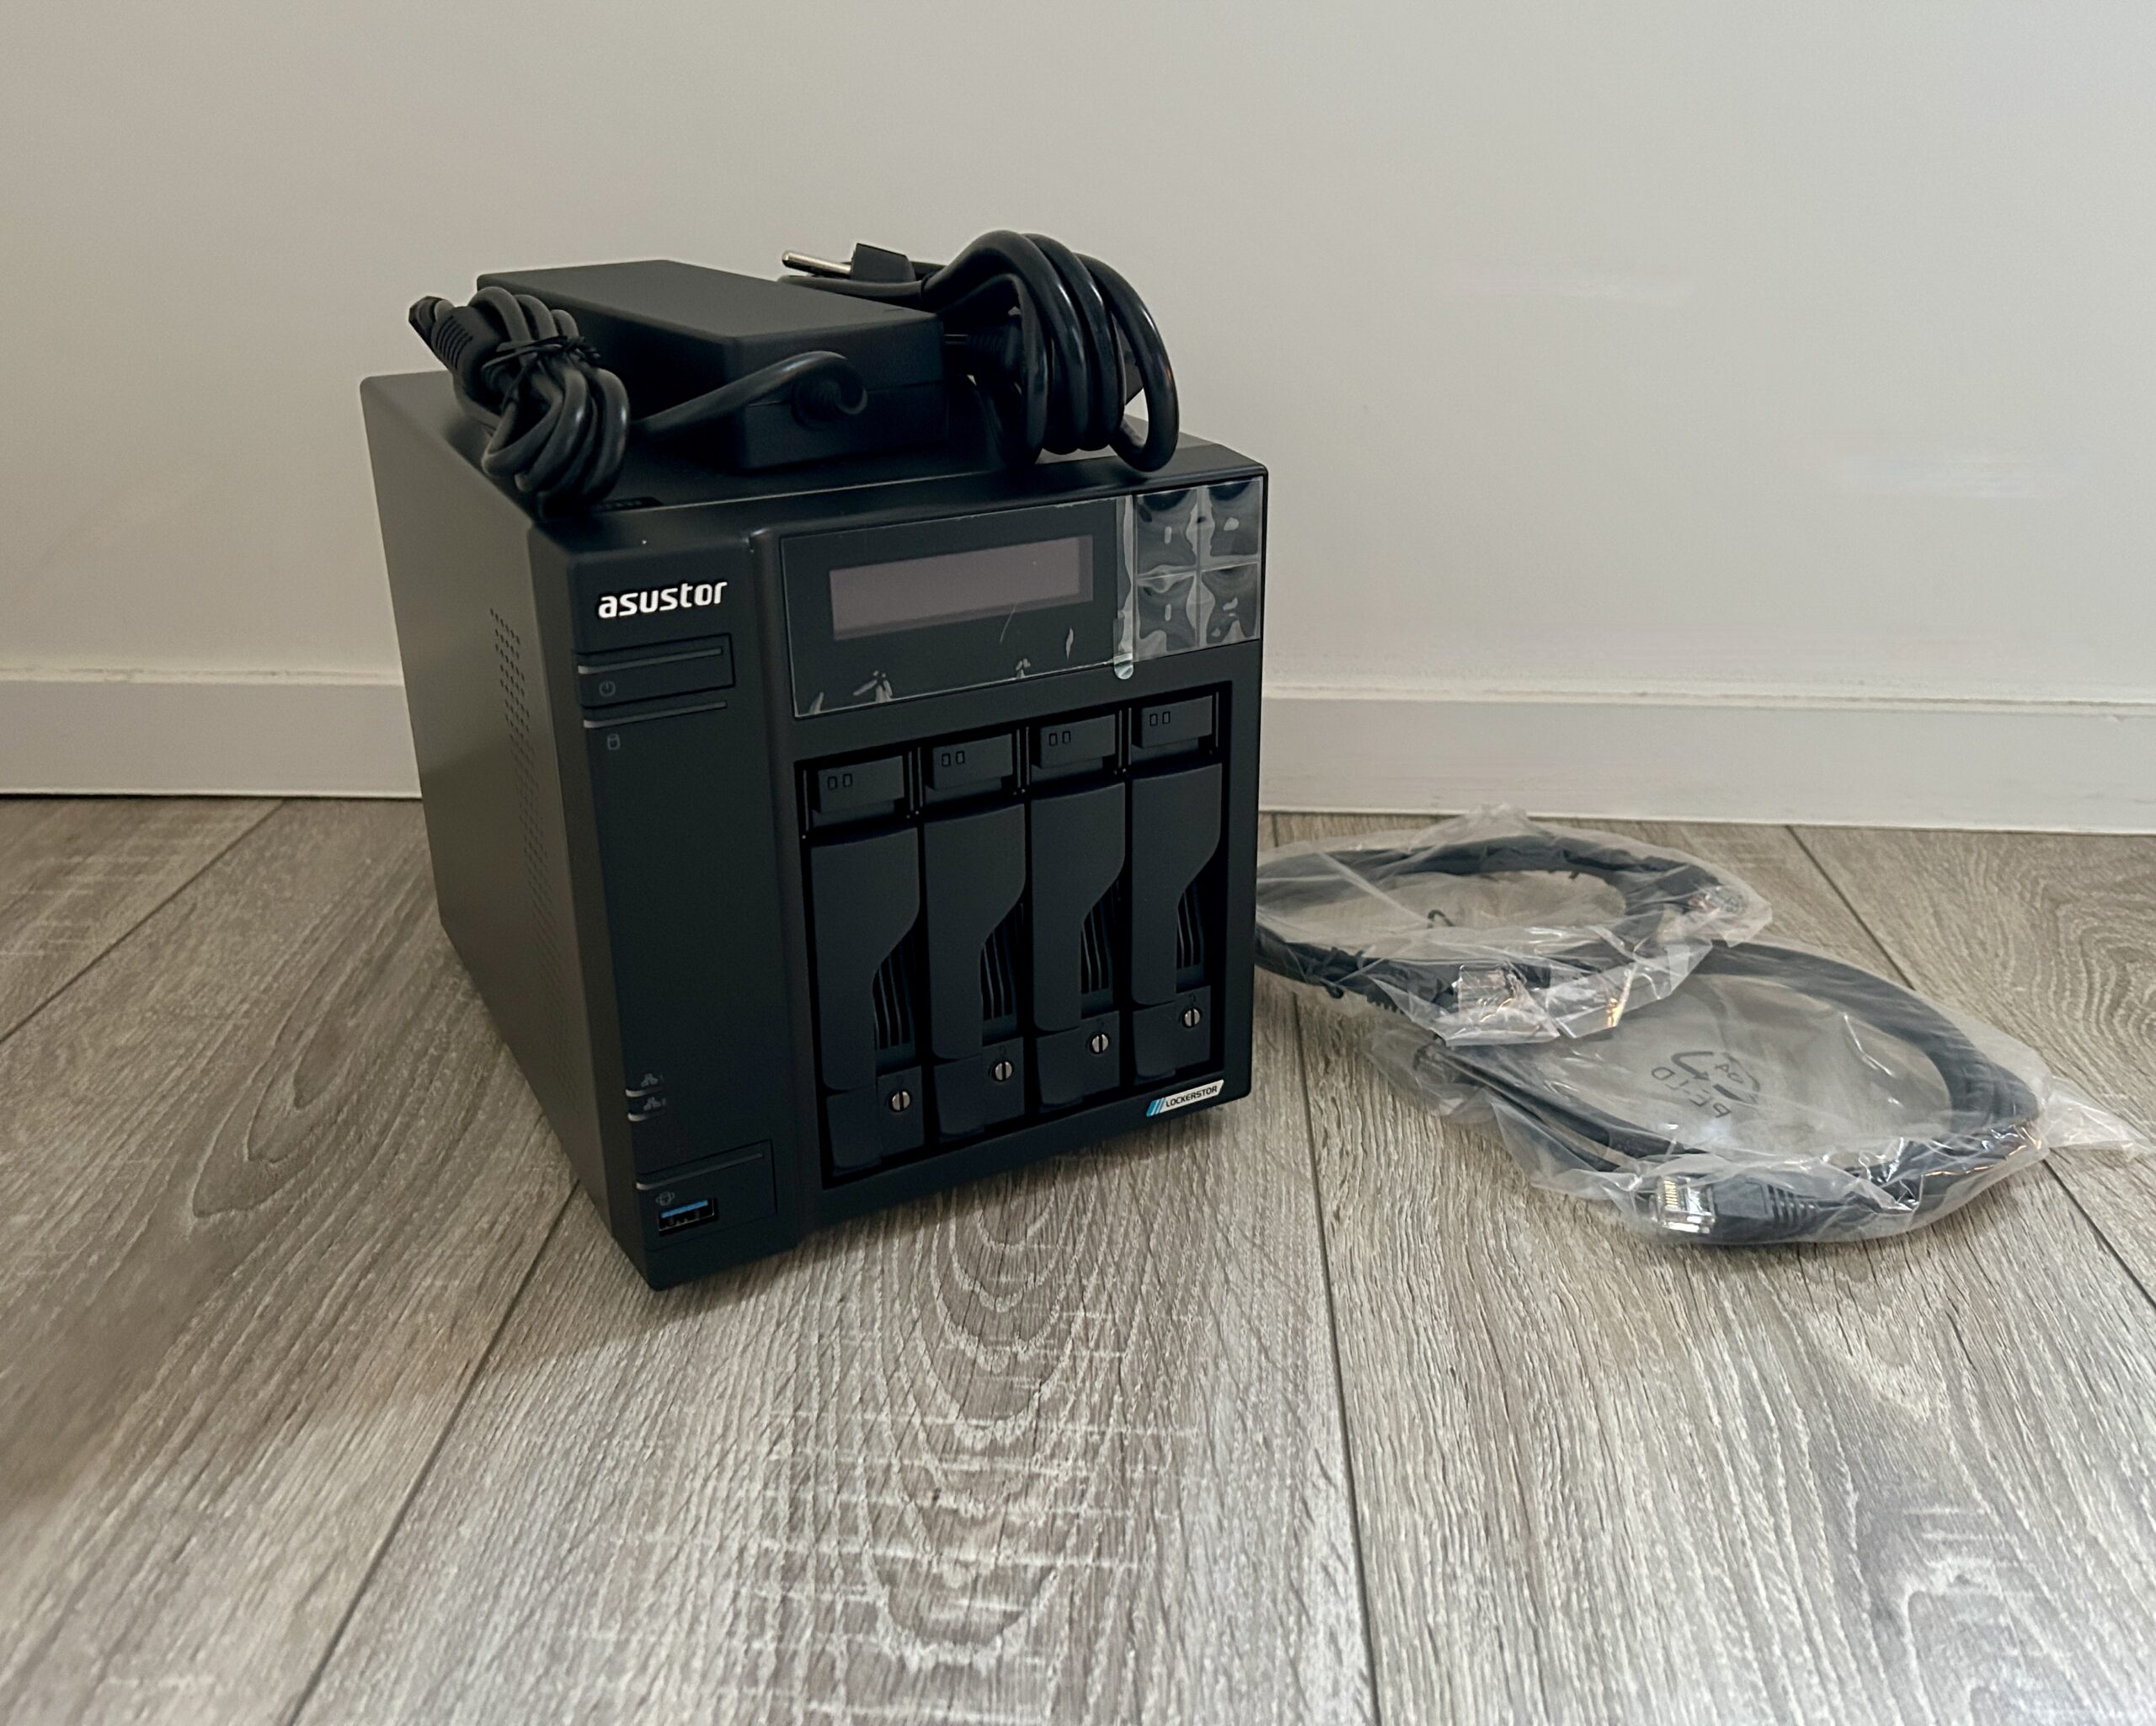
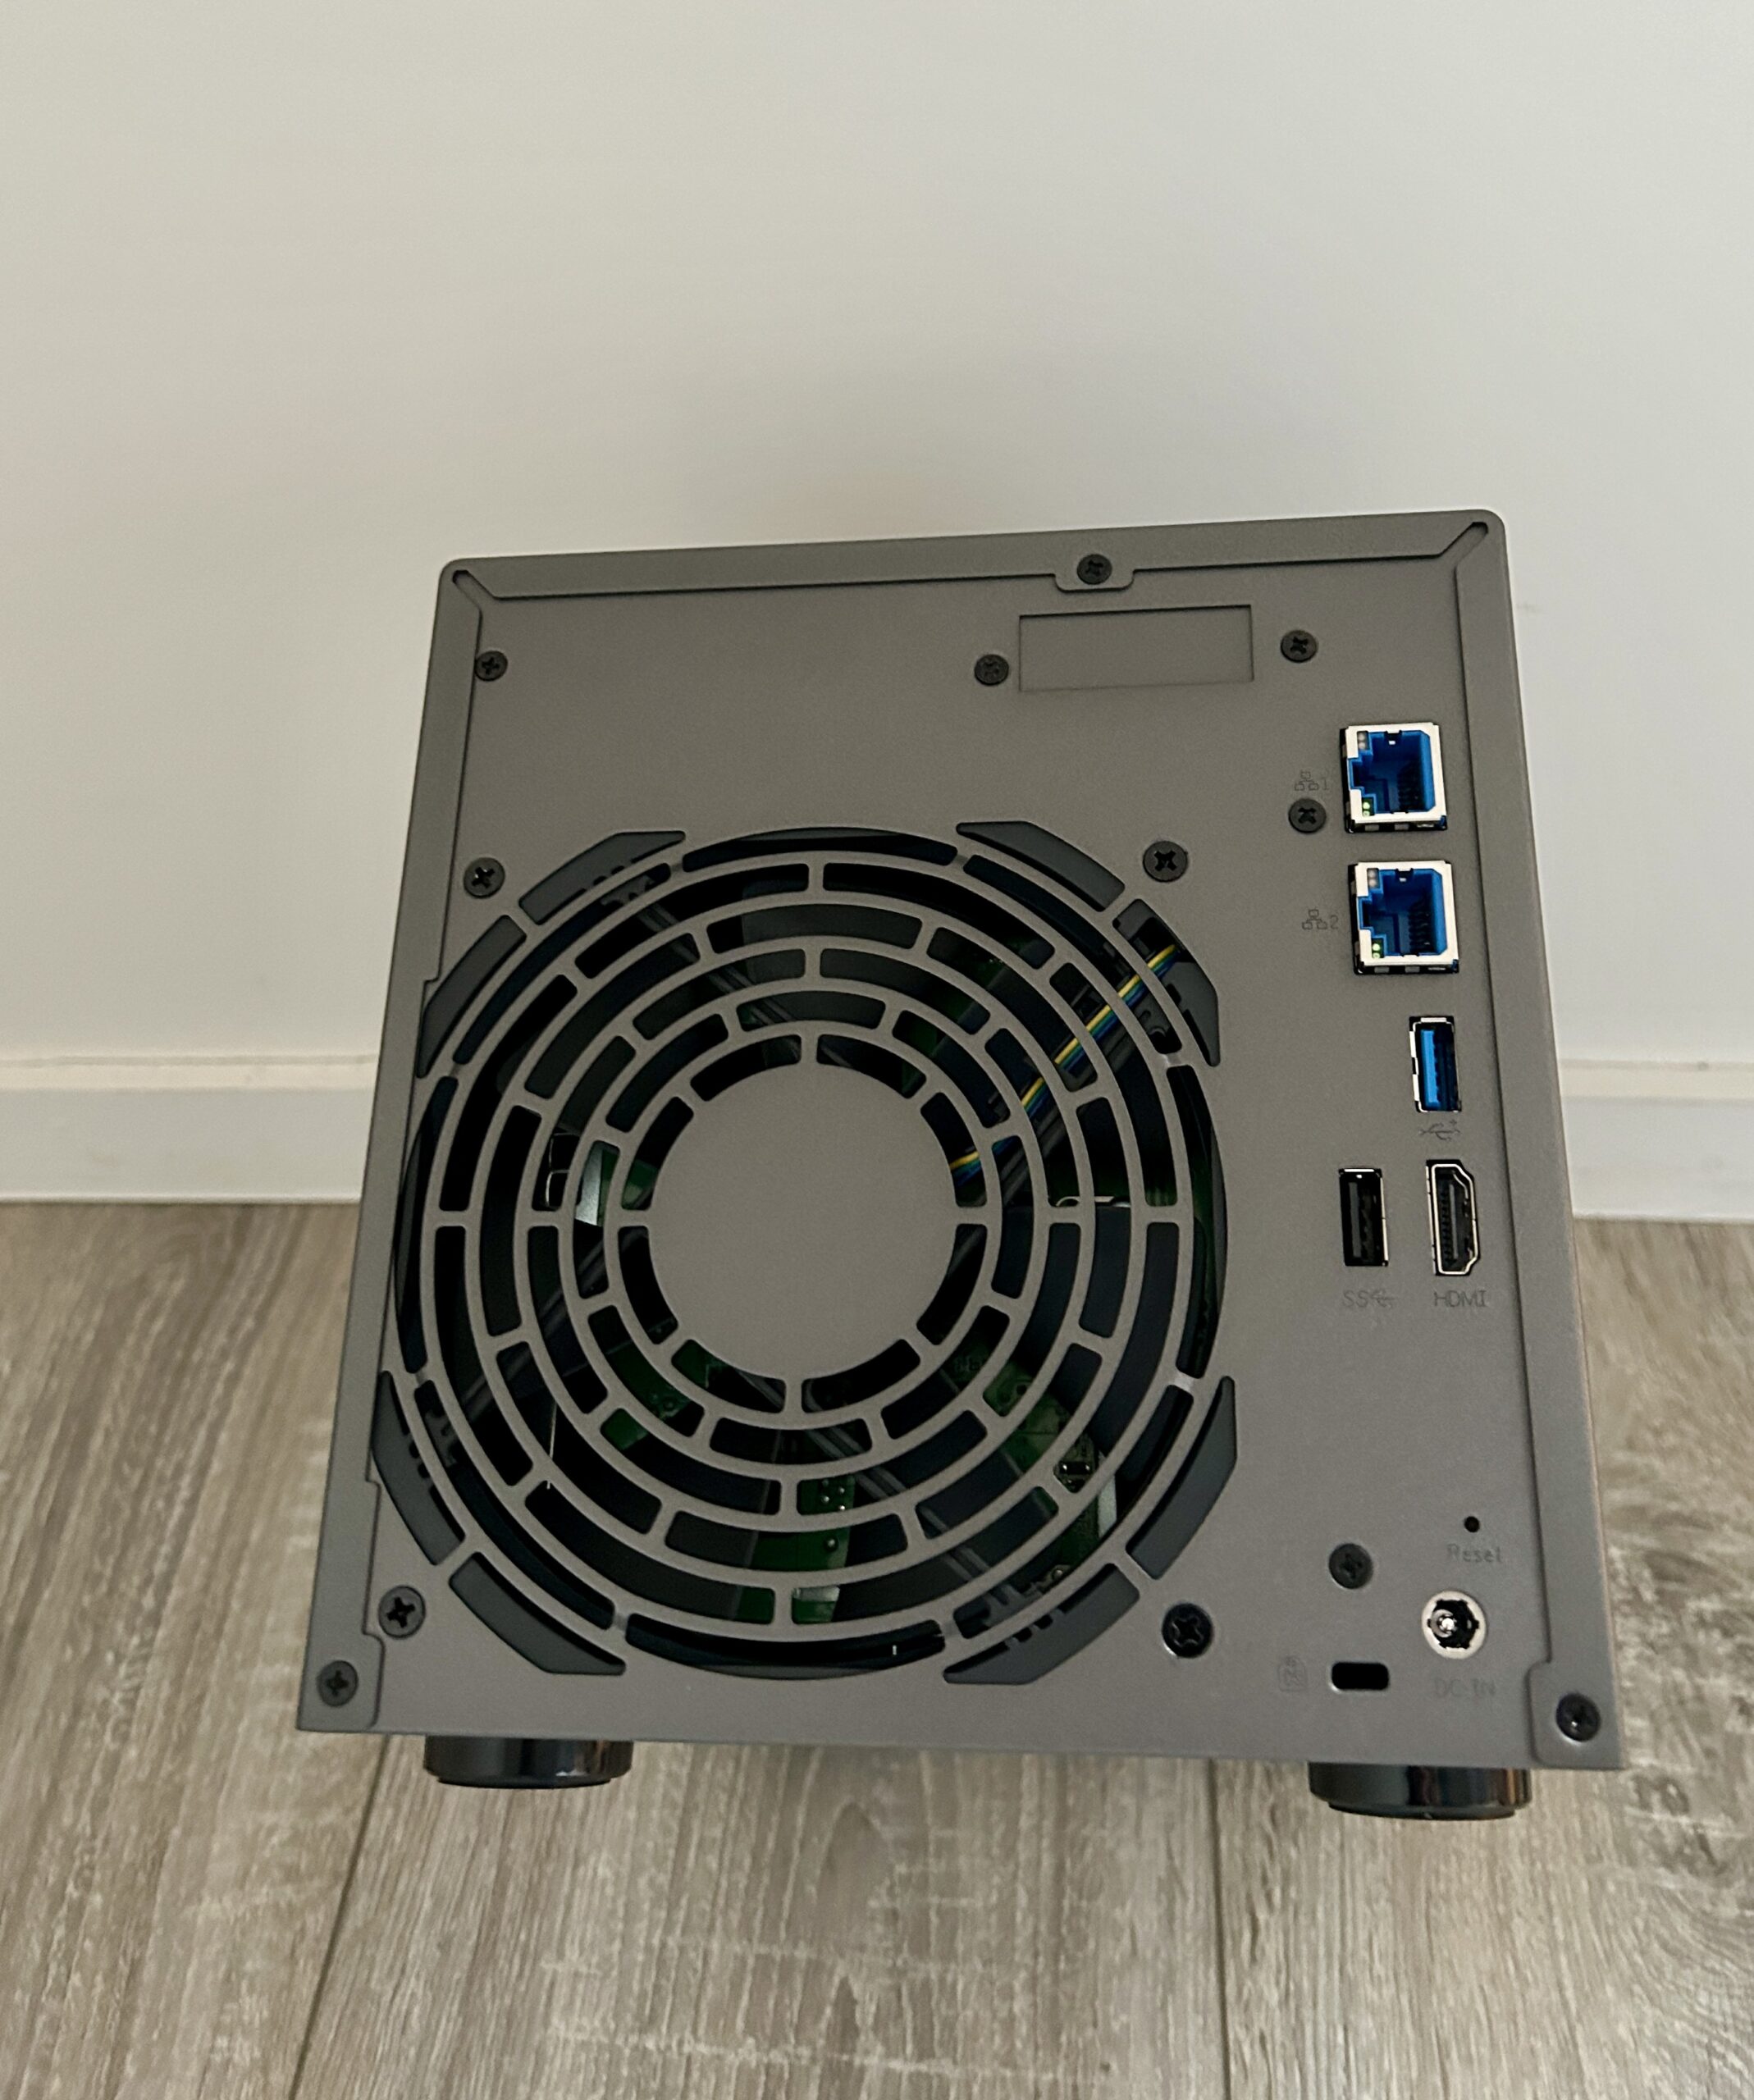
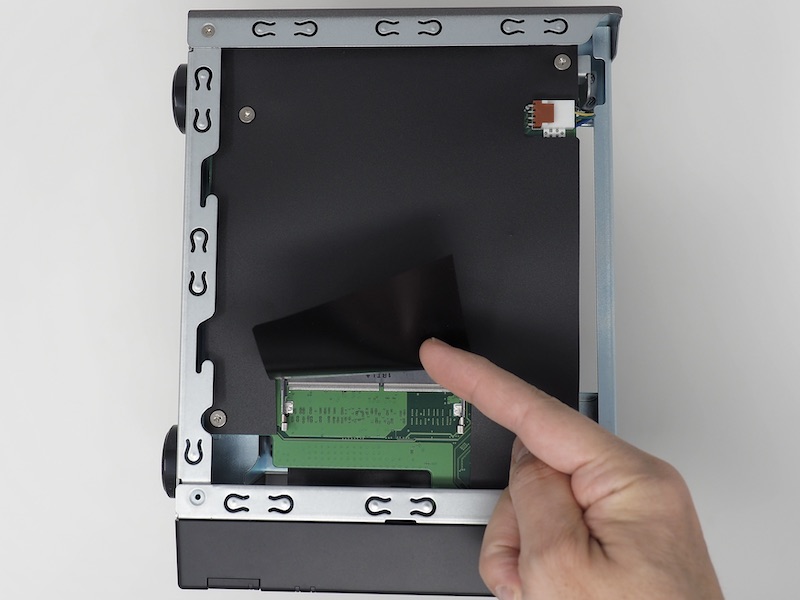
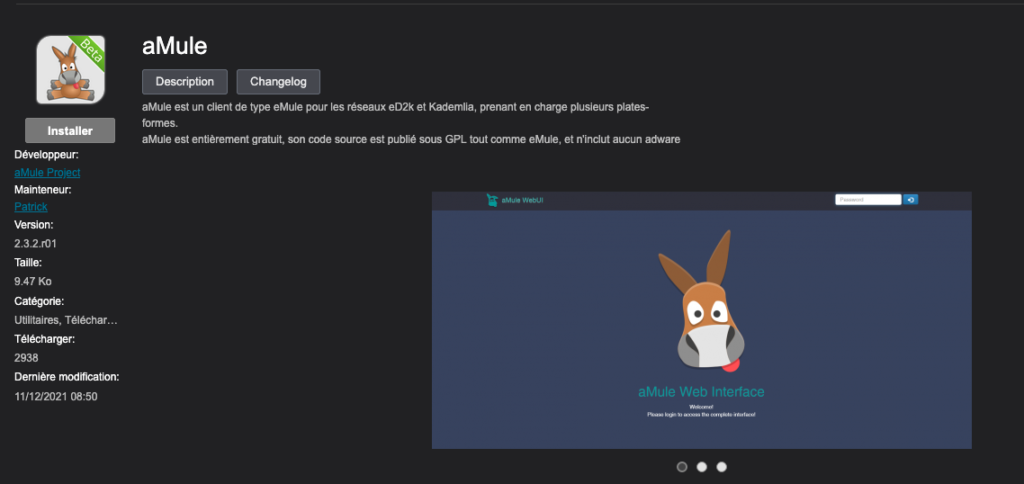
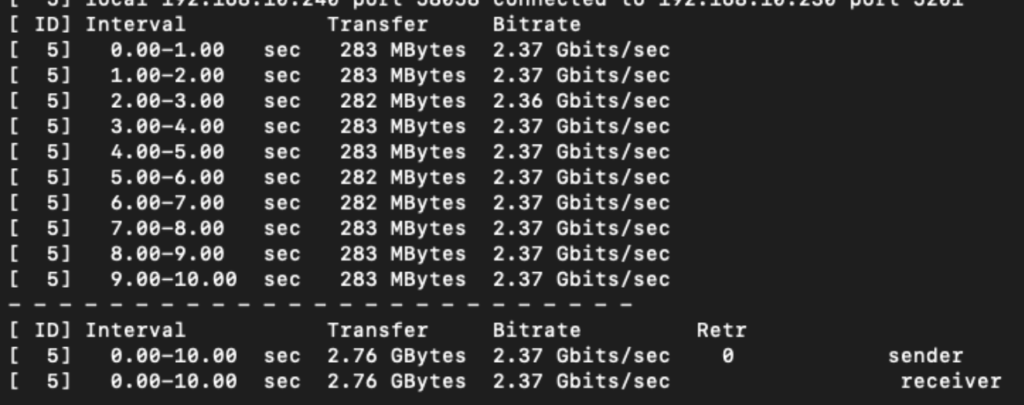
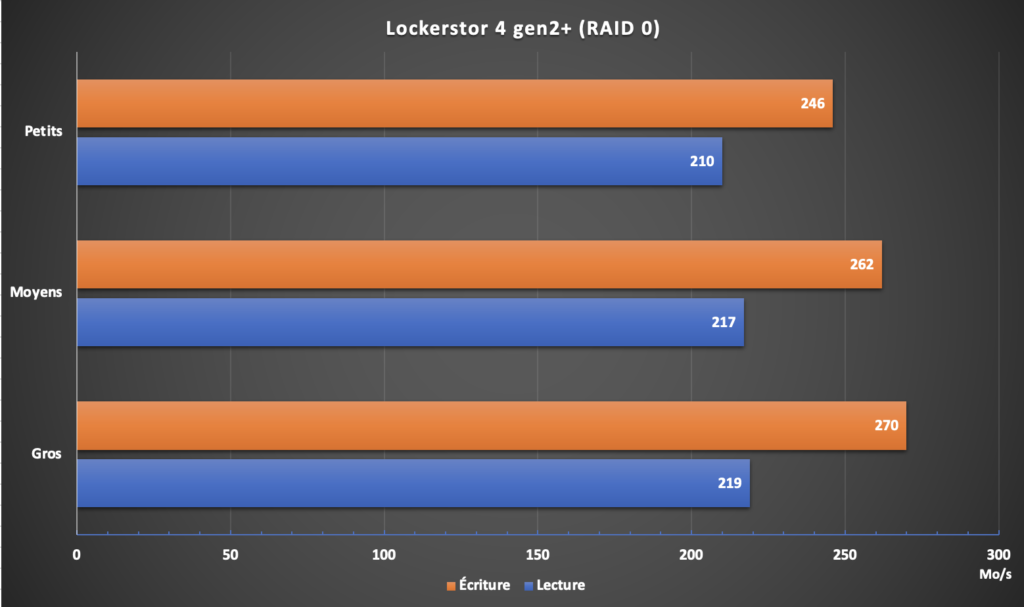

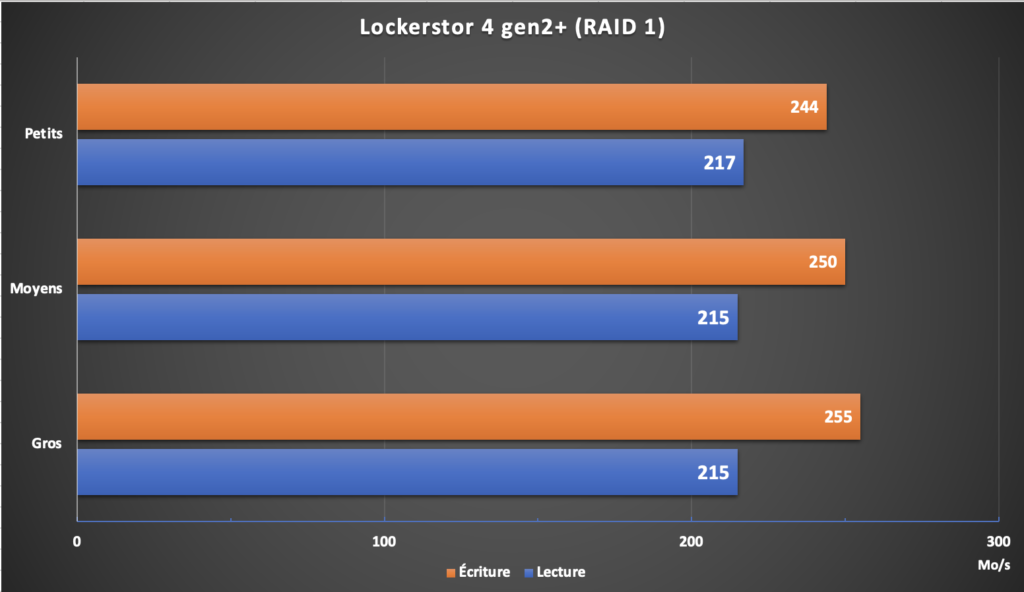


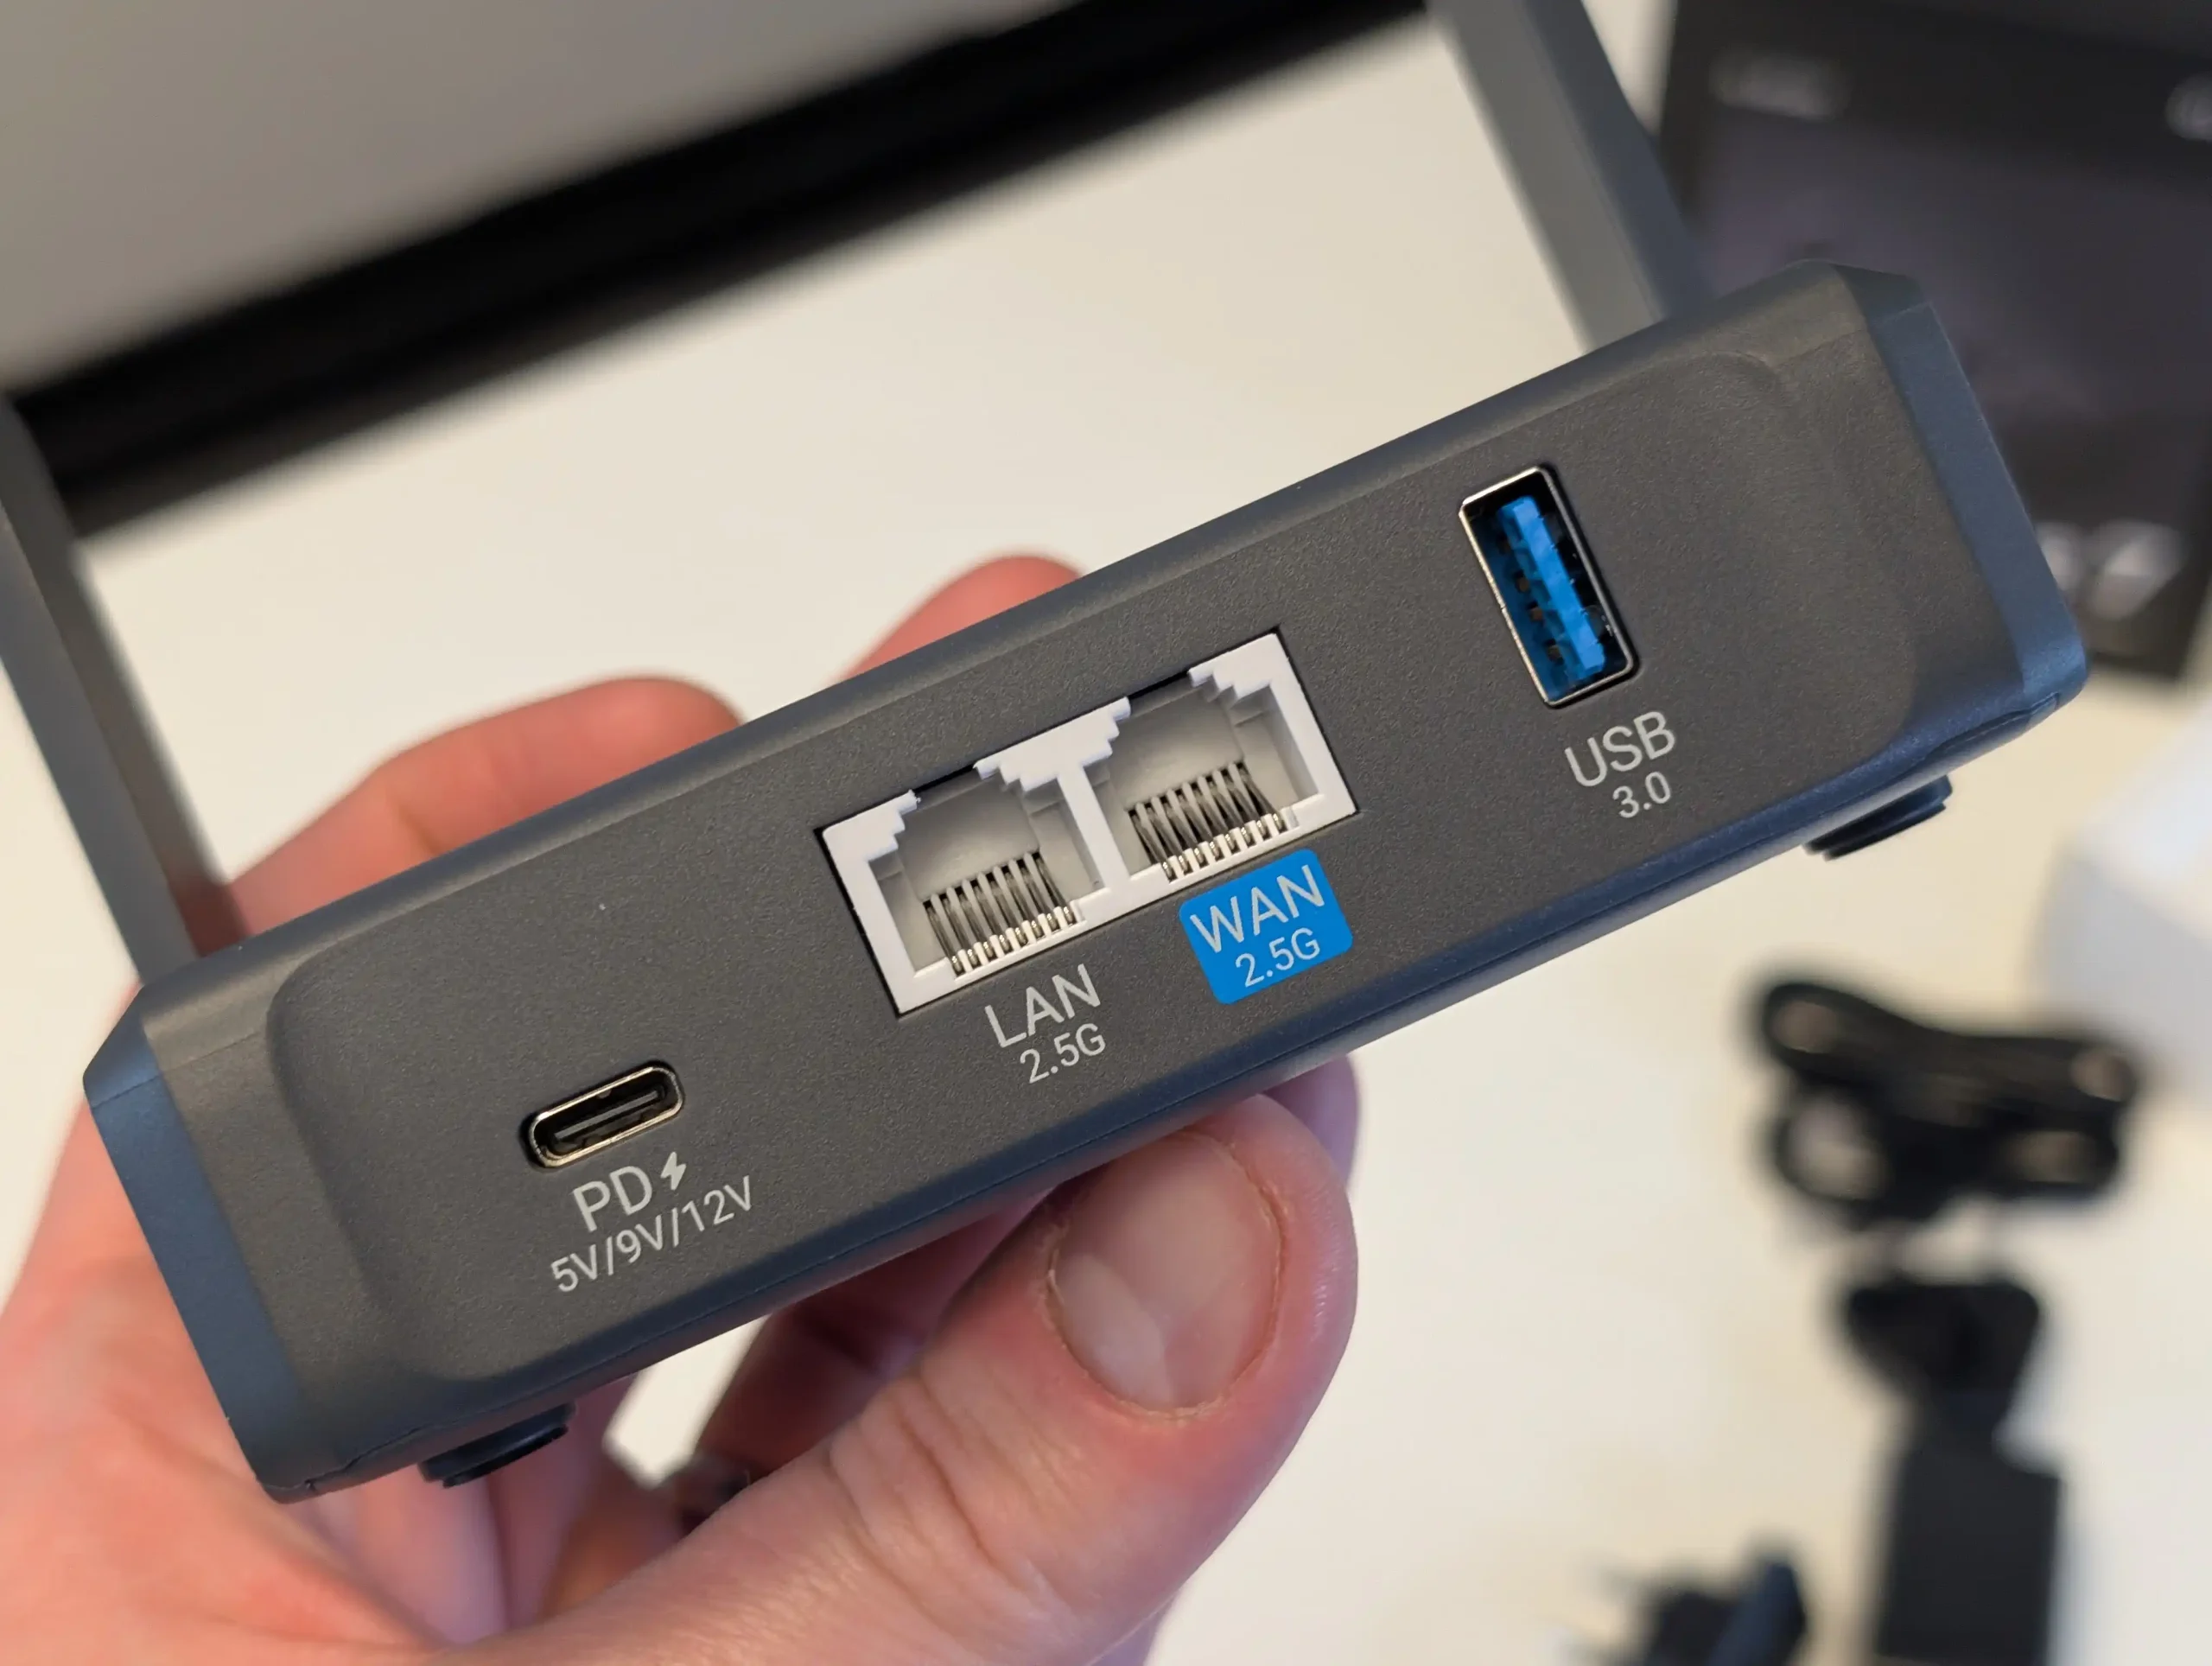


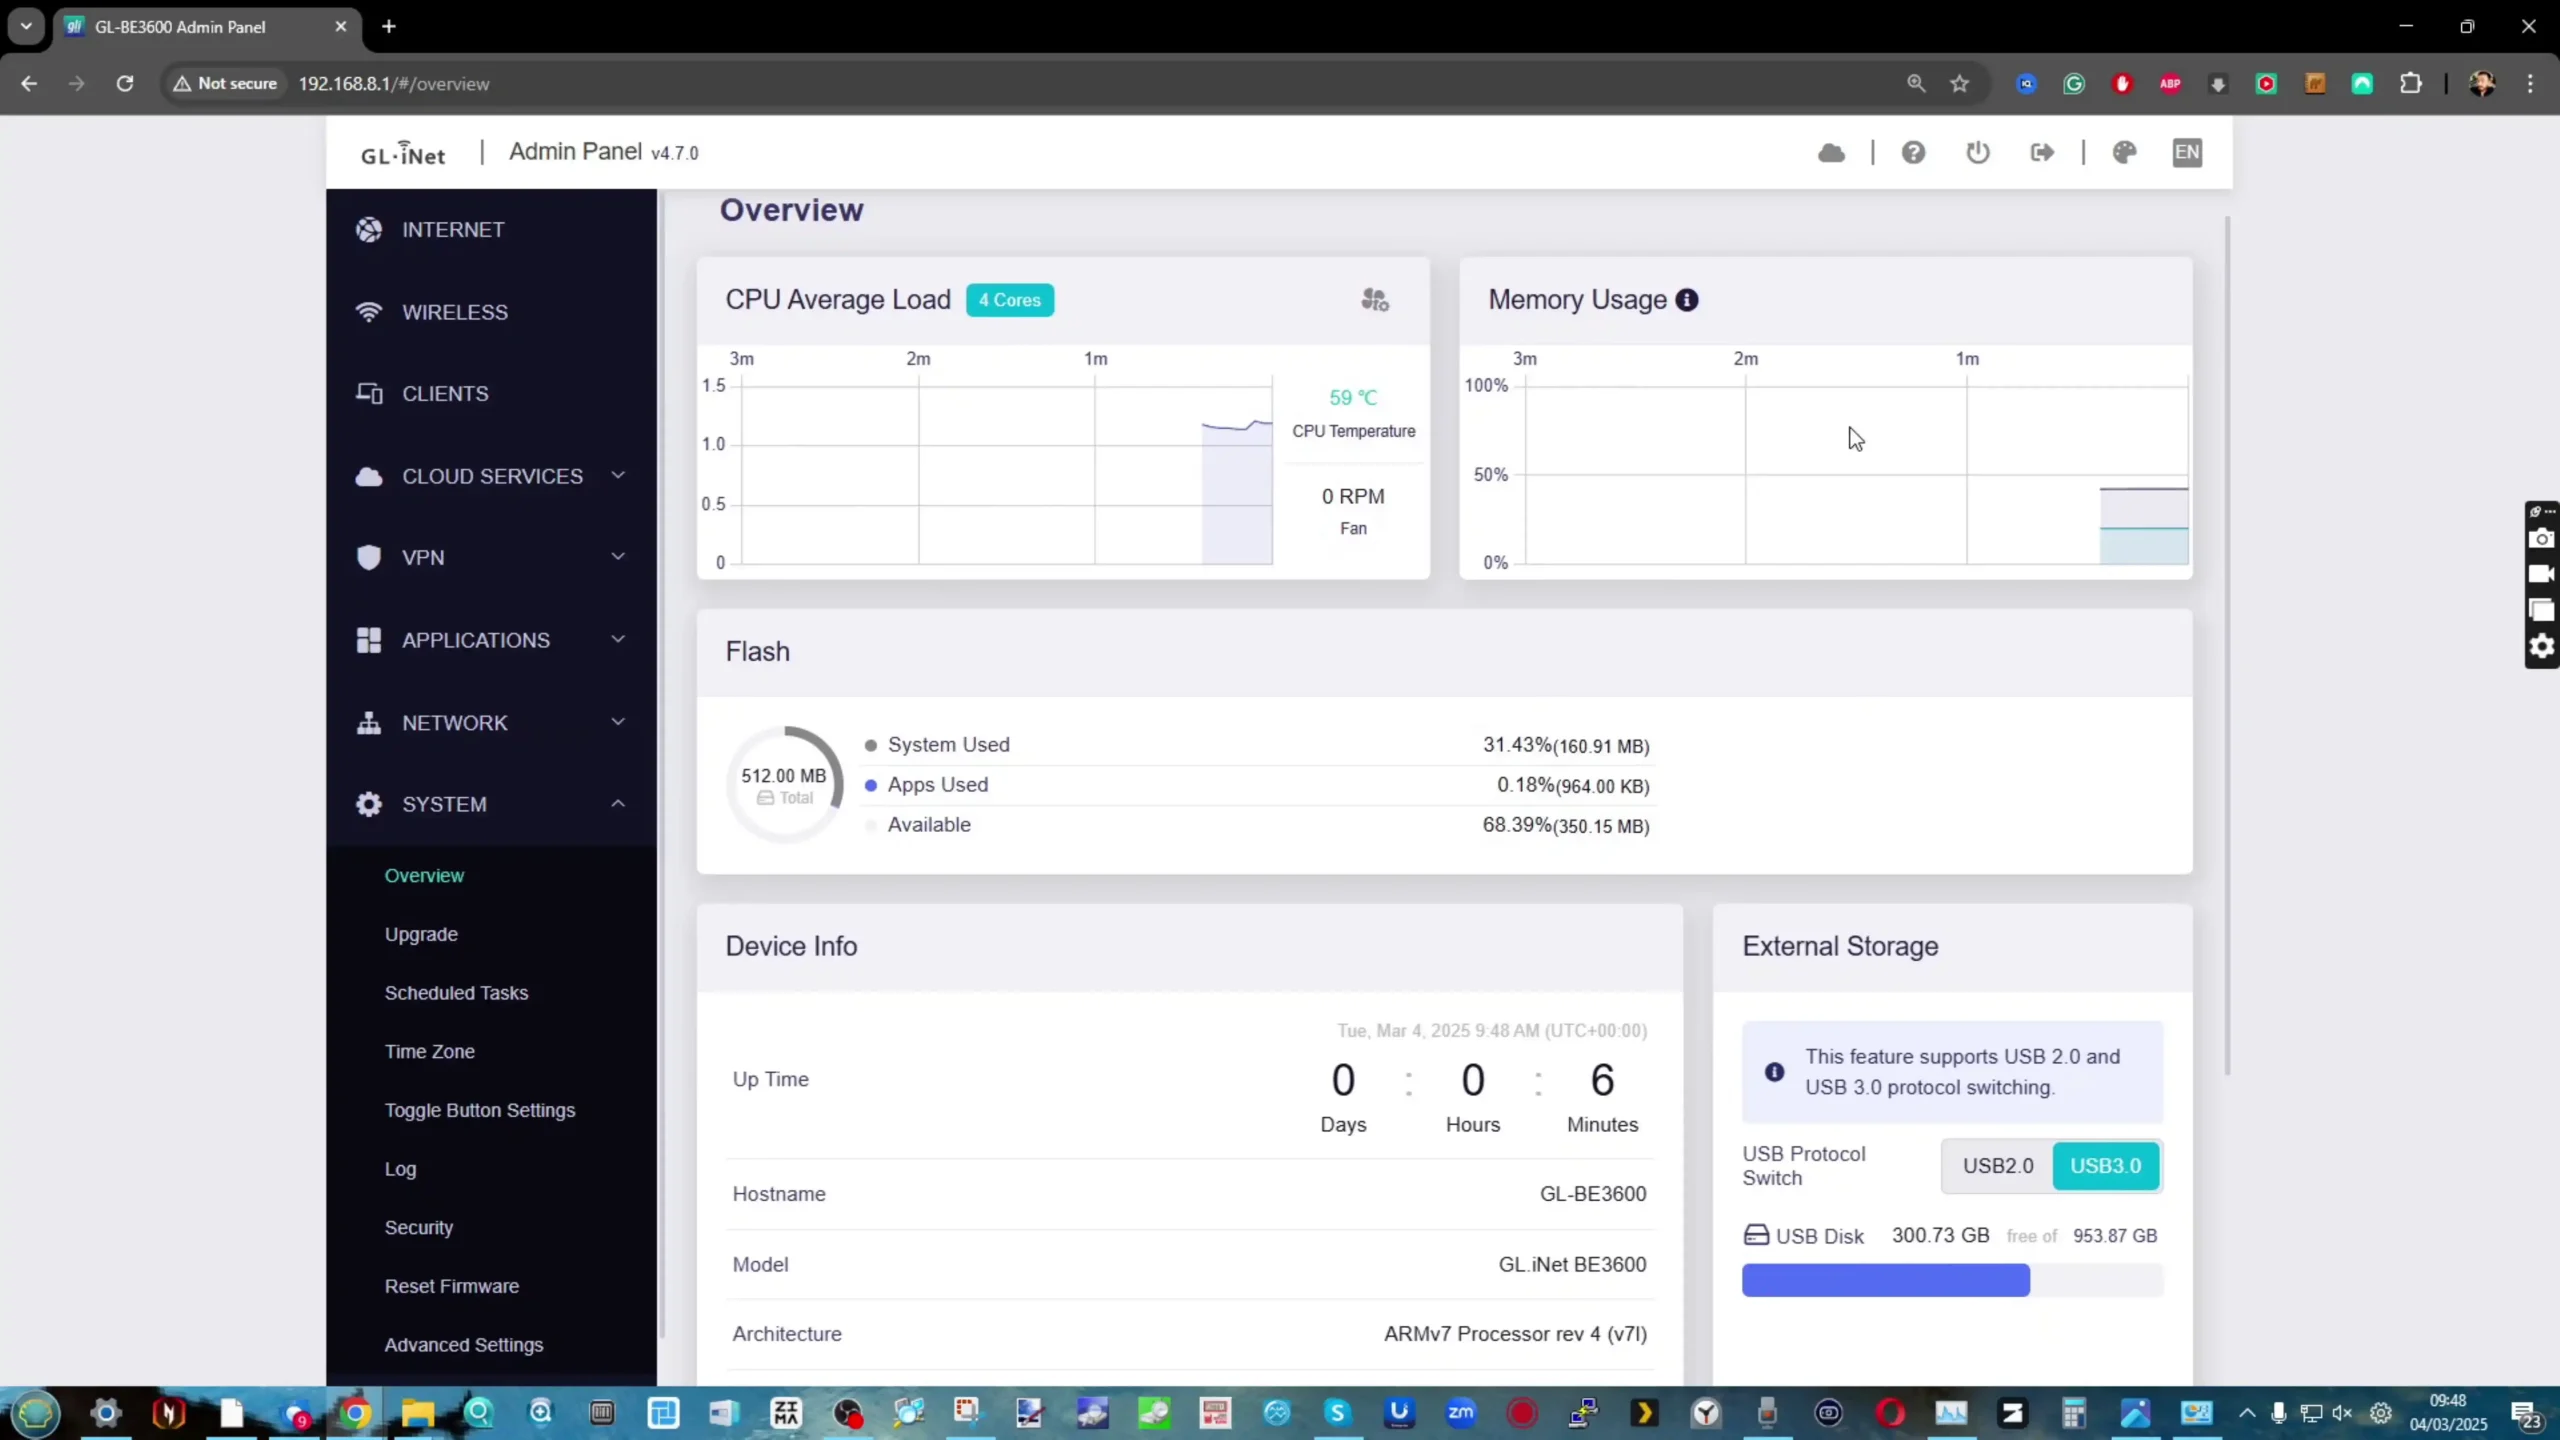


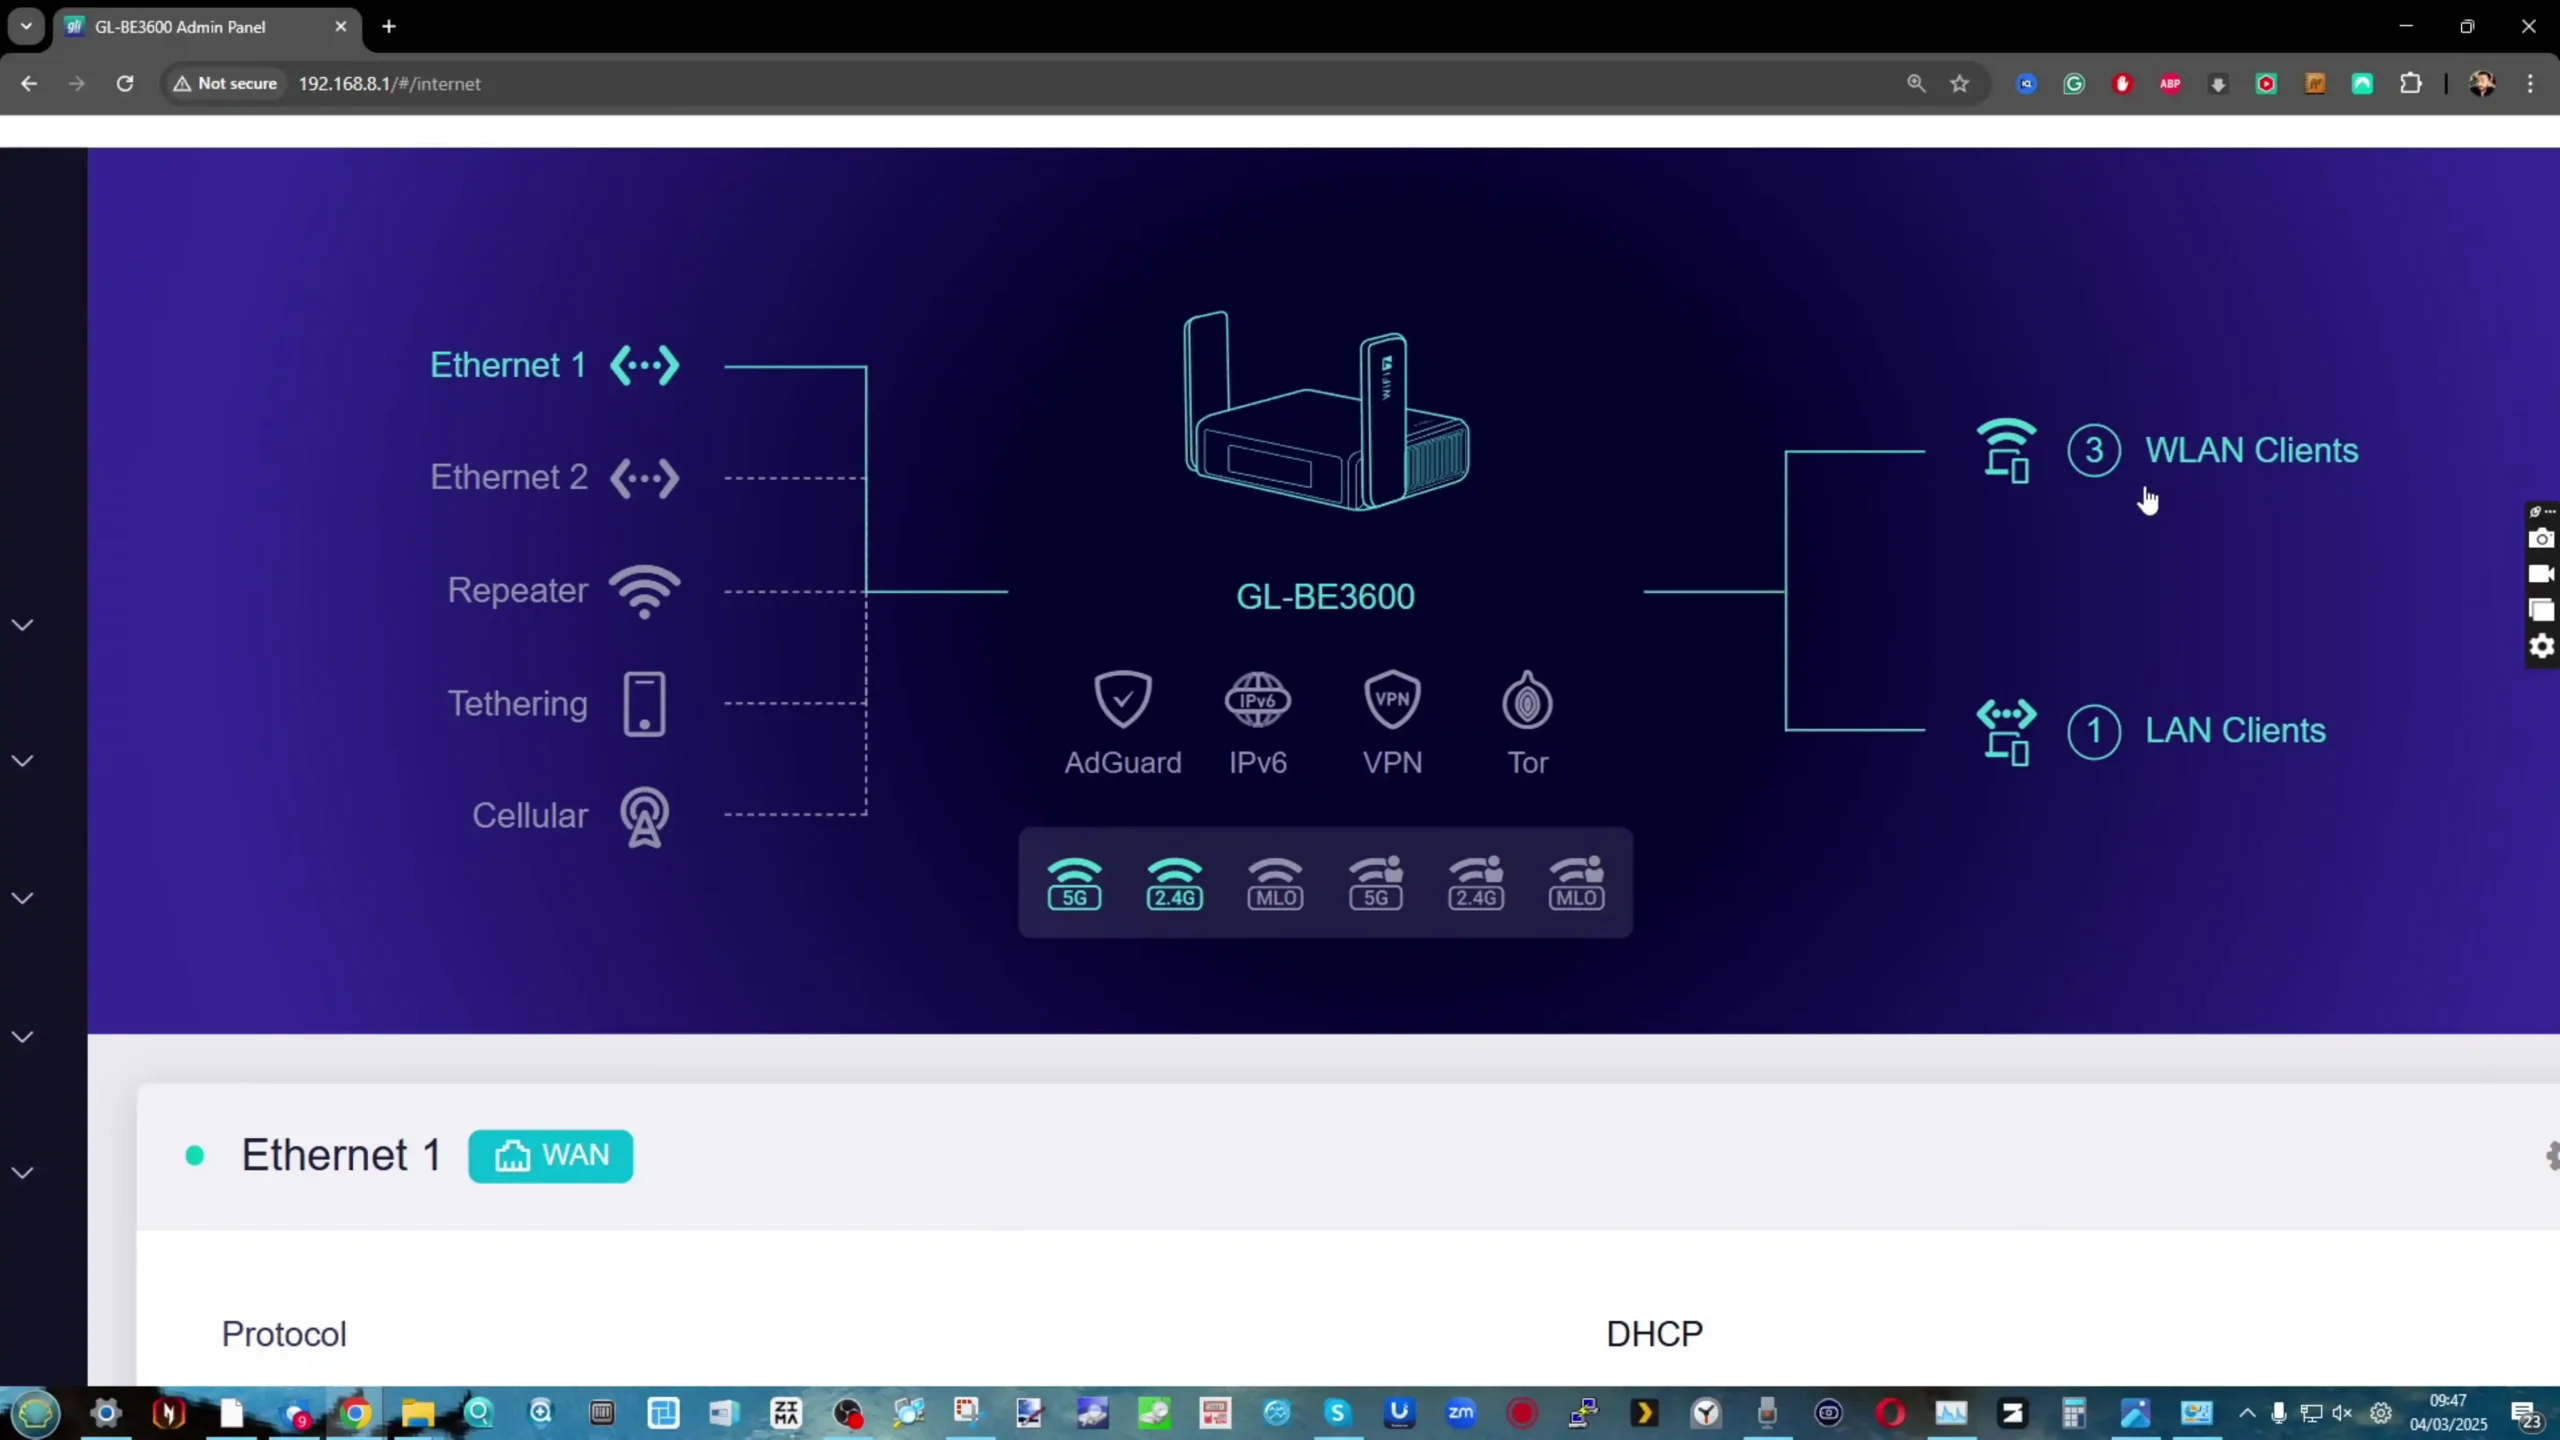


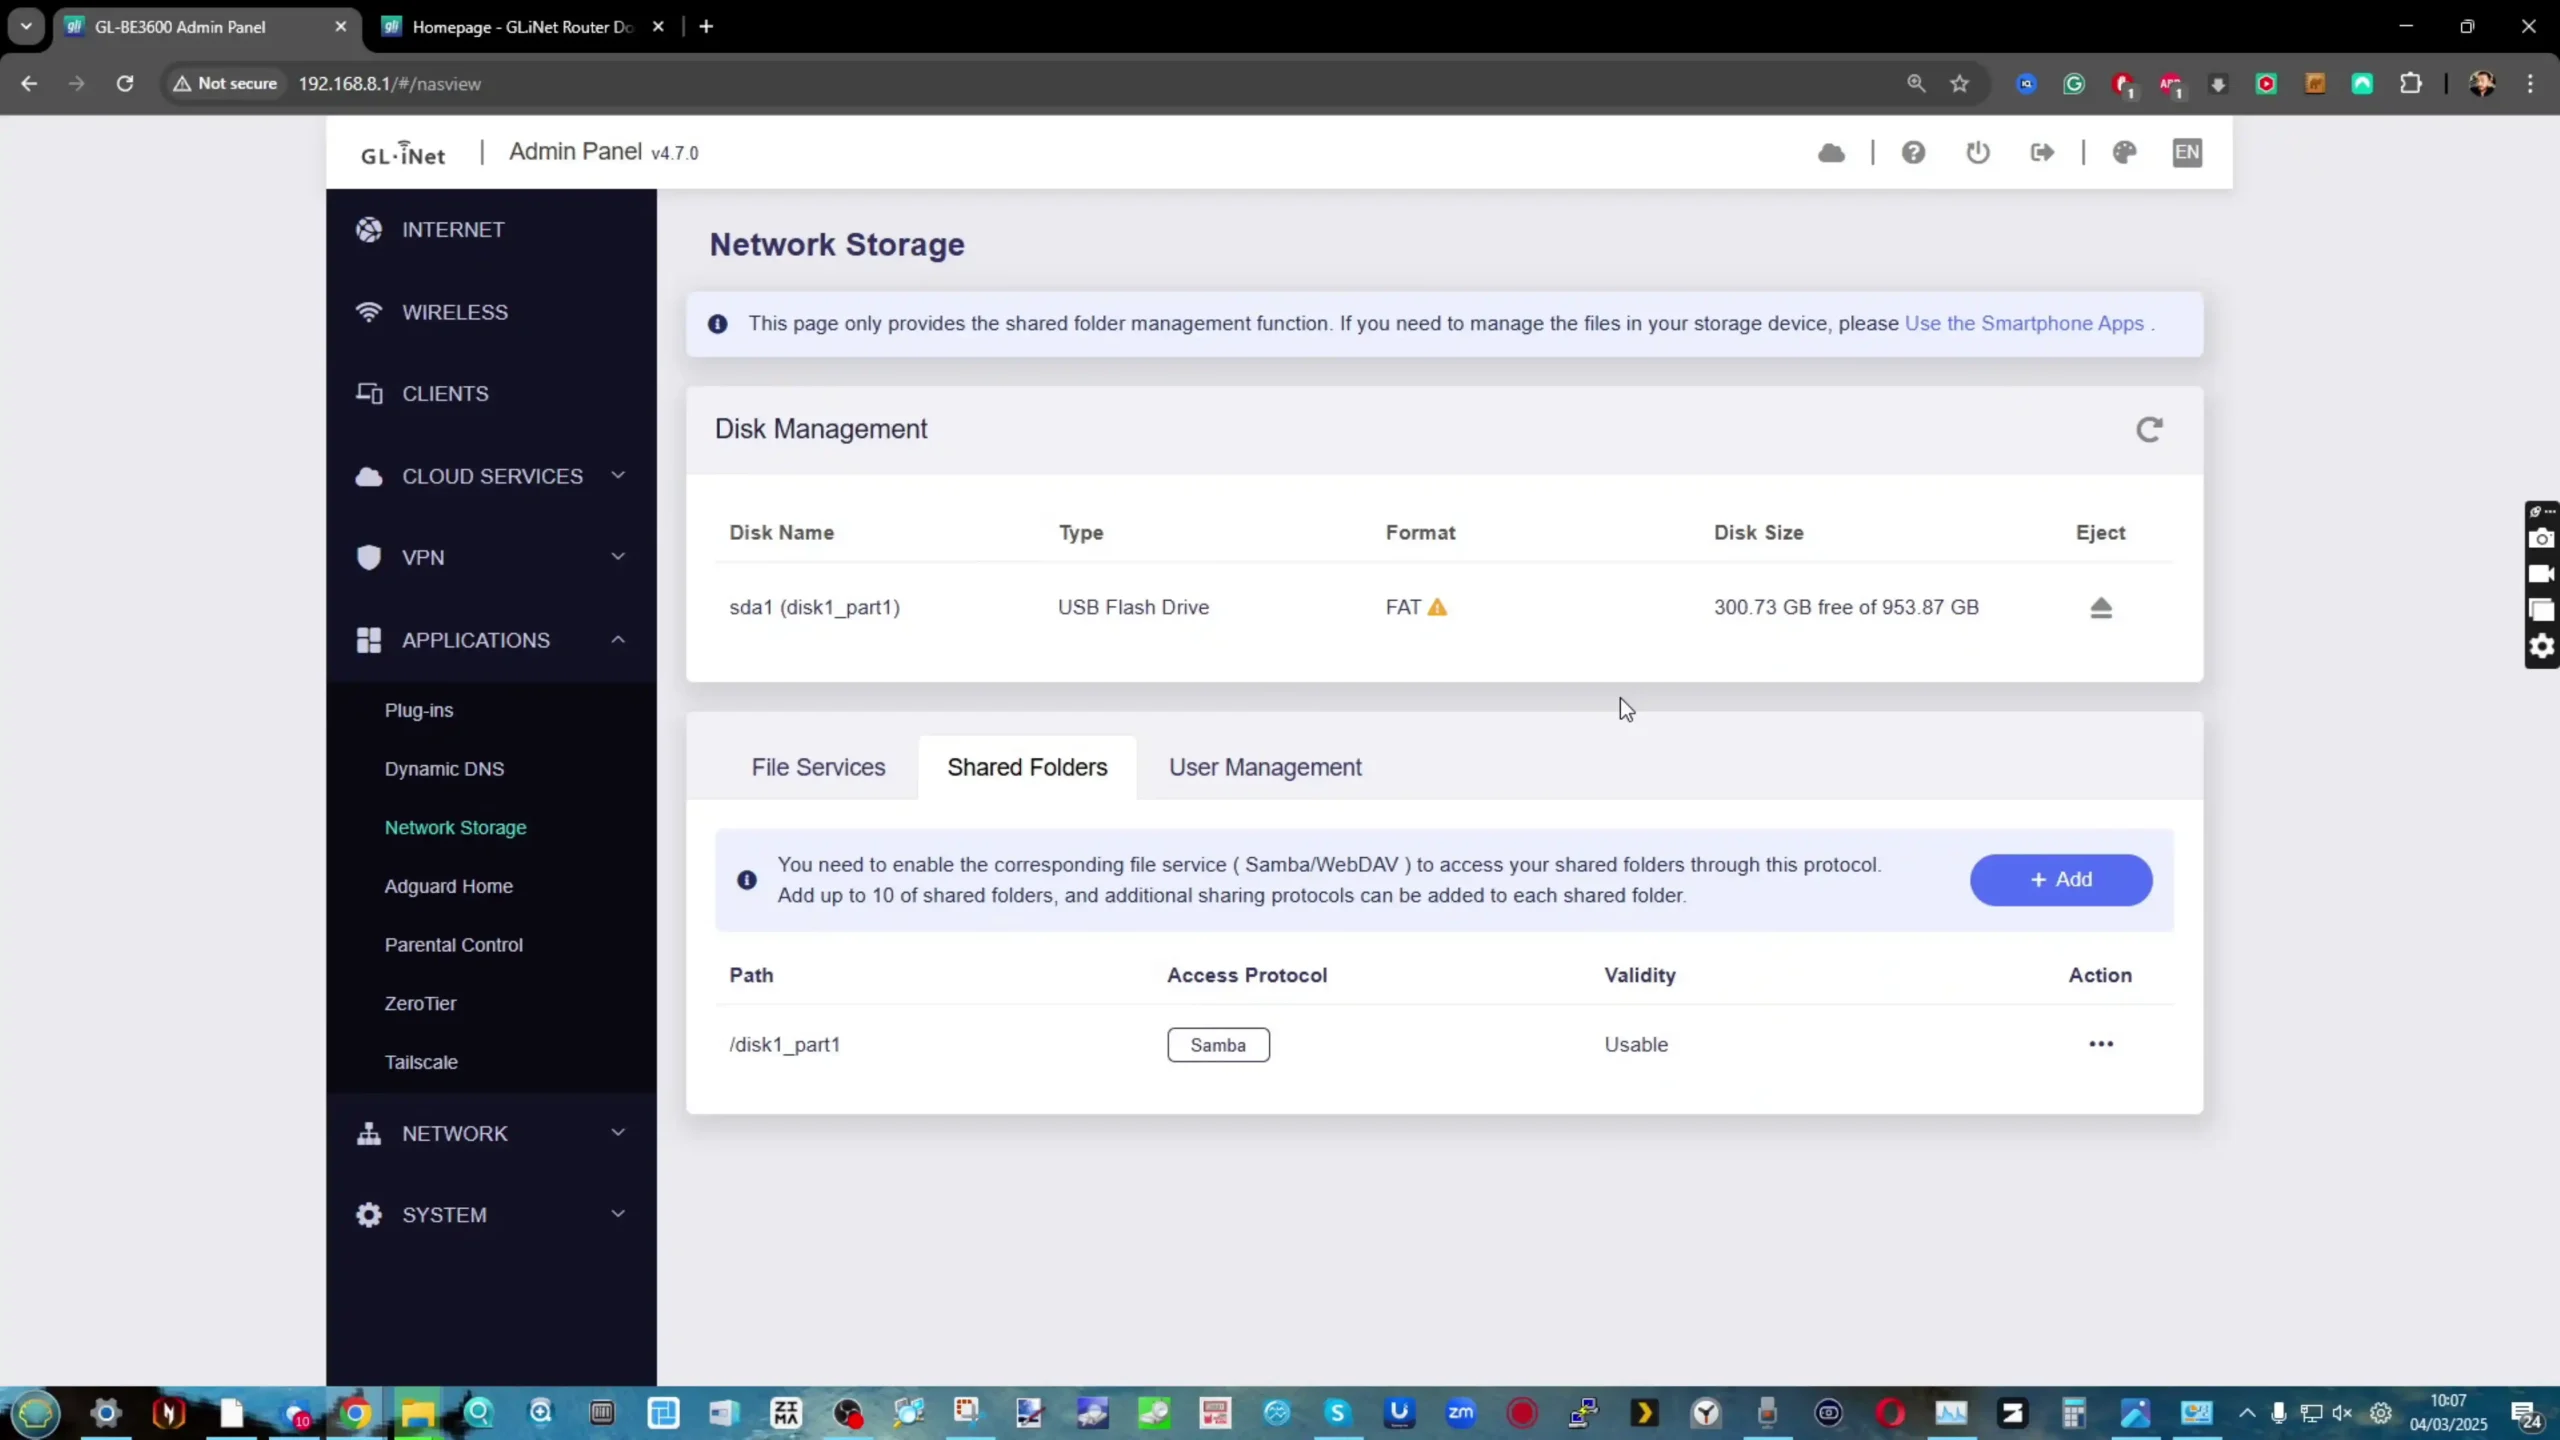


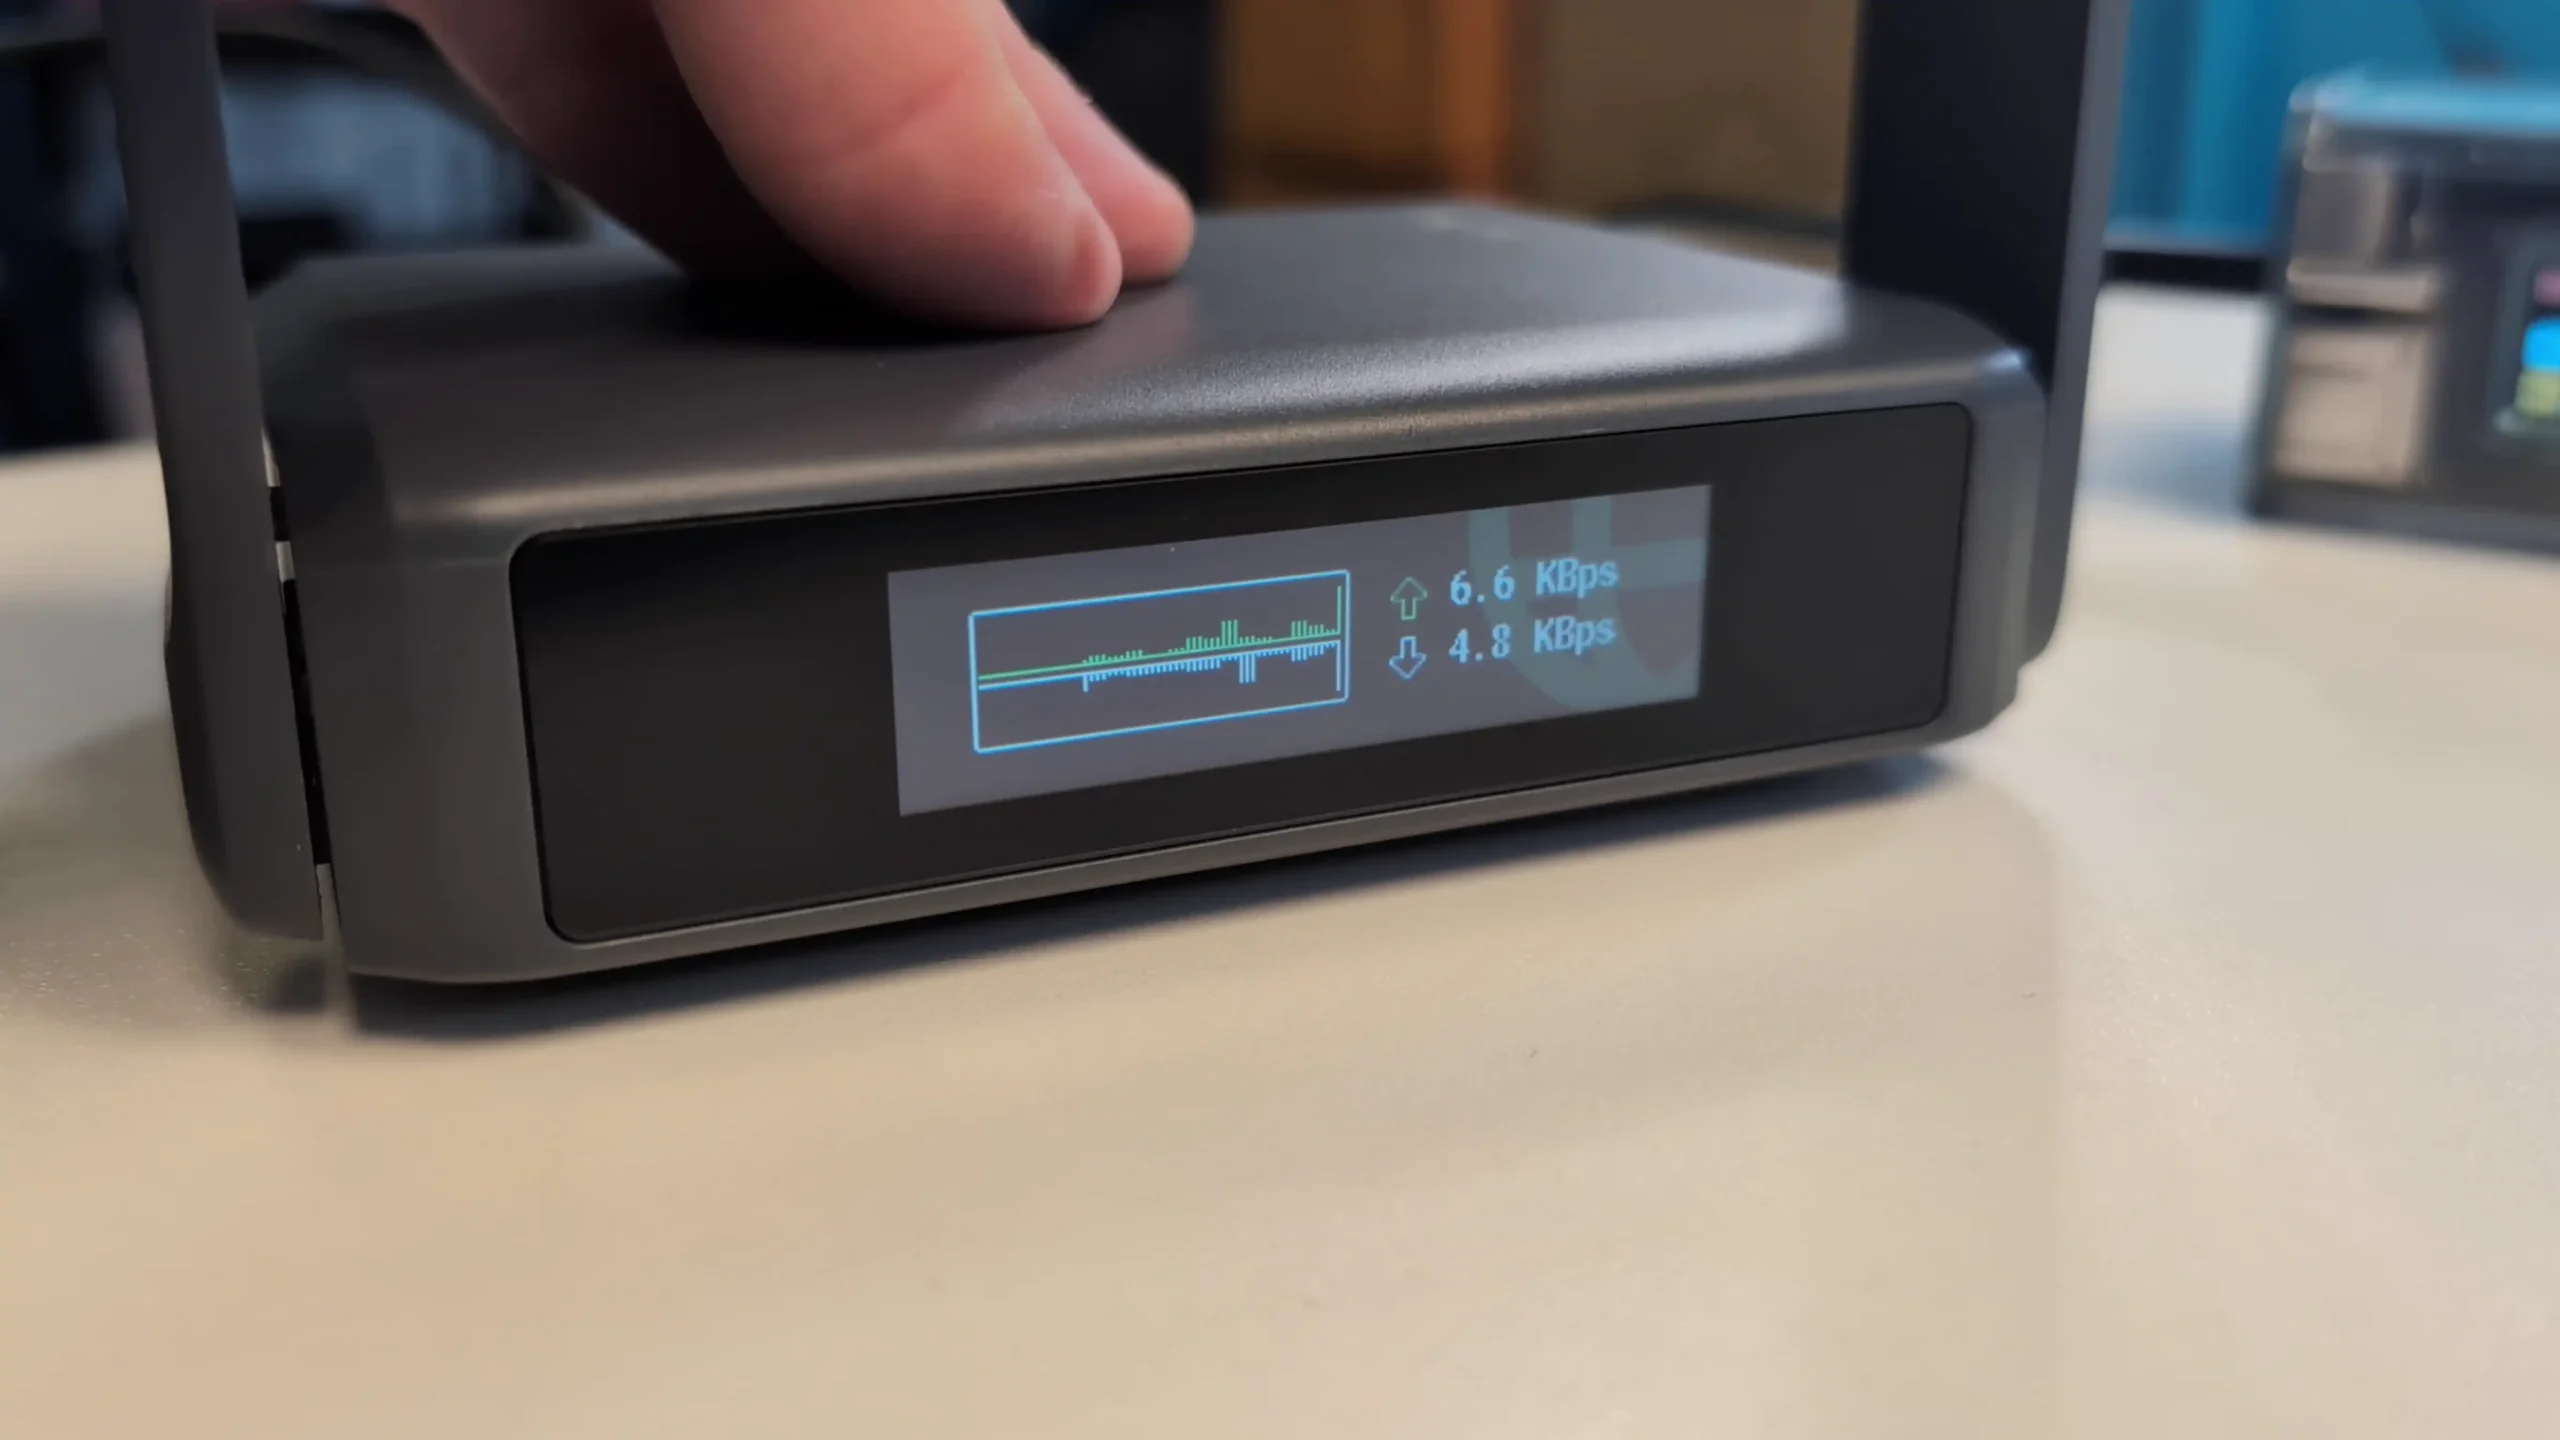


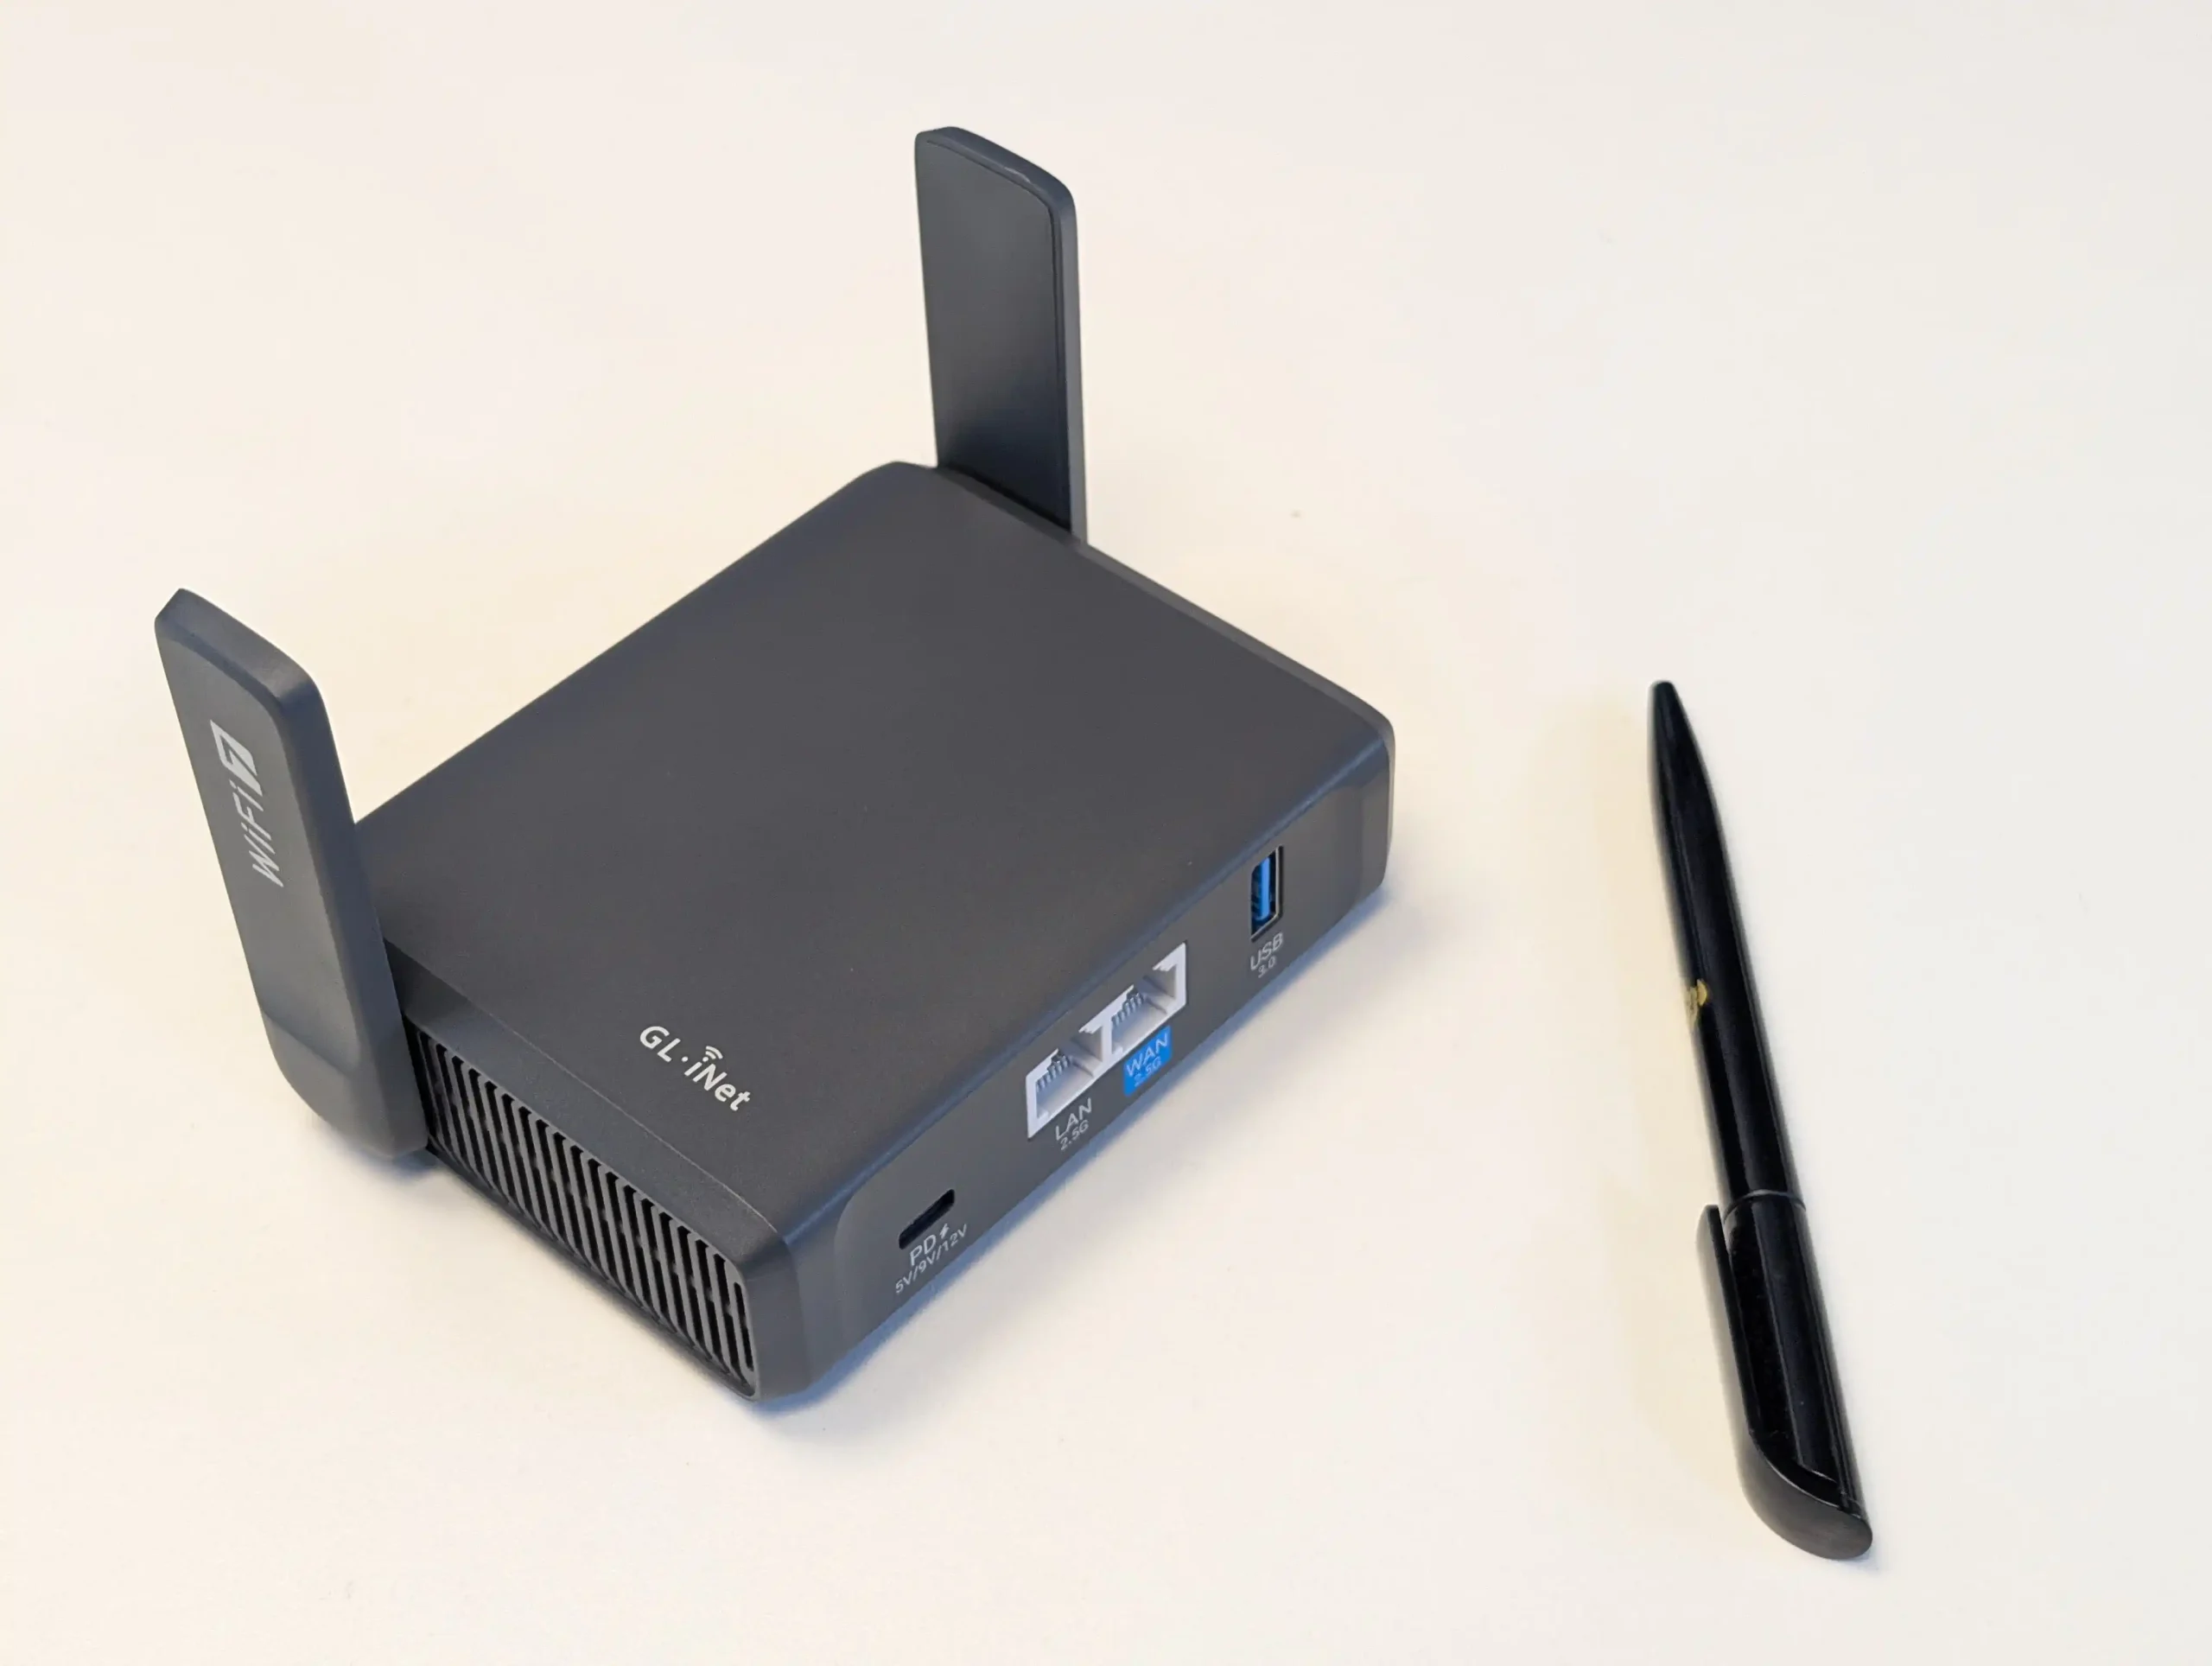


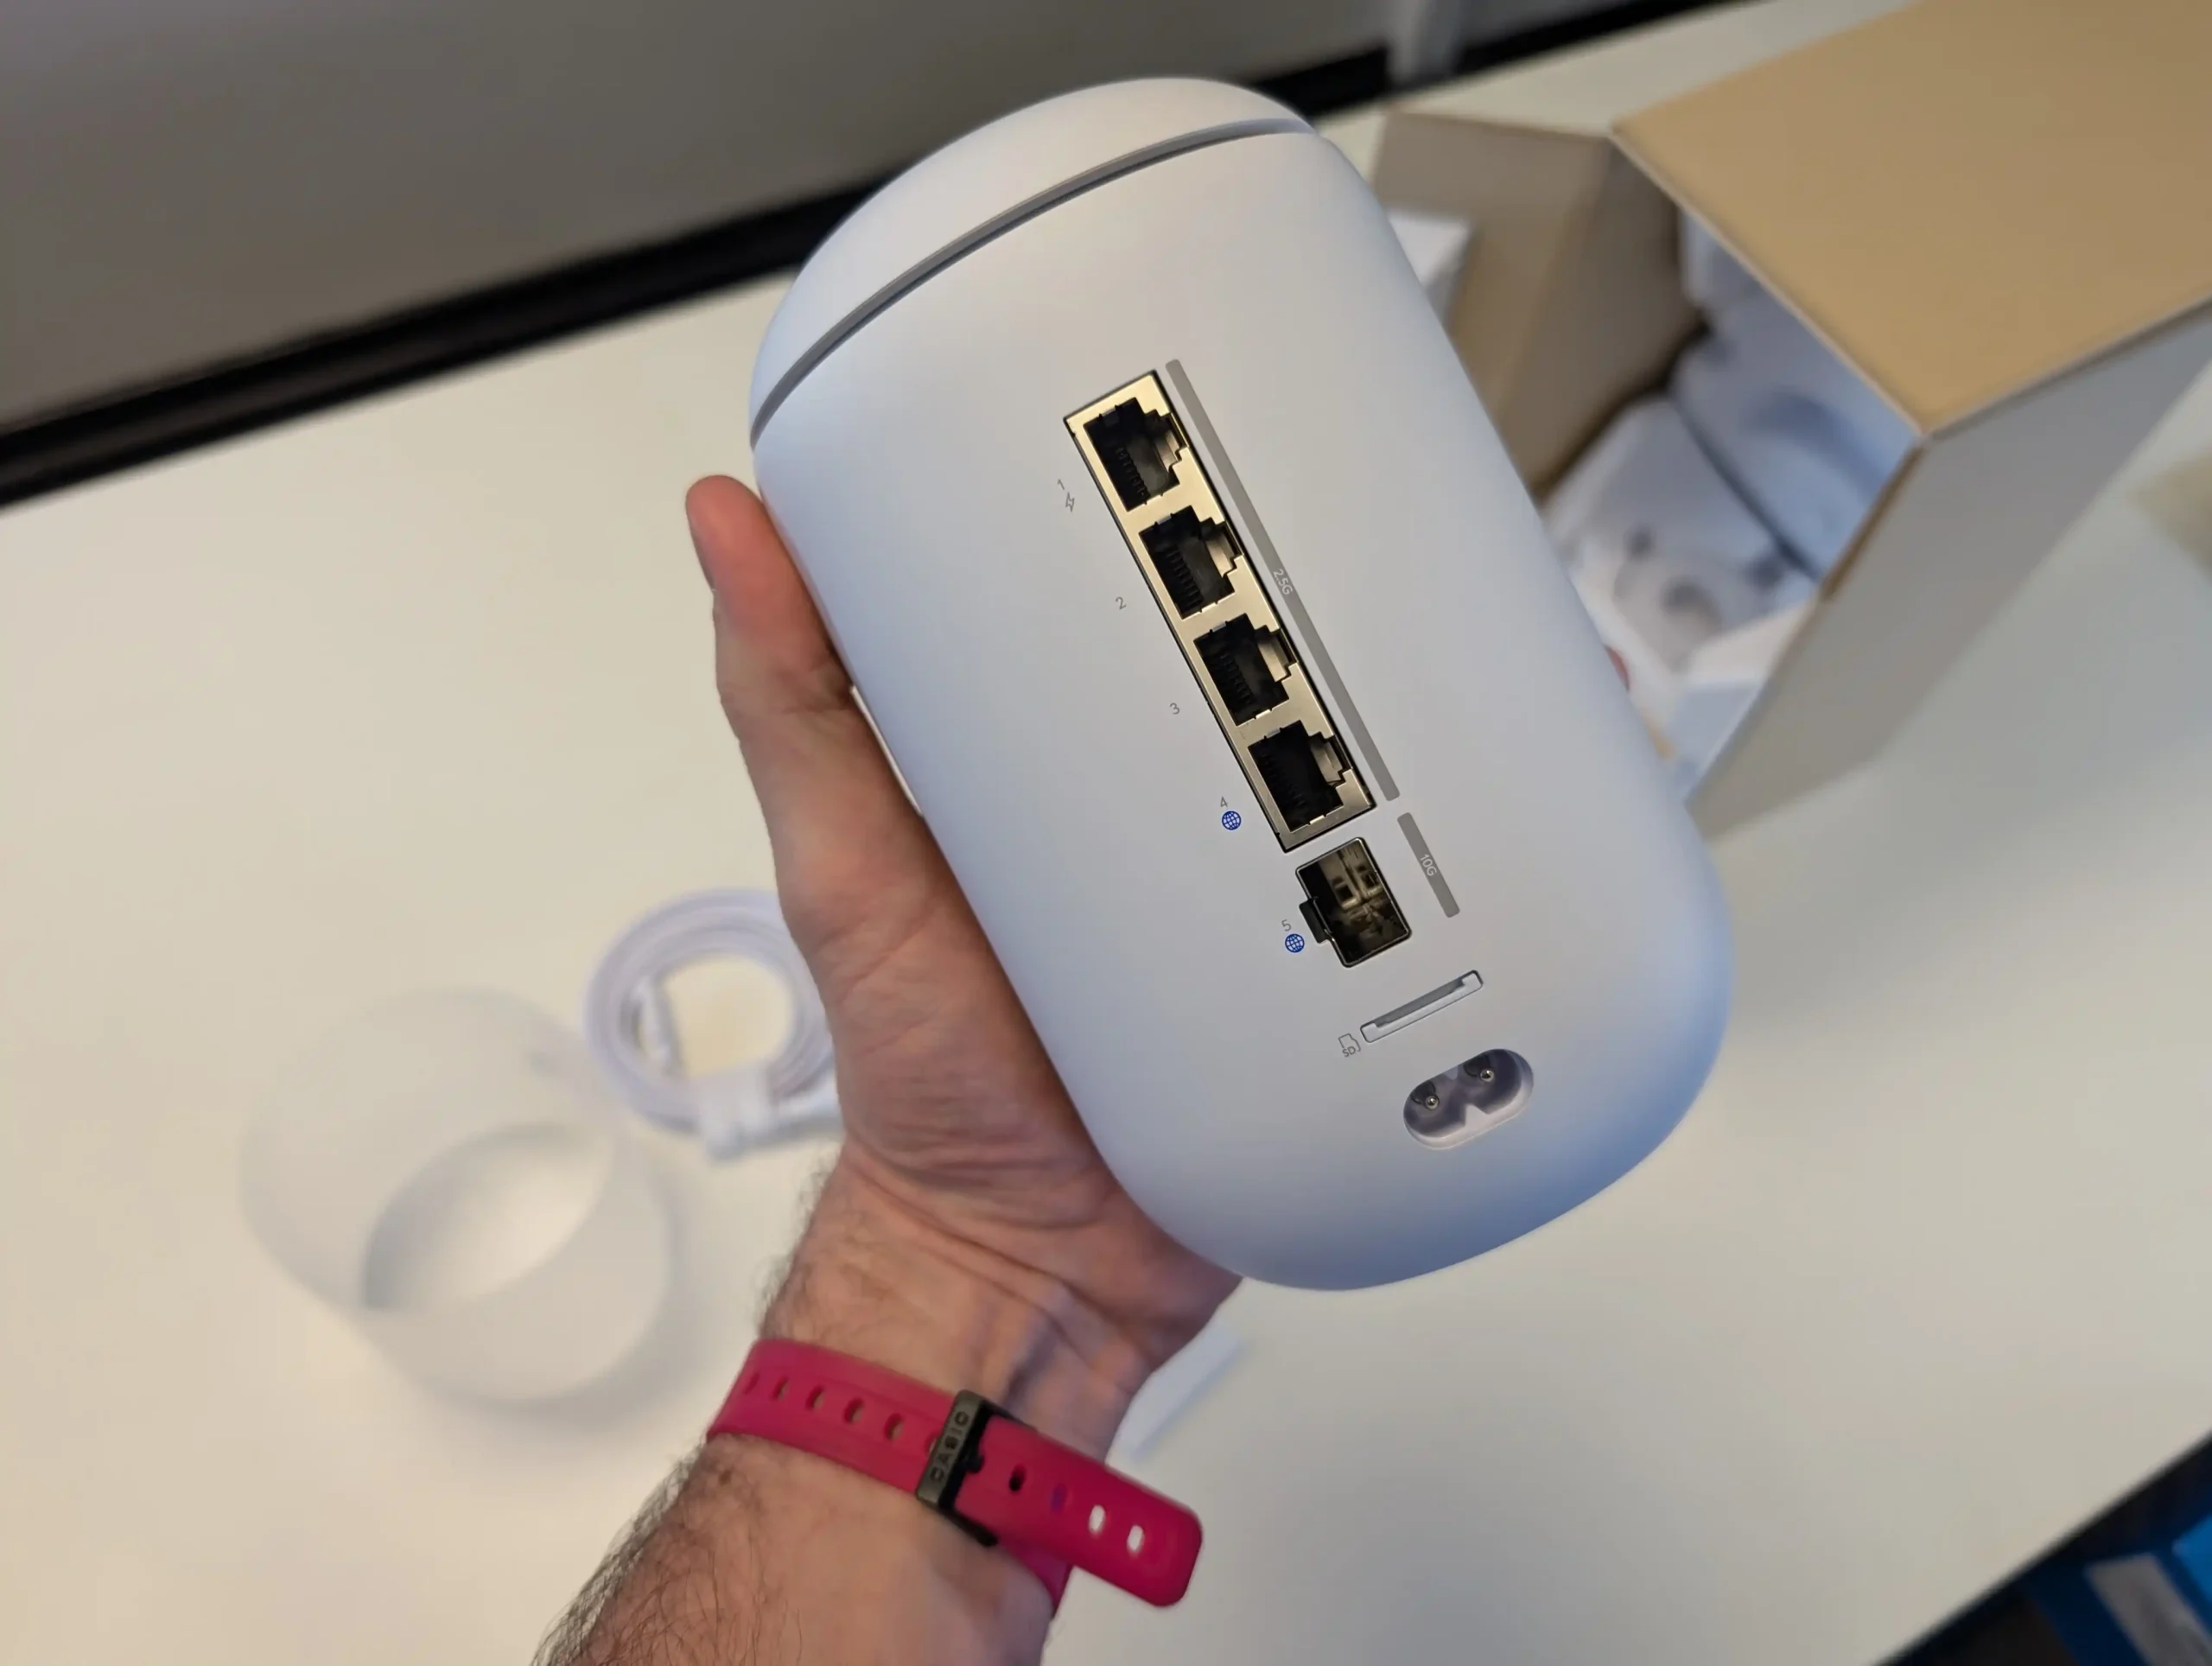


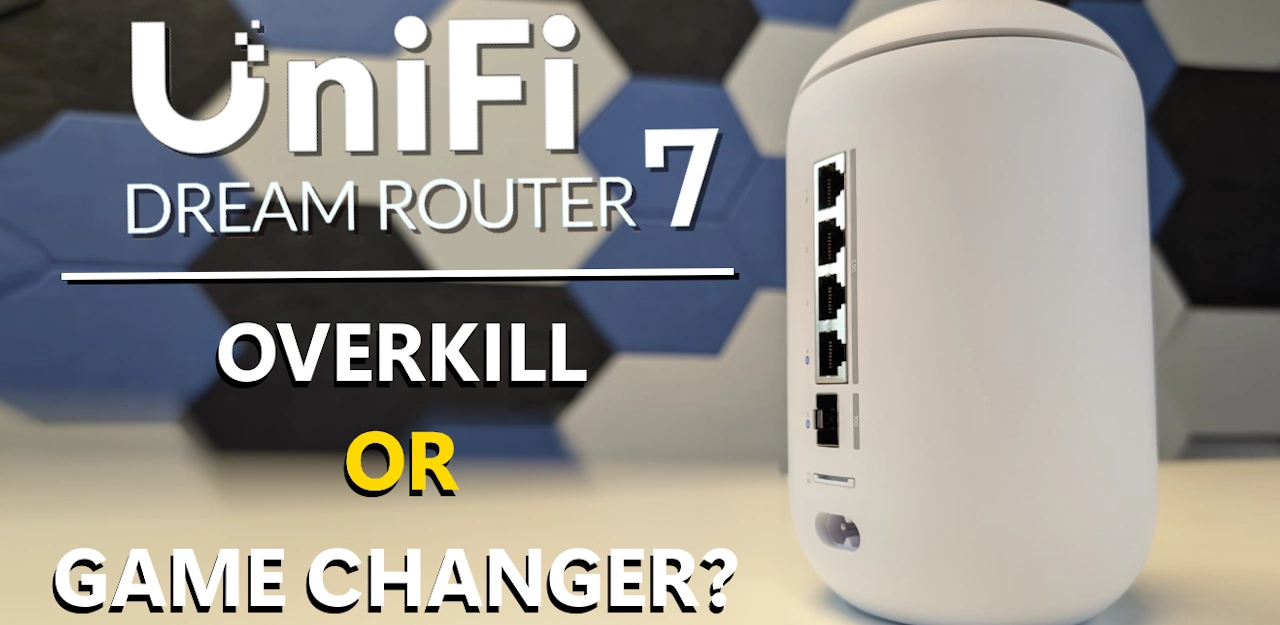


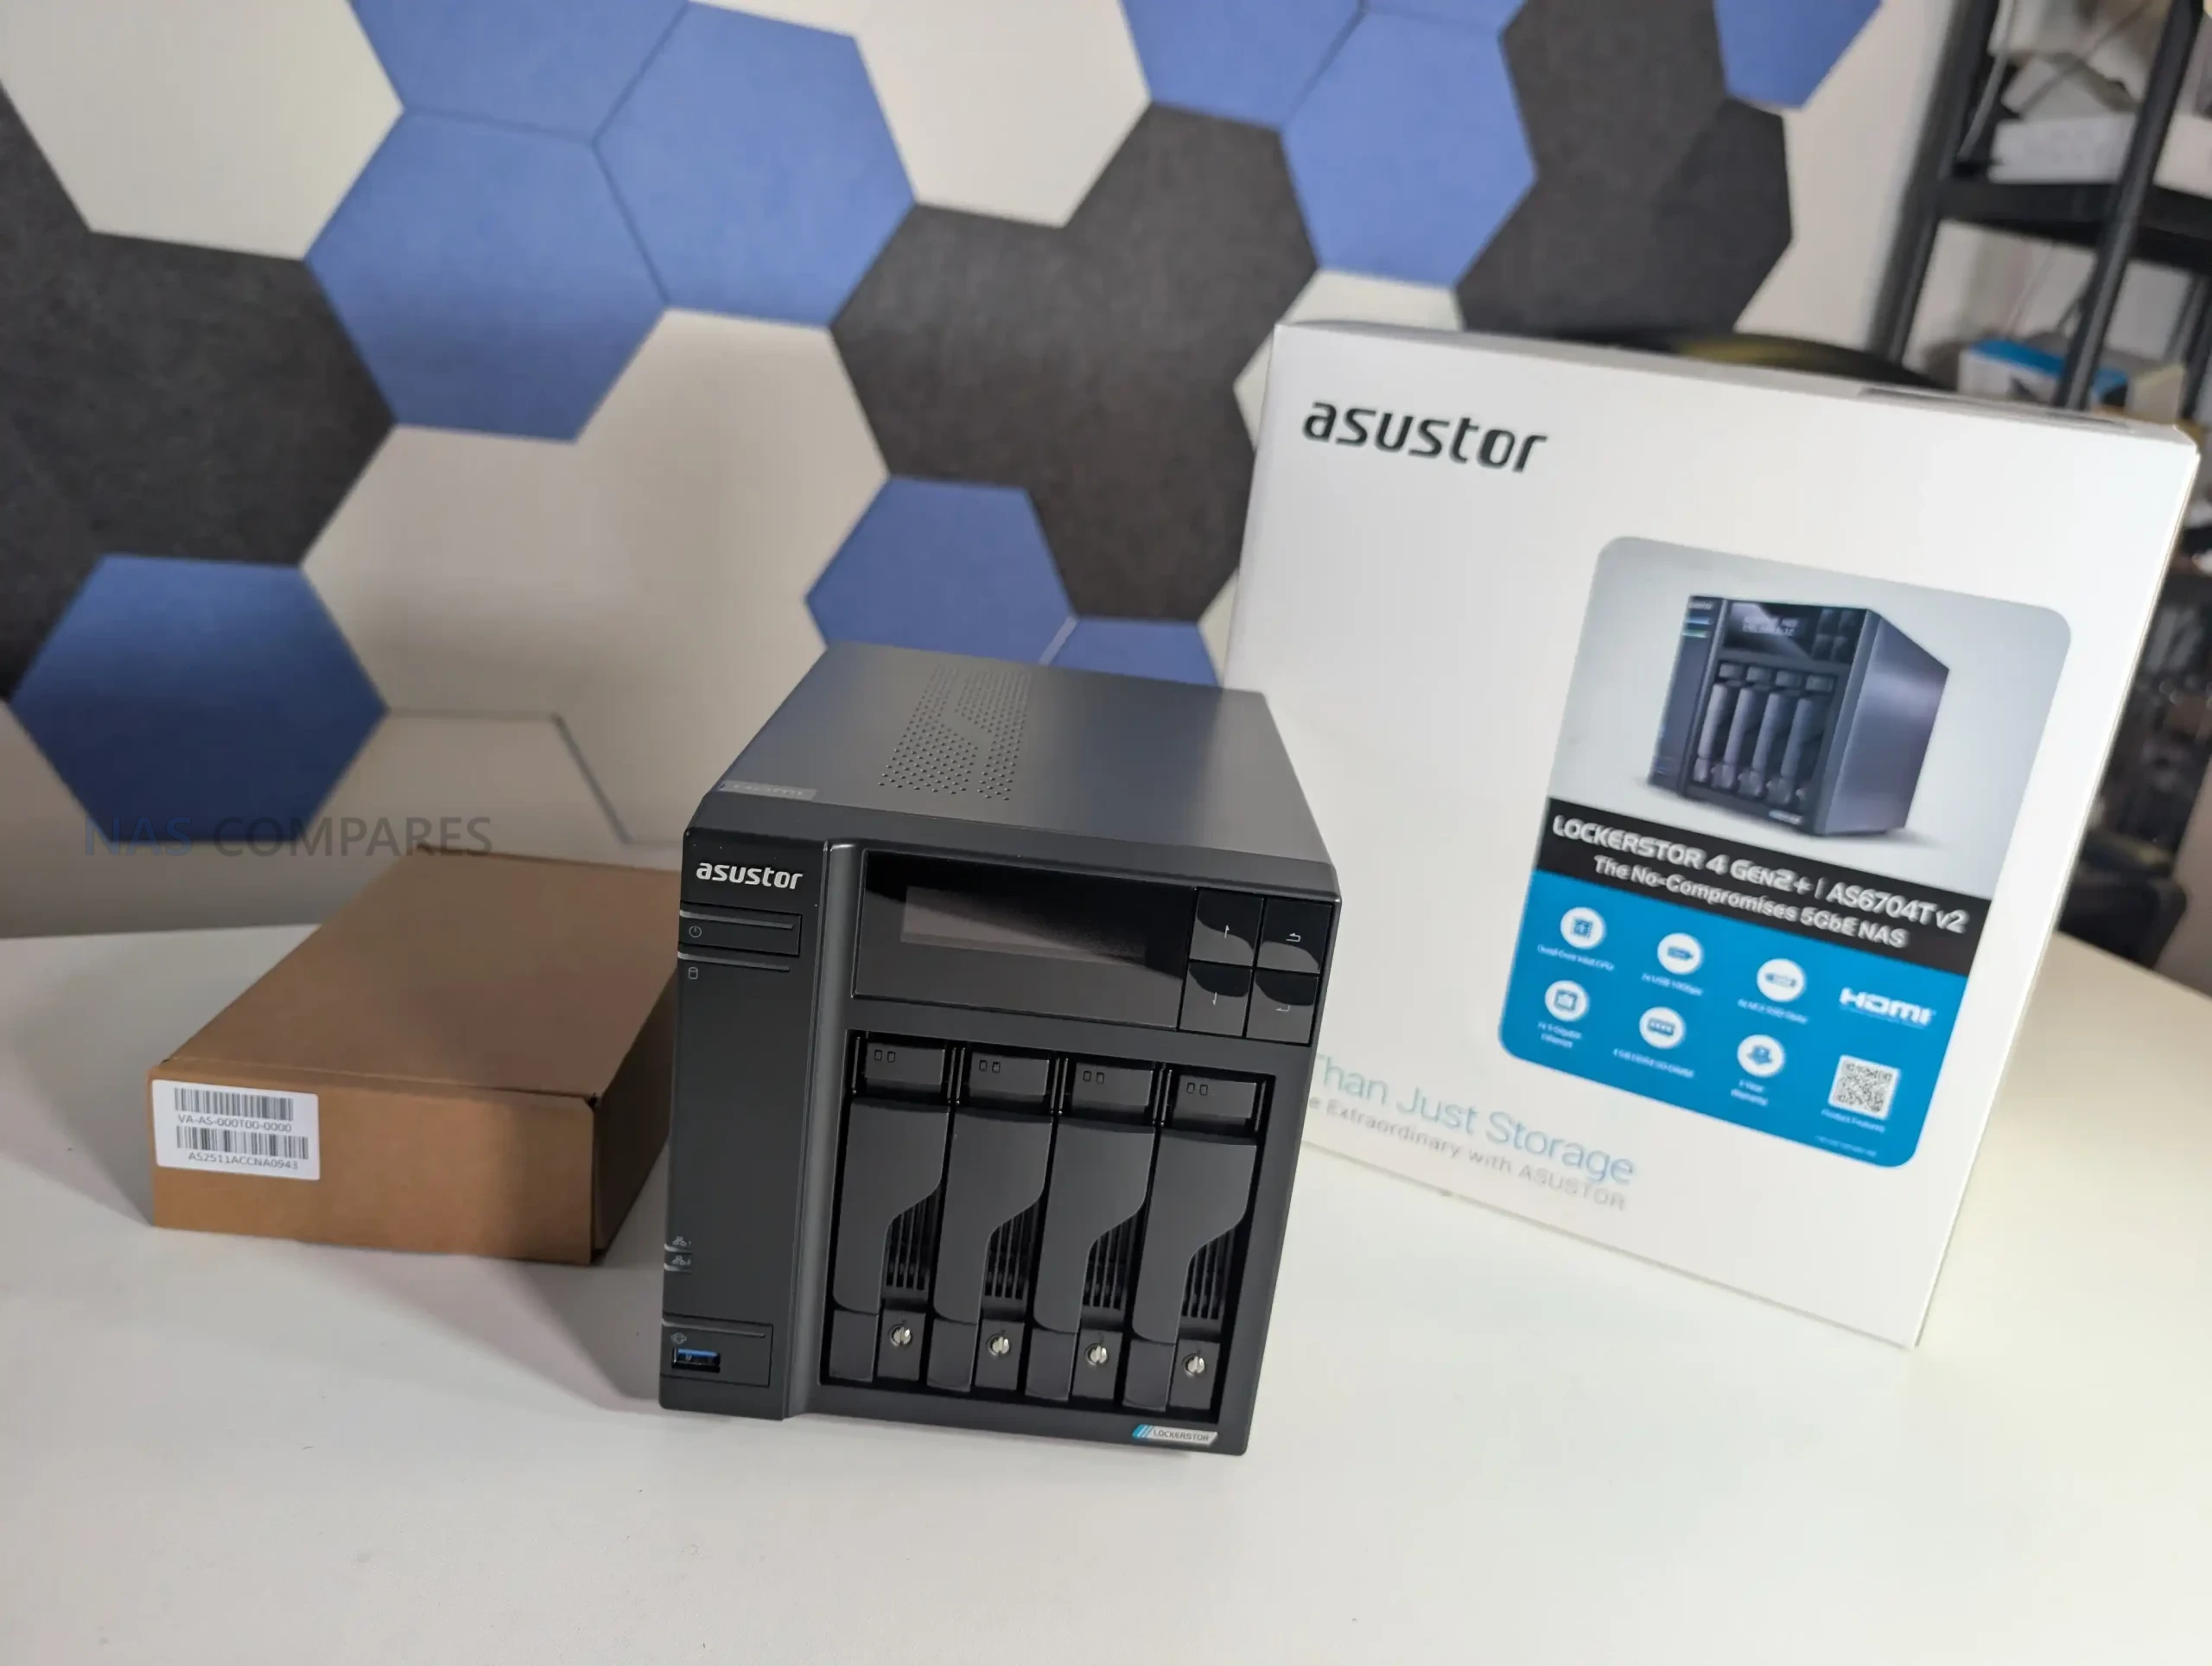
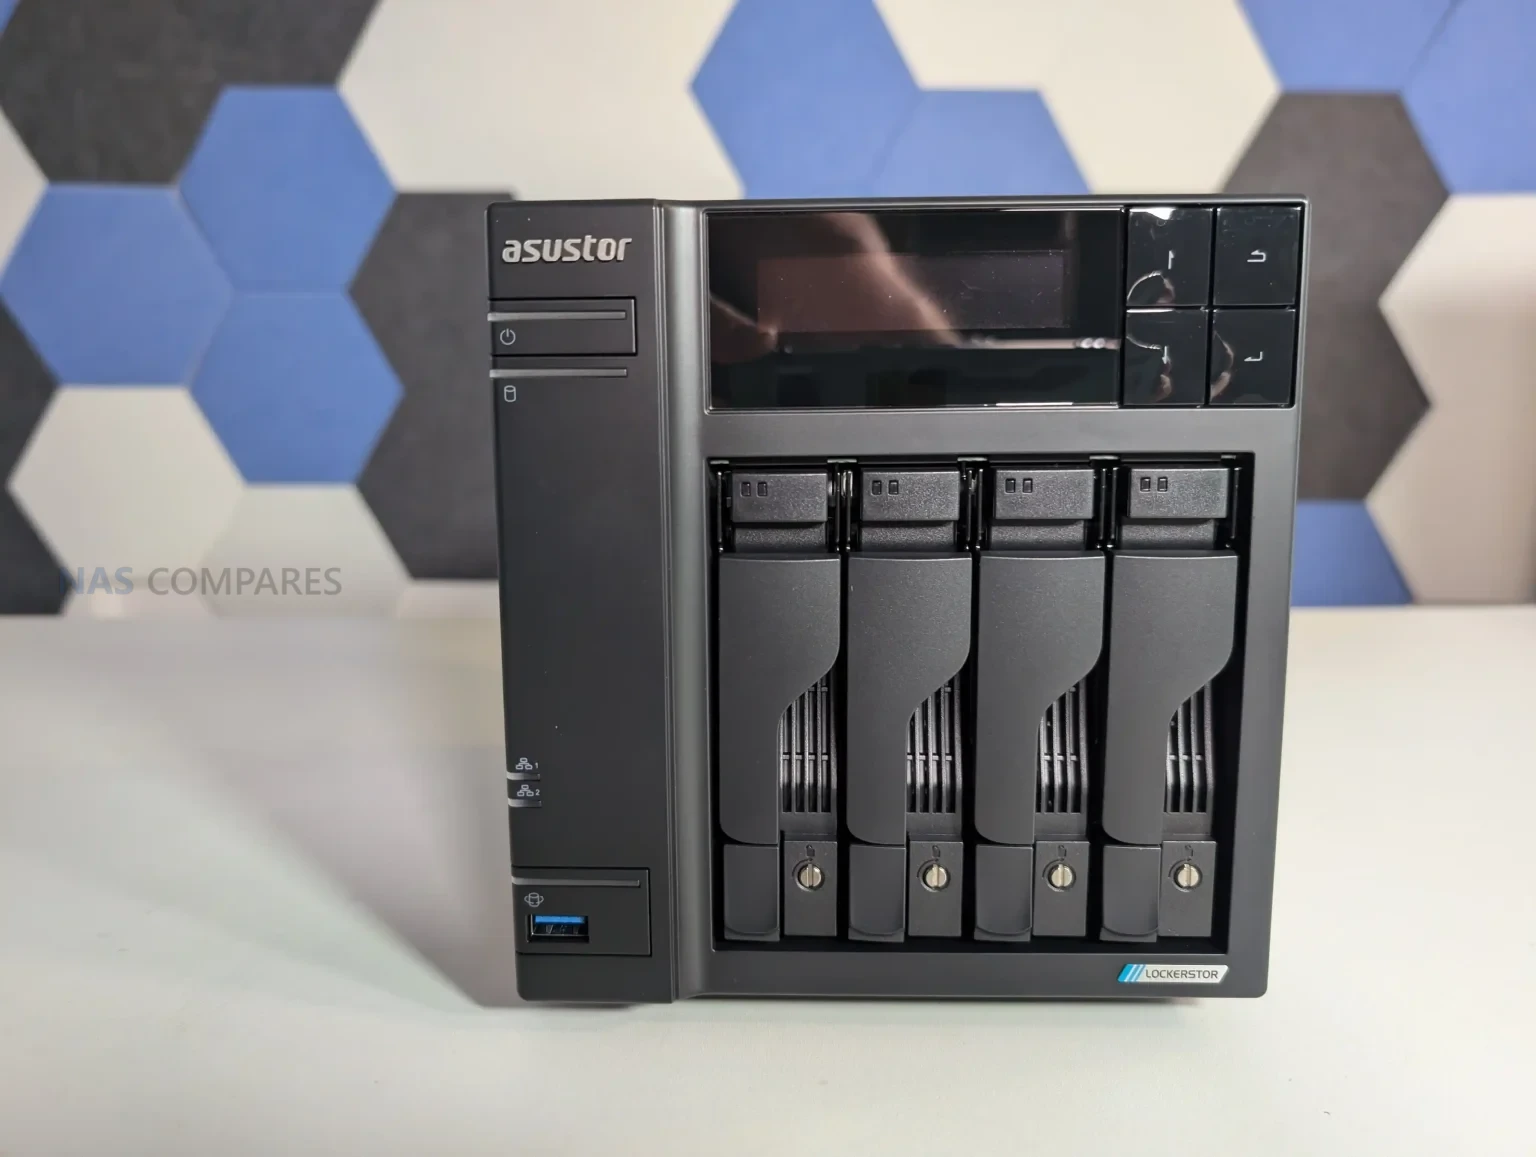


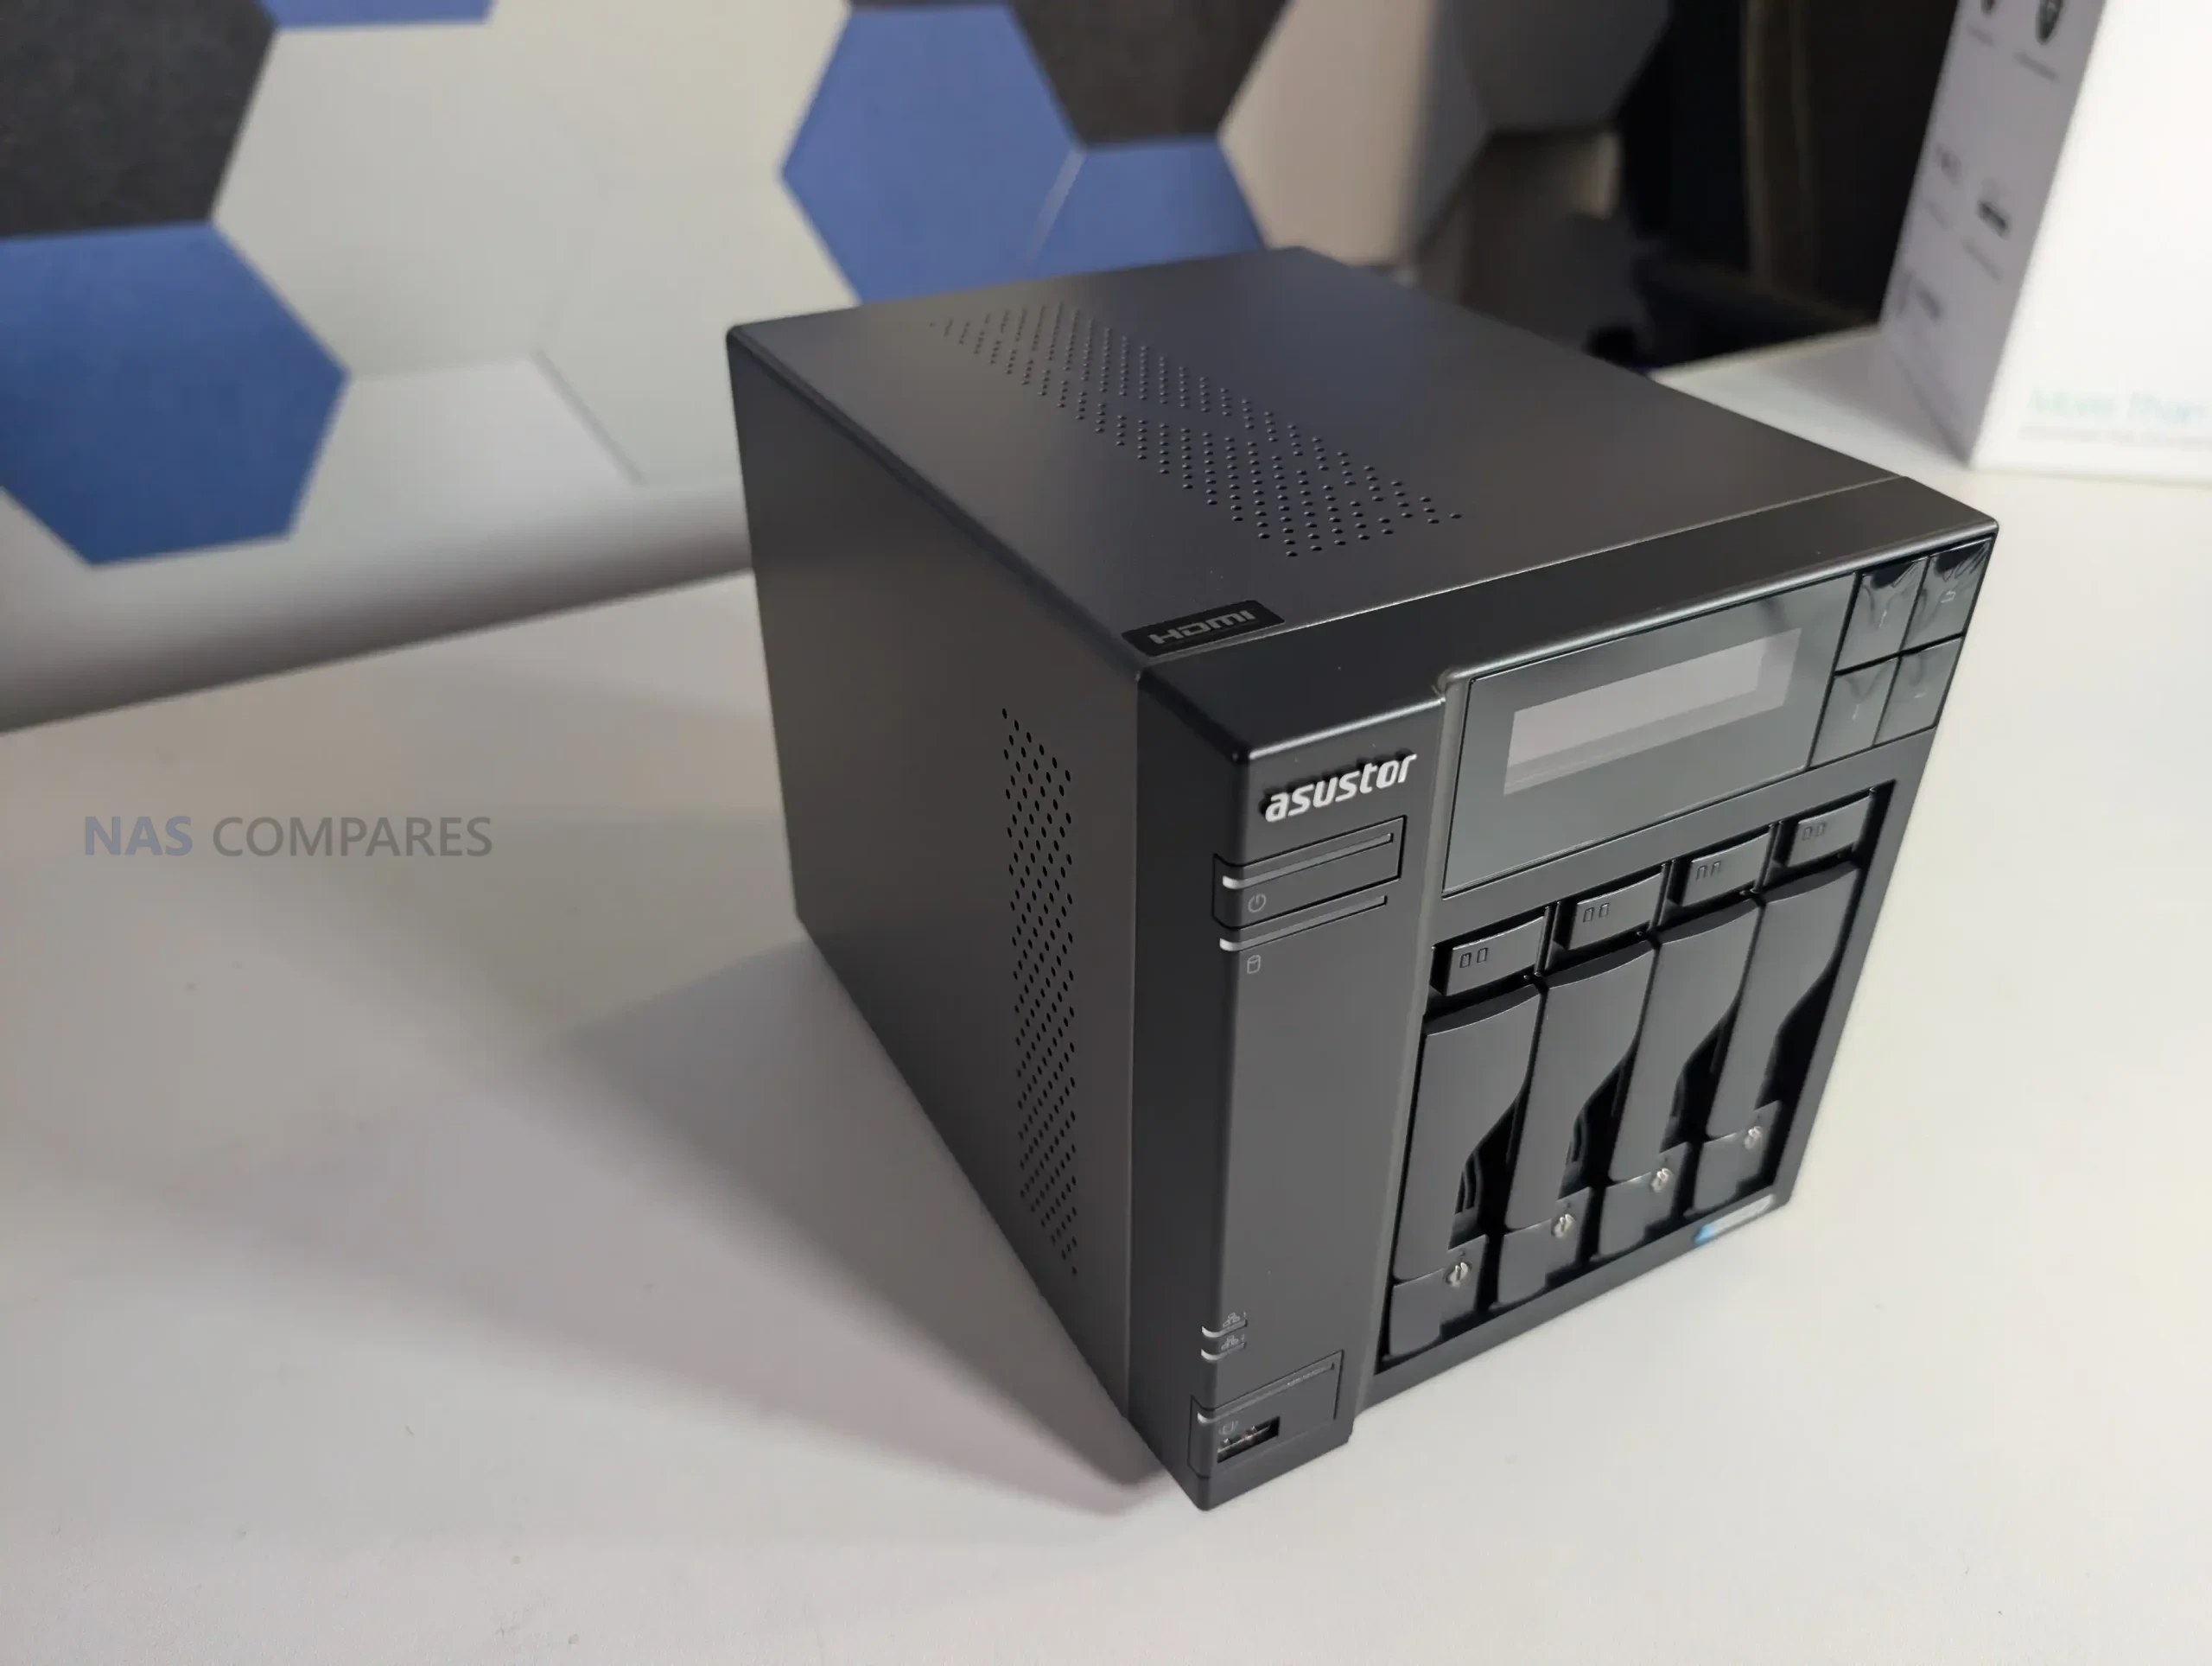

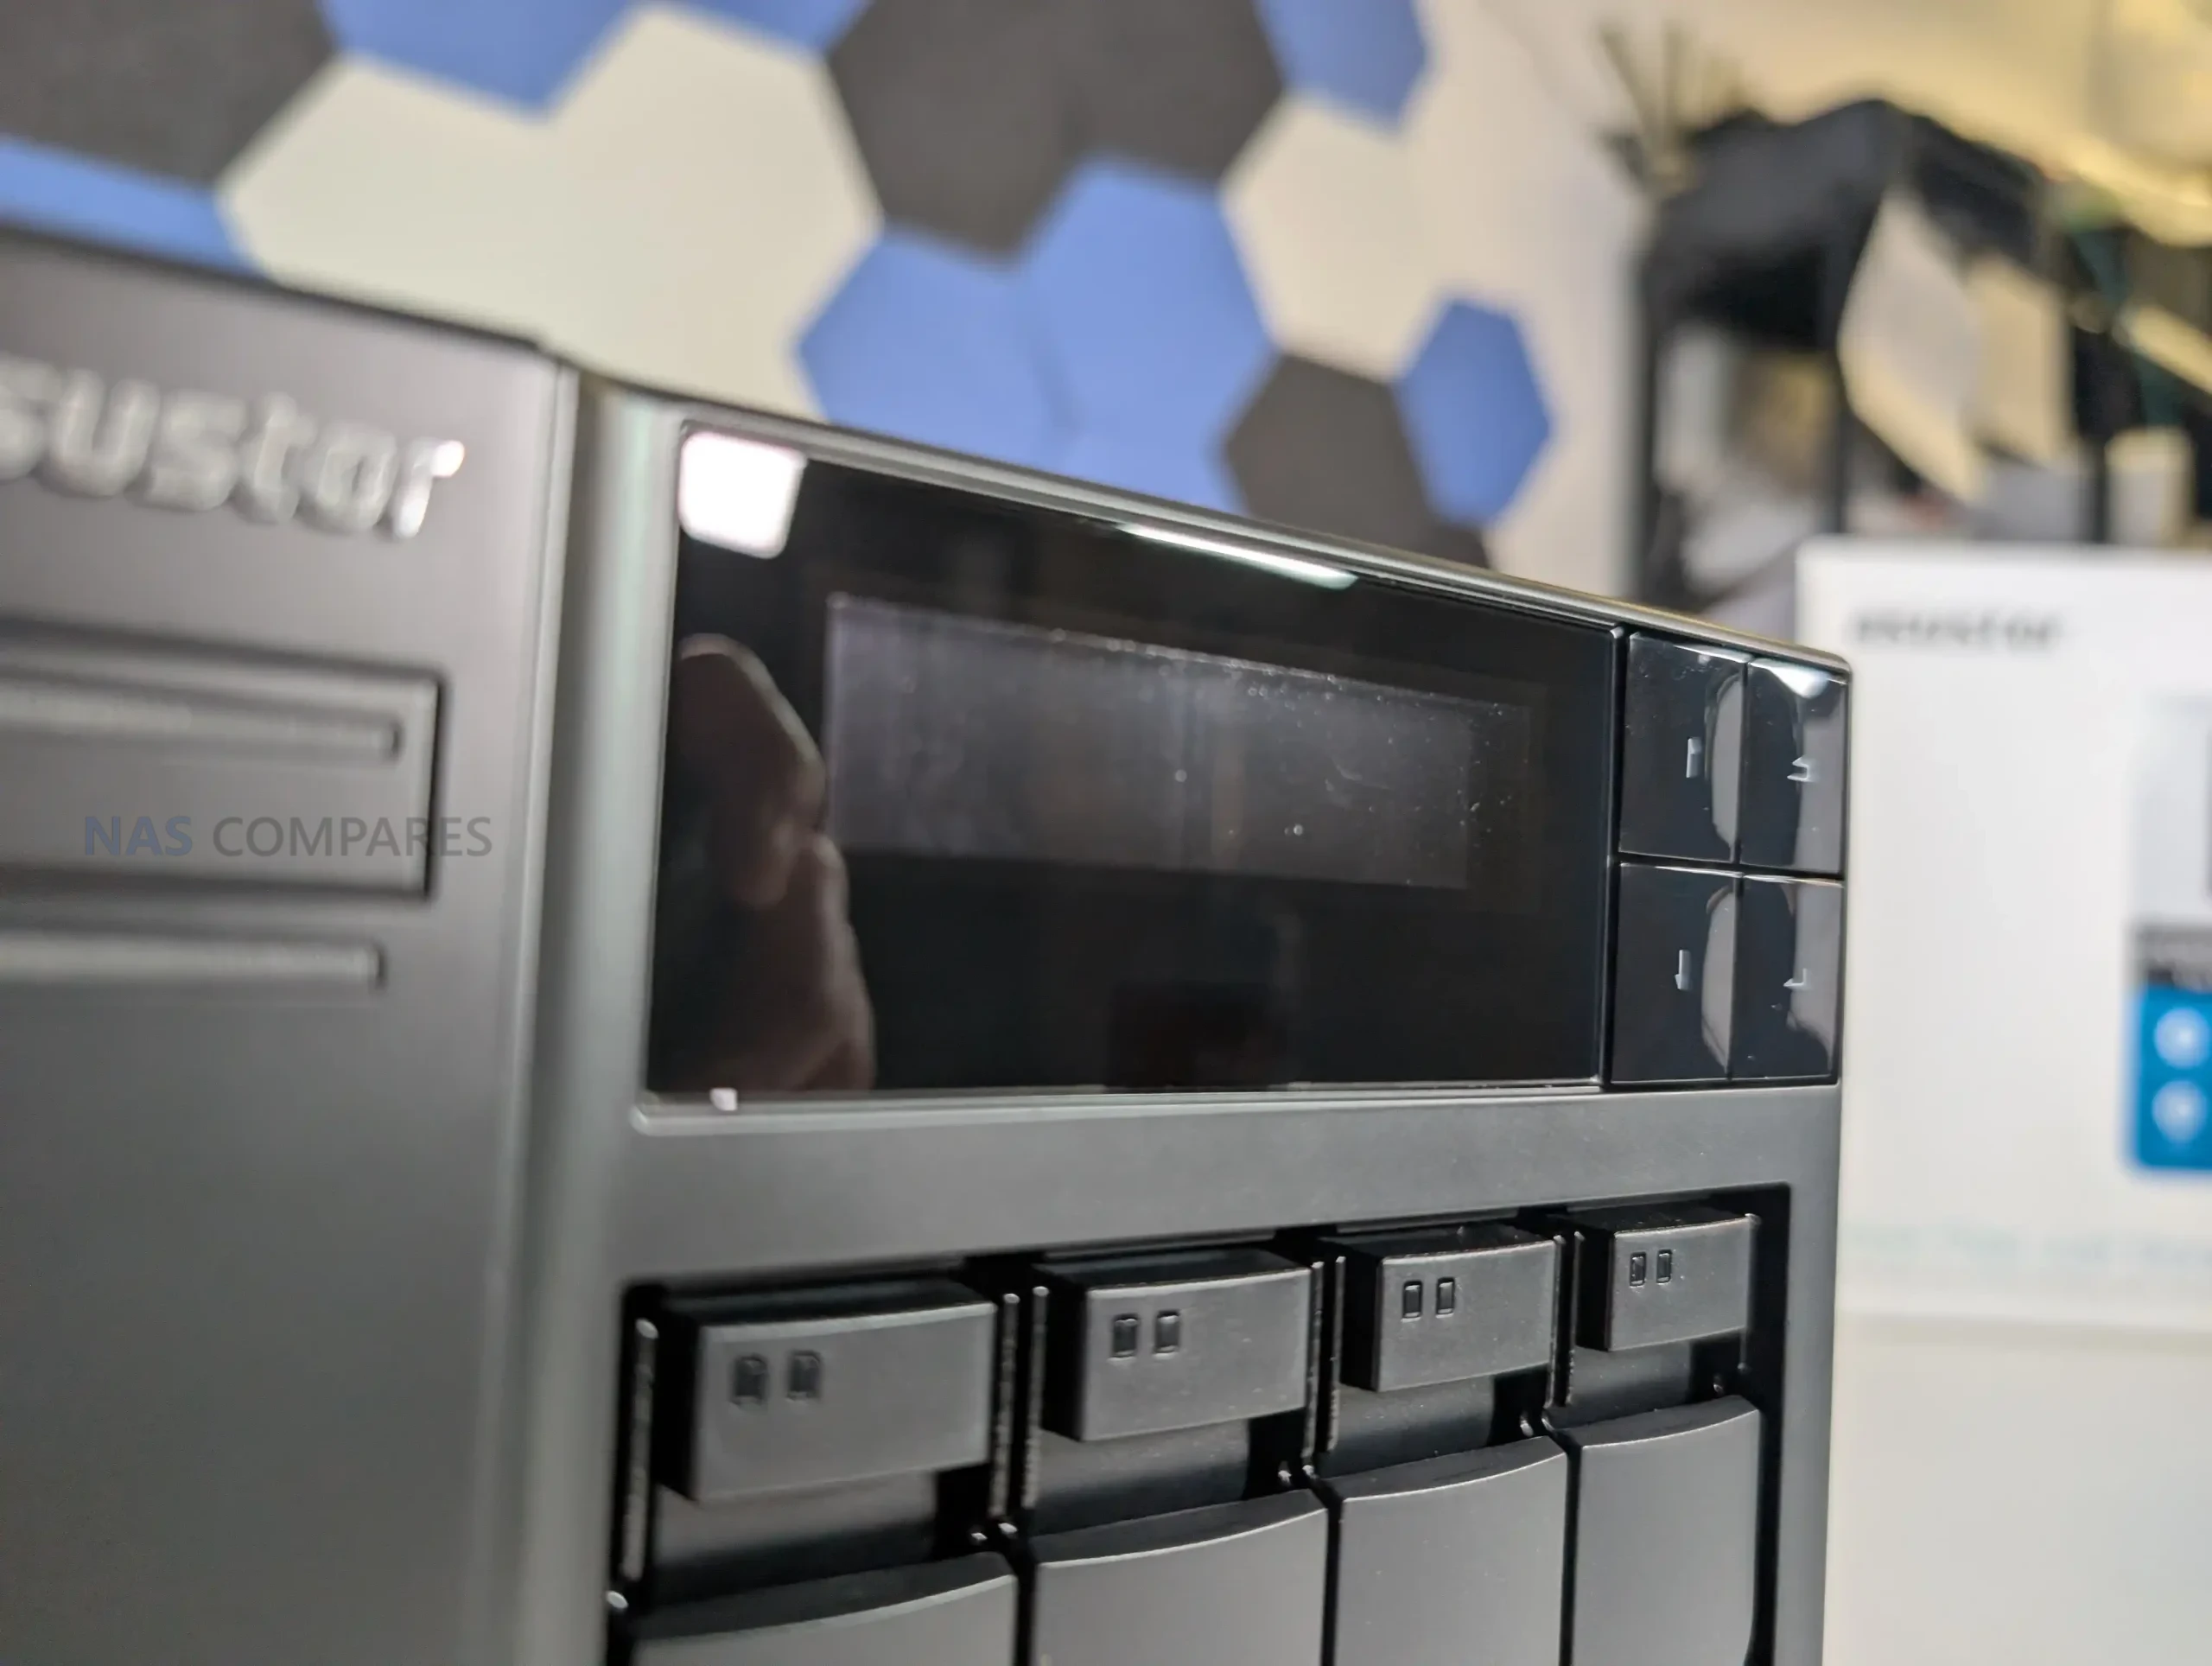
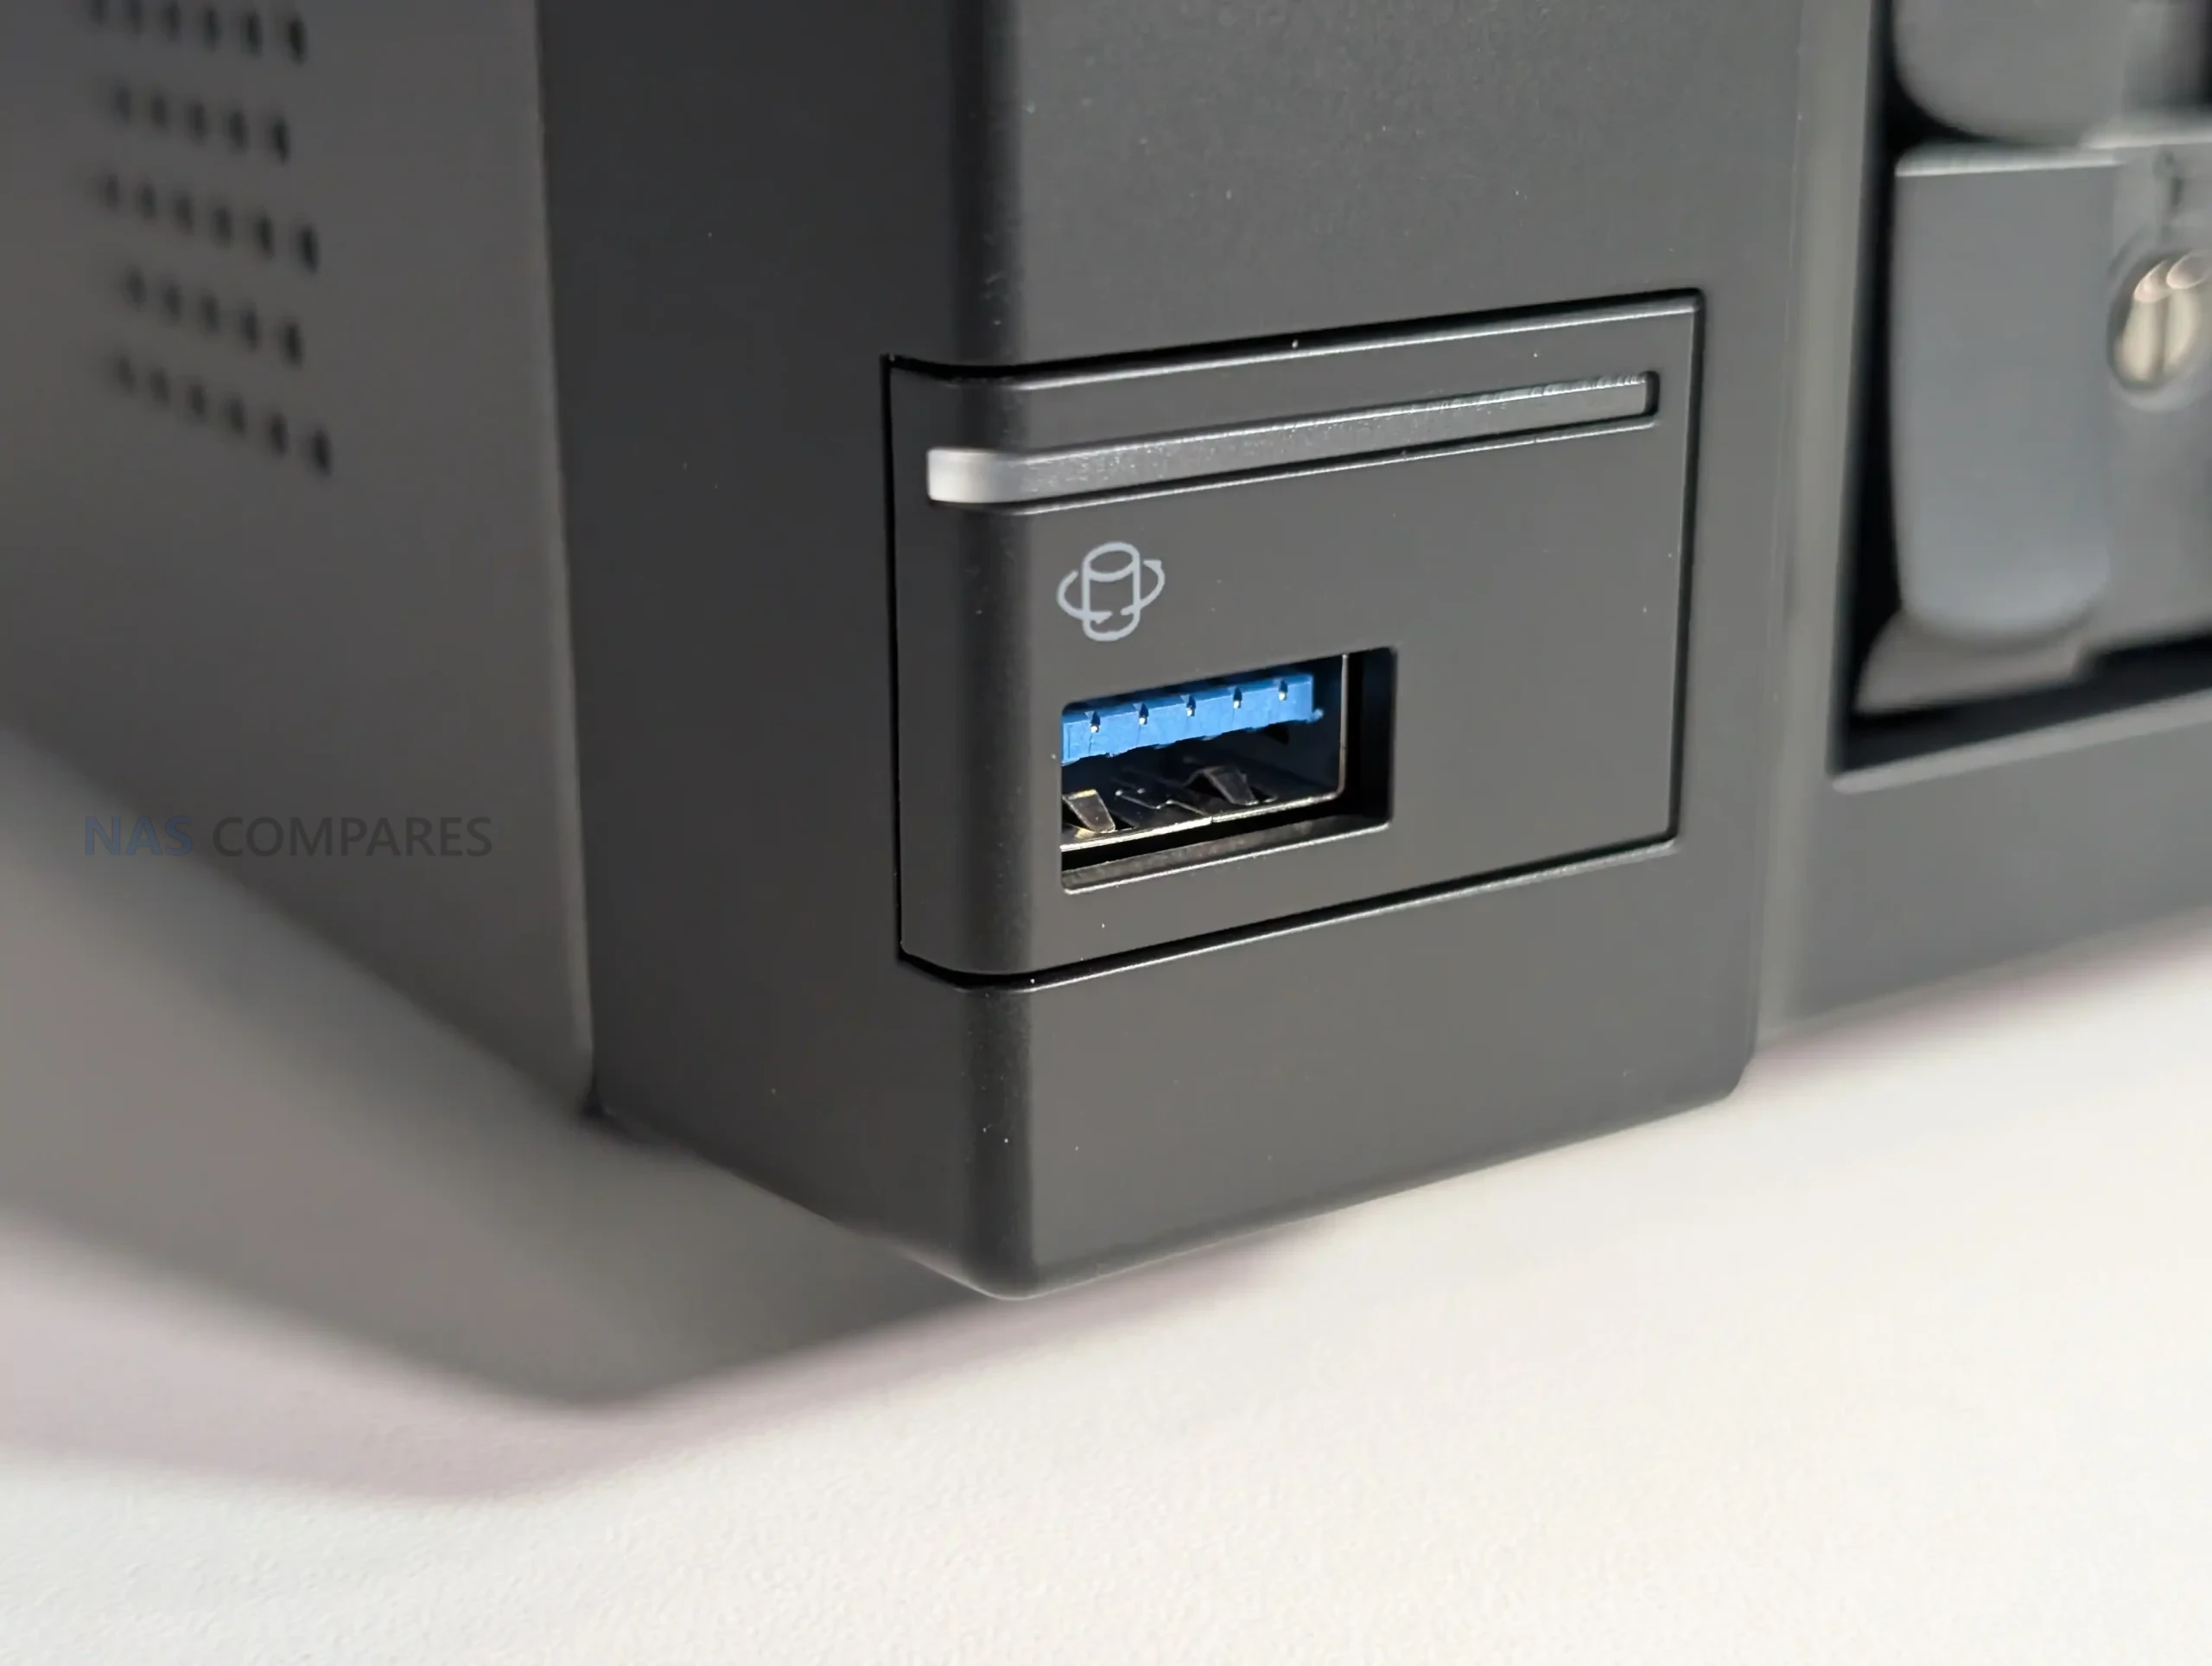
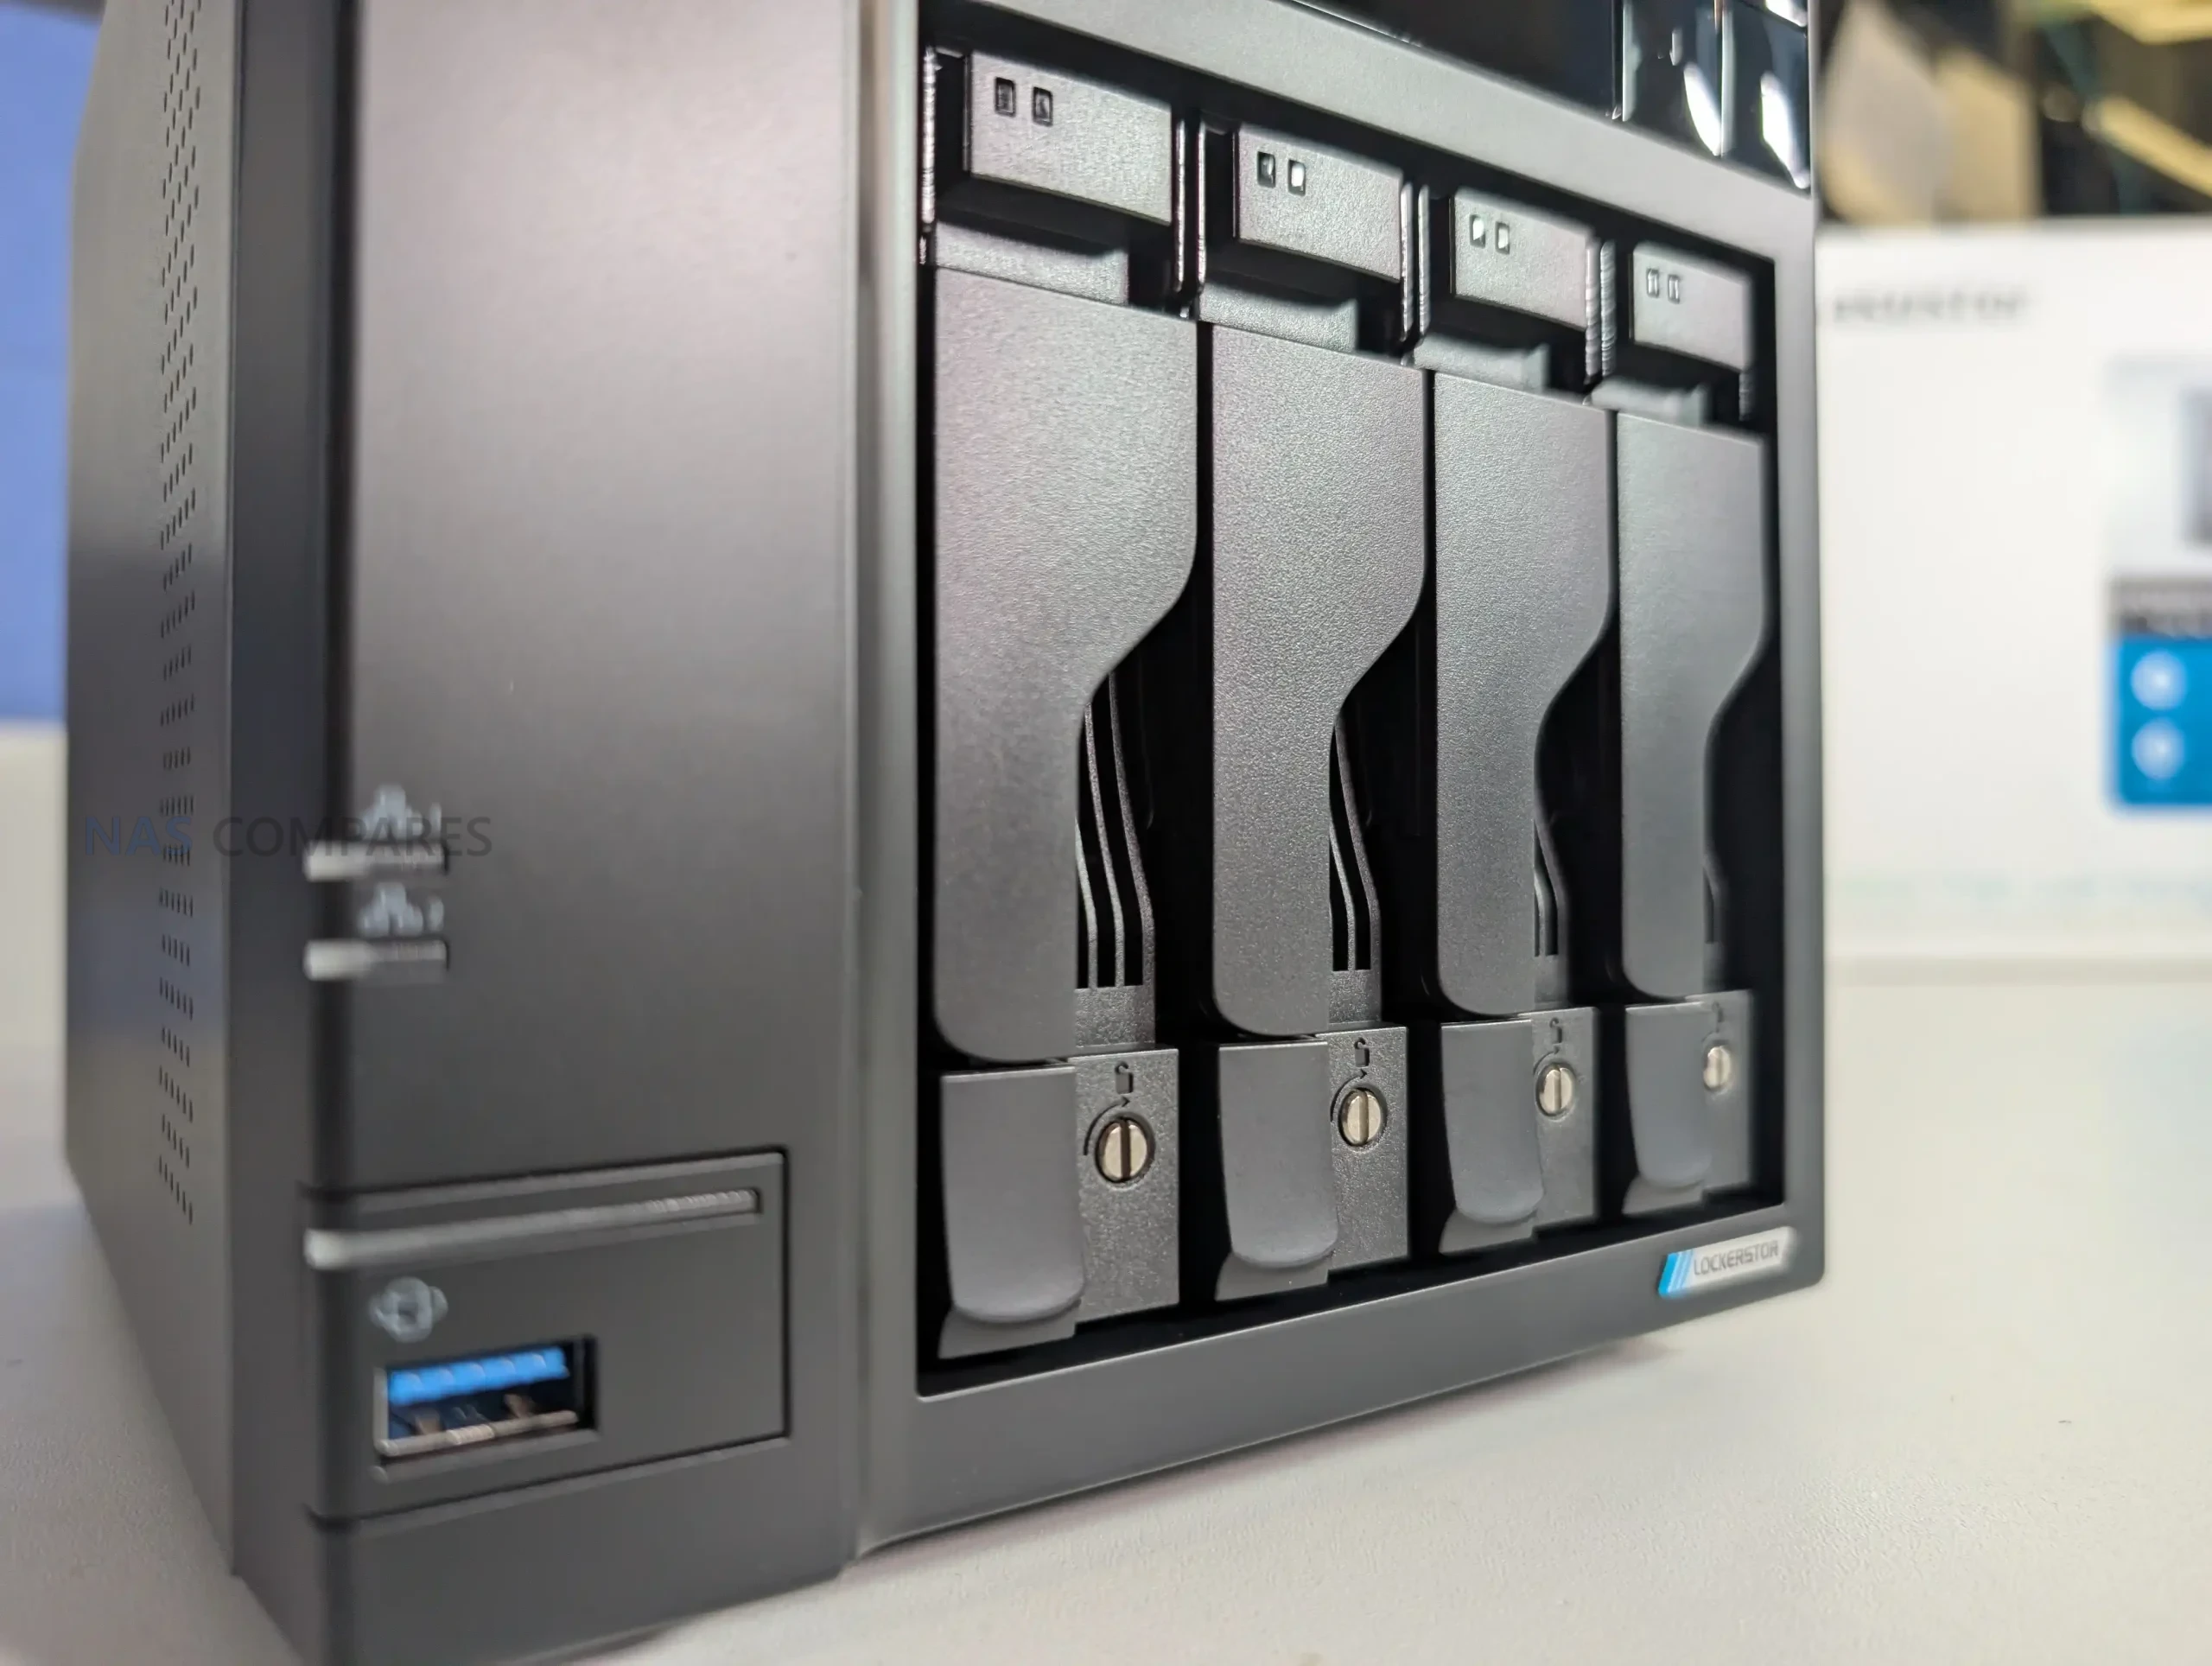
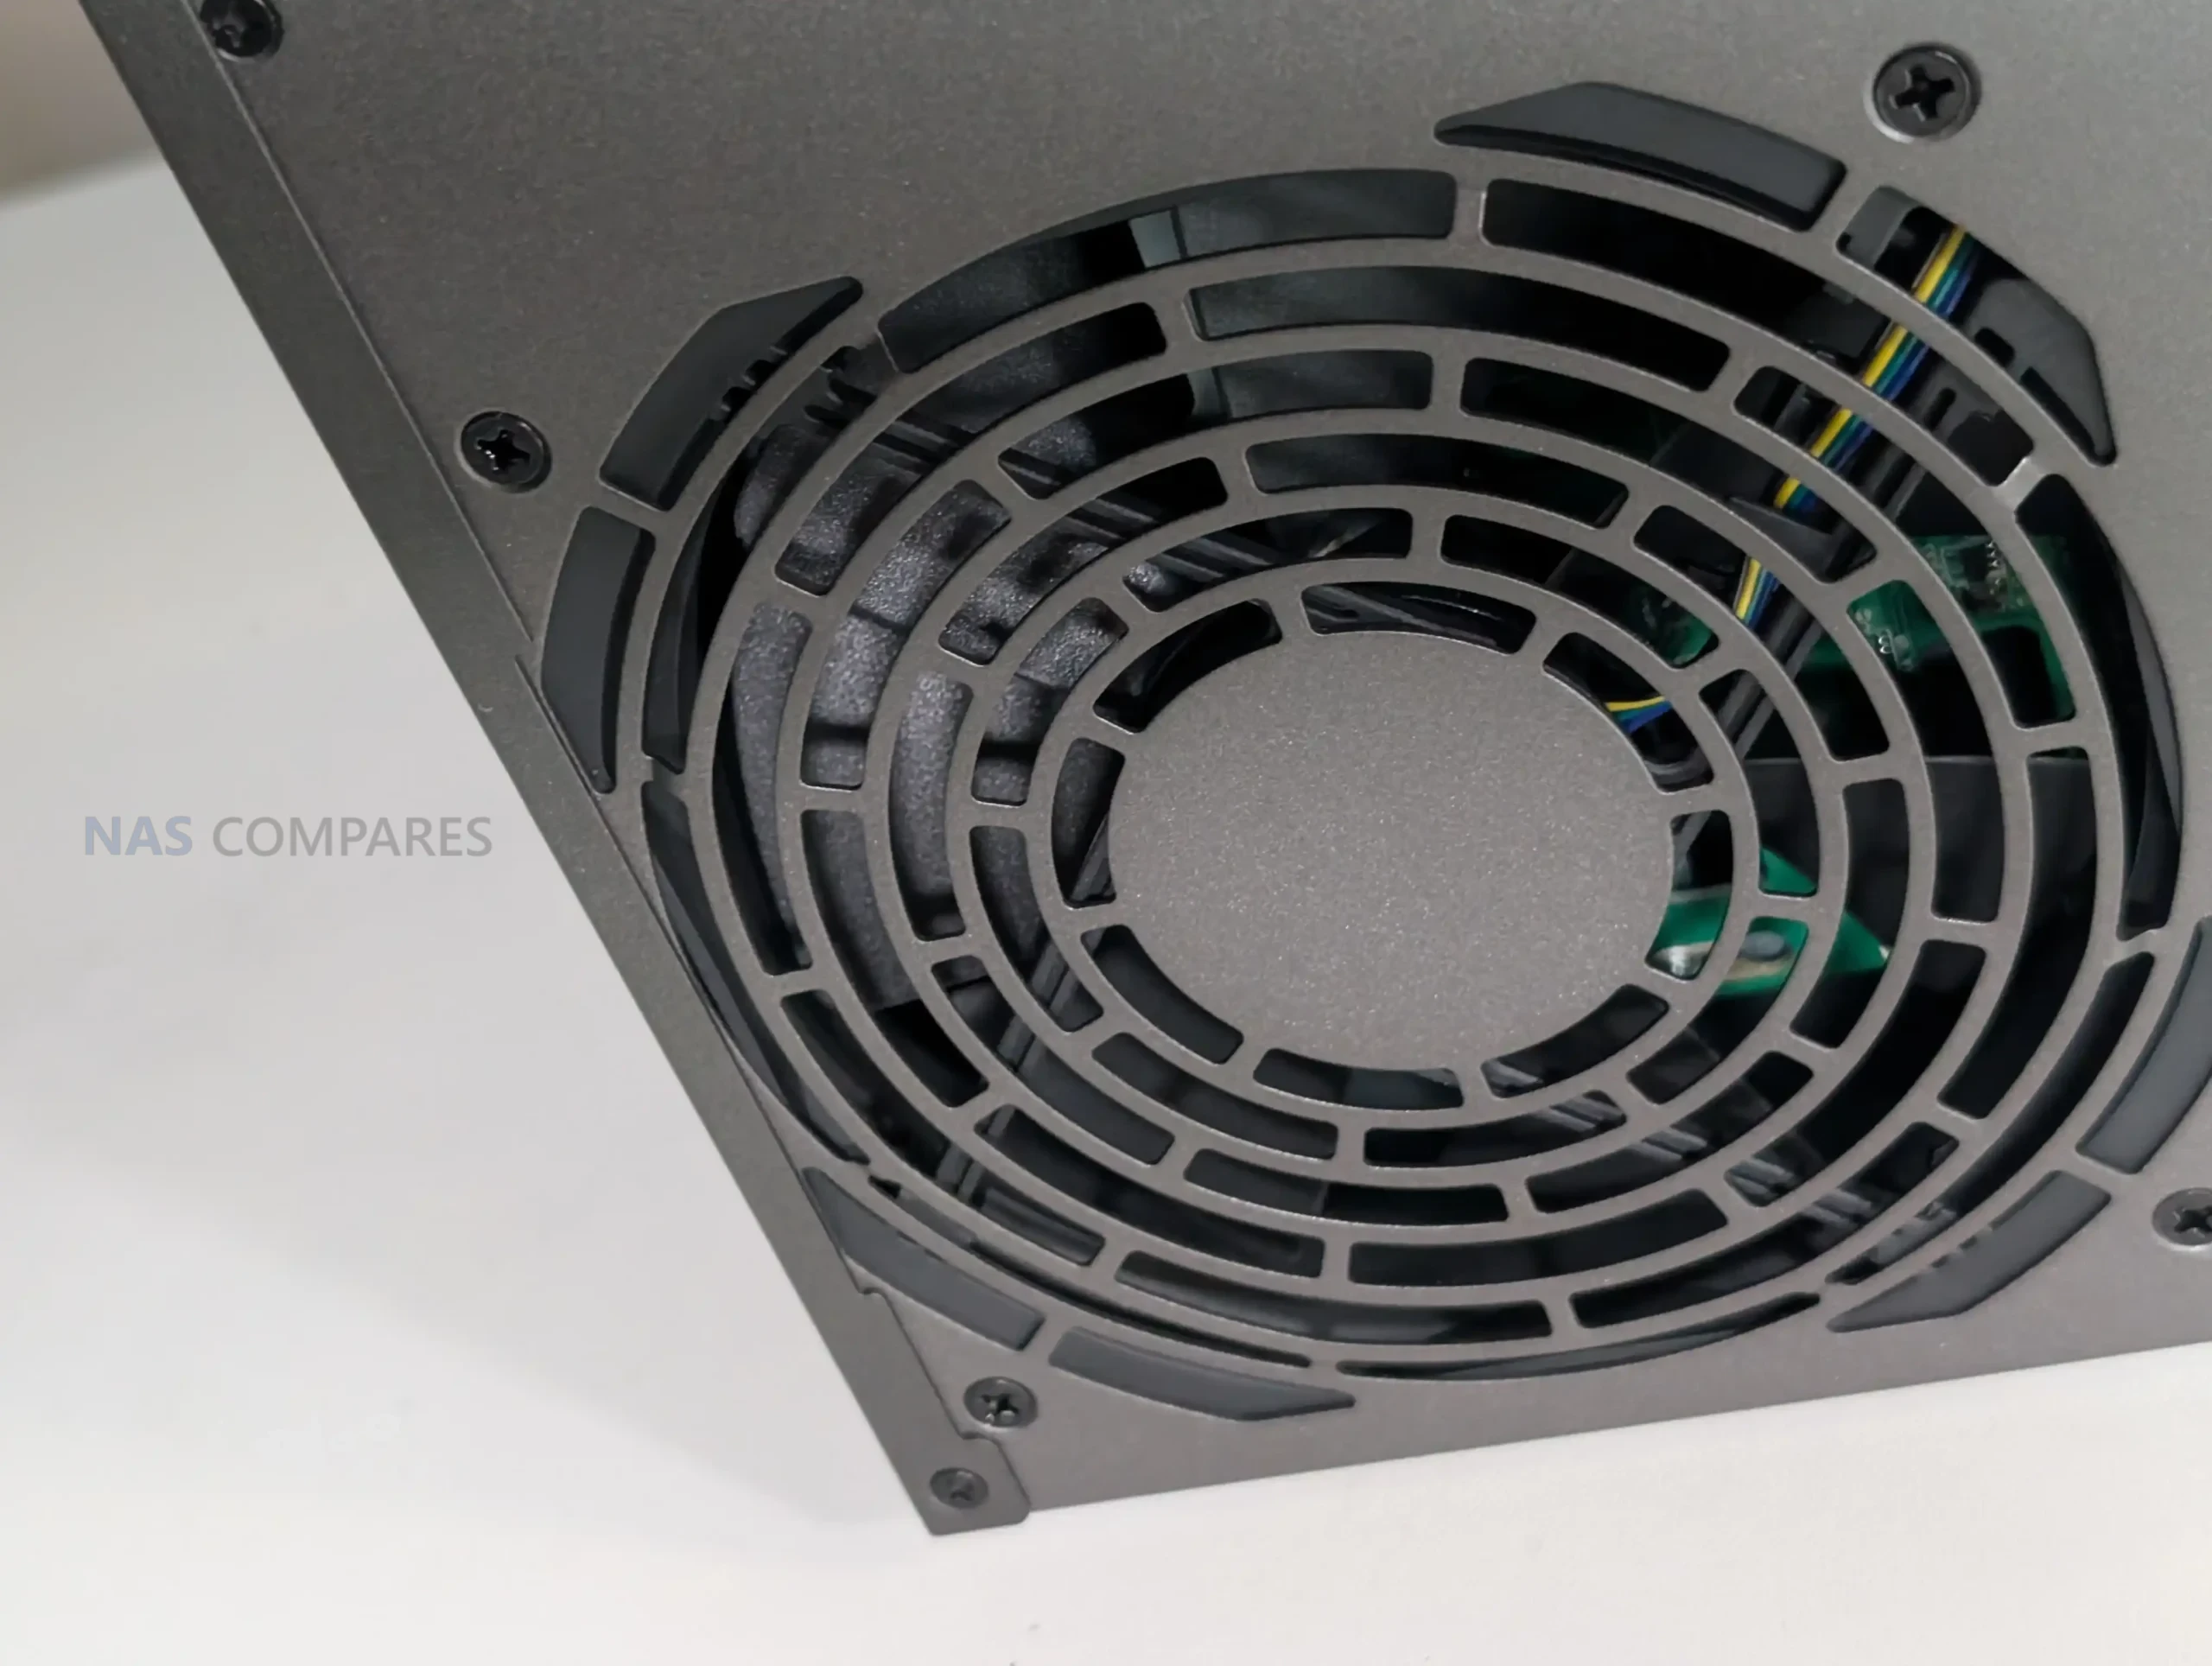
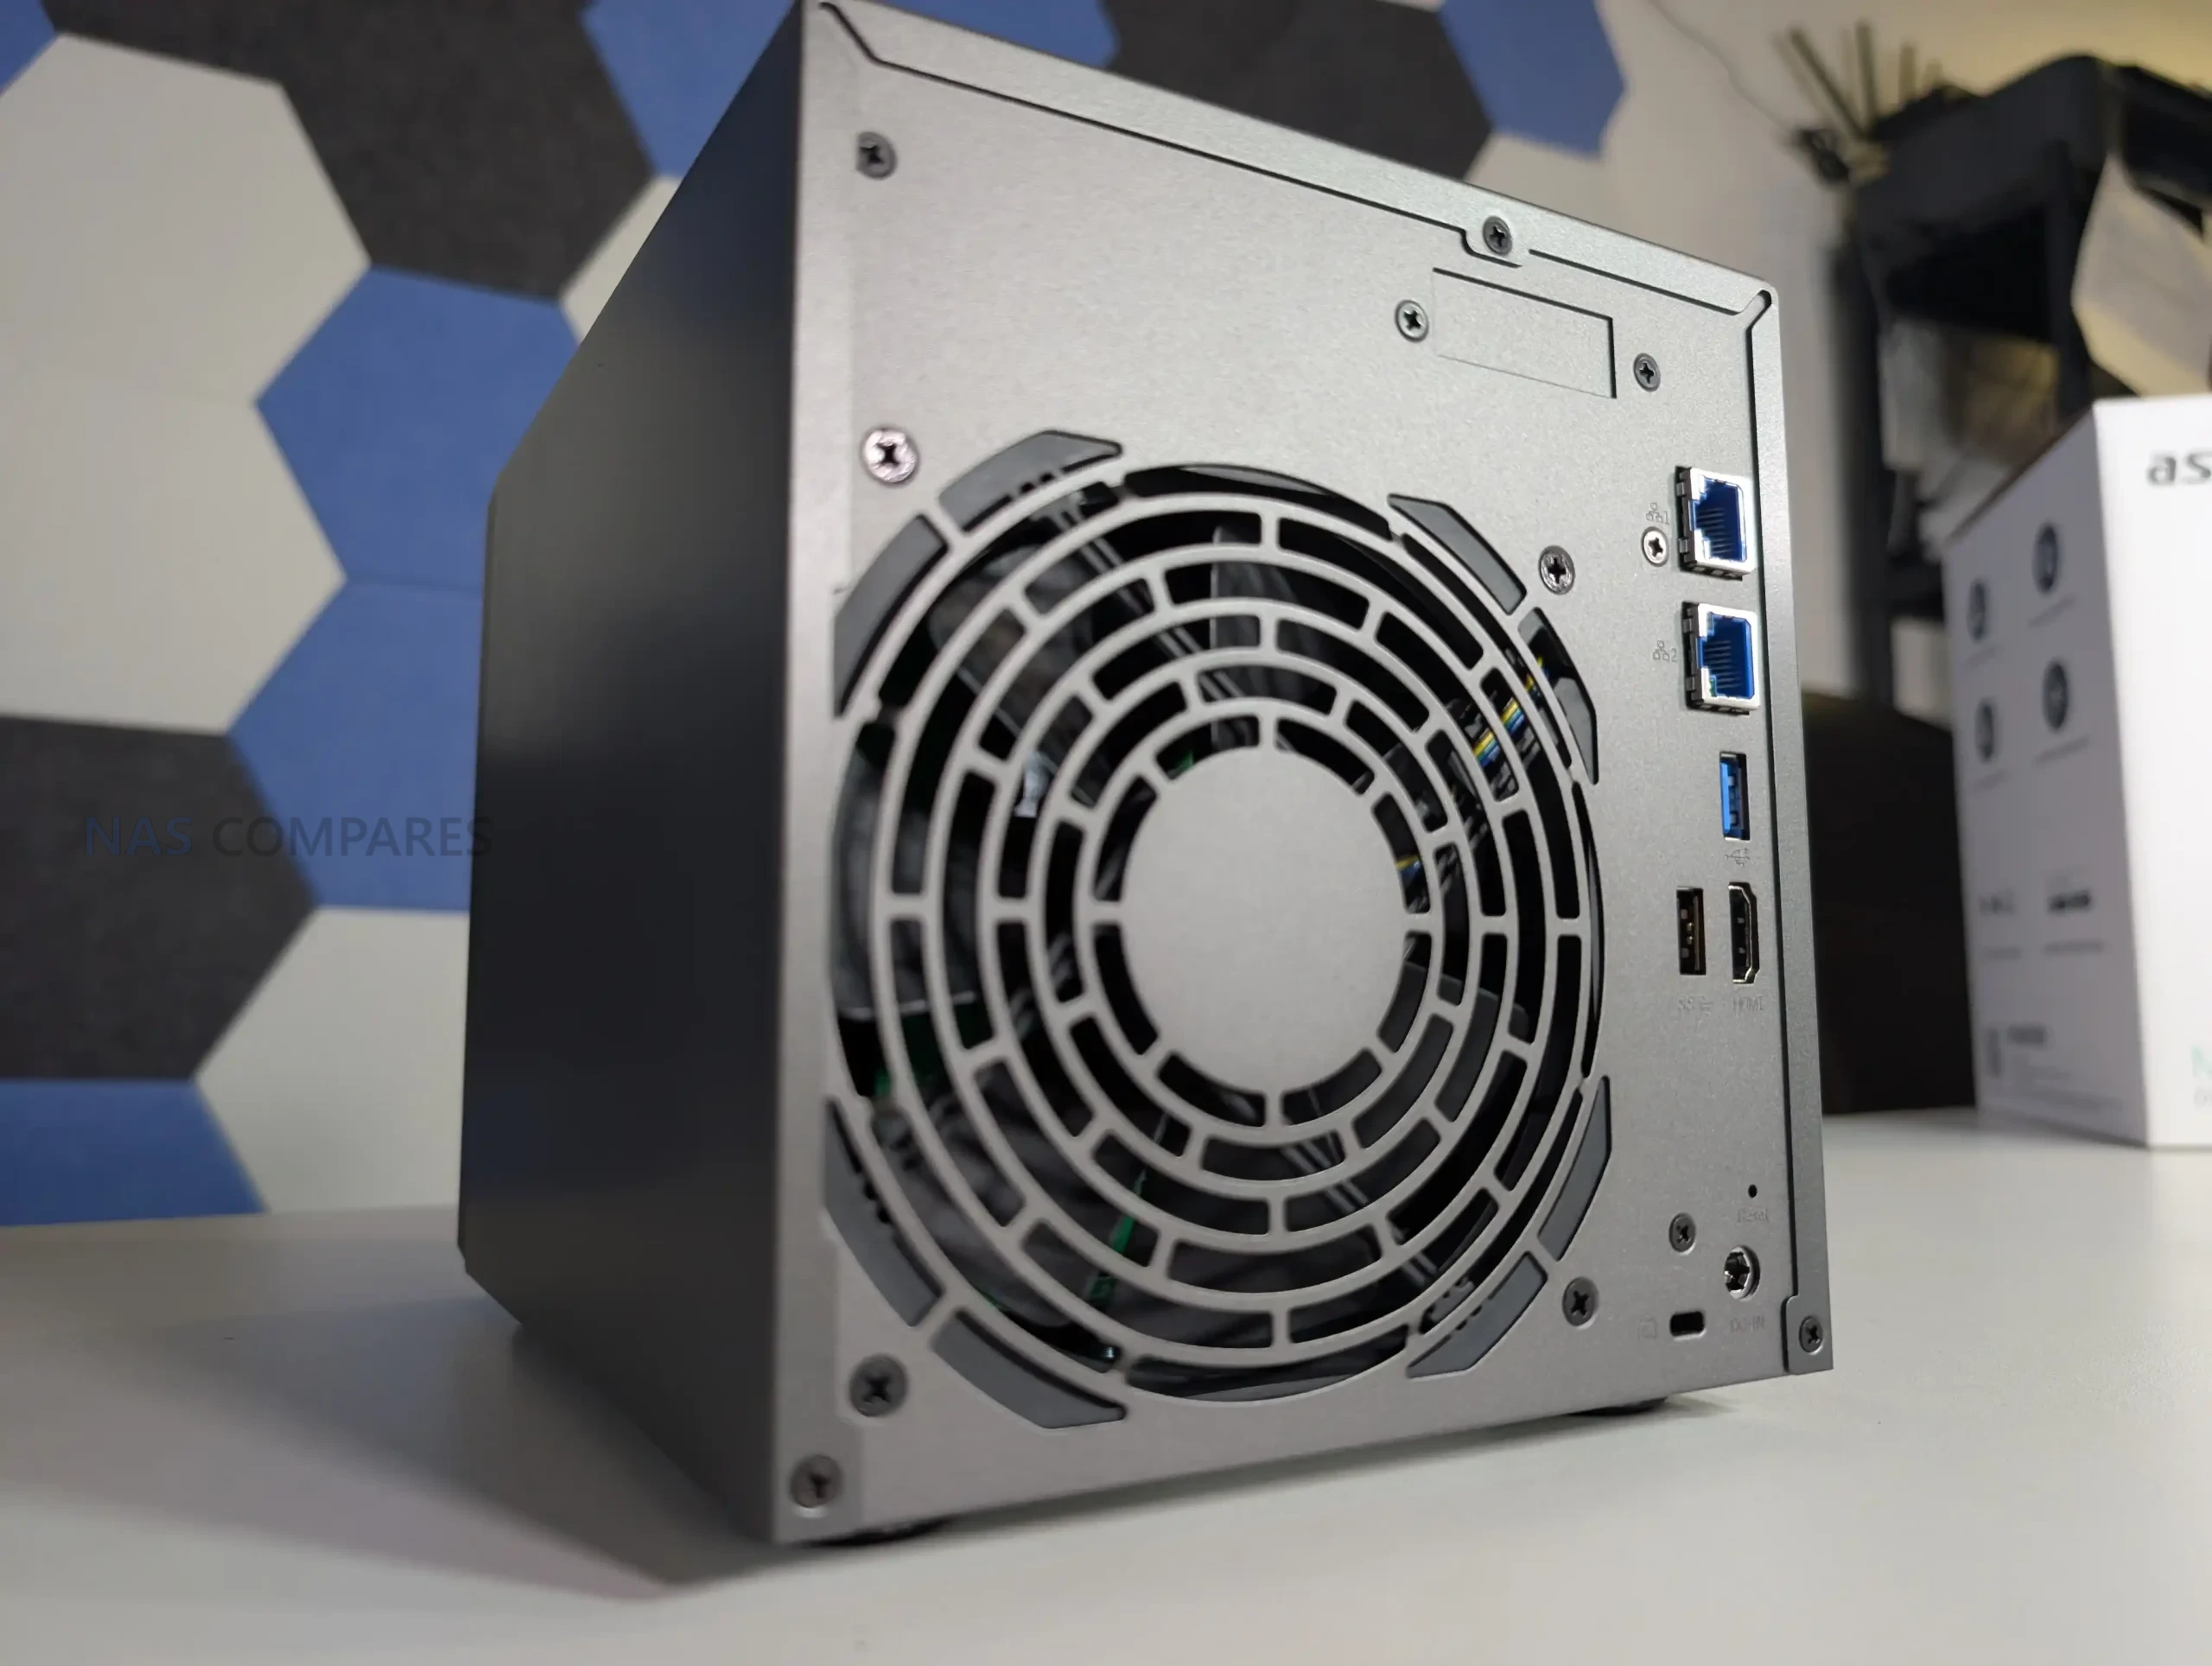
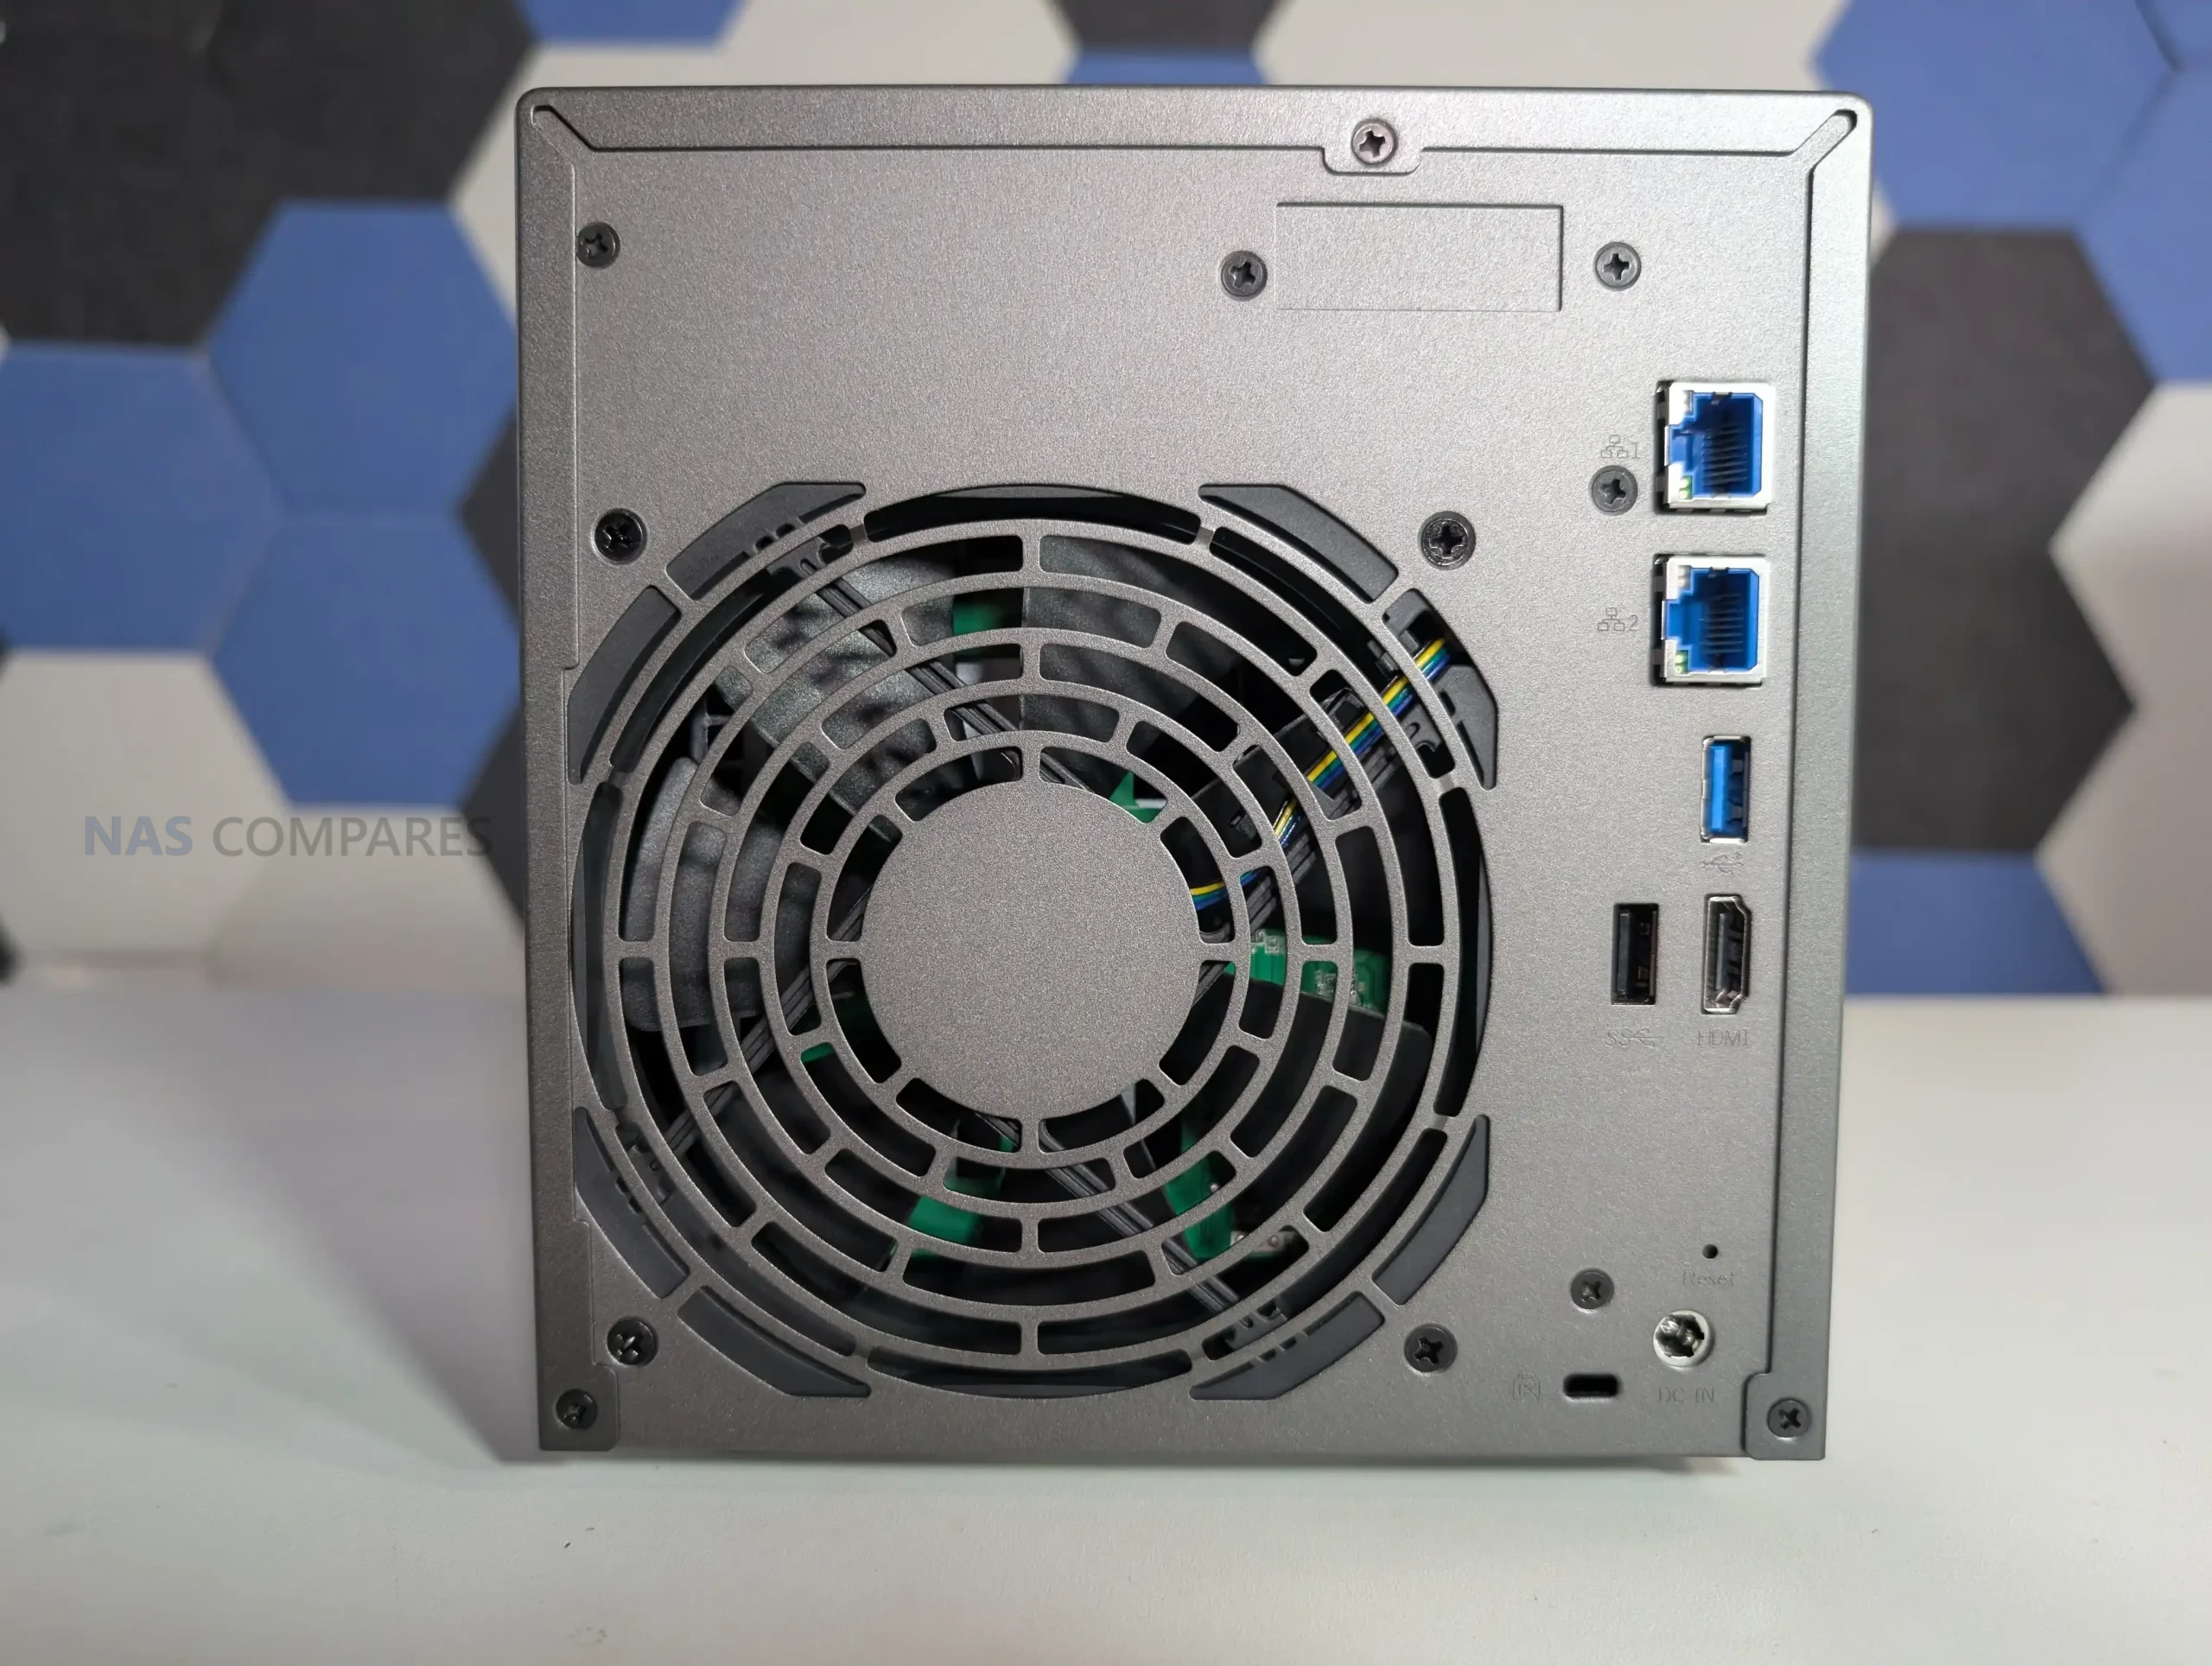
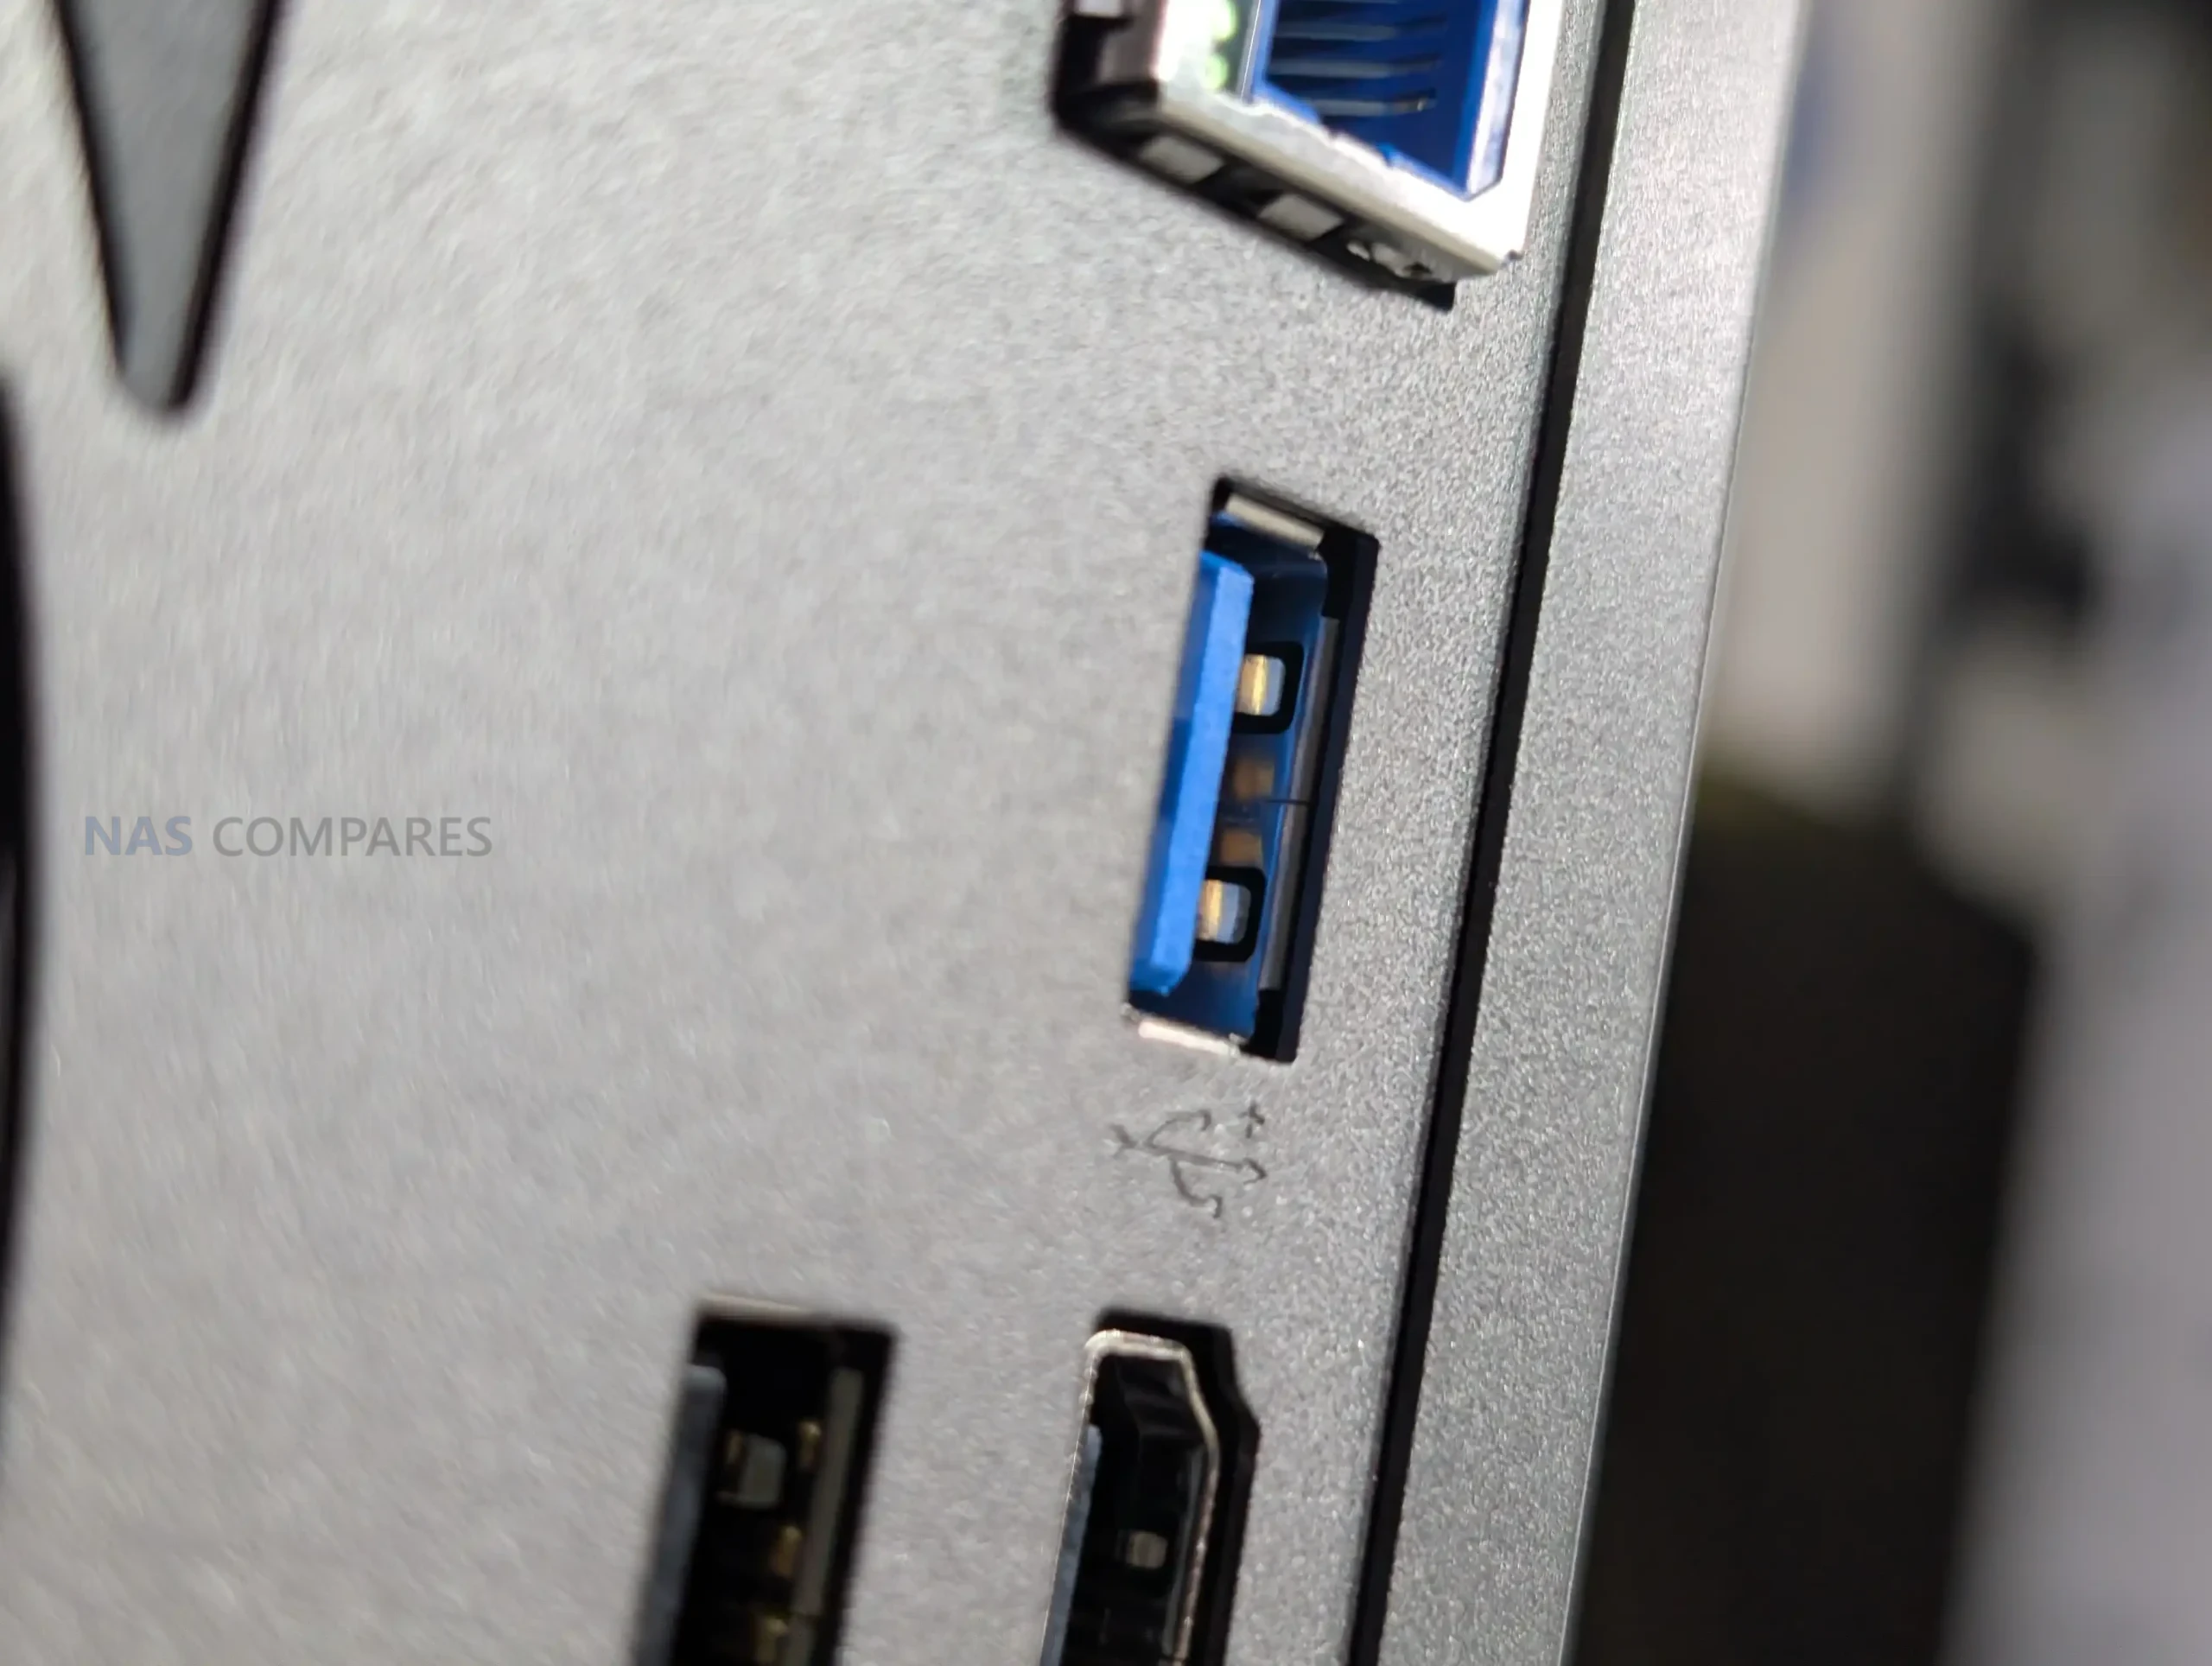
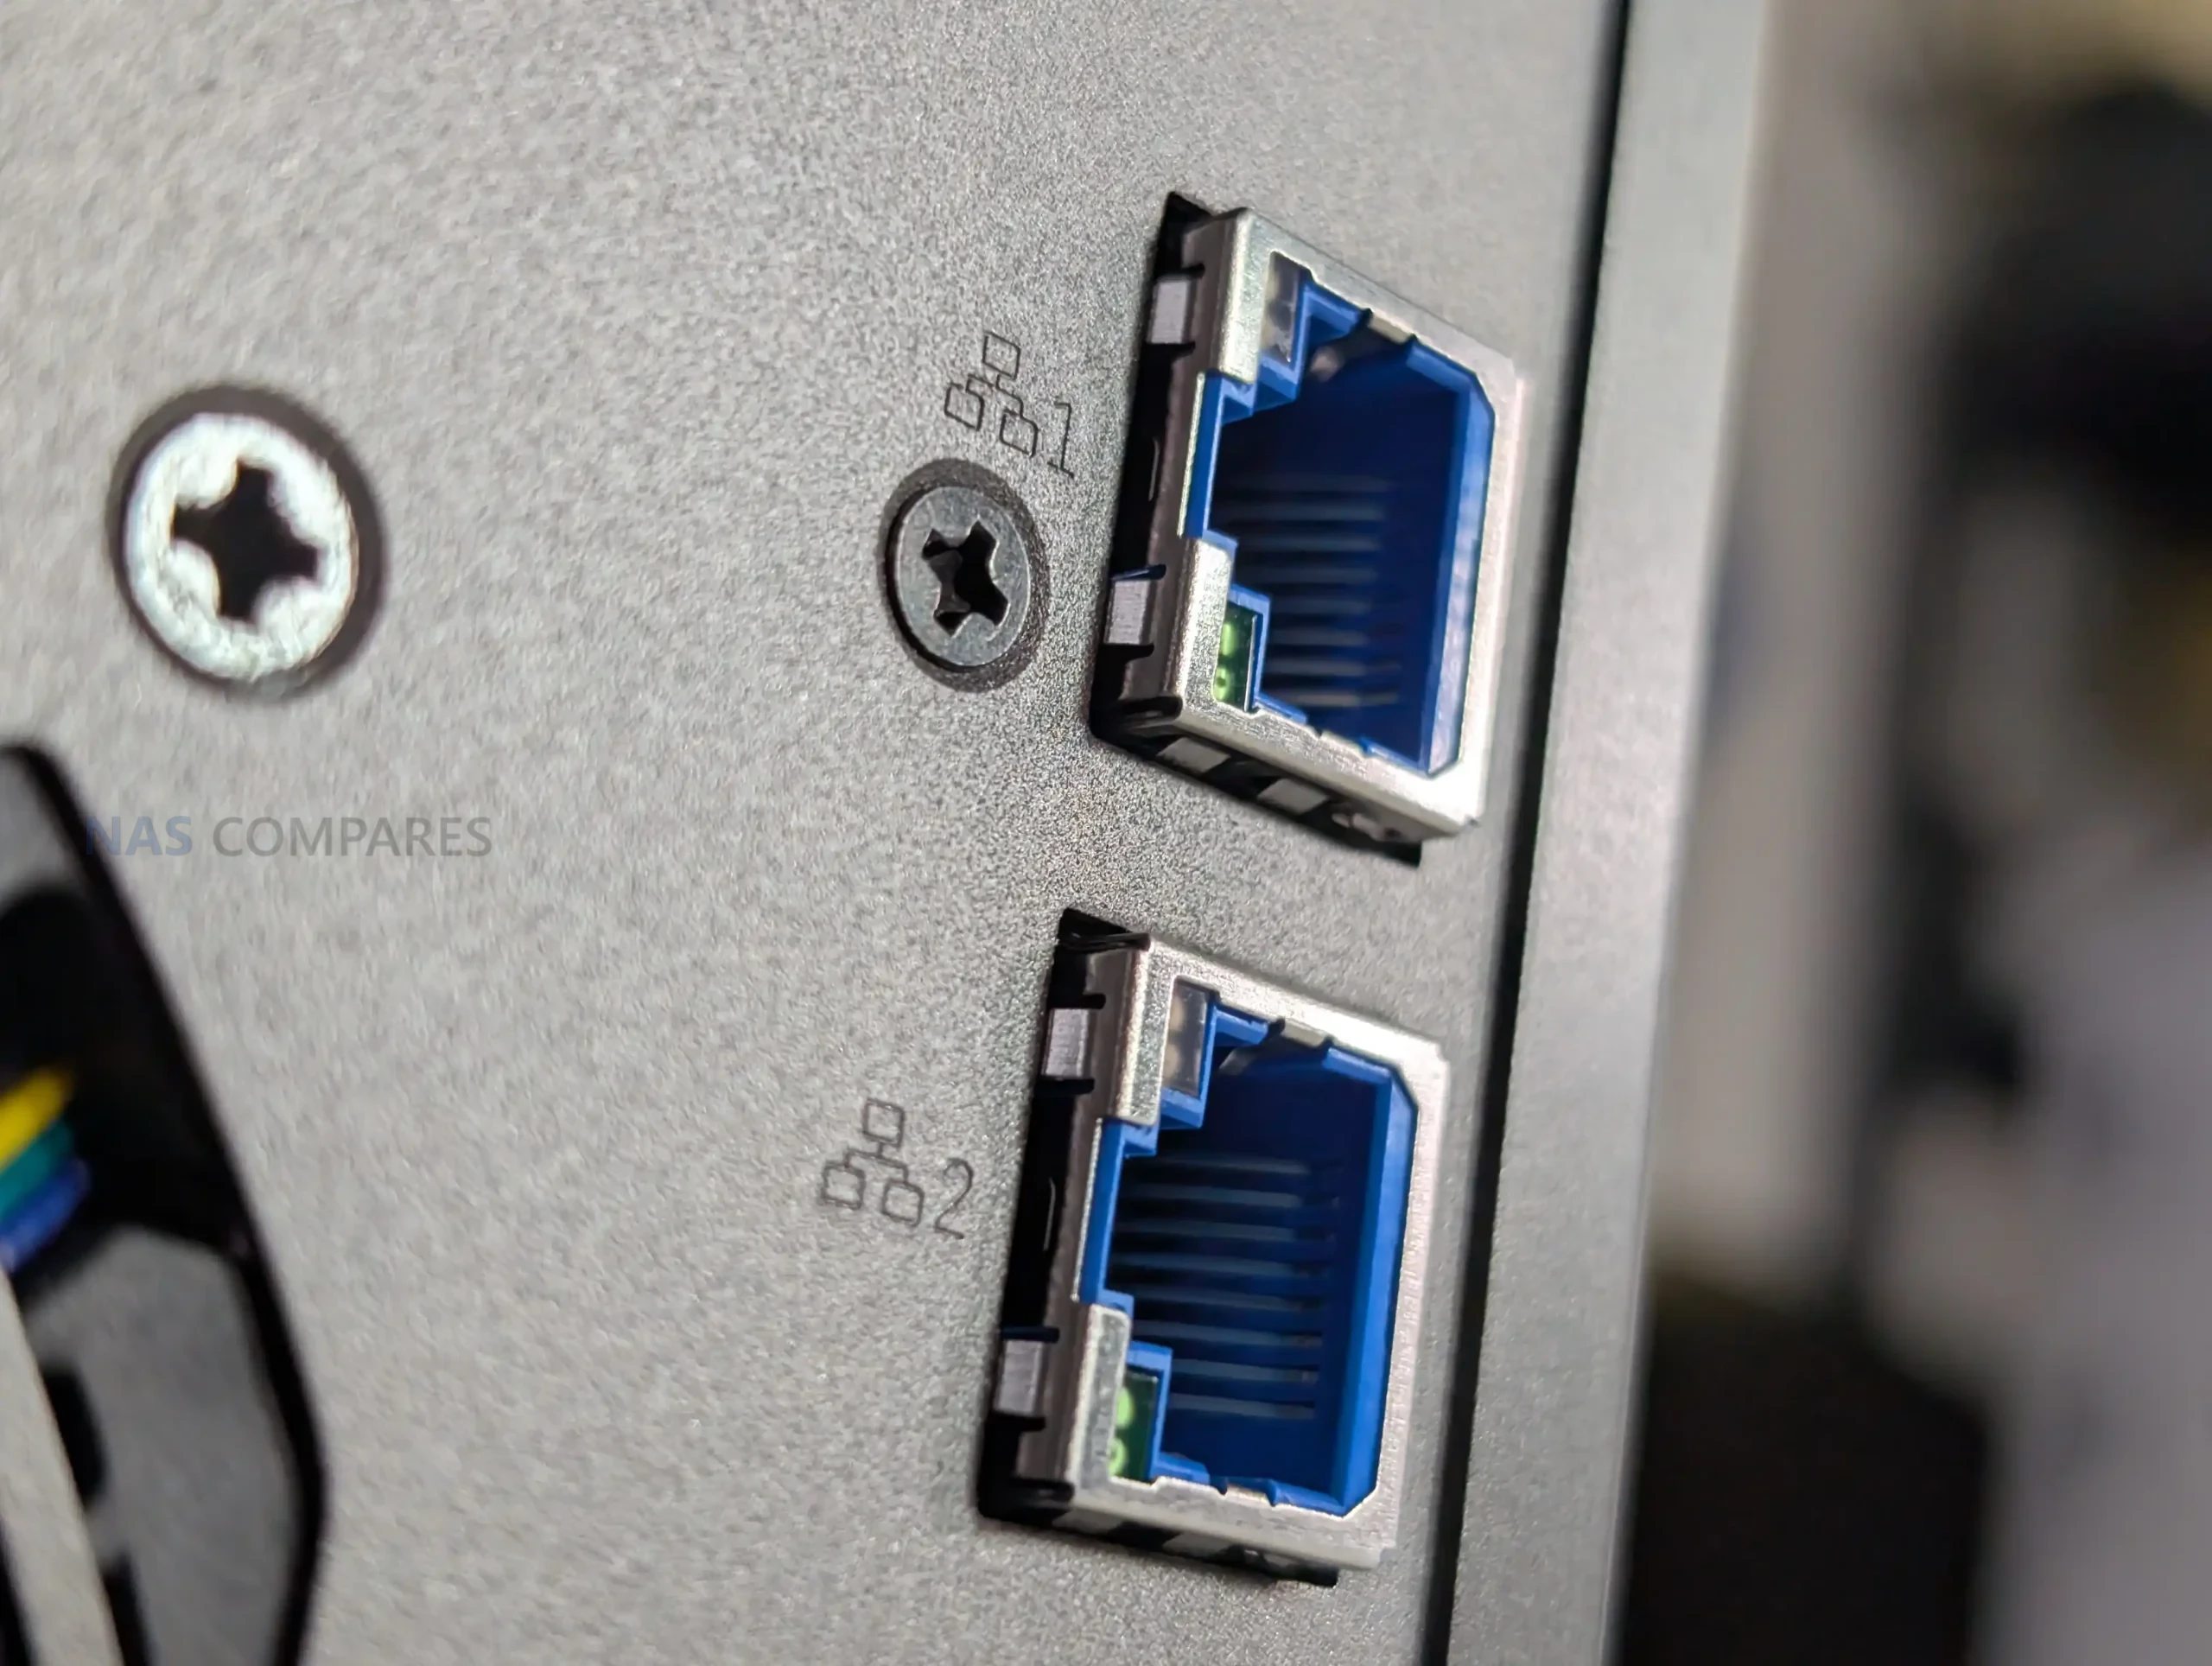
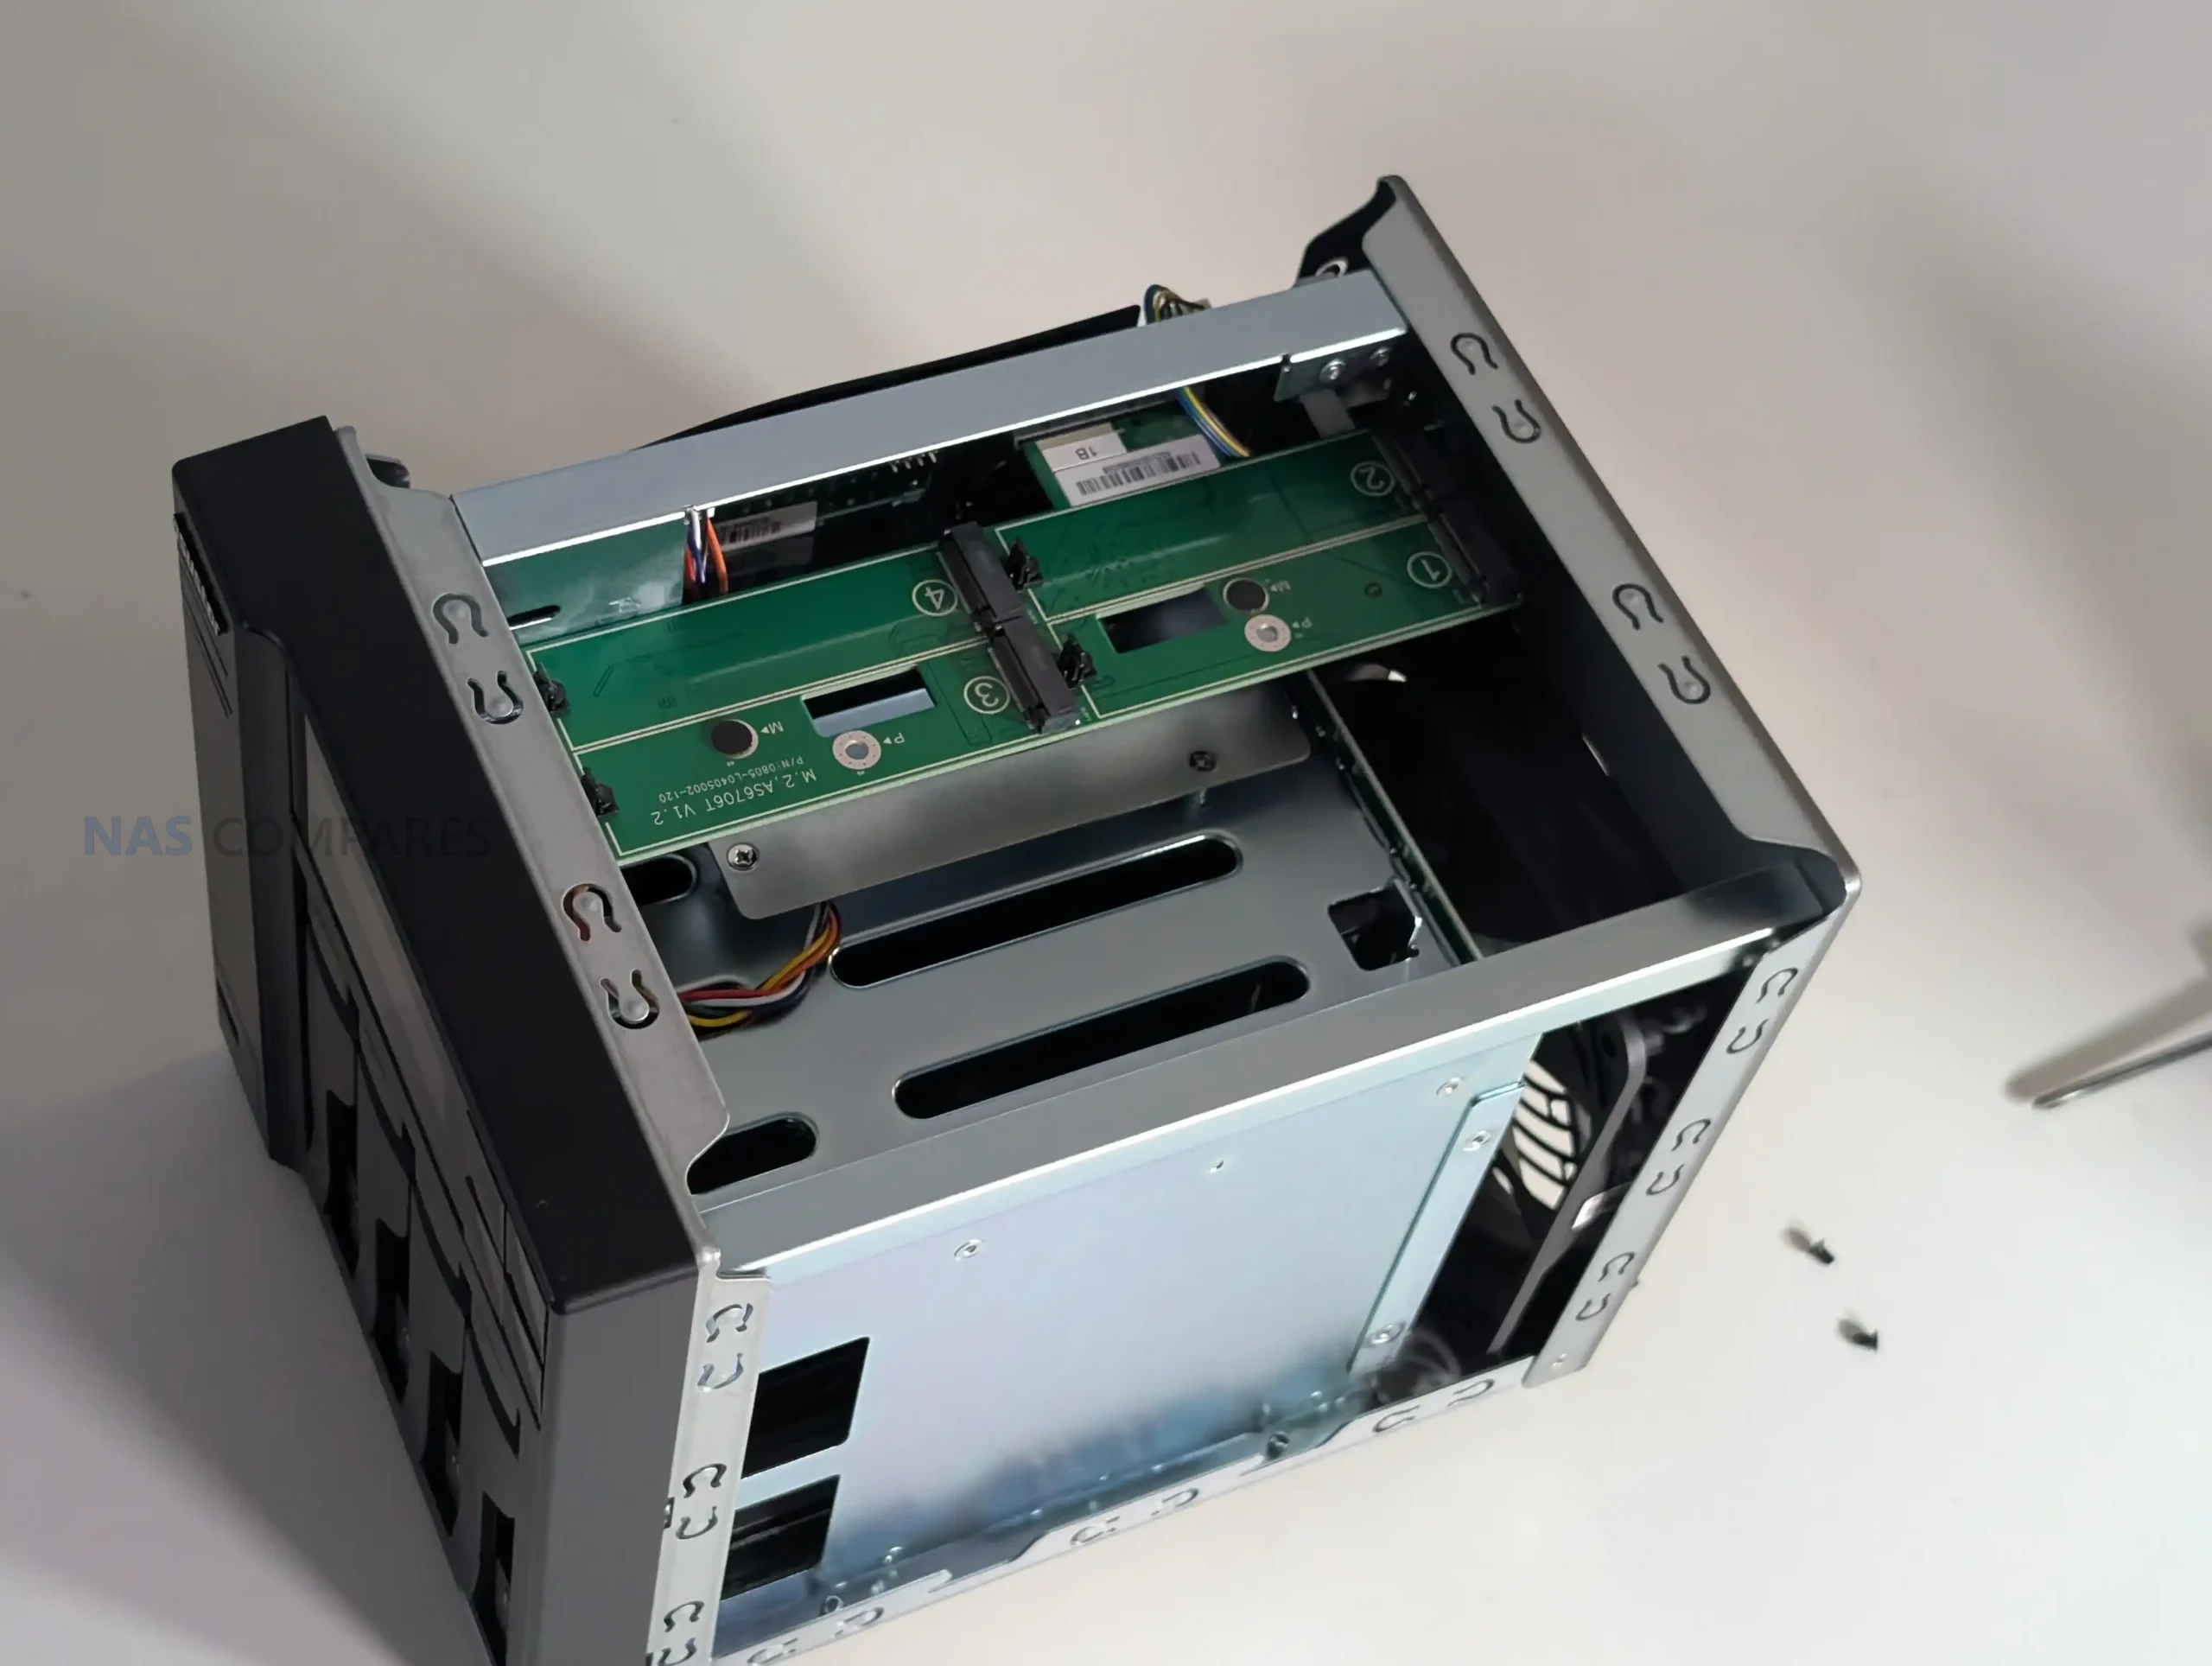
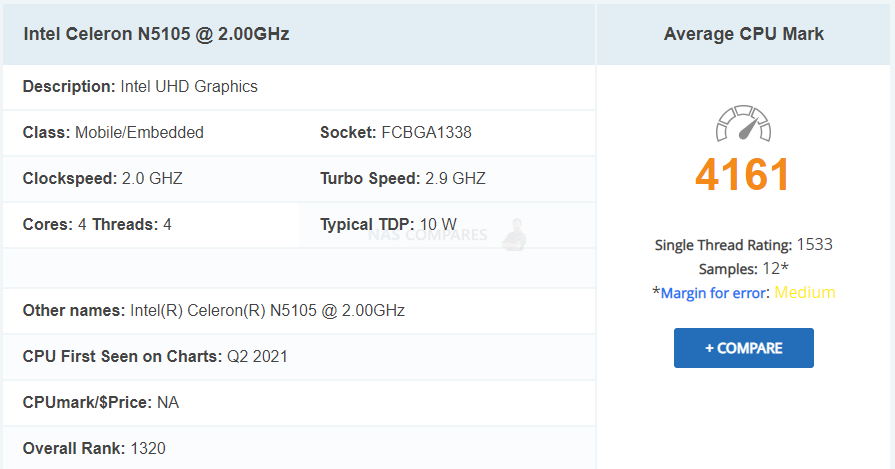
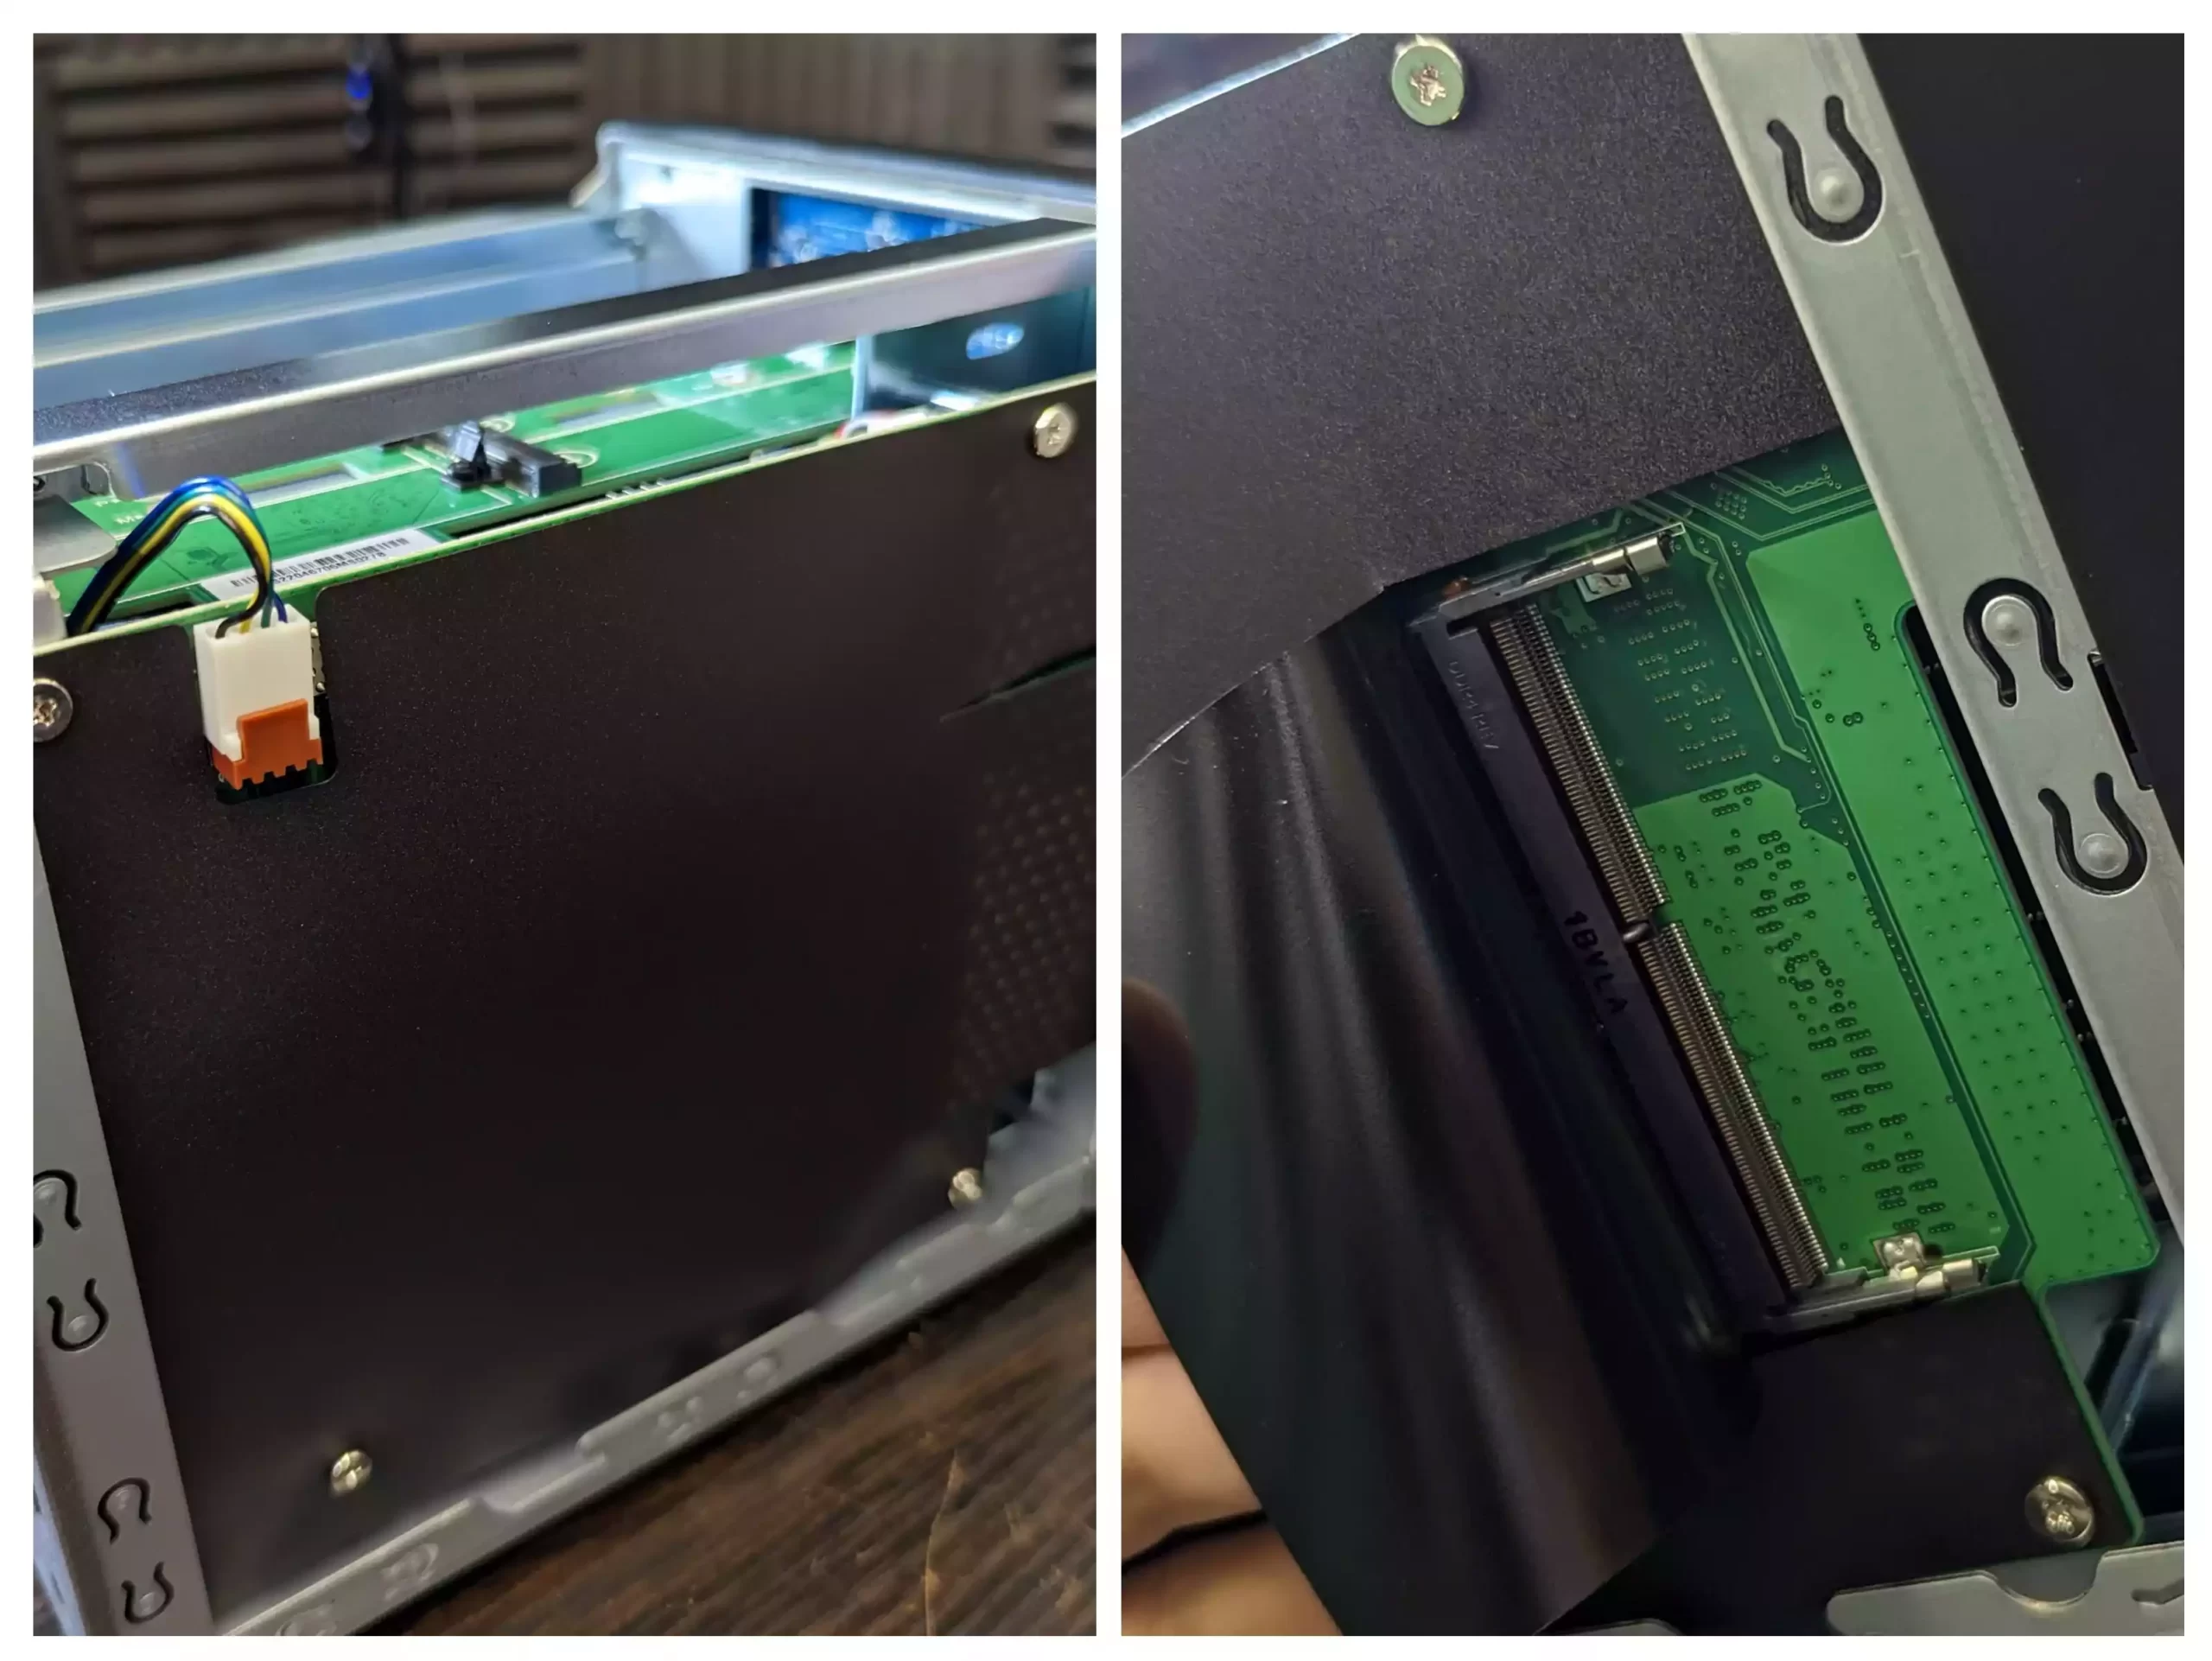

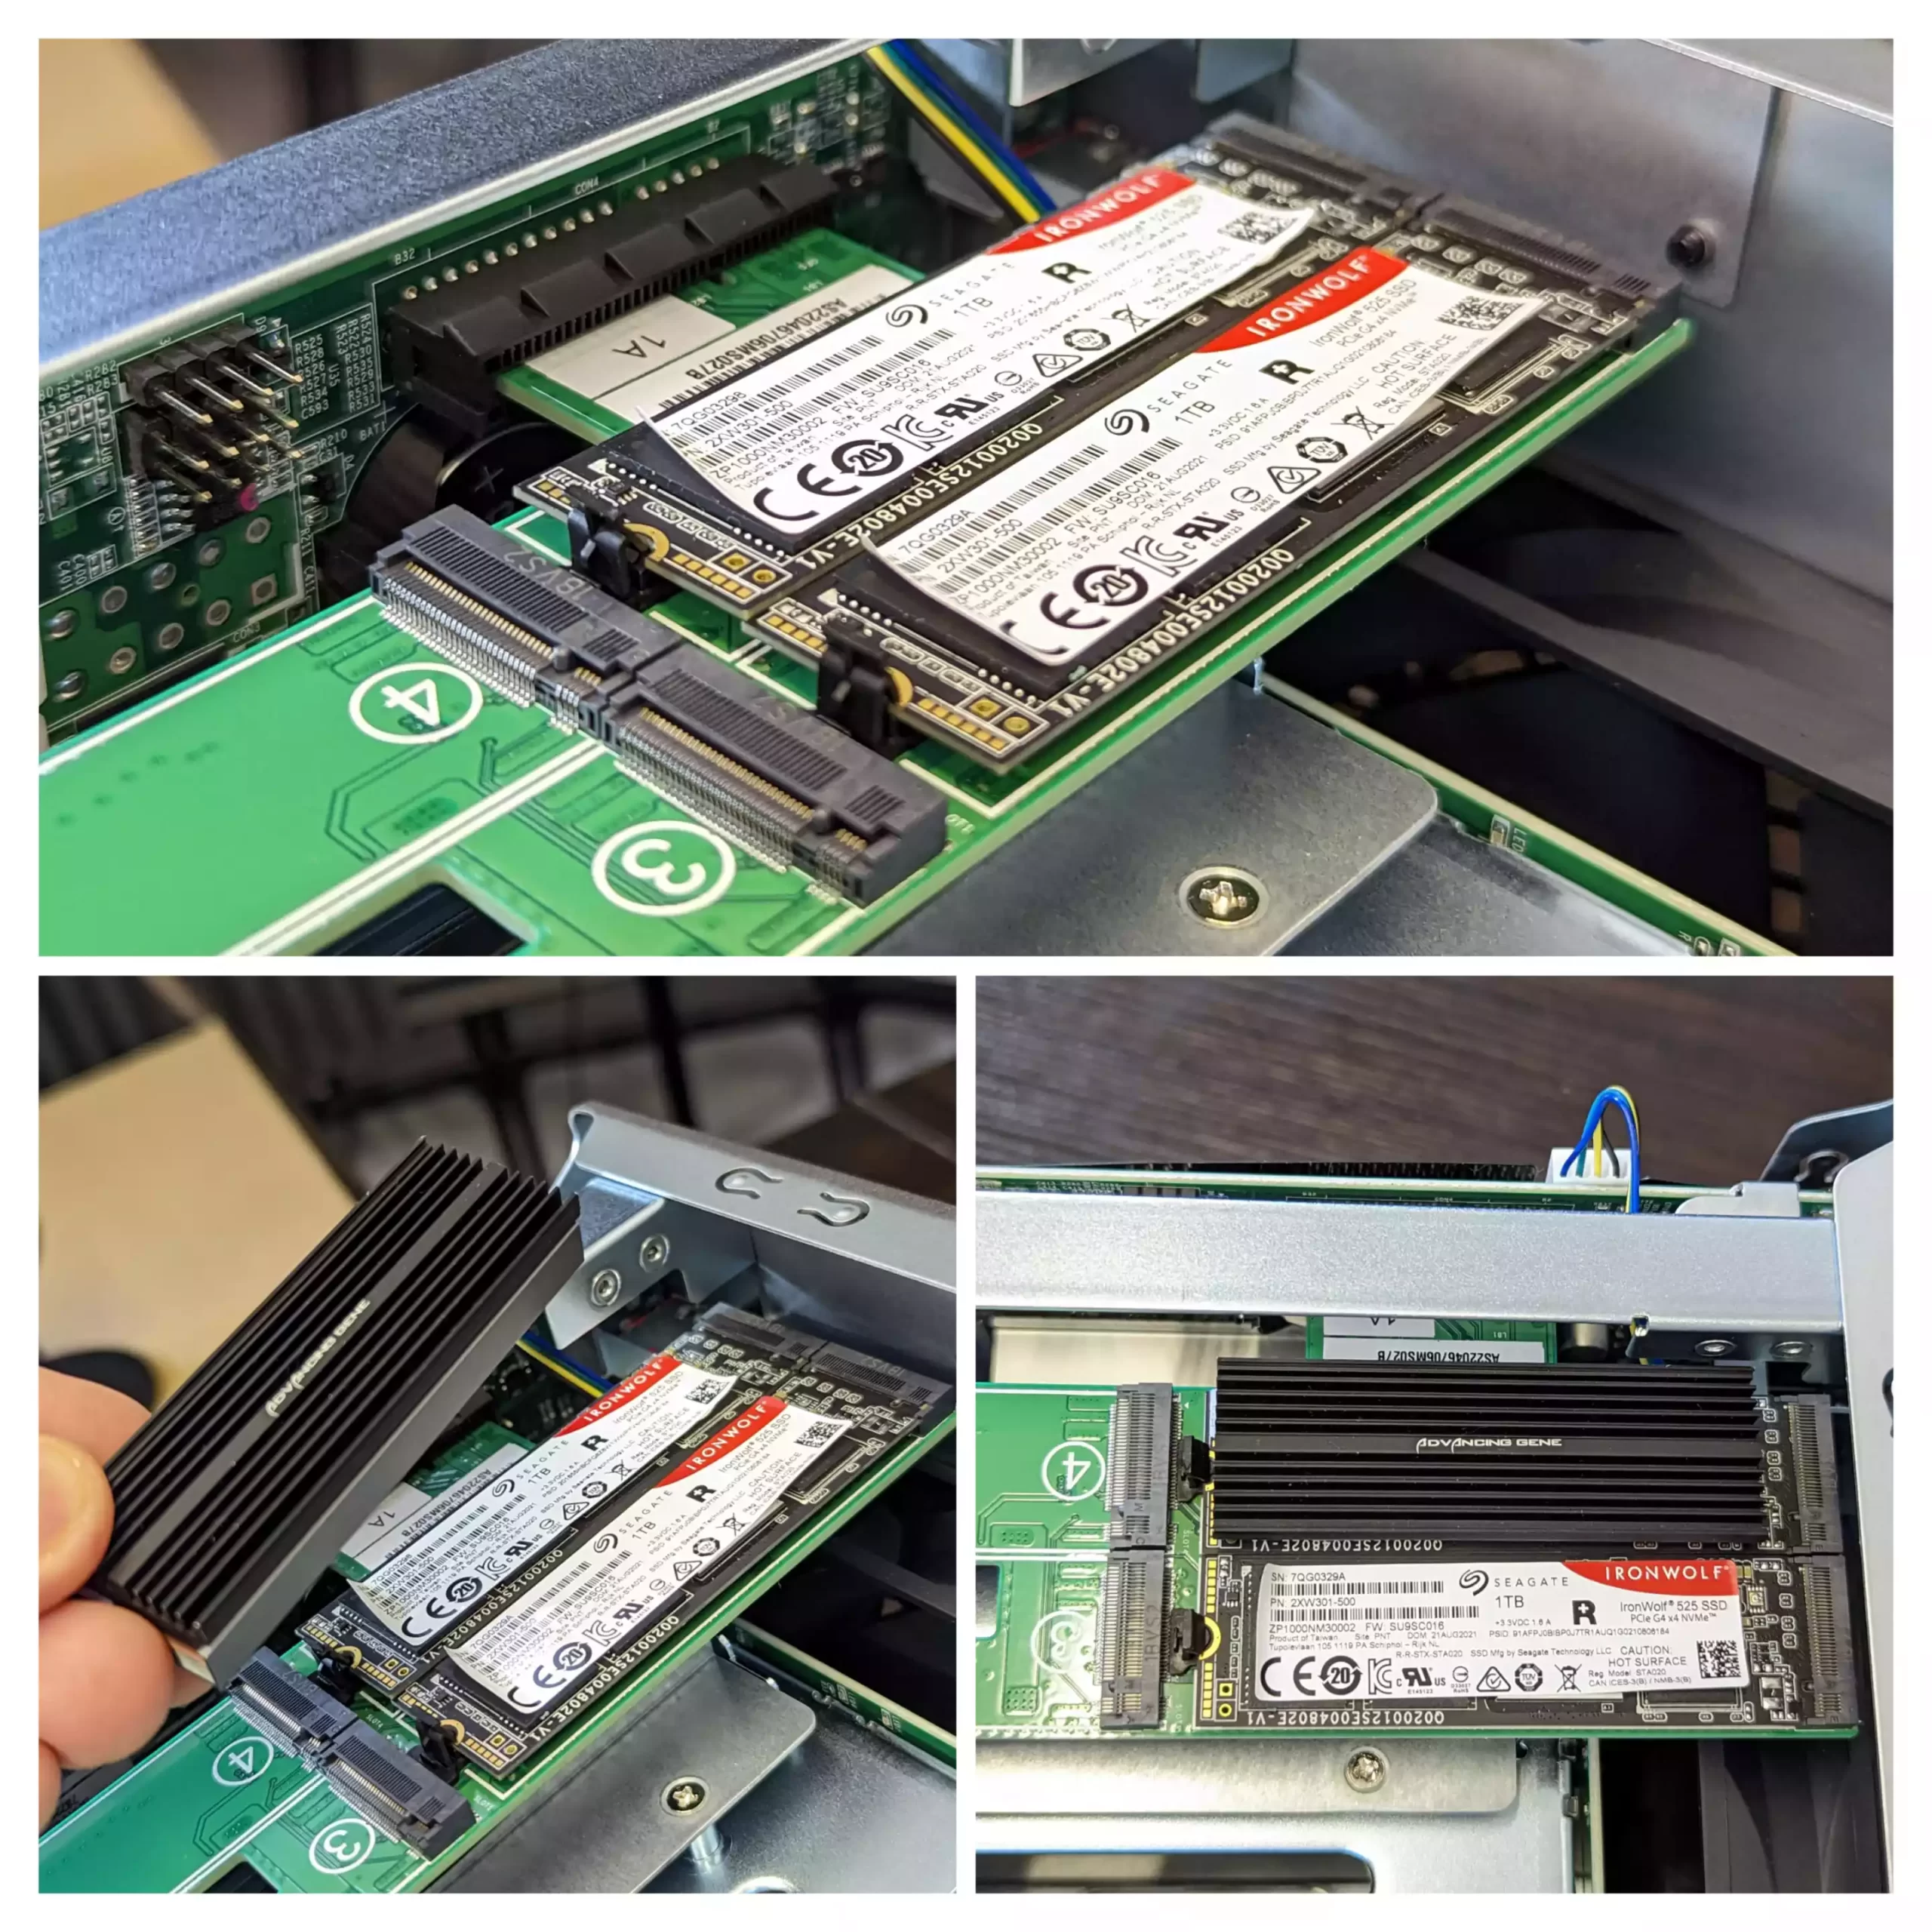
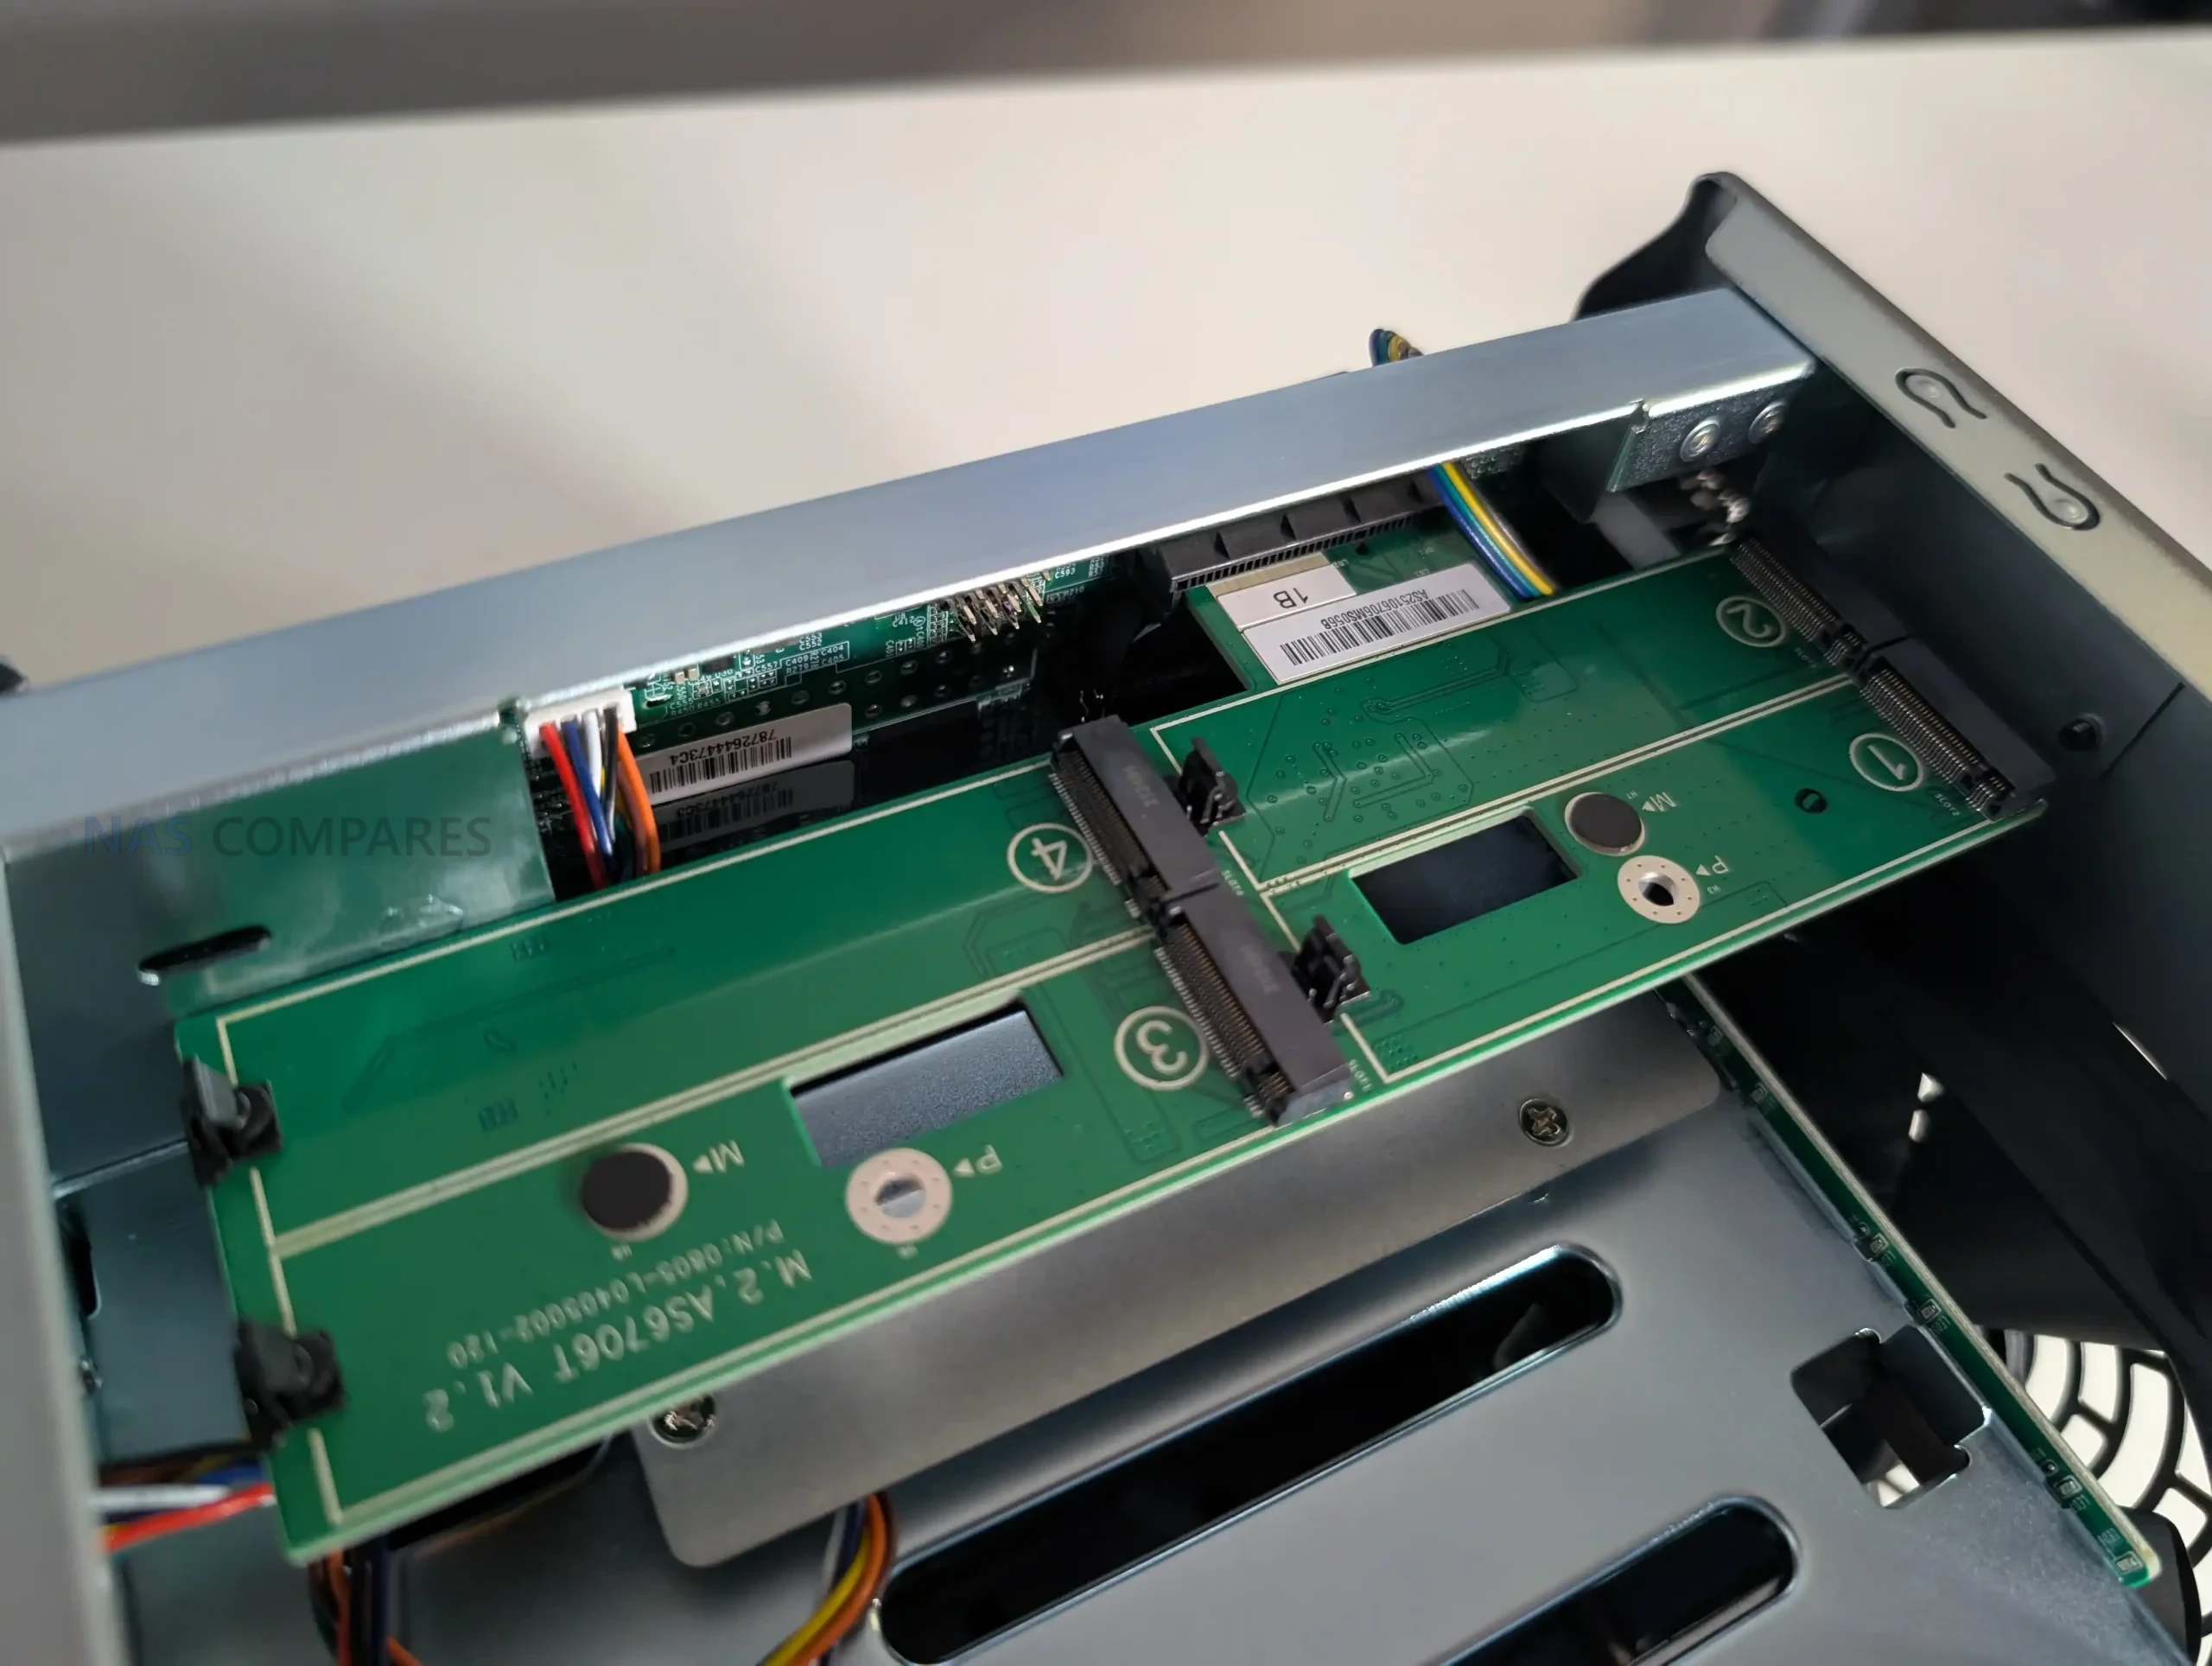
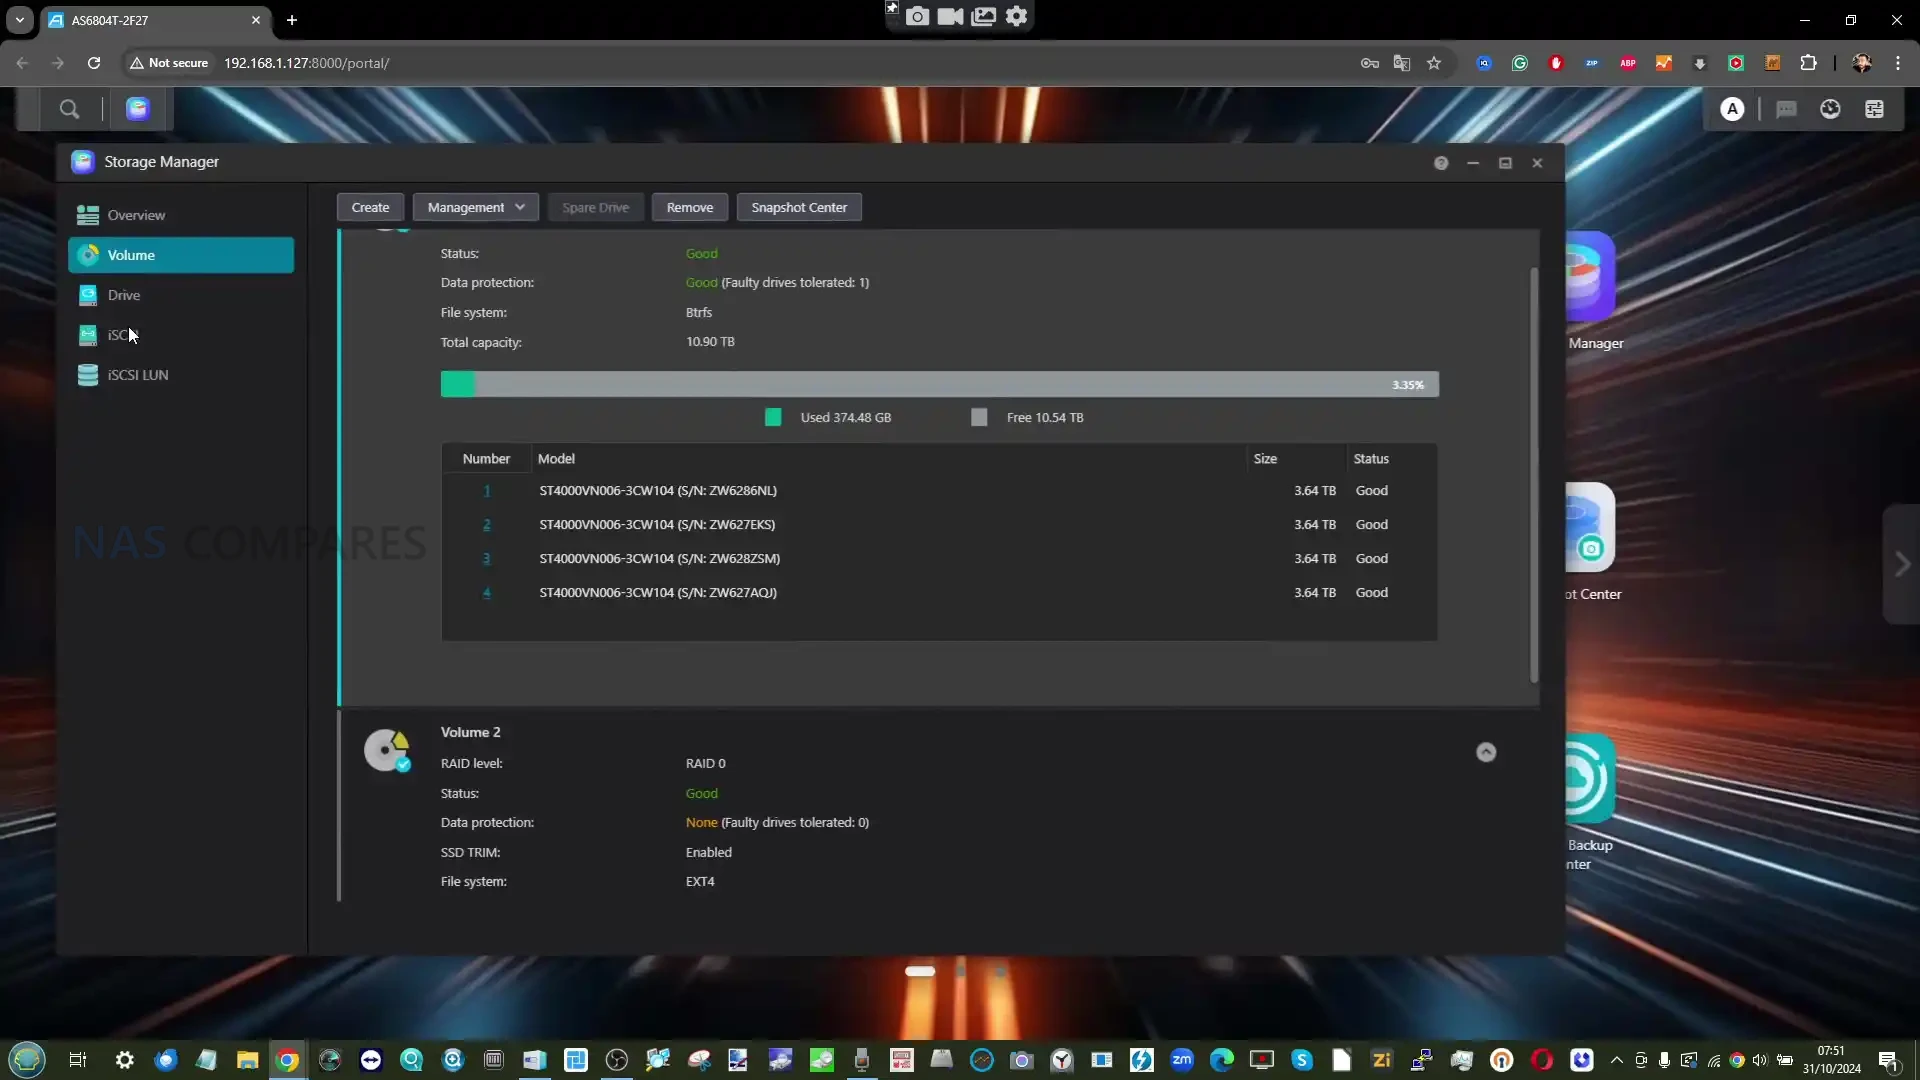
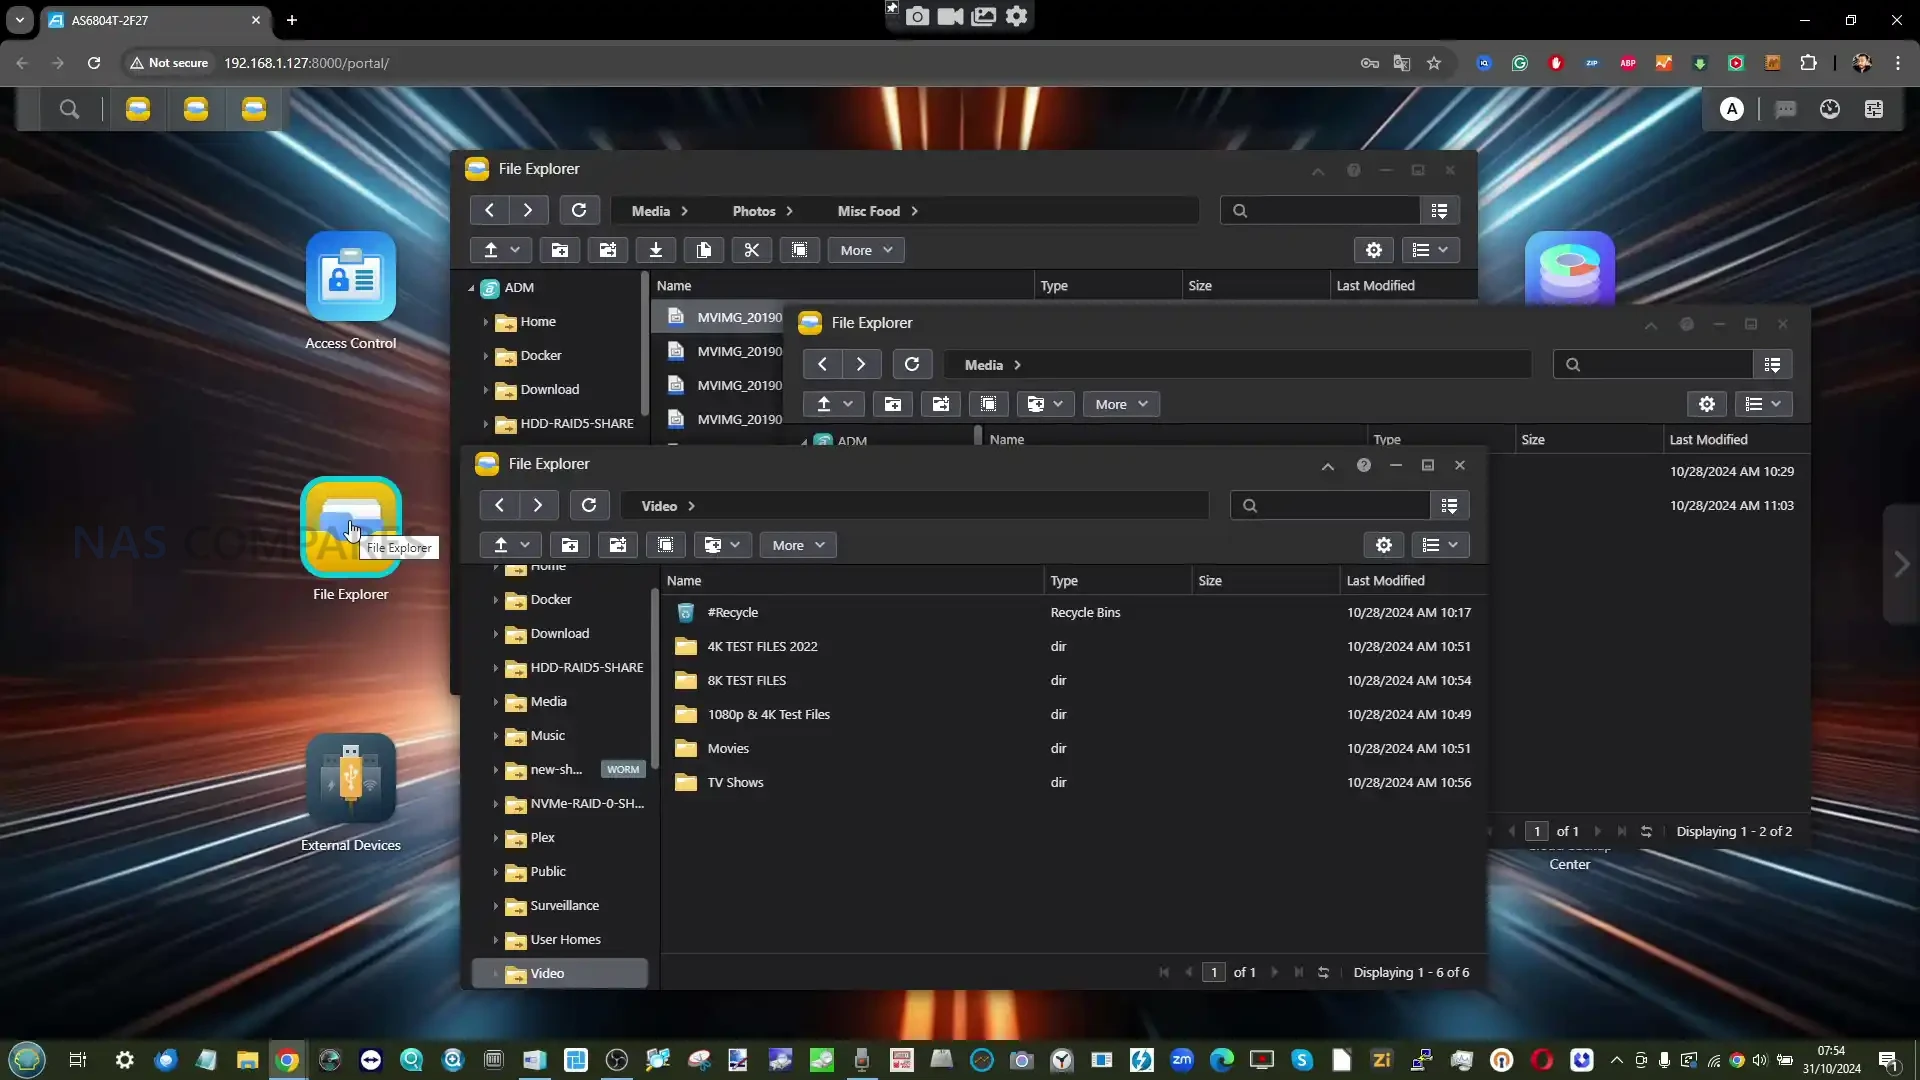
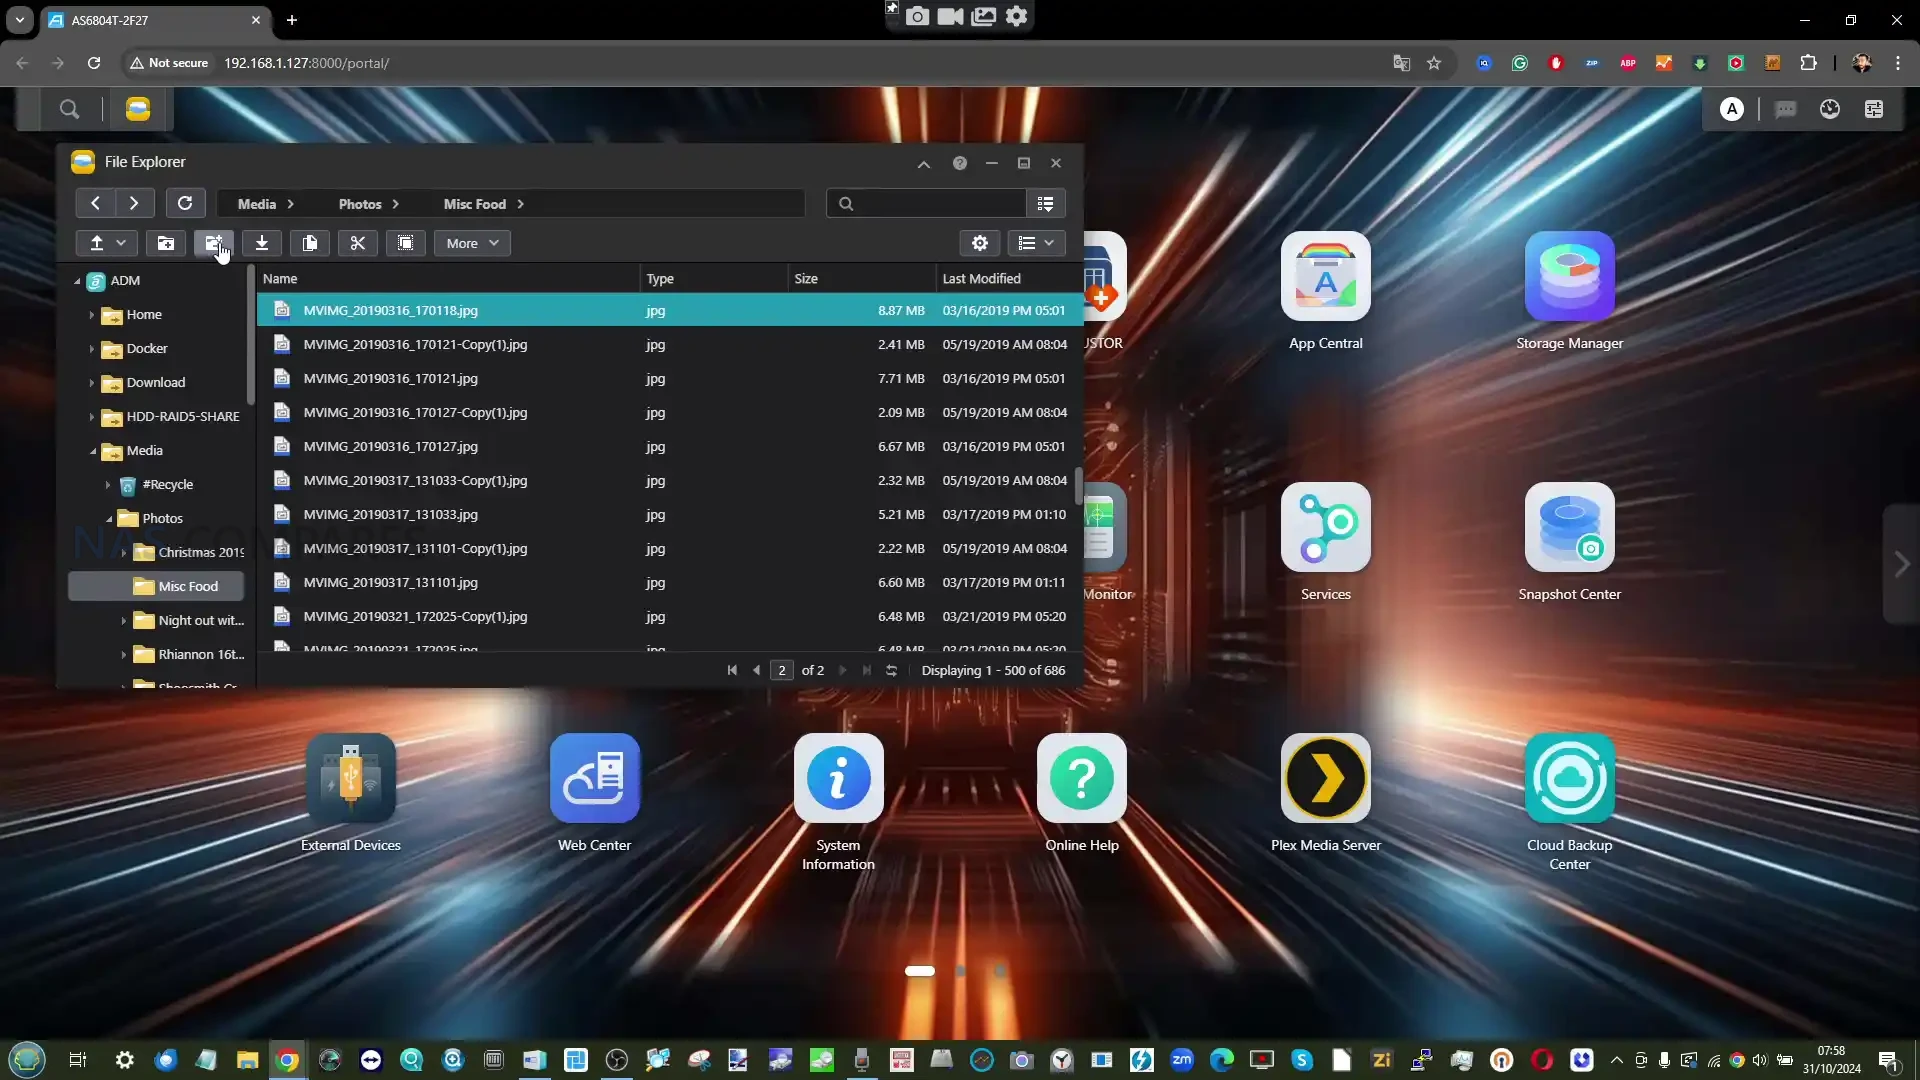

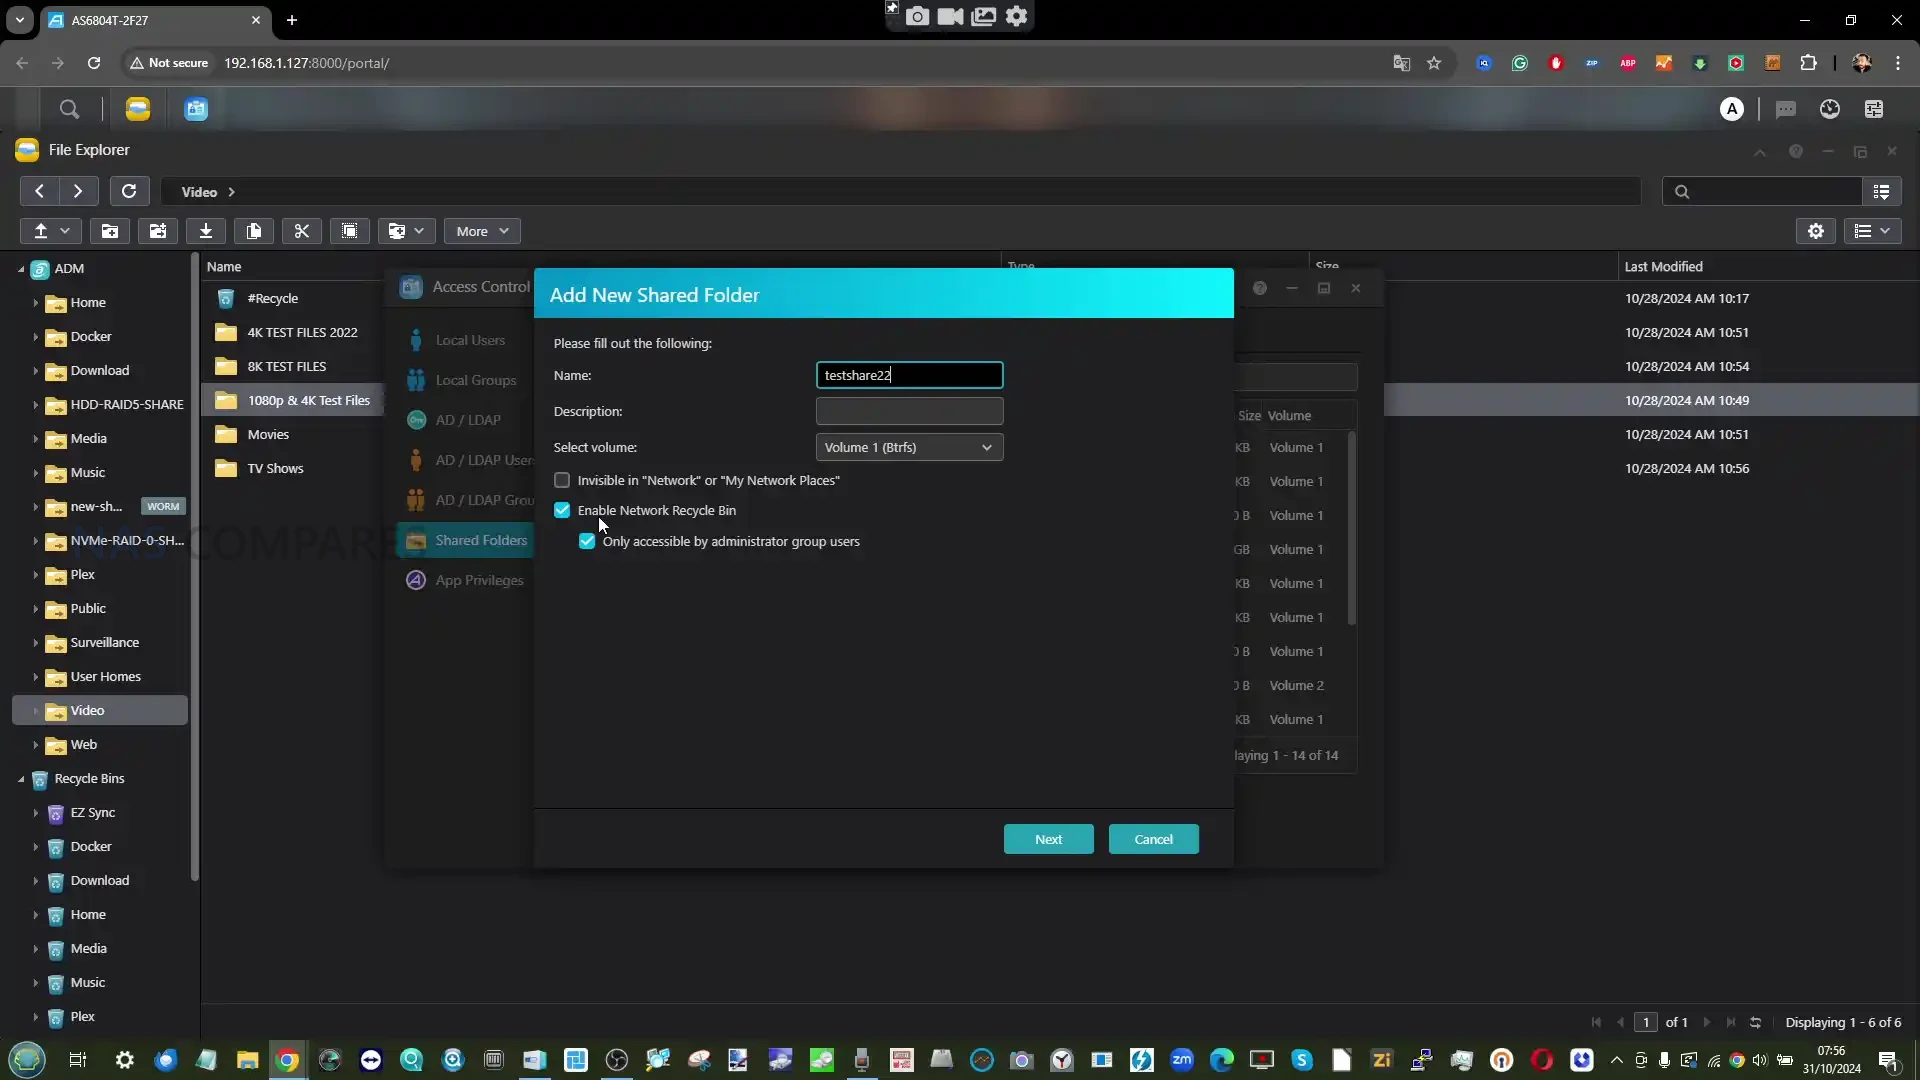
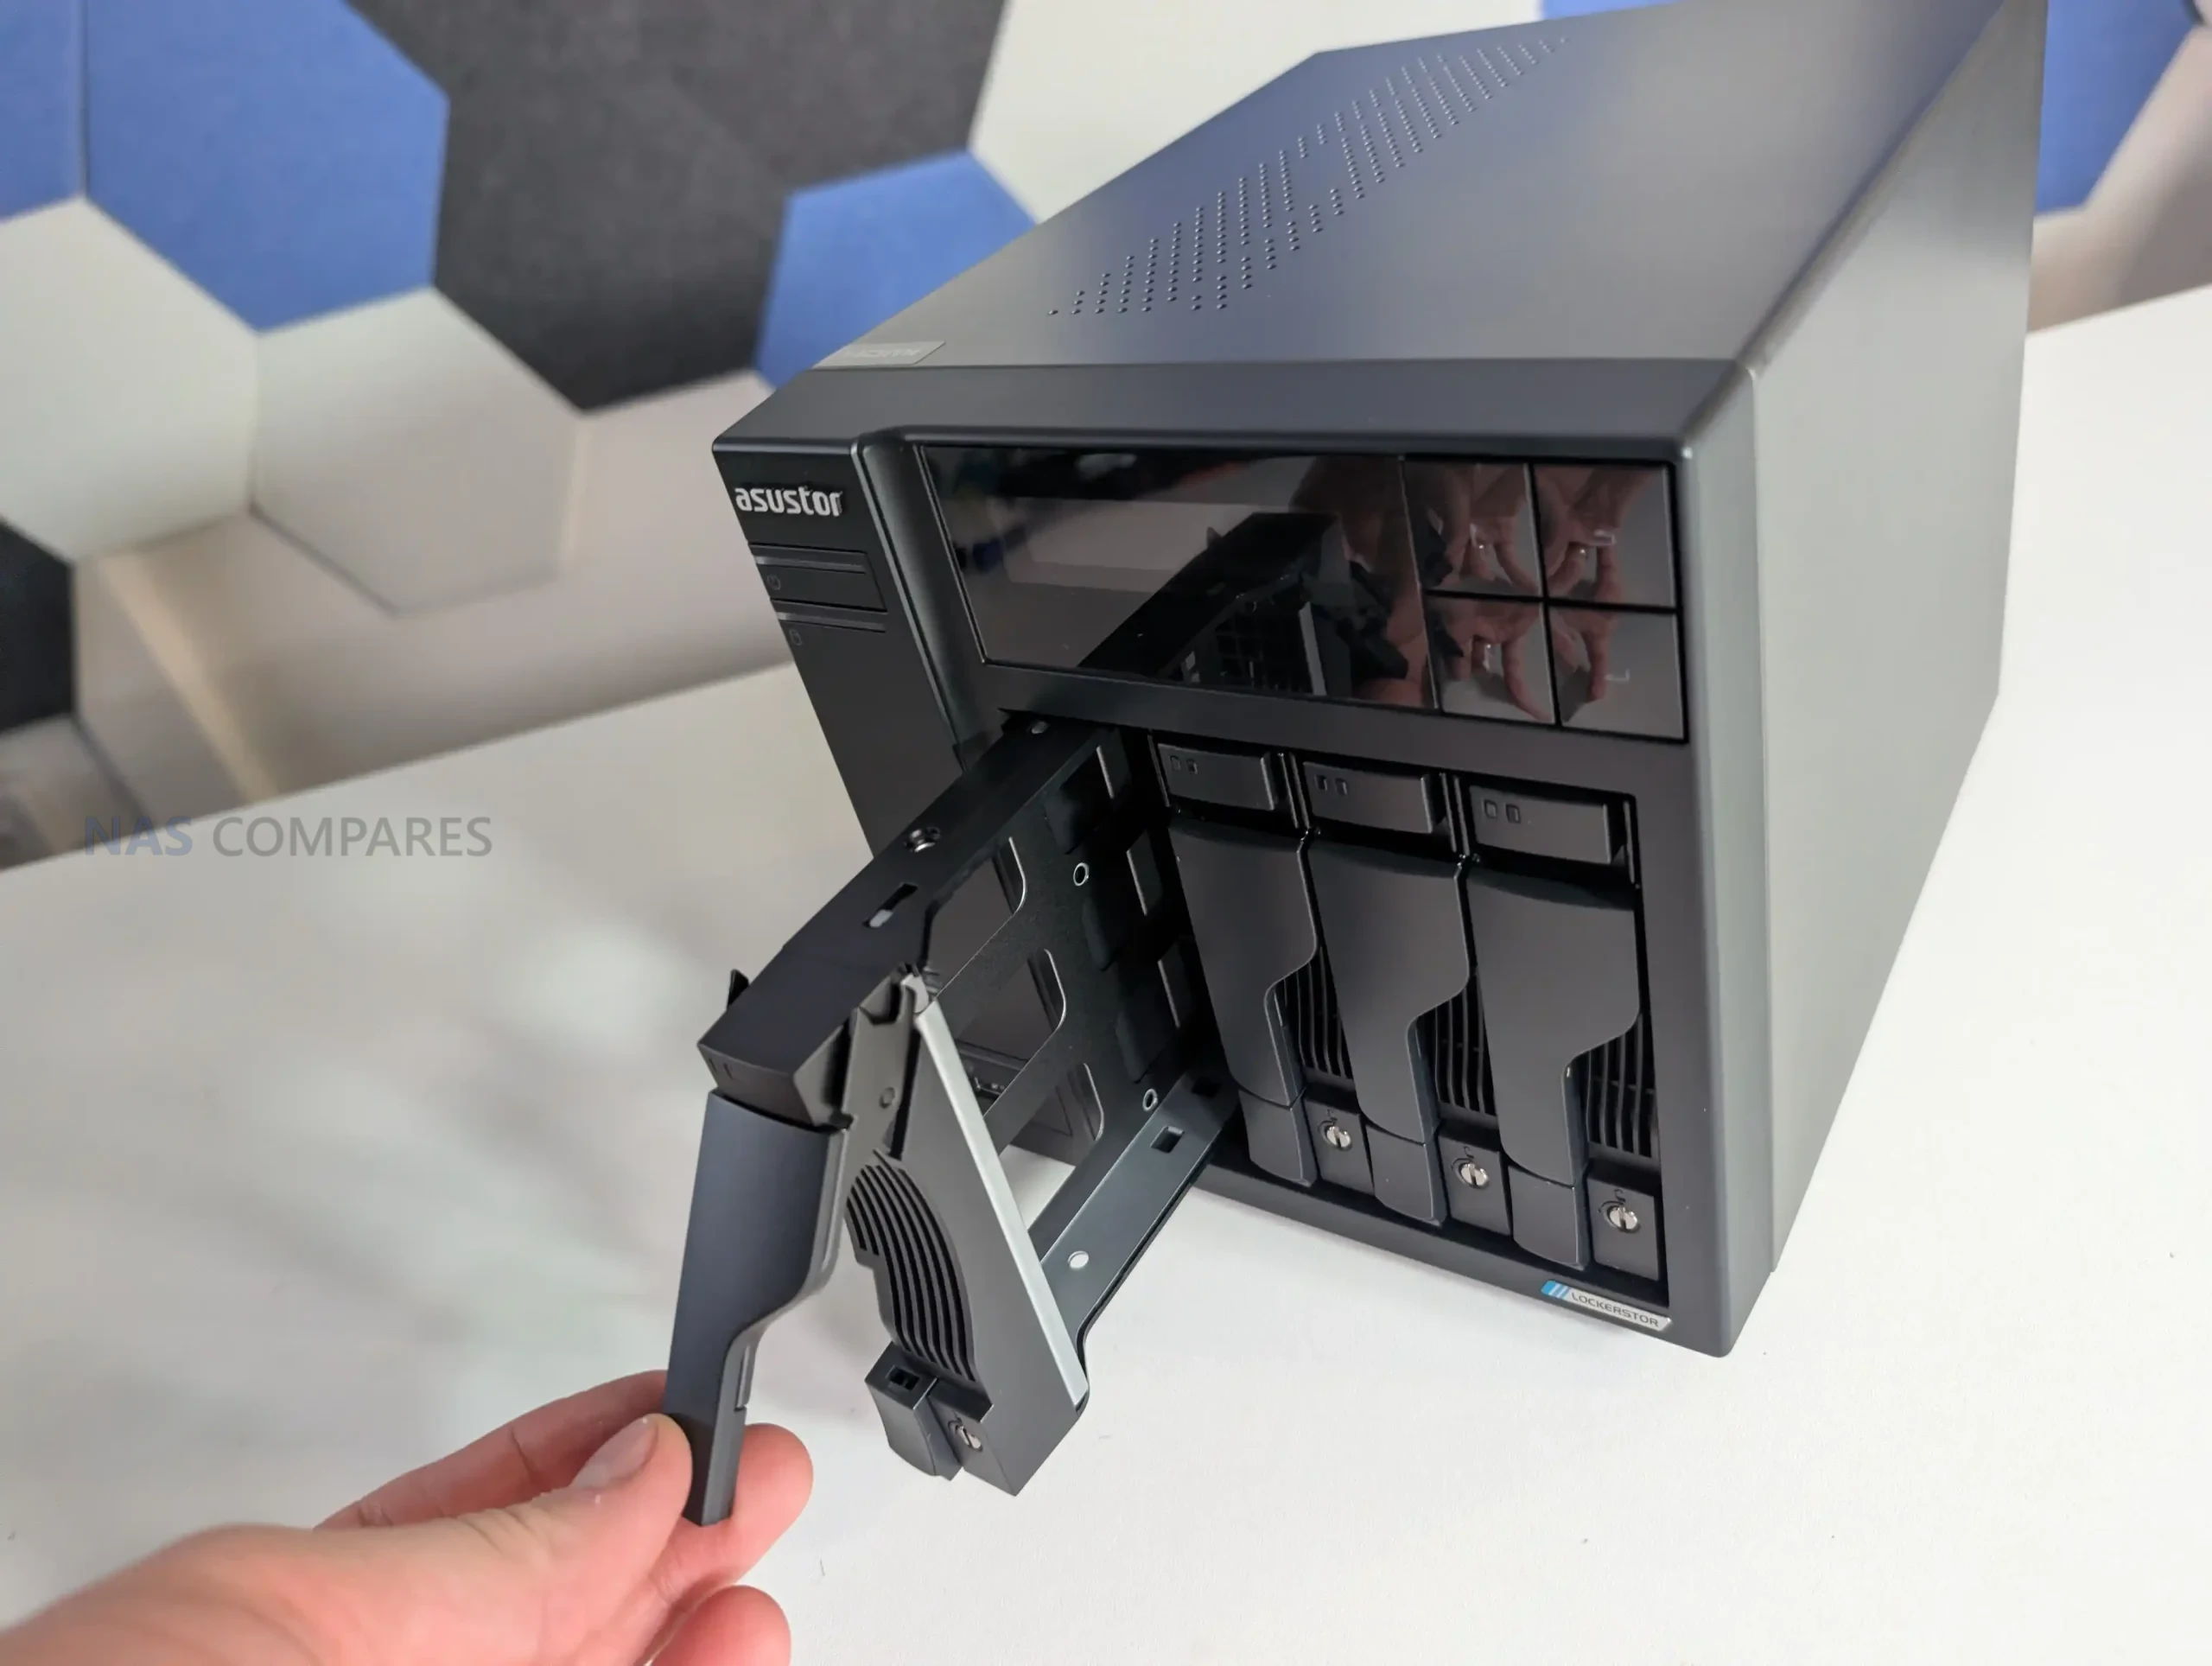


 Aucun
Aucun