Test du Minisforum MS-A2 : Mini PC ultra-puissant et connecté
Quand Minisforum m’a proposé de tester le MS-A2 en version barebone, j’avoue que j’ai sauté sur l’occasion. Un Ryzen 9 9955HX dans un boîtier compact, avec du réseau 10 GbE intégré. Sur le papier, c’est exactement le genre de machine qui me fait de l’œil. J’ai donc complété la configuration avec 24 Go de RAM DDR5 et un SSD 990 Pro NVMe et je l’ai passé au banc pendant plusieurs jours. Voici le bilan…
MINISFORUM MS-A2
Minisforum n’est plus un inconnu dans le monde des mini PC. La marque s’est taillé une solide réputation avec des machines comme le MS-01… et le MS-A2 représente clairement une nouvelle étape dans cette logique de mini workstation orientée pros. L’idée est simple : offrir une puissance de calcul et une connectivité réseau dignes d’un serveur, dans un format qui tient dans la main.
Le barebone est vendu sans RAM, SSD, ni OS… ce qui permet de choisir ses composants selon ses besoins. C’est à la fois un avantage (liberté totale) et un inconvénient (budget à prévoir en plus).
Contenu de la boîte
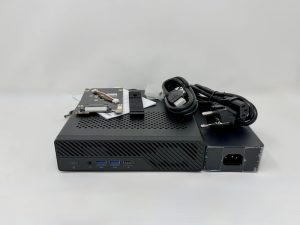
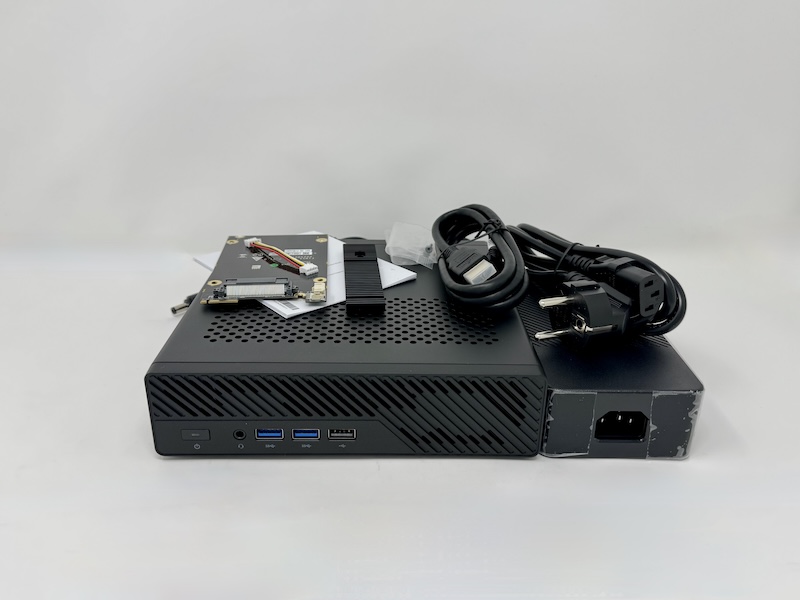
À l’ouverture, on retrouve :
- Le MS-A2 barebone ;
- Un bloc d’alimentation externe (120 W) ;
- Un adaptateur U.2 NVMe/M.2 22110 ;
- La visserie nécessaire pour les SSD ;
- Un câble HDMI ;
- De la documentation.
On aurait peut-être apprécié un câble réseau, pour une machine aussi axée connectivité…
Design
Le MS-A2 est un boîtier compact de 196 × 189 × 48 mm et 1,4 kg sur la balance. La finition est en aluminium brossé gris anthracite, sobre et robuste. La prise en main est agréable, on sent qu’il y a du sérieux dans la construction, loin des plastiques bas de gamme que l’on croise parfois sur ce segment.
Deux ventilateurs sont intégrés et restent relativement discrets au repos. En charge, le bruit monte assez rapidement mais ça reste acceptable dans un environnement de bureau.
Connectique
La connectique du MS-A2 est franchement impressionnante pour ce format :
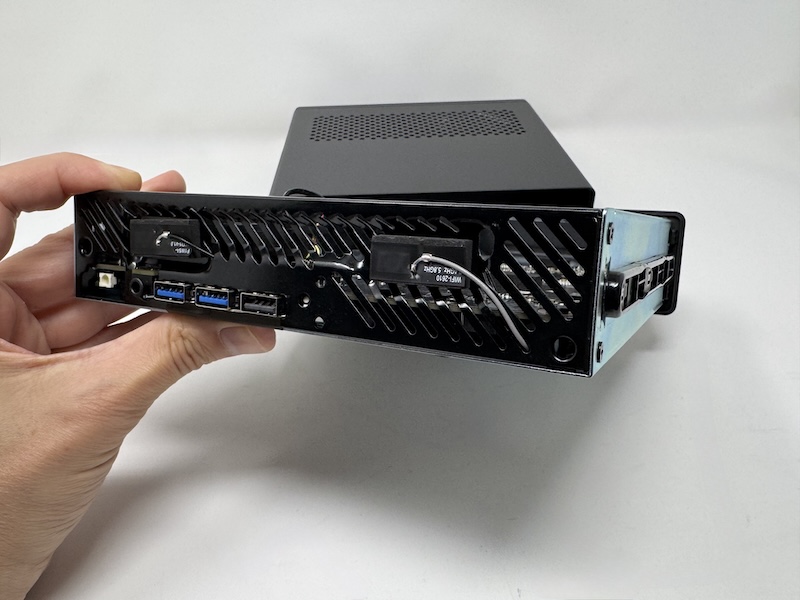
Façade :
- 2 × USB 3.0 ;
- 1 × USB 2.0 ;
- 1 × prise audio jack audio 3,5 mm ;
- 1 × bouton marche/arrêt.
Arrière :
- 1 × HDMI 2.1 (jusqu’à 8K@60Hz) ;
- 2 × USB-C 3.2 Gen 2 (compatible jusqu’à 8K@60Hz) ;
- 1 × USB 3.2 Gen 2 Type-A ;
- 1 × USB 3.0 ;
- 2 × 2,5 GbE en RJ45 ;
- 2 × SFP+ 10 Gb.
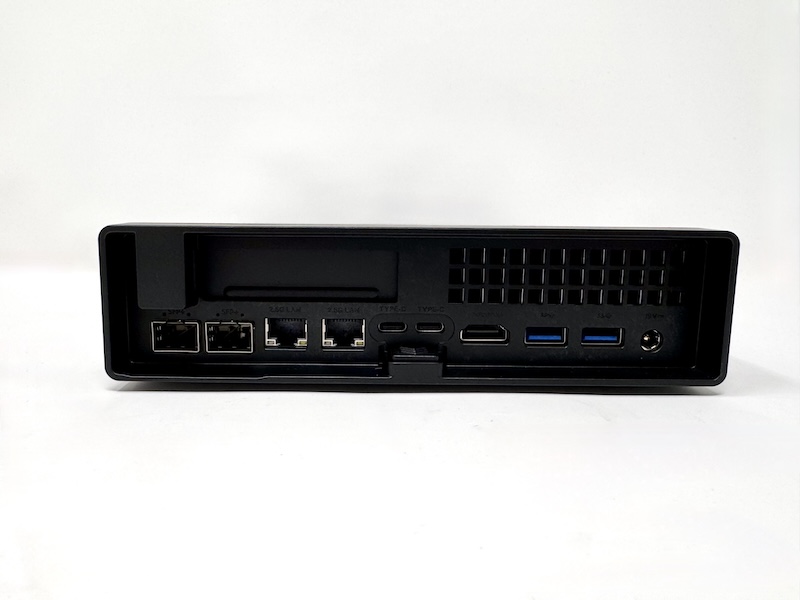
On a bien 3 sorties vidéo possible, 4 ports réseau dont 2 compatibles 10 Gb/s. On est clairement sur une machine taillée pour les usages professionnels ou homelab haut de gamme…
Intérieur et montage
L’accès à l’intérieur se fait en appuyant sur le petit bouton poussoir (à l’arrière) et on fait glisser. La première chose qui frappe, c’est la qualité du système de refroidissement : quatre caloducs en cuivre pur pour l’interface thermique du CPU. Minisforum annonce une augmentation de 30 % des flux d’air par rapport à la génération précédente.
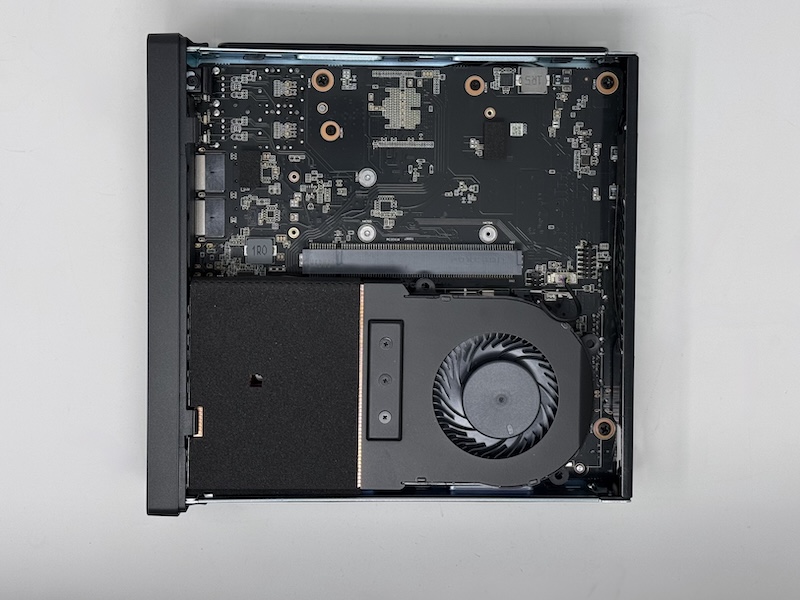
On trouve à l’intérieur :
- 2 emplacements DDR5 (jusqu’à 96 Go) ;
- 2 emplacements M.2 2280 PCIe 4.0 x4 pour les SSD ;
- 1 emplacement M.2 22110 / U.2 PCIe 4.0 x4 (via un adaptateur fourni) ;
- 1 slot PCIe 4.0 x16 physique (bande passante x8, fractionnable en 2×4) ;
- 1 emplacement M.2 2230 E-Key pour la carte Wi-Fi compatible 6E intégrée et Bluetooth 5.2.
Oui, il y a bien un emplacement PCIe de libre.

Le processeur : AMD Ryzen 9 9955HX
Le Ryzen 9 9955HX repose sur l’architecture Zen 5 avec 16 cœurs / 32 threads cadencé jusqu’à 5,4 GHz et 64 Mo de cache L3. Le TDP par défaut est de 55 W, mais il peut monter au-delà notamment en mode boost.
Le site PassMark indique 62702 points, on aborde les performances un peu plus bas. L’iGPU intégré est une Radeon 610M (2,2 GHz) qui peut gérer plusieurs sorties 8K et du décodage vidéo. Attention, cette dernière n’est pas taillée pour le jeu récent… mais n’aura aucun souci avec les jeux plus ancien. C’est le seul vrai point de faible de cette configuration, que le slot PCIe interne vient partiellement compenser si besoin.
Installation de la RAM et du SSD
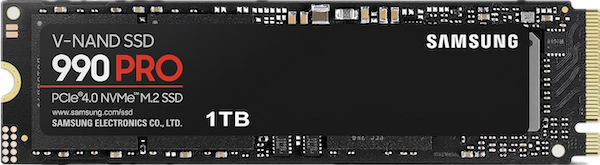
J’ai choisi 24 Go de RAM DDR5 (en configuration 8+16 Go) et un SSD Samsung 990 Pro NVMe M.2 en 1 To. Le montage est relativement simple… en moins de 10 minutes.
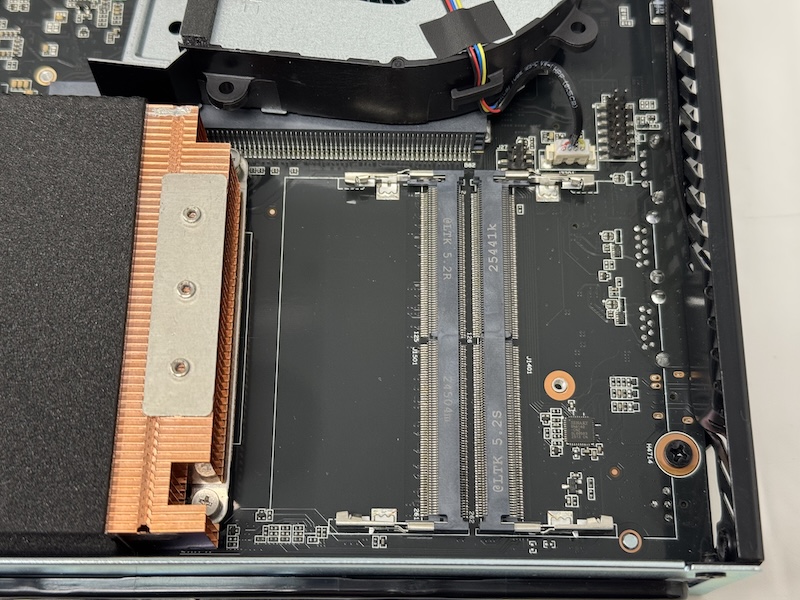
A noter, l’accès à la mémoire se fait en retirant les 3 vis du ventilateur (voir la photo ci-dessus).
Performances
Bureautique et multitâche
Sans surprise, la machine est d’une fluidité absolue pour tout usage quotidien. Navigation, bureautique, édition de documents, visioconférences simultanées… rien ne lui fait peur. Avec 24 Go de DDR5, le multitâche est sans friction. Si vous le pouvez, monter jusqu’à 32 Go (virtualisation, IA…), mais 24 Go couvrent sans problème 99 % des usages.
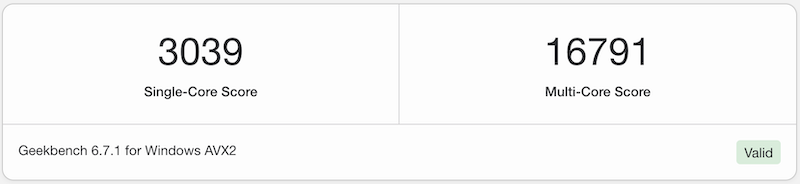
Lorsque l’on confronte l’ordinateur à Geekbench, on remarque le processeur assure… il obtient un score tout à fait honorable.
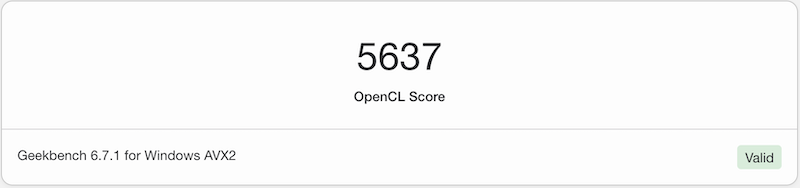
La carte graphique intégré obtient 5637 points.
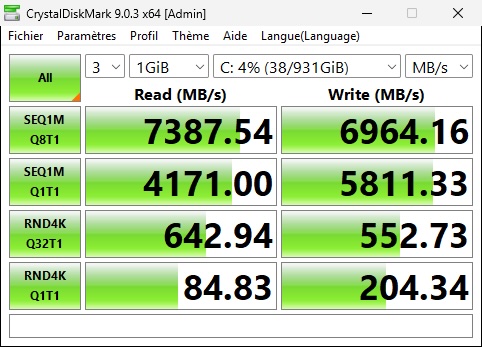
Stockage avec Samsung 990 Pro
Le Samsung 990 Pro ne déçoit pas. En lecture séquentielle, on approche la barre symbolique des 7 400 Mo/s et en écriture on frôle les 7 000 Mo/s… c’est cohérent avec les spécifications PCIe 4.0 x4. Les temps de chargement des applications et le démarrage Windows sont quasi instantanés.
Virtualisation et homelab
C’est clairement le terrain de jeu préférentiel de cette machine. Proxmox s’installe sans aucun souci, les 16 cœurs permettent de faire tourner simultanément une dizaine de VMs légères ou plusieurs conteneurs sans transpirer. Tous les ports réseaux (y compris 10 GbE SFP+) sont parfaitement reconnus sous Linux.
Pour du LLM local, la Radeon 610M est trop limitée, mais le CPU peut parfaitement tourner des modèles quantifiés (du 8B sans problème et un 14B avec un peu de patience).
UEFI
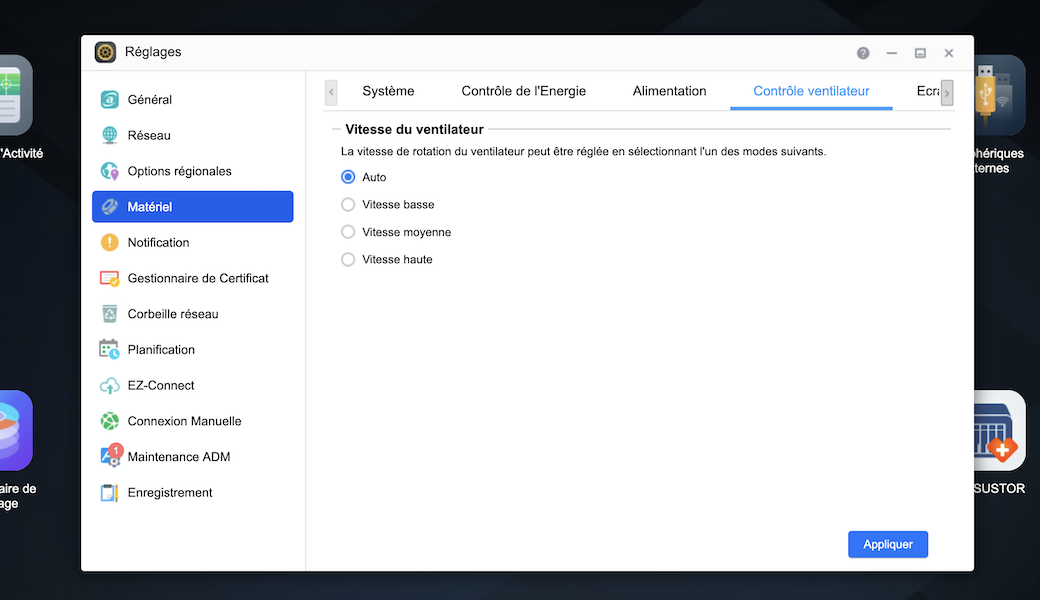
Un petit mot de l’UEFI embarqué. Il est relativement complet et permet plusieurs réglage notamment la gestion des ventilateurs, la séquence de démarrage (boot), le démarrage automatique sur coupure, etc. Il peut se gérer 100% à la souris.
Consommation électrique et nuisance sonore
Le ventilateur se fait rapidement entendre, même sans forcément pousser la machine. Il souffle contiuellement et c’est normal sur ce type de configuration. Côté consommation électrique, le NAS affiche environ 30 W en usage normal (avec 1 SSD NVMe) et jusqu’à 65 W en charge plus soutenue.
Mais si vous savez précisément pourquoi vous souhaitez 16 cœurs Zen 5, du 10 GbE SFP+ et un slot PCIe dans un boîtier de 1,78 litre, alors le MS-A2 répond à cette question mieux que n'importe quelle alternative actuelle. Ce n'est pas un achat impulsif : c'est un achat ciblé, pour un usage ciblé.
On attend la suite avec intérêt... Si Minisforum continue sur cette trajectoire, il va falloir leur faire de la place dans le labo !


 Cependant, il est peut-être temps de réfléchir à une migration… pas dans l’urgence, mais avec méthode.
 Activez votre essai Prime gratuit (obligatoire)
 Revenez régulièrement, cette page sera mise à jour en temps réel


 65°C+
65°C+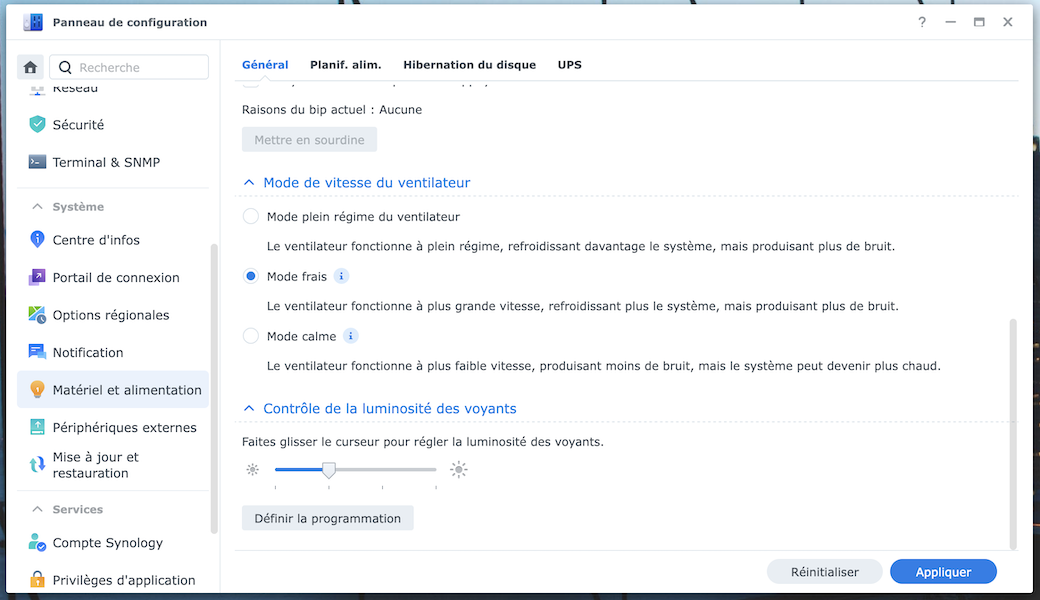
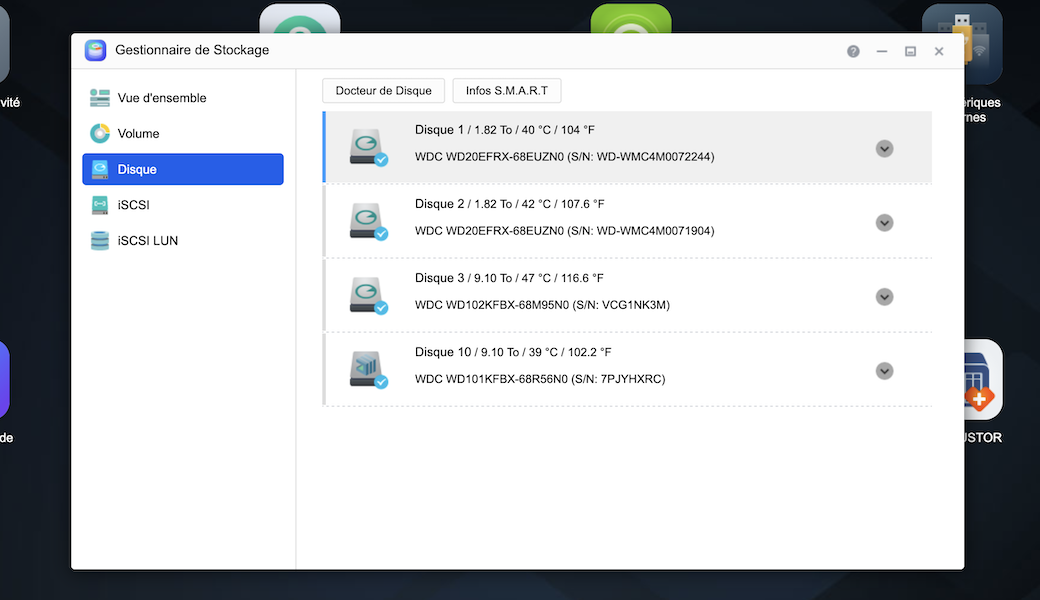
 Situation normale : HDD < 45°C / NVMe < 65°C
 Attention : HDD 45 – 60°C / NVMe 65 – 72°C
 Urgence : HDD 60 – 75°C / NVMe 72 – 80°C

 Checklist

 Comparatif des meilleurs NAS en 2026